


Landlubber Mike
-
Posts
4,508 -
Joined
-
Last visited
Content Type
Profiles
Forums
Gallery
Events
Everything posted by Landlubber Mike
-
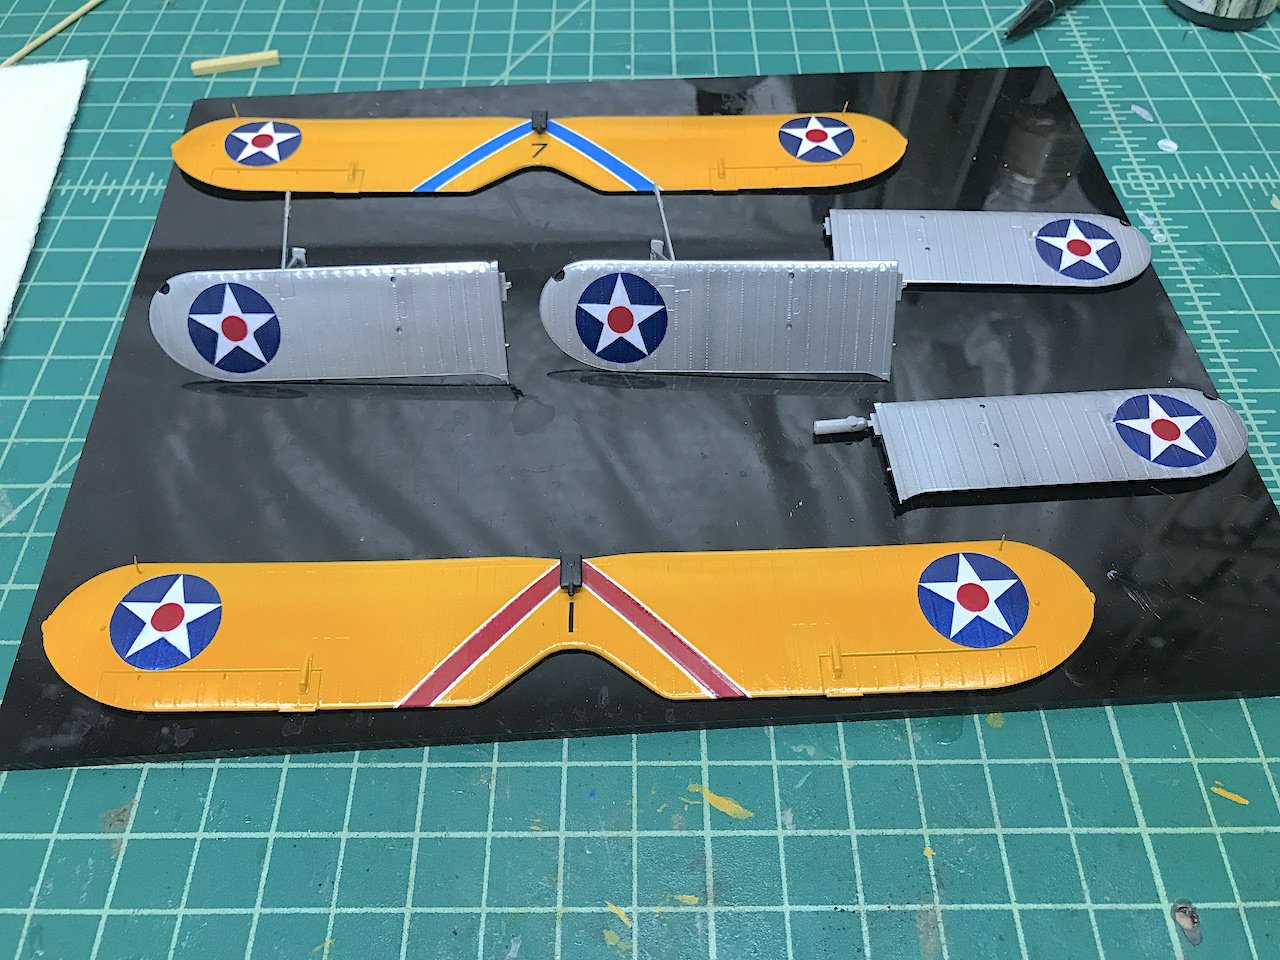
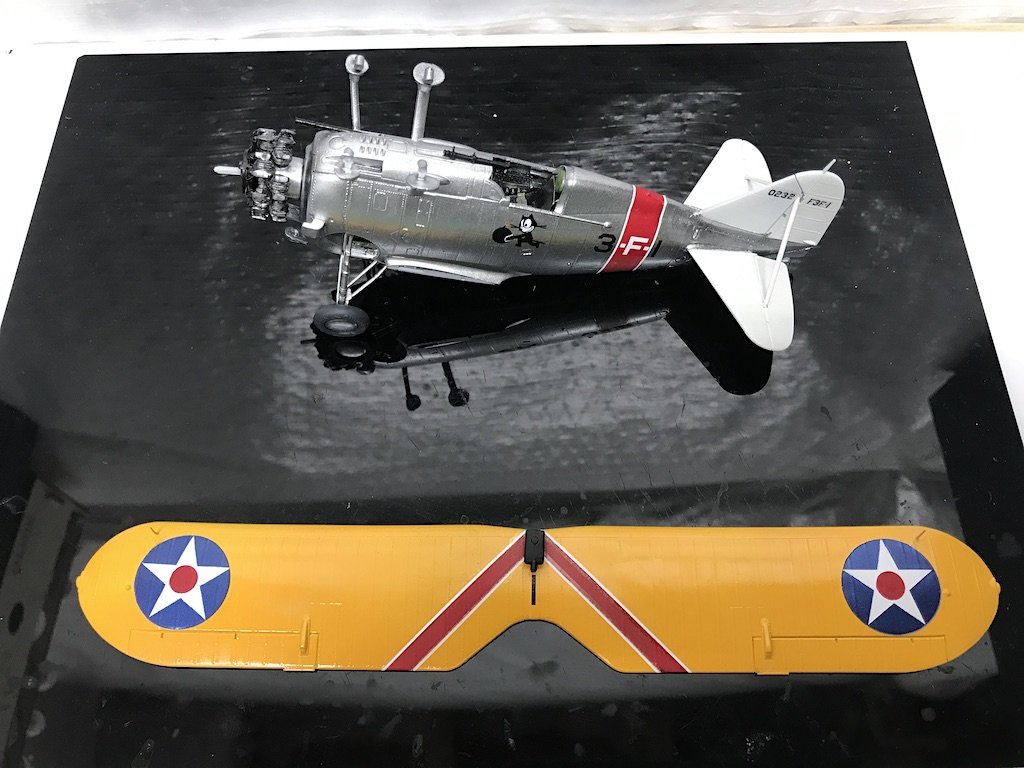
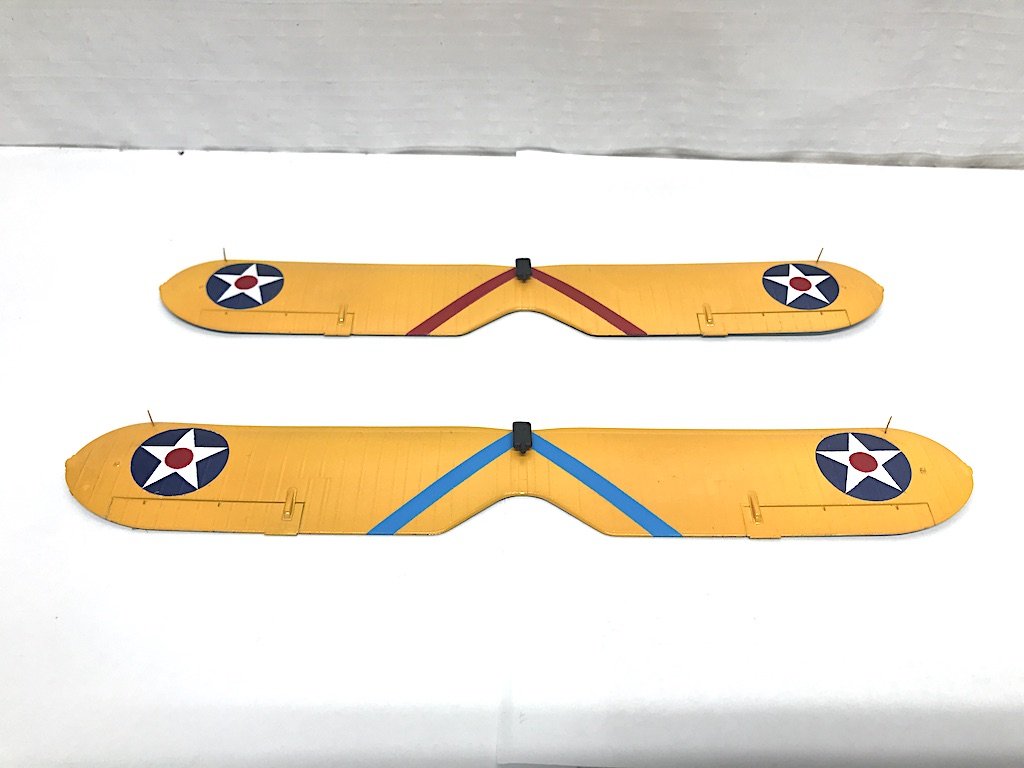
 Yves, thanks very much for the kind words. For the insignia, I used the following set from Montex which makes things a lot easier: Here are the steps I took: 1. For the yellow top wing, after priming with Mr. Surfacer 1200 spray primer, I then sprayed with Tamiya white primer (from the rattle can), followed by Tamiya Camel Yellow (decanted from the Tamiya rattle can). For the lower wings, I sprayed with Mr. Surfacer 1200, then followed up with Vallejo Gloss Black primer (recommended for use as undercoat when using Vallejo Metal color paints), then sprayed with Vallejo Metal color (I believe I used white aluminum for a slight color different from the fuselage where i used aluminum). 2. Next I painted the decals. I started with the square mask (e.g., on the upper right corner of the green sheet), but left the interior circle out to be able to paint the underlying white disc. For that, I believe I once again primed with Mr. Surfacer 1200 (as white can tend to show underlying colors like yellows and reds), then sprayed Tamiya white primer. That left me with white discs. 3. Next I painted the blue background of the insignia. Leaving on the square mask, I took the star and added it to the disc to seal off the white star of the insignia. Then I sprayed with Vallejo Arctic Blue. 4. Last was to paint the red circle in the middle of the star. I removed the square and star masks I used in steps 2 and 3, and then used the circle masks (e.g., on the upper left corner of the green sheet). I placed the open circle in the middle of that mask onto the white star, and then had the red circle. For that color, I used Vallejo Red. The Montex mask is a bit translucent, so you can easily see where you need to position it on the star so that the circle is in the center. Those were the steps that I took, maybe there are other ways to do it. Some tips and other experiences to pass along if anyone is a masochist and wants to paint their own insignia: 1. Make sure that you burnish the edges of the masks as much as possible just before you actually paint. The white discs worked really well. I had some bleed under with the next two masks quite likely because (a) I did not take the time to burnish them as well as I did with the white disc mask, and (b) I might have sprayed too heavily, when I should have just sprayed a few lighter coats (big lesson for me!). I almost cried when I lifted them and saw that the blue and red had run under. Interestingly, the top wings were fairly blemish free. The bottom wings on the other hand look horrendous. 2. Thankfully, with the Tamiya synthetic lacquer white undercoat, I was able to take a wooden toothpick and gently scrape off the Vallejo colors that had run under the mask. The paints still left a very light stain, but was much easier to paint over the stained areas than if the full paint remained. Touch ups were done by hand using the same paints. 3. I thought I was being smart and added the radio PE parts to the upper wings so that I could prime and paint them yellow along with the rest of the wing in one shot. Problem I soon discovered was I had a really rough time adding the disc mask to the wing because that PE part was in the way. I ended up having to add a small slit on the mask to let the mask lie as flat as possible on the wing (essentially the PE part sticking straight through). A bit of paint went through that area, but was fairly easy to touch up. 4. Each time I painted, I left the mask on for 24 hours for the paint to cure. I was particularly worried about the Vallejo which can get pulled up from masks I've found. Happened again here. Decals make things much easier obviously, and you are left with very crisp edges. Painting gives you a little more freedom on colors, and I think can look a little more vibrant. You also don't have to worry about decal issues like color mismatches to other similar colors on the model, bubbles, rips, underlying colors bleeding through, etc. I tend to like a challenge so I might try painting them again sometime. On this model, I could have also used the Montex masks to paint the numbering along the belly band, and the smaller insignias on the front of the F3F-2 fuselage. I decided not to as I didn't want to potentially ruin the aluminum finish that I had on the fuselage, and figured I had already used up a lot of luck in getting to where I already was. Hope that helps!
- 128 replies
-
- 10
-

-
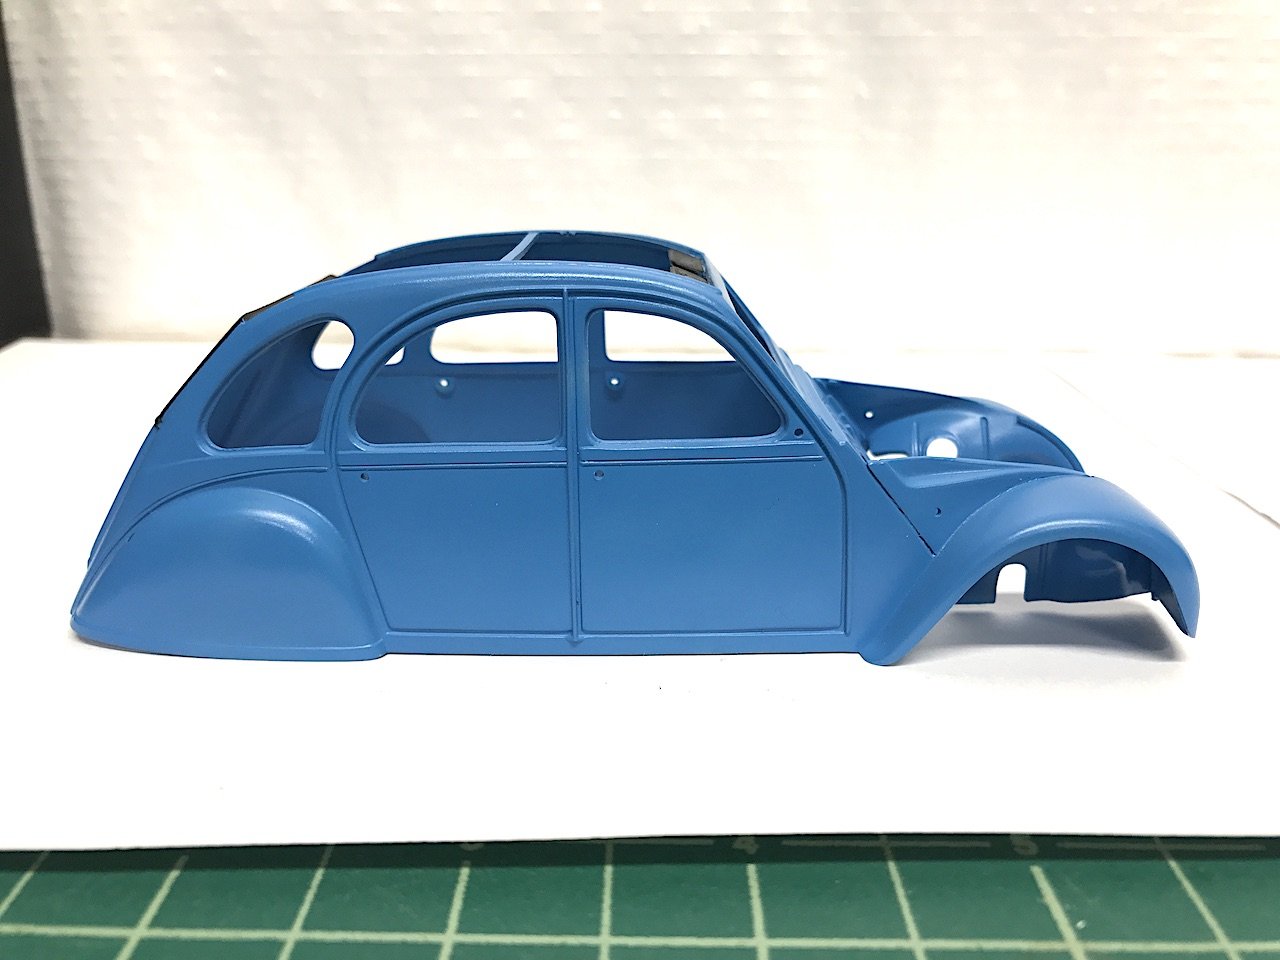
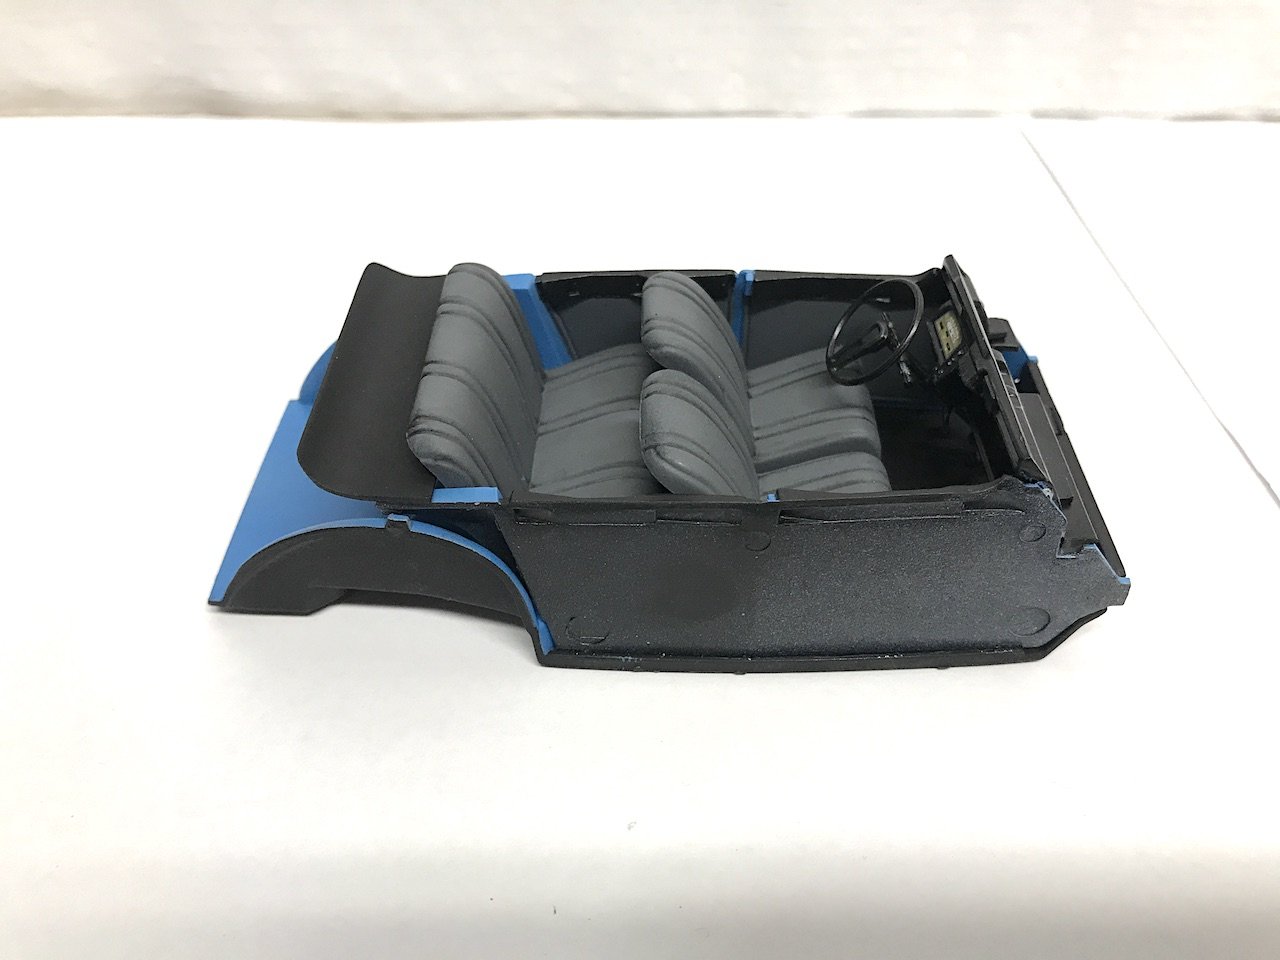
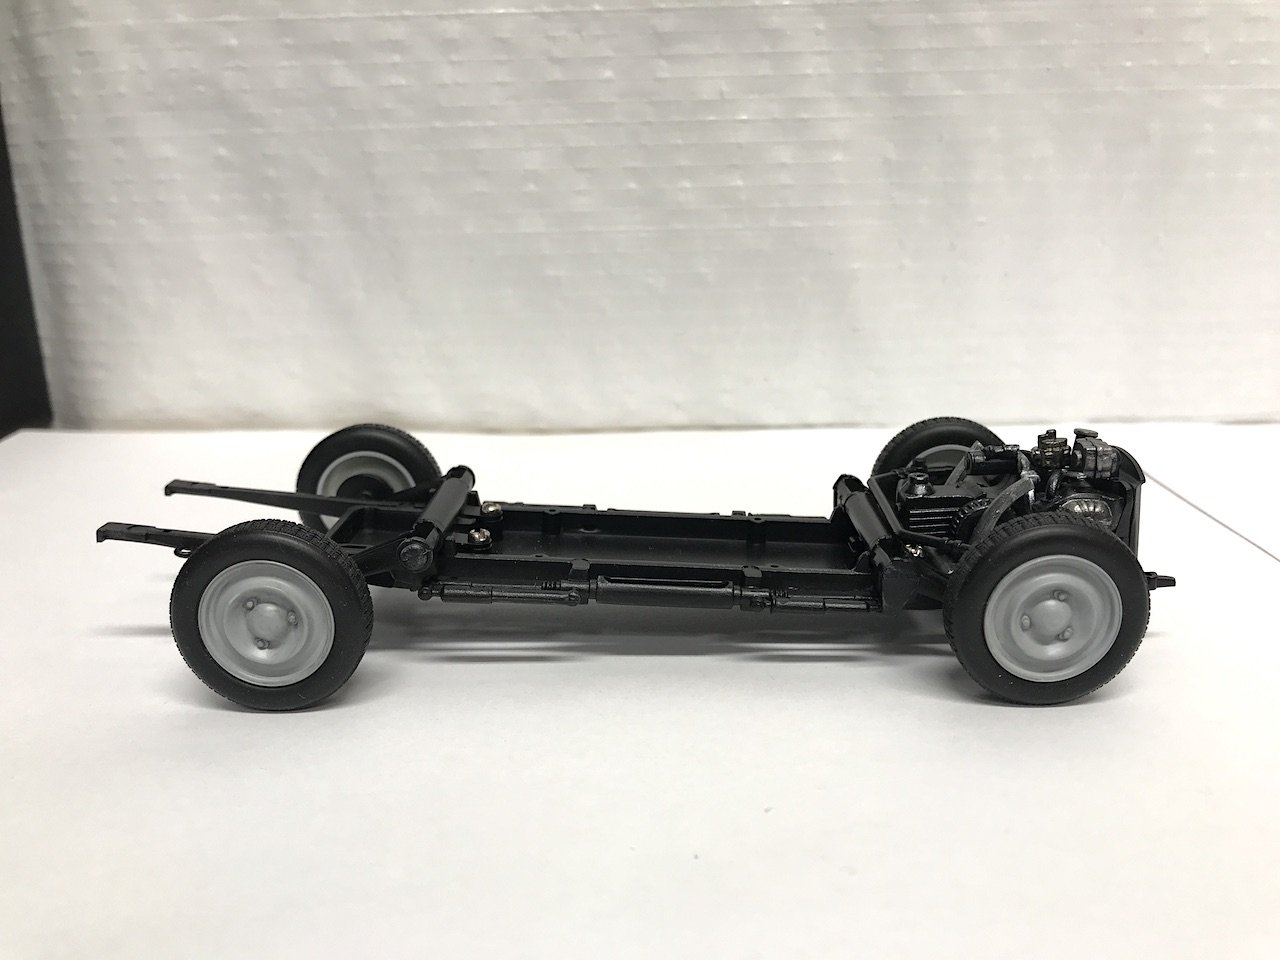
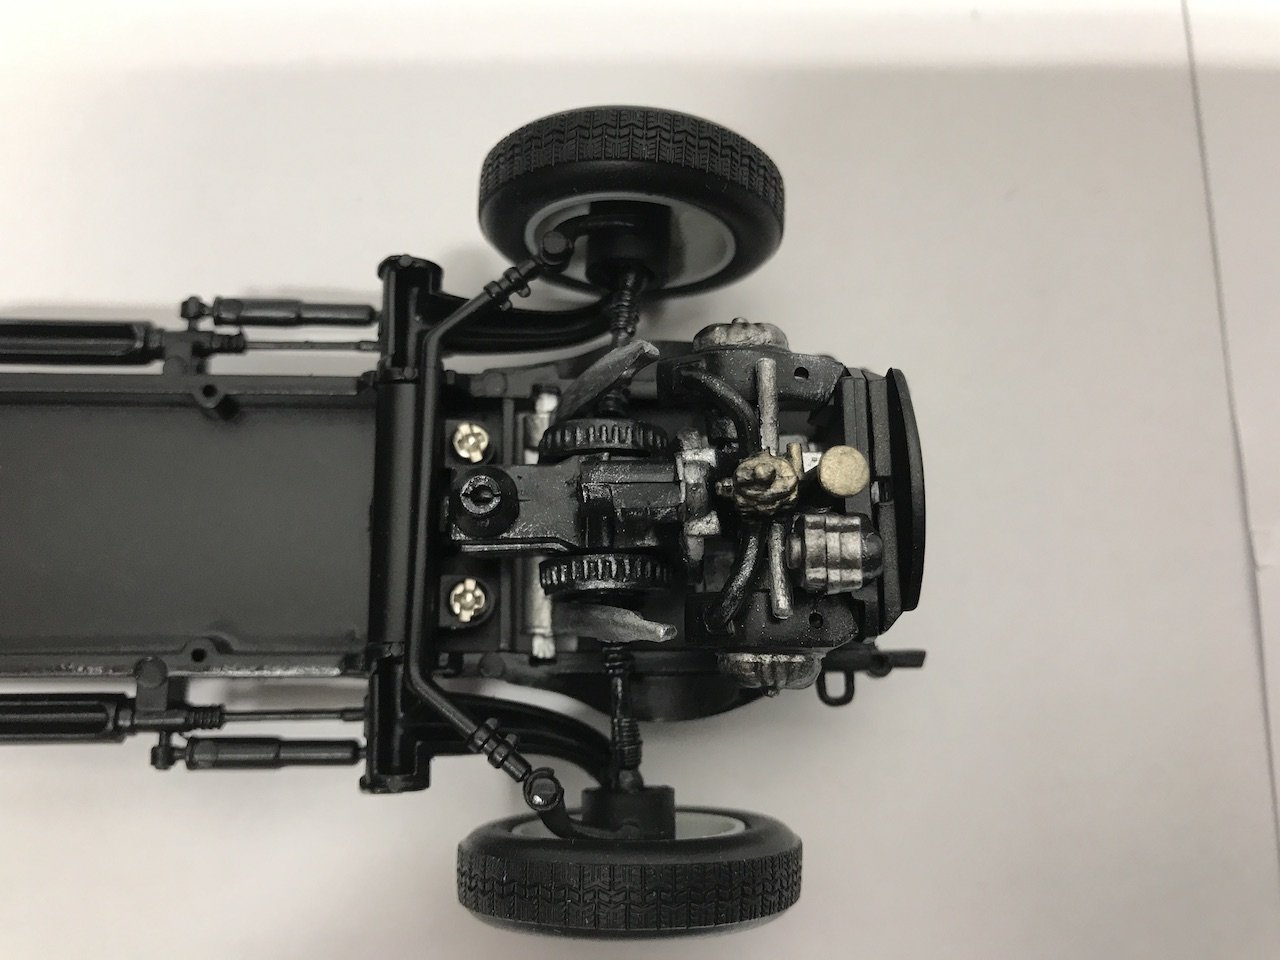
I'm moving along fairly quickly on the Tamiya Citroen 2CV kit, and am more than halfway through the instructions at this point. The fit and design are better than the Airfix kit, and you can tell that Tamiya set up the kit in a way to make construction more solid, easier to paint, etc. One other thing that's nice about Tamiya is that the bumpers have a black band running in the middle of them. I had a hard time painting a crisp line on the Airfix kit given that the plastic wasn't perfectly smooth. Tamiya gives you black decals which make things much easier. Tamiya also gives you the option of presenting the model with an open or closed roof, and I believe you can flip the windows to an open position. I decided to go with a french blue exterior/gray interior (like Tom's cousin's car pictured above, but without the white hood). For the exterior, I once again went with Tamiya - french blue in the rattle can - but this time decanted the paint and sprayed through my airbrush. Much cleaner spray than spraying directly from the can. For whatever reason, the Tamiya cans seem to like to spit, which is a pain because then you have to sand or otherwise remove blemishes and then try to repaint. Decanted, it sprayed super smoothly in pretty much one coat. On the Airfix, I spent a ton of time going back and cleaning up the spit and other issues, respraying, and repeating multiple times. The rest of the car I'm using Vallejo acrylics. I like the ease of use and clean up of Vallejo a lot. For a car exterior, however, I like the harder finish of the Tamiya synthetic lacquer, which probably holds up better to my brute handling of the model during assembly. Vallejo also can be weird about peeling when being taped at times. Tub: Chassis - nice that all four tires are sitting evenly on the ground unlike my Airfix kit Behold! The mighty 29 horsepower engine! 😆 With the chassis and tub done, really all that's next is to add all the details to the body (and a fewer remaining details to the engine compartment). Tamiya has you add the body to the chassis, then add the details. I think I'm going to first add most of the details aside from things like the windows, then spray the clear coat, then assemble. I figure I might as well have a consistent clear coat on the model without worrying about getting clear coat on areas it shouldn't go like the tires, and the clear coat can generally cover up any extra glue marks. Thanks for looking in!
- 126 replies
-
- 13
-
-
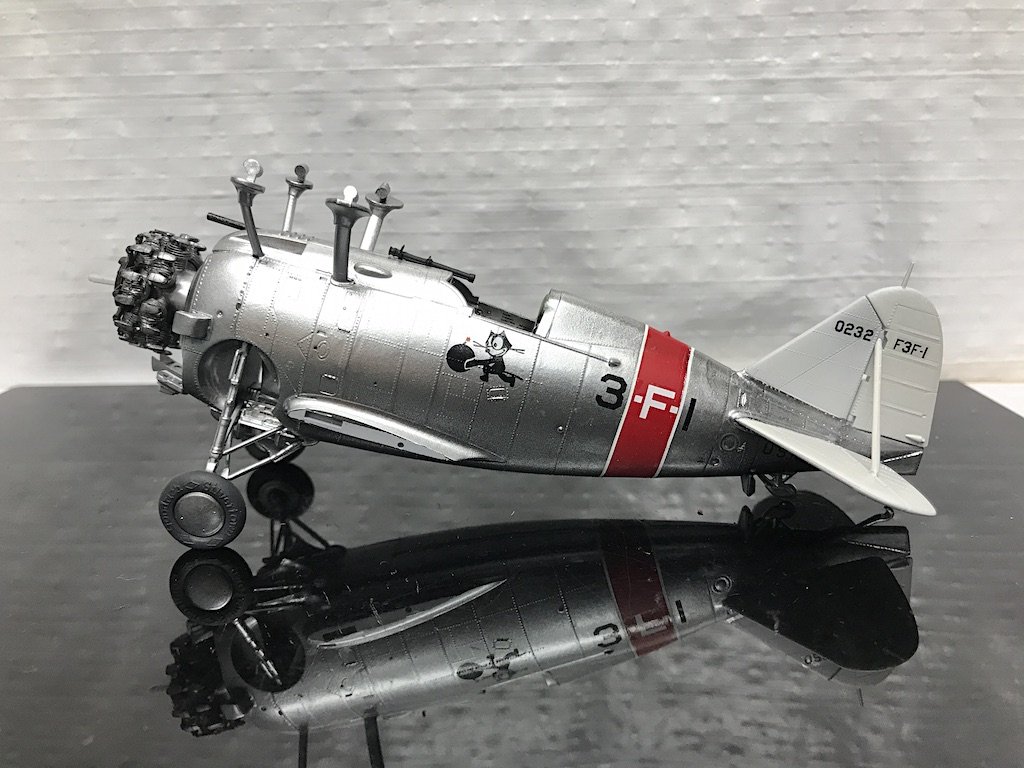
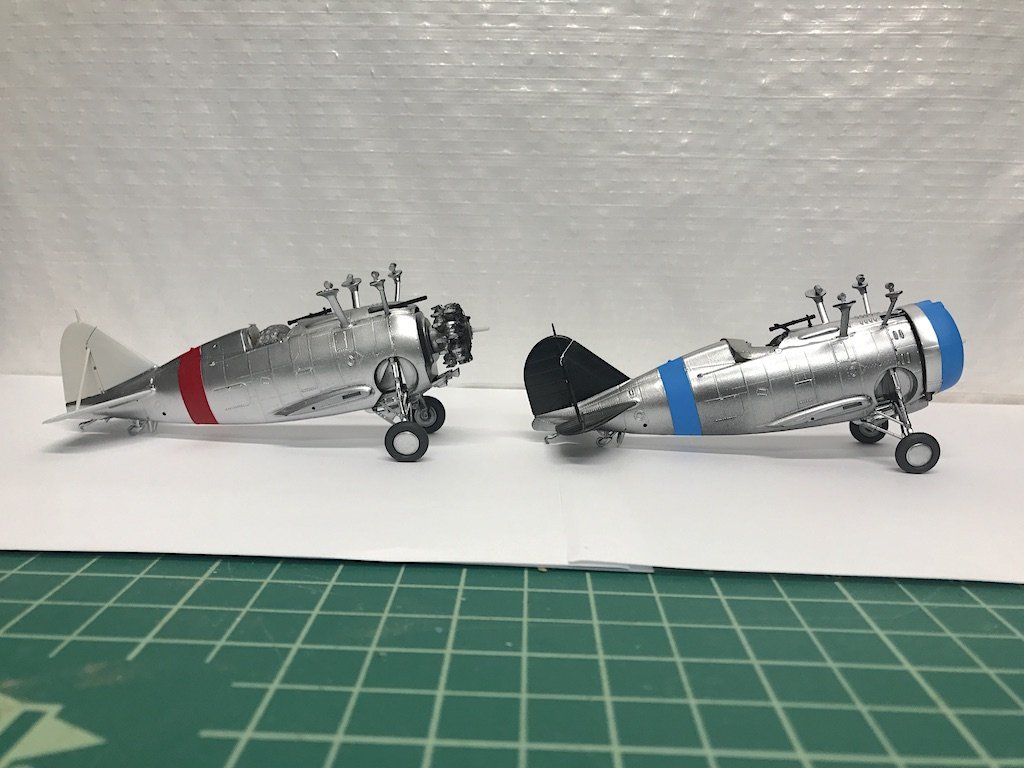
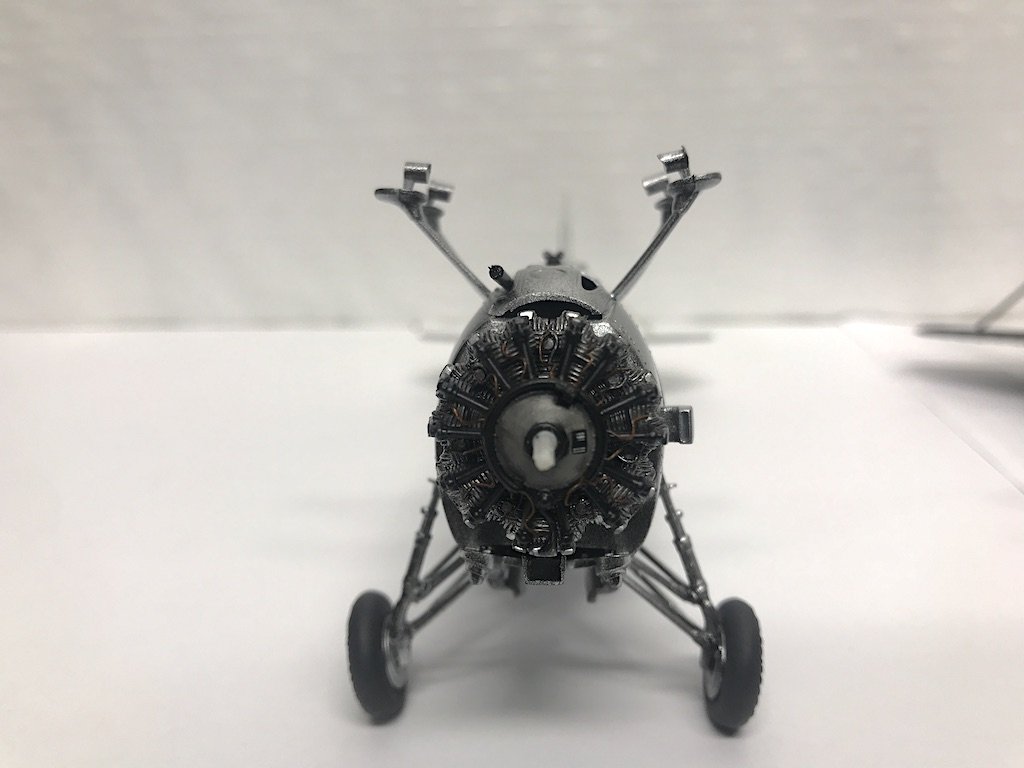
On the home stretch now. Finally got the cowl on the F3F-1 all straightened out. After stripping the paint, priming with Mr. Surfacer gray, followed by Tamiya white primer, I added the Vallejo red. Then I taped and added the aluminum band (Vallejo gloss black primer followed by Vallejo Metal aluminum). Everything was looking great when I started pulling the tape off, except I got a weird 3mm or so line of black paint on the red. Argh! Have no idea how that happened, except that it might have come through some tape when I was airbrushing the interior of the cowl. I tried touching it up with white primer and followed by red, but it was noticeably whiter. Another argh! I tried a different approach of lightly sanding off the new red, white, and black to get back down to the original white primer coat. Then I had to re-tape and spray the red a couple of coats across the full cowl to even out the color, and finally the modeling gods were with me and everything worked out. Then I was able to add the pinstripe (need to touch up a tiny spot that seems to have ripped), so the F3F-1 is finally, after all the cowl trials and tribulations, caught up to the F3F-2. Everything is pretty much painted except for the canopy pieces. Next up is some very light weathering/shadowing/highlighting (to keep the bright look of the planes), final clear coat, and remaining assembly and rigging. Wings came out fairly well too - the numbers and pinstripes along the chevrons are decals, the US insignia markings are painted on: Looking ahead, I'm next going to work on the Tamiya F4F-1, to be converted to a FM-1 (same plane really, just made by a different manufacturer with different gun specifications) with a wing fold set. I have the Aires full resin detail set for it, which will add a layer of difficulty, but the paint scheme will be significantly less complicated than these yellow wings. I'm glad I tried painting the US insignia on these F3Fs rather than using decals, but that made for a ton of extra work. Famous last words, but the FM-1 should be easier, at least in terms of painting. Thanks for looking in!
- 128 replies
-
- 14
-
-
Looking great!
-
Really nice job! If you don't think you're a plastic modeler after turning out that beauty, there's no hope for me. All kidding aside, excellent build!
-
Thanks, really appreciate it! I don't think that these are Accurate Miniature reboots of older Monogram kits (unlike the F4B-1 and P-6E boxed set I put together a couple of months ago). Aside from the tricky landing gear assembly (that you have to turn three different ways to pop it in), the kit has been really great to build and I highly recommend it. They pop up on eBay from time to time for reasonable prices. I don't think the aftermarket is necessary, the kit is great on its own. The Eduard PE set looks great when you're putting the cockpit together, but then you can barely see any of the details once in the fuselage. Those tabs do need to be cut off. I've left them to help handle the models as you noted. Keeping them on for now helps too in avoiding getting paint on that area in case I want to use plastic cement as opposed to CA (I might just use two-part epoxy to lock everything in). Thanks Lou, appreciate the kind words and you looking in. I've pretty much got everything but the canopies painted up and ready to go, but ran into a bit of an issue with the cowl on the F3F-1, needing to strip off the paint and start over. So far, the red has gone on nicely, and last night I taped and sprayed gloss black as the base for the aluminum section of the cowl. Fingers crossed that the masking this time works! I burnished the tape with a toothpick, sprayed a lighter coat of the black, and hung the part to dry with the tape side high so any extra paint hopefully will flow down by gravity and not under the tape (hopefully any potential capillary action is not stronger than gravity!). I find the Vallejo gloss black primer takes a while to cure, so I'll give it at least a full 24 hours before spraying the aluminum. In the meantime, I started work on the canopies. I dipped them twice in Future, and started the taping process last night. Not a fun part of the build! The canopy parts are so small. I have Montex and Eduard sets, but they seem to only fit the F3F-1 (the F3F-2 has a different size and shape to the canopy). Also, for some reason the masks for the rear section don't have and opening for the midline of the framing. I think I'm just going to paint the canopies by hand in stages using the masks where I can, and otherwise using tape. I don't think I'm going to make my own masks and then try to airbrush them, the canopy pieces are just too small.
-
Looks great Grant! Good to know about spraying it - I tried using the pen on my Citroen 2CV, and it's a bit tricky. You need to be very careful and not go back over your work or the finish will look wonky. The pens generally have good flow, but from the one time I used them, at times the flow isn't consistent. I'll have to try out the airbrush approach. Also agree on the longer drying time. I found that to be the case with their black pens as well.
-
Thanks Pete, I’ll have to try that! just out of curiosity, how much paint does a Tamiya rattle can hold? About the same as one of their larger jars?
- 40 replies
-
- 2
-
-
- best airbrush
- compressor
- (and 1 more)
-
I believe there were slight modifications to the guns and bomb racks, and possibly wing shapes. I think I have the Wolfpack wing fold set for it. Thanks for that picture, looks really cool! The kit I won came with the mega detail Aires set which includes a super detailed resin engine, so I might leave some of the panels off to display the engine like the one in your picture. A little more boring of a color scheme, but after the four yellow wings, I’m looking forward to working on something a little different.
-
Thanks man, really appreciate the kind words! These make for cool colorful little planes and the Accurate Miniatures kits for them are very well done. I have some other US planes in the stash (WWII era) but the coloring is a bit more drab with just blues and grays. Speaking of the other kits, I have the TBF-1 Avenger from Accurate Miniatures, SB2C-4 Helldiver from Pro Modeler, and the F4F-4 Wildcat from Tamiya (that I will like convert to a FM-1 Wildcat with a wing folding conversion set I found). I picked them up off of eBay as packages with full aftermarket accessories, so that should be an interesting jump in building for me. I was going to do the Helldiver next given that the box is very big and taking up a lot of stash space, but I’ll probably start the Wildcat next, given that the box is falling apart.
-
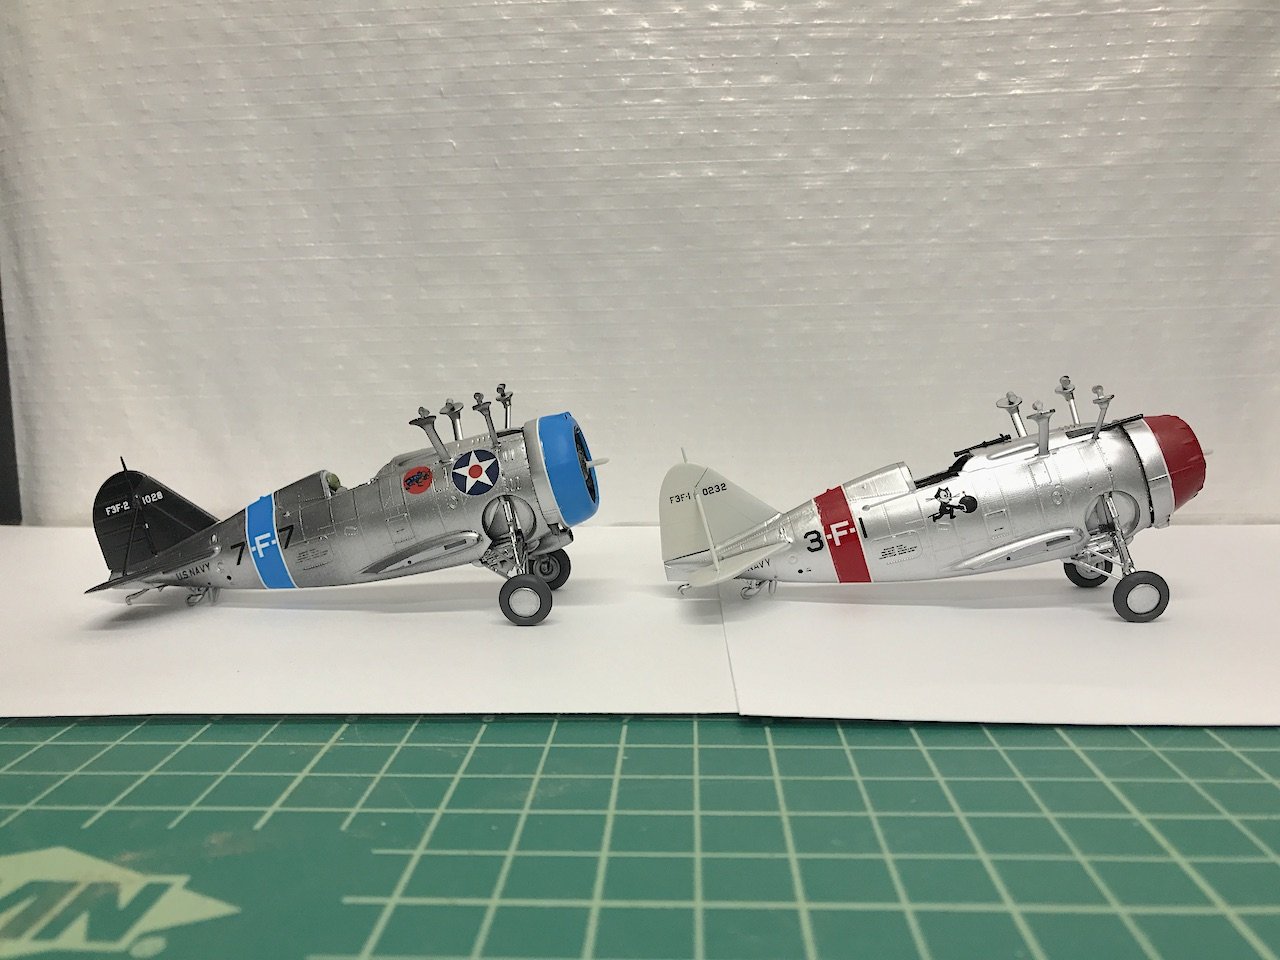
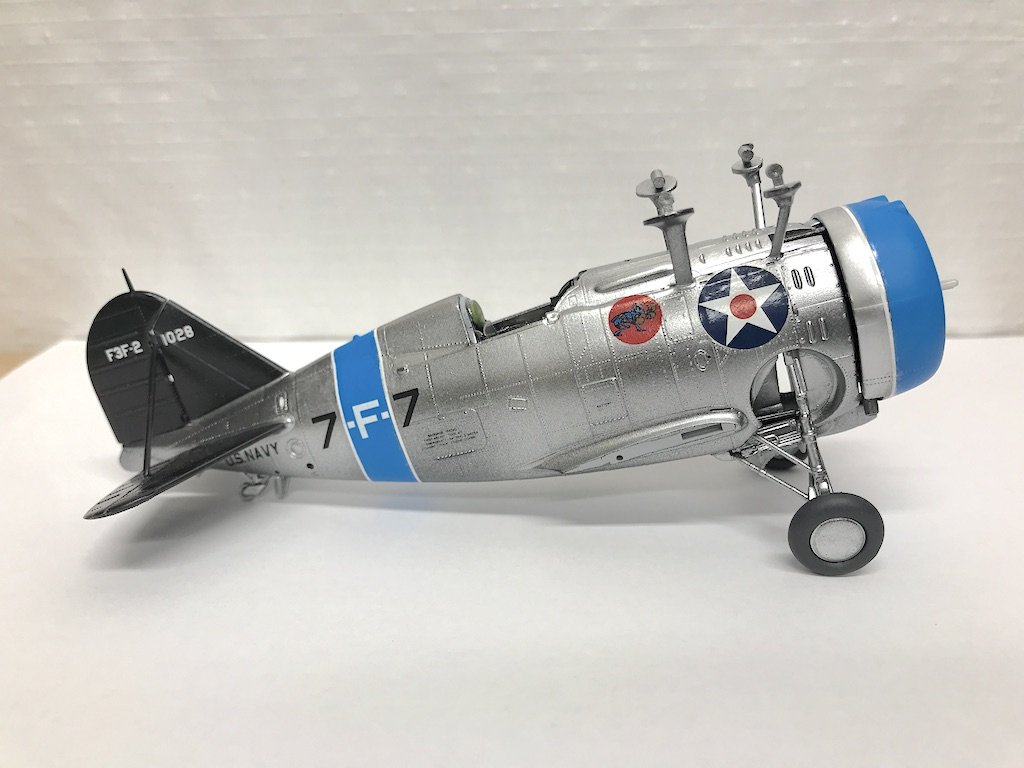
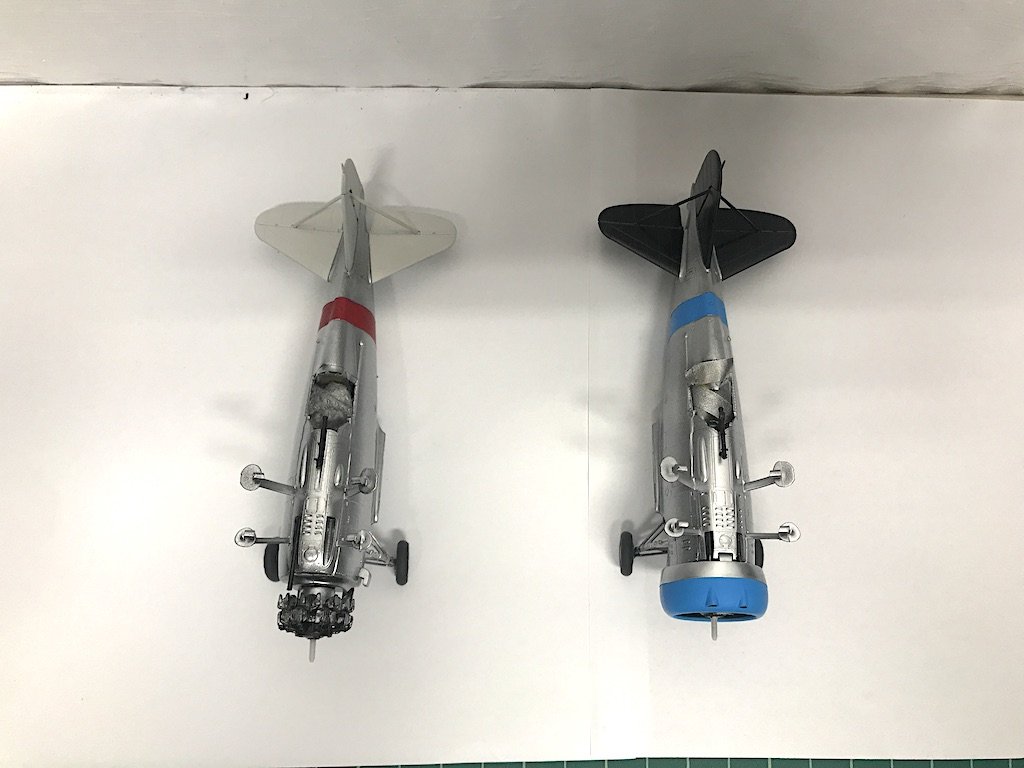
Thanks for all the kind words guys. For my second pair of plane models, I am liking how they are coming out. I've learned that painting reds and yellows are tricky, as they are very apt to be affected by any colors underneath. I tried repainting the red cowl on the F3F-1, but it was just looking messier and messier, so yesterday I decided to strip off all the paint and start again 😤 So, once again used Mr. Surfacer 1200 rattle can primer (gray) for the base coat, followed by Tamiya white rattle can primer to give the red a nice base. A few minutes ago I sprayed Vallejo Air red. I'll give that 24 hours to dry, then tape and spray the black gloss primer followed by Vallejo Metal Air aluminum for the cowl's aluminum band. For more positive news, after more hours of work than I would have expected, I added the decals to the F3F-2. Am very happy with how this one is looking! This was a little more different in that I was going for a different plane than the stock one in the kit, which meant that the 7-F-7 and 1028 markings were all done using individual decals for each number/letter. The kit's decal sheet includes lots of extra individual numbers and letters, which gives you lots of flexibility. Interestingly, the F3F-2 did not have the grasshopper insignia in it, but the decal sheet for the F3F-1 had it. The grasshopper decals in the Yellow Wings decal sets could have worked, but I liked the colors a little better on the kit sheet. Also, rather than painting the US insignia on the front of the fuselage, I went ahead and used the kit decals. Masking that area would have been a nightmare, and I didn't want to press my luck too much given that I had painted the insignias on the wings and they came out decent. Finally, the pin striping went on much easier than with the F3F-1. Per the Micro Set instructions, I was brushing on Micro Set onto the model prior to adding the decal, and then added more Micro Set on top. The Micro Set makes decals get soft quickly, which can be a problem when dealing with long thin decals like the pinstripes. This time around I worked with water only, and then when the decal was positioned in the right place and a bit drier, I used Micro Set (in some cases, I followed up with Micro Sol when I was sure that the decal was set and positioned correctly). That made adding and positioning the decals a lot easier. Here are the two planes side by side. I don't have the best lighting set up, but I would say that the aluminum fuselages are probably somewhere in between the two planes (maybe a touch darker than the F3F-1). I'm liking the bright bodies, so I think I'll just add light applications of washes to the panel lines to add some depth and highlight things, and call it a day. Thanks for looking in. For those in the US, happy Labor Day weekend!
- 128 replies
-
- 10
-
-
Beautiful work Mark as always. Stern looks fantastic!
-
How do you safely punch a hole in the can? I have used the straw into a bottle that has plastic wrap rubber banded to the top with a small hole for the straw. Works ok but can be a bit messy (decanted a can yesterday in fact).
- 40 replies
-
- 2
-
-
- best airbrush
- compressor
- (and 1 more)
-
I use an Iwata Eclipse HP-CS - works really well, though Vallejo paints can gum it up a bit and despite running water and a cleaner through it, sometimes I need to take it apart and give it a deeper clean. It's a 0.35mm needle I believe, and double action. More recently, because I have some larger models, I picked up the following airbrush that was recommended by a member here. It's 0.5mm, bigger cup, and is absolutely fantastic for both small and larger areas: https://spraygunner.com/gsi-creos-mr-airbrush-procon-boy-ps-290-0-5mm-pistol-trigger-type/ I was brand new to airbrushes, and spent many hours trying to figure out what to get. People here were very helpful, but I still found things confusing. Things like needle size, cup size, spray pattern, ease of cleaning, etc. meant little to me until I had one in my hand. I went with the Eclipse because it seemed to be a good size for both small and larger work. I bumped things up with the PS-290 as I said for larger models. Much quicker to airbrush a model car chassis with the PS-290 than the Eclipse. For what it's worth, I also prefer the control and comfort I have with the pistol grip on the PS-290 over the small knob/lever on the Eclipse. Both airbrushes are running off an Iwata compressor. I have one of the models that has two outlets so you can hook two airbrushes up at the same time. It's also fairly quiet as far as airbrushes go, with a wide range of PSI that it can accommodate. Cost was certainly up there, but I figured I would go for good quality, something quieter, and with flexibility to use other types and sizes of airbrushes. If you're new to airbrushes, the amount of choices for airbrushes and compressors can seem overwhelming for sure. I guess there are different ways to go to get experience if you don't have ready access to one - start cheap and upgrade if you need to, or go for higher end. I ended up opting with the latter approach, but I certainly appreciate that might not be for everyone. All that being said, I'm so amazed at how much better a spray finish looks over hand painted. The amount of detail that is retained is incredible. Then there are a ton of choices on paints and primers - acrylics like Vallejo, synthetic lacquers like Tamiya, bottle versus rattle can, etc. That's another of those elements that you just have to try and see what works best for you. I originally thought I would stick with acrylics straight from the bottle like Vallejo - so easy to use! However, I'm less impressed with their primers on areas of a model where you might want to sand to get a perfectly smooth finish like with a car model. The Mr. Surfacer lines of rattle can primers on the other hand are incredible - I couldn't recommend them enough. Tamiya's rattle can primers aren't bad either. I'll use Vallejo primers on smaller detail type pieces that don't need a sanded finish. For paints, I've been using a combo of Vallejo and Tamiya. Vallejo is much easier to use (clean ups, smell, straight from bottle, etc.), but can be tricky if you need to mask. Tamiya on the other hand dries very hard and thin - just a pain as you have to use thinner, sometimes you might want to decant their rattle cans (which have very nice colors not available in the normal bottle line) for finer spraying through an airbrush, they aren't as good for hand brushing, etc. Hope that helps!
- 40 replies
-
- 5
-
-
- best airbrush
- compressor
- (and 1 more)
-
Wow, very cool Tom! Apparently the thing with these cars was that they were so simple, owners could work on them to repair or modify them. I love your cousin's work! They don't seem to be the fastest thing on the road, but I bet with their simplicity, they are a lot of fun to drive. So far the Tamiya is crisper, with less to clean up and much better anchoring points. I'll post some pictures in the next few days - I've pretty much gotten the chassis done, and am starting to work on the body and interior tub. And yeah, the grill took me a bit to figure out how to approach it given that there aren't many anchoring points, and the grill comes to almost a V at the center. Not perfect, and maybe could have tried using brass, but I'm happy with it as a first attempt. I'll try to post some pictures. The suspension does move - take a look here beginning around the 6:00 mark: Thanks for the sketch! Am I'm sure that evening was entertaining to say the least.
-
Thanks for the kind compliments gentlemen, really appreciate it! Roger, my dad worked for Grumman for a stretch in the 80s-90s if I recall correctly. I remember there was a corporate picnic one summer when I was a kid and we got to see planes like E2-C Hawkeye and the F-14 Tomcat. I forget if they had older planes like the F3F out as well. Back then I was more interested in modern fighters like the F-14 bristling with Phoenix, Sidewinder, Sparrow missiles, bombs, etc. Nowadays I find the older aircraft absolutely fascinating. Cool to see all the quirky designs in the WWI era, refined into the WWII era. And big props to the pilots and gunners of aircraft during this period! I've had some time the last couple of days and made some additional progress on the F3F-1. Got the decals on the fuselage (love Felix the Cat!), and just need to add the pinstripe to the cowl when the cowl is repainted (as well as some detail decals to the propeller). I was originally going to go with a 6-F-1 designation from the Yellow Wings decals set, but the decals were slightly wider than the belly band I had painted. So, I just went with the kit's 3-F-1 decals instead. I had already added the numbering decal to the tail, so had to remove it and add the matching decal for the 3-F-1. Who knows if anyone would have realized the numbers were a mismatch, but it probably would have bothered me. Decal came off pretty easily with Micro Set, so all is good. The white pinstripes around the belly band were a pain because of the curves in the fuselage, but I think I got it to lay down properly. I'll need to do a little touch ups but am pretty happy with how things look. I also added the white border lines along the upper wing chevron. The US insignia was painted using stencils - three sets of masks! First to apply to white background, then the blue border around the white star, finally the red center. After doing it to two sets of upper and lower wings, maybe I'll just go with the kit decals in the future, it's a lot of work - especially when you have to touch up things because paint got under the mask. One nice lesson I learned in all of it is that Vallejo is easy to scratch off a Tamiya or Mr. Surfacer primer undercoat using a toothpick. I had painted the wings with Mr. Surfacer grey, then Tamiya white primer. The white primer served as the white for the insignia and base coat for the Tamiya Camel Yellow. The blue and red for the insignia were Vallejo Arctic Blue and Red. For whatever reason, the Vallejo leaked under the mask, and I was horrified. Thankfully I was able to scratch most of it off, which has made it easier to touch up the white areas. Exciting to see this come along and nearing completion. Gets a little boring having bunches of pre-assembled, pre-painted parts sitting around. Nice to start putting it all together and see the real thing. I learned my lesson on my last kit of the 1/72 F4B-1 and P-6E, where I assembled, and then painted. Lot less masking to pre-paint and then assemble! What has helped is the really nice fit of this Accurate Miniatures kit - the tail and horizontal stabilizers fit like a glove with no gaps. The stabilizer bars needed some work to get them to fit, but AM designed them with extra material so that you could customize the fit to your build. Took some time, but much better than having the parts be too short leading to some nasty gaps.
- 128 replies
-
- 10
-
-
If I remember correctly from reading the various logs out there, the doors/sides of the Bentley Blower were canvas I believe. So you captured it perfectly. I need your kind of luck! Thanks for the pictures of your paints - that Tamiya dull aluminum is gorgeous, I'll have to try it out.
-
Wow beautiful work! I picked up this one for the stash a few months ago and your log is going to set a high bar for me! You may have already seen John Teresi's build log of this car, but in case you haven't, it's one of the best I've seen: http://www.modelcarsmag.com/forums/topic/50534-mpc-112-1930-bentley-racing-car/ Can I ask what paints/colors you are using for the metallic colors and the British racing green? I saw Tamiya in some of your pictures, but am really impressed with the colors of the metallics you are using.
-
Nice job! That canopy looks cool, but the modeler in me cringes at how difficult it was to paint. Excellent work!
-
Very nice job Josh! I think it looks fantastic!
-
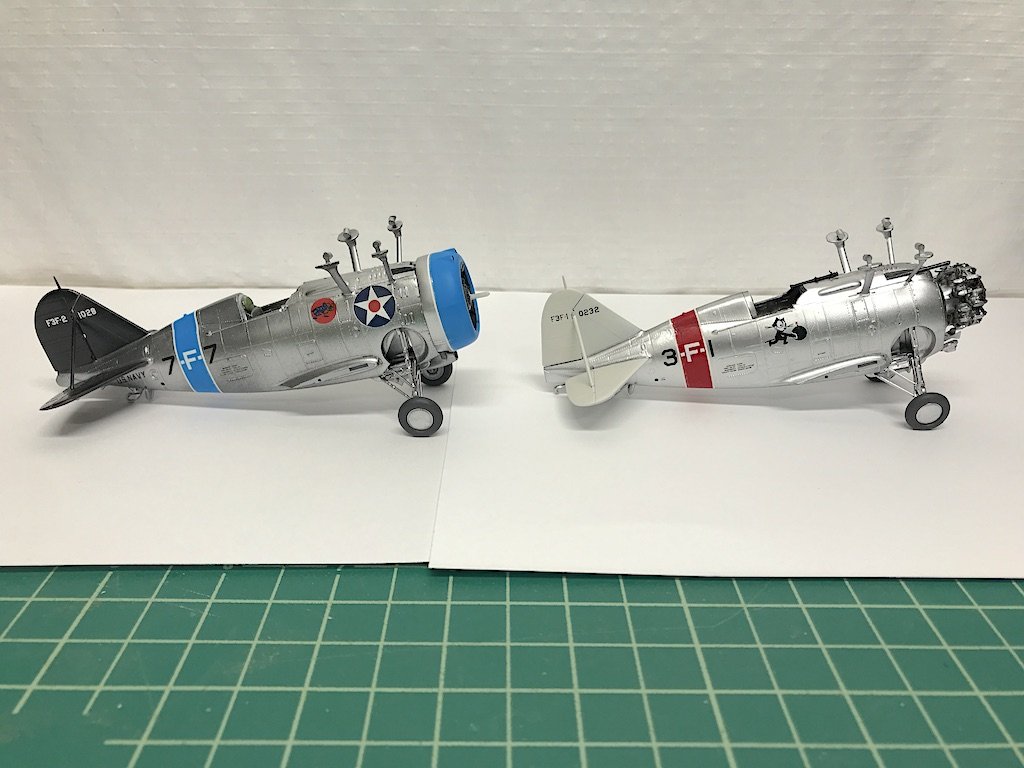
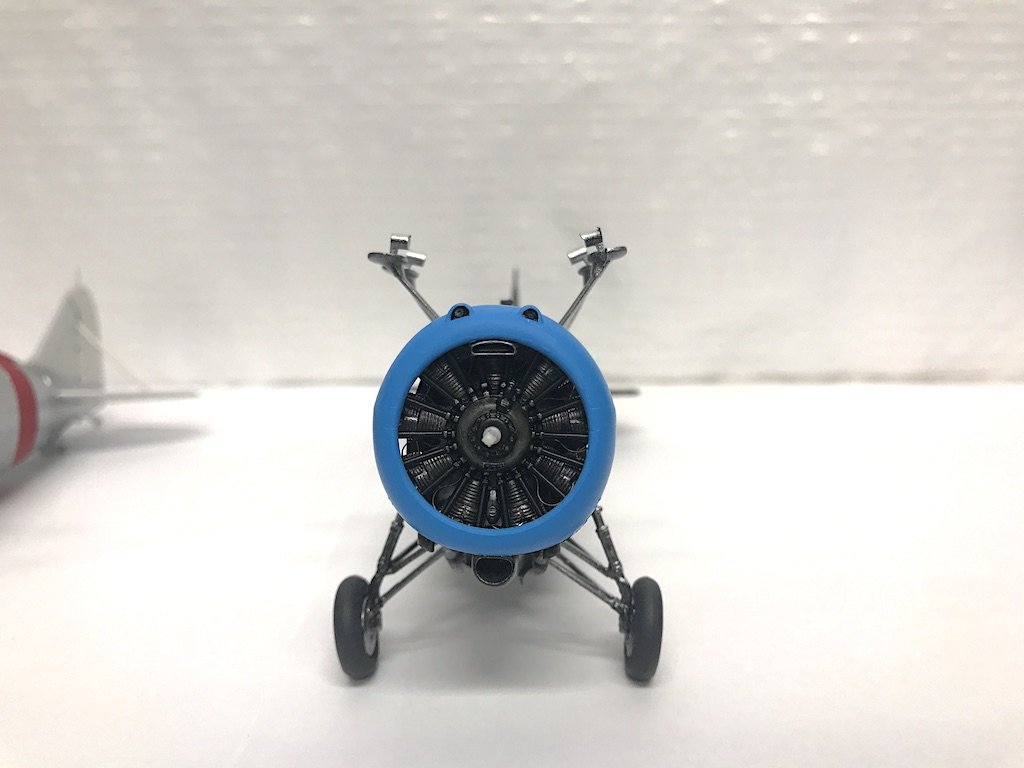
Made some additional progress with the F3Fs the past few days. Had some fit issues with the cowl for the F3F-2, but managed to get it on ok. Cowl for the F3F-1 is going to need the red re-done. Some of the aluminum color had run under the masking, and no matter how many coats of red I've added on top of it (even trying to add primer) it's a bit dark in that area. Probably would be ok if I weather, but I'm going to keep the weathering to a minimum given that these didn't see combat and likely were kept in fairly nice condition (plus, the colors on these are just too vibrant to darken too much). So, I'm just going to start over on the red section, using Mr. Surfacer, then a coat of Tamiya white primer, then the Vallejo red. Otherwise, everything so far is going ok: I think I mentioned earlier that I tried painting the US insignias using the Montex stencils. Decals would have been a lot easier, as paint ran a bit under the various stencils. Have been spending quite a bit of time trying to touch them up. They aren't perfect, but they came out fairly nicely I think: I think I'm going to apply the decals and weathering directly, and not add a coat of Future. I don't want to dull the metallic colors too much by adding multiple clear coats. We'll see how that goes. After, I'll use Vallejo's metal varnish to seal things. Thanks for looking in!
- 128 replies
-
- 15
-