
DONATION DRIVE - SUPPORT MSW - DO YOUR PART TO KEEP THIS GREAT FORUM GOING!
×


Landlubber Mike
-
Posts
4,541 -
Joined
-
Last visited
Content Type
Profiles
Forums
Gallery
Events
Everything posted by Landlubber Mike
-
 Thank you so much - really appreciate sharing all your knowledge and know-how! I’m going to see what the Verlinden is like and compare it to the True Details piece. I’ll probably use those first and then try to scratch build my own carrier decks using the Tom’s Model Works PE. Might be fun to put together some small diorama pieces. At the very least, would give the model a little extra protection.
 -
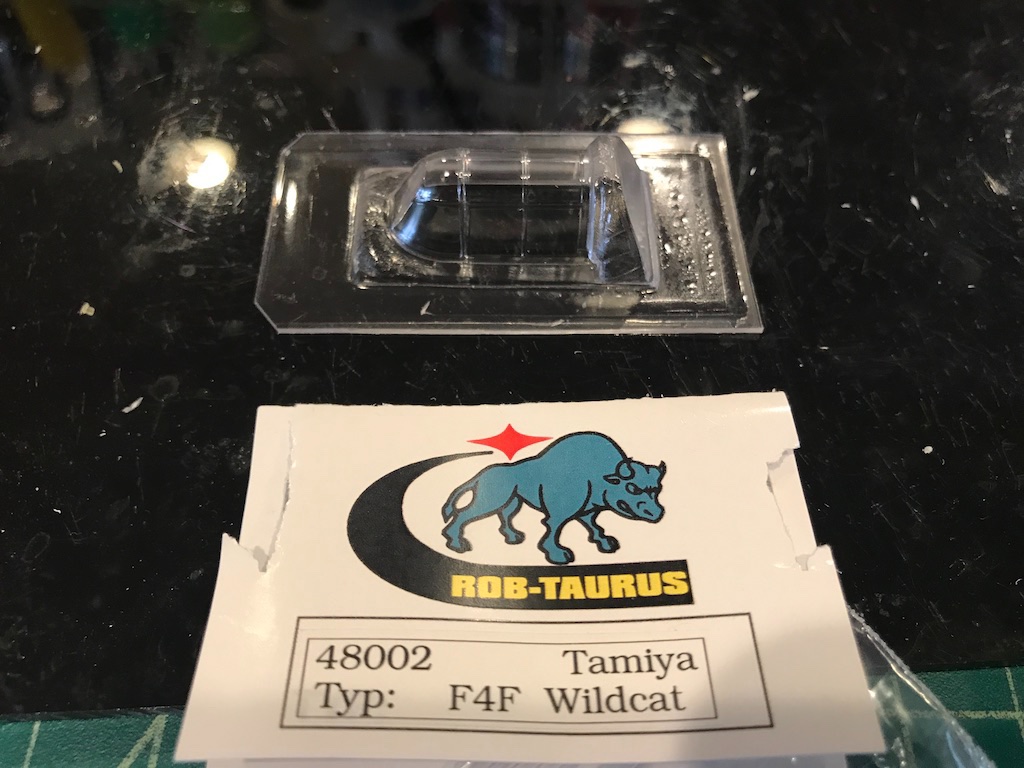
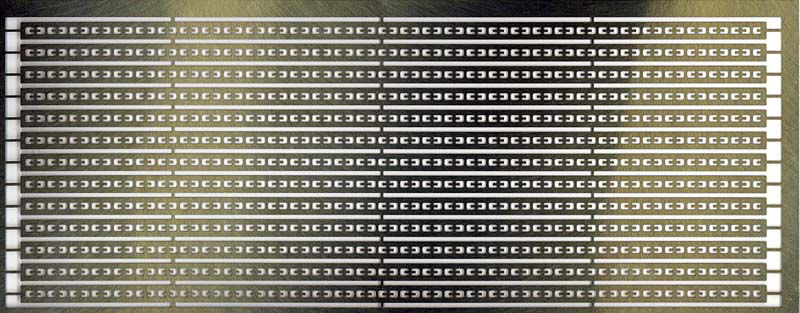
Here's a couple of questions for you guys: 1. The auction for this Wildcat kit included not only the Aires detail set, but also a Taurus cockpit: This is probably a dumb question, but I assume I need to carefully cut it out of the mold - seems like it could be tricky without a very sharp blade as any bending of the piece will lead to some sort of crazing effect on the glass. Any tips on how to do this? Also, the kit includes the cockpit in two sections so you can open it up. This includes the cockpit as a single piece, so I'm assuming this means if I used it I would be stuck with a closed cockpit? Even if I cut it into two, the end frames would be too thin to include on the model. Maybe I'm missing something? I was planning on displaying the cockpit open since the cockpit didn't come out too badly, so maybe I just end up practicing on this one. 2. Has anyone made a WWII US carrier deck for diorama purposes? I bought a Verlinden one that is supposed to arrive this week and a True Details one that looks ok. I did notice that Tom's Model Works sells a PE set for the tie-downs (#215): Has anyone used these before? If so, do these tie downs sit flush with the wood deck around them? Any color difference between these and the surrounding wood? I believe these were metal, but just trying to think about how one would lay these into wooden deck. Thanks in advance!
-
Thanks Ken, that is a good idea. I've seen people free hand scribe panels, and while I have steady hands, seems like a recipe for disaster on a round area like the belly. Thanks man, really appreciate it. I'm hoping to make some substantial progress on my outstanding builds over the next few weeks with lots of vacation time planned, etc. I did spend a bunch of time these last few weeks thinking about dioramas and picking up diorama figures and other accessories where I could find good deals, as well as taking inventory of my stash and re-arranging/re-locating boxes so that I didn't end up with crushed boxes. So, I suppose that's model related
-
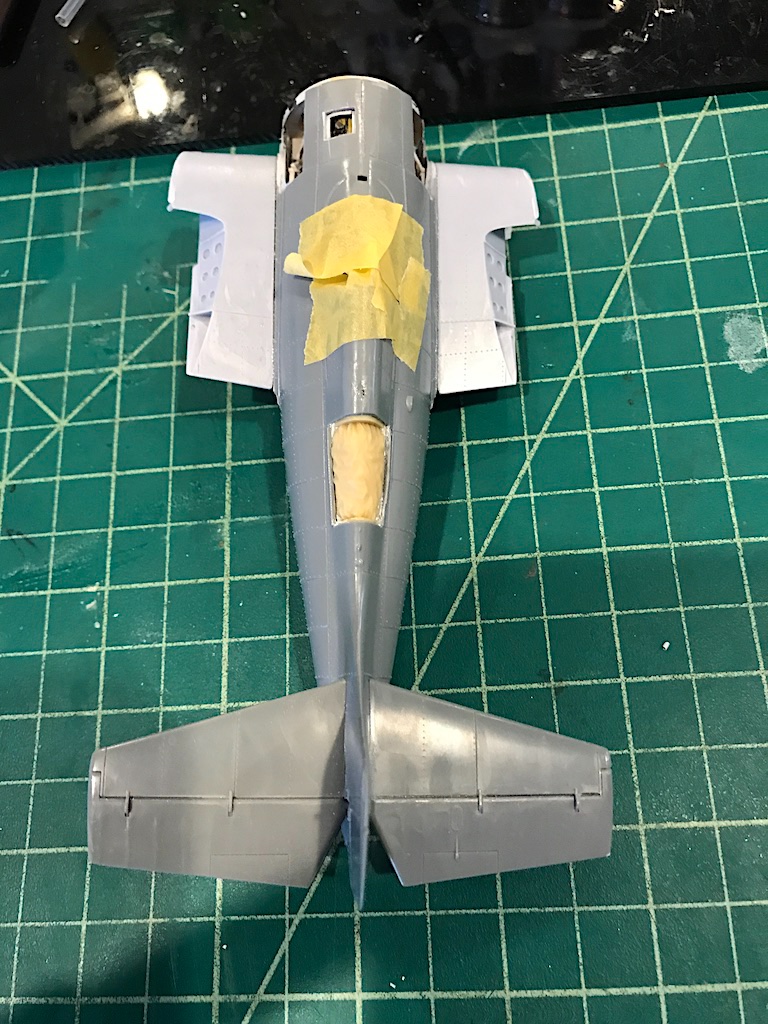
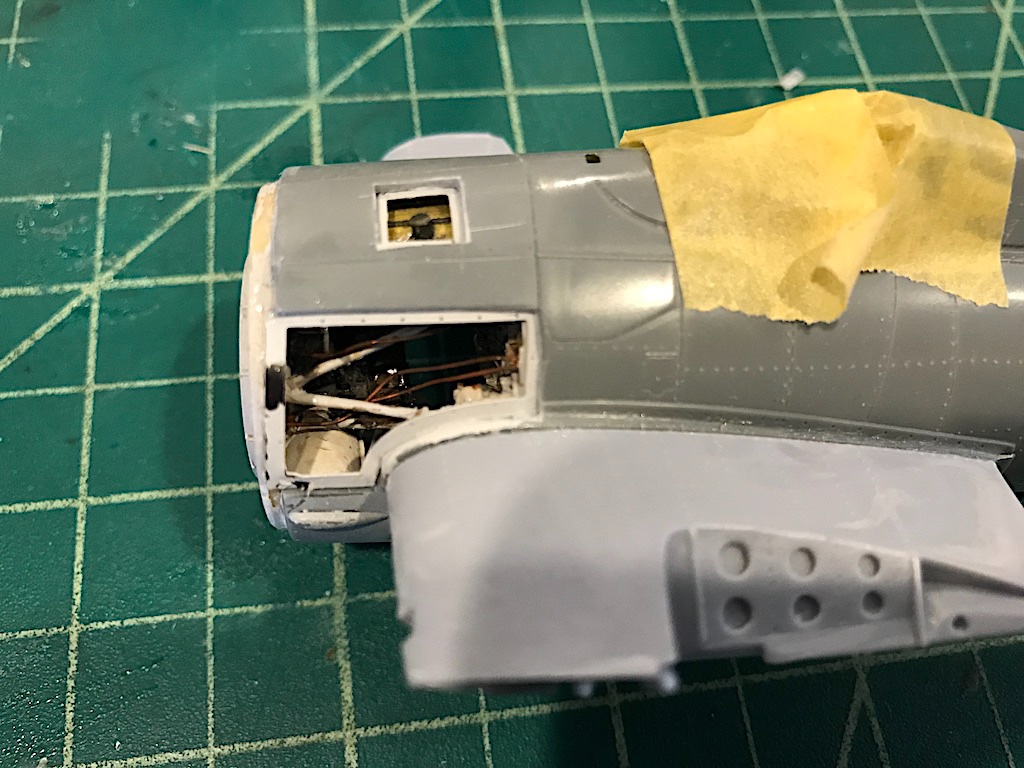
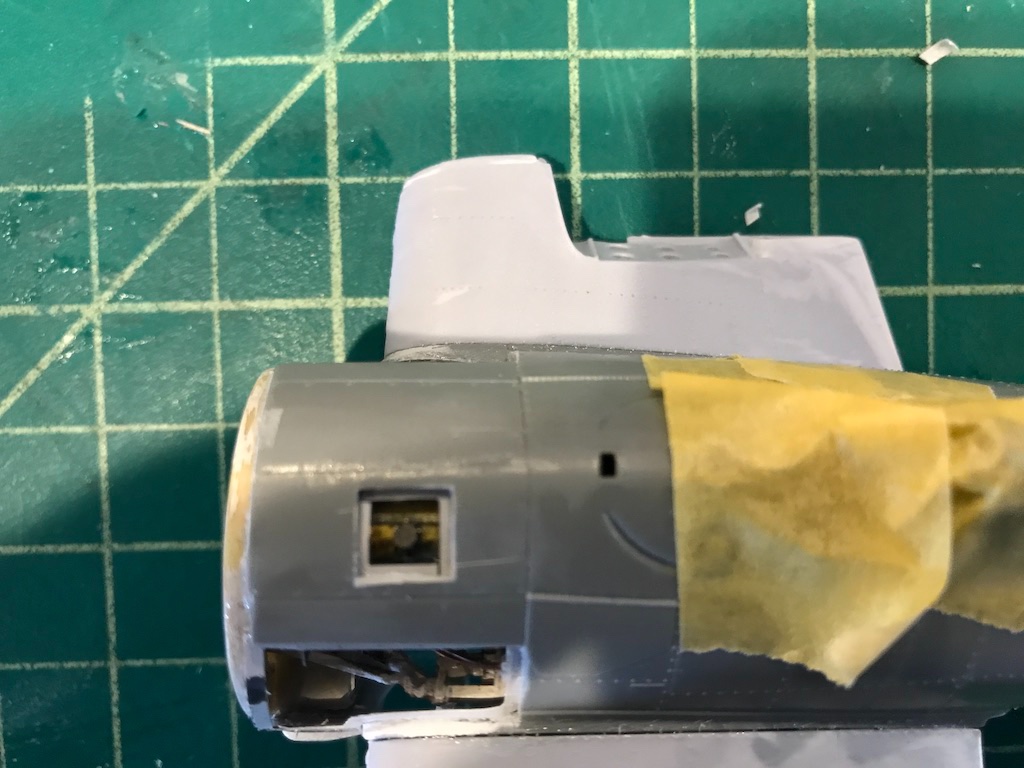
Hello everyone, hope you all had a nice Thanksgiving (for those in the US or that have similar holidays). With the holidays, various home projects, etc., I haven't made as much progress on the Wildcat as I've hoped, but I did cross a couple of big thresholds. The lower tub is now glued into the fuselage. Took some slight modifications to help get everything to fit correctly as there are multiple parts with the deflector plate, the PE open panel parts, etc., and I decided to use 2-part epoxy to make sure it all holds together. Big relief that I'm passed that stage. As you can see, I added a few wires in the open engine mount area, and opened up the fuselage panel at the top of the nose which leads to the oil tank. Last night I glued the wing stubs from the Wolfpack set also using 2-part epoxy. They went on fairly easily, which just some slight sanding to help get them to sit correctly. Looks ugly, but hopefully things will smooth over after filled and painted. I've got a tiny amount of filler to use, but so far everything is generally fitting together fairly well. I do have an issue with the underbelly where the tub and the fuselage didn't exactly line up too well, so I'll have to sand it down, rescribe the panel line, and add rivets. Will be a first for me, and hopefully it looks ok given that this kit has raised panel lines. Oh, and I broke (1) one of the landing gear legs, (2) the tail wheel, and (3) the antenna rod on the top of the fuselage. Ugh. For next steps, I need to clean things up in preparation for painting. I might try out black basing, though again, that will be new for me. What will be tricky on the painting is whether to add the engine and cowl so that the paint lines are smooth across the model and with a consistent color (on the flip side, there will be some tricky masking with the open panels). Of course the folded wing sections have to be worked in somehow as well to keep a consistent shade. Thanks for looking in!
- 241 replies
-
- 11
-

-
Beautiful work Dan! No critique here except I hope that I can someday paint a camo scheme half as well as you can!
- 20 replies
-
- 10
-

-
-
1/48 Italeri Hawk T.1A (On Hold)
Landlubber Mike replied to Old Collingwood's topic in Non-ship/categorised builds
Very cool! I'm in for this one. -
Looks fantastic. I agree with Egilman. Great work!!
- 211 replies
-
- 6
-
-
- prince of wales
- tamiya
- (and 2 more)
-
Sorry to hear Chris, but sounds like this was the right decision. This is supposed to be a fun hobby. I terminated a wooden ship build and was disappointed in doing so, but either it or myself was going to be thrown out the window so better to just leave it where it stood.
-
Awesome, I'm in! I saw a Ford Galaxy in an episode of Counting Cars. Really sharp looking car - understated powerful look.
-
Beautiful job as always Craig. Very sharp paint job, well done! I see you have lots more room on the shelves for your "car garage" - glad to see you started a new one! Can I ask a question? Did you do anything to the door and trunk lines? They look darker/shaded perfectly. Wondering how you achieved that effect. I've been hemming and hawing on my CV2 on what to do, if anything, there and my build pretty much stalled.
-
Nice choice Kevin, I'm in for this one! I like the bottom one as something a little more unique but certainly more challenging. The top one is definitely a nice look as well.
-
Sorry, didn't catch that you were using oils either. I've never used oils so disregard what I said
-
Awesome! Excited to see this starting. Those Kraken upgrade sets look fantastic. Along with the very nice crispness and detail, I like the fact that they directly replace the kit parts, rather than have you remove sections of a part and replace with PE, etc. Much cleaner and less fuss that way. Could the issue be that the paints are thinned a bit too much? I see what you mean about the camo pattern being tricky, but if it were me, I think I would try to mask and airbrush -- but that's mostly because I suck at hand brushing. I'm certainly nowhere near as experienced or skilled as you, so take my thoughts for what you paid for them. But, if I was going to mask, I could see going one of two ways. First way would be to draw the camo lines in pencil on the hull, add a thin masking tape like Tamiya over the section, trace the outline onto the tape, remove the tape, cut the outline, and then add the tape back. That would be two tape lifts before the final stick on the hull, so that might be pushing things when it comes to getting the tape to tightly fit to the hull. Another approach might be to again draw the lines in camo, then use a liquid mask. I haven't tried liquid masks yet, but from what I've seen, they seem to work nicely when lines are irregular. Again, just how I would think about approaching the camo. Good luck - this is going to be a fantastic build (and an educational log to follow!), so I'm happy to see you started.
-
Ha! For some reason she seemed somewhat supportive of the idea - or at least didn't hit me with a frying pan or anything.
-
Great subject Craig, and nice save. It's amazing how much better the molding is on newer kits compared with the ones from a few decades ago. Too bad for cars like this you generally need to look at the older stuff. I'm jealous! I was driving my mom's old Nissan Sentra in grad school, and with three kids, I was driving a minivan for the last few years (though just bought myself an SUV). I told my wife I'm getting a 60s-early 70s muscle car when I retire. I'll be old and not single, but still worth it!
-
Great job as always Kevin. That green paint job is stunning. I haven't been as enamored with the Japanese planes because of the green, but after seeing your build it's growing on me.
-
Enzo Ferrari by CDW - FINISHED - Tamiya 1:24 Scale
Landlubber Mike replied to CDW's topic in Non-ship/categorised builds
Nice job!! Looks fantastic! -
Nice! Funny you mentioned this - my parents saved some fantasy miniatures I painted 30 years ago as a kid. Recently I found them in a box in my basement and put them out for my kids to take a look at. Surprisingly they held up well all these years.
-
1:8 1965 Shelby Cobra 427 S/C - Agora Models
Landlubber Mike replied to James H's topic in Non-ship/categorised builds
Wow, that looks amazing! Just saw they have a 1:200 Bismarck upcoming as well 🤩 -
Fantastic work Bob!
-
Coming along nicely OC! Looks like it will be a nice sized model.
-
Nicely done Kevin!
-
Great job Denis!!!