
DONATION DRIVE - SUPPORT MSW - DO YOUR PART TO KEEP THIS GREAT FORUM GOING!
×


Landlubber Mike
-
Posts
4,541 -
Joined
-
Last visited
Content Type
Profiles
Forums
Gallery
Events
Everything posted by Landlubber Mike
-

Dust extractor - compact and quiet?
Landlubber Mike replied to Rik Thistle's topic in Modeling tools and Workshop Equipment
Wow man, relax. From everything I've read - and I read a lot when setting things up on my end - having a dust extraction at the tool itself is one of the best things you can do. If the Rabbit works, that's great. Good for you. I wasn't denigrating anyone or anything. -
Thanks man! Every time I see your log I'm so tempted to start my Yukikaze, but I'm trying to have only one plastic ship going at a time. Still need to finish my 1/700 Hatsuzakura destroyer which hopefully I can get done by the end of the year. The PE is just so small I need to be of a particular mindset - i.e., masochistic - to work on it
- 26 replies
-
- 4
-

-
- Yukikaze
- First Build
- (and 3 more)
-
Dust extractor - compact and quiet?
Landlubber Mike replied to Rik Thistle's topic in Modeling tools and Workshop Equipment
I run my Byrnes tools through a Fein shop vac, with a Dust Deputy cyclone canister to lower the load on the shop vac and save on bags. I also have an overhead Rikon filtration unit that is supposed to pull in dust that doesn't make it into the Fein. If you are going to use a shop vac, be aware that you might need an adaptor if the tool is imperial and the vac is metric or vice versa. Fein being German, I had to use a combo of two different adaptors to connect the Fein to the Brynes tools. I'd be curious if that Rabbit is sufficient for dust collection. My Byrnes tools kick out a lot of sawdust - I think you want to capture as much of the particulate as possible as it comes out of the machine, rather than wait for it to eventually get pulled into a contraption like the Rabbit. Plus, some particulate is heavy and will immediately fall, the rest light and may stay airborne. Not saying it can't work, but I think the safest thing is to try to capture as much as you can at the tool as possible. -
Nicely done! Congratulations! Mikasa will be a good second one to work on
- 26 replies
-
- 6
-
-
- Yukikaze
- First Build
- (and 3 more)
-
Enzo Ferrari by CDW - FINISHED - Tamiya 1:24 Scale
Landlubber Mike replied to CDW's topic in Non-ship/categorised builds
Looks really cool Craig, nice work! I saw someone build a Ducati that used carbon/graphite decals to stunning effect on the body of the motorcycle. Maybe that was posted here on MSW, I forget, but was really awesome. Going to look fantastic on your Ferrari. -
Looks fantastic! Those figures really show the scale of these ships.
- 211 replies
-
- 5
-
-
- prince of wales
- tamiya
- (and 2 more)
-
Awesome job guys!
-
Really excellent work Joe! So clean and precise, looks perfect.
- 140 replies
-
- 2
-
-
- benjamin w latham
- model shipways
- (and 1 more)
-
Thanks Joe. Yeah, this cockpit needed some modification but in the end I got it in. In the end, I'd say that probably using the original kit parts as modified with the Eduard PE set would have been just as nice for a lot less trouble. Plus, you can't really see much inside the cockpit anyway. I do like this particular Aires set for the engine and other details though. Does make you wonder whether to just stick with the newer, better designed kits - Wingnut, Zoukei-Mura, etc. Unfortunately, they are fairly niche product lines so you are stuck looking at older kits for most subjects (which generally can be spruced up a bit with aftermarket).
-
Looks great to me Chris. I'm impressed you can pull off all those curves and details in card!
-
Enzo Ferrari by CDW - FINISHED - Tamiya 1:24 Scale
Landlubber Mike replied to CDW's topic in Non-ship/categorised builds
Beautiful work Craig. The fit and detail of the parts looks amazing. Gotta love Tamiya kits! -
Thanks for the kind words! It's funny, when I got back into models maybe ten years ago, I didn't want to do plastic because I thought it was insert tab A into slot B and paint from the old little Testor's enamels bottles (which I was terrible at). So I went to wooden ships for more variety of components and parts of the build. When I saw how plastic models have changed with all these detail sets, airbrushes, adhesives, etc., I've almost completely moved back to plastic (though, I still want to work on and complete my wooden ship kits and there are a few I'd like to scratch build down the road). Personally, I find the subjects of WWI-WWII era planes and ships (and for cars, early 70s and earlier) more interesting. So, I'd give it a shot! I really feel like I've learned a lot in terms of techniques, tools, etc. to be a better wooden ship modeler. Definitely post a build log here. The MSW folks have been kind to allow a place for non-ship builds, and I have to say, there seems to be more activity, commentary, help, and sharing here than on some of the plastic plane boards. I'm enjoying the camaraderie and education on this forum as much, if not more so, than actually building.
-
Really well done Craig, especially with those colors and decals. Congrats!
-
Looking great! How do you like those Northstar figures? The flat PE ones (that you build up by folding in half) don't seem as nice as these. I can see using the PE ones at 1/700, but 1/350 can probably use more of a 3D feel.
- 211 replies
-
- 5
-
-
- prince of wales
- tamiya
- (and 2 more)
-
Wow, those are decals? Went on really well with all those curves. Nice job!
-
Tom, this is the set I have been using. With Covid, wouldn't be surprised if masks and cartridges are still hard to come by. https://www.amazon.com/gp/product/B009POHLRC/ref=ppx_yo_dt_b_search_asin_title?ie=UTF8&psc=1
-
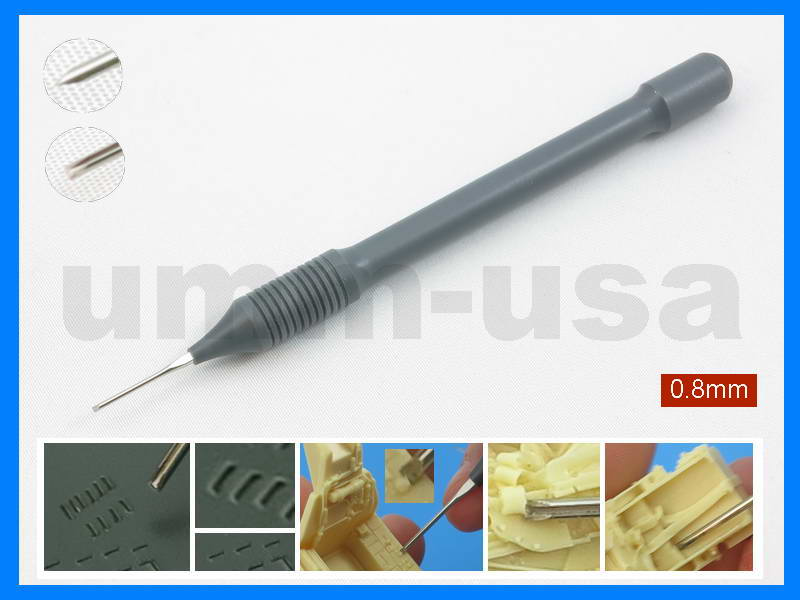
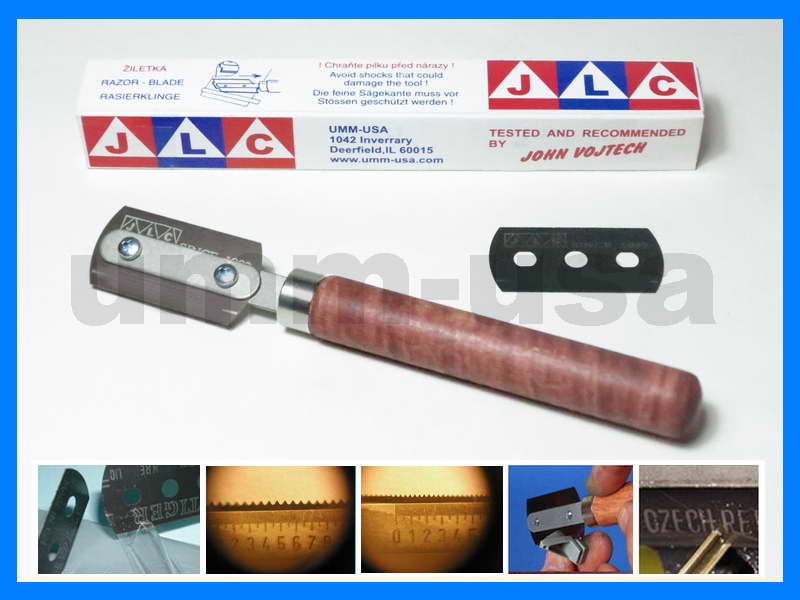
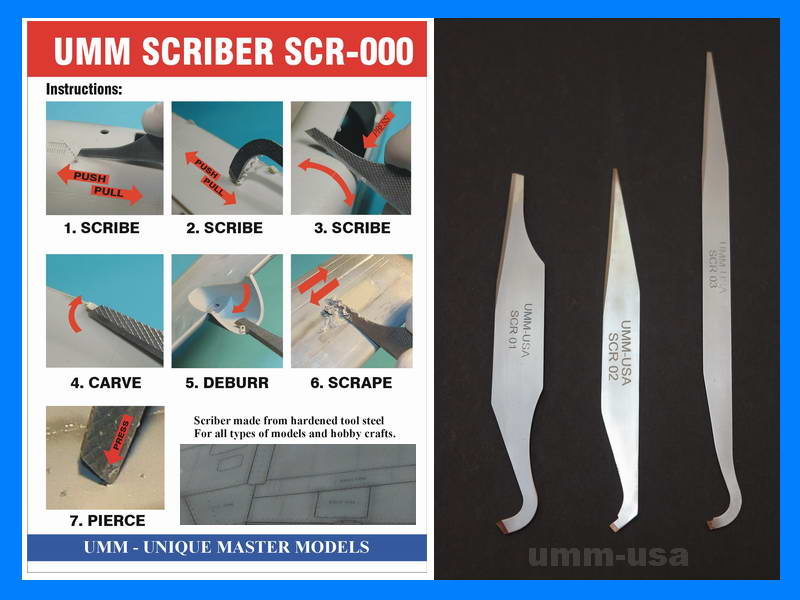
Just wanted to pass along some tools I've found very helpful on this build. I picked these up from John Vojtech of UMM-USA (Unique Master Models) : http://umm-usa.com/onlinestore/index.php (no affiliation). He's got a lot of other goodies for plastic modelers on his site, so just a warning Micro saw - very helpful to cut plastic and resin parts with a very thin kerf. I used this to cut out the fuselage for adding the life raft. He also sells mini miter boxes for this saw. Scribers - these are really helpful for a variety of uses as shown below. I used them to cut out the various panels from the cowl and fuselage. I started with a #11 blade to deepen the panel line a bit, then ran the scriber to finish the cut. Much quicker, easier, and safer than trying to use an X-acto blade in my opinion. Micro chisels - very helpful to cut out and remove sections of parts for better fit, to replace with aftermarket, etc. They come in different sizes and shapes.
- 241 replies
-
- 10
-
-
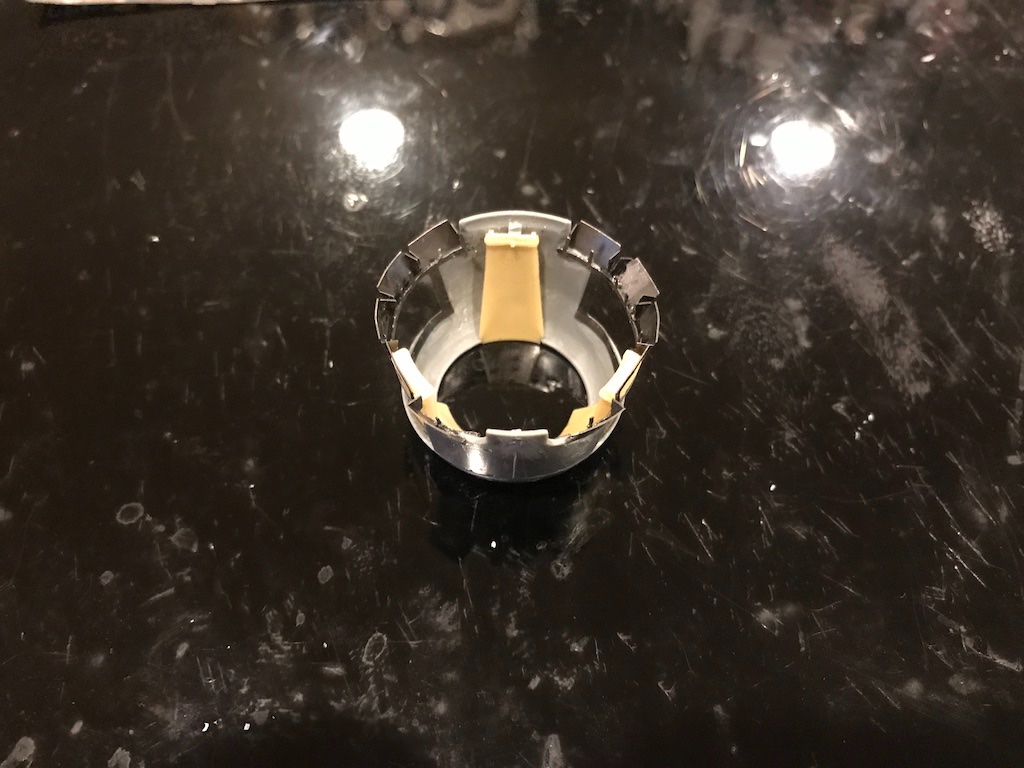
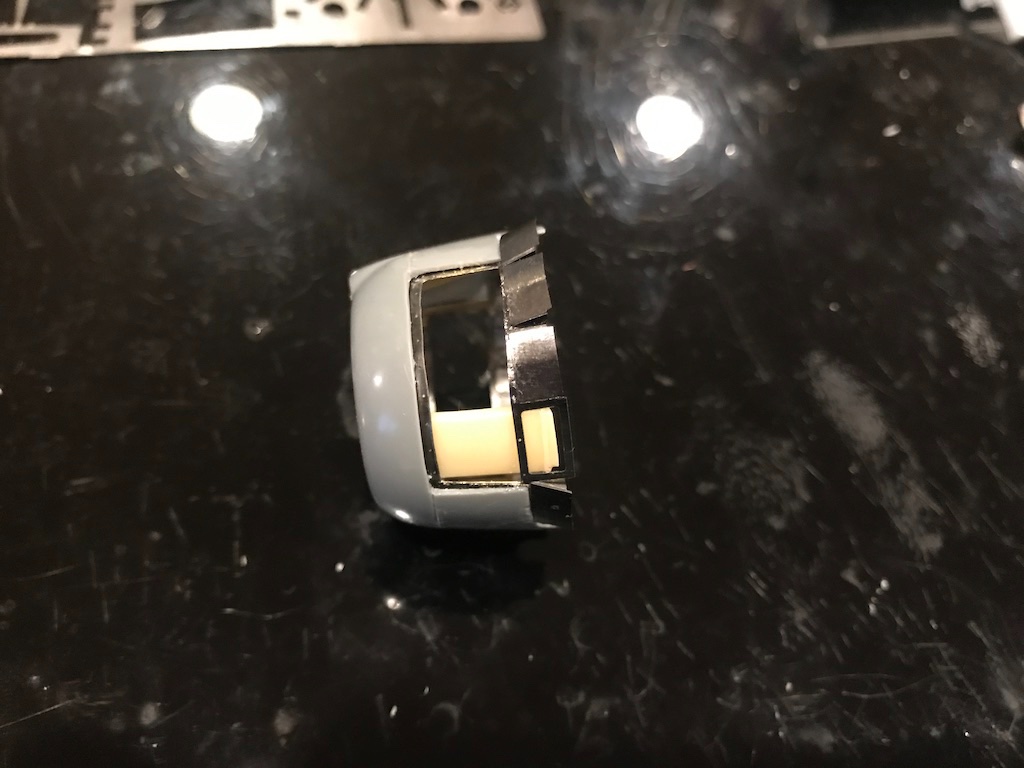
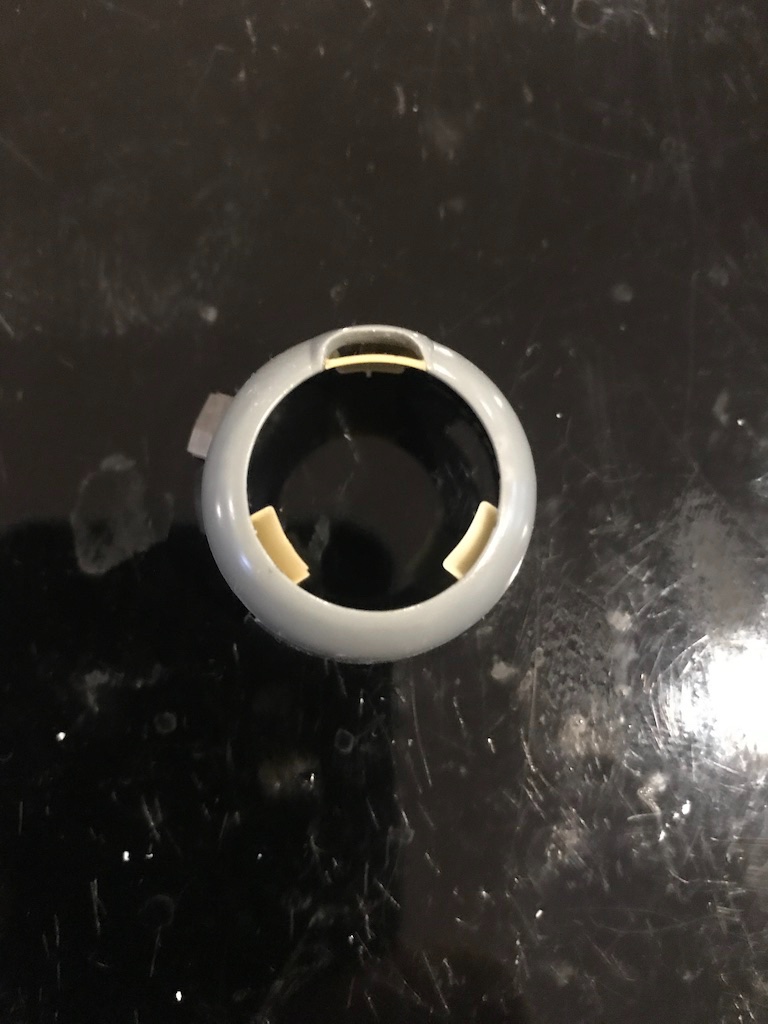
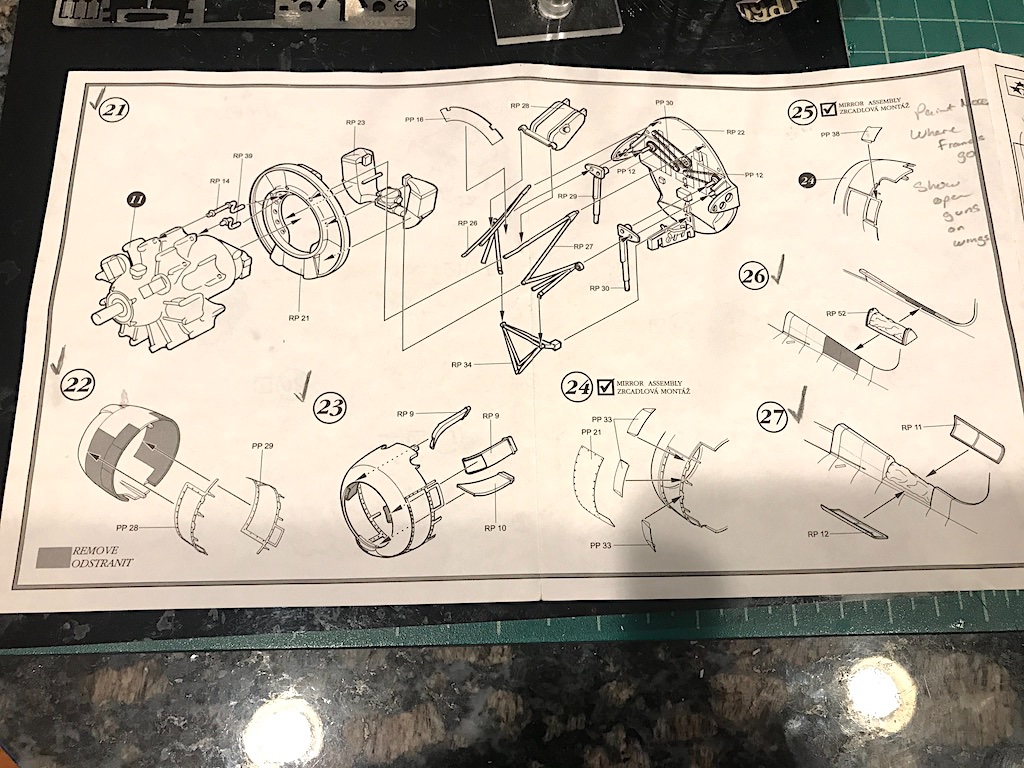
Thanks guys for all the kind words, really appreciate it. Well, after many more hours than I care to admit, I think I'm done assembling the cowl. Lot of surgery and new parts! The Aires PE and resin parts generally fit very well, but the instructions are sparse to put it mildly. Good diagrams showing what goes where, but there is quite a bit of dry fitting and figuring things out on the fly. The engine compartment forward of the firewall in particular took a lot of studying, research, dry fitting, etc. to figure out how things all fit together. Here's the cowl - I'm pretty pleased with how it came out. After cutting out half of the cowl and carving out the air intakes, I added the interior frames (PE), the three air ducts (resin), and eight cowl flaps (PE). Aires also gives you exterior panels to cover up the open areas if you choose, or you could display them off the model in a maintenance scene. Unless I decide to open the gun bays, that should be it for the Aires set. The rest of the build should come together fairly quickly given the relatively simple color scheme and the fit and design of the kit. Thanks for looking in!
- 241 replies
-
- 11
-
-
Really nice work James! What a cool little project. Are you planning on painting it?
-
Hey Tom, good to hear from you. Hope all is well over there. As Grant suggested, a respirator mask might do the trick. I don't use one when building models, but when I turn pens and add a CA finish (which requires lots of CA), I use one of those 3M masks with two pink cartridges. Can't smell a thing. The one issue with those masks is that they are a bit heavy, so working hunched over doing fine detail work on a model over a long period of time may put some stress on the neck.
-
Hey Kevin, hope all is well. Any more progress on this one?
-
Looks great Craig. White is not an easy color to lay down in big swaths like that. Well done!
-
I'm in for this one too! Though, I might have one eye closed. I started with plastic ships and told me that was the end of plastic for me. Then I started on planes, and said no way will I buy car kits. Well after a bunch of car kits in the stash, I have been saying no armor kits! With your skills, I'll be sorely tempted to break yet another vow!