


Landlubber Mike
-
Posts
4,549 -
Joined
-
Last visited
Content Type
Profiles
Forums
Gallery
Events
Everything posted by Landlubber Mike
-
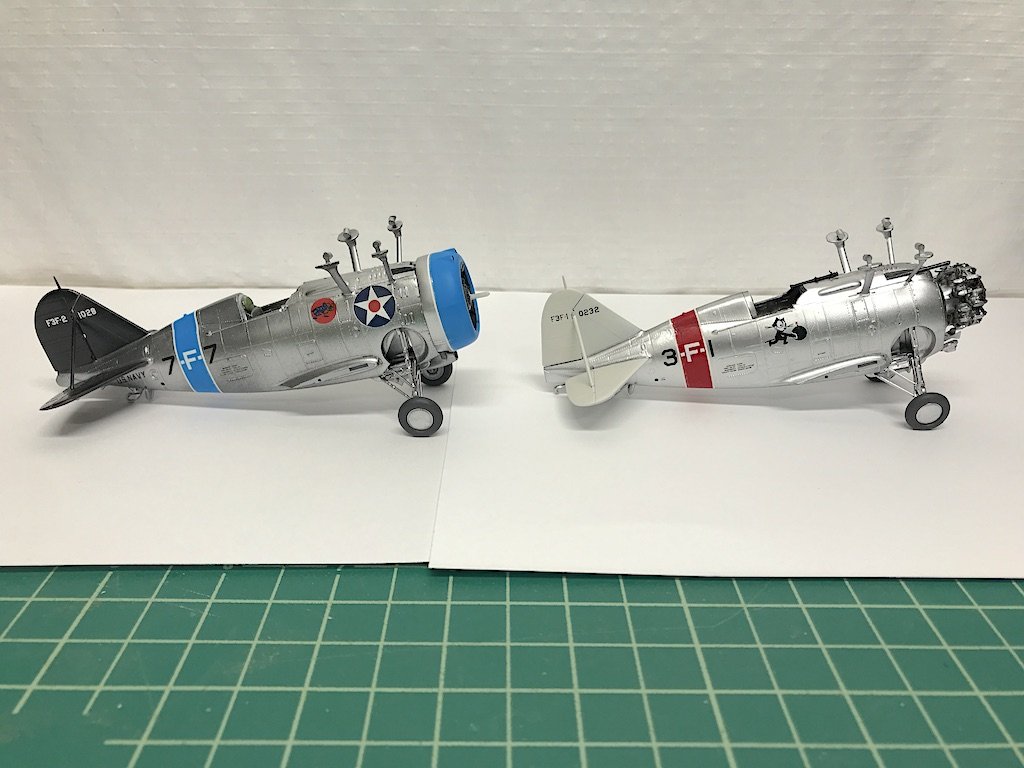
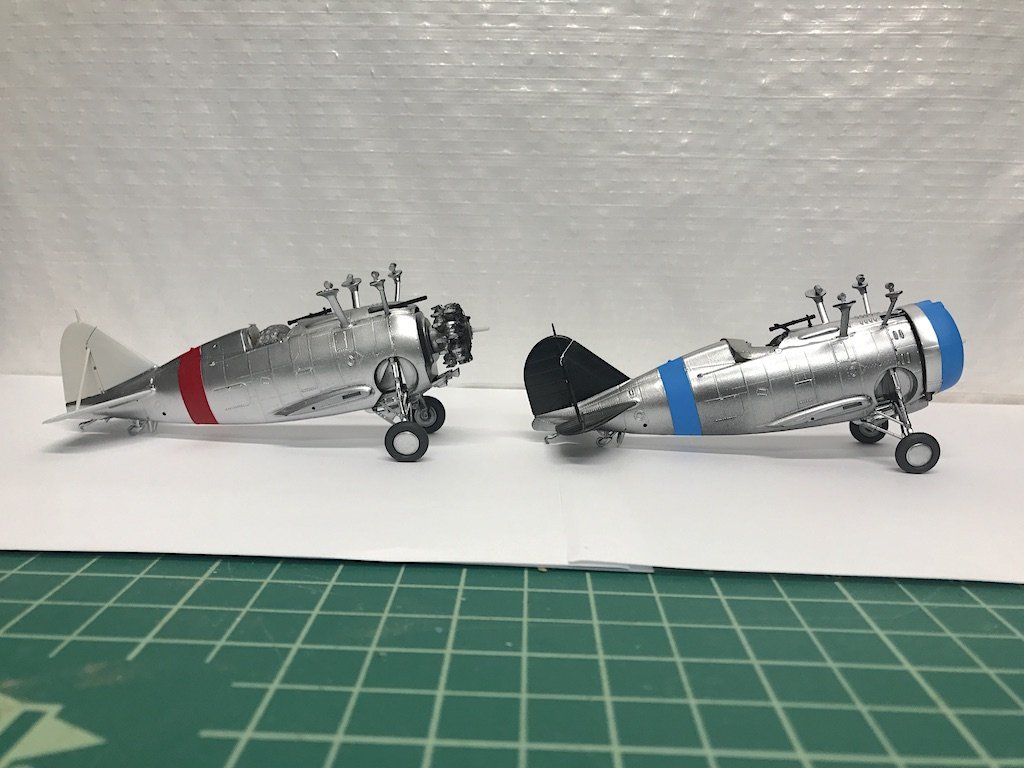
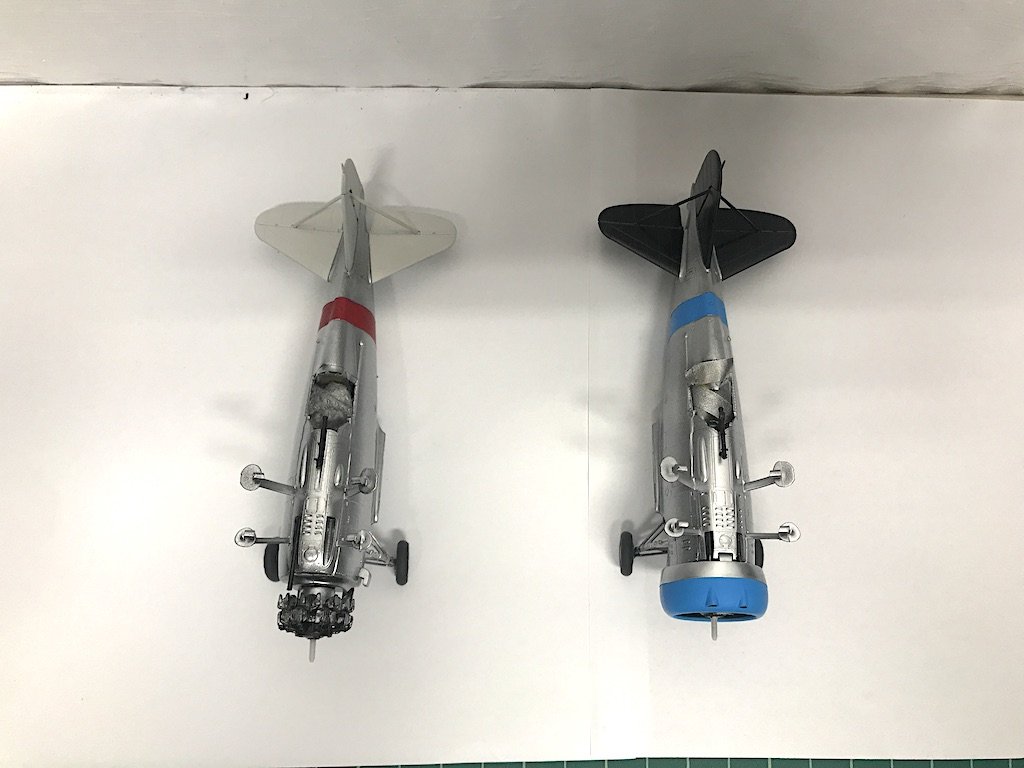
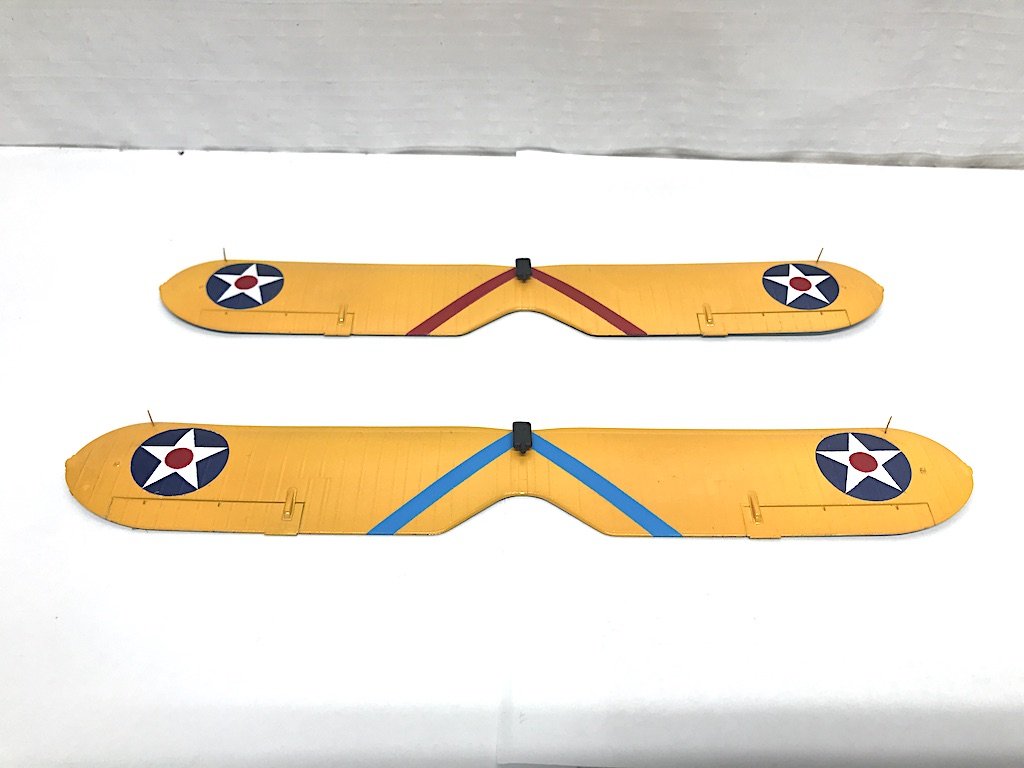
 Thanks for all the kind words guys. For my second pair of plane models, I am liking how they are coming out. I've learned that painting reds and yellows are tricky, as they are very apt to be affected by any colors underneath. I tried repainting the red cowl on the F3F-1, but it was just looking messier and messier, so yesterday I decided to strip off all the paint and start again 😤 So, once again used Mr. Surfacer 1200 rattle can primer (gray) for the base coat, followed by Tamiya white rattle can primer to give the red a nice base. A few minutes ago I sprayed Vallejo Air red. I'll give that 24 hours to dry, then tape and spray the black gloss primer followed by Vallejo Metal Air aluminum for the cowl's aluminum band. For more positive news, after more hours of work than I would have expected, I added the decals to the F3F-2. Am very happy with how this one is looking! This was a little more different in that I was going for a different plane than the stock one in the kit, which meant that the 7-F-7 and 1028 markings were all done using individual decals for each number/letter. The kit's decal sheet includes lots of extra individual numbers and letters, which gives you lots of flexibility. Interestingly, the F3F-2 did not have the grasshopper insignia in it, but the decal sheet for the F3F-1 had it. The grasshopper decals in the Yellow Wings decal sets could have worked, but I liked the colors a little better on the kit sheet. Also, rather than painting the US insignia on the front of the fuselage, I went ahead and used the kit decals. Masking that area would have been a nightmare, and I didn't want to press my luck too much given that I had painted the insignias on the wings and they came out decent. Finally, the pin striping went on much easier than with the F3F-1. Per the Micro Set instructions, I was brushing on Micro Set onto the model prior to adding the decal, and then added more Micro Set on top. The Micro Set makes decals get soft quickly, which can be a problem when dealing with long thin decals like the pinstripes. This time around I worked with water only, and then when the decal was positioned in the right place and a bit drier, I used Micro Set (in some cases, I followed up with Micro Sol when I was sure that the decal was set and positioned correctly). That made adding and positioning the decals a lot easier. Here are the two planes side by side. I don't have the best lighting set up, but I would say that the aluminum fuselages are probably somewhere in between the two planes (maybe a touch darker than the F3F-1). I'm liking the bright bodies, so I think I'll just add light applications of washes to the panel lines to add some depth and highlight things, and call it a day. Thanks for looking in. For those in the US, happy Labor Day weekend!
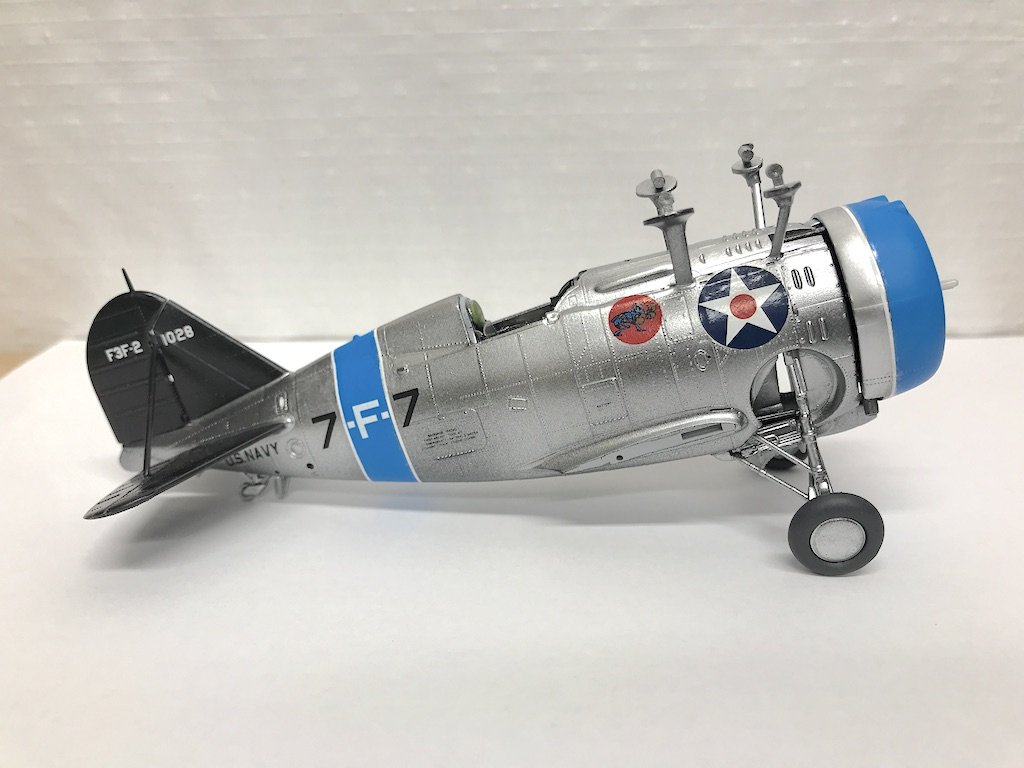
- 128 replies
-
- 10
-

-
Beautiful work Mark as always. Stern looks fantastic!
-
How do you safely punch a hole in the can? I have used the straw into a bottle that has plastic wrap rubber banded to the top with a small hole for the straw. Works ok but can be a bit messy (decanted a can yesterday in fact).
- 40 replies
-
- 2
-
-
- best airbrush
- compressor
- (and 1 more)
-
I use an Iwata Eclipse HP-CS - works really well, though Vallejo paints can gum it up a bit and despite running water and a cleaner through it, sometimes I need to take it apart and give it a deeper clean. It's a 0.35mm needle I believe, and double action. More recently, because I have some larger models, I picked up the following airbrush that was recommended by a member here. It's 0.5mm, bigger cup, and is absolutely fantastic for both small and larger areas: https://spraygunner.com/gsi-creos-mr-airbrush-procon-boy-ps-290-0-5mm-pistol-trigger-type/ I was brand new to airbrushes, and spent many hours trying to figure out what to get. People here were very helpful, but I still found things confusing. Things like needle size, cup size, spray pattern, ease of cleaning, etc. meant little to me until I had one in my hand. I went with the Eclipse because it seemed to be a good size for both small and larger work. I bumped things up with the PS-290 as I said for larger models. Much quicker to airbrush a model car chassis with the PS-290 than the Eclipse. For what it's worth, I also prefer the control and comfort I have with the pistol grip on the PS-290 over the small knob/lever on the Eclipse. Both airbrushes are running off an Iwata compressor. I have one of the models that has two outlets so you can hook two airbrushes up at the same time. It's also fairly quiet as far as airbrushes go, with a wide range of PSI that it can accommodate. Cost was certainly up there, but I figured I would go for good quality, something quieter, and with flexibility to use other types and sizes of airbrushes. If you're new to airbrushes, the amount of choices for airbrushes and compressors can seem overwhelming for sure. I guess there are different ways to go to get experience if you don't have ready access to one - start cheap and upgrade if you need to, or go for higher end. I ended up opting with the latter approach, but I certainly appreciate that might not be for everyone. All that being said, I'm so amazed at how much better a spray finish looks over hand painted. The amount of detail that is retained is incredible. Then there are a ton of choices on paints and primers - acrylics like Vallejo, synthetic lacquers like Tamiya, bottle versus rattle can, etc. That's another of those elements that you just have to try and see what works best for you. I originally thought I would stick with acrylics straight from the bottle like Vallejo - so easy to use! However, I'm less impressed with their primers on areas of a model where you might want to sand to get a perfectly smooth finish like with a car model. The Mr. Surfacer lines of rattle can primers on the other hand are incredible - I couldn't recommend them enough. Tamiya's rattle can primers aren't bad either. I'll use Vallejo primers on smaller detail type pieces that don't need a sanded finish. For paints, I've been using a combo of Vallejo and Tamiya. Vallejo is much easier to use (clean ups, smell, straight from bottle, etc.), but can be tricky if you need to mask. Tamiya on the other hand dries very hard and thin - just a pain as you have to use thinner, sometimes you might want to decant their rattle cans (which have very nice colors not available in the normal bottle line) for finer spraying through an airbrush, they aren't as good for hand brushing, etc. Hope that helps!
- 40 replies
-
- 5
-
-
- best airbrush
- compressor
- (and 1 more)
-
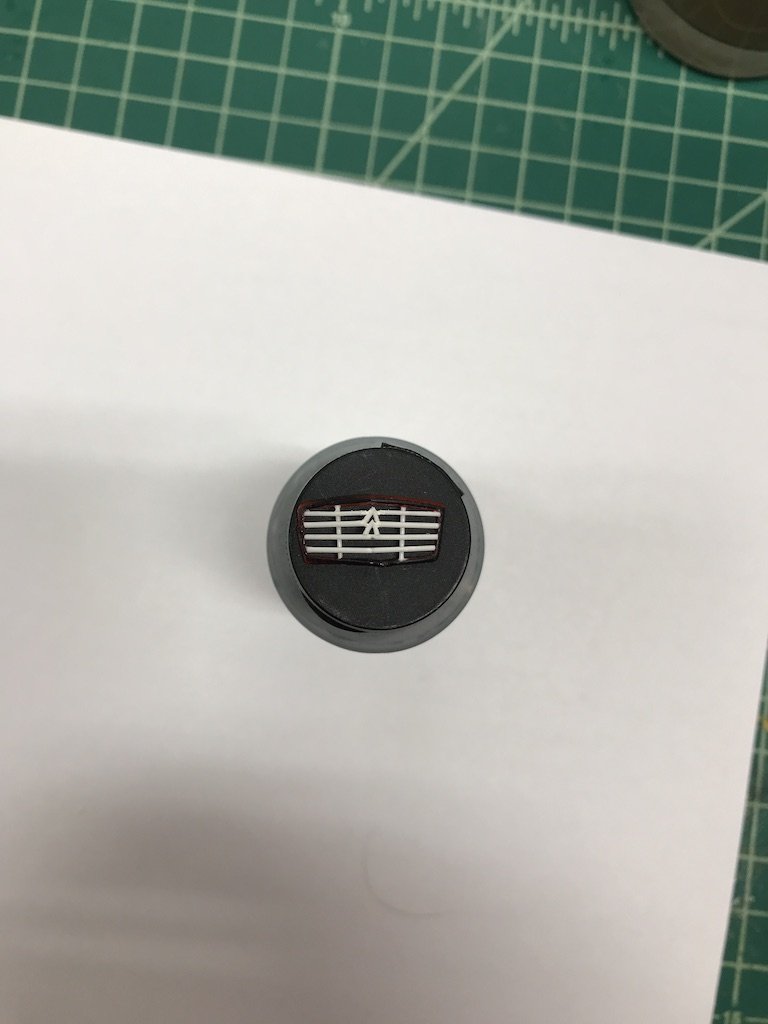
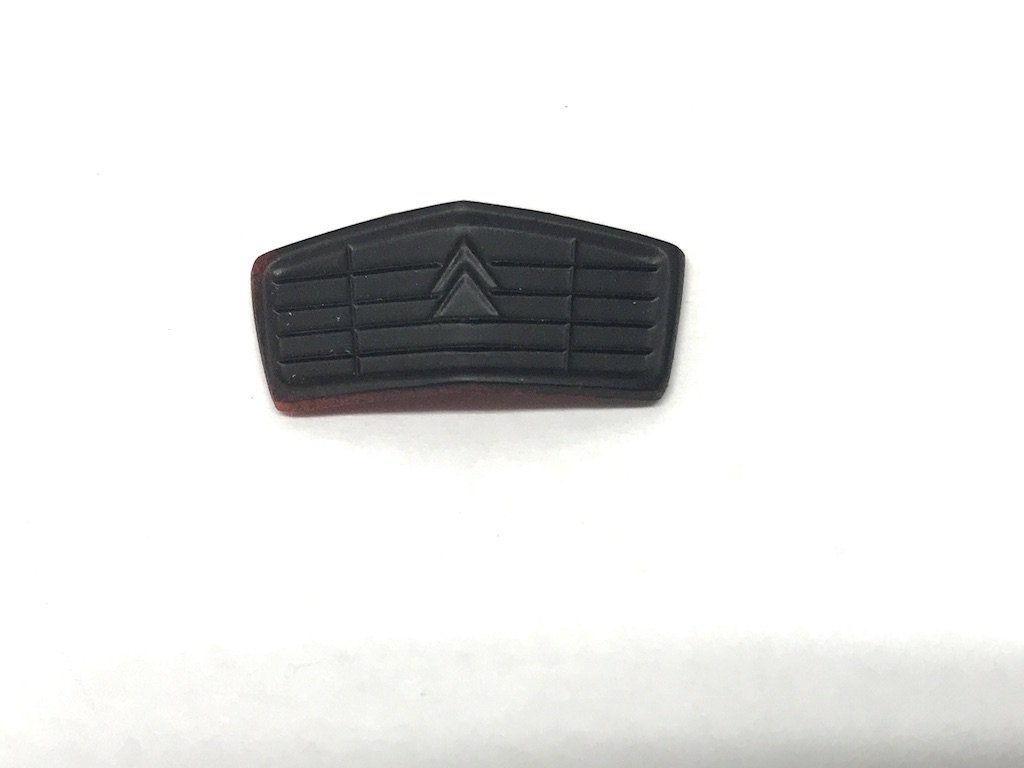
Wow, very cool Tom! Apparently the thing with these cars was that they were so simple, owners could work on them to repair or modify them. I love your cousin's work! They don't seem to be the fastest thing on the road, but I bet with their simplicity, they are a lot of fun to drive. So far the Tamiya is crisper, with less to clean up and much better anchoring points. I'll post some pictures in the next few days - I've pretty much gotten the chassis done, and am starting to work on the body and interior tub. And yeah, the grill took me a bit to figure out how to approach it given that there aren't many anchoring points, and the grill comes to almost a V at the center. Not perfect, and maybe could have tried using brass, but I'm happy with it as a first attempt. I'll try to post some pictures. The suspension does move - take a look here beginning around the 6:00 mark: Thanks for the sketch! Am I'm sure that evening was entertaining to say the least.
-
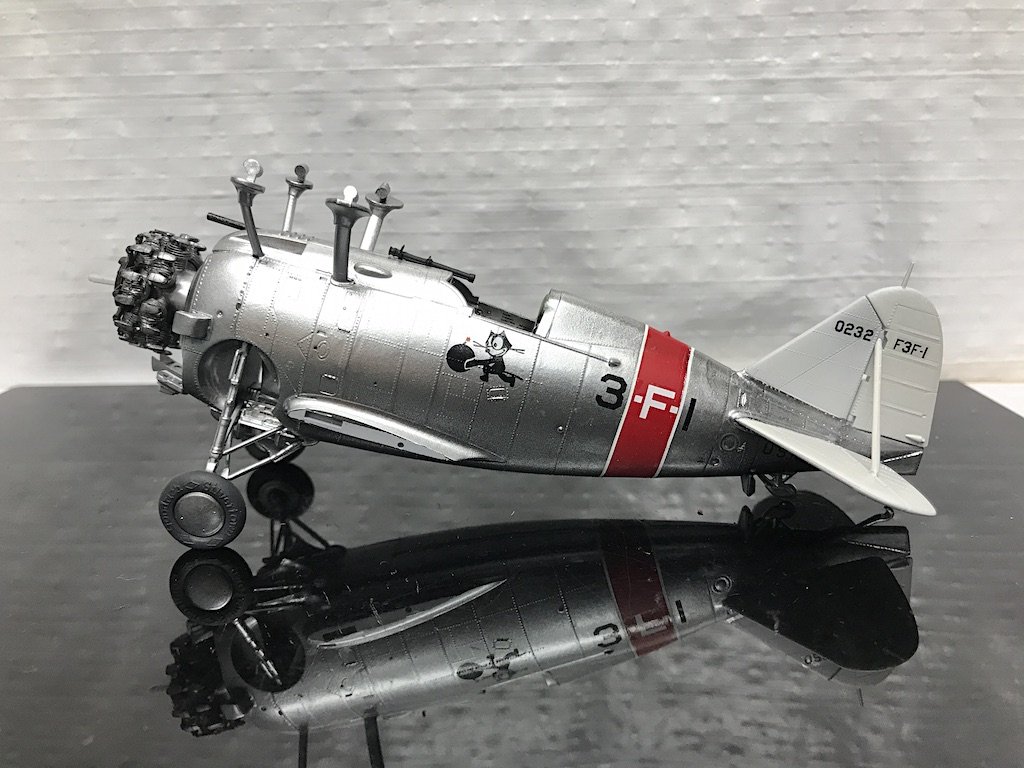
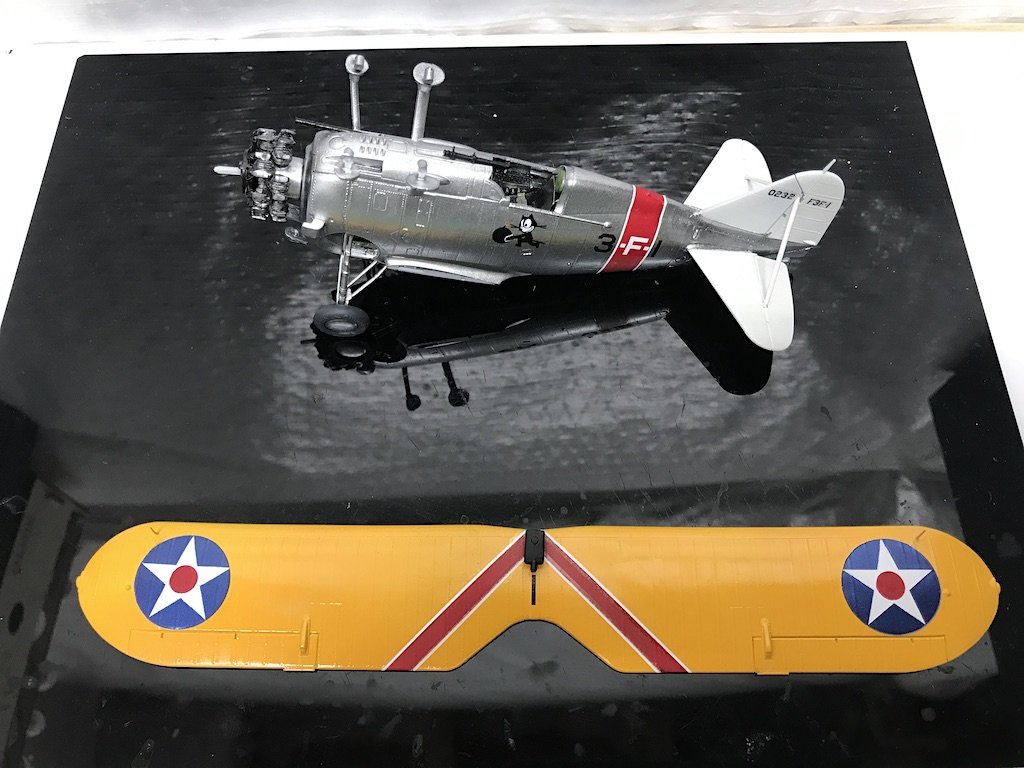
Thanks for the kind compliments gentlemen, really appreciate it! Roger, my dad worked for Grumman for a stretch in the 80s-90s if I recall correctly. I remember there was a corporate picnic one summer when I was a kid and we got to see planes like E2-C Hawkeye and the F-14 Tomcat. I forget if they had older planes like the F3F out as well. Back then I was more interested in modern fighters like the F-14 bristling with Phoenix, Sidewinder, Sparrow missiles, bombs, etc. Nowadays I find the older aircraft absolutely fascinating. Cool to see all the quirky designs in the WWI era, refined into the WWII era. And big props to the pilots and gunners of aircraft during this period! I've had some time the last couple of days and made some additional progress on the F3F-1. Got the decals on the fuselage (love Felix the Cat!), and just need to add the pinstripe to the cowl when the cowl is repainted (as well as some detail decals to the propeller). I was originally going to go with a 6-F-1 designation from the Yellow Wings decals set, but the decals were slightly wider than the belly band I had painted. So, I just went with the kit's 3-F-1 decals instead. I had already added the numbering decal to the tail, so had to remove it and add the matching decal for the 3-F-1. Who knows if anyone would have realized the numbers were a mismatch, but it probably would have bothered me. Decal came off pretty easily with Micro Set, so all is good. The white pinstripes around the belly band were a pain because of the curves in the fuselage, but I think I got it to lay down properly. I'll need to do a little touch ups but am pretty happy with how things look. I also added the white border lines along the upper wing chevron. The US insignia was painted using stencils - three sets of masks! First to apply to white background, then the blue border around the white star, finally the red center. After doing it to two sets of upper and lower wings, maybe I'll just go with the kit decals in the future, it's a lot of work - especially when you have to touch up things because paint got under the mask. One nice lesson I learned in all of it is that Vallejo is easy to scratch off a Tamiya or Mr. Surfacer primer undercoat using a toothpick. I had painted the wings with Mr. Surfacer grey, then Tamiya white primer. The white primer served as the white for the insignia and base coat for the Tamiya Camel Yellow. The blue and red for the insignia were Vallejo Arctic Blue and Red. For whatever reason, the Vallejo leaked under the mask, and I was horrified. Thankfully I was able to scratch most of it off, which has made it easier to touch up the white areas. Exciting to see this come along and nearing completion. Gets a little boring having bunches of pre-assembled, pre-painted parts sitting around. Nice to start putting it all together and see the real thing. I learned my lesson on my last kit of the 1/72 F4B-1 and P-6E, where I assembled, and then painted. Lot less masking to pre-paint and then assemble! What has helped is the really nice fit of this Accurate Miniatures kit - the tail and horizontal stabilizers fit like a glove with no gaps. The stabilizer bars needed some work to get them to fit, but AM designed them with extra material so that you could customize the fit to your build. Took some time, but much better than having the parts be too short leading to some nasty gaps.
- 128 replies
-
- 10
-
-
If I remember correctly from reading the various logs out there, the doors/sides of the Bentley Blower were canvas I believe. So you captured it perfectly. I need your kind of luck! Thanks for the pictures of your paints - that Tamiya dull aluminum is gorgeous, I'll have to try it out.
-
Wow beautiful work! I picked up this one for the stash a few months ago and your log is going to set a high bar for me! You may have already seen John Teresi's build log of this car, but in case you haven't, it's one of the best I've seen: http://www.modelcarsmag.com/forums/topic/50534-mpc-112-1930-bentley-racing-car/ Can I ask what paints/colors you are using for the metallic colors and the British racing green? I saw Tamiya in some of your pictures, but am really impressed with the colors of the metallics you are using.
-
Nice job! That canopy looks cool, but the modeler in me cringes at how difficult it was to paint. Excellent work!
-
Very nice job Josh! I think it looks fantastic!
-
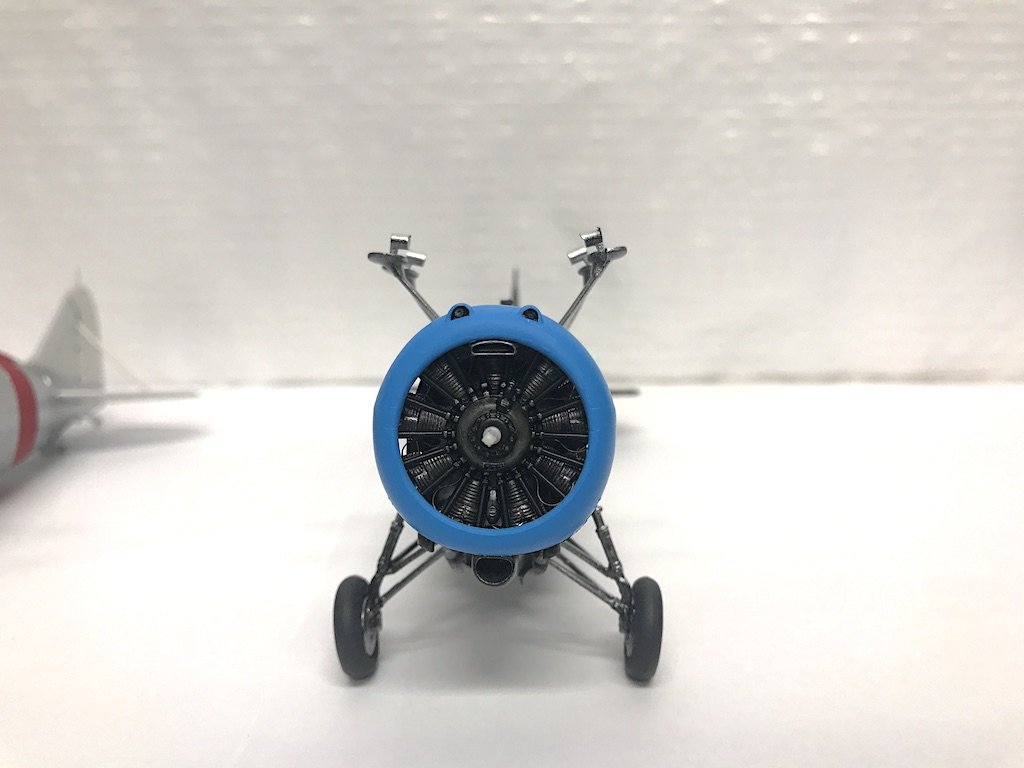
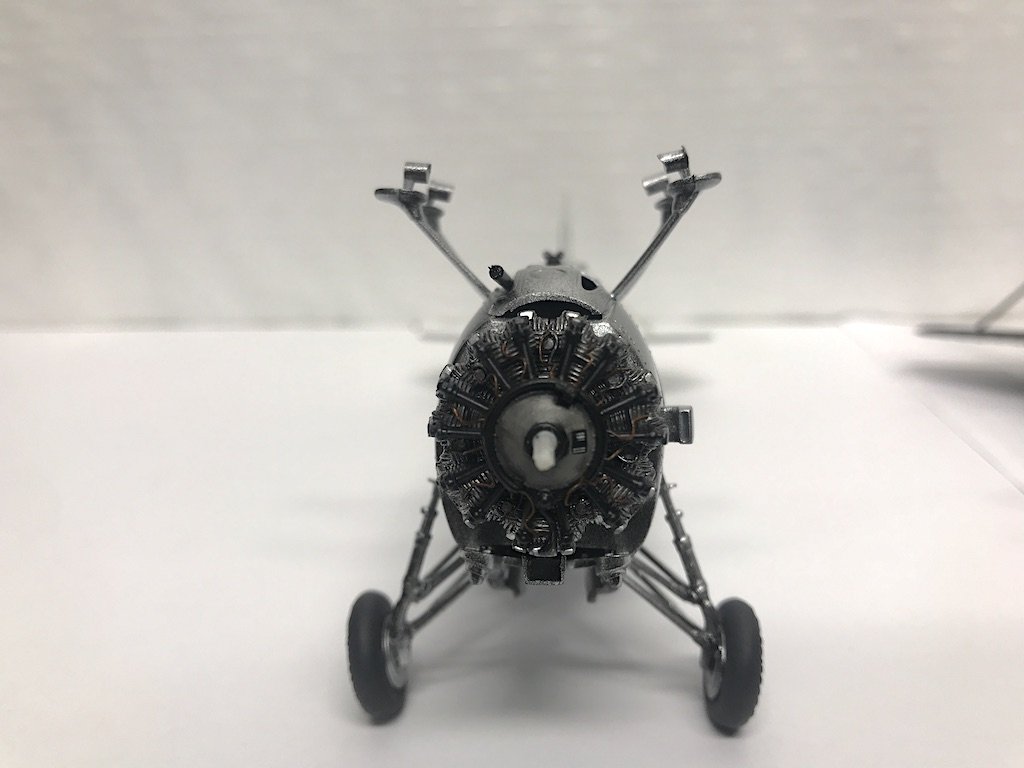
Made some additional progress with the F3Fs the past few days. Had some fit issues with the cowl for the F3F-2, but managed to get it on ok. Cowl for the F3F-1 is going to need the red re-done. Some of the aluminum color had run under the masking, and no matter how many coats of red I've added on top of it (even trying to add primer) it's a bit dark in that area. Probably would be ok if I weather, but I'm going to keep the weathering to a minimum given that these didn't see combat and likely were kept in fairly nice condition (plus, the colors on these are just too vibrant to darken too much). So, I'm just going to start over on the red section, using Mr. Surfacer, then a coat of Tamiya white primer, then the Vallejo red. Otherwise, everything so far is going ok: I think I mentioned earlier that I tried painting the US insignias using the Montex stencils. Decals would have been a lot easier, as paint ran a bit under the various stencils. Have been spending quite a bit of time trying to touch them up. They aren't perfect, but they came out fairly nicely I think: I think I'm going to apply the decals and weathering directly, and not add a coat of Future. I don't want to dull the metallic colors too much by adding multiple clear coats. We'll see how that goes. After, I'll use Vallejo's metal varnish to seal things. Thanks for looking in!
- 128 replies
-
- 15
-
-
Looks fantastic Ernie! Add a little sawdust filler and you’ll be good to go. I’m sure Speedy appreciates the company on the work bench 😉
-
Thanks Lou! I actually did just that in setting it up in the display cabinet. Who knows, maybe I'll get a laugh out of it once I get a few more models under my belt.
-
Beautiful job man, looks fantastic! Just like the real thing!
-
That's probably doable, but I'm sure I will end up busting off the detail pieces, mucking up the body finish, etc. I'll just chalk this one up to a learning experience and move on, especially since I have other kits on the shelf that I can work on. Disappointing as now that's the only thing I'll notice when I look at it 😕
-
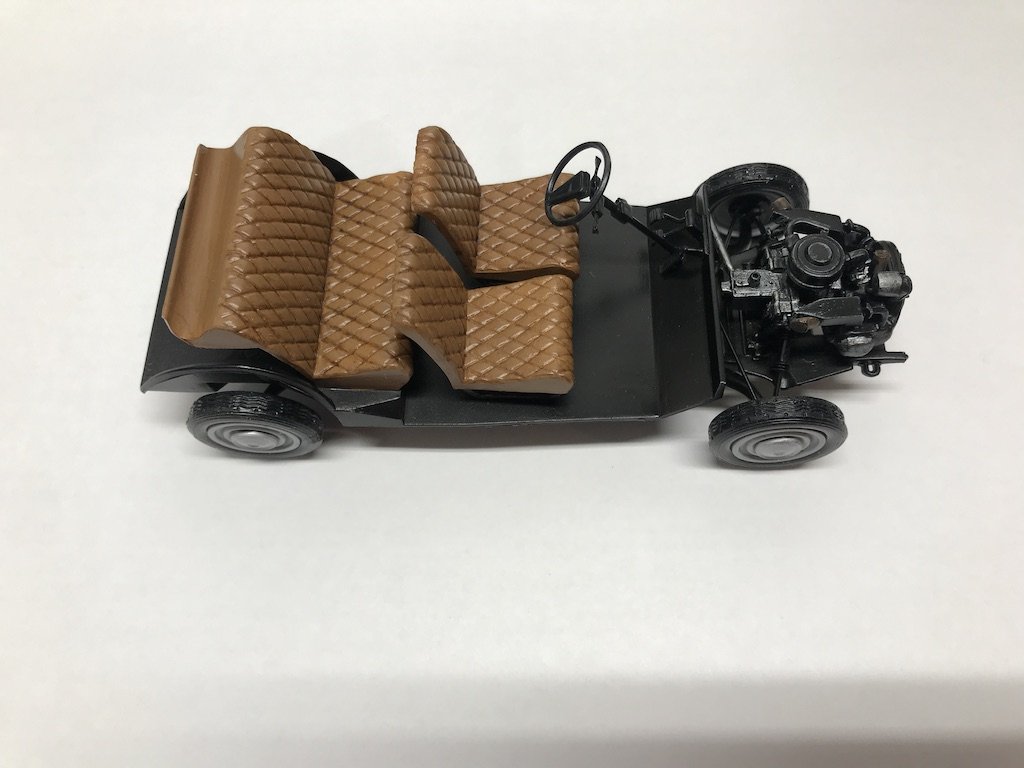
@wefalck, just to get back to what you're saying about the front wheels, I looked at the model and you are totally correct Ugh, now I remember that a few months ago when I broke off the rear axle, the front axle broke off as well when I had to separate the chassis to reattach the rear axle. There was no indication of where either axle were supposed to fit because again, the kit didn't have good anchoring for either axle, but just trapped it between the chassis and the tub. So, I guessed, and it looks like I guessed incorrectly. Oh well, live and learn I suppose. One lesson - use epoxy when you are worried about connections that aren't very secure and that may be subject to stress. Hopefully the Tamiya kit will come out better. I had some time today and got started on building the engine and priming a number of the parts. So far so good. Even on the engine, you can see where the Tamiya developers took care in where the sprue tab connections should be, where potential sink marks could occur (minimal in this kit, and to the extent there are some, they are in hidden areas), better connection points, etc. The Airfix had a number of sink marks in visible areas that had to be filled and sanded, and some parts came in two halves that didn't match up very well and needed a lot of work to make them look decent. Tamiya took the approach of molding a number of these as full pieces so you don't run into those issues.
-
Thank you! The kit had the umbrella stick - problem is, the way the kit is designed, you need to insert it from the engine into the body, which then goes through the firewall on the chassis and into the interior of the car. I couldn't get the stick to fit through the hole in the body into the interior so I just left it off. I ordinarily would have test fitted things, but after trying to add the body to the chassis early in the build and busting loose the rear axle, I wasn't too keen on doing more test fittings. Like a few other items on the model, the "dashboard" also didn't have a good system of anchoring it to the model, so I was worried that pushing the umbrella stick could cause the dashboard to fall off which would be a disaster (it had broken off twice before when I was preparing the body). This was a problem with most of the kit - instead of having typical pins and holes to align parts together, there were little nubs maybe 0.5mm and dimples rather than holes. I found I had to drill out the dimples and switch to two-part epoxy (from CA and plastic cement) in order to provide extra strength to keep parts together. I just looked at the Tamiya kit and it similarly runs the umbrella stick from the engine into the interior of the car. But, it looks like the body/firewall give better access and anchoring points. Hopefully it works better as I am considering building the model with the top open. The parts also look much crisper - looking at the final pictures of the Airfix, I should have tried to sand things like the bumpers more - without paint they looked fine, but after painting and trying to do the two tones, you can see how the plastic isn't particularly smooth. I think the front wheels are fairly centered - I took the pictures from my phone close up, so from the angle, they probably look further back than they are.
-
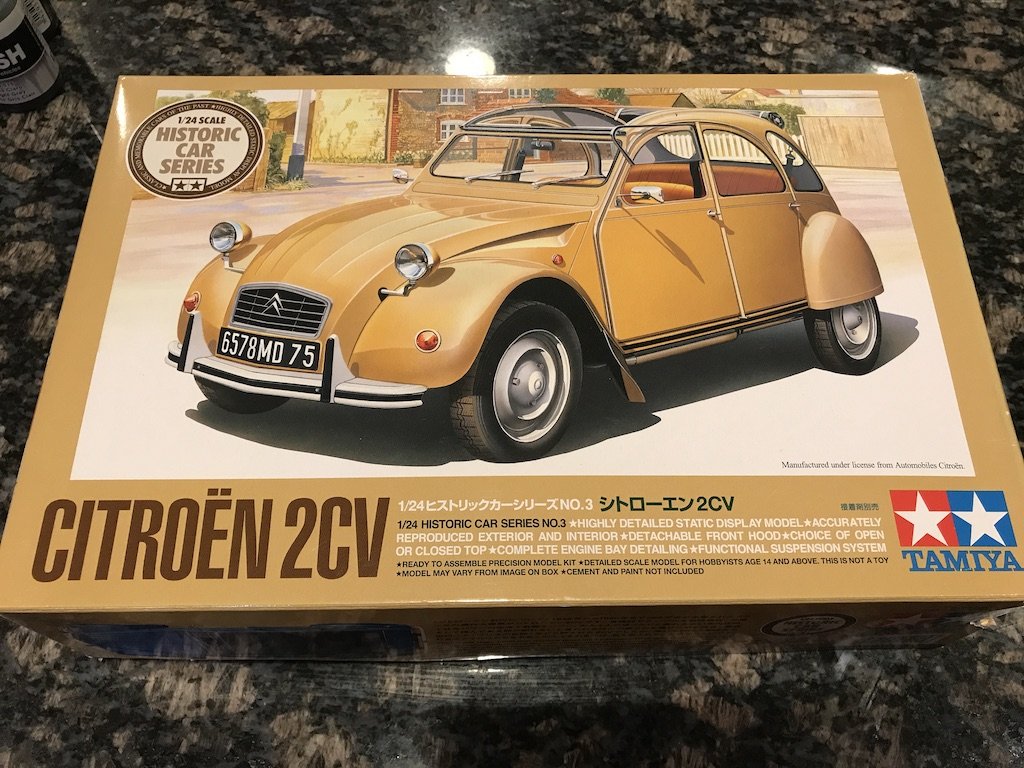
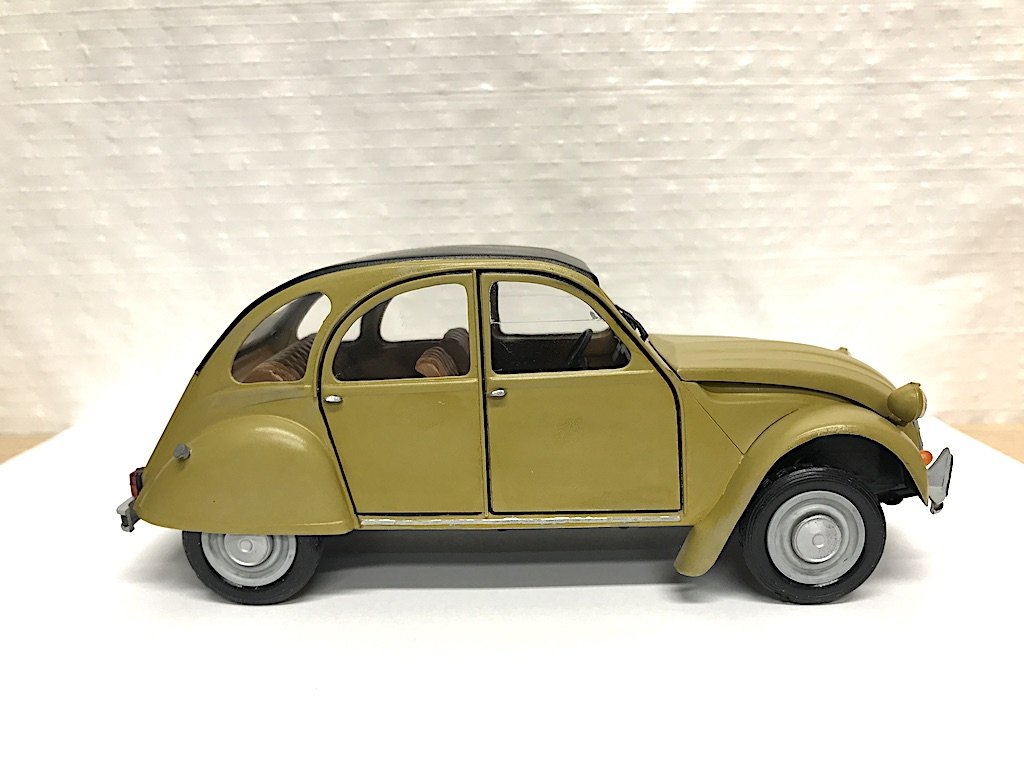
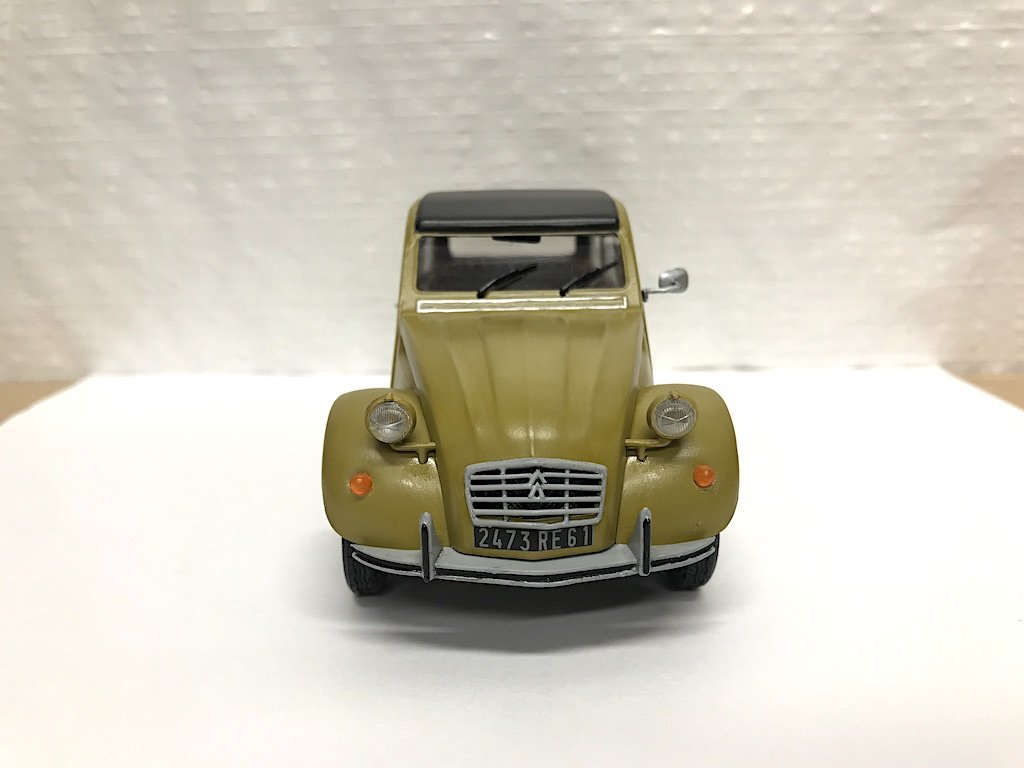
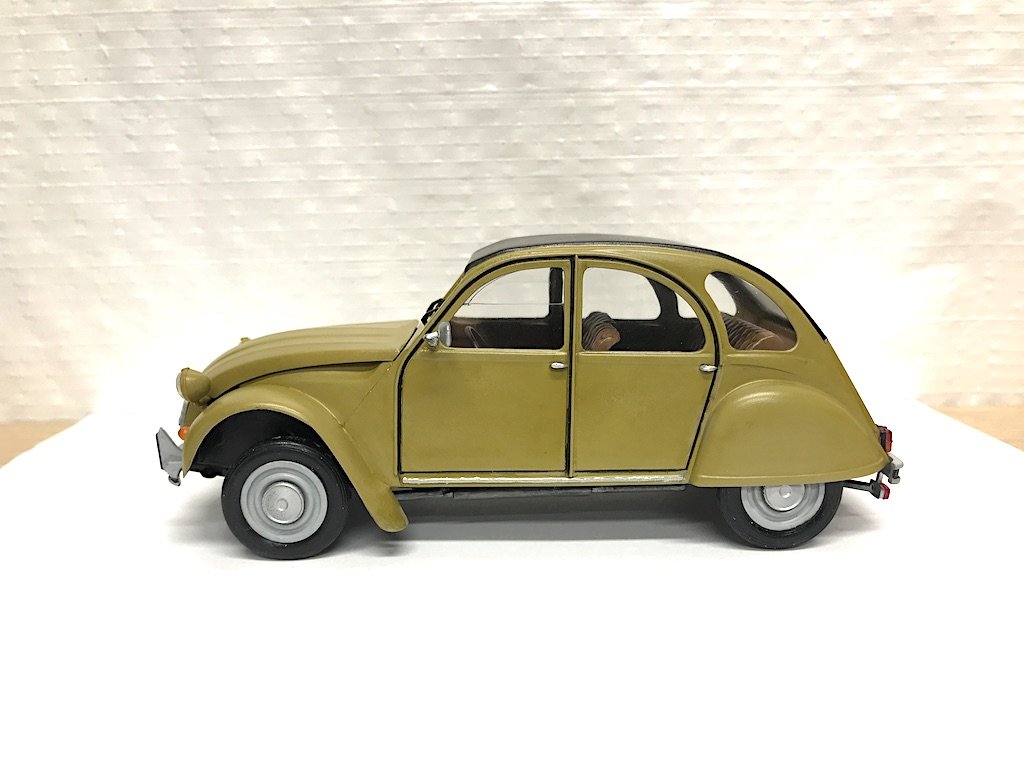
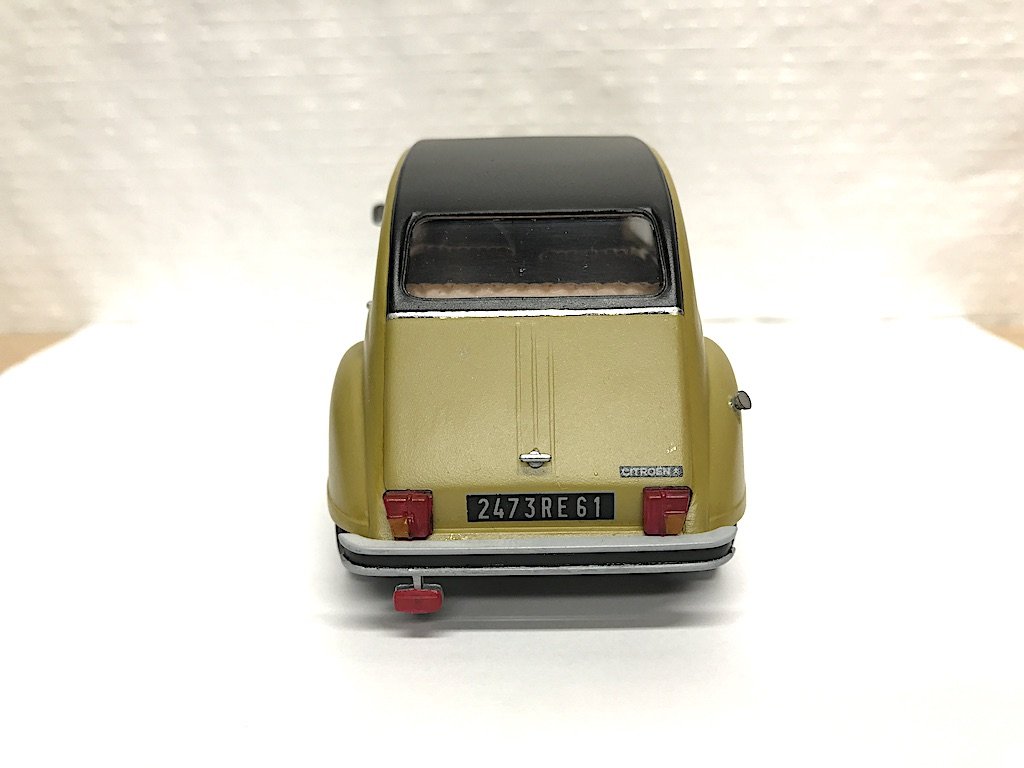
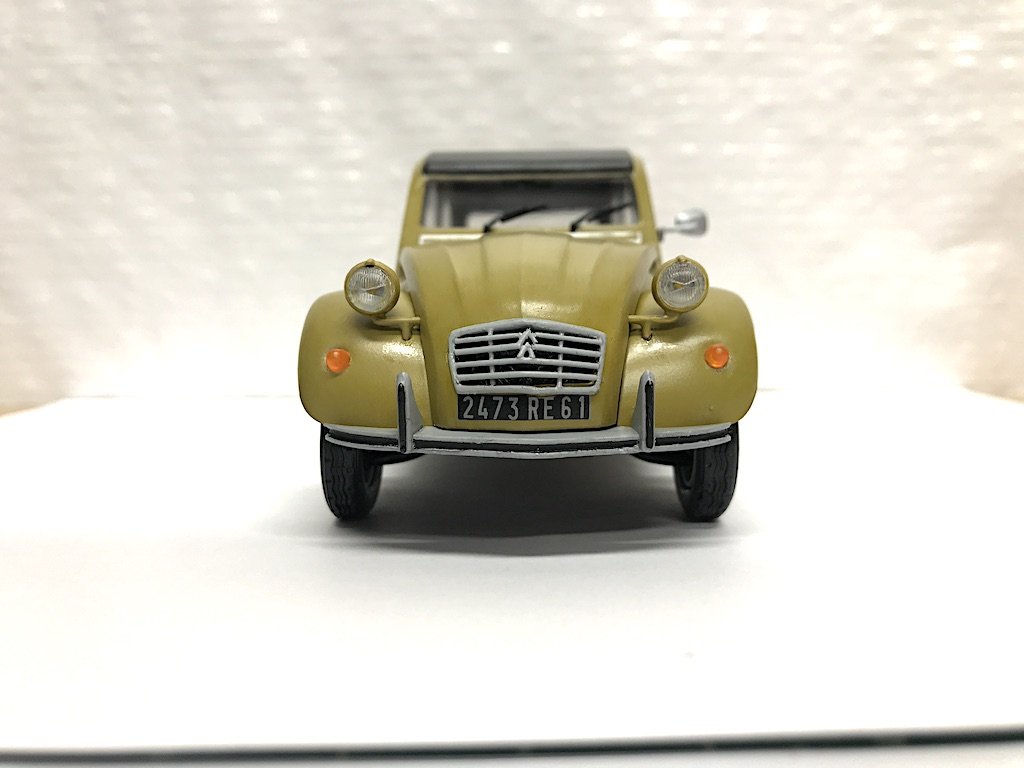
All done! Had some fit issues with getting the hood on the car (others apparently have had similar issues), and I had to cut off a high part of the fan to get it to fit. Ended up gluing the hood on anyway, so not a big deal. The back wheels are a bit tight to the wheel wells, and one tire is slightly elevated versus the other three. A few of the detail parts didn't really fit, or had poor anchoring, which was a bit frustrating - especially when it came to the chassis/axles, which as I mentioned earlier, were assembled by trapping the axle between two chassis pieces. The rear axle broke off when I was test fitting early in the build and required me to break apart the chassis to fix it (possibly why there some issues with the tires). All that being said, it was a fun little kit and a good intro back into plastic car modeling after more than 35 years. Learned a lot and got to experiment, so all good here. I ended up scratch building the grill on the hood. I didn't really like how it was a solid piece, and figured I would try to first hollow out the spacings between the grill cars with a tiny ball bit on my micromotor. The bars were really too thin though, and I noticed the tendency of the plastic to fuse to the bit tip, which tended to make more of a mess of things and not give the precision with the clean bit (cracked the bottom of the frame which was annoying). So I scrapped the idea, hollowed out the interior, and rebuilt the grill works. Was tricky, and took a ton of time, but was a good learning experience. It's not perfect, but doesn't look bad from a normal viewing distance. While things were drying, I pulled the Tamiya Citroen 2CV off the shelf. It looks like a better kit, with crisper details, pieces have proper anchoring components, etc. Will be interesting to see how this one builds relative to the Airfix. I'll probably just add the Tamiya build to this log. Thanks for following and for the helpful advice!
- 126 replies
-
- 13
-
-
Fantastic! I have a 1/700 destroyer I'm working on and your work is giving me incentive to finish it. I feel for you on the PE - that stuff will make you go blind for sure!
-
Thanks for the kind words! I feel like I still have a long way to go up the learning curve, but have greatly benefited from folks like you and others here who have graciously posted your tips and experiences and have answered my many questions. I couldn’t thank you all enough.
-
Very nice! You're very talented. Best wishes as you recover my friend