


Landlubber Mike
-
Posts
4,415 -
Joined
-
Last visited
Content Type
Profiles
Forums
Gallery
Events
Posts posted by Landlubber Mike
-
-
Looking great Alan and the finish line is in sight! I'll echo what OC said that it's an extra hurdle or five when the kit isn't the best. You're doing a very nice job with what you were given in the box.
- Old Collingwood, Canute, Egilman and 3 others
-
 6
6
-
Looking really good Biggles! The decals, washes and weathering really bring it to life.
I'm still low on the learning curve when it comes to painting/washes/etc. It's true artistry when the pros use pre- and post-shading, weathering, washes, filters, etc., along with using oils and other types of paints, to bring everything together in the end. I tend to try to go shade lighter on some colors knowing that washes will darken things a bit, and have started coming back with a very diluted filter if I need to lighten things back up a bit. A lot more complicated than the old days of when I was a kid and painted a coat of Testor's enamels and called it a day!
- Canute, king derelict, AJohnson and 5 others
-
8
-
7 hours ago, Lt. Biggles said:
Looks like an interesting build! Flying a normal plane the fuel is a big enough hazard… can’t imagine flying knowing that fuel tank was right behind me while in a combat environment!
Yeah, not sure how common that was/is. I haven't fully gone through the cockpit area, but it looks like there is what could be a metal armor plate between the seat and fuel tank to maybe offer a little protection. I think this plane also had fuel tanks built into the wings, as one of the CMK detail sets allows you to model those.
-
Well done Peter!! Sorry to have missed this earlier. You put it together quickly!
Makes me want to finish my SIB build. I got a little stuck in how I wanted to represent the bulwarks in a thinned down version and just decided to start something else. I wanted to get it thin, but then of course needed to be strong enough to hold the rigging. I was originally trying to use thin plywood, and might try it again. After building 1/700 scale ships, I have better tools and ideas on how to proceed with details like that. Your build log is very inspiring!
-
Nice job Alan, looking great! I know what you mean about trying to figure out the order of things when it comes to handling the model. I ended up doing the PE first on my JRS-1, as I was worried about excess glue that I couldn't remove over the painted surface, but it took a lot of discipline to remember to grab and hold the model in only one position. A few times I forgot but thankfully I didn't knock anything off.
- Egilman, Old Collingwood, AJohnson and 3 others
-
6
-
-
Thank you Scott, really appreciate it!
- Old Collingwood, Jack12477, Egilman and 3 others
-
6
-
2 hours ago, Egilman said:
Well I've got the Liberty engines coming and the F2A, and yes when serving with the fleet assigned to Utility Squadron 1 attached to the USS Wright in 1922 they had Chrome yellow upper wing and Hor. stab surfaces with star with red dot insignias....
YEA TEAM!!!! She can be built as a yellow wing...
Chrome Yellow photographs dark in the early film days... Overall navy grey with a black hull bottom, Silver doped lower wing + underside of the H stab, Chrome Yellow top of the upper wing and H stab...
Should be pretty....
That will be incredible! Are you building it in 1/32 or 1/72 or some other scale?
-
11 minutes ago, ccoyle said:
The problem with viewing other people's build logs is that it often kindles a strong desire to build a similarly-themed model. In this case, I'm thinking about all the desert camo kits I have in my stash, both Axis and Allied. I'm very close to finishing my current project, ya know. 😬
Glad to get your interests piqued! Would love to see your desert camo work!
In other news, after some prodding by the folks on LSM, I've decided to do a second diorama of the desert Hs 129B-2. First will be the one I'm currently working on, with all the aftermarket, things opened up, etc. Second will be a recreation of this scene below of a Hs 129 B-2 "Blue C":
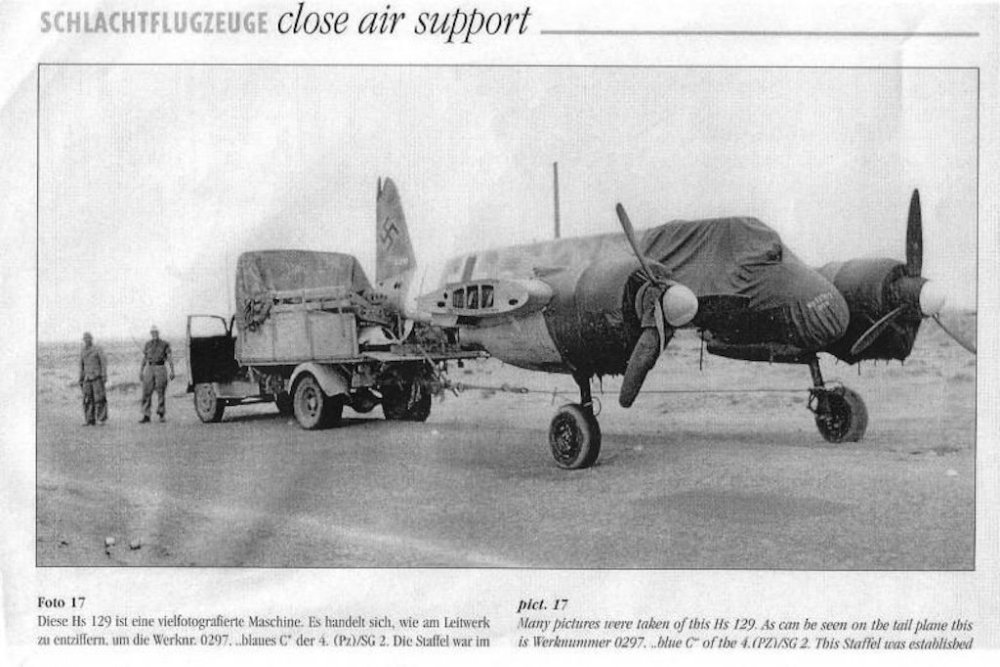
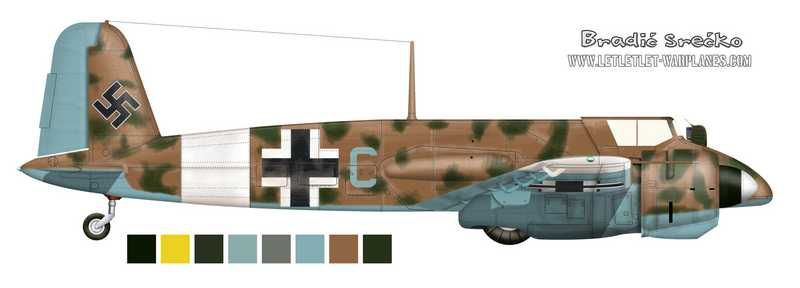
I already have an Opel Blitz truck in the stash, and building this Hs 129 will be fairly quick as I won't need much aftermarket, particularly since the nose, cockpit, and nacelles are covered by tarps, and I won't need to include the wings. A couple of hours ago I managed to pick up an older Hasegawa B-1 kit off eBay for a really good deal. The B-1 and B-2 were very similar, and essentially the two kits are the same minus different nacelles (which will be covered up by the tarps). Along with the great price, the B-1 kit has a decal for an "O" which I can use as a template to create a mask for the Blue C. The camo is a little easier to recreate, so I can practice on this second one before the the more complicated first one.
-
Looks like I'm not the only one with multiple projects in the hopper
")
This is coming along great Alan. Glad you figured out the door/ramp as a solution for the tail sitting. Did the instructions tell you how much weight to put up front? I've seem some models out there where people talk about putting all this weight in, but I never quite figured out how they knew how much to add given that they close the fuselage after the weight is added.
-
Wow Alan, what a great start! I love the way you painted the clothing - looks like it has fabric texture. Nicely done!
- AJohnson, Old Collingwood, Canute and 3 others
-
6
-
-
That came out really great Dave! Nice save on the Vallejo paint issue - really great paint work!
- Canute, Egilman, Old Collingwood and 3 others
-
6
-
I have the same kit in the stash and was planning on doing the D scheme as well. Looking forward to following along!
- Egilman, king derelict, Jack12477 and 2 others
-
5
-
-
Looks really good - nice job!
-
35 minutes ago, Egilman said:
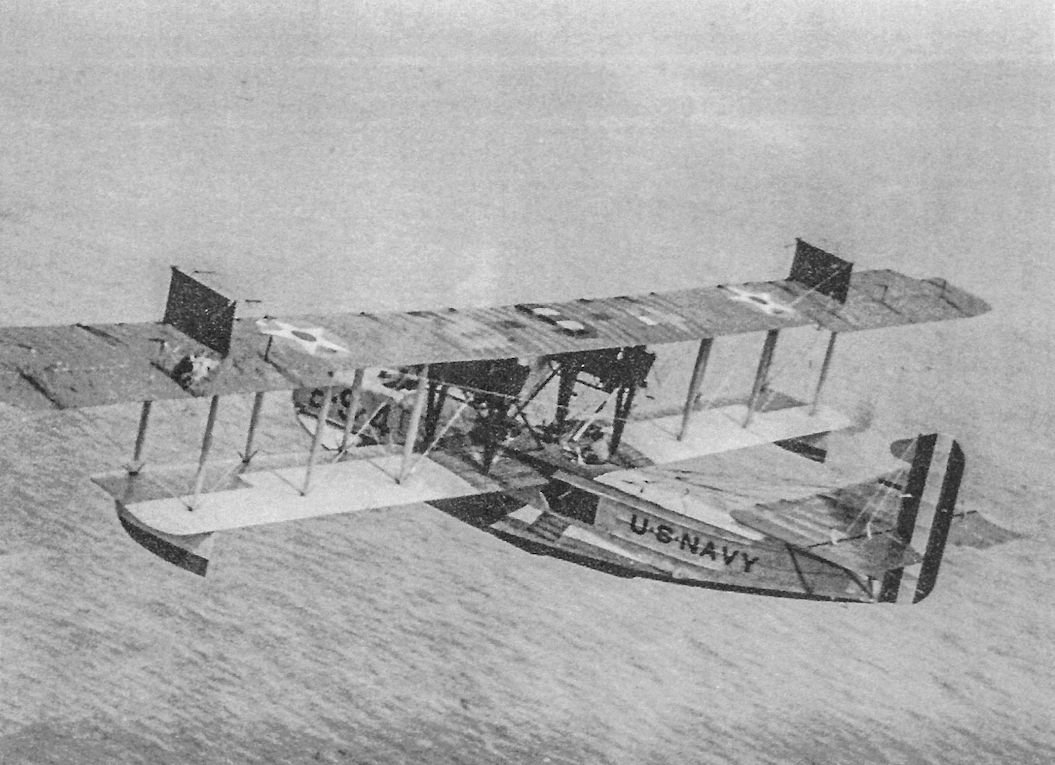
There is another thing I leaned about the Felixtowne F2A's... The chief designer of the F.2A, John Porte, had co-operated with Glenn Curtiss for many years and Curtiss had great experience in designing and building flying boats. He was the guy that worked with Curtis on designing the H-12 earlier... His company Felixtowne gave a license to build the F2A in the US as the Curtis H-16, in fact the RN flew more Curtis's than they did Felixtowne's but this allowed Curtis to sell the H-16 to the US navy... In British service the Felixtowne's only lasted into 1919 until they were retired for good, but they served in the US Navy well into the late 20's... They were anericanized though using Liberty engines... So it's enitrely possible to have a yellowing Felixtown F2A disguised as a Curtis H-16, all we would have to do is substitute to a pair of Liberty engines for the conversion... During the war the US Navy flown versions pretty much only flew in the US and didn't arrive in England until the war was over, but the RN flew more of them than they did the F2A....
I haven't found a pic of a Yellowing version yet which is my new research mission... (and to find a Liberty engine in 1/32 scale)
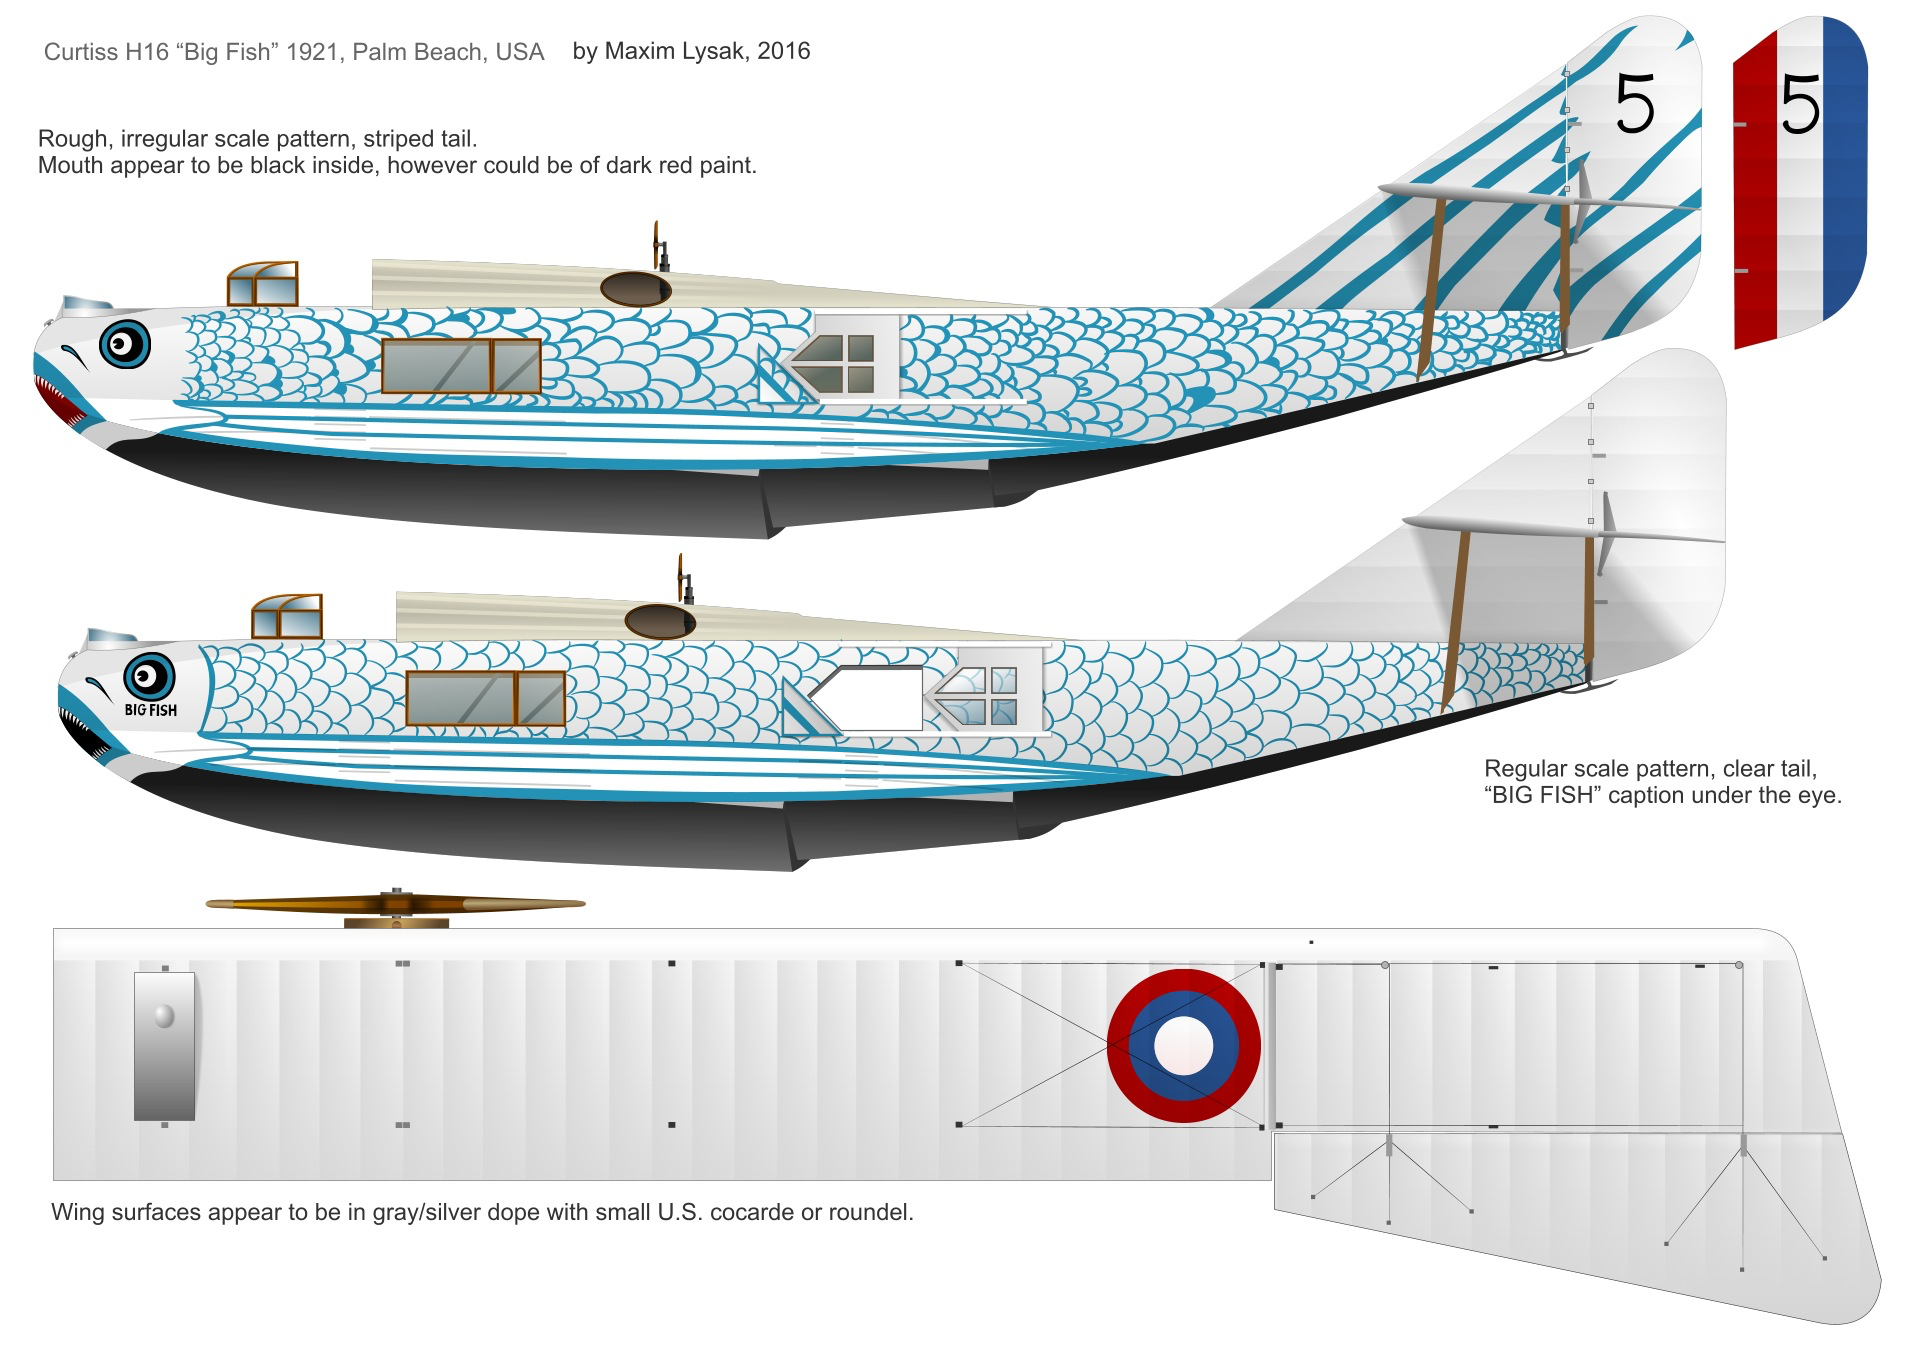
EG - not sure if you saw, but Roden apparently makes a 1/72 Curtiss H-16. Very similar, except has the Liberty engines, a different cockpit window configuration, and some other bits and pieces. The Roden Curtiss H-16 boxing is essentially the same as their Felixstowe boxings minus a pair of new Z sprues and the clear parts sprue.
I'd love to do this fish version!

- Old Collingwood, mtaylor, yvesvidal and 5 others
-
8
-
Hey EG, I can wait on the Catapult until you are ready to go. I'm working on the Hs 129 at the moment which will keep me busy.
That's really cool about the Curtiss H-16 - never knew of that plane. Some really cool pics here:
https://flyingmachines.ru/Site2/Crafts/Craft187693.htm
- Jack12477, Egilman, Old Collingwood and 4 others
-
7
-
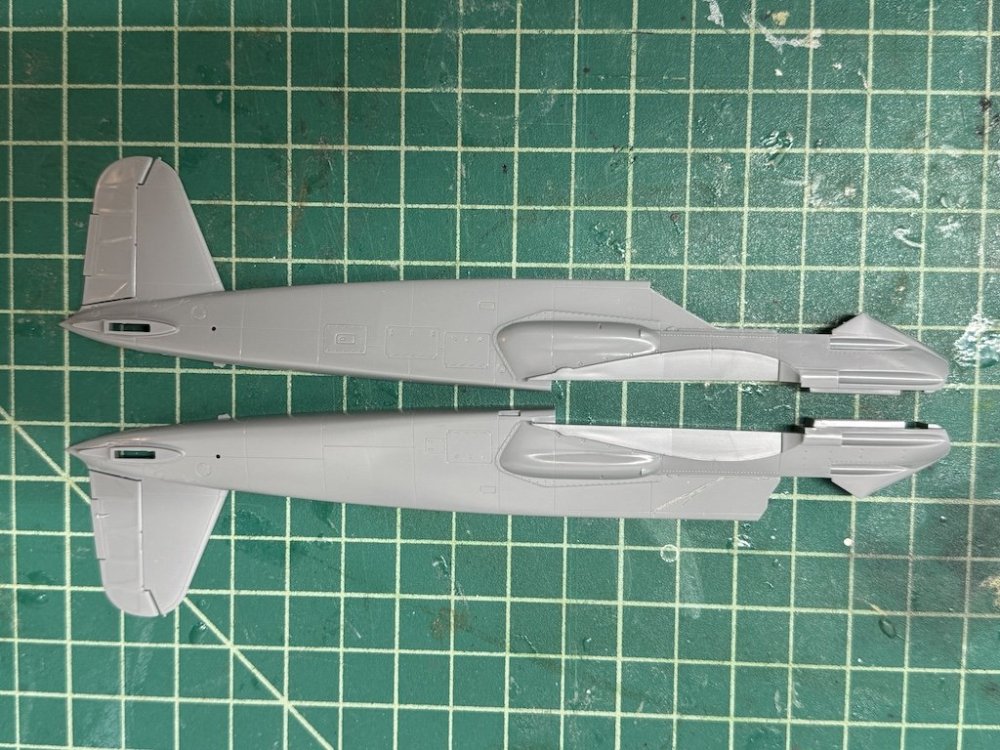
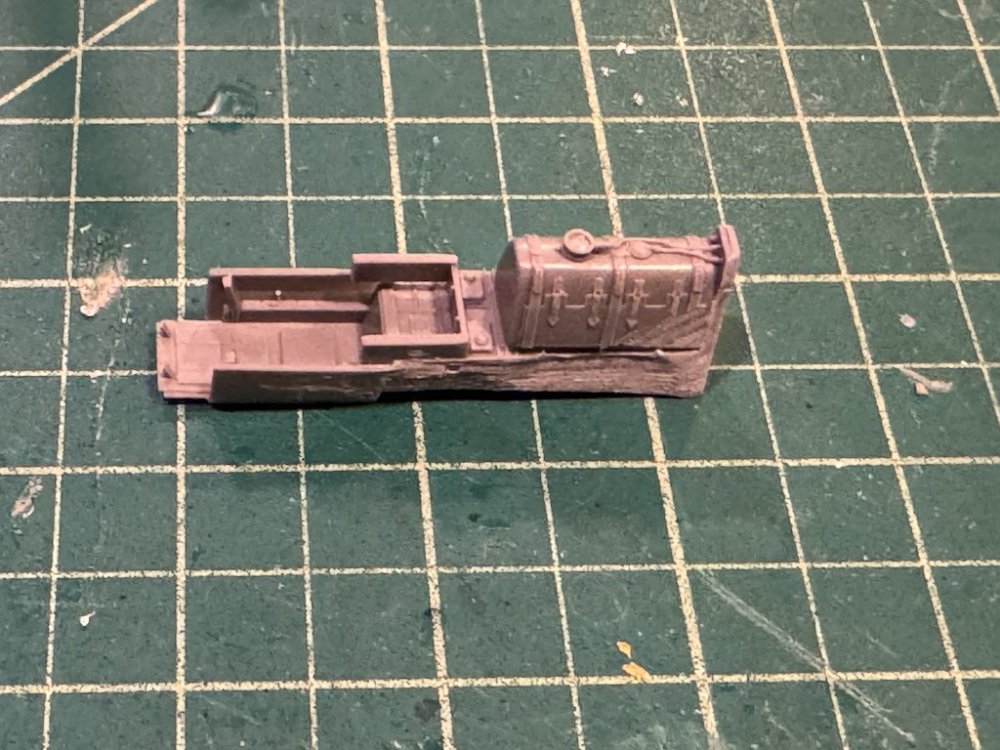
Last night, I started work on the cockpit. The CMK set has a nice replacement tub that includes the fuel tank behind the pilot's seat. To display the fuel tank, you need to cut off the part of the fuselage that covered it, which you can see in the top fuselage half below:
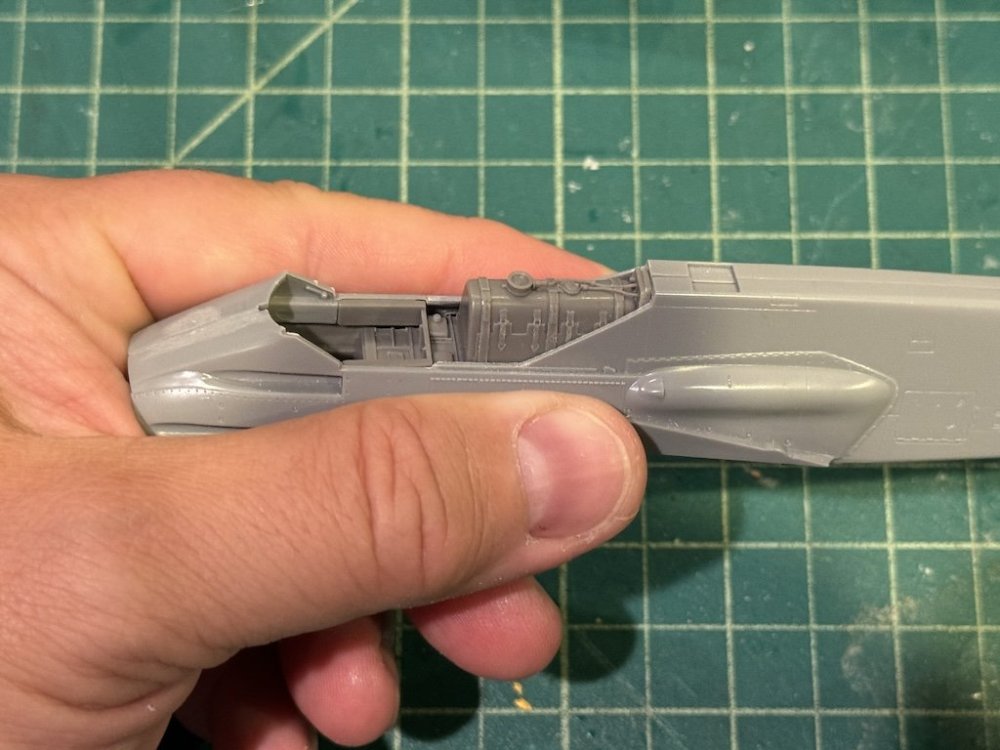
Next up was trying to fit the CMK tub. It was a bit too big for the fuselage halves to close properly, but after sanding back some of the interior of the fuselage and portions of the tub that will not be visible, it fit nicely:
Thanks for looking in!
-
Thank you Gary, really appreciate it!
-
Hey Alan, after my marathon sprint on my JRS-1, I've been catching up on everyone's build logs. This came out great! Roden kits can be really tricky from what I've heard in terms of fit and decals. You did a nice job for a difficult kit! I think I mentioned this on my JRS-1 log, but if you ever want to do your Roden Felixstowe, I have two and could build alongside you if you'd like. I think you mentioned you have a Roden Gotha as well - if you build that one, I can build my Zeppelin Staaken and we can tackle the two beasts together.
A couple of things I thought I'd pass along, though feel free to ignore this unsolicited information. For filling gaps and holes, I use different materials depending on the situation mostly to deal with potential shrinkage. For small holes or cracks where shrinkage doesn't matter, I use Tamiya putty - I've also used Vallejo putty, Mr Putty, and CA (some people use black medium/thick CA so they can see what overflow needs to be sanded off which seems like a good idea). I've actually started using CA more and more for small gap filling, as you can add it to an area, and before it's fully cured you can start sanding off the excess fairly easily making cleanup fairly simple.
Larger gaps are always tricky. I usually try to stuff thin pieces of plastic in the gap to fill up as much as possible. In some cases, that can be enough or you can fill the remainder with Mr. Putty, CA, etc. On my JRS-1, I also started using Tamiya's two-part epoxy putty. That is now one of my favorite approaches to larger gaps or even to build up areas where there is a depression because it (1) doesn't shrink (or at least doesn't appear to), (2) it is very strong and won't crumble, yet when dry sands very easily, (3) takes a while to dry so you can take your time working it into the area, and (4) isn't messy like Tamiya putty. I guess like all materials, it's just getting used to the strengths and weaknesses of the products and having a little experience on what works best in certain situations for you.
On the metal finishes, I really love Vallejo's Metal Colors for their ease of use, clean up, etc. For me, it will spray perfect 98% of the time, but then there are times when it just doesn't look right. Sometimes that's a result of spraying too high of a pressure or too close, where it's almost like the paint doesn't want to adhere properly so you get a weird darker spot. Once I learned about the pressure/closeness issue, I made sure to avoid that and still would occasionally get those odd spots. Not sure what caused it - maybe oils from my fingers? Who knows. For my JRS-1, I tried Mr Color Super Metallic 2 series. I absolutely loved it - sprayed really easily and evenly, and as a lacquer, but on a good hard shell for decals, taping, etc. I sprayed it over a base coat of Mr Color GX 2 Ueno Black per recommendations I saw online and was very happy. So, I think that line of Mr Color will be my go-to for larger areas where you need a pristine finish like fuselages. I'll continue to use Vallejo on smaller items like engines and the like. Also, I was able to use the Vallejo paints to do some minor touch ups on the Mr Color and it worked perfectly - I found you can brush paint the Metal Color paints, but the Mr. Color paints aren't meant to be brushed. For what it's worth, apparently, there is an earlier line of Mr. Color metallic paints that are meant to be buffed, but I forget what those are.
Anyway, I'm still very much in the learning phase on all this, but thought I'd pass along what I learned on my last couple of builds. Looking forward to your next one!
-
17 minutes ago, king derelict said:
I have the Felixstowe by Roden along with a Gotha. I have no idea what I was thinking. They look like being a serious challenge. Especially as I have trouble with rigging a ship
Alan
Hey Alan - I’ve got two of the Felixstowe and the Zepellin Staaken. Same deal with you - if you start the Felixstowe, let me know and I can build mine alongside yours!
- Old Collingwood, Jack12477, Egilman and 5 others
-
8
-
2 hours ago, Egilman said:
Yeah I have the Kittyhawk Kingfisher and the Big Ed for it...The Catapult is the P-6 Standard US Navy catapult... It is a 3D print model, a bit basic but can be printed in any scale you want it in... It was a free download from the net but I don't remember where, I've had it for a while... I've combined the DOCX build log files into a single PDF so you can see what it is....
I remember it as free and there is no attribution in the file so I'm pretty sure it's public domain...
I've uploaded it below for whomever wants it...
I haven't checked the STL files for errors yet, but I will if anyone likes what they see and wants it...
Fantastic EG! Thank you! Let me know if you’re building the kit and I can build alongside you!
- Canute, Egilman, Old Collingwood and 2 others
-
5
-
1 minute ago, Egilman said:
I have the WWII catapult (3D print files) for my kingfisher, I was thinking of doing mine as a bird off the Arizona when she was a yellowing or off the Washington when she was three color blue.... The Catapult is the same whether the center deck one on the old battleships or the newer deck edge ones on the fast battleships...
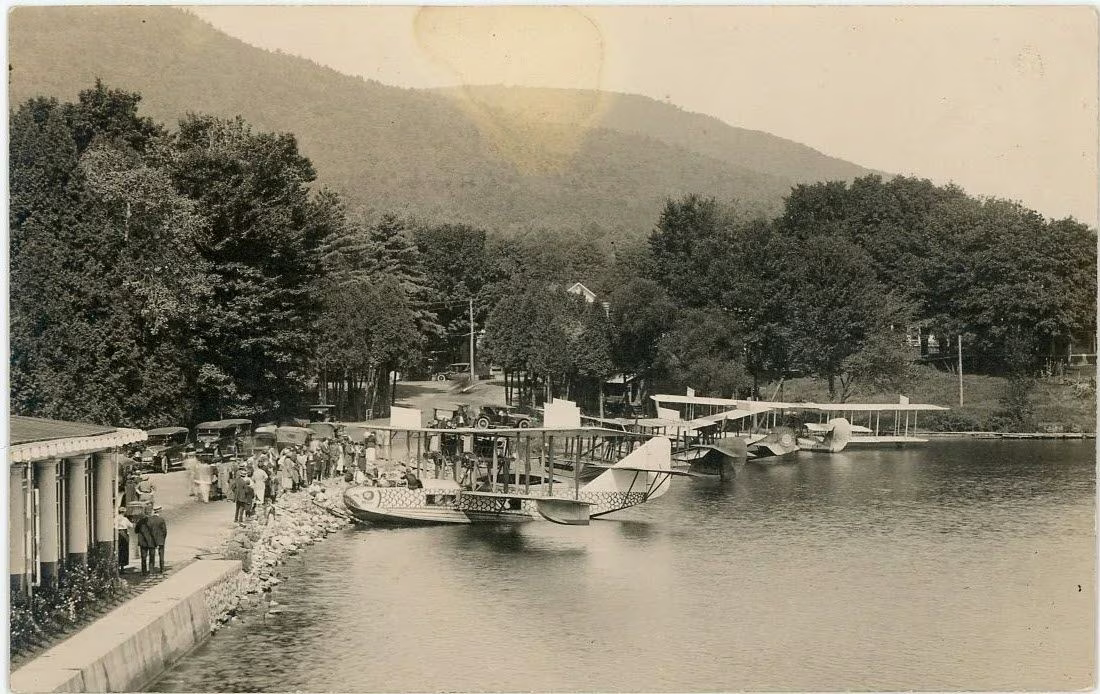
That's quite the collection of flying boats.... a biplane yellowing?
Oh wow, a 1/32 US catapult? Do you have the Kitty Hawk kit? That would look really cool. I'm planning to put my Walrus on the NeOmega catapult, and also have the HpH catapult for my Arado and the NeOmega catapult for the Hurricane. I think these seaplanes look really cool on catapults, which ends up being a nice diorama setting for the model.
For biplane yellow wings, I have some of the old 1/32 Hasegawa and Williams Brothers kits, along with some from Silver Wings and Lukgraph. I really like the interwar paint schemes.


IJA Akitsu Maru by Landlubber Mike - Five Star - 1/700 - RESIN
in - Kit build logs for subjects built from 1901 - Present Day
Posted · Edited by Landlubber Mike
While waiting on some paints to arrive for my Hs 129, I put in a little more time on this build the last few nights. I built up the deck structures which make up the bridge. I thought pre-painting them in black would be a good idea, given that there are windows and doorways so it would save me a step in trying to later paint the interior black given that if left unpainted, the brass would be clearly visible and annoying. So, I primed the PE frets with Mr. Surfacer 1500 black before removing the parts. The downside of this is that it's a lot harder to see what you're doing folding PE parts, not to mention, seeing what the part numbers are when the frets are painted black. But, I managed to make it work.
I also built up four the Ka-1 gyrocopters using an aftermarket FiveStar set that gives you four units. These surprisingly took a long time to put together. The set gives you a resin body, to which you add 10 separate PE parts (three of which are stacked on top of each other to build up the engine) to complete the gyrocopter. Some of the parts were probably less than 2mm in diameter. Very delicate work to say the least. When done though, the gyrocopters look much better in my opinion than the plastic ones in the Aoshima kit.
Thanks for looking in!