


Landlubber Mike
-
Posts
4,217 -
Joined
-
Last visited
Content Type
Profiles
Forums
Gallery
Events
Posts posted by Landlubber Mike
-
-
There are lots of different colors of maple, including figured maple like curly maple. If you look at my Pegasus log you can see the maple I used for the deck. If you look at my Badger build, I believe the deck wood that came with the Caldercraft kit was tanganyika. The maple was a lot lighter than the tanganyika. If I recall correctly, the Badger deck (tanganyika) was oiled with tung oil which brought out some richness and a golden sheen to it. The maple on the Pegasus deck does not have a finish on it, but I would expect it to change in color and tone a bit as well depending on what is used.
-
In case anyone is interested, I found this short video on the JRS-1 subject I'm building and how it went looking for the Japanese fleet after the attack on Pearl Harbor. Amazing bravery for these guys - the JRS itself did not carry any armaments - the only weapons carried were rifles that Marine and Army volunteers planned to shoot out the back windows if they had to 🇺🇸
-
I've been making slow but steady progress on this kit. Part of the slow crawl is my fault in using the very nice CMK aftermarket set. But the main reason is that there are a lot of fit issues and other things like lack of connection points for important parts like the struts holding up the tail section and the main wing. For some examples:
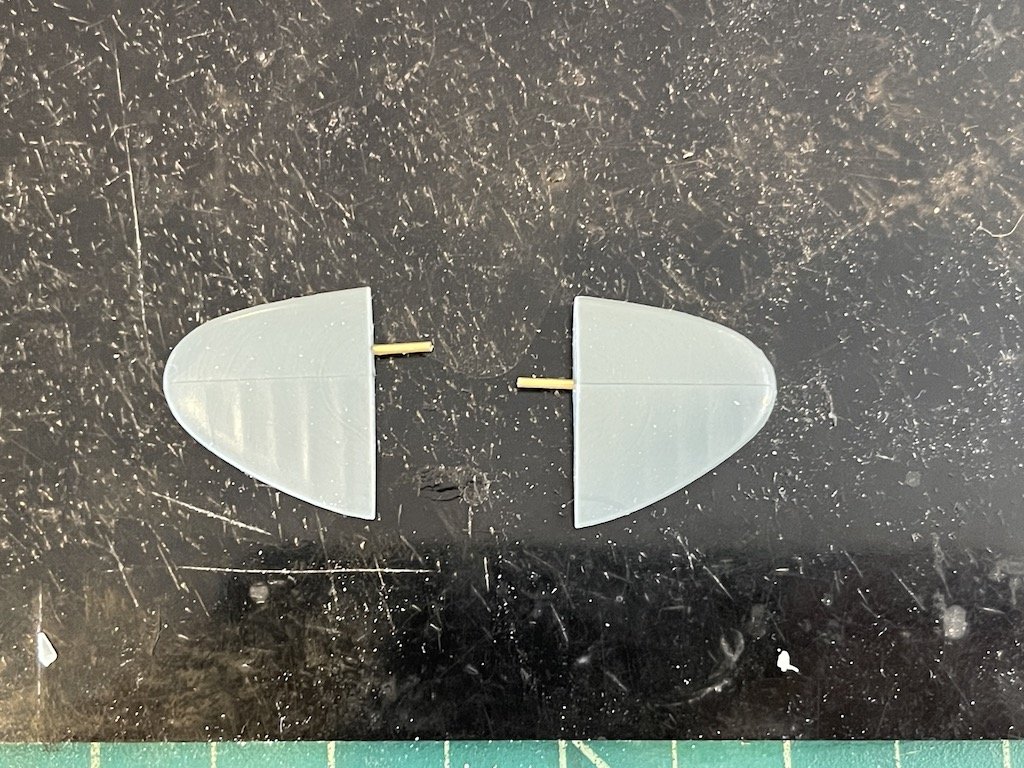
- Main wing tips are separate parts (in halves) that you have to glue together and then do some cleanup. I ended up adding brass rod to help secure them:

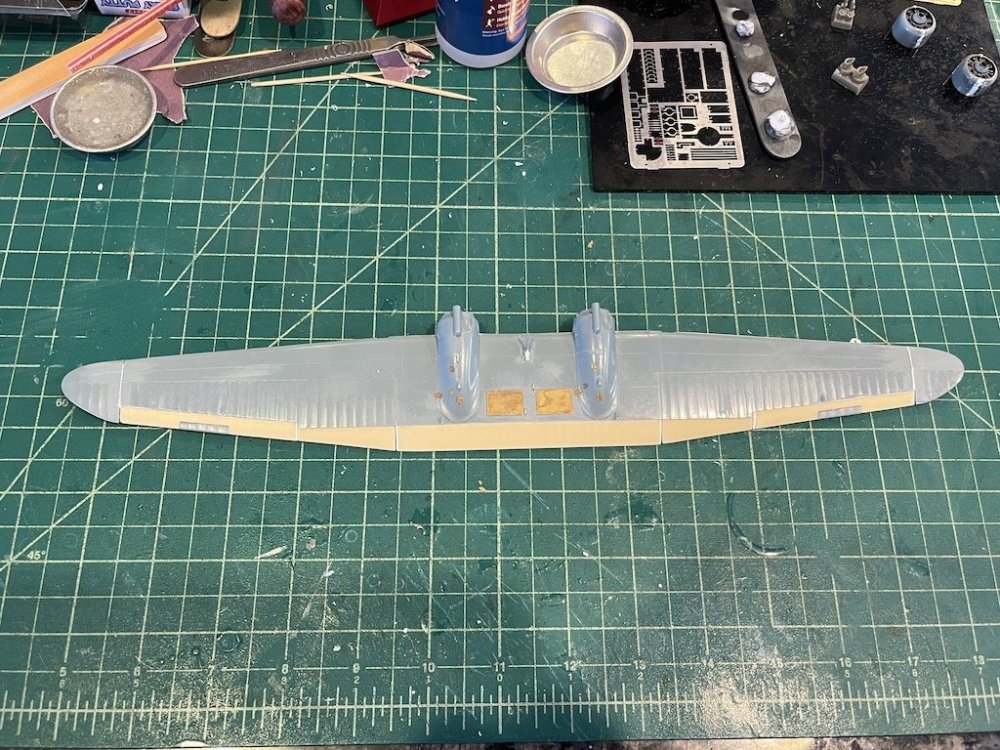
- Engine cowlings are too small, so I added thin plastic strip between the halves to fit the engines. Figured that was much easier than filing down the engines:
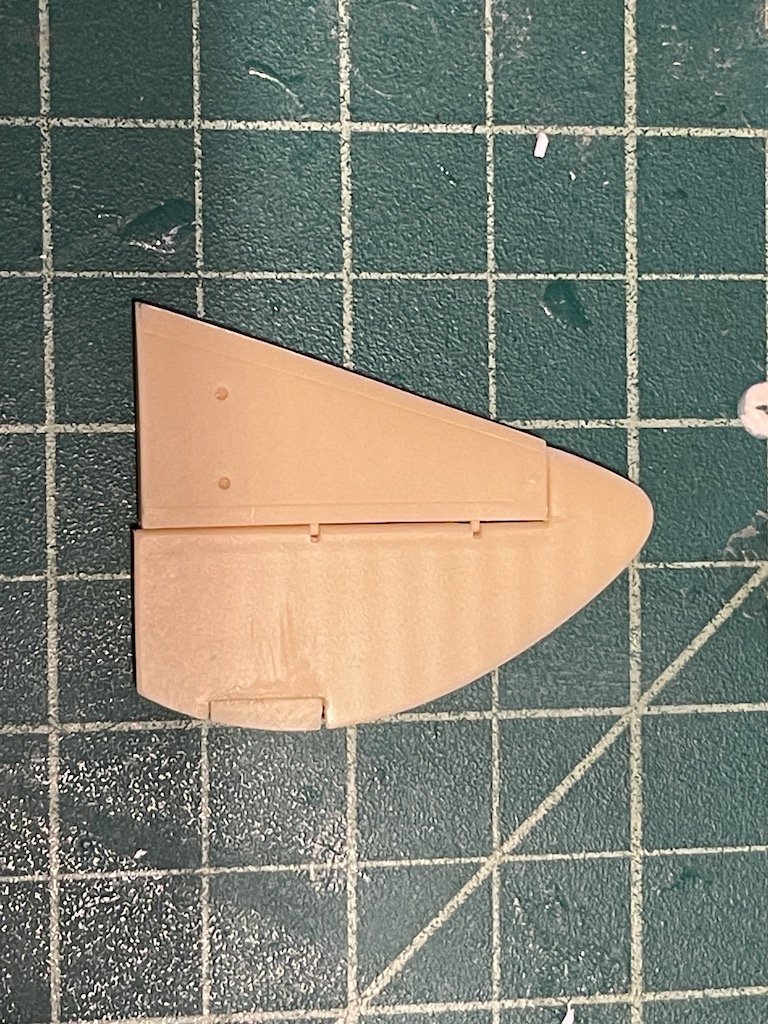
- CMK tail isn't quite right, needing extra plastic on the fixed part of the tail:

At the moment, I'm mostly done with the wing. The CMK set is nice in that it gives you the control surfaces, but still quite a bit of work to add them. I have a few bits of PE to add along with the exhausts, and then of course the pontoons:
The body is close to being done as well. I have a few more pieces of PE to add, along with the cockpit and landing gear and some other odds and ends that I'm waiting to add as they are fragile and will likely bust off. But, I think so far it's looking pretty good:

I'm still debating how to go about staging the painting sessions. I might end up painting the wing separately, then adding it to the body and painting the body once the wing is installed. Because the wing struts don't have attachment points, I'm a bit worried about glue getting where it shouldn't be. Still a bit to go before I get to that stage so I can think on it a little more.
Thanks for looking in!
-
-
-
-
Dan, somehow I missed that you completed this one. Another stellar build! Well done!
- Egilman, Old Collingwood, Canute and 1 other
-
 4
4
-
-
-
-
-
-
1 hour ago, king derelict said:
Thank you Mike. I was a bit nervous of the Mirage kits but they are really quite nice with decent detail. I wish they made a short forecastle version but I suppose it impacts the tooling and costs. I have the four ships that they make, some have PE for railings others not. The White Ensign PE is good for the later bridges and different radar lanterns but quite a bit of it won’t get used.
Alan
I have the Revell 1/144 Snowberry kit with Pontos set (bought from a member here a few years ago) and the Revell 1/72 kit with the David Parsons upgrades. Would love to start building them, but want to get my skills up a bit to do them justice. Those Mirage kits look quite nice, especially at that scale.
- Canute, AJohnson, Old Collingwood and 2 others
-
5
-
-
Looking great Alan! I love the Flower Class corvettes.
- Canute, Old Collingwood, mtaylor and 1 other
-
4
-
-
Hi Nils, great start on your Elbe! These light ships are really interesting. I visited the Overfalls a few years ago (it's in Delaware) and always thought these ships would be cool subjects to model - something different than the 5000 English war ships that are out there. Looking forward to following along!
-
-
-
Looks great Dan - nice decal work.
- Canute, Old Collingwood, mtaylor and 5 others
-
8
-
Looking great Chris! Love the shelf too!
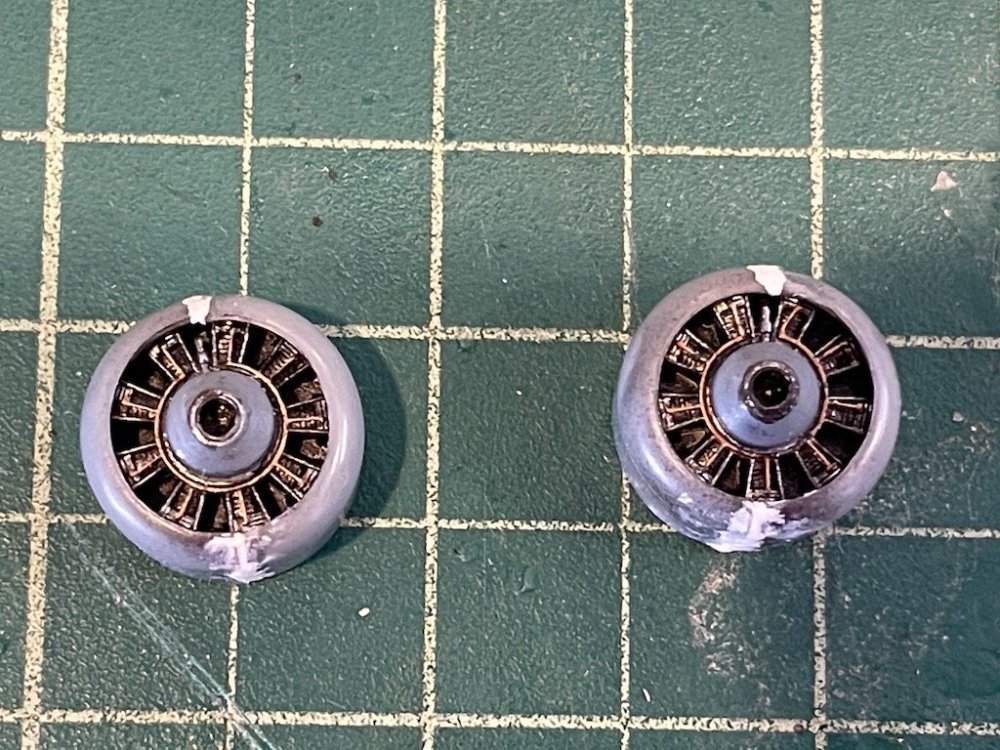
Just out of curiosity, are these kits usually built OOB (out of envelope)? Seems like things like the pre-cut frames would almost be a necessity. I'm sure the pre-made resin wheels are also a much welcome piece of aftermarket.
-
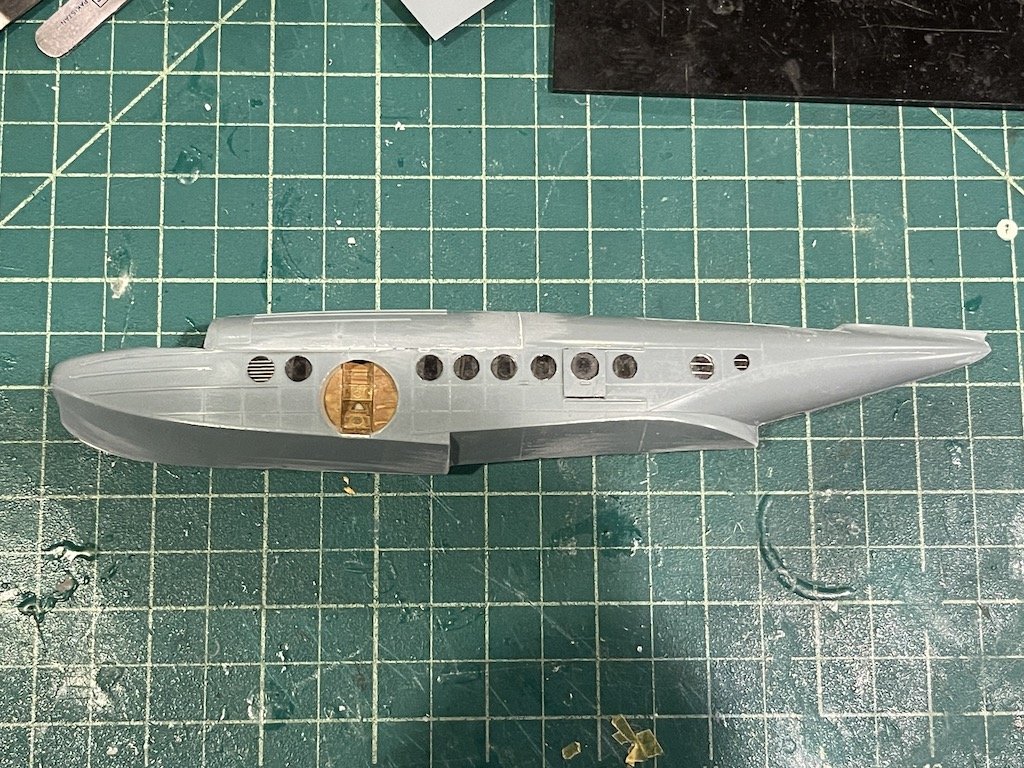
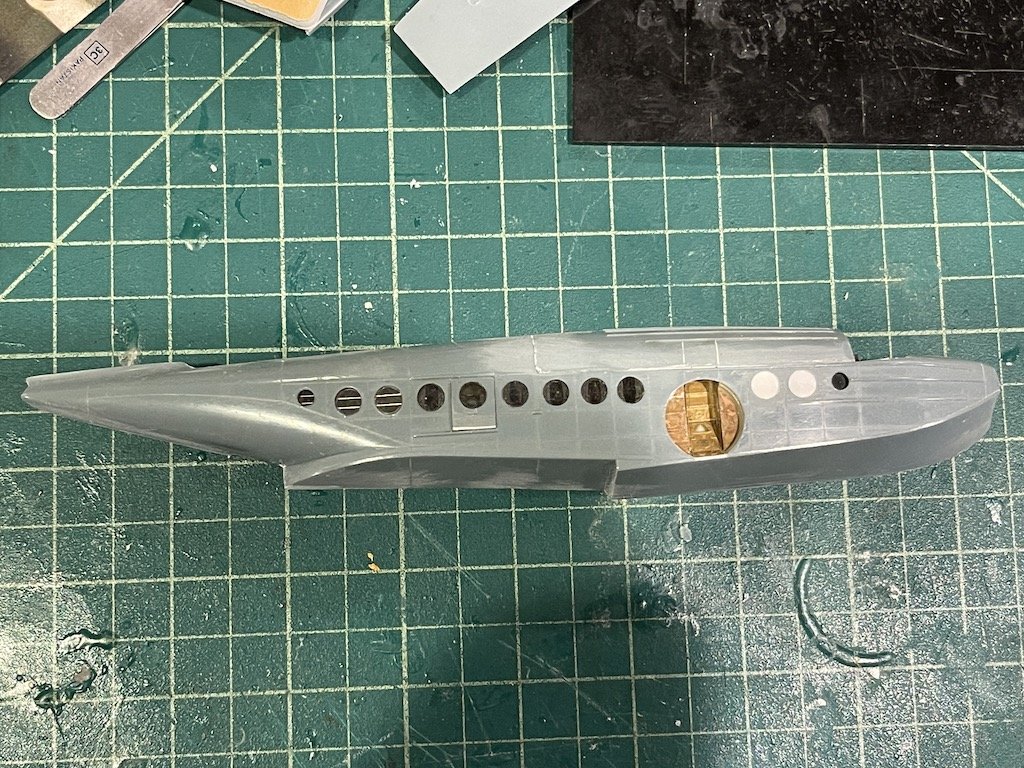
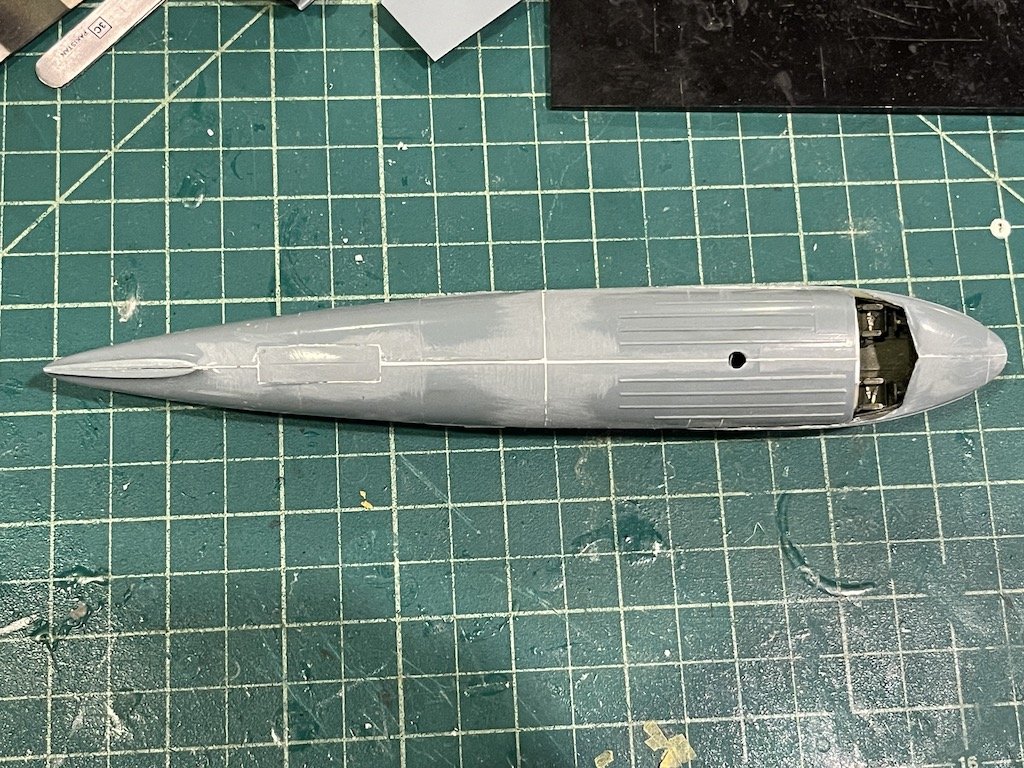
Made some good progress on the JRS-1 the last few days. First, installed all the interior components - bulkheads, cockpit, seats, windows, window frames, curtains, etc. Given that you can't see much of any of the details from the outside, I didn't bother trying to make everything look pristine.
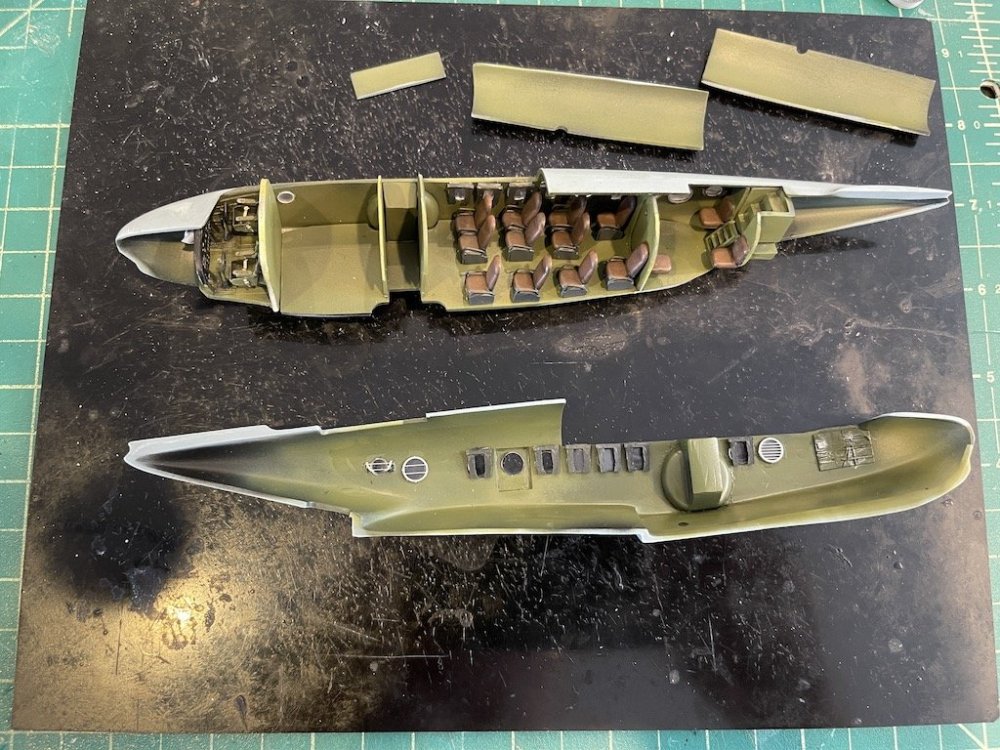
Then managed to get the fuselage buttoned up. Surprisingly, very little filler or plastic strips needed, though the canopy is going to require plenty.


The top was a pain because you had to insert the rectangular piece in between the fuselage halves (you could cut this in half and model it as open), as well as the two forward top fuselage halves. Not exactly easy to do, but eventually got there.
Thanks for looking in!
-
-


AMC DH9 by davec - FINISHED - Wingnut Wings - 1/32
in Non-ship/categorised builds
Posted
That's looking really really good with the decals on. I agree with Rob - glad the white was opaque enough to not have issues with the red bleeding through. Good to know the Wingnut decals hold up well in that regard.
That's going to be quite the eye-catching model in your display case!