


Landlubber Mike
-
Posts
4,077 -
Joined
-
Last visited
Content Type
Profiles
Forums
Gallery
Events
Posts posted by Landlubber Mike
-
-
-
-
-
-
I'm doing mine a bit different in that I am covering the hull with very thin ebony. My guess is that I'll probably need some drop planks in certain sections or specially cut planks. For the planks below the waterline, I'm going to copper plate the hull so I'm not as concerned with the first planking. I just ran the first planking as naturally as possible, and filled the gaps with stealers as necessary.
-
Looking really good Steve. The hull looks easy to plank, but there are a lot of curves that make it more complicated than it would appear. Almost done!
-
Great job Craig! Coming along nicely!
I have increasingly gotten to like Mr. Putty. I also like the Tamiya two-part sculpting epoxy. It works well and doesn't shrink like other putties. For big gaps, I try to fill with plastic card as much as possible. I'll also use CA as a small spot filler - it works really well and sands nicely.
-
-
Wow that was fast! Came out great Craig! Looking forward to following the next one.
- Canute, SigEp Ziggy, Ryland Craze and 5 others
-
 8
8
-
-
-
Looks like a nice kit of an interesting subject. Hopefully it doesn't have the fit and other charm issues SH is known for
")
- mtaylor, Old Collingwood, Egilman and 3 others
-
6
-
-
-
-
13 minutes ago, yvesvidal said:
Craig, I have the Mefistofele FIAT and the Bentley on my shelves. I will wait for your Build logs, before starting them.... :-))
Yves
Me too - thanks for blazing the trail for us Craig!
- Canute, Old Collingwood, Egilman and 2 others
-
5
-
-
2 hours ago, Javlin said:
Thanks Andy seen some pics of heavy wear on some but have a feeling the stripes were for this one particular event Diepe
")
Thanks Mike not quite a SOD kit but one I have eyed for the better part of 20 yrs now.The limited run kits of late have intrigued me not your shake and bake kits though still at times like the Wife can be a PIA!!

Hope your wife doesn't read this board. Don't worry, I won't say anything 🤐
-
-
-
I do too Yves - some people say the Buffalo was an ugly plane, but I quite like the look of it.
- mtaylor, Old Collingwood, Canute and 2 others
-
5
-
Well since I can't seem to decide on what materials to use to rig my Walrus, I dusted this one off the shelf. I first started with the wings, gluing in the ribs into the landing gear area, filling the extra landing light hole on the right wing, and added the Brengun flaps PE set. All went together fairly well. As I noted in my 1/48 B339-23 build, Brengun had the triangular pieces in the upper part of the wing, while the 1/32 set has them correctly in the flap itself. I thought about removing the ailerons, but given that they are angular where they insert into the wing (the top half and the bottom half are different widths), I thought it safer to just deepen the lines so they look like they are moveable parts of the wing.
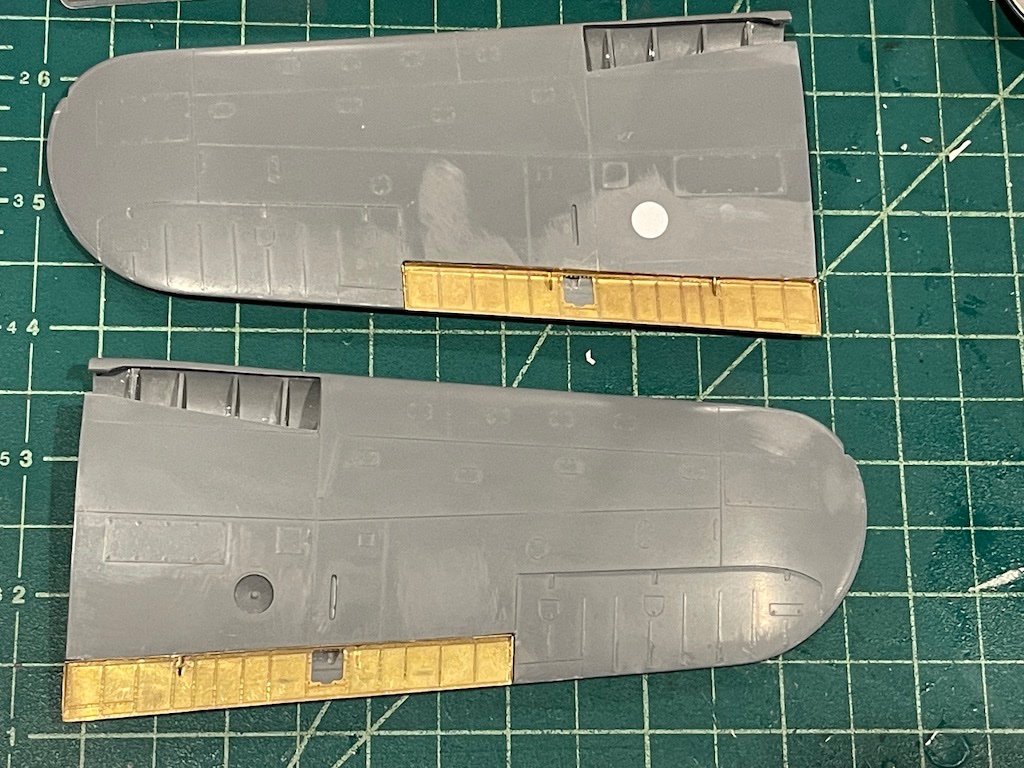
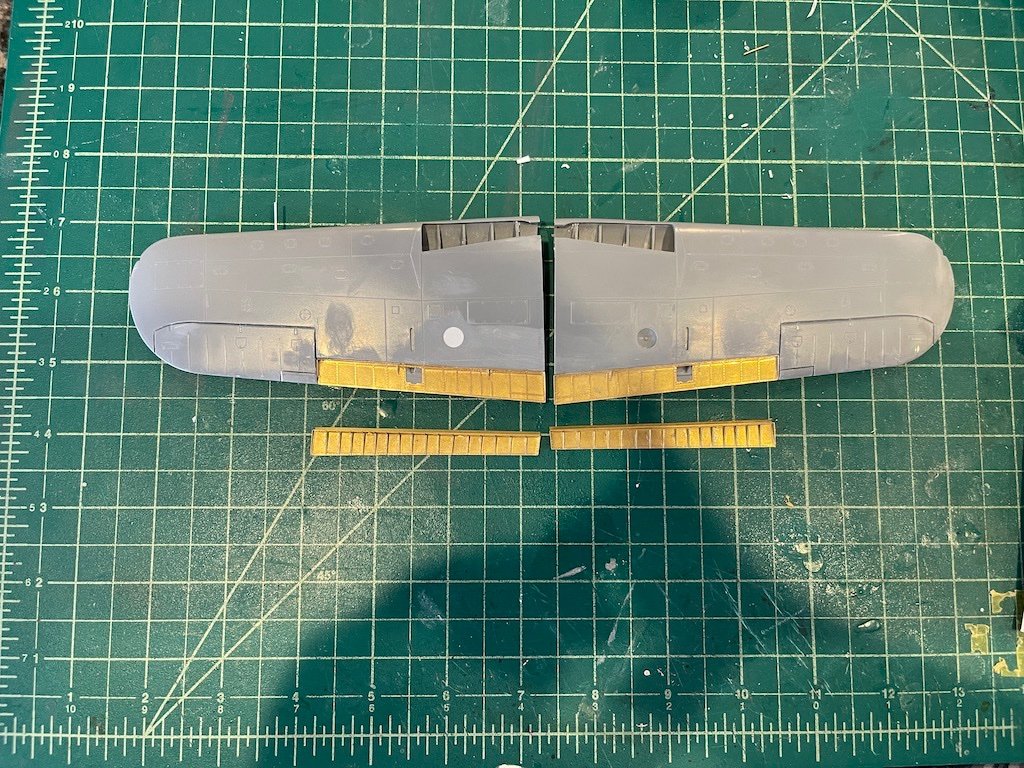
The kit's wing guns looked too large and out of scale, so I decided to go with Master brass barrels. Because the barrels are slightly smaller in diameter relative to the gun opening in the wings, I used my RP Toolz punch set to create small rings that I could inset into the opening to close the gap around the Master barrels. I also added a Master shark fin pitot tube which is more in scale and I think the proper shape on the B239. I epoxied it into the wing, but left off the delicate shark fin end which I will add at the end of the build since it's easy to break off. Learned that lesson on my 1/48 build and had to buy another pitot set to replace the end which broke off and cracked.
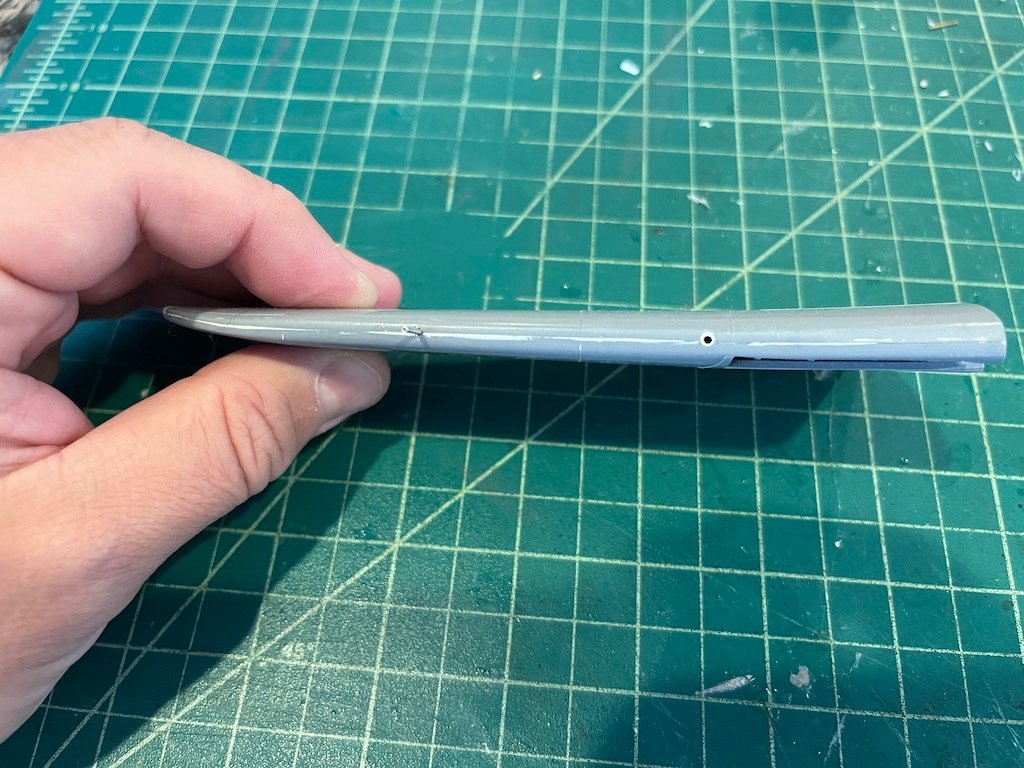
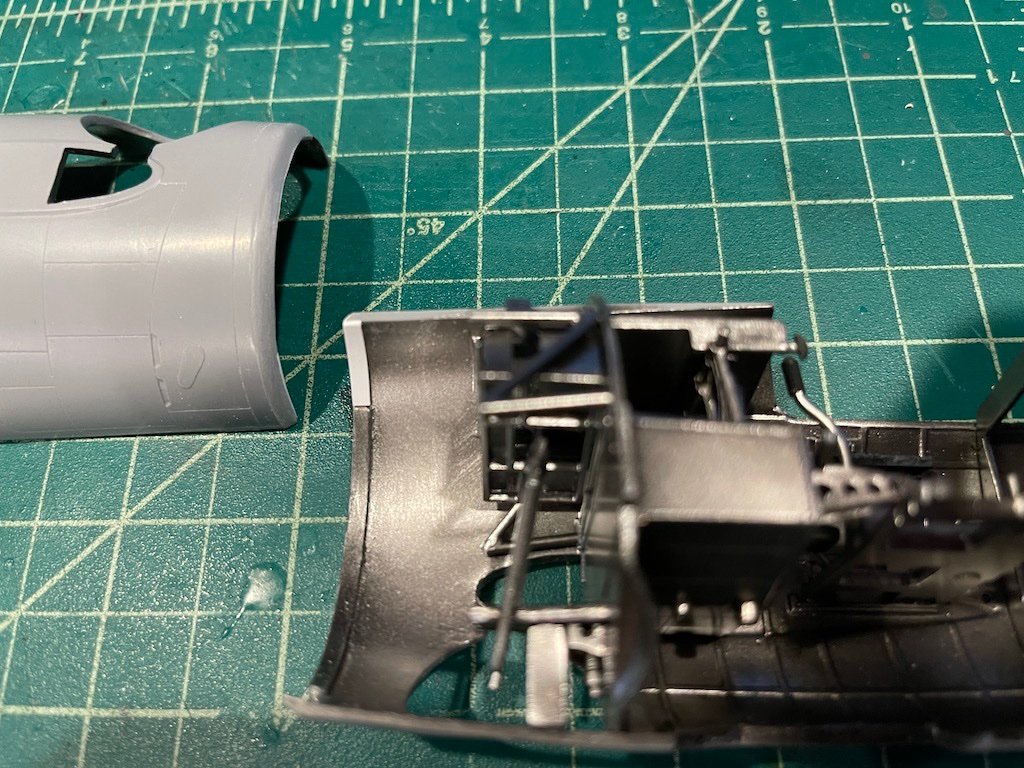
Next I worked on the edge of the fuselage halves before the cowl. With the cowl panels open, I need to replicate part PUR9 in the picture below - the part that goes at the end of the fuselage just before the cowling:
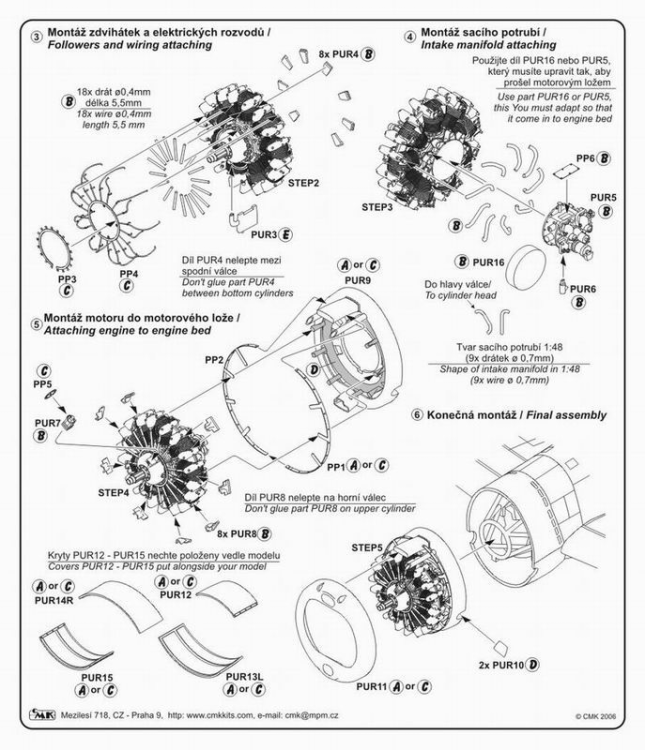
I thought I could work with the kit fuselage halves, but the just don't go far enough forward (see below). So I'll have to scratch build something like PUR9 or just figure a way to add extra material to the end of the fuselage halves to extend another 2-3mm out and cover up/extend past the exhausts. Still working on a solution for this, but I think I have a game plan.
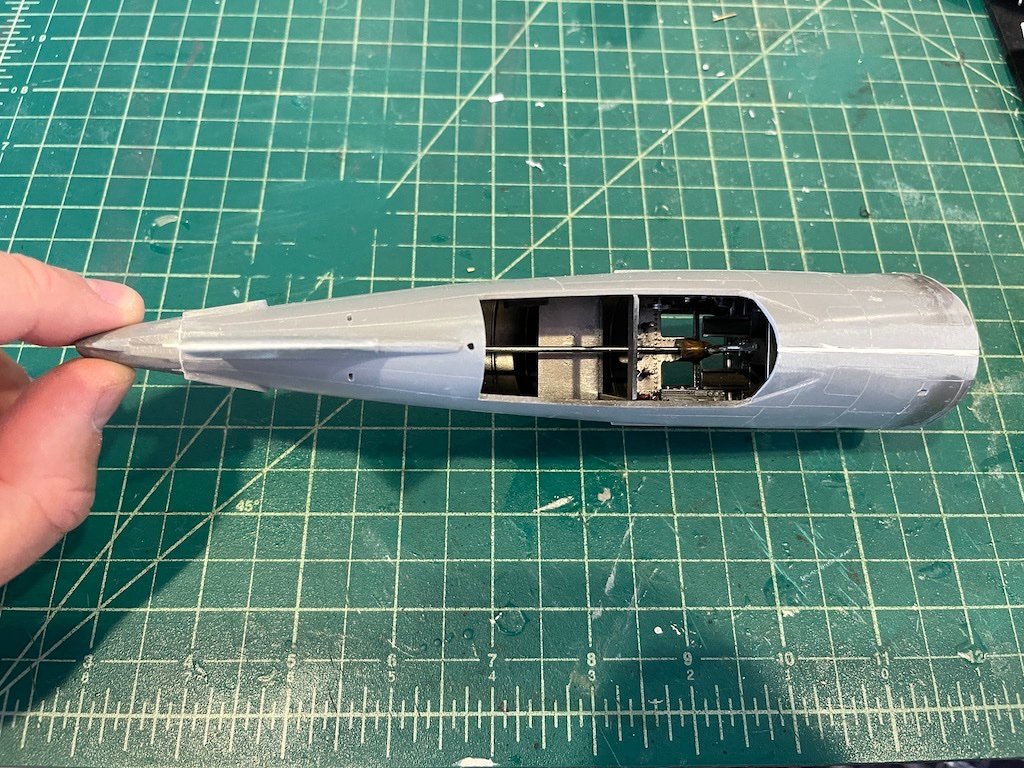
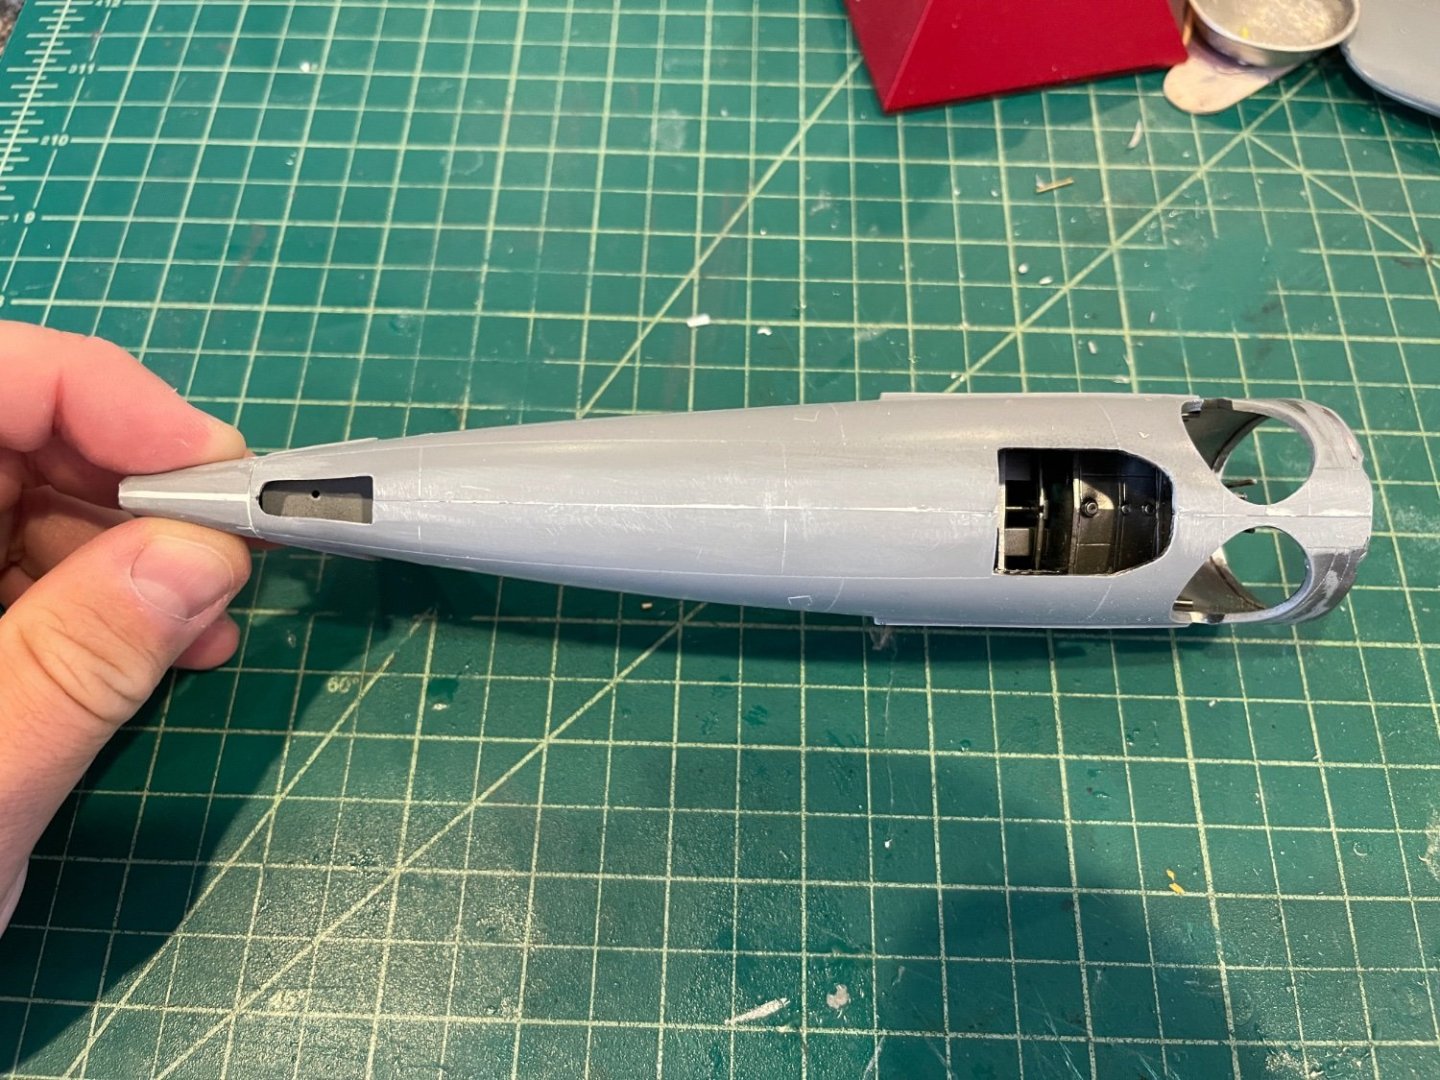
Next I worked on closing up the fuselage. Like other builds I came across online, this was certainly a battle. The fit is poor to say the least, particularly at the front end of the fuselage halves and where the tail is attached. I started by gluing the middle of the halves from the rear of the ventral window towards the back of the plane. Then I worked on the front end, which just wouldn't close. I found the cleanest approach was to first glue the bottom parts together, then when set, add a strip of styrene about 1.25mm across the top in between the two halves. Both sections were glued using two-part epoxy, and three clamps were used for the top to keep the halves not only together, but to push the right side back and in place because it kept having a tendency to slide forward. Was a real pain to say the least!
Then when I went to attach the tail, things were a total mess. The two halves of the tail just don't fit properly against the joined fuselage halves. In particular, the flat section at the tops of the tail halves are wider than the fuselage halves by a good 2mm. So I ended up opening up the gap at the top of the fuselage halves where the rudder sits and adding thin sheets of plasticard until I got the proper width to match the tail halves. Then I glued the tail halves on, connecting them at the top and running them along the fuselage halves sides to follow the fuselage lines. That left a 1mm gap at the bottom of the tail halves which was also filled with plasticard.
So, a lot of work, but the fuselage looks pretty good now I think. Hope these steps help others that might be building this in 1/32.

Thanks for looking in!
-
-
Just caught up with your log Craig. Really pristine work my friend, looking fantastic!
- Old Collingwood, mtaylor, Jack12477 and 2 others
-
5


Wa’a Kaulua by Glen McGuire – FINISHED - 1/100 - BOTTLE - Traditional Hawaiian Ocean Voyager
in - Subjects built Up to and including 1500 AD
Posted
Another creative project, I'm in! Love the idea and use of native woods, this is going to be another Glen special!