HOLIDAY DONATION DRIVE - SUPPORT MSW - DO YOUR PART TO KEEP THIS GREAT FORUM GOING!
×


clearway
-
Posts
2,228 -
Joined
-
Last visited
Content Type
Profiles
Forums
Gallery
Events
Everything posted by clearway
-
 Honestly Keith S there is that much in the way regards shrouds, trusses, halliards and lifts that it would be a nightmare rigging the gaffs😵. However i am also thinking wouldnt it be nice to have an Erebus to go with her🤨! Regards the bridge Keith B i am planning on having the binnacle mounted on there and having metal rods supporting it midships along with the wooden framework at the bulwarks and yes i agree they would have had a men on the bridge wings and in the topmast trees shouting warnings/ directions to the officer of the watch so he could give instructions to the helmsman. the other Keith
 -
Thanks Lubber, there would indeed have been scuppers, there are some good shots of her hull when painted white which show a lot of good detail, regards the flag ... interesting viewpoint and yes should indeed be the red duster, though he did offer Endurance to the navy for the war effort but they said no proceed with the mission. Keith
-
Thankyou for your input Keith and Keith, I think i am basing to much trust in the London news lithograph regards the tri sail masts and yards, other exploration vessels also had them (Beagle for one), part of my reasoning was they were used to close haul and permit better control into the wind hence why i was in two minds as the Navy would have installed the steam engine to do this instead. I will have to leave them off as i wont be able to fit them now without demolishing all the rigging! As regards the ice bridge my thought follow Keith s argument and have been wondering if there were any supports midships not just for the bridge but the skid beams as well (could be iron supports as they were coming into fashion around then) Also great to see you back keith and have some Terror back and forth going again☺️ The other Keith
-
Nice model of a nice looking vessel- it's amazing how the old guys even made work boats look pleasing to the eye- now its all sheer computer designed functionalism🙄. keith
- 32 replies
-
- 4
-

-
- Lackawanna
- BlueJacket Shipcrafters
- (and 1 more)
-
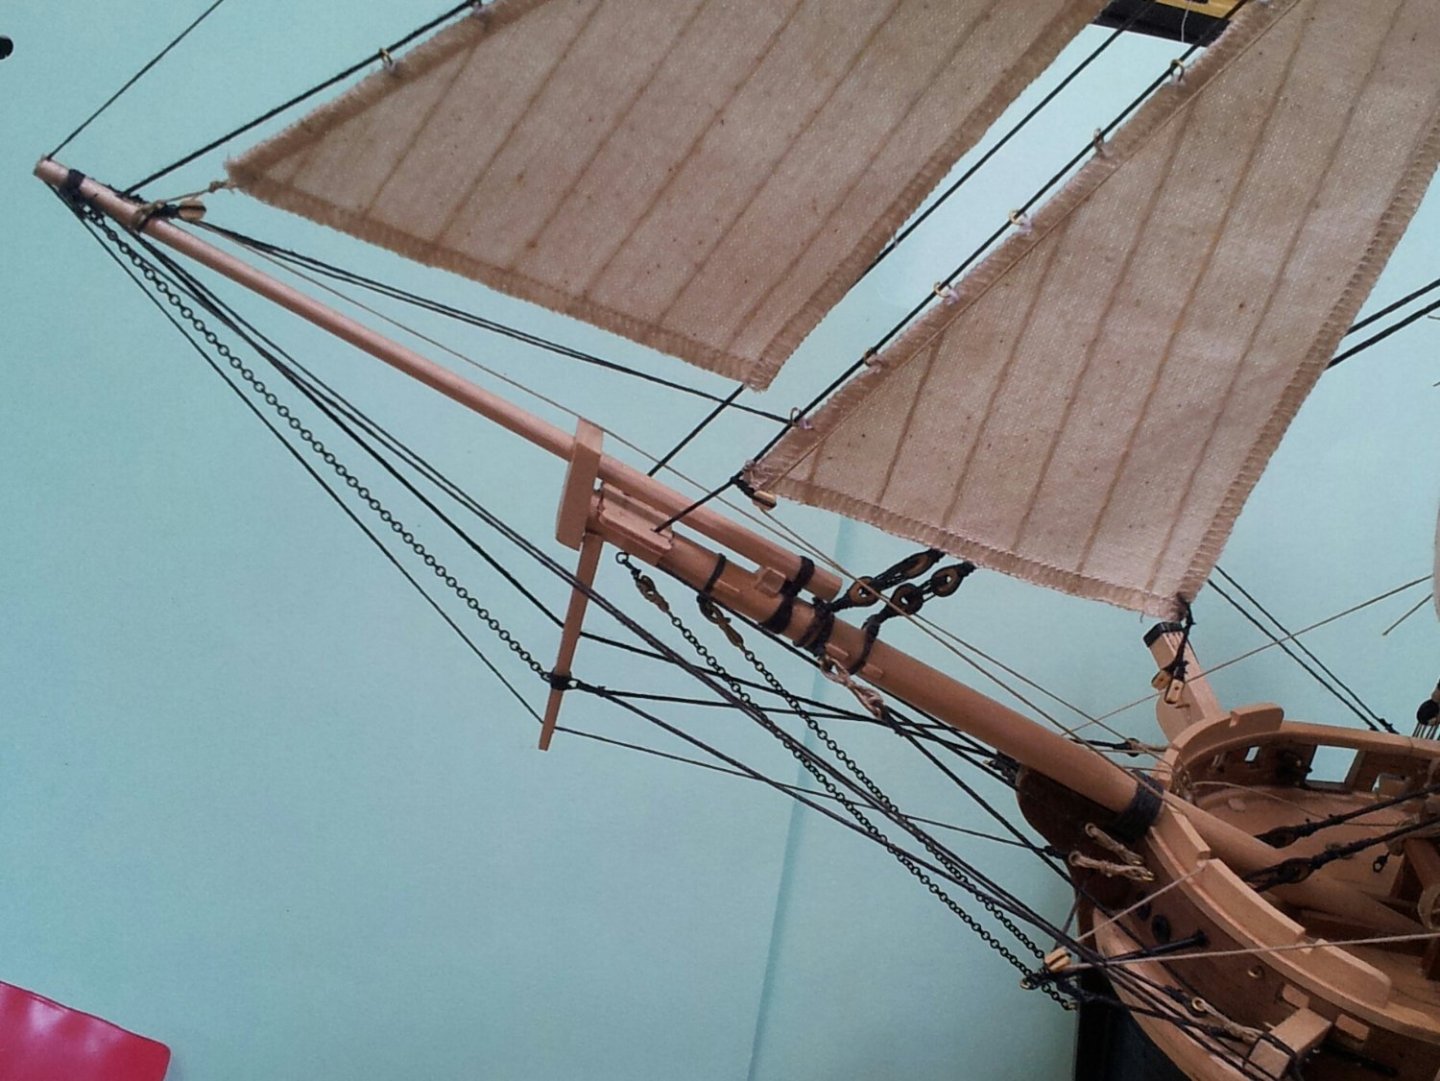
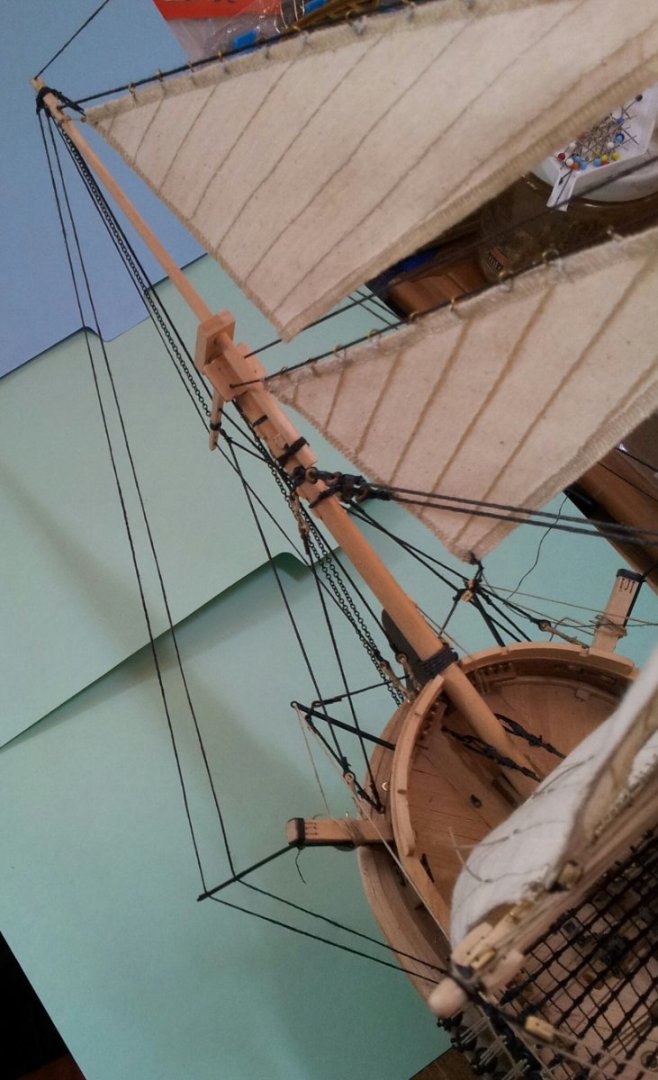
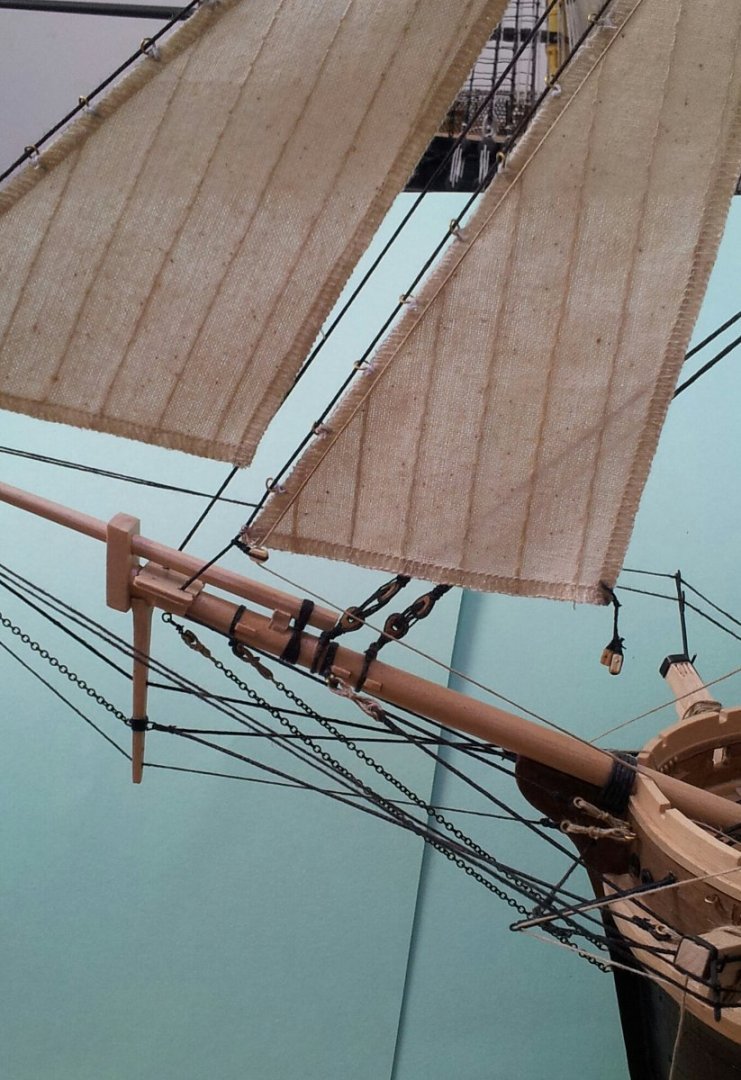
thanks for the likes and views everyone, while no work on Terror since last pic i have been poring over images and plans of her in matthew betts book and google. it looks like while she did definitely have studding sails and tri sail masts/ yards fitted during the back voyage, there isnt anything to confirm 100% they were still fitted for the Franklin expedition as any images available didnt depict them (maybe the extra sail area wasnt needed because they had the auxiliary steam engine)? However i think i have finally figured out the supports for the ice/conning bridge. As far as i can tell there is an upright fastened to the bulwarks and a support running from the aft skid beam onto the top of said upright. As regards the "plank" itself i am figuring it would maybe have been made out of 6" x 2" sided timber fastened together for strength and is around 2 feet in width as i cant see a plank that size being made out of a single piece of wood and if made in sections could be dismantled and stored when not in use/during heavy weather? 2 years in and getting towards the end of the build she is still throwing curve balls at me! Keith
-
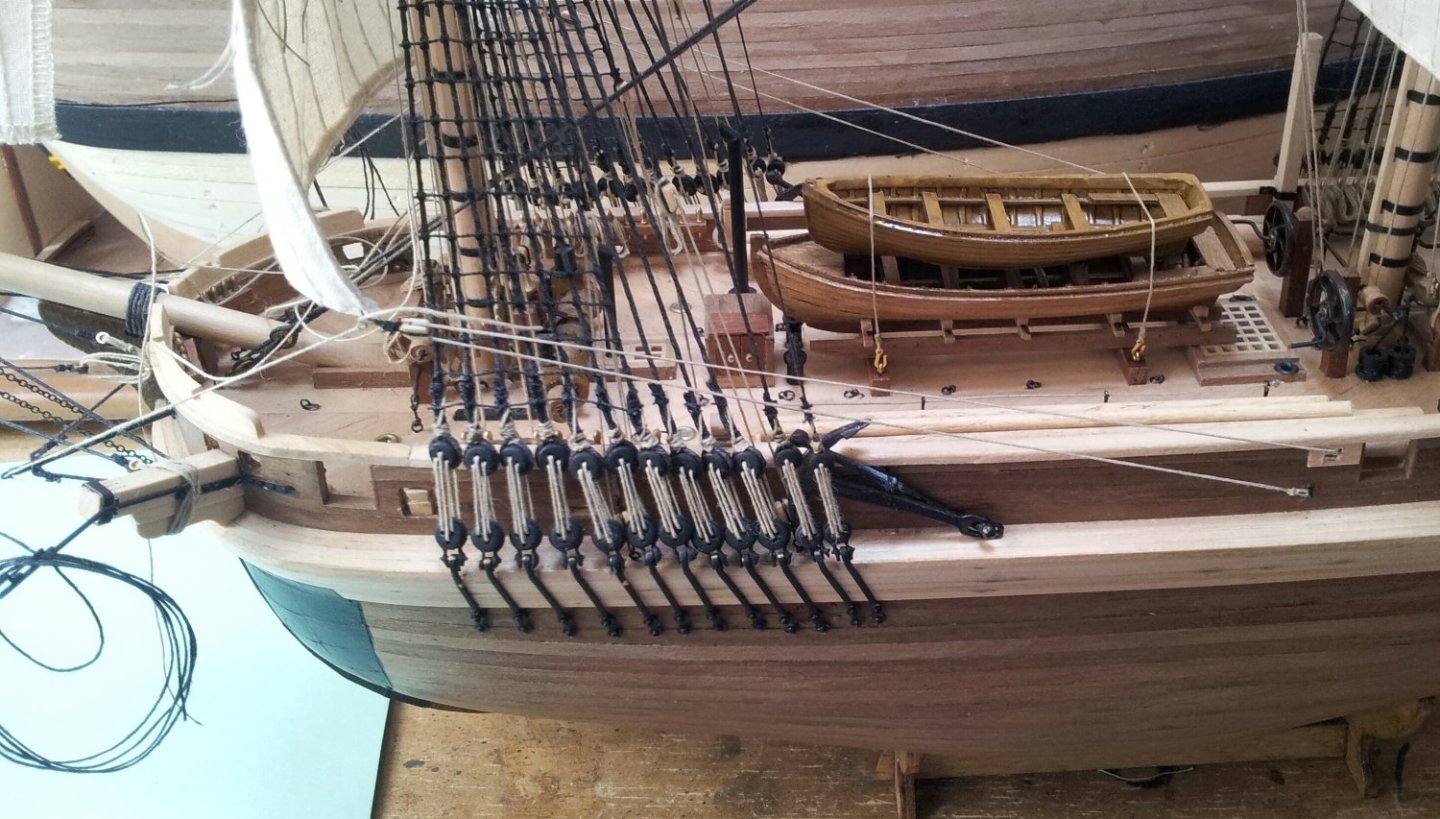
Ty again Allan and thanks for the likes, comments and looking in everyone. Well i went to continue digging out the area in front of the coal bunker to lay paving stones and after a sweaty hour or so retreated to the shipyard before i ended up looking like yoda! The blocks have been fitted to the boomkins and the fore course tacks rigged and belayed but not coiled yet, the down hauls for the jib and stay sail have been belayed and coiled but still need the sheets rigged. The pin rails either side of the bowsprit have been shall we say interesting to belay too! Take care all Keith
-
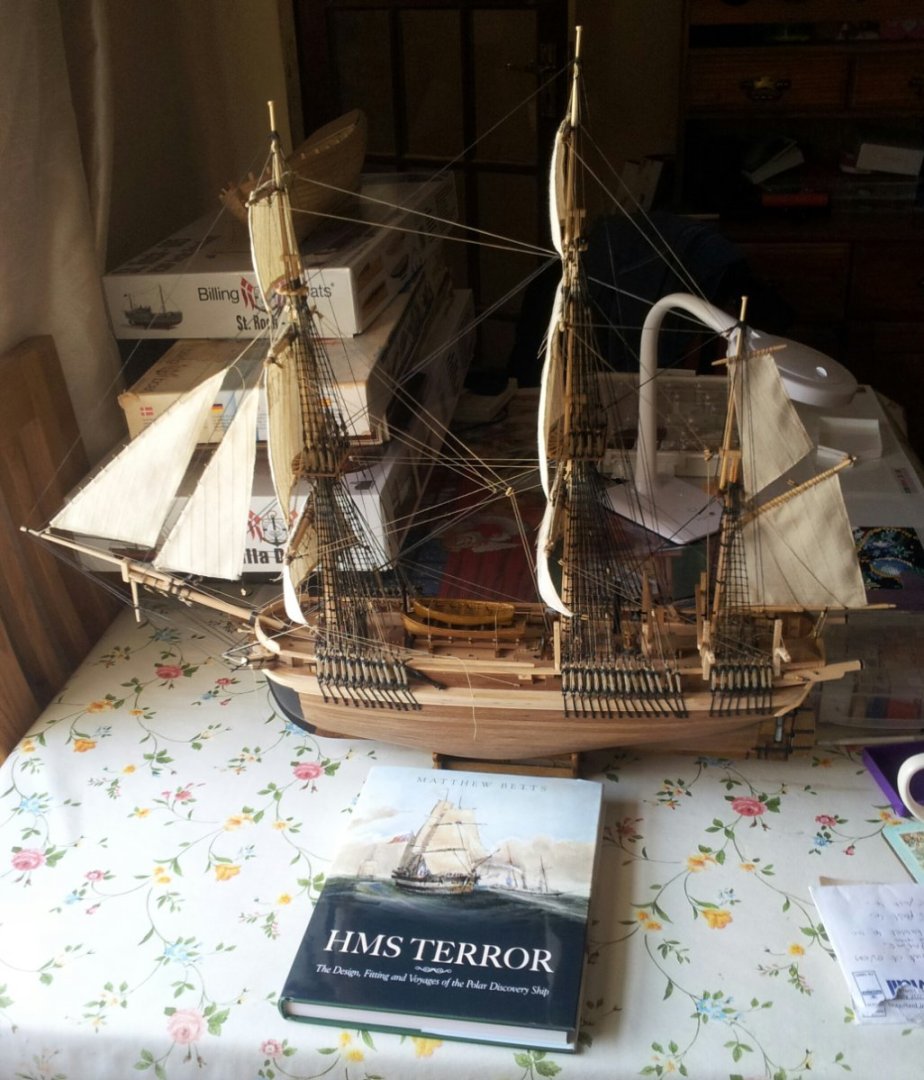
Thanks Allan, i still have Terror to finish along with Victory, Endurance coast boat Bent and some not mentioned on here!!!!I have several in the pipeline but i have bought the old billings birgitte lugger which i want to convert to a steam drifter and on top of the pile on the table is the infamous R.C.M.P. St Roch which i am thinking of bashing into her pre 1942 re fit configuration though will need more details of the wheel (pilot) house and deckhouse/exhaust arrangment. Keith
-
Thanks for looking in and the likes/ comments everyone. Still nothing happened with terror due to summer weather, but I finally have it!!!!!!!!! If your looking in thank you Matthew and kudos to Keith S. If i were building my Terror again after studying the plans i would follow the other Keith regards the starboard deckhouse at the stern, i would also keep the masts as they are but add around 20mm to the masts above the hounds on the fore and main topgallant masts and the topmast on the mizzen (still wouldnt rig a topgallant mast on the mizzen though/ she would have originally had a topsail but looking at the topsham model and some pictures no topgallant sail). Also would add the flying jib boom though still not sure about the trysail yards (will need to double check the book to see if there is any evidence on the masts for them). Another thing to go would be the occre sails (i was in two minds but went with them in the end). Still in the air about studding sail booms (is there any evidence of the irons on the yards near the wreck)? and would heighten the bulwarks. Cant wait to get my teeth into the book though with temperatures of 31C at the moment not very atmospheric! I said to the guy in the book store "define irony..... buying a book on a polar exploration vessel in a heatwave". 😄. Should be starting back on Terror soon (sharp eyed among you might have noticed another kit for an arctic exploration vessel! Take care all and this book is a must for all Terror fans. Keith
-
I had the gap problem on the bulwarks as you have and i used a piece of scrap ply to "bridge" it before starting on 2nd planking( see earlier pages of my build log). I used walnut for the 2nd planking as i like the colour it oxidises into after a while and looks a lot better than the stuff occre supplied. keith
-
No problem Daniel- looking nice and busy in the bow area😁 Keith
-
Very nice indeed- i have always wanted to build this kit but the price made my eyes water somewhat! Well done on another great build Keith
- 58 replies
-
- 3
-
-
- Calypso
- Billing Boats
- (and 1 more)
-
to be honest if i were doing her again i would leave her with no sails bent to the yards, Keith s is thinking along the lines of furled sails from silkspan as mentioned by allanyed. Keith
-
Not much happening with Terror at the moment due to D.I.Y. and gardening - Yey summer is here🤪- However did get a phone call off the bookstore to say my HMS Terror book had finally been delivered so will take a run to Carlisle at the weekend😁 Take care all Keith
-
Getting nice and busy- the kits bulky anchors are the reason i bought the aeronaut replacements which are a lot thinner (+ you need two smaller anchors near the stern as well). Keith
-
Thanks Keith, wish i had a fiver for everytime i have knocked the whisker booms😬! On a good note The Book is finally printed so hopefully will get a call off the bookstore i ordered it with soon 😁. Keith
-
Thanks for looking in folks. Work continues on the poop deck companionway and the engine room skylight is complete though not fastened in place yet. Take care all Keith

-
Thanks for the likes and looking in as always everyone, thanks to rain moving in Friday afternoon all the way through til this Sunday) morning , garden chores out the window but got some work done on Terror. The jib boom guys are now rigged along with the down haul on the fore topmast stay sail. Take care all. Keith
-
I chose the flattening the ends of wire and drilling holes through for the deadeye strops on my HMS Terror build and it was shall we say interesting! Keith
- 118 replies
-
- 2
-
-
- billing boats
- meta 484
- (and 1 more)
-
welcome to the Endurance club. Keith
-
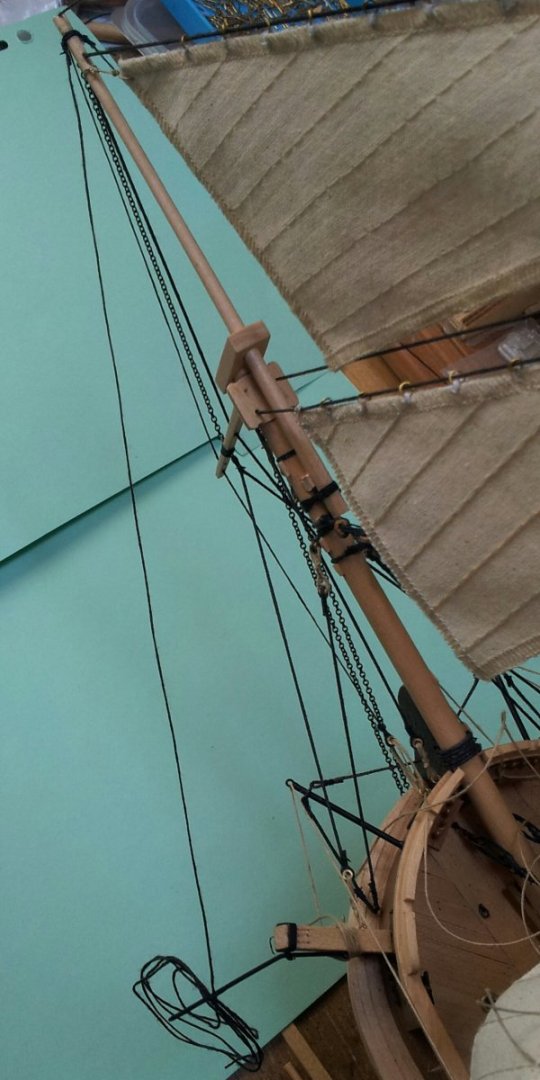
Ahhh summers like we used to get before the 2000s! Either work outside in the high twenties centigrade or hide in the shipyard🤪. Managed to finally get the whisker booms painted and temp fitted (feels like agessss since i made these)! Also got the first of the jib boom guys spliced on the end. Moving aft slightly the sheets on the fore course are rigged though the tacks still need run through a block on the end of the boomkins and belayed, the midships anchors have also been stowed on the ice bumper along with trail fitting of spare spars in the waist stanchions. looking at some of the images that have come to life it does look like flying jib boom and stunsail booms were fitted! though not sure tri sail yards would be rigged, hindsight is a wonderful thing but just going to leave my lil Terror as is! Thanks for looking in and the likes/ comments as always everyone. Keith

-
yes that is the one😁. keith
-
welcome to the Terror club Hakezou .There is a fascinating video on u tube with an interview with matthew betts which was filmed a few months ago (cant wait till the hard copy of his book is available, had it on pre order for several months now)! Keith
-
Hi Daniel, i will eventually get around to adding ladders to both sides , all ships i have seen have had ladders both sides and suspect terror and erebus would have been no different (if you look at the much repeated lithograph of the ships setting out you can make out the ladder on the port side of erebus {closest of two ships in pic}) Keith