clearway
-
Posts
2,228 -
Joined
-
Last visited
Content Type
Profiles
Forums
Gallery
Events
Everything posted by clearway
-

HMS Victory by Hadesmr - Corel
clearway replied to hadesmr's topic in - Kit build logs for subjects built from 1751 - 1800
pssst victory should be in the earlier dated post, as she was around 40 years old at time of Trafalgar😁 -
while i scratch built new chainplates for my victory to replace the billings fittings, i soldered the strop around the deadeye and the lower most link but didn't solder up the middle link (just made the link the twisted to one side to fit then bent back into shape). if you are only replacing the middle links i would recommend anealed iron craft wire which is stronger than brass. if you pull the links apart while rigging you have it too tight! Keith
-
Ty wahke- i was torn between paint her or leave au natural at the start of the build, but glad i decided to plank her with walnut and leave in the wood finish. Keith
-
i think a lot of model shops are having problems due to manufacturing being messed up with this covid mess, same is happening with model railway suppliers. Keith
-
for fittings there is also The Model Dockyard in the u,k, who ship overseas. Keith
-
Welcome to the hms terror club😁, for further info on how to improve the kit see keith s and my logs where we obtained different spares to upgrade occre fittings (depends how in depth you want to go in altering occres mistakes). Keith
-
Welcome back. if modelled with gunports closed you would have saved putting the planks along the gundeck😁. There does seem a lot of discrepency with plank thickness on decks though (got to love occre)🤪. Keith
-
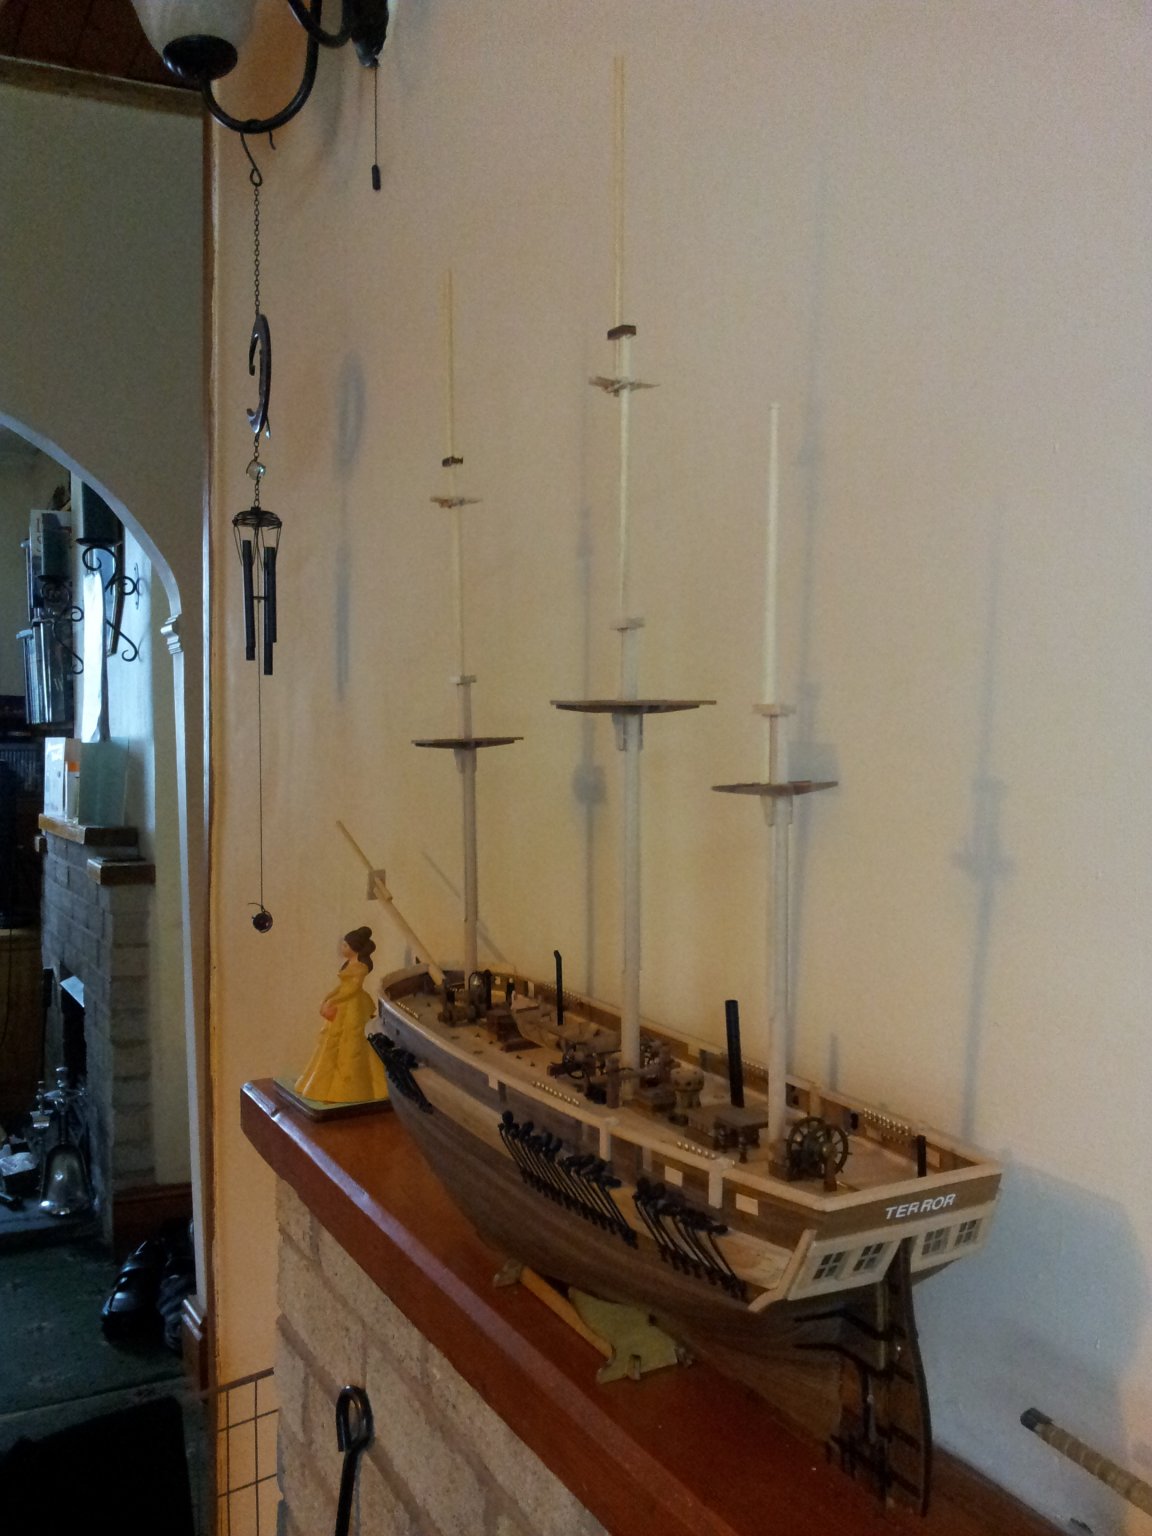
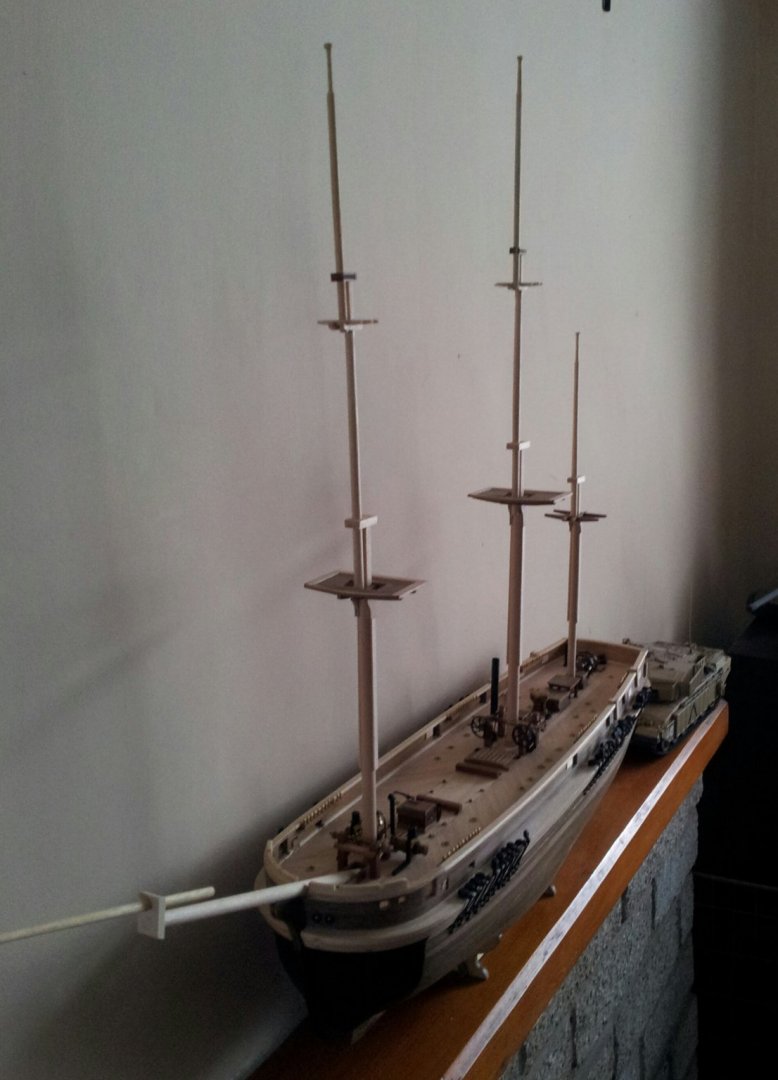
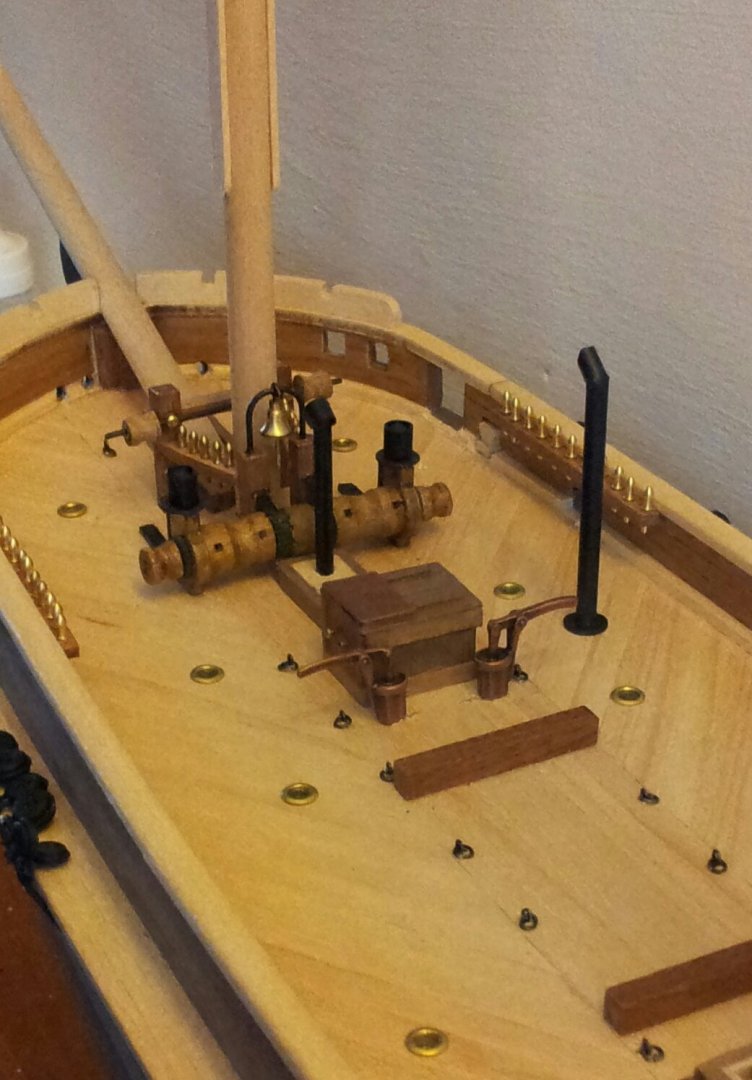
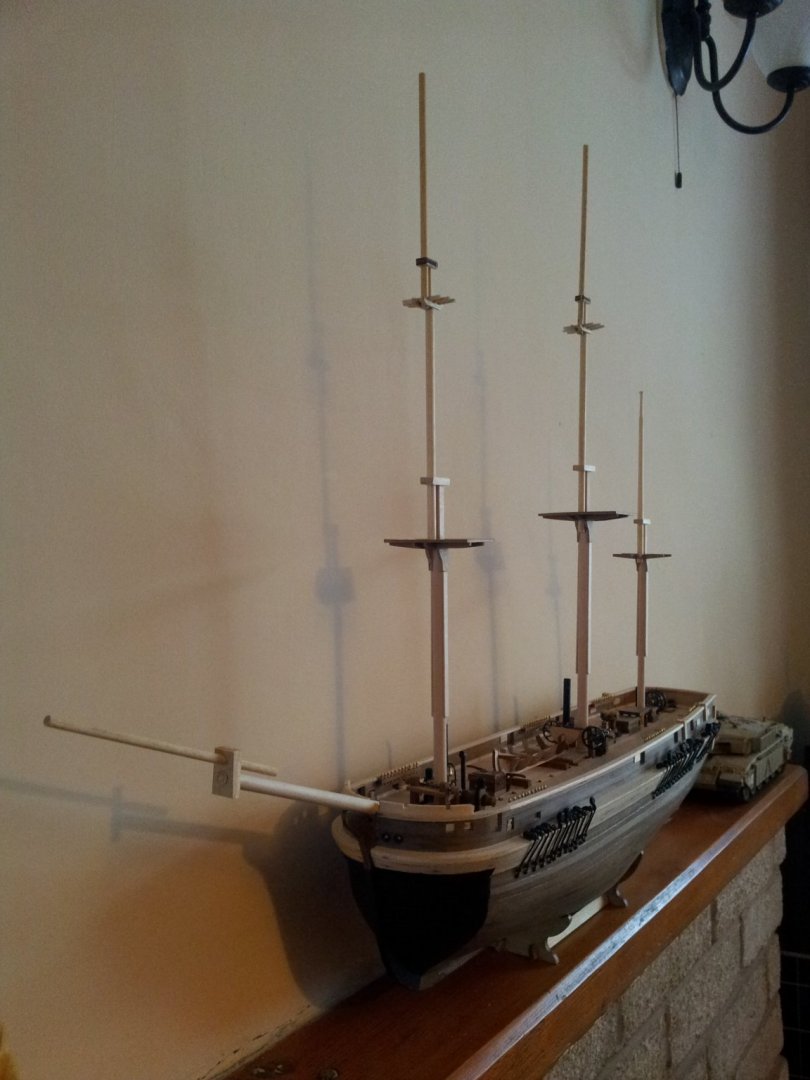
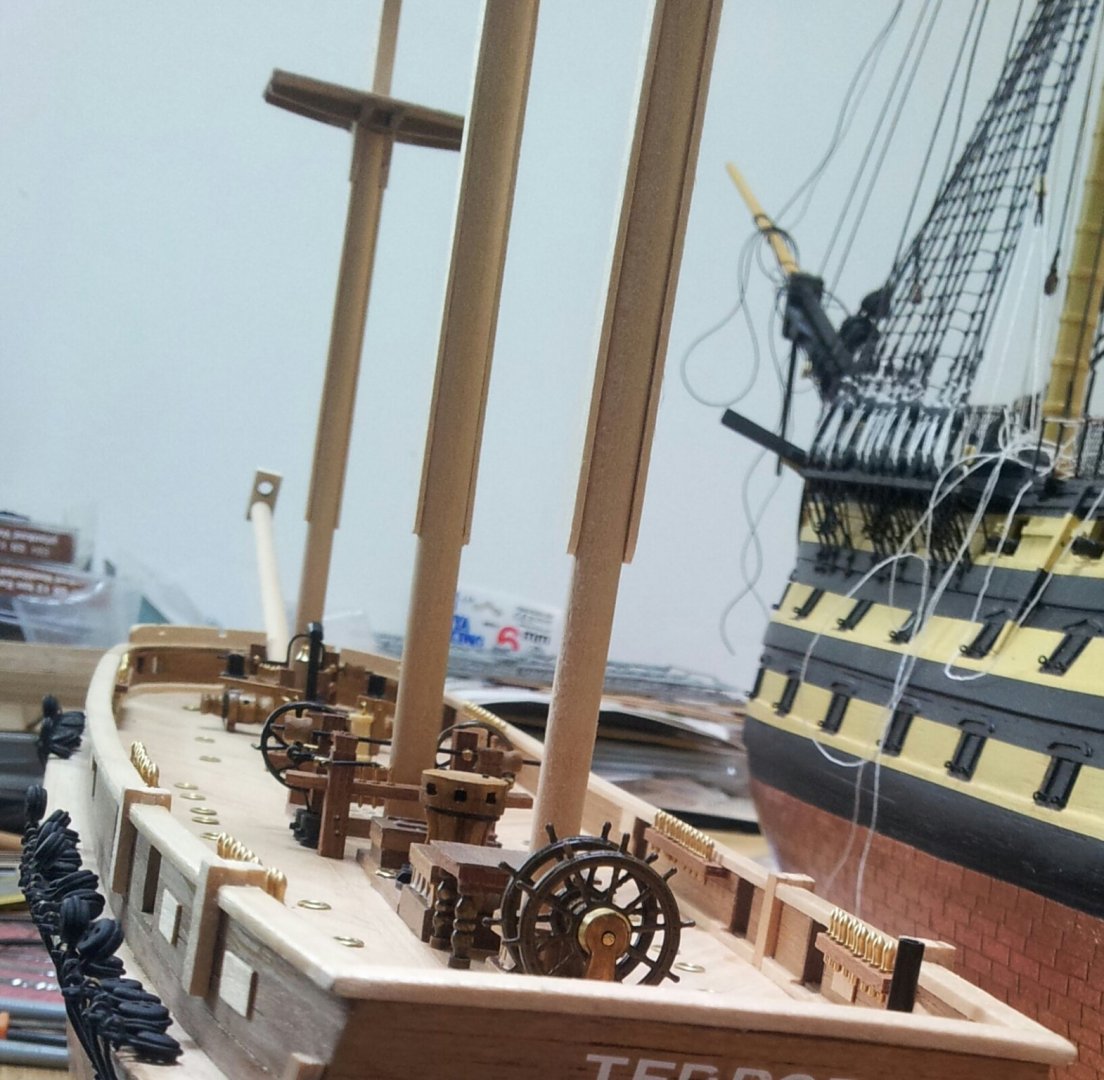
thanks for looking in as always everyone, started to add the tapers to the top/ t'gallant masts and tapered the jib boom. Also found some better looking elm tree pumps which will need painted black. Only the cheeks/bibs on lower masts are glued in place at the moment with the masts just friction fitted together so the might look a bit "wonky"! take care and have fun everyone. Keith
-
if painting and coppering the hull it wont really matter. if adding second layer of planking it will hide it the same. i used planking battens on my billings victory. Keith
-
i basically hardly ever refer to the instructions as they have the deck fittings wrong, but i do have many years and builds to draw on🙂. Keith
-
i hear you there, sometimes think it might have been easier to just scratchbuild her, but your cruiser looks good keep up the good work. Keith
-
yeah kit manufacturers can cut corners to suit their standard fittings (you have seen the fun keith s and i have had with occre's HMS Terror)! Keith
-
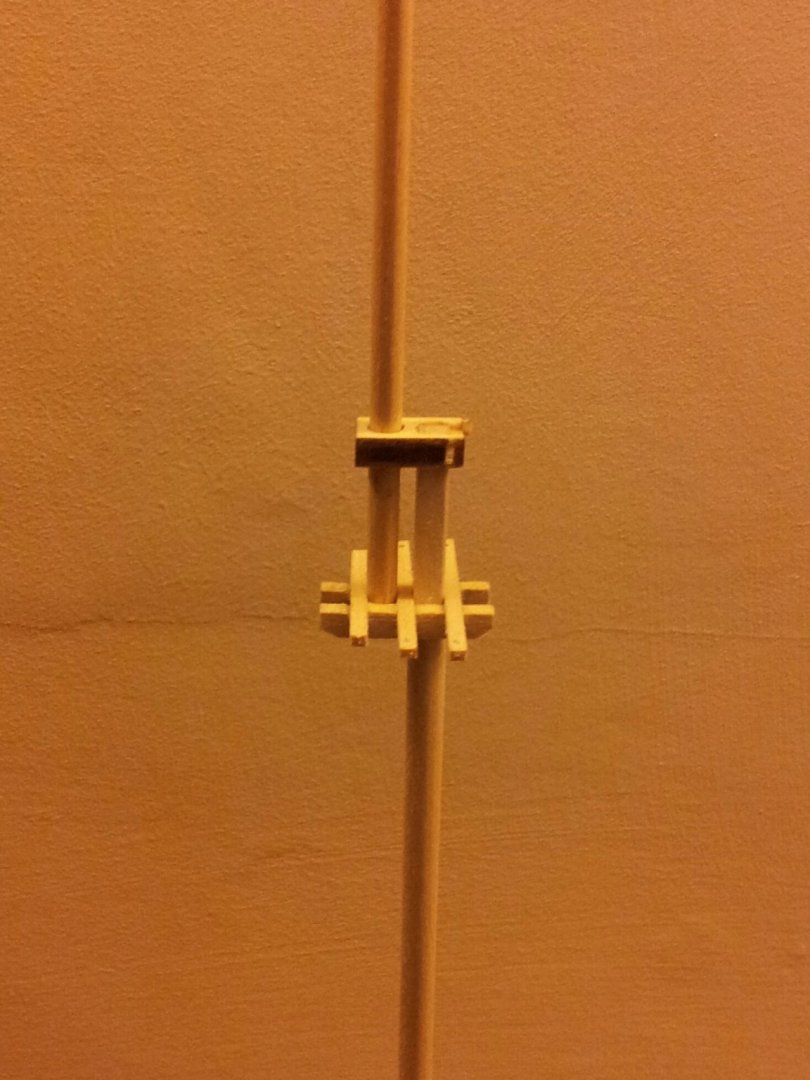
hello Keith, I square the mast heads for the trees first as already described earlier in the log, and then using course sandpaper wrapped around an old piece of 2" x 1" wood i start from what will be the narrowest part and twist and sand working the taper further down the mast till roughly how i want it, then use fine paper to finish off. For the mast caps/ hounds i score a line around the top of the dowel to the thickness of the cap, do the same where i want the hounds, then carve out the wood between roughly to shape before using a needle file to round off to thickness- then i work the taper in from hounds downwards if that makes sense. Now have all the sections in place, but still need to taper topmasts and topgallant masts on fore and main along with new mast caps on topmast mastheads, and taper the jib boom. Keith

-
that is what we are here for😉 Keith
-
it is good when all the brain ache comes together and looks like a ship😁. Keith
- 312 replies
-
- 3
-

-
- enterprise
- caf
- (and 1 more)
-
thanks for looking in everyone, started on the topmast trees (topgallant mast still needs tapered, and new mastcap made). Also after Keith s timely advise made a new tiller using brass stock though still not glued in place yet. take care all Keith

-
seems strange as caldercraft are among the top kit suppliers compared to occre ,artesenia etc Keith
-
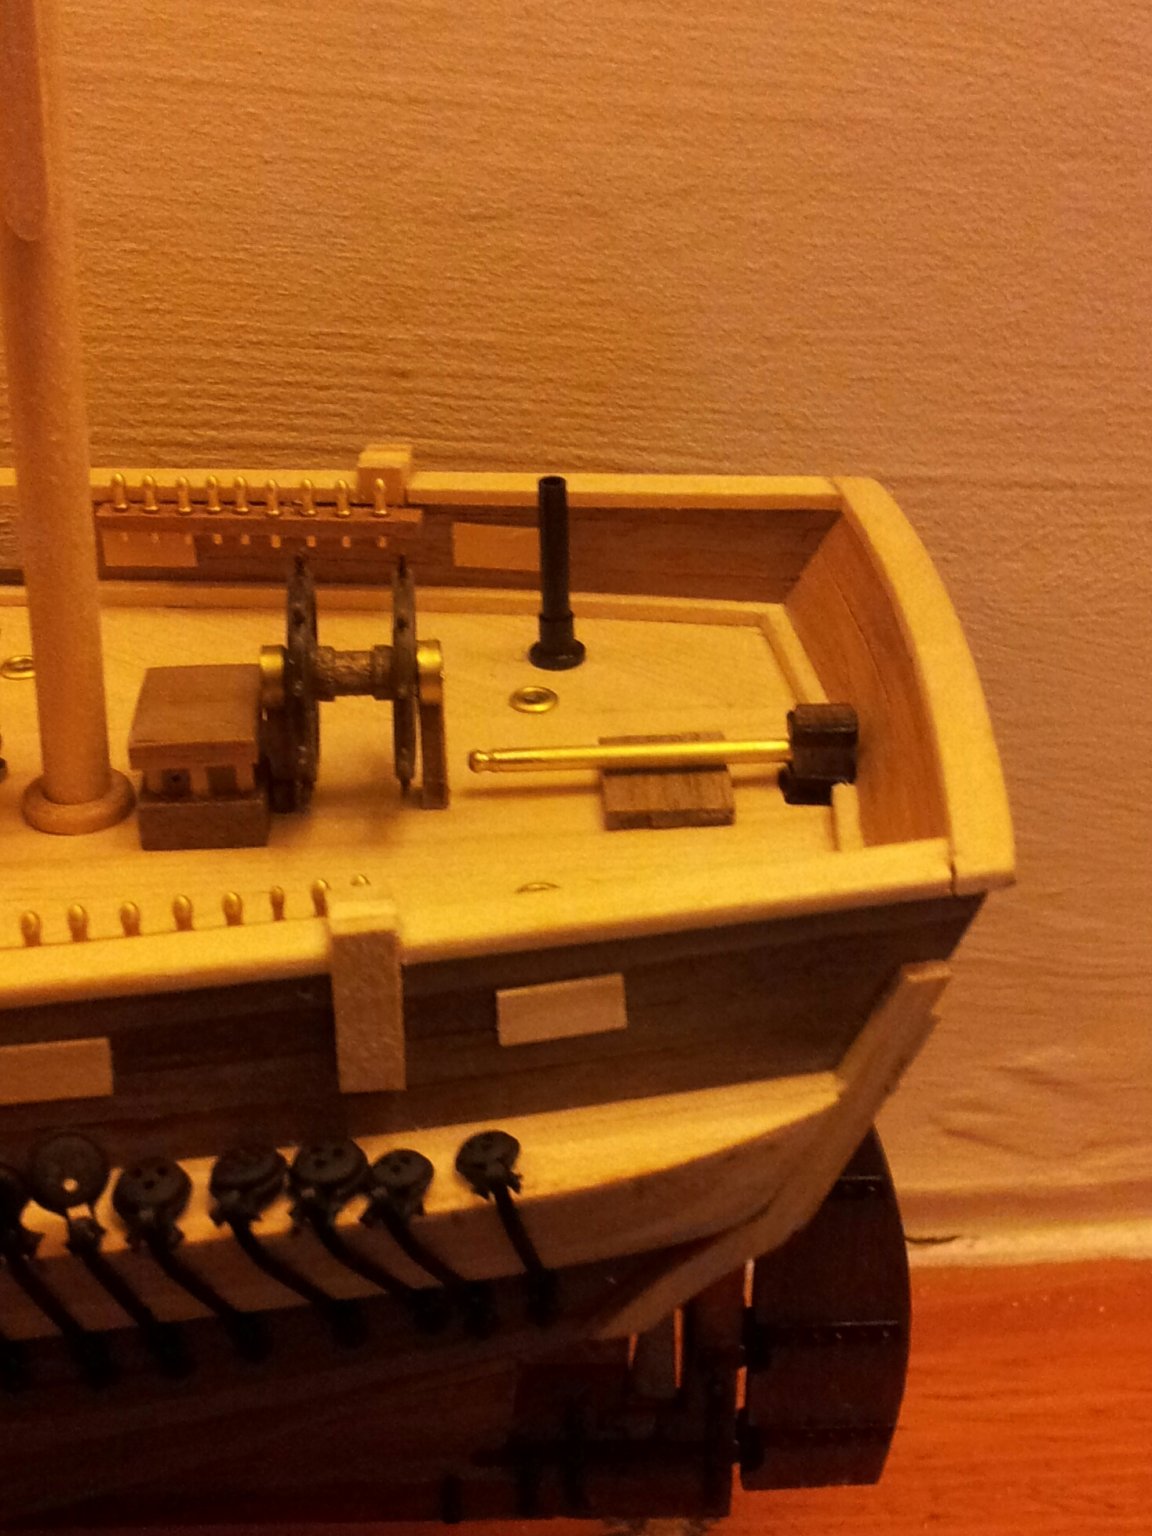
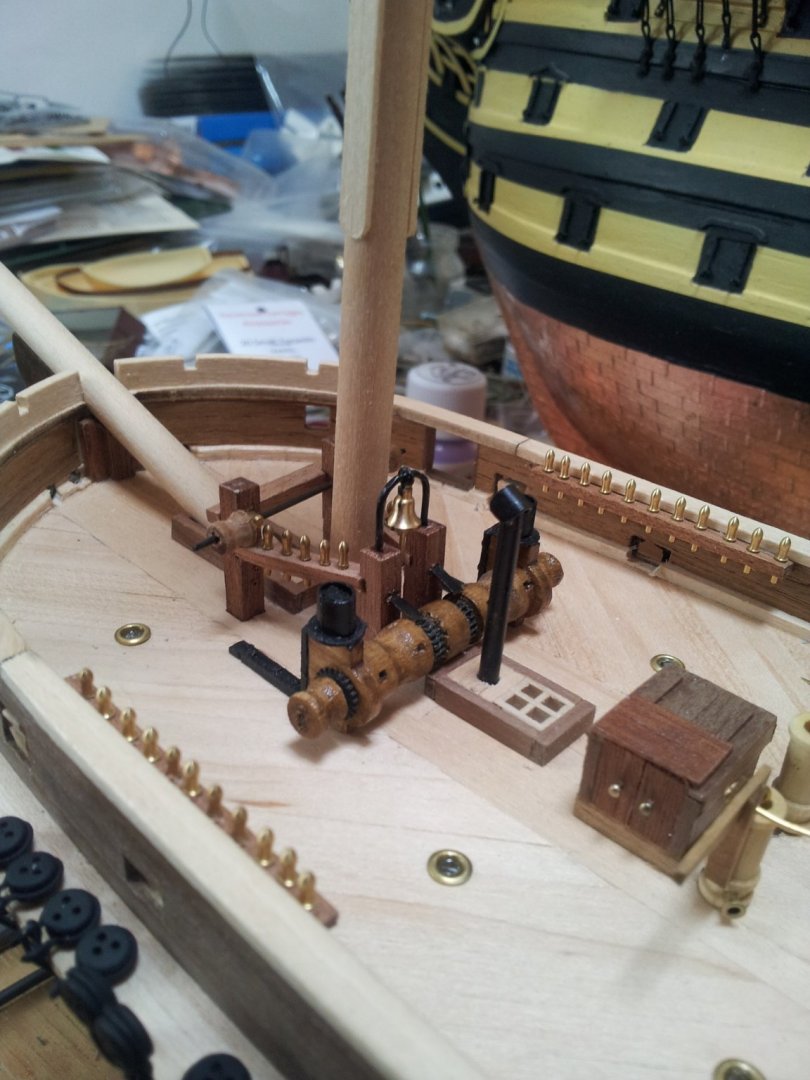
Thanks Keith, luckily i haven't glued the tiller in place yet so still option to remodel (tis a bit strange because tillers were normally wood... the intrigue of the arctic ships continues)! The set up with the wheel and tiller lasted until the steering quadrant was invented most likely as you say for mechanical advantage. slightly later ships like Cutty Sark had a worm screw arrangement right atop the rudder head. I was looking at them pin racks on Erebus foredeck which makes sense for the rigging from the jib boom (can we assume terror was the same)? Also thinking did they still fit kevels or had they replaced these with cleats like on HMS Trimcolee🤔 as Terror lost her bulwlarks when she collided with Erebus in Antartica, you can go bonkers trying to work this out and mr Betts book isn't due out til spring next year. Keith
-
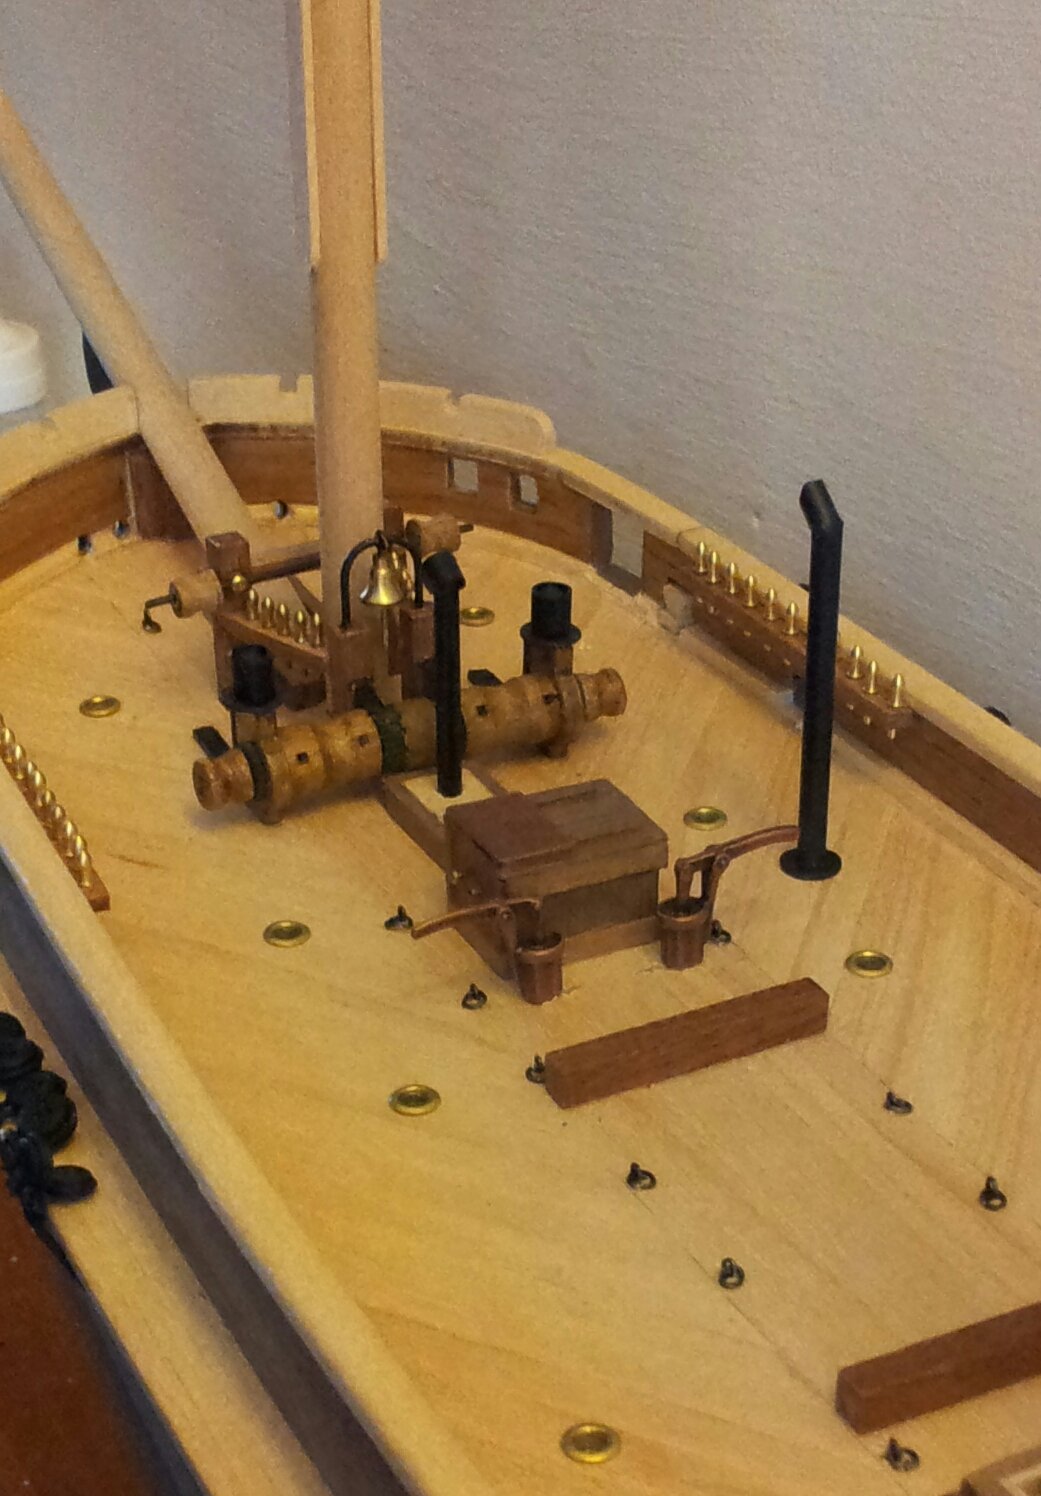
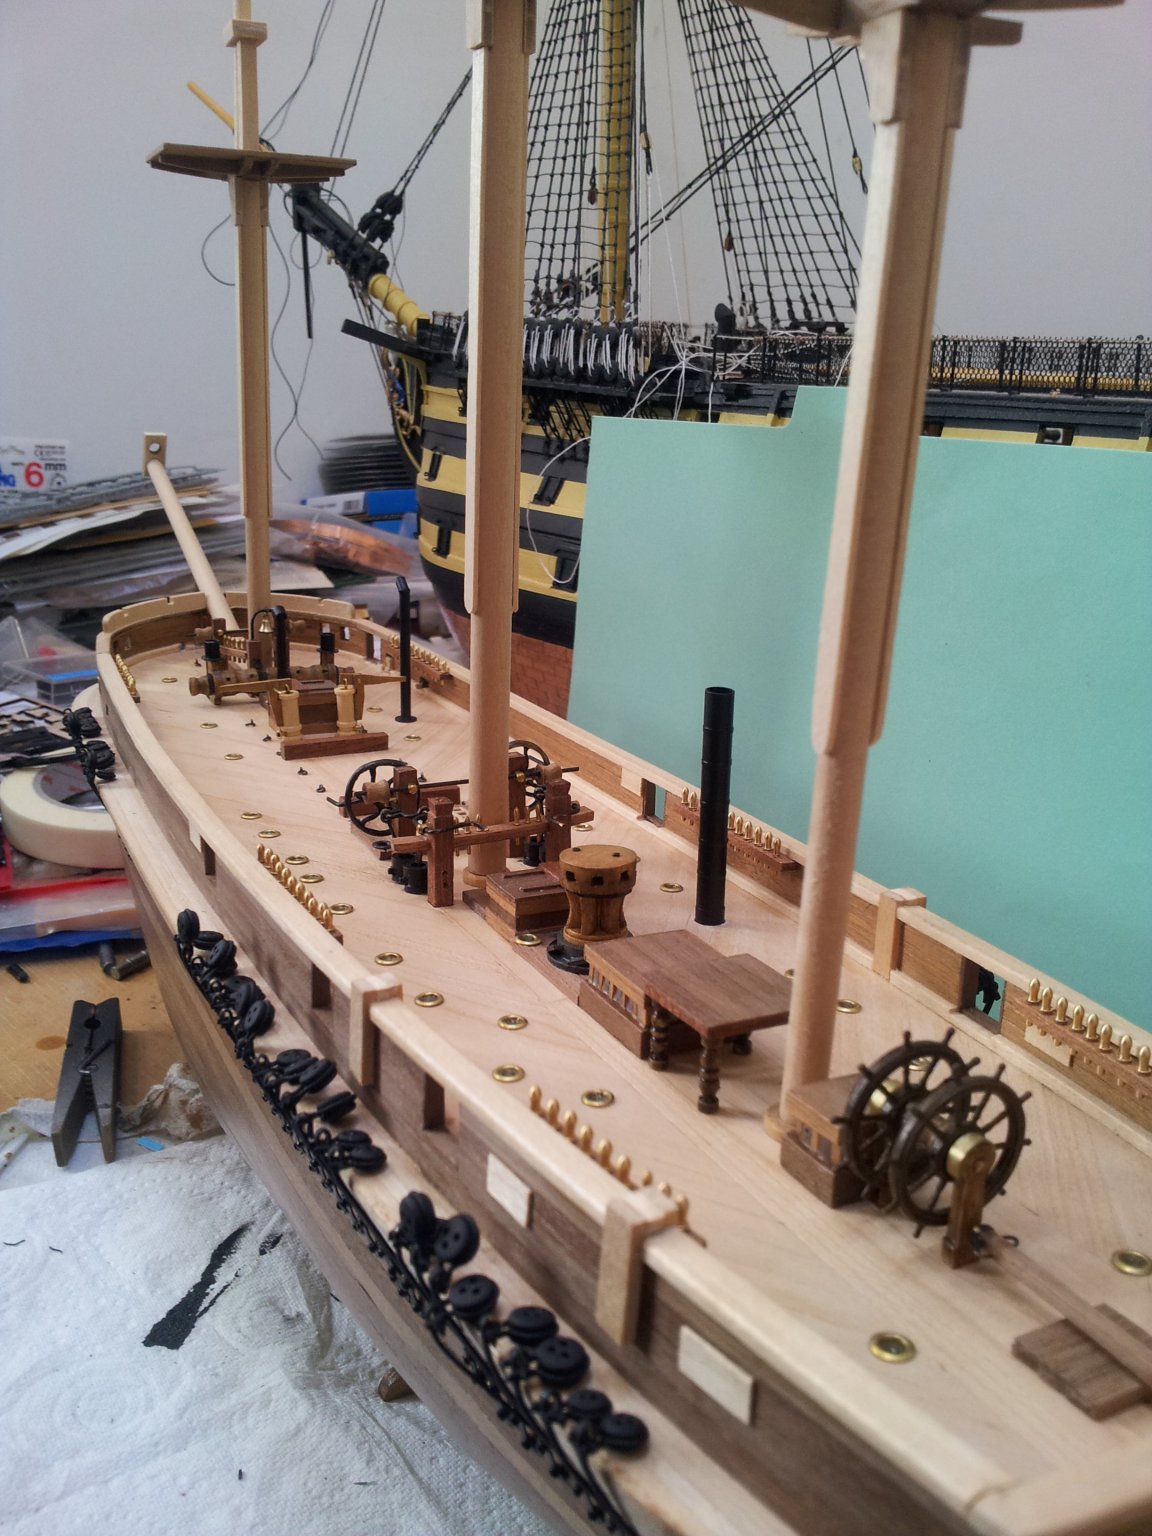
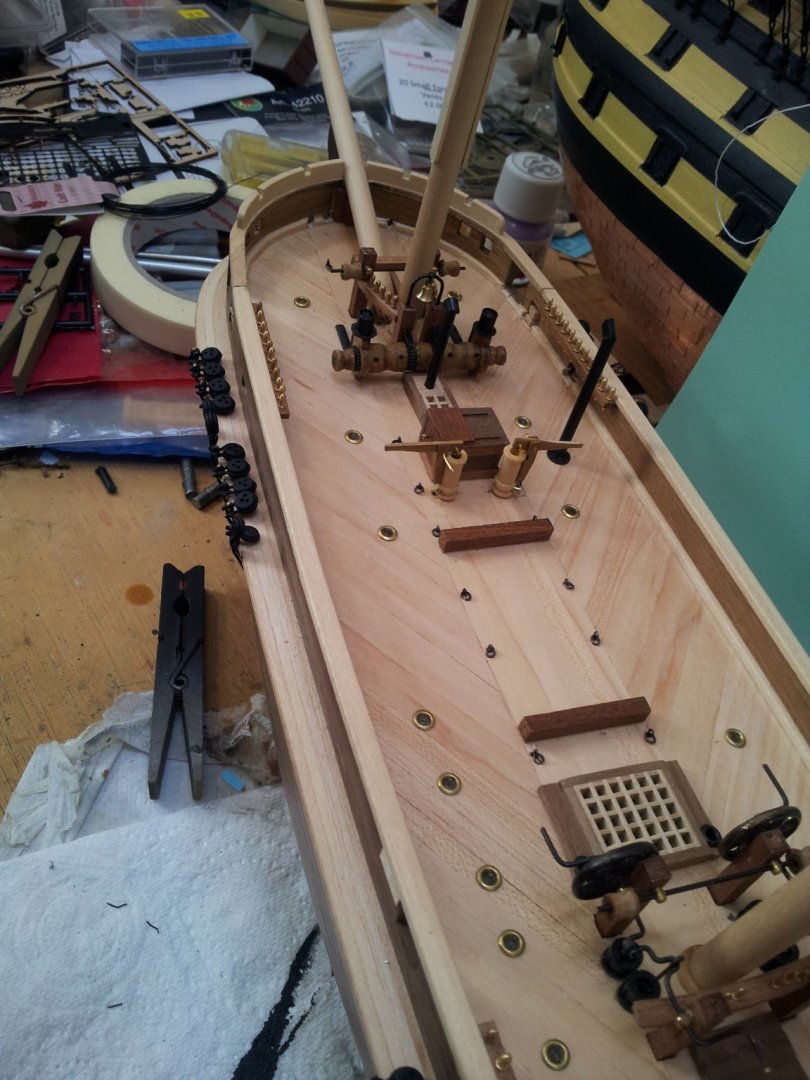
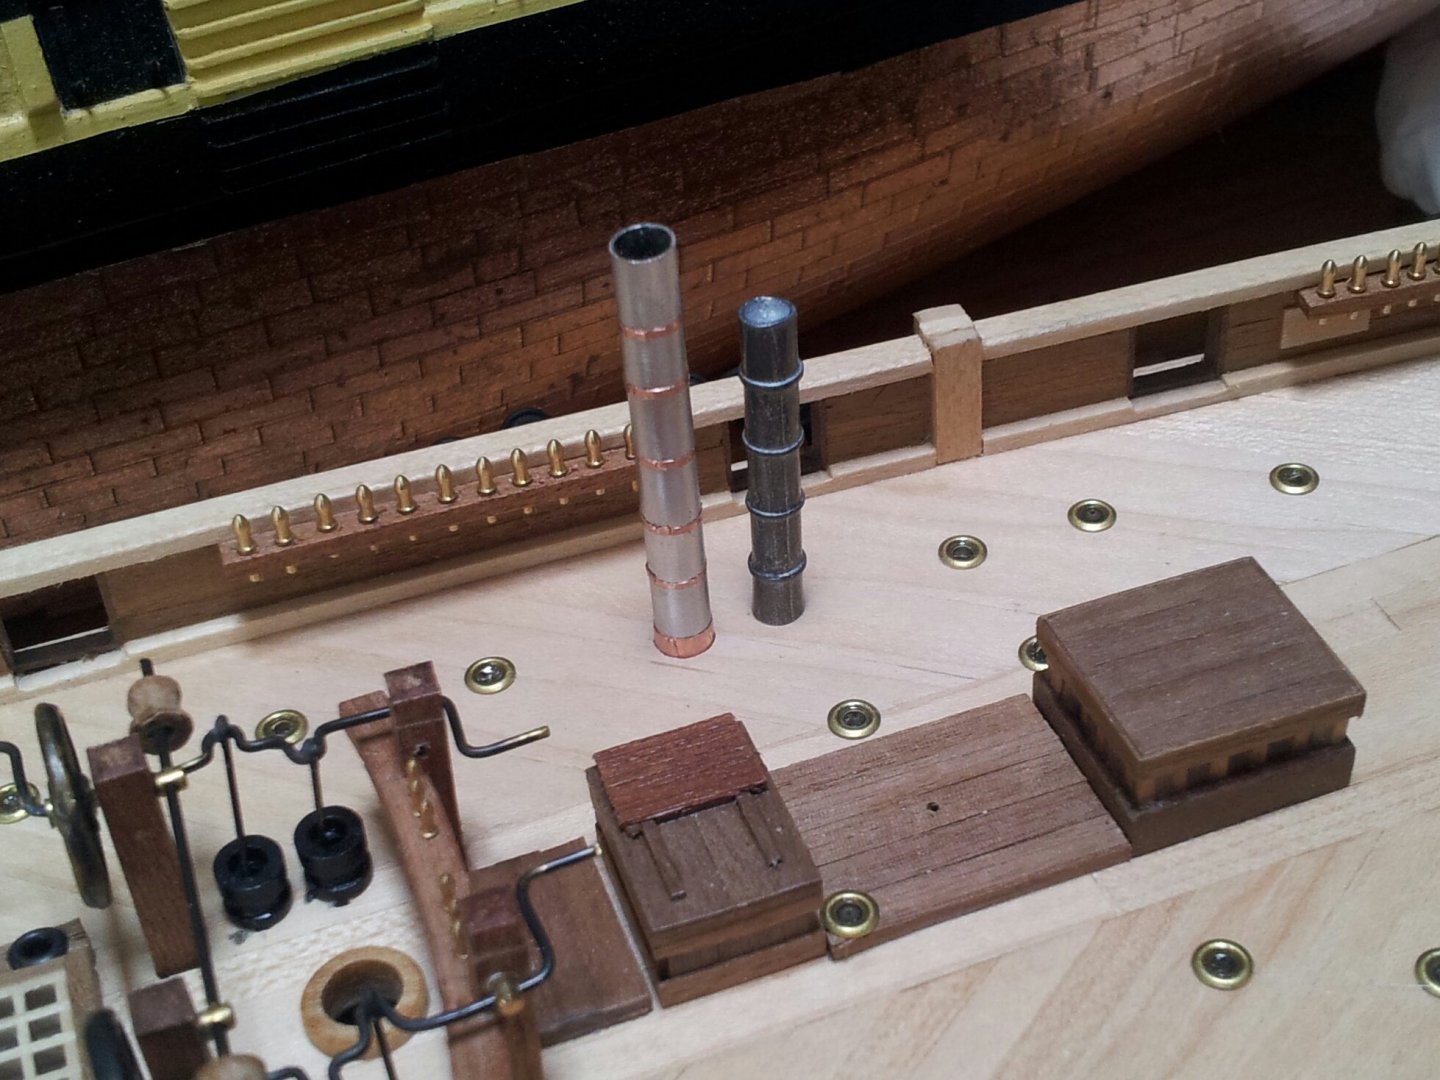
work continues on terror.feels weird just having all day to myself at weekends only again after 5 months furlough! got the eyebolts and rings for nipping anchor chain in place and painted loco engine funnel and heating flue along with a coat of matt varnish ( make sure to clean aluminium and paint as soon as possible because of oxidization). I might make some people curse here, but another faux pas by occre is giving her a metal tiller, fashioned tiller out of some walnut stock and made a band for the end using some scrap etch and made eyes out of anealled iron wire. starting to look really busy on the decks now😁. take care all Keith


-
ca dries hard and makes the knots brittle- try using the p.v.a. straight (i never dilute mine) just work it in with your fingers after applying. the thread looks glossy which won't help either. Keith
-
looks o.k. all comes with practice, more tedium = better results 😁 Keith
-
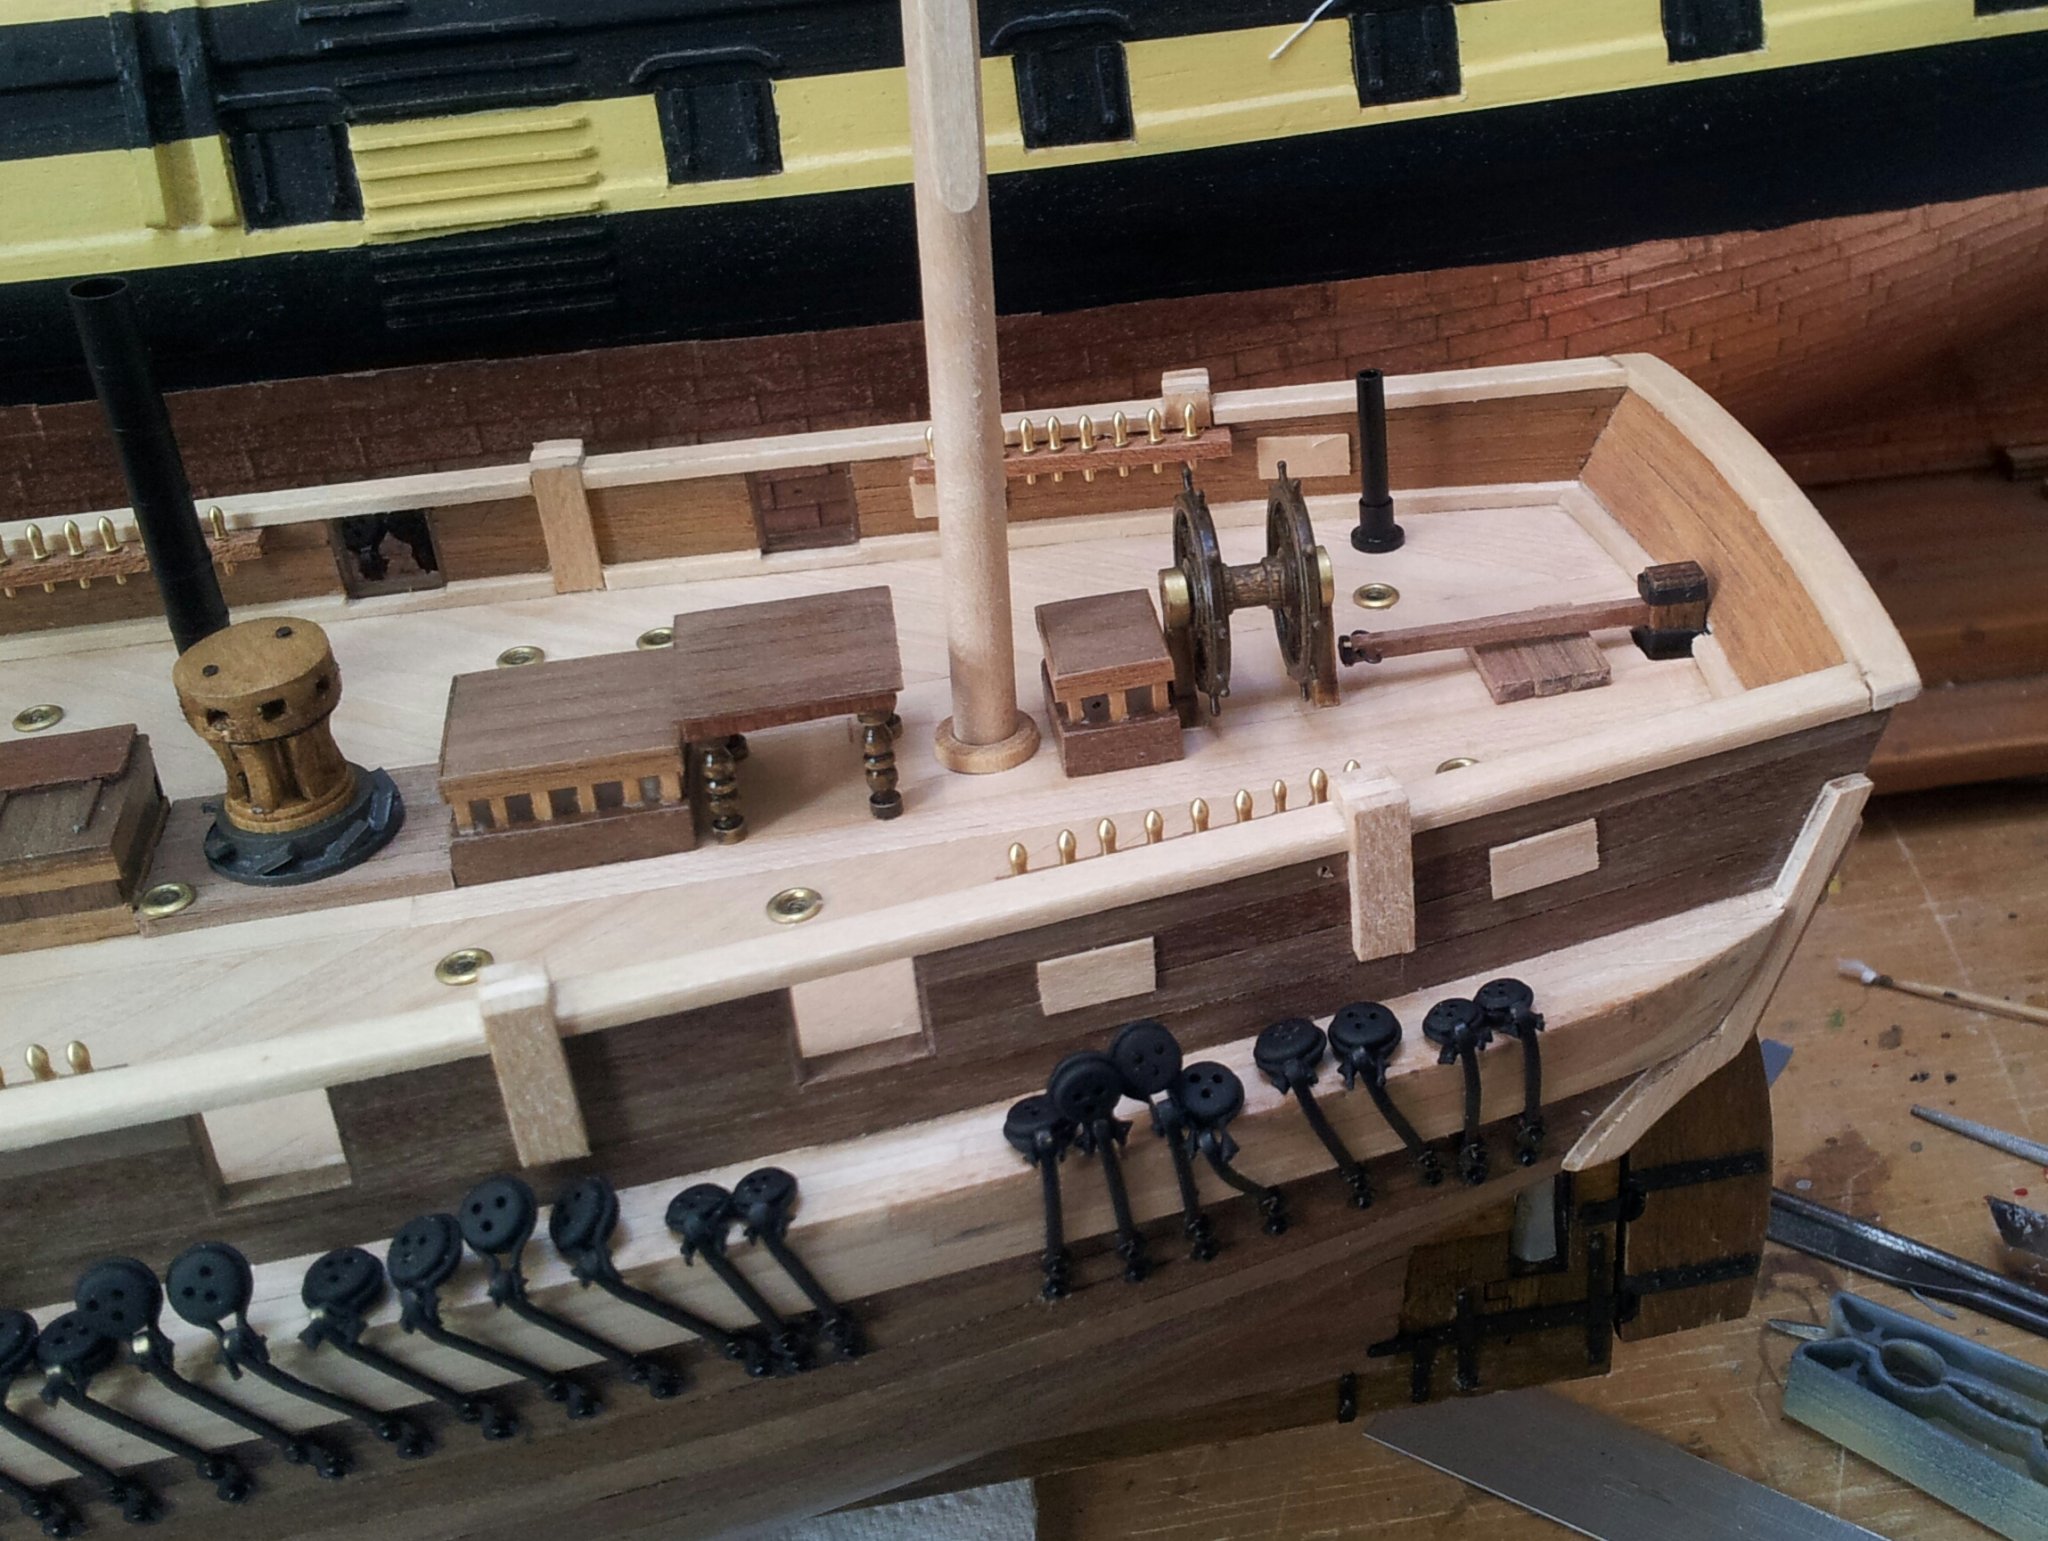
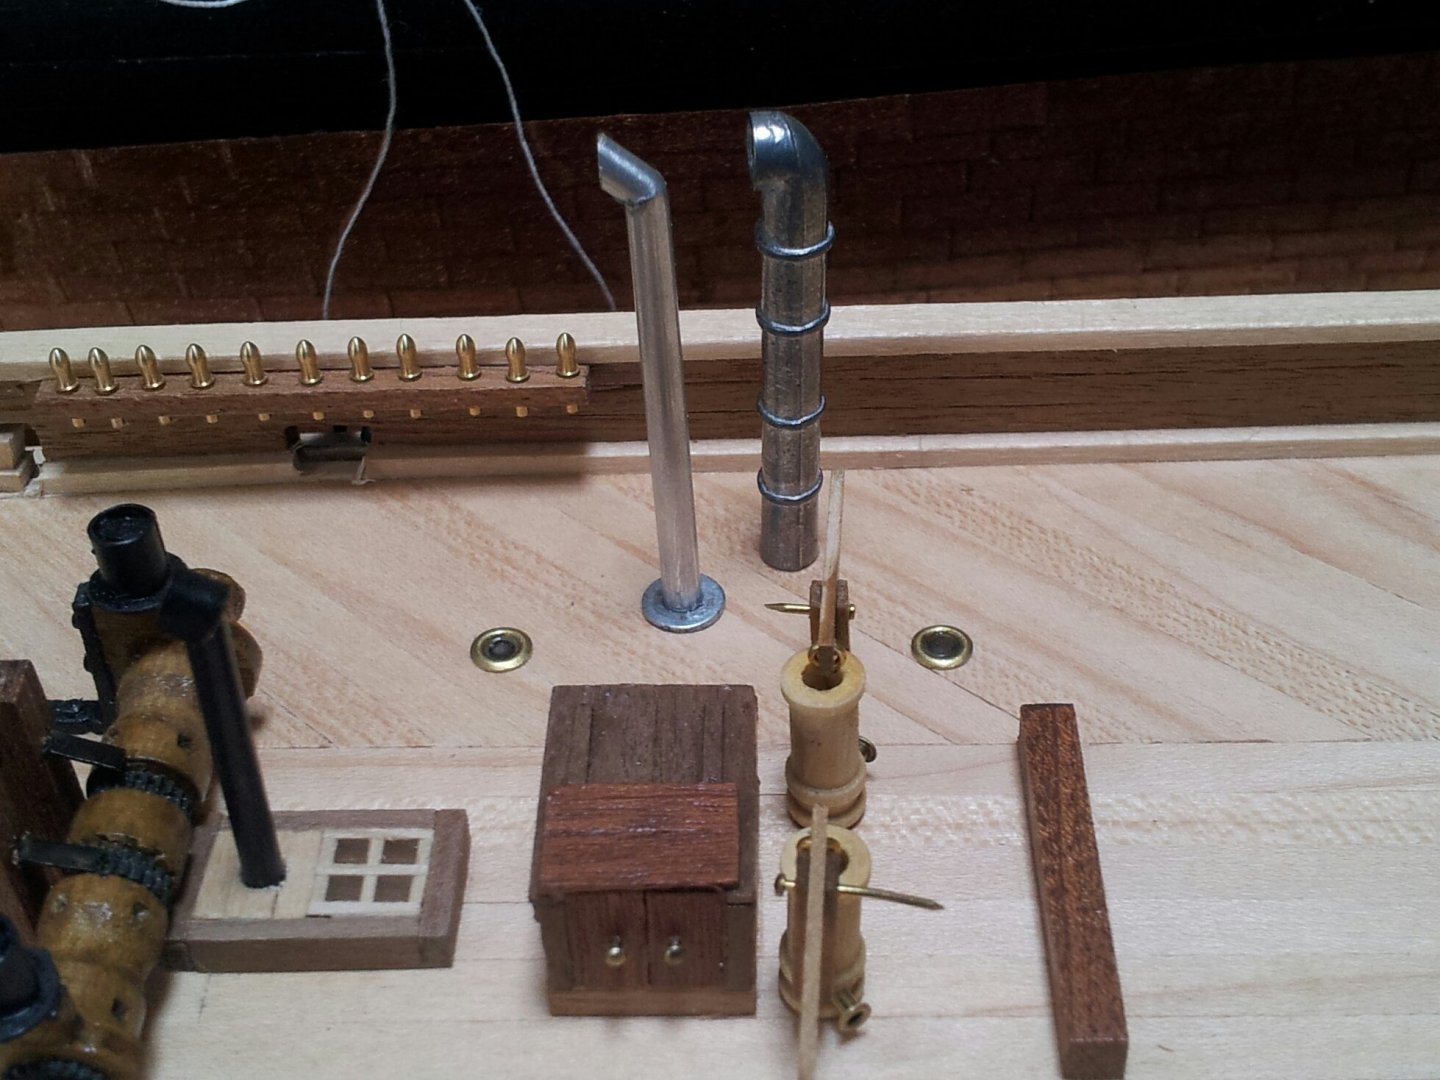
thanks for likes and comments everyone, work continues on the deck fittings with the massey pumps finished (though still not glued in yet till i get the eyebolts in place for the rigging around the base of the masts). got some of the "iron work" around foremast painted, and not happy with the occre fittings, made a new fluepipe for the heating stove and the funnel for the steam engine out of aluminium pipe out of my stash (used self adhesive copper strip cut into thin strip for joins on funnel).The original occre castings are shown alongside the replacements. also need to think about cleats and fastenings for the topmast tyes as well before gluing everything onto deck and blocking access. take care all Keith

-
it all gets easier with practice guys honest. Keith