clearway
-
Posts
2,239 -
Joined
-
Last visited
Content Type
Profiles
Forums
Gallery
Events
Everything posted by clearway
-
 ty for the comments and likes everyone- blue ensign- yes i like the research side of things and the other keith (keiths) has been a great help along with matthew betts build log- long live the little terrors😁. Geowolf- that is why i have replaced the kit supplied very thin splintery veneer with 0.5 mm x 4mm walnut strip which will allow a bit of sanding back. Keith
 -
Thank you Keith- i have a natural distrust of ca glue for plank work - even though you can get a tight joint the wood can actually splinter away with bits of the parent surface still attached🤪. don't know if you can get it over in Canada but i use evo-stick interior wood adhesive which has a fairly fast "grab" time and is set in about 6 hours which is a lot faster than P.V.A. but you do have to be fairly quick in forming the bond (couple of minutes). As an aside has anybody else noticed spell checkers arn't familiar with nautical terms for ships furniture- been teaching my samsung galaxy phoneand think it's getting to grips😁 Keith
-
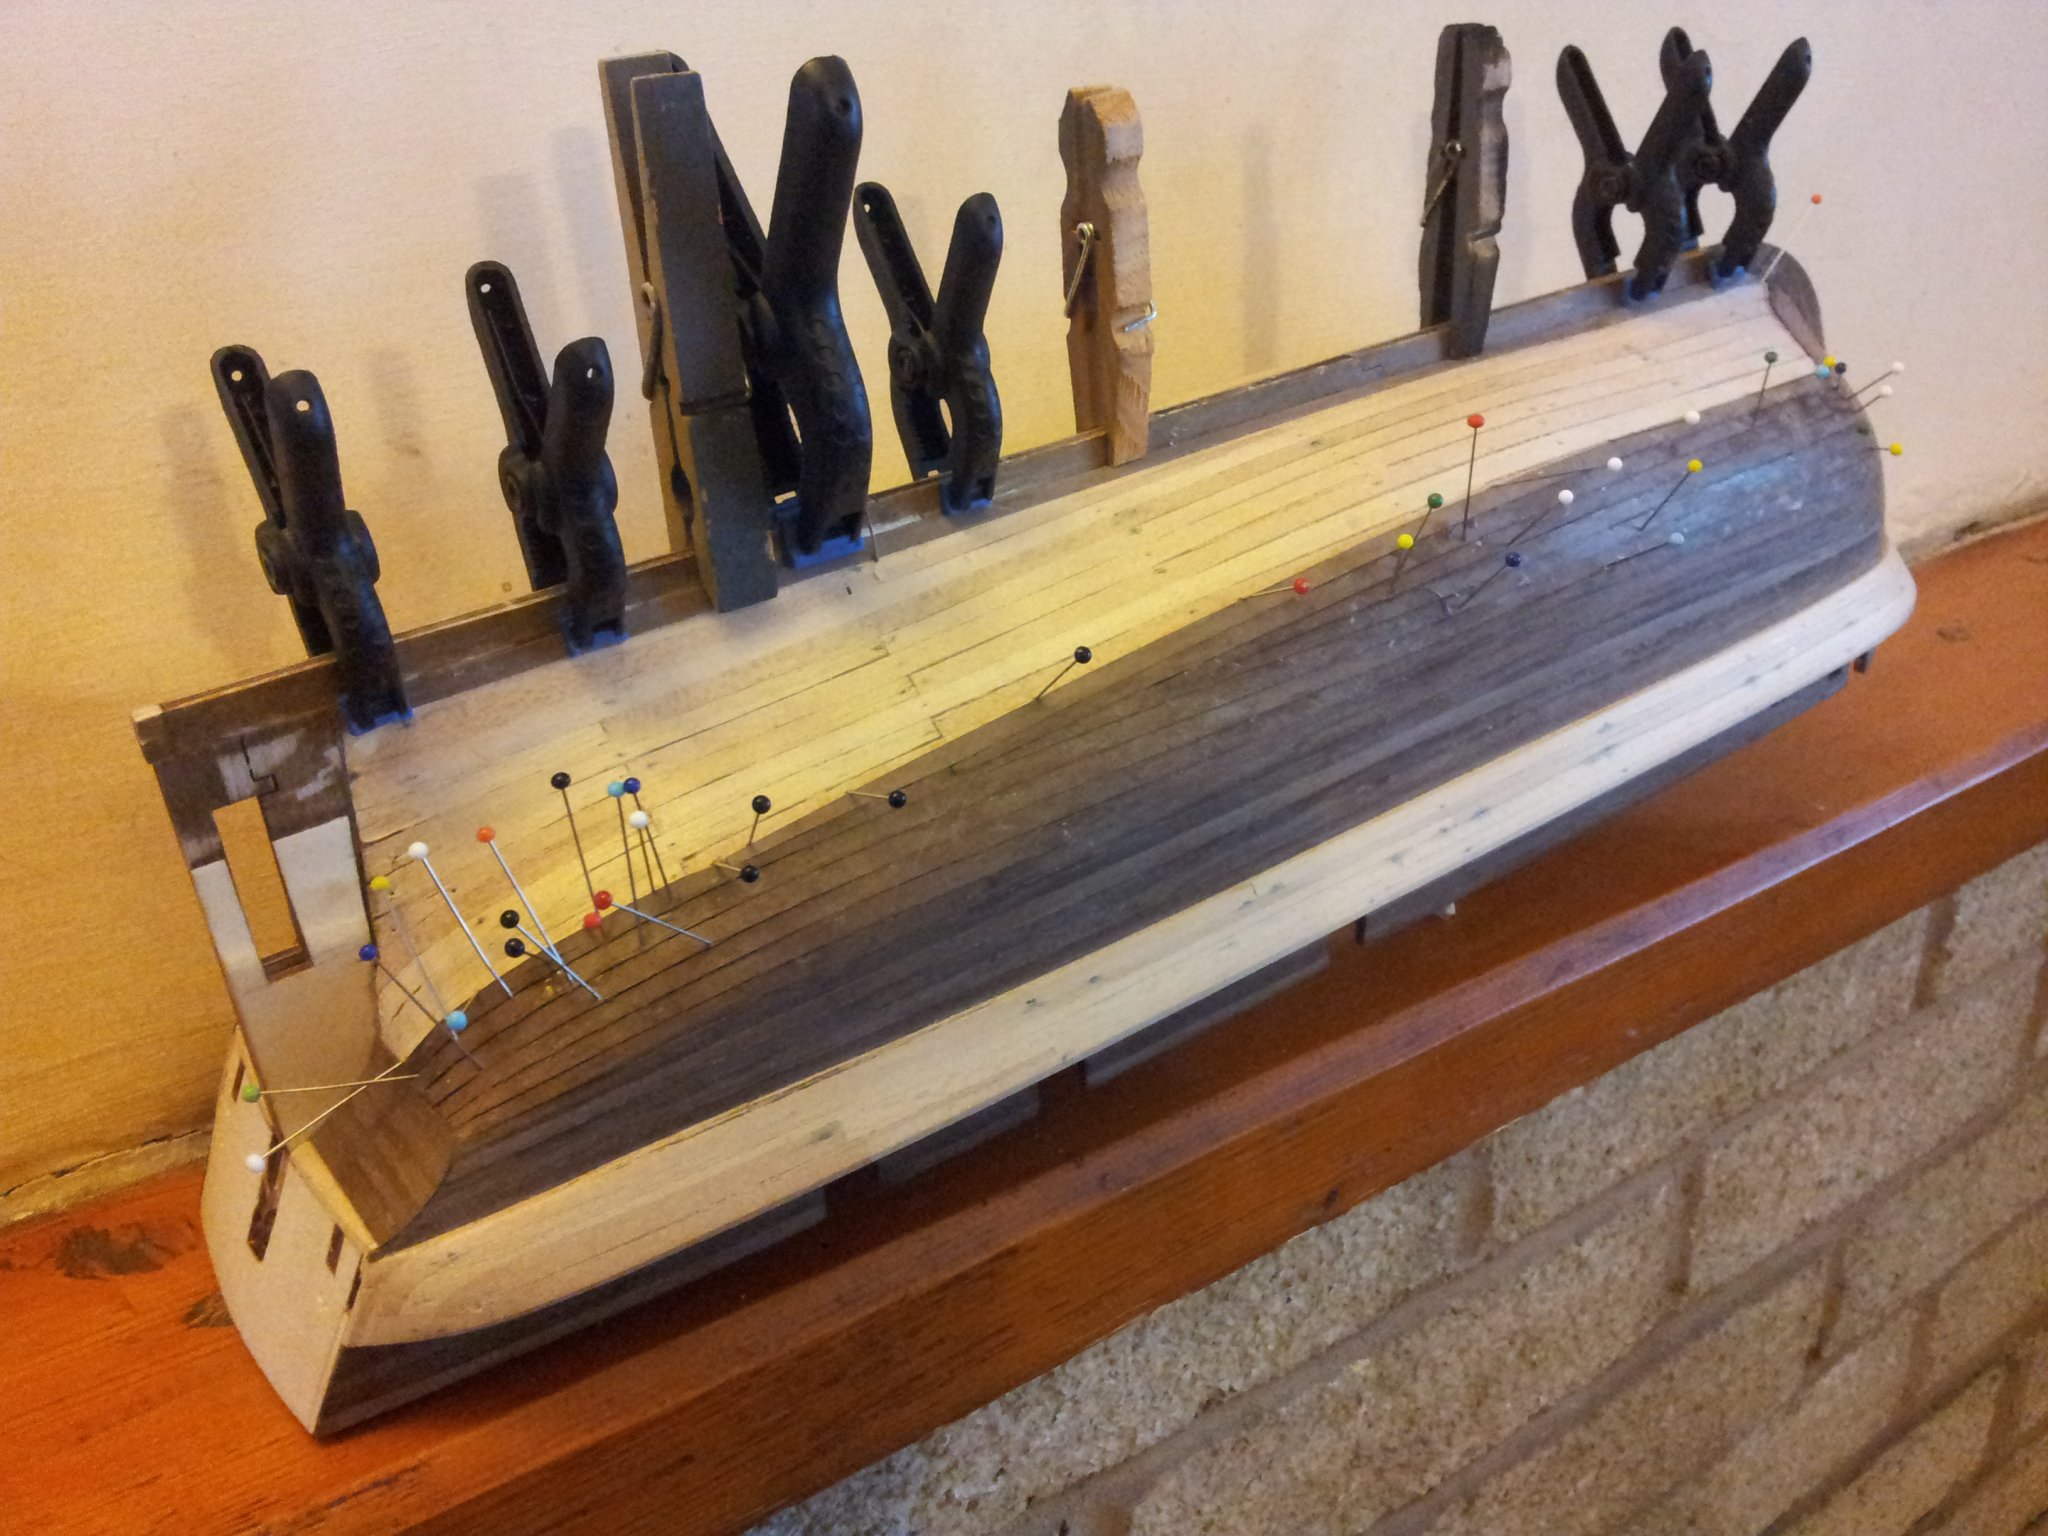
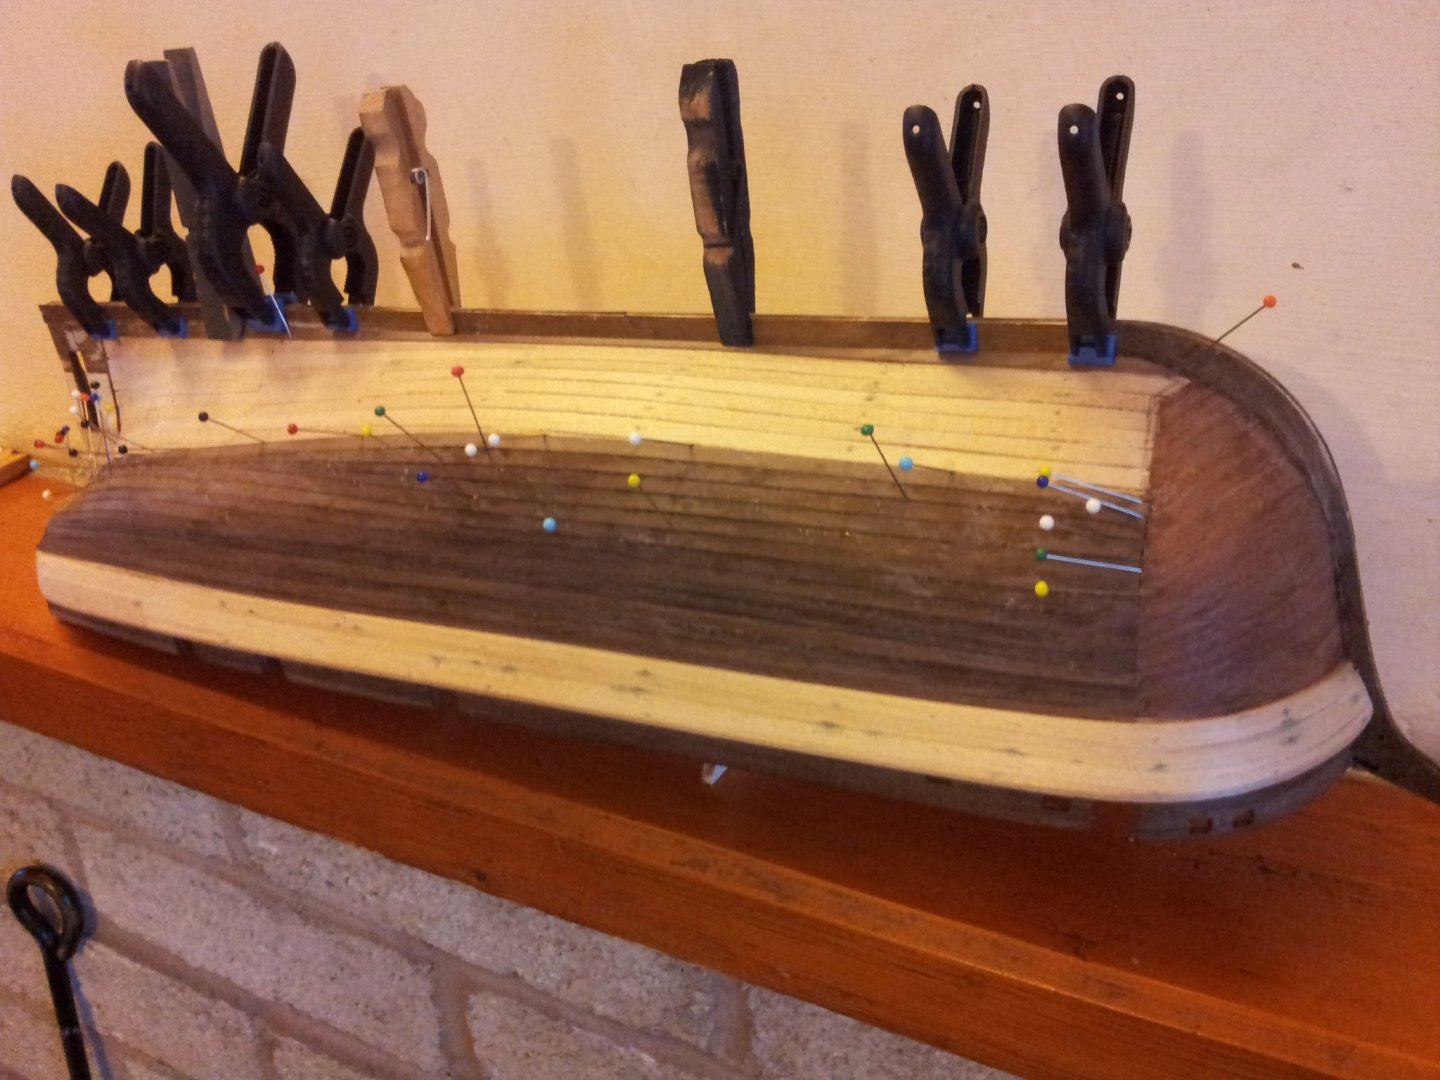
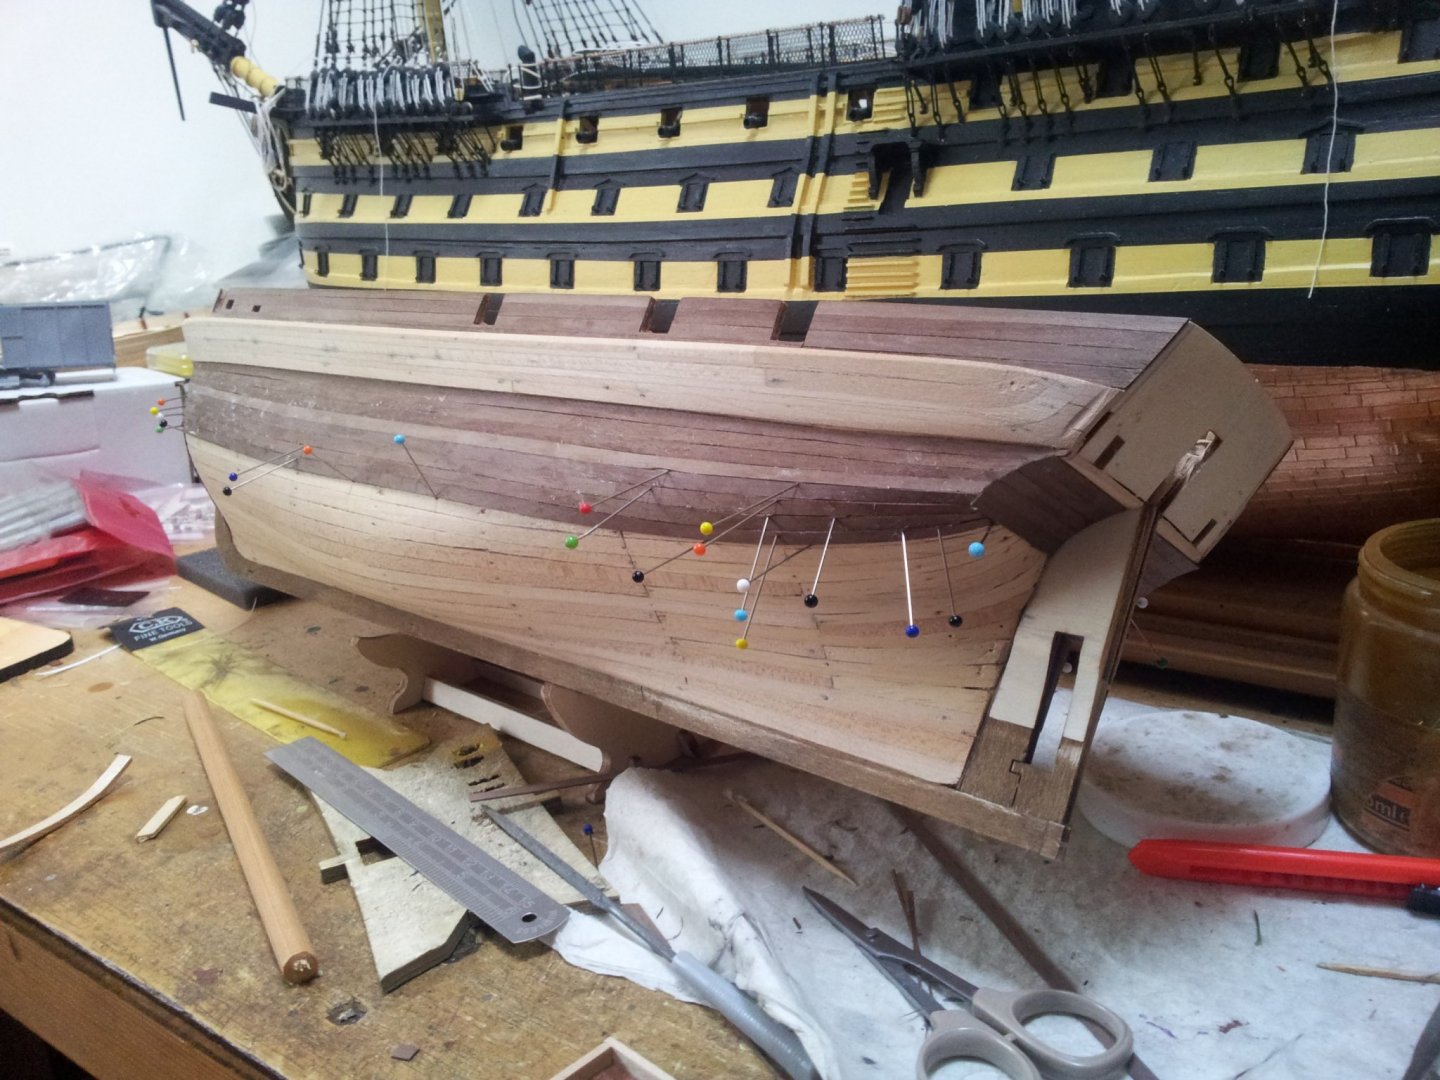
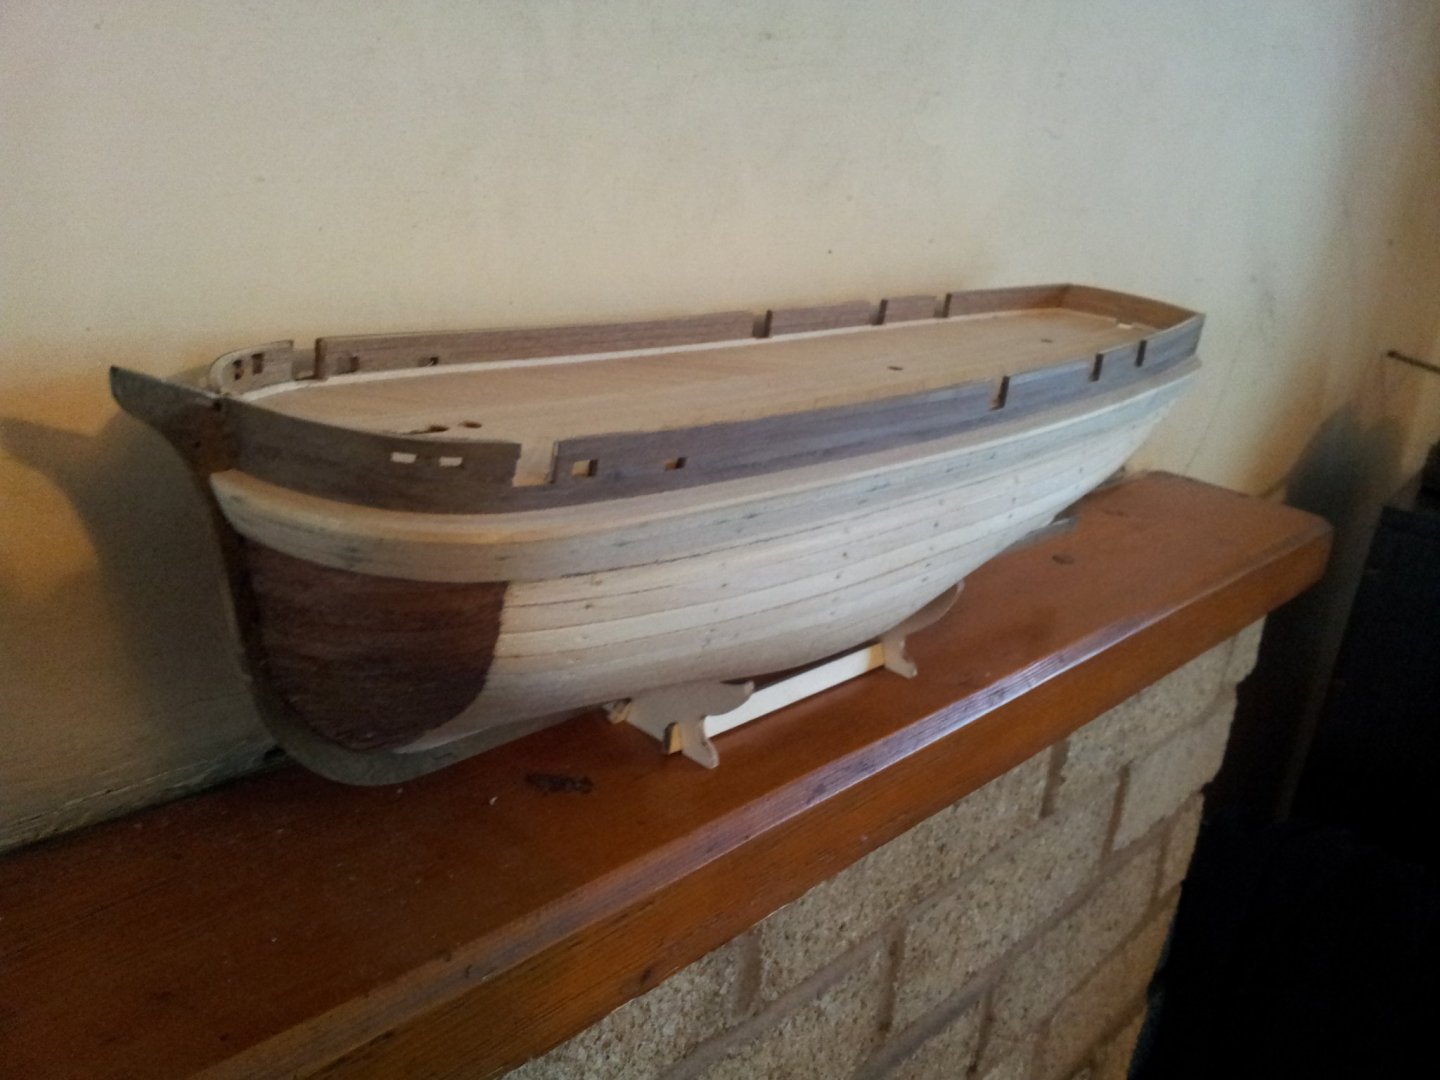
work slowly progressing on the 2nd walnut planking- using white wood glue as opposed to contact adhesive thus only a few planks at a time and the dressmakers pins😁. also fitted the garboard plank. take care all keith

-
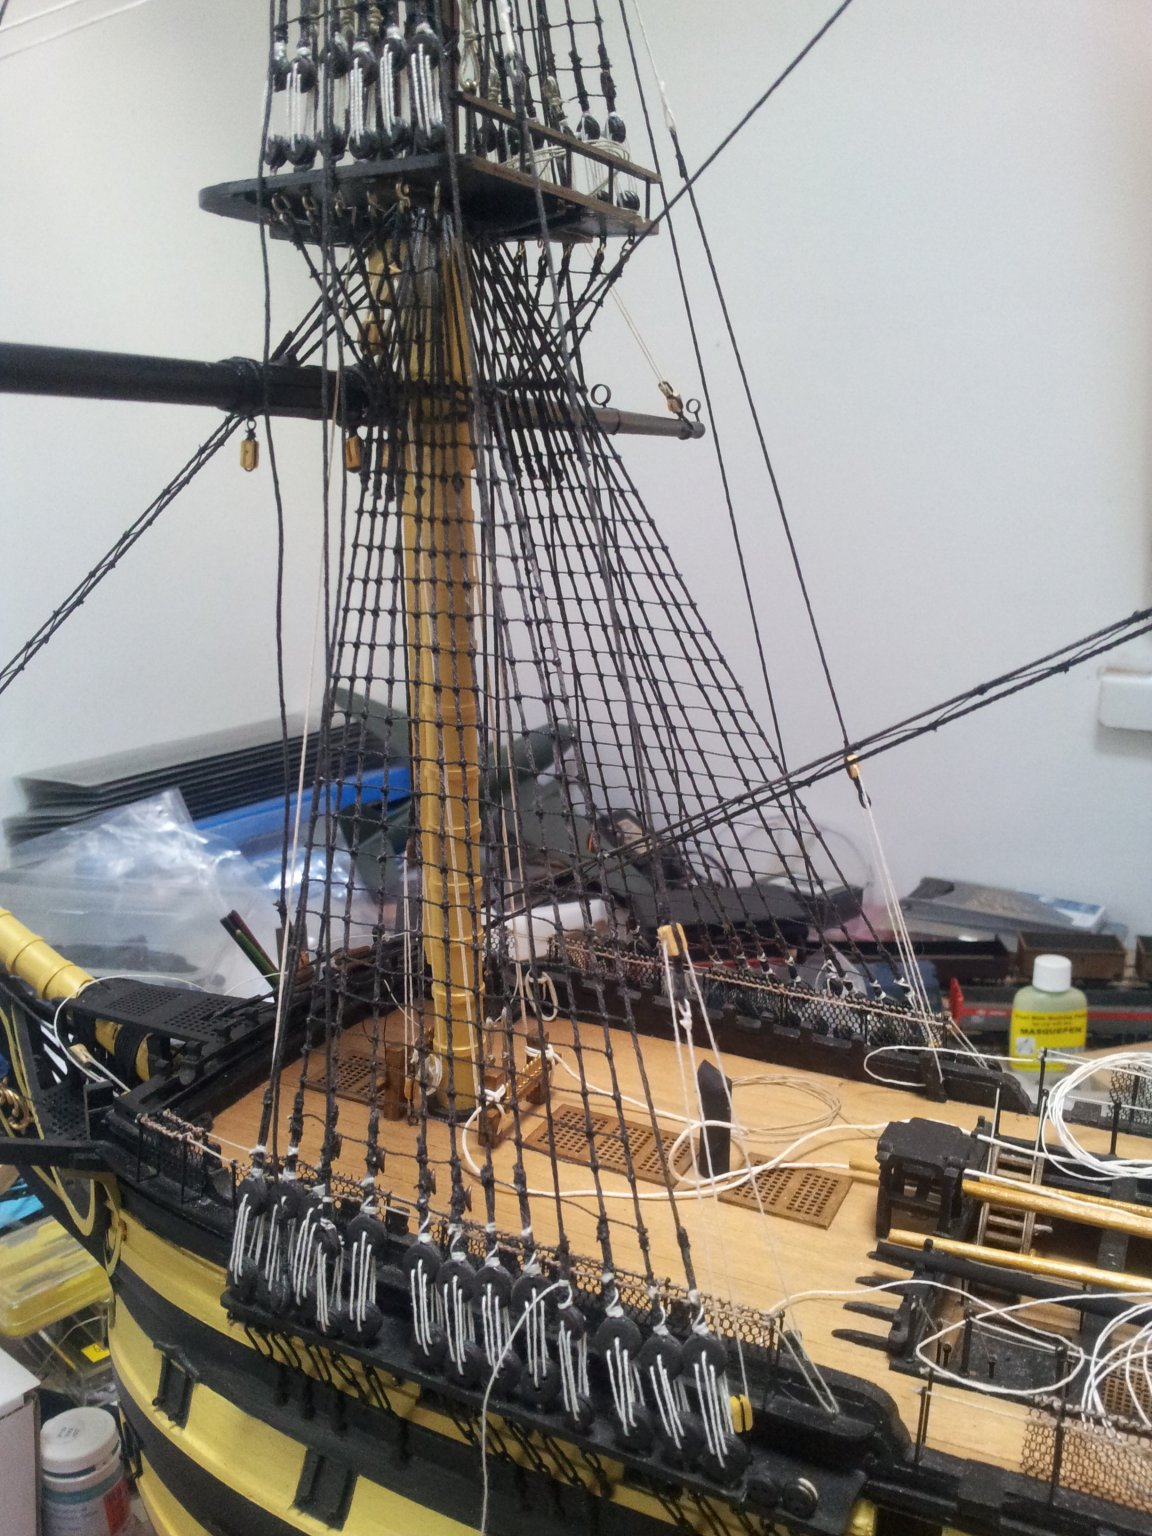
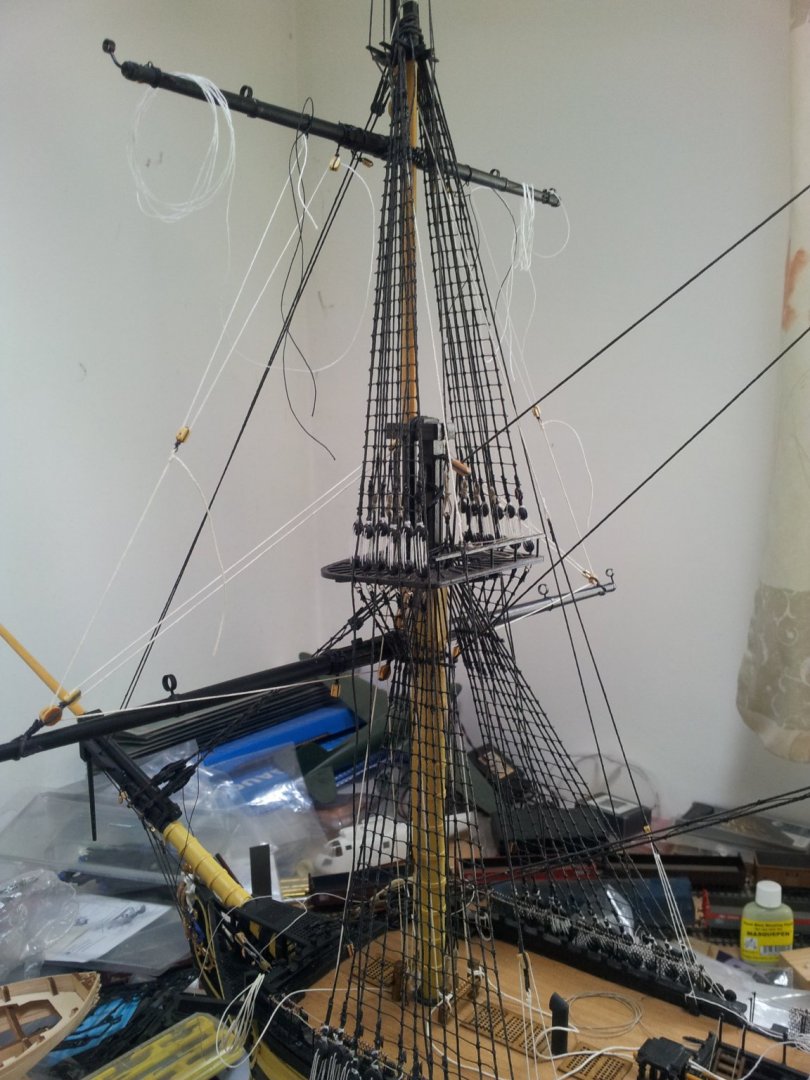
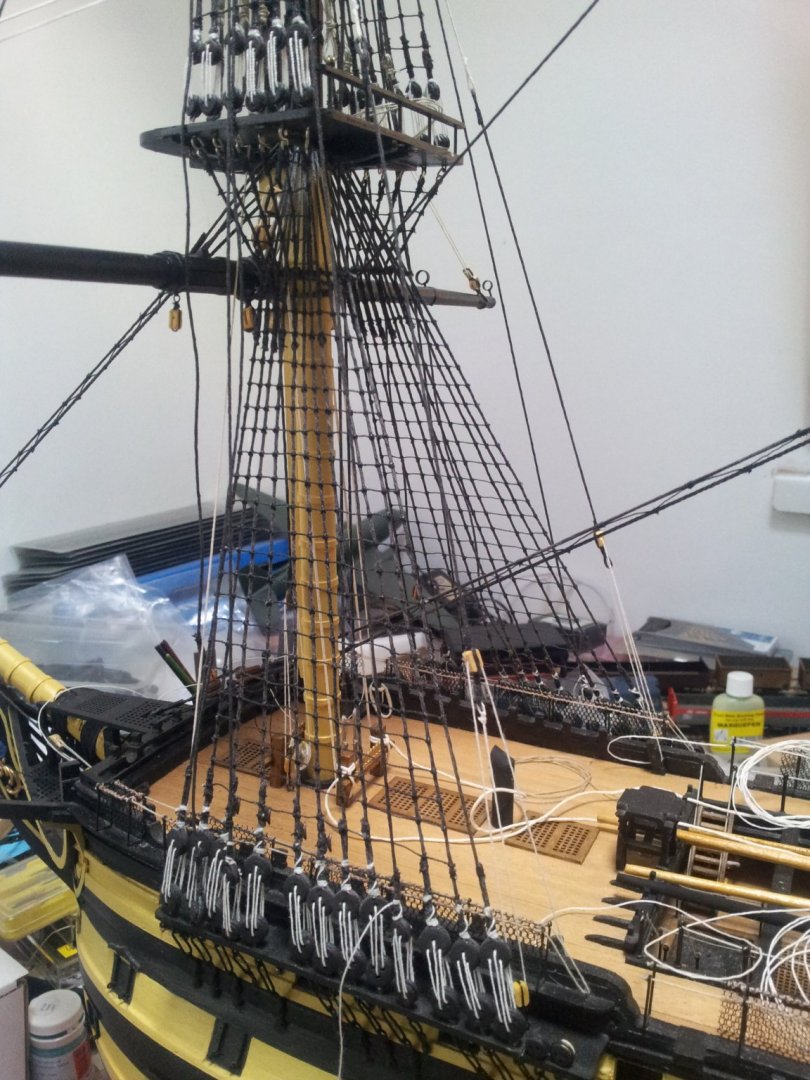
back in the shipyard due to bad weather again- got the clewlines and lifts belayed for the fore topyard then can start on the fore t'gallant. take care all- just hope the rain remembers to stop - cumbria is the wettest area in england- suppose thats why its called the lake district and not the dried up riverbed district! Keith
-
HMS Victory by Helli - Caldercraft
clearway replied to Helli's topic in - Kit build logs for subjects built from 1751 - 1800
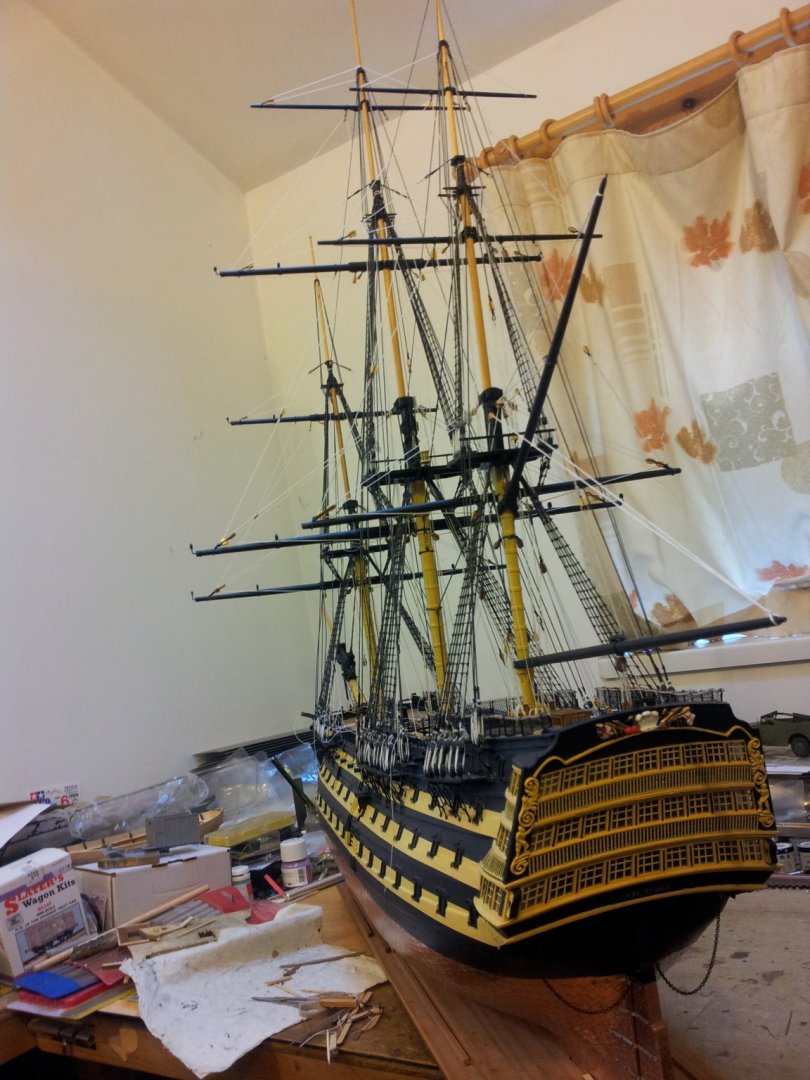
looking good - tearing off the old shrouds must have hurt a little, but replacements look a lot better. i nearly bought the caldercraft victory but the price was wayyyyyyyy too much despite the excellent detail😁 Keith -
for weathering the lifeboat try a couple of washes of diluted grey paint to tone down the effect? Keith
-
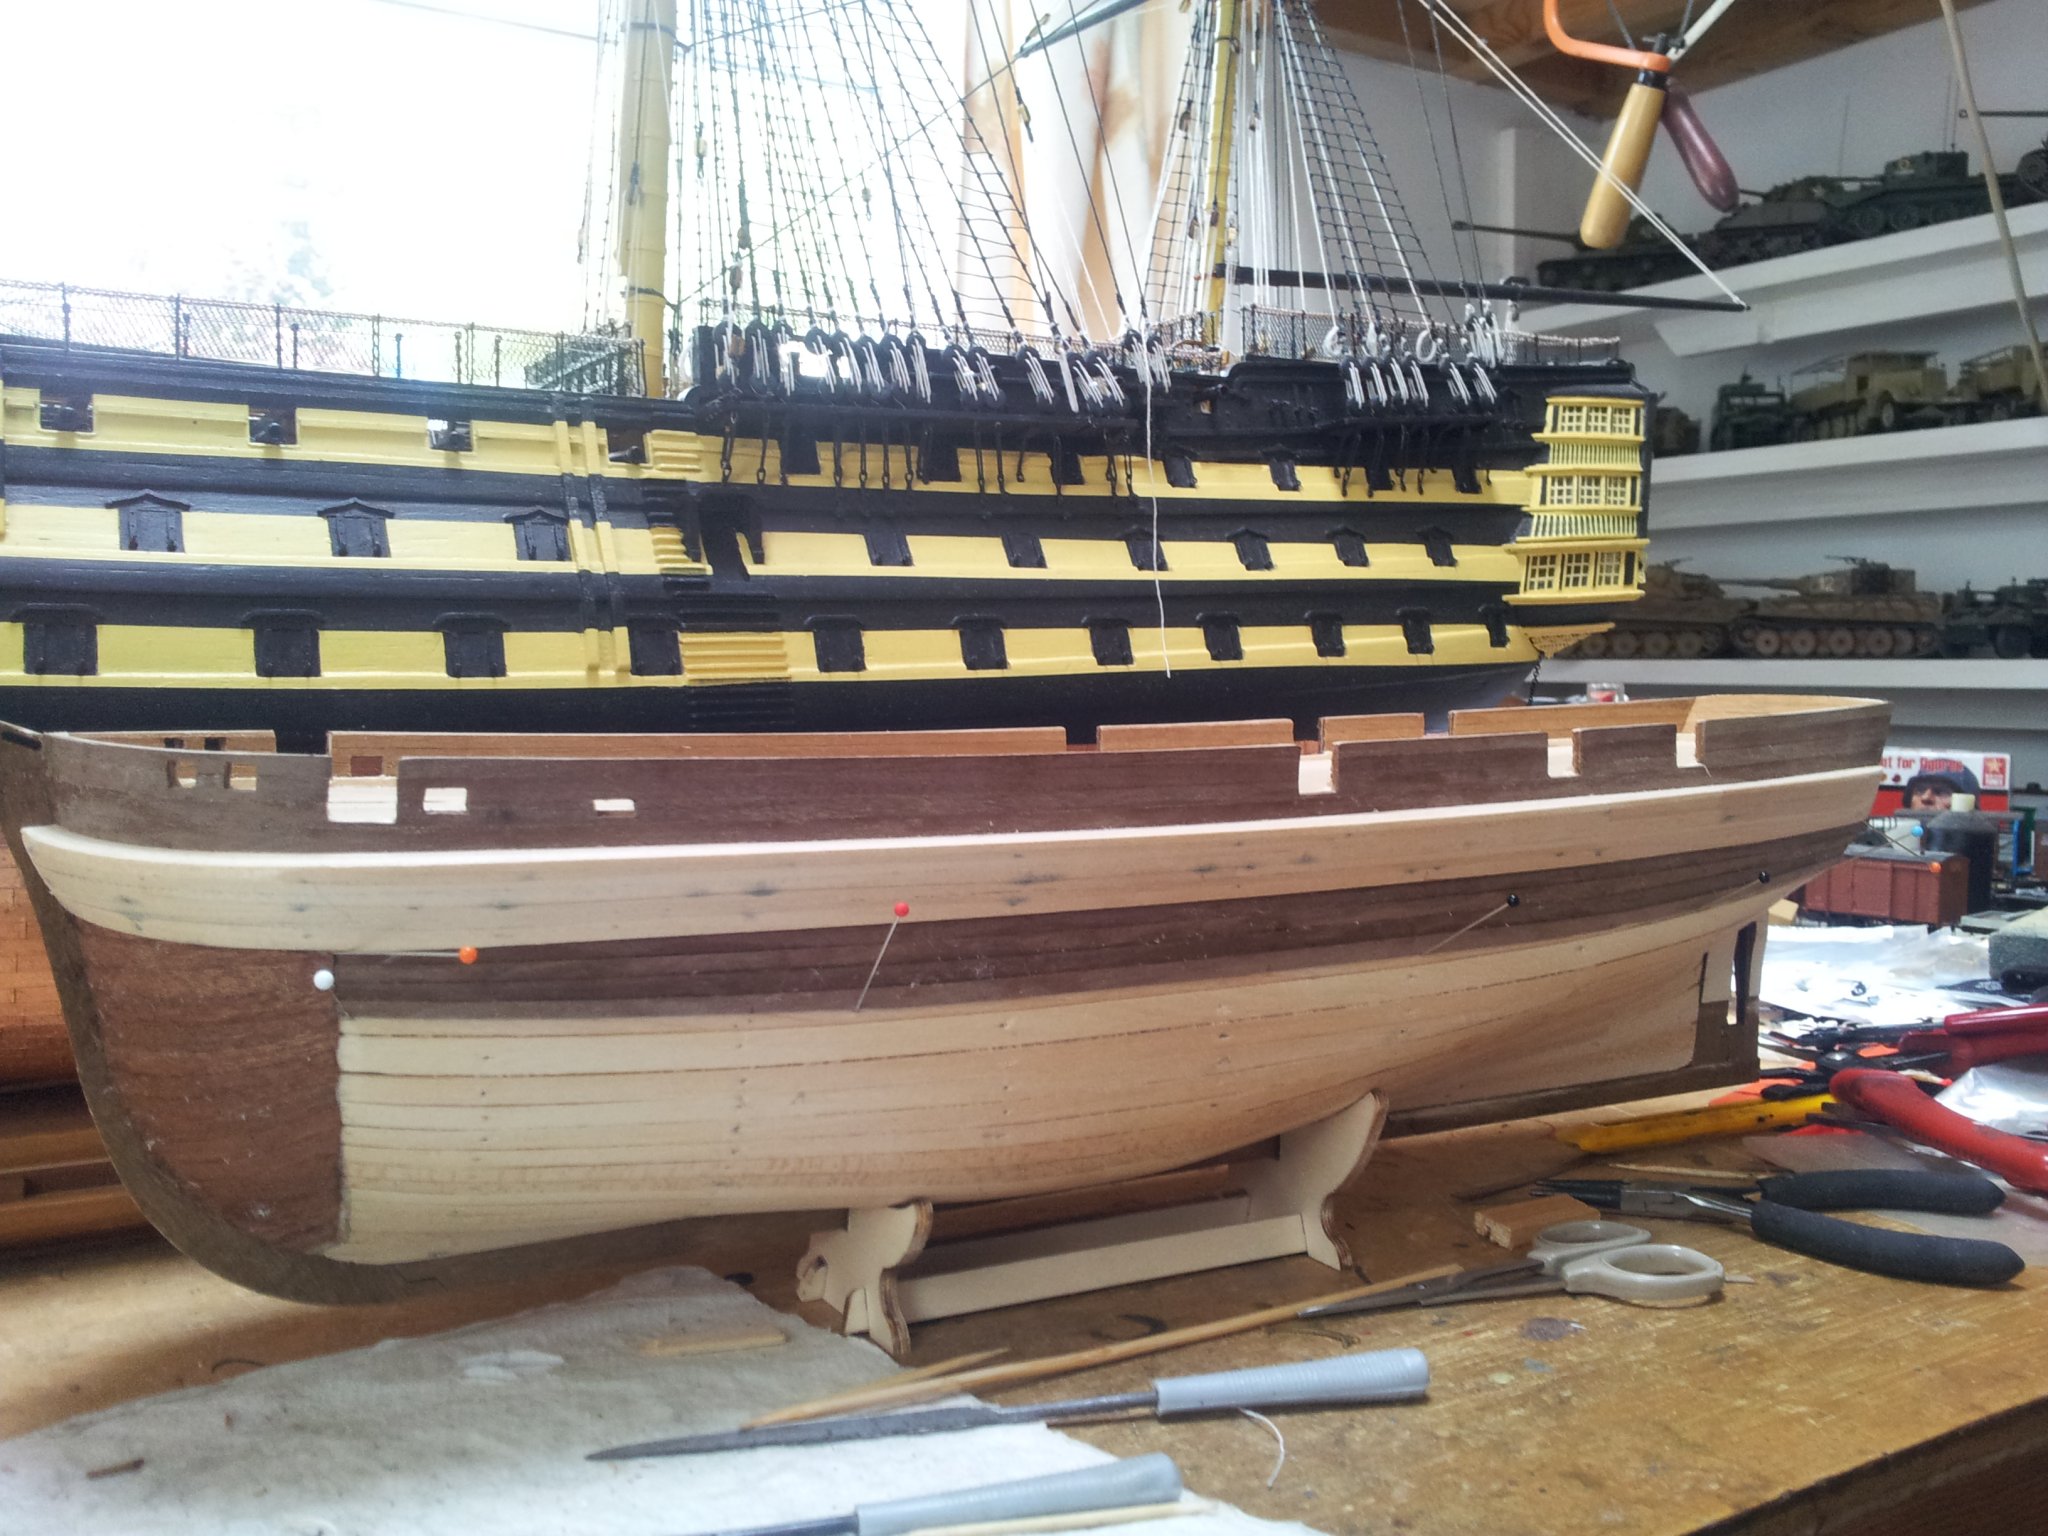
Thanks for the views and likes everyone. Thankyou geowolf and your english is very good. Back in the shipyard and continued with the second planking. The counter was planked with walnut and will be sanded back when rest of planking finished on the "tuck" still trying to work out best way to tackle the run onto the sternpost🤔. Take care all Keith
-
back in the shipyard due to bad weather- this new set-up with the build logs is taking some getting used to- getting to like it though🤨 rigged the fore topyard sheets and clewlines , but not belayed yet. take care all Keith
-
due to continued showers through the day had a little time in the shipyard and got some of the walnut planking added below the shroud protector- getting a feel how the finish will look. take care all. Keith

-
thinking about strengthening the bulwarks- how about using thick card without the corrugations glued to the frames ?
-
😁good idea about reducing the hole size- them new belaying pins look a lot more realistic, and as we know from the wreck shot the belaying pins are a brass alloy - still freaks me out because they look like they have only been underwater a week or so! Keith
-
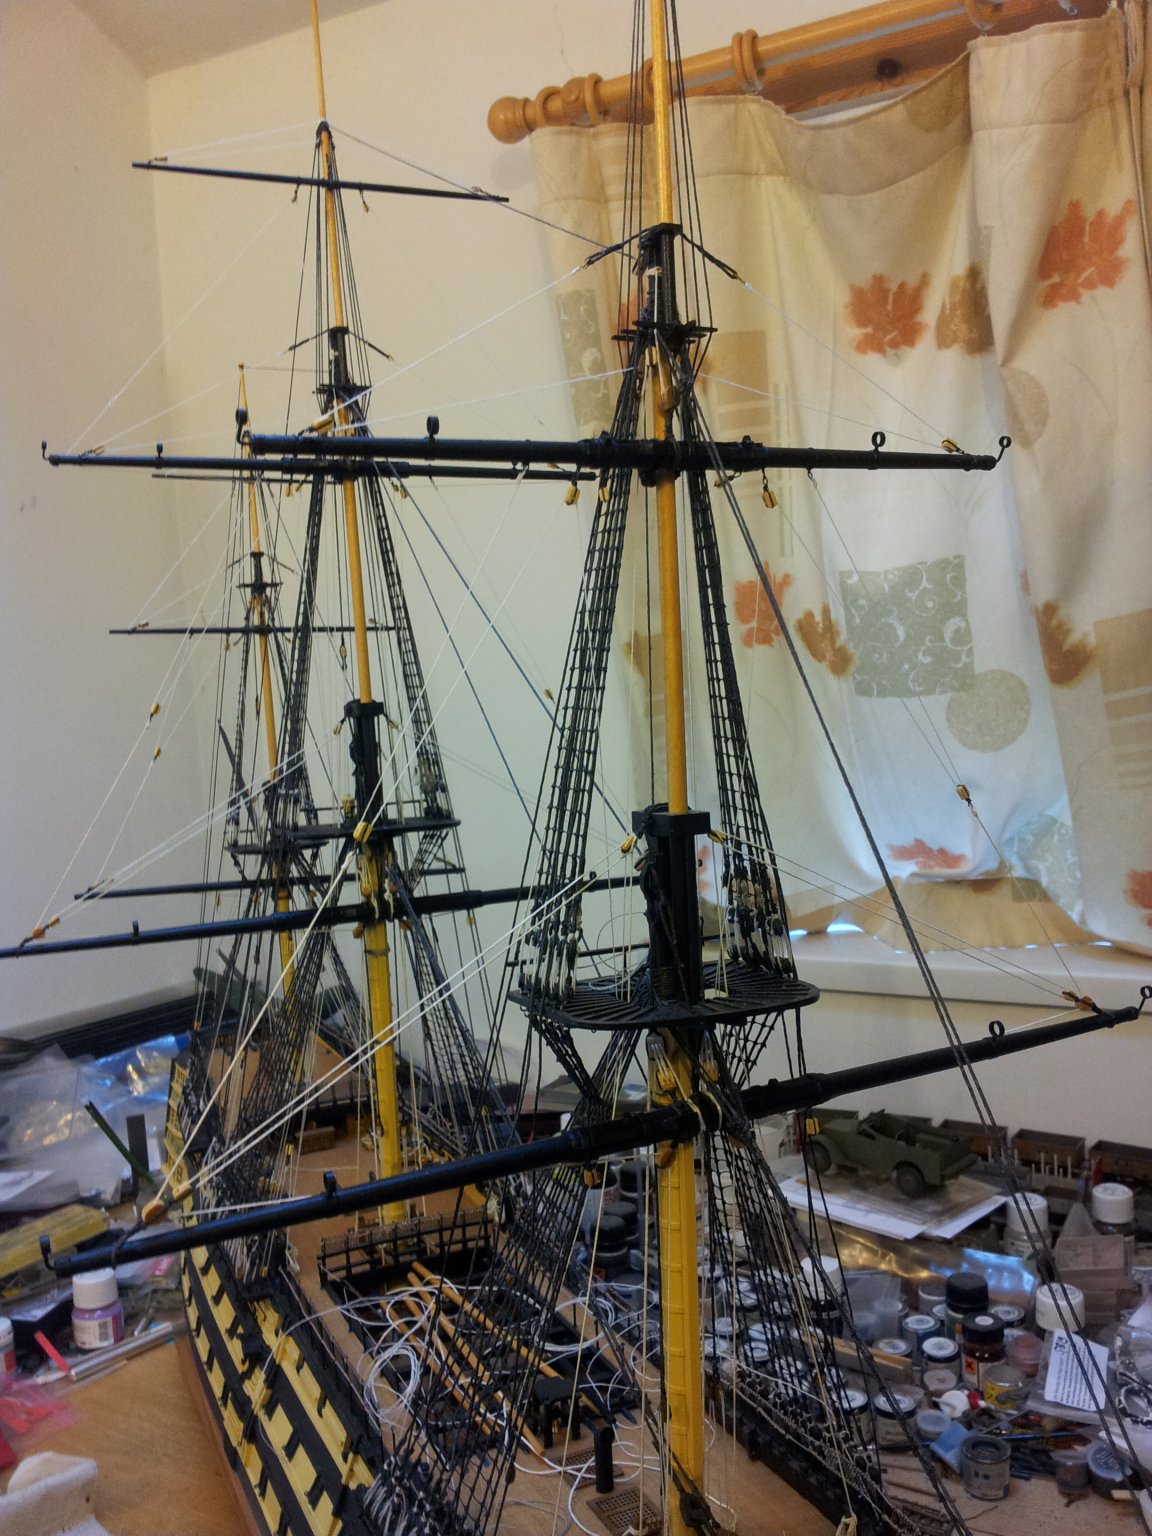
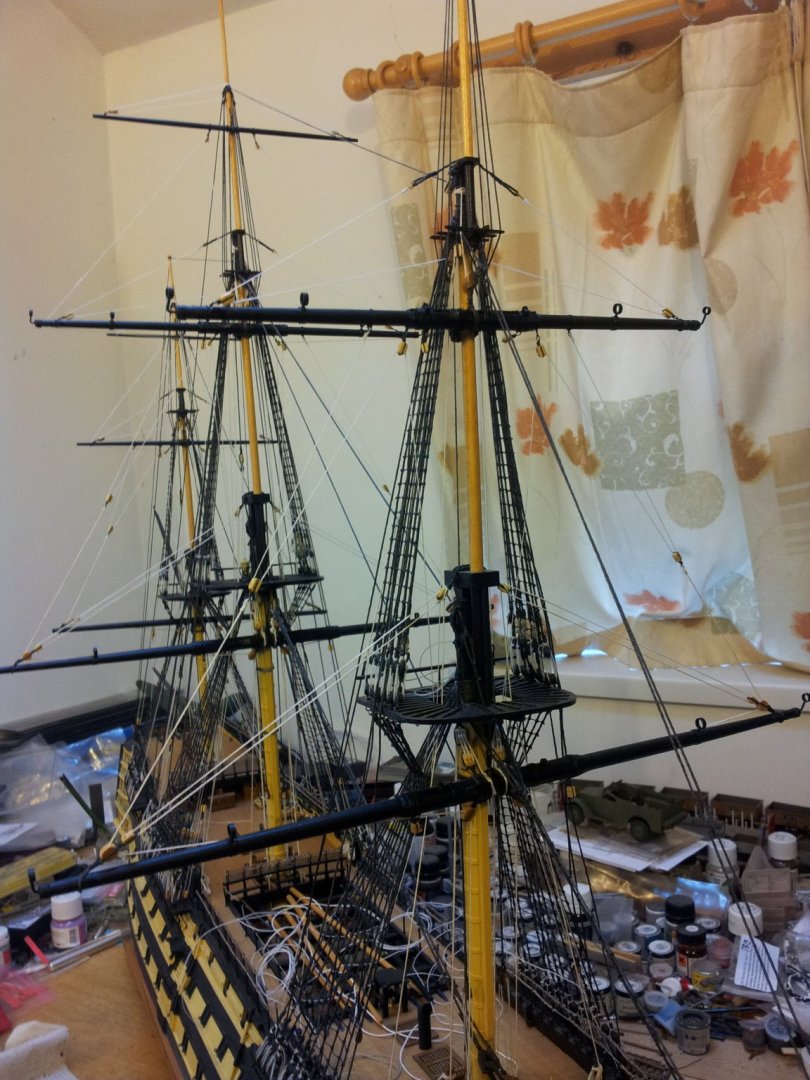
No problem Keith- we are experiencing massive delays with the u.k. postal system because they can't cram the staff into the sorting office due to "social distancing/ safe space rules" at the moment so are having to work with 30% of the staff doing 100% of the work. except for the mizzen build the masts as occre describe but with the squared tops to the masts and i will most likely scratch new tops as the ones in the kit are too small due to having 2mm wide rim added- i will make them to the different shape and add a finer rim on top so deadeyes are at the edge- will do the mizzen as fore and main but with just the crosstrees and trestle trees. i will also be scratching the trees for the top mast as i dont like using ply for them (same with mizzen) probably out of walnut or basswood as they will be painted white. Keith
-
looking nice and smooth- don't worry if some of the planklines show through after top coat and varnish as they do on the real thing- it's more about getting rid of the oversize wood grain effect. Keith
-
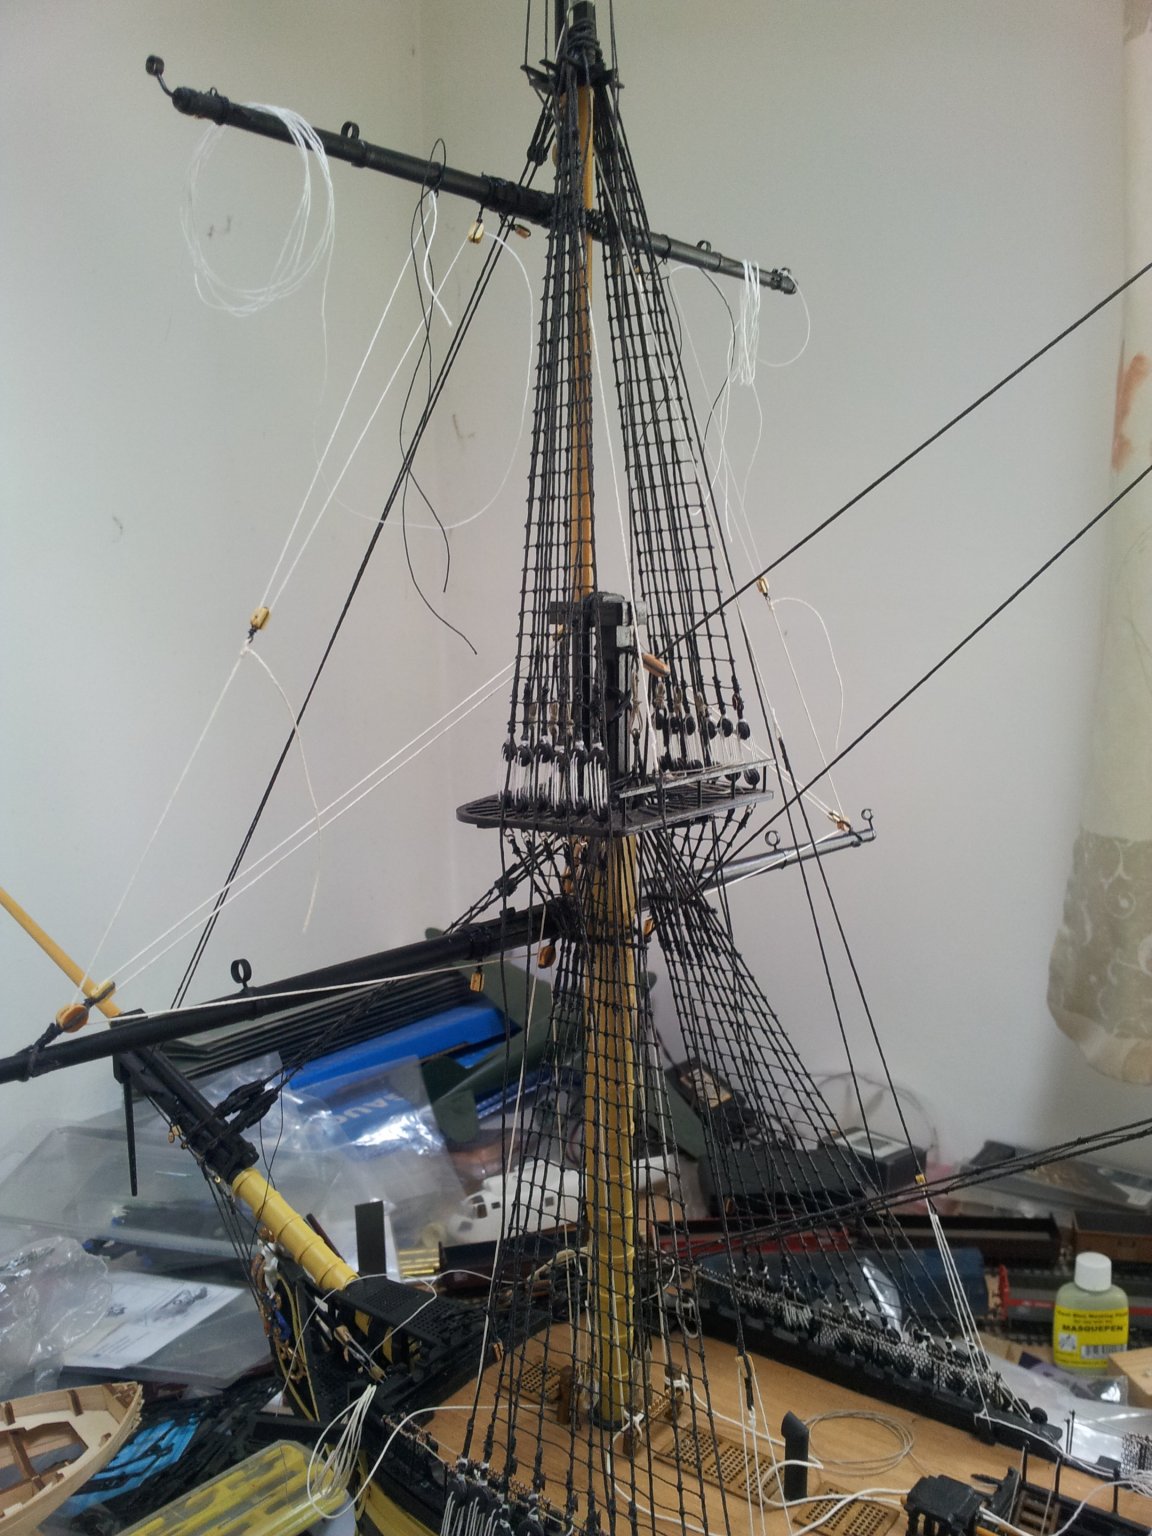
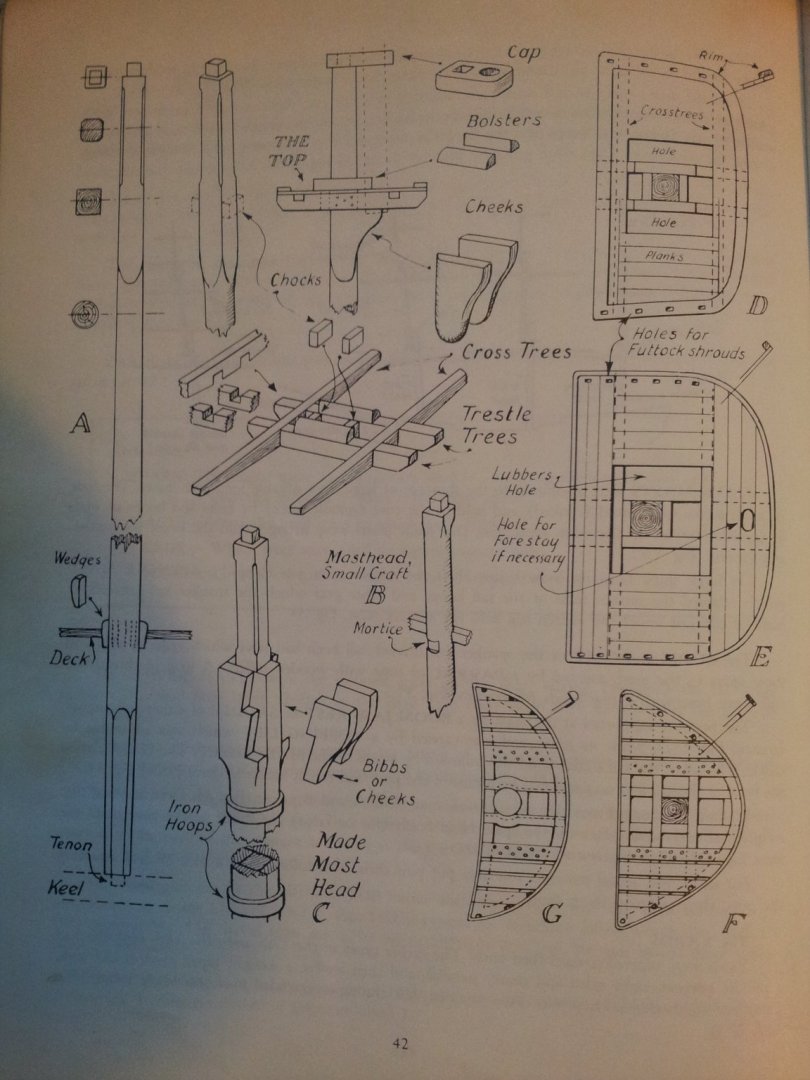
all sailing ships had the tops of the masts squared at the tops where they doubled- i make the top including crosstrees and trestletrees then trim the top of the mast , first with a knife then fine tune till the top is a nice fit- you will need to carry the flat down the sides for the cheeks and the two pieces of flat timber that run so far down each side- it shows some of what i did earlier in my victory log- also see below which shows varios styles of top through the ages. i think terrors will be like the top one fig D Keith
-
You will get the hang of it Emmet- and yes it is fun! Keith
-
yep spider band looks a lot better keith- i think occre have the heights of the masts about right but dont fasten anything to them until you have squared the tops and added the bands etc. Keith
-
good to hear Keith , your soul sounded in a dark place there for a while. Not a bad little boat and nice seeing a sailboat gaff rigged as opposed to the run of the mill triangular sails you see . Keith
-
Hi Keith- sorry to hear about the lost book- if you need any info in the future just ask(when i get to it there is a standard ratio they used for lengths of masts/ yards- a little "modellers licence" is allowed though😉. Taking a break from her is a good idea if it is doing your nut in- there's gaps of 6-12 months where i havn't touched victory, and i still have to finish a scratch built dredger i started in 1998! Out of curiosity what type of craft are you building as i grew up around boats being the son of a fisherman and was hopping over bulwarks and anchor chains about as soon as i could walk. take care Keith
-
still working away on my winter messy modelling workshop so not much happening in shipyard though did manage to get the fore tops'l yard tyes rigged to the kevels on fore deck. next job will be the tops'l sheets. take care all Keith
-
i install the masts then rig the shrouds starting with mizzen and sequence forward - basically there is a step by step guide on my billings victory log- then i install the driver boom and gaff then the yards working from mizzen forwards- on ships from terrors era the futtock stays rig to cains around the mast as opposed to the shrouds on earlier ships.😉 beware occre havn't got the rigging 100% correct. Keith
-
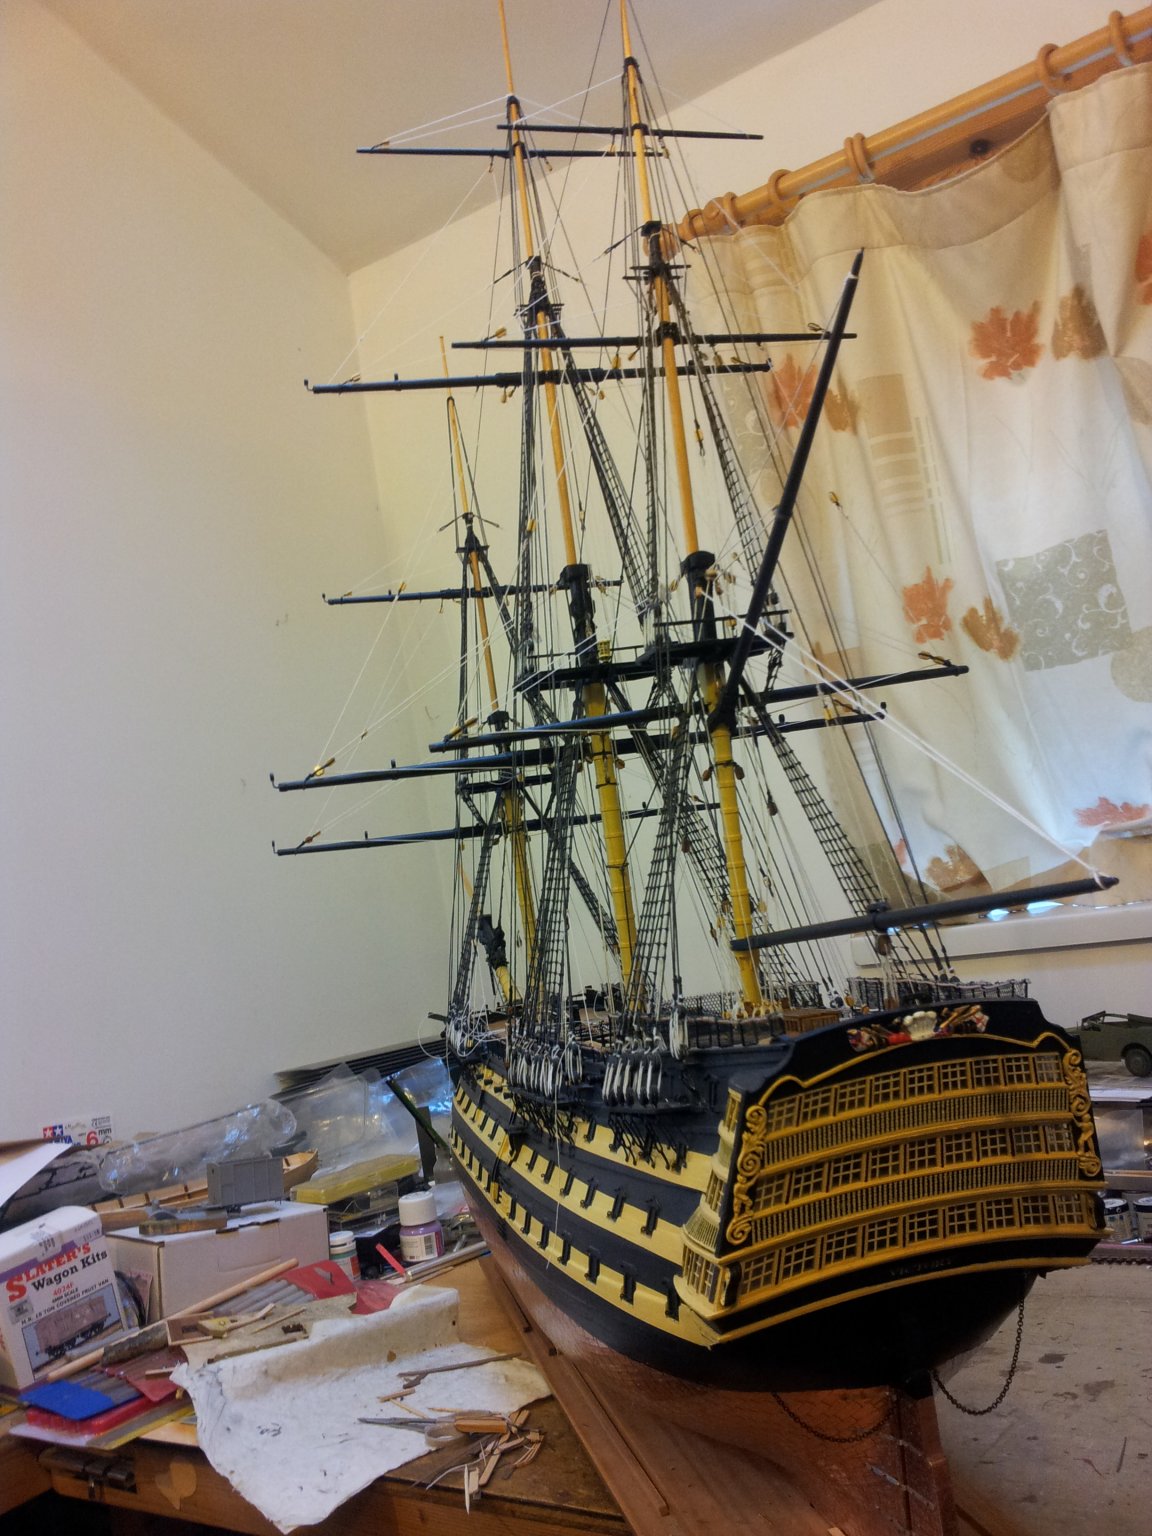
not much happening in the shipyard due to D.I.Y. projects (getting my winter messy job lair organised with spray benches, stove and lift up shelter on veranda - admiral says i look like kiosk keith!) did manage to get the walnut planking on the outside of the bulwarks which gives an idea how the hull will look colour wise- should be dark enough though walnut can mellow in colour when it is exposed to air long enough. the access ports etc still need trimmed to size on bulwarks. take care all Keith
-
that is the best way Emmet- i spent a lot of time getting the planking on my victory as good as possible because even though i was painting/ coppering i still wanted a sound foundation for everything to rest on- filler and coppering shouldn't be used to hide serfious mishaps😉 Keith
-
it will go as far as the start of the bow or forefoot-the build log i mentioned will explain- but if your method is going to work go for it😉😁. everyone has their own viewpoint on this. Keith