


mort stoll
-
Posts
530 -
Joined
-
Last visited
Content Type
Profiles
Forums
Gallery
Events
Posts posted by mort stoll
-
-
Hi Allan,
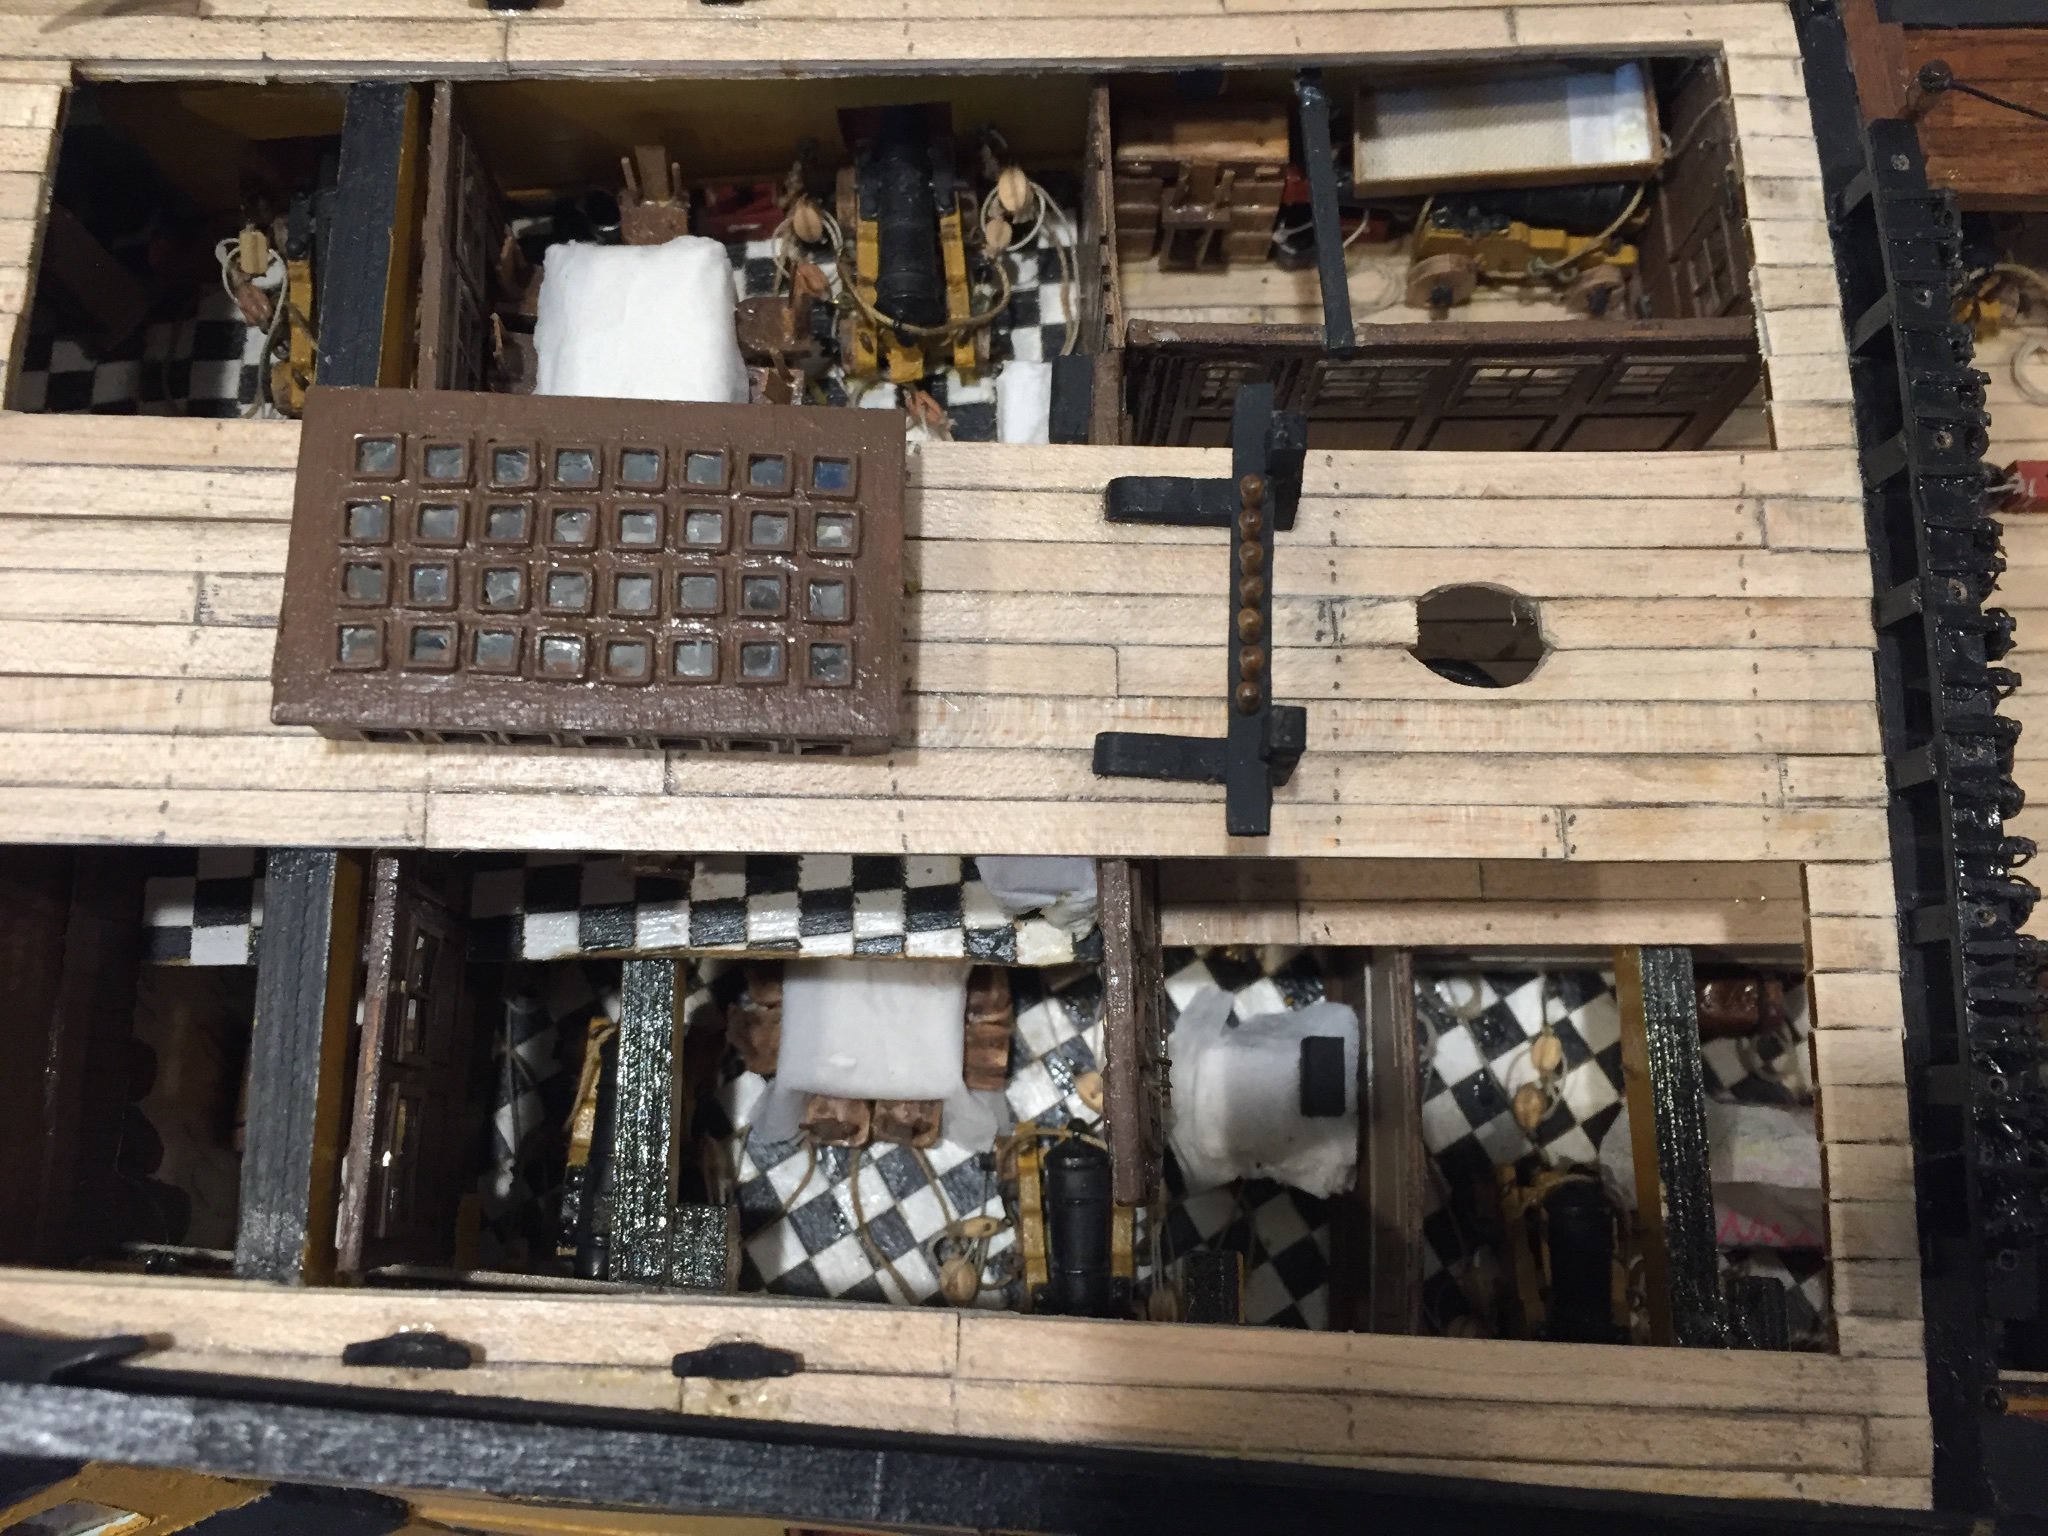
Gratings are from Syren - Chuck Passaro - not from the kit. Checkered floor pattern I learned to make through Bob Hunts Rattlesnake Practum. I will be happy to post pictures from my build as to how I did it if you like.
I already have signed up through the Jersey Club for the Trafalgar Series. Hope it comes to pass.
Mort
-
Perfect. Thank you very much.
Mort
-
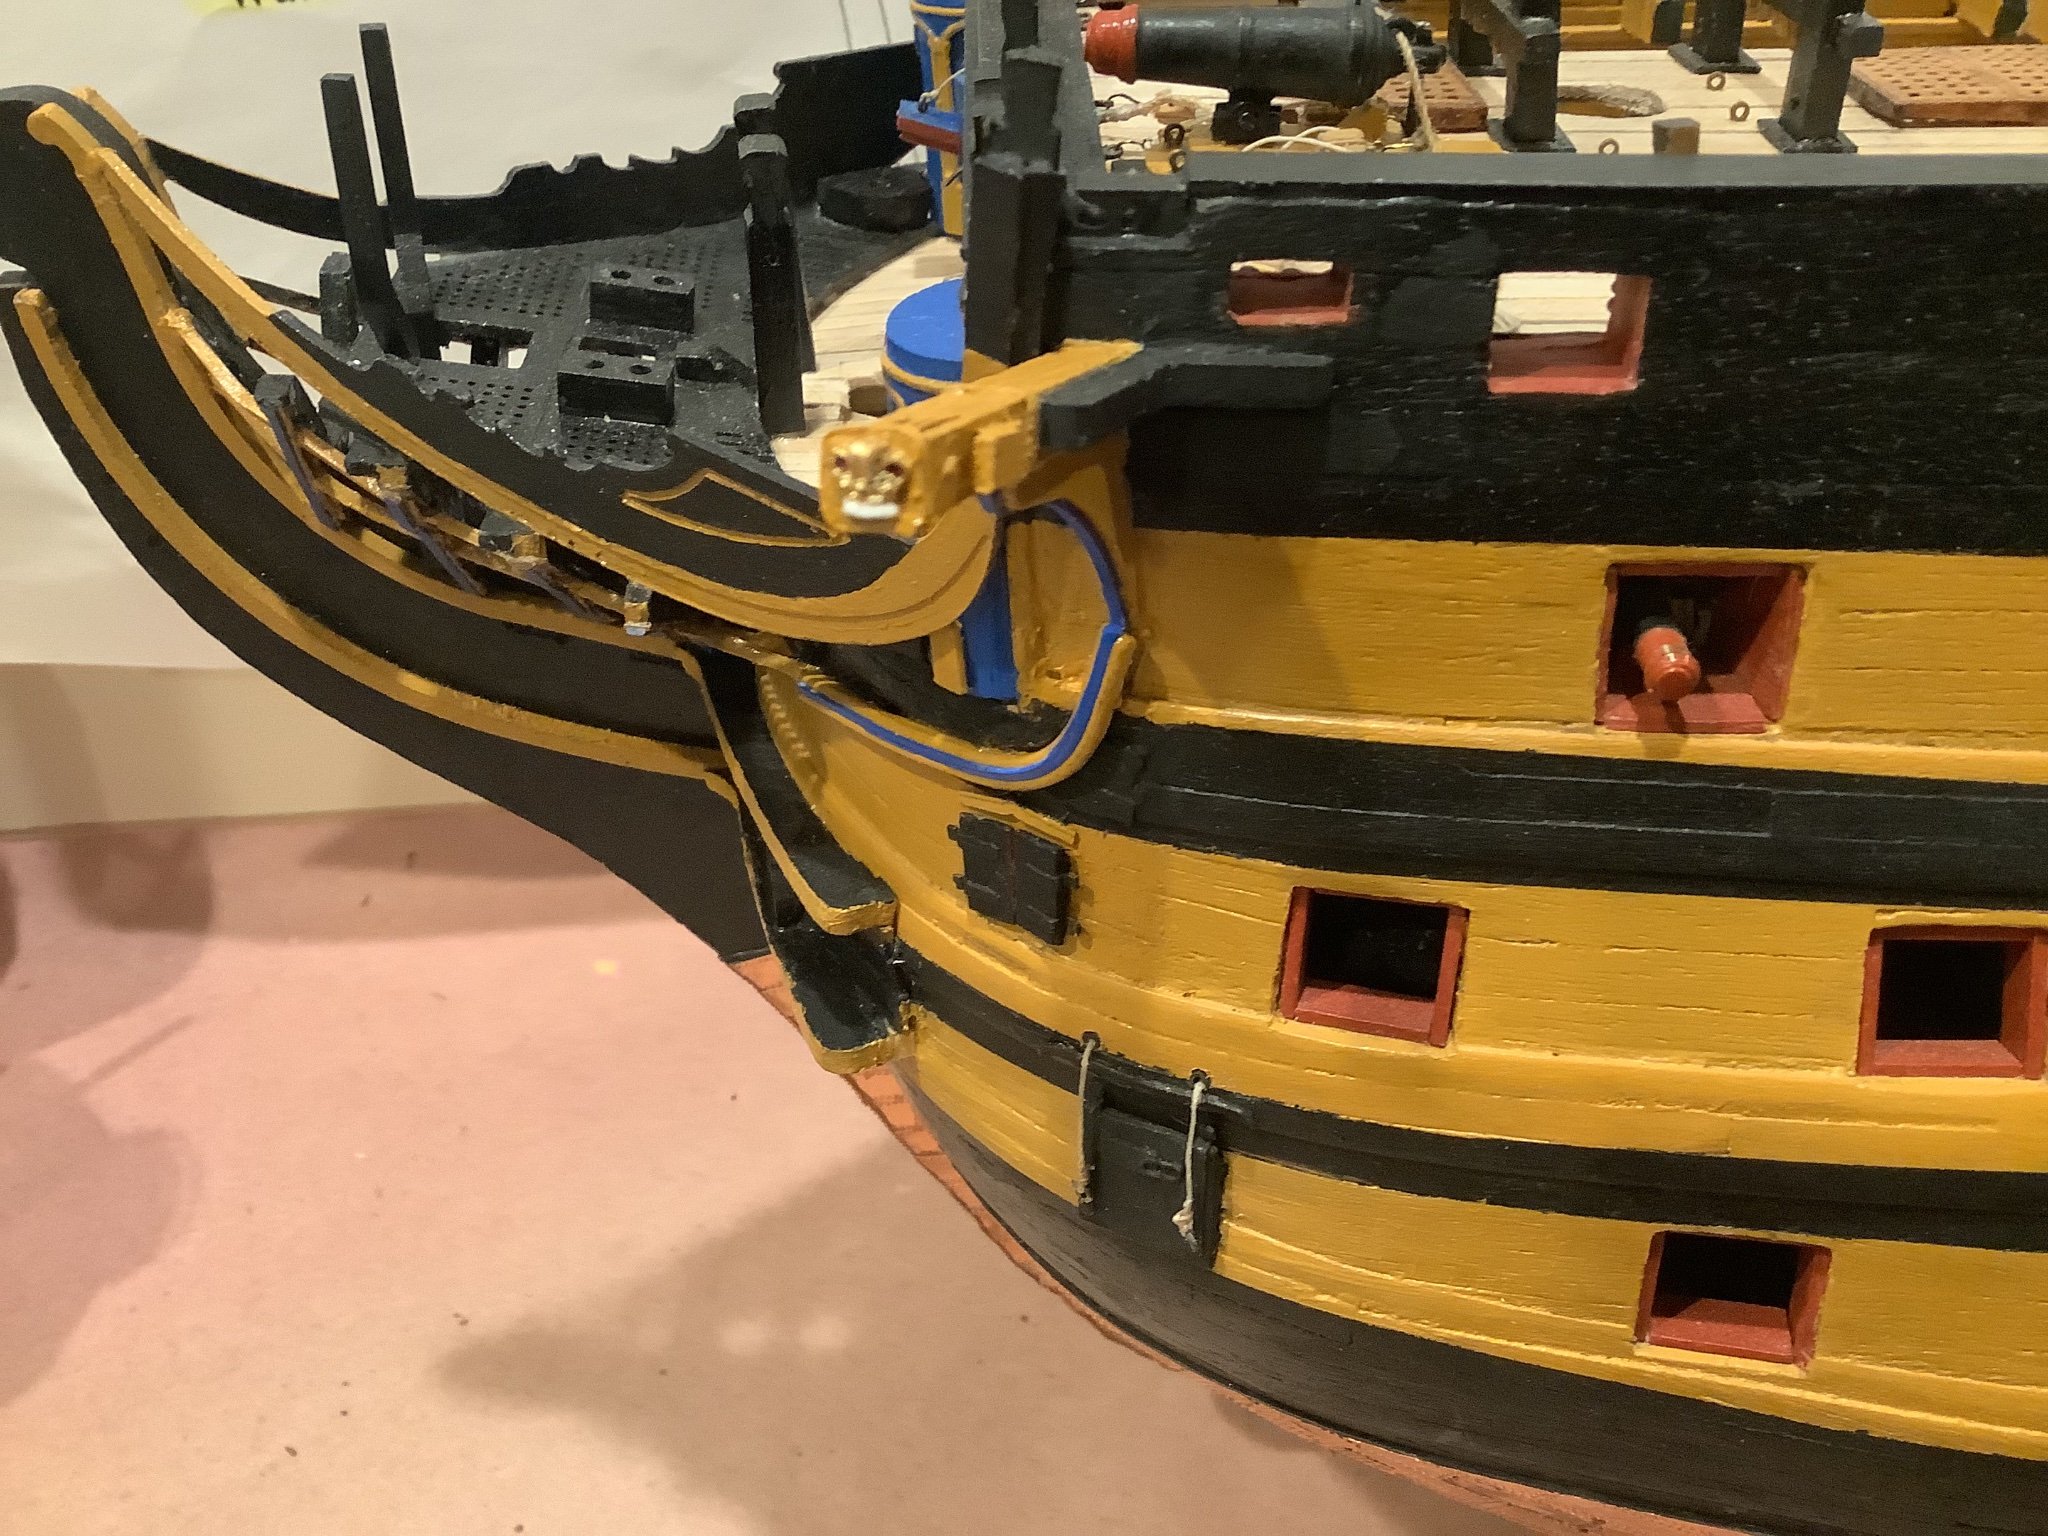
Completed the bow head rails, gratings , cat-heads and the figure heads. Took me awhile to get it organized but it worked out fairly well. Poop deck is planked - with maple - and just about complete. Am now working on the flag lockers.
Stay safe and well,
Mort
- Charter33 and Ryland Craze
-
 2
2
-
-
Great job. Sorry if I missed it but where did you get the fabric for the sails and what did you use for the hammocks? I have used tissues in the past for hammocks but yours look great.
Thanks,
Mort
-
-
Hi Will,
I carefully bent the copper plates using the small Exacto chisel blade as sort of a bending aid for support . I put the blade over the plate and bent it. I trimmed them with an Exacto chisel, a Dr. Slick microtop scissor - used in fly fishing - and a cuticle scissor. The plates are easy to shape as they are not that thick.
Hope this helps, if not don't hesitate.
Keep up the great work,
Mort
-
How much of the stern cabins are going to be exposed on the completed model?
Thanks,
Mort
-
Yes you can. I coppered my rudder and dry fitted it and then put it away until after I complete the stern. It's a matter of choice. I wanted to complete all of the copering in one step.
-
I would do the gun port linings now and then copper the hull and rudder but not install the rudder until later in order to avoid damaging it during the stern assembly.
Hope this helps,
Mort
-
Hi Will,
Meant to add that when I used regular contact cement I only used the 3 ounce bottles and applied the cement to 150x40mm area which kept the fumes to a minimum. The low odor contact cement was only available in a 32 ounce can.
Mort
-
I've never aged my copper plates. I prefer them to age naturally. They look more realistic I feel as they don't all age at the same pace.
Previous to my Victory I used Weldwood Contact Cement whenever I coppered a hull. I always had the fans and a mask on and windows open in my ship room when I worked.
Just before coppering on my Victory was to begin I heard that Weldwood had a low odor formula contact cement. I tried it and it was fine. Didn't need a mask.
I prefer contact cement because it allows me a few seconds to adjust the position of the plate should I have to after it's placed on the hull. If further adjustment is necessary after the plate is dry, or a day or so later I simply heat the plate or plates with my plank bender and readjust the plates. No problem.
Good luck. It's a great kit. Keep up the good work.
Mort
-
-
Hi,
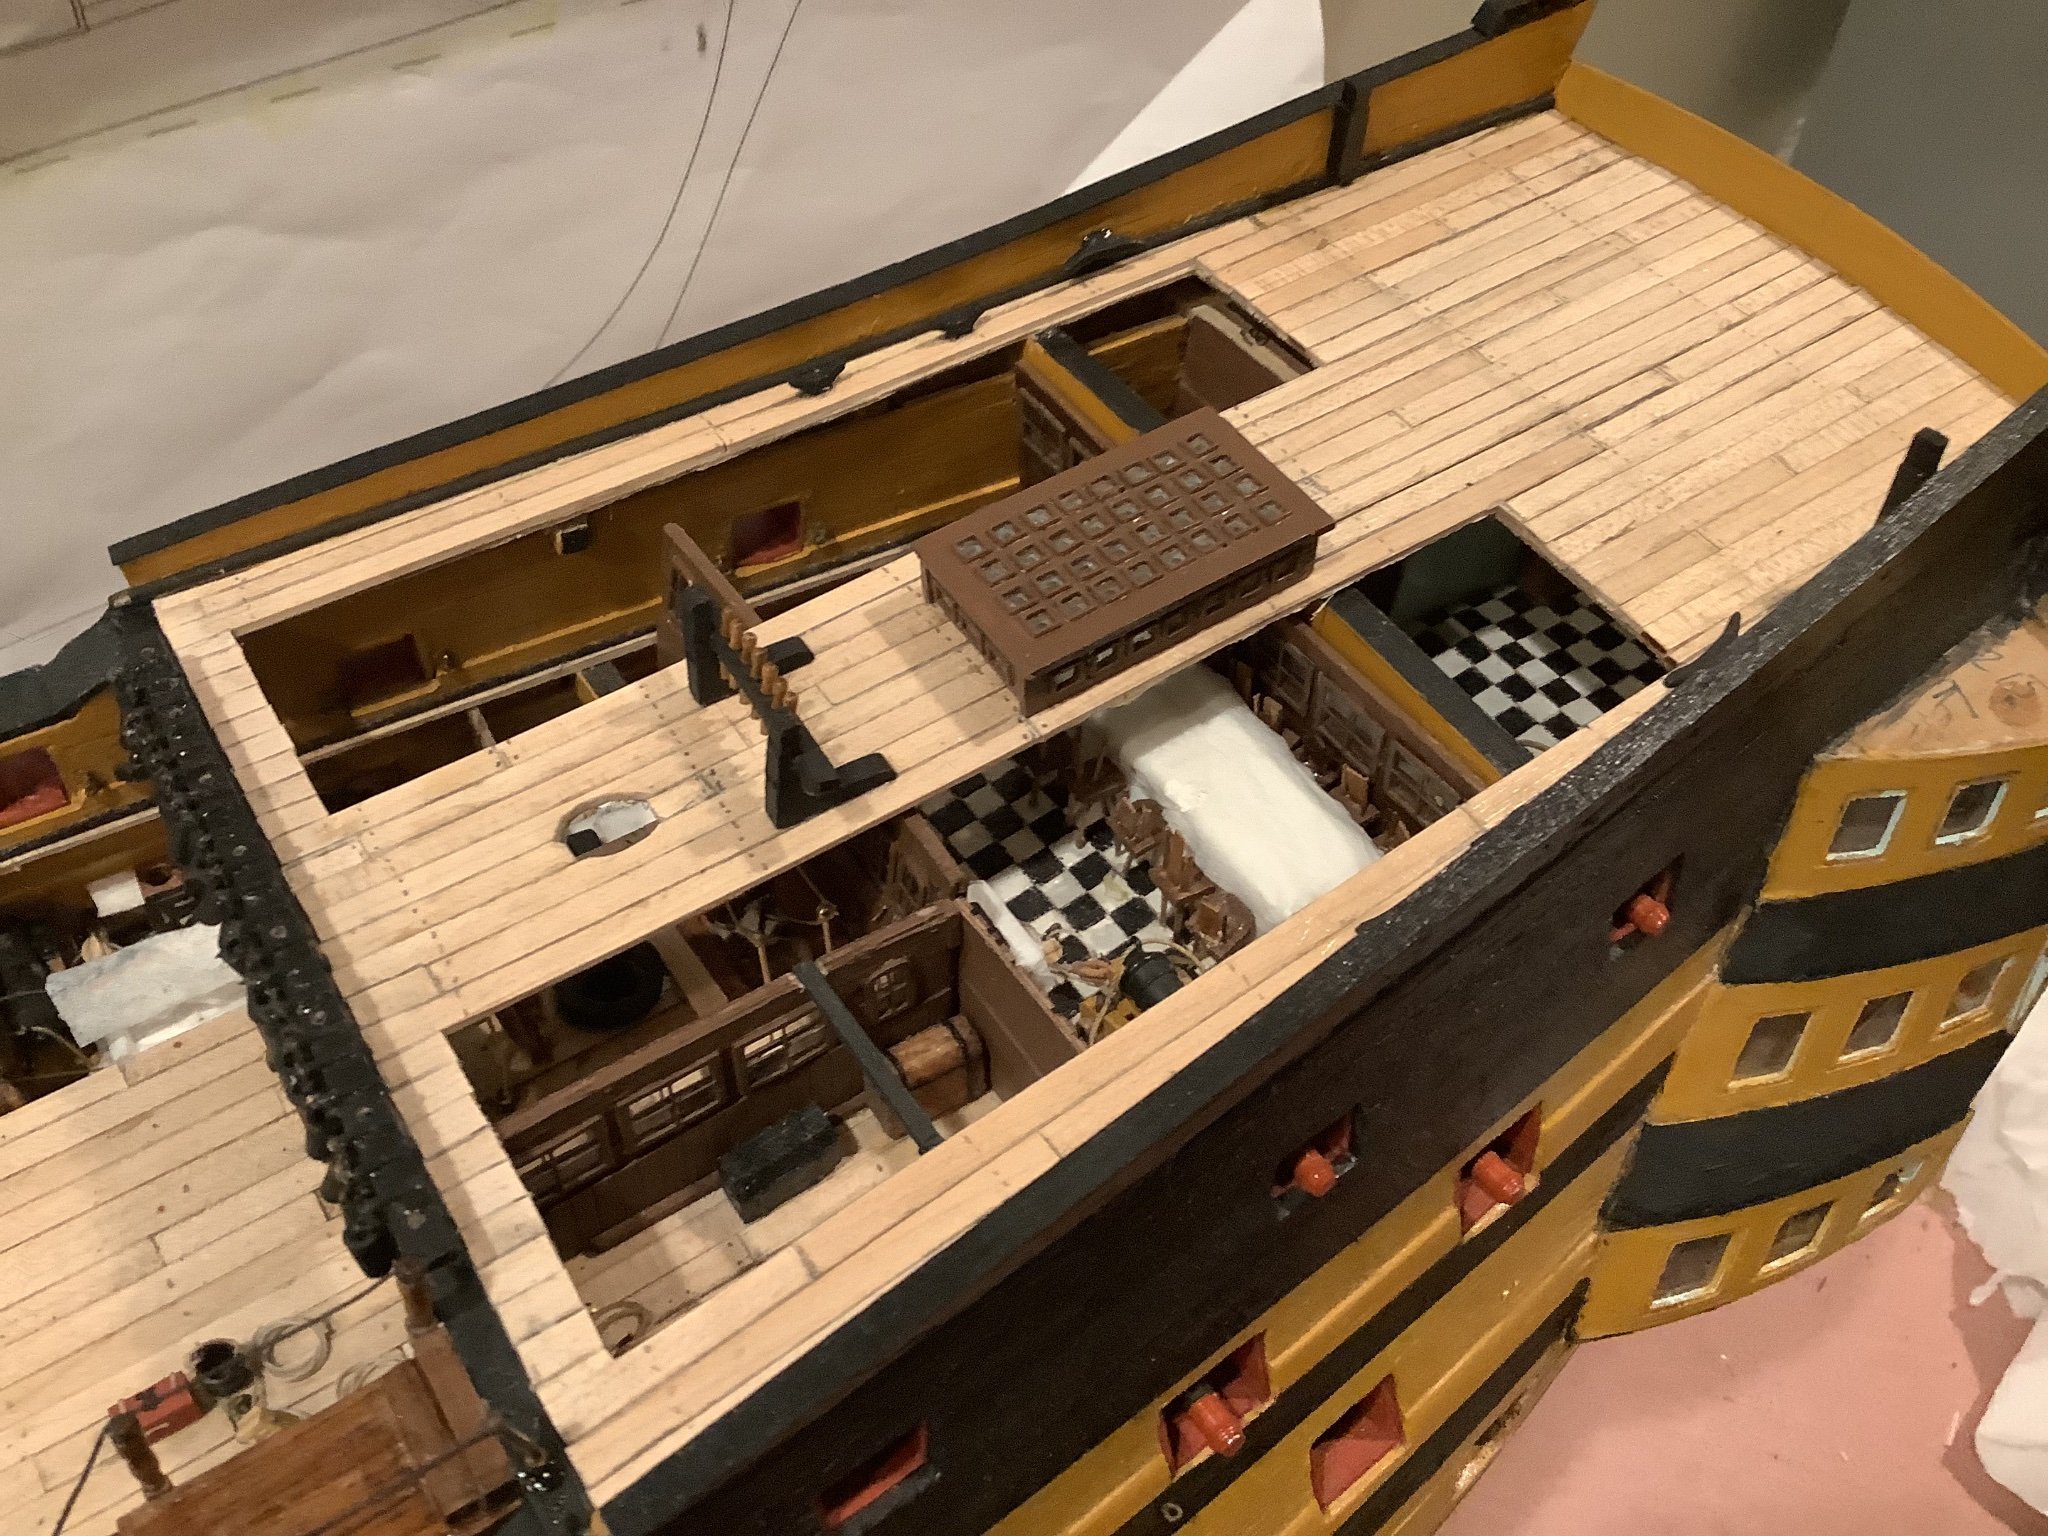
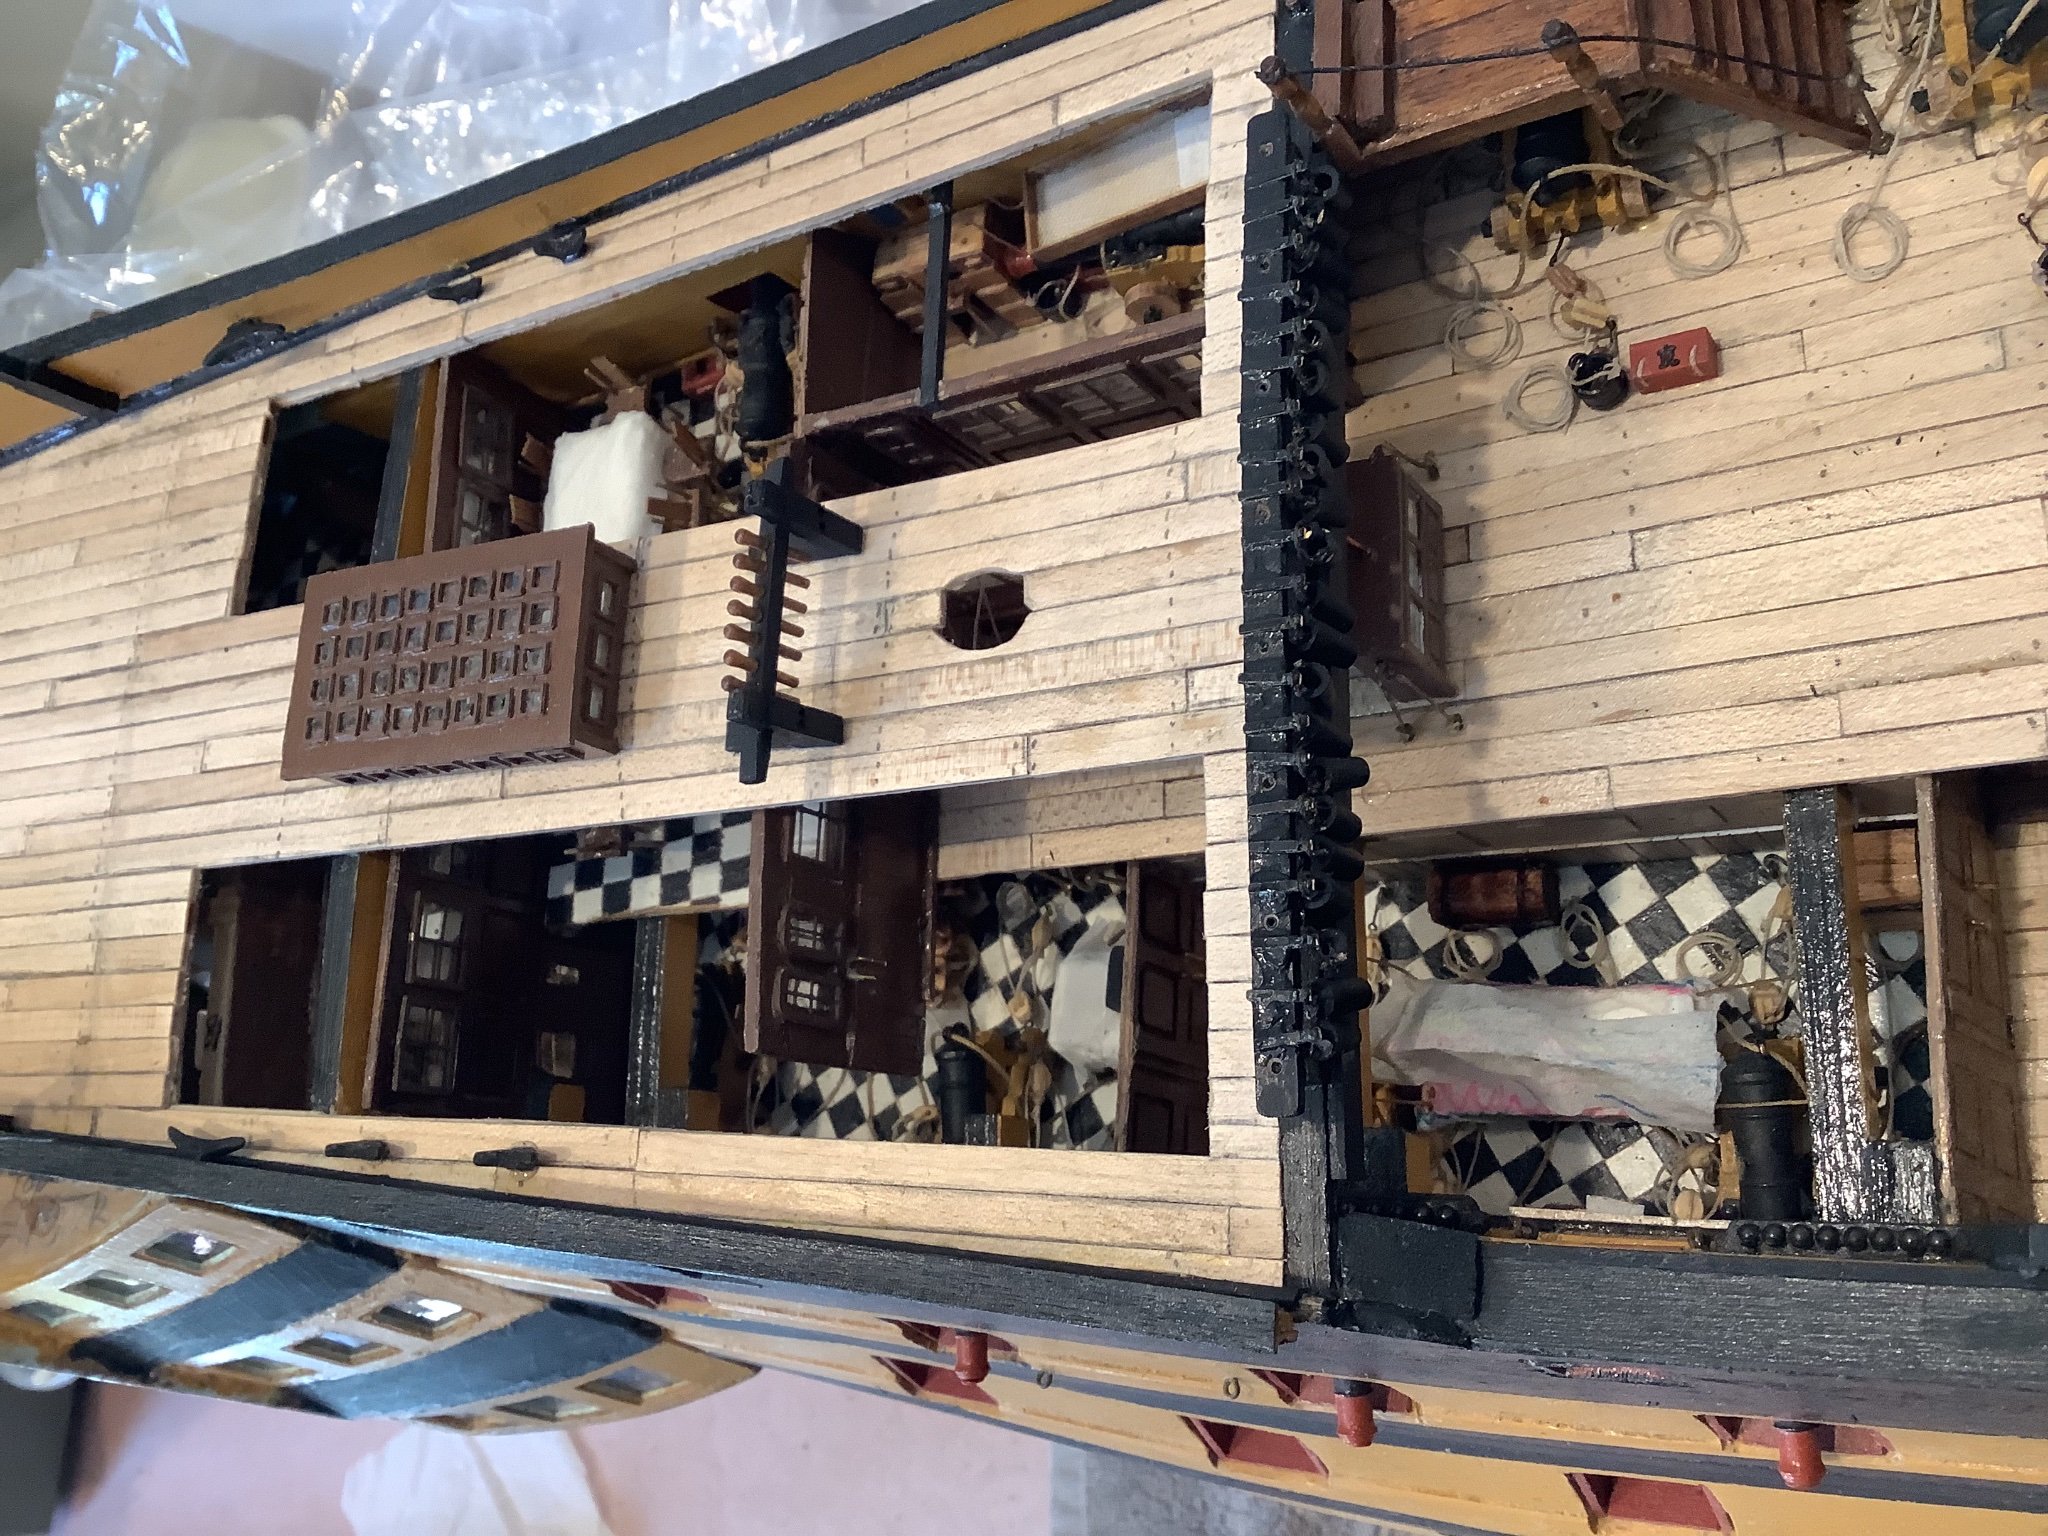
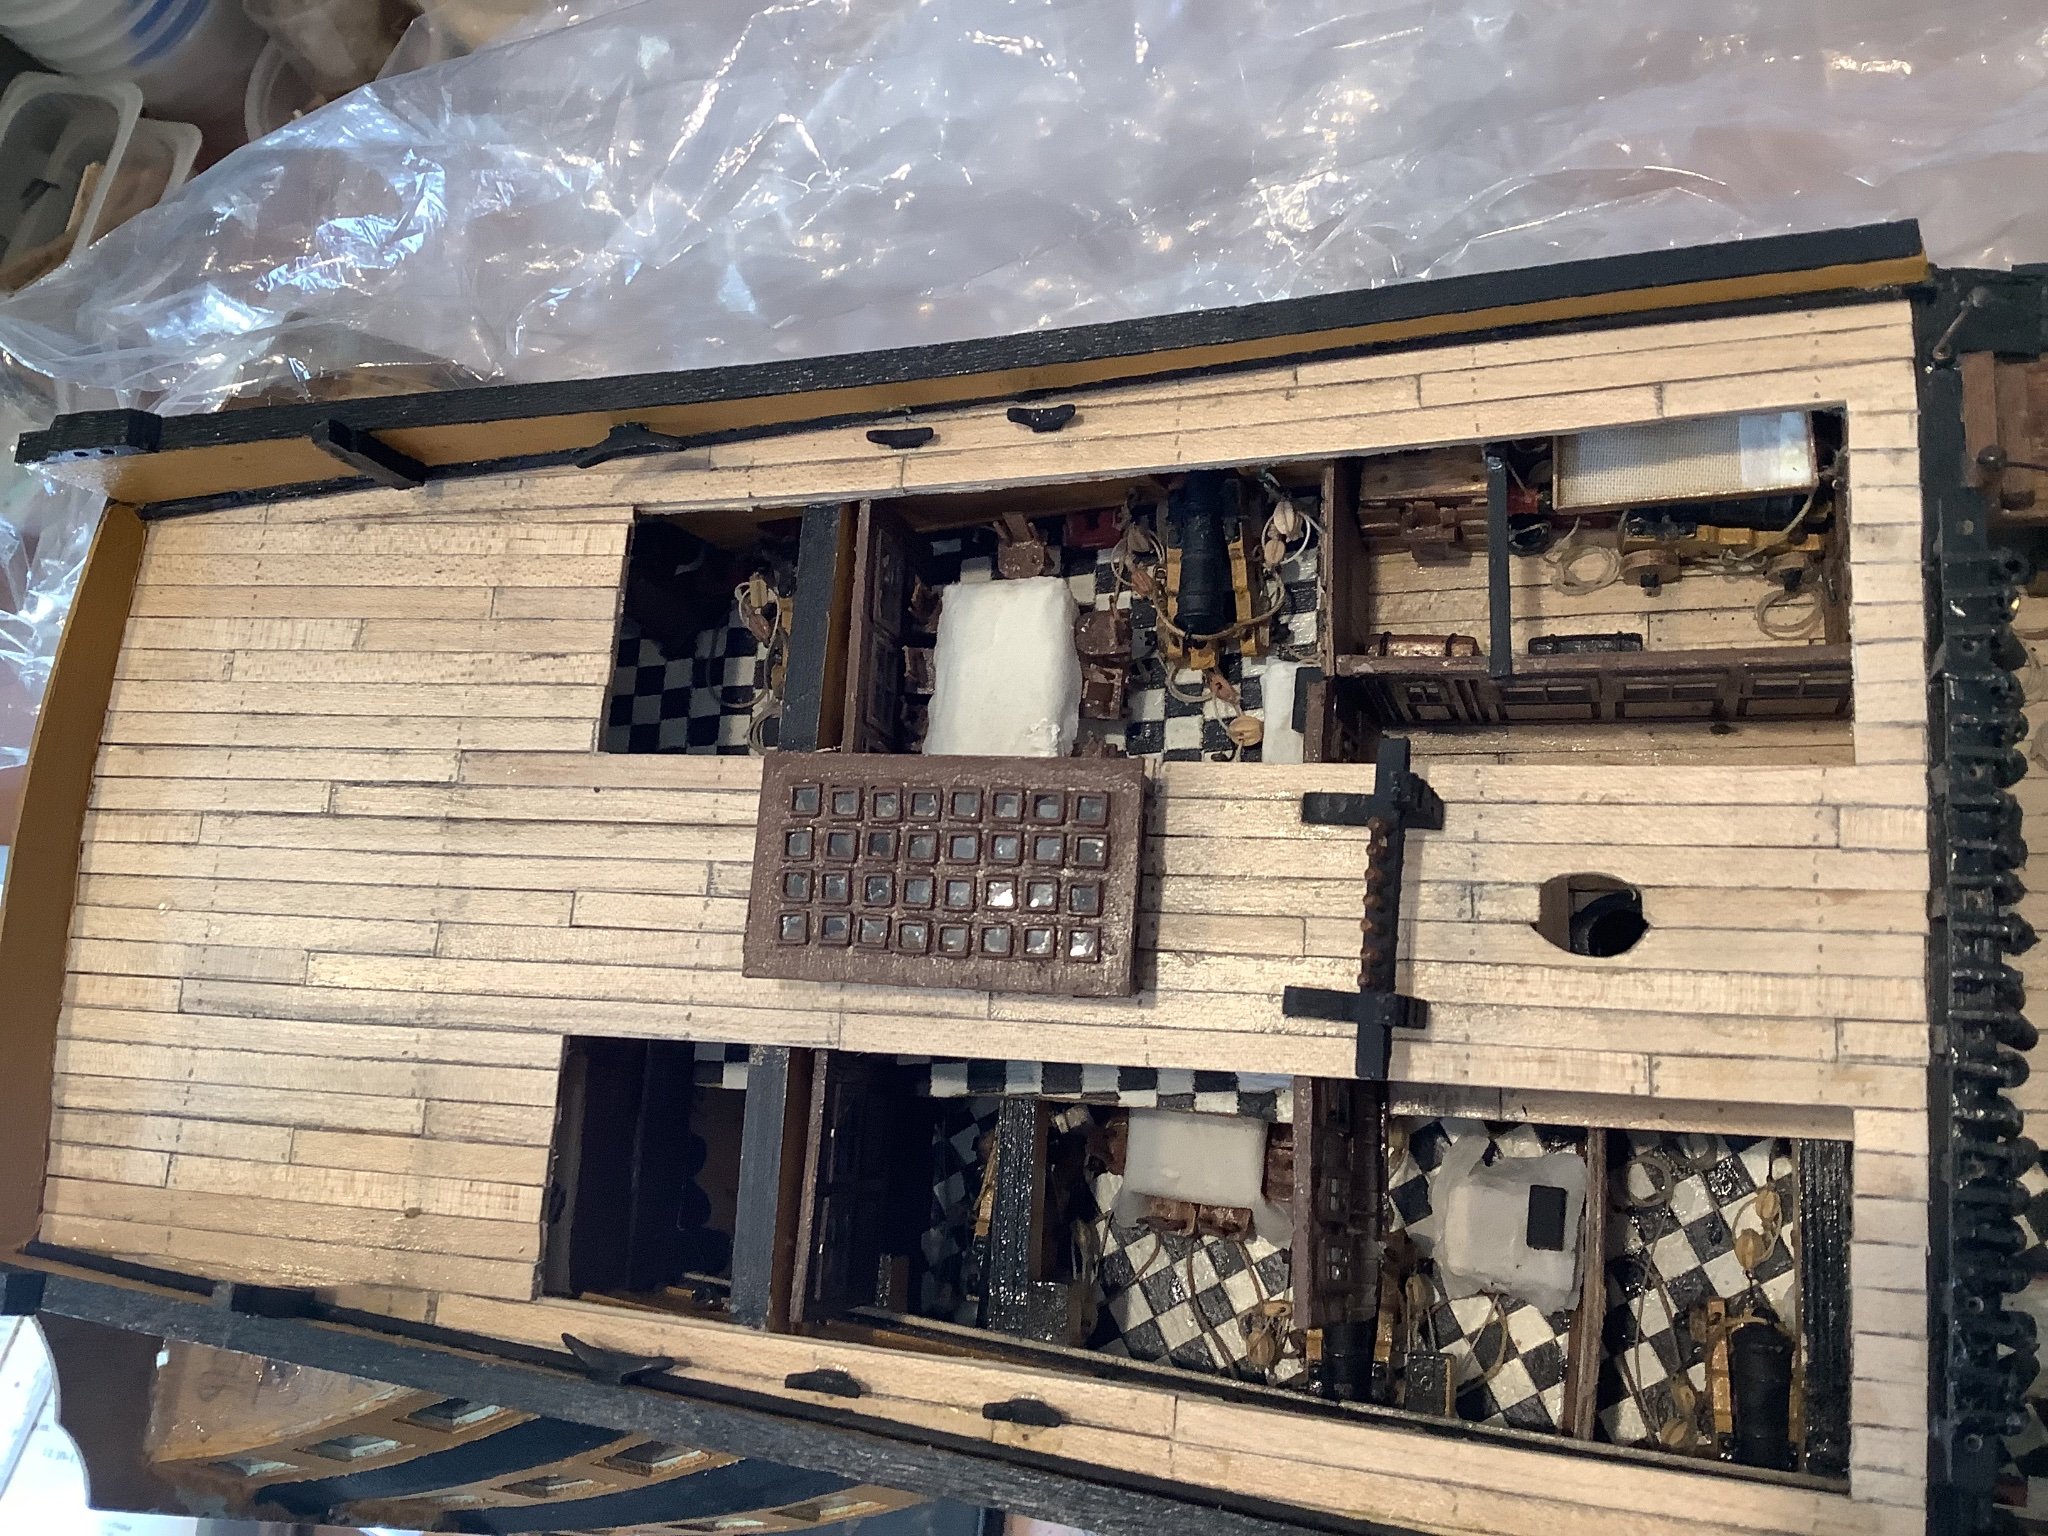
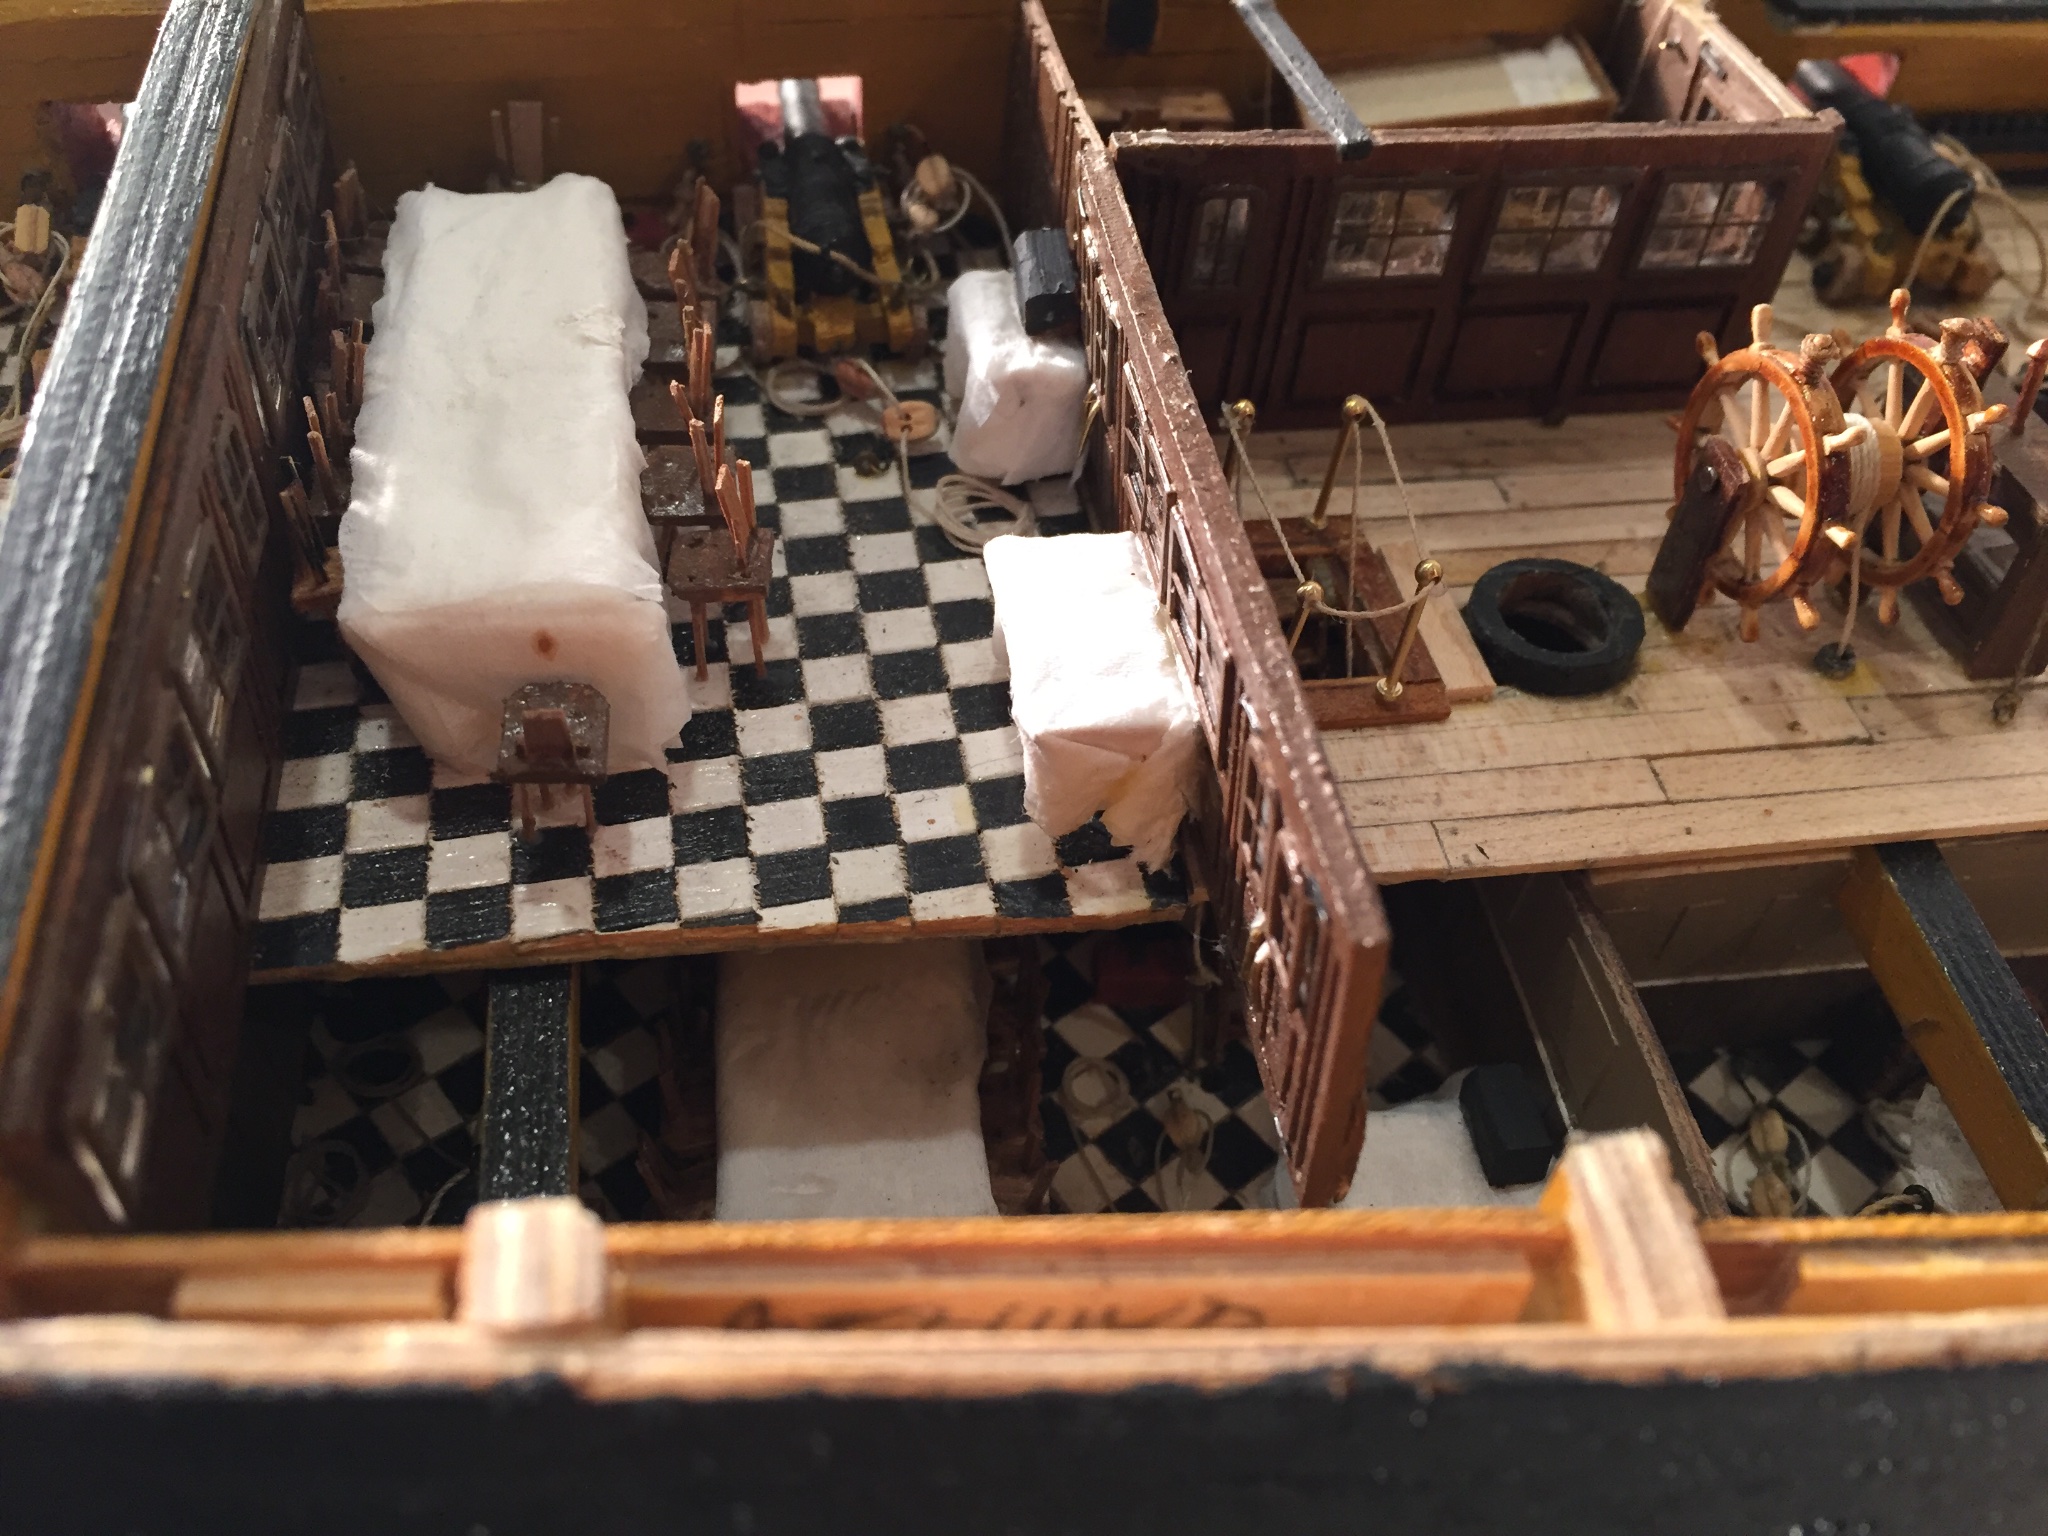
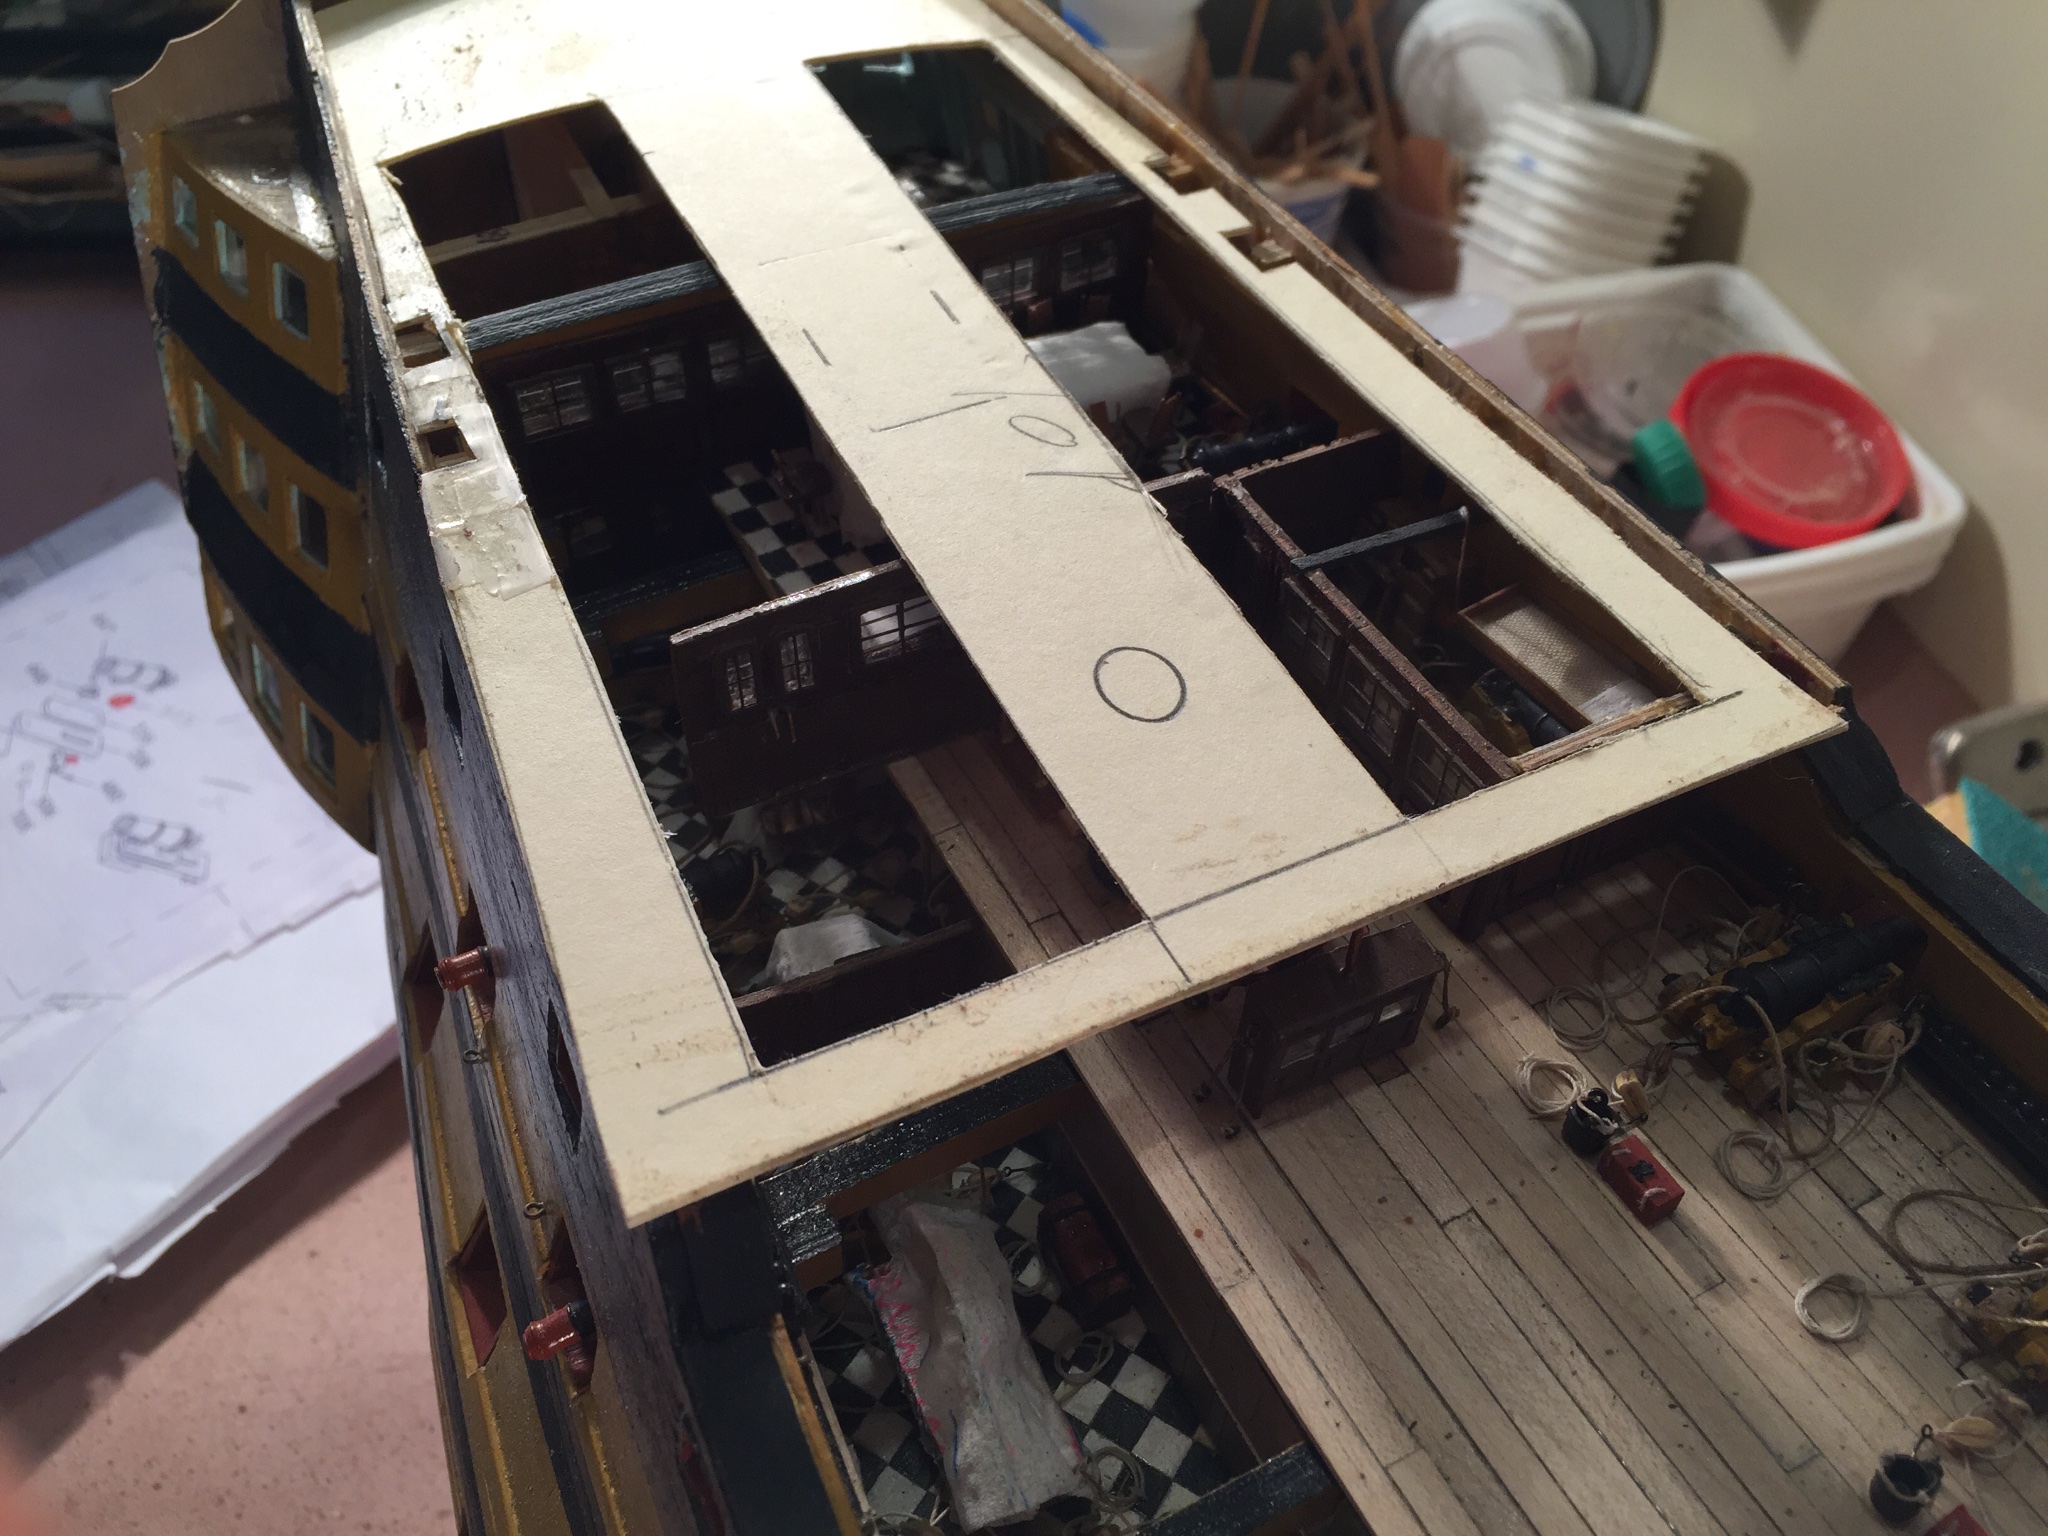
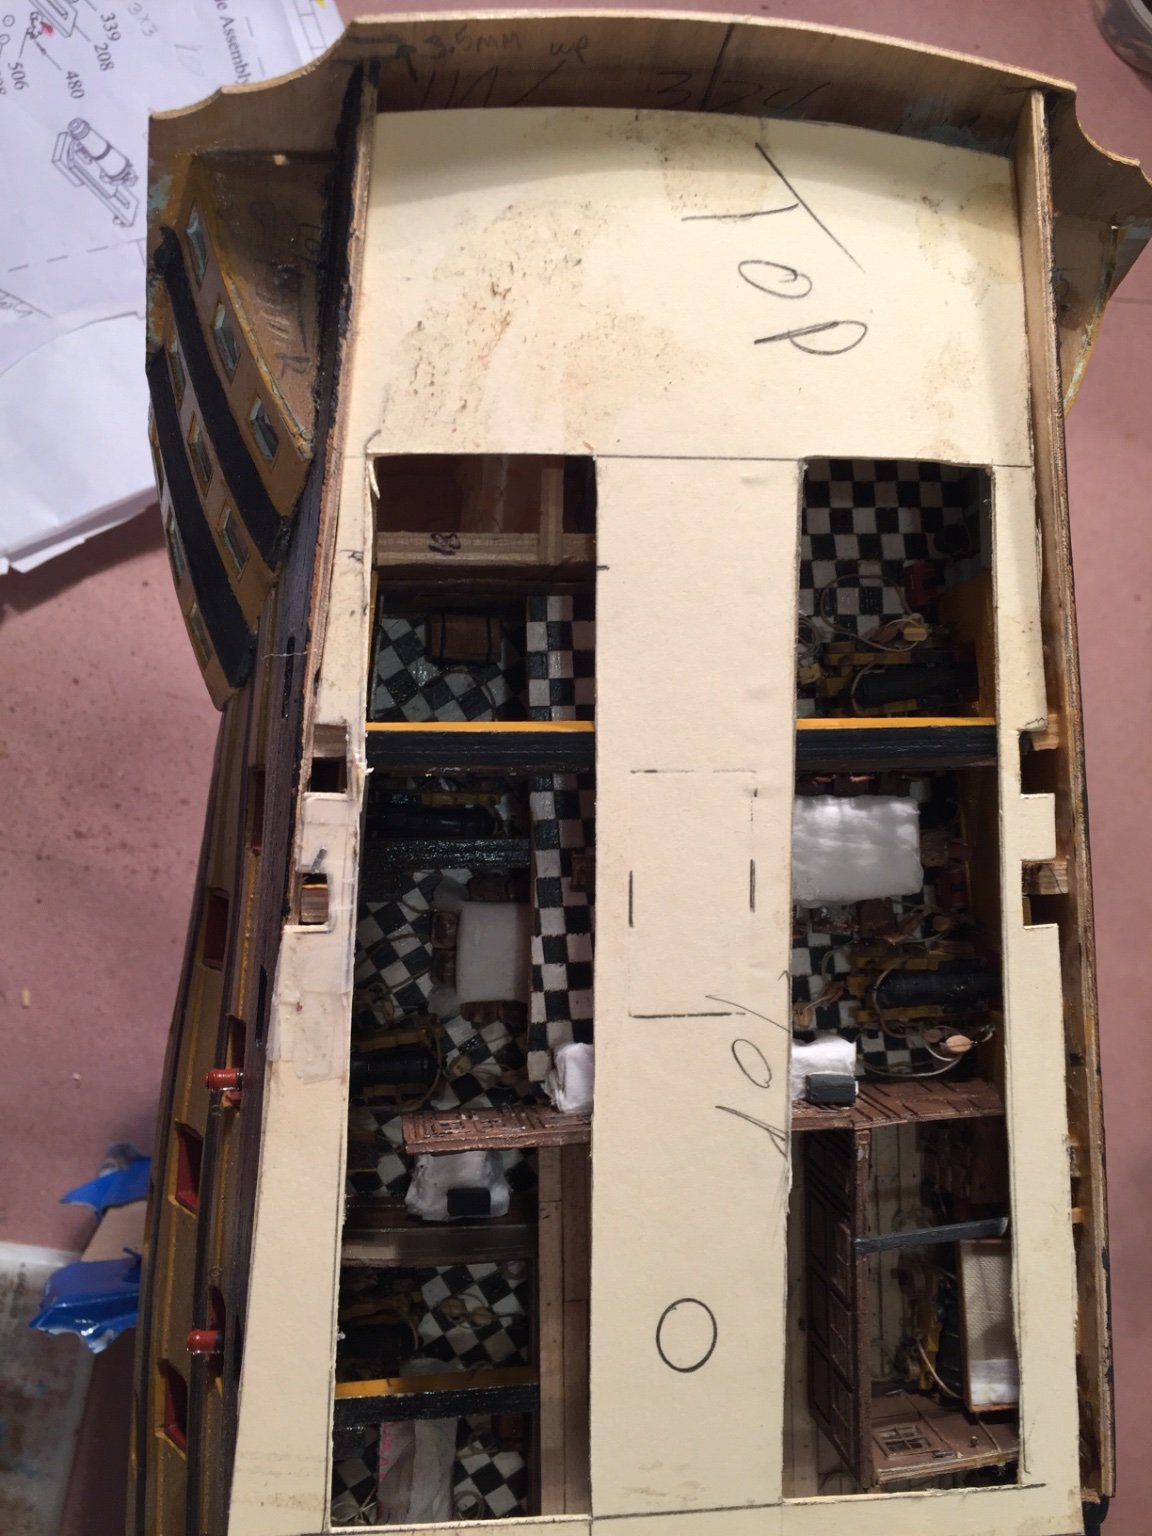
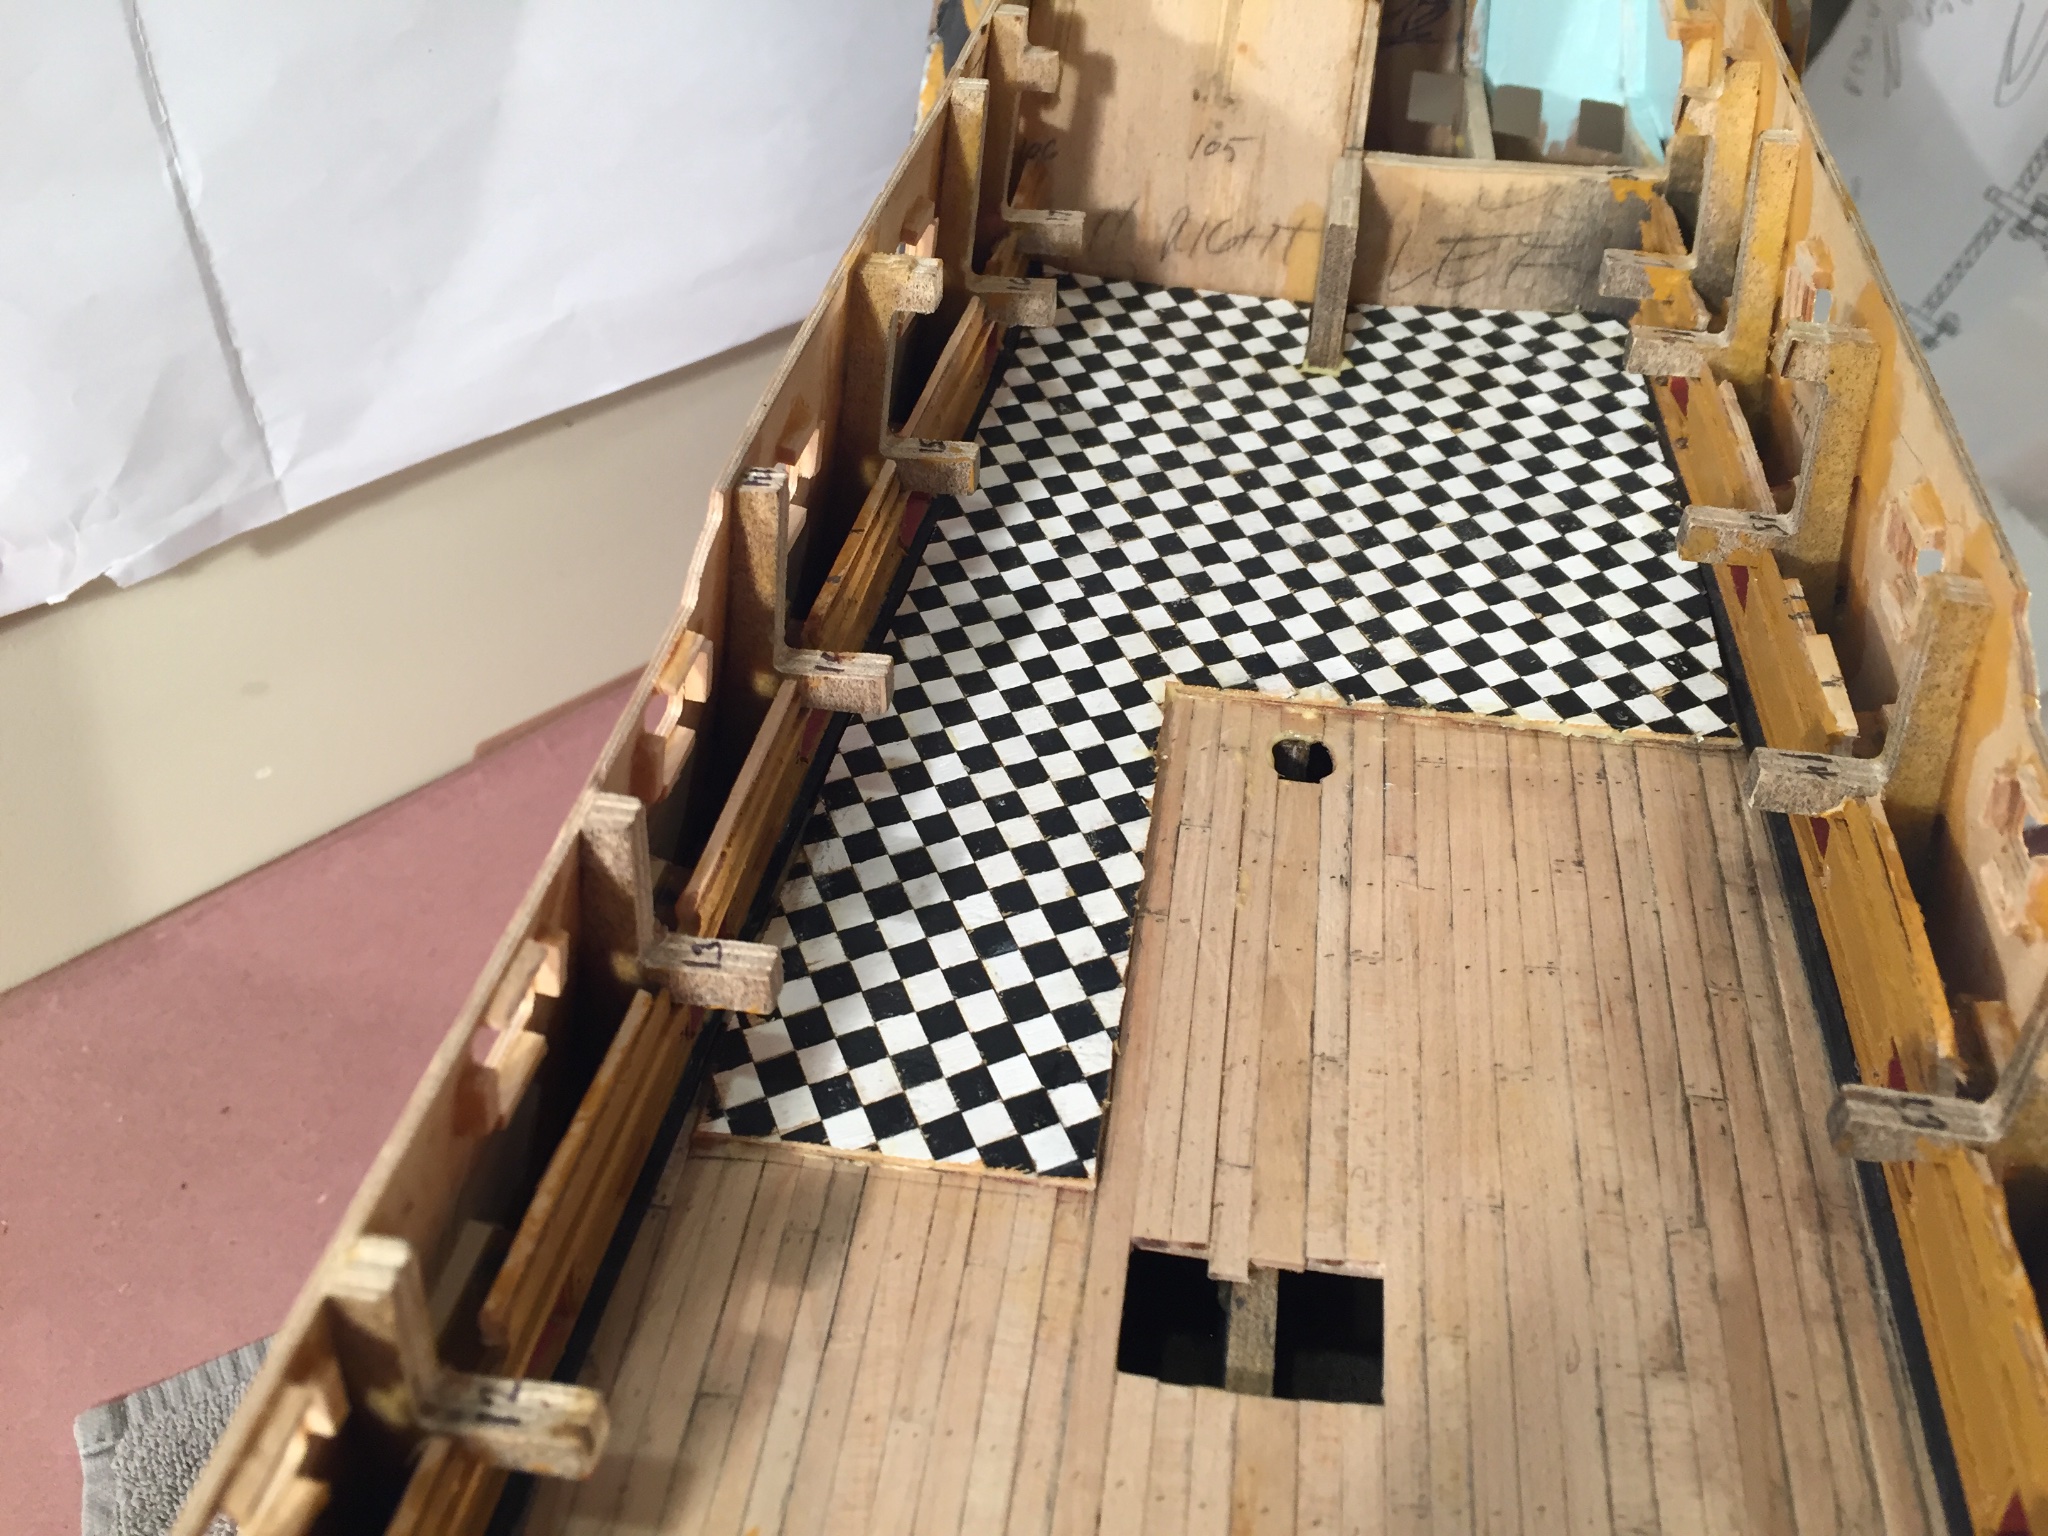
As you can see I've completed the beakhead bulkhead and timberheads. The bulkheads for the Captain's dining and day cabins are installed. I've also completed the Captain's dining and day cabin. The dining cabin has 2 side tables and a liquor box in addition to the dining table and chairs. The day cabin contains 2 clothes trunks, a dresser, a chest and a desk. I'll probably add a small circular table.
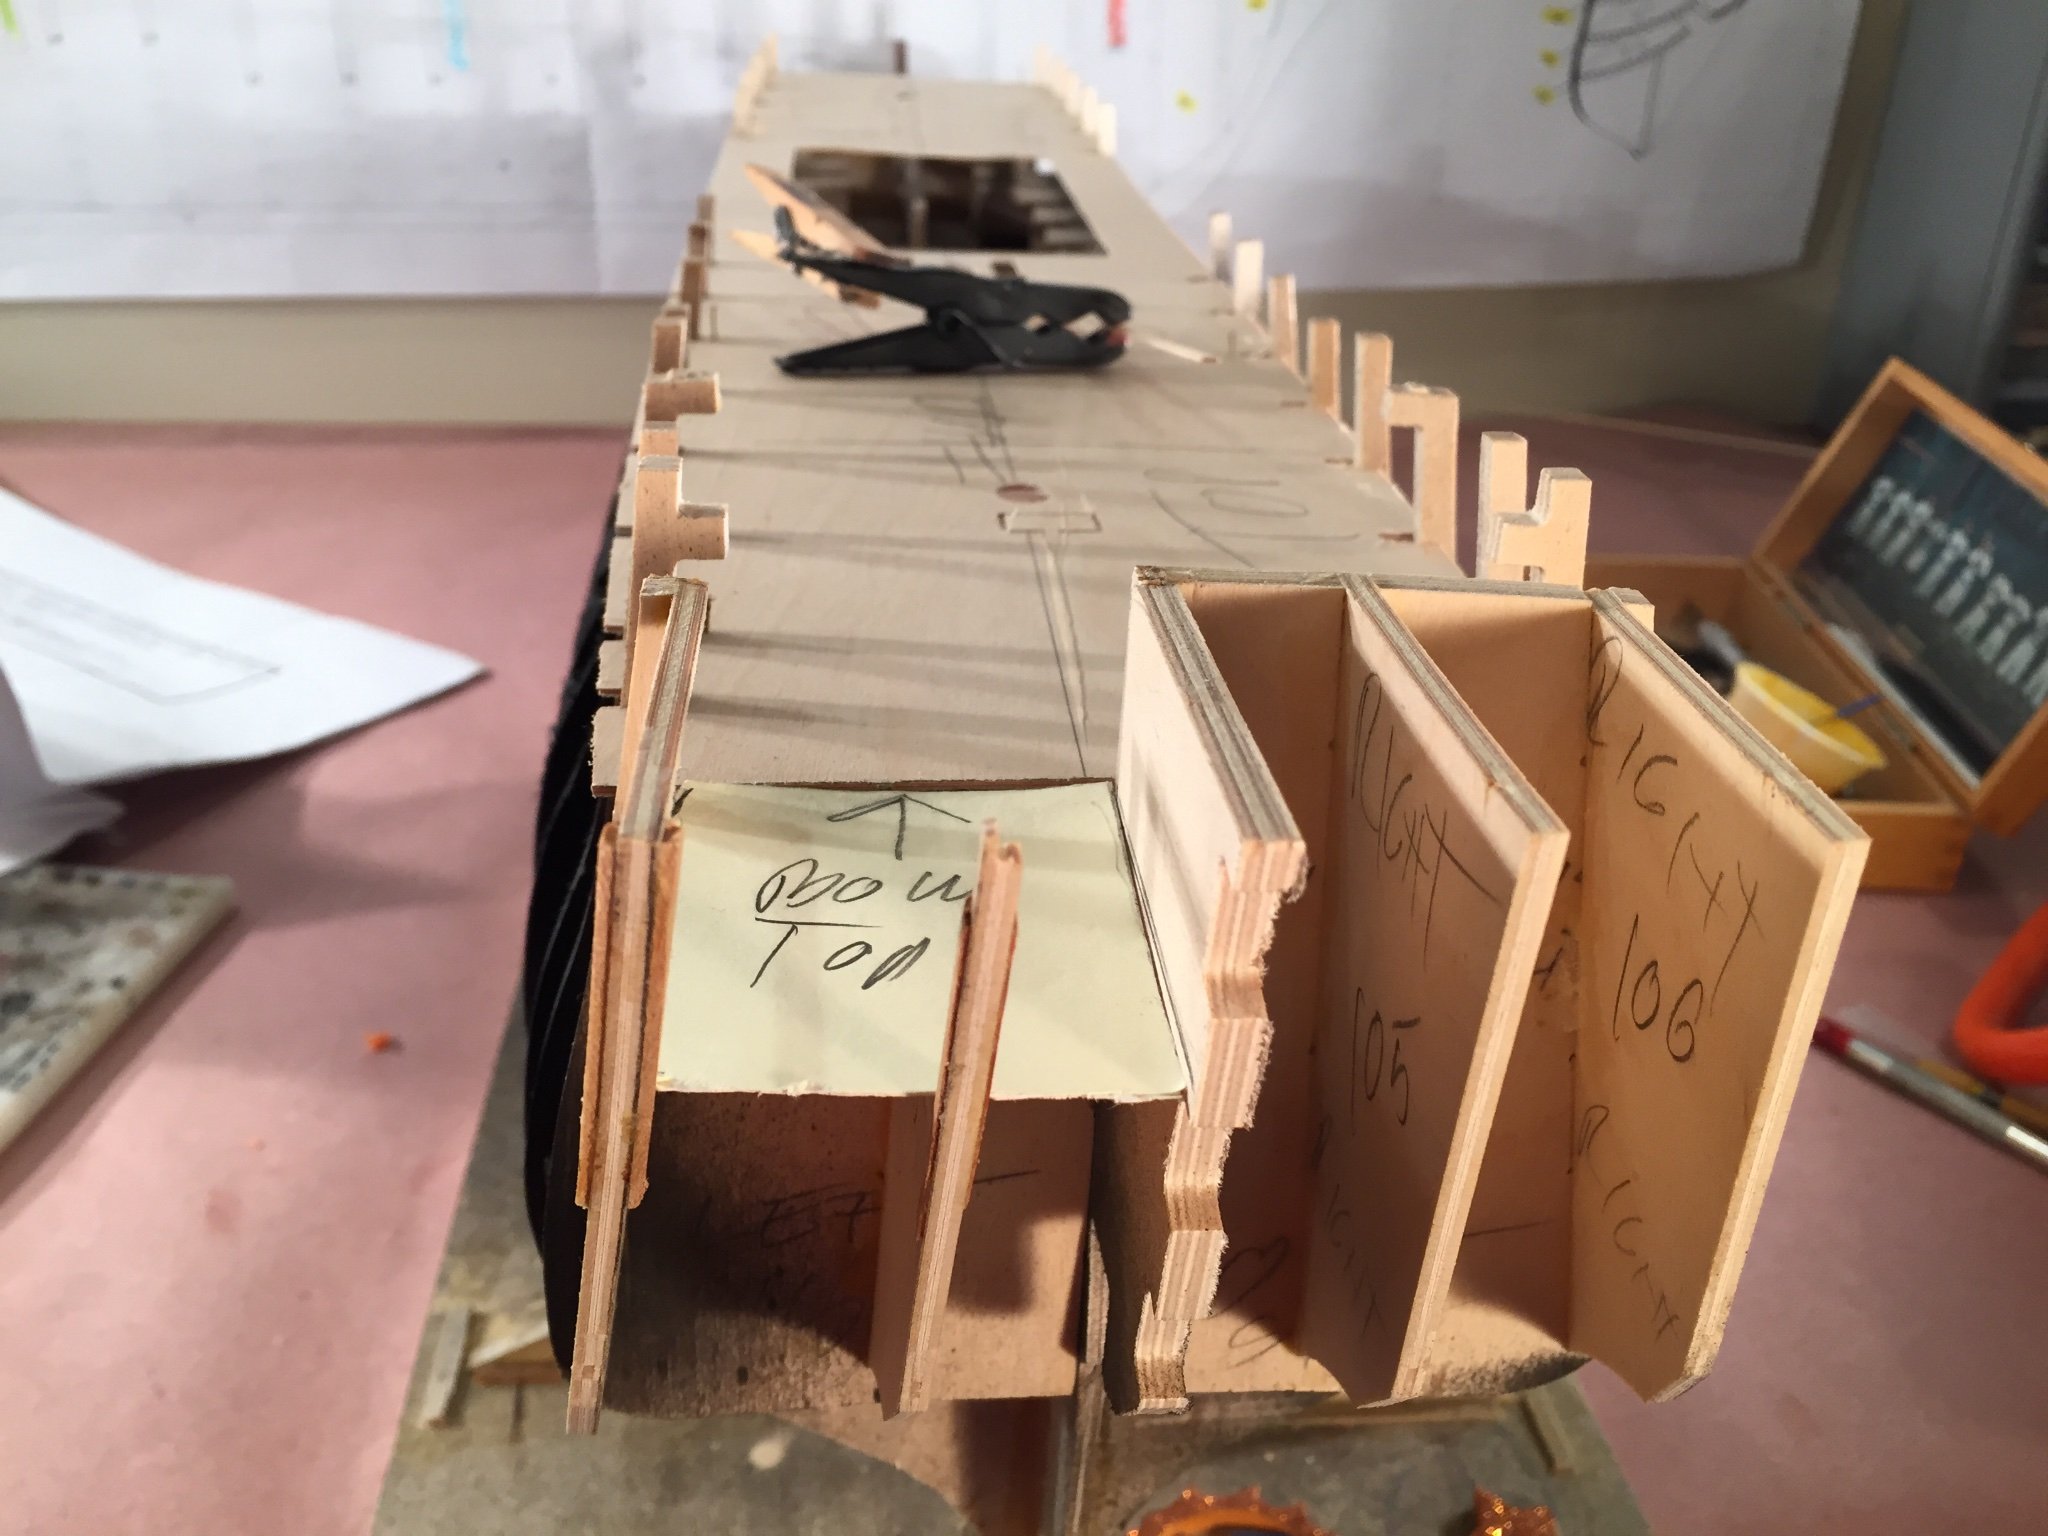
I tried to remove the center keel piece and the other bulkhead # 105 thereby opening the remaining area of the day cabin, but It's too involved for my skill set.
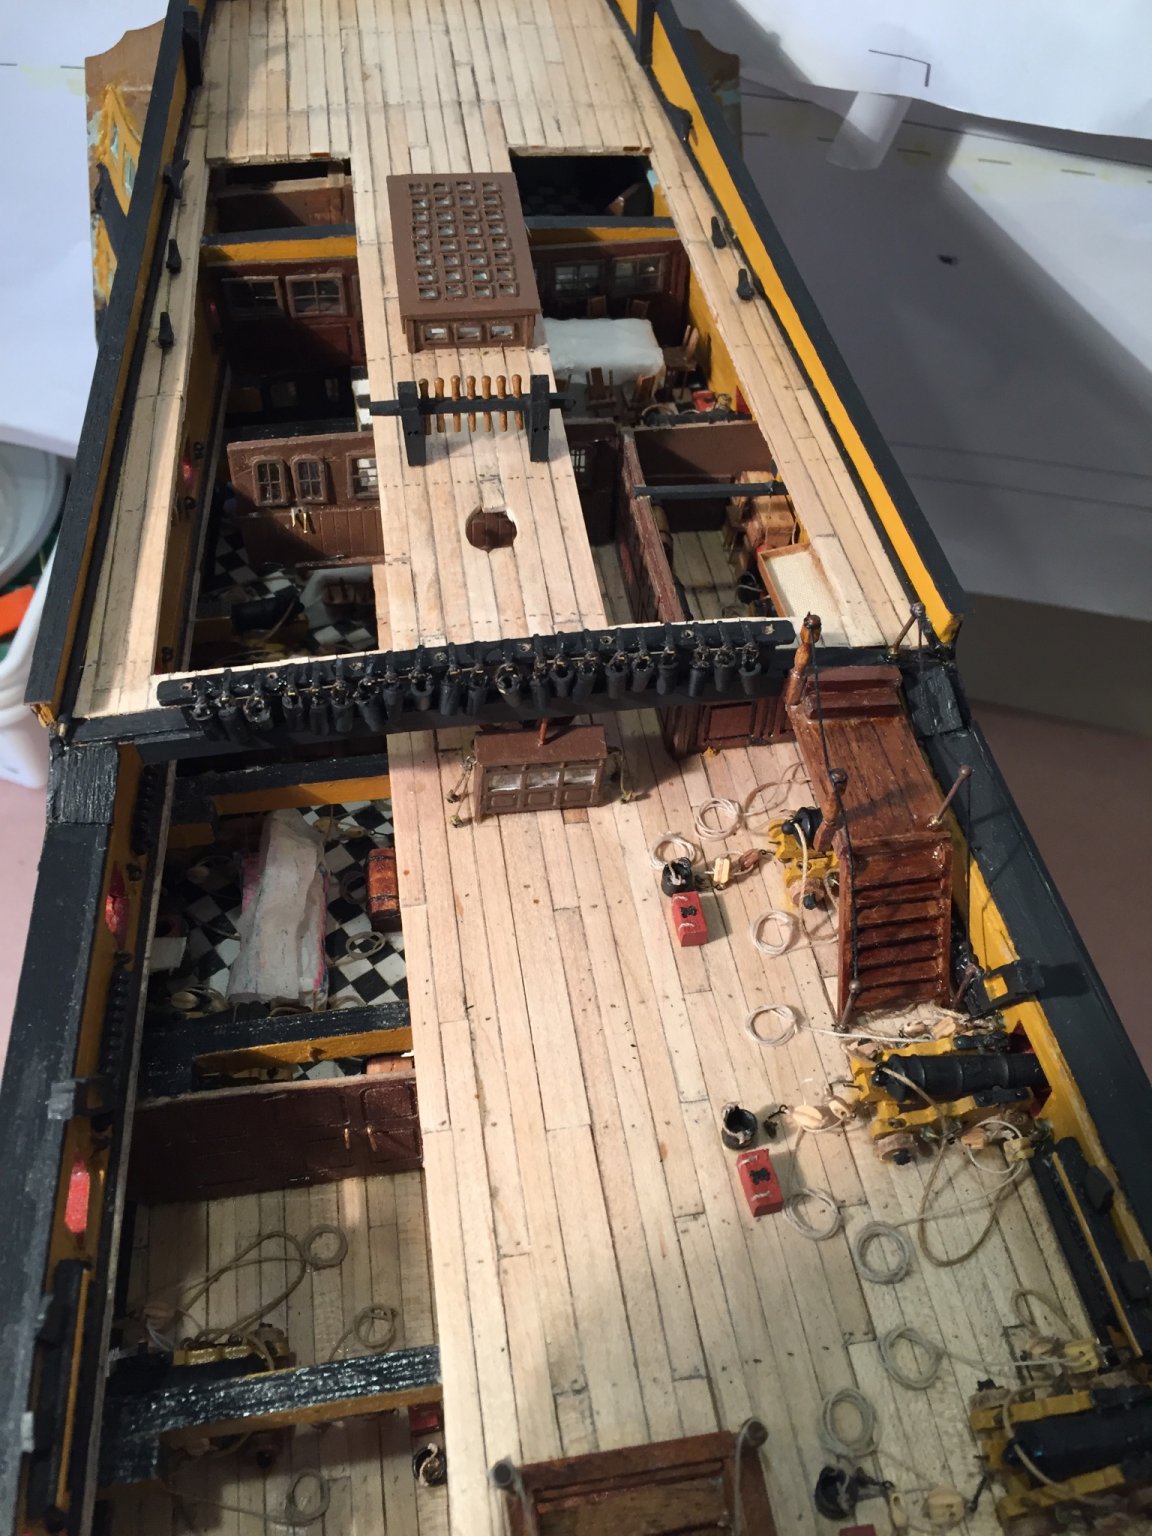
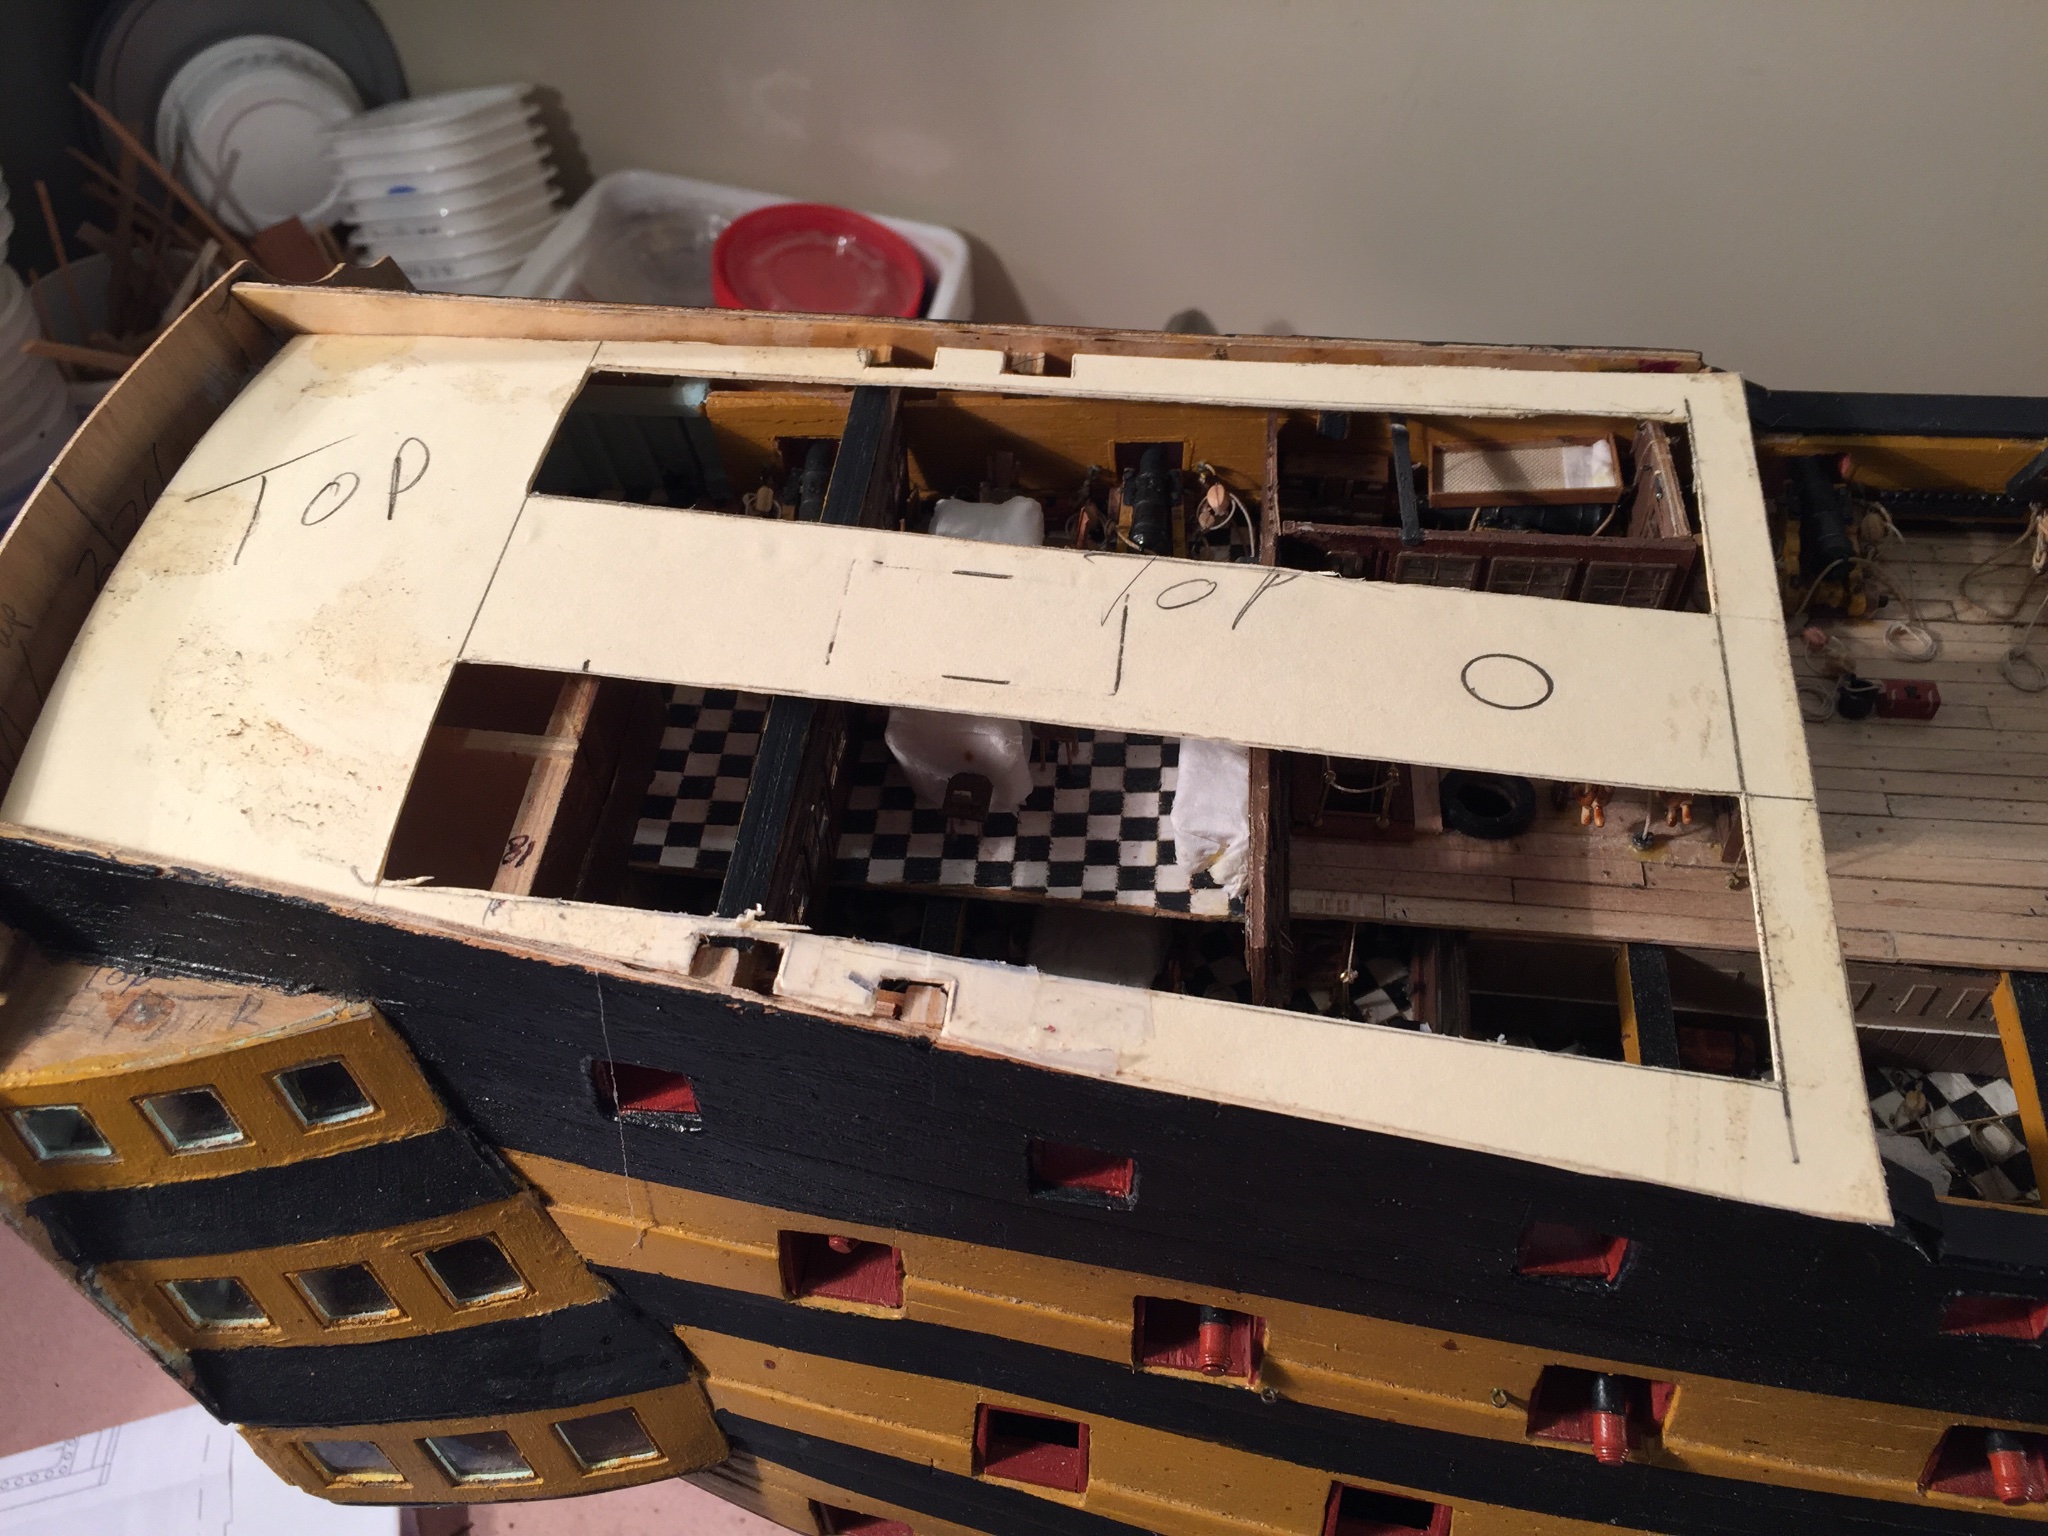
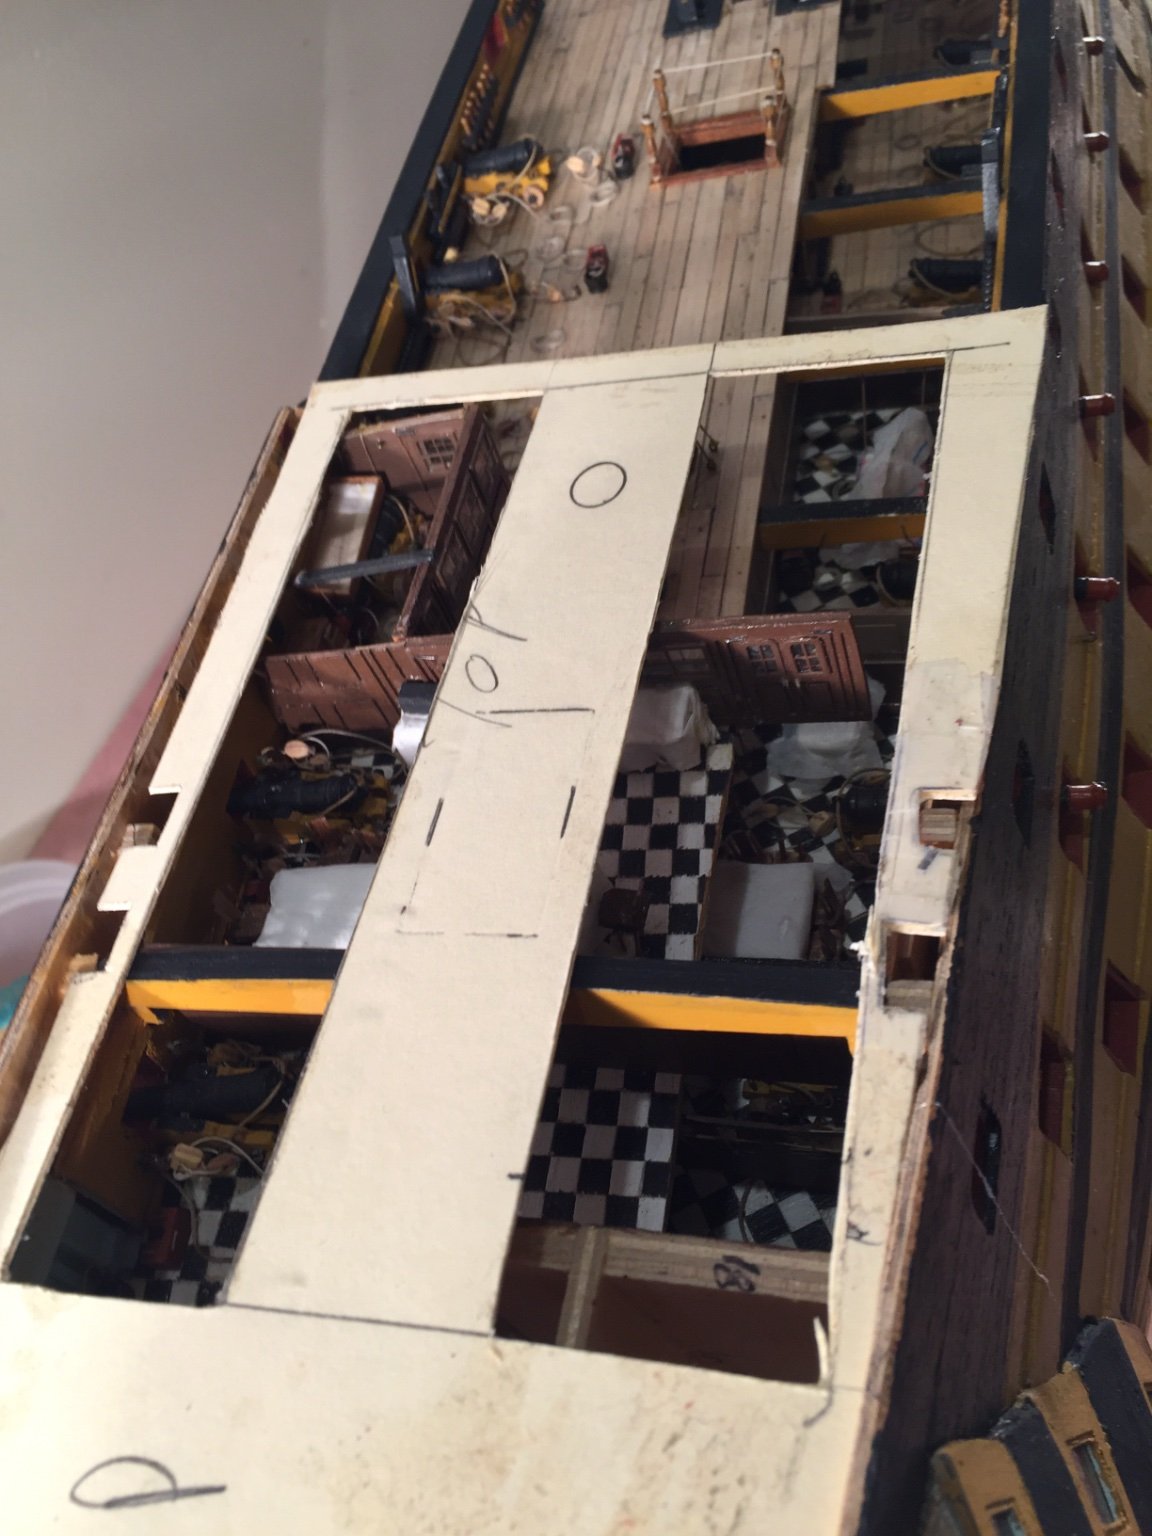
You can also see the template for the poop deck dry fitted, there exposing the Admiral and Captain's cabins.
I thank you Heinz very much for your support. You're the best.
Stay safe and well,
Mort
- Charter33, Heinz6672 and Shipyard sid
-
3
-
-
I think it depends on the size of the rope you're serving. I've used both sizes - Gutermann's - for years and am happy with the results.
Stay safe and well,
Mort
-
Hi Avi,
Years ago I bought a set of "French Curves " made by Staedtler at my local Staples. That should work for you as far as the ships curves are concerned.
Hope this helps,
Mort
-
Hi Jason,
No it won't be necessary to adjust any of the deck beams. The only adjustment is the removal of the right half of the beakhead bulkhead. My concern is amount of the upper gun deck visible when looking at the model bow on.
The windows are mica. It was a gift from a fellow NJ Club member ages ago. He doesn't remember where or when he got it, but he bought it on line.
I got the idea from looking the models in the "Rodgers " and "Kriegstein Collection" books.
Hope this helps.
Stay safe,
Mort
-
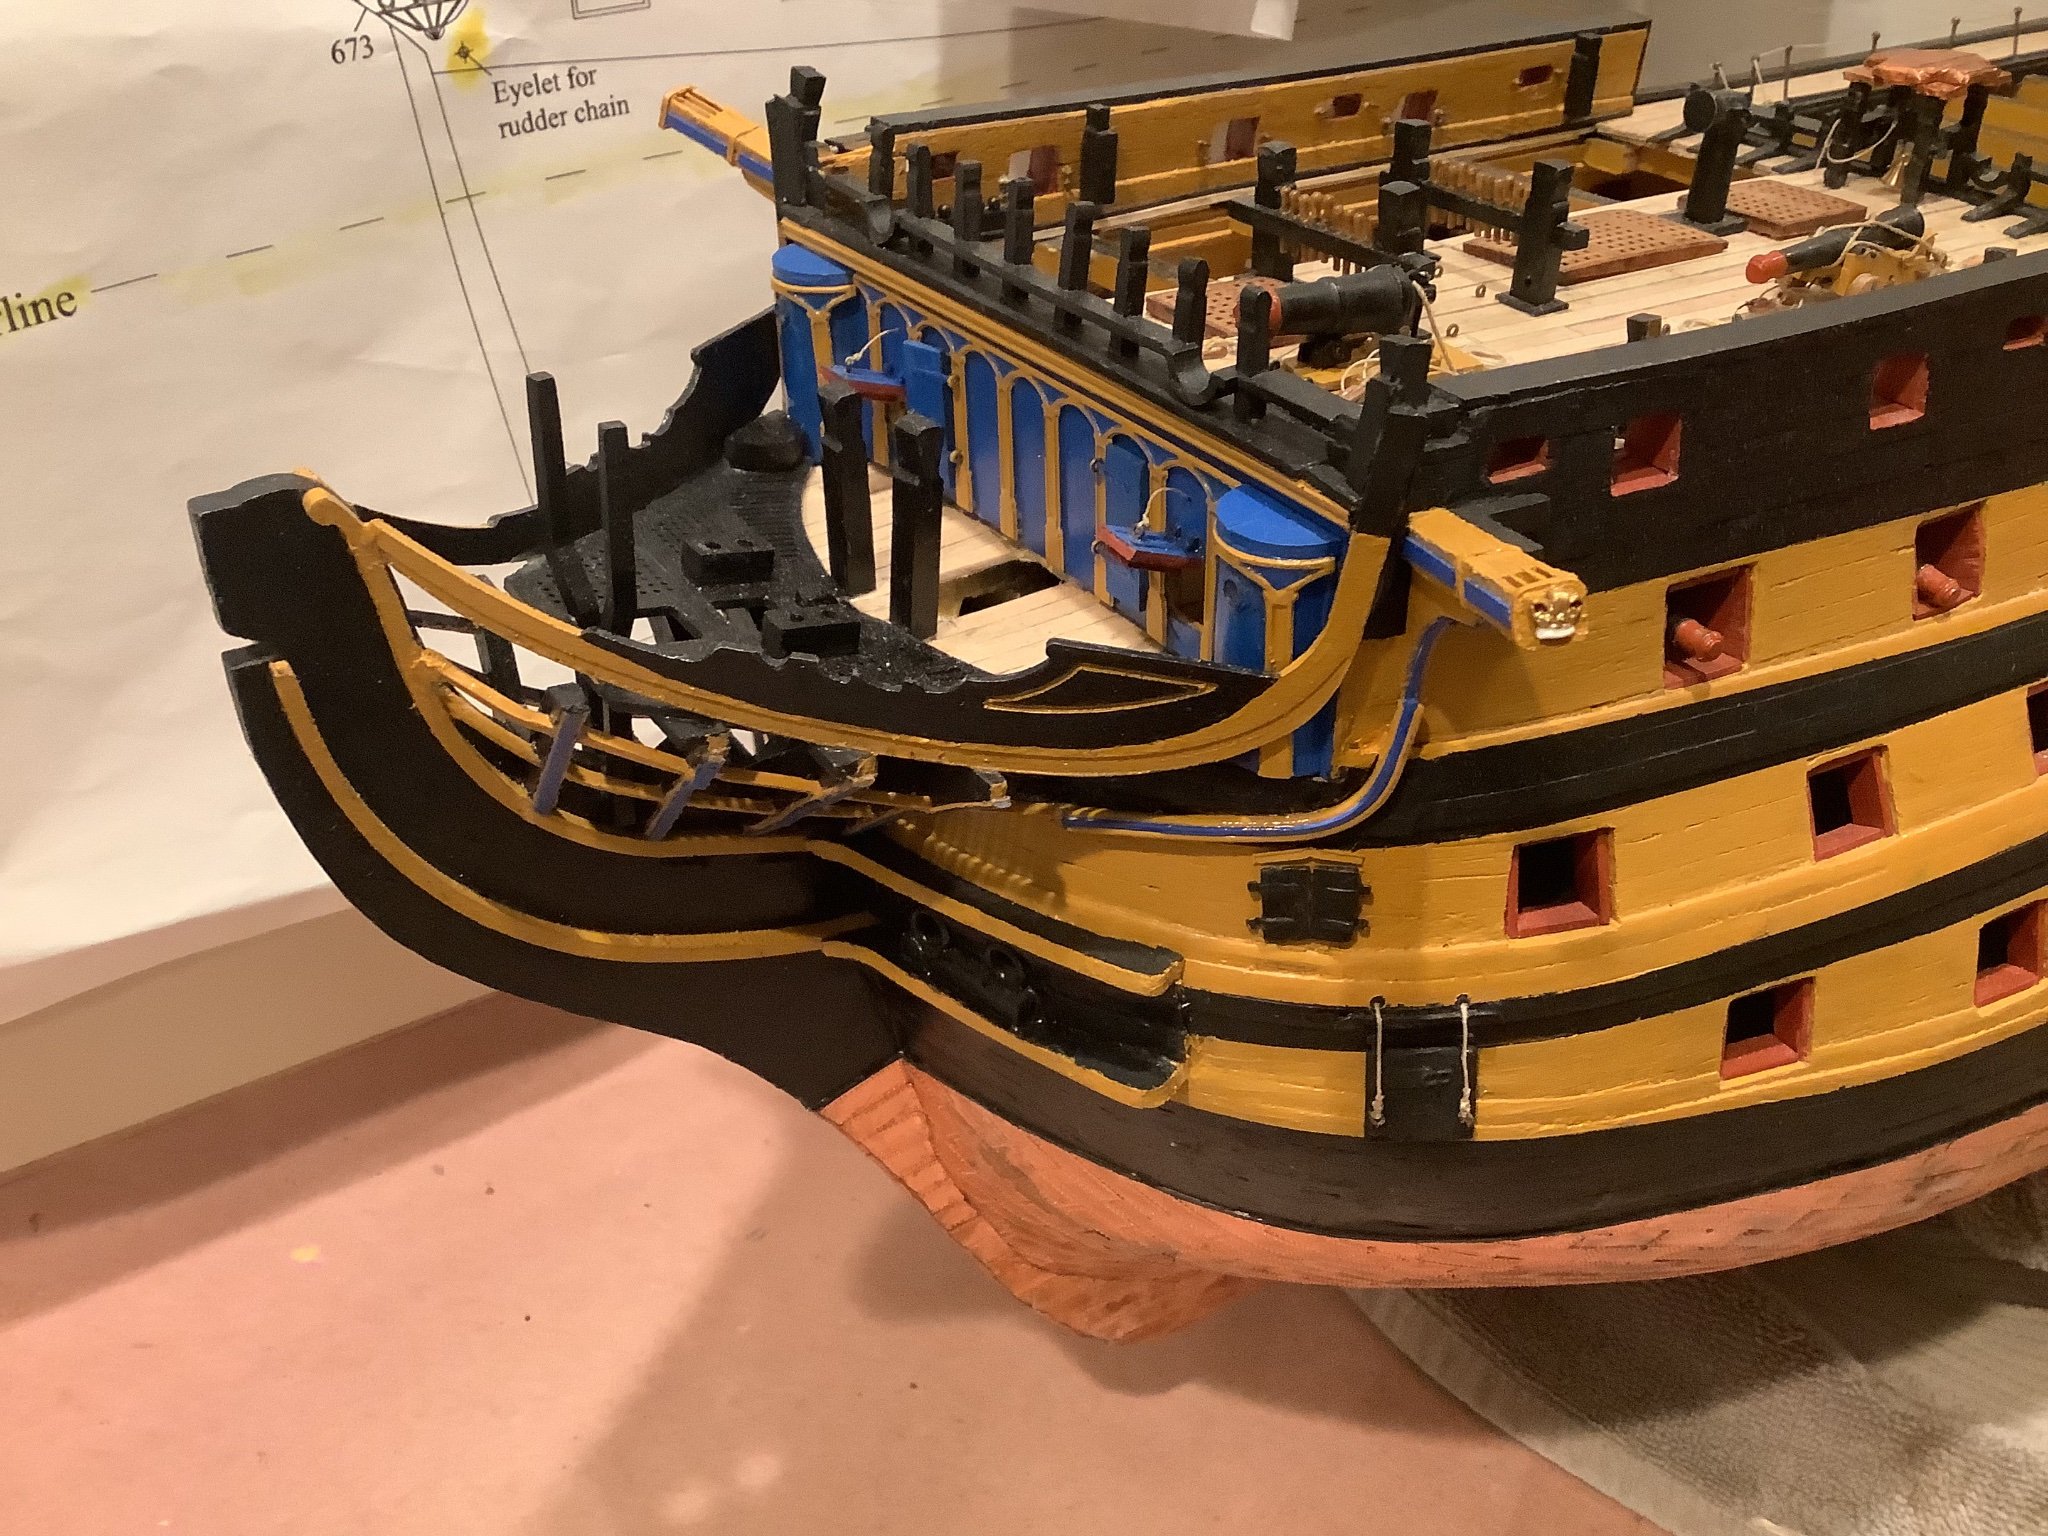
I've a question concerning the beakhead bulkhead #205. I'm thinking of removing the right side of the bulkhead in order the make the bow interior more visible when viewing the front of the ship. As you can see if you check my 2/15 post - the first picture - the starboard bow portion of the upper gun deck is exposed. With the marines walk, bowsprit etc. will removing part of the bulkhead provide more visiblity and do you think it's worthwhile?
Thanks,
Mort
-
They're great. Where did you buy them?
-
Hi Lyle,
Been meaning to ask - perhaps I missed it - did you post any photos on how you built your chairs? They're great.
Thanks,
Mort
-
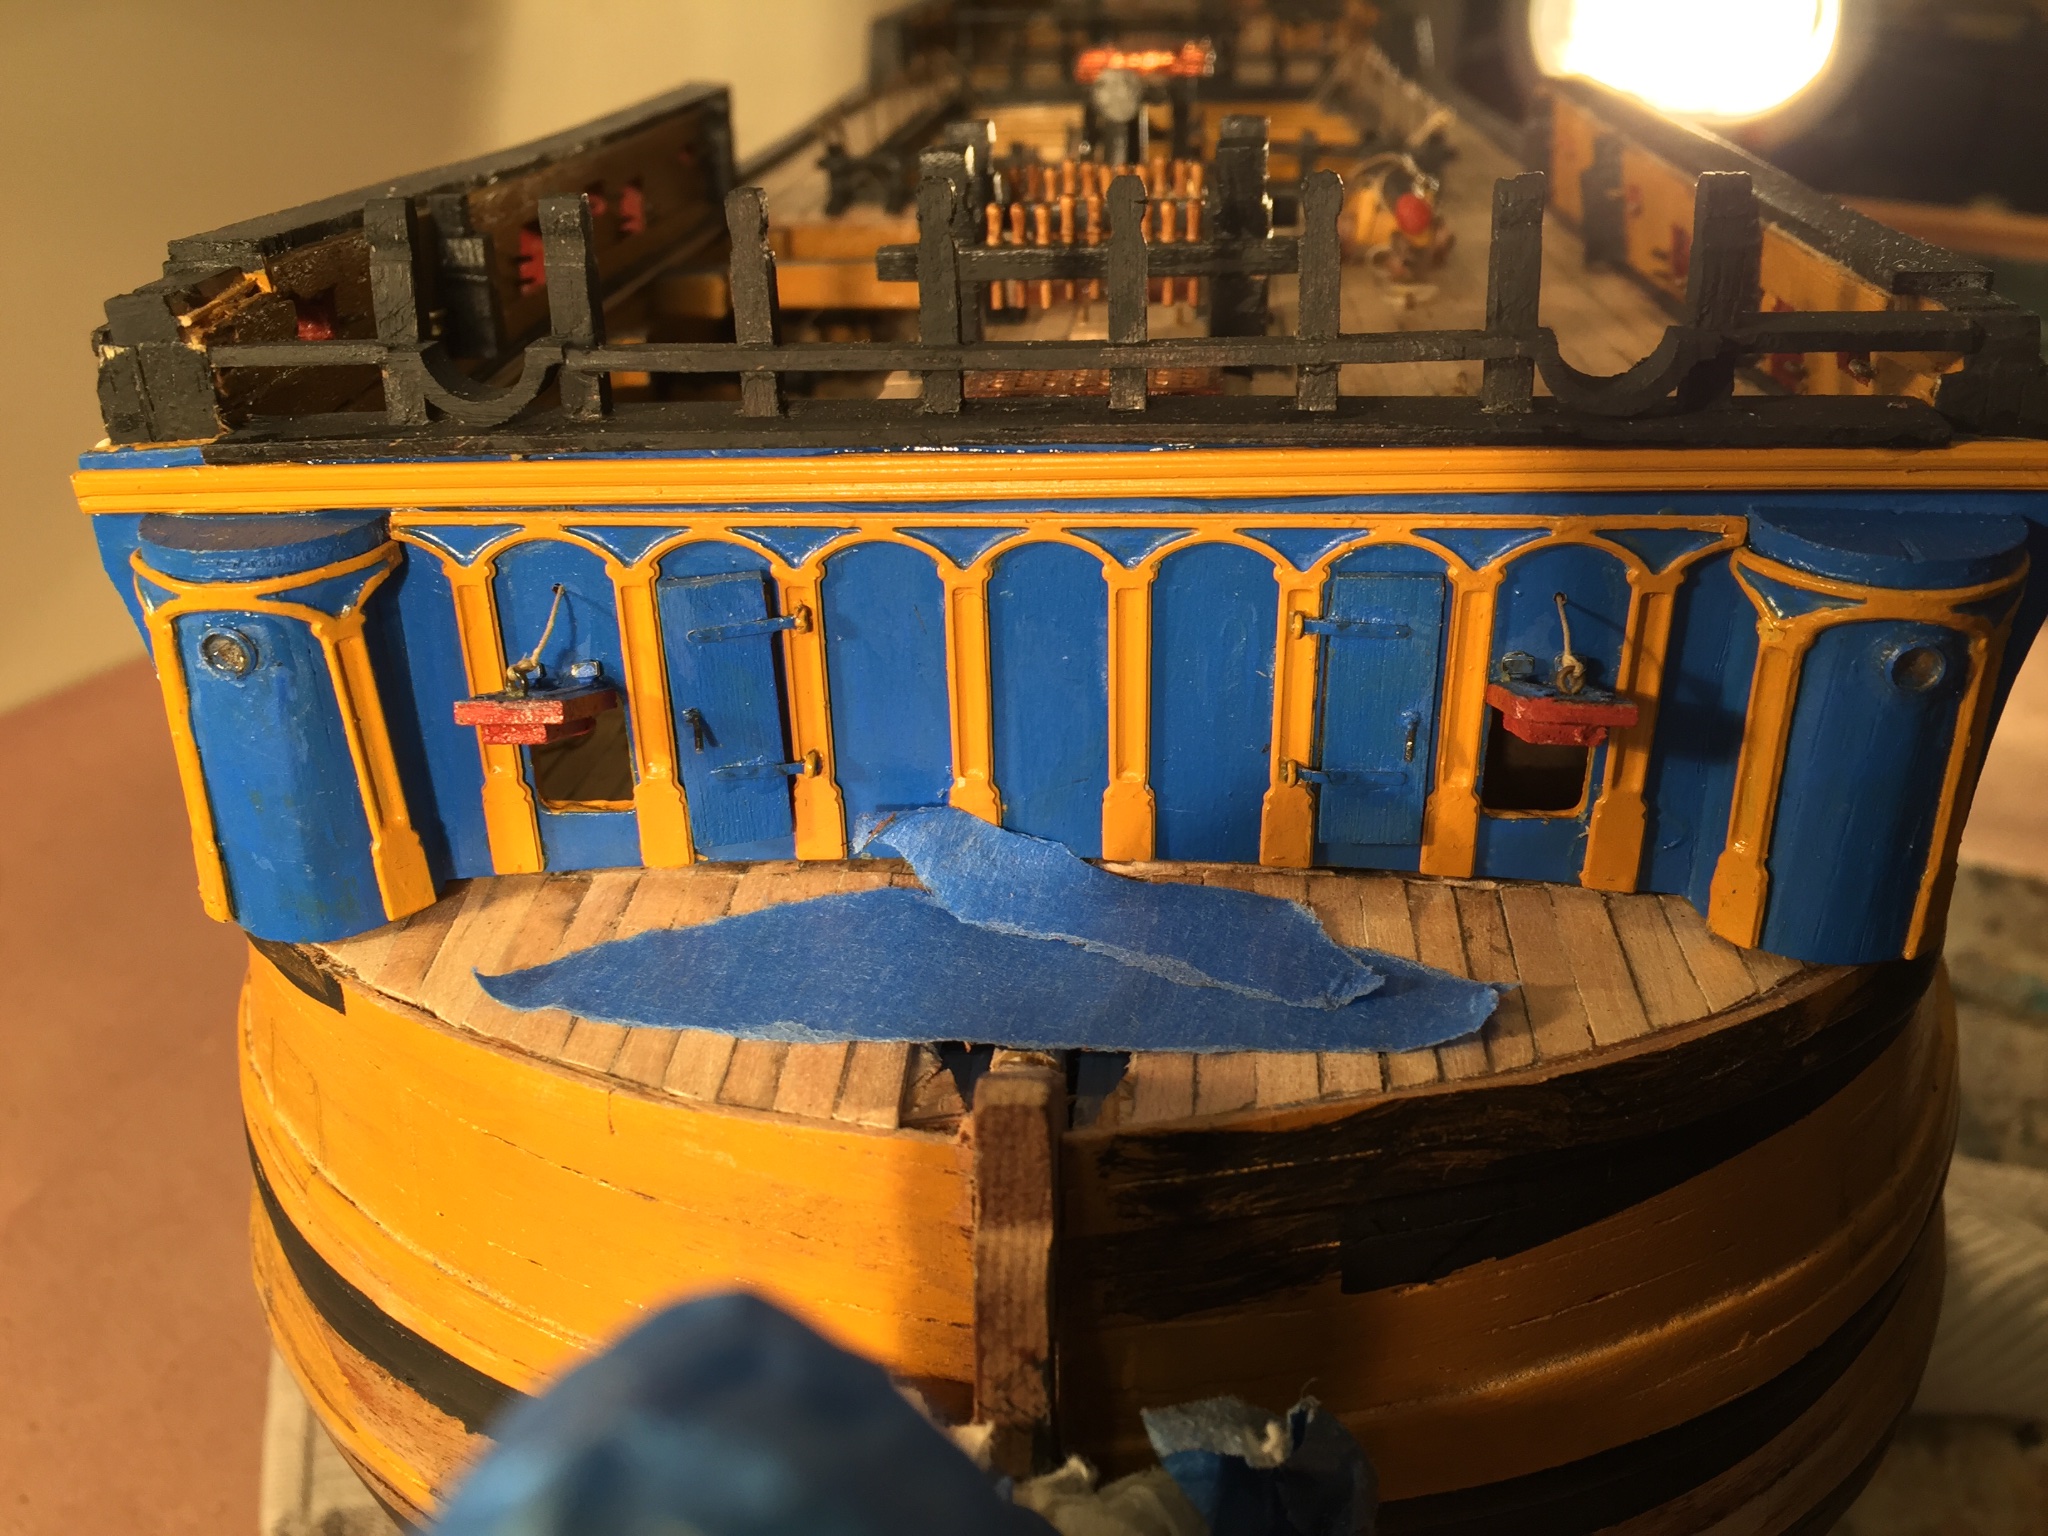
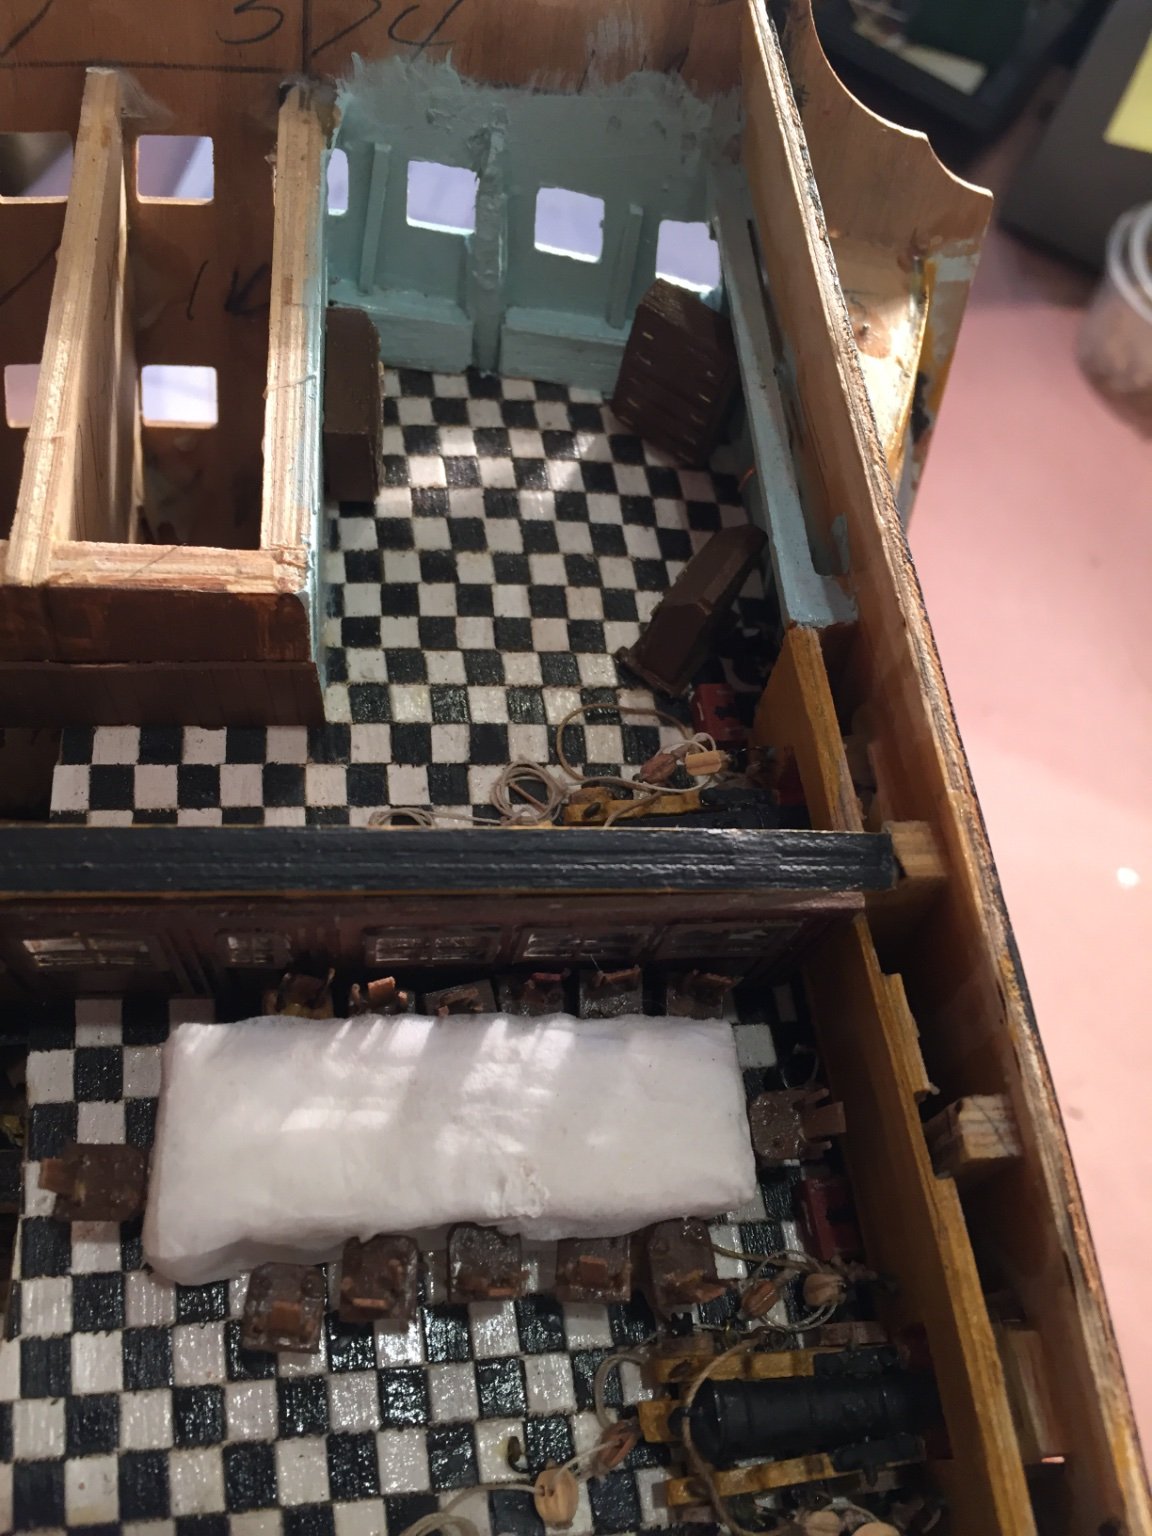
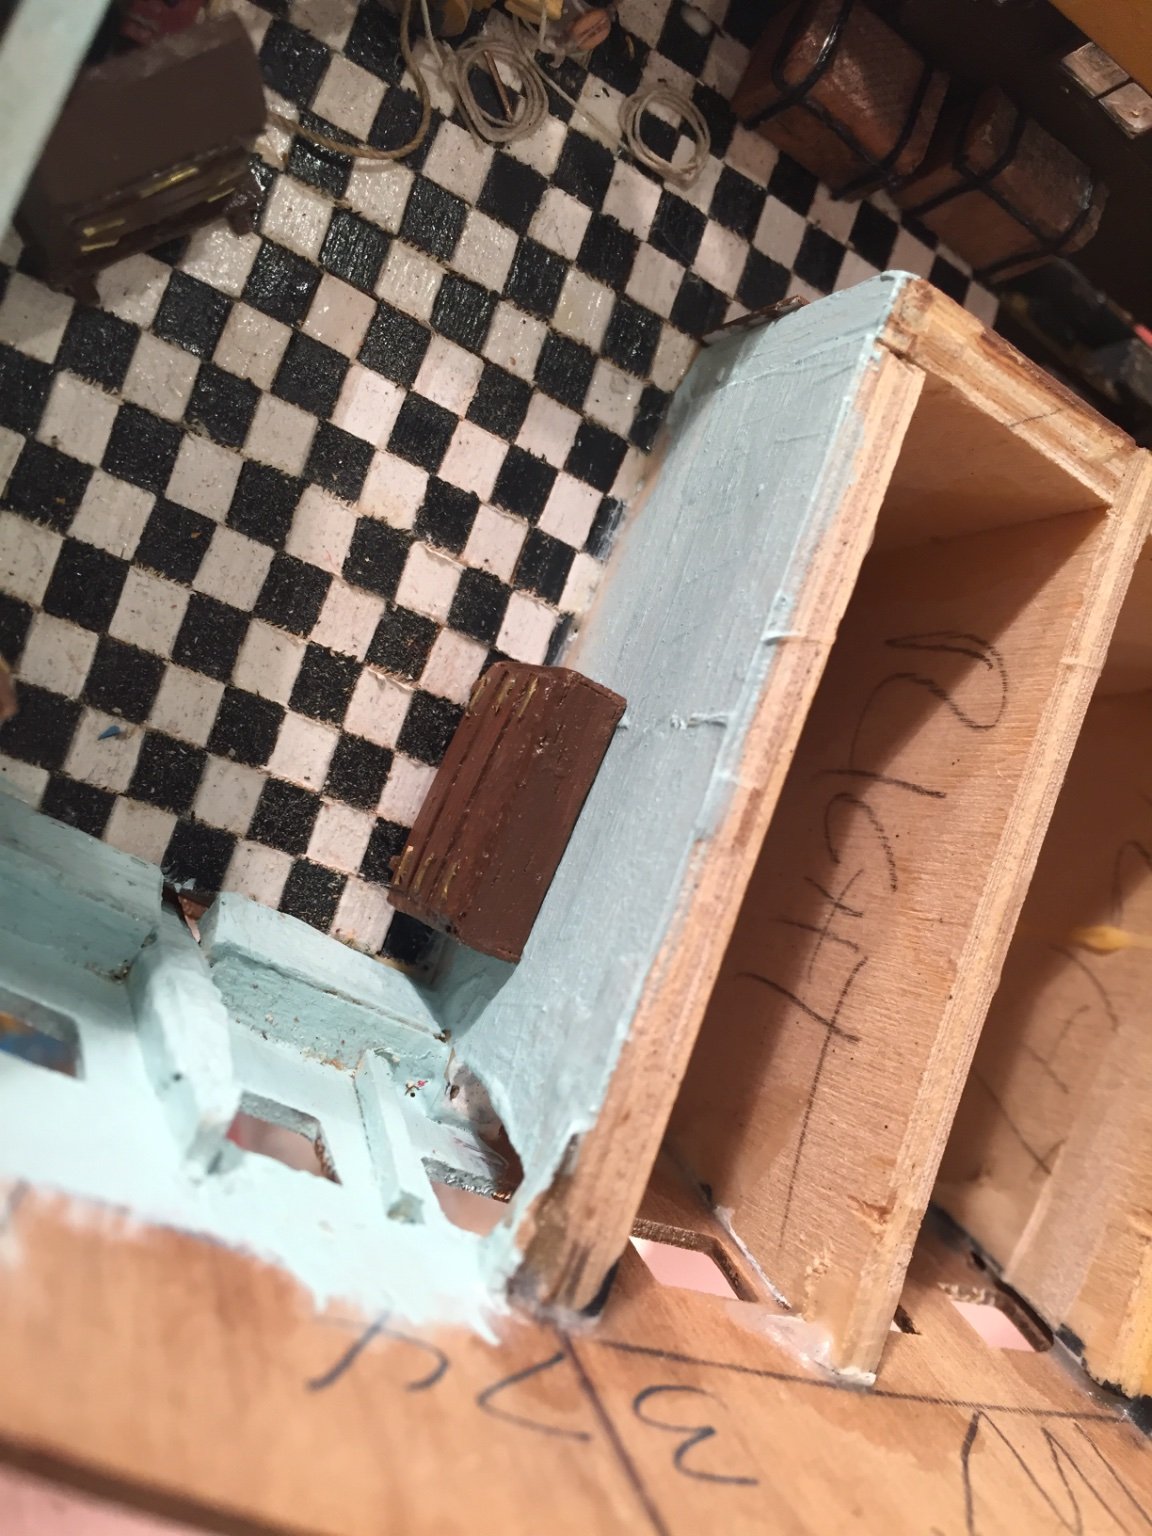
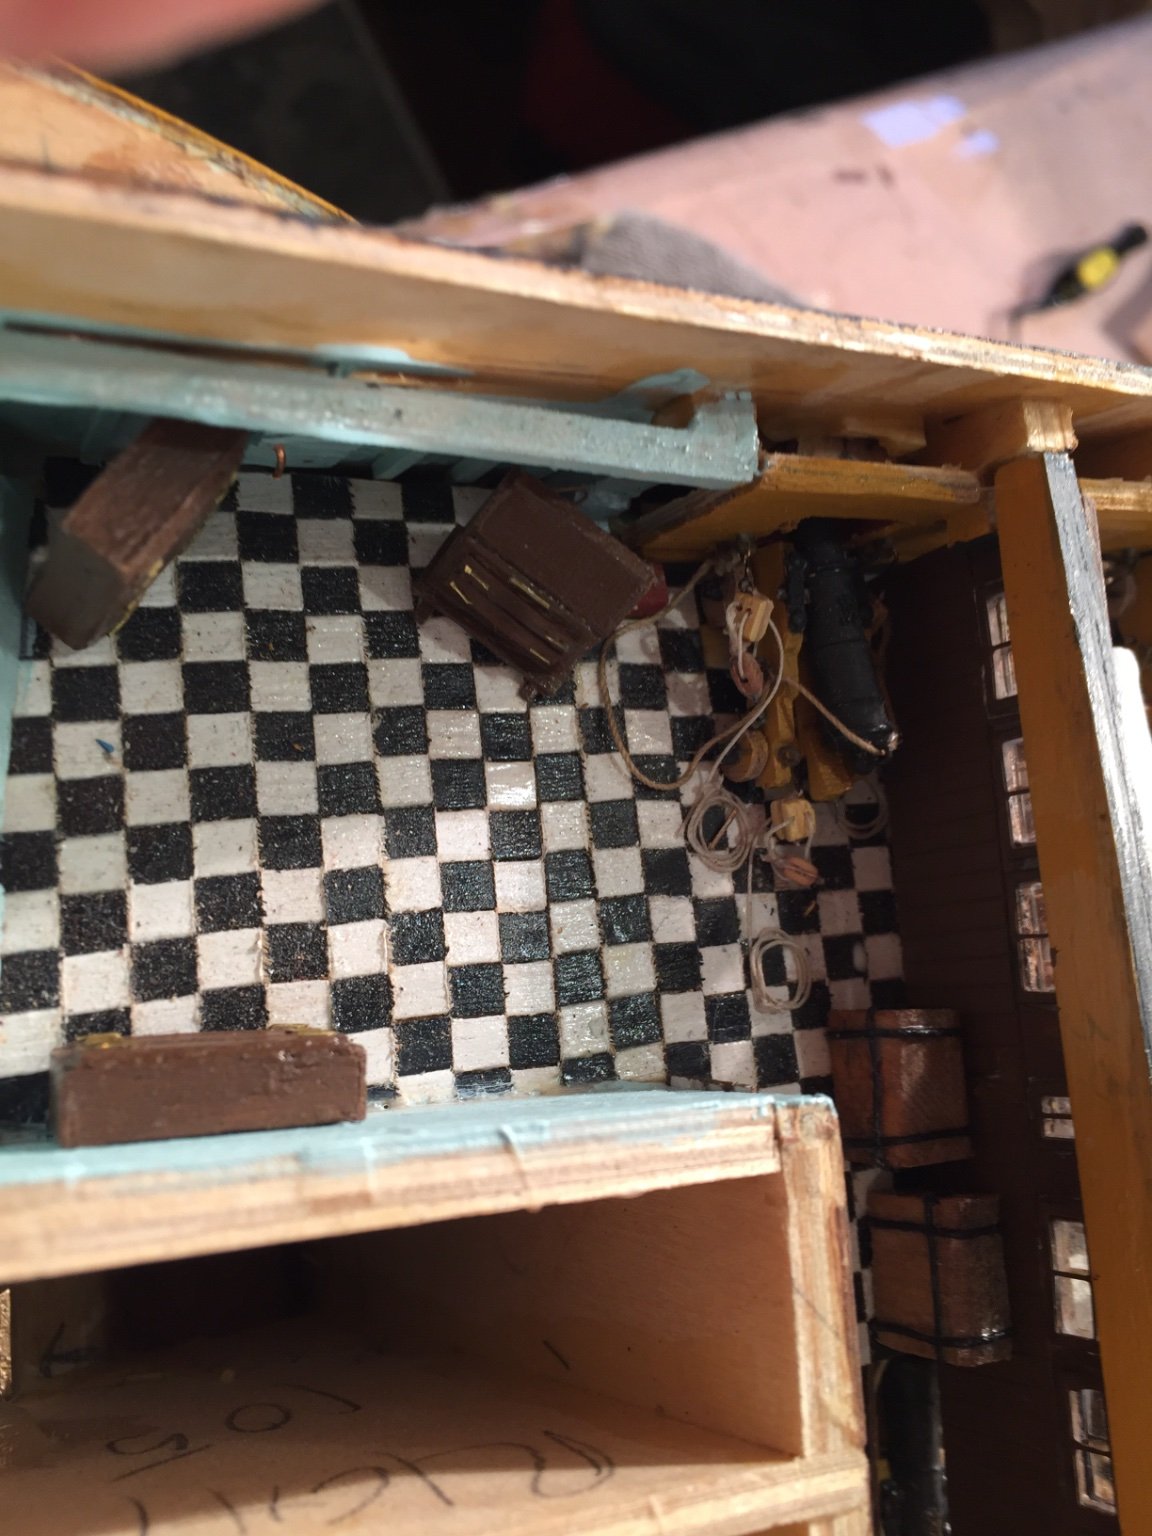
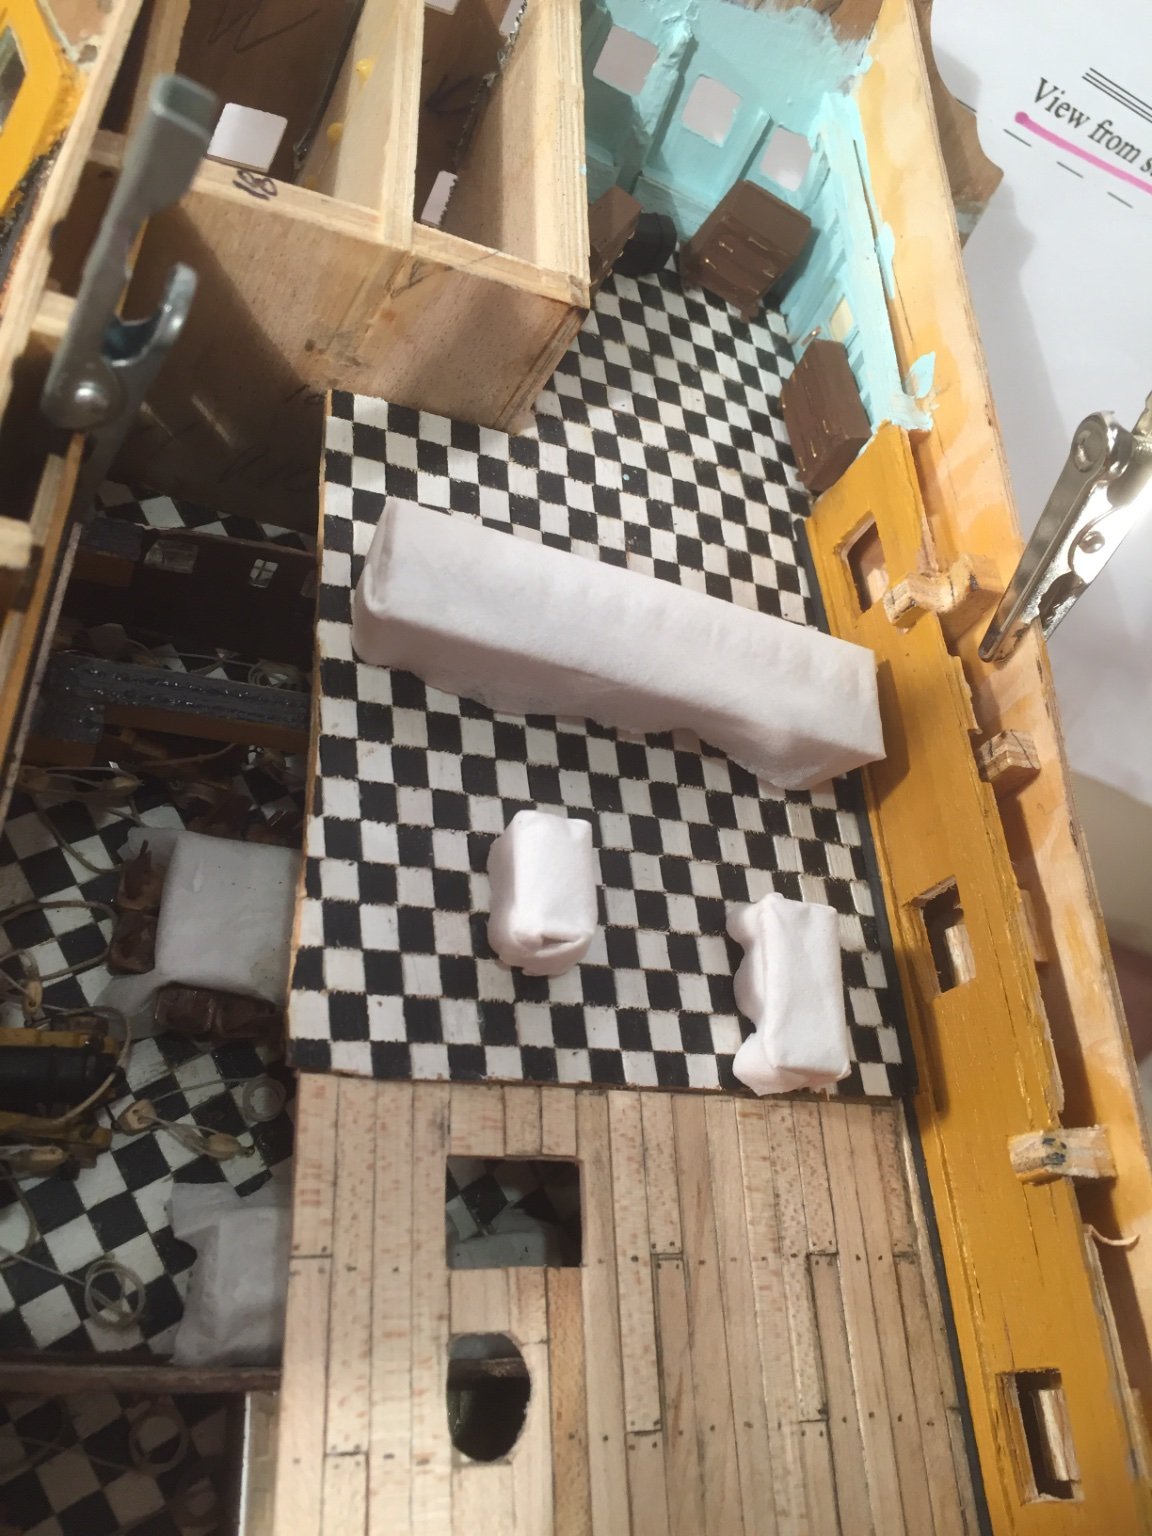
As you can see I removed part of #105 in order to build part of the captain’s area. In retrospect I should have removed both of the top parts of #105 and the keel piece but I couldn’t visualize if it would work or not if the stern fascia #374 would properly fit. The pictures show the captain’s quarter gallery with a hanging lantern and commode. Also shown are some furniture dry fitted in the captain’s day cabin.
-
-
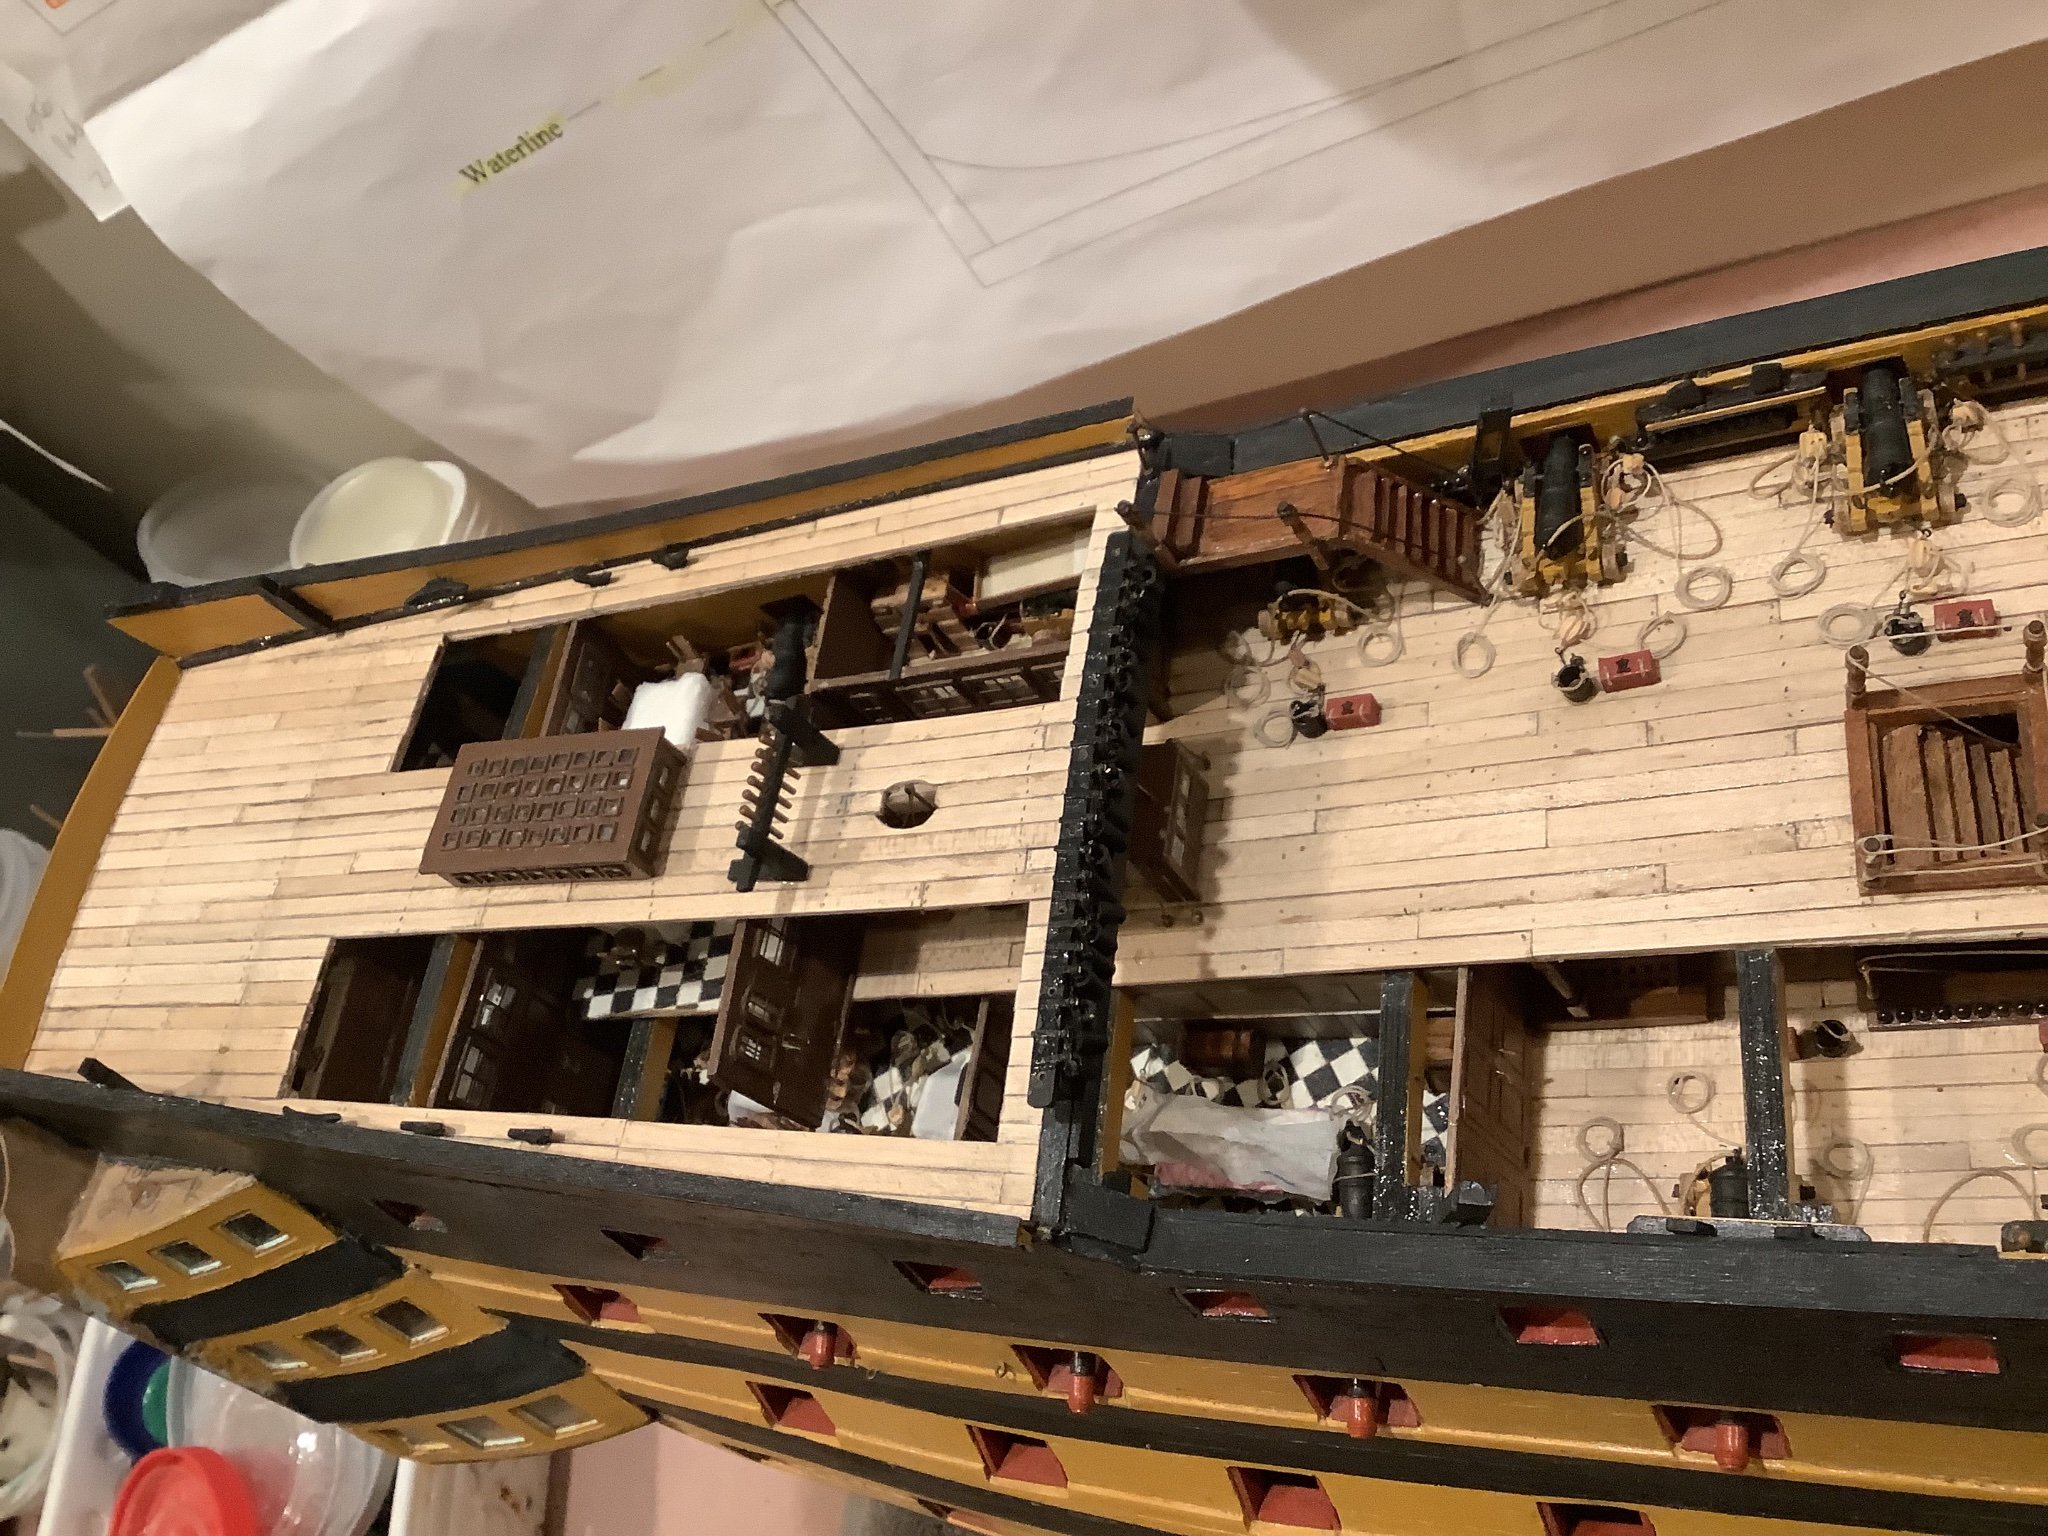
Hi,
I think I've figured out how to post pictures, which don't do any justice to the real life appearance. Hopefully I can do it again. I'll try post earlier ones. The above show the forecastle breast beam assembly, with the exposed port side upper gun deck, the masters cabin - with bed, desk and clothes trunk - the admirals sleeping cabin - with wash stand, clothes trunk and bed - partially exposed admiral's dining cabin and the captains dining and day cabins. I'm awaiting more parts from Caldercraft and then I can complete the captain's dining and day cabins.
Stay safe and well,
Mort


HMS Victory by mort stoll - FINISHED - Caldercraft - Scale 1/72
in - Kit build logs for subjects built from 1751 - 1800
Posted