HOLIDAY DONATION DRIVE - SUPPORT MSW - DO YOUR PART TO KEEP THIS GREAT FORUM GOING! (Only 20 donations so far - C'mon guys!)
×


Shazmira
-
Posts
1,303 -
Joined
-
Last visited
Content Type
Profiles
Forums
Gallery
Events
Everything posted by Shazmira
-
 Yea pictures!!! Looks like it is progressing well Sjors, I will follow very closely since I will be at this point very soon.
-
Excellent work Randy!!! Give yourself a big pat on the back!!!
-
It's here! It's here! I can't believe it's here!!! And it is soooo beautiful!!! lots and lots of sticks and string to play with Thank you so much Chuck for creating the Syren!


- 773 replies
-
- 6
-

-
- san francisco ii
- artesania latina
- (and 1 more)
-
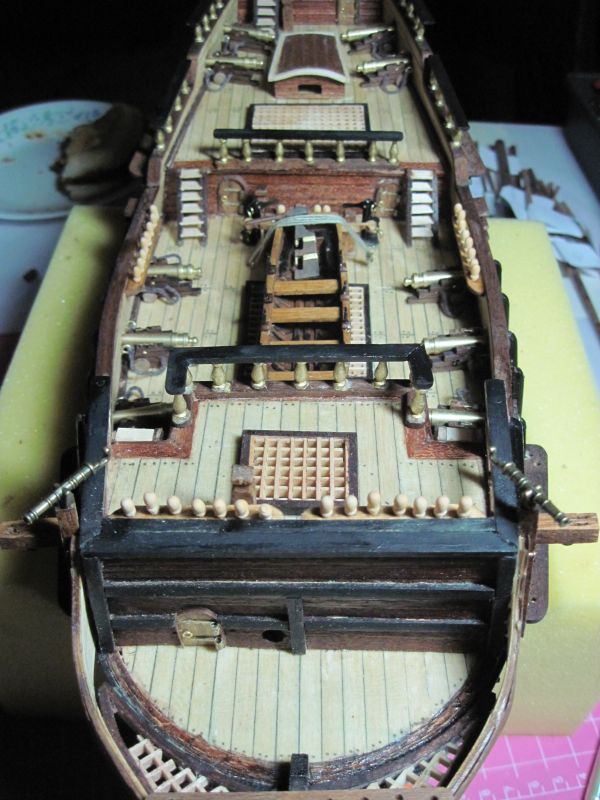
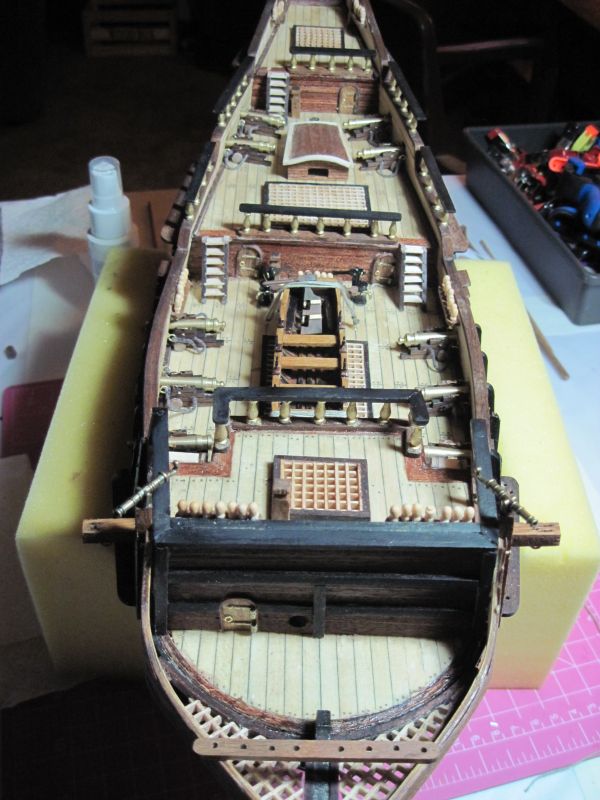
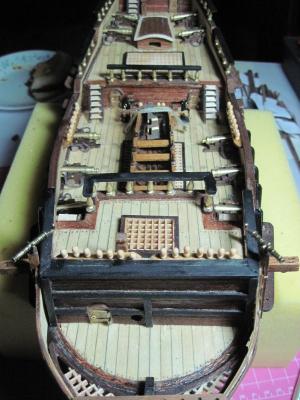
Okay, i have straightened out the deck furniture and made sure everything is now centered and straight on the keel line, and I made new pin racks so I could put the proper distance between the belaying pins. Unless someone sees anything else I need to fix or improve speak now please before I start on the masts and the rigging.
- 773 replies
-
- 2
-
-
- san francisco ii
- artesania latina
- (and 1 more)
-
Danny, you continue to astound me. My hat is off, and I bow to your mastery!! Keep the pics coming please...I am trying to soak some of that skill through the computer into my own fingers!
-
So Crackers, aka Tony is right, my belaying pins are too close together...I guess I will need to make new ones tonight
-
HAhahaha Keith...shhhhh, you aren't supposed to let the others know what us teachers are really doing during class Hand is ....I am not sure how to explain it....half working I guess. The thumb, pointer, and the middle finger work fine, other two, not so much. Still can't hold anything, or grasp anything that needs to lay accross my palm at all. The incision area itself is hper-sensitive, and the scar tissue build up is pretty bad. I was not a good patient and I unwrapped it and used it before the doctor said to which caused the stitches to pull and tear through the skin leaving an open, gaping wound. This wound eventually closed and healed, but left massive scar tissue behind that has left a protruding deposit of the stuff about 3/8 of an inch high. I thought, well, looks ugly but it's scar tissue so no big deal. Ooops, this bundle of scar tissue presses down on the healing nerve bundle, causing some pretty intense pain sometimes. Whodathunkit! So dr. has me going through scar therapy...I have to keep this silicone covering on the scar tissue now, this is supposed to soften the skin, and help break down this large mass of tissue. The therapy is already showing signs of helping (started last Friday) but the side effect is that now I have basically a pressure bandage placed on an area that feels pain under any type of pressure. Now, instead of just the occasional jolt of pain, I get 24 hour pain. However, this too serves a purpose and I am becoming a bit more desensitized to it all. Long story short..it is getting there, but I won't be doing any golfing for awhile yet.
-
Keith, Gee Syren was supposed be 30-45 days on back order...nope, it will arrive tomorrow I had it delivered to my work address instead of home, so I am going to have to leave it locked in my office. If I take it home I will be in really big trouble, as I will hear her whispering to me to come open her up and get started src, glad to see you back, I wondered what had happened to you lately! Crackers....ok, my stupid question is this, do I actually have to tie something to these pins? or are they for looks only? I have been thinking the same thing about them being too close to each other, but I am not sure how to fix this...I have no more of the applewood in the proper dimesnions, but I could remake them in basswood. I cut everything according to the instructions, but the pins themseves seem to be overly large. Hamilton, Dr. Hamilton that is...I hate those cannons so close to the stairs...seems very impractical to me, but I suppose that is the whole scale issue with this and other models. Buck, I don't want to wait till Custer for those oars lol. Yes, it is a beautiful place for sure! No rum for this pirate however, I like my Jack, Black lol. Steve, my foam cradle....how ironic, the surgeon gave me that to rest my hand on while sleeping so I wouldn't roll over on it during the night lol. Works very well for supporting the build though Sleep is over rated lol...I want to see her completed!!! But the ever critical eye of the other half noticed some small issues this morning, so tonight I will address a couple minor things and straighten up the "lines" of the deck.
-
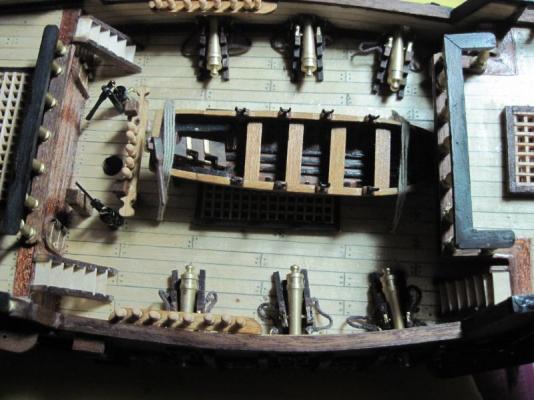
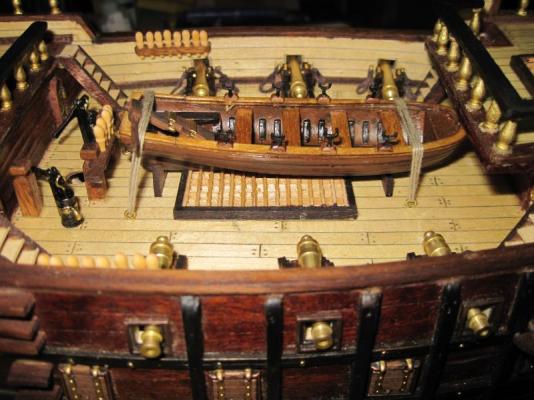
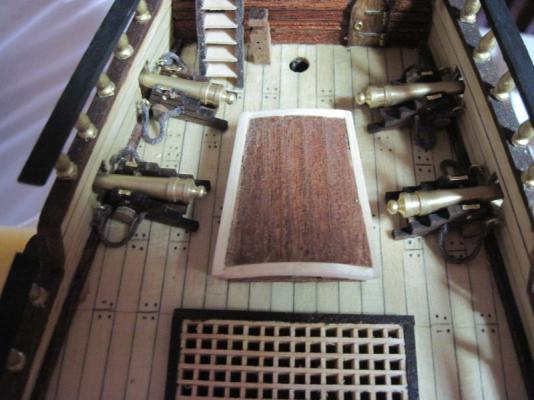
finished the deck furnishings!!!! Cannons are complete Lifeboat is done and tied down. I plan to add some oars but have to wait for the wood I ordered to get here. Should be able to add those easy enough. Time to start the masts!!!


- 773 replies
-
- 2
-
-
- san francisco ii
- artesania latina
- (and 1 more)
-
Wow, Painted?!?! In that pic it looks very 3 dimensional
-
Chuck, a bit off topic since this isn't rigging related, but in the pic above I am noticing the decoration at the stern and around the top of the hull. Looks like metal of some sort. I know the kit provides the friezes to use for this, but which is more historically accurate, a painting on of the decorations, or adding a carved element instead?
-
Mine says it has the flux in the core on the package. When I went to buy the soldering iron, I was looking for flux, but the hardware store didn't sell it...just the flux core stuff. Thank you very much for the tutorial. I had to make a purchase of some dowels from ME, my kit was short one length of dowel for one of my masts, so while I was at it I also purchased a different soldering iron since this battery powered one seems to be a joke!
-
Very nice, I like yours much better than mine...but I just couldn't make myself wait for wood to arrive to make my own. Patience is NOT my strong suit
-
Keith, I guess I need to find some flux before I try again. And thanks for the tip about heating the part first. I was not doing that. David, why silver? What is the difference?
-
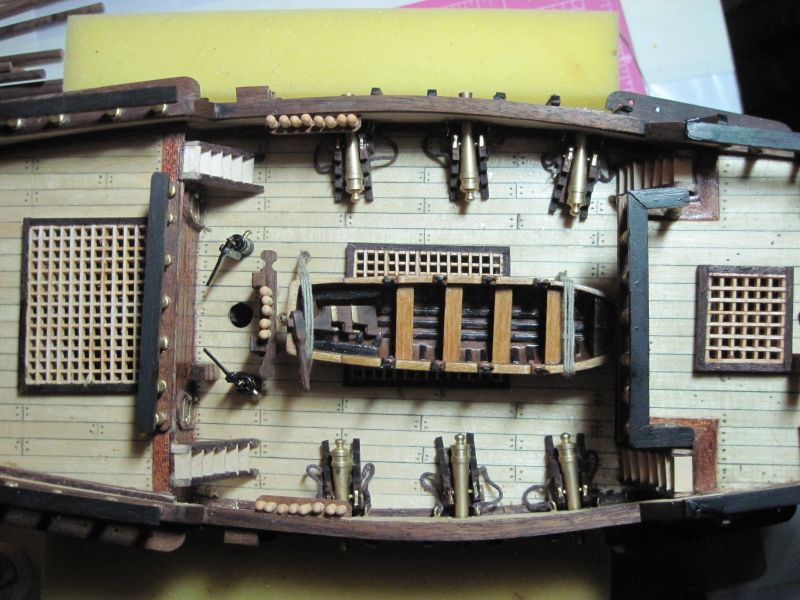
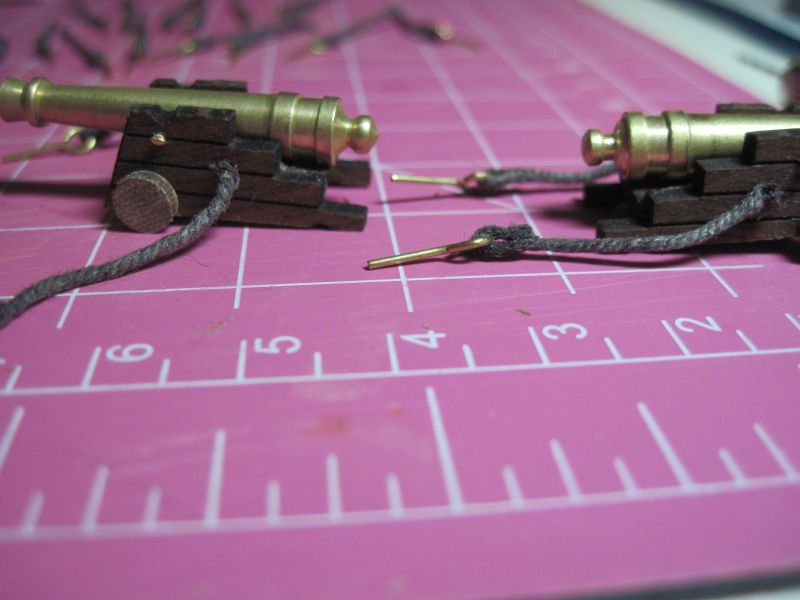
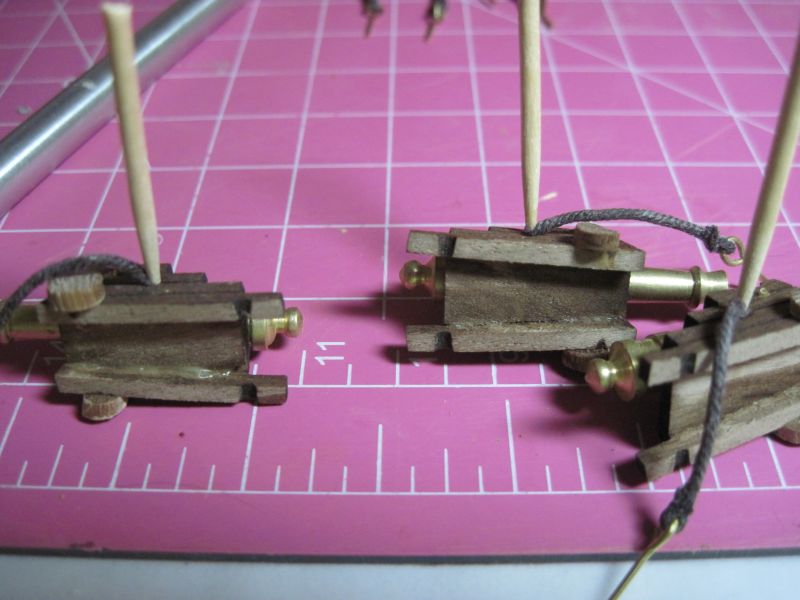
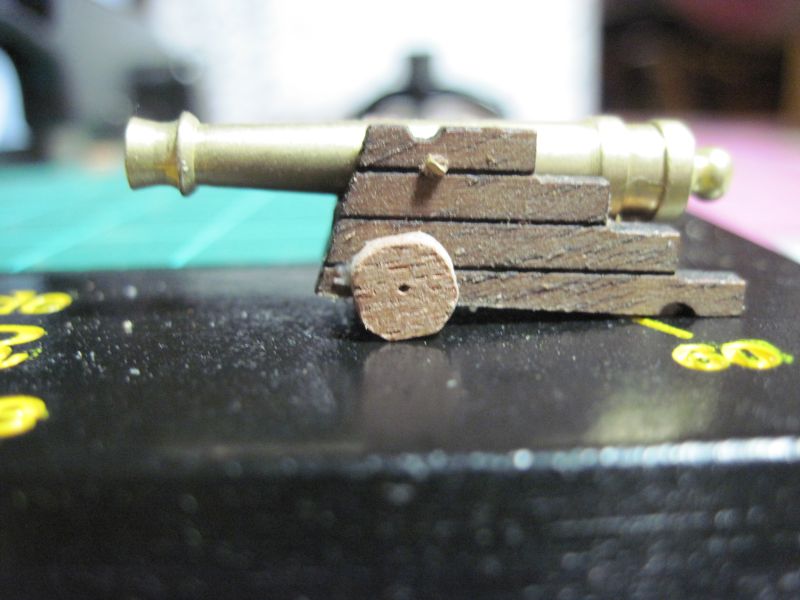
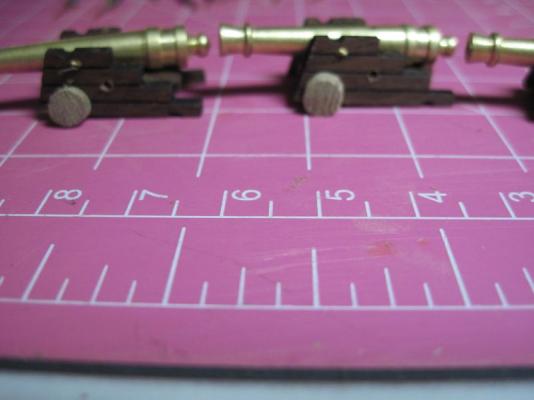
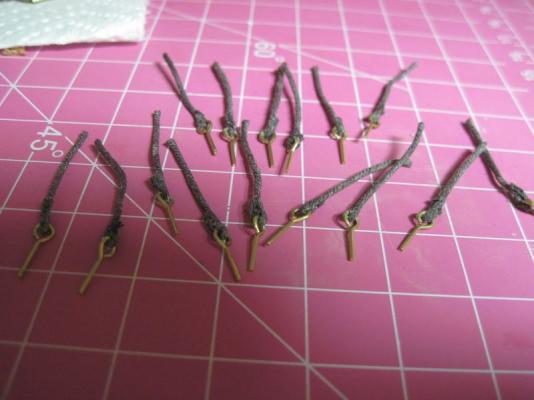
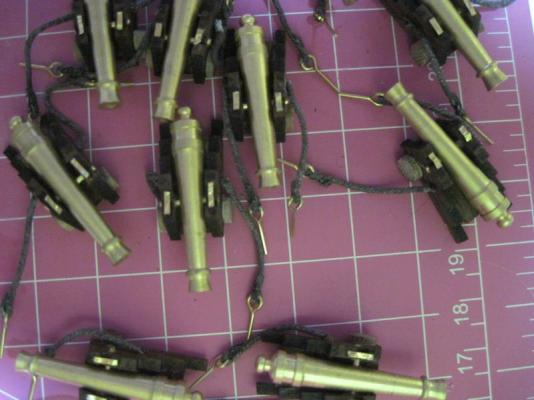
Busy day today, but progress has been made. Finished making wheels for the carriages Made the little ropes that hold them in place Had to drill holes in the sides of the carriages for the restraining lines Used my high-tech tools to insert and hold the restraining lines into to holes on the carriages (toothpicks) Added "brass" straps to the tops of the carriages. these straps are actually made of gold foil which I found in the candy making aisle..seems to simulate what i needed it to. Wish I'd had this when I was making the hinges for my doors. first 4 cannons installed!!!


- 773 replies
-
- 4
-
-
- san francisco ii
- artesania latina
- (and 1 more)
-
I think the hinges work well....I attempted to make my own, but was not happy with the results so ended up just using the kit supplied ones. I am finding it difficult working with things on such a small scale..I don't know if it is the lack of proper tools and materials, or just that I am all thumbs.
-
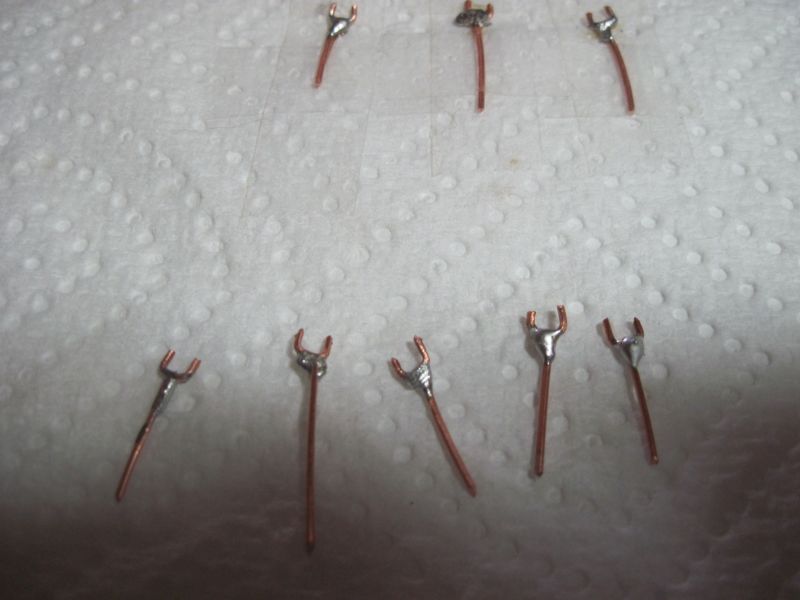
Steve, I am afraid the SF will have to stay safely at home...don't think she would be too safe on the back of the Harley....It will be an interesting trip this year...interesting to see how much thinking about my build I will be doing. I am hoping I will be finished with the SF by then and ready to begin the Syren...but you know what they say about the best laid plans. I had actually expected to be working on my masts today, but I spent yesterday doing the lifeboat, and today I have decided I need to put wheels on the gun carriages after all. That means it will probably be mid week at least before I get to the masts The nice thing to look forward to is that I am pretty darn sure no kit bashing will be necessary for Chuck's Longboat....that should make it an intensely easier build, at least in that respect.' David, Grant, Adrieke, Sjors, Andy, Steve...thanks for encouragement. Andy...I don't know if it is me, the equipment, or the material....but nothing wicked like it should have. I would get this "ball" of solder, and would then have to place that next to the joint and melt it to join the two pieces. I know I bought a cheap battery powered soldering iron, so that might be the problem, I could have bought and electric one for a few dollars cheaper, but I thought I wanted cordless for ease of handling...I don't think the heating element works properly in it to hold a steady temperature Then again, maybe I need a different solder (think I have 60/40 tin, lead mixture with a flux core) hardware store did not offer anything else other than lead free. Or maybe it is the fact I was trying to solder copper wire since I did not have access to brass. Here is a shot of my new carriage wheels....dang camera shows every single flaw lol. Honestly they look much better from 6 inches away 1 carriage down, 2 wheels made, only 18 more wheels to go..

-
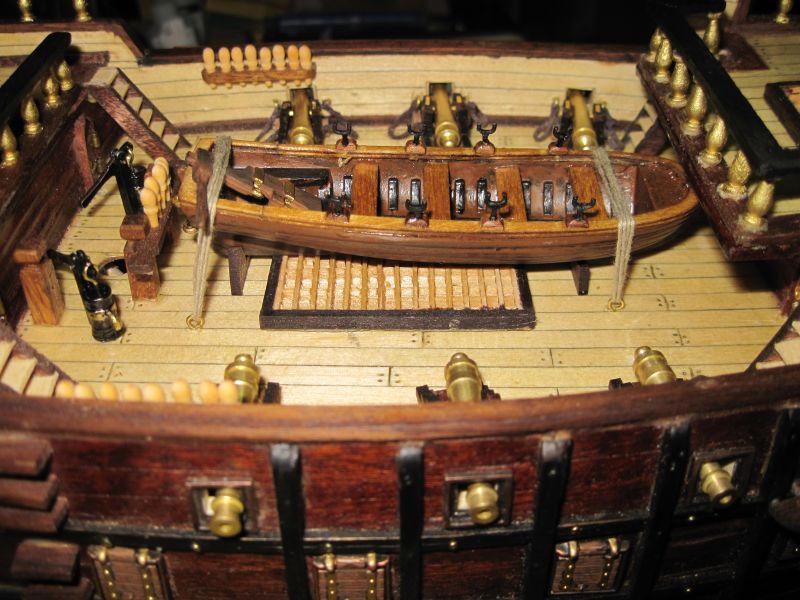
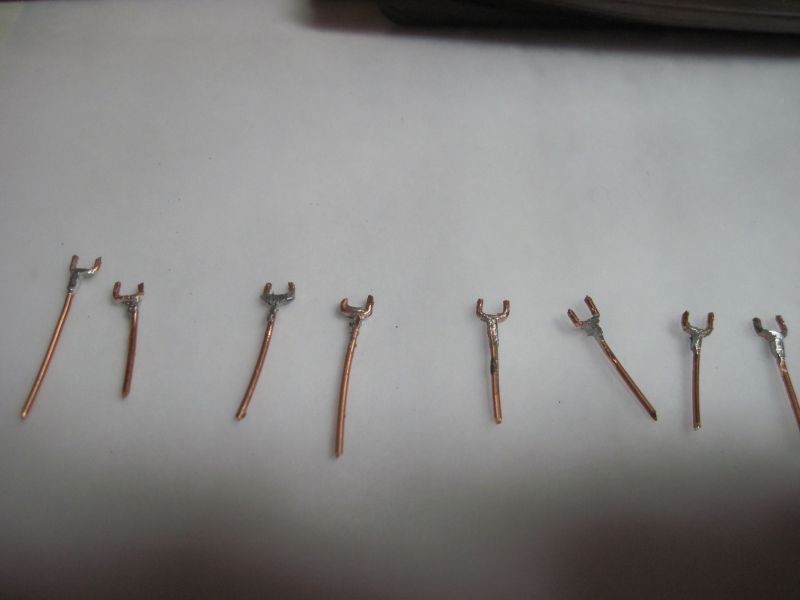
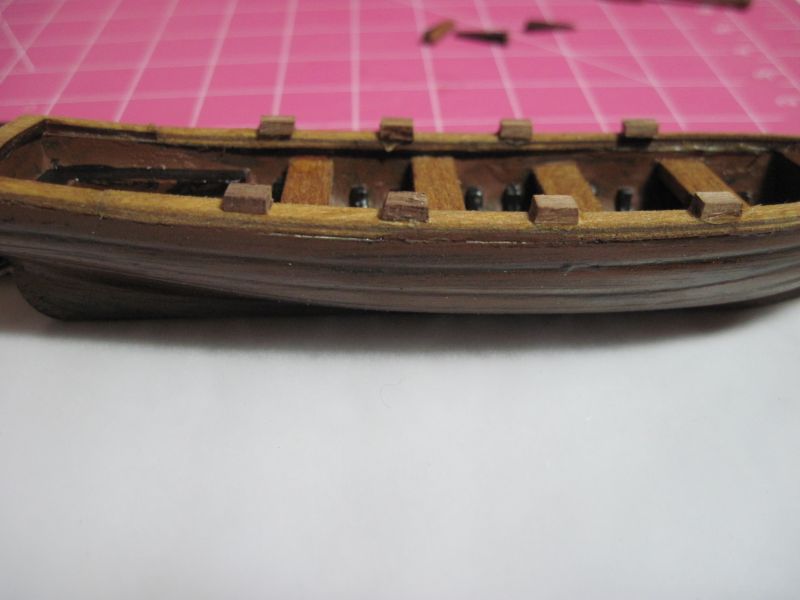
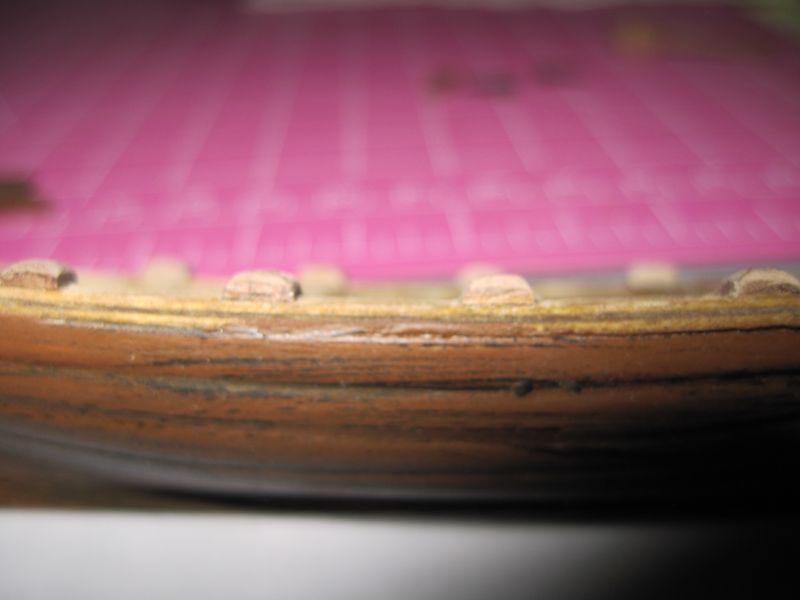
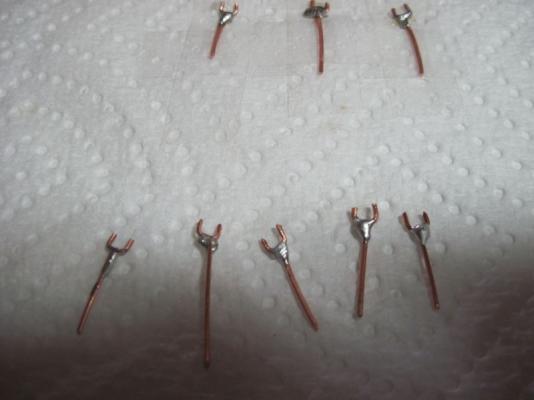
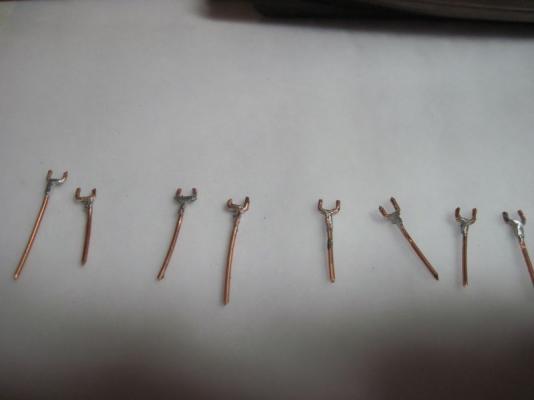
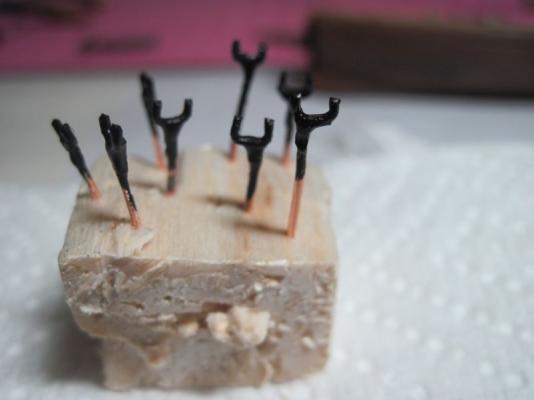
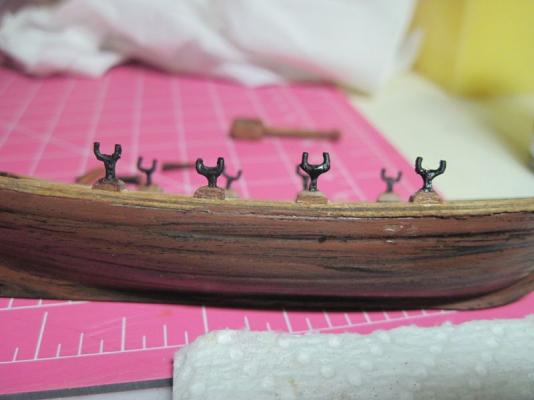
Ok, some progress to report. I have been working on improving the oar brackets for the lifeboat. My very first attempt at soldering....not so great So I spent some time filing down the solder Then painted them black as I have no blacken it While those were drying I took a look at the ugly blocks glued to the limber boards I decided they needed a bit of shaping Now I have the oar brackets dry fit...I know, they need some more shaping and filing

-
1 tube = 1 lifetime oops, I bought 2 lol.
-
Love the captain! Much better use of your scalpel, than placing it in your thigh for safe keeping
-
Looking beautiful!!! I love the color!
-
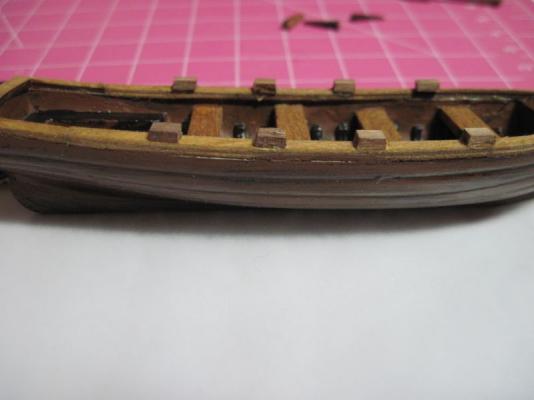
Ok, I decided to use the metal lifeboat provided with the kit....I know big cop out. However, my Syren that was supposed to be on back order for 30-45 days has shipped . Now I really just want to move on with this build and git er done as some say. But, last night while trying to sleep and instead dreaming and thinging about the build, I decided that there are a few things I need to do to the lifeboat to at least improve its quality. The oarlocks are just little 4mmx3mm blocks with a piece of brass wire stuck in the middle, according to the instructions. Well, that just wont do :mellow: So, decided I need to file and shape those blocks into something more visually appealing than a blocked out hunk of wood. Also decided it is time to buy a soldering iron and test my ability at making a proper brass oar resting point on the oarlock. Figure it cant be too difficult to make. So more tonight...
- 773 replies
-
- 1
-
-
- san francisco ii
- artesania latina
- (and 1 more)
-
yep, in the newer version they replaced the metal ones with laser cut wood pieces that you have to put together.
-
If I had wheels I would, but honestly...I just am not in the mood to make any at this time...I have my eyes on the next build and want to get to it lol.