


Jack12477
-
Posts
5,447 -
Joined
-
Last visited
Content Type
Profiles
Forums
Gallery
Events
Posts posted by Jack12477
-
-
OC, try taking a Probiotic. The antibiotics kill the good bacteria in your gut. You need to replace them.
-
Nice simulation of a parge coat, OC.
-
-
Been up here snoozing in the hammock.
- Edwardkenway, mtaylor, Egilman and 3 others
-
 6
6
-
-
-
1 hour ago, Egilman said:
Yeah, that Bosun's chair, (bounce chair) does have an unfortunate habit of getting people wet from time to time, I wouldn't want to sit in one for very long either brother
Well I probably misspoke as usual. I was thinking of this type chair (the Admiral loves hers)

- king derelict, Canute, Egilman and 6 others
-
9
-
Hey Lou, you forgot you can use a left handed sky hook and bosun chair 😉 😀 I'm hanging fine 🙂 😀
-
Send a PM to @James H he can correct it for you
- mtaylor and Keith Black
-
2
-
Feb 3rd & 4th we got hit with the "Perfect Storm" of winter ice storms. The system sat directly over northeast Ulster County NY and dumped an icy rain on us for several hours during the night, coating everything in 3/4 inch to 1 inch of ice. Woke us up at 3 AM with tree limbs dropping ice on roof, scraping roof and house siding. At 9 AM Friday (4th) we lost all electric power and our heat, house inside temperature dropped to 48 F, about 7 C, overnight. Outside temperatures dropped to 9 F overnight. Power was off for us until Saturday early afternoon, about 30 hours. 65,000 homes and businesses in a county that covers 1, 161 sq miles were without power, some until Wednesday this week, 1,000 tree and line crews were brought in from several surrounding states to help get power back, clear roads of downed trees and limbs, restring powerlines etc. Fortunately I did not suffer much tree damage, only 2 small limbs on my Birch tree snapped off, but my next door neighbor wasn't as lucky, their front yard was littered with large broken limbs from their 80 ft tall pin Oak. But no house damage to anyone on street. For anyone interested in the science behind this Perfect Storm here's a Link.
So there wasn't much incentive to wander into a cold dark cellar to the shipyard. Been here 50 years and never seen a storm this bad, winter or summer.. Not even hurricanes Sandy, Irene and Lee caused this much outage.
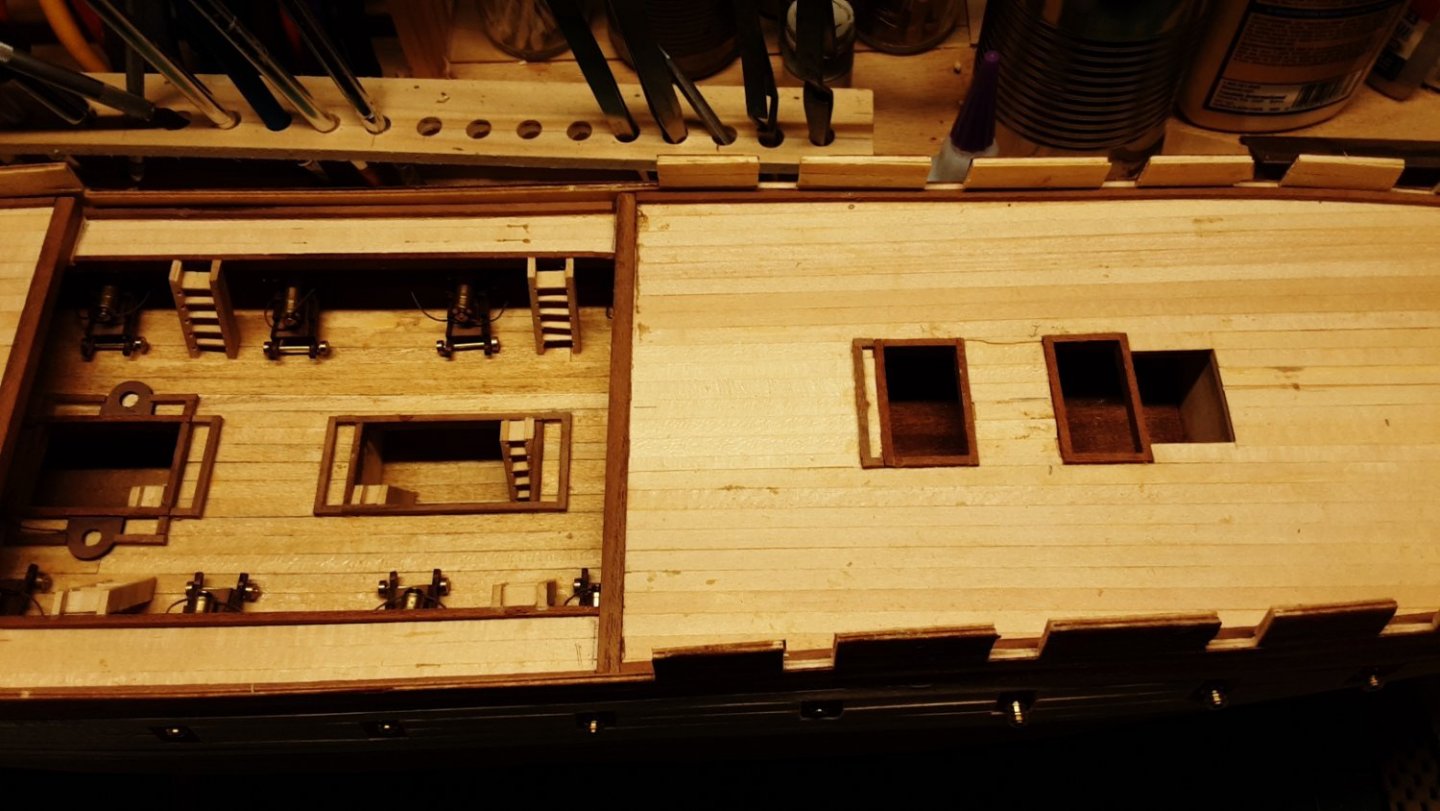
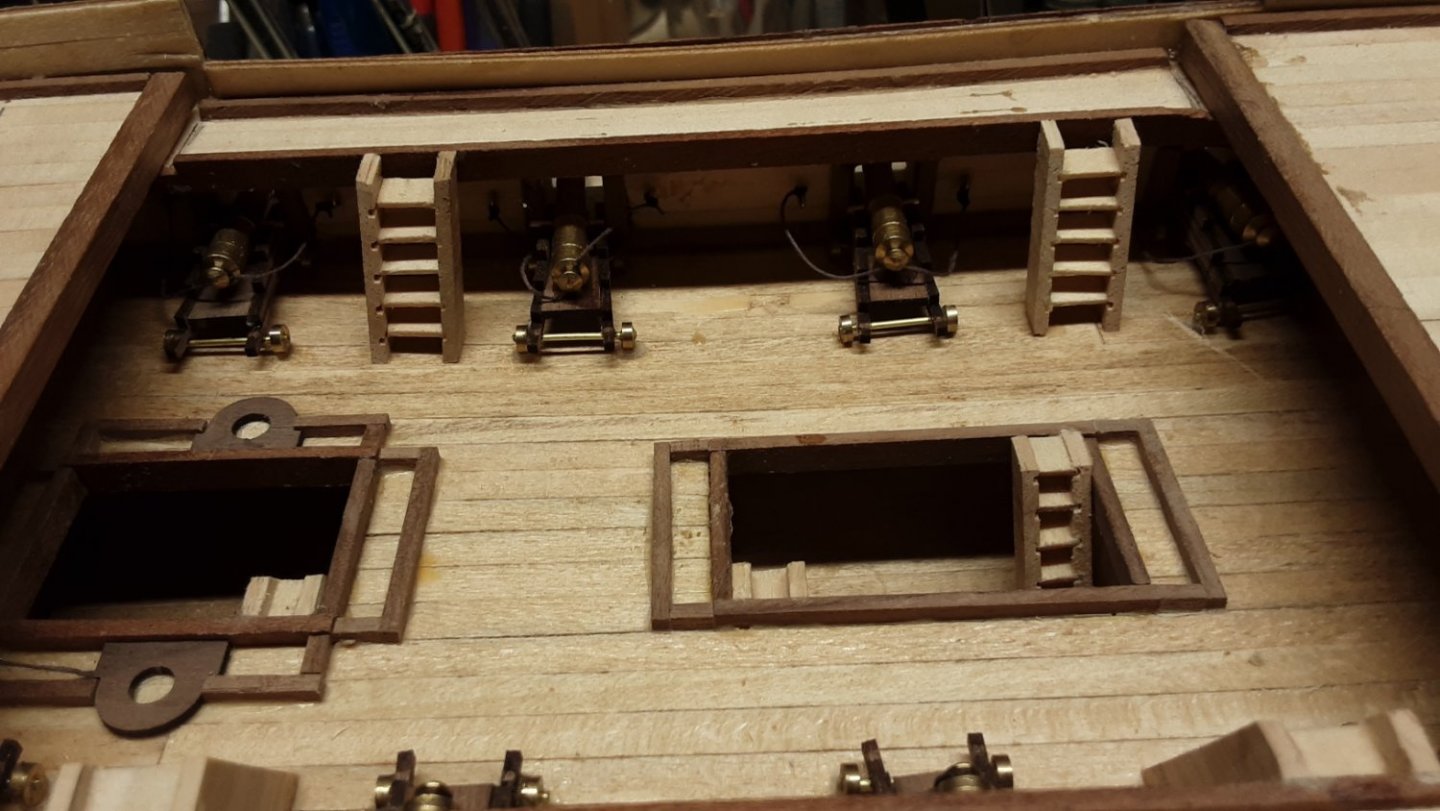
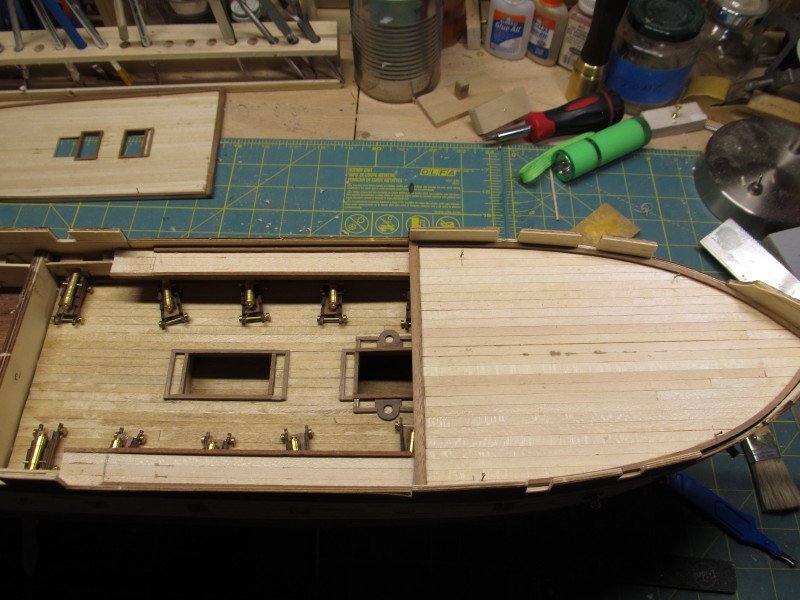
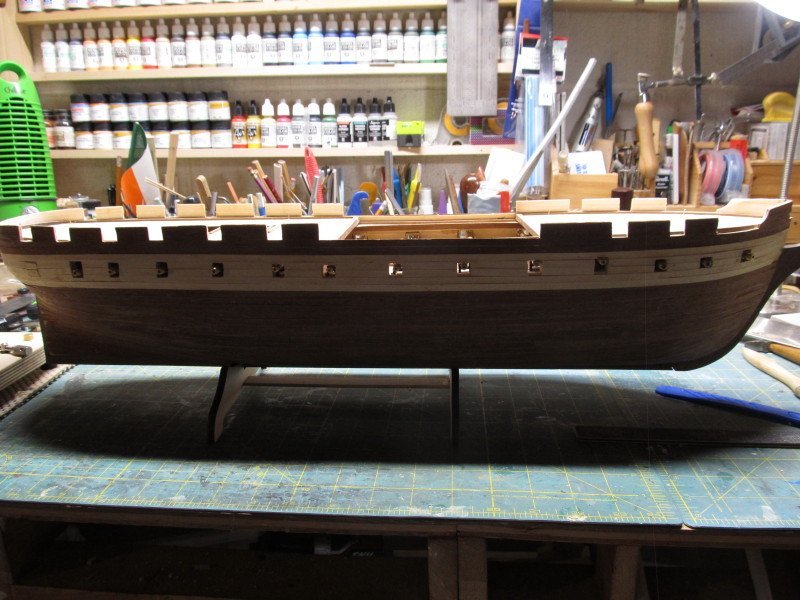
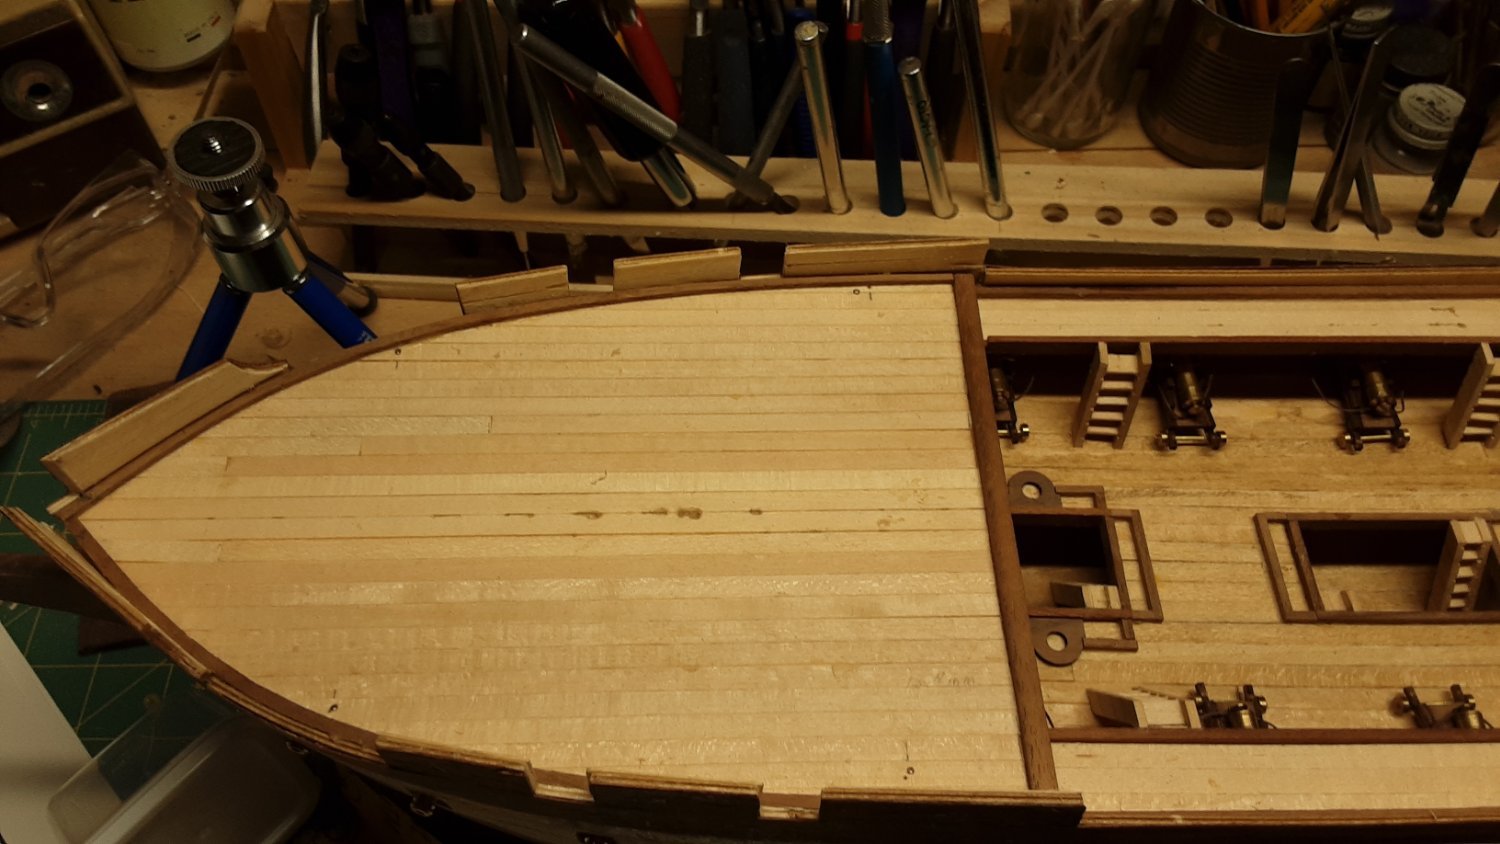
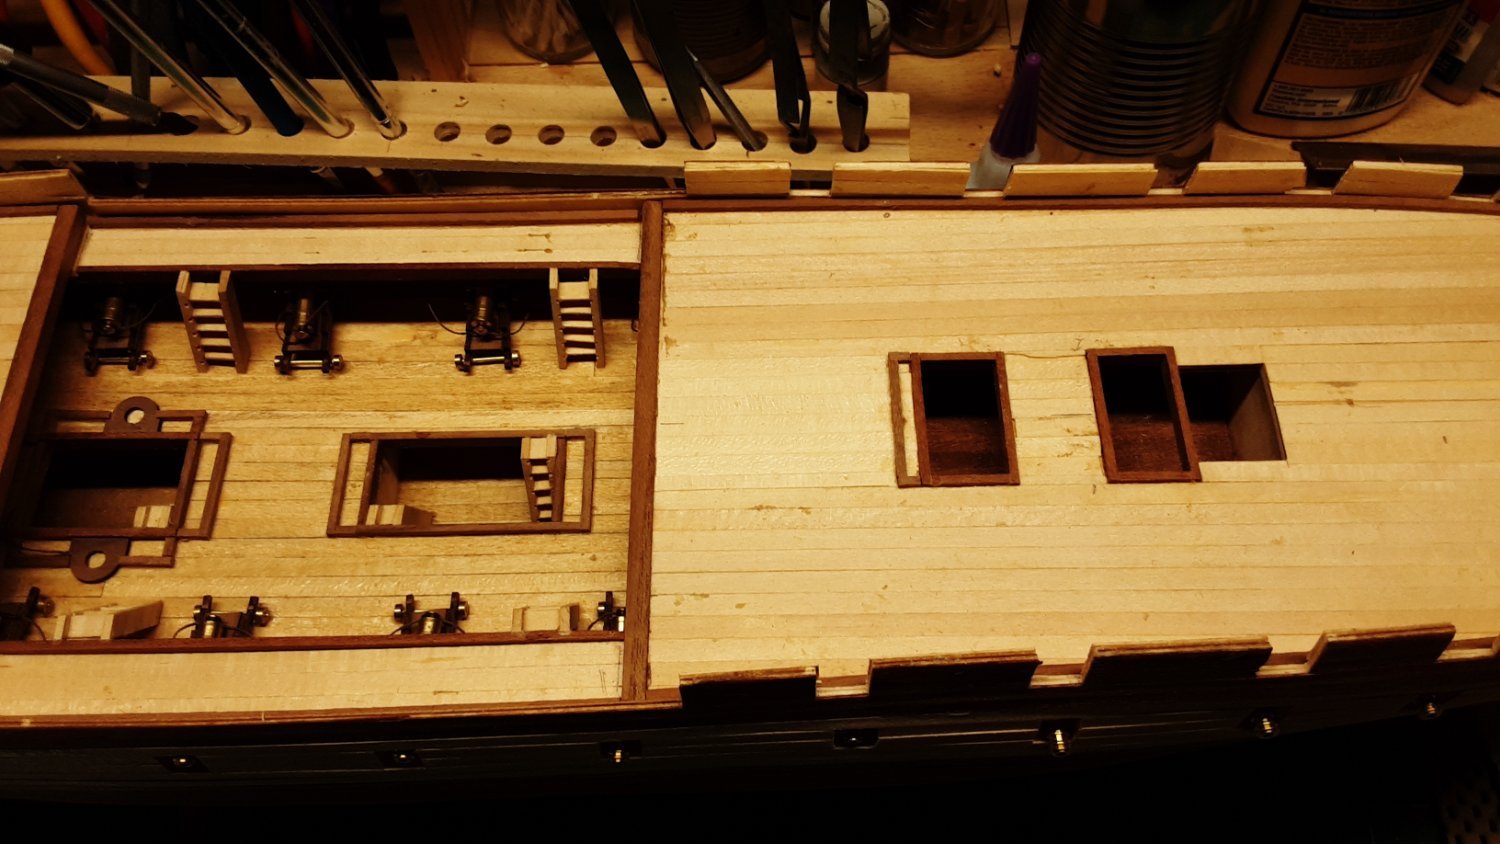
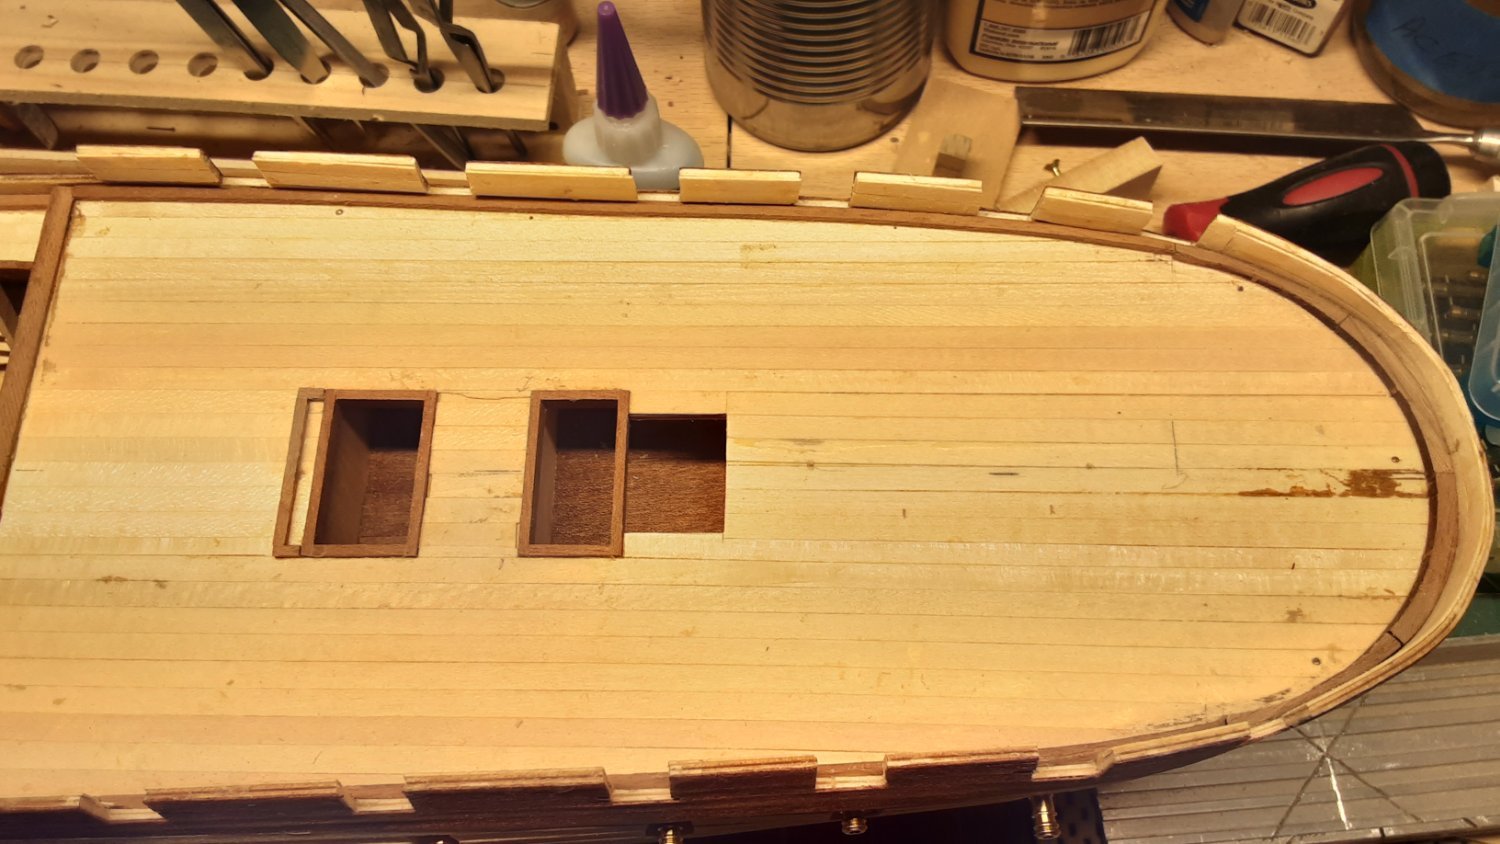
I did manage to finish installing the cannons before the storm hit. Broke 4 drill bits trying to drill the bulkheads underneath the catwalk for the recoil ropes. So I decided to leave all the tackle off the "hidden" cannons to save my sanity. 😉 I'll install them on the main deck cannons that are visible. After getting the cannons installed and the ladders I permanently installed the fore and aft main decks. Finally! 🙂
Photos follow:


-
Finally got the guns installed under the catwalk, but not before I broke 5 good drill bits trying to drill holes in the sides for the ring bolts to attach the recoil ropes. Now to finish off the ladders, install them and finally get the fore and aft main decks permanently installed. The pieces for the ladder sides all have 9 slots cut in the for the stair treads but it seems only 5 treads are needed per stair, something that is not made obvious in the written instructions. So I may run out of material since I've been cutting and installing 9 treads per stair instead of 5.
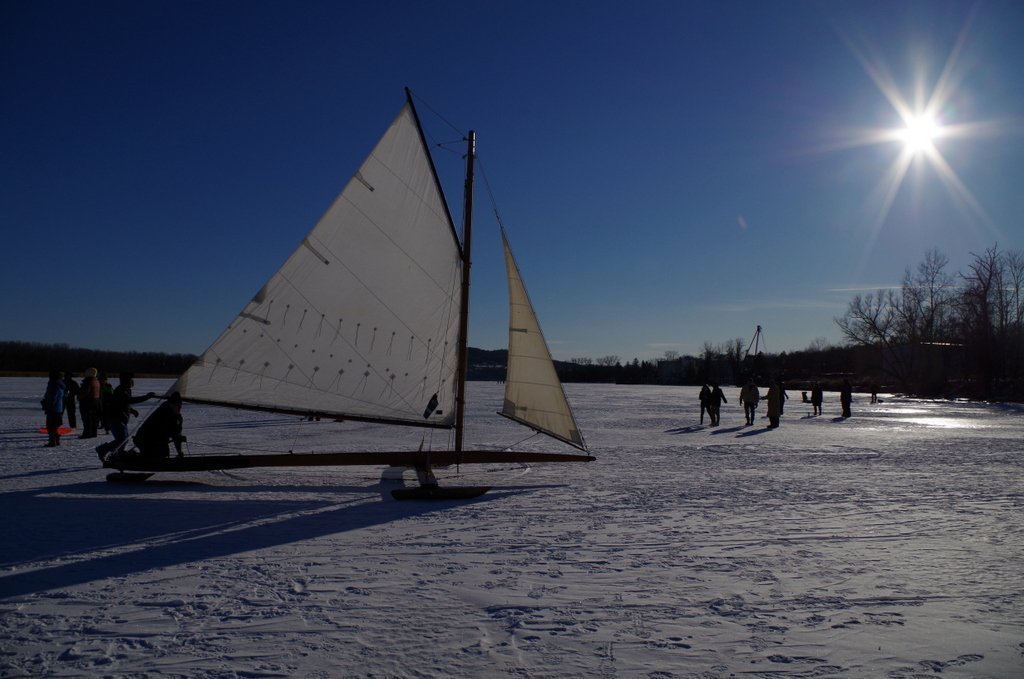
But this can wait. Mother Nature has finally granted us a release fom Covid Prison by providing us with foot thick ice on the river for sailing and some good sailing weather once winter storm "Landon" 😀 😄 passes by (winter storm "Izzy" was a boring ho-hum over-hyped storm in this area). Eight vintage ice boats from the late 1800s are parked in a Cove near Athens awaiting us. So model building is taking a backseat to more outdoors events for now. Gotta get some good ole fresh air and vitamin D. Stay tuned.


-
Pulling up a chair. Love these pulling boats, reminds me of the boats used by the United States Life Saving Service (USLSS).
- Edwardkenway and mtaylor
-
1
-
 1
1
-
Already been going thru my wood stash looking for suitable wood to substitute. I can use my miniature thicknessing jig with the miniature Jack Plane to reduce the thickness to 1 mm. Looking at the wood in the kit, I doubt it is sapele which is a dark wood, this is more blond like mukali which is also included in the kit. Probably another instructions/parts list error. 🤷♂️
- Edwardkenway and mtaylor
-
2
-
Just adjusted my jig to 9 mm and assembled a ladder. Now it looks more like all the pictures in the kit and everyone's build log. Have to decide what to do with the 5 I built with 6 mm wide steps, either use them or rebuild. Not sure if I have enough 1x5x100 mm strips for a do-over. I'll finish the ones in kit and then decide.
Thanks for the feedback everyone.
-
13 hours ago, Moonbug said:
Sounds like the instructions are up for
some interpretation Jack.
Yea, @JDDouglass responded to my post in his build log that he used 9mm as his length. I guess the instruction translator inverted the 9 to a 6. And there are 9 step DADOs cut into the stringers where the plans show only 5 steps. Ah well ! 😌
- mtaylor and Edwardkenway
-
1
-
 1
1
-
-
I'm building the stairs now. On the parts list it indicates the stair treads are cut from a 1x5x100 mm sappeli strip with each tread " 0,6 mm" long. However my completed stair seems to be too narrow and does not match the photo in the instruction manual or the photographs in other Constellation build logs. Looking at the kit blueprints it appears the stair tread are 9 mm long, but there is no scale on the blueprint for reference and they are not drawn to 1:1 scale either. How long/wide are the treads? And how wide is the finished stair ?
- Edwardkenway, mtaylor and Moonbug
-
1
-
 2
2
-
JD, sorry to hear about your car accident, wishing you a speedy recovery.
I do have a question about your build. I'm building the same model. On the parts list it indicates the stair treads are cut from a 1x5x100 mm sappeli strip with each tread " 0,6 mm" long. However the completed stair seems to be too narrow and does not match the photo in the instruction manual or your photographs. Looking at the kit blueprints it appears the stair tread are 9 mm long, but there is no scale on the blueprint for reference. How long did you make the treads in your model? And how wide is the finished stair ?
Thanks
-
-
Nice start Edward, planking looks good 👍
-
Thanks Edward, Mark. Building this in the order called for in the kit instructions is a recipe for painting oneself into a corner. I have to skip from step 40 to,step 52, then go back to 45 then jump ahead to step 60. If I glue the main decks down now, then I can't get my hands into the lower deck to install/rig the cannons, install the ladders, rope railing, etc. So the lower deck in mid section has to be done before I glue the main decks down, then I can finish the main deck. It gets very confusing at times, especially trying to remember where you left off. I put checkmark next to each completed step but it's still confusing. 😏
- mtaylor and Edwardkenway
-
2
-
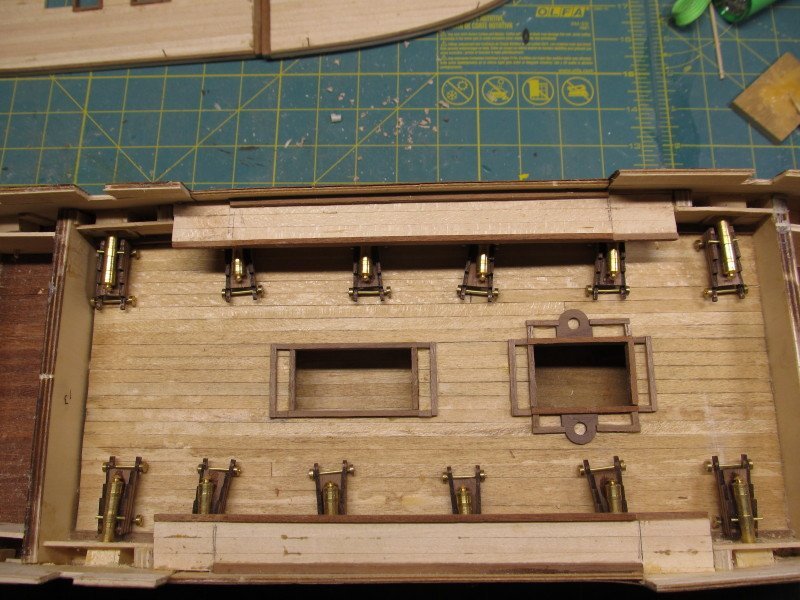
Finally got the half cannons installed inspite of the cryptic instructions. Started assembling the cannon carriages and cannons along with the carronades and their platforms. For now I have just placed the cannons on the deck to check placement and fit. At least 4 of the cannons will not be viewable once the fore and aft main decks are installed. Some progress photos.
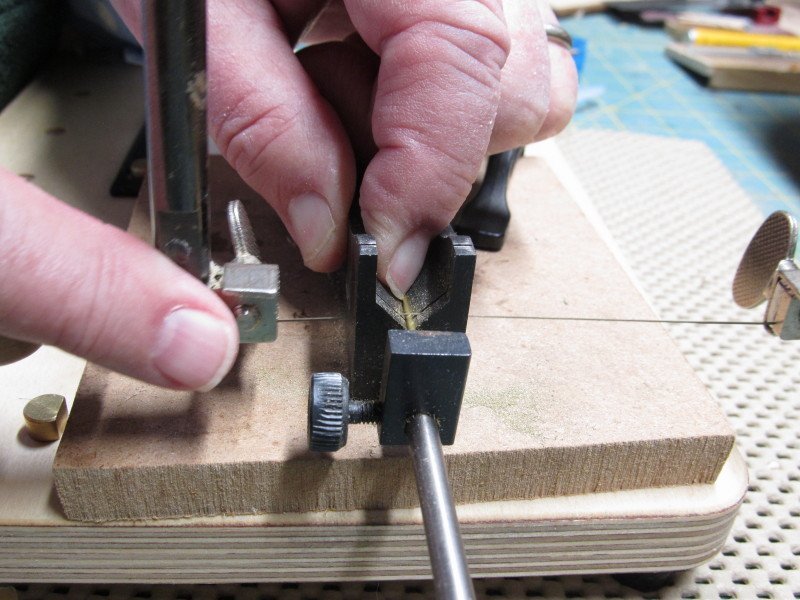
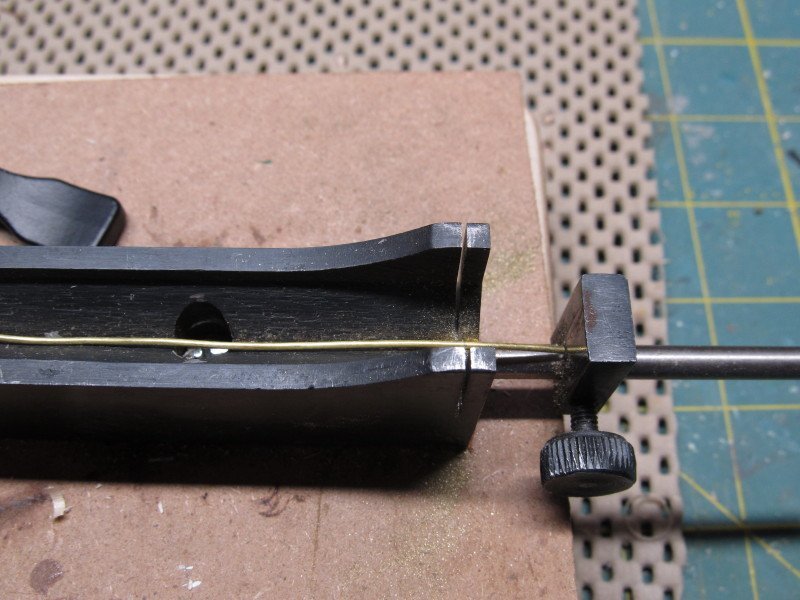
My jig for cutting the wire for the cannon axles and cannon.
Cannons installeddd

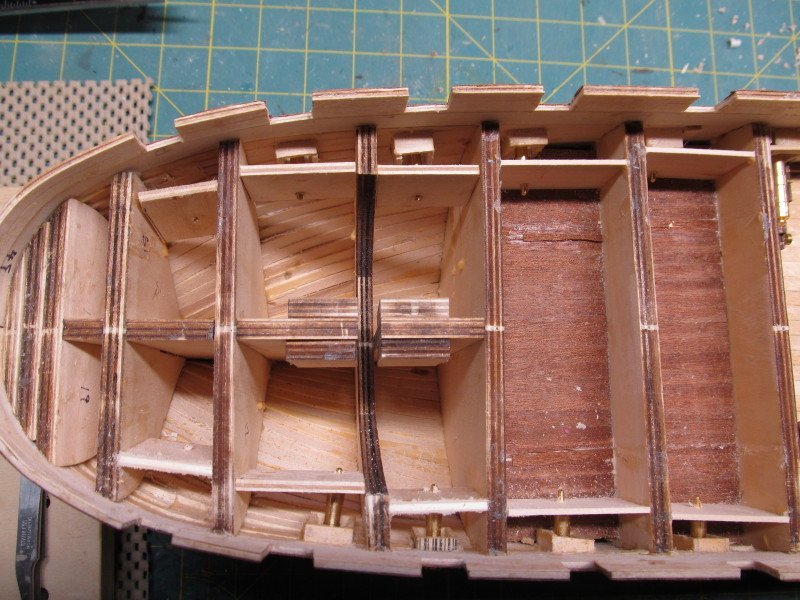
Test fitting the cannons and decks

-
Pulling up a barrel in the front row.
- Edwardkenway and mtaylor
-
1
-
1
-
Interesting history! Thanks
Oh the Lady was fixed a while ago, just never updated the photos


Henry Ramey Upcher 1894 by Edwardkenway - 1:25 - Sheringham lifeboat
in - Build logs for subjects built 1851 - 1900
Posted
Looking good !