Jack12477
-
Posts
5,674 -
Joined
-
Last visited
Content Type
Profiles
Forums
Gallery
Events
Everything posted by Jack12477
-
 Thanks, OC
 -
I think it is named after General Charles T James who developed the James system of rifling to convert smoothbore cannon to rifled cannon. See http://www.civilwarartillery.com/calibertopounder.htm
-
That string has been replaced at least twice, Lou. Yea, that is a concern of mine also. Maybe I should get all the Tamiya Armor out and line them up in battlefield formation and photograph them They are for the most part stored in plastic boxes with covers to keep the dust out.
-
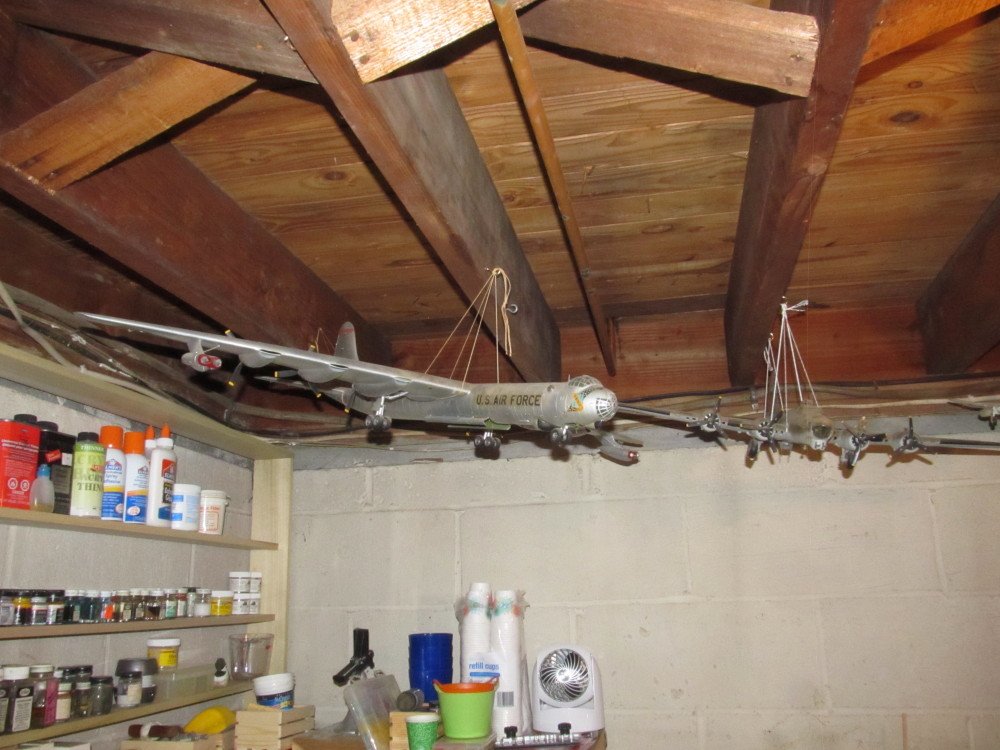
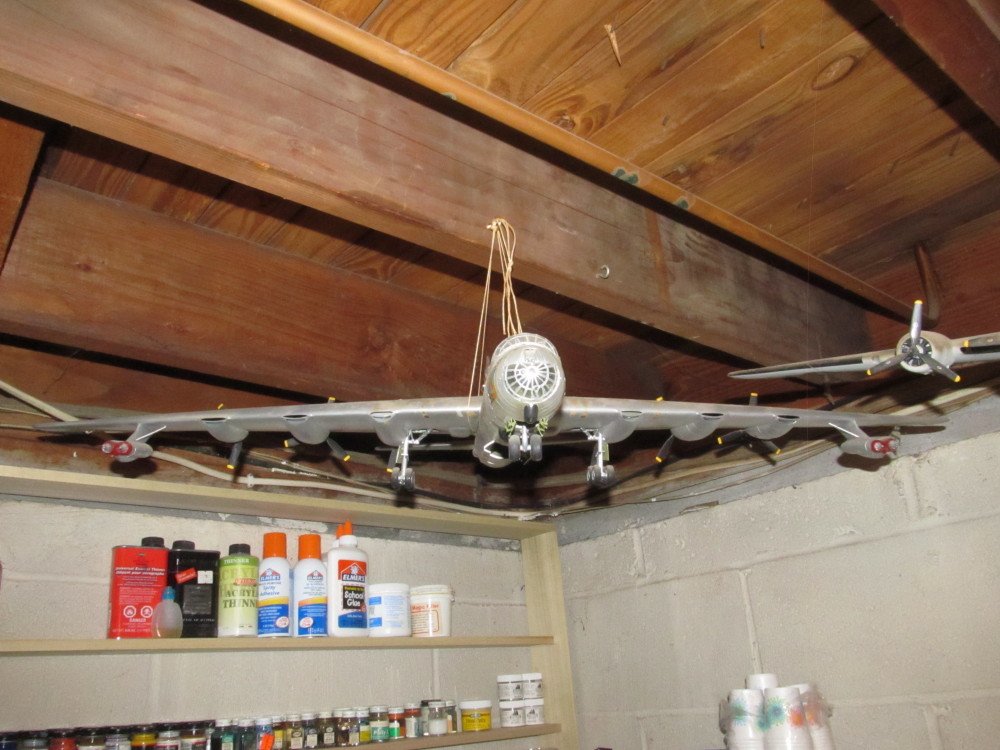
Denis, do you mean this bad boy or the B52 kit ? I build this B36 kit probably thirty years or more ago, can't remember if it was a Revell or Monogram kit but it was advertised at the time as being the largest wingspan model airplane available. It's been hanging from the rafters in my cellar since I built it and some parts have fallen off due to glue failure and some of the decals are coming off too; been trying to salvage the decals with Microscale's Sol and Gloss to reattach and reseal them. Plus it is covered in dust which I have to periodically take it down and dust it off without doing any damage. Wingspan by the way is 38-39 inches. Don't remember what scale but I'm guessing 1:72 maybe. (That's my B17 to the right of it)
-
Thanks, Denis. Nice model of the F-15 you did. I like the shading. I did a F14 some decades back but it got so busted up in storage I had to toss it out. Sitting on the shelf in addition the the F117 A are 1:48 Scale Testors/Italeri : YF-12 A Interceptor, and AC-130 A Hercules Gunship both are huge models. The box for the AC 130 is 40 inches long and the YF12 is 20 inches lone. Once I figure out how and where to display them I will start building them, that is, once I scrape 2 decades worth of dust off the boxes.
-
Yes, Lou, I do occasionally operate in Stealth mode ! See F19 Stealth Fighter
-
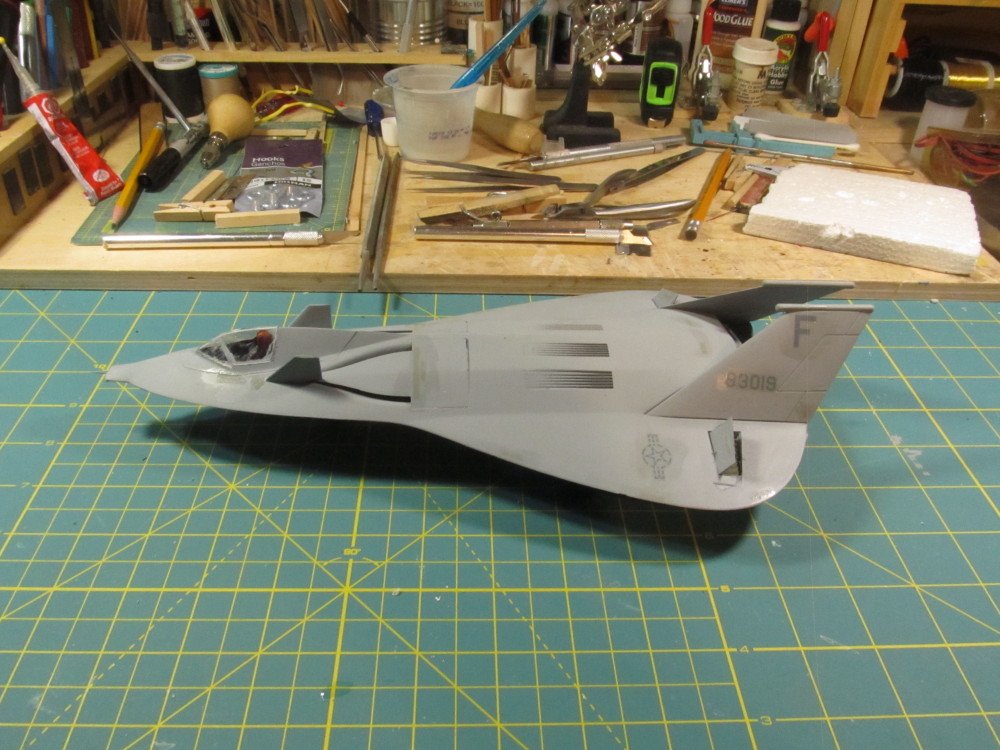
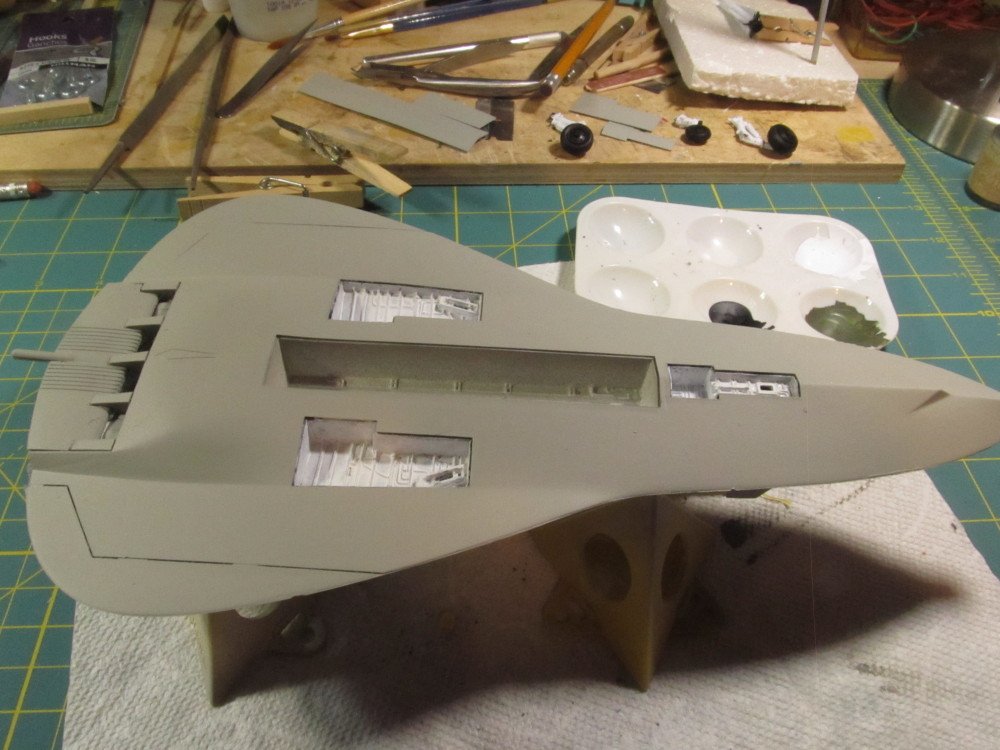
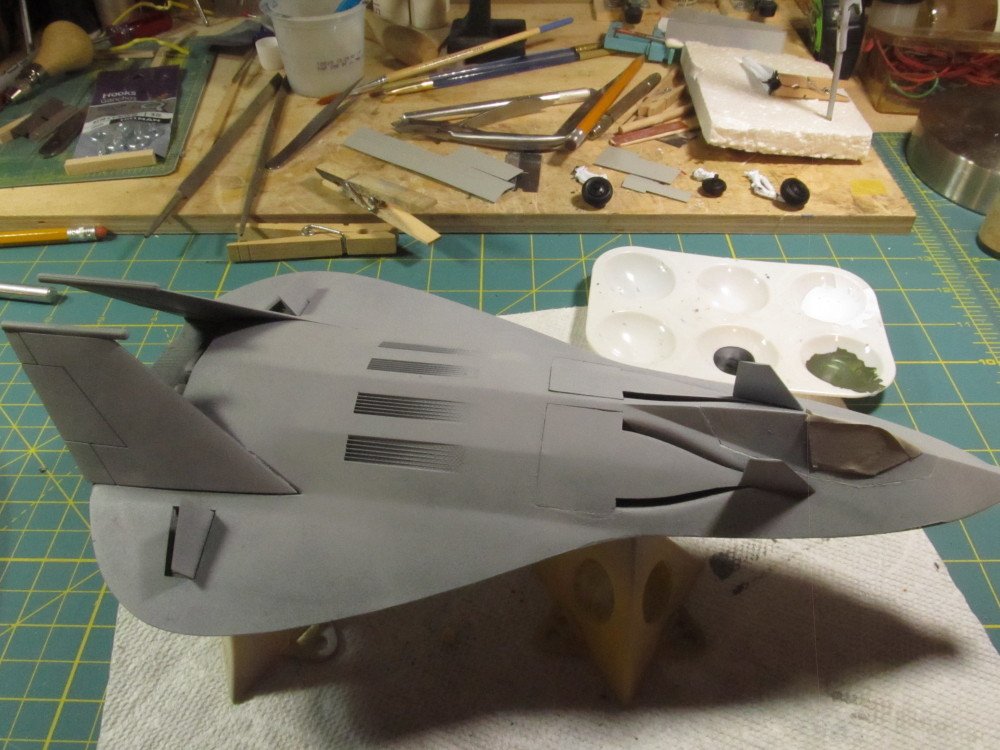
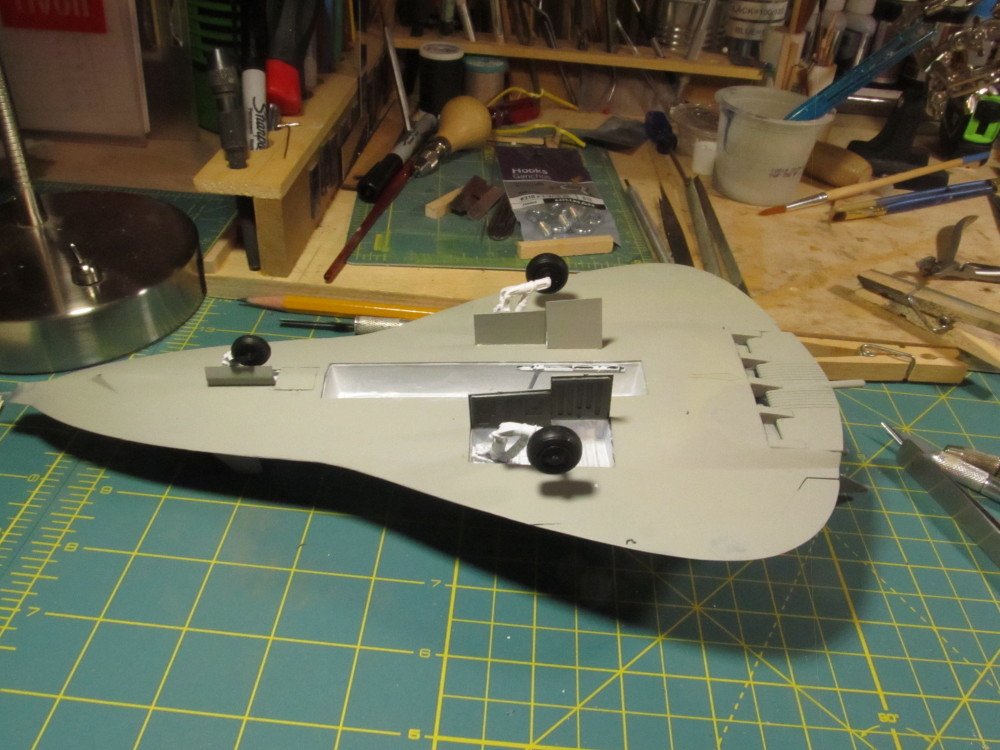
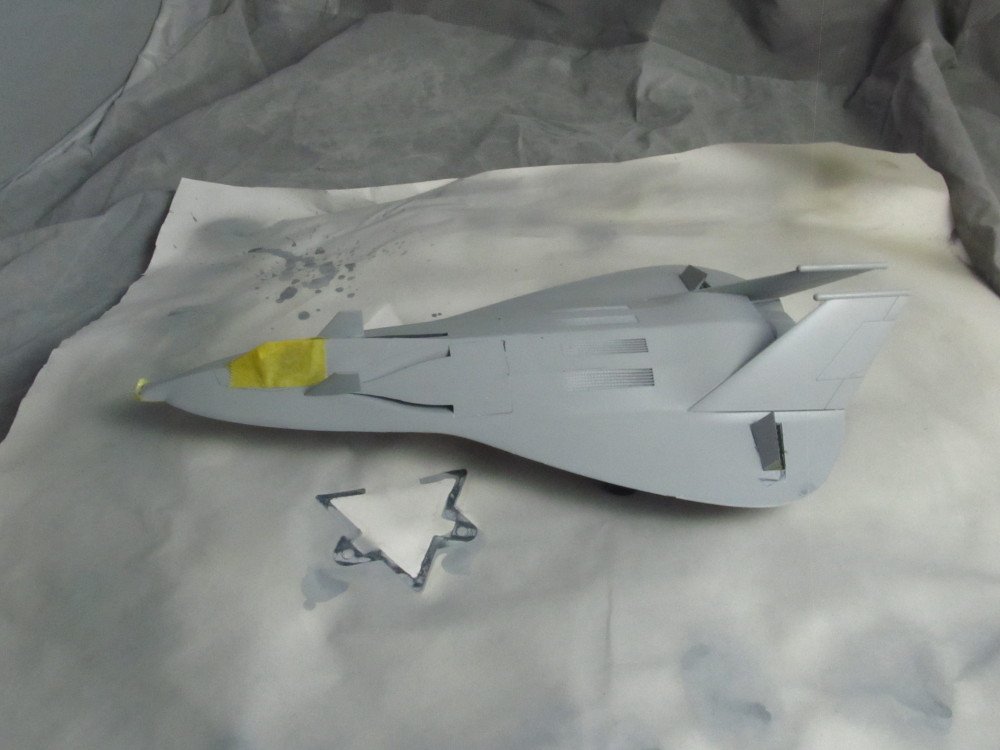
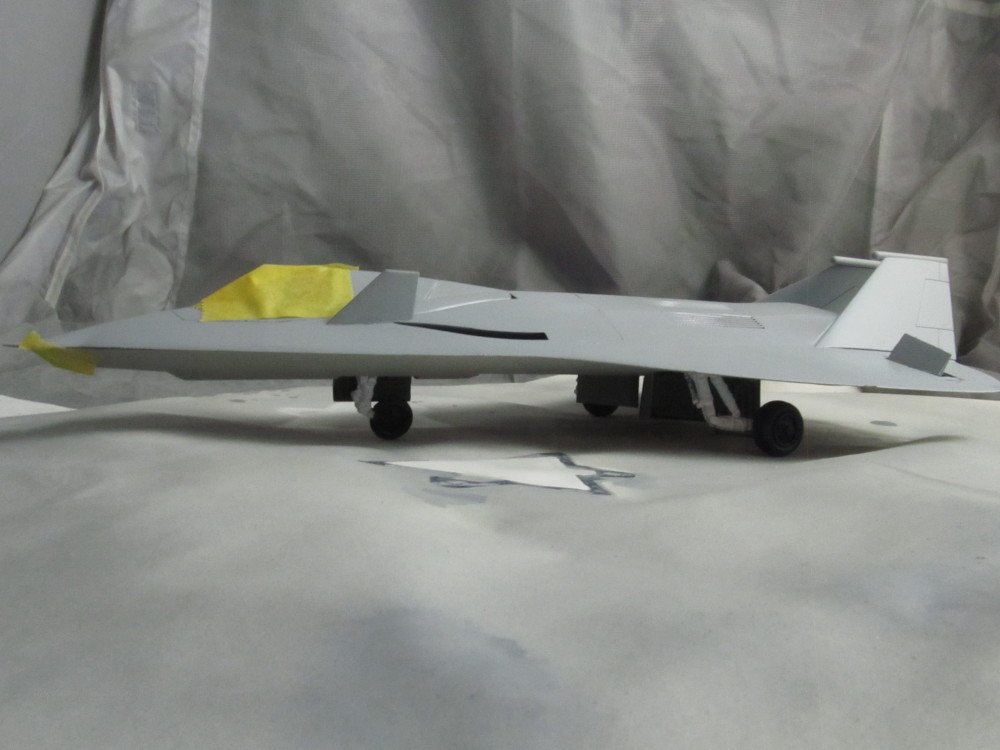
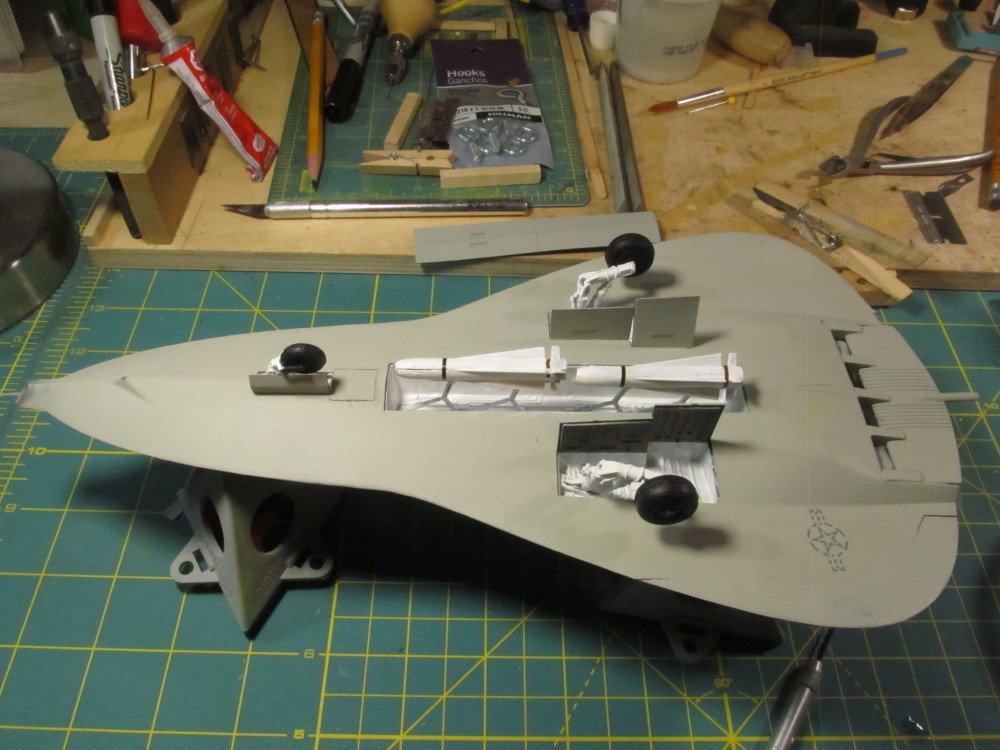
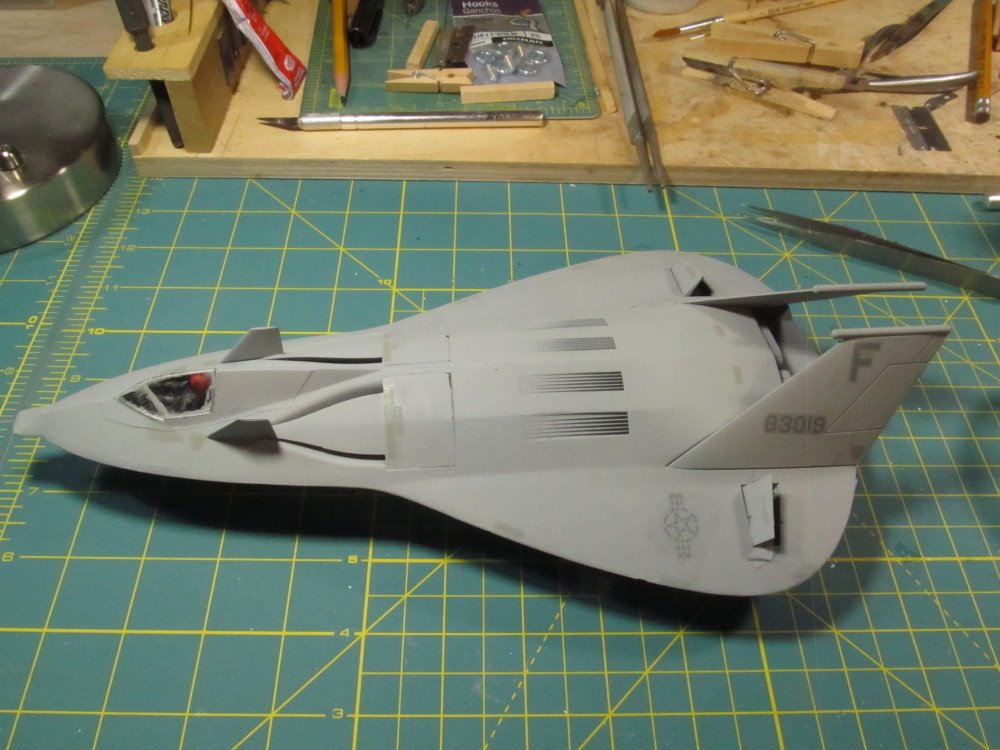
Sorry I don't have a full step-by-step build log for this one but I had not thought about a build log when I started it, hence I have only completed/near completed photos to show I chose the daytime mission colors (all gray) over the nighttime mission colors (all black). Even then the decals are barely visible when photographed and only slight more visible to the naked eye. But it was a fun and rather easy build. Not a lot of fiddly bits to mess around with. I also have the F117 Stealth Fighter by Testors/Italeri in 1:48 scale to build - Soon !!! In Paint shop : Final assembly and decal:
- 11 replies
-
- 10
-

-
Continuing on :

-
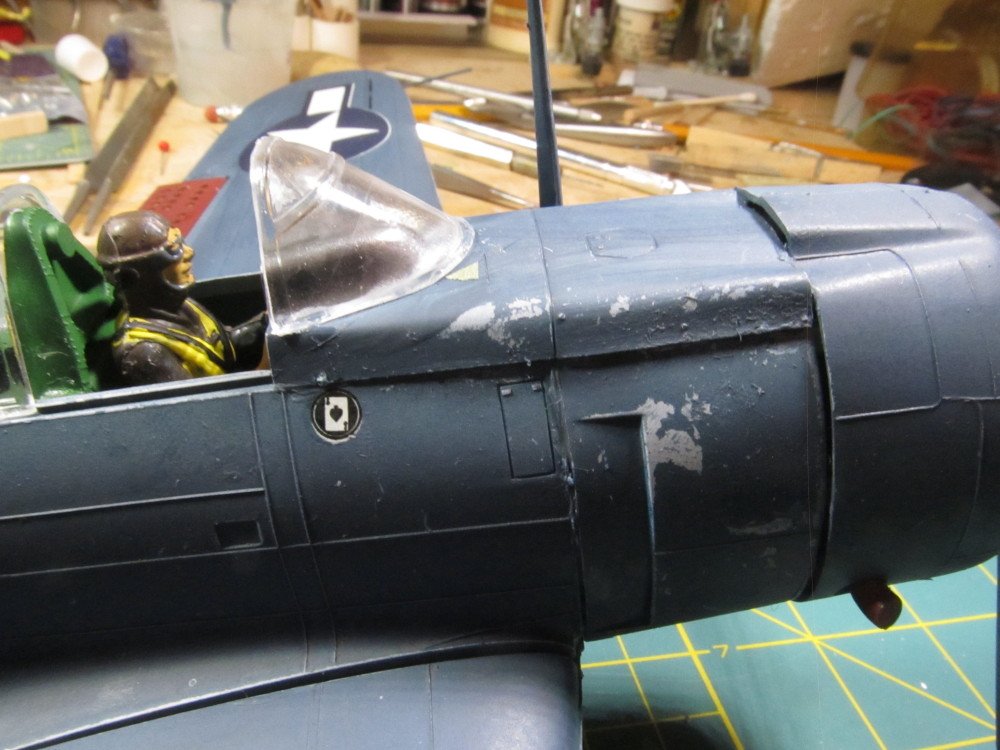
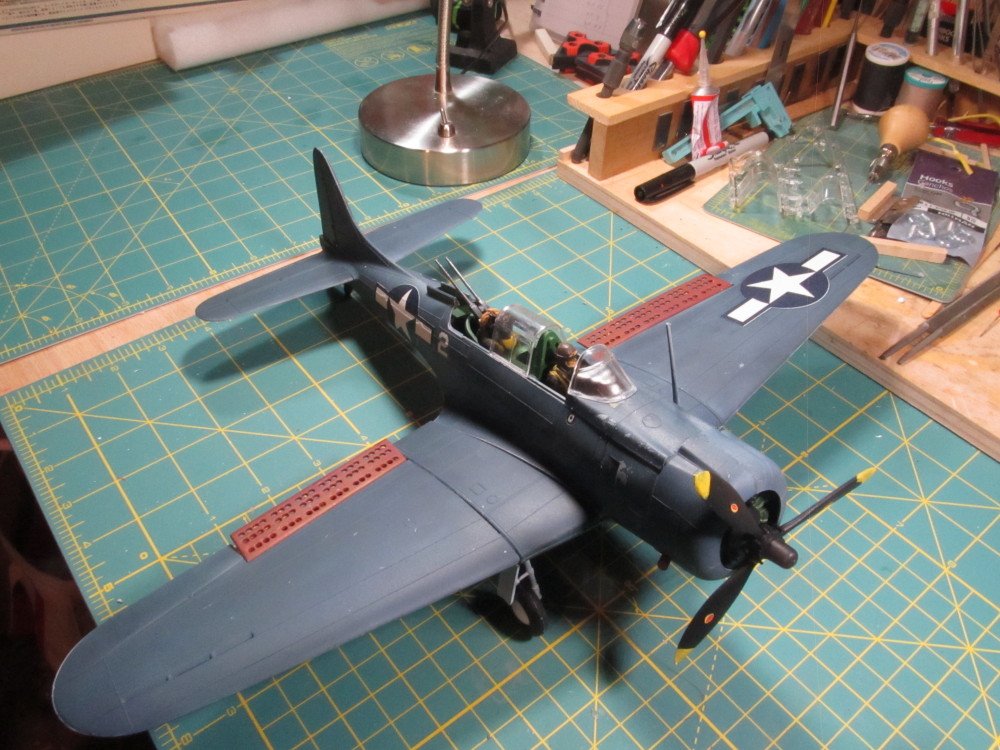
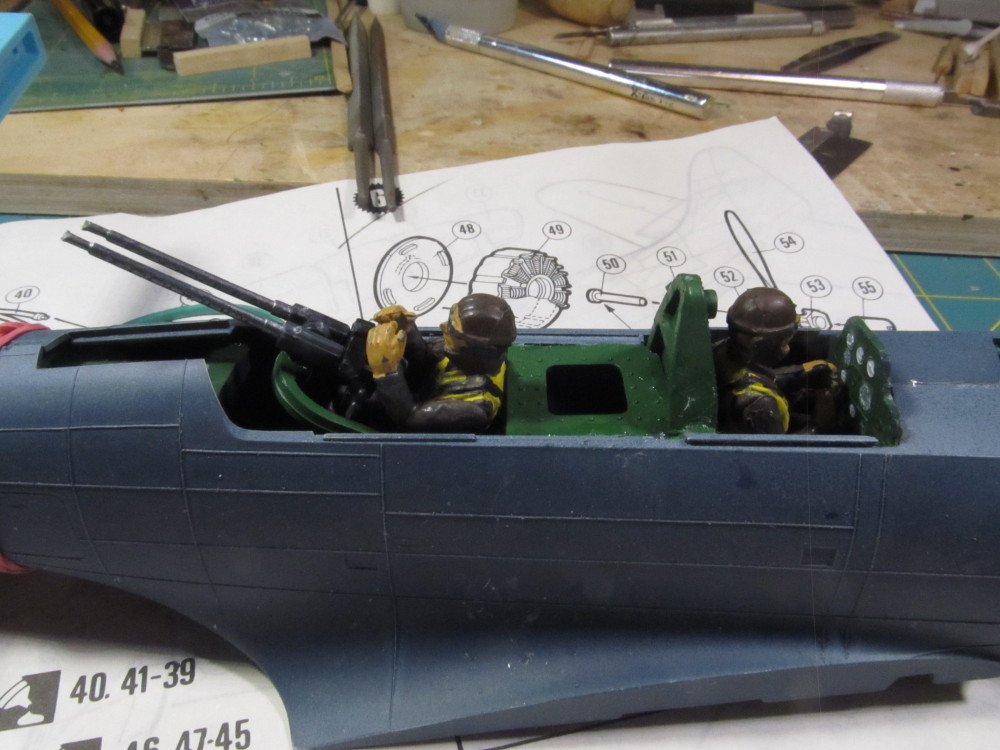
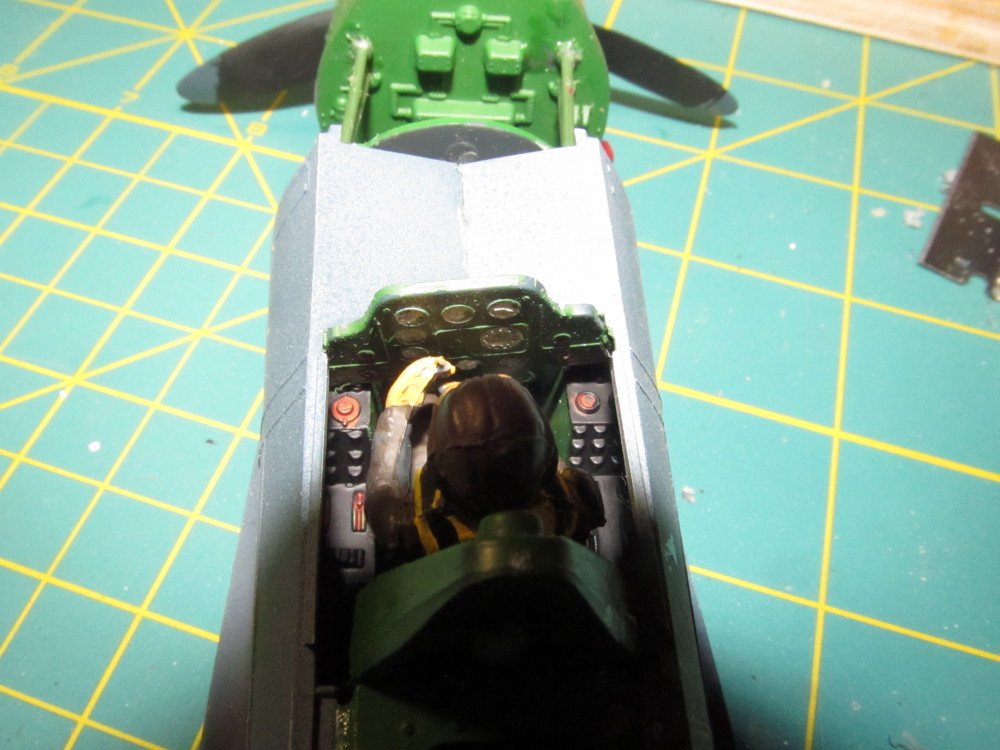
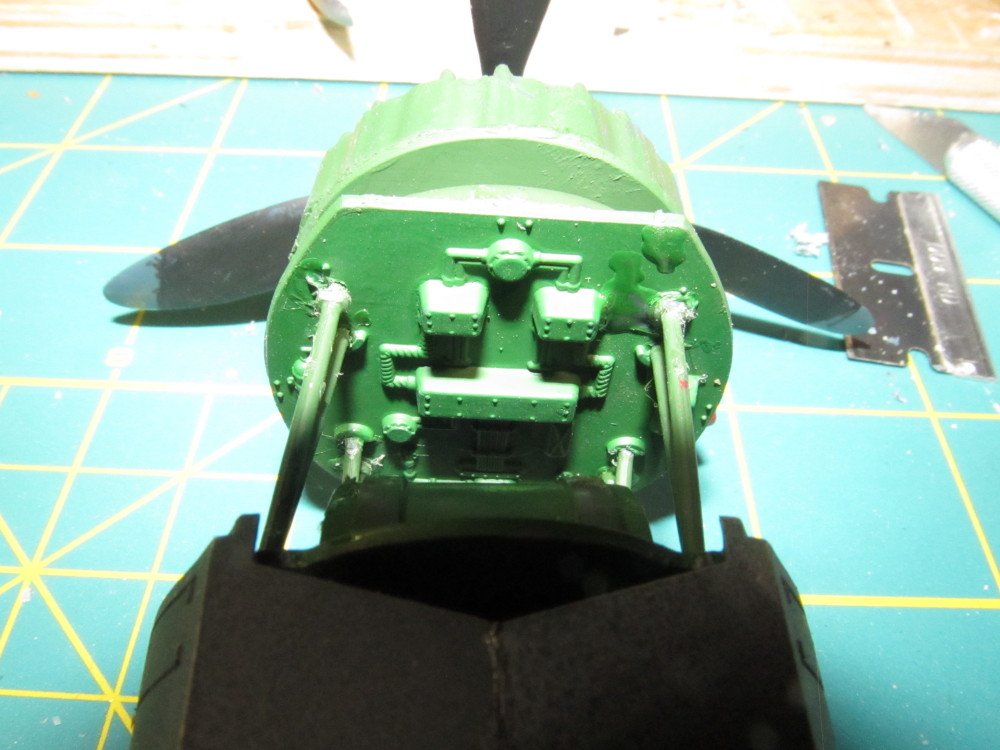
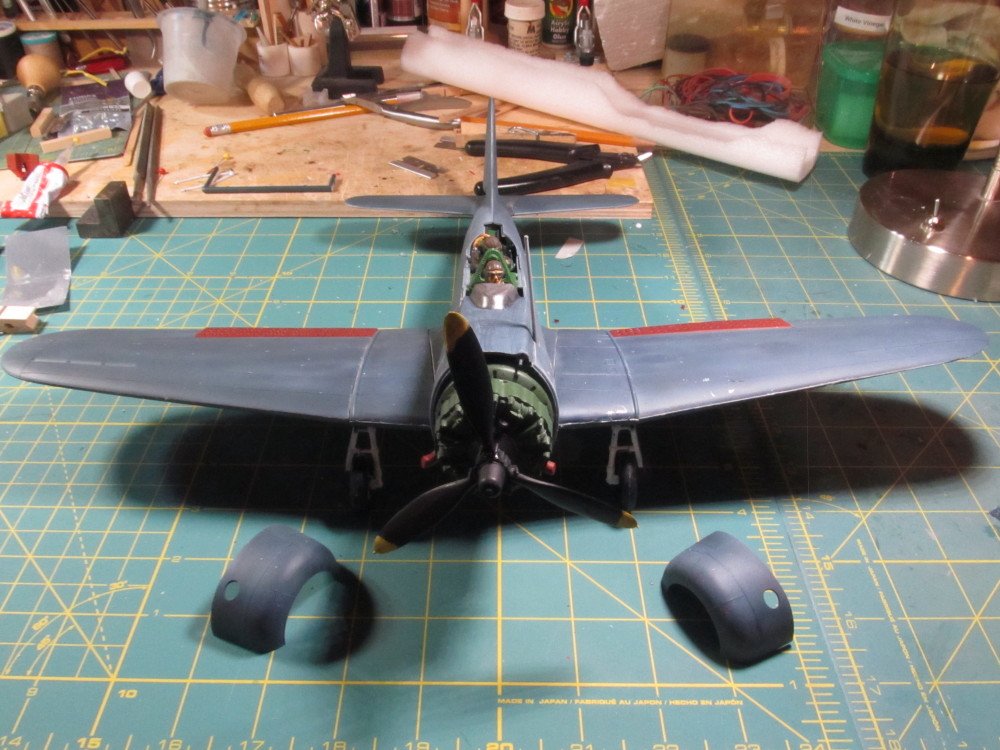
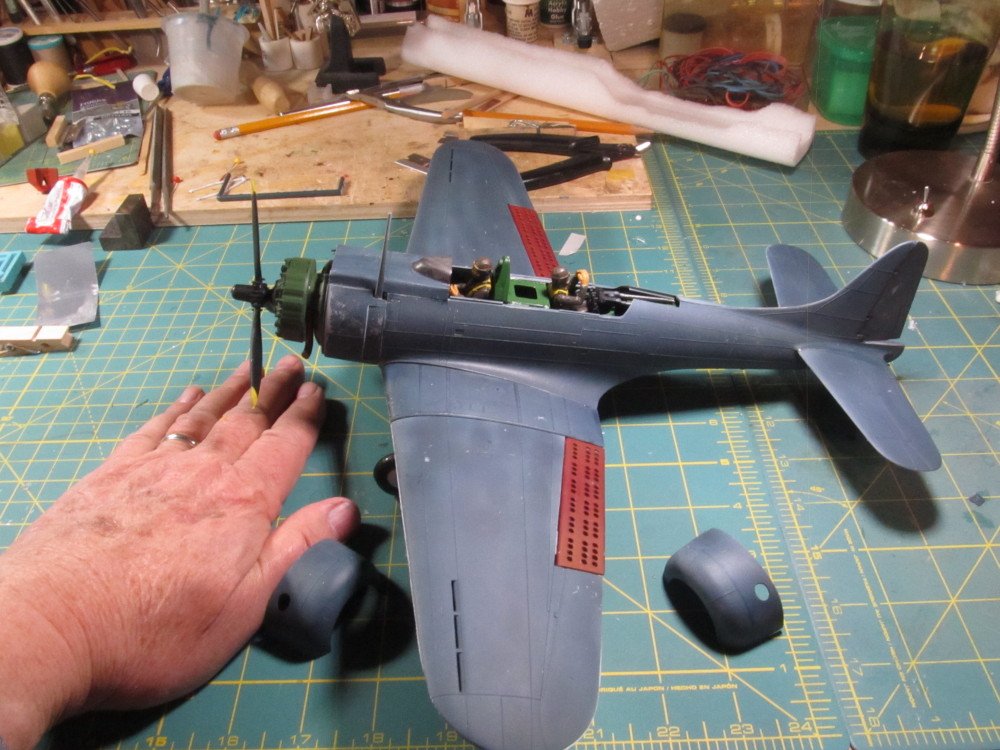
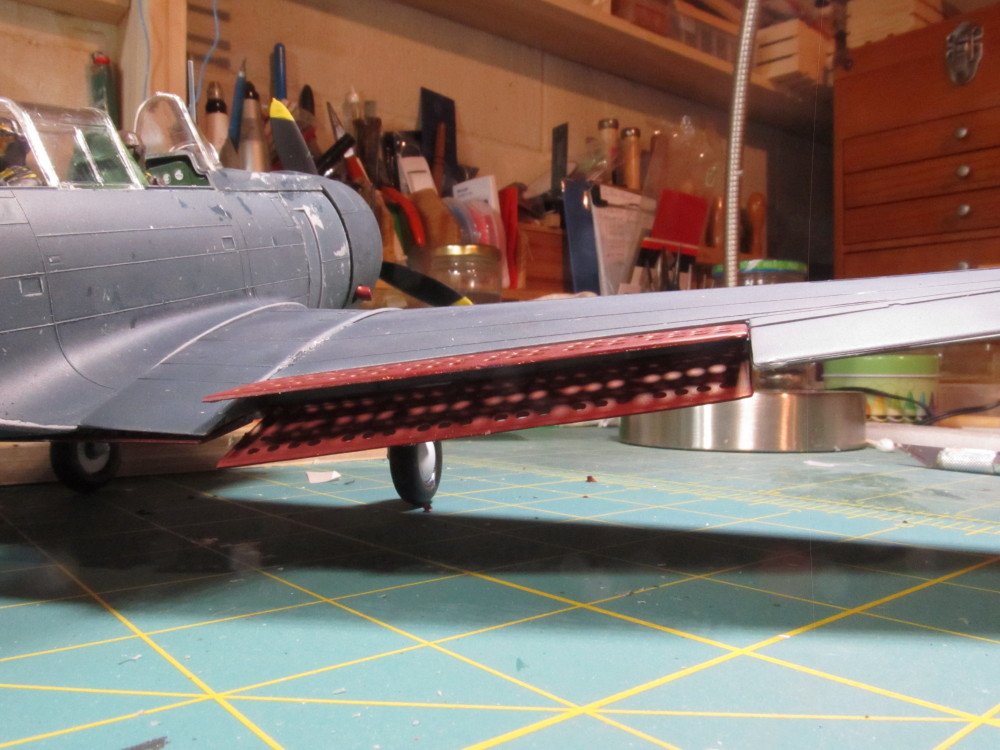
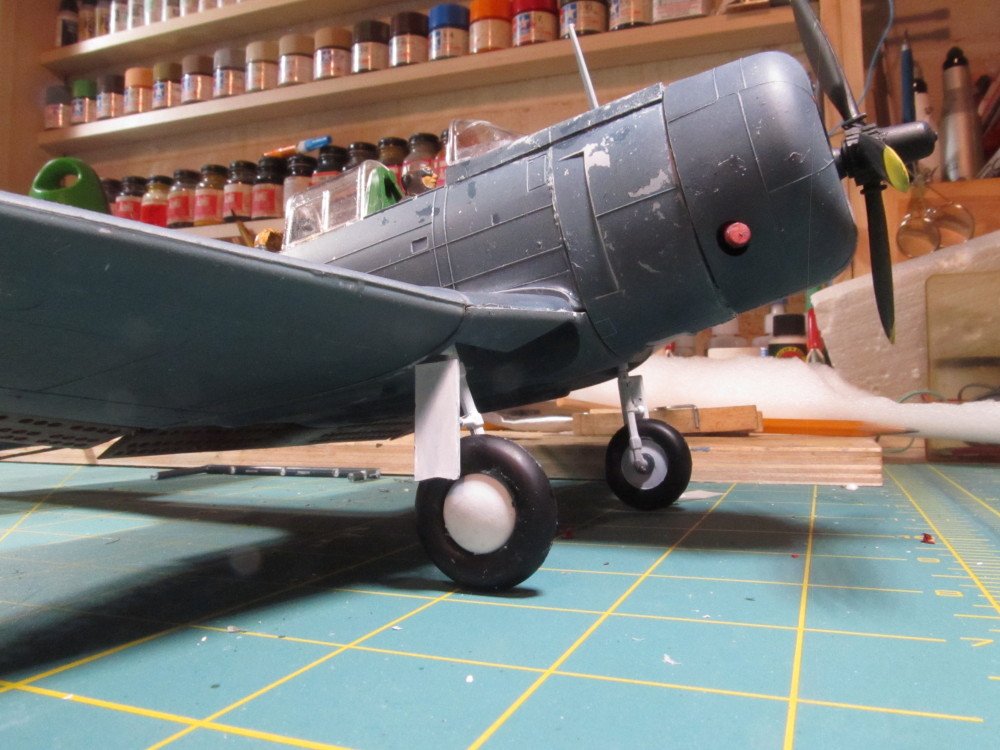
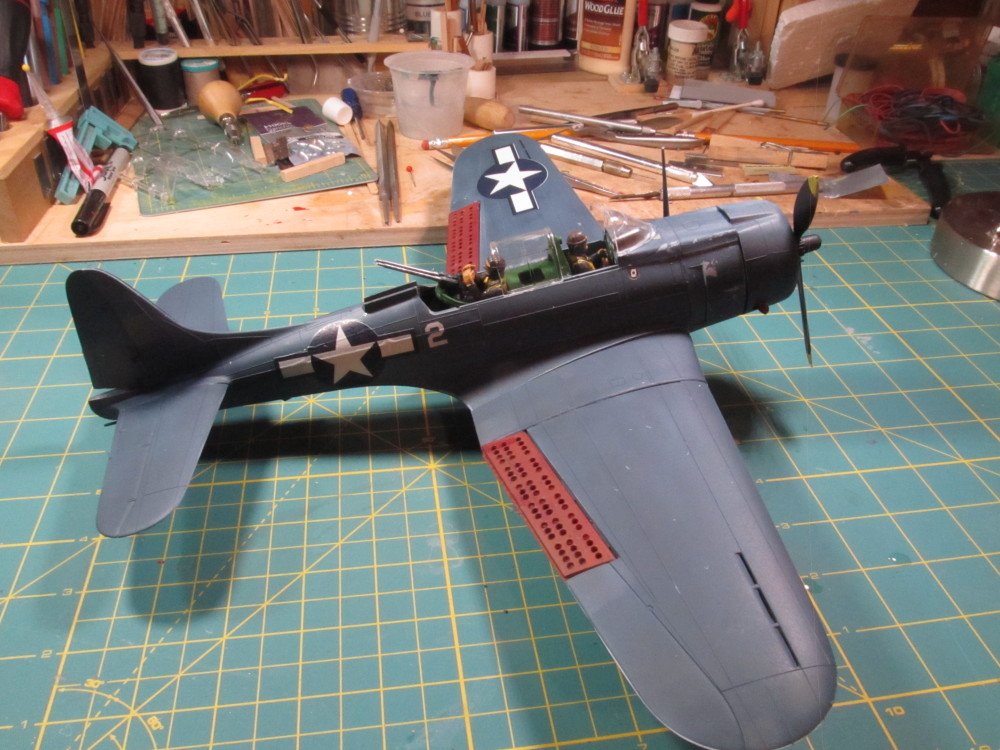
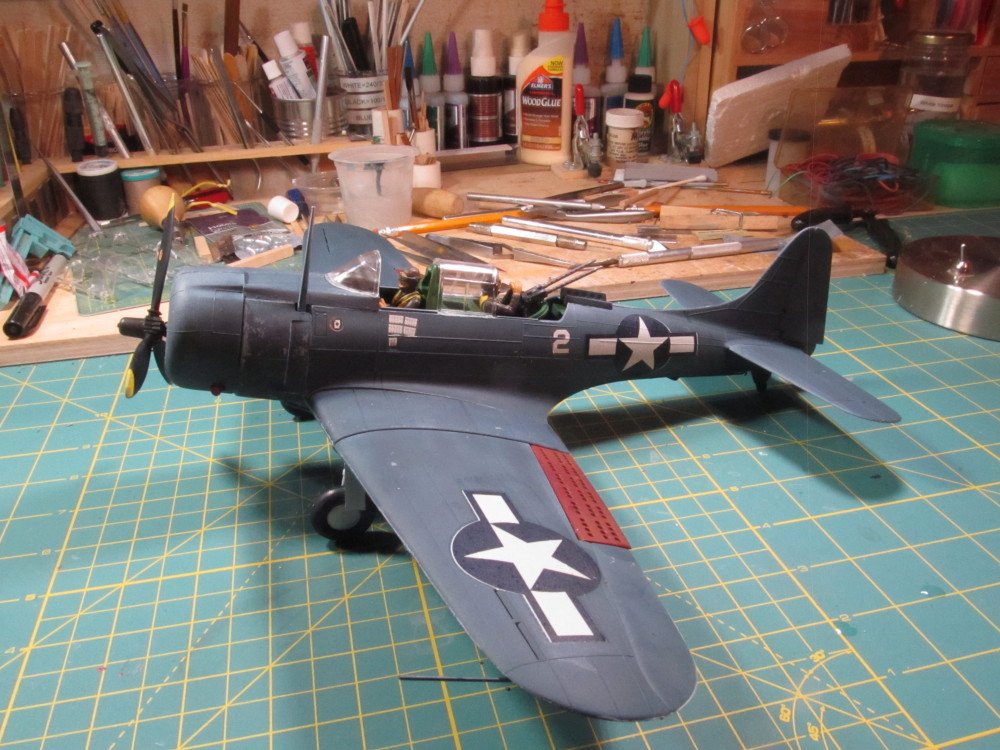
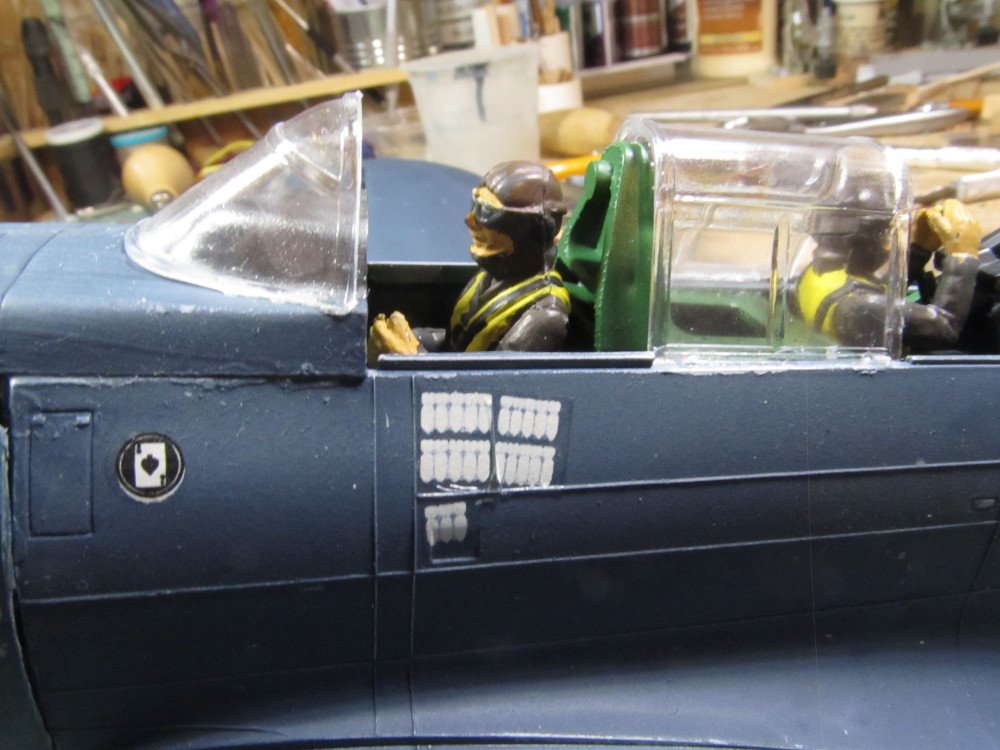
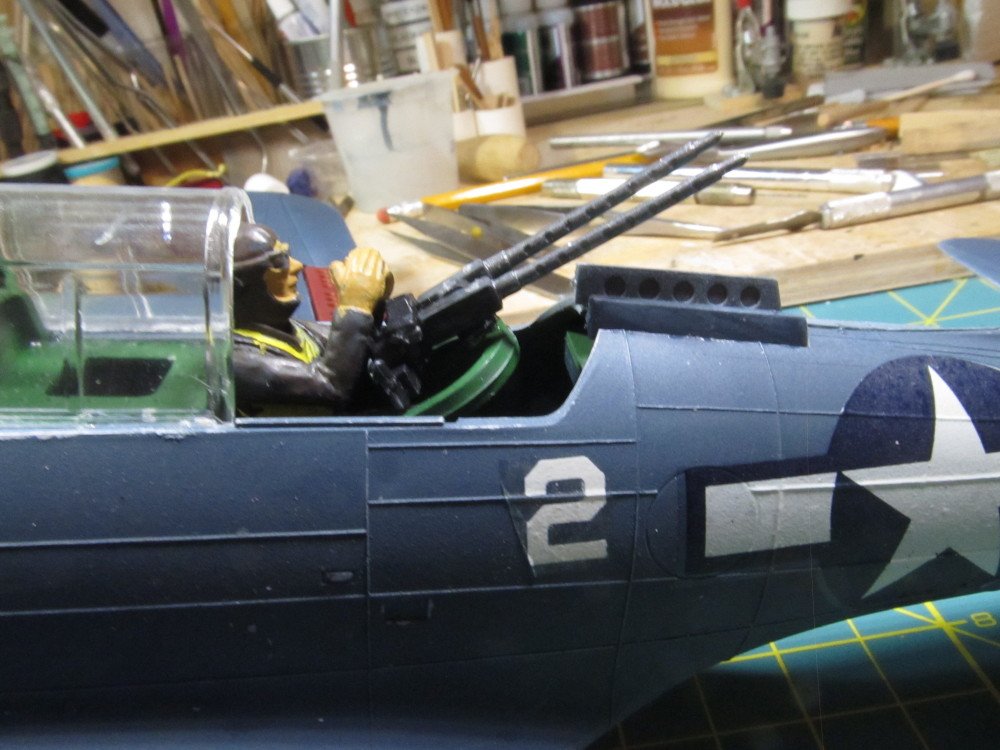
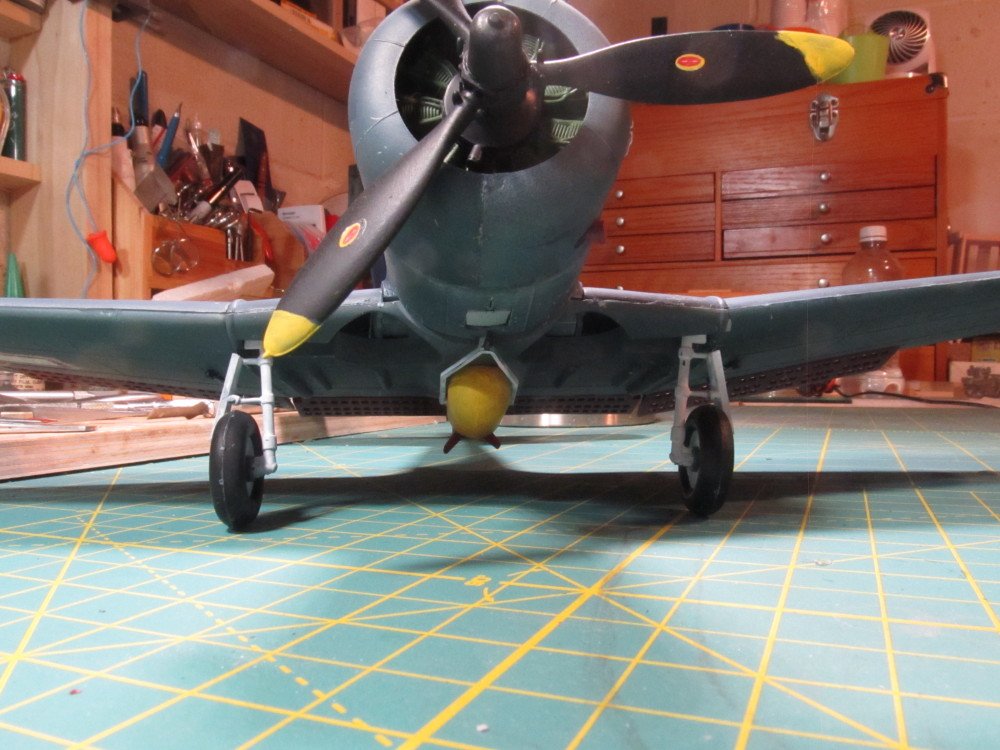
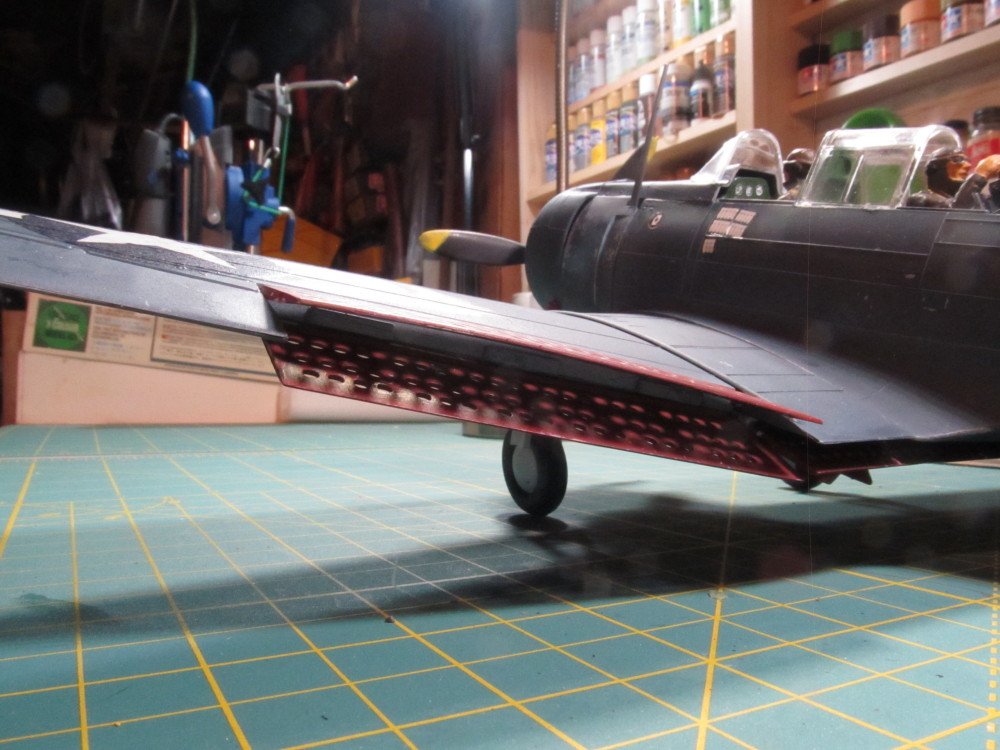
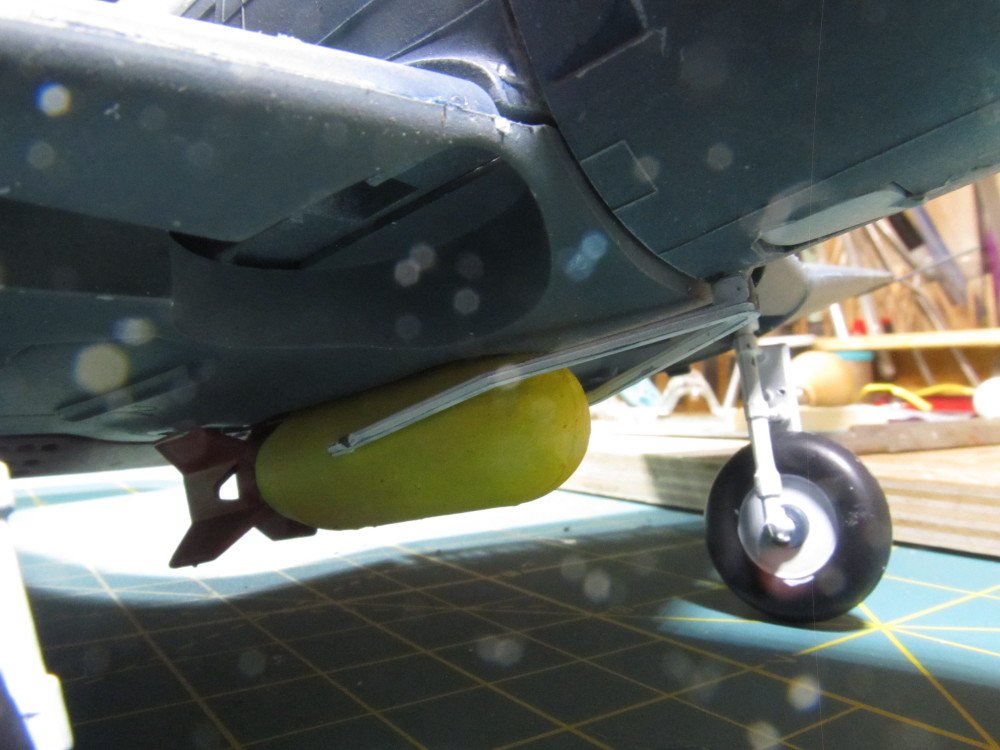
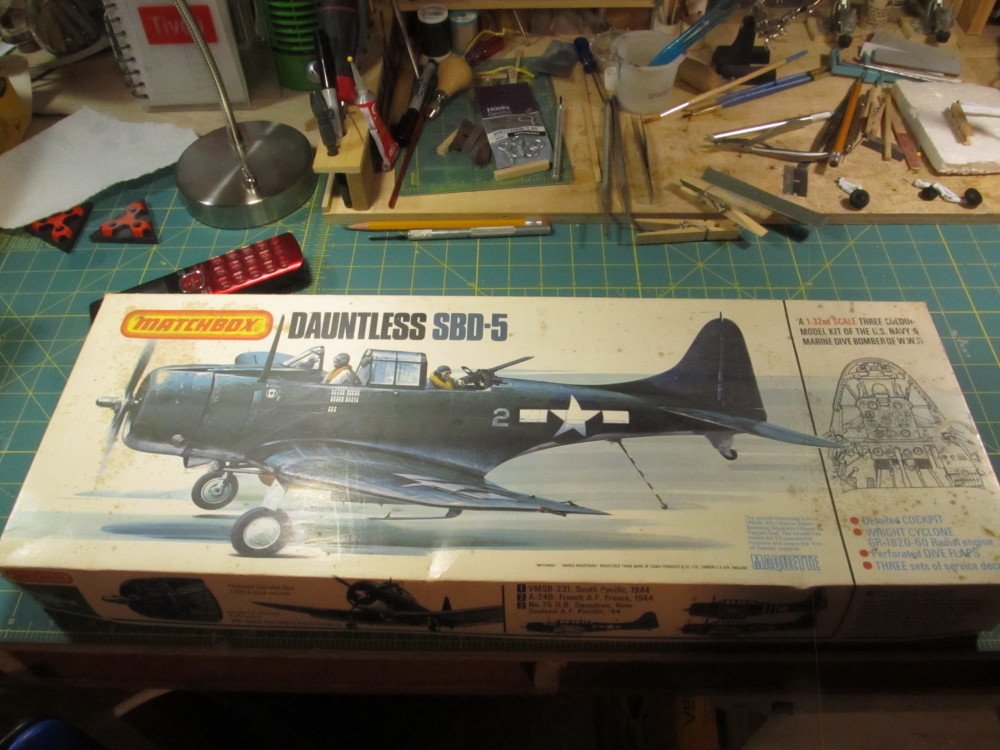
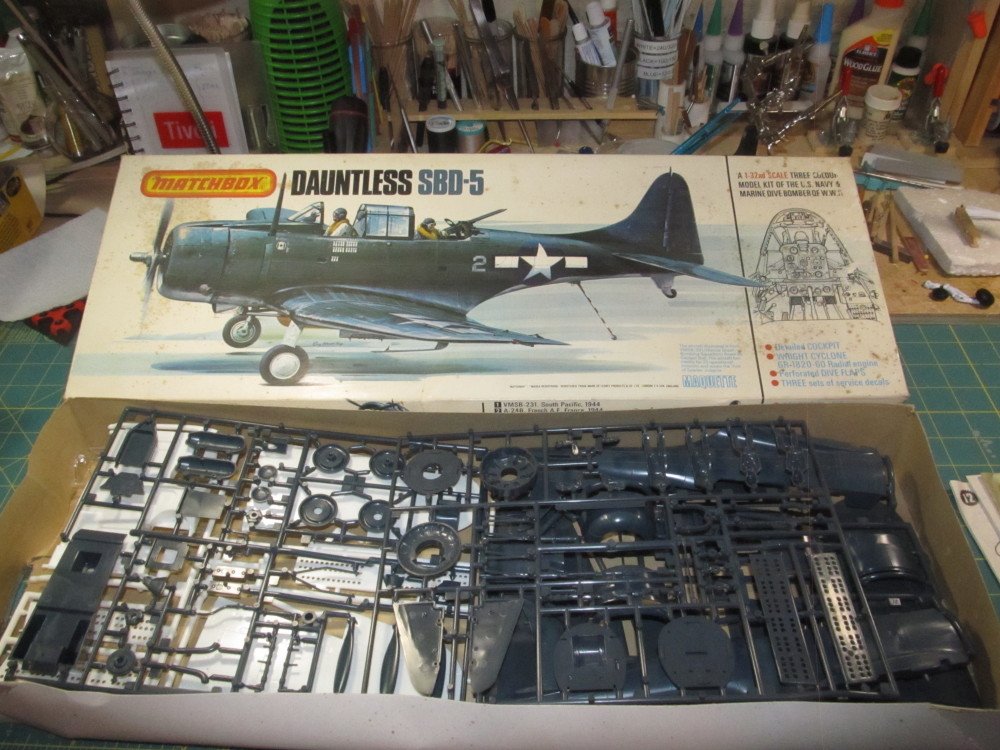
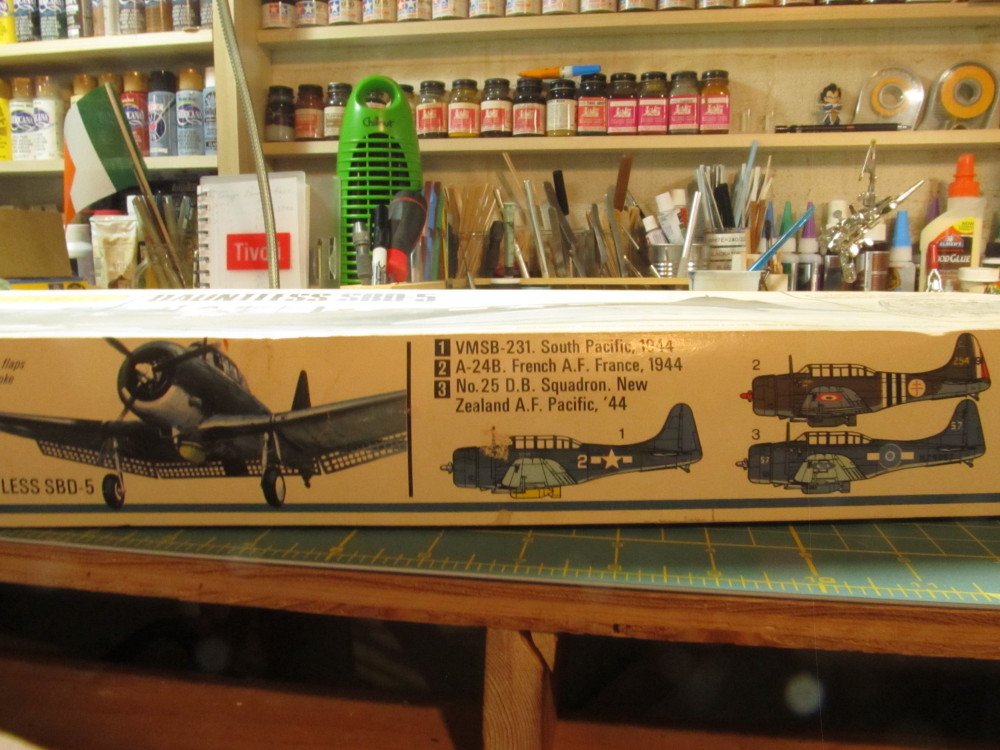
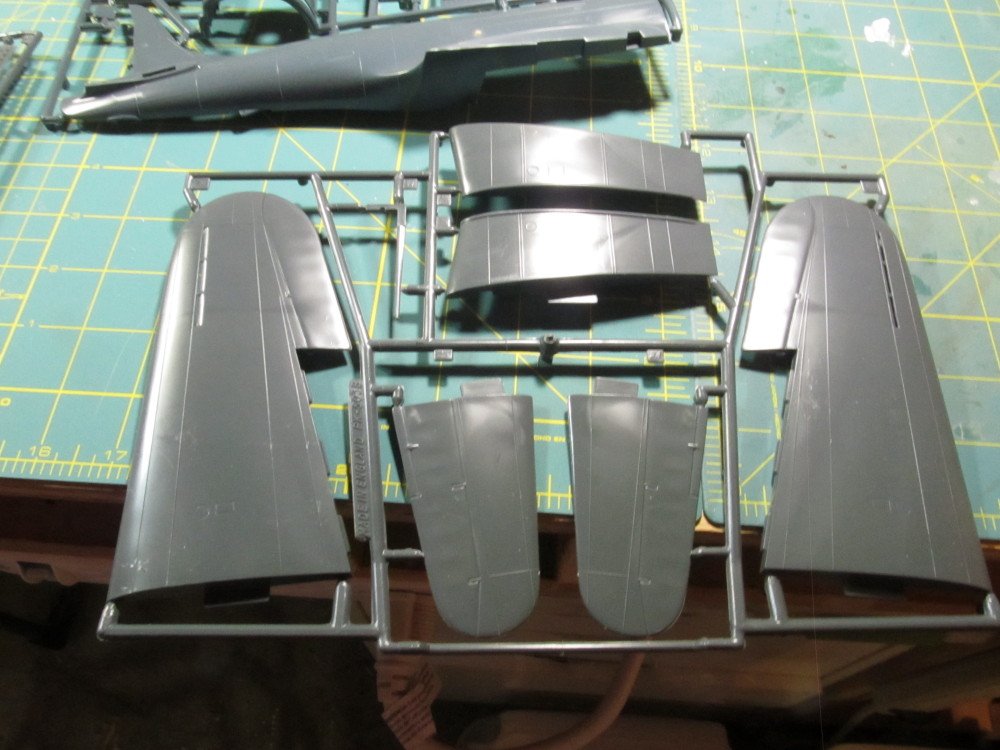
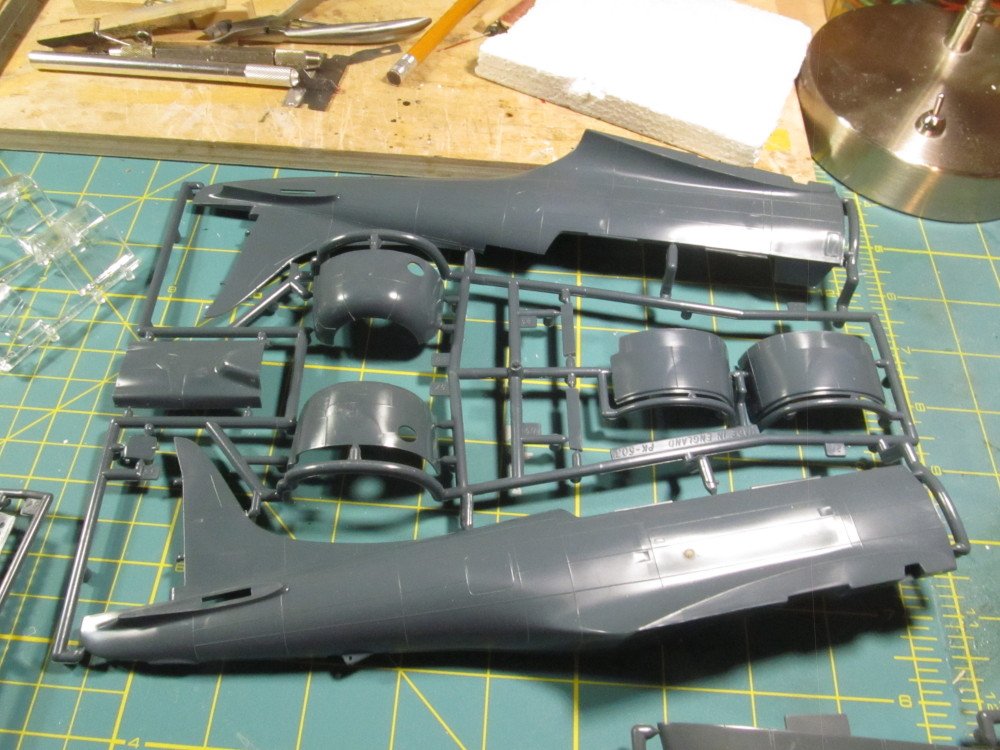
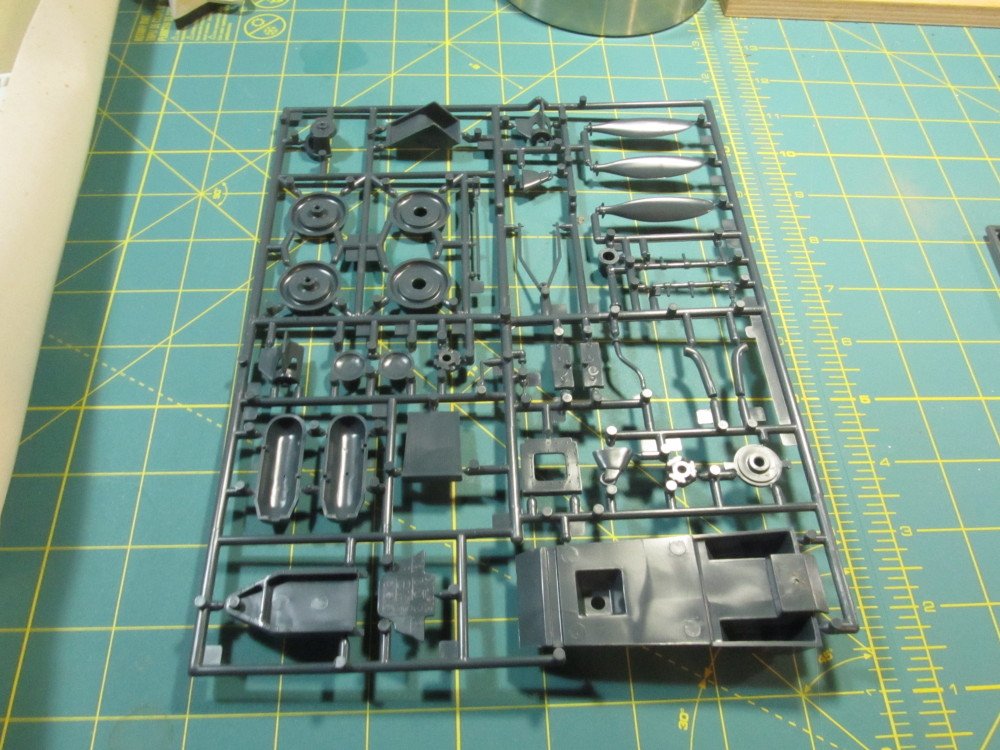
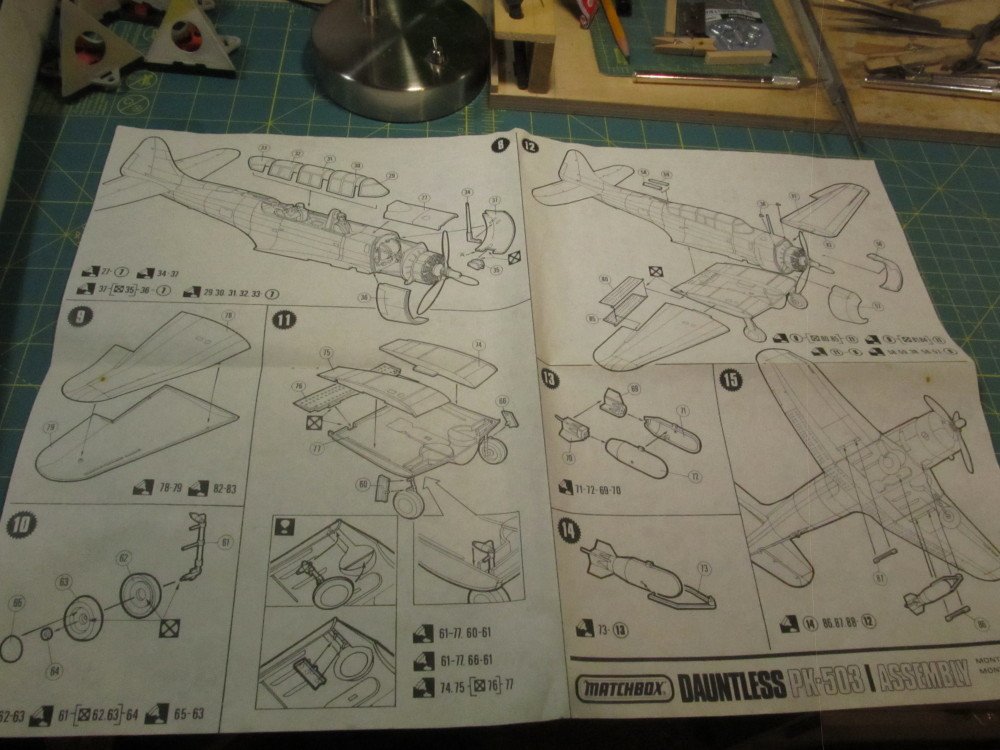
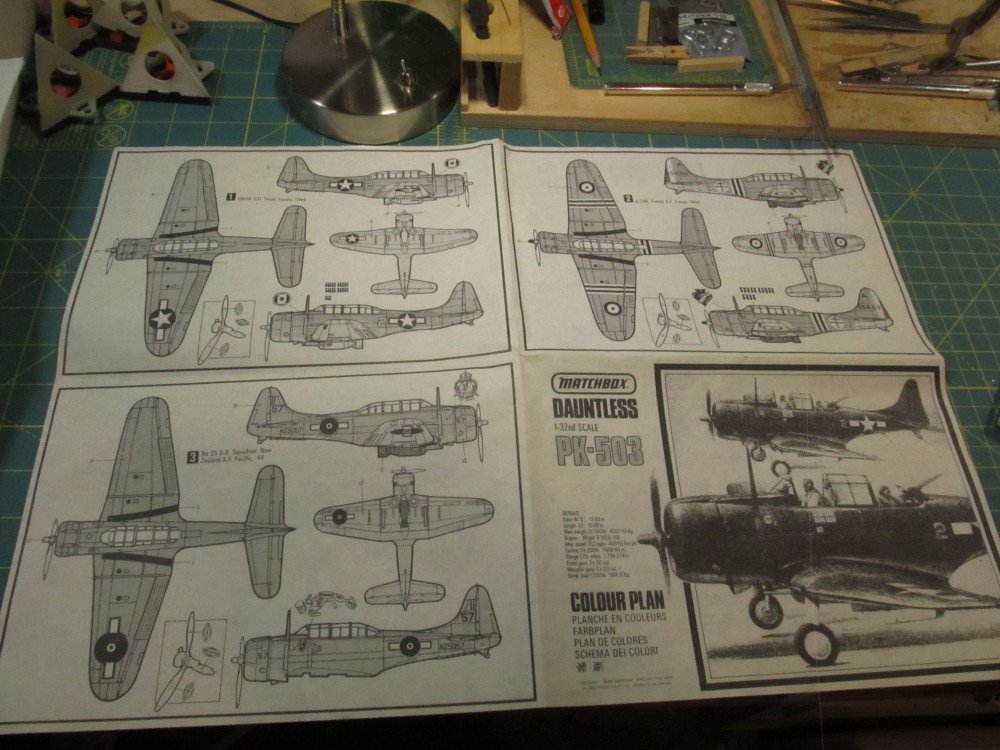
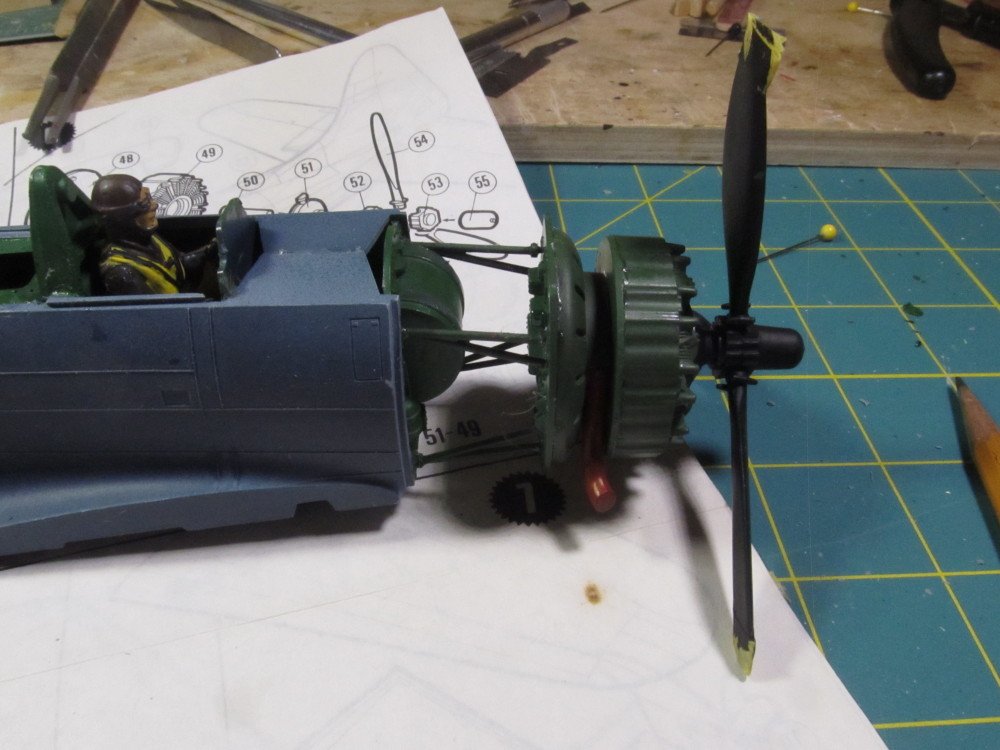
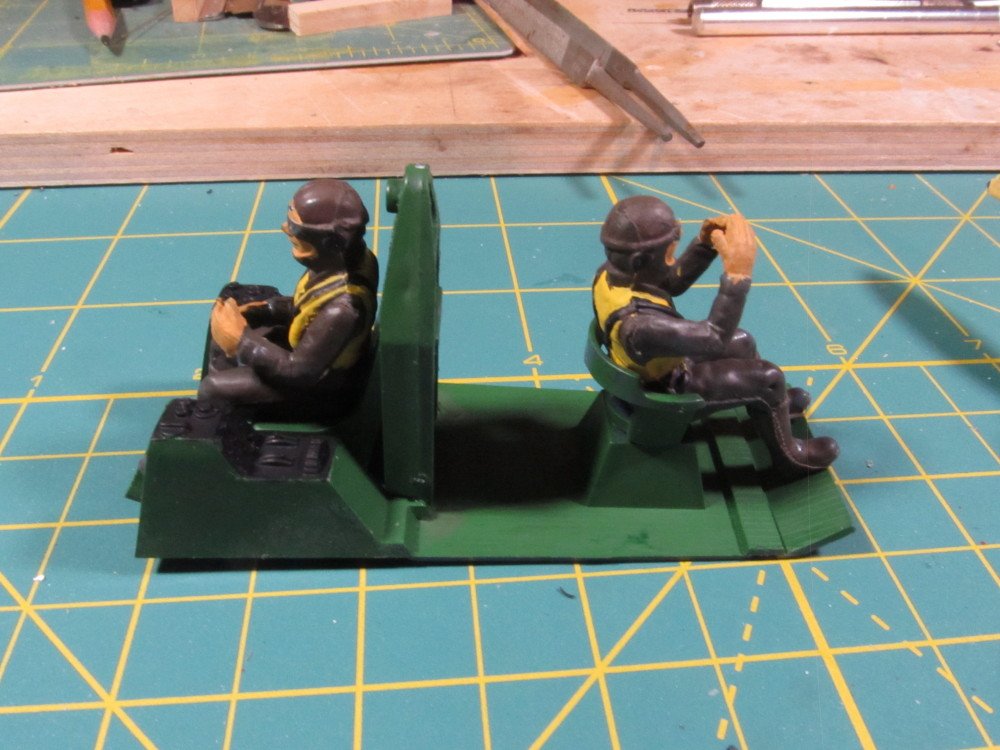
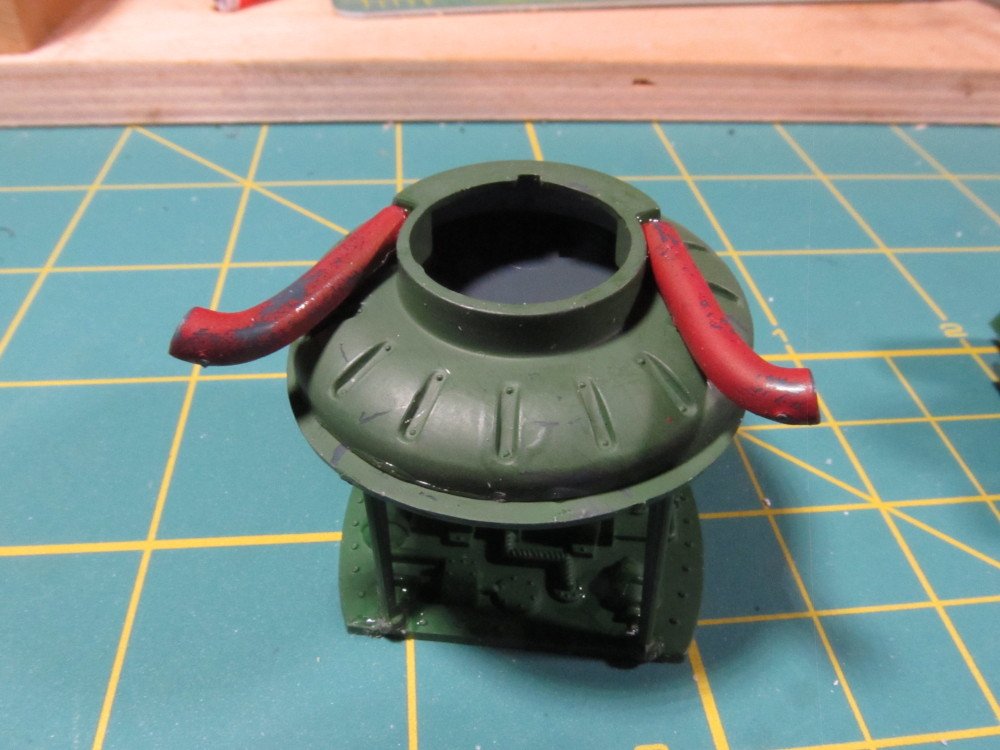
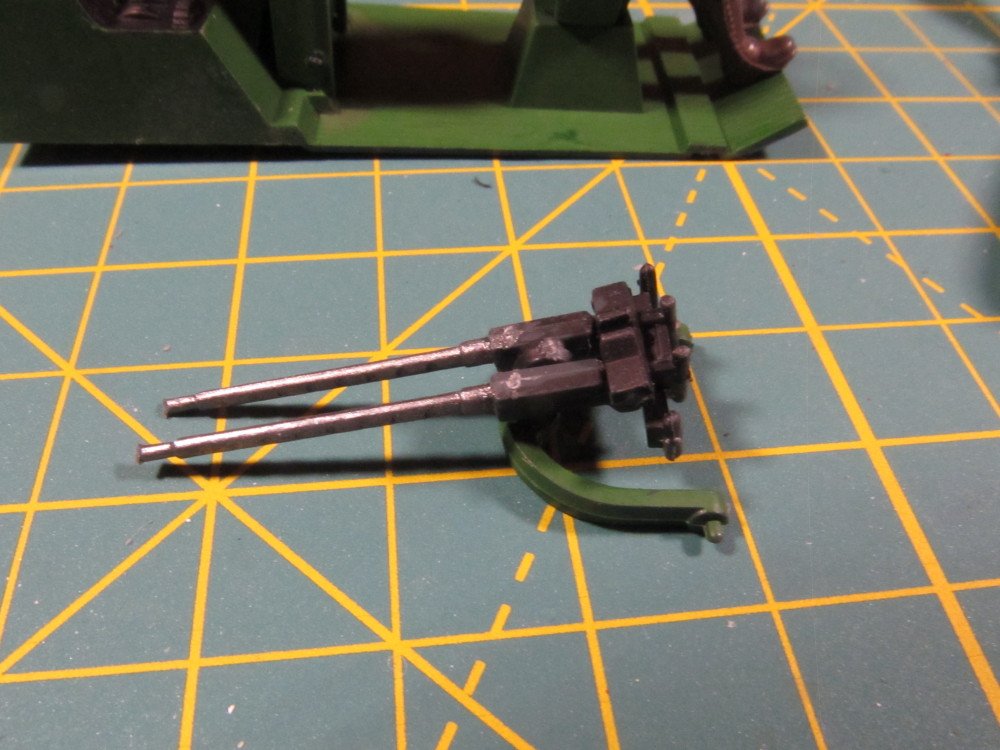
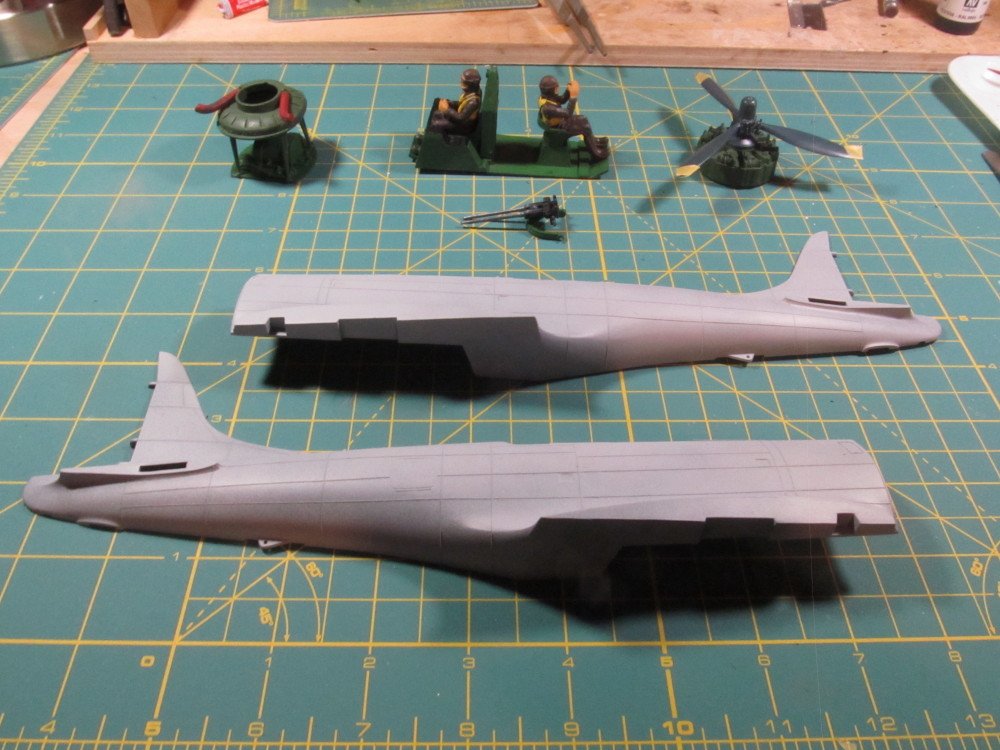
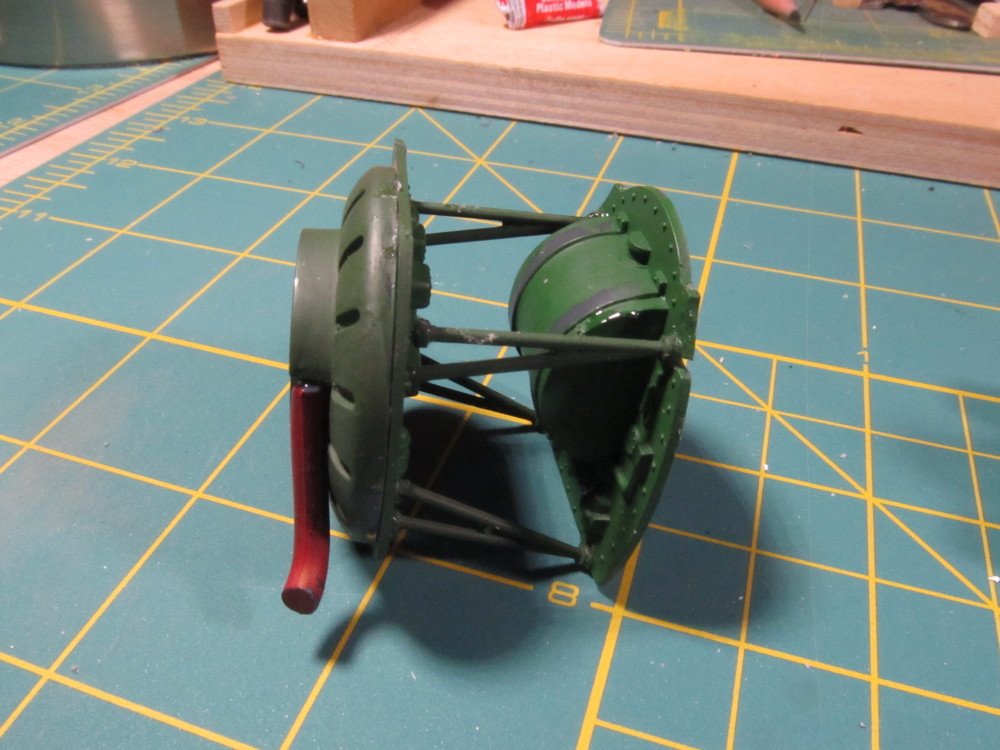
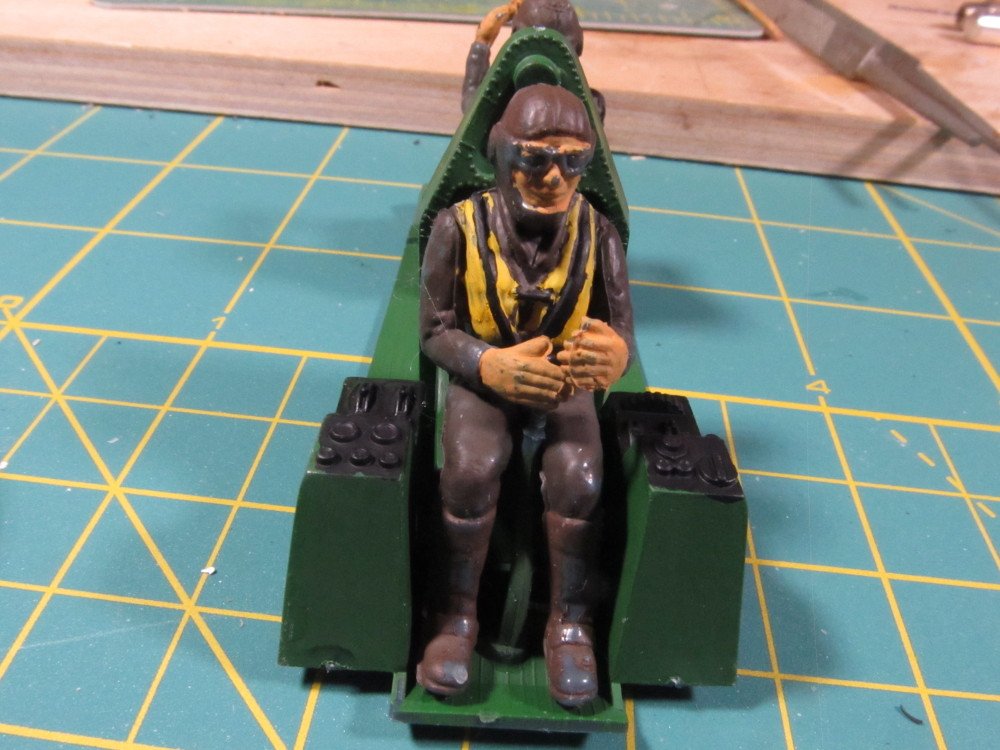
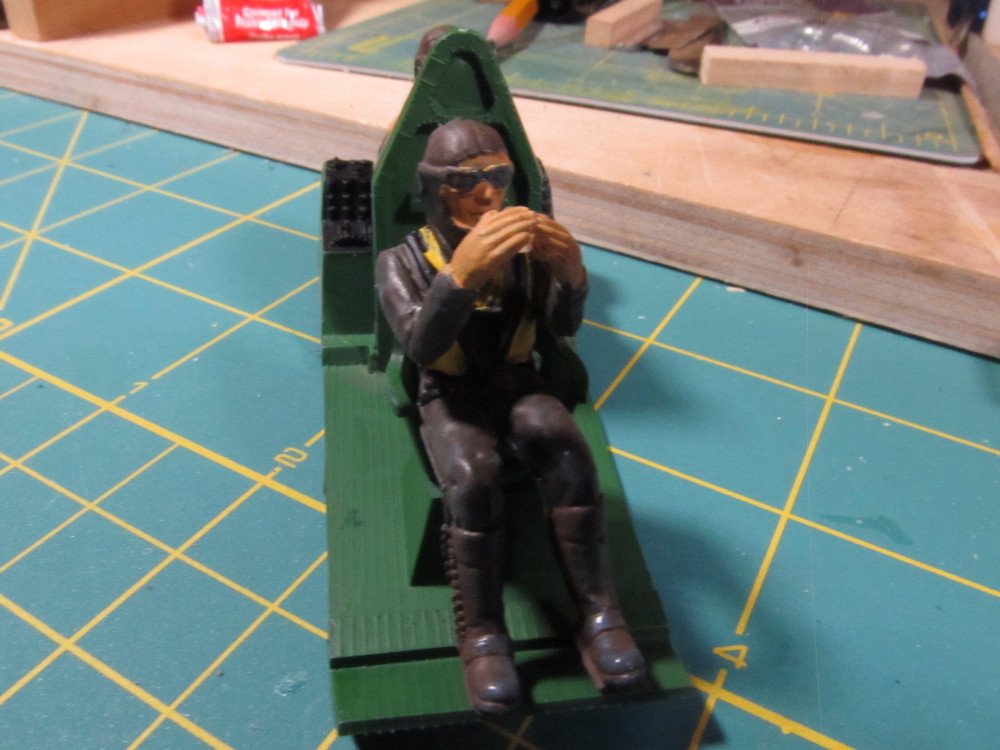
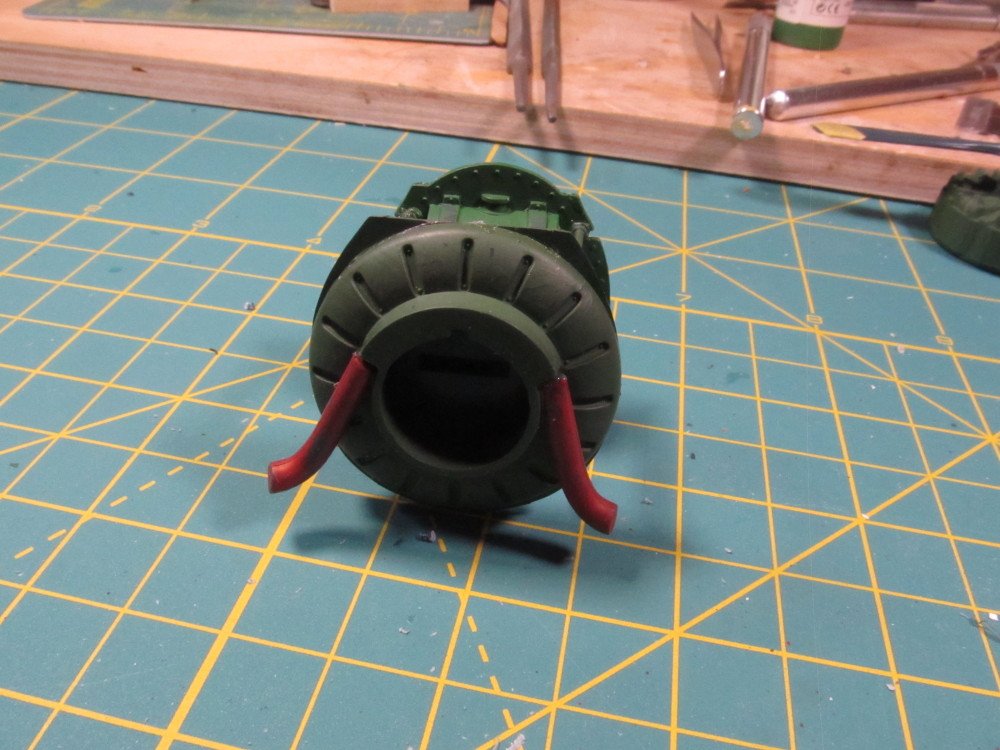
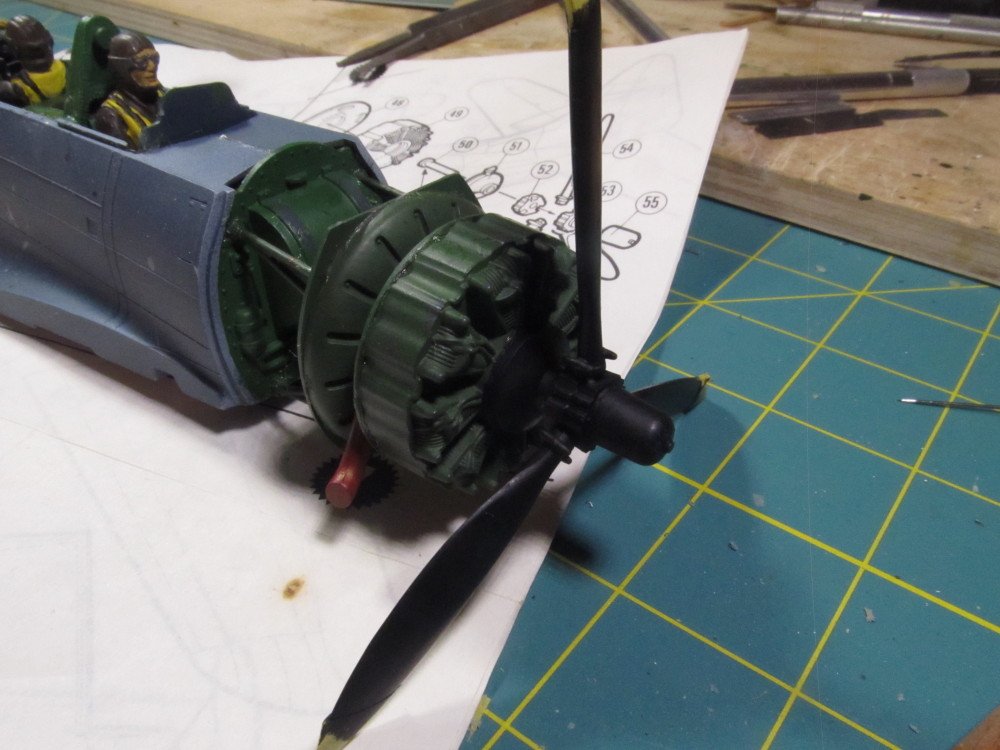
I decided to take a break from ship models and whittle down my stash of kits. Chose the PK-503 Dauntless SBD 5 Matchbox kit in 1:32 scale. This model kit was produced by Matchbox from 1977 to 1981. Not sure when I acquired it but the price tag on the box lists KayBee Toy and Hobby stores, price $12.99 on sale (probably clearance) for $3.00. KayBee went out of business entirely in 2007, bought out by Toys-R-Us. Their local store closed some 10-15 years prior. The aircraft model has functioning perforated Split-dive flaps, moveable tail rudder and propeller, a 1,000 pound bomb payload, Wright Cyclone GR-1820-66 radial engine. Kit is 3 color plastic (blue grey, white, and clear), offers a choice of models VMSB-231 South Pacific 1944 USA, A-24B French AF 1944, and #25 D B Squadron, New Zealand AF South Pacific 1944. I chose to model VMSB-231 Marine Bombing Squadron Scout flown by Capt Bell, credited for 23 operational missions and wears the "Ace of Spades" insignia. I used a combination of Valejjo and LifeColor paints. The outer hull of the aircraft was airbrushed with LifeColor Navy Blue. Photos follow: Assembly starts


-
In the US, the brand name is Bondo.
-
Nice cannon, Tom. Looks like new addition to ME's kits. I did the Whitworth cannon, Coffee Wagon, and Limber wagon kits some years ago. Lots of fun.
-
I think I'm going to reduce the stash by building the 2 Testors/Italeri kits of the F117A and F19 Stealth Fighters which have been sitting on my shelf for ages, then I'll go back to boats.
-
OC, Carl, CDW, thanks for the info. OC, I use LifeColor too , don't dilute like you do but I do dilute with tap water, I put a small amount of paint on a pallette, dip the brush in water then mix with paint till I get the consistency I want, then brush onto model.
-
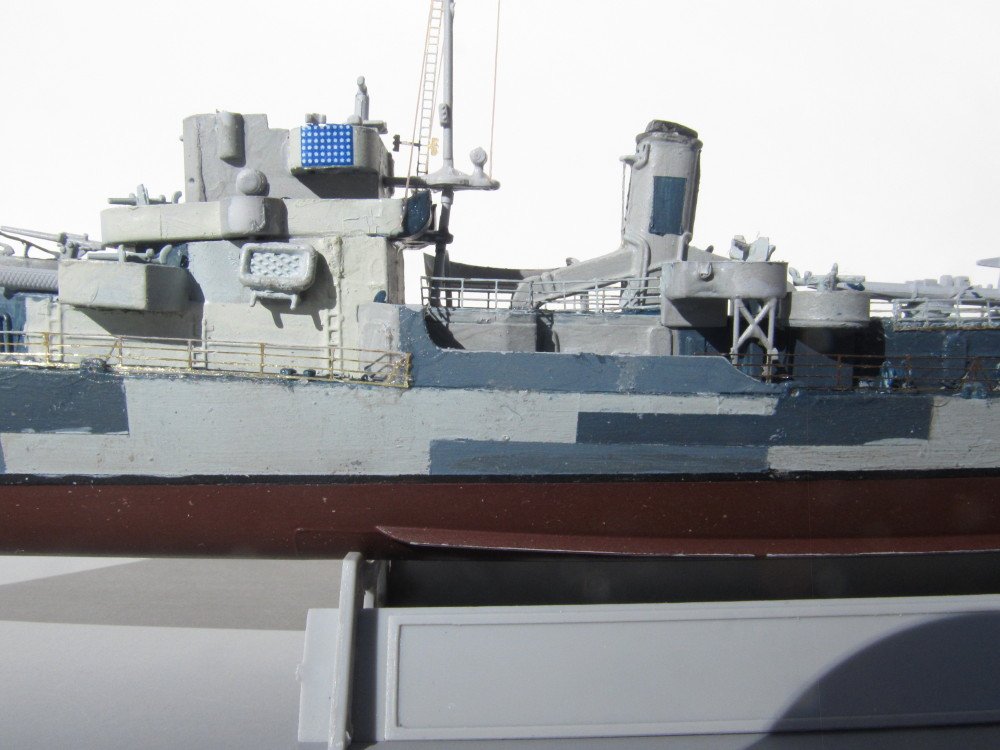
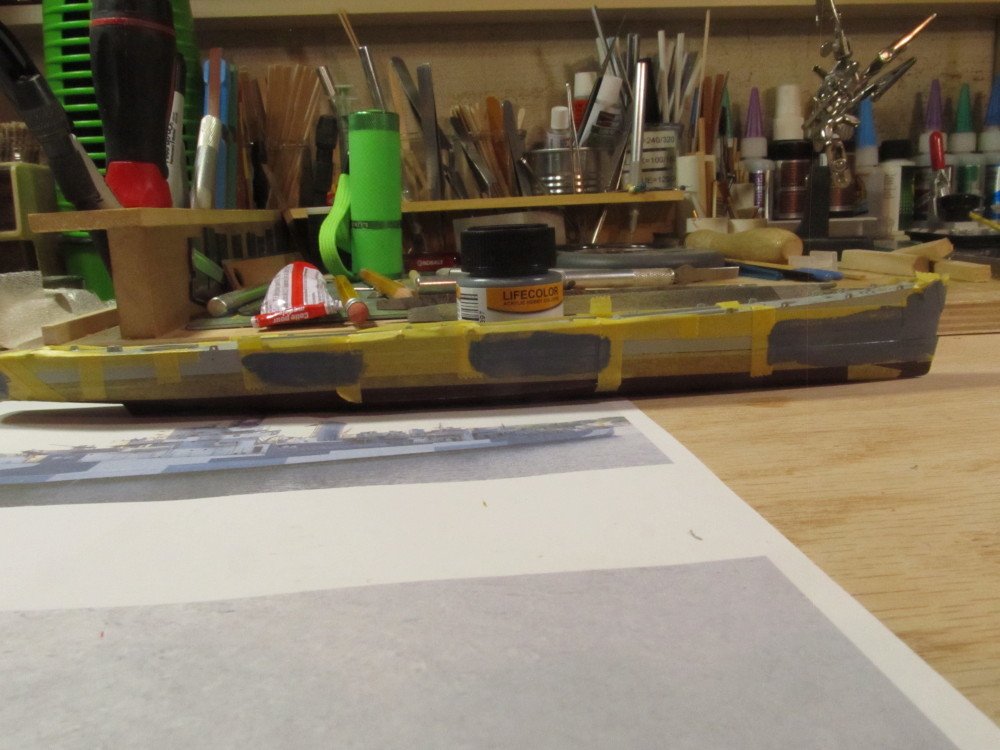
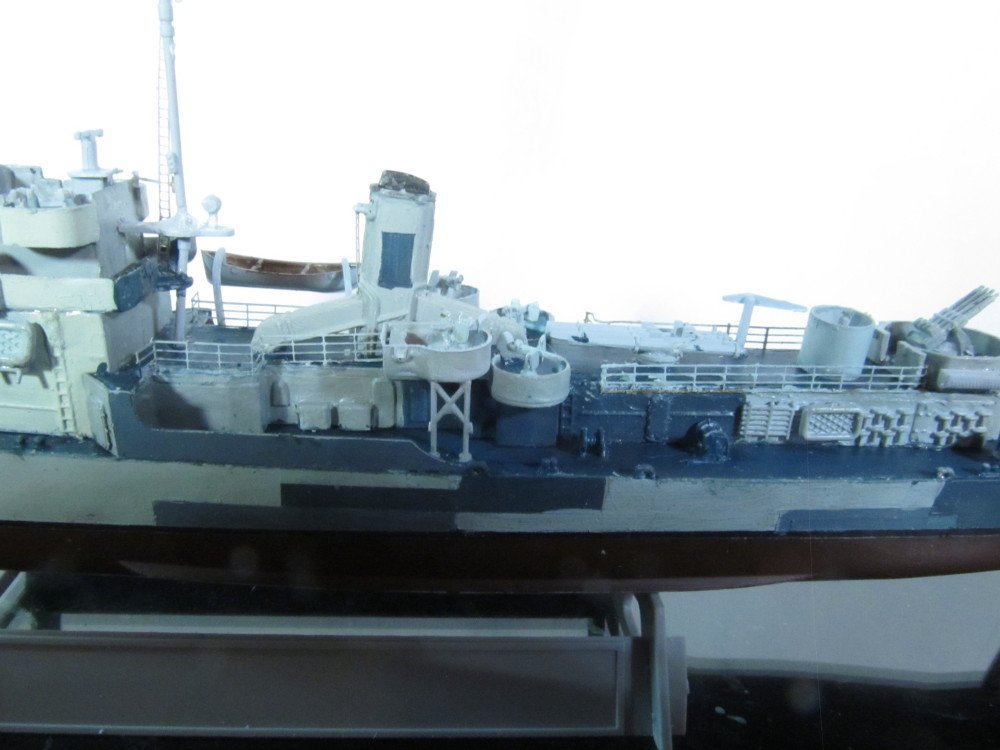
Thanks Carl, yes I had a lot of free time to work on it every day. RE: the primer - the only non-rattle can primer I have is Tamiya gloss white, I have to find some flat gray primer. I've tried the gloss white and it doesn't work to well. The other problem I have is the paint filling in the gaps between the rails, even the rattle can primer does this and I spray from a distance and keep the can moving left to right as I spray but it still fills in the "holes" with paint. Thanks CDW.. I found the Gator Grip worked well if the two pieces being mated were in a horizontal or near horizontal plane but not so well in a vertical plane. Example; trying to attach the ladder to the mast the Gator Grip did not hold long enough to set, the ladder kept falling over. Same with the railings around the upper and lower decks. The Gator didn't have enough holding power to keep them vertical until the glue set, so I had to resort to medium CA for these brass parts. Otherwise it was pretty good. General comment on painting - I'm still trying to work out the right combination of paint to thinner for my airbrushes - so far all I get is a clogged brush so I resorted to hand brushing the past 3 models. Still working on the airbrush. All of the plastic Armor (Tamiya kits) I did before were done with Floquil paint which was easy to mix (for me at least), these acrylics are a bit more difficult (for me) but they do brush on nicely. I'm also experimenting with different brands.
-
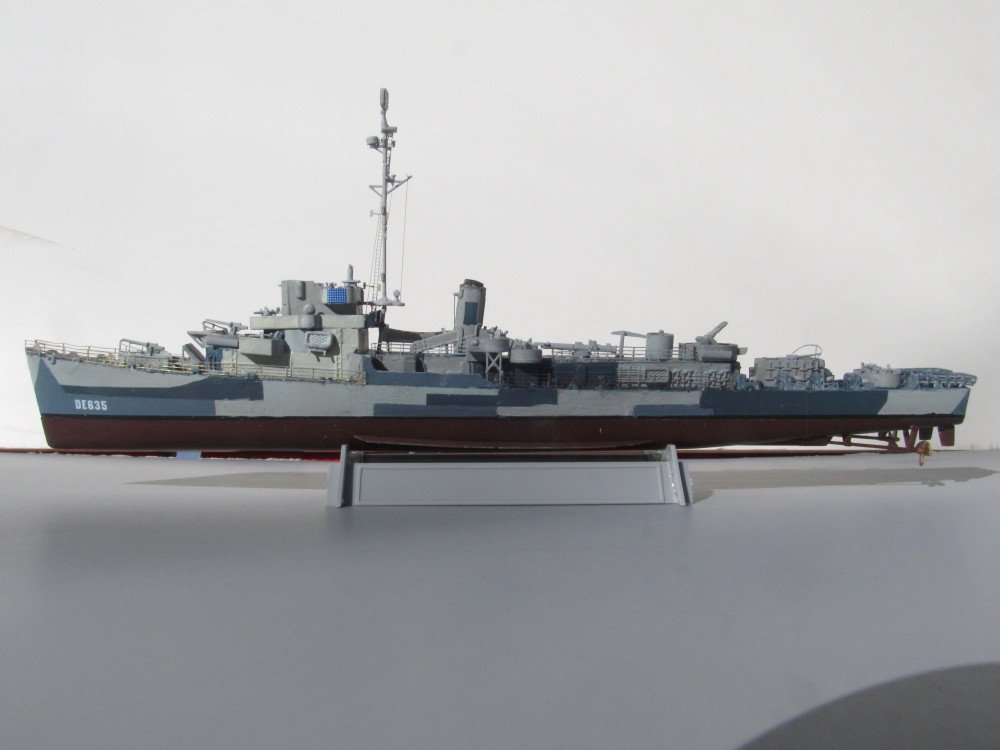
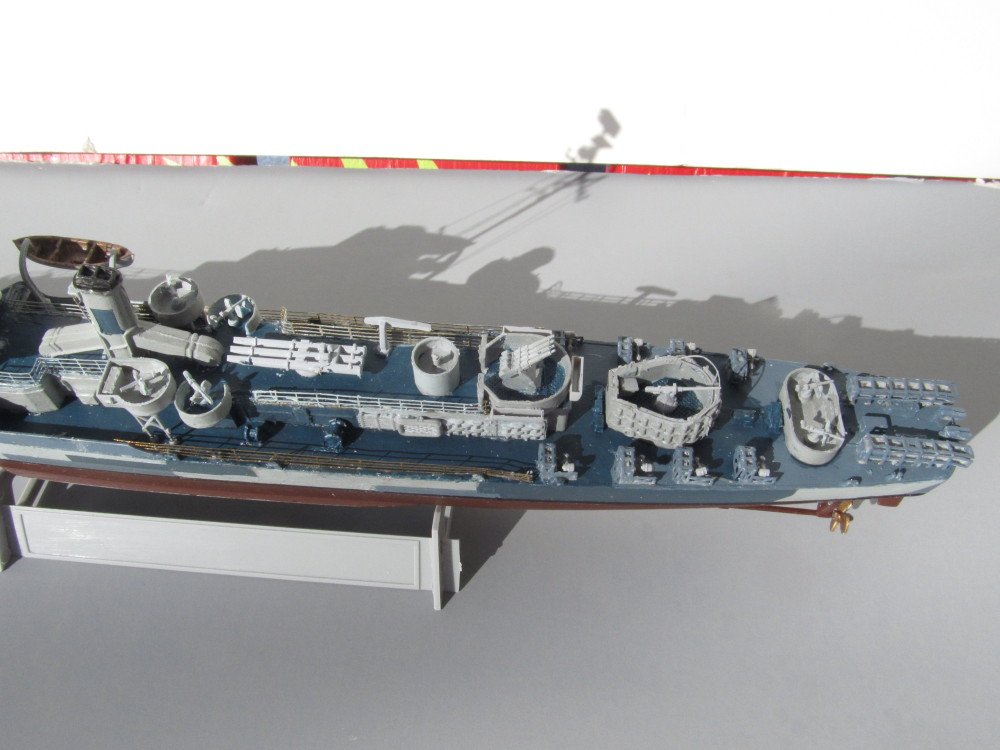
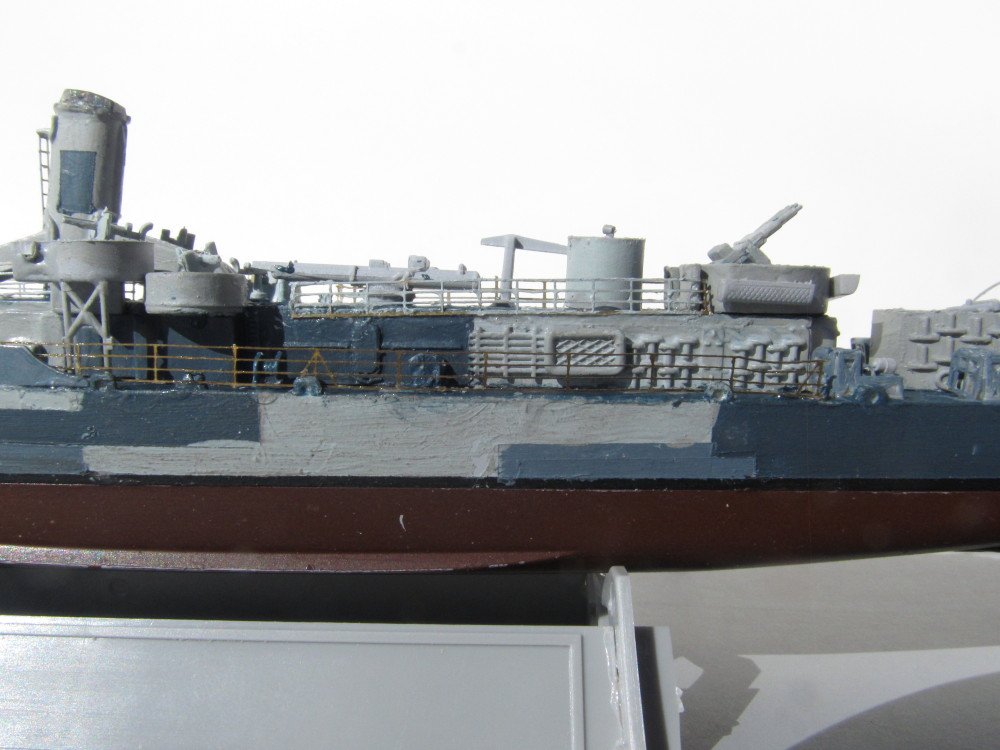
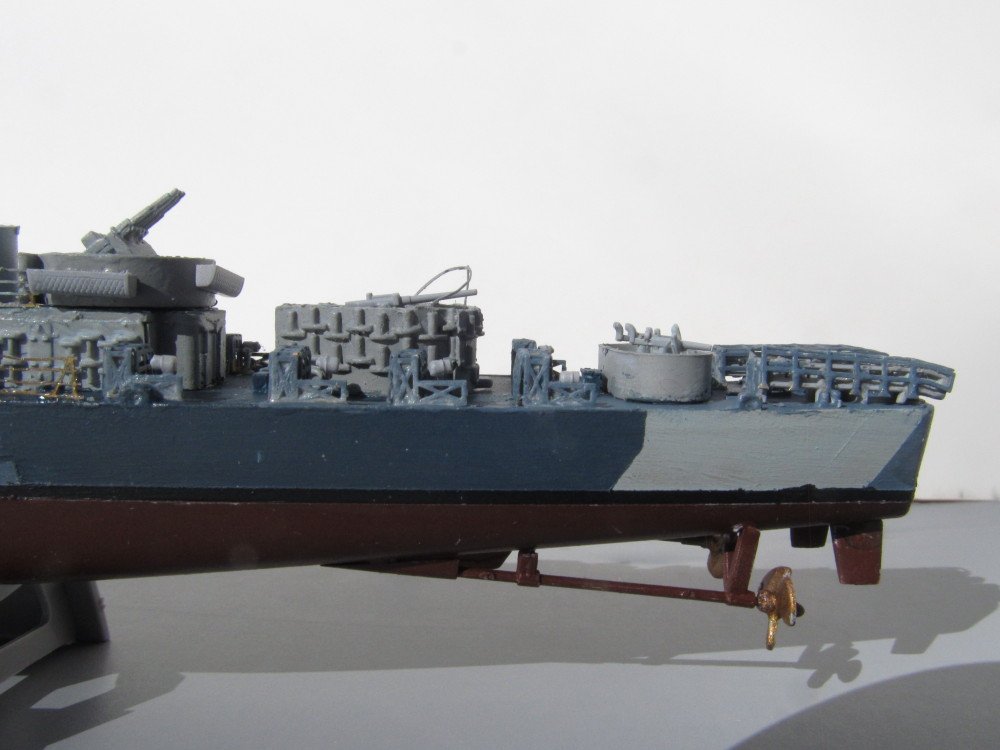
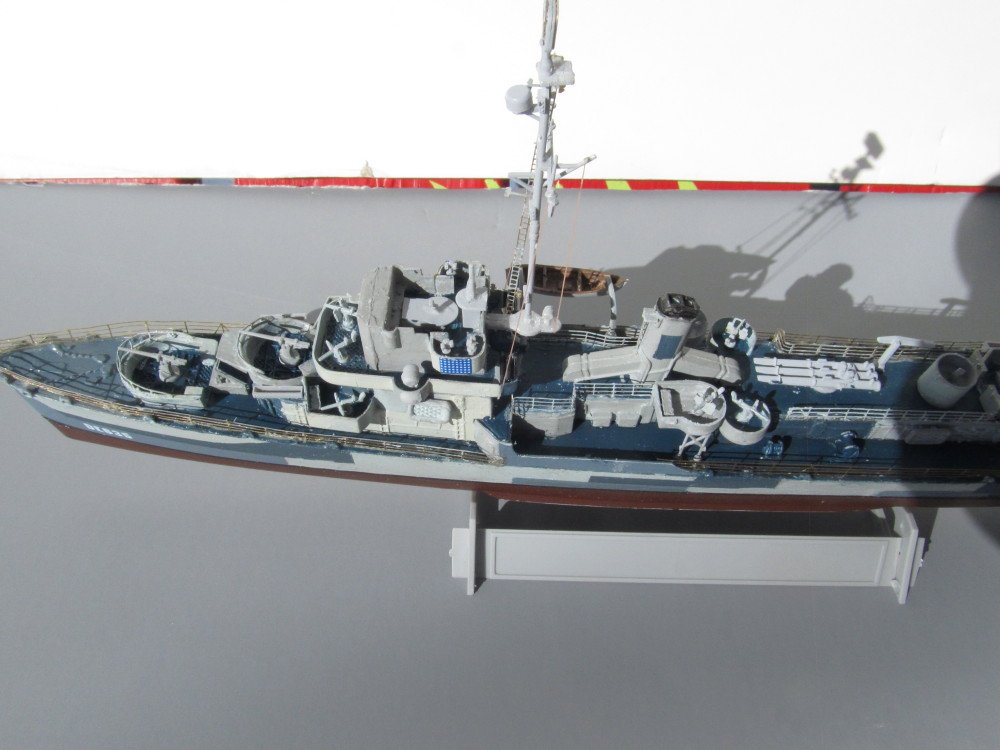
Now fully assembled with most of the PE Brass installed. Still working on installing the deck railings on the main deck. Some touch-up paint, apply decals. Photos below:
- 71 replies
-
- 12
-
-
Thanks I eye-balled the lines - no tracing - used "landmarks" on the superstructure to line the panels up, applied the Tamiya Masking tape, cut some of it to get the curve - then free hand brushed it - one color at a time.
-
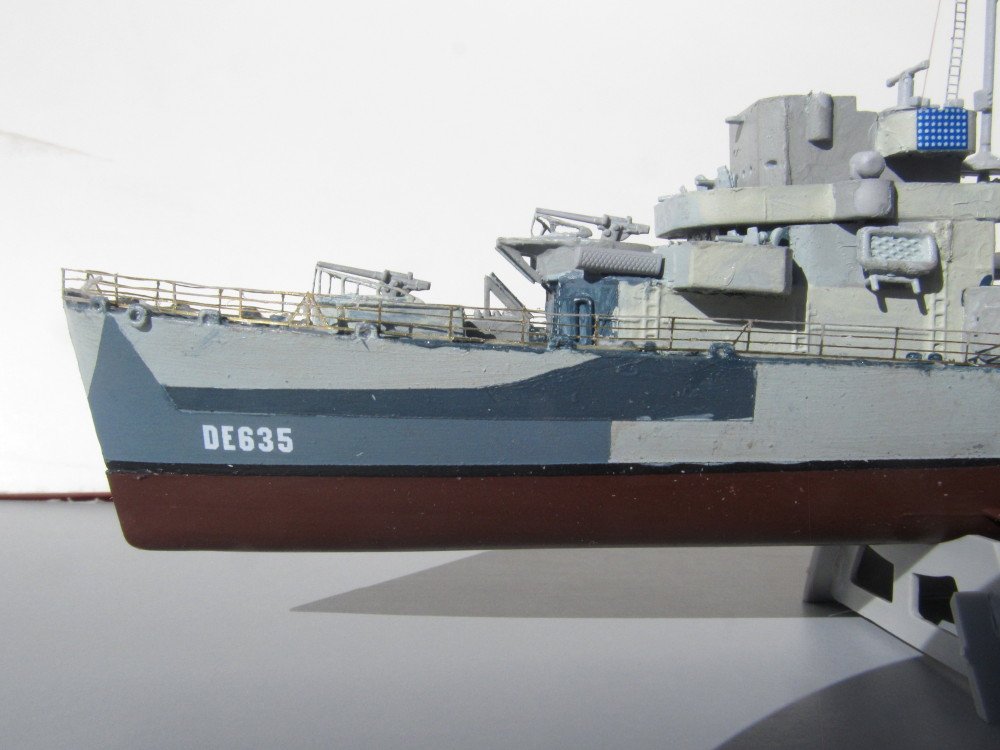
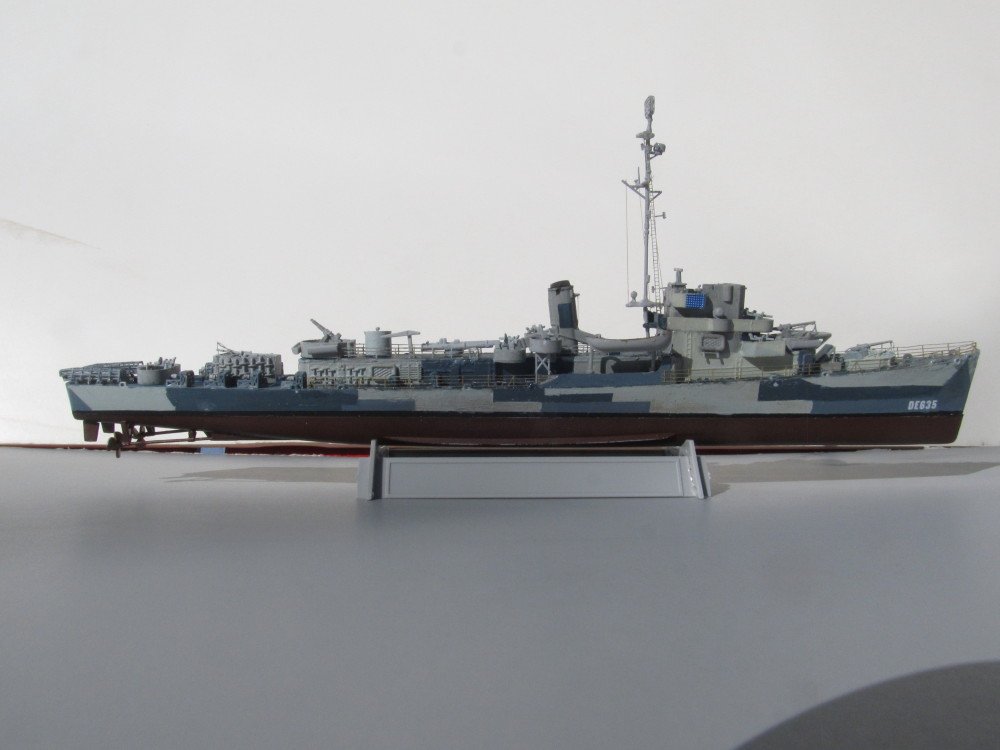
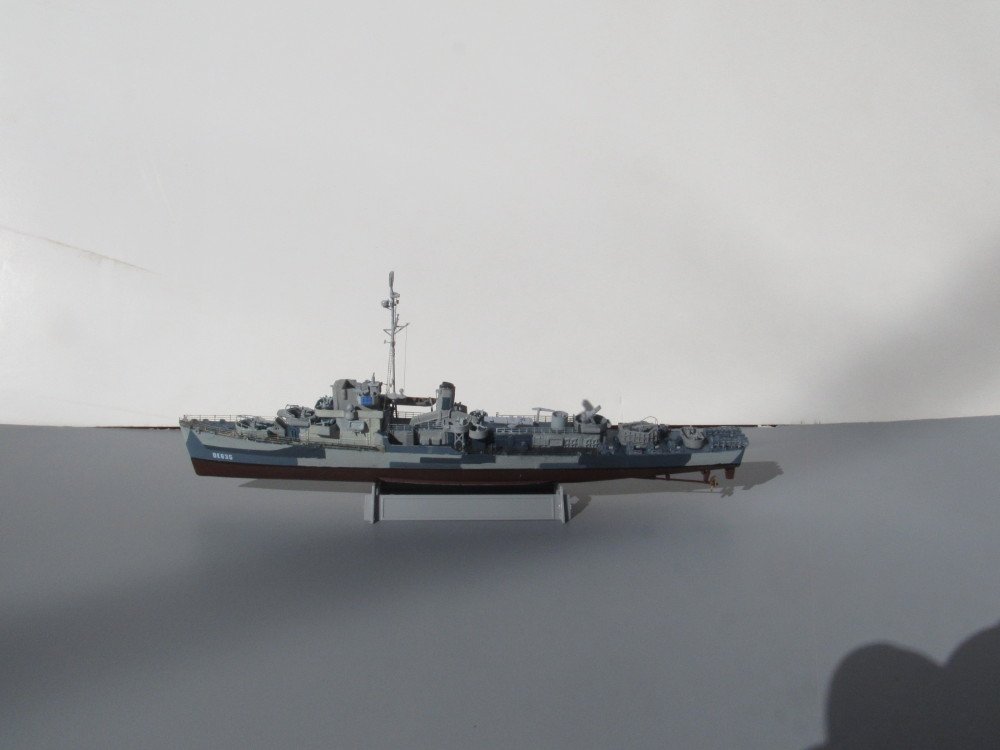
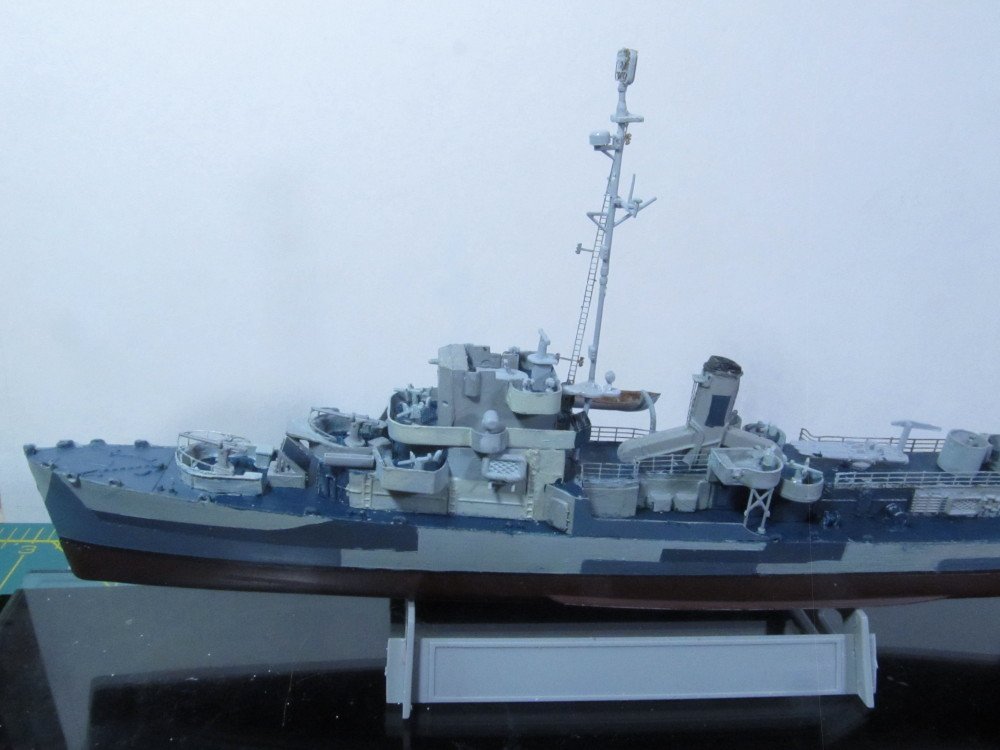
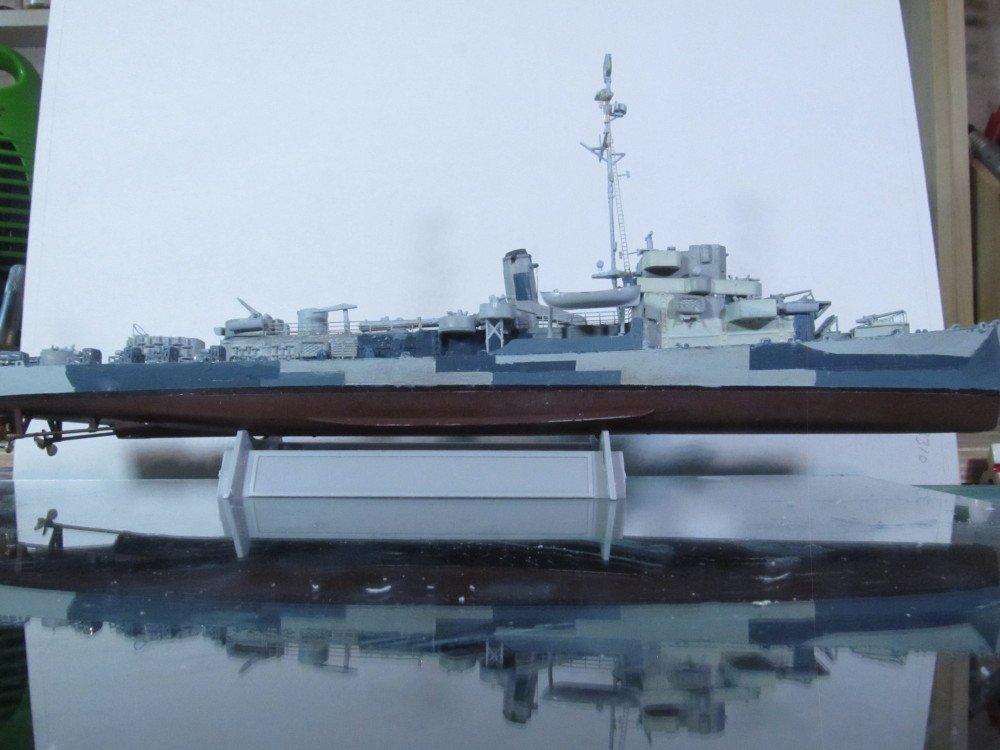
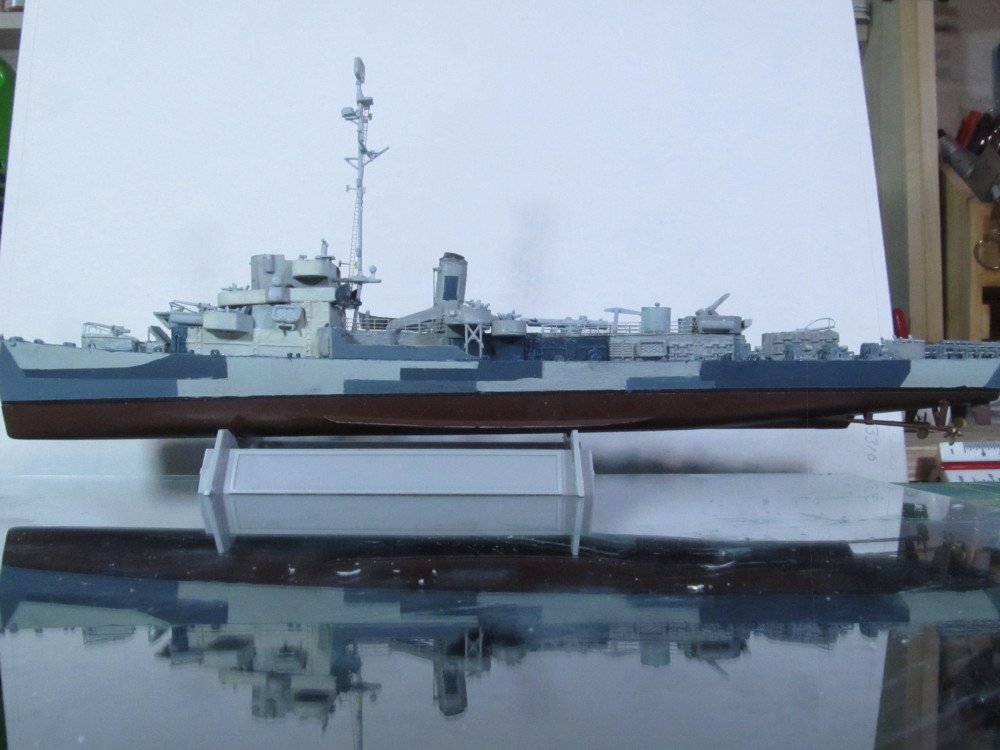
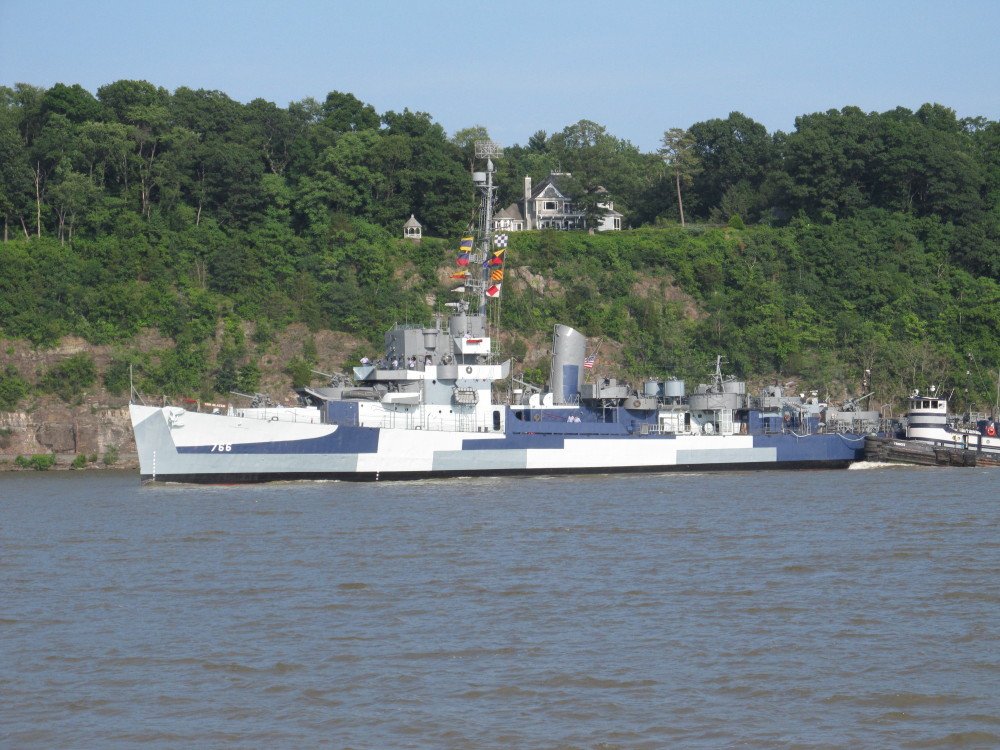
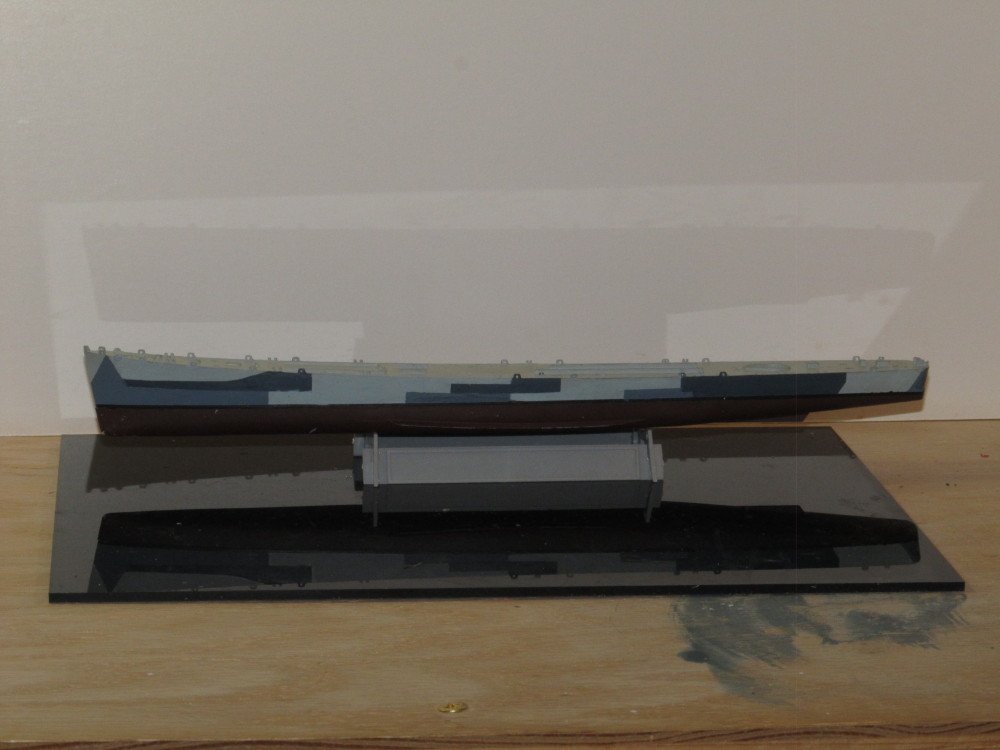
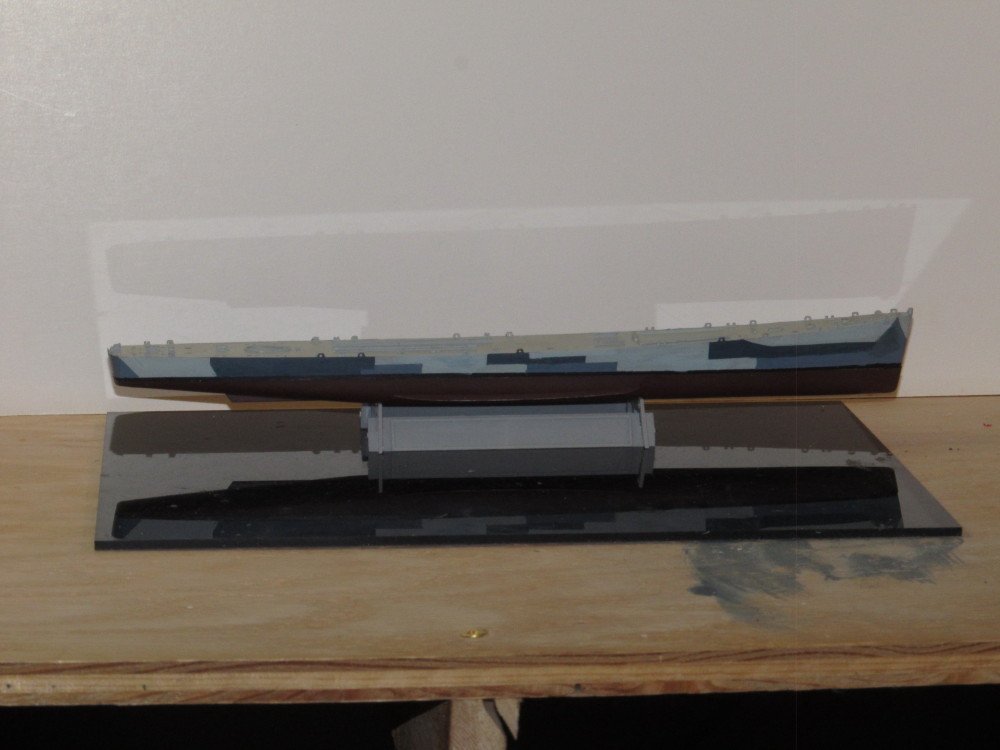
I've been retracing my research after some discussion offline with other members. I didn't make note of this before but the USS England is a Buckley class DE, while the USS Slater is a Cannon class DE; different power plants, different silhouette, different stacks. In addition Slater spent most of her WWII service in the North Atlantic before transferring to the Pacific near the War's End, while England spent all of her service in the Pacific. Camo Measure 32, which the Slater used, is a North Atlantic camo pattern, not used in the Pacific; Measure 21, which the England used, was more heavily used in the Pacific. After comparing the two measures, I find the Measure 21 "all blue" ship a bit boring and uninteresting, while the Measure 32 pattern has more visual appeal. So ! I have decided to continue with the Measure 32 for the model since it has, for me at least, more visual appeal. The following photos are ones I took of the Slater as she was being towed back to Albany NY in June 2014 after her re-paint at a shipyard in NYC. The two photos were taken about 2 minutes apart and after the ship had moved about 100 yards north (up river) - notice the drastic change in color - same camera (digital), same lighting, bright sky bright sun. The sun is directly behind me shining directly on the ship in both photos. I also located the official US Navy Measure 32 pattern diagrams with color designations, these match the colors I have in the LifeColor set I got for the other two kits. This is my interpretation of the Measure 32 pattern. (Getting a decent lighting is a challenge - I'm using daylight rated LED lighting for the 1st two photos and for the 3rd photo I took the model outdoors under a clear blue sky with the snow acting as an additional reflector)


- 71 replies
-
- 13
-