


Jack12477
-
Posts
5,674 -
Joined
-
Last visited
Content Type
Profiles
Forums
Gallery
Events
Everything posted by Jack12477
-
 Call your credit card company and tell them it's a fraudulent charge. Don't know what the UK laws are but here in the US you are either not liable at all or only get nicked for $50 USD. Either way most cards have fraud protection for the cardholder.
 -
Thanks, Kop, I do have a hold and fold and the appropriate blade. Got them a while back from The Small Shop in Oregon/Washington area.
- 140 replies
-
- 5
-

-
- the sullivans
- trumpeter
- (and 2 more)
-
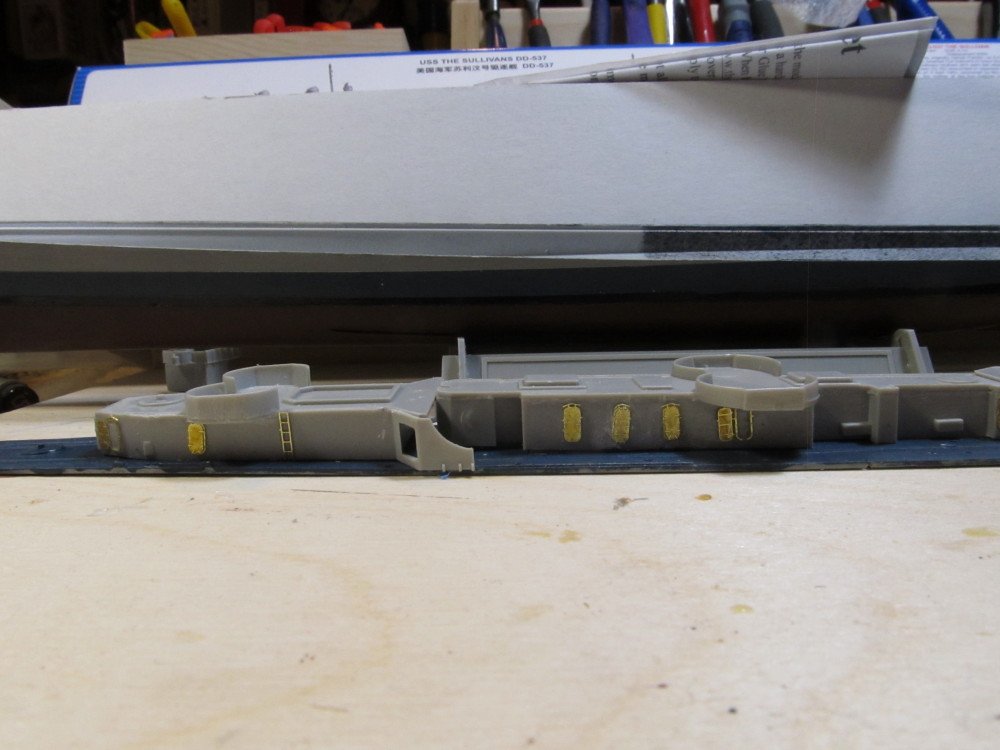
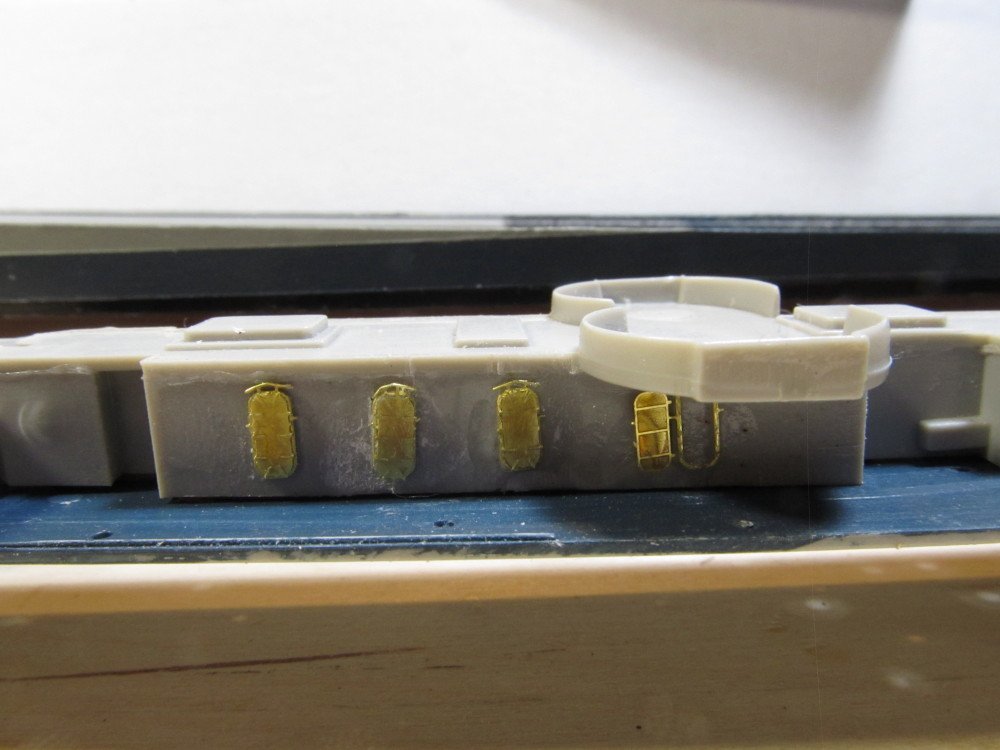
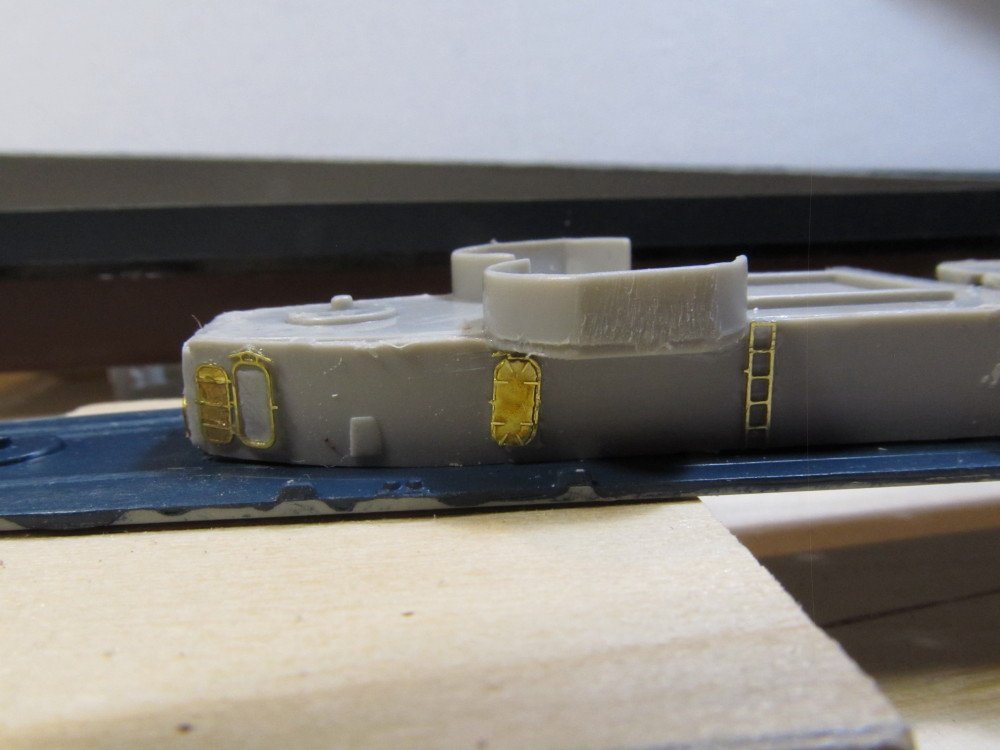
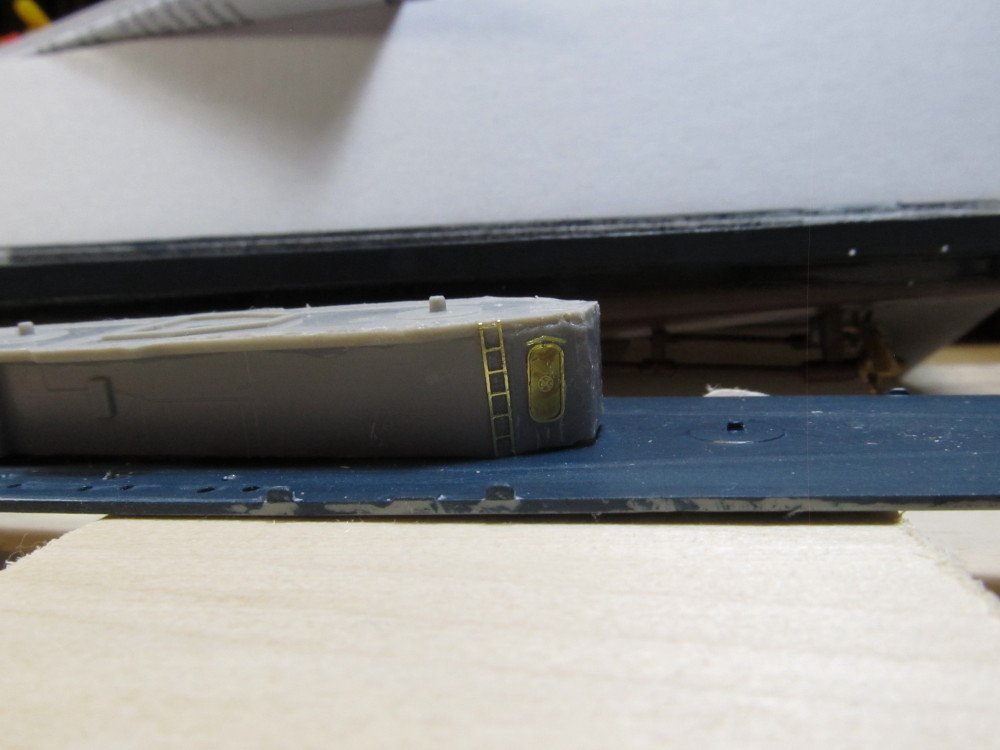
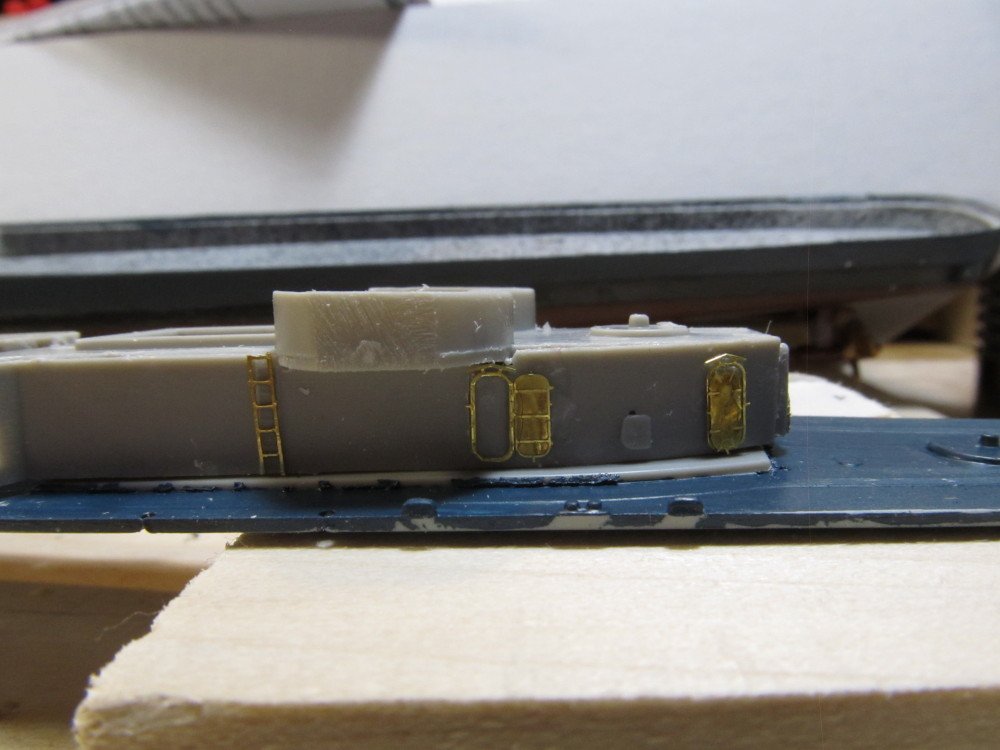
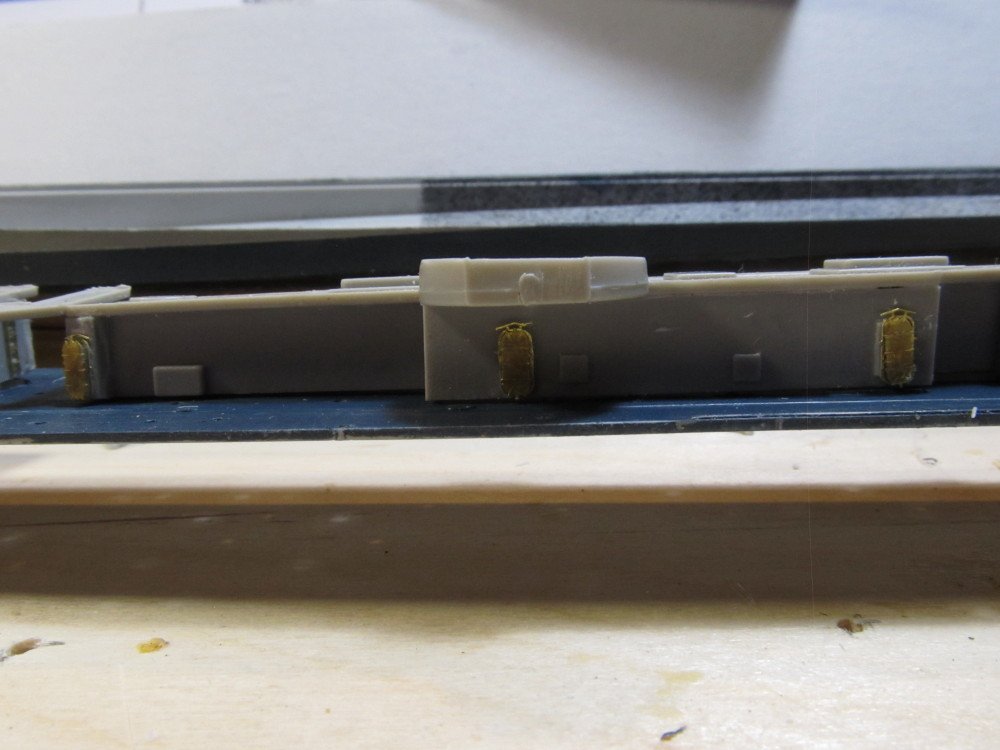
Question for everyone : the PE ship's doors have a single very very thin brass band linking the doot to the door frame. I have been cutting the two apart, glueing the frame on first, then glueing the door onto the frame. I tried to fold the door over onto the frame but with only one thin brass piece holding them together they don't align correctly. How do you guys handle the doors ? One folded piece or two separate pieces ?
- 140 replies
-
- 5
-
-
- the sullivans
- trumpeter
- (and 2 more)
-
Thanks, OC, I think I have some of that glue. Wiil try it.
- 140 replies
-
- 5
-
-
- the sullivans
- trumpeter
- (and 2 more)
-
Is that available in US ? I've never seen it before . Only ones I seem to find are Elmers brand.
- 140 replies
-
- 5
-
-
- the sullivans
- trumpeter
- (and 2 more)
-
I've done both ! If I apply to part, it immediately seizes when it contacts the plastic and won't let me adjust it, even with medium/slow/15 sec CA. Thin CA is too fast setting. There is an even slower setting CA but it may be too thick to use - never used it before so I would have to buy some. I'm still experimenting.
- 140 replies
-
- 5
-
-
- the sullivans
- trumpeter
- (and 2 more)
-
Thanks everyone for the Likes, Comments and suggestions. I'm not having a problem picking up and placing the pieces. I have a very good quality set of jeweler tweezers that work well. The problem is keeping the part in place while I apply the glue to it; as soon as the CA touches it the part moves. I'm going to trying the PVA glue that OC uses and a variation on Carl's tweezers to hold the part in place while I apply the glue.
- 140 replies
-
- 7
-
-
- the sullivans
- trumpeter
- (and 2 more)
-
Did any of them settle in Nieuw Dorp, Chris ? (aka Hurley NY )
-
Actually, I find taking off my distance glasses makes it easier to see, no magnifier needed [YET]. I do have sunlight/daylight LED bulbs in both work lamps, 100 watt @COG , @RGL , do you guys have any tricks you use to keep the PE in place while you apply the glue? It's applying the glue that causes the part to move.
- 140 replies
-
- 6
-
-
- the sullivans
- trumpeter
- (and 2 more)
-
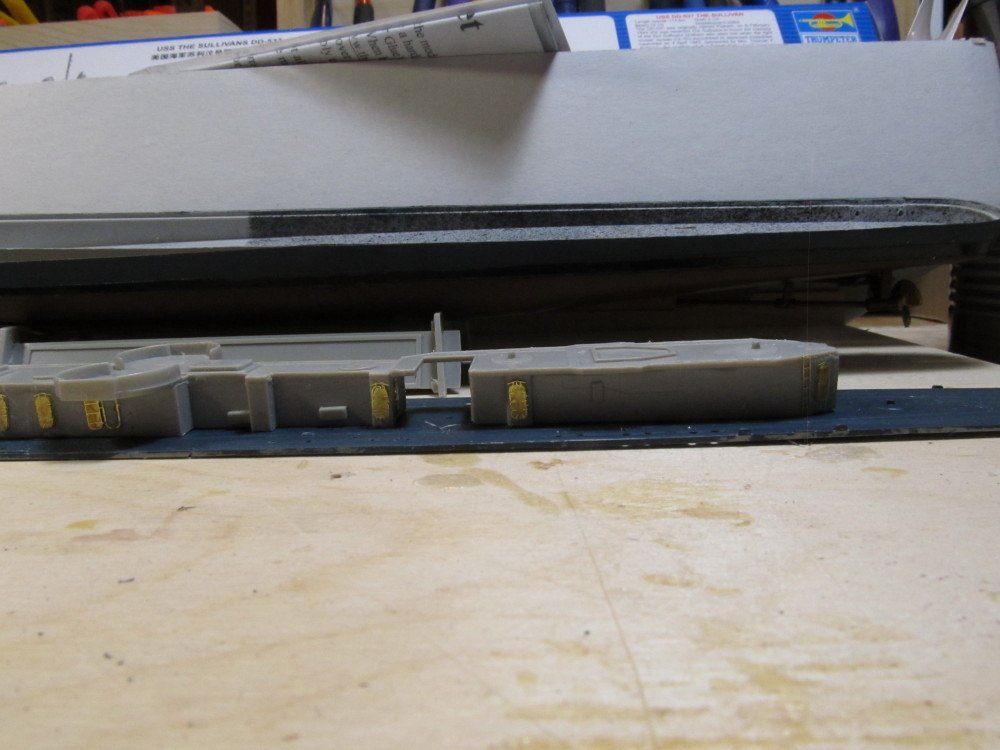
Some progress photos: looks like a few doors need to be reattached. Keeping them aligned is a bear. I am using a sewing needle with the eye cut off then inserted into a paint brush handle to place the glue but still tricky because the parts move. I'm using Medium CA (15 sec set time). Wondering if the Testors brand tube cement for plastic would work and still hold the brass. Might give me more time to re-position the doors better. The thin CA sets too fast and doesn't allow time to position the piece. I'm scraping the molded on detail off the molded doors but leaving the molded door a little proud so I can position the frame, rather than scrape it flush to sidewall. I will paint the open door openings flat black after I've painted the structure gray.

- 140 replies
-
- 10
-
-
- the sullivans
- trumpeter
- (and 2 more)
-
It is a metal hook used to attach wool or cloth while it dries, usually attached to a wooden frame or fence. I would guess that the Brits expression is similar in meaning to our Yanks expression "on pins and needles."
-
Label on bottle reads "Elmer's Carpenter's Wood Glue" "for Dark Woods" - no product number that I can find but the UPC code on back is 26000 00710 Says it is good for walnut, oak, cherry and other dark woods. Mine is a 4 oz bottle. In the bottle, the glue is about the same color as chocolate milk.
-
Elmers makes a dark brown wood glue, PVA, for use with dark woods like walnut. I used it to glue the deck planks down, it pushes out a liitle between the planks and looks like dark caulk when dried. Lightly sanding the planks removes any residue as does a damp sponge.
- 87 replies
-
- 1
-
-
- scottish maid
- artesania latina
- (and 1 more)
-
Chris, Card ! Wow! Even more impressive!
-
Really nice looking model, Chris. Nice camo also. Did you mask or free-hand the painting? I assume it was air brushed ?
-
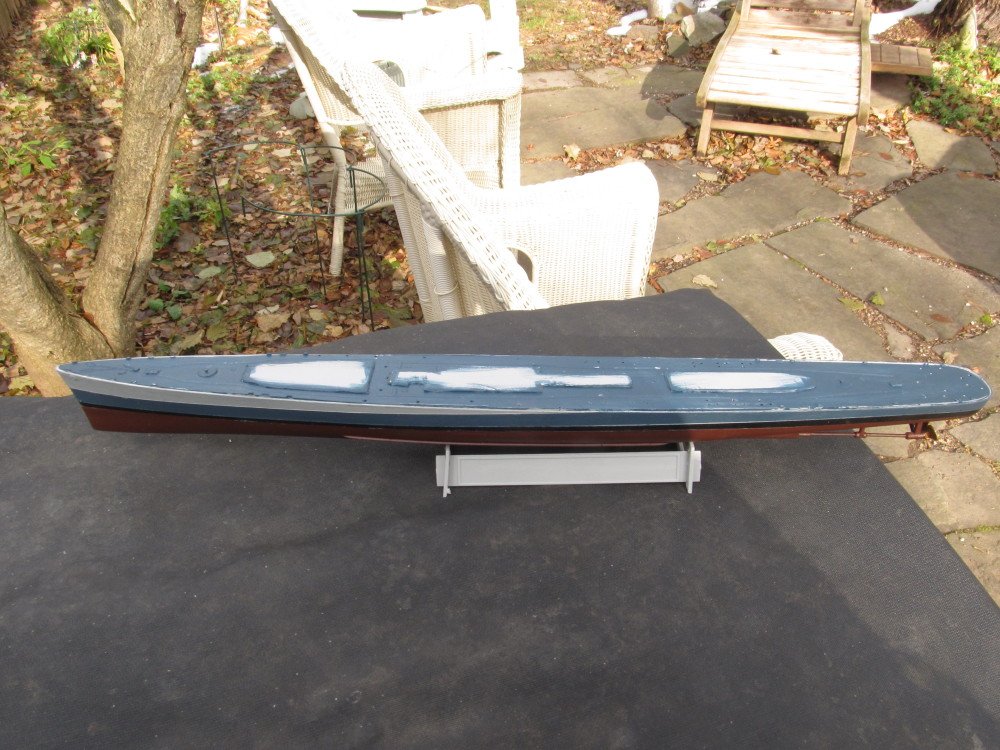
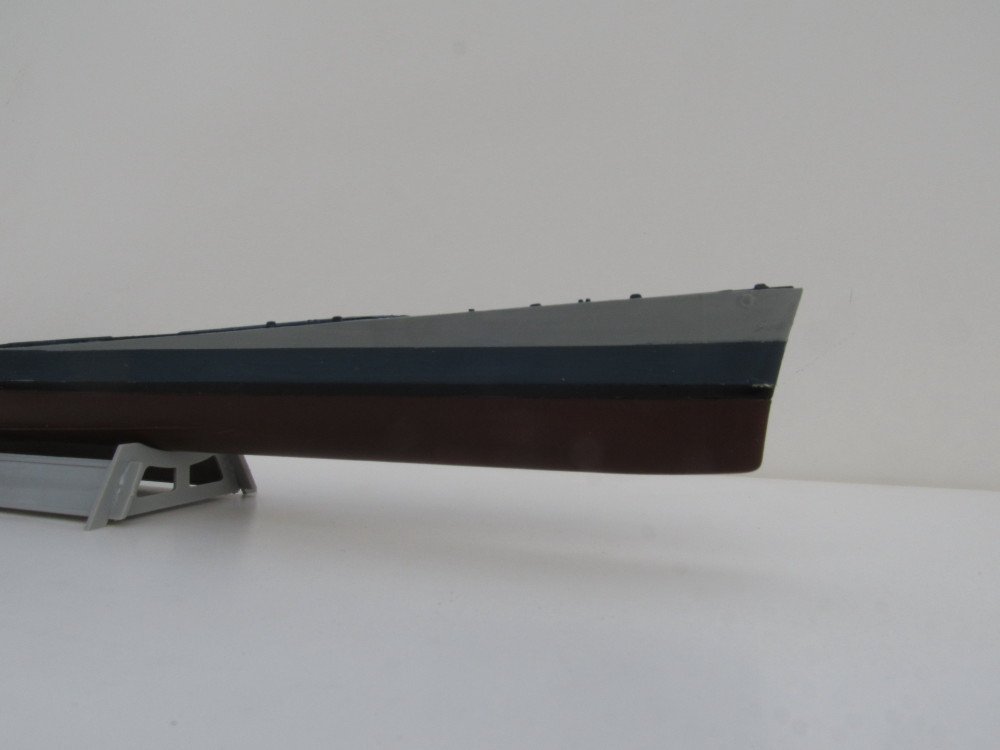
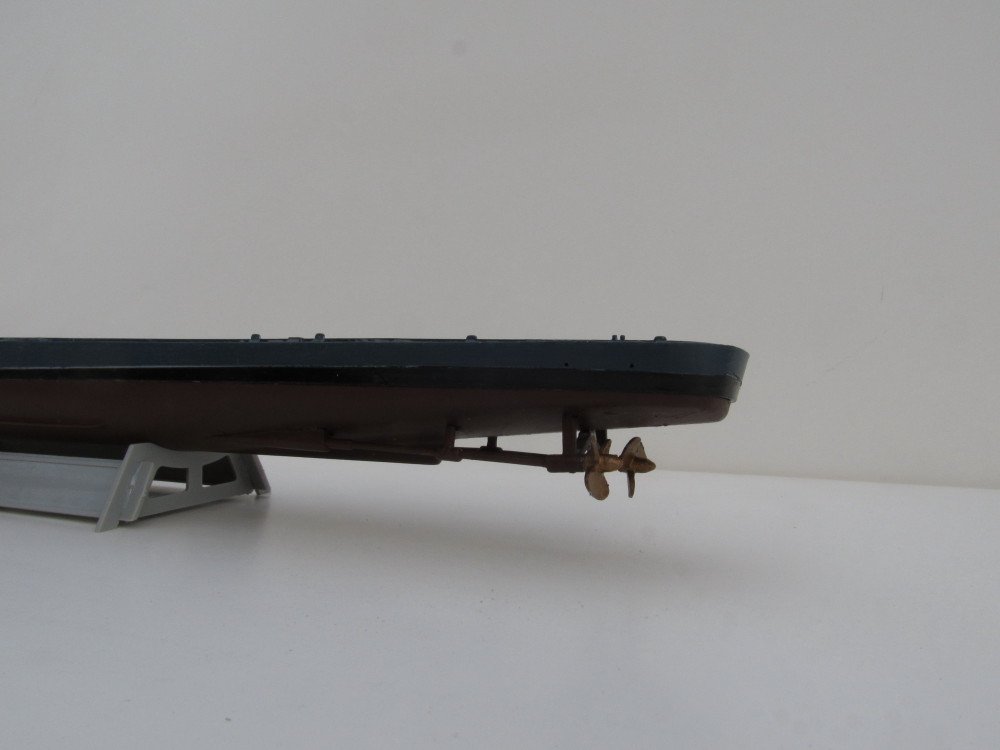
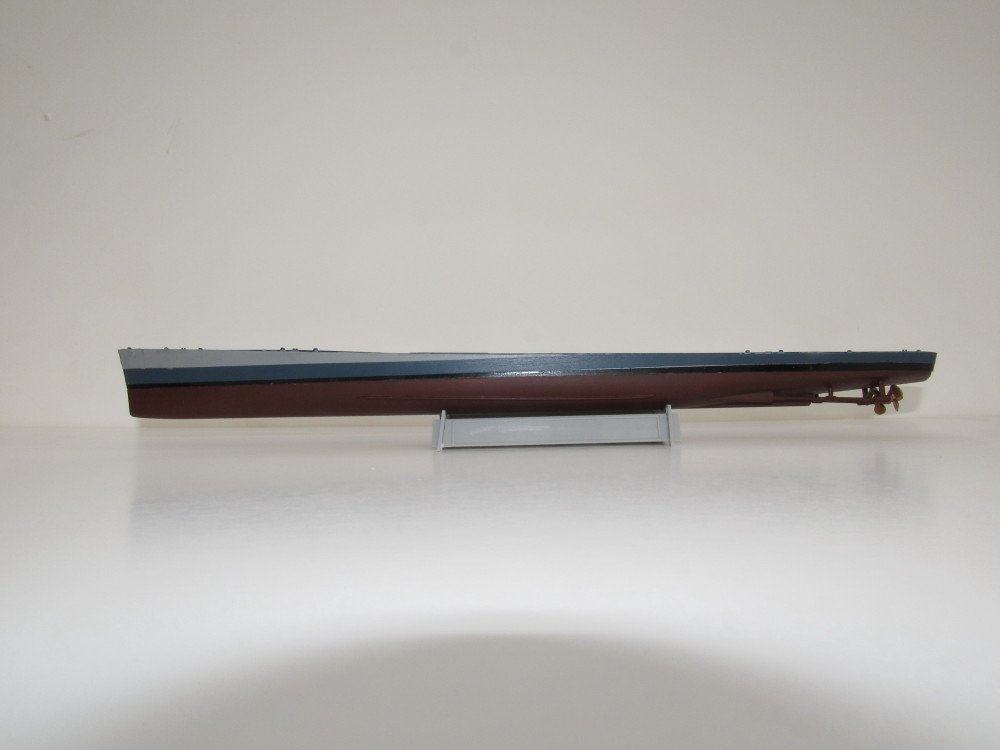
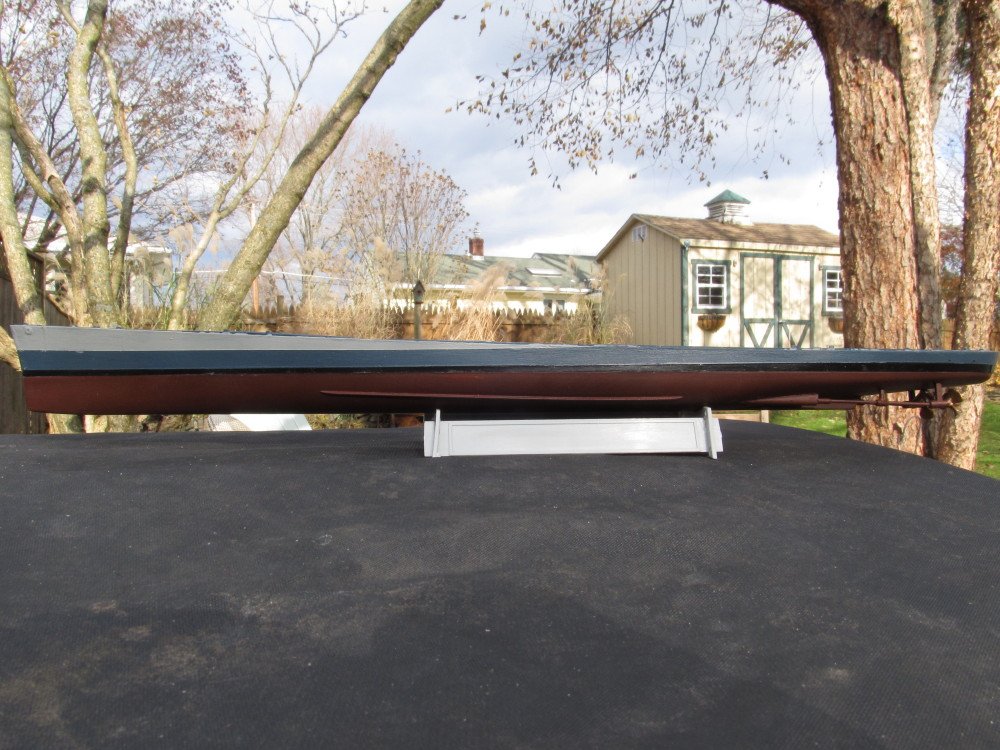
After spending an entire weekend browsing thru several online Hobby shop catalogs, I finally located a source for the paint colors I need. I've decided to build it as the 1945 configuration as shown in the kit rather than try and research all the changes needed to duplicate the ship as she sits today in the Naval Museum in Buffalo NY. The LifeColor brand had two 6 jar kits with the exact colors called for to do the 1943/1945 paint scheme. I ordered the CS24 and CS25 kits, took an extra couple of days to arrive due to the unusual early November snow storm (8 inches) we got right after I placed the order. So with the right colors in hand, I hand brushed the hull and deck in the 1943/1945 color scheme. Even tho the photos were taken outdoors in sunlight I had a difficult time getting the digital camera to get the colors to my satisfaction (experimented with several white balance settings). Sorry for the poor background in the last two photos, I had to get the model in direct noon-time sunlight to get the color I wanted. The deck is just dry fit, the rest is glued. Oh and I did touch up the bare spots where the paint peeled off.
- 140 replies
-
- 11
-
-
- the sullivans
- trumpeter
- (and 2 more)
-
Just ordered my copy.
-
And the mailman brings 2 dozen catalogs per day (about 20 lbs weight) 99 percent of which never get read and wind up being being tossed in the recycle bin. Yea, OC, we Yanks are a tad crazy. oh and Mark did not mention the house decorations aka lights
- 467 replies
-
- 6
-
-
- mikasa
- wave models
- (and 1 more)
-
And a bigger basement / house !
-
Don't feel bad Tom, you are 2 years younger than me. Glad I could help .
-
Same way you started this forum. Go to the appropriate forum - KITS or SCRATCH - on the main page, click on the forum title, In the next screen, click the Green "Start a New Topic" button in upper right and go.