


Jack12477
-
Posts
5,674 -
Joined
-
Last visited
Content Type
Profiles
Forums
Gallery
Events
Everything posted by Jack12477
-
 We're expecting the same here. Just hope it doesn't melt the ice tho - almost good enough to go ice boating in a week or two . A little surface melt and refreeze will give us a nice smooth sailing surface. See the 1888 Gaff rigged ice yacht build log in my signature for photos.
- 82 replies
-
- 2
-

-
- skipjack
- wye river models
- (and 2 more)
-
Reed, that's a heat wave you're having compared to my -6 F here in the Hudson Valley - USCG Ice Breakers making daily passes up the Hudson River to keep the oil heating barges moving heating oil to Albany....... Boat is coming along nicely !
- 82 replies
-
- 1
-
-
- skipjack
- wye river models
- (and 2 more)
-
Have you tried using Microscale Micro Sol/Set solutions on those decals ? I've had success using them to rescue old decals.
-
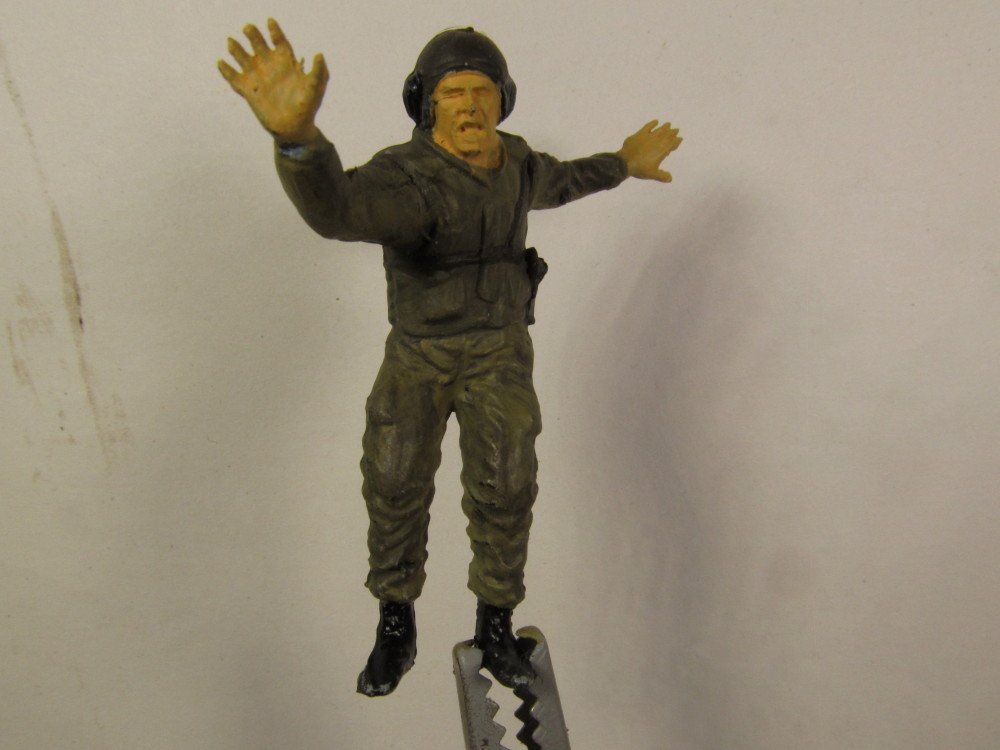
Yes the alligator has him tight in his jaws - good place for him too. Makes him stand still for awhile.
- 106 replies
-
- 7
-
-
- trumpeter
- john brown
- (and 2 more)
-
Can't speak to the MK1 but the Trumpeter are most definitely waterslide decals. I'm not familiar with anyone who includes dry transfer in a kit but I could be wrong. Most dry transfer I've seen are after-market decals.
-
I'm going to try and do the camo as winter camo. I've got too many other tanks in jungle and/or desert camo, but only one in winter camo. Yea, that figure stands atop the tank !
- 106 replies
-
- 6
-
-
- trumpeter
- john brown
- (and 2 more)
-
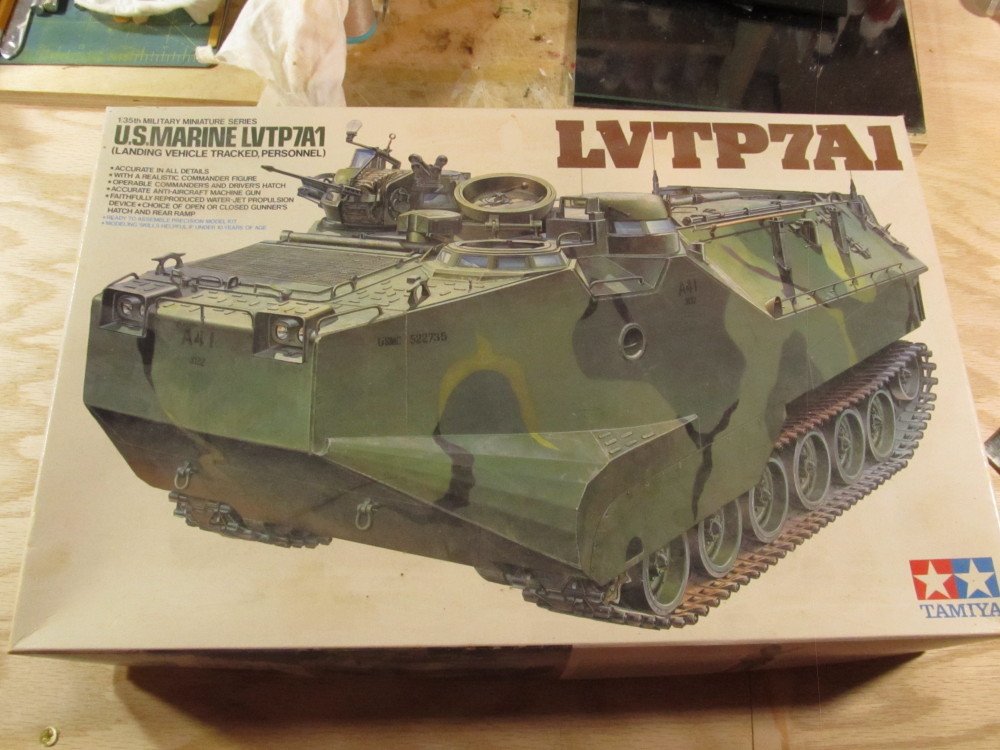
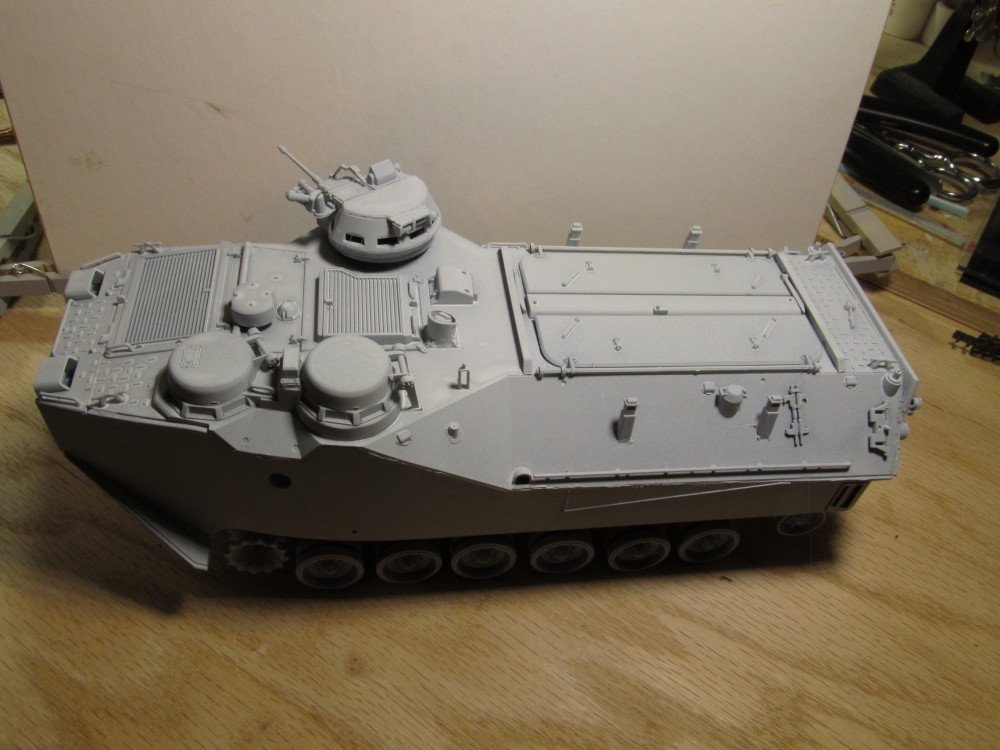
As a diversion while I await delivery of additional supplies, I decided to work on this Tamiya LVTP 7A1 amphibious tank (USMC)
- 106 replies
-
- 11
-
-
- trumpeter
- john brown
- (and 2 more)
-
Nice find Lou, thanks! But talk about intimidating ! Will see what I can do. Or wait for Greg's group build
- 106 replies
-
- 6
-
-
- trumpeter
- john brown
- (and 2 more)
-
Thanks Reed. At least the Willie L Bennett and Marie Jeanne came with rigging plans/diagrams, this kit has none and all the photos I can find do not show the lines end to end. Still trying to find diagrams. But I have to wait for a re-supply of EZ line and some other items first.
- 106 replies
-
- 5
-
-
- trumpeter
- john brown
- (and 2 more)
-
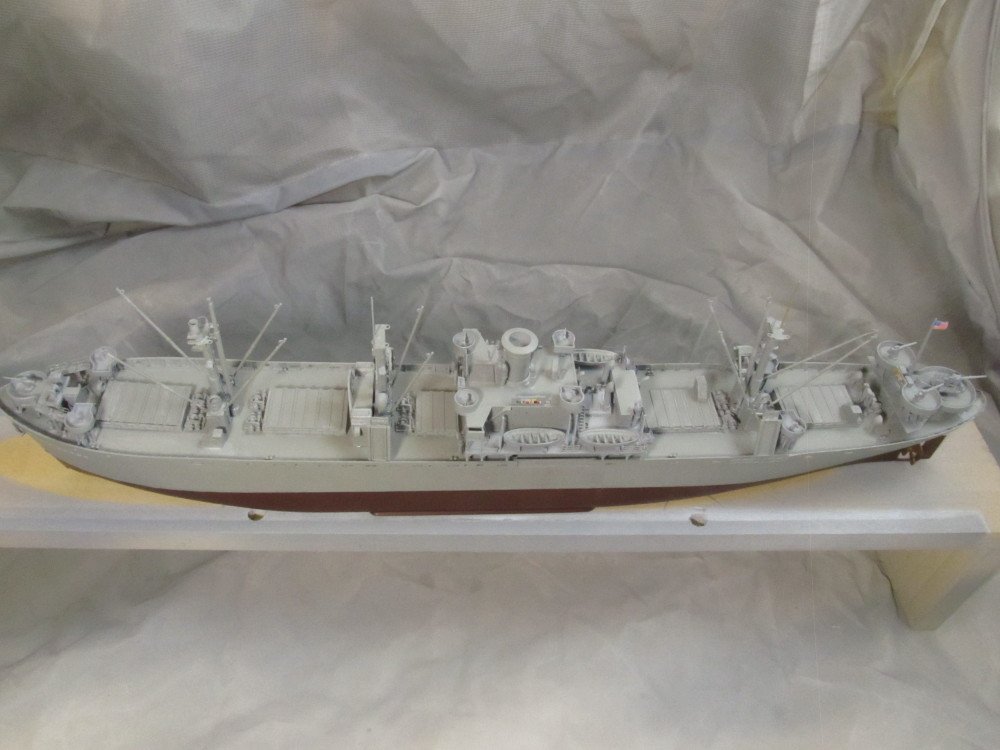
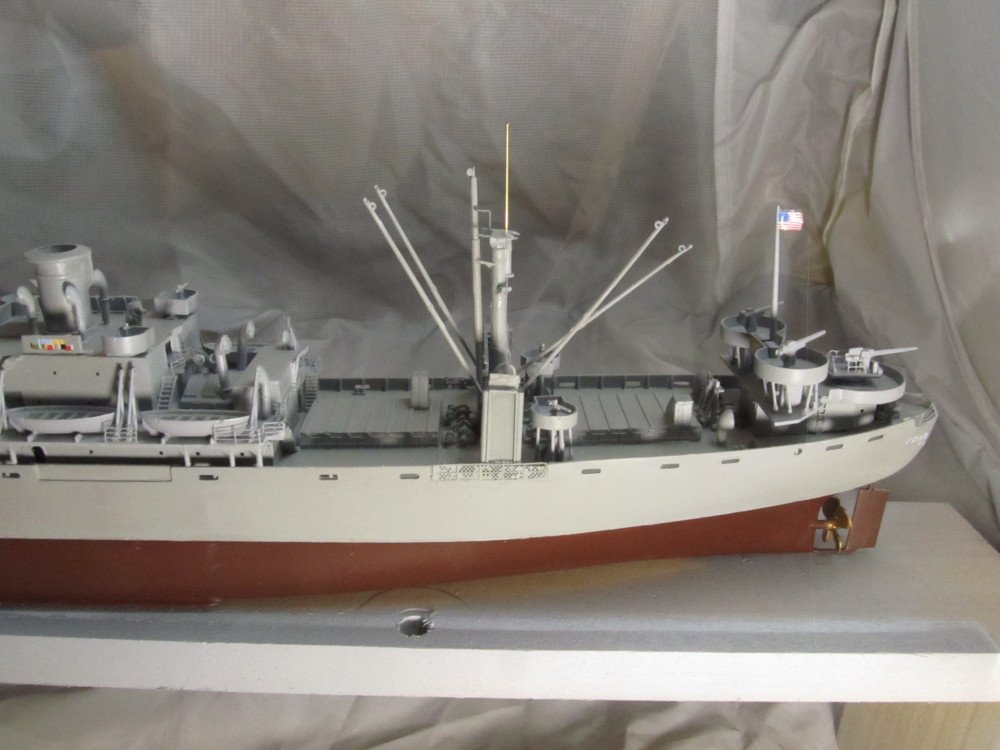
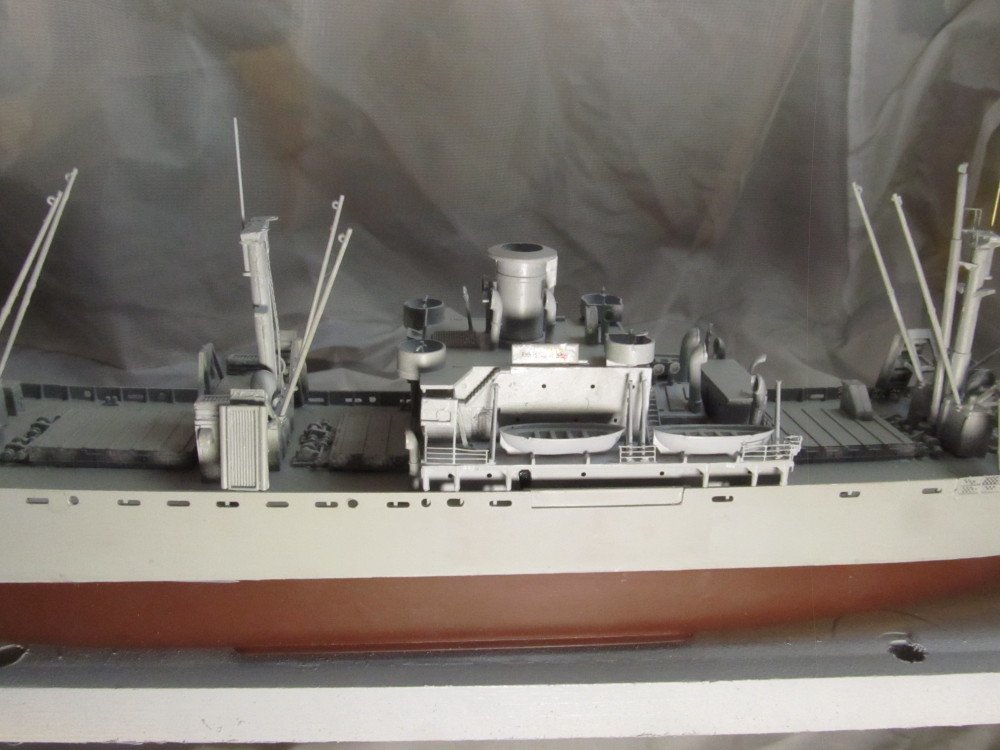
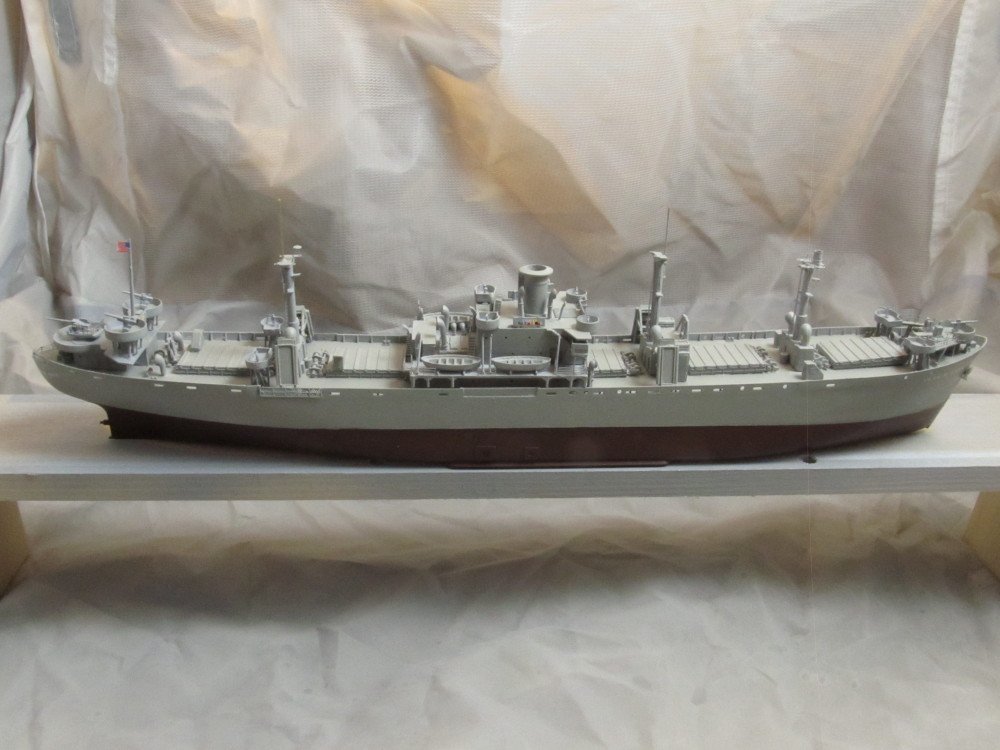
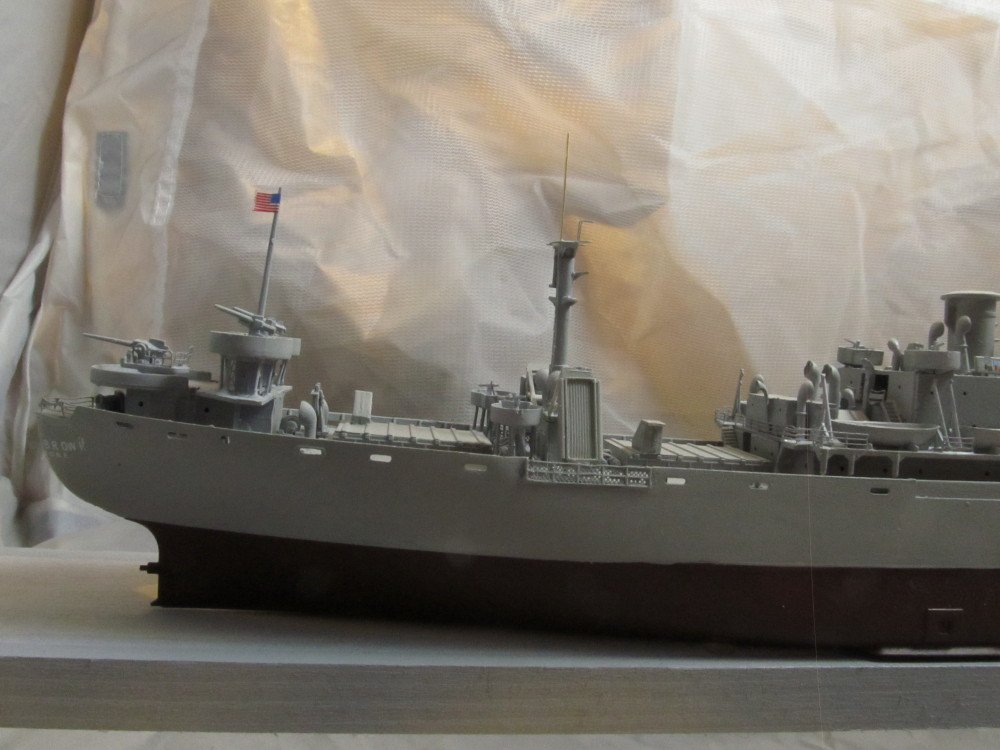
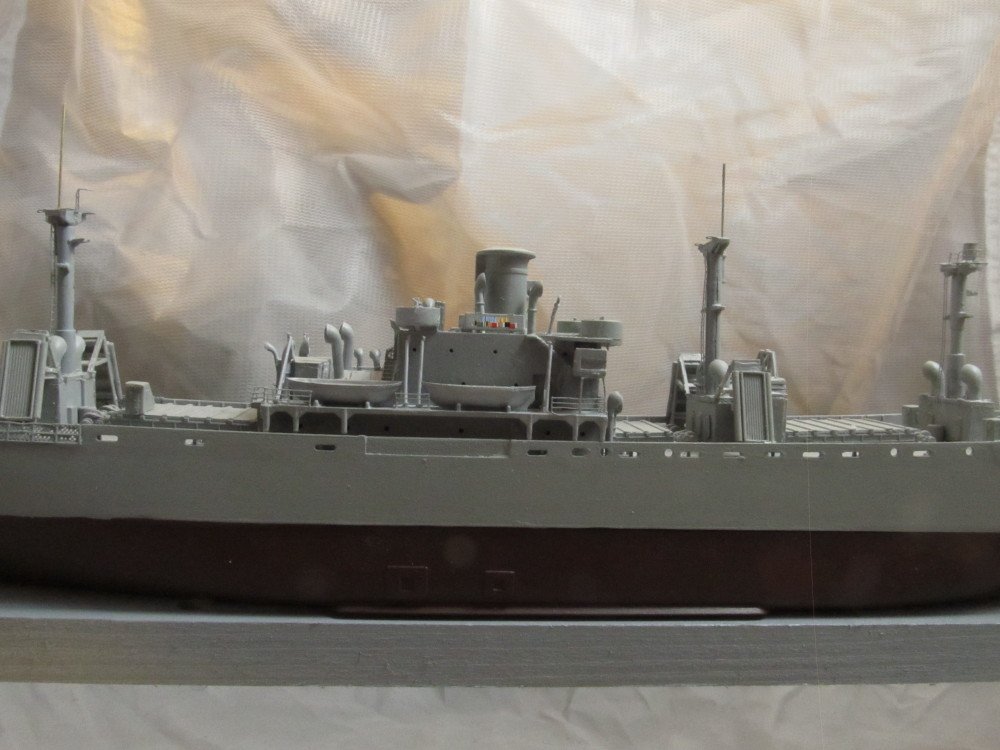
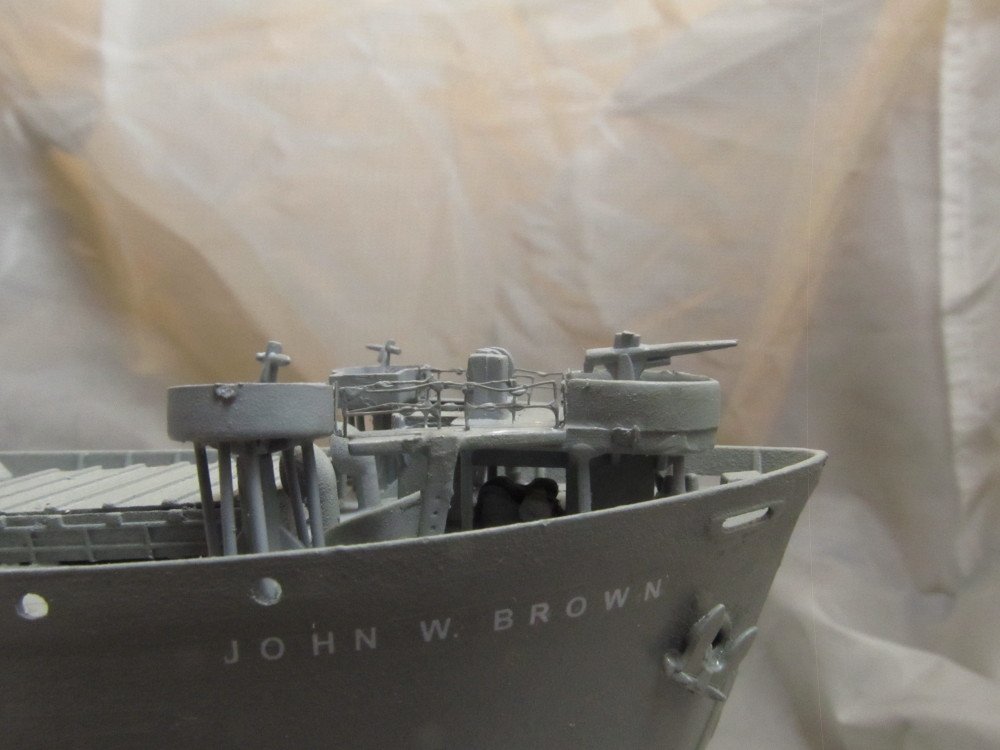
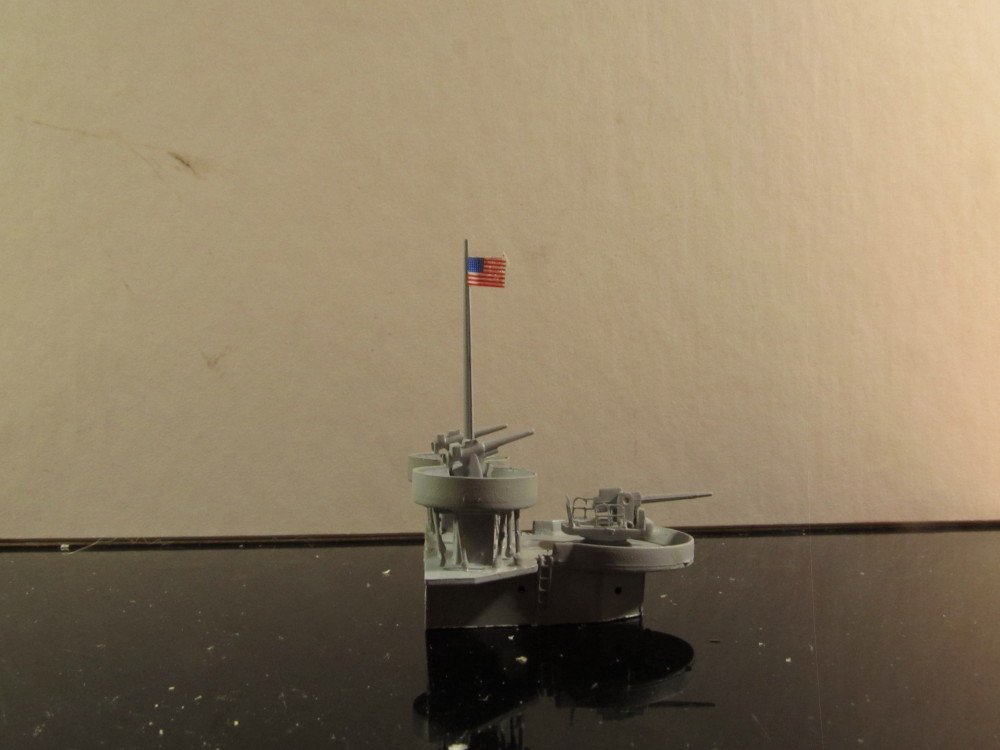
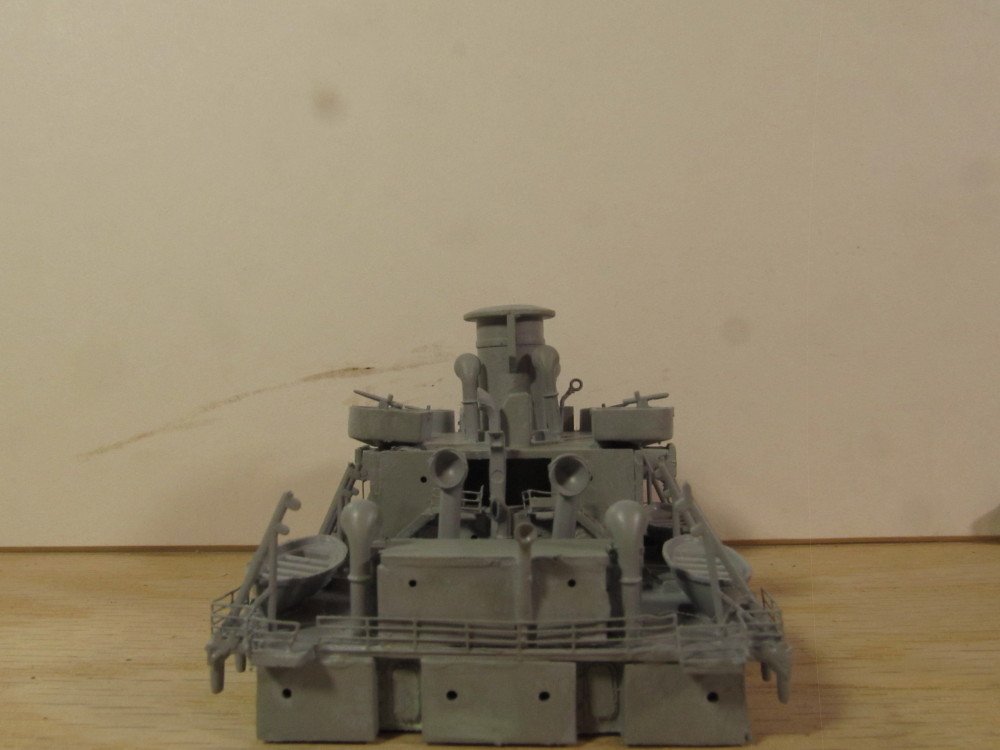
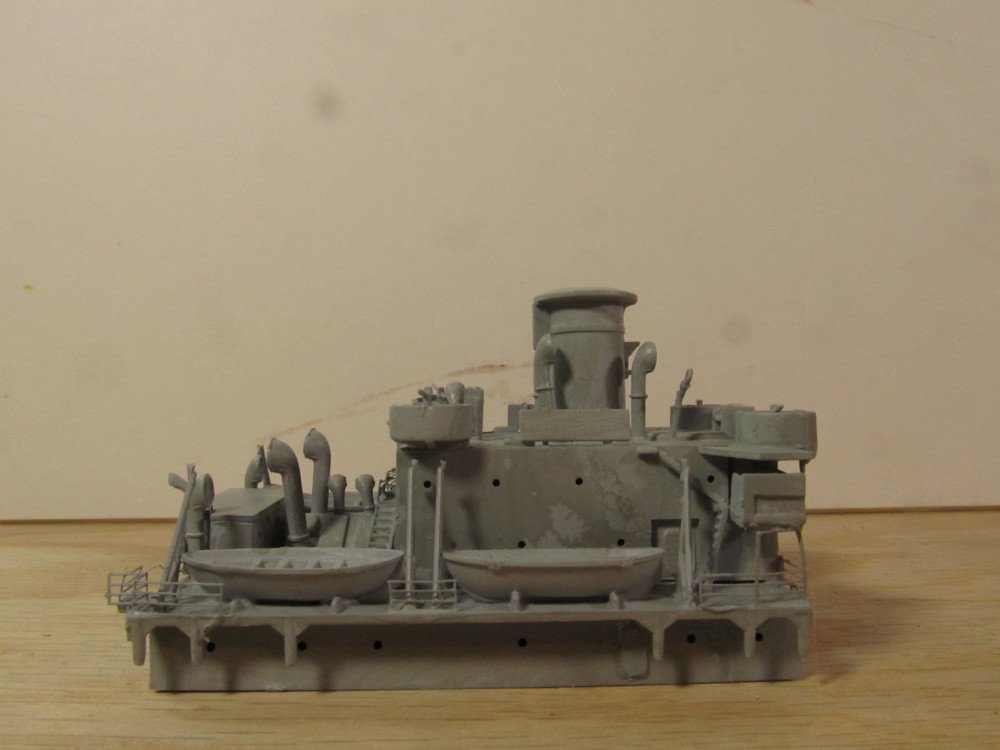
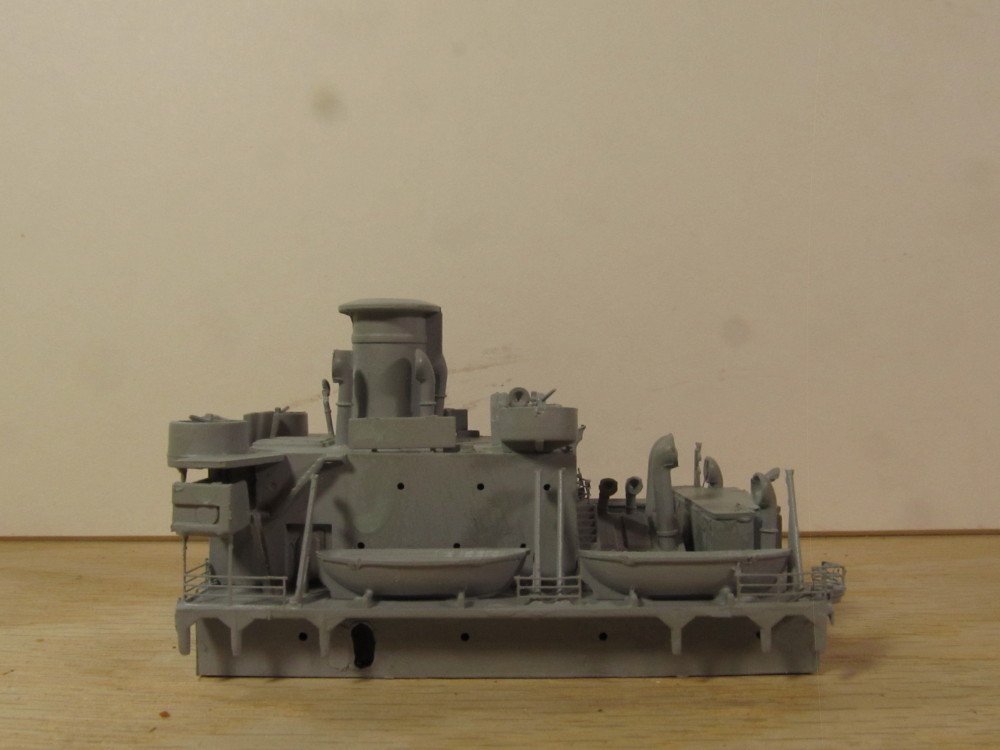
Added the cranes to the model: Some of the PE railings look like they've been beaten on with a sledge hammer to knock off the ice build up from a North Atlantic transit to Murmansk If you are wondering what the wrinkle background is, it's the portable nylon spray "booth/shield" I picked up thru the Woodcraft catalog. Works quite well. I haven't decided whether to call it a "wrap" at this point. I haven't figured out if there are pulleys included in the PE sheet and how to assemble them or where to attach them as I don't have a clear rigging diagram for the cranes. In addition, I would have to order some EZ Line if I am going to rig it further. Decisions ! Decisions ! Decisions !

- 106 replies
-
- 8
-
-
- trumpeter
- john brown
- (and 2 more)
-
Go one level deeper - there's a sub-category under Shore Leave - Non-ship/categorized builds
-
Wefalck, you can use a fictitious email address, it does not validate it. You can use "santaclaus@northpole.com" for example and it will work.
-
Installed all the subassemblies to the main deck. Only thing left is the cranes and the crane rigging.
- 106 replies
-
- 11
-
-
- trumpeter
- john brown
- (and 2 more)
-
It wasn't any of these as I was able to spray clear water thru the brush from the same/similar bottle. It was the paint itself, not diluted enough.
- 106 replies
-
- 6
-
-
- trumpeter
- john brown
- (and 2 more)
-
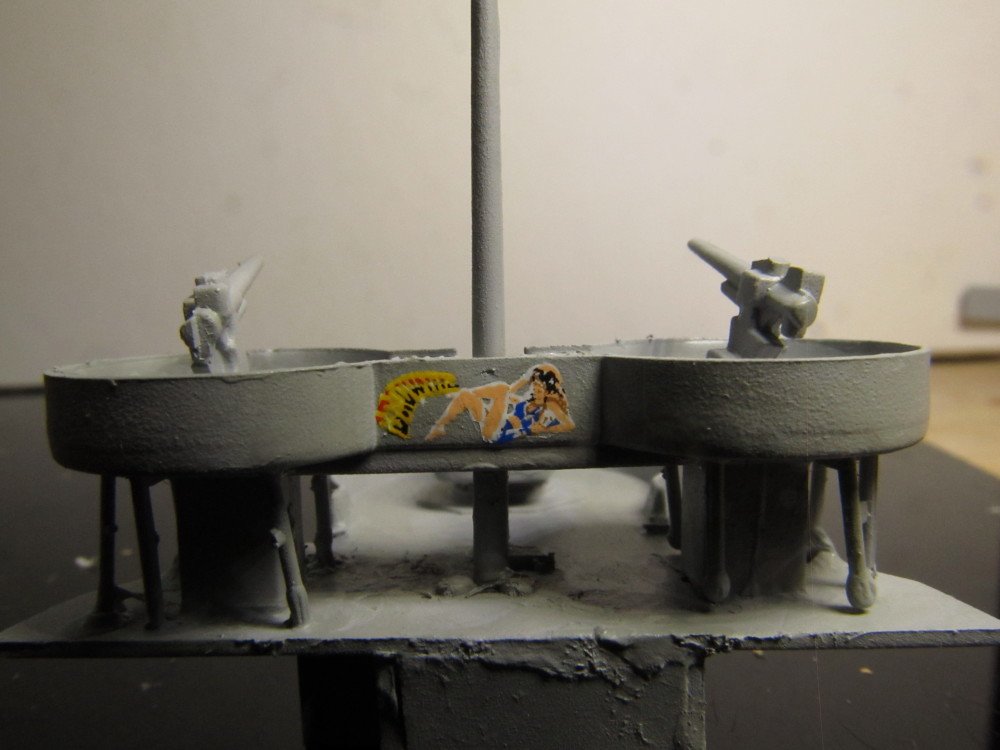
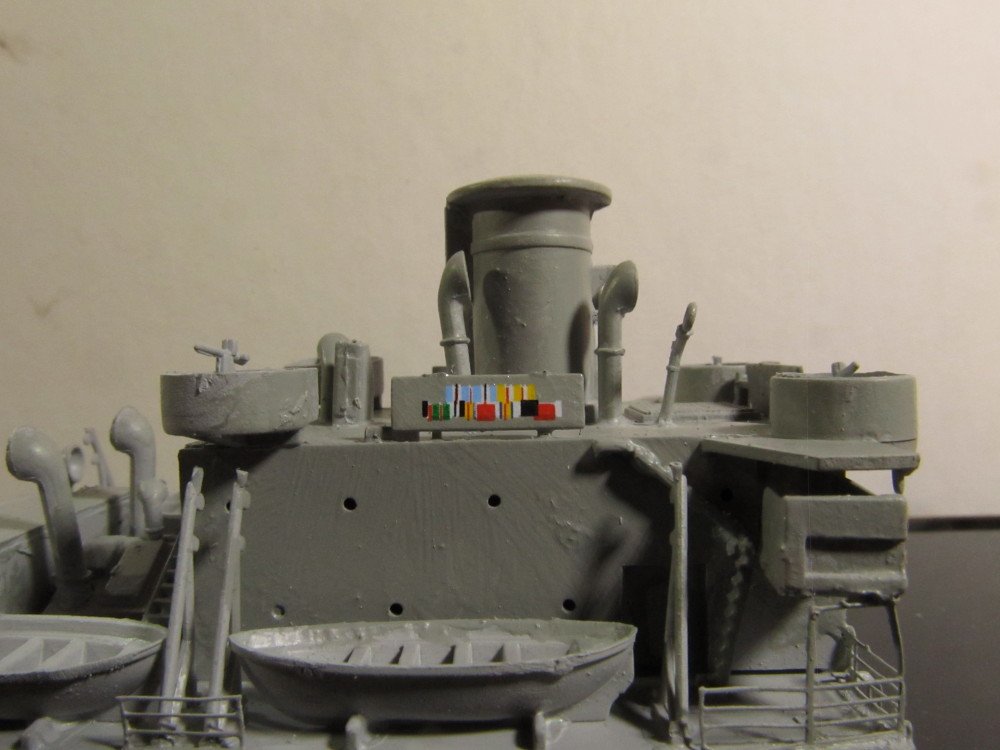
Lou, I think you are right about the museums adding the nose art and campaign ribbons. The 2 museum ships in Buffalo have campaign ribbons painted on also.
- 106 replies
-
- 6
-
-
- trumpeter
- john brown
- (and 2 more)
-
It's a siphon feed. Badger 150. Thanks for tip on Gator Grip glue. None of my usual online suppliers carry it, but found a new source, Free Time Hobbies, that does carry. What's the shelf life on this glue?
- 106 replies
-
- 6
-
-
- trumpeter
- john brown
- (and 2 more)
-
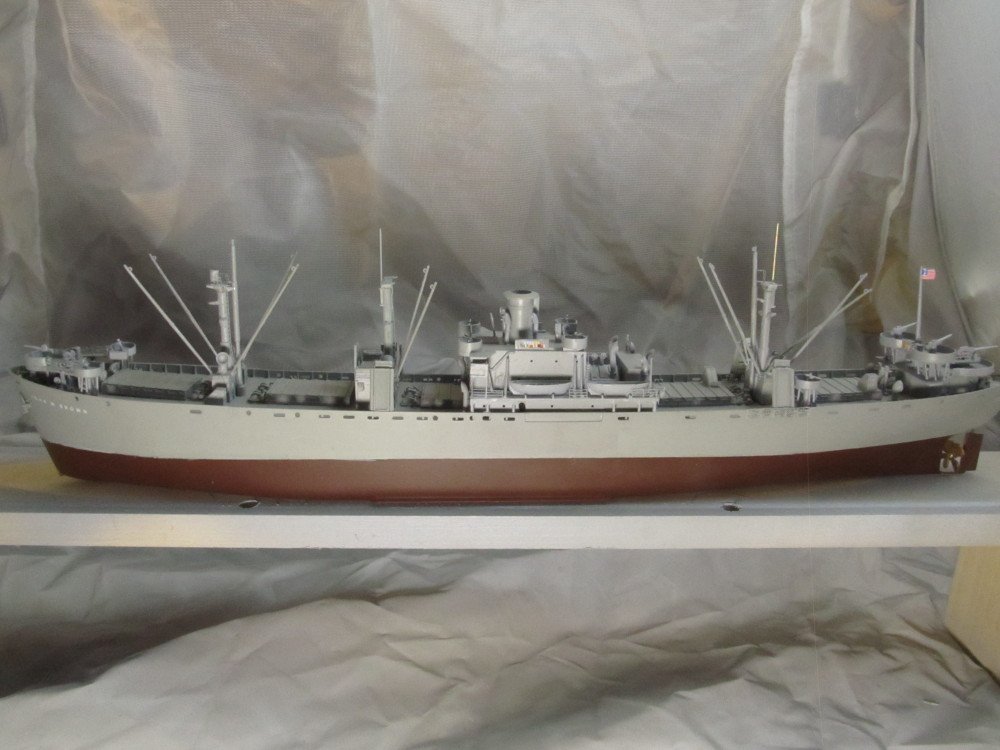
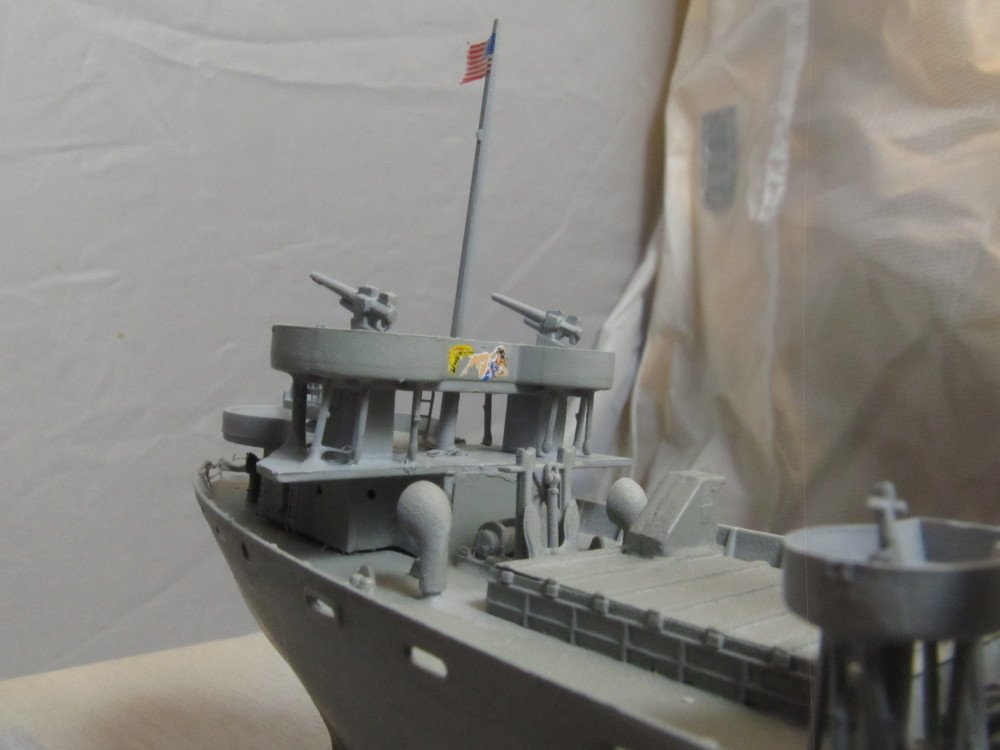
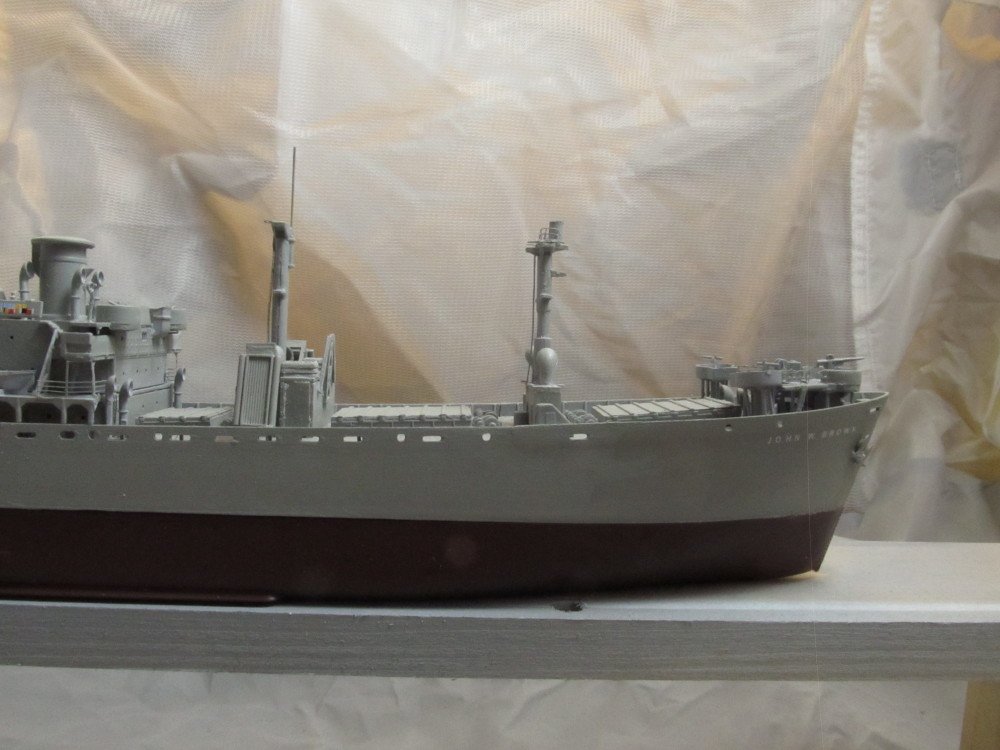
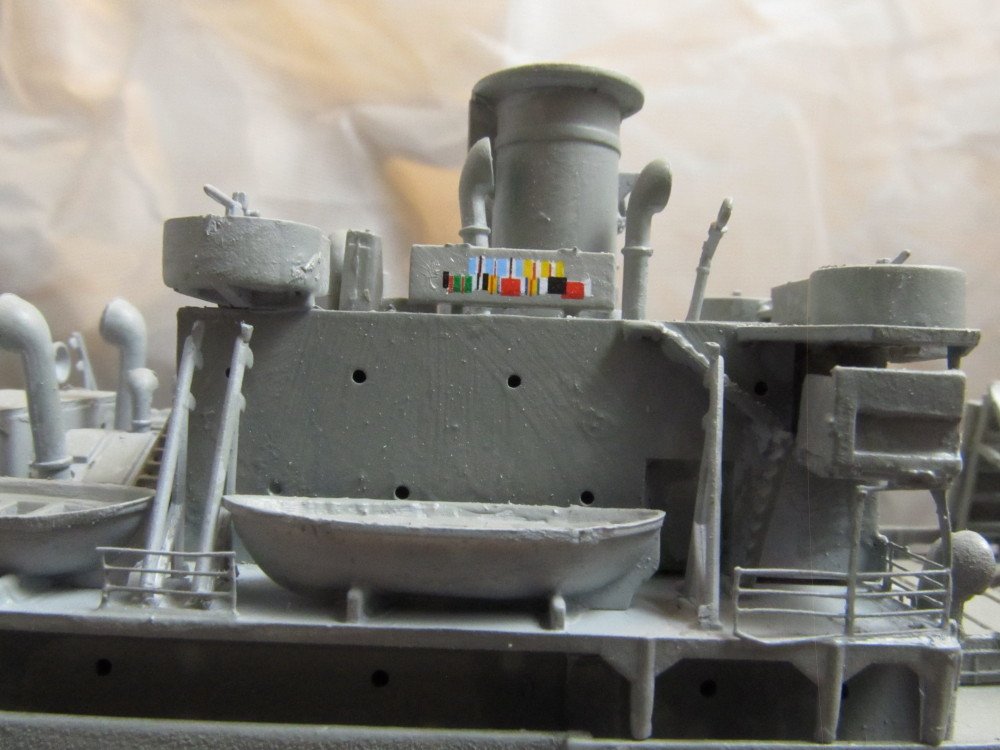
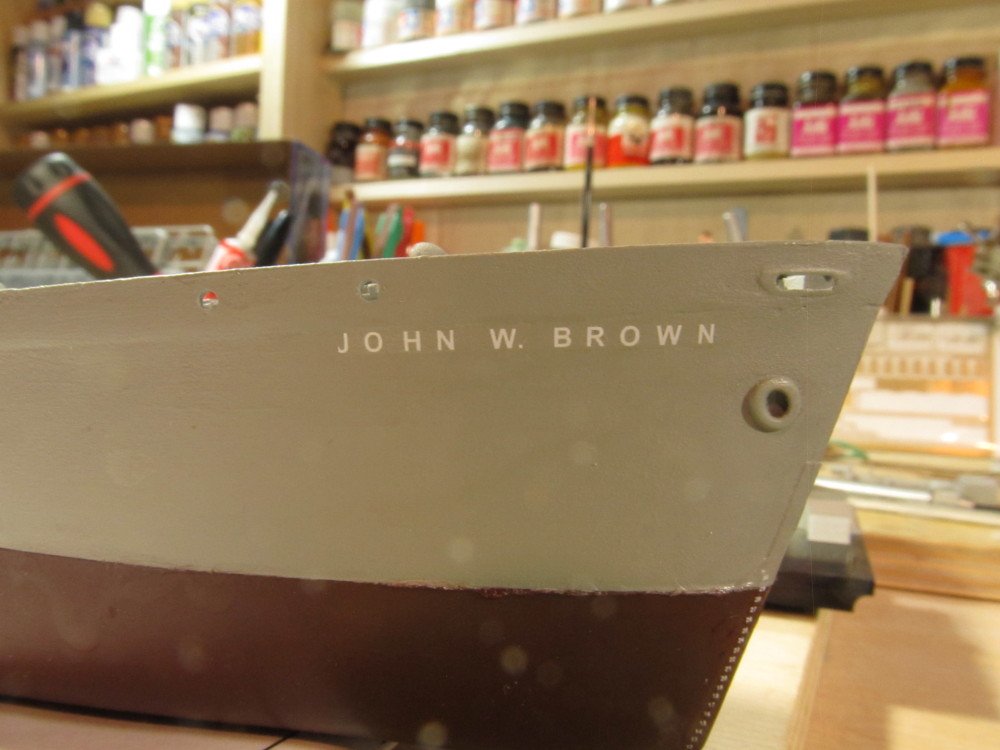
Decals applied - Here you go Lou ! Just for you ! Considering the scale and the magnification of the camera lens, it's not a bad representation of the original (see below) Other decals from the kit set applied: Now to seal the decals and then start placing all the sub-assemblies on the deck.

- 106 replies
-
- 9
-
-
- trumpeter
- john brown
- (and 2 more)
-
To answer your question Lou, YES !!!!! It's included with the decal set.
- 106 replies
-
- 6
-
-
- trumpeter
- john brown
- (and 2 more)
-
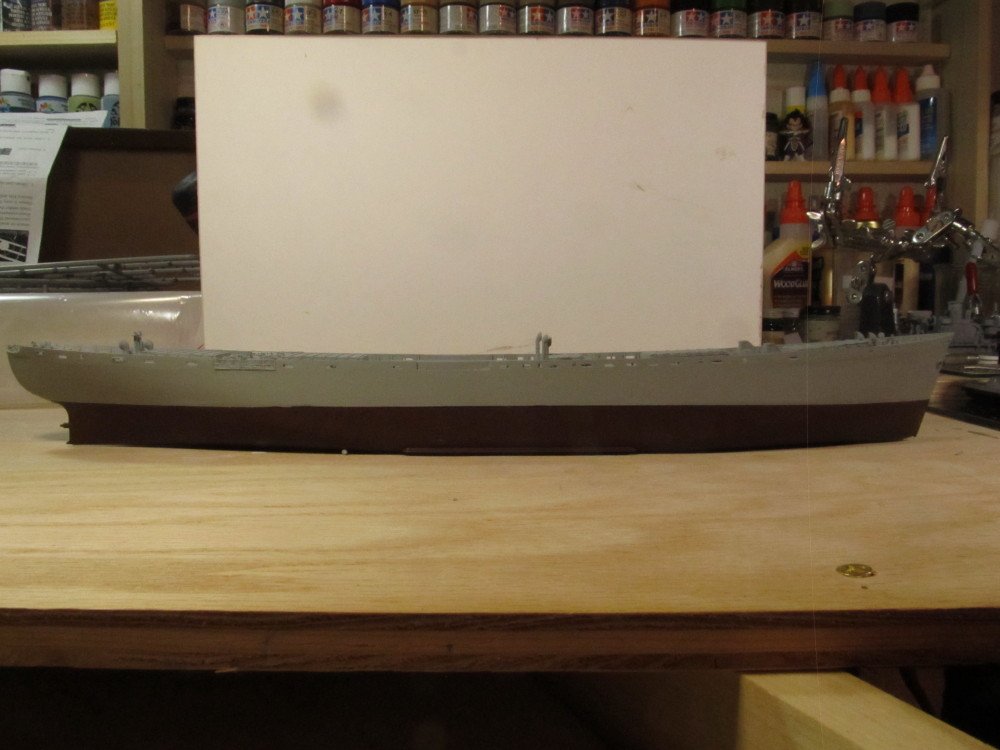
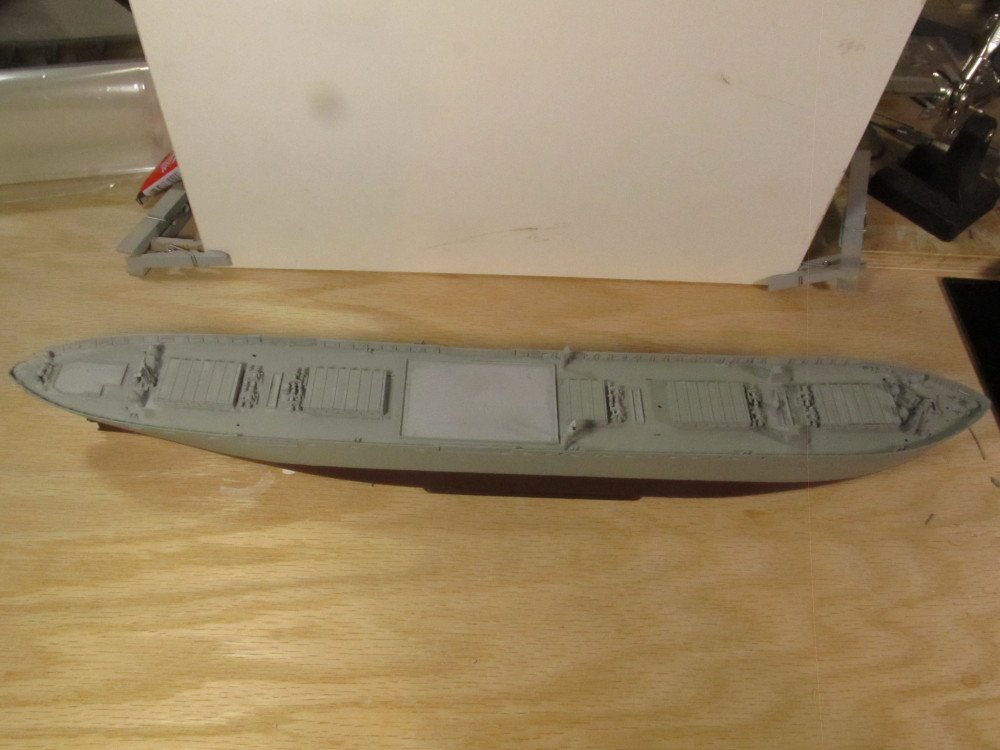
While I await the delivery of the needed thinners, I primed and brush painted the hull halves, and upper structure. glued the two hull halves together. The deck superstructure will wait for now. All the brass add-on have been added and painted. And the splotchy paint has been fixed. Photos follow: Tomorrow (Saturday) morning is back to the ice yacht restoration project before the "monster snow storm" they've been forecasting since last Monday hits us. Up to 20 inches could fall overnight Saturday into Sunday. Good time to stay in the shipyard with some beer, chips and shrimp for sustenance.
- 106 replies
-
- 11
-
-
- trumpeter
- john brown
- (and 2 more)
-
Anyone using electric plank bender?
Jack12477 replied to MESSIS's topic in Modeling tools and Workshop Equipment
I use an ordinary hand held hair dryer - bought it for about $20 US in Target (big box store) - works fine. I also have the soldering iron/plank bender from (????) and it works fine also. Hair dryer is easier tho. -
Lou, I did test both brushes with a jar of plain water, sprayed fine, even adjusting needles pattern so water got wider or smaller as I manipulated them. So it was the paint that was the problem. Re: doors: That's what I was trying to do. Guess I need more practice. And maybe a new set of eyes
- 106 replies
-
- 5
-
-
- trumpeter
- john brown
- (and 2 more)