


DaveRow
-
Posts
661 -
Joined
-
Last visited
Content Type
Profiles
Forums
Gallery
Events
Posts posted by DaveRow
-
-
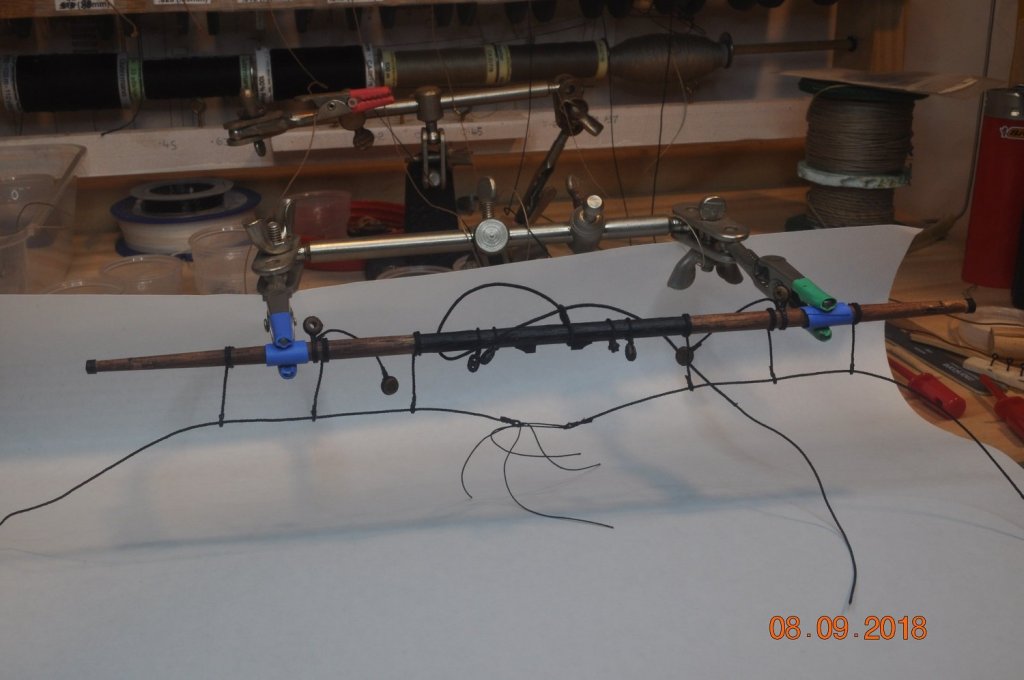
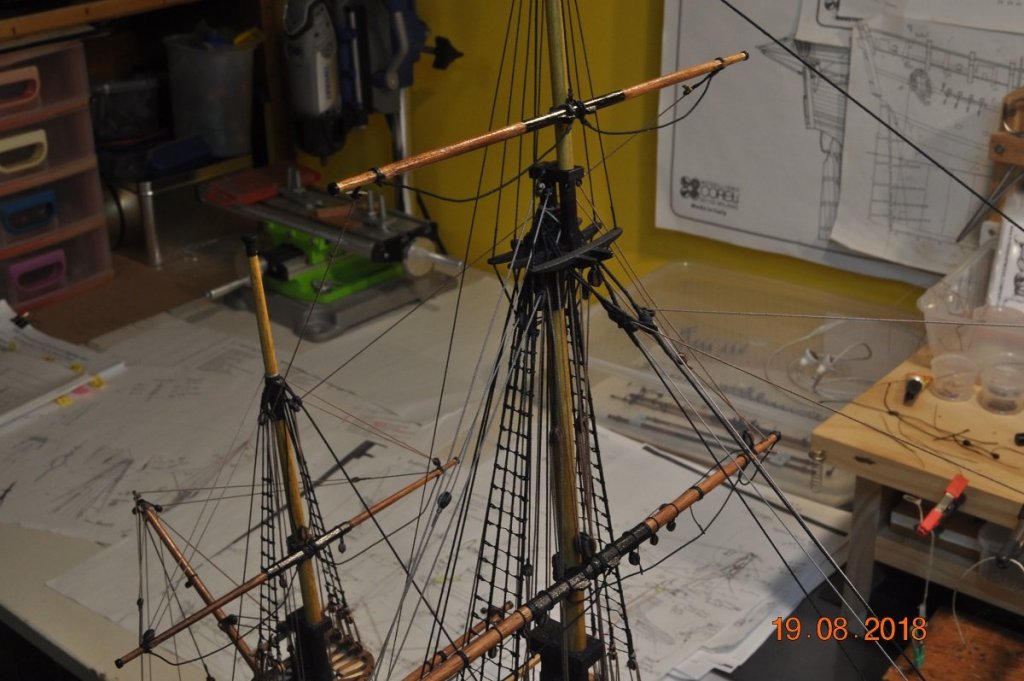
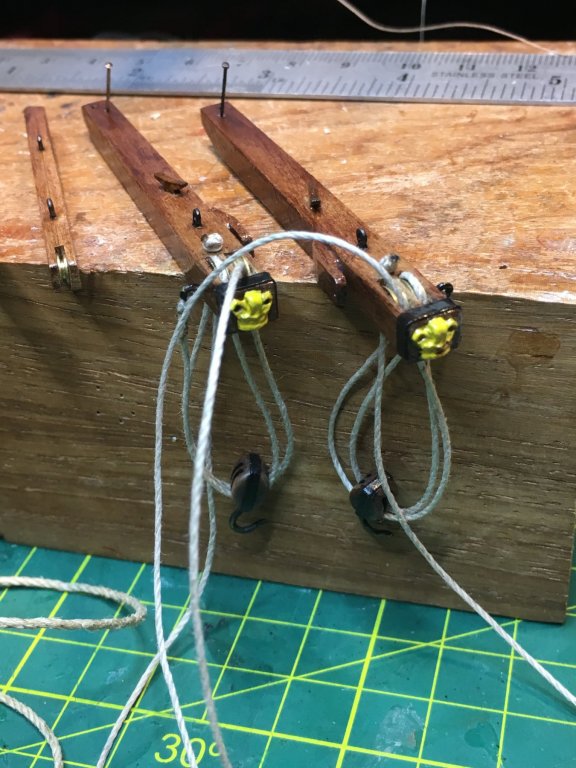
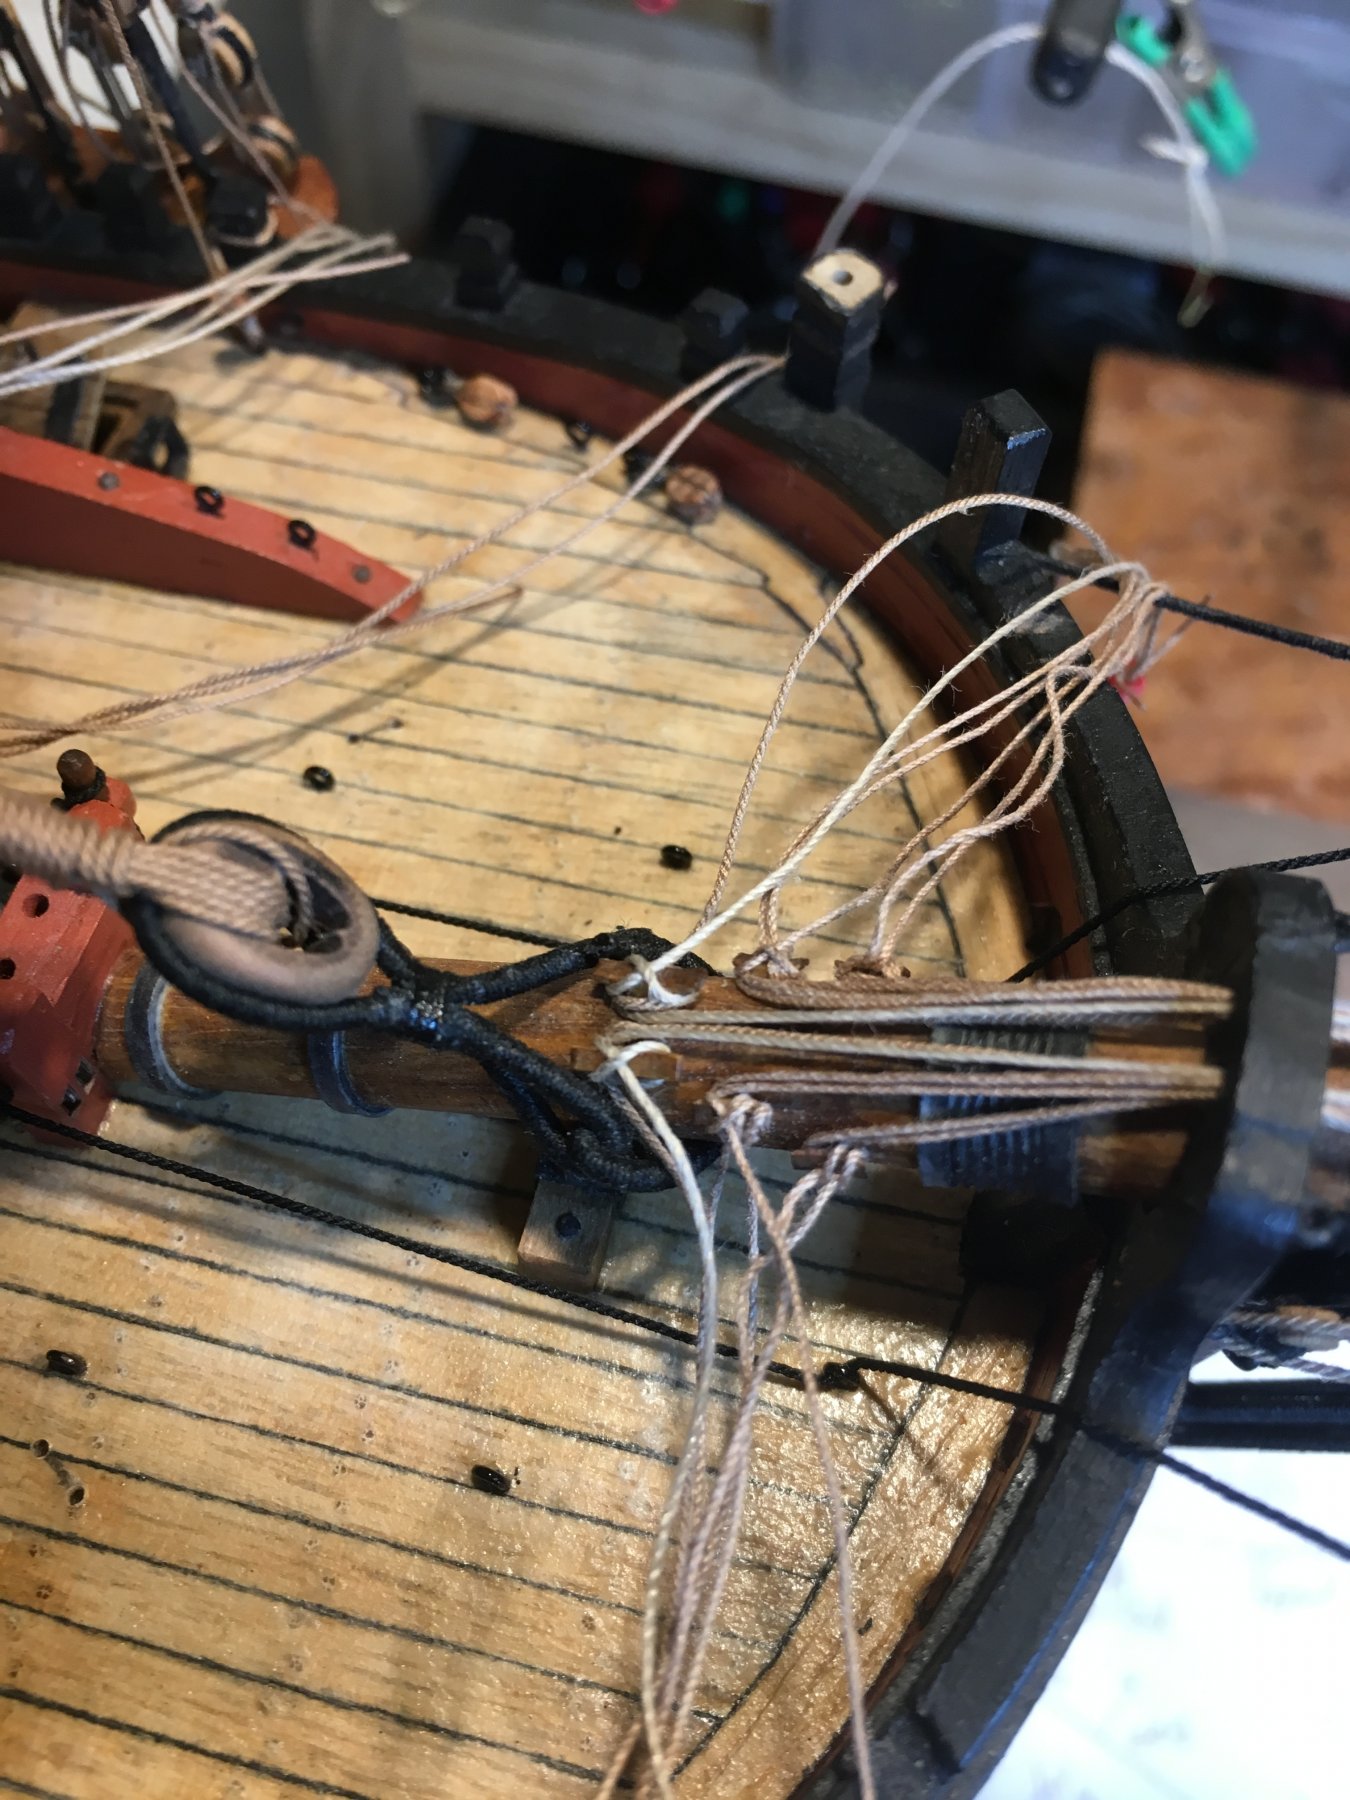
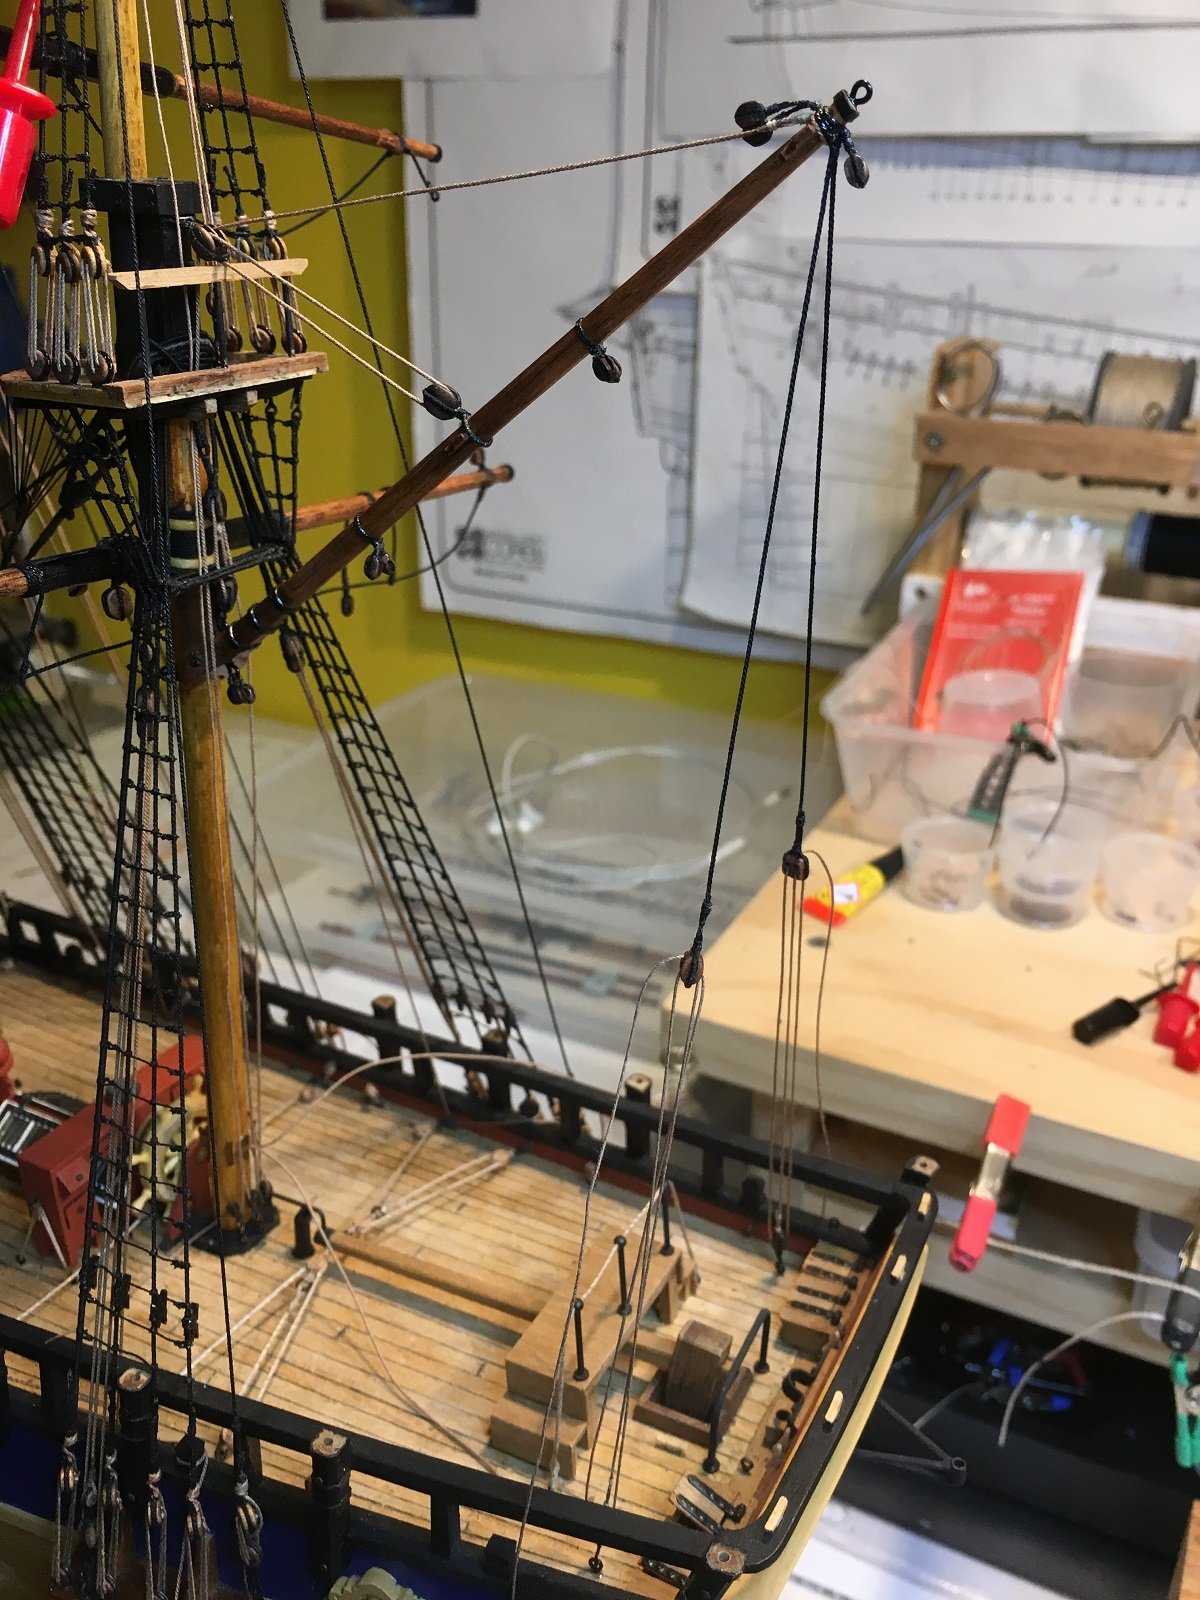
Shipyard Update:
SpiritSail SpritTopSail Yard Rigging
Took a while to rig all these ropes/blocks. All the blocks I had fitted have been used with a rope through each.
Lifts
Braces
Clew lines
Buntlines
Jib Boom Outhauler and braces
SpriritTopSail Halyard
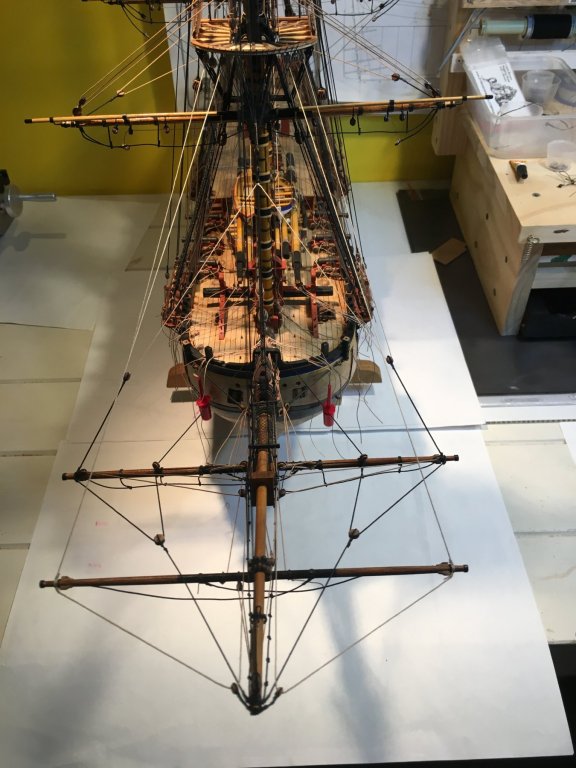
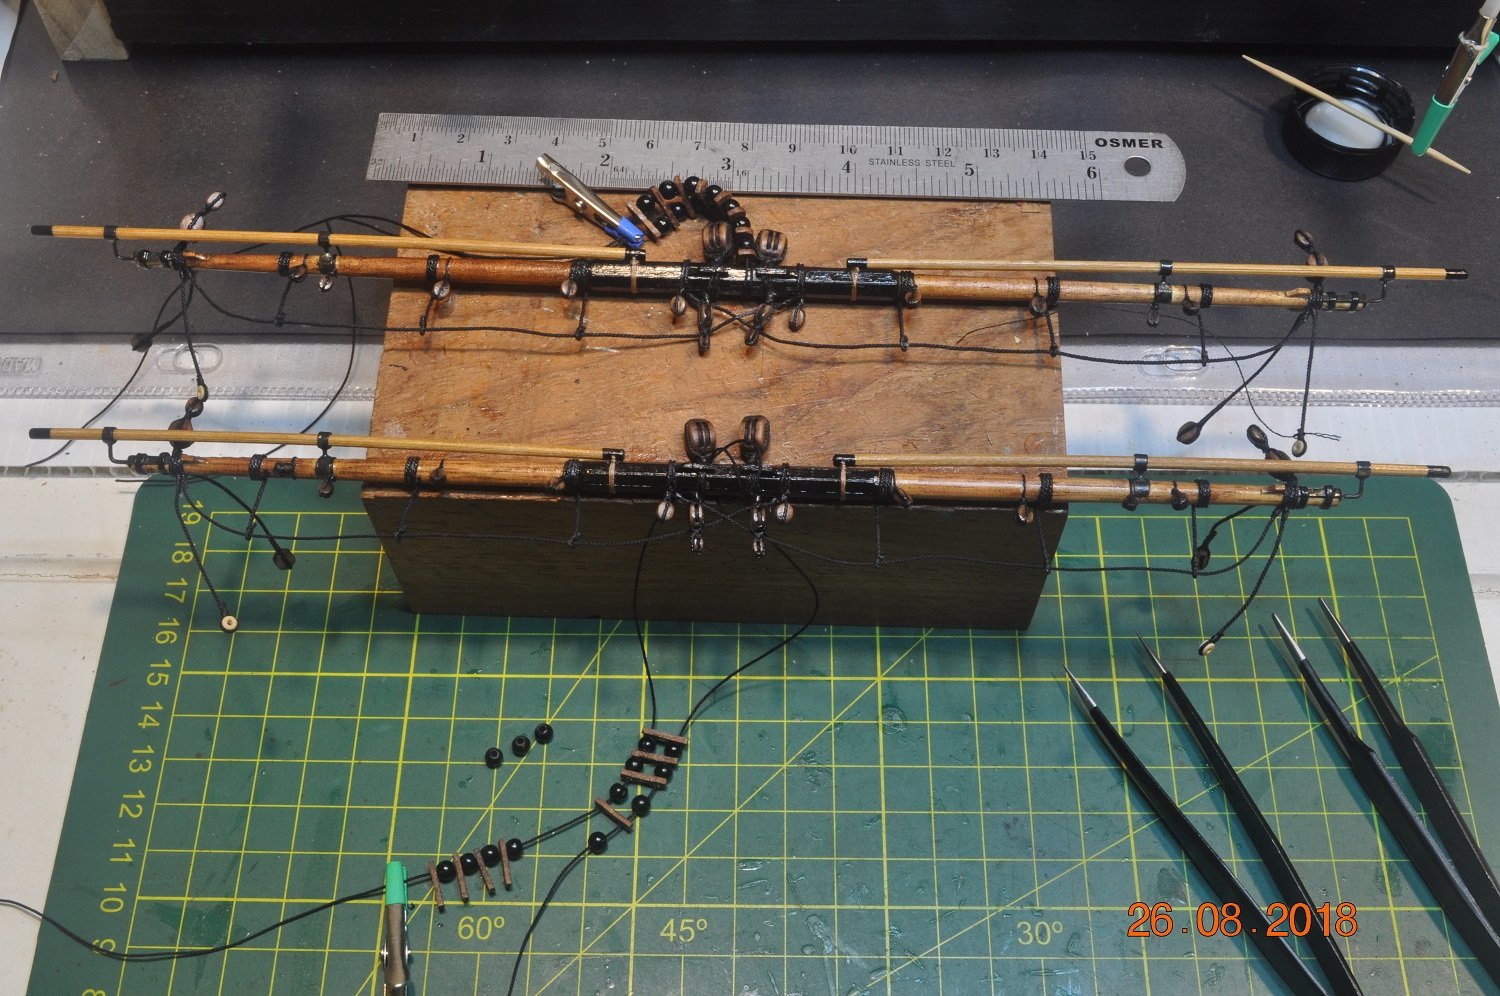
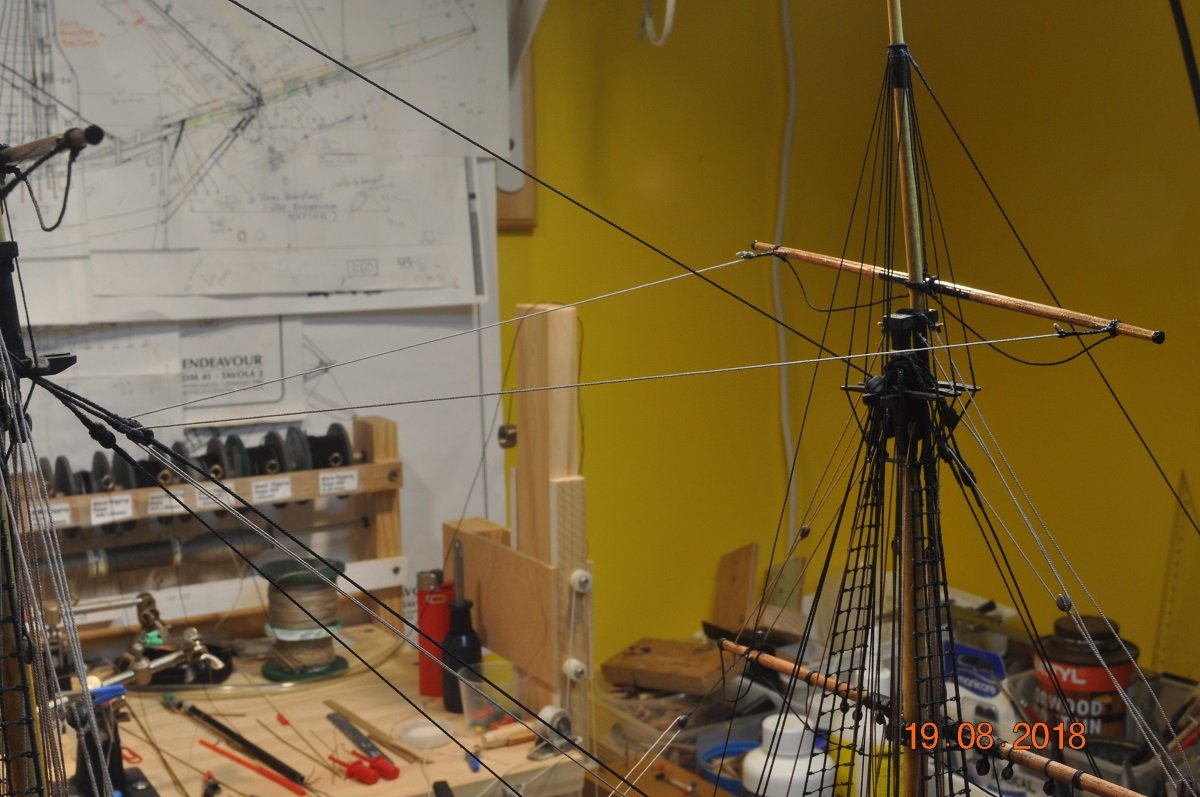
Above: Top view of the layout of ropes.

All tied off at the back end. A few lines to work out how to spool/loop off.
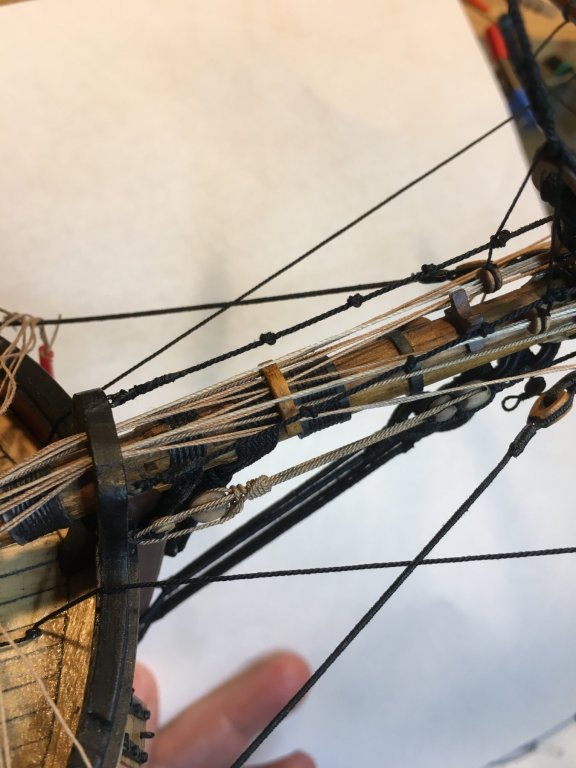
I count 15 ropes coming back from the front yards, Bowsprit & Jib Boom.
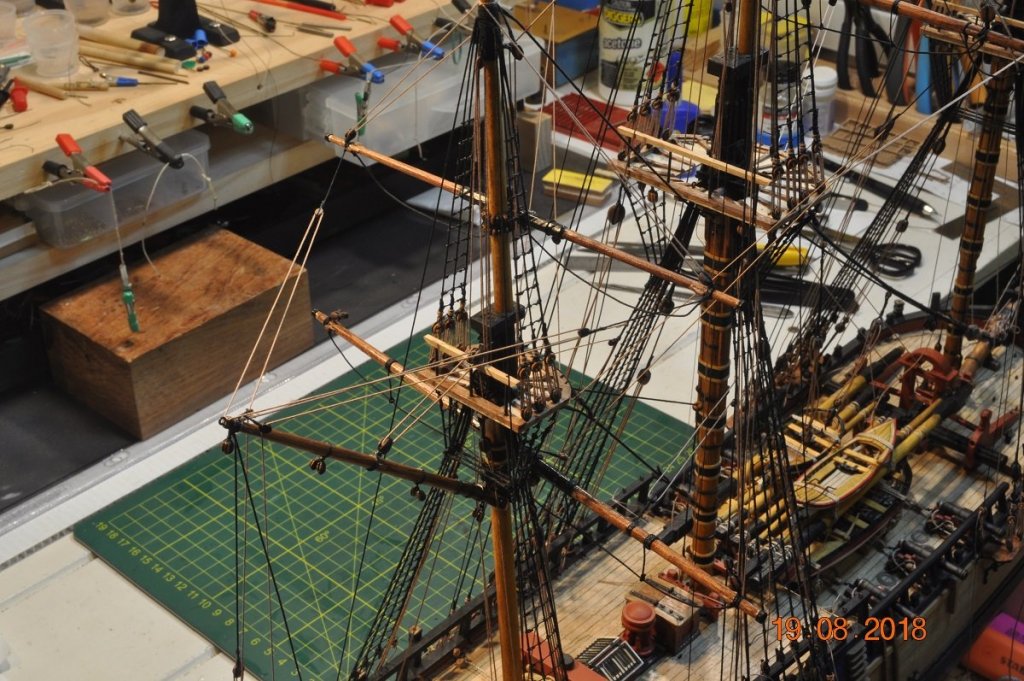
Another wider view all them ropes heading back.

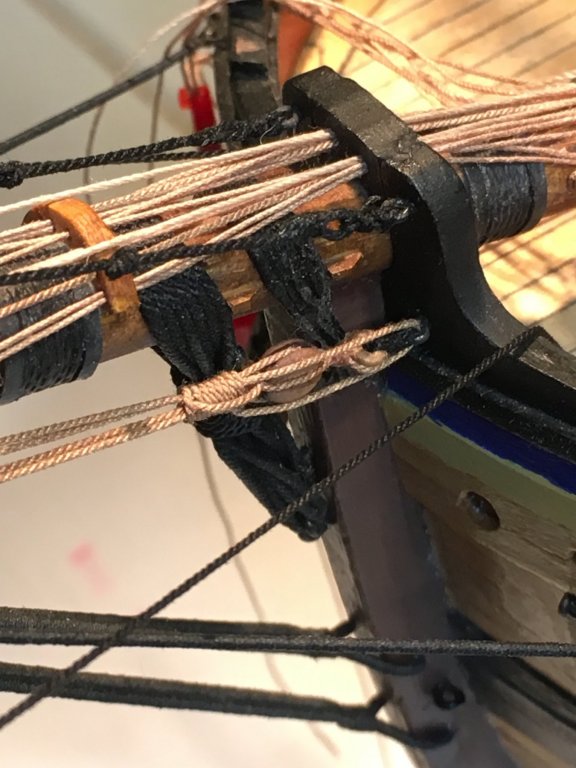
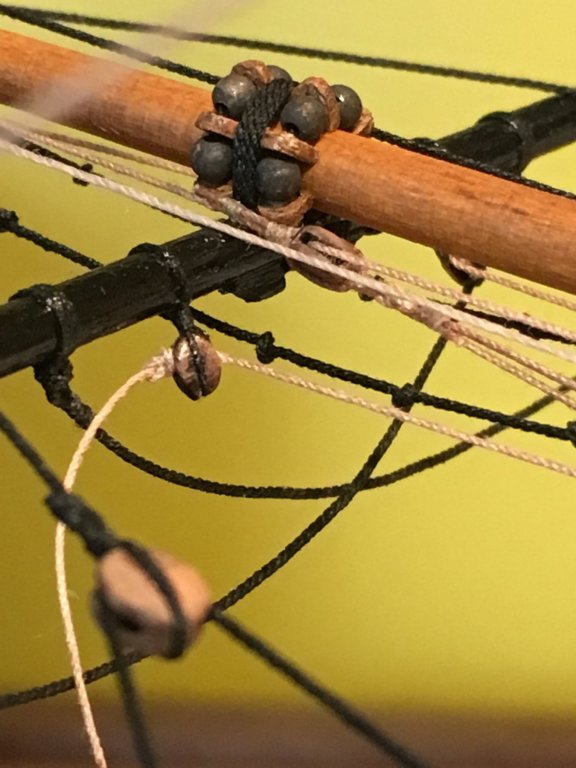
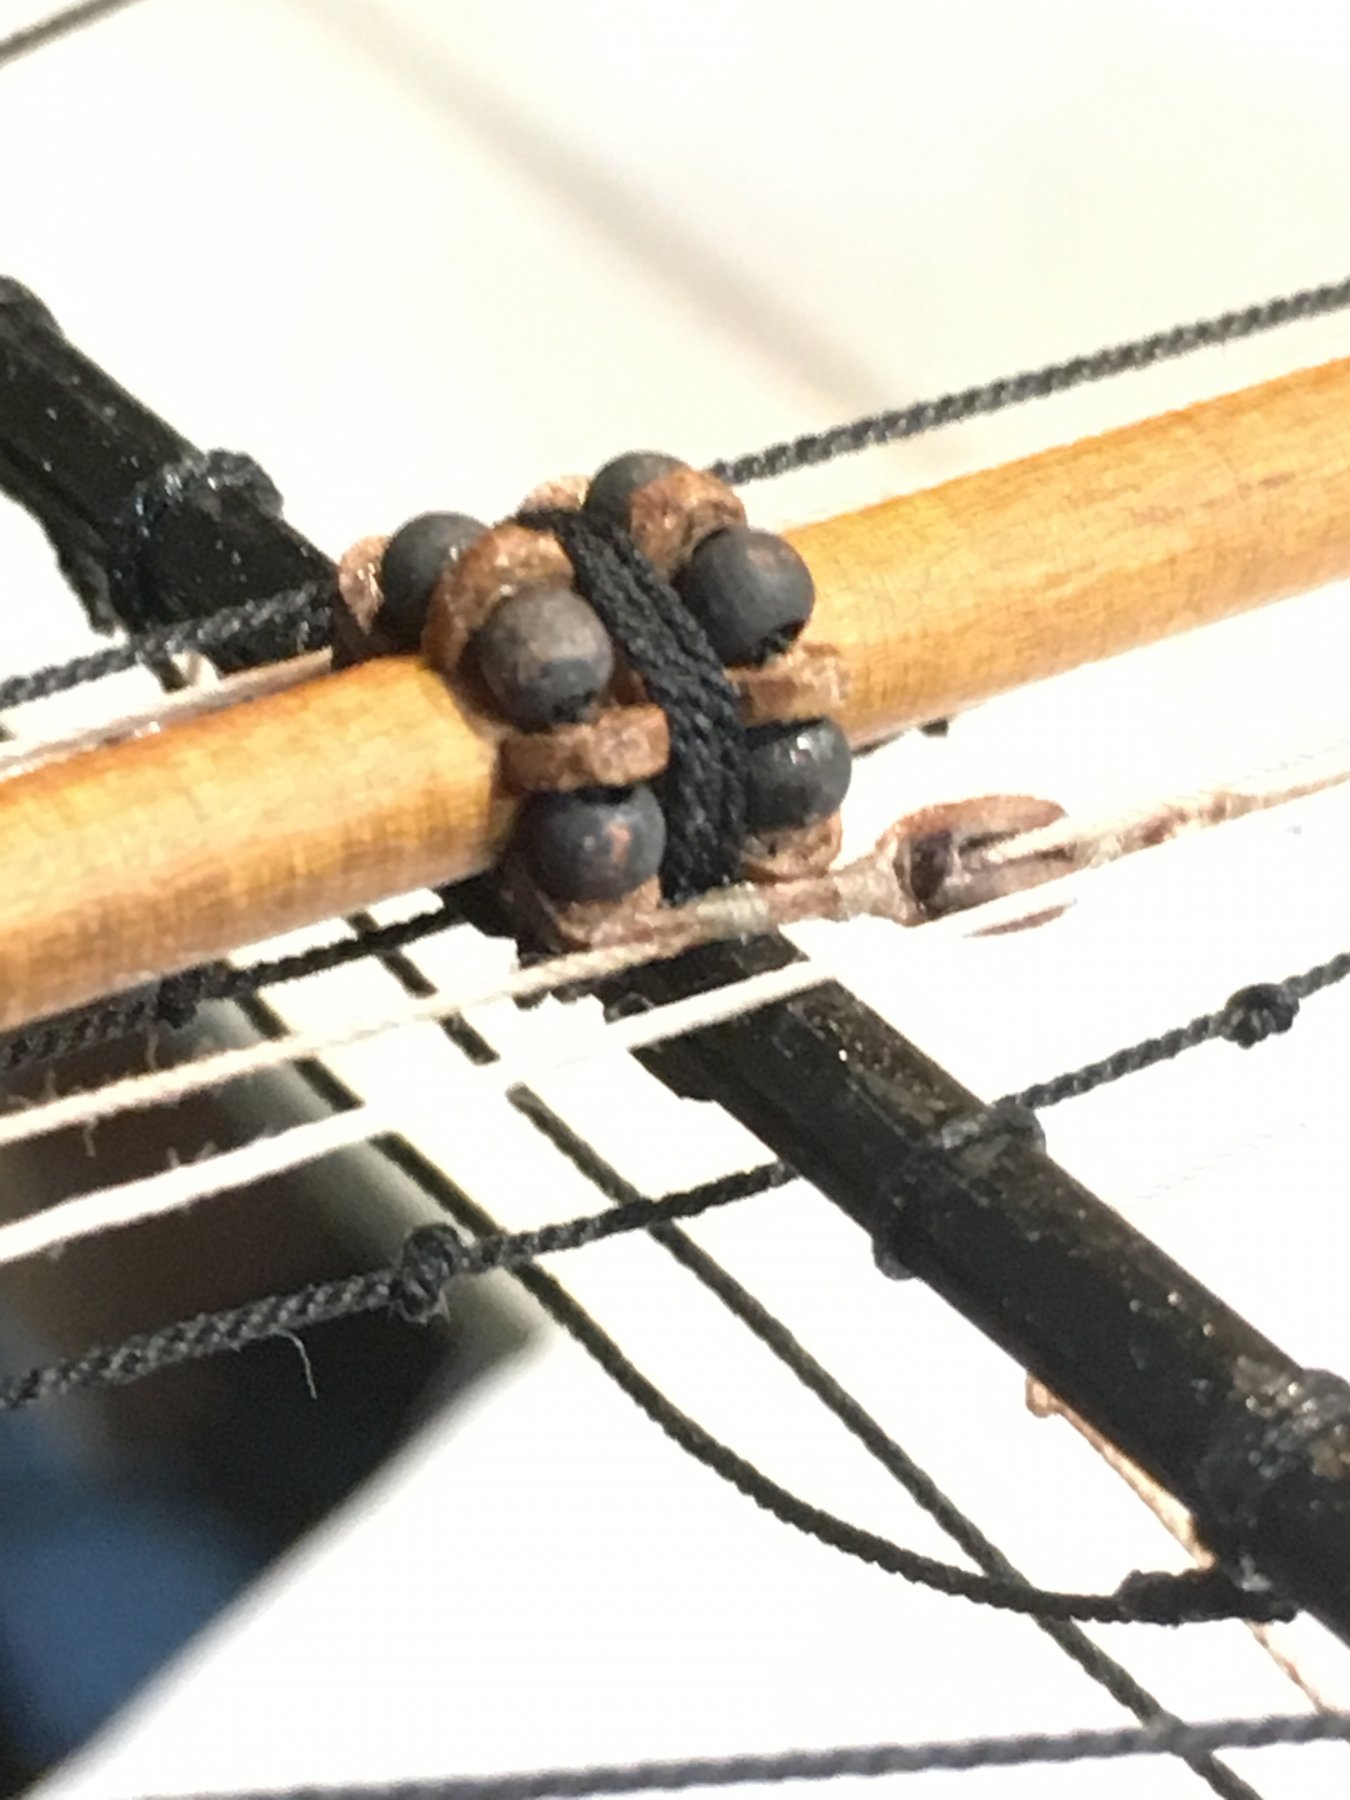
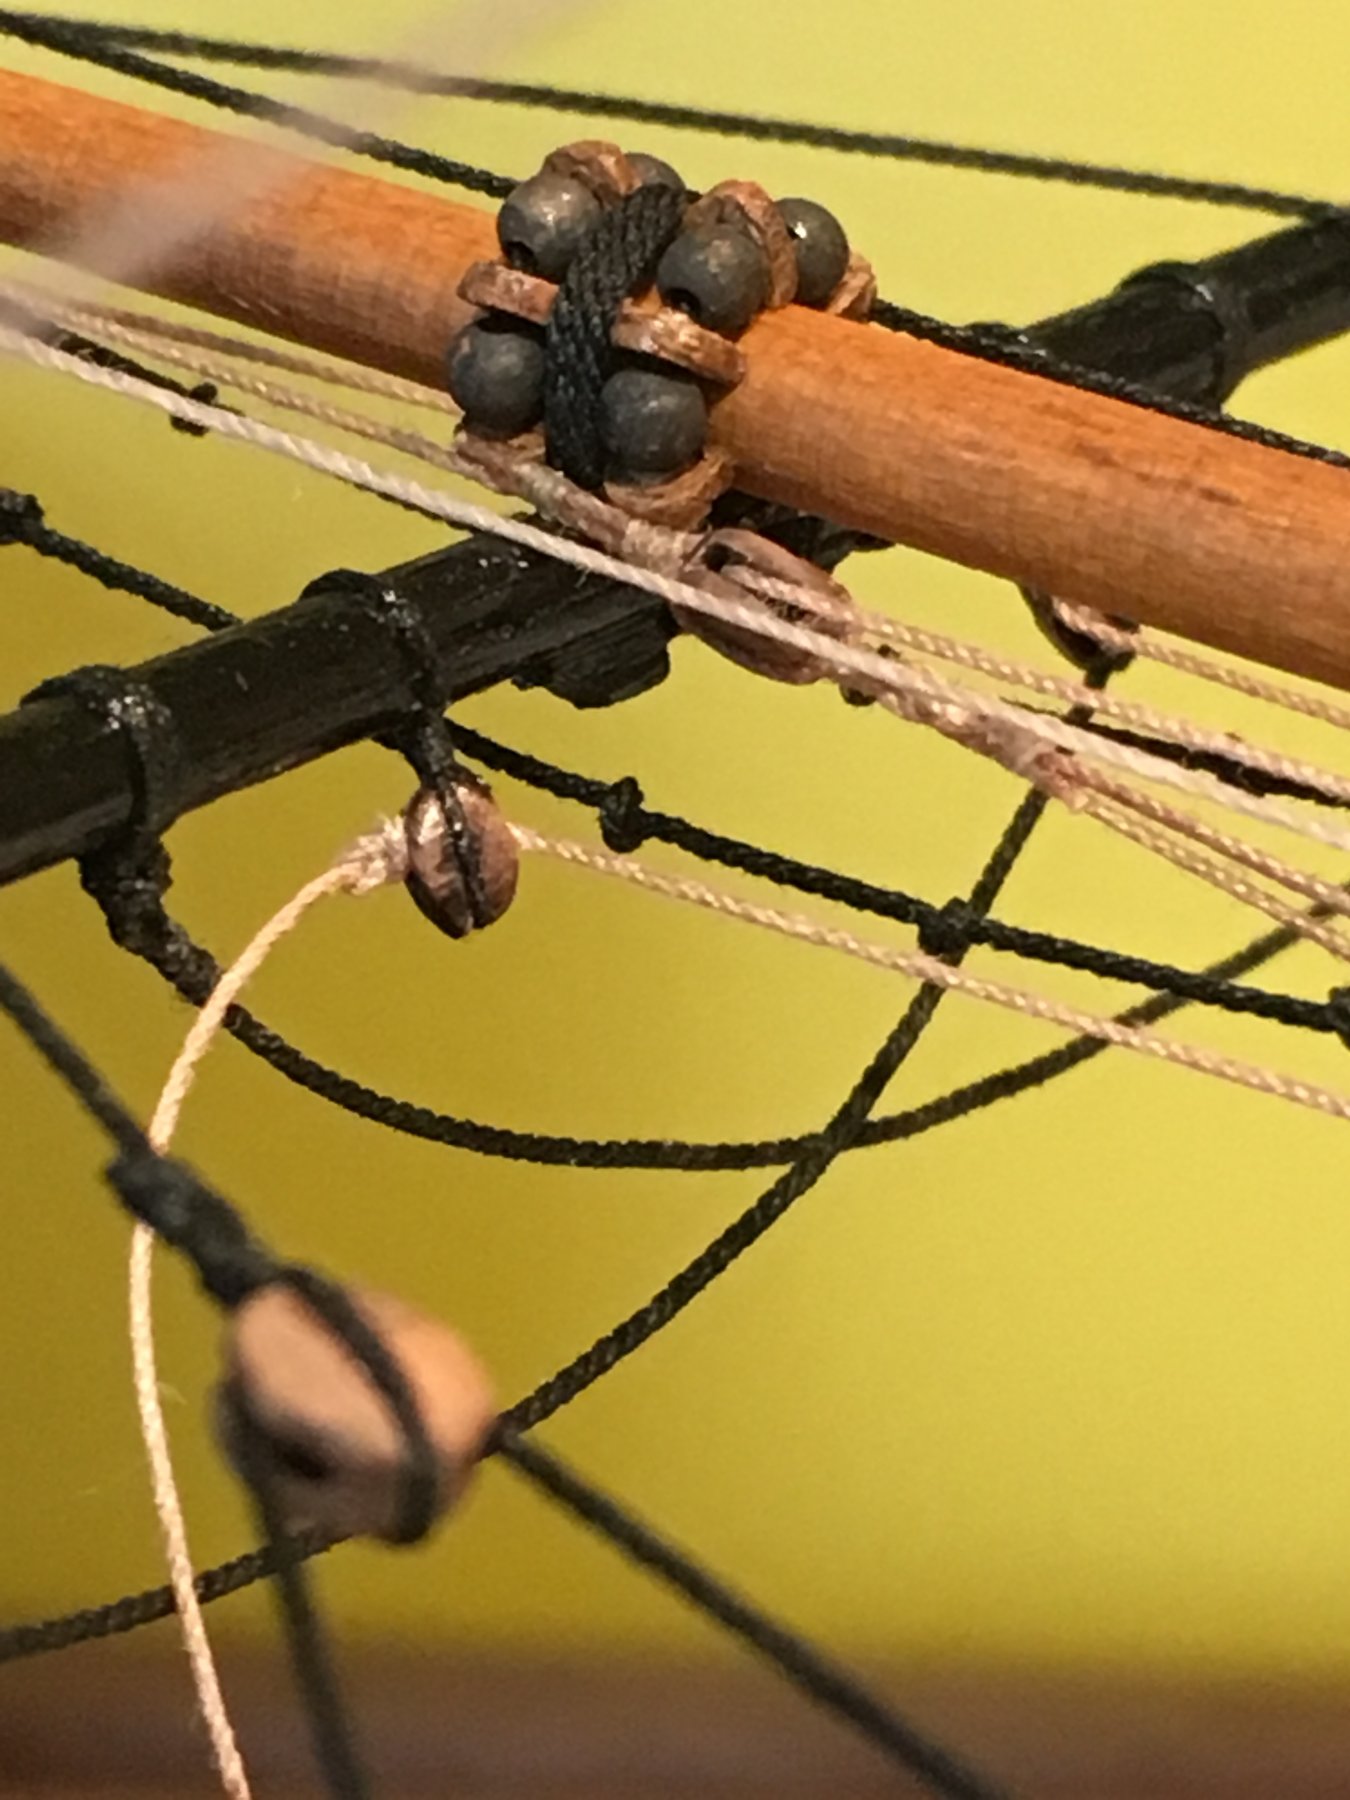
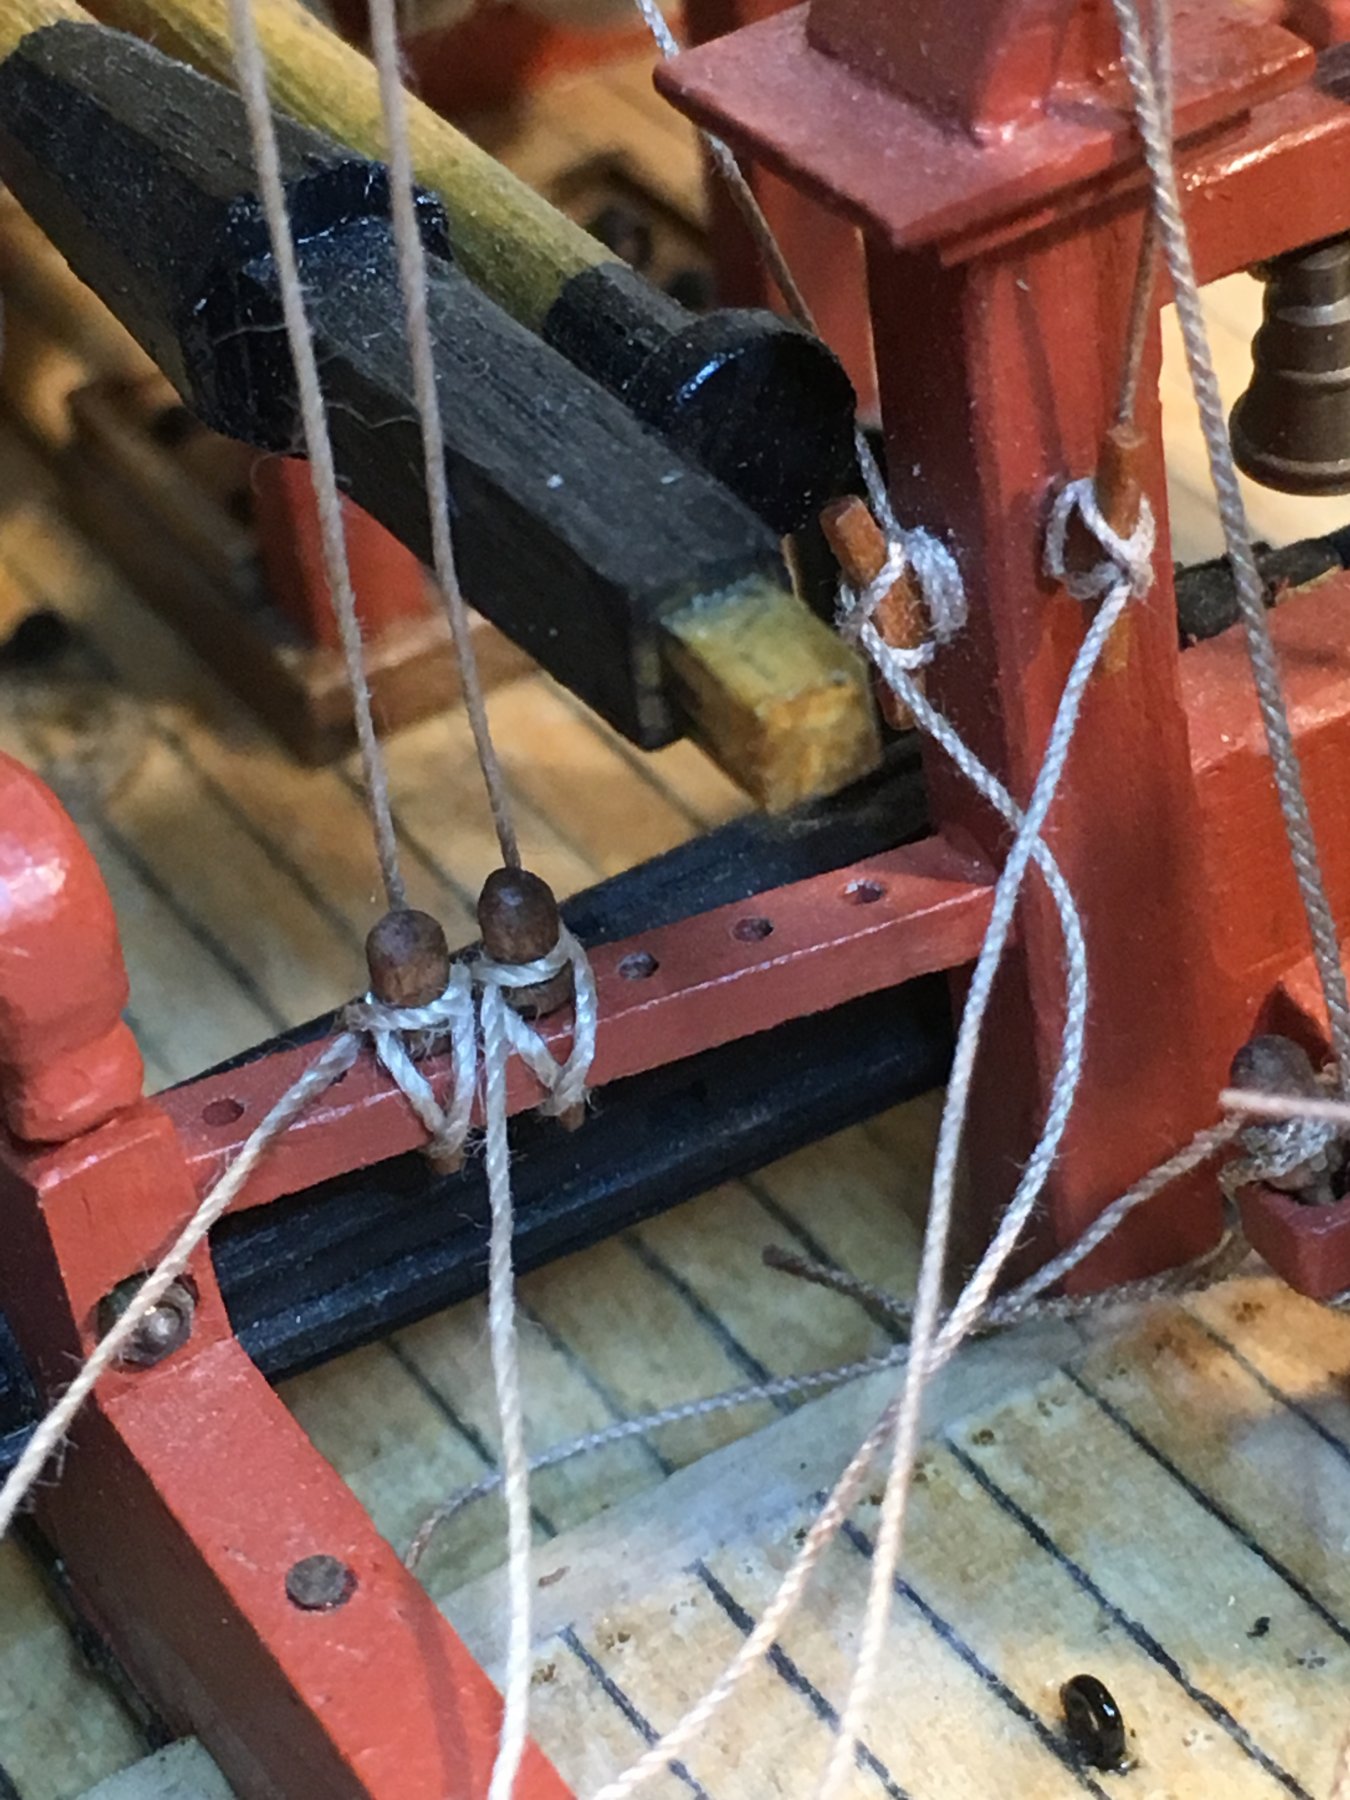
Parrel on the Job Boom holding the SpiritTopSail yard below.
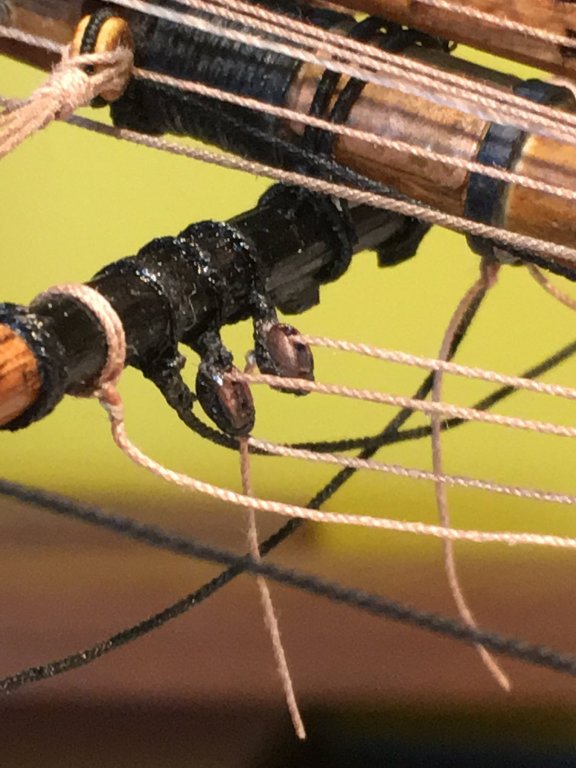
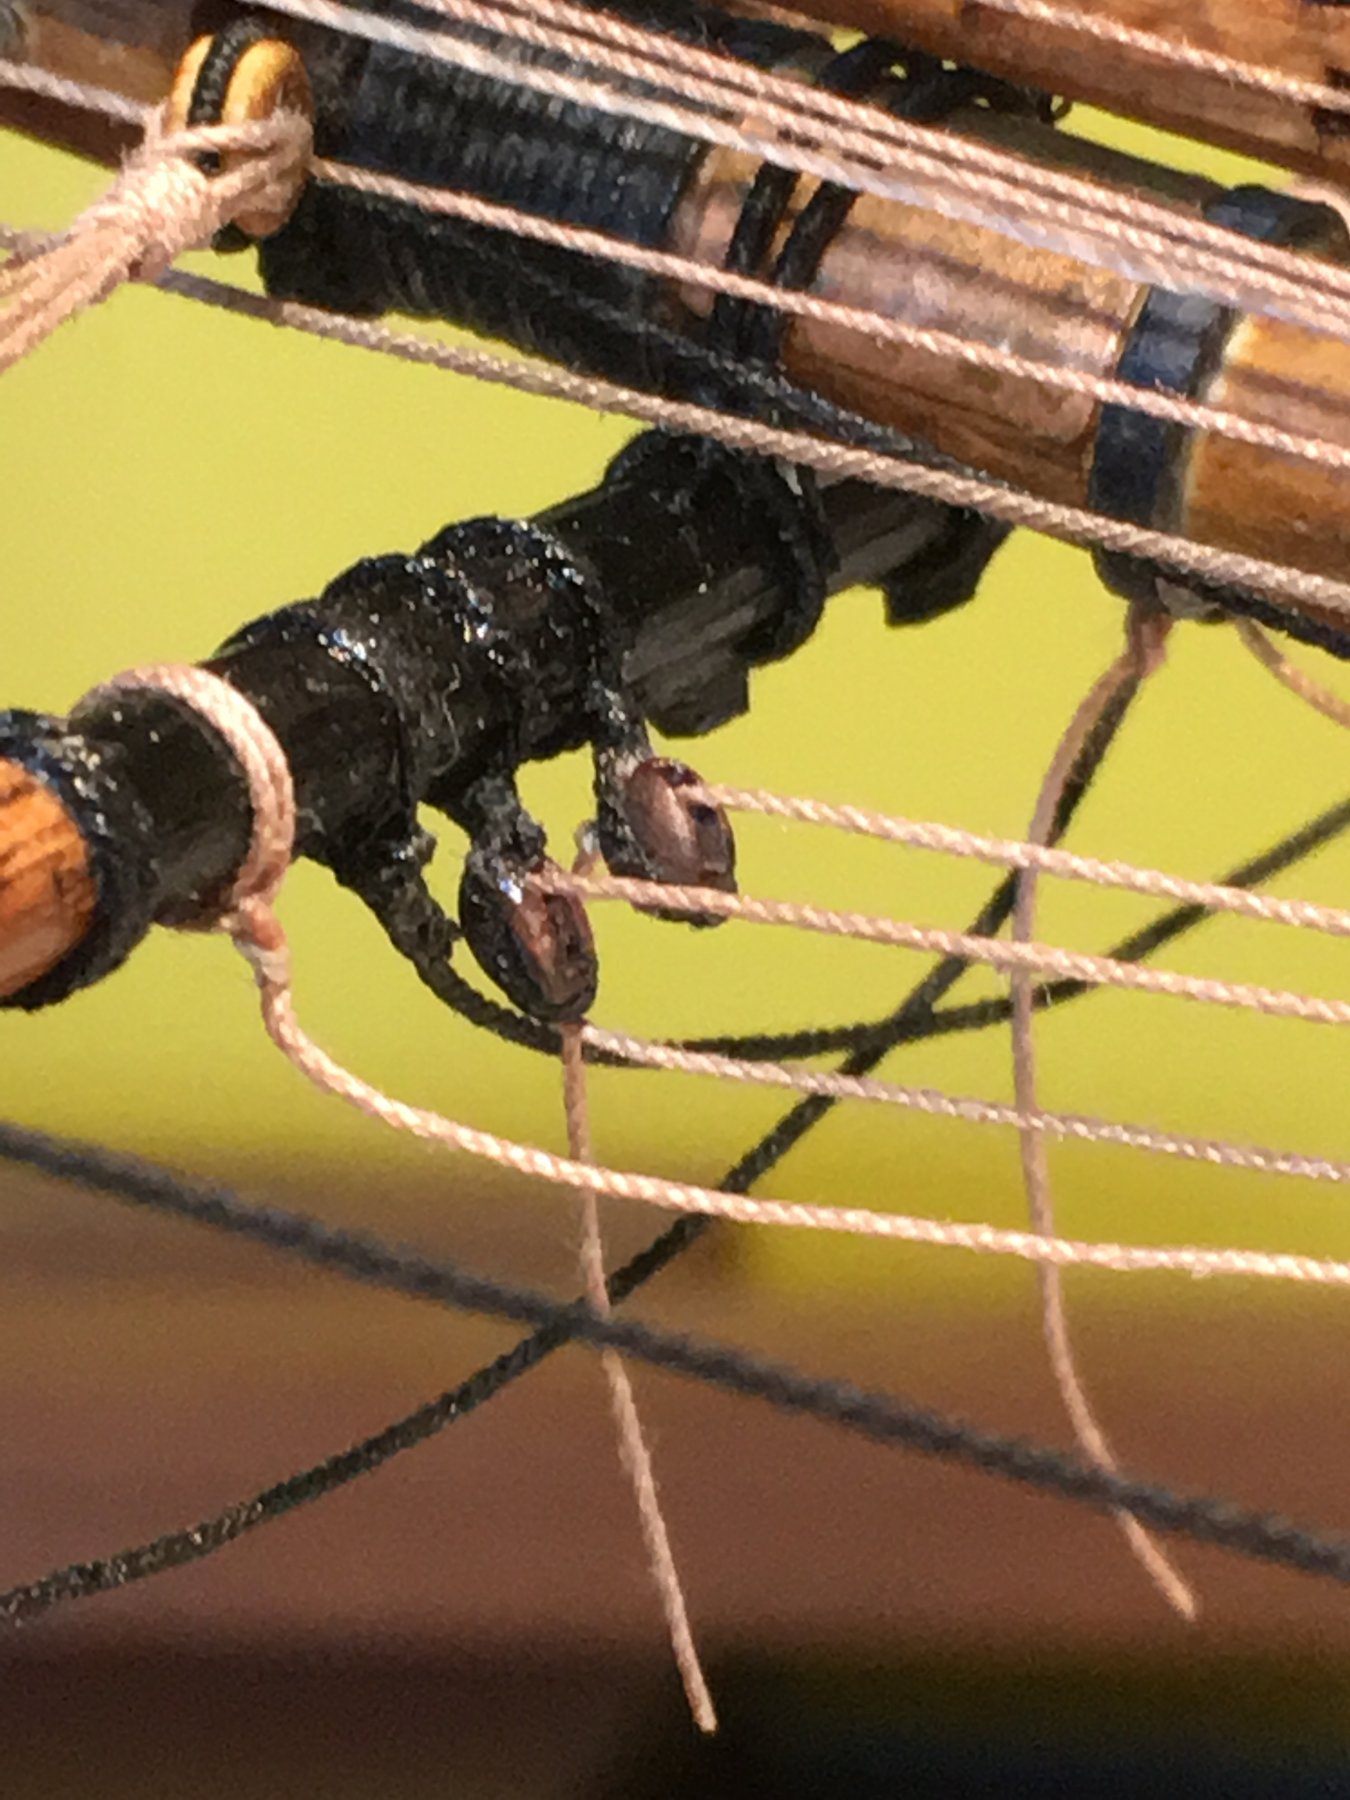
Bunt and Clew lines on the 2 Spirit Yards
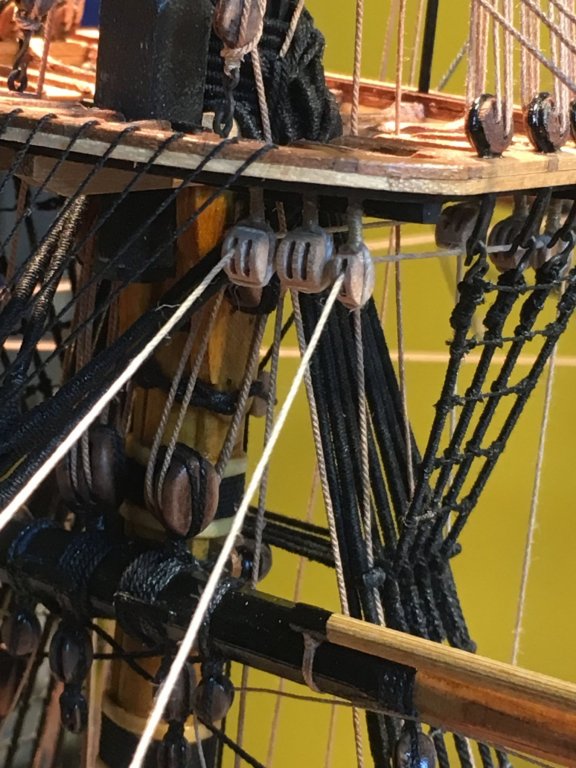
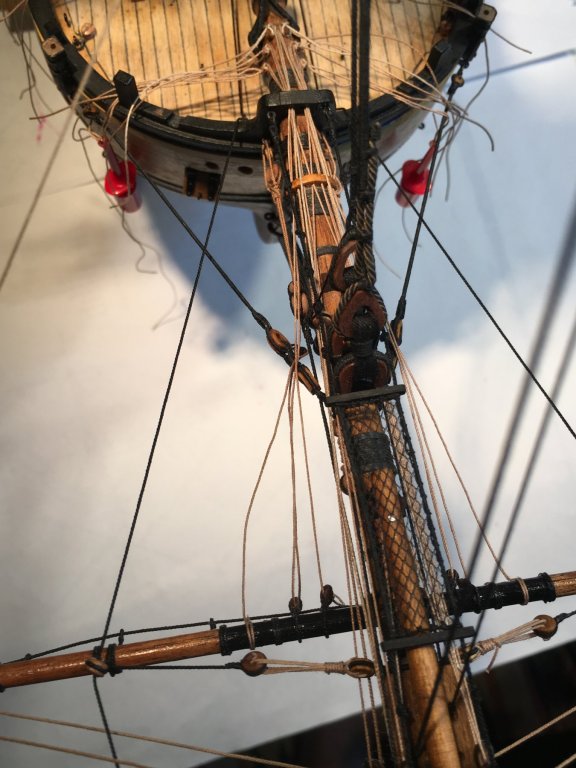
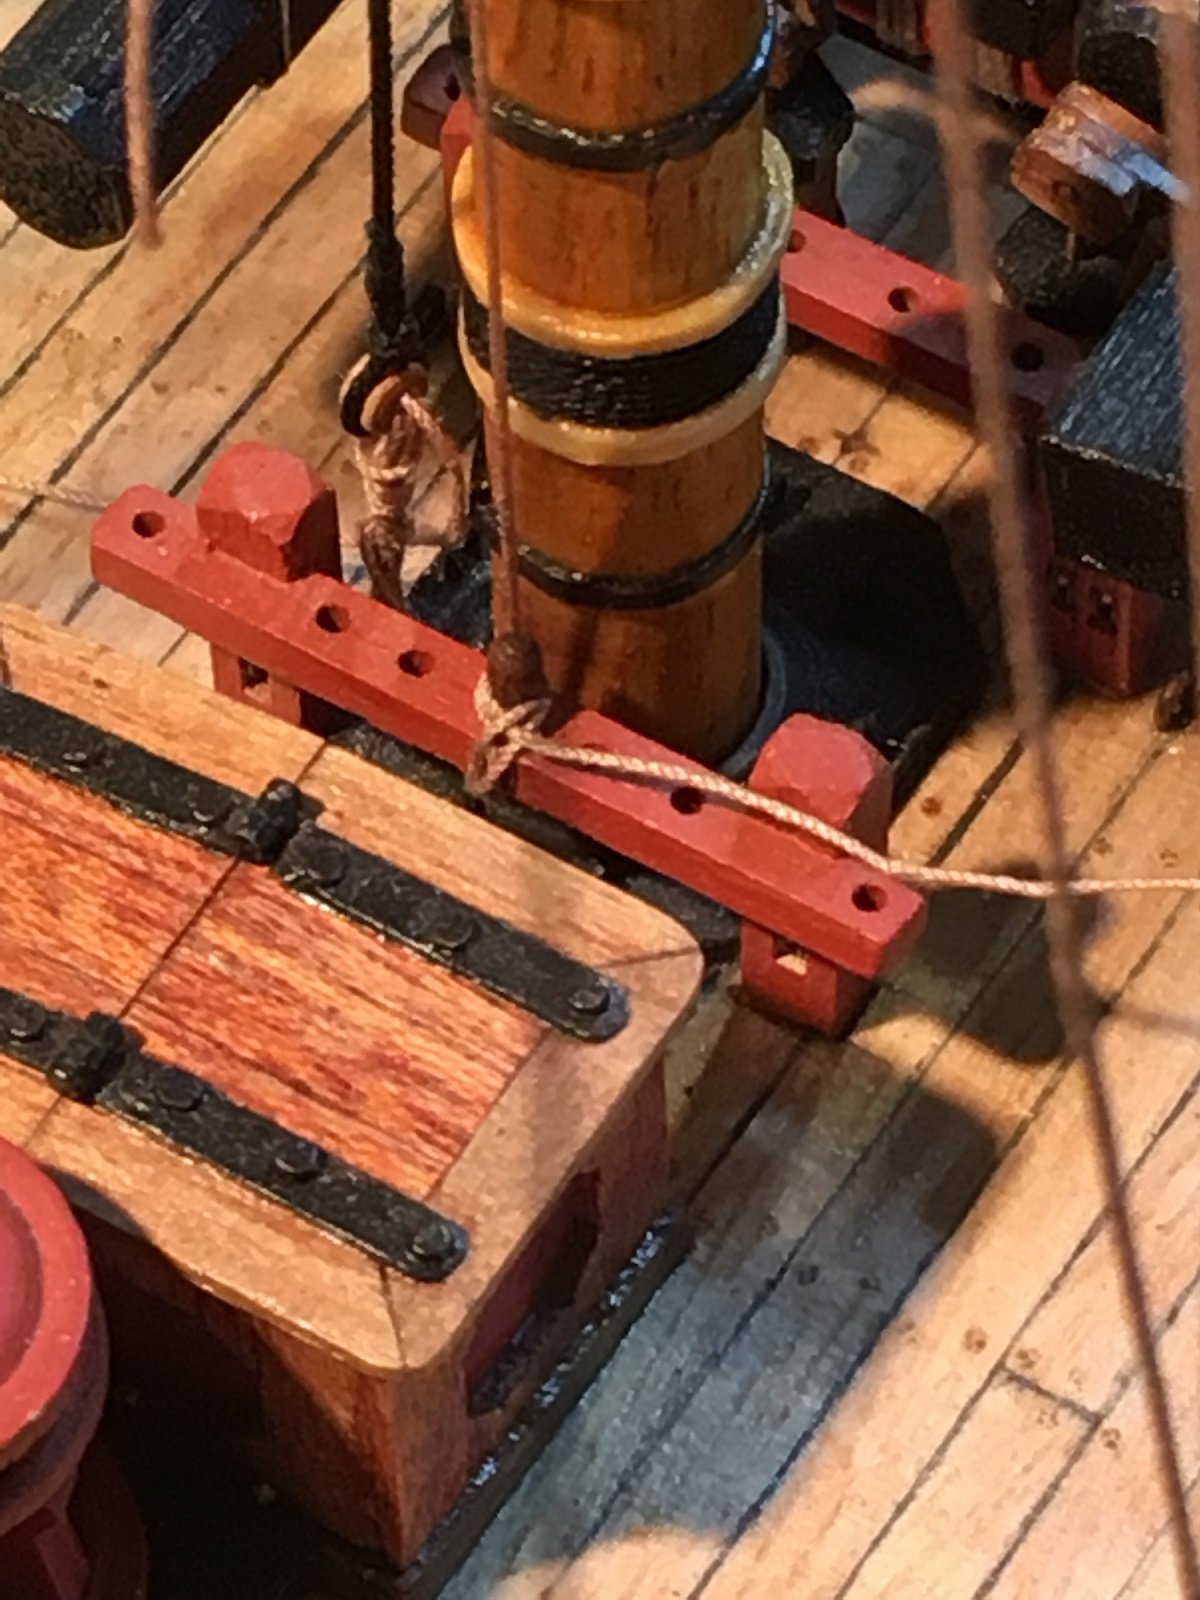
Lifts up to the blocks under the Fore Main Mast top. Using a slightly lighter rope now, since I ran out of Chucks 0.45mm.

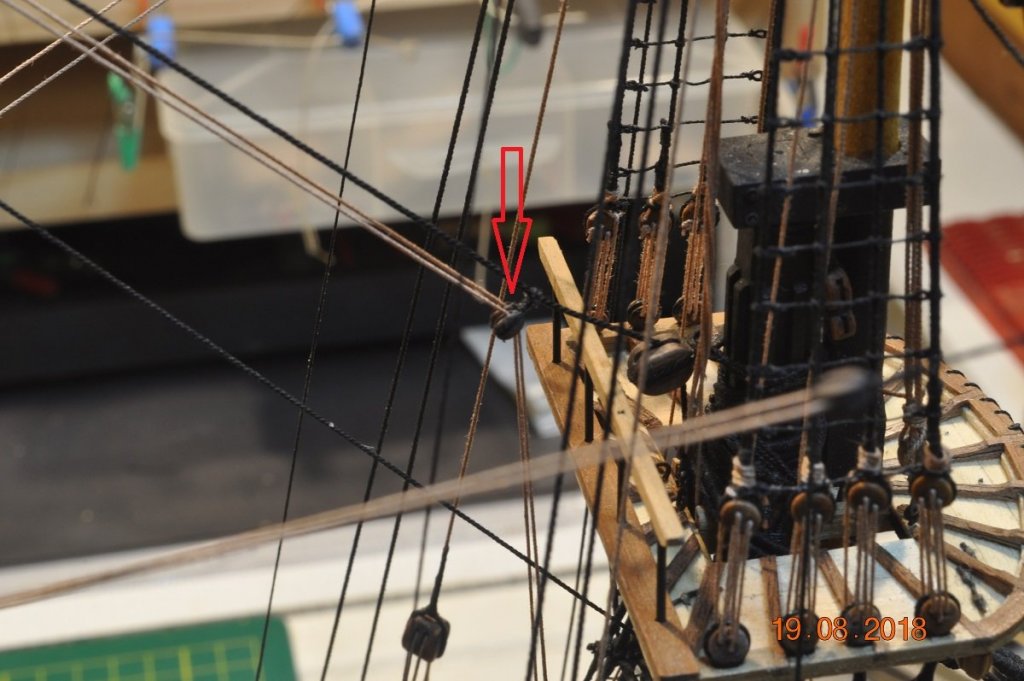
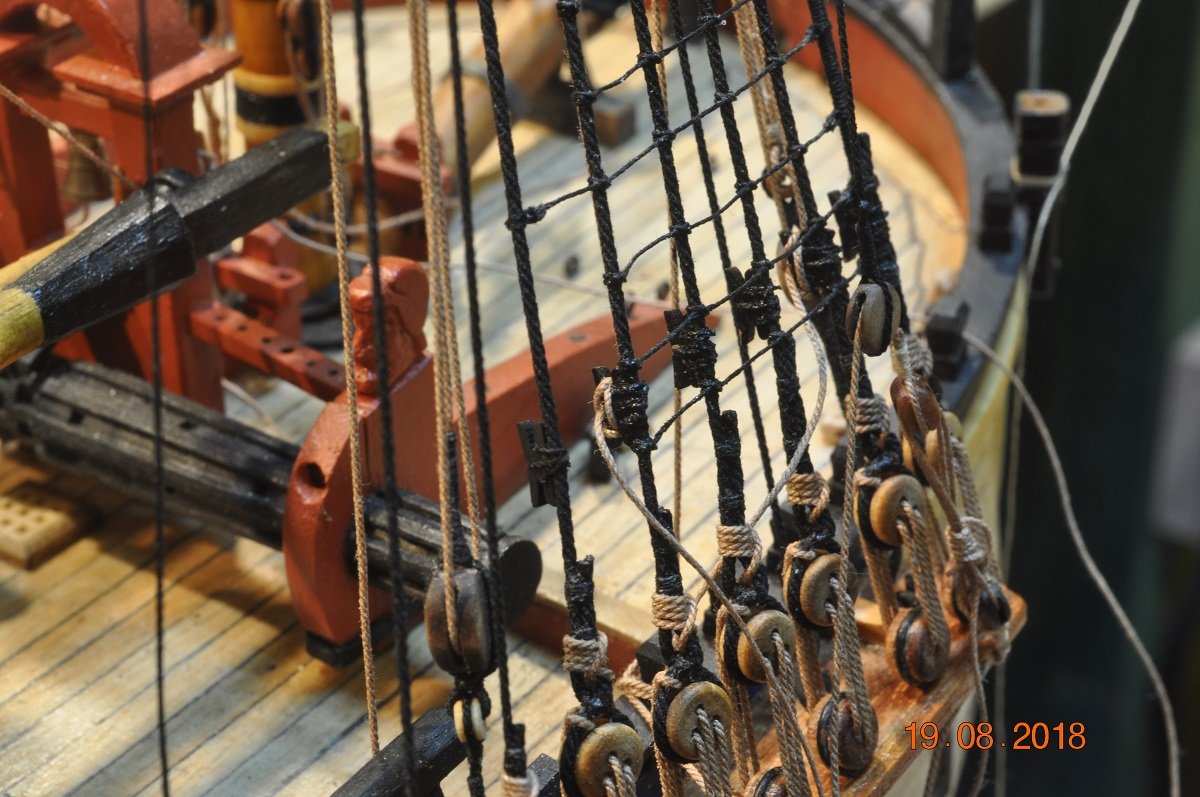
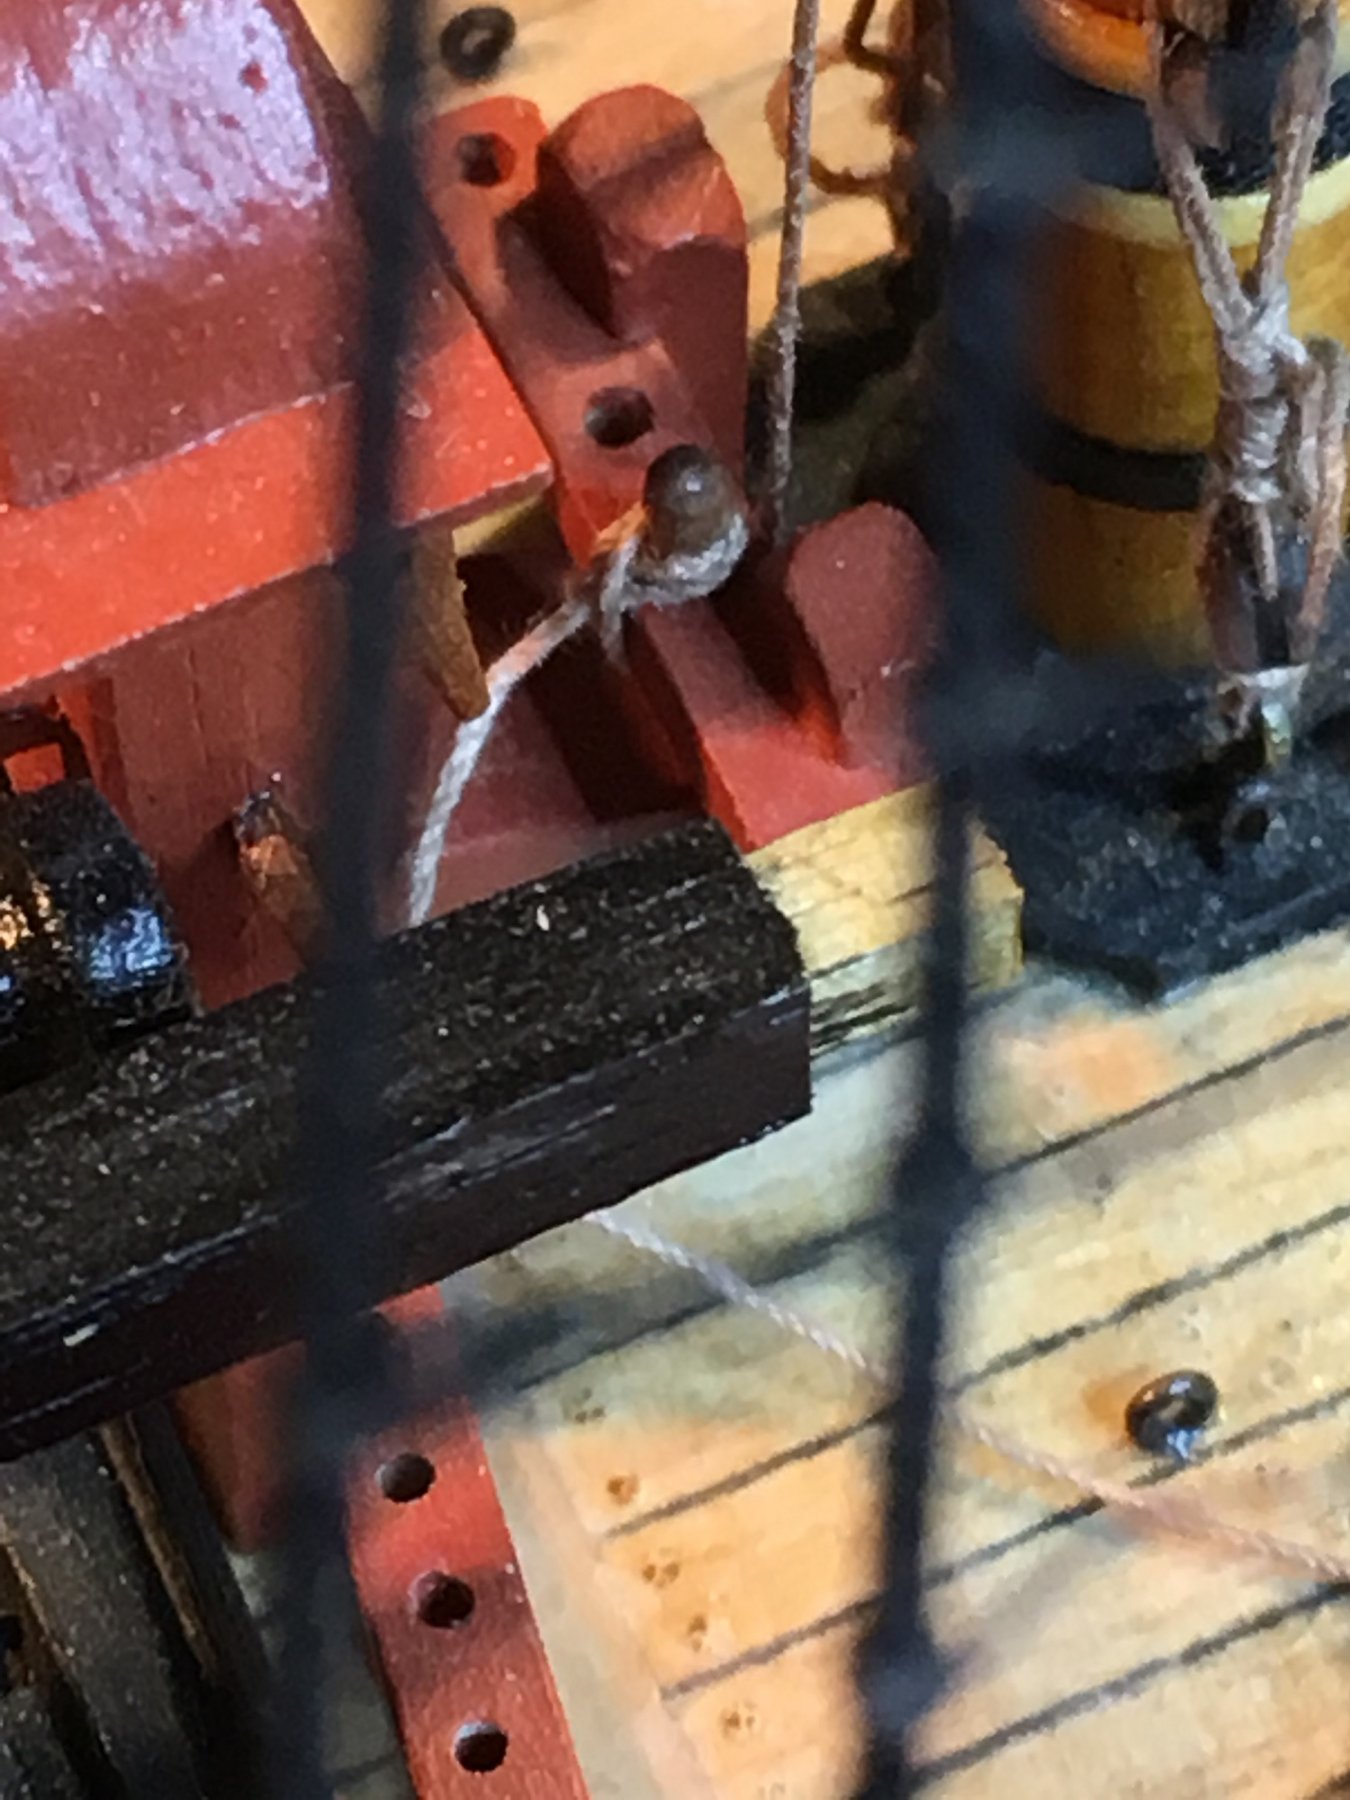
On each side L/R the pair of Lifts tied off onto the rail. Bit of fun tying the knots with 2 pair of tweezers.
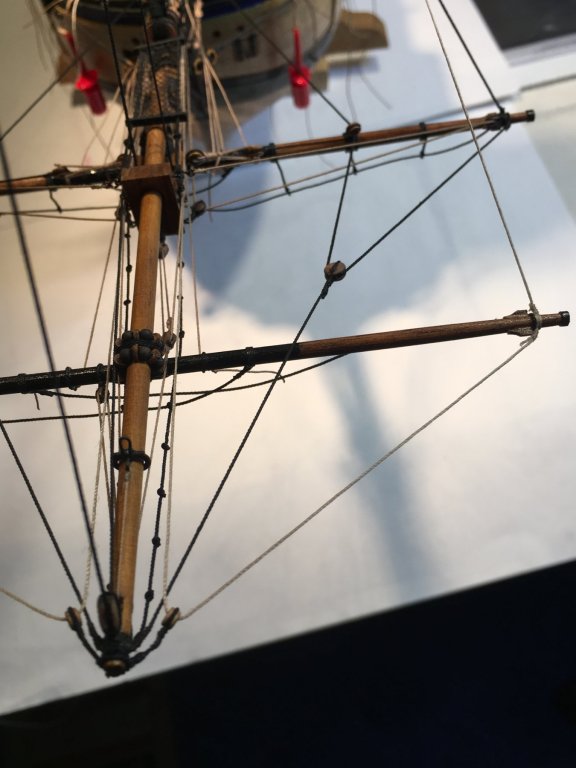
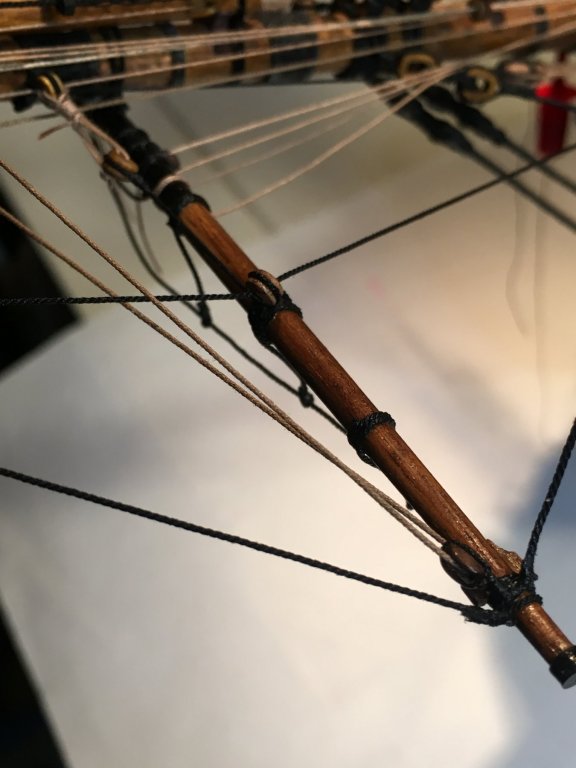
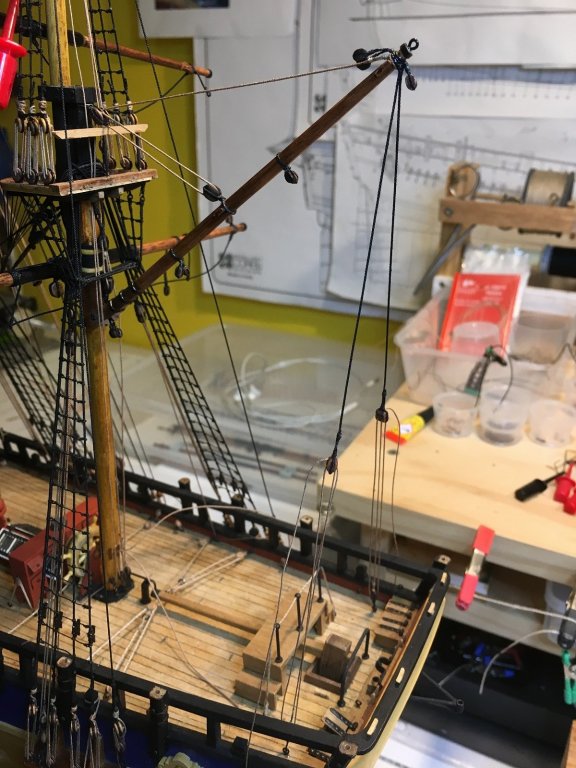
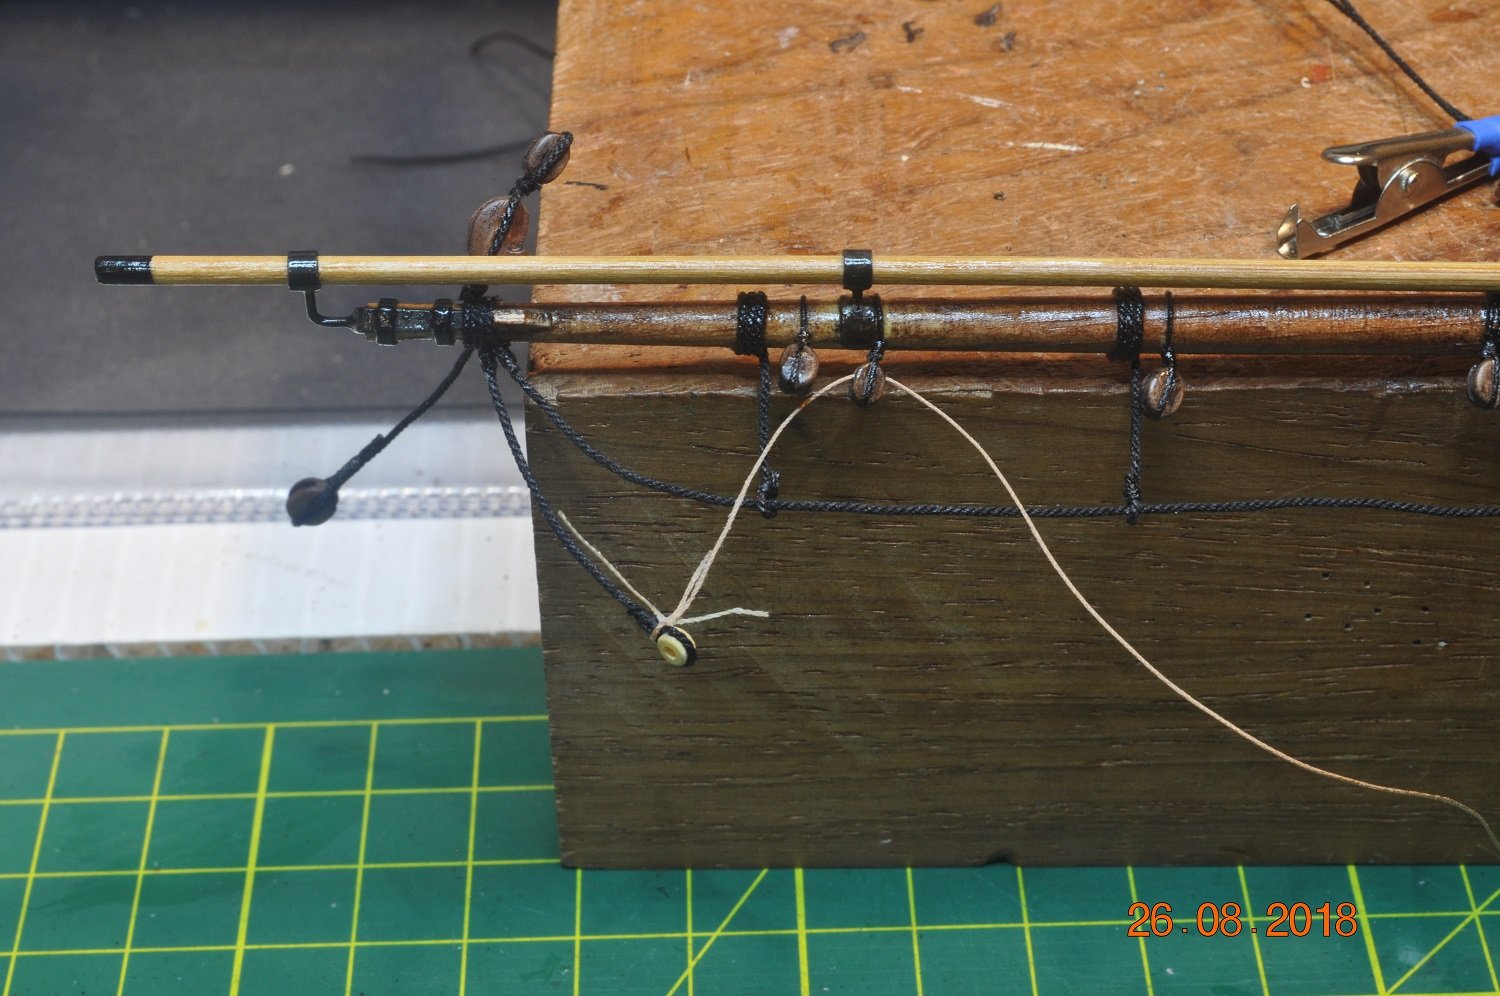
View over the Jib Boom brace back to the SpiritSail Yard. Fixed at the end, run forward through a thimble. back to a mid yard thimble and back to bow.
And now to devise a way to tie off all those rope ends.
- GrantGoodale, rvchima, glennreader and 4 others
-
 7
7
-
Hi Pat,
They look like they will do the job anyhow Pat.
I was looking at how to roll a taper in the ends. Could you of cut the linen with a triangle each side, then when rolled(with tri's at either side) would of been thin on the ends ?
-
On 9/10/2018 at 10:35 PM, Fernando E said:
Hi Dave
Looking absolutely brilliant....very impressed!
I'm also seriously in awe of your rigging set up.......no wonder your work looks first class.
Cheers..............Fernando

I'm a beginner really. So many others I see on this site doing fantastic work/creations.
Thanks for just looking in and you kind comments.
-
On 9/11/2018 at 4:48 AM, rvchima said:
Dave,
Thank you for all the advice on rigging the blocks. Your photos really help explain the process, which is not too complicated after you see it.
And I'll echo Fernando in complimenting your rigging tools. I've been working with a spring clamp held in a vise and two old fingers. It's time for me to get a little more sophisticated.
Rod
Hi Rod,
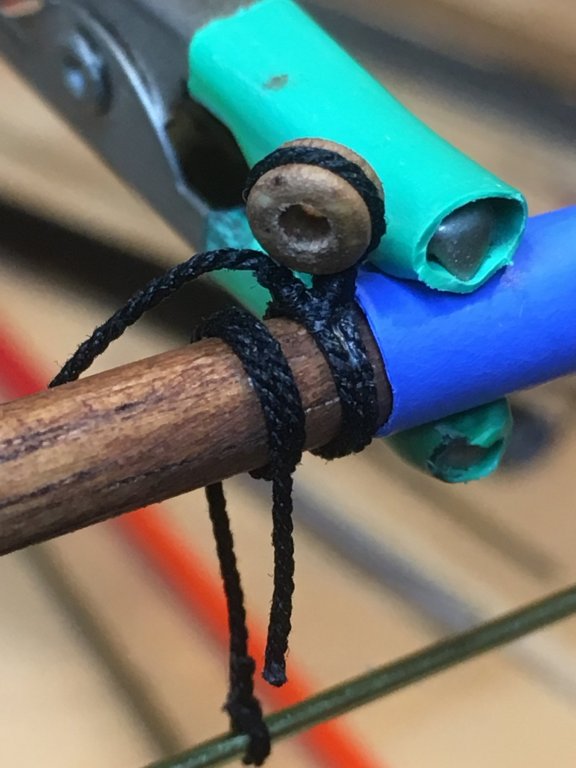
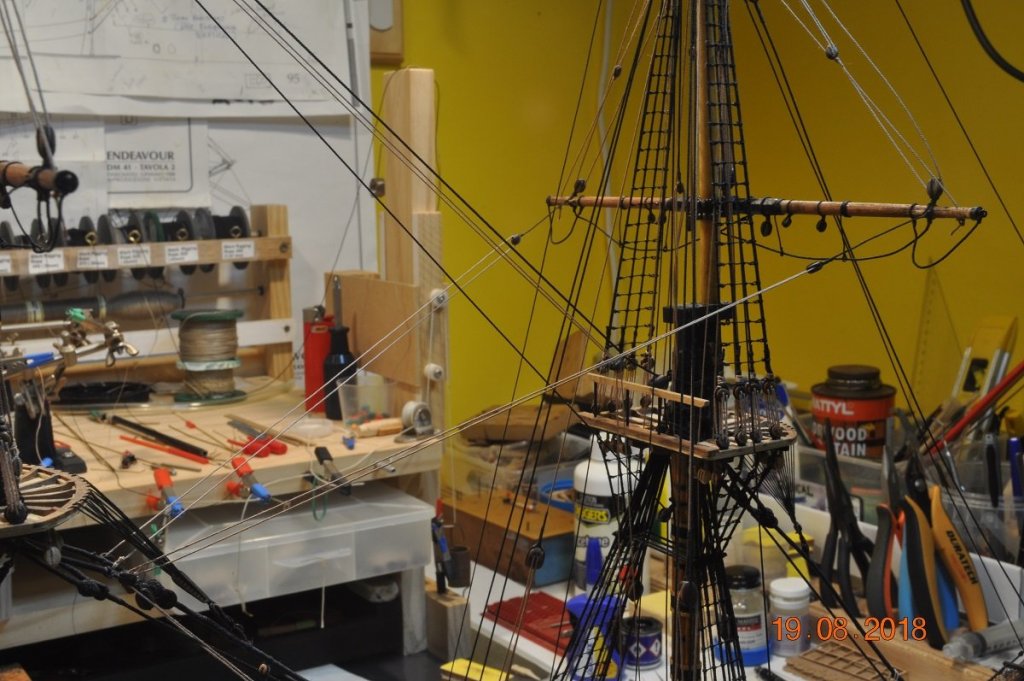
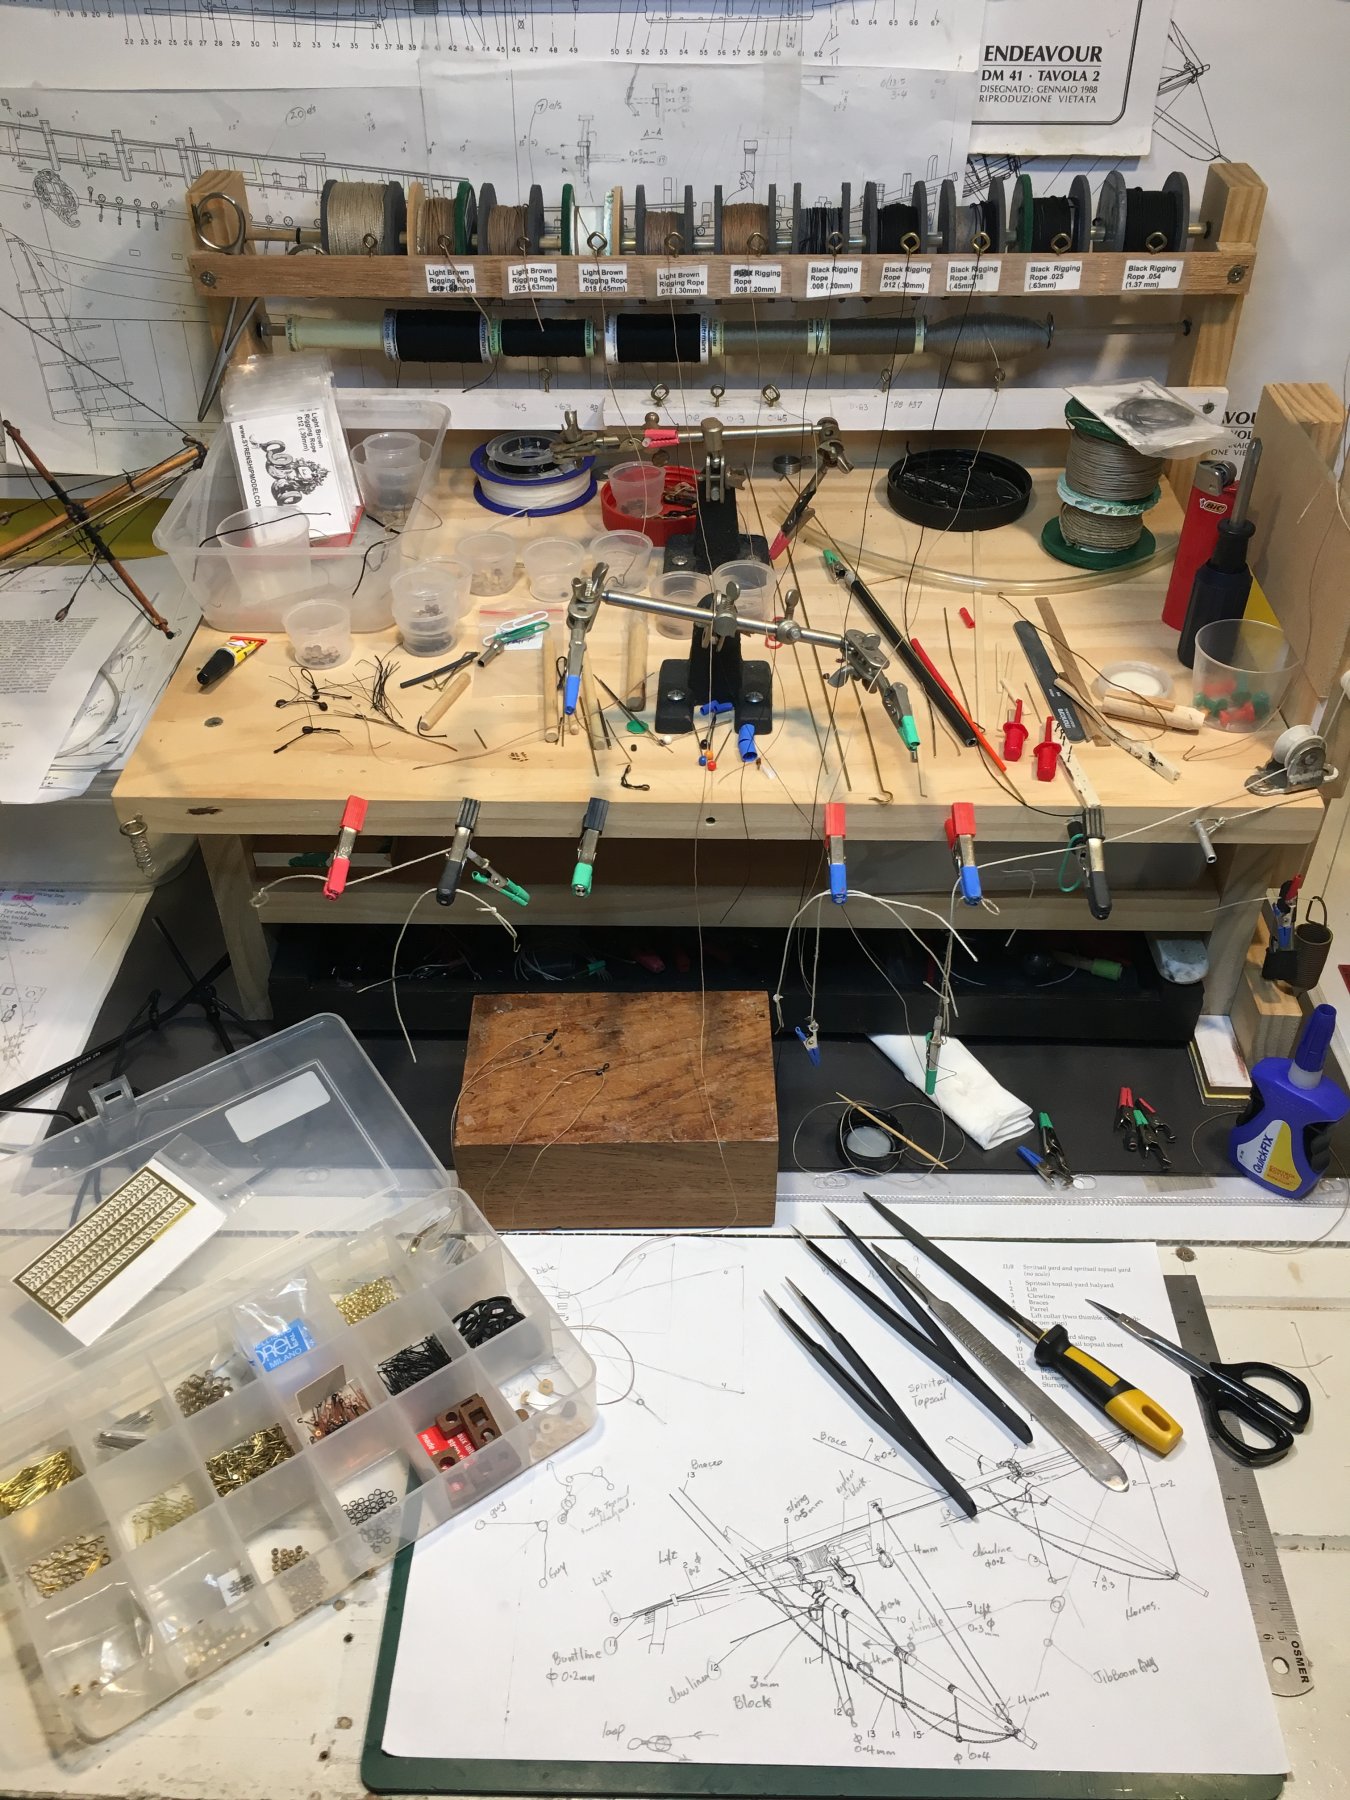
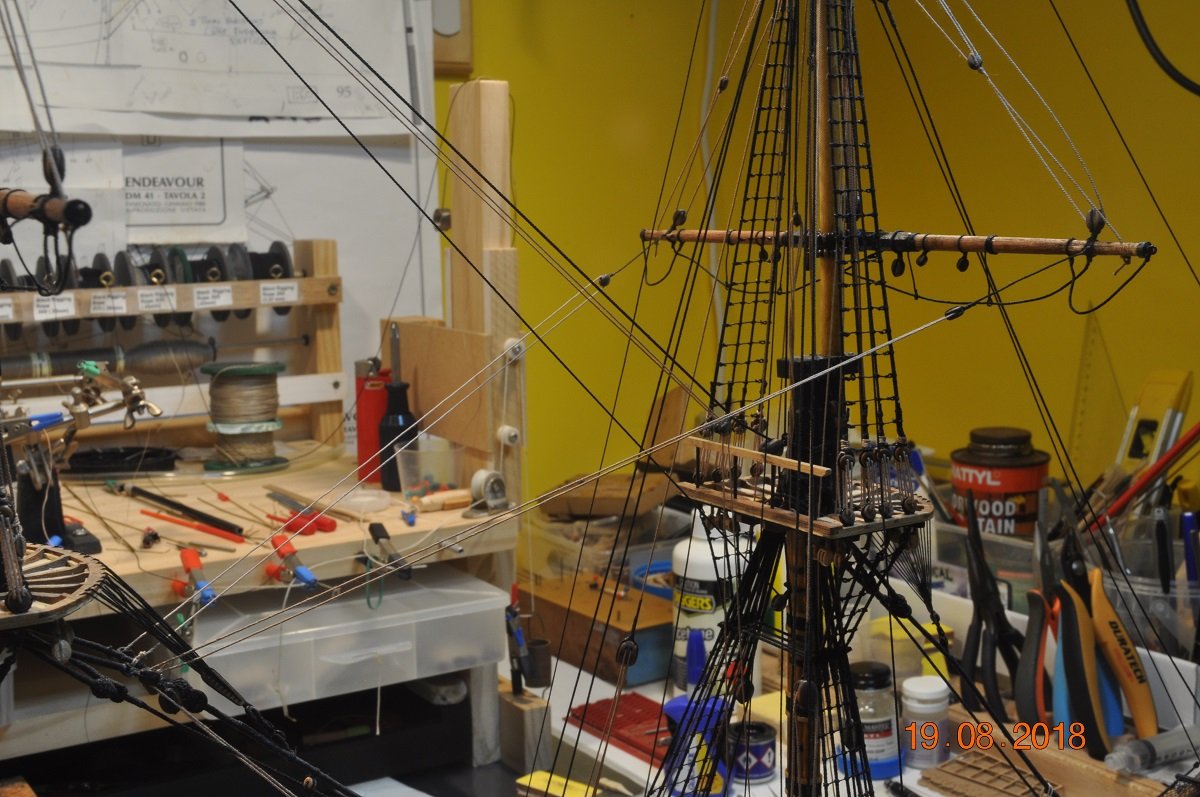
When I thought of all the blocks and rigging to do, and that Banyan(Pat from Melbourne AUS) shared a Pic of a rigging station he had built, I decided a decent work station was needed(so ever grateful to Pat for that first pic).
My Rigging Station has had a serious workout on this build.
Main features which are real handy:
- reels of rope and thread on spools at the back, all handy to pull forward
- fixed shelf under for holding my 2 main boxes(timber blocks and metal eye bolts etc.) so their always handy
- a sliding draw(black) at bottom to throw bits & bobs in
- the main deck(!!) well it has all the bits that come in handy. There's a multitude of little caps to hold things, hooks, dowels, short ropes etc. that have gathered over time, each comes in handy at a time to hold, space, clamp when creating the various blocks and rigging.
- But it all comes together between the 2 small clamps on the front to hold blocks, ropes etc. The space between the green and blue clamp(middle).
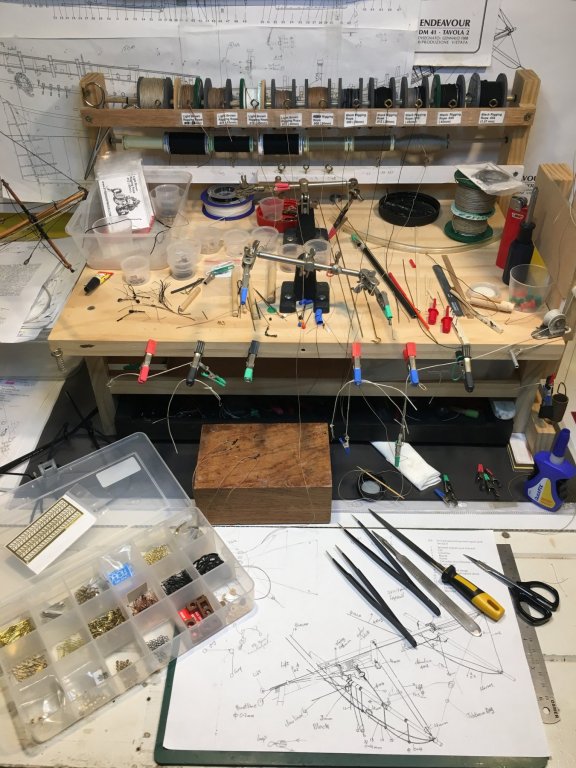
The Essential Rigging Station
- BANYAN, Fernando E and RGL
-
3
-
Shipyard Update:
SpiritSail Yards
Recently been working on preparing the SpiritTop and SpiritTopSail Yards to attached and fit-off to the Bowsprit.
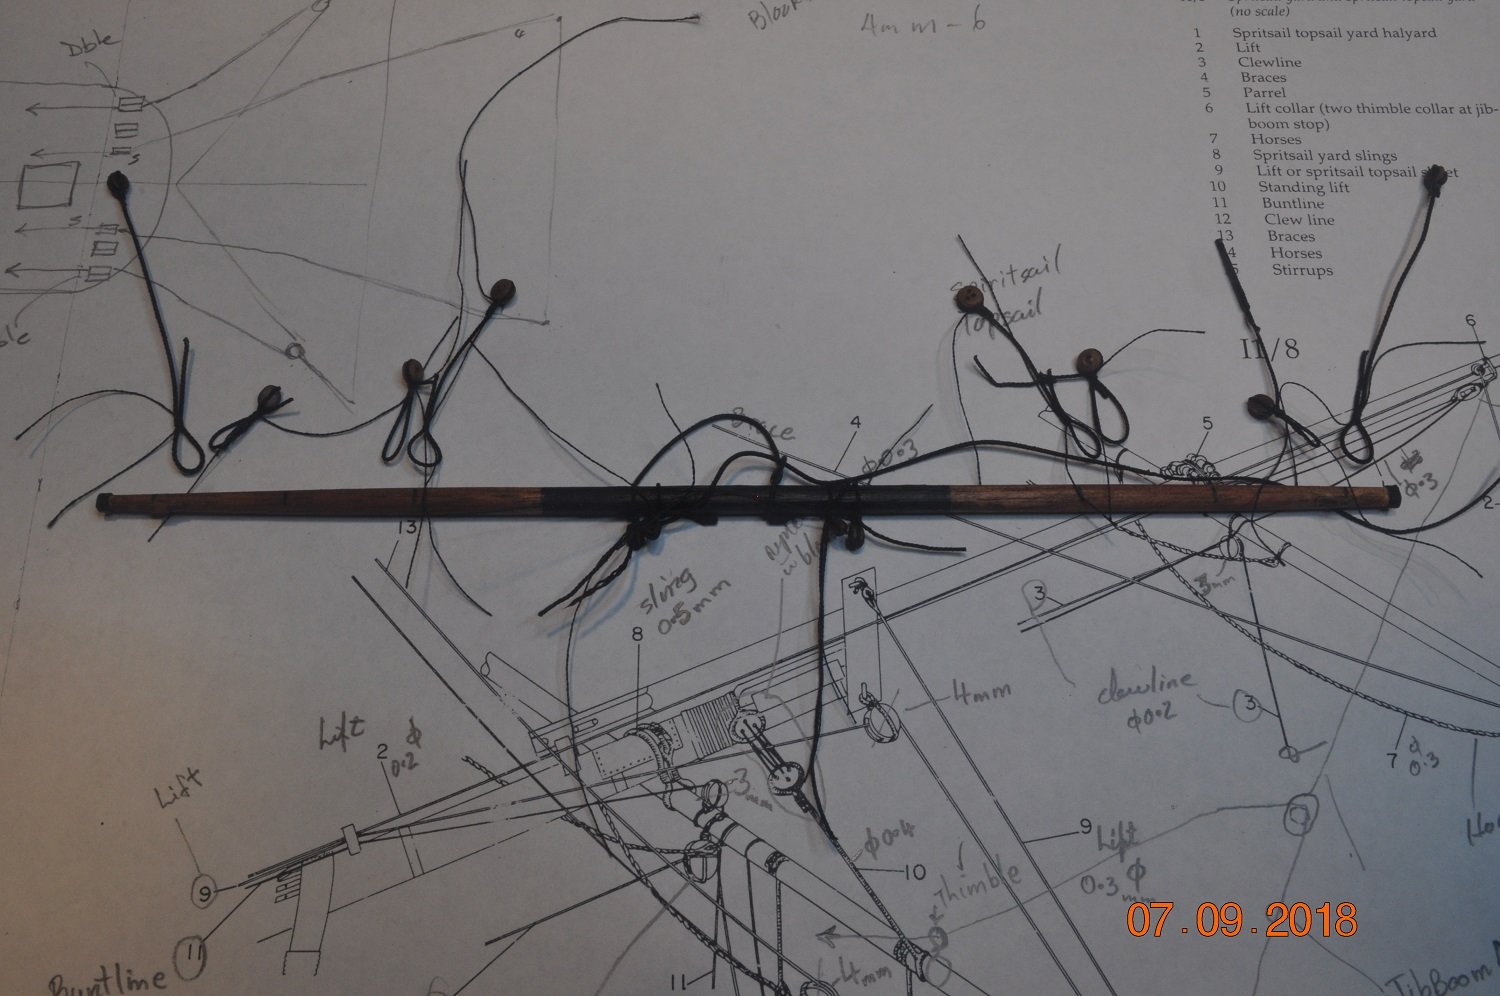
The following of the SpiritSail Yard
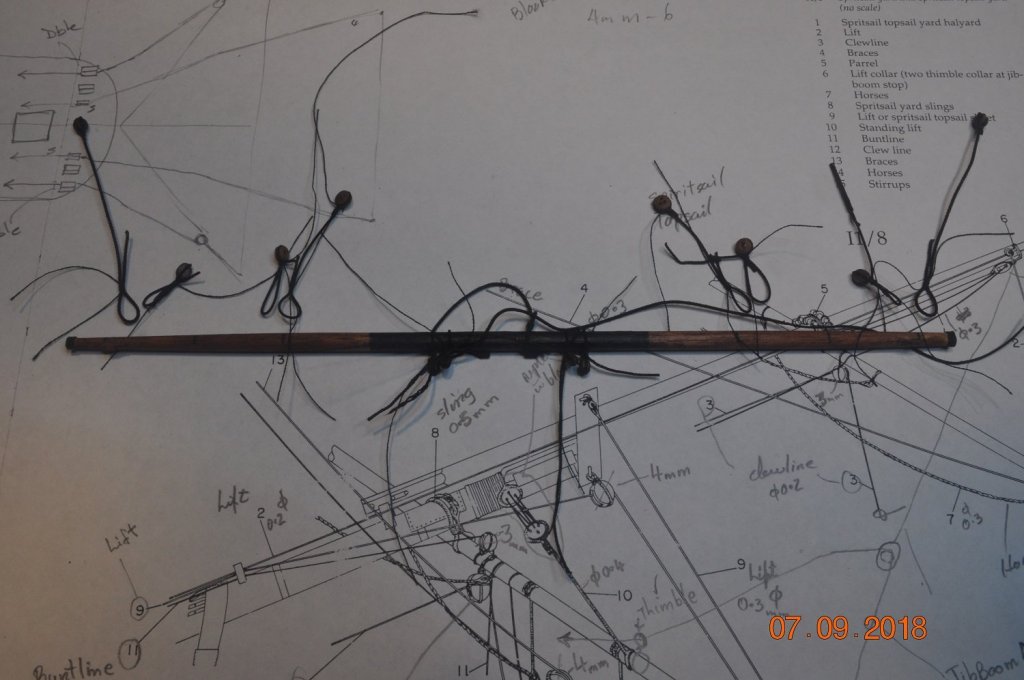
Made all the blocks off the yard. Started to attache each to their respective positions. My markup page from the AoTS underneath with my scratchings(what goes where and sizes).
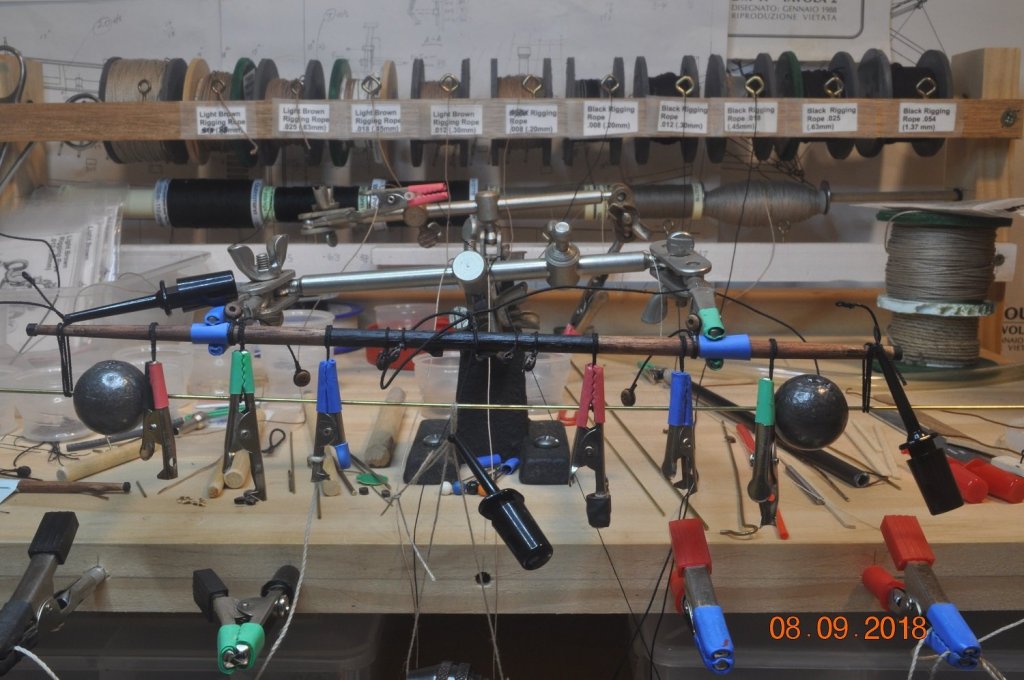
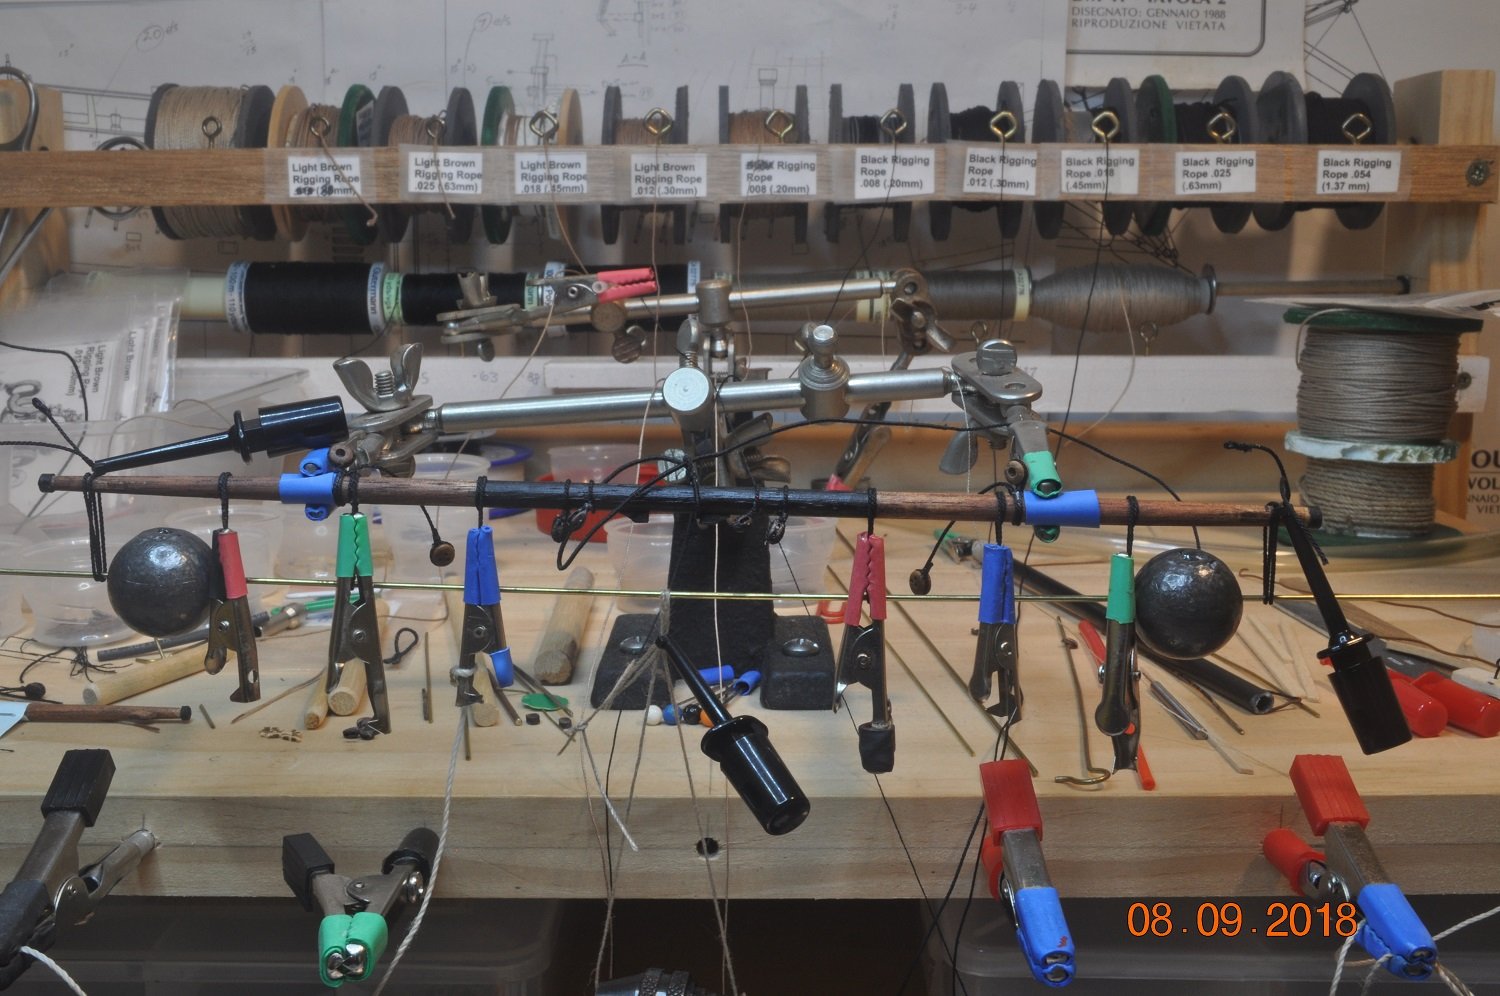
This mess, I've attached all the blocks, now setting up the horse stirrups with a brass rod 15mm(900mm full size) below the centre of the yard with weights to set each stirrup straight. Just realized the picture angle, all 6 are behind the clamps drying. I'm sure you get the idea. !
Threaded the horse rope through the stirrups, ready to tie the ends to the yard.
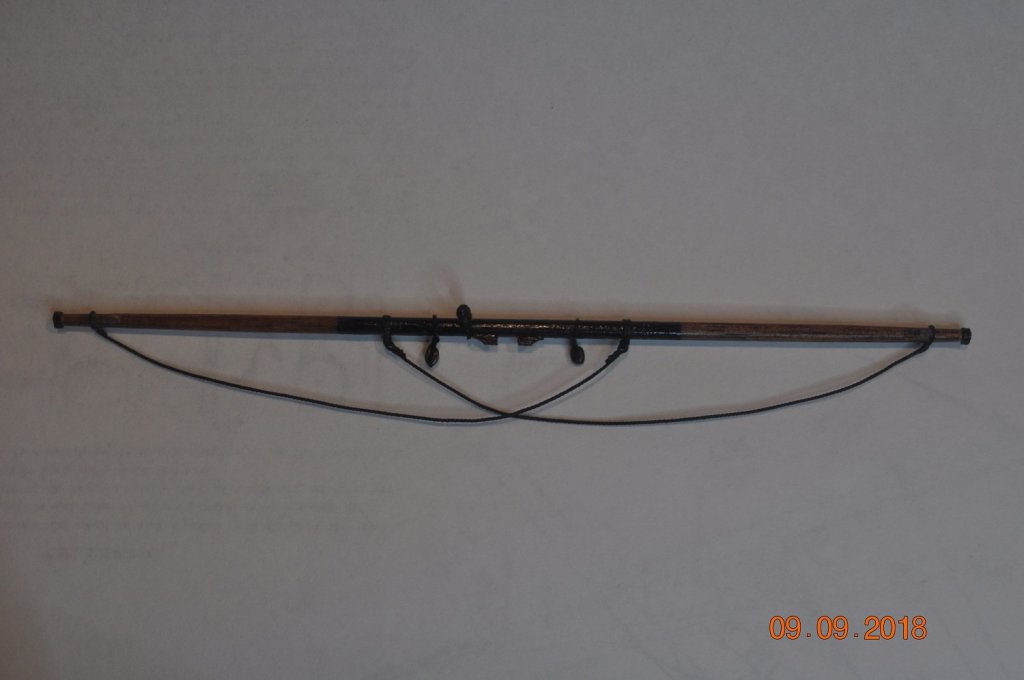
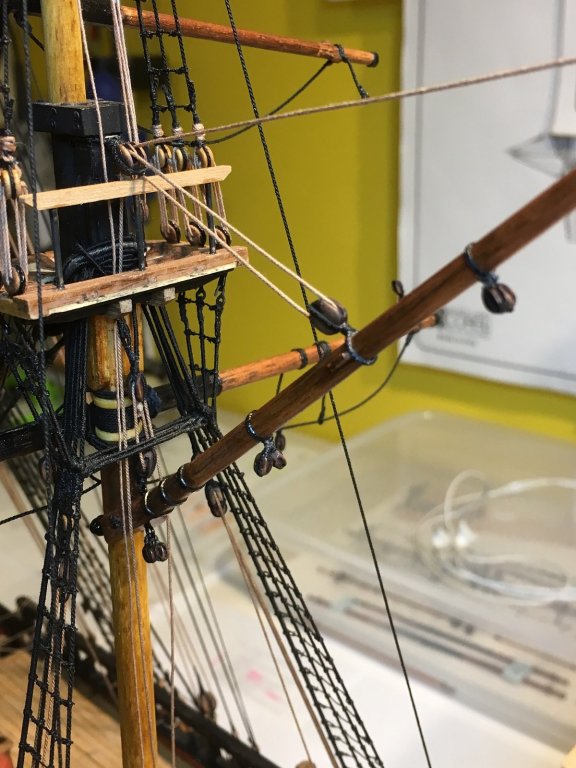
This is the SpiritTopSail Yard fitted out with blocks and horse.
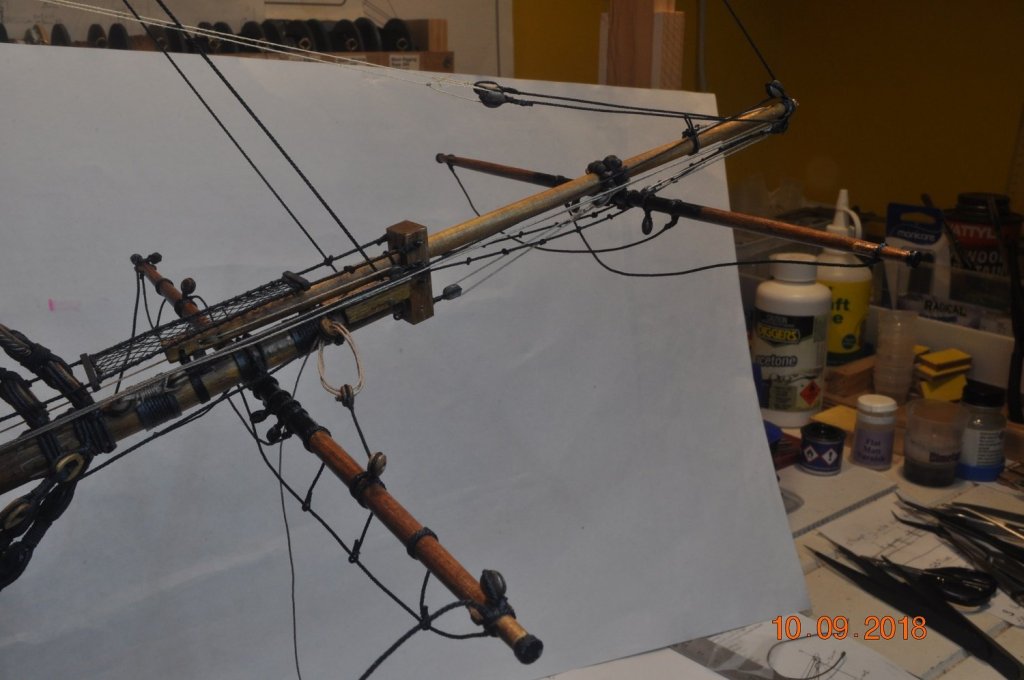
Above the Spirit Yards are fitted to the Bowsprit and JibBoom.
Next to run the various ropes to and off these yards.
- rvchima, Fernando E and BANYAN
-
3
-
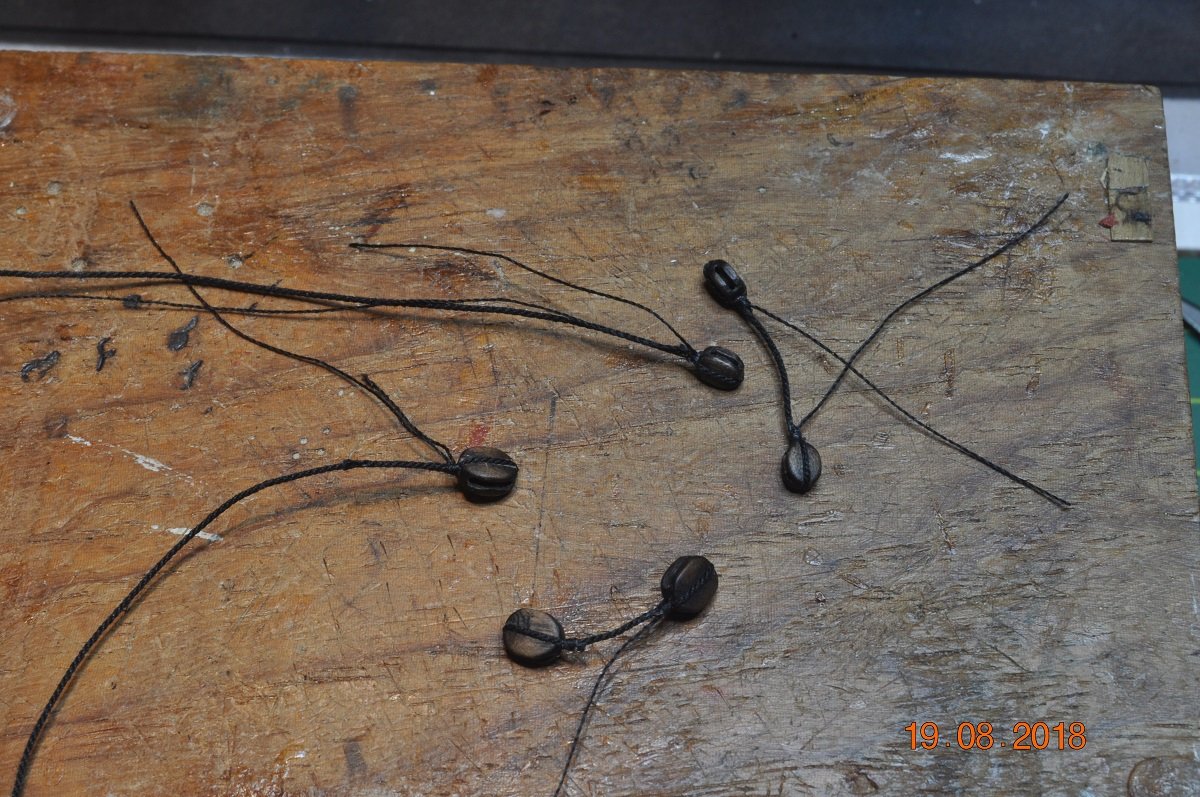
Hi Rod,
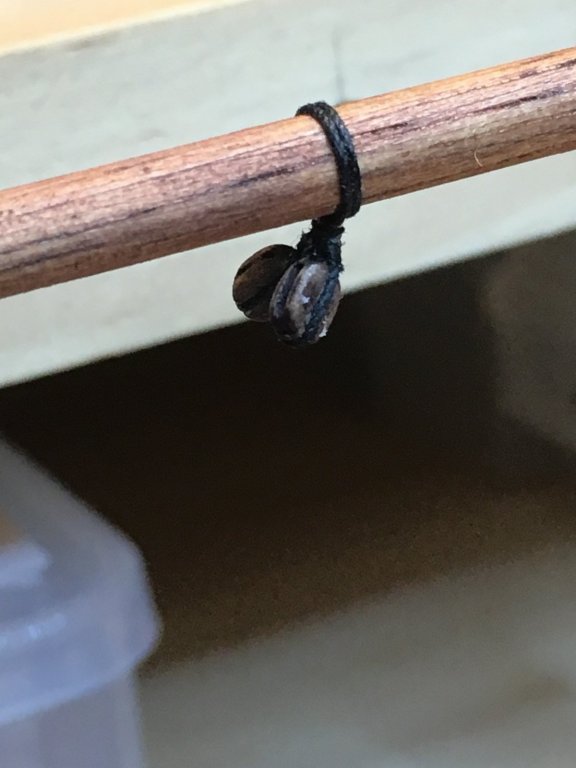
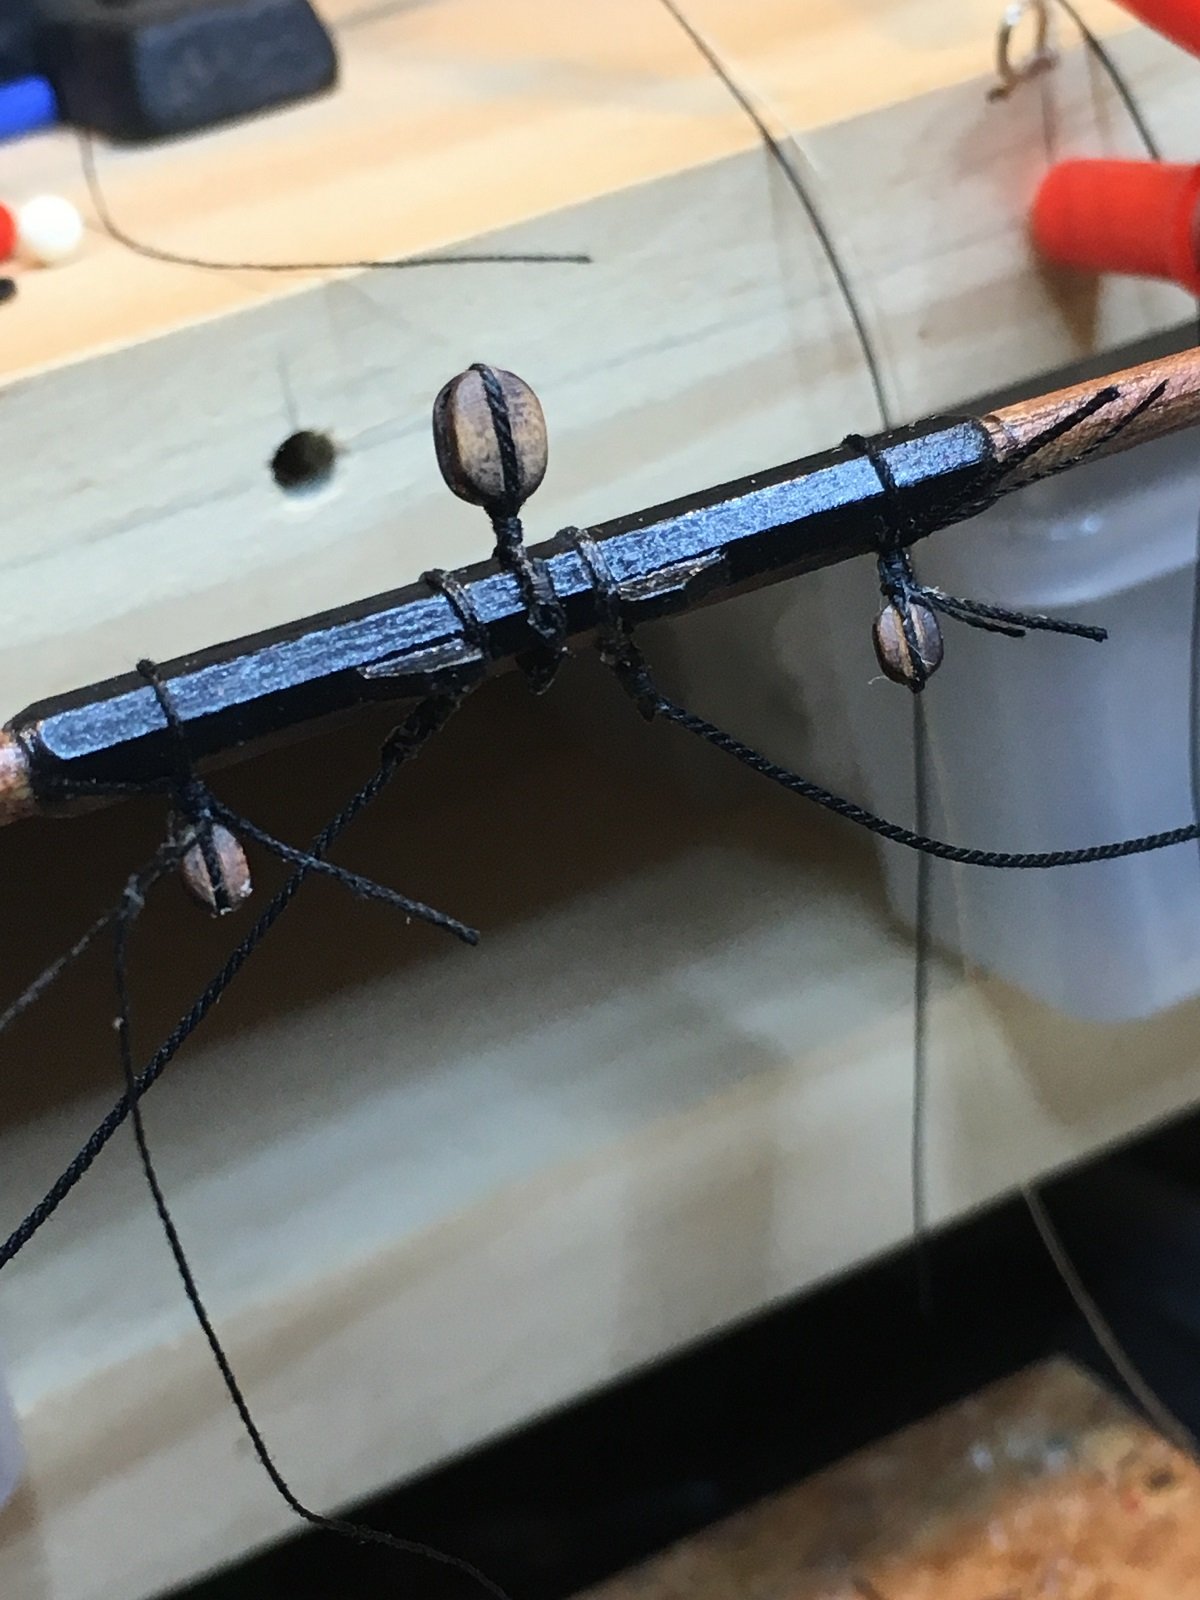
Below is the process I use for making:
1. block at the end of the rope and
2. block with a rope loops to go over yards etc. (One will see what I do know is leave a short tail on the rope about the block)
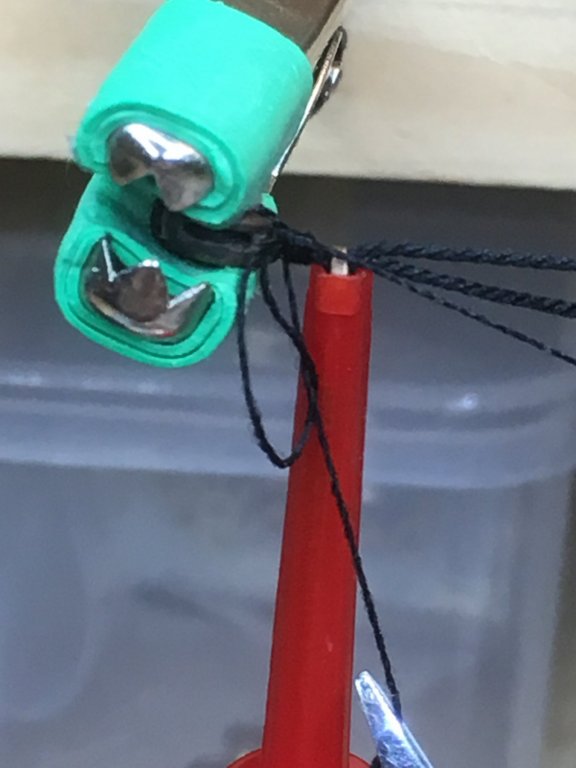
Description below each picture below:

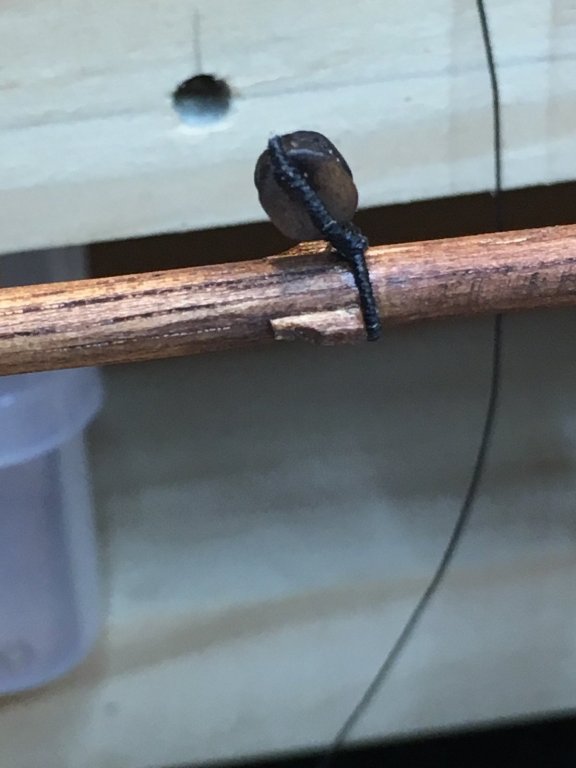
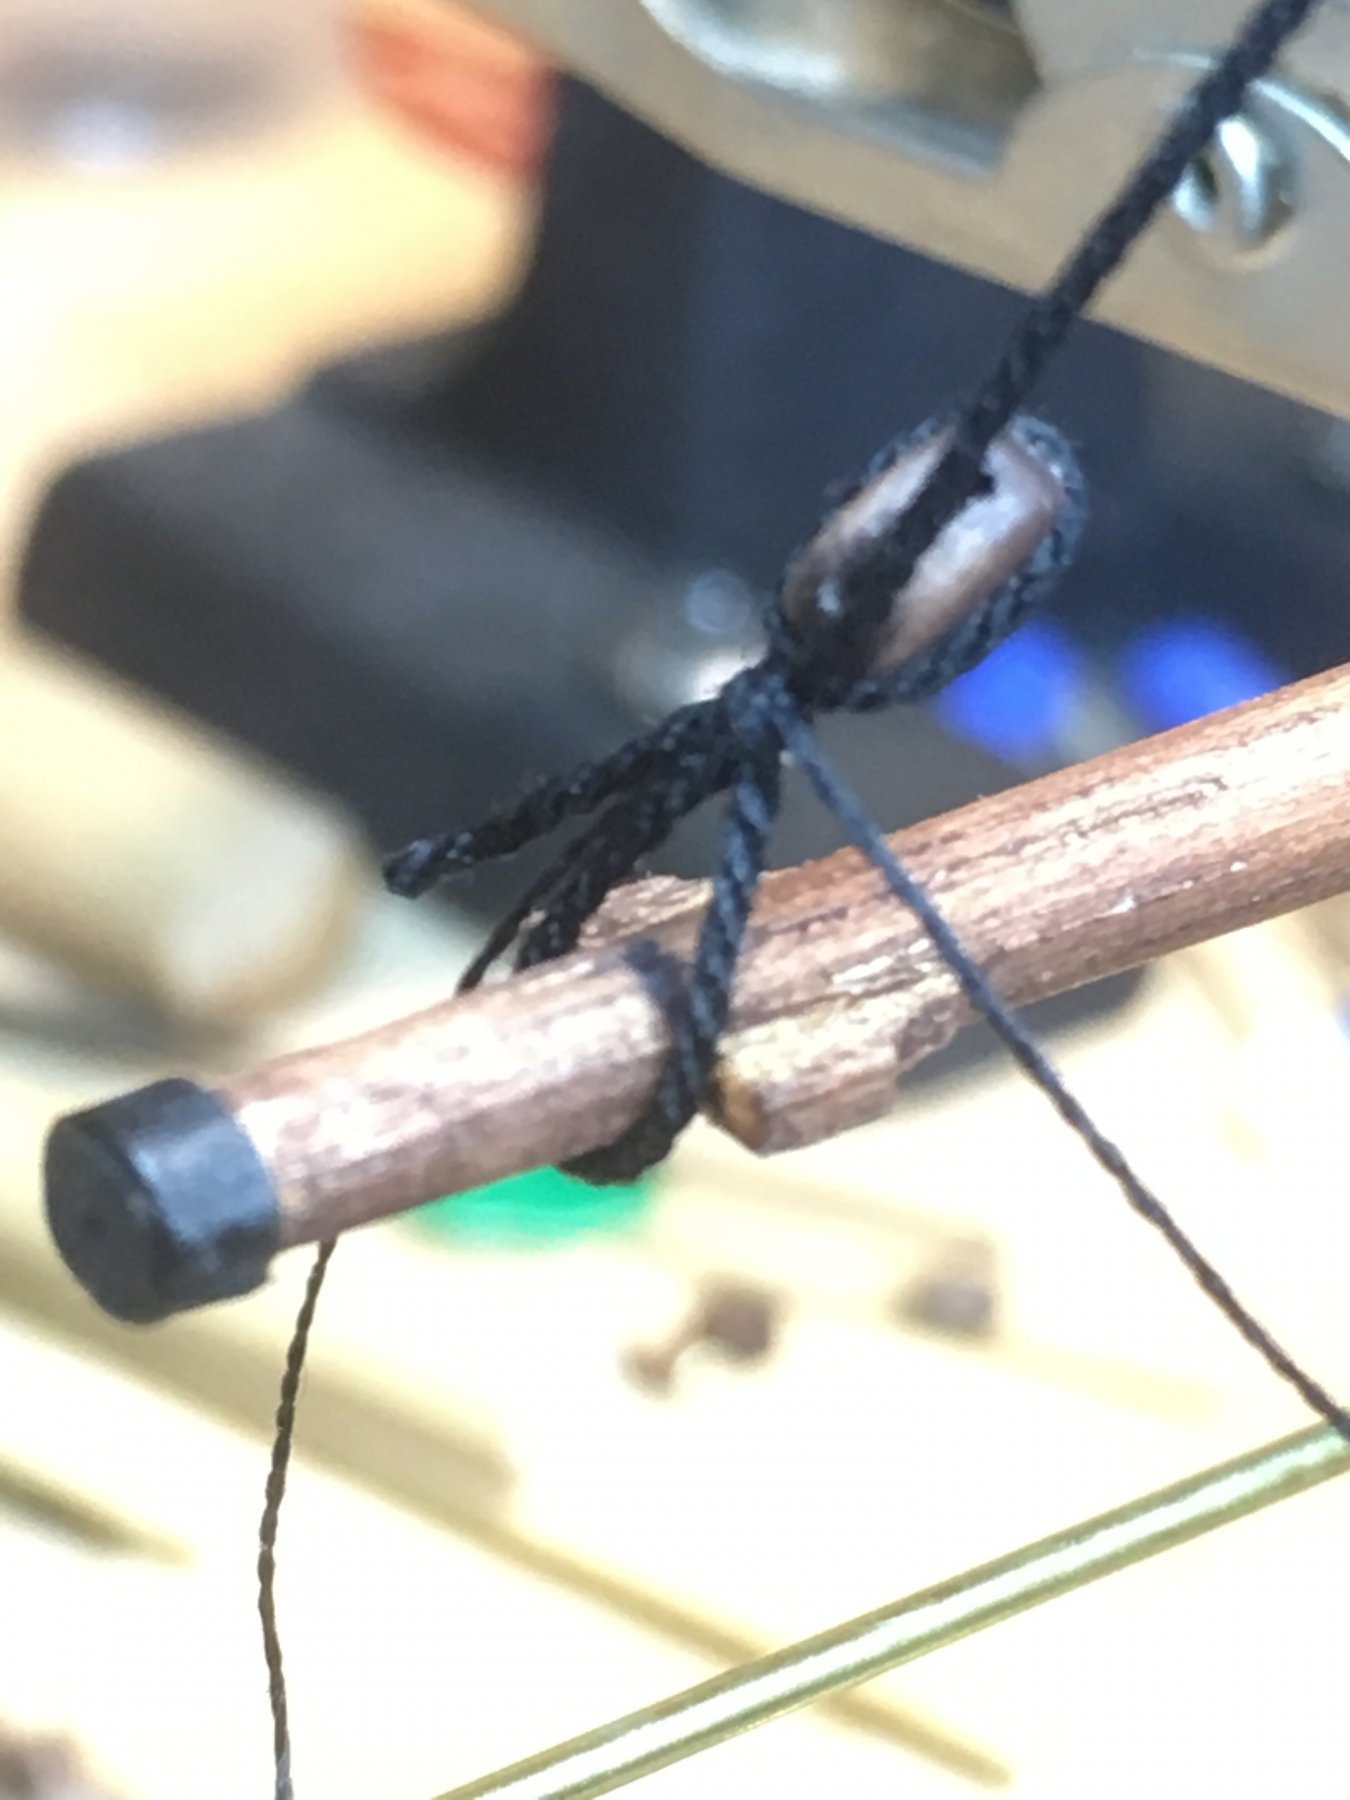
First I groove a blank block where the rope is to go, so it "lies" in the groove.

Next I clamp the block with rope so I can work where the seizing is to go.
I clamp the 2 rope ends with an electrical clamp.

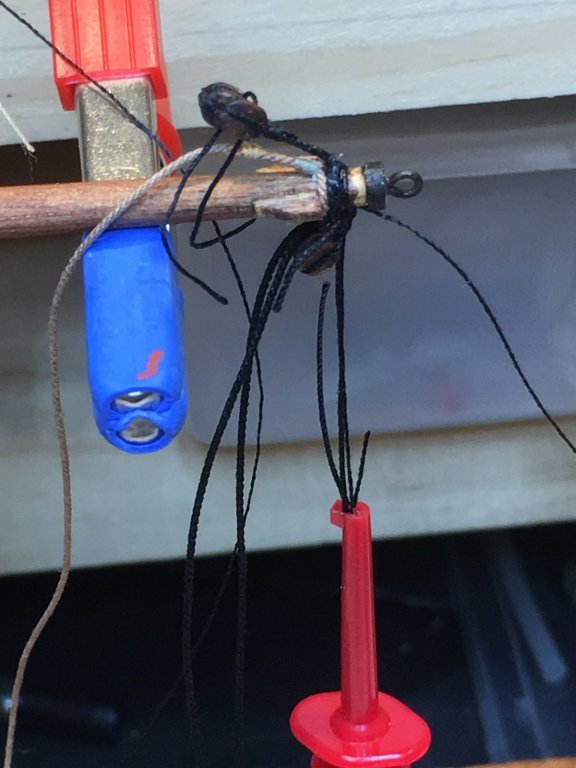
Next I use sewing tread. coming from the right I bring it past the clamps and hold it to form a loop, bringing it back(to the right) over the and behind the 2 ropes between the clamps, bringing it under and forward. At this stage, you could dab some 50/50 PVA H2O mix between the ropes, where the seizing is to go. Note: for block at end of a rope.

The tread is wound around min 3 times to form the seizing.
The thread is then "threaded"(pocked) through the loop on the left(created earlier).
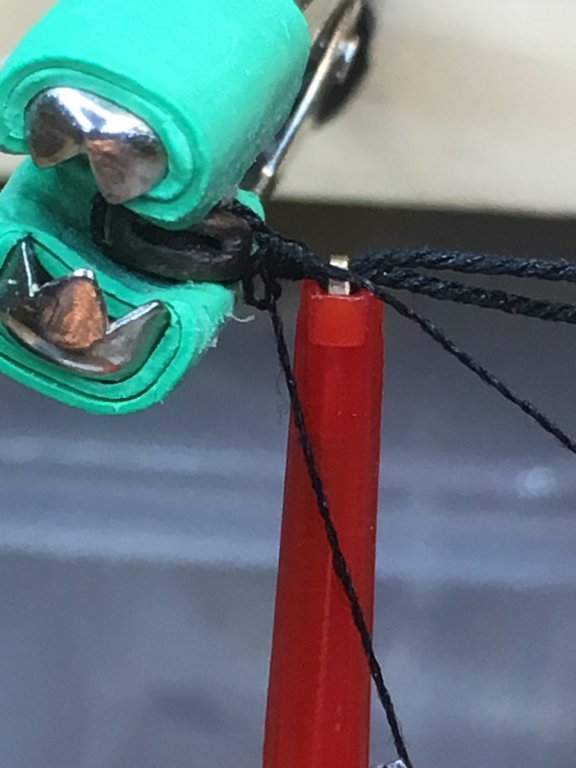
The thread on the right hand side is slowly pulled, whereby the loop is slowly closed up. The aim here is to pull the left thread under the "rings" of the seizing to "hide" the interlocked left and right threads(like if you were to interlock your index fingers) Hope that all makes sense.... !!
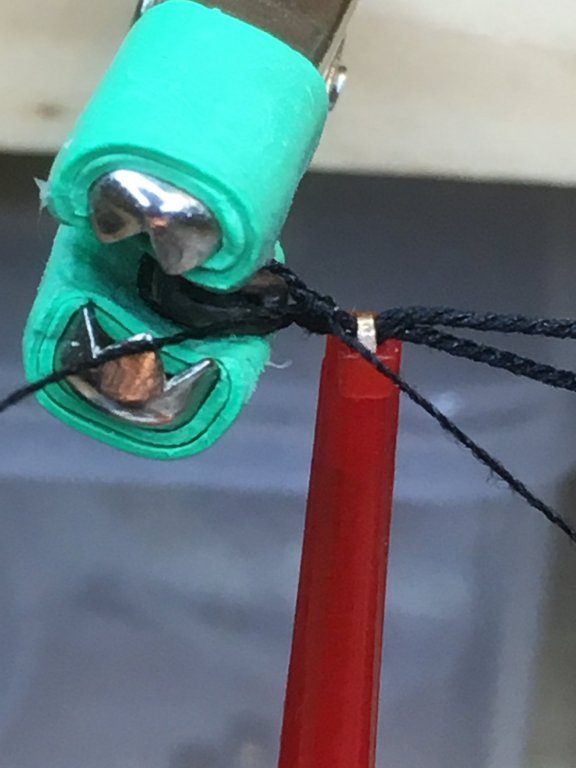
Above the thread is under(or at best tightly locked) the seizing. From here you/I would use 50/50 PVA/water mix around the seizing, let it dry. Later cut the short rope end back to the seizing. At times another seizing can be added a little further on and short end cut.
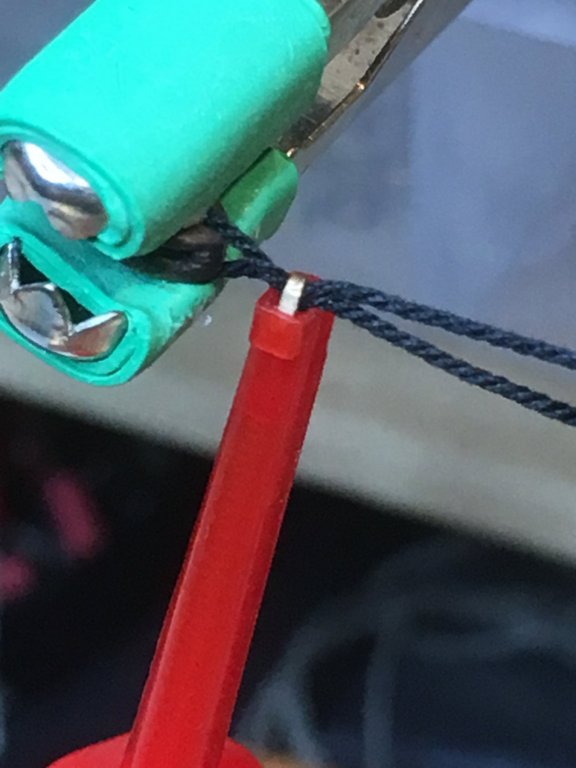
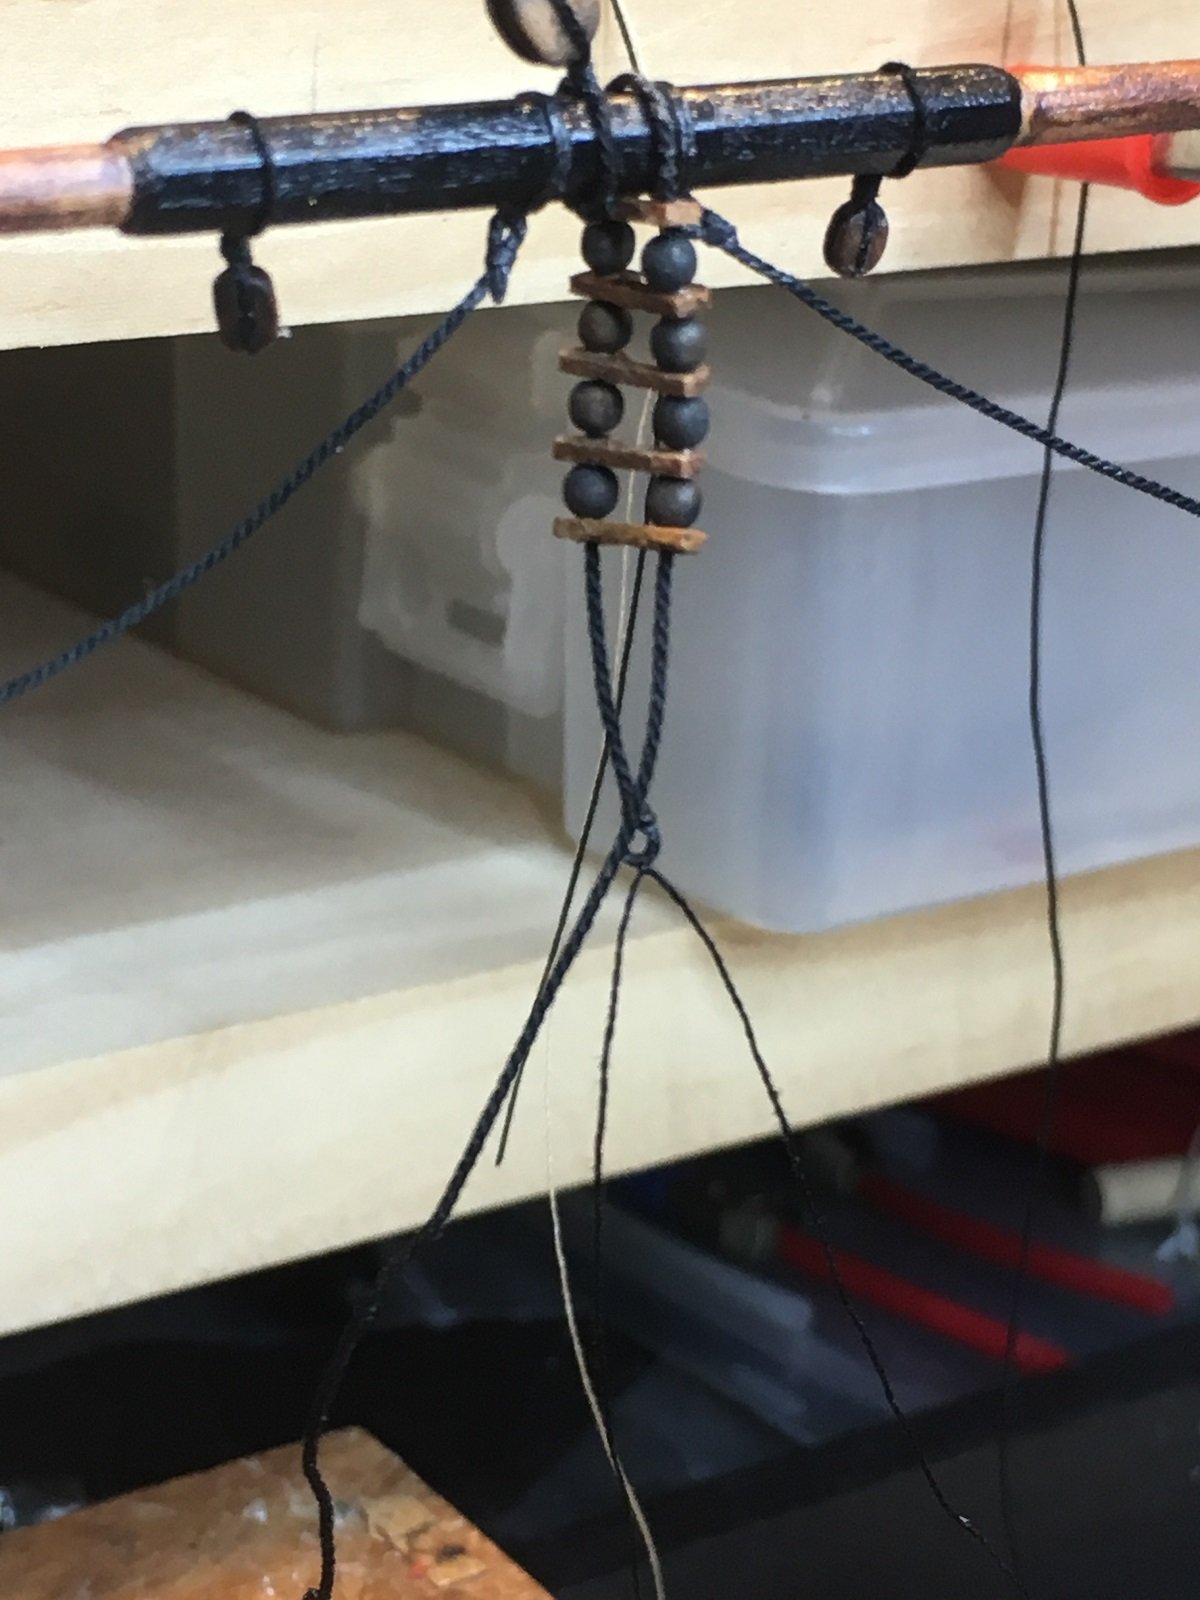
Now the other Pulled Loop Version:

Above all the previous steps have been applied up to this stage.
Note: no glue applied at all.
It is hard to see, however the red clamp has 3 ropes clamped in place, 2 from the block and another from the blue clamp to the right(where the loop was made(clamped)

This pic. above shows things clearly, as the red clamp is removed, showing the short rope from the block(this is the end that you DON'T want to go under the seizing when the loop is tightened onto a yard.
When attaching to a yard, I clasp the sort end(with tweezers) whilst pulling the rope(on the left) to close the loop onto a yard(or what it is intended for)
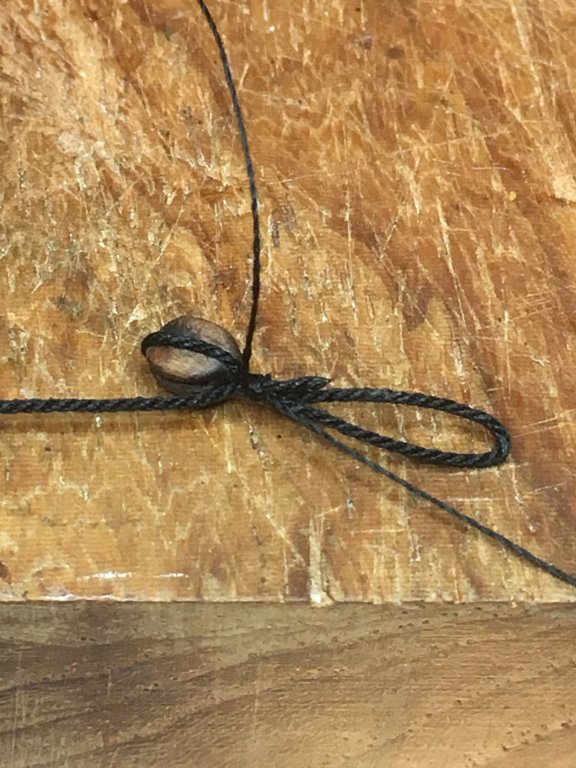
Pulled out of the clamps.
I don't trim the thread off till on the yard, PVA mix dried.

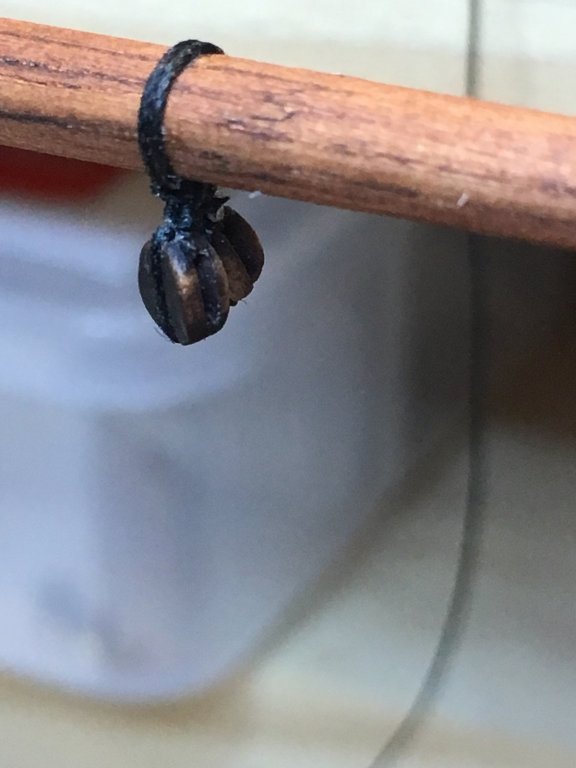
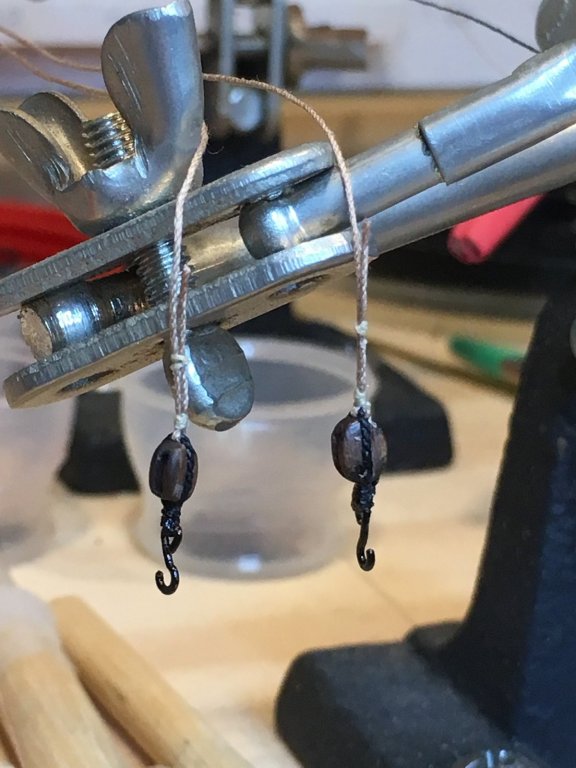
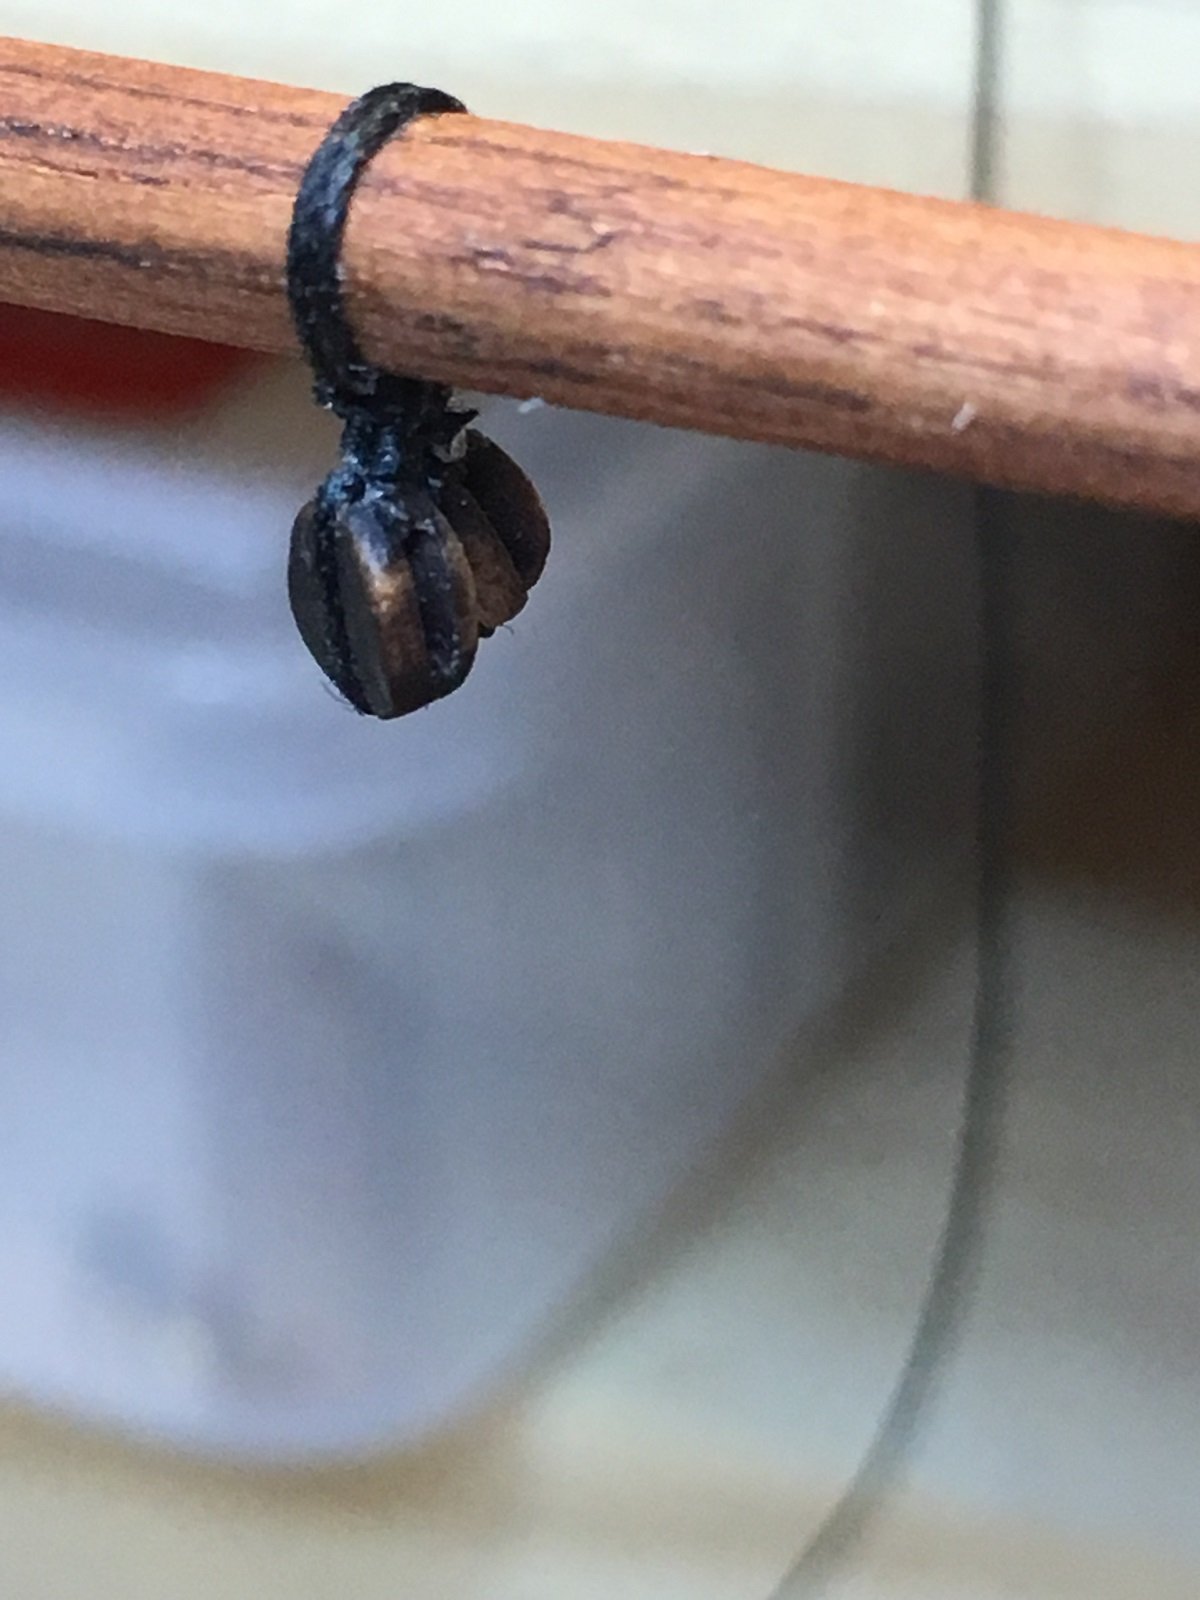
This a recent looped block on the end of a yard. ready to be tightened. I'd pull the rope on top up, whilst holding the sort rope with tweezers, or sometimes I clasp the seizing enough to let the rope pull through. Never has the short rope end run back under the seizing.
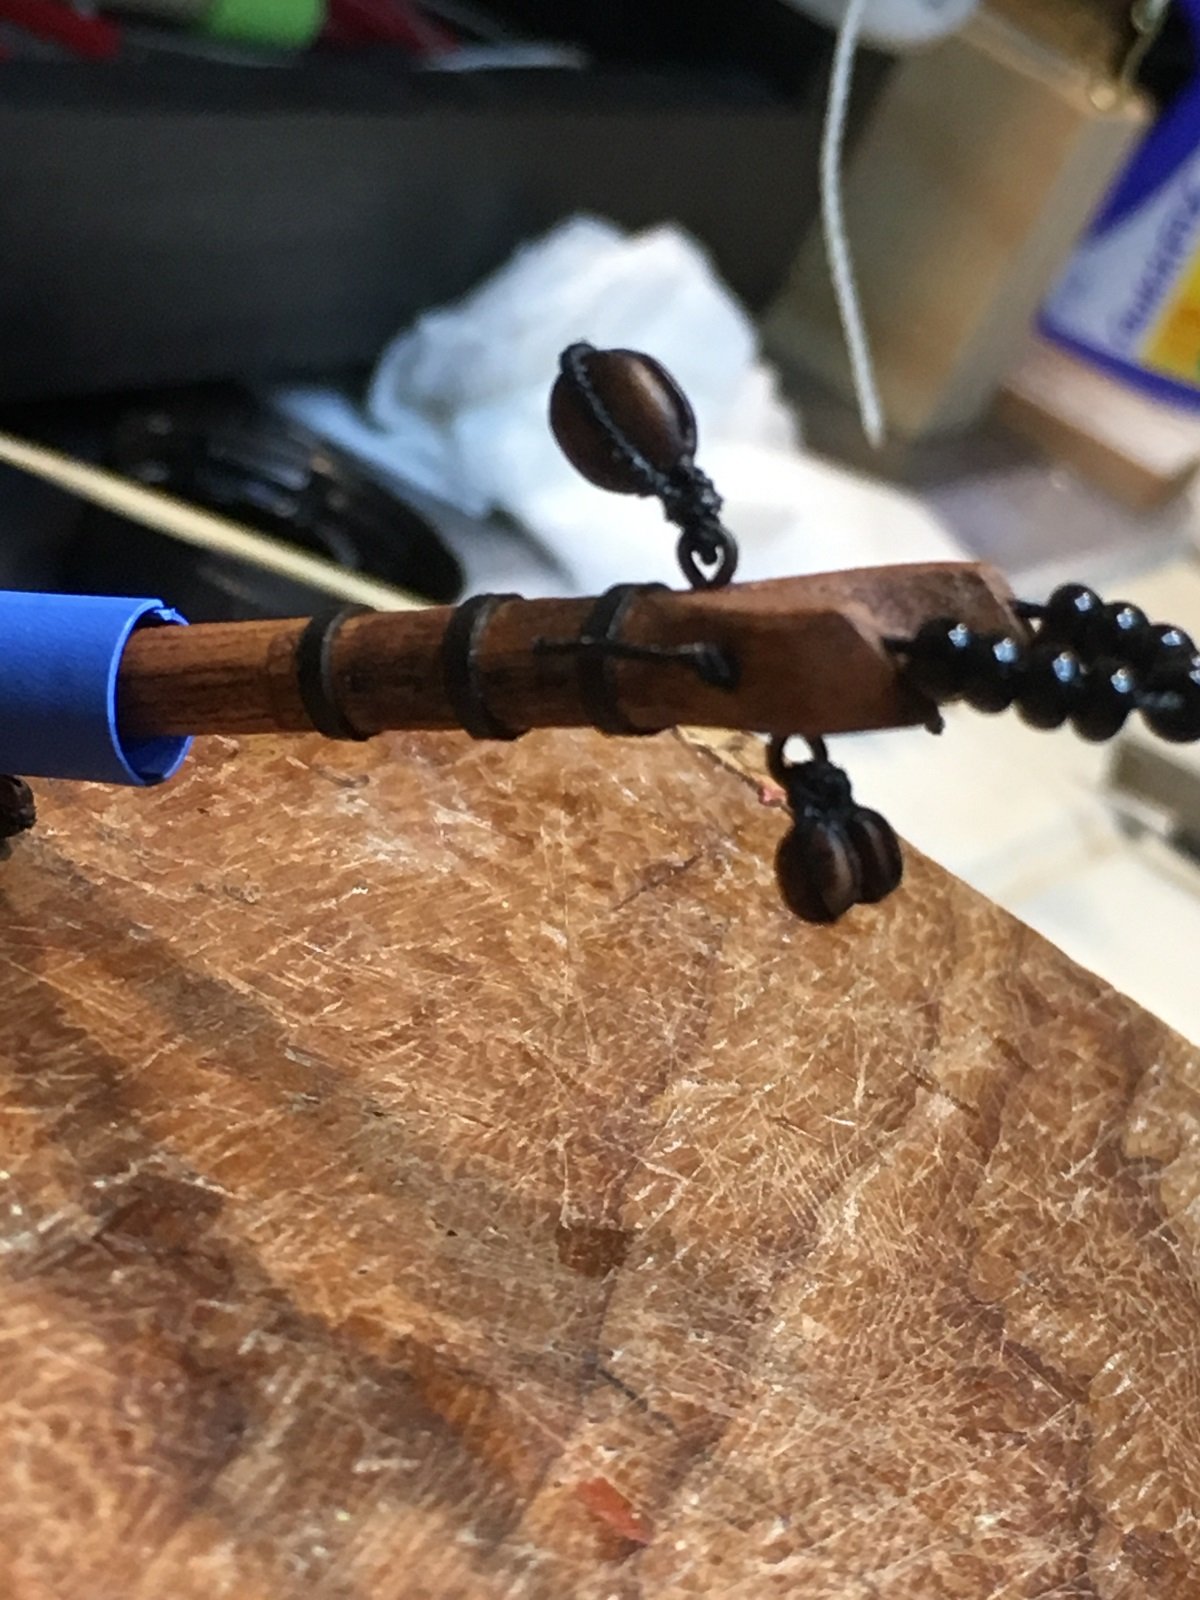
The above is 2 items: thimble and a pendant attached to a yard.
With some practice(after a few dozen, hundred !!) the loops/blocks end up pretty neat.
Well Rod(and others), I hope I've explained the making of blocks with ropes well enough.
Works for me.
- el cid, RGL and Fernando E
-
3
-
You have been busy Rod,
Nice paddles. The remake >> better than all brass.
-
Shipyard Update:
Mast Yards
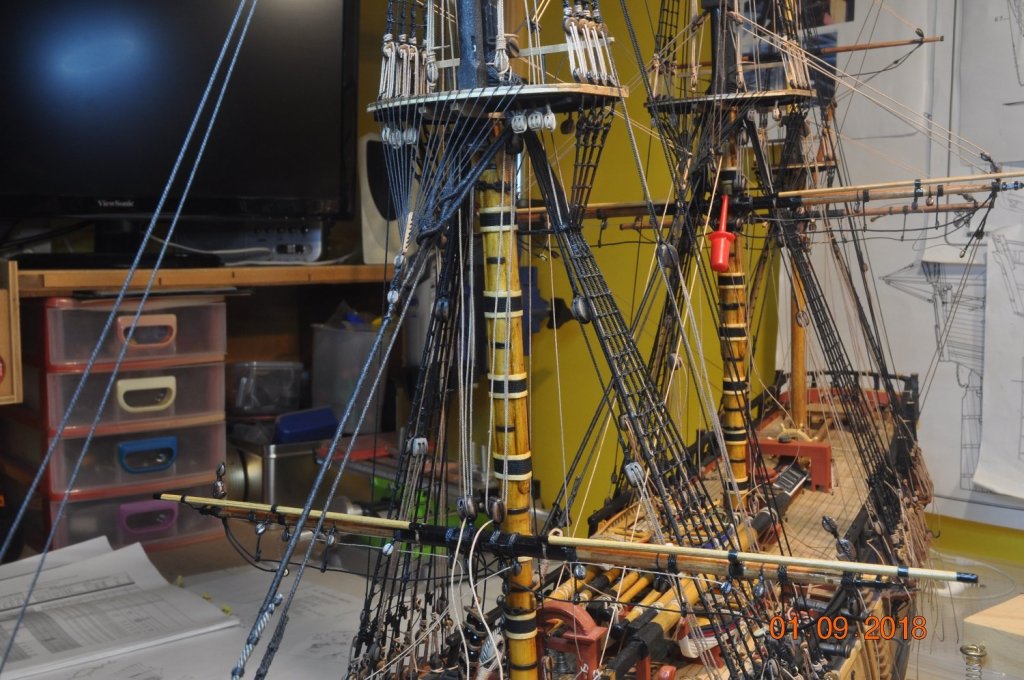
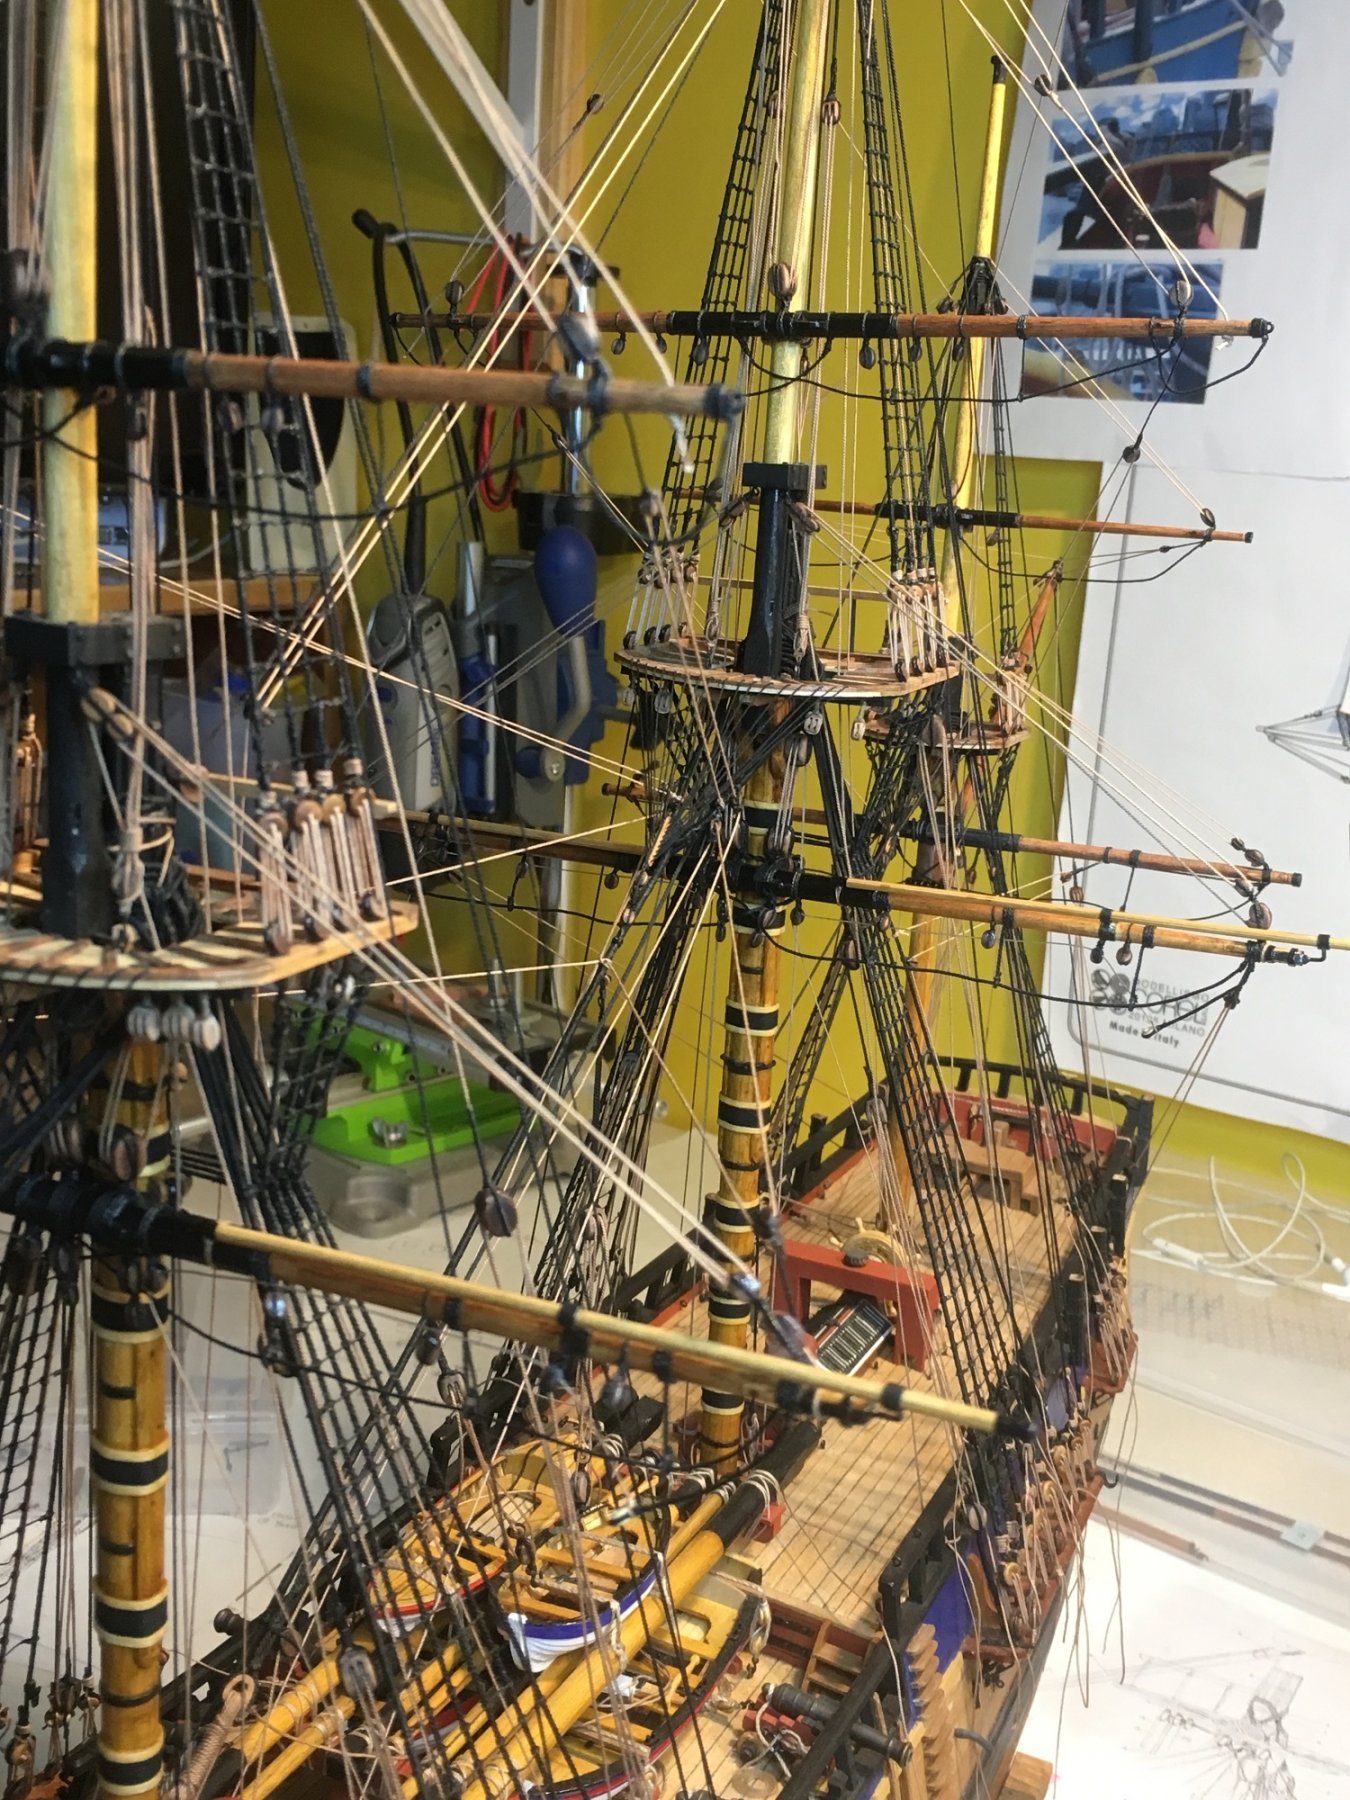
General Pic of the port side mast yards.

Have now attached - to Mast Yards:
- Braces
- Reef Tackle Pendants
- Lifts
- Outer Tricing Lines
Many more i can do, maybe look at some after the 2 x Spiritsail Yards.
- Fernando E, RGL, ccoyle and 2 others
-
5
-
Thanks Fernando, Pat and Rod for looking in recently.
This rigging stage is quiet testing on the hands skills, and I just do a bit at a time.
-
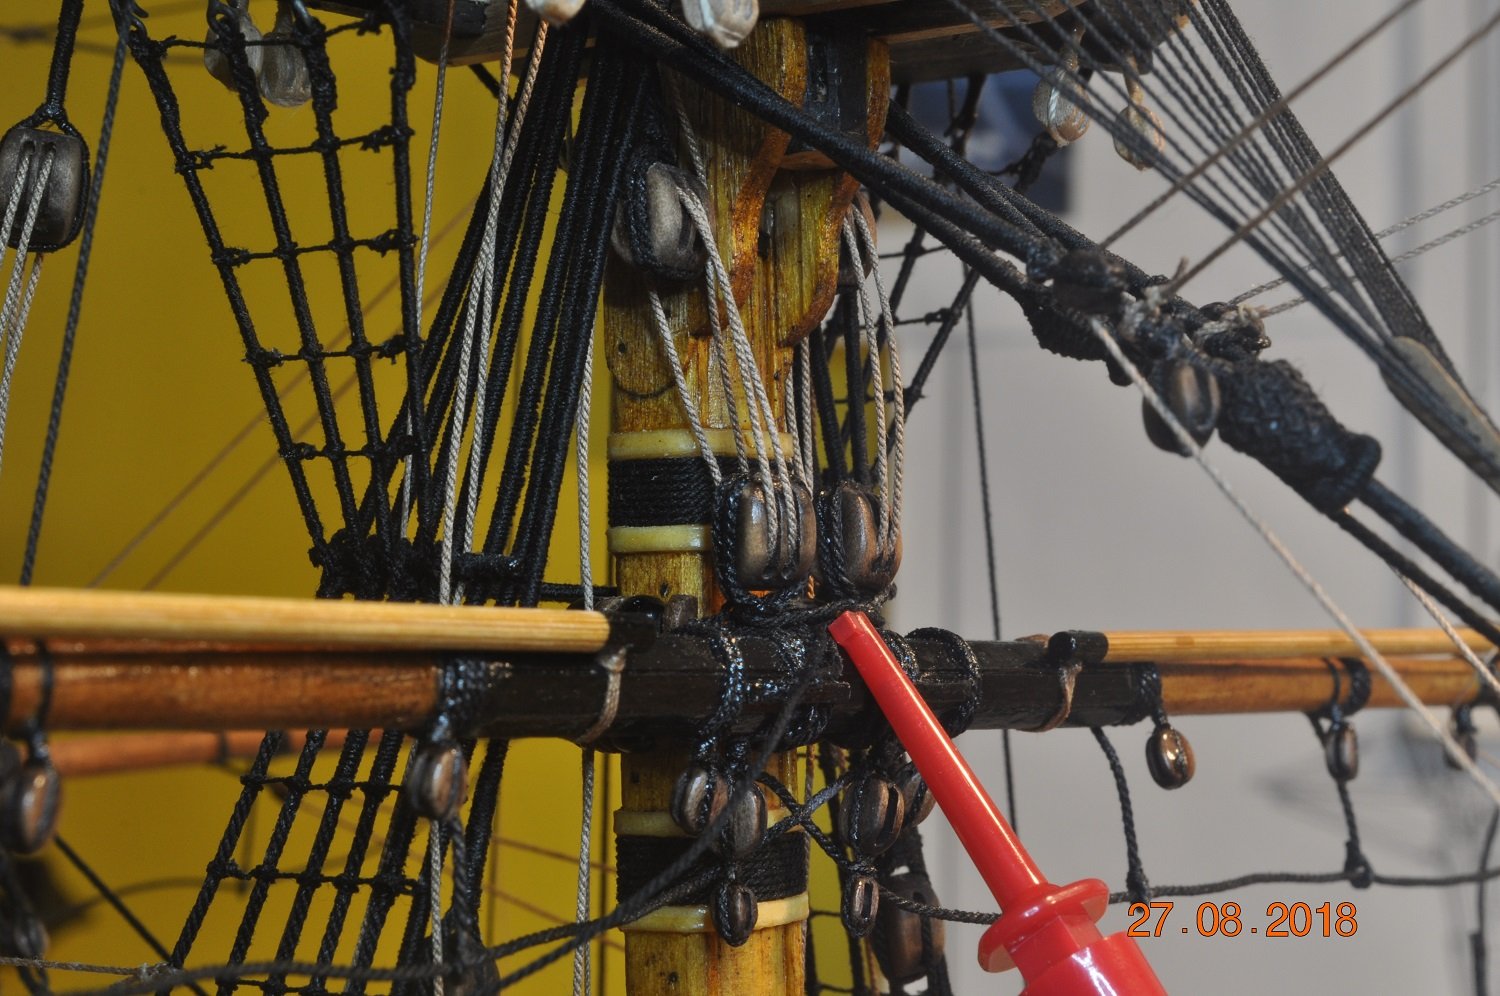
Shipyard Update:
Main & Fore Main Yards
Been a little while for a post.
I made the Main and Fore yards, what seems a long time ago.

I added the studdingsail booms and game each a coat of clear varnish.
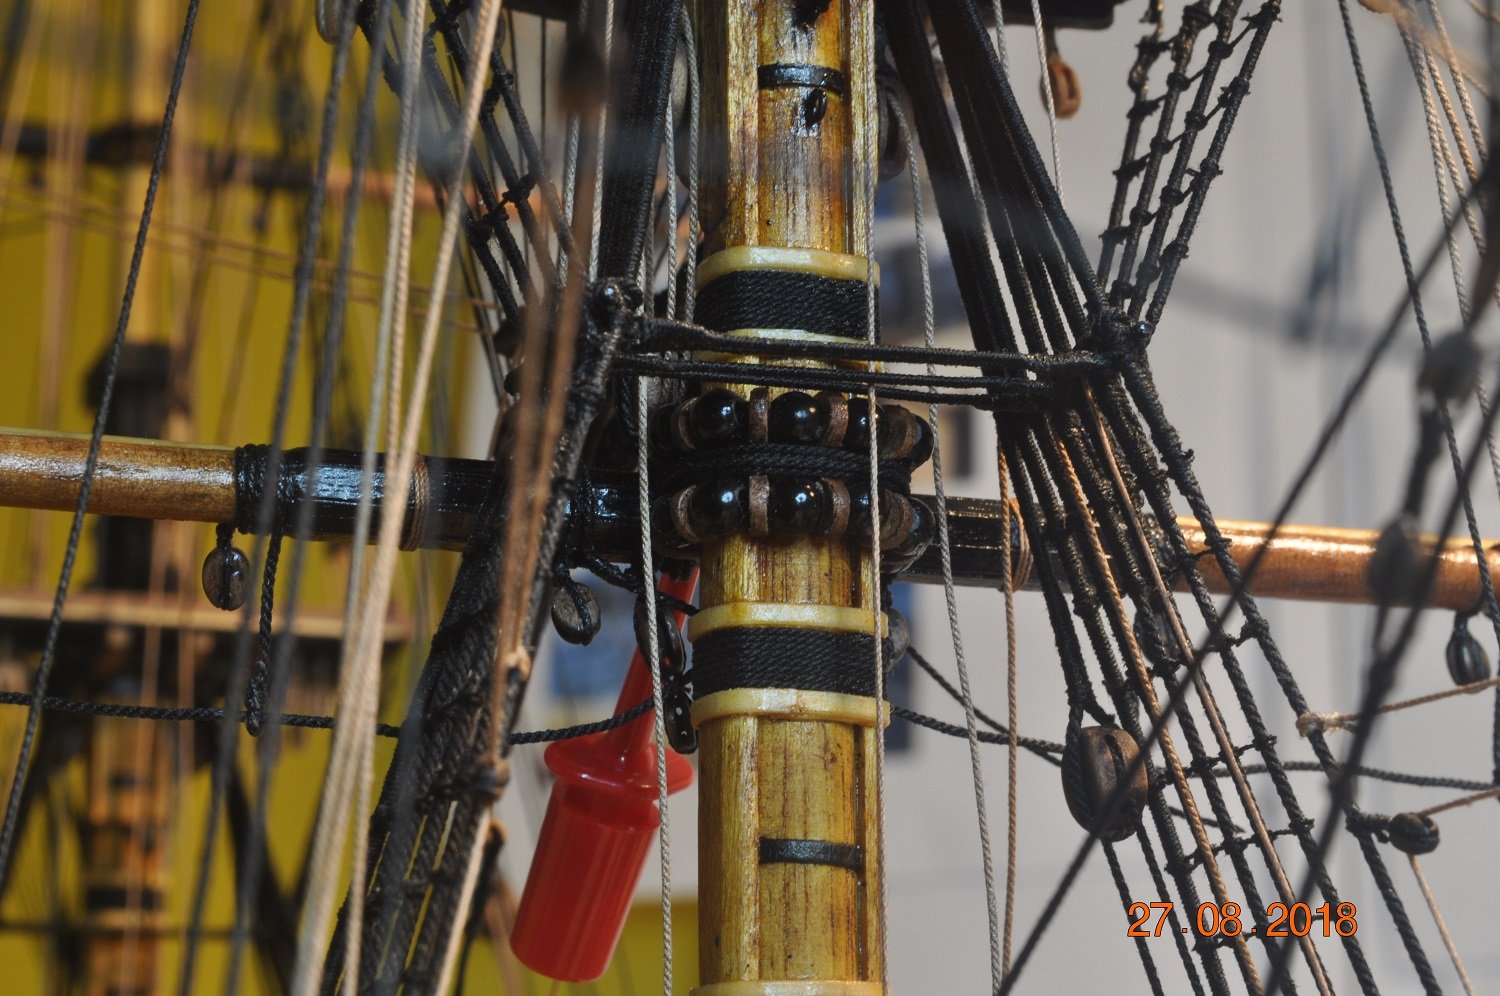
Set each up with the Parrel.

Also added the Outer Tricing Line now, to cut down the "tweezer in the air" duel.
Hoisting the Fore Yard up into position.
Used a electrical clip to hold the Parrel rope ends tight while the glue dries.

Added the Lifts in this Pic.

Back of the Parrels (Main ones in this shot/Pic)

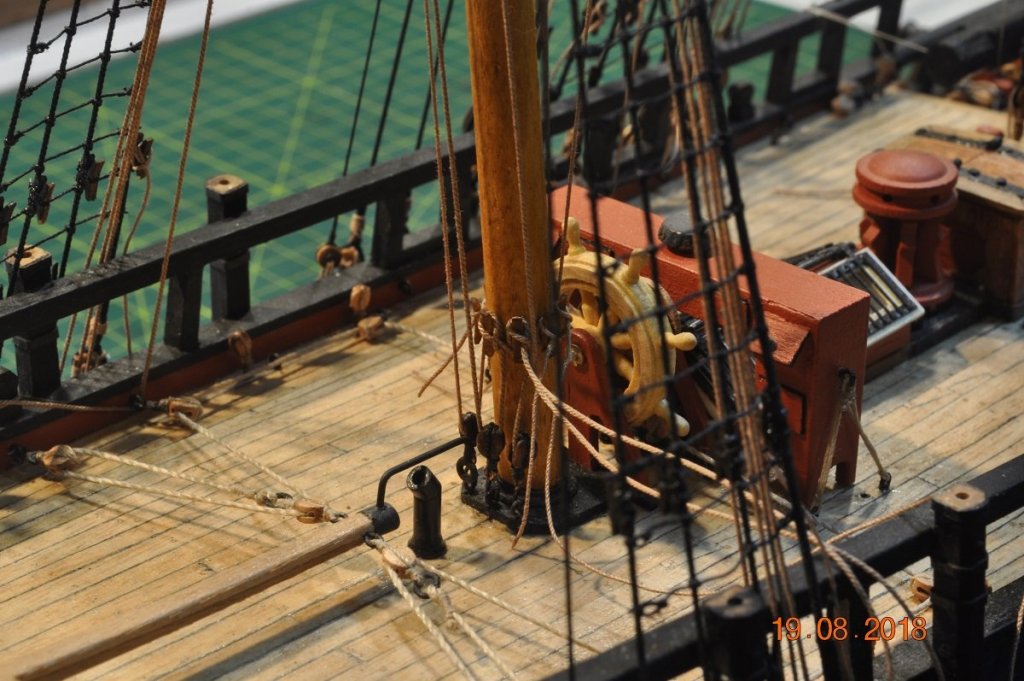
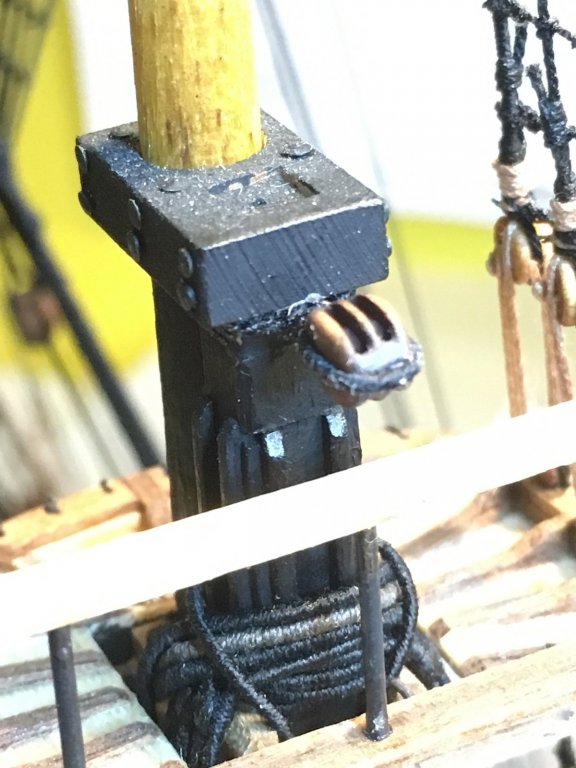
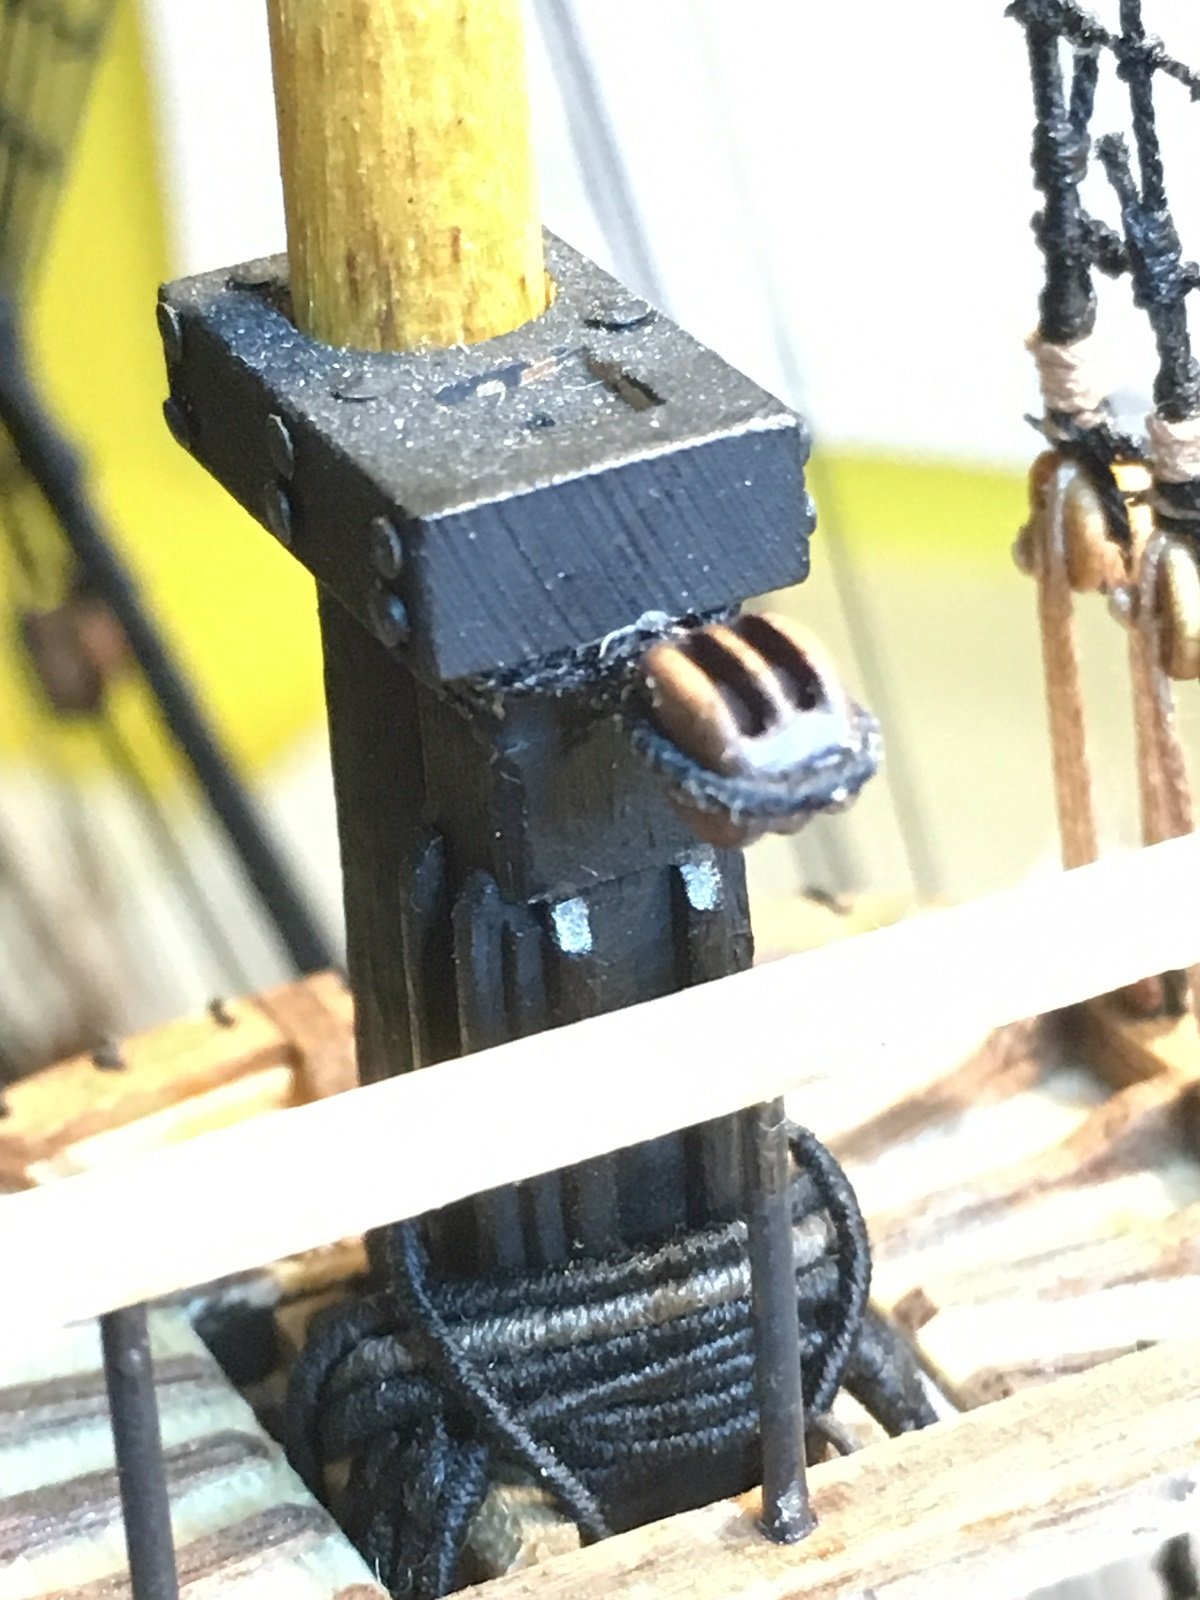
Fore Mast Yard: Bit tricky, but I got the Jeer halyard through the Sheeve in the Bit. The hole and sheeve I had allowed some years ago, was just big enough. I ended up using CA on the end 10mm of the halyard, let it dry then tapered it so I could feed it in through the bit shaft. Was then able to pull the halyard though.
Main Mast Yard: Jeer halyard through the Sheeve in the Bit.
- BANYAN, Fernando E, RGL and 1 other
-
4
-
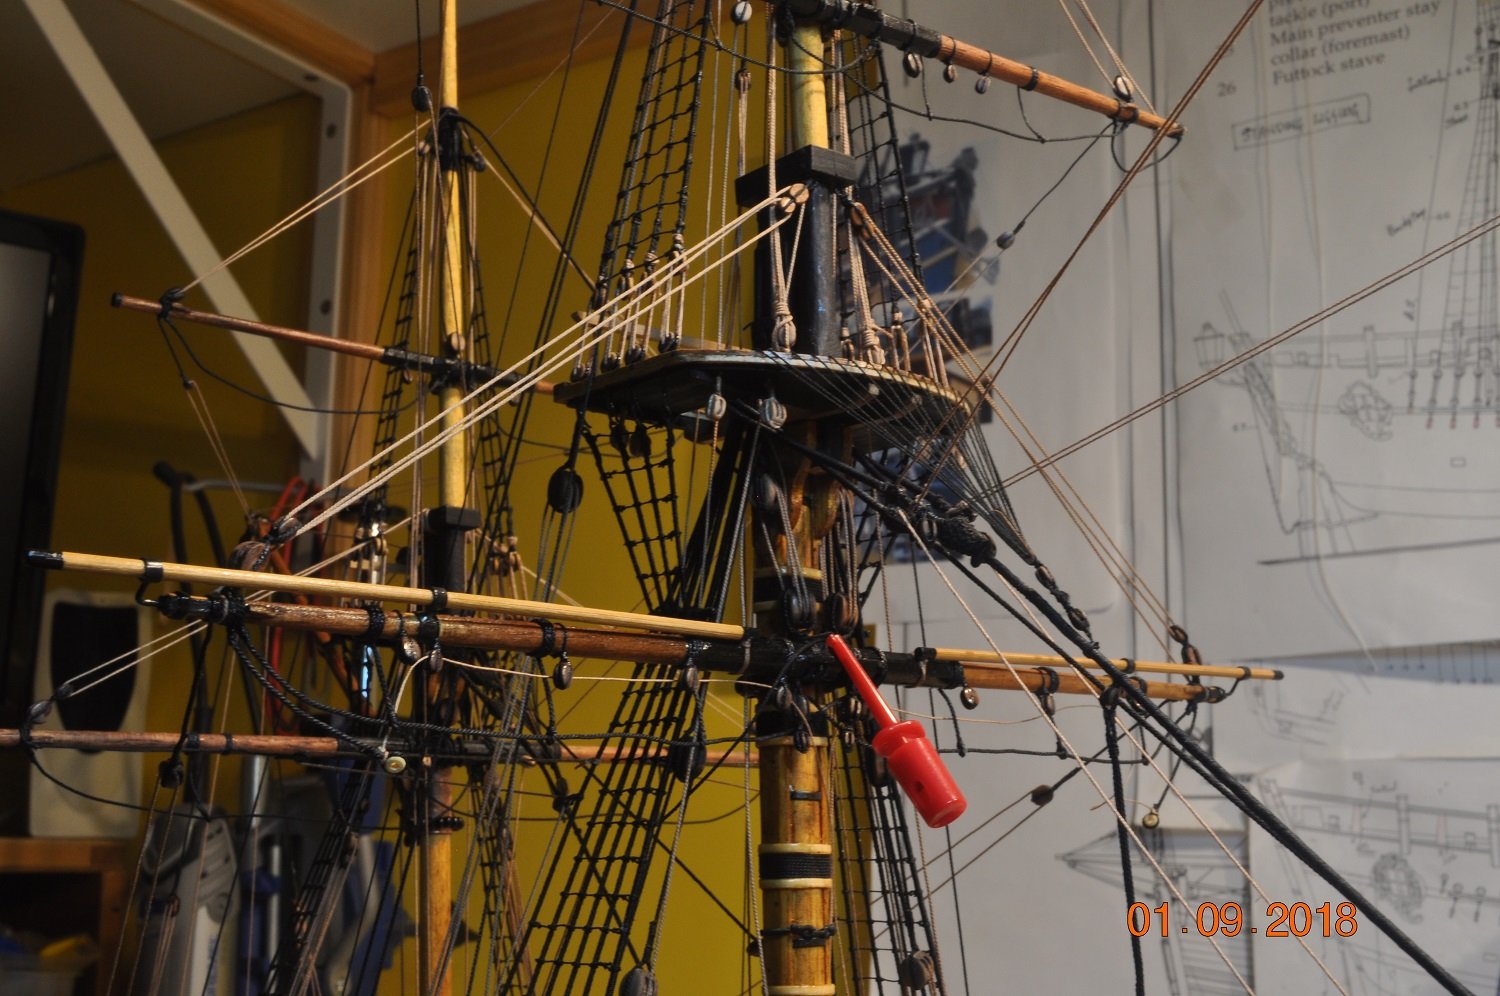
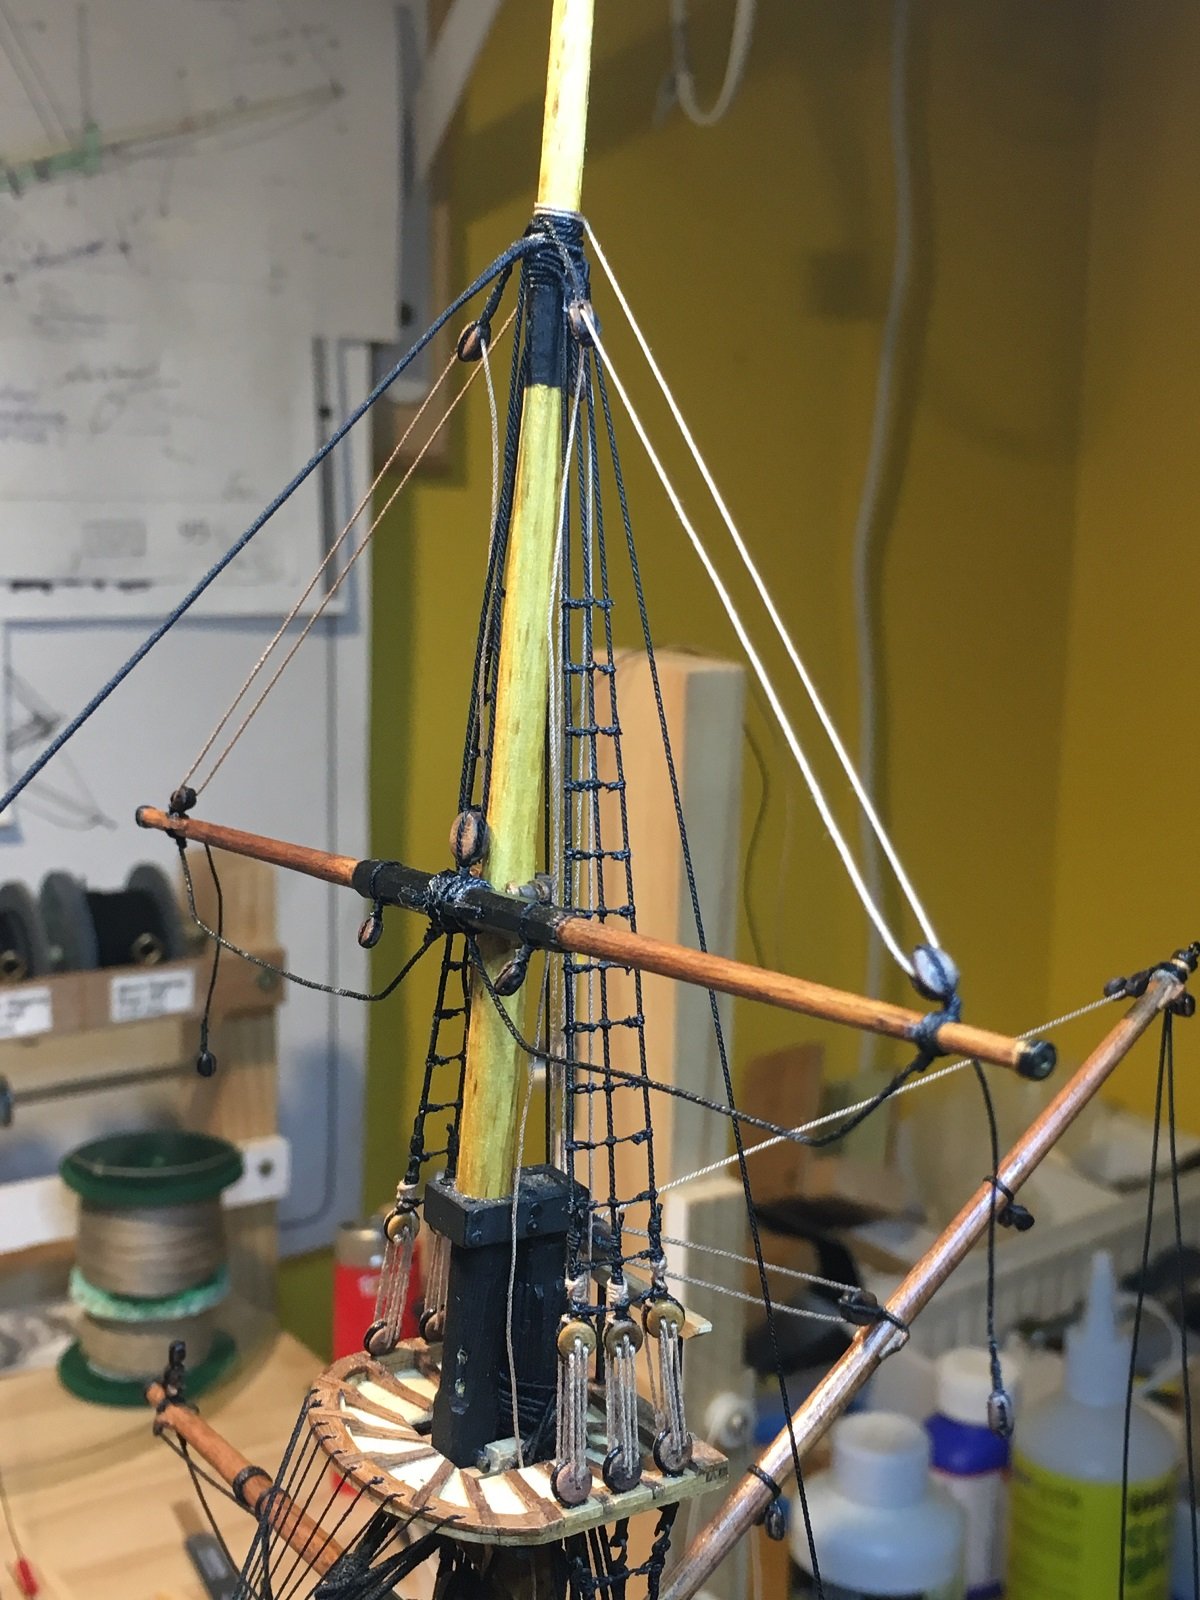
Shipyard Update:
Lifts, Braces & Reef Tackle to the Upper Yards
Main and Fore TopGallant & Topsail Yards
Mizzen Topsail & Crossjack
So the boys in the shipyard have been busy adding the Lifts & Braces to the above, along with some Reef Tackle pendant & falls(to the Topsail Yards)
Some blocks were already on the mats(e.g. for the Main Topsail braces on the Mizzen)
Many have been added by making single or double sets in 3mm, 4mm or 5mm blocks. The Topgallant in 3mm Topsail in 4mm and the Main Yards will have the 5mm blocks.
Below are 4mm and 5mm sets

Below are various shots of the recent additions:

Fore Topsail Yard with Lifts, Reef Tackle & Braces back to the Main Mast, Main Stay
Main TopGallant braces back to the Mizzen
Main Topsail Yard with Lifts, Reef Tackle & Braces
Mizzen Topsail yard Lifts in the background.
Mizzen Topsail Yard with Lifts & Braces back to the end of the Gaff.
Gaff with Lift.

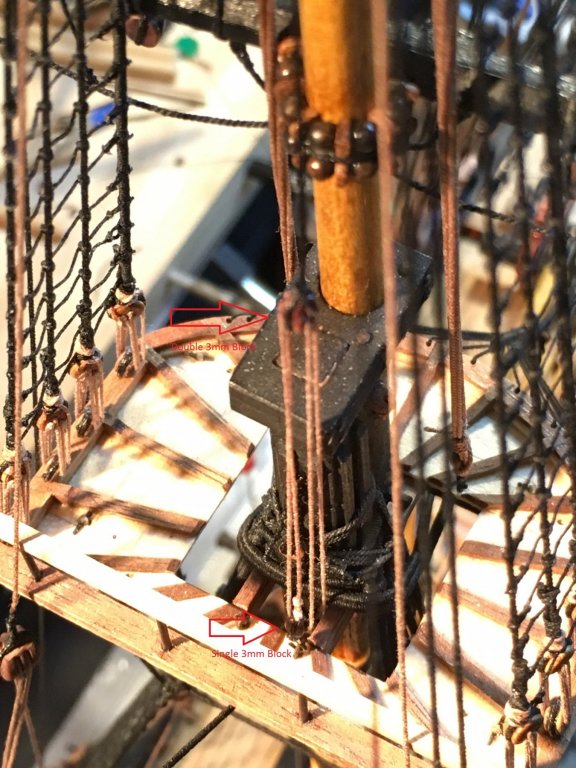
Main Mast Cross Trees: 3mm single blocks added for the Fore Topgallant braces which run down the Stay to 2 more blocks(below shot)
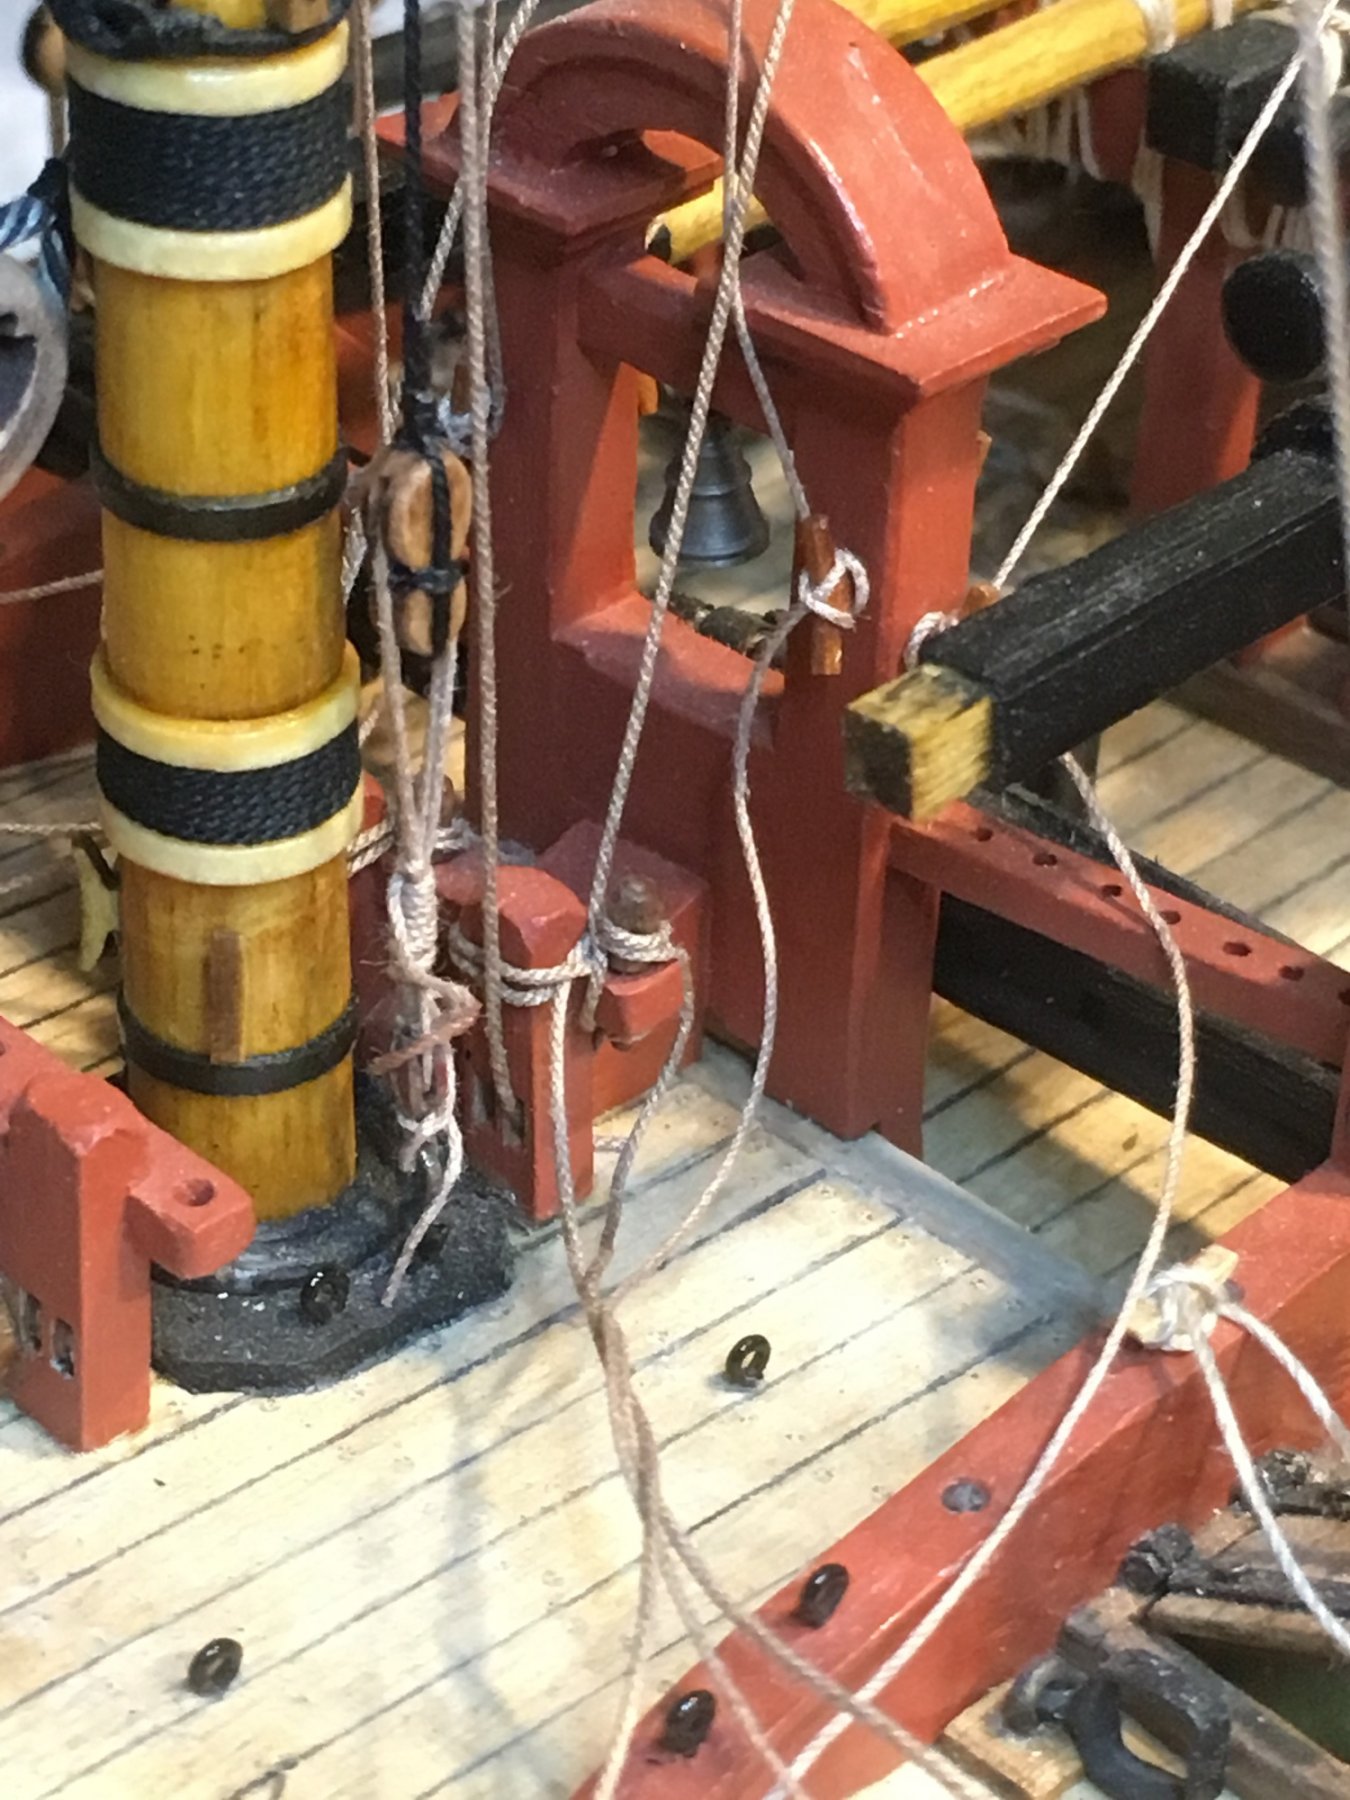
2 x 3mm single blocks added to the Main Topmast Stay, where the Fore Topgallant braces run down to cleat - on side of Bell Belfry.
Fore Topsail Braces back to the Main Mast, Main Stay
Main Mast, Main Stay blocks(in RED) 4mm for the Fore Topsail braces.
Additionally have already added(in Blue) a 5mm for the Fore Yard braces.
Mizzen Mast: over the Crossjack are the pendent for the Main Topsail braces(in RED). Crossjack pendent blocks(in BLUE) for the braces(in GREEN) which run froward to the Main Mast rear Shroud
Mizzen Topmast, 2 x 3mm blocks added to forward shroud for the Main TopGallant braces to run down.

Fore Mast TopGallant Yard braces back to the Main Mast, Stay blocks.

Port Main Shroud Cleats: Braces are tied off to the cleats on the shrouds. Bit messy, a lot of cleanup to do down the track.
I added another set of cleats on the rear(6th) shroud for the Crossjack Yard brace.
Starboard Fore Mast shrouds: Cleats for braces. I added another set of cleats on the rear(6th) shroud. you can see the different lashing used.
Bottom of the Mizzen Mast, cleats filling up.
Next will probably add the 2 Main yards.
- oneslim, zappto, Beef Wellington and 4 others
-
7
-
Pat,
Your doing a fabulous job on her...
-
Hi Blacky,
Looks pretty dam good that 2nd planking. A sand should bring it up nicely.
Looks like you will glue the Wales over this layer ?
Not sure for the OcCre Kit, the channels on my Corel kit(not that it was that great for details) and AoTS show a thicker timbers, the same depth as the channels, in line for the 3 x channels per side. How you going to attach them ?
-
Vinnie,
Good start, plenty of more to go.
-
Shipyard Update:
Top Gallant Yards for Main and Fore Masts.
Got the boys to hoist the Top"G" Yards.
Each had:
- brace arm at each end with a toggle hole
- Sling Parrel: the "loop" end was lashed onto the yard before the fitment to the mast-top
- one of the horses was attached both sends(onto the sling-parrel loop and outer yard end)
- the other horse just to the outer yard end, the inner end of the horse attached to the lashing end of the sling-parrel
- the halyard with double block run through the back of block under the hounds

Above: Fore Top Gallant Yard in place
Above: Main Top Gallant Yard in place
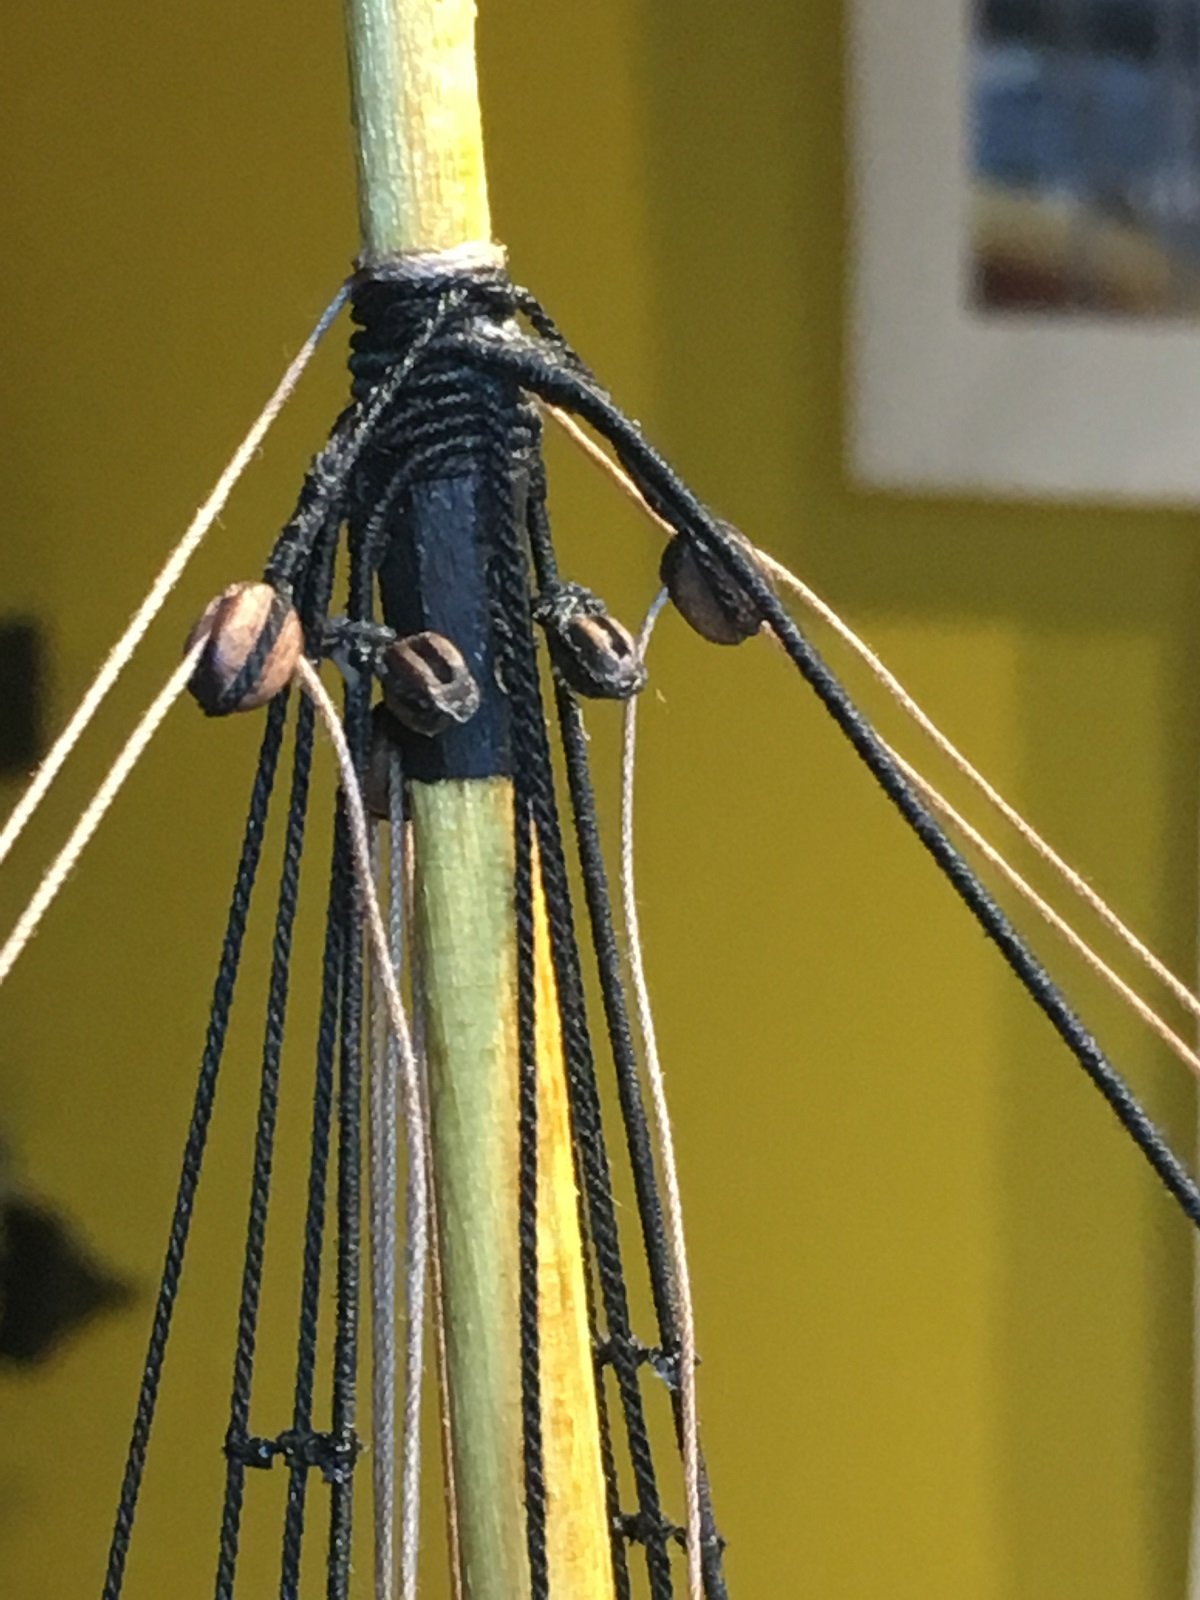
Above: Top Gallant Yard - middle of the yard with Sling-Parrel, horses and halyard attached.
Above: Top Gallant Yard Halyard - each as a block and tackle, 3mm double block attached to the lower end of the halyard, tackle with a 3mm single block with hook at the bottom to an eye bolt into the Mast Top. the tackle rope down to Mast Bits.


Above: Halyard Belaying - tied off to the middle of the Mast Bits(Main and Fore) to Belay Pin. What a job that was.
Onto Main Yards. Had them made months ago, time to get them on I suppose.
- BANYAN and Fernando E
-
2
-
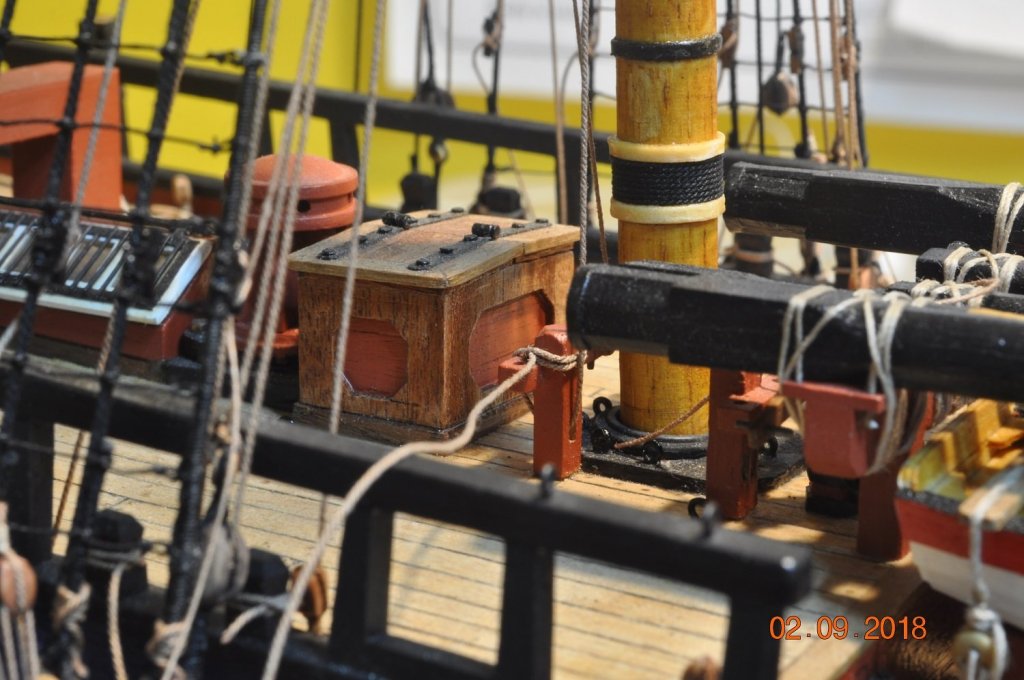
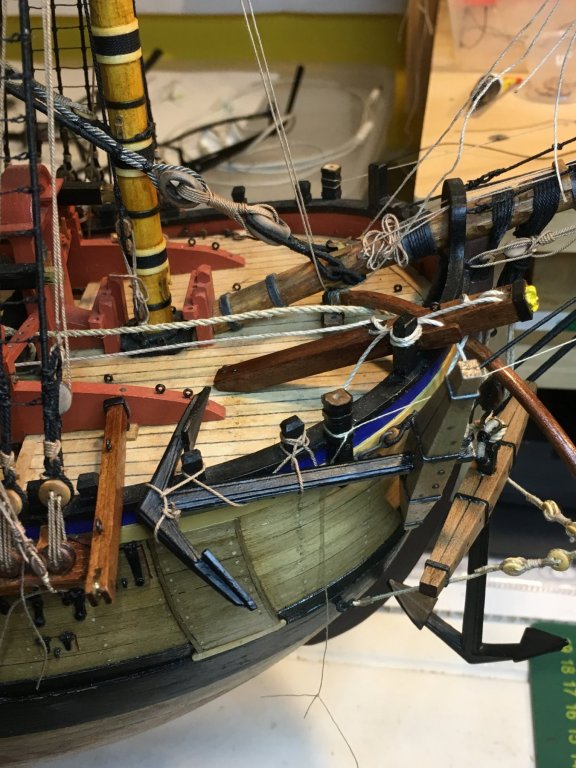
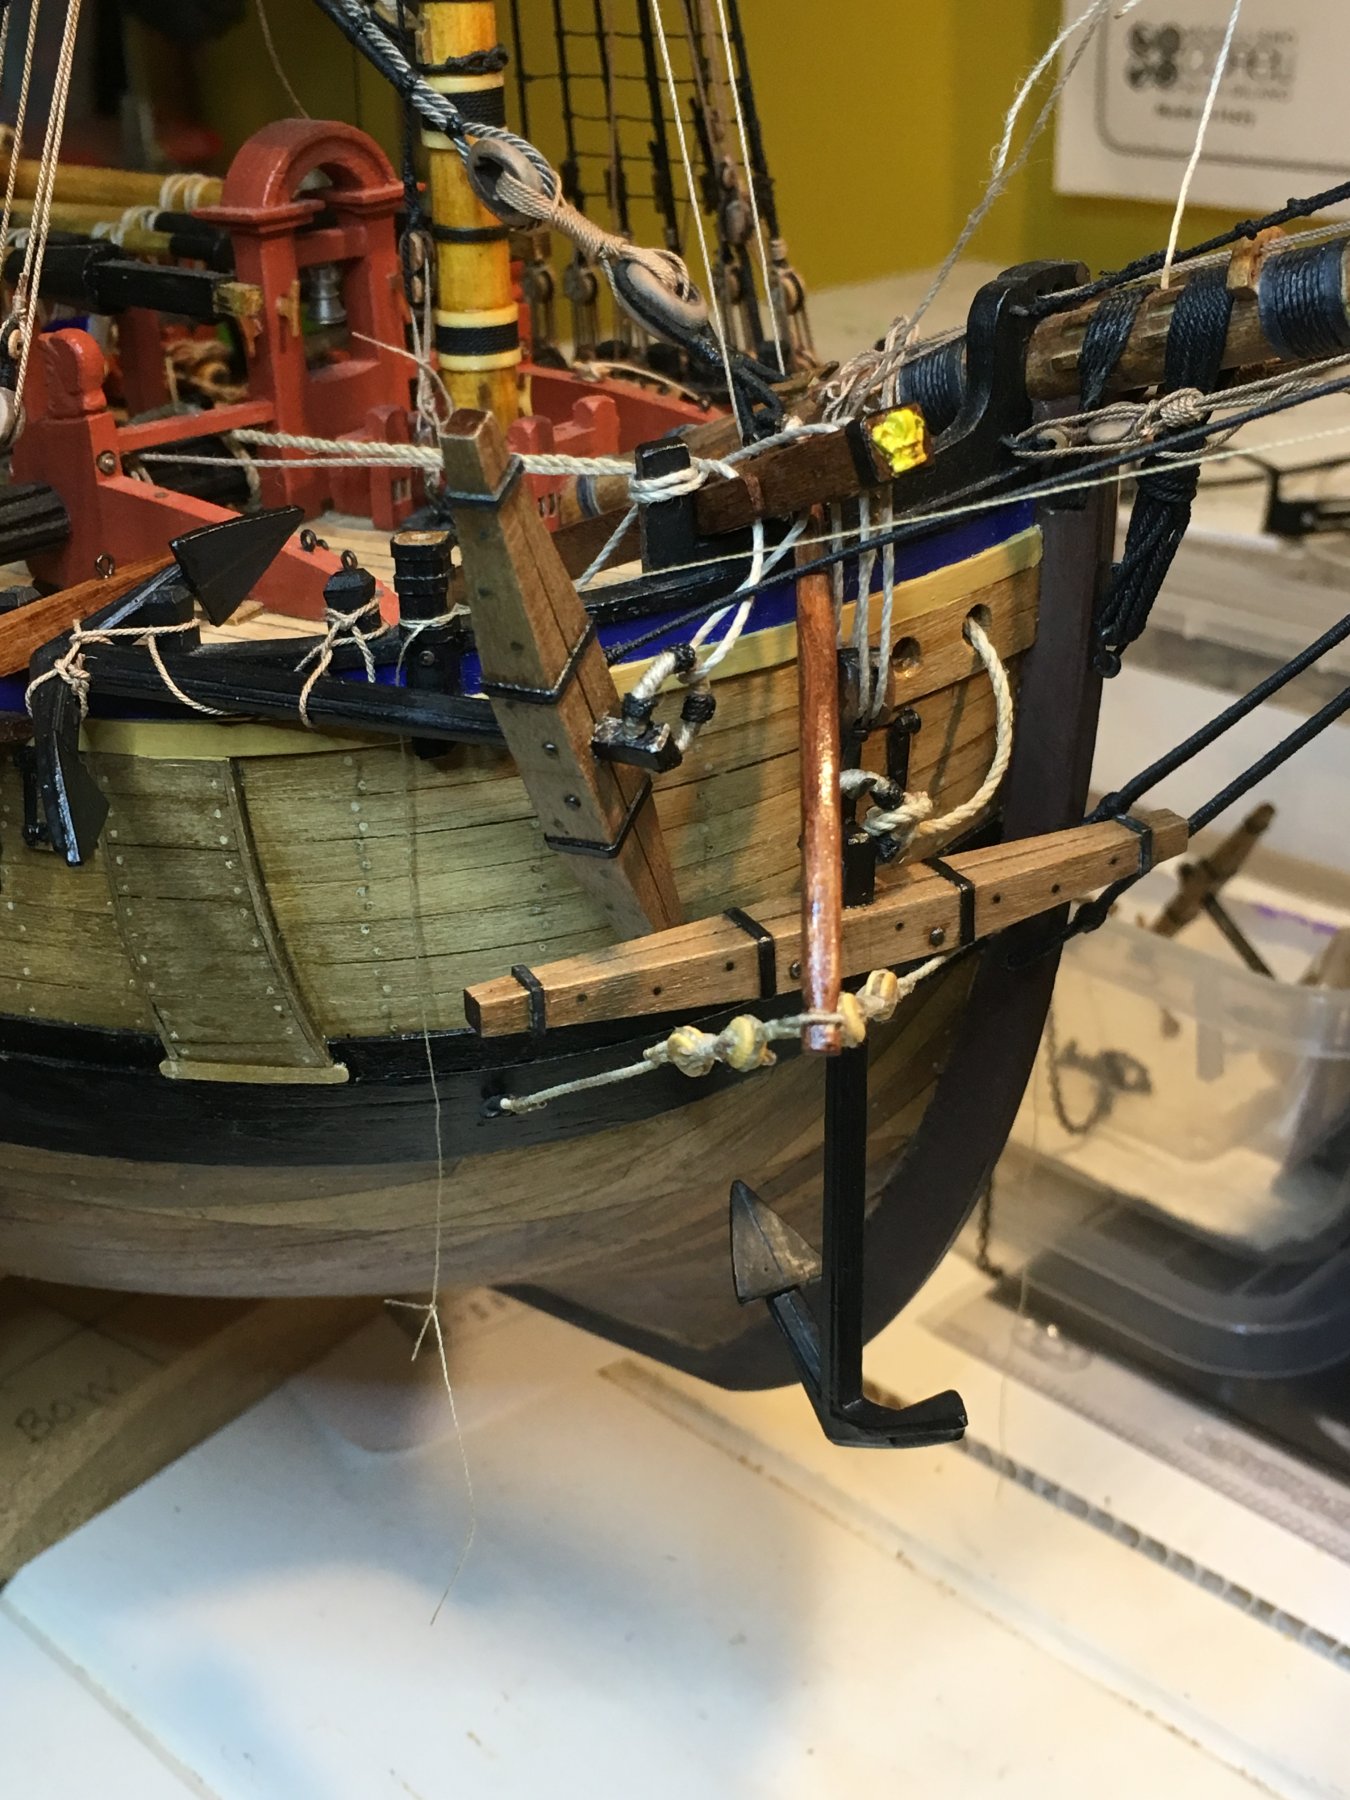
Shipyard Update:
After some time fiddling about, I came up with Anchors, Bumpkin and Fish Davit on the Starboard Bow - below.
All just sitting there, not glued in place yet, as not sure or happy with the layout.
And I'm confident I can postpone the final arrangement, continue rigging and fit this lot later on towards the end.
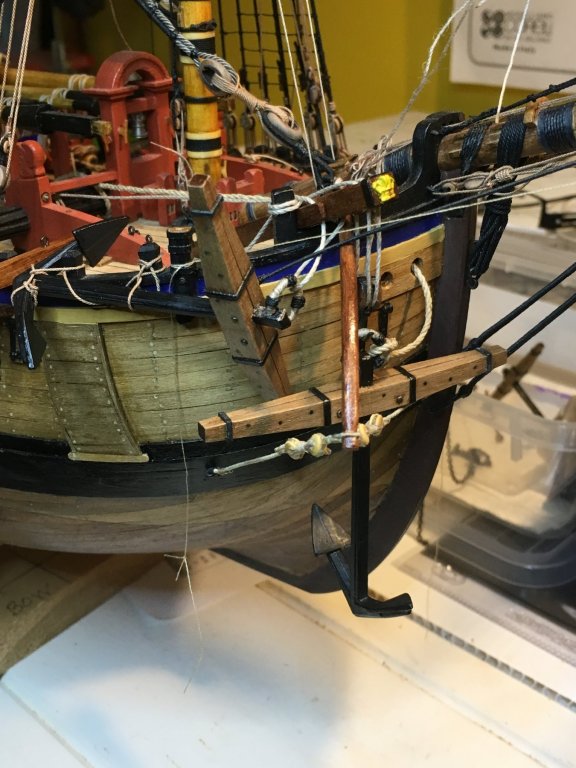
So all coming off and going into storage.
Move onto the Main and Fore TopGallant >> Yards.
-
-
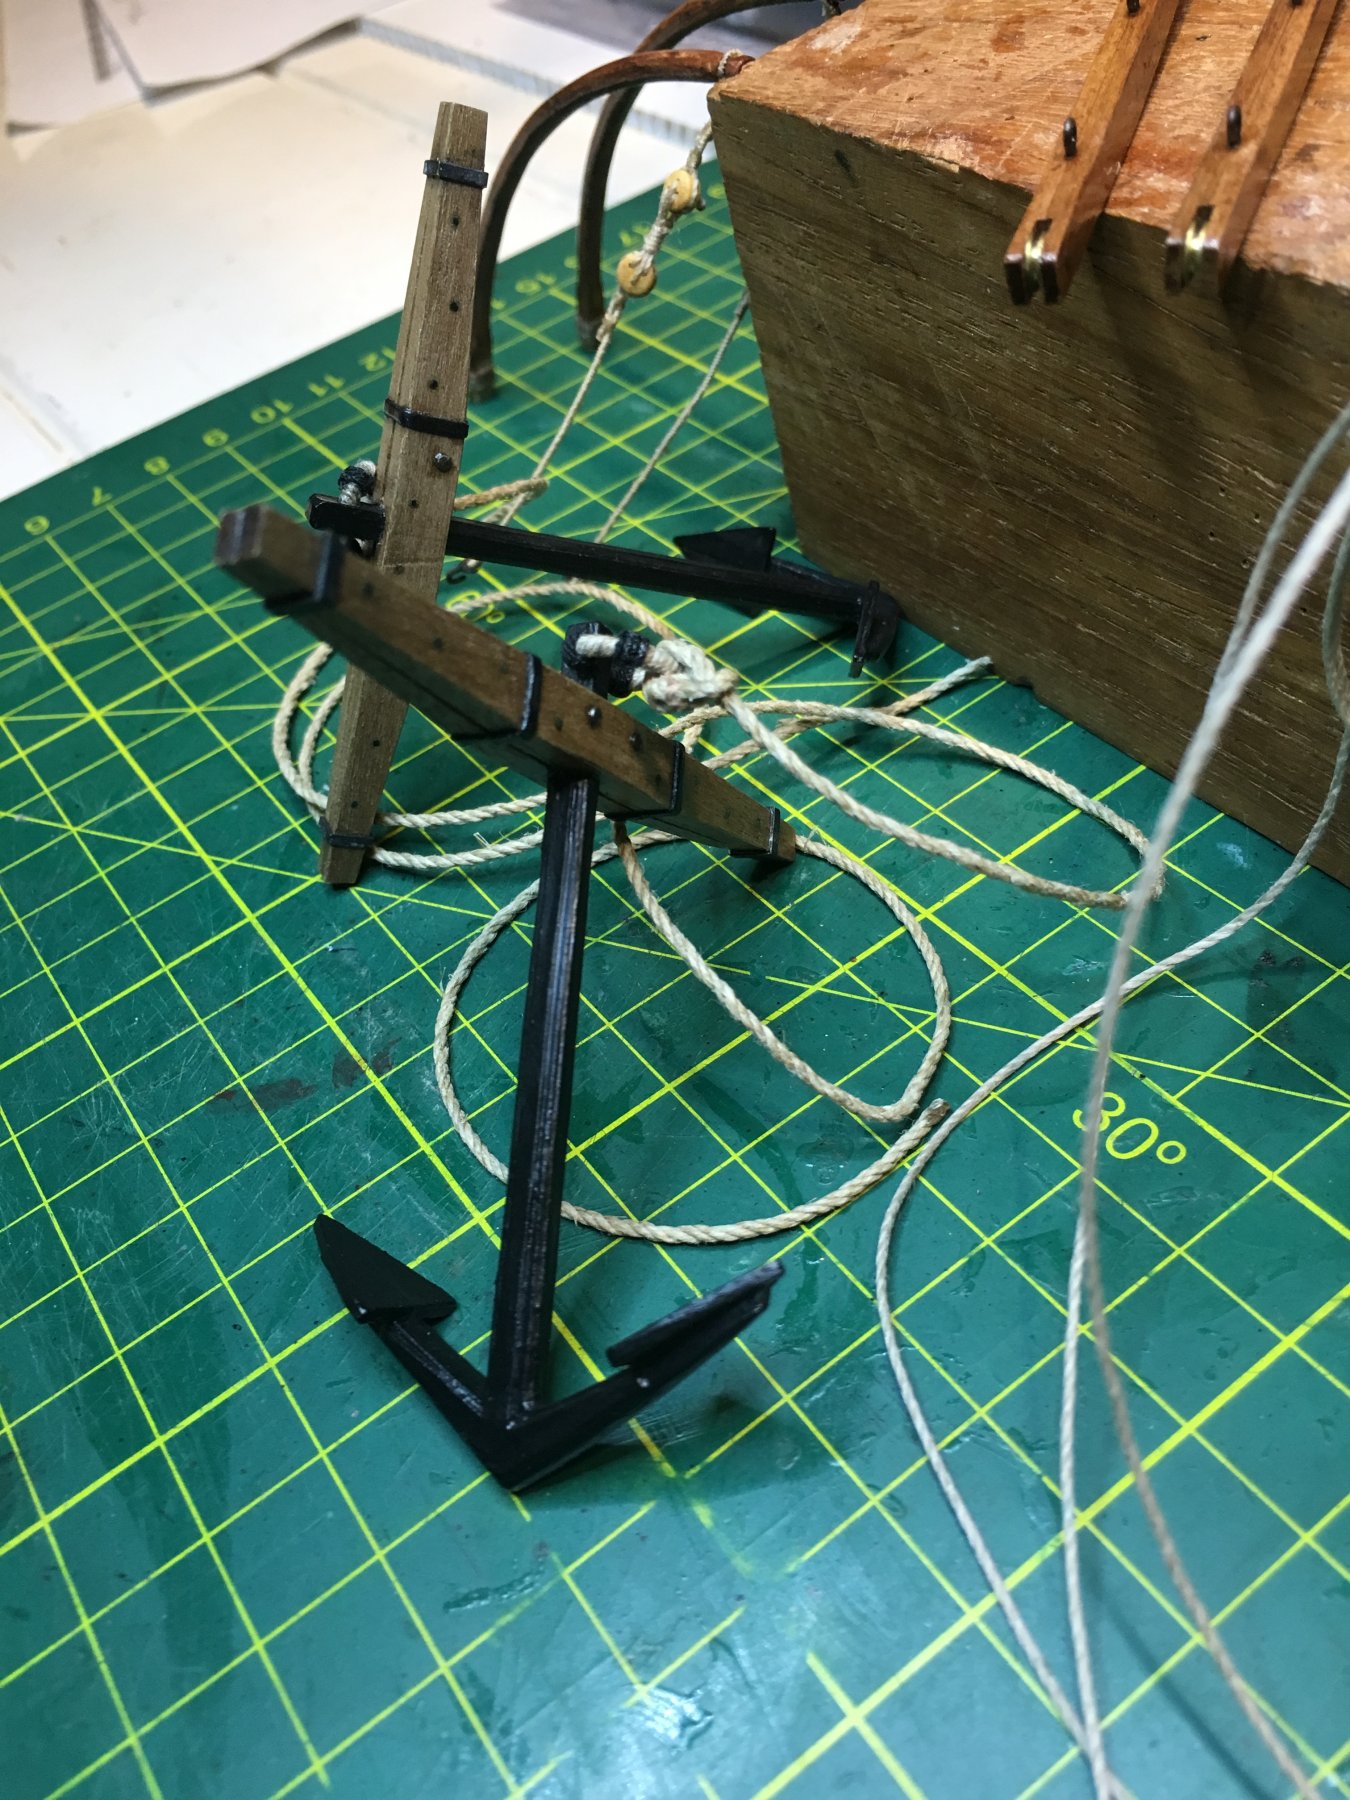
Shipyard Update:
Change of tack.
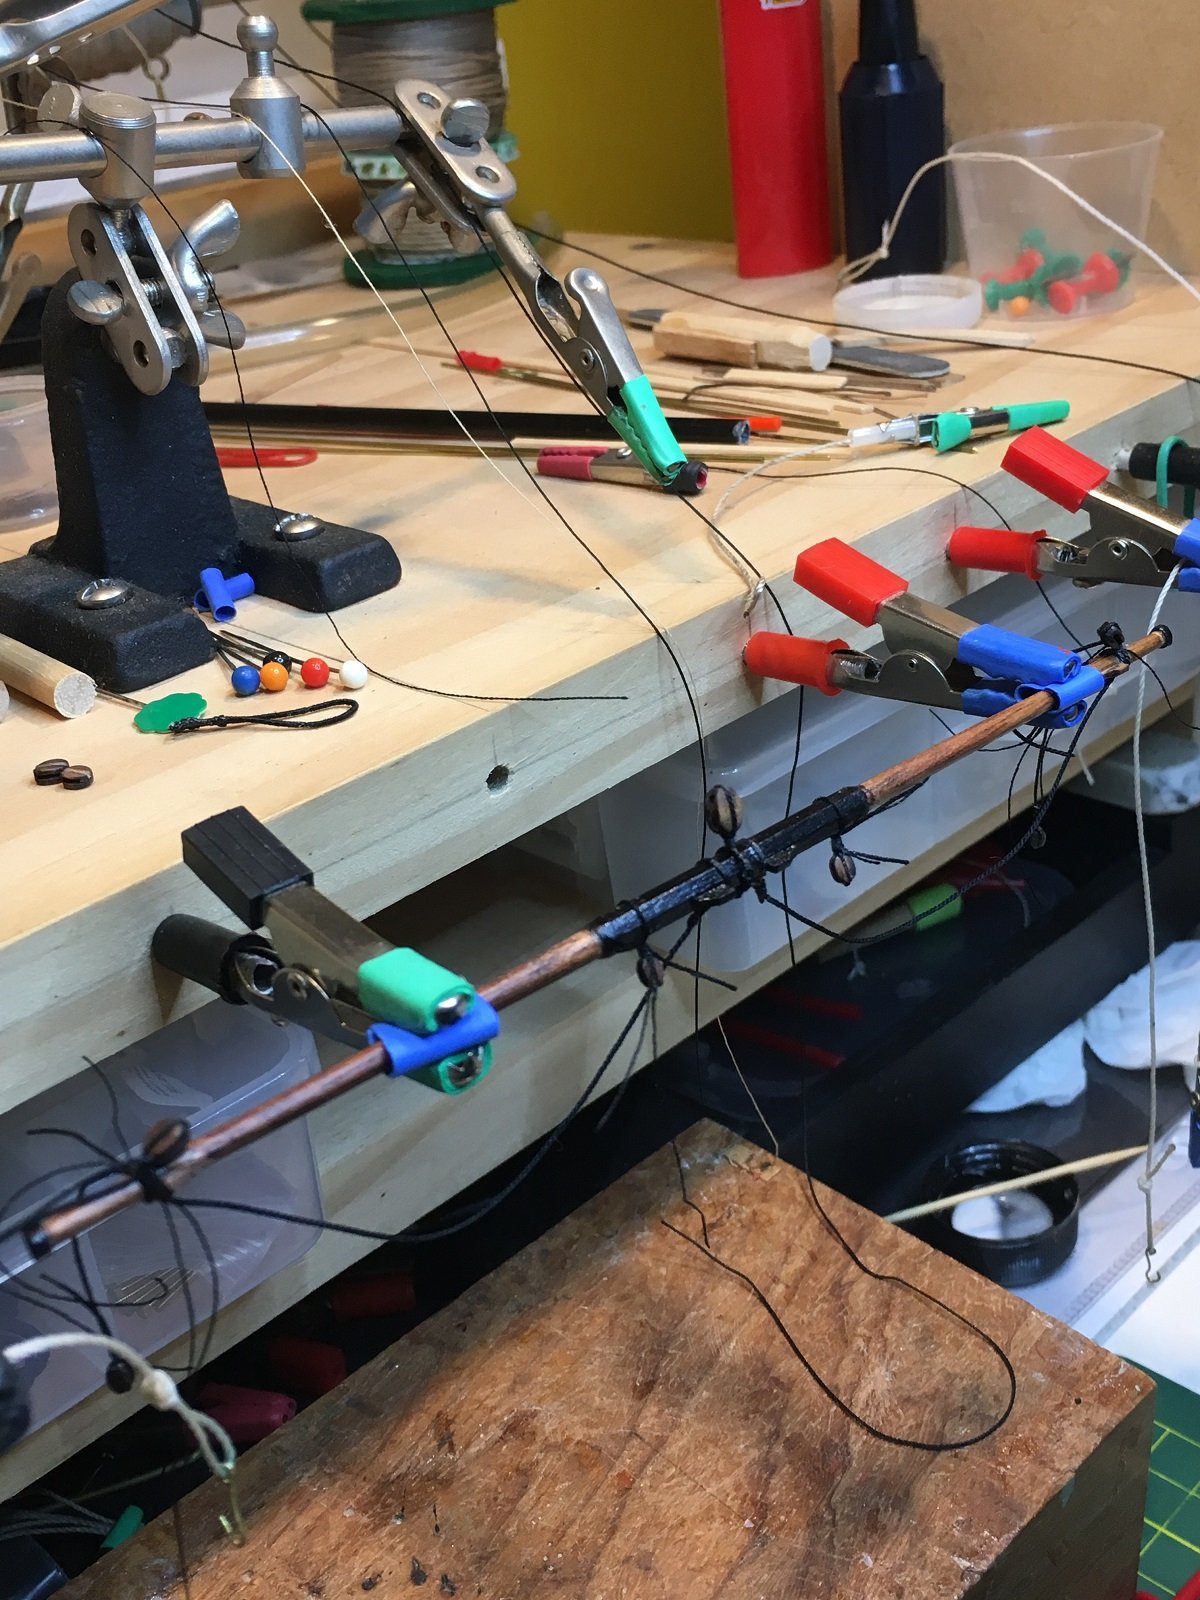
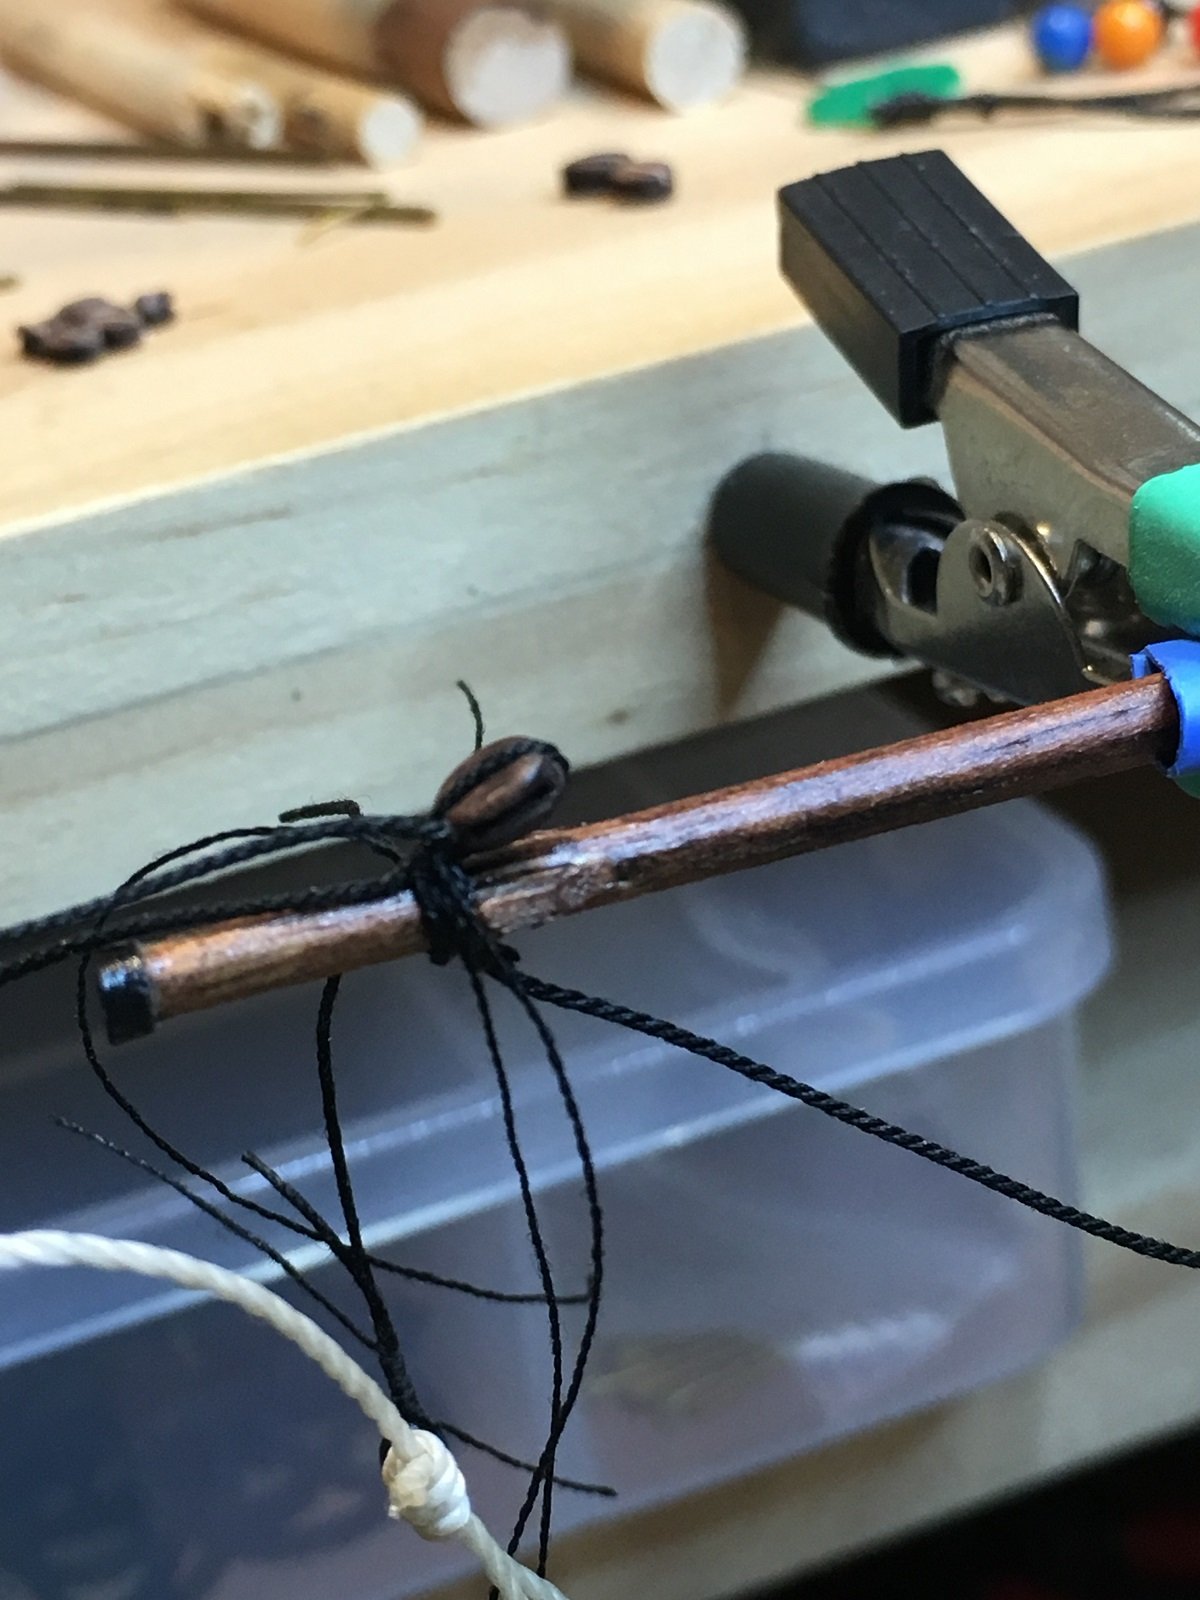
Back in early to mid 2016 I made the Anchors and Bumpkins and Fish Davits.
Before I potentially "lock myself out"(access), thought it time to fit the above on the bow area before ropes and other work is done.
So Rope added to the Main anchors and a final coat of matt varnish.
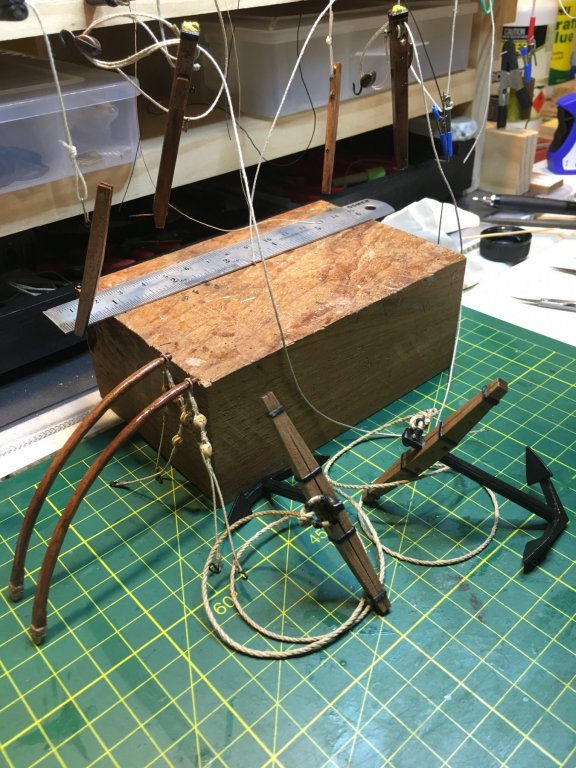

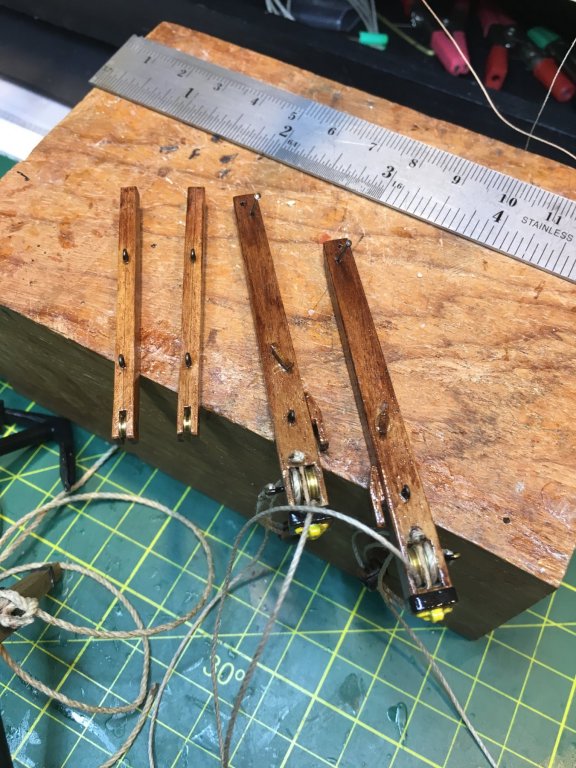
Will be attaching the above to the Bow next, along with the smaller 2 Anchors.
- RGL, BANYAN and Fernando E
-
3
-
Shipyard Update:
Mizzen TopSail Yard.
Previously I made reference for the above as the Mizzen TopGallant Yard, which was wrong.
I had also made the yard as a TopGallant, which has been rectified.
Below are pictures of the new fit-out.

Fitting the blocks and ropes to the Topsail Yard.


Above: Left to Right > Yardarm Lift Block, Tye-Block(Clew blocks at sides), Parrel being added.

TopSail Yard in place with Yards and Tye lifts.

Main TopGallant brace Blocks added, tied to the front Shroud(either side)
Plenty more for the shipyard to get no with. Chop Chop.
-
Blacky,
Their is a saying the final paint job is only as good as the preparation underneath.
So my suggestions are:
- Check the hull is fair, all even curves
- no dips as these will show up on the final skin
- fill any dips, sand any highs if enough "meat" to fair it out
- plan out how you are going to lay the planks from bow to stern. Lining out the widths and where you are going to show the joins
- their is a lot of tapering of planks, dropped strakes(planks at bow) and new ones to add in(Steelers, usually aft)
- do not force a plank into place, each should lay in the space
- bevel at least one(1) edge(top) so no gap exists when they laid down
Confused, ? i was, but plenty of reading, prep. will help and get you their.
-
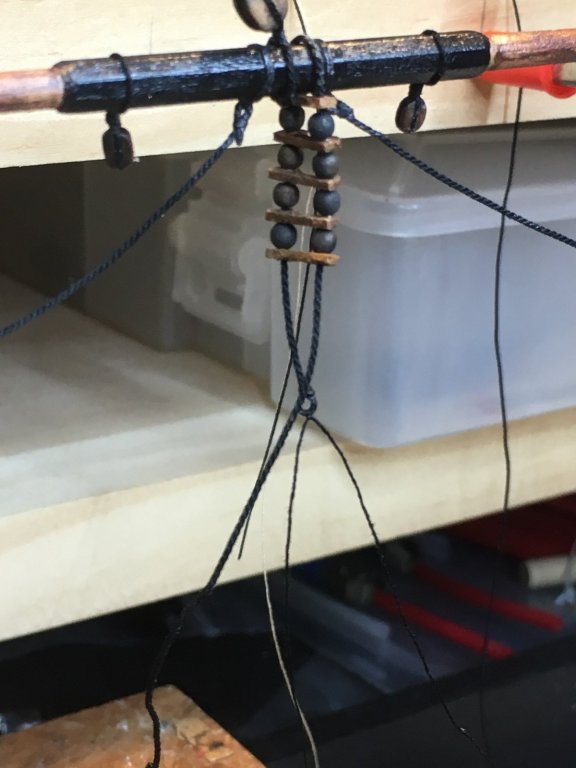
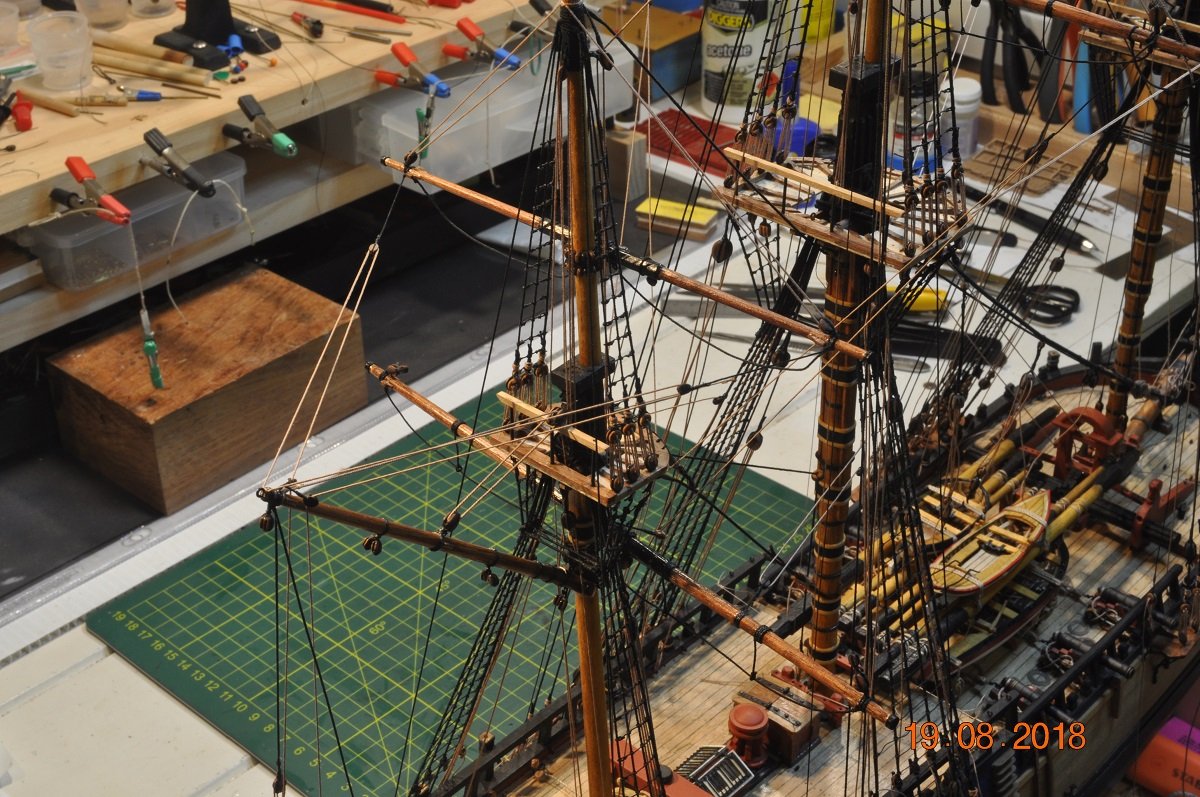
Shipyard Update:
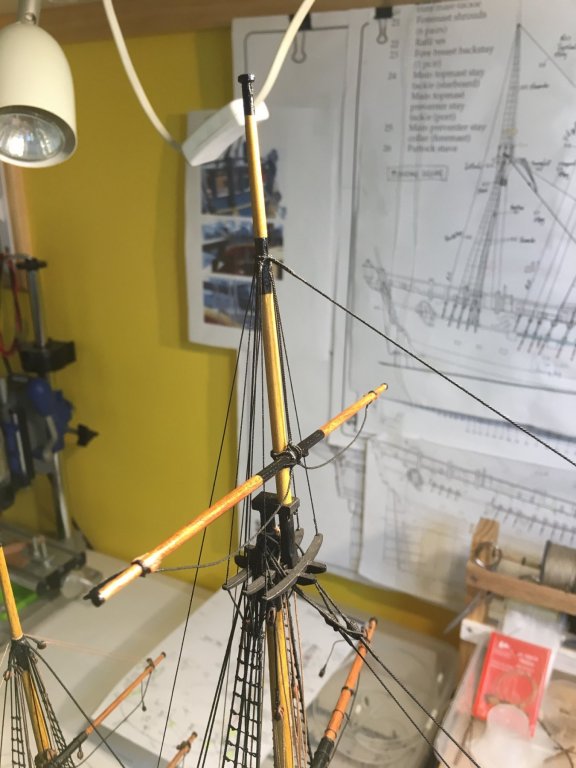
We have moved onto the Mizzen Gaff and TopGallant Yard.
The Gaff has a number of blocks and slings on it, all providing the hoisting, Vang, bracing to the TopGallant yard, Brails to the sail.
Below is Gaff nearly ready to hoist to the Mizzen.
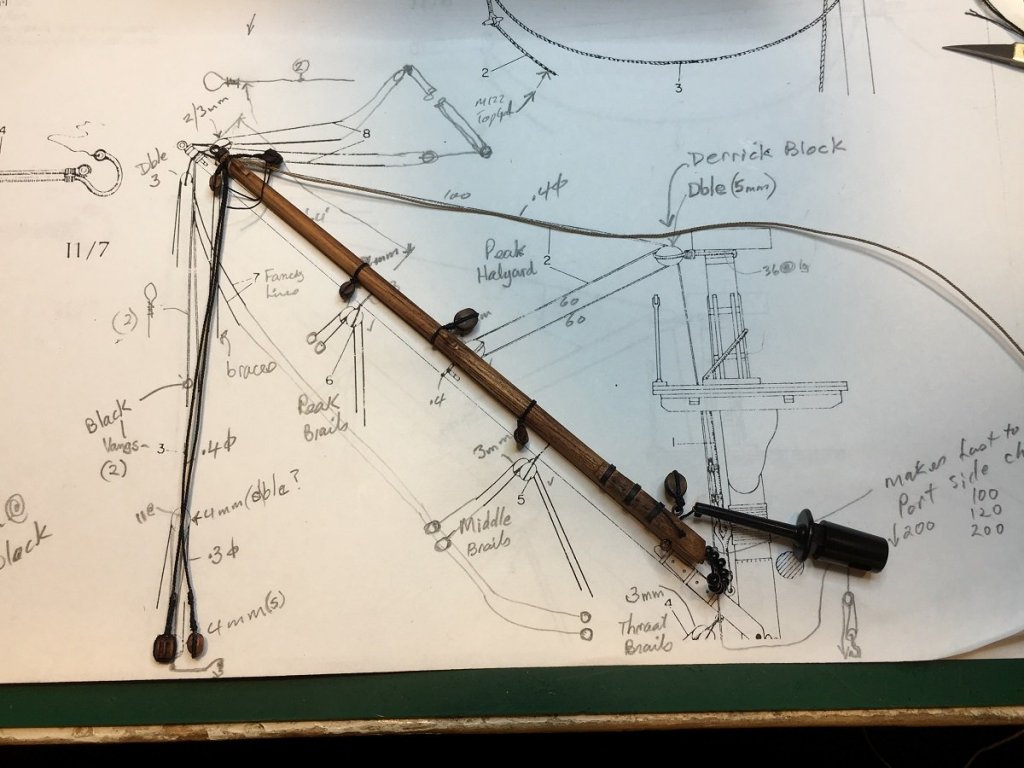
Below picture of the components added to the Gaff:

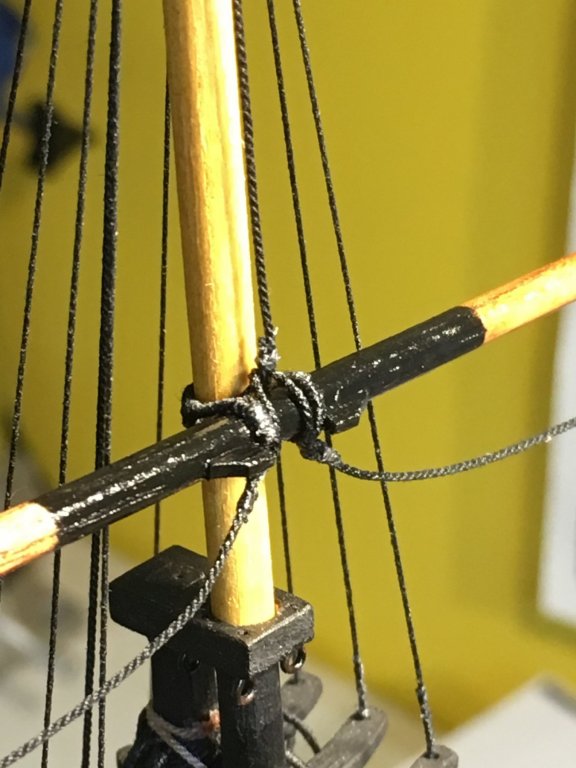
Fitting the Parrell to the Gaff beak.
Top the 4mm JeerBlock and below the 2 x 3mm Throat Brails
Mid and Peak Brails Blocks 3mm
Derrick Block(4mm)
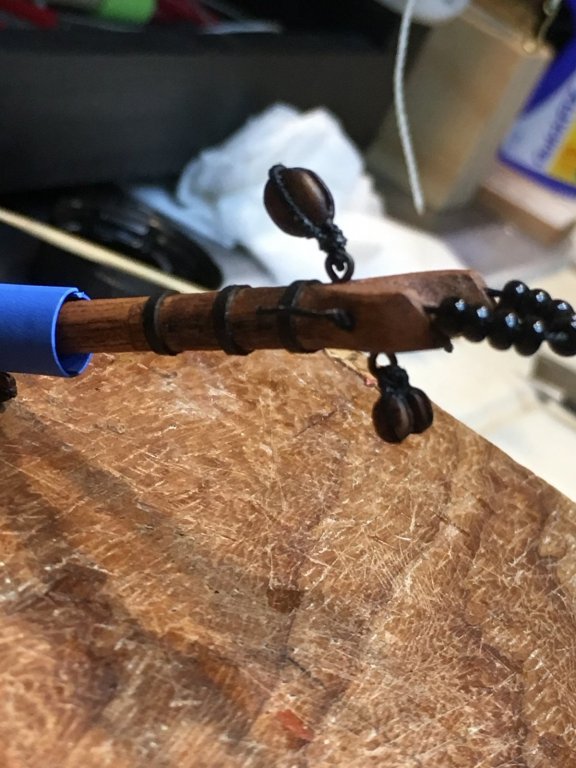
Gaff Paek; a lot of ropes and blocks attach to the end.
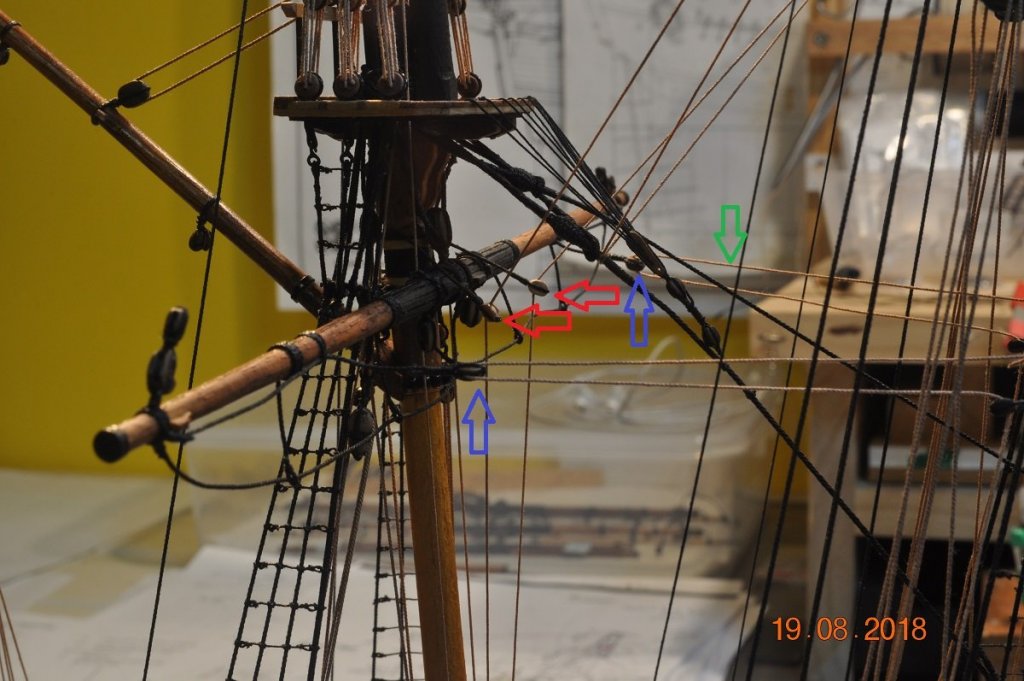
Mizzen Topsail Yard Braces(2 x 3mm) topside
Fancy Line blocks(2 x 3mm) underneath
Vangs Slings(2)
Peak/Derrick halyard(1) - single lighter rope on top
Derrick 4mm DoubleBlock is lashed to the Mizzen-cap
Halyard through the Derrick Blocks(4mm)

JeerBlock(4mm) with sling, around and under the Mizzen Cap.
The AoTS had a fixed sling for this. I replaced it with Jeer Blocks like the Replica has. Made sense so the Gaff can be raised more easily.
Vang - lower 4mm blocks with hooks
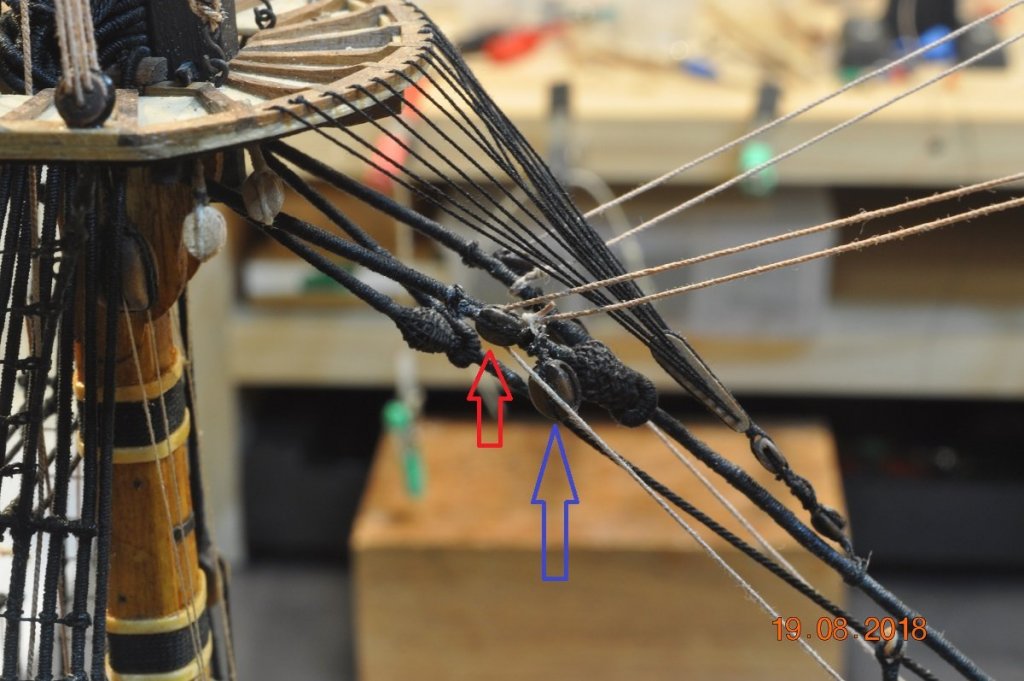
Vangs(2) falls fitted to end of Gaff to eye-bolts in the quarters

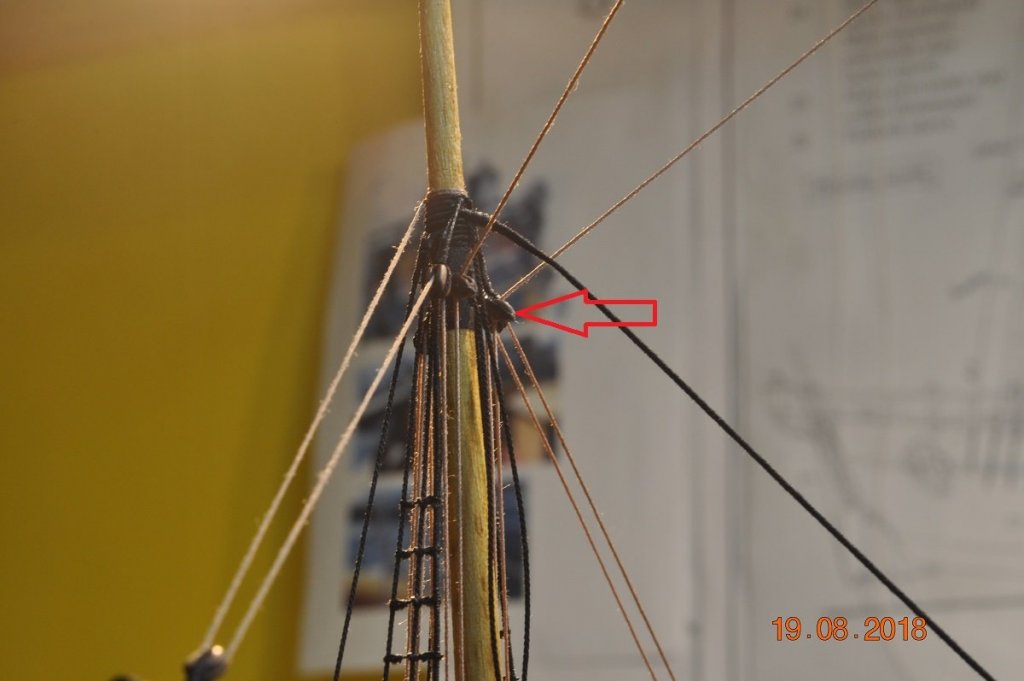
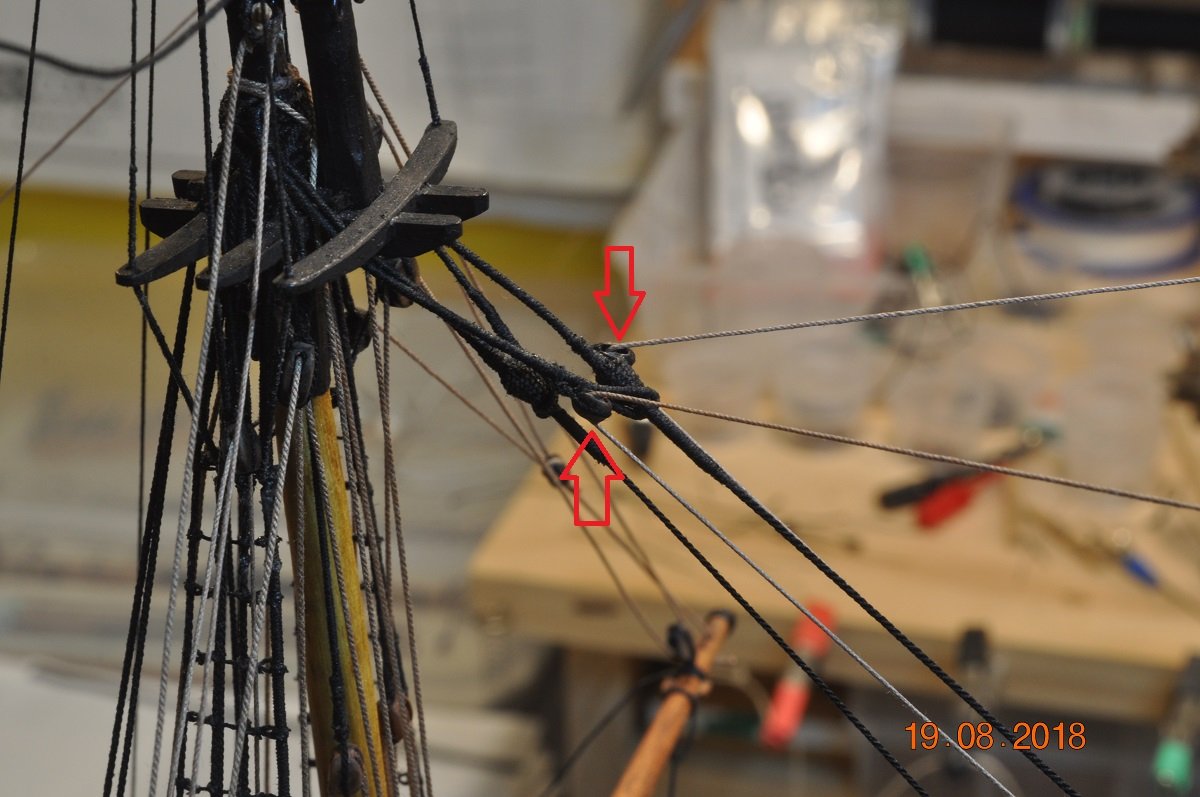
TopGallant Tye fall: top end rope runs through a hole under the shrouds with a 3mm double block(top red arrow), lower end 3mm block hooked into an eye-bolt(lower red arrow)

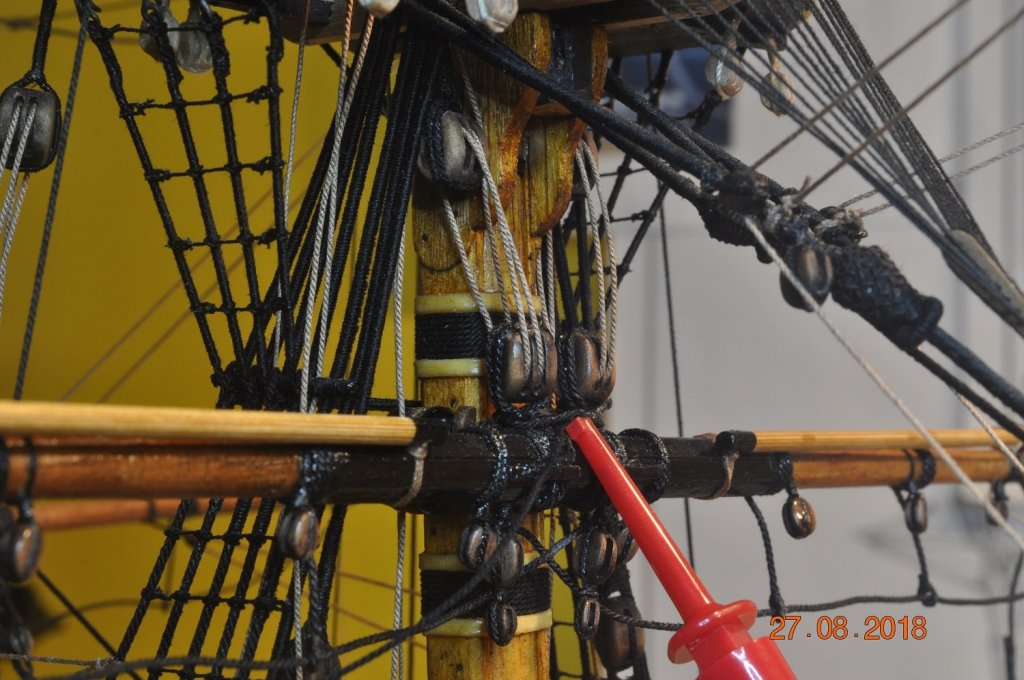
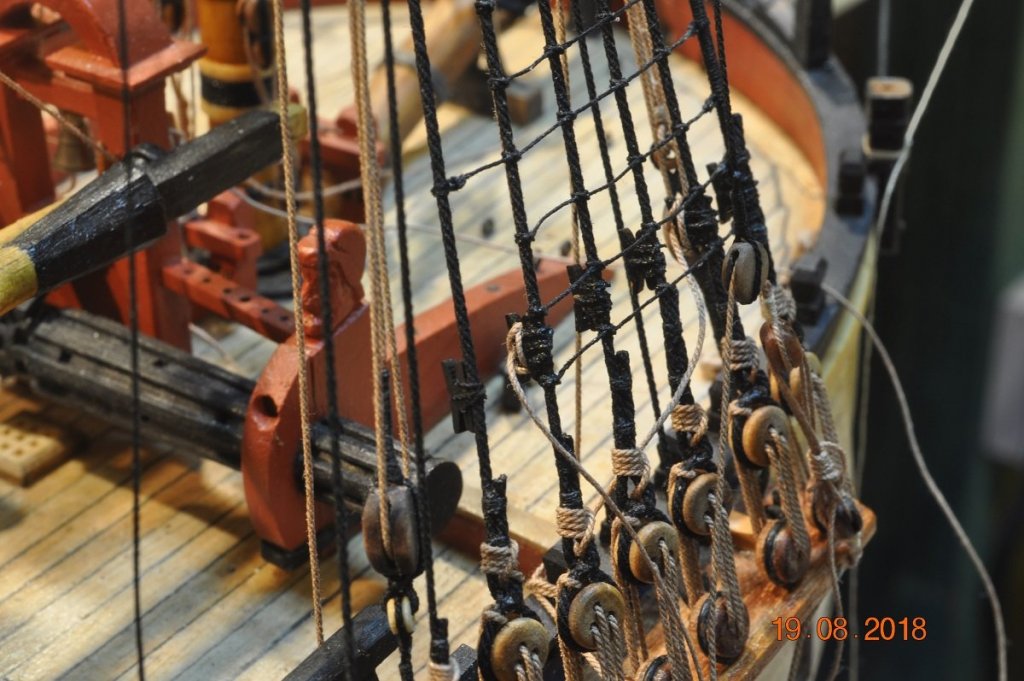
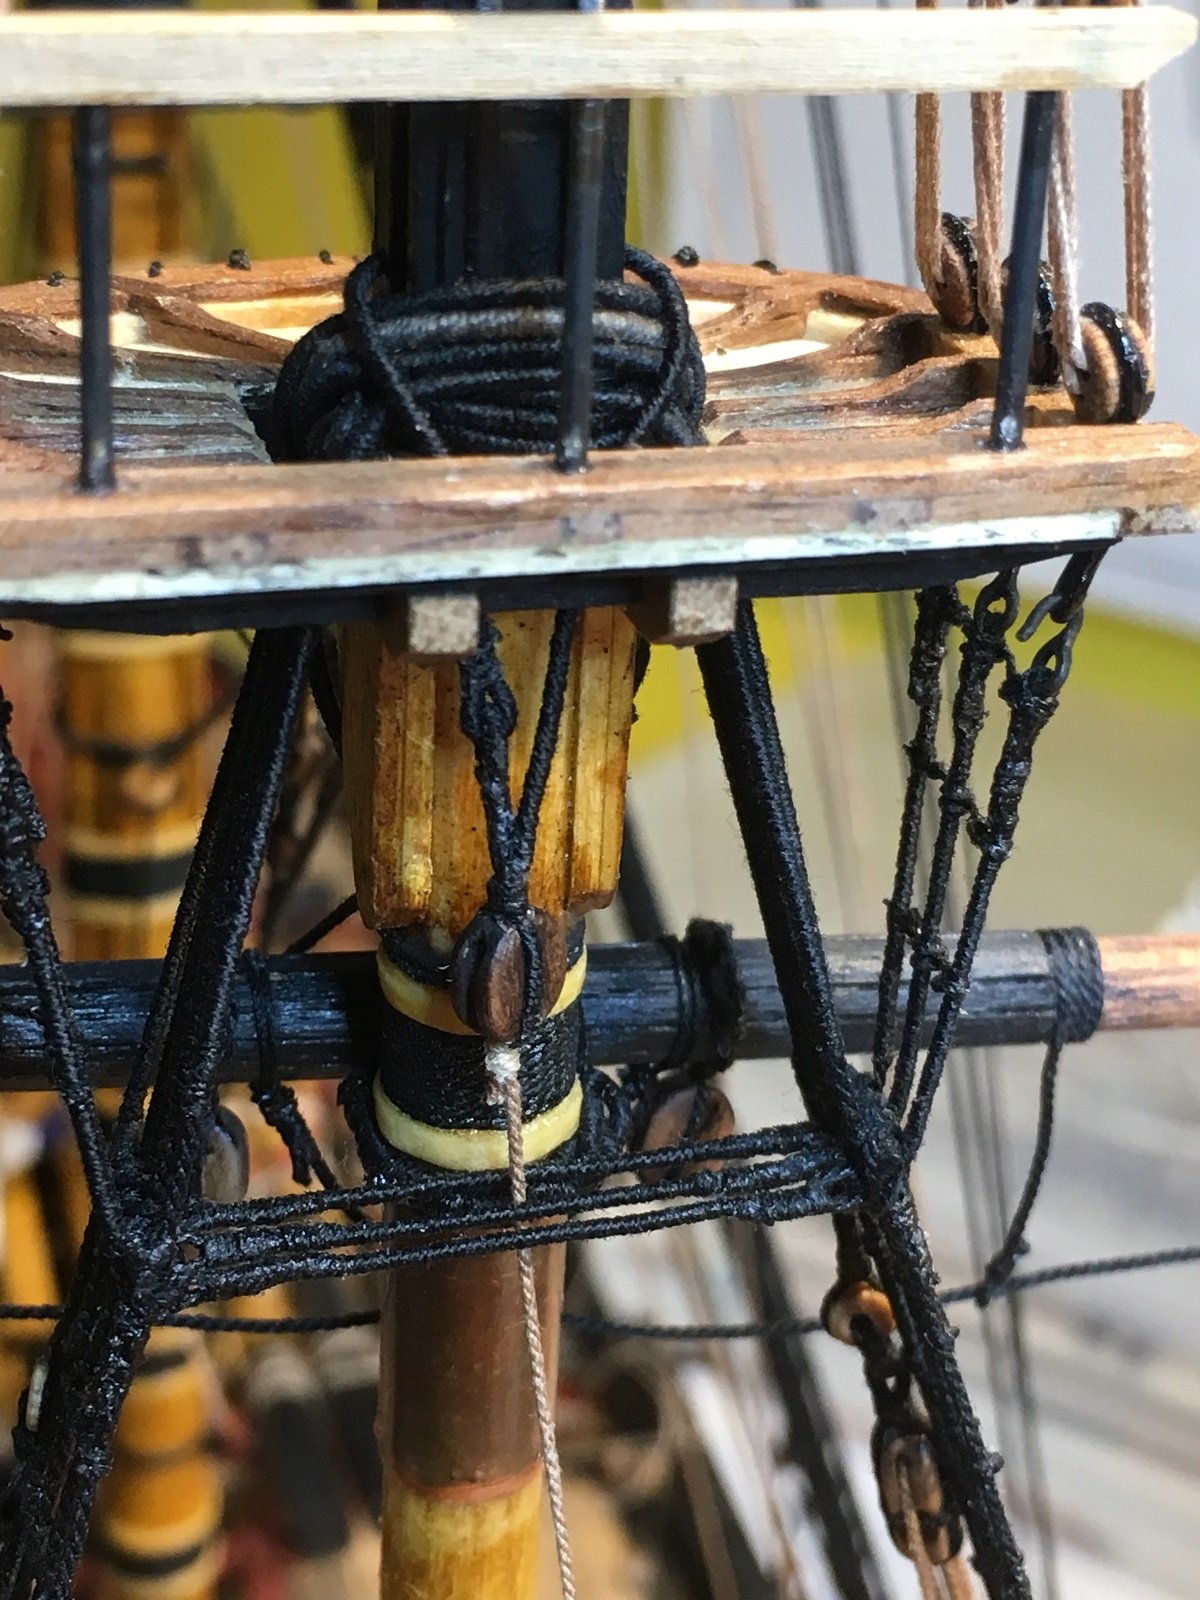
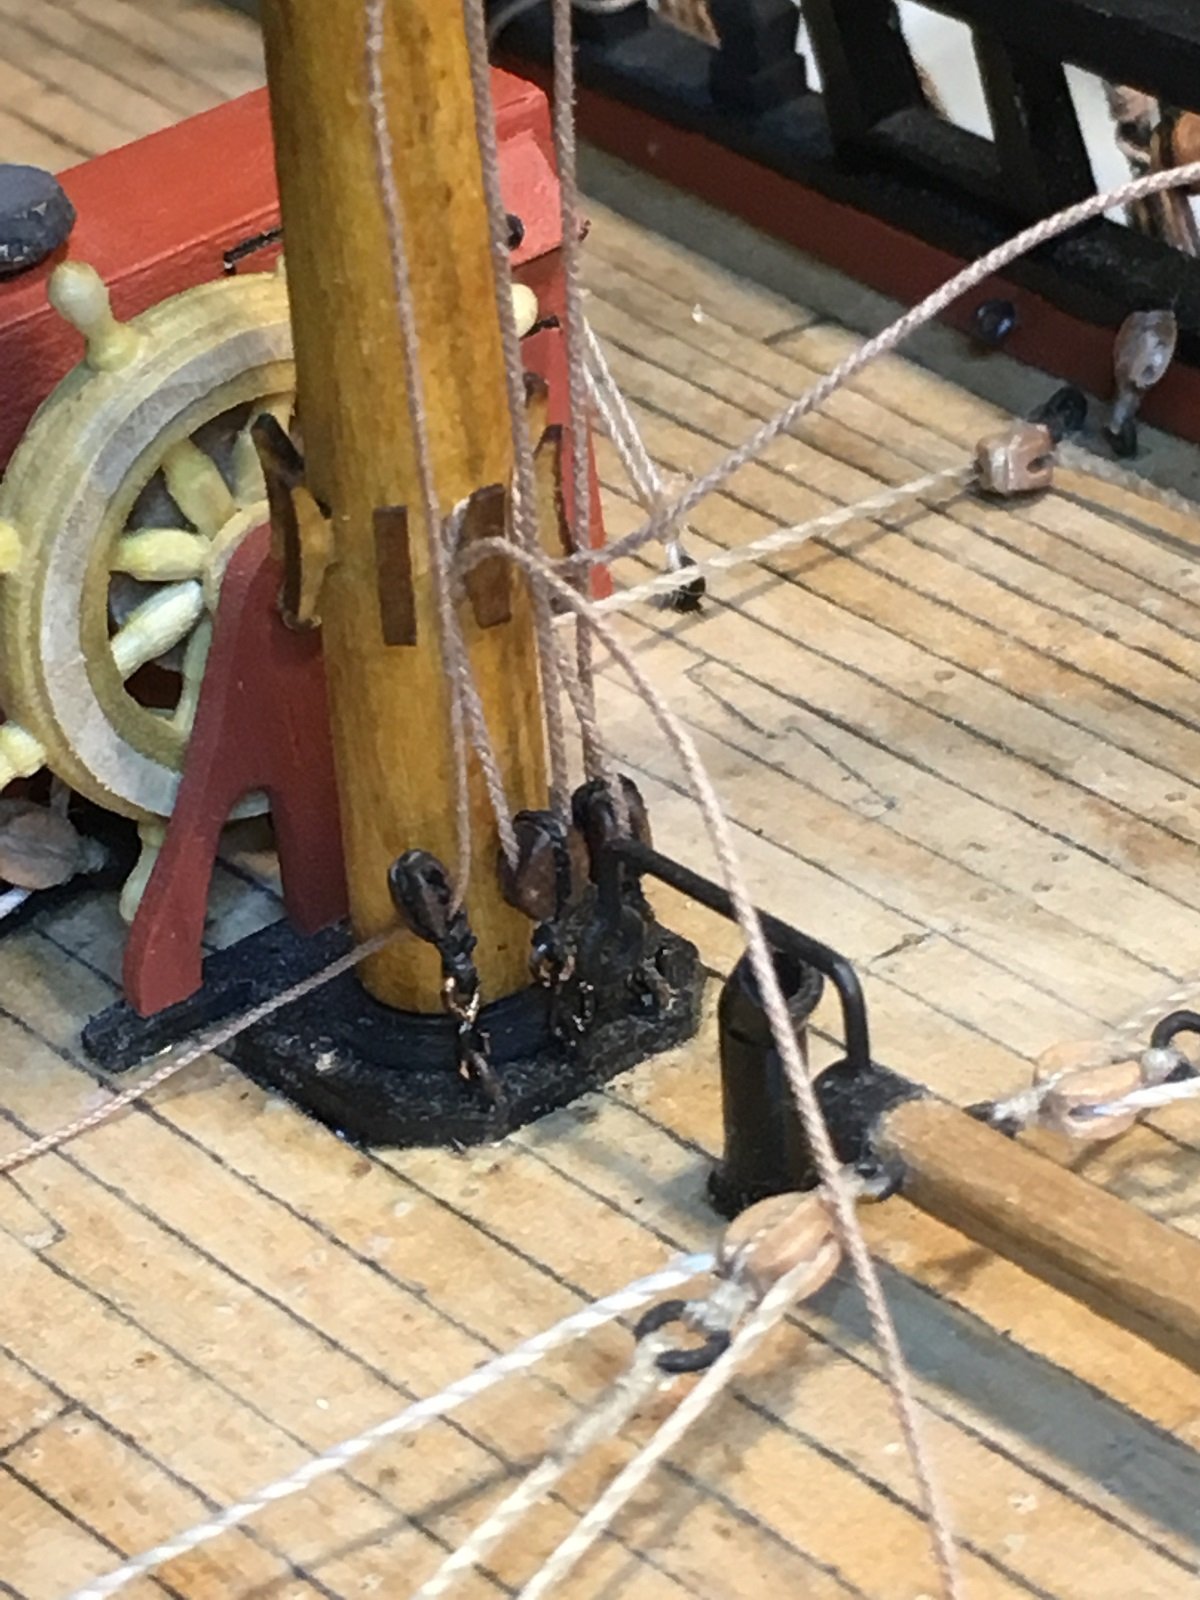
The Mizzen Mast base - Halyards and Jeers running through blocks
Bit of tidying up to do, but nearly their.
Add the Fancy and Brails lines.
All up it's taken me a couple of weeks on/off to get it all together.
-
On 7/6/2018 at 10:32 AM, rvchima said:
Hi Dave,
I definitely have not paid enough attention to your build log. i just went through the last 10 - 12 pages of your log and realized that you pay as much attention to detail in your log as you do in your build. I saw a lot of details about how you built your masts, spars, and rigging that will be a huge help when (if?) I ever get to that point. I'll keep following the new posts and searching the old for ideas that I can use.
Rod
Thanks for looking in Rod,
I have learn't so much during my build, with many thanks go to others who have shared ideas and techniques.
To give back I do the same, in hope it is worthwhile for others for their builds.
-
Hi Rod,
Your Endeavour is coming along very nice indeed.
I keep an eye out for updates all the time.
-


HMS Bounty by Vinnie - Mamoli - 1:65 scale
in - Kit build logs for subjects built from 1751 - 1800
Posted
Taking shape well Vinnie.
Glad you went to the ANMM.