HOLIDAY DONATION DRIVE - SUPPORT MSW - DO YOUR PART TO KEEP THIS GREAT FORUM GOING! (Only 27 donations so far out of 49,000 members - C'mon guys!)
×


Justin P.
-
Posts
1,008 -
Joined
Content Type
Profiles
Forums
Gallery
Events
Everything posted by Justin P.
-

Cutting and shaping masts: tips on how to do it.
Justin P. replied to Peterhudson's topic in Masting, rigging and sails
I agree, I actually found using a lathe to be more work. I tried at first because I had one, and wanted to use it. Eventually I settled on square stock, an Ibex finger plane and sand paper. Much easier. -
Its just a mark. Place pencil onto the wood, and twist back and forth like you are just trying to make a dot. That mark will hold up against staining and light sanding. In this case I think I just used too much pressure.
-
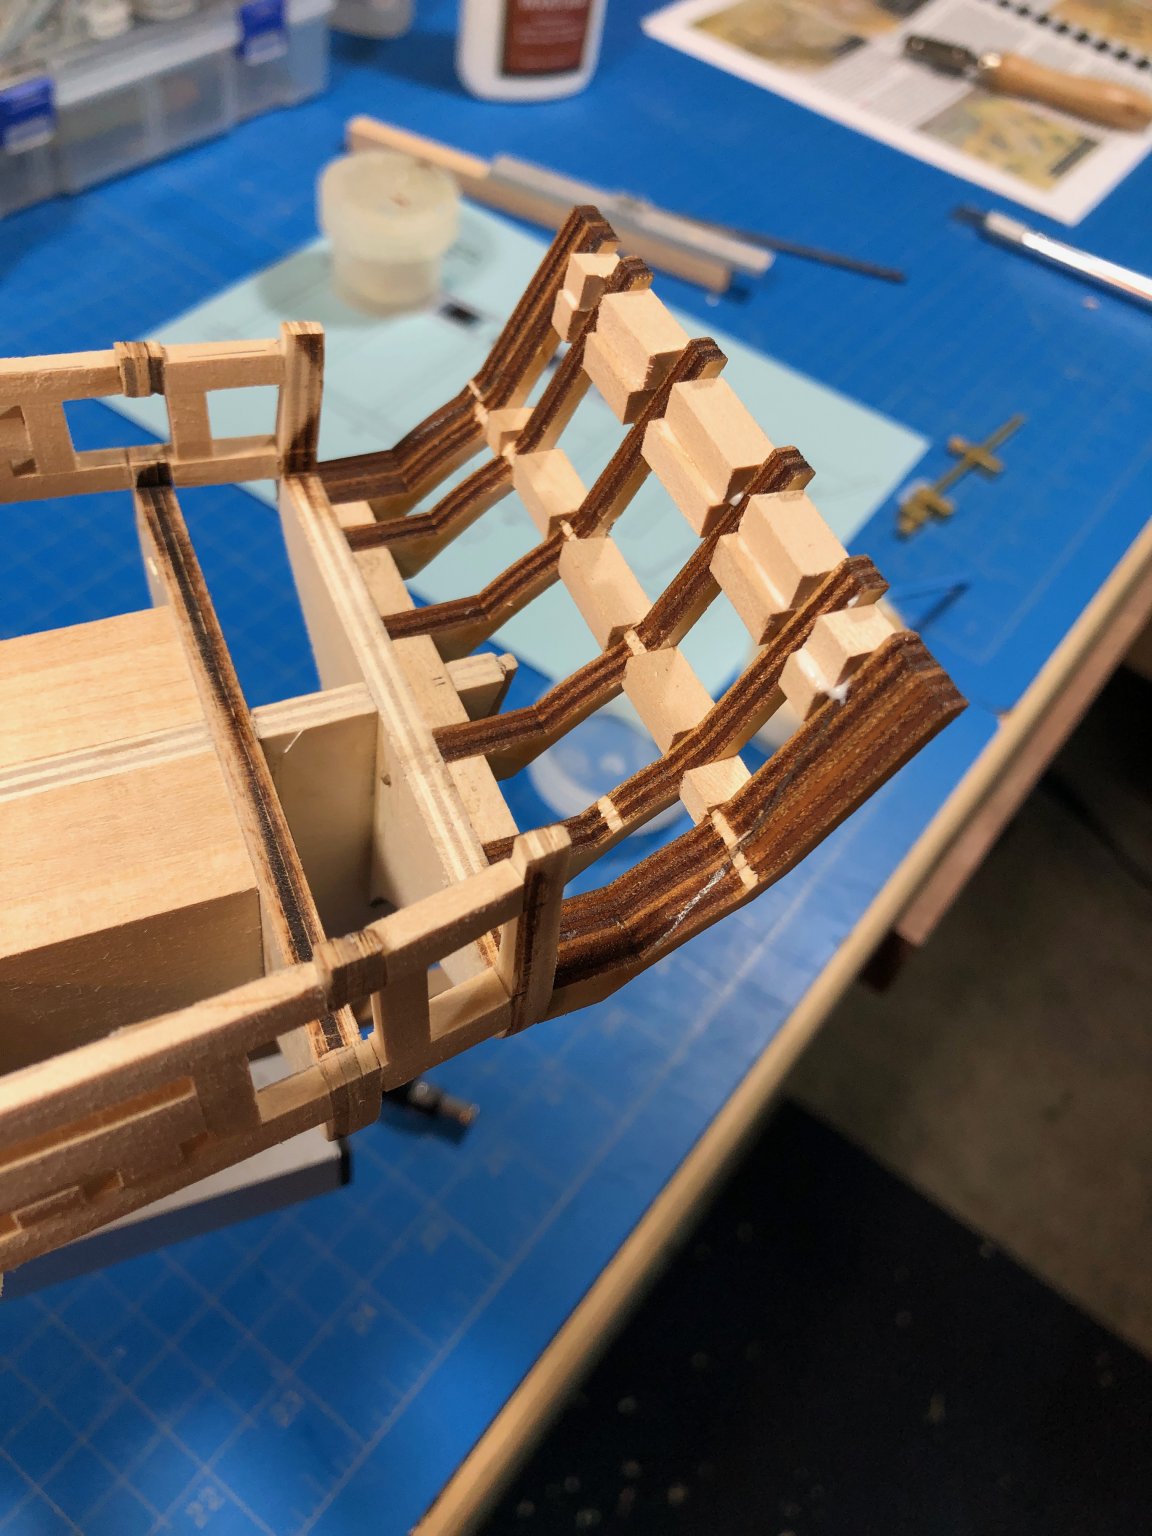
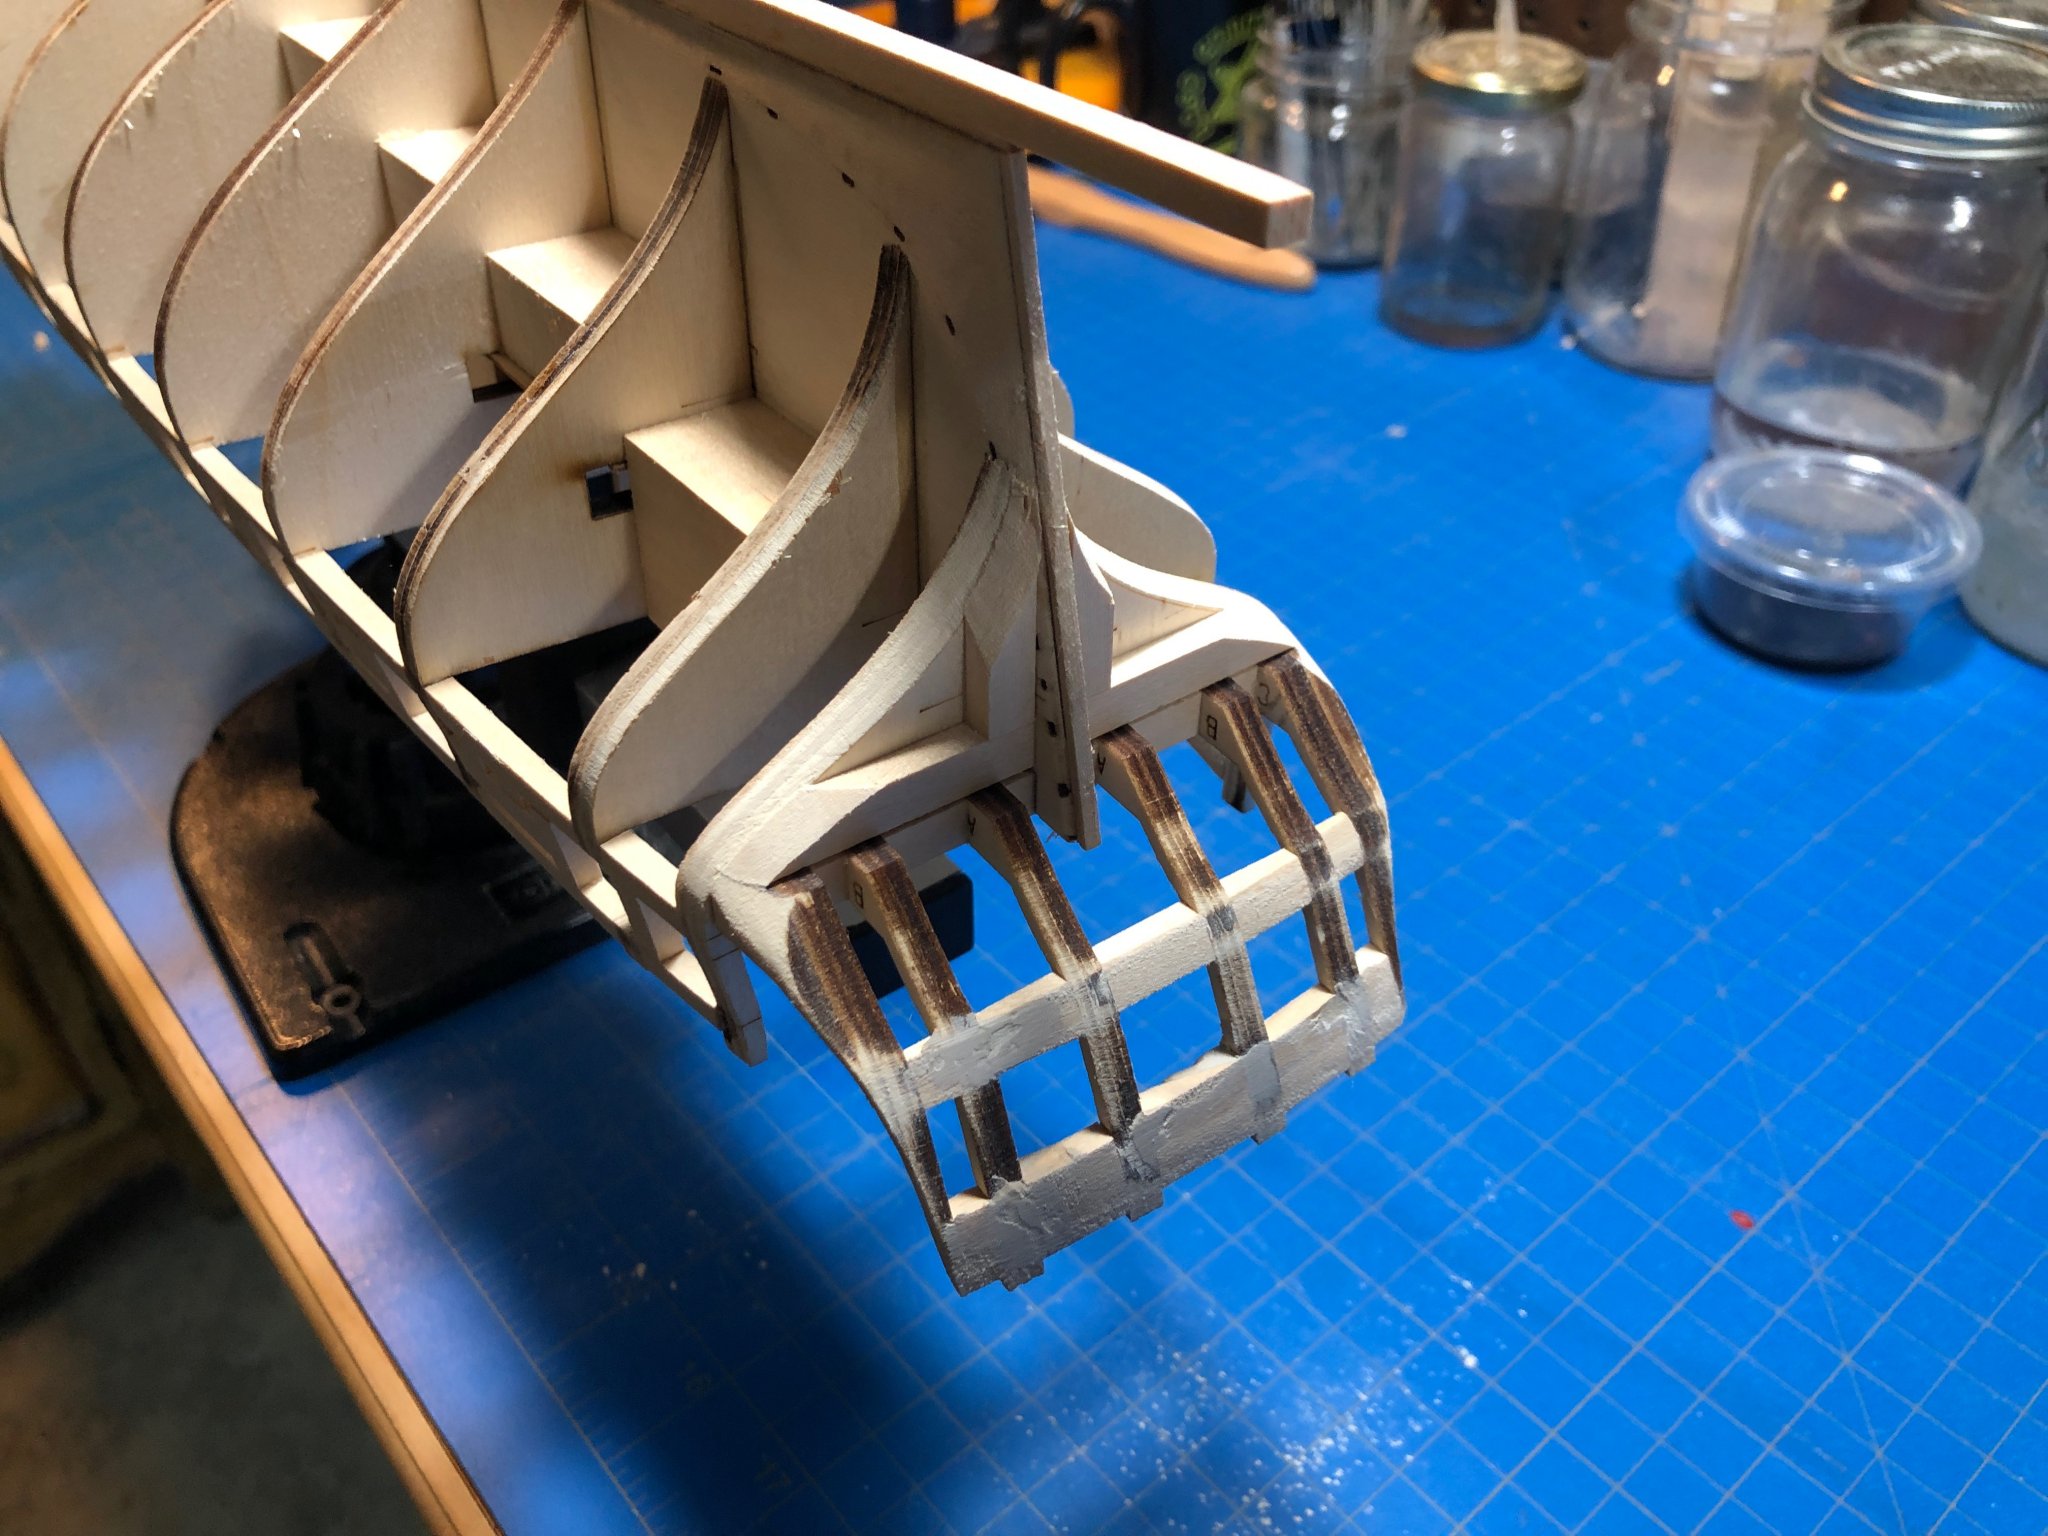
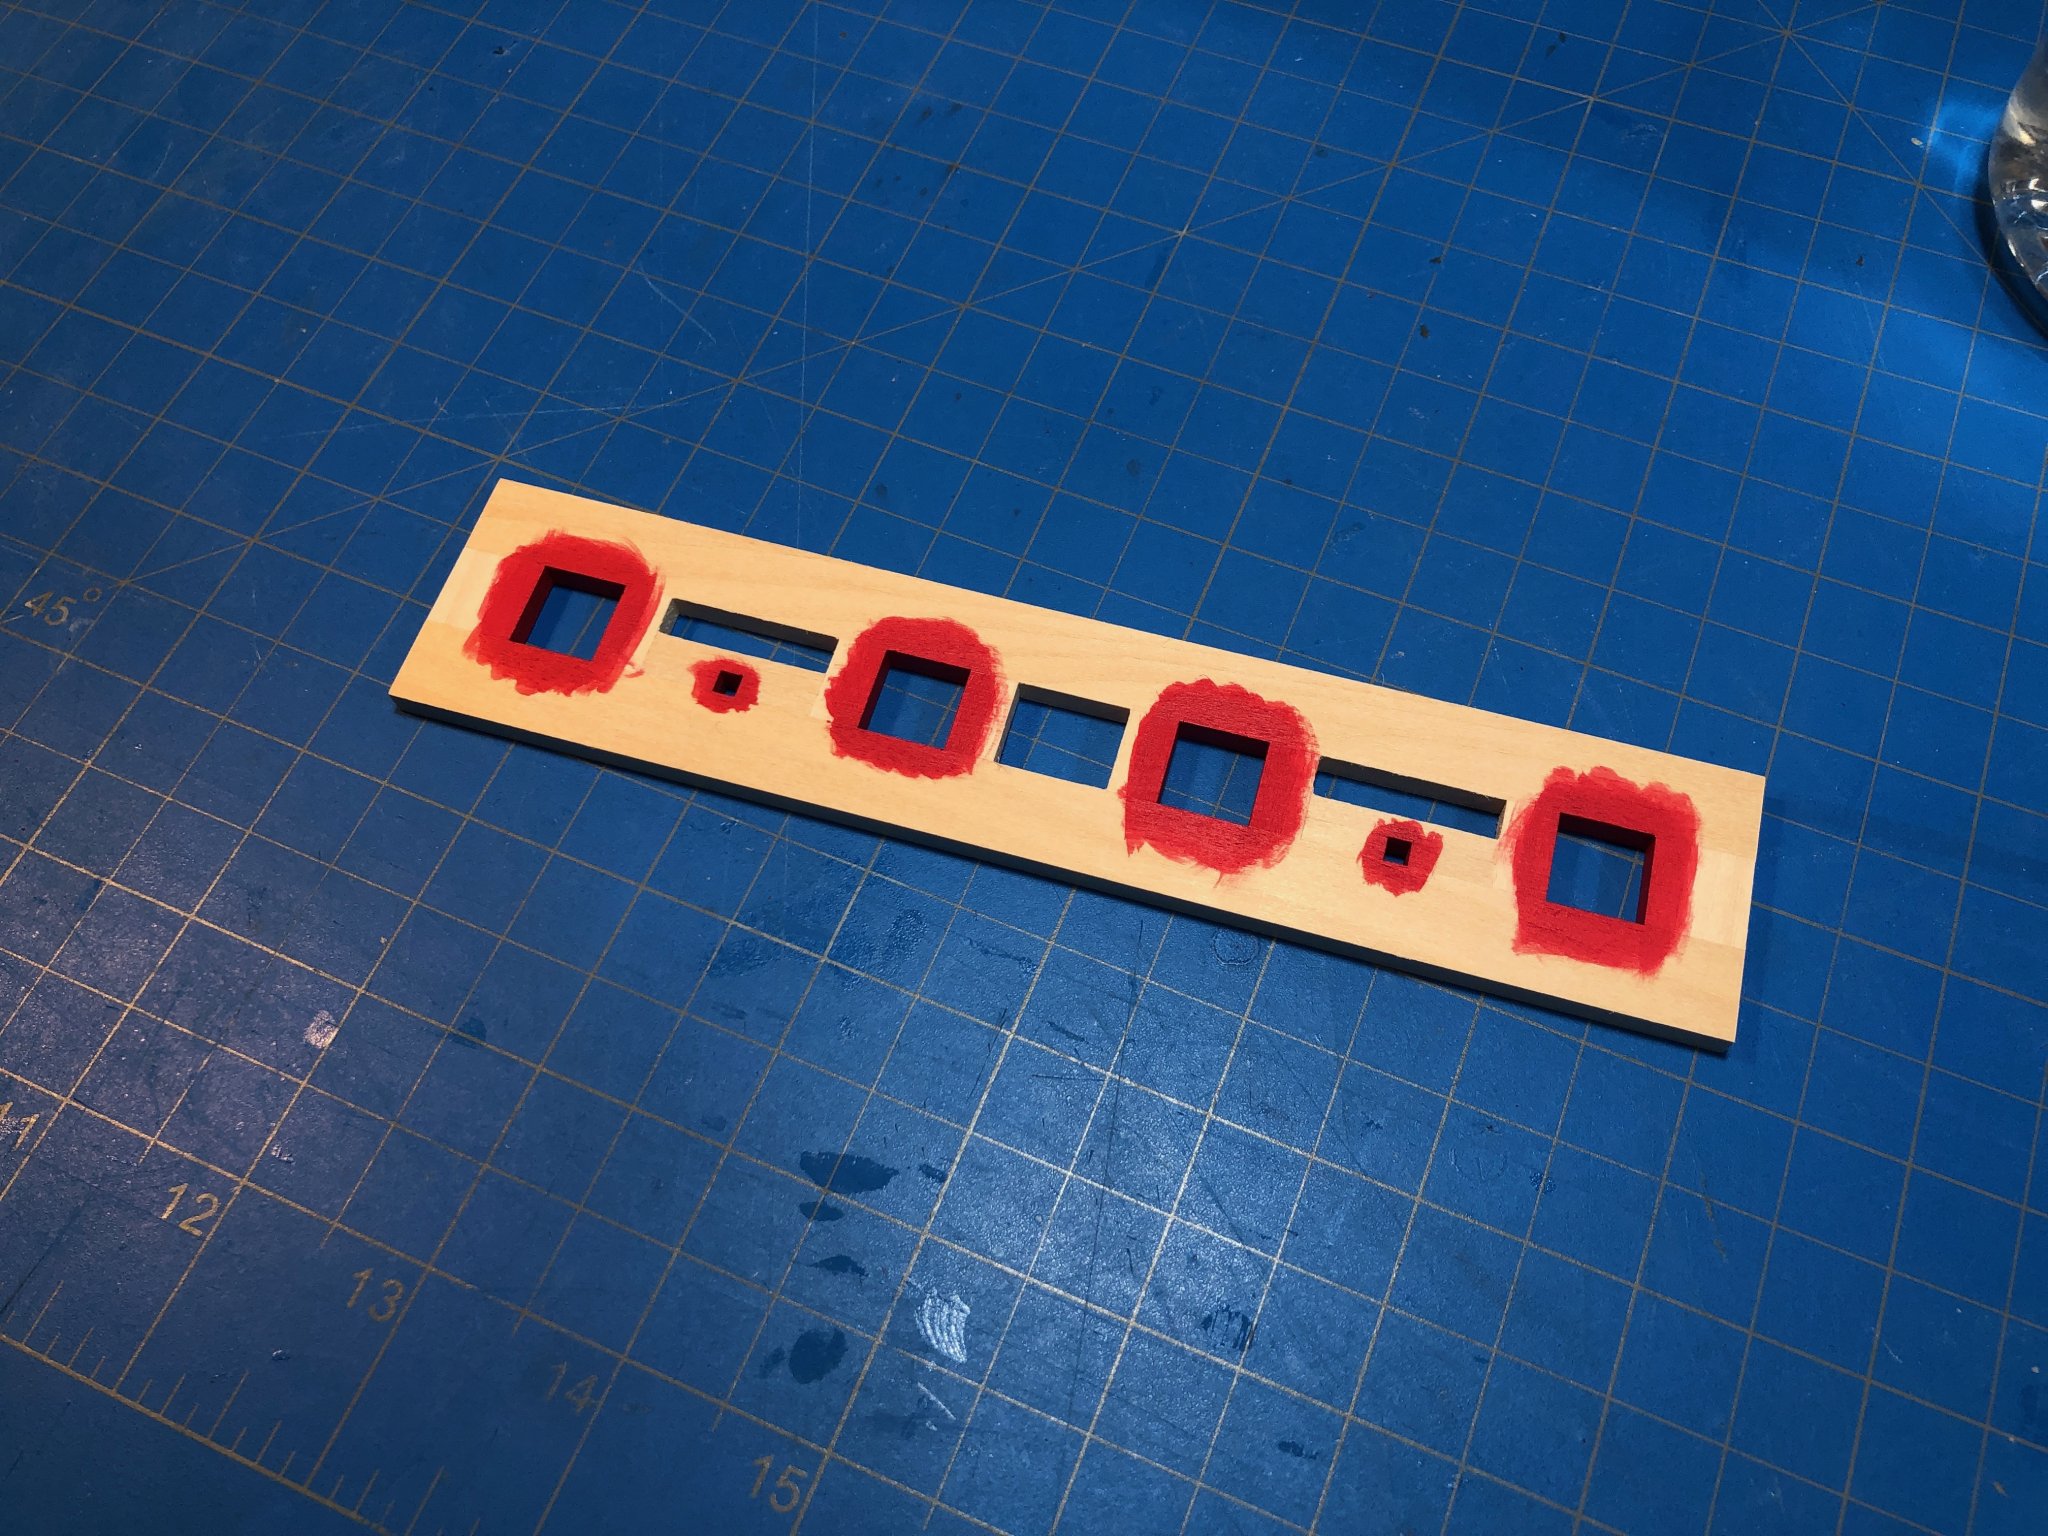
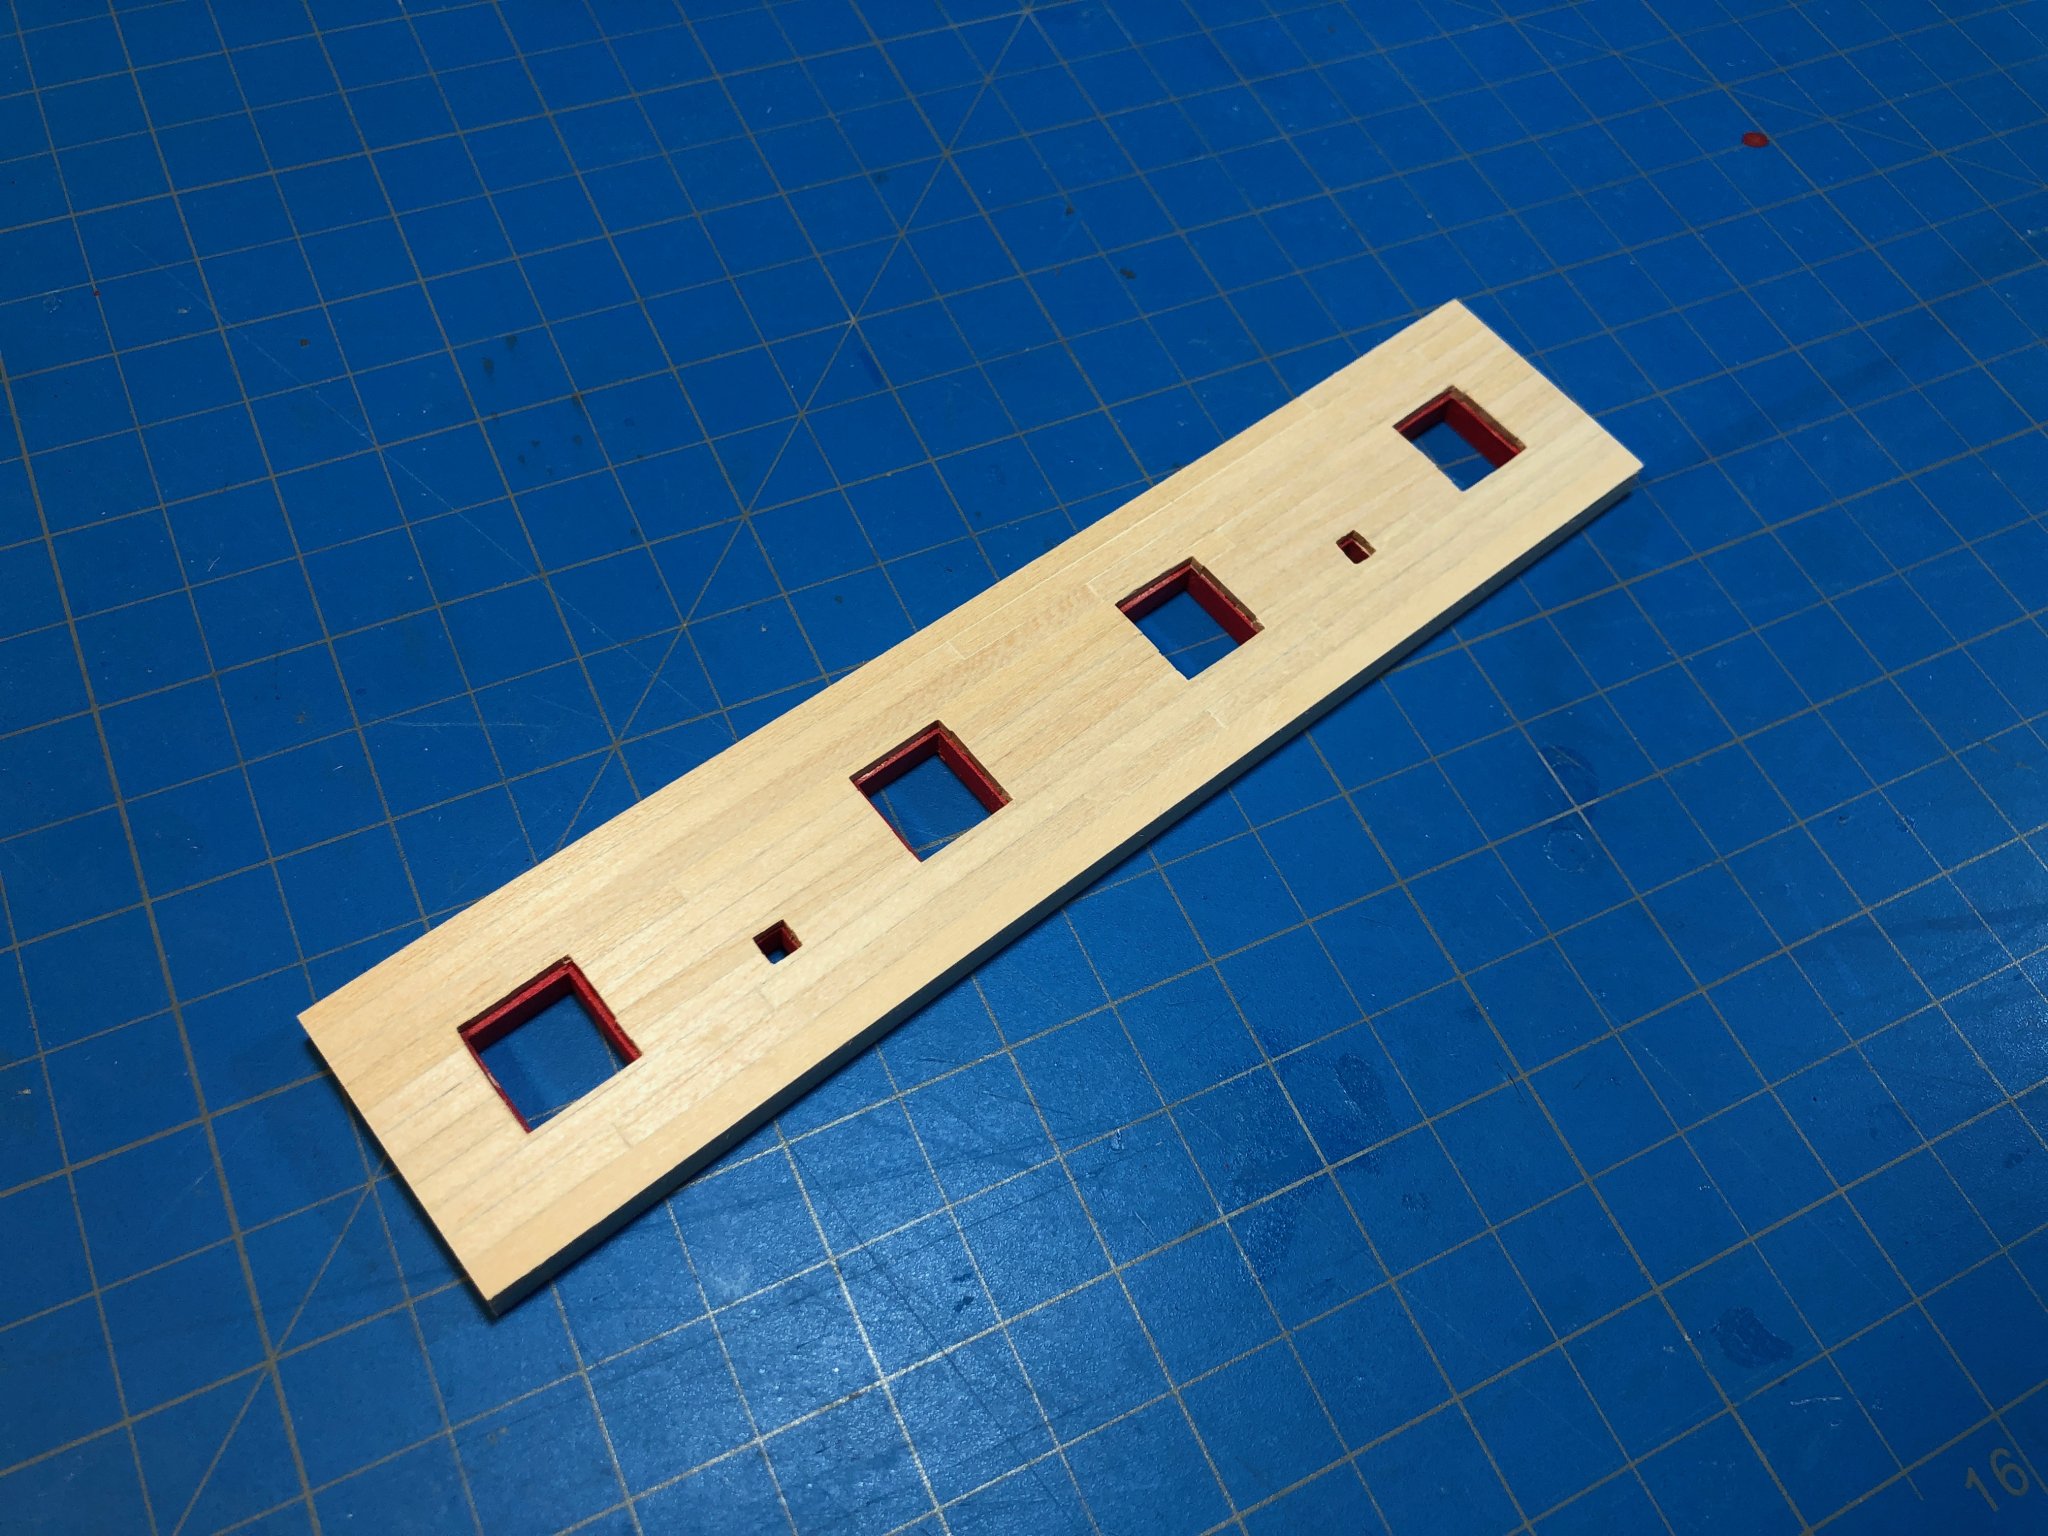
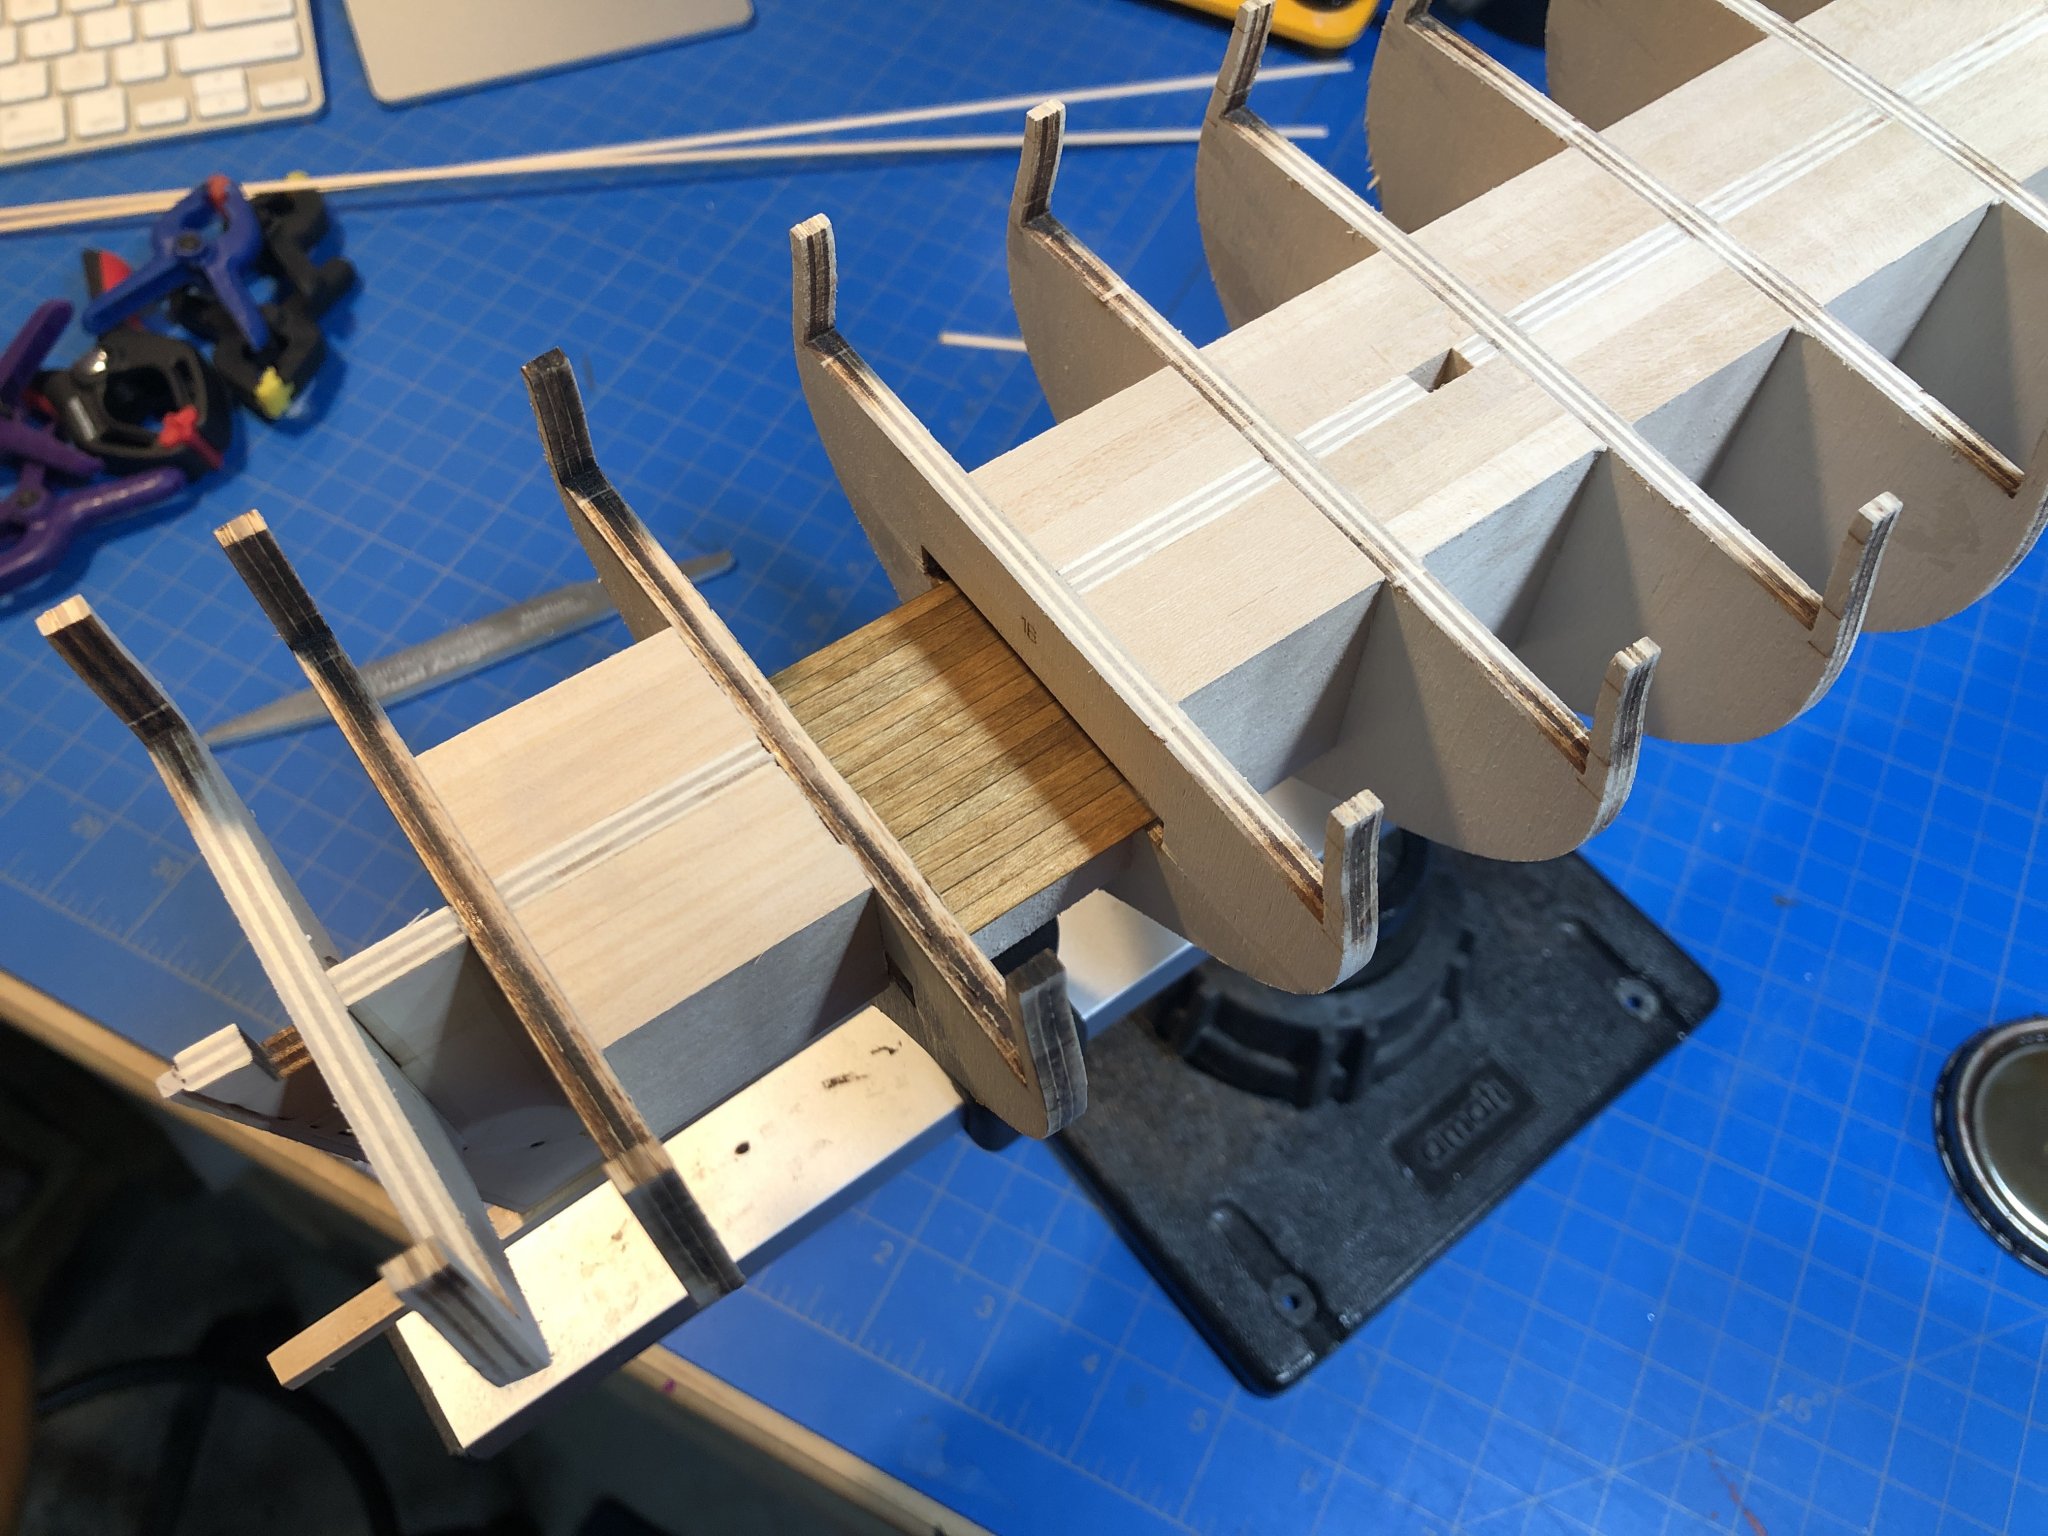
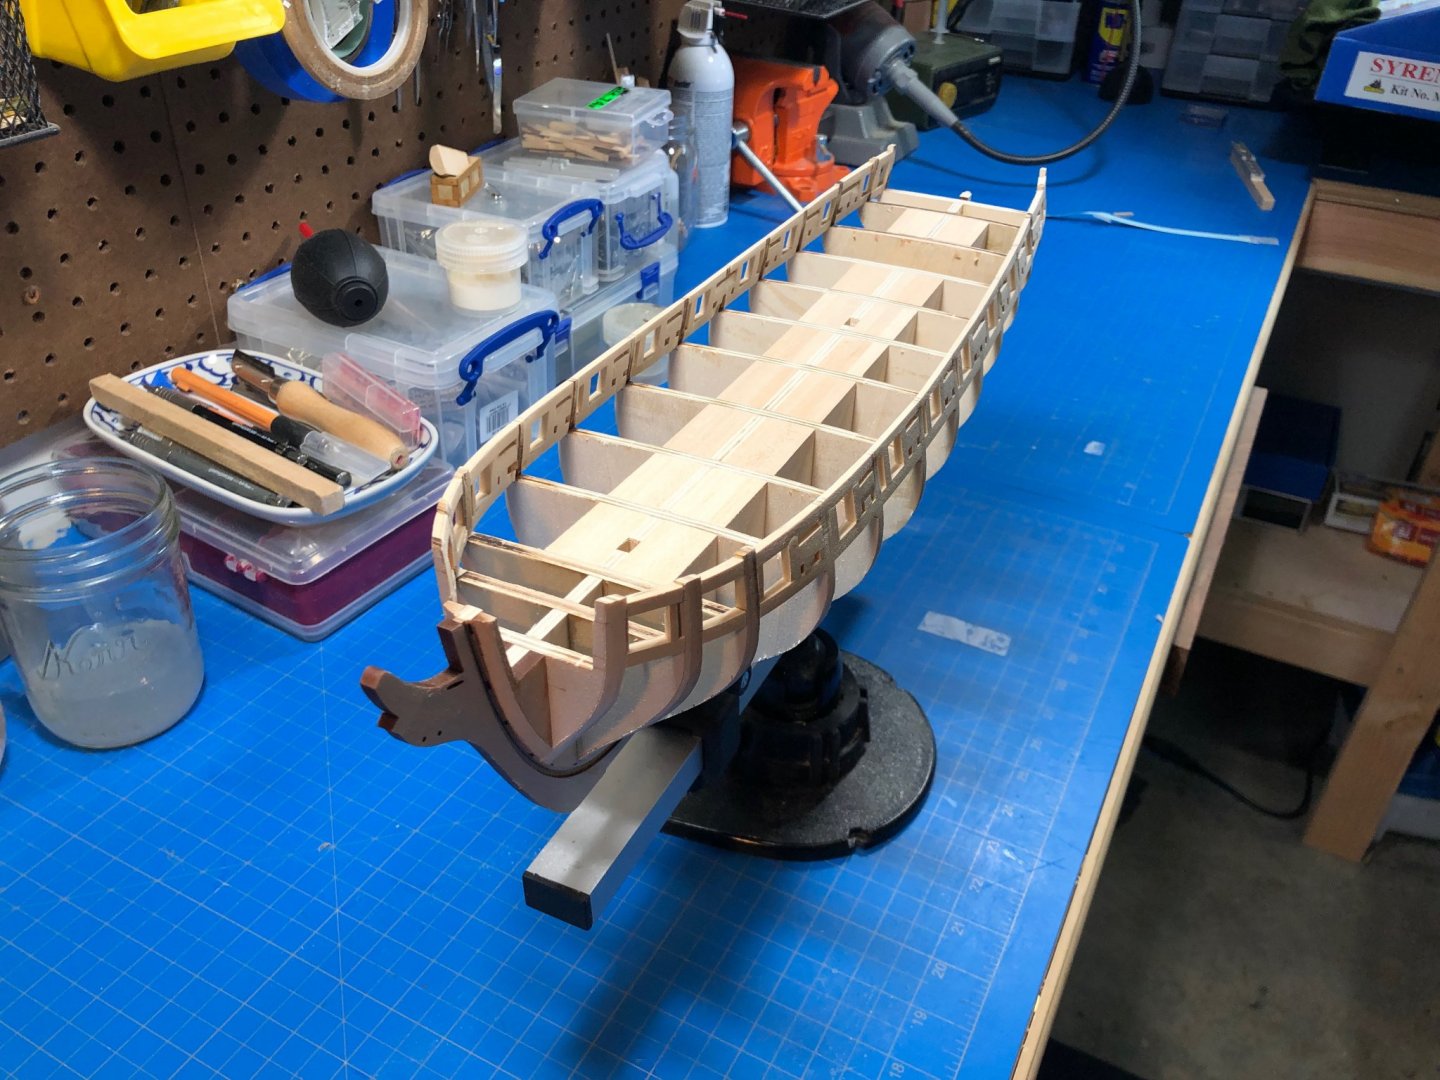
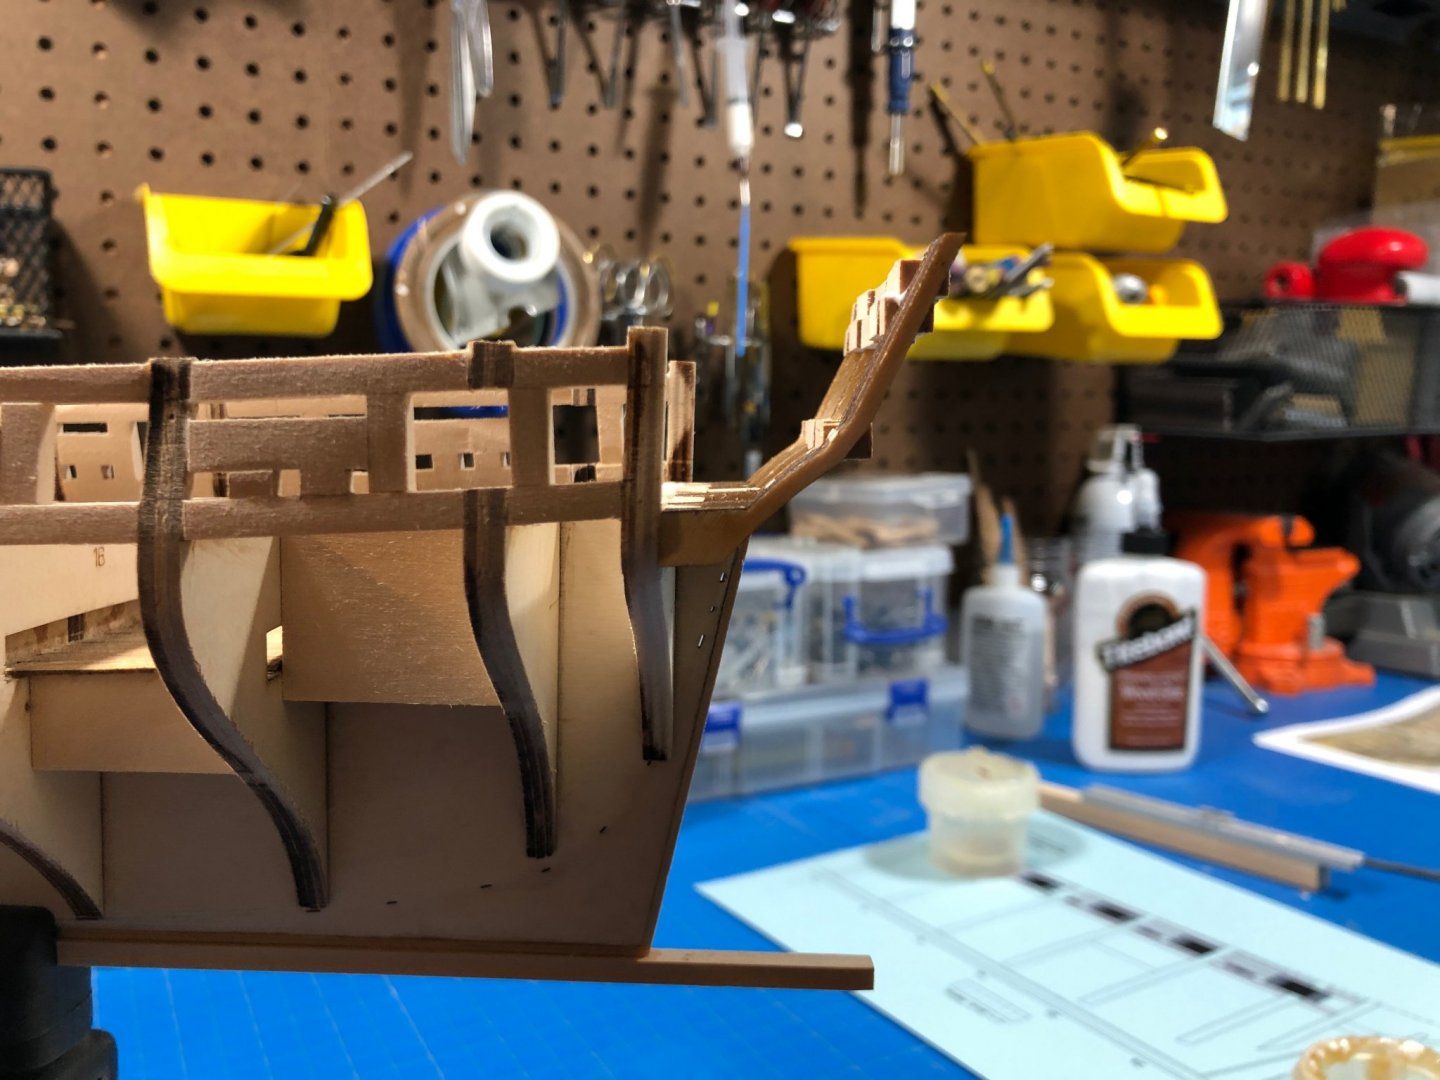
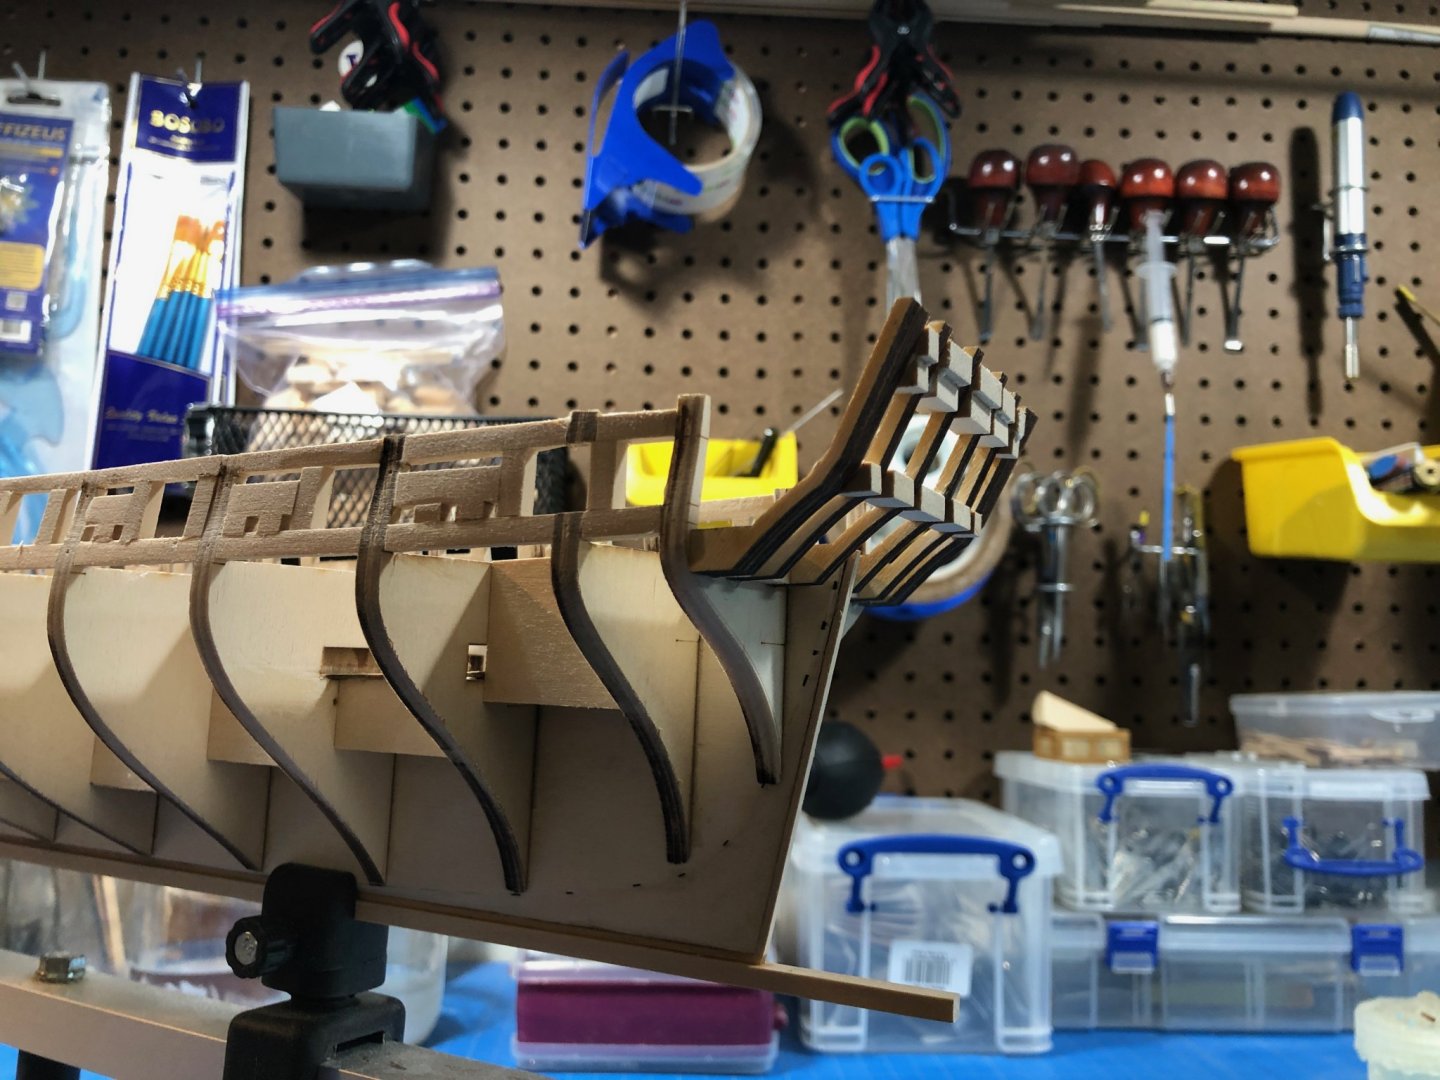
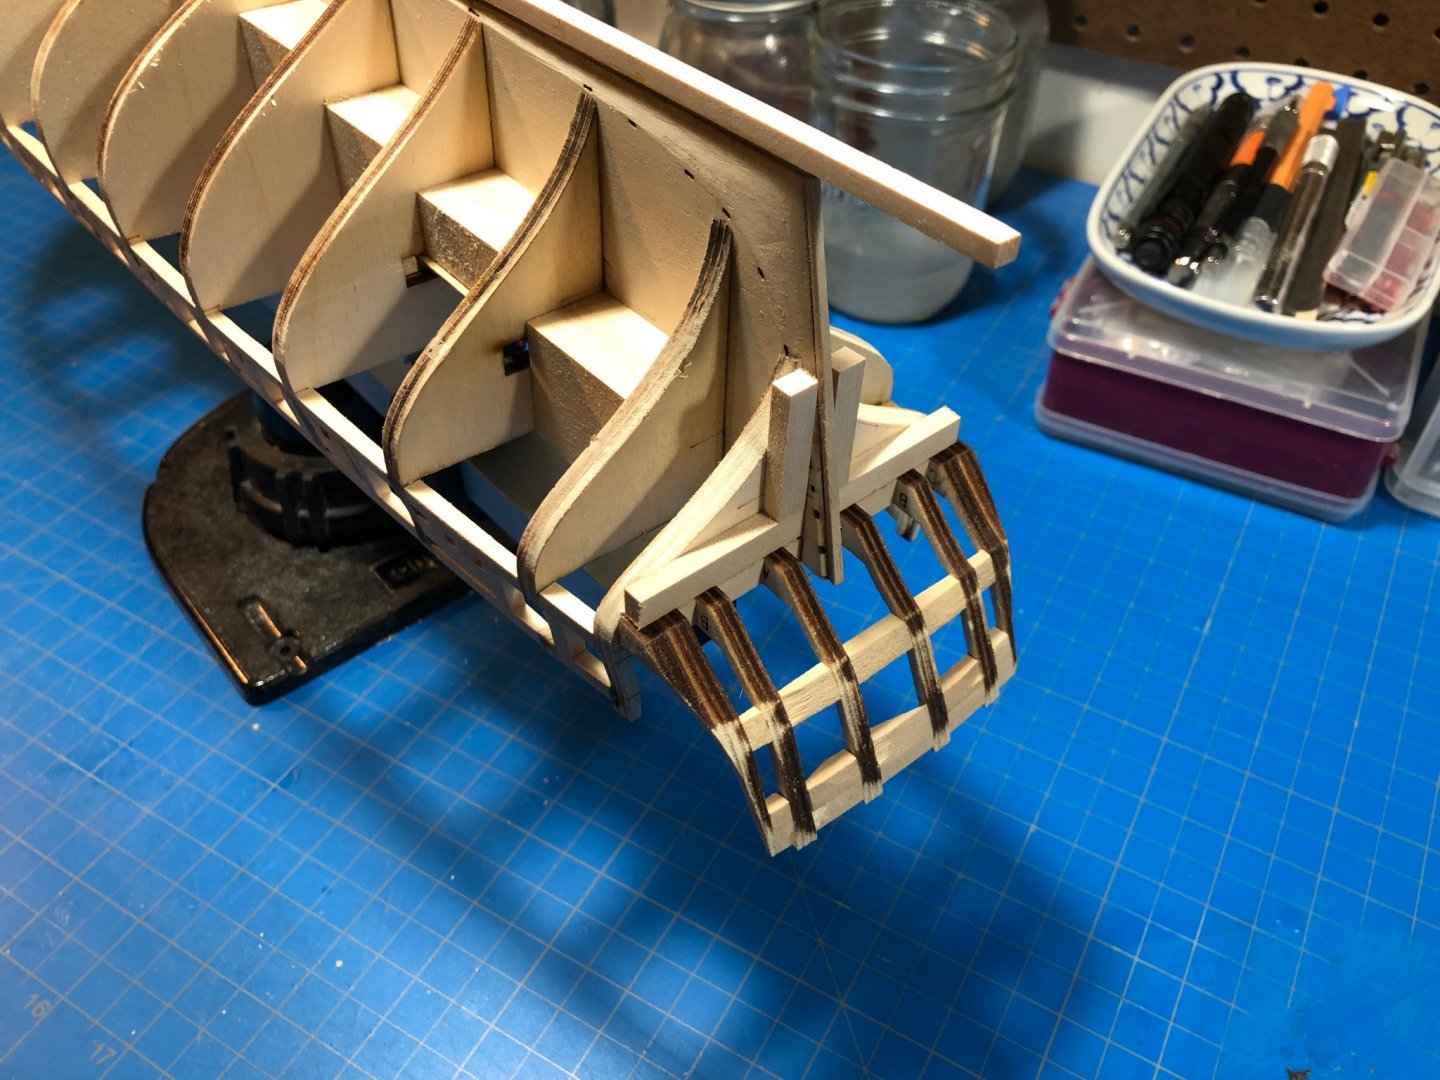
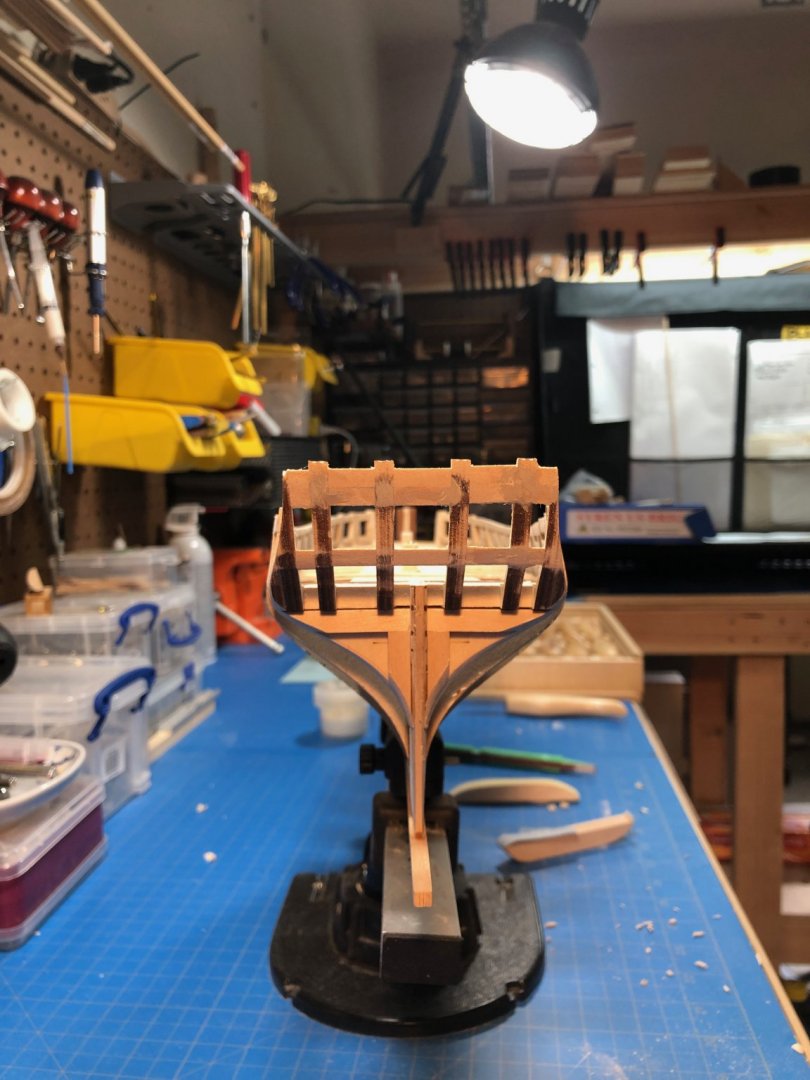
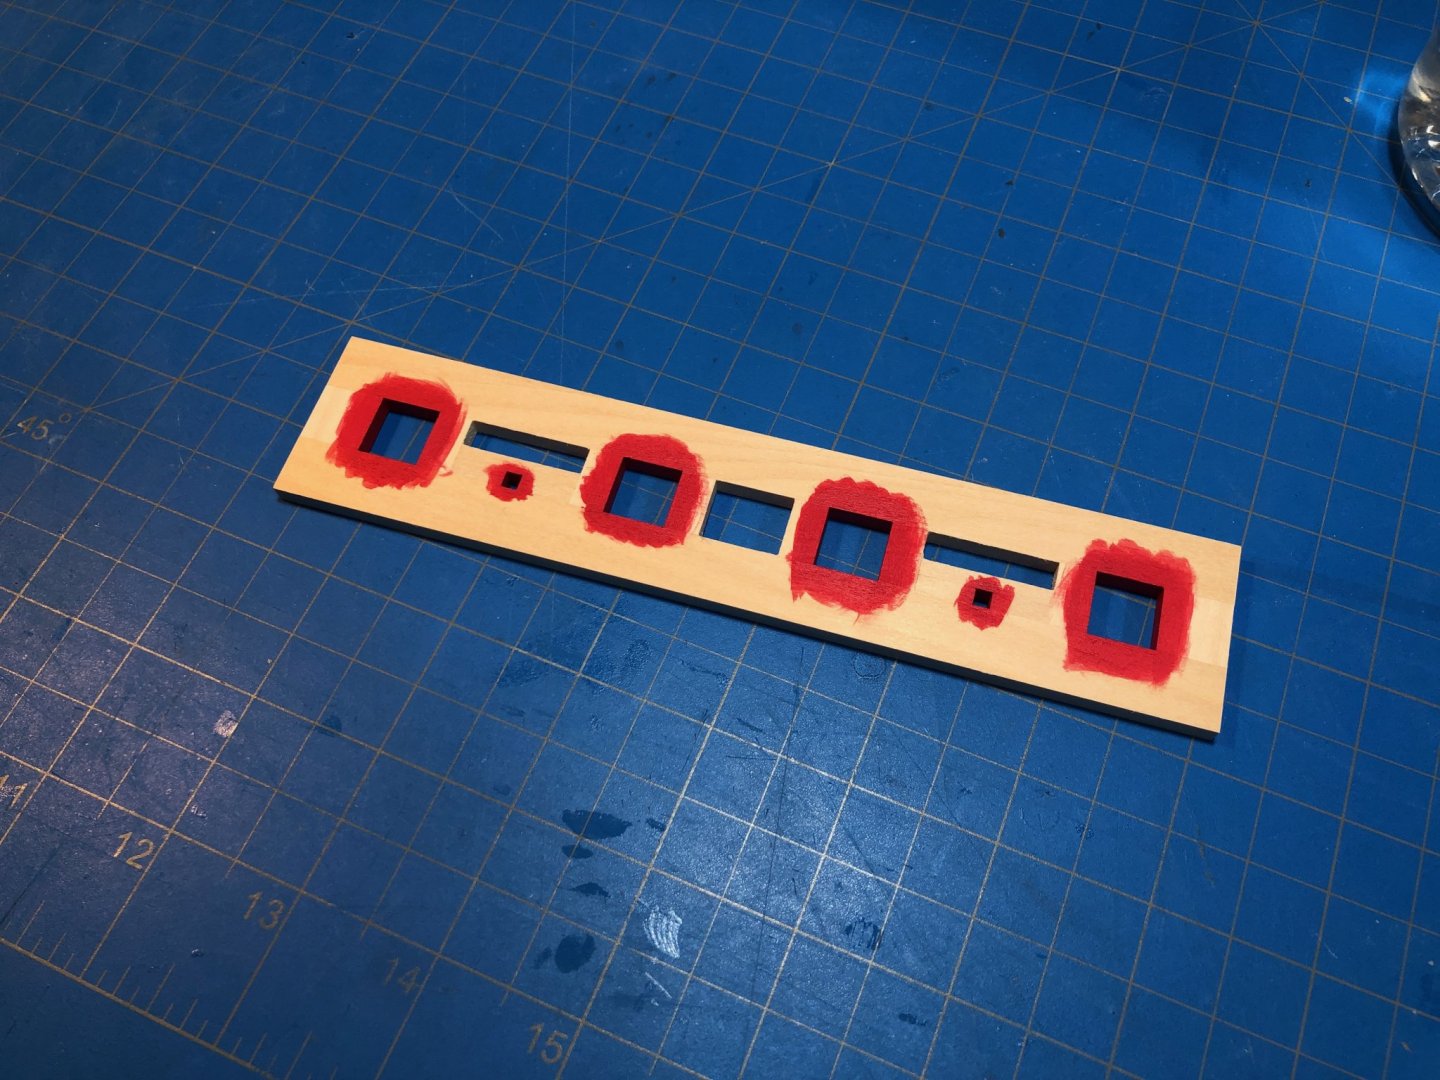
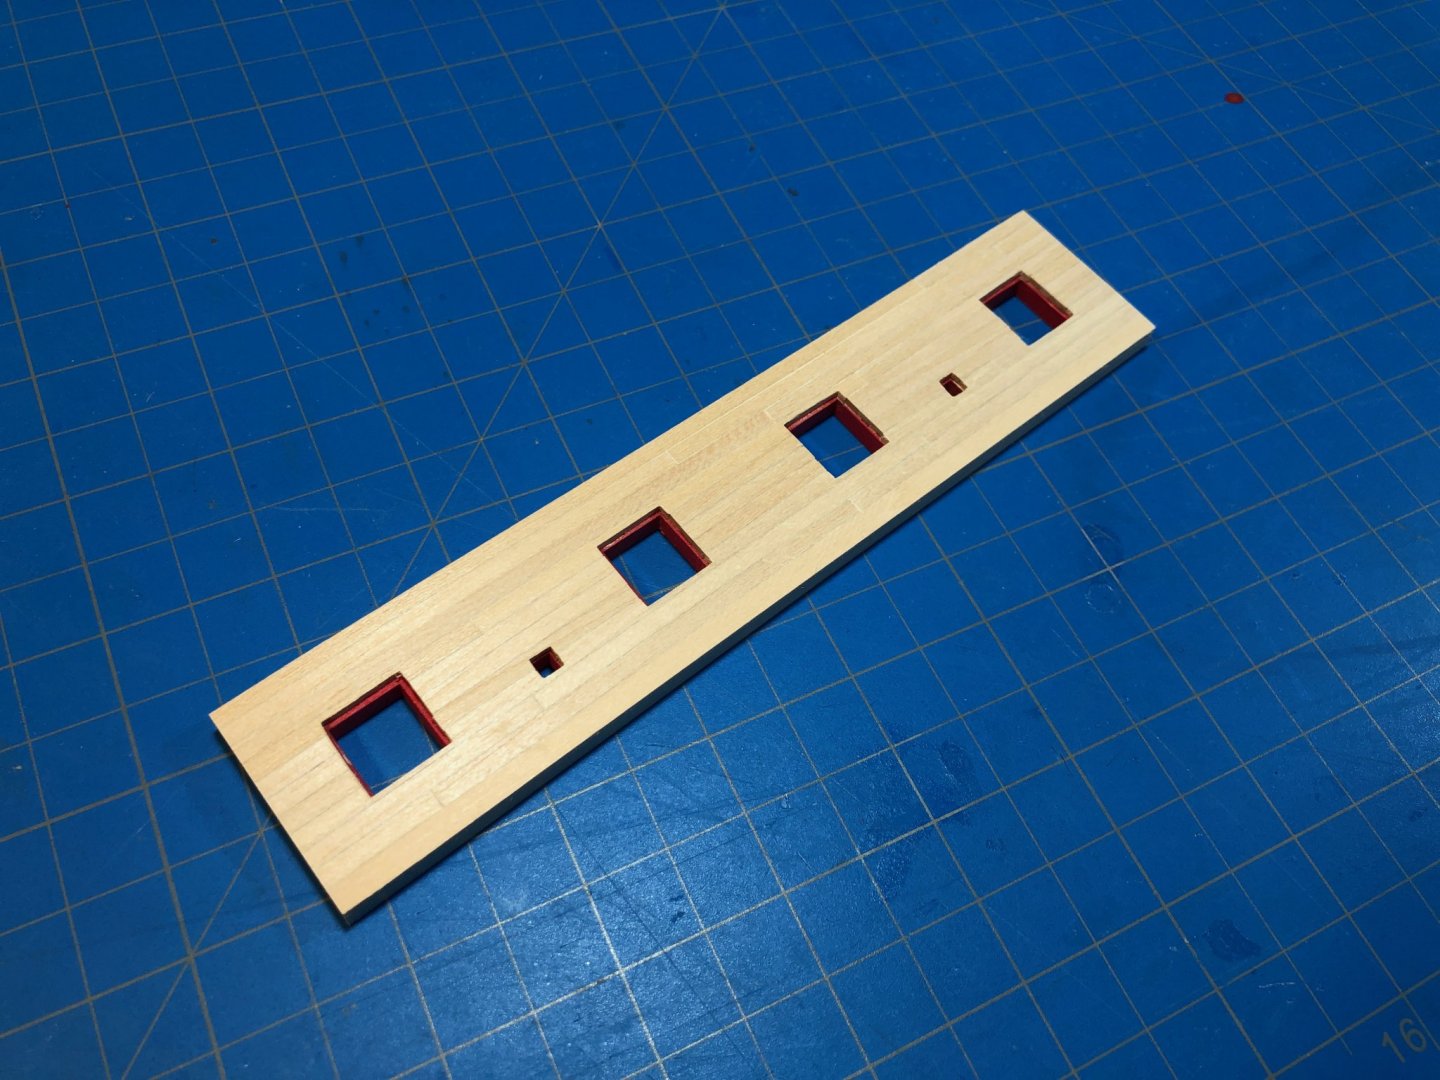
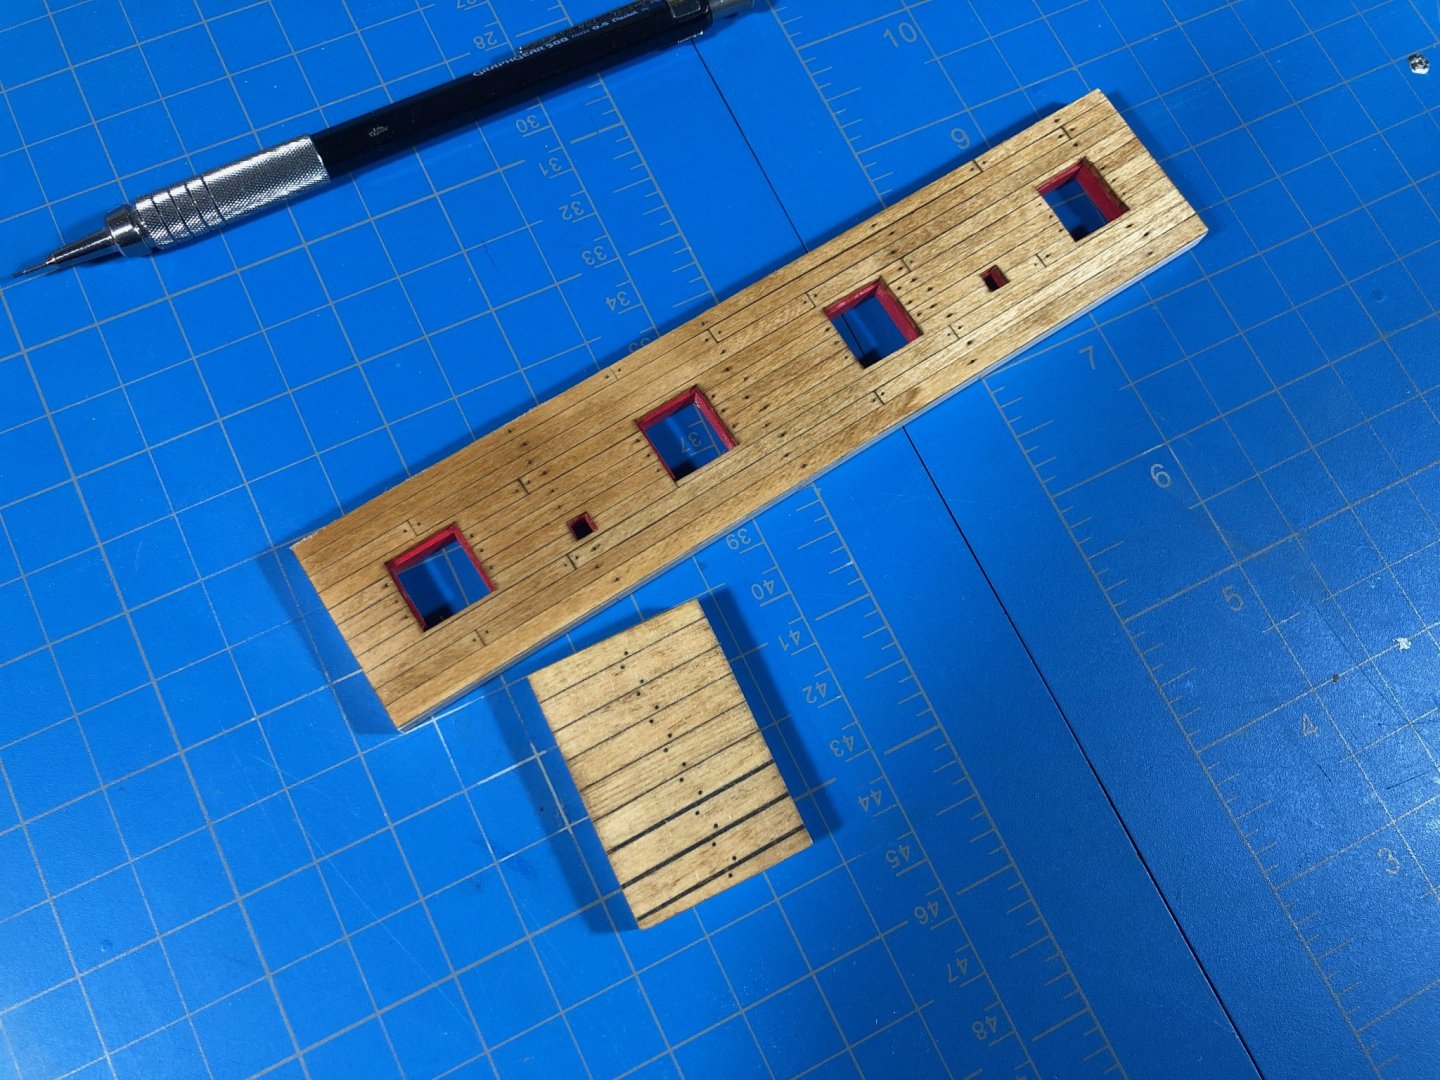
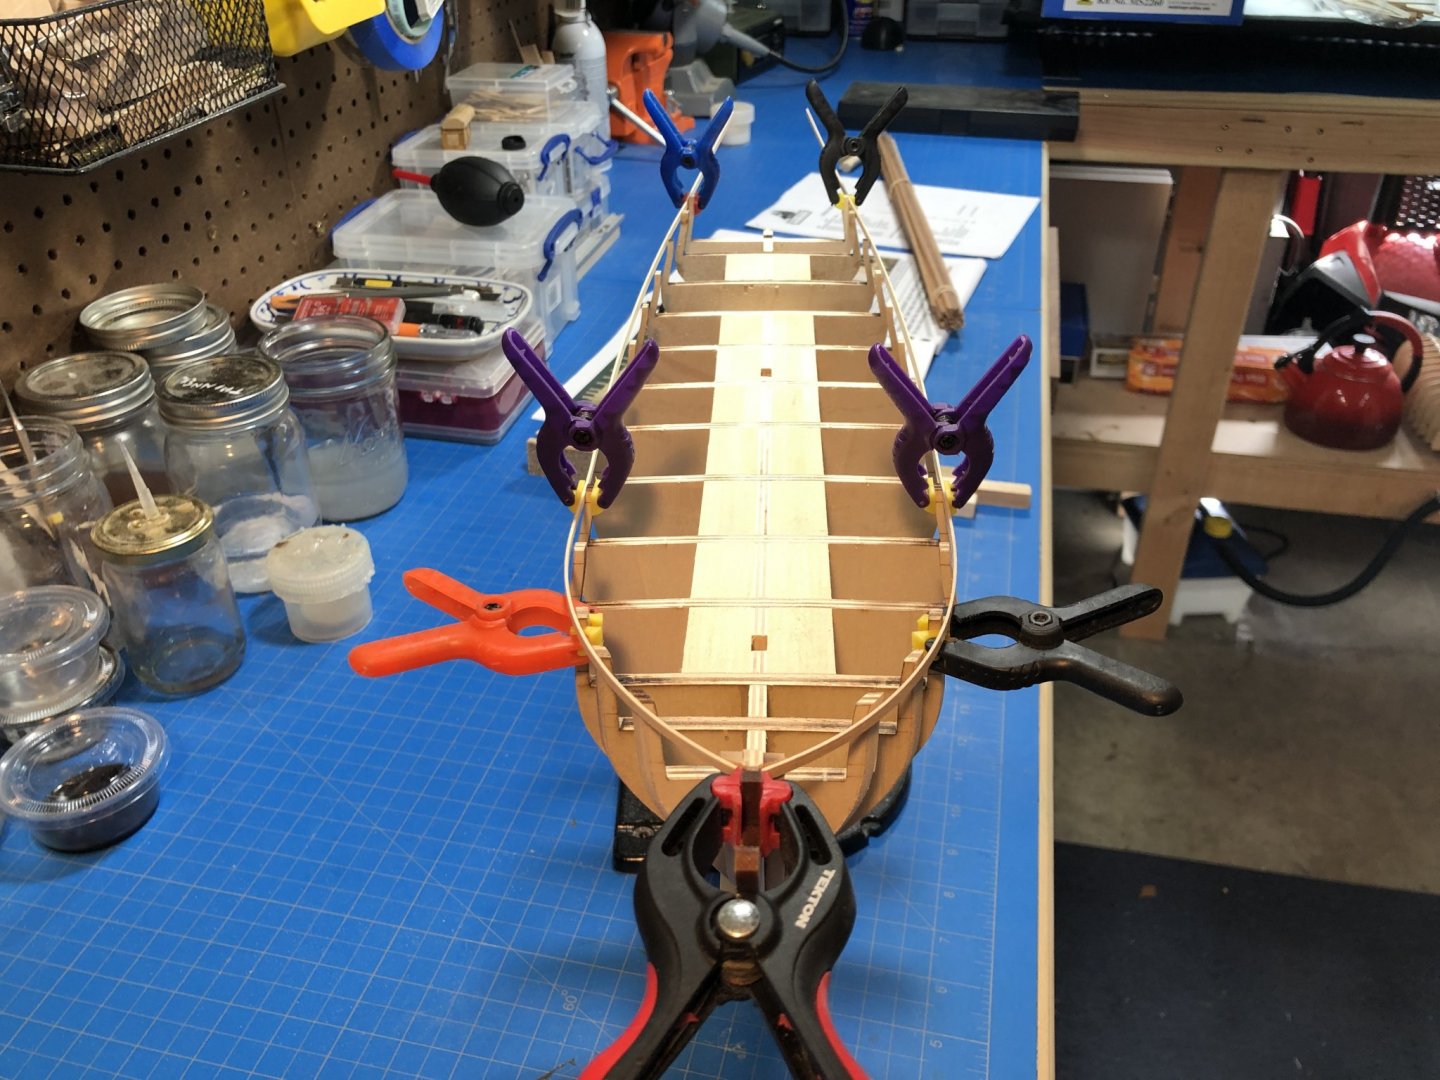
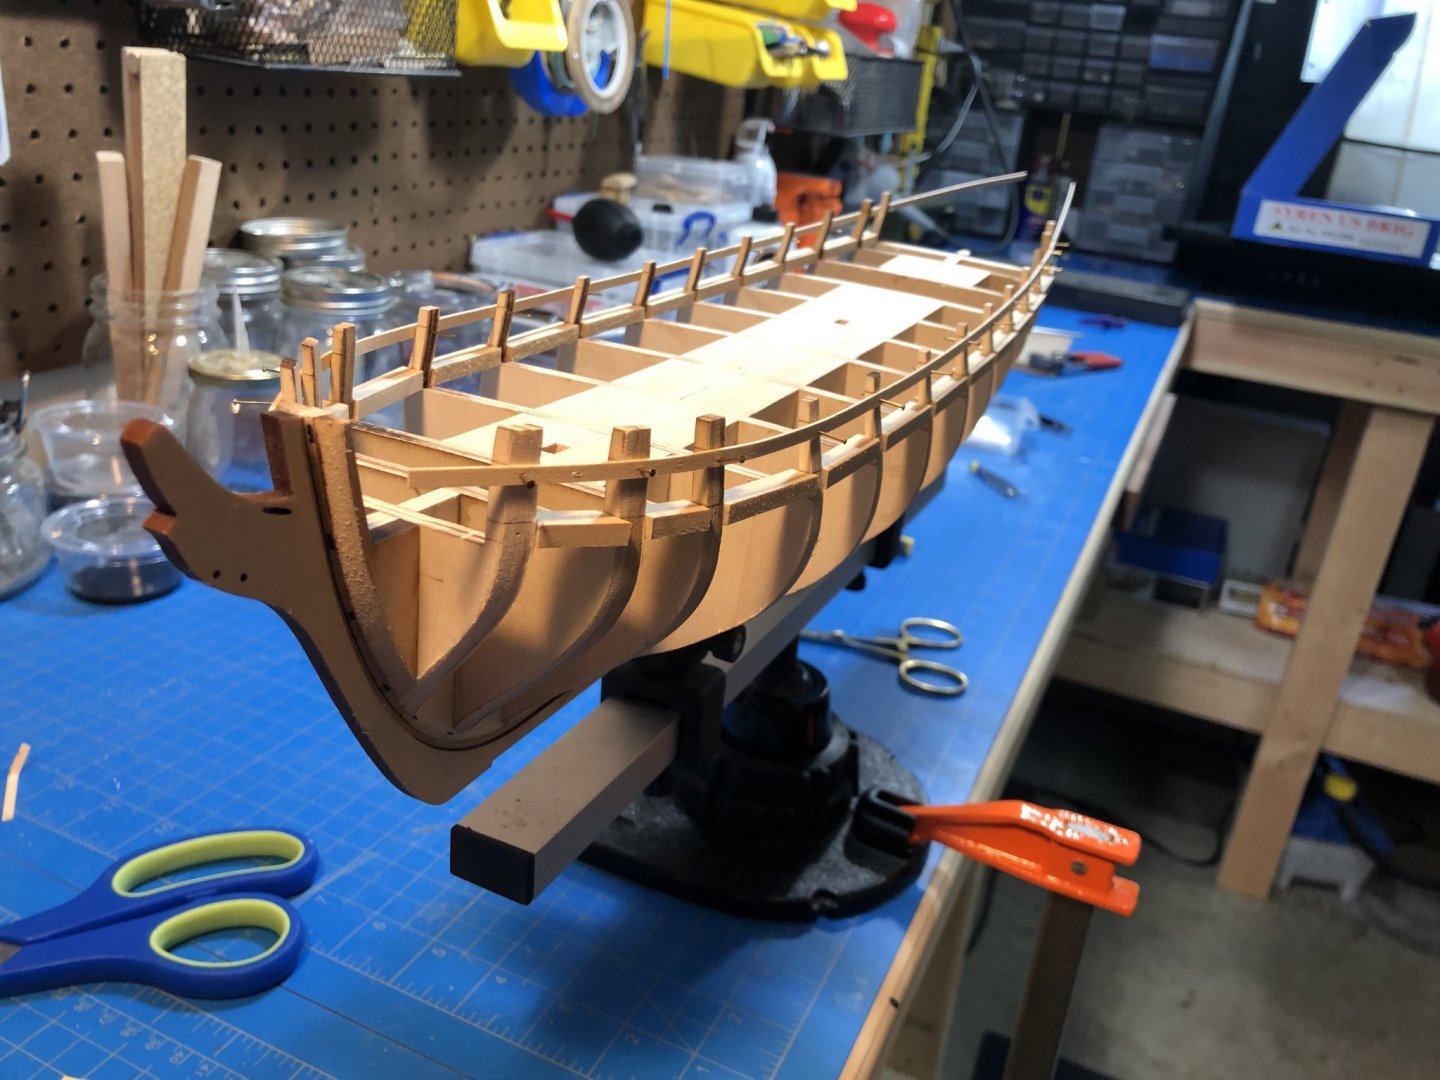
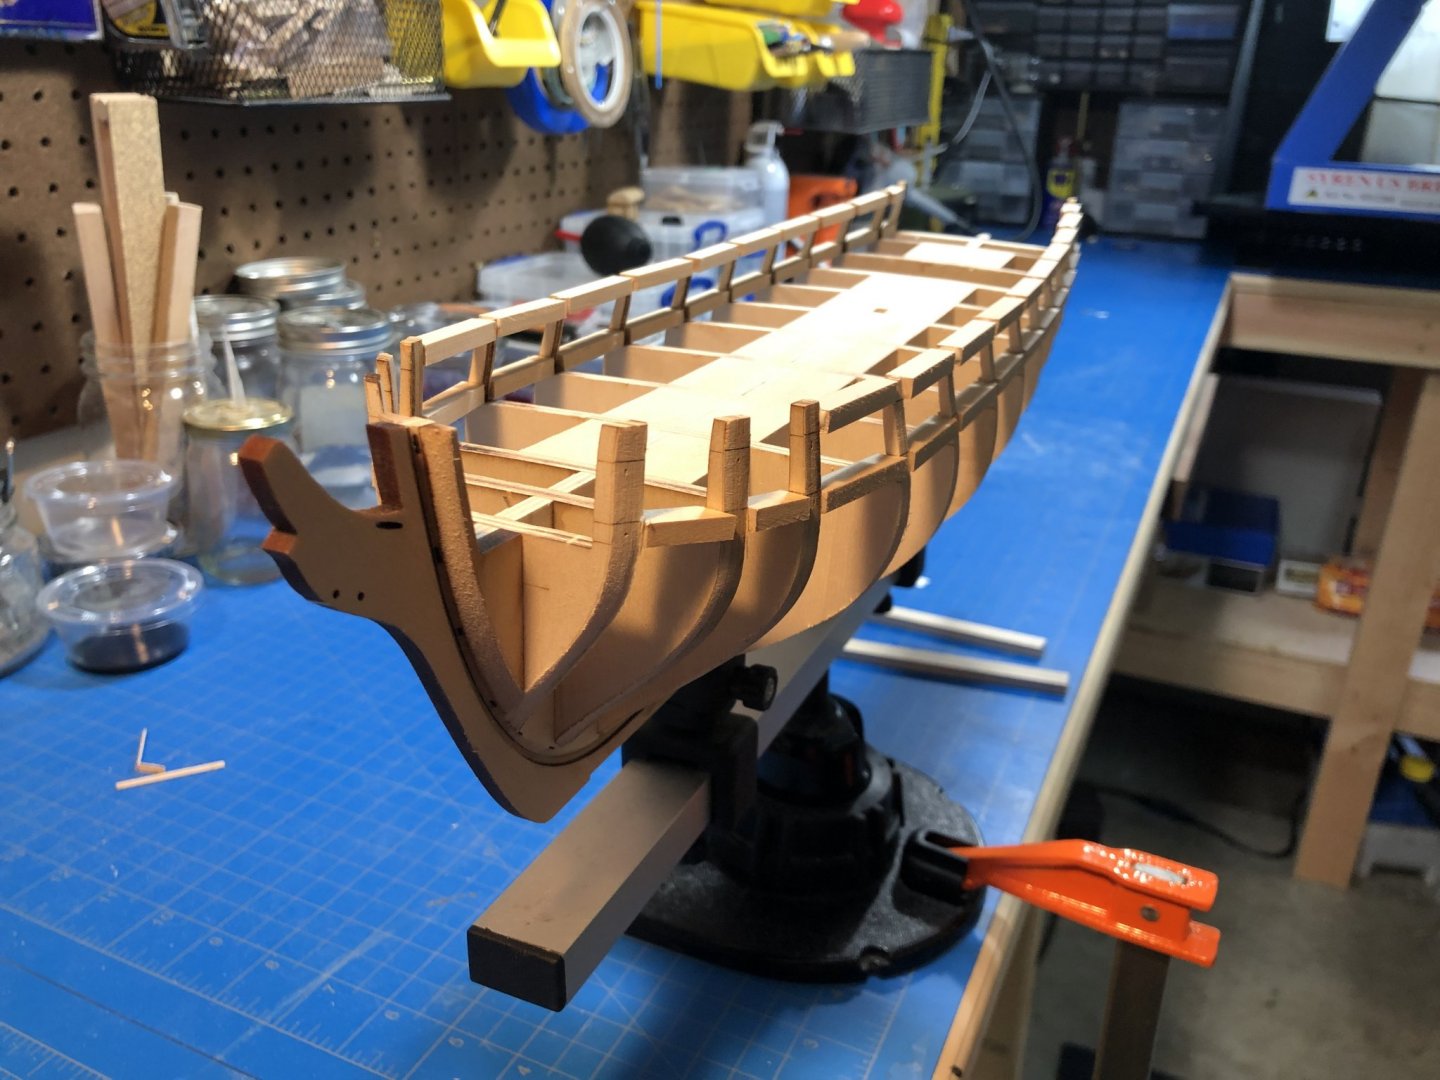
Busy week. I managed to get all the gun and sweep ports constructed. This took me forever, but Im happy with the result. As mentioned above, I constructed everything all the way through this process against the recommended instructions, as I felt more comfortable with fewer passes with the fairing sticks. I wanted everything in place so I could just fair once. This may have meant two or three times the work, but for me, less room for error. Below is shown this process, with the starboard fairing near complete, with the inboard and port sides left to be completed. This work was done with a combination of knives and sand paper. And now pictured with everything completed to the point that I could move on. I then started work on the stern framing, which thanks to the excellent production quality of my particular sample everything went together nicely. I proceeded with building out the ports in the same manner as above. Its at this point that the build proceeds into paint choices, upper wale planking and thoughts about finish and tree nailing. I really wanted to think this process out before proceeding, so as I do in my professional life I decided to mock it up first. I built a dummy section of upper wale with gun and sweep ports; painted and planked it and then added treenails. Finally a wash of stain as per the recommendations. Its at the treenails where I deviated. In other Syren builds, the treenail examples Ive seen haven't sat well with me. All other details might be wonderful, but it seems some of the proportions and material choices just put me off. Im a big fan of the filament and/or pencil type so thats the direction I went. Paint: Model Shipways "Bright Red Trim." I had done the other in "Hull Red" but I rejected that immediately and did not move forward with that mock-up. At the moment Im feeling rather ambivalent about the result. The full mock-up is done with a .5mm pencil while the partial mock-up below is done with .6mm monofilament. The monofilament is much cleaner, while the pencil crushes the grain a bit and results in the elongated "eye" shape around the nails. Not something I want all over my model. The filament at .6mm is still a bit too large for this scale (in my opinion). I may knock-out one more quick mock-up with a smaller filament size if I can find it, or I may try some blackened wood filler. I should sleep on it. Otherwise, Im happy with the Golden Oak Miniwax stain, the choice of graphite for the caulking and paint choice.


-
Thanks. Yes I do plan to taper it. I know it sounds crazy, but sometimes I deviate on steps, knowing how I work and in which order I might achieve greater success. For instance, Im now working on the gun ports and will not fair any of it until the entirety is constructed. The instructions say to fair as I go (i.e ports/lintels then the next step) but I know that just wont work for me. Im bound to take too much off if there are multiple steps.
-
Hi Tom, I wish I could help more, and likely someone can but wanted to point out that it might be helpful to know what vessel we are talking about. This might be an important detail - I dont know, just guessing. Is this from your Leopard project? Good Luck!
-
Glad to be back following along, I missed the last few weeks but Ill try to catch up on my reading. Looks great so far!
- 950 replies
-
- 1
-

-
- syren
- model shipways
- (and 1 more)
-
Fantastic re-post of great info. Thanks! Also, Ive been away for a bit, but your progress is wonderful. I love the details you are putting in.
-
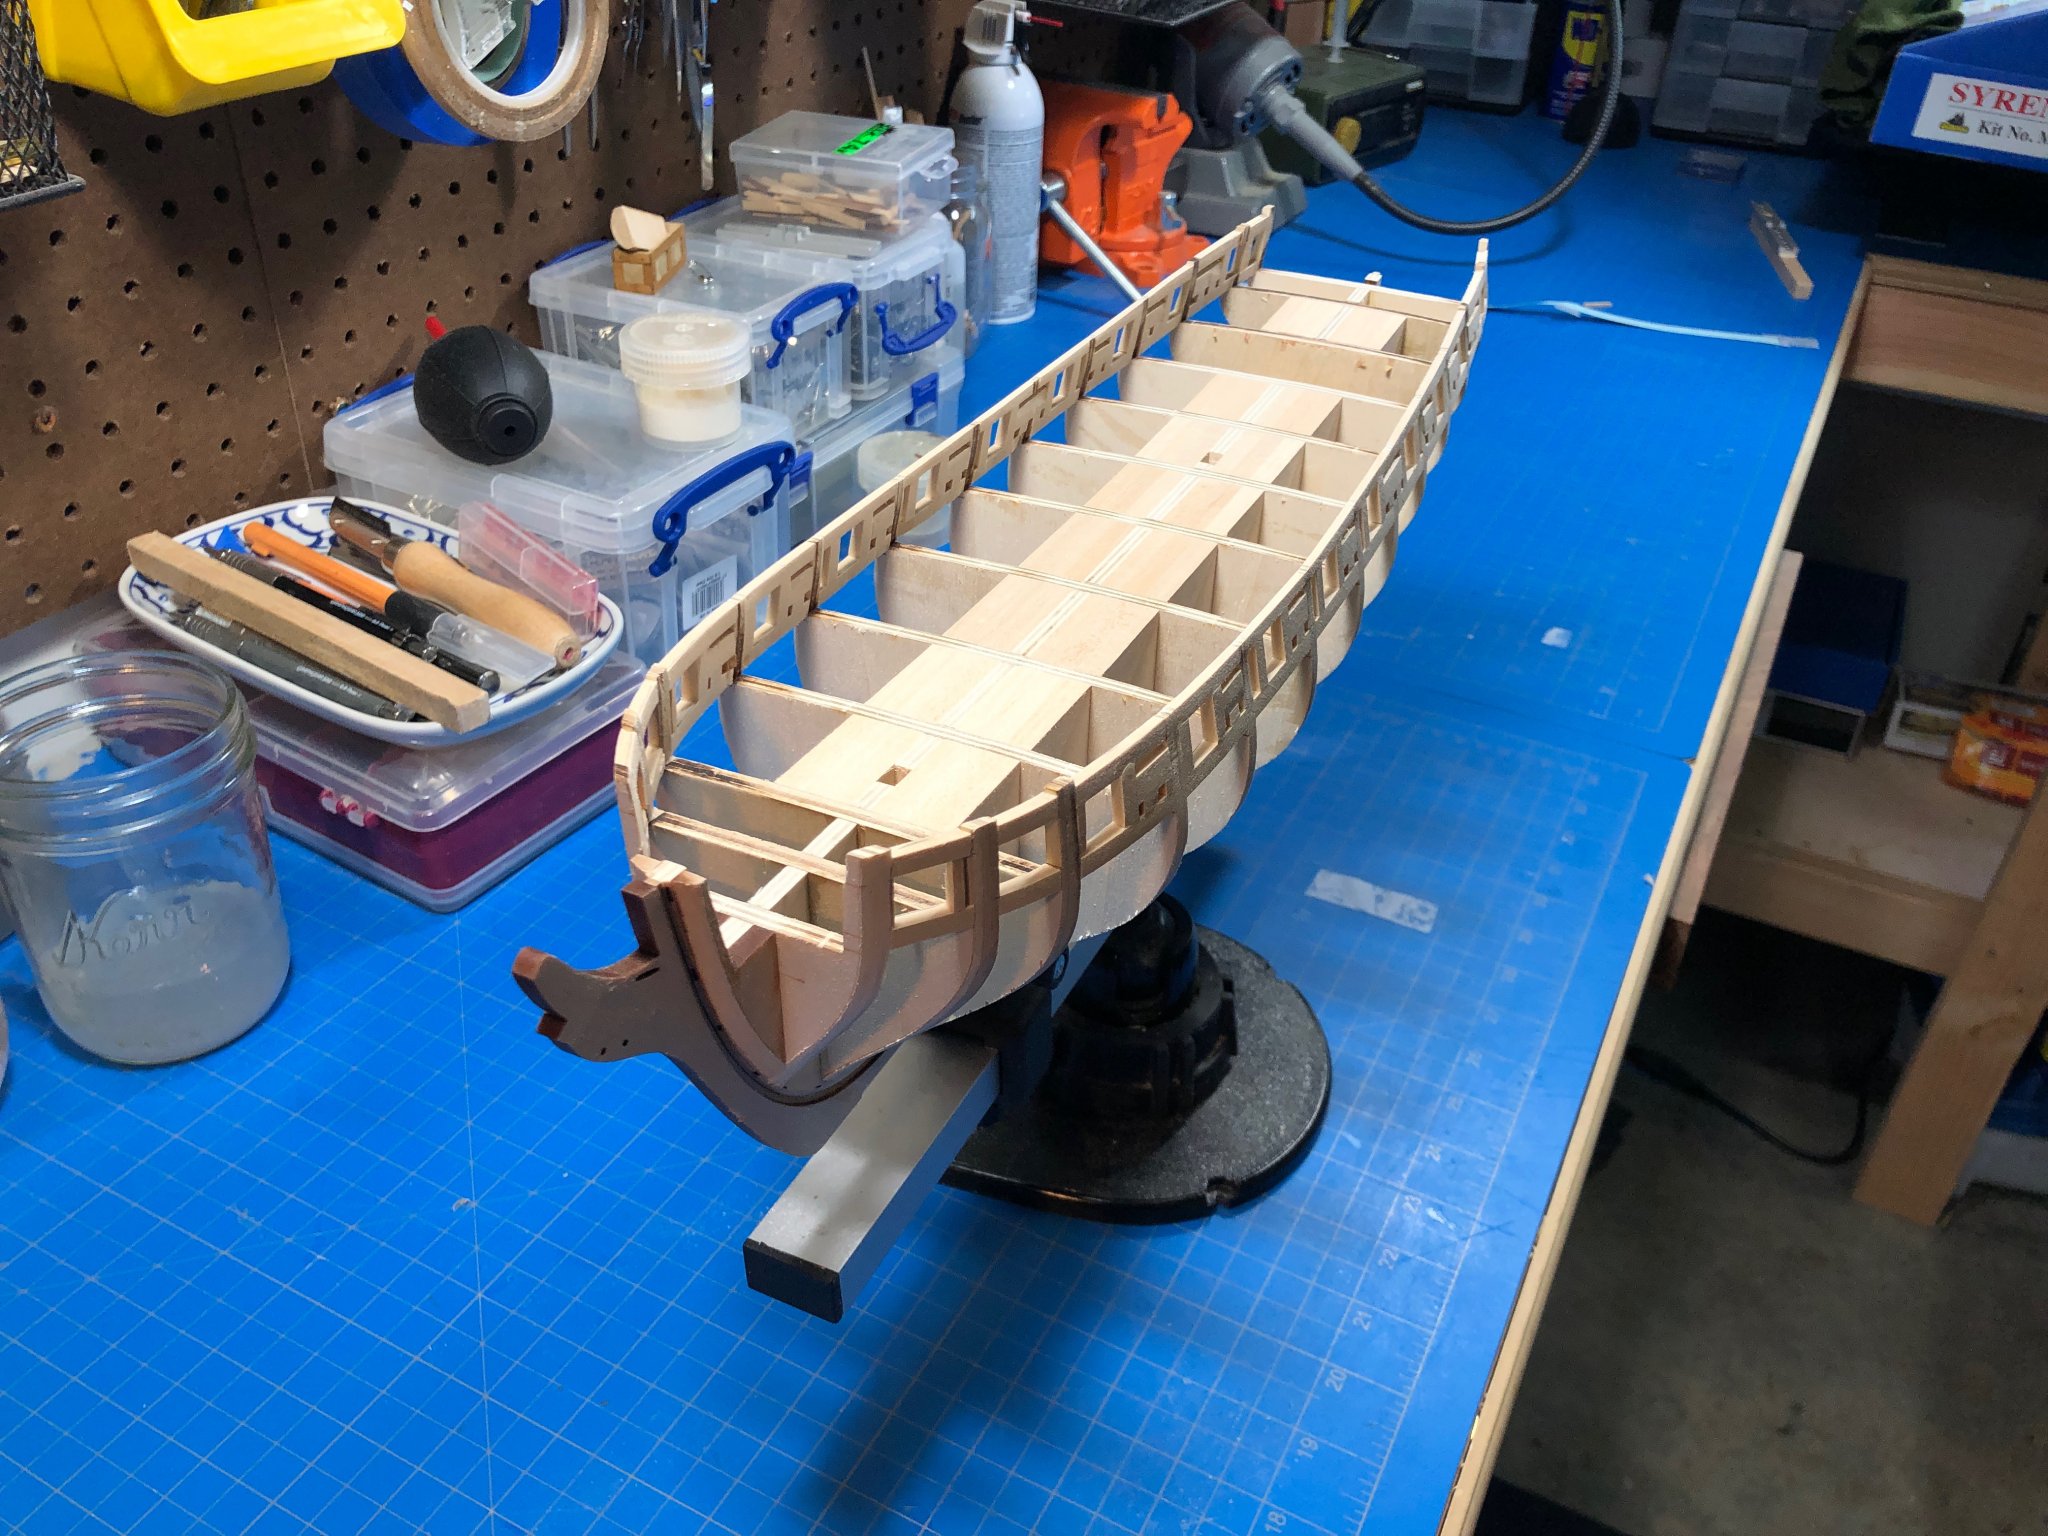
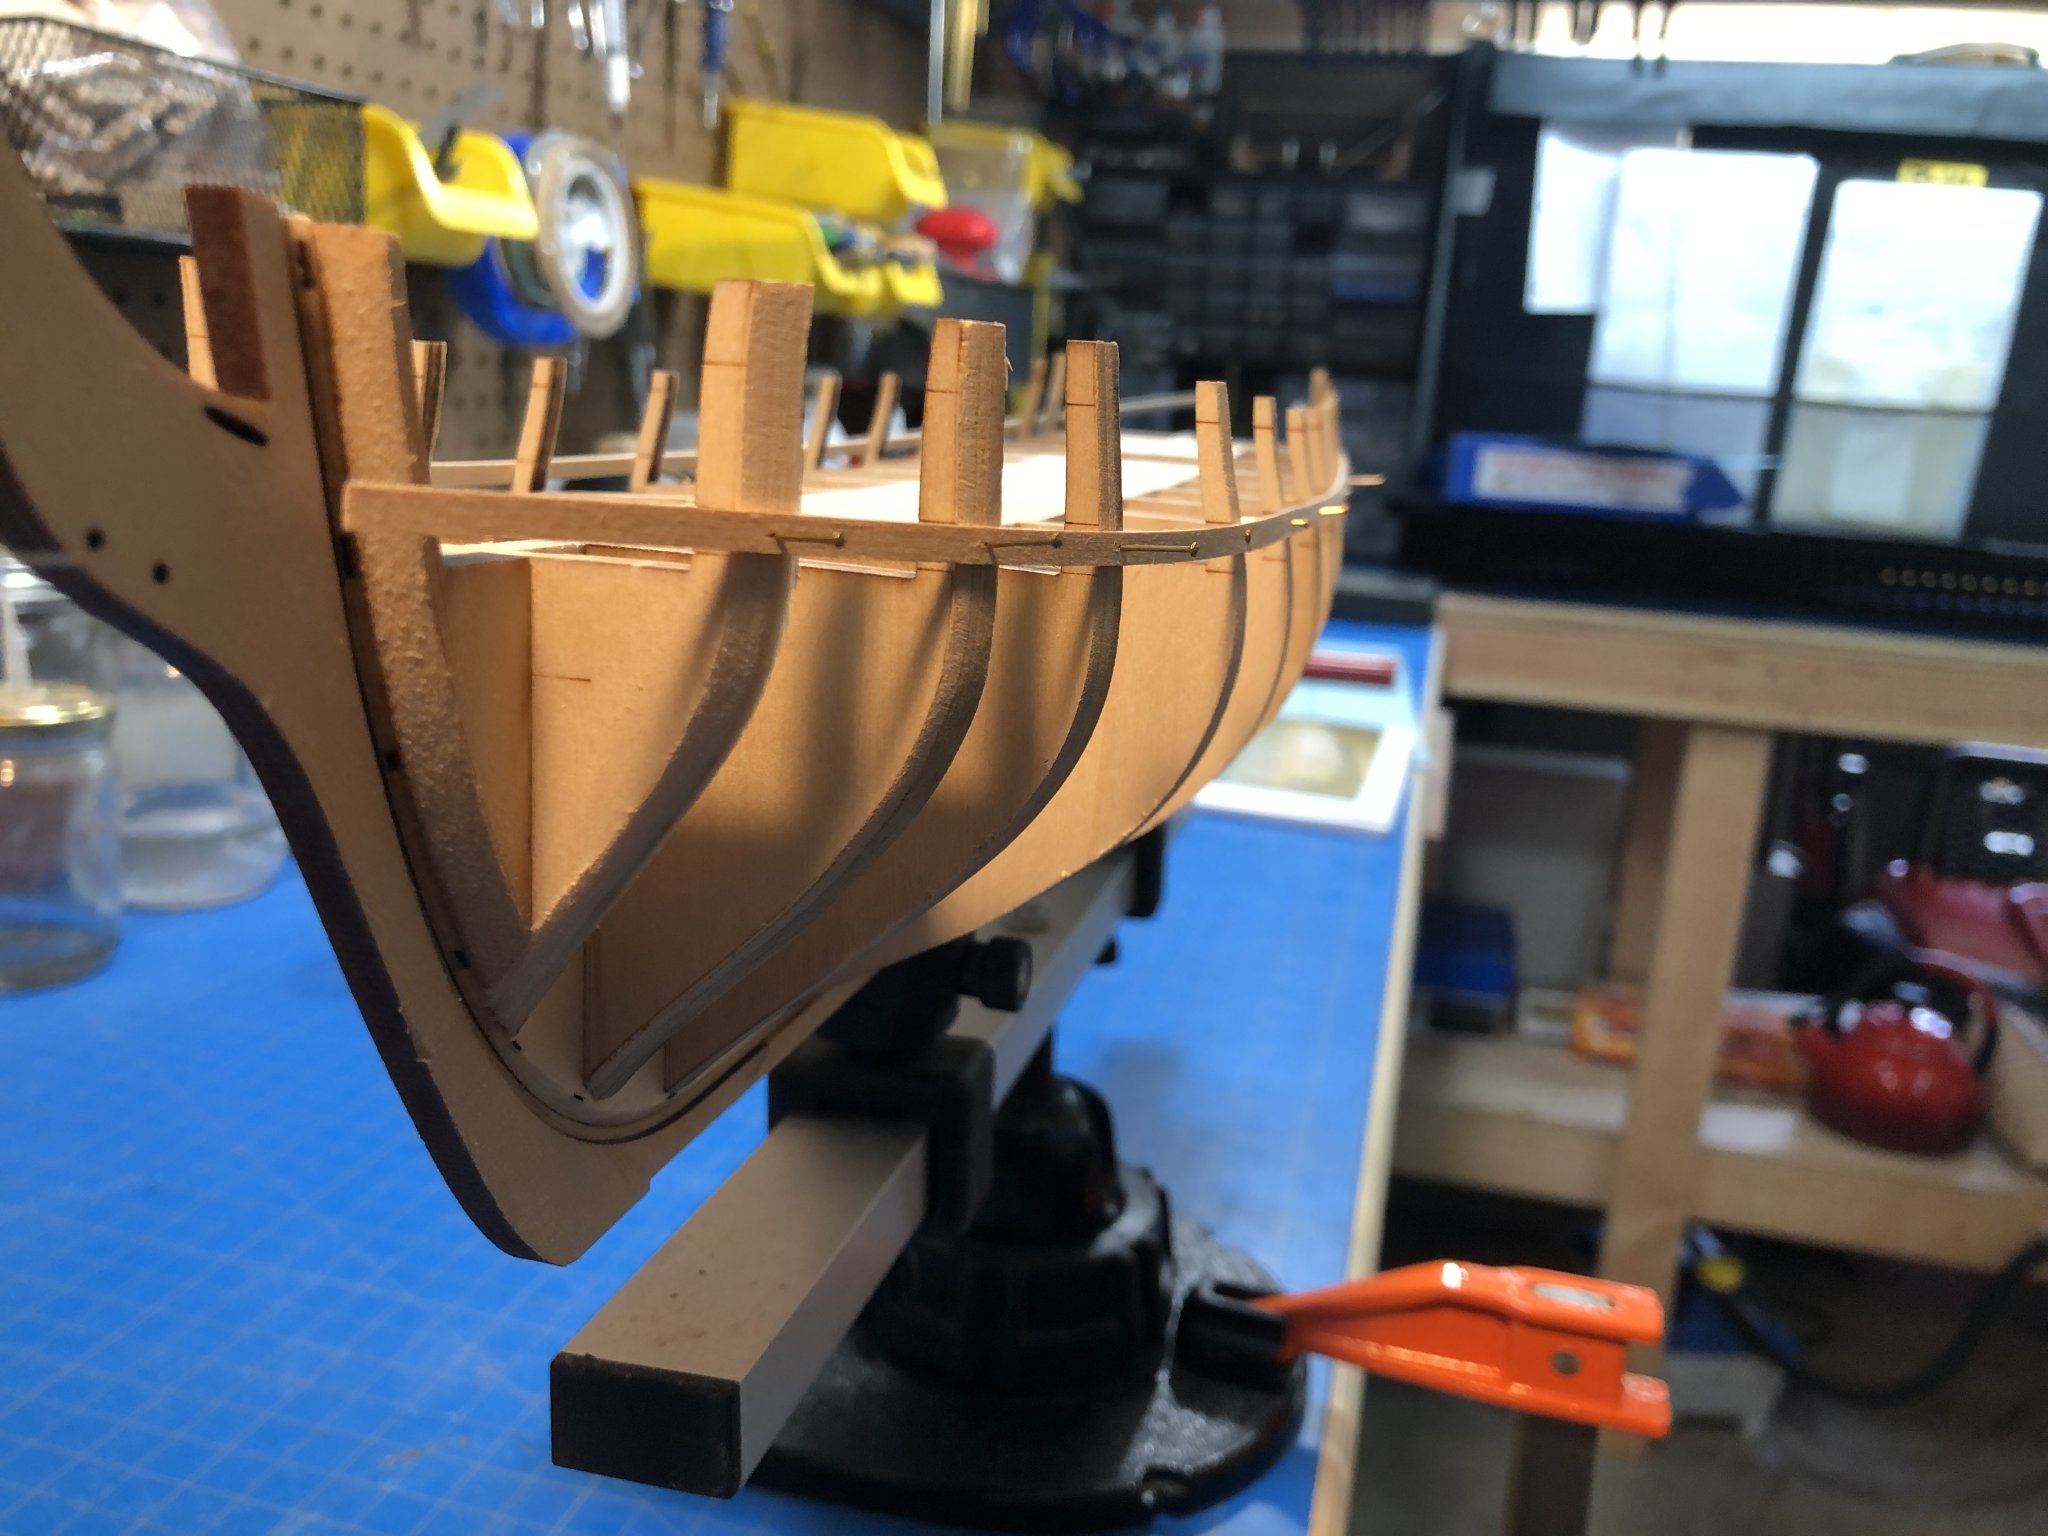
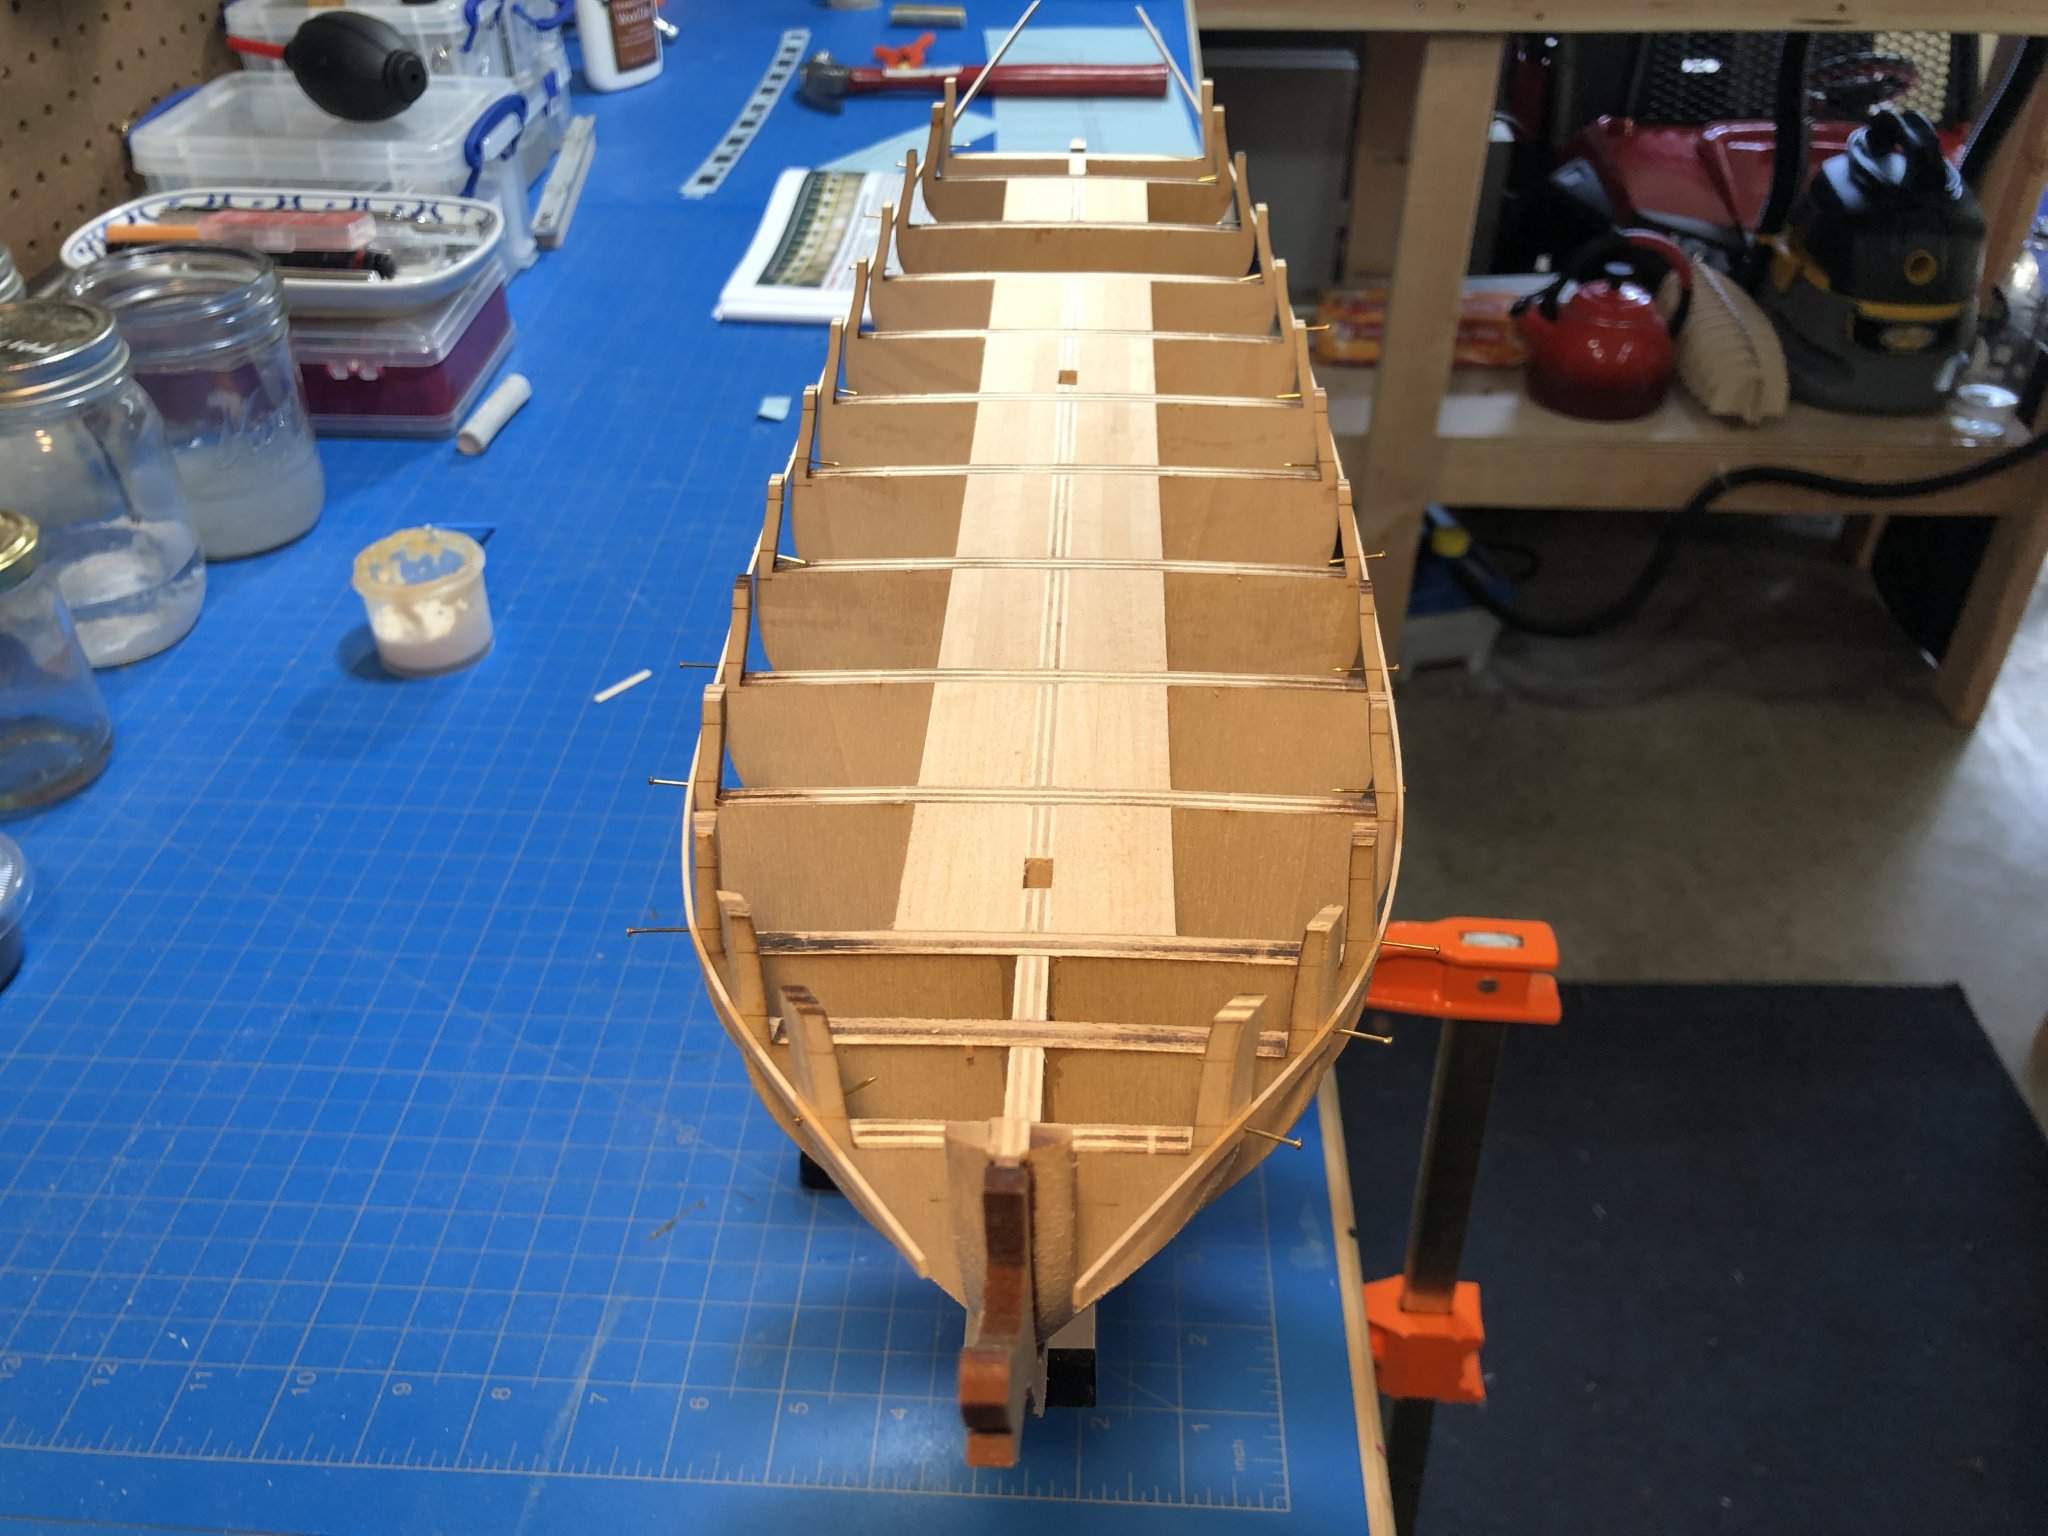
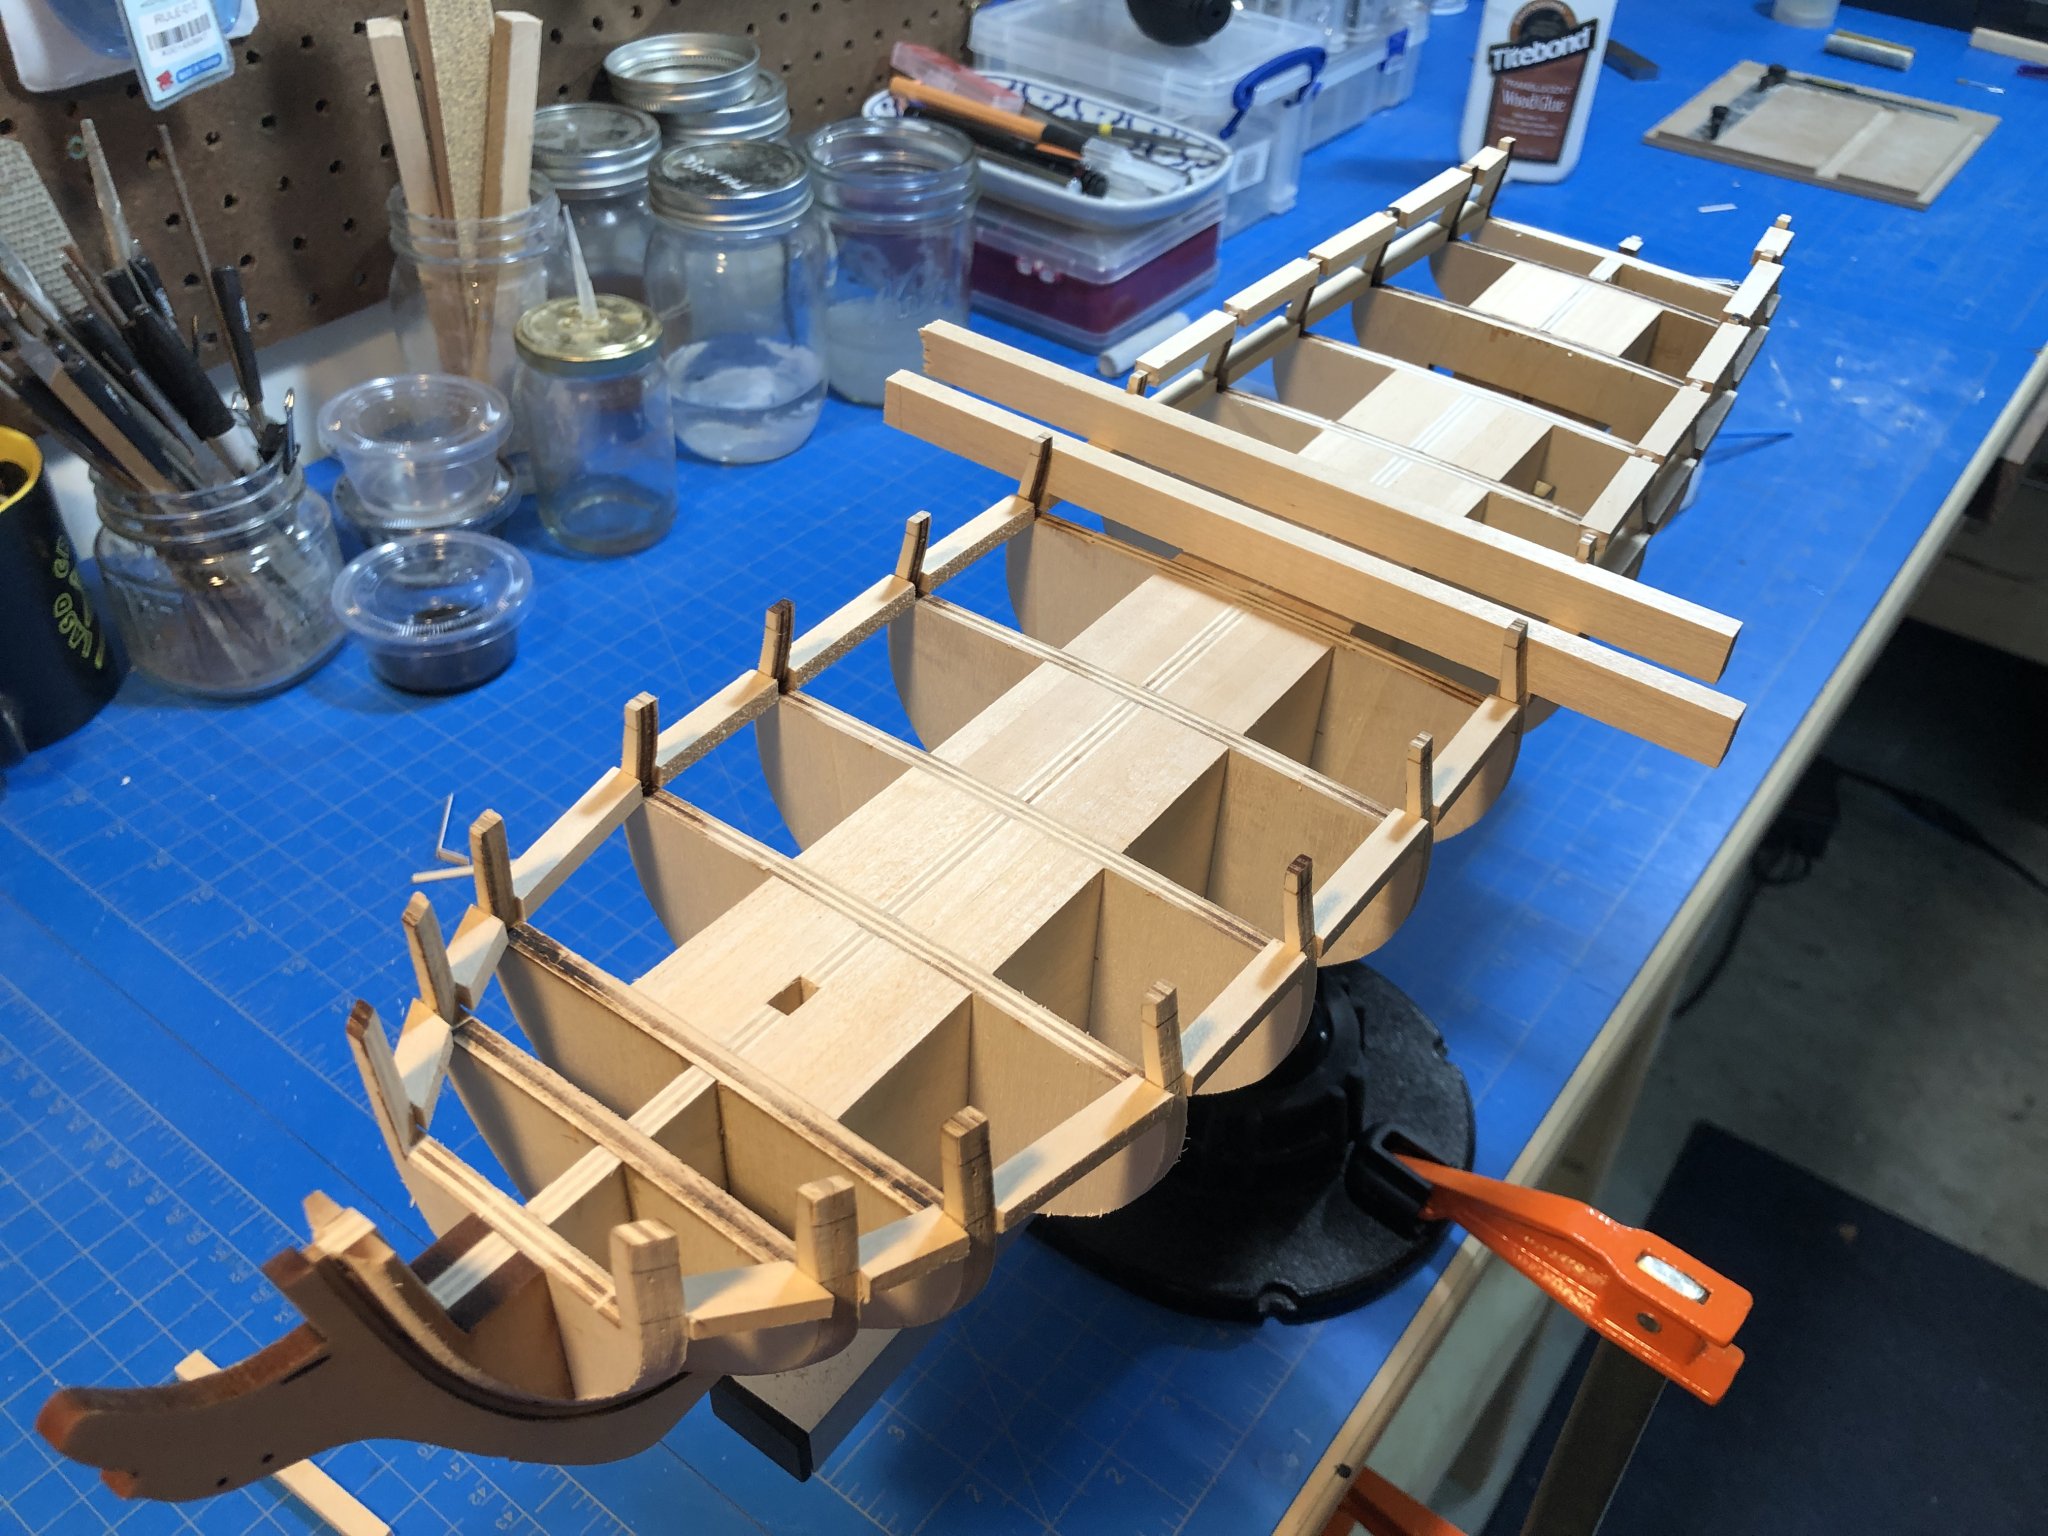
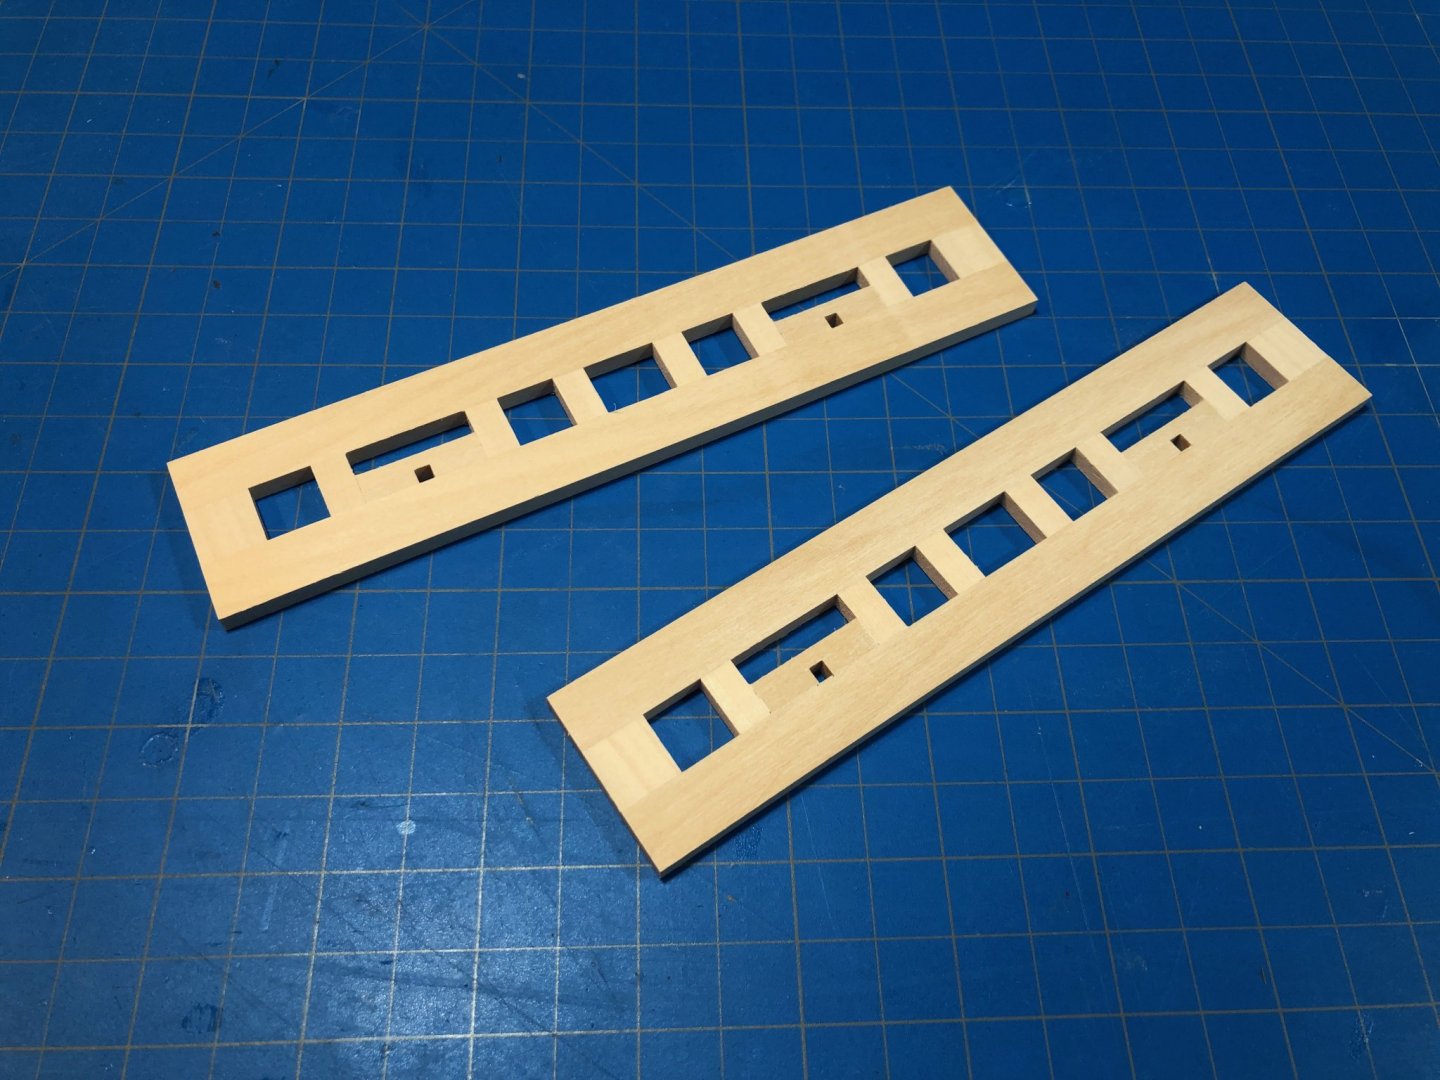
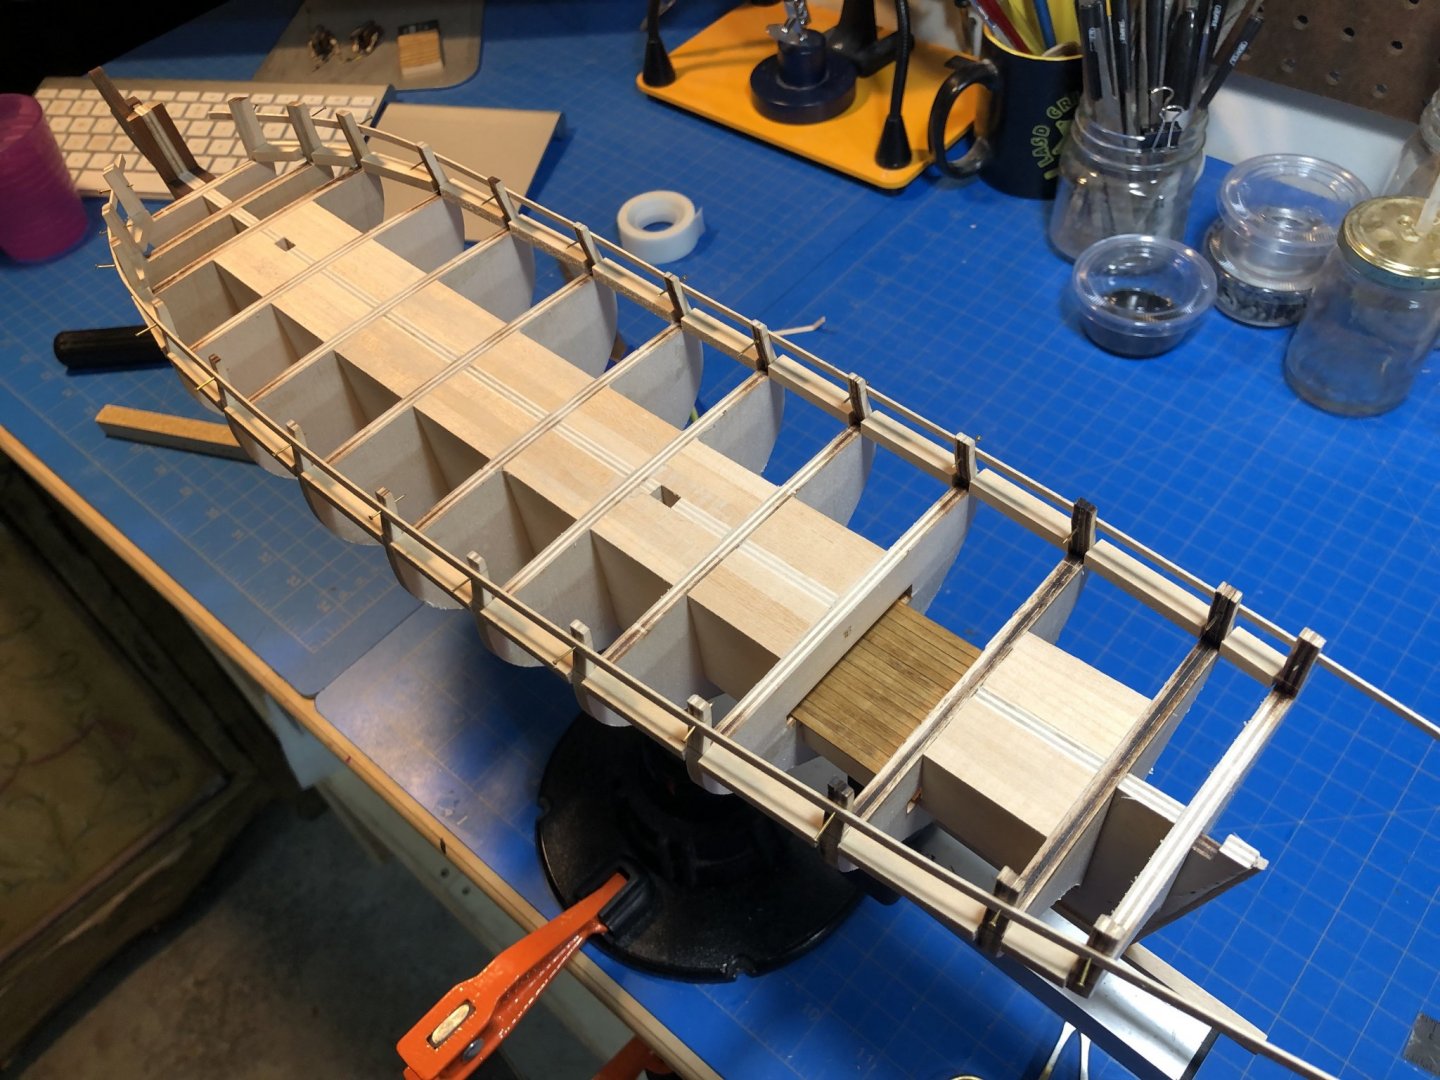
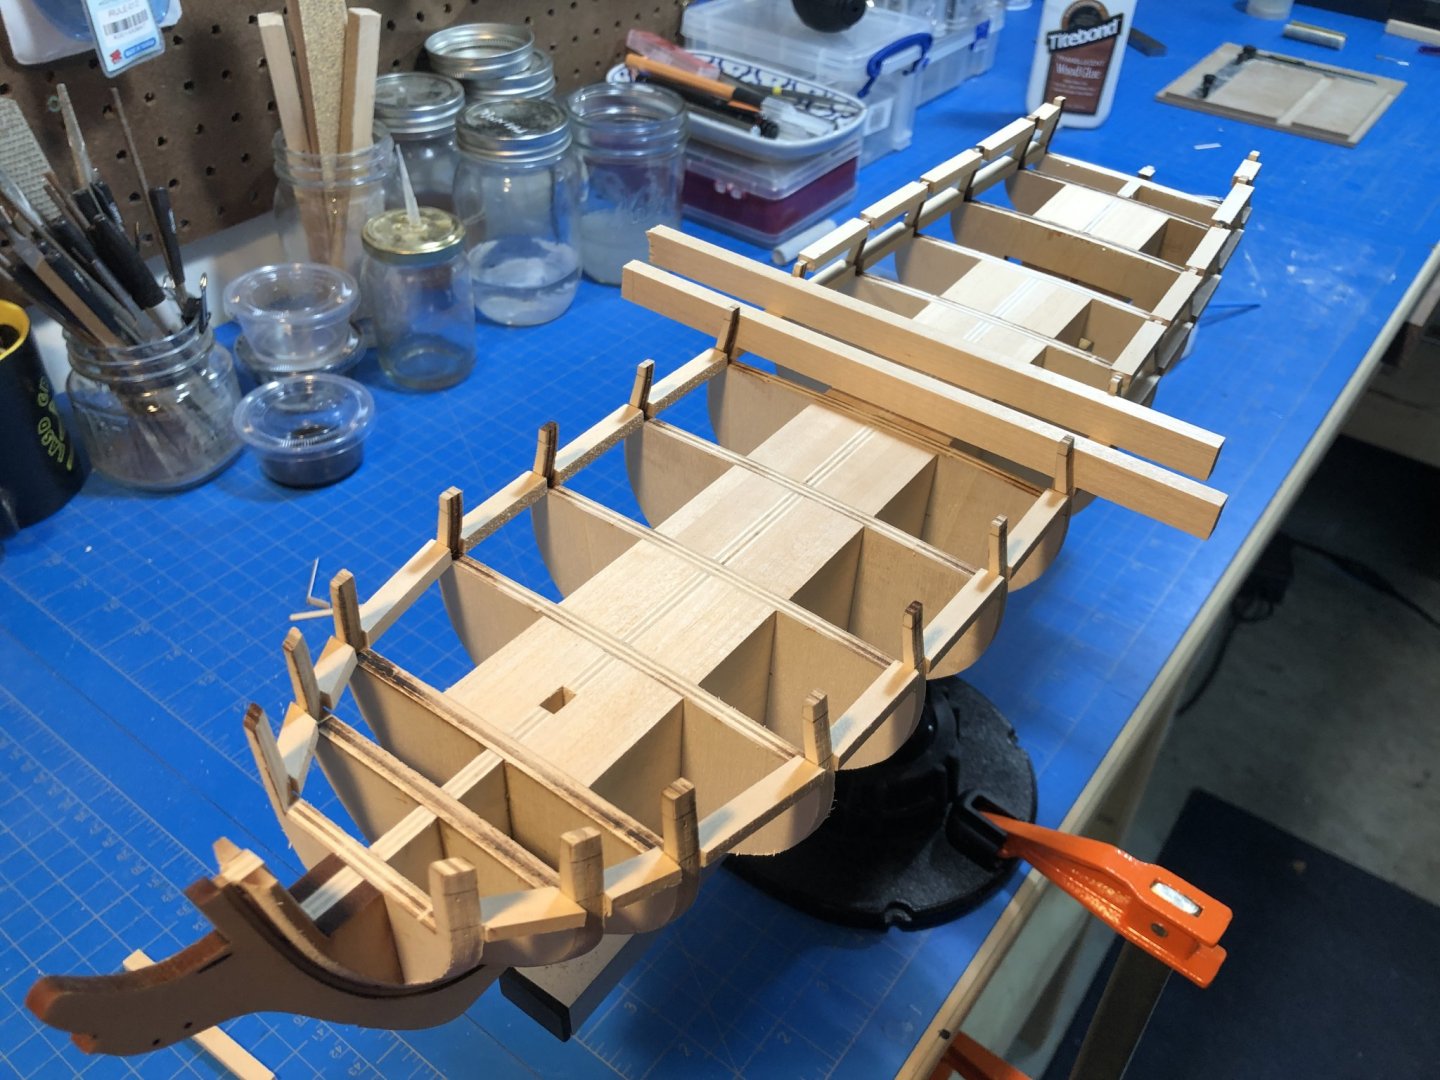
Glad to be focusing back on this project. Along with work I took some time away from Syren to finally finish my Bounty Launch which had been sitting around for some time. Now that I have no more open projects, Im very happy to say my attention is squarely on this complex build. Reorienting myself to where I left off took a bit of time, I needed to assure myself that I had completed outer fairing to the point where I thought I ought to stop. I couldn't quite recall where my mind was when I set this aside. Needless to say I sanded a bit and ran a few battens satisfying myself that I indeed came to good stopping point. I then went ahead and installed the lower deck planks and stained according to Chucks good suggestion of Miniwax's Golden Oak. I very much enjoy the warm, weathered look this stain imparts on basswood. I'll need to experiment a bit to get the right whitened/silvered tone for the upper deck but suffice to say that on its own its a really nice color. The next few steps proceeded well. I cut out the gunport templates, taped them together and strung them up to the bulkheads. Unfortunately they didn't quite fit very well, which must be a problem with printing because I really couldn't hunt down a problem on my build. Reading through the instructions a bit relieved my anxiety some, as it turns out the overlay of this template and the positioning of the bulkheads isn't terribly critical. More important that the port sills go in along a smooth line and that they go in square. Running another batten to check the line of the sills gave me the confidence to go ahead here. After installing the port sills I went ahead and ran a second upper batten for the lintels. Of course something didn't feel right as I was checking this out. This inner ear I credit to having read the instructions so many times, as Chuck clearly states that this isn't necessary, and that what I ought to do is simply measure the 15/32" from the top of the sills and mark the locations of the bottom of the lintels accordingly. Curiously, I went ahead and took a line off my batten and then went back and cut a couple 15/32" sticks and sure enough had I gone ahead with my batten I would have screwed up. Thankfully I caught this, and took the reminder to slow down and read the instructions yet again. Something I must remember. The sticks proved very useful, leaving me with perfectly level equidistant port sills and lintels. Next Ill finish off the bow and the gunport frames. Then more sanding...


-
No offense Greg, but that is outrageous! I don't pay for cable, just internet. We have HBO, Netflix, Amazon Prime Video, Disney Plus, Peacock and Apple TV and we pay less than $200 for all of it (including the high speed internet to stream it). I havent see an ad or a commercial in 3 years. It all is connected seamlessly on our living room TV (and can be watched anywhere we happen to go. That said, I watched Greyhound on my phone, on a plane and still loved it. Cable TV is a rip-off.
-
I feel similarly. I know next to nothing about WWII Naval warfare or ships, at least compared to the Age of Sail. I too felt the movie was really more about pressures of leadership, vigilance, and commitment to duty. The noise maker and radio hijacking bit was an interesting twist if only just a thematic element and not something that ever actually happened. It was exceptionally heavy on CGI, which I noticed early on but quickly forgot about as the characters and momentum of the story was exhilarating. I thoroughly enjoyed the movie. It is, after all, a movie - not a treatise or history lesson. It will eventually be available to rent either on DVD or elsewhere, it was only released on Apple TV due to COVID. Expect to see it at your local Redbox.
-
That satin! Wonderful job Bob. I hope you are pleased.
-
Looks really great. I might have lost my mind trying to work out those tiny sheaves - perhaps I will when I get there. Definitely understand how work gets in the way, I had a great productive few months and now Im all bogged down myself with "emergent issues." Though, your description is a bit more gracious that mine might be...
-
Its looking wonderful. I hope to make some progress myself soon... thankful you are leaving me with some great leads to follow.
- 950 replies
-
- 1
-
-
- syren
- model shipways
- (and 1 more)
-
Yes, I actually meant at the joints. This is what I meant, and should have been more specific. I, too, have read the arguments and ultimately decided it comes down to the precision of the laser cutting and the fit. Ive never worried about the glue personally, more about that slight misalignment from recto/verso which might have an ill effect on squaring of the bulkheads. I certainly had builds where sanding was required otherwise the bulkhead absolutely would not square. Of course, Ive had some that were cut far wide and needed shimming to get a tight fit. So I guess you do what you need, when you need to... Ultimately my question was more about James' approach (which he answered). I see some folks go through and sand every last bit of char before assembly and turn out wonderful models and I'm always hunting down those steps which separate their wonderful models and my middling attempts :). Was just curious how serious people are about that char, har har! Thanks James, Ill stop hijacking your build log now!
-
I noticed very little - if any- char removal. Are the bulkheads fitting well and square without intervention? I can never figure out if char removal is a rule-of-thumb or just a common, though perhaps unnecessary, step. Thanks for sharing, as usual your photography is unmatched.
-
Im very interested, though I cant say Im particularly thrilled to see another Victory kit in the market - perhaps this one will become THE one. Looks like a lot of design work and prep went into it congrats to them, happy to follow along. Thanks for sharing with us all James.
-
I received an email about the new site, and went to comment that it looks great but it seems to have disappeared. Anyway, the site looks really great - a great big thank you to those who worked hard to make it a reality. Huzzah!
-
Ill follow along. I enjoy this little boat.
- 34 replies
-
- 1
-
-
- model shipways
- 18th century longboat
- (and 1 more)
-
It does become complicated, but I would caution against belaying as you go. Once everything is rigged, you'll need to tension everything up. I don't know what the appropriate sequence is for that, Ive just always gone bow to stern. BUT the important bit is that as you tension in one area you will need to re-tension in another and keeping things "un-belayed" helps tremendously with this. I usually coil the rope and attach an alligator clip to the length of line for some light tension (provided by the weight of the clip). Leave yourself lots of extra line and don't be tempted to clip the excess until well after you've completed the belaying of the entire model. Even then, wait like a day or so for things to "settle."
- 1 reply
-
- 2
-
-
Those are a massive upgrade over the cast badges. Are you happy with them?
- 950 replies
-
- 2
-
-
- syren
- model shipways
- (and 1 more)
-
Wow... I think Im convinced. That paint turned out great.
-
Welcome. Im building SYREN as well! Good luck to us all!
-
2021 NRG CONFERENCE
Justin P. replied to kurtvd19's topic in NAUTICAL RESEARCH GUILD - News & Information
If everything works out, it'll be my first.