

Siggi52
-
Posts
989 -
Joined
-
Last visited
Content Type
Profiles
Forums
Gallery
Events
Posts posted by Siggi52
-
-
Mark, I found it between the forecastle pictures. I had overseen it too.
Druxsey, I have build now for both capstans long pawls, because at the Bellona picture the pawls look also longer then I have seen them normally.
I have an other picture, ok without any pawls. My friend took this picture 2 years ago and all I know is, that it should be a 70 gun ship in the NMM.
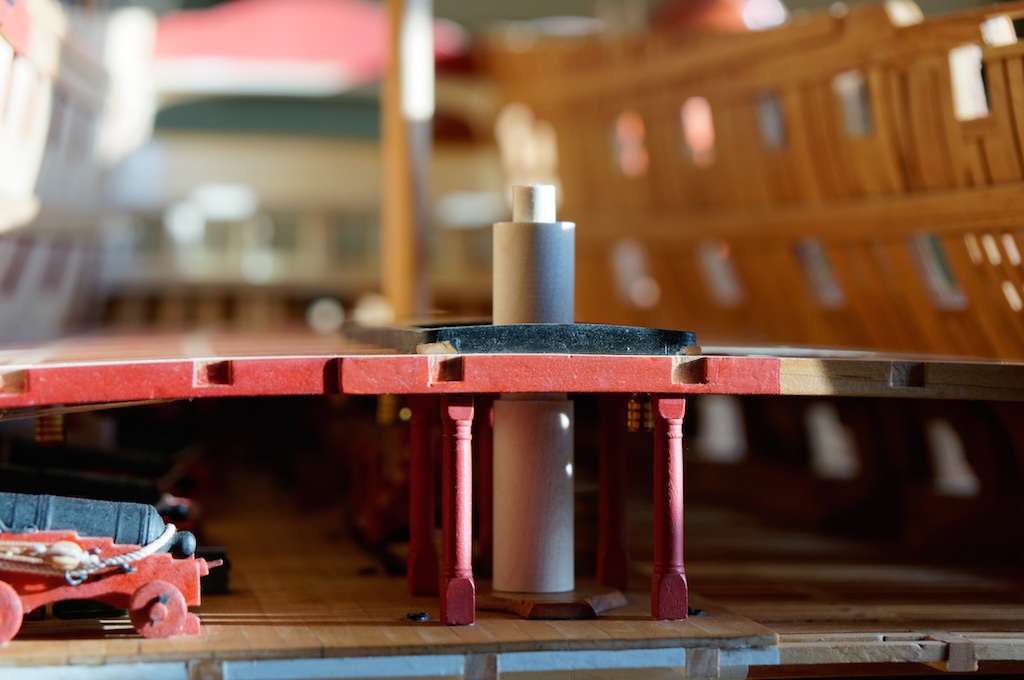
Here we see that the fore capstan has a round plinth (I don't know if this is also a partner?) If it is a ship of the 1790th there could be a pawl ring, if not there will be no pawls at the lover capstan.
I think it could be so, that the fore capstan is mainly worked from the upper drum. Here they could see what actually happens and could also work the pawls when needed. Only when there is a heavier load to manage, they would manner the lover drum.
At the aft capstan it would be the same, only when the get in the anchor, the lover capstan would be the commando centrum and then they would use also the lover pawls.
Ronin, I'm sorry, but that I did't know.
Regards,
Siggi
- Senior ole salt, WackoWolf, mtaylor and 3 others
-
 6
6
-
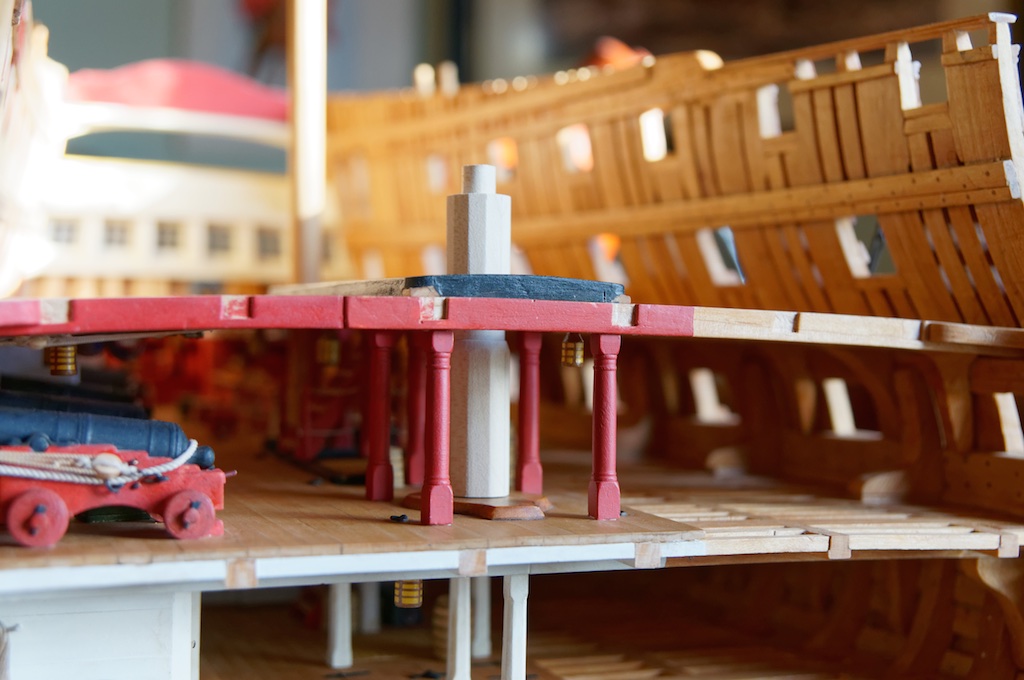
druxey, if the pawls would be only at the upper capstan, that long extension at the partner would't be necessary.
I found a picture of the gun deck of the Ajax 1767, here you can see the pawls, the long version (!), at the aft capstan. The fore capstan seems to have non, or they are lost here.
Then I looked again through the pictures Mark send me from the Bellona and I found one where you could see also at the upper capstan pawls. So I think I could build pawls at every capstan.
Regards,
Siggi
-
Mark, I think that was not the problem. There are enough gratings around. But if one accidentally kicked it in! In my case, if they use only the upper drum, one man could stay at the lover capstan for that purpose. I don't know.
Siggi
-
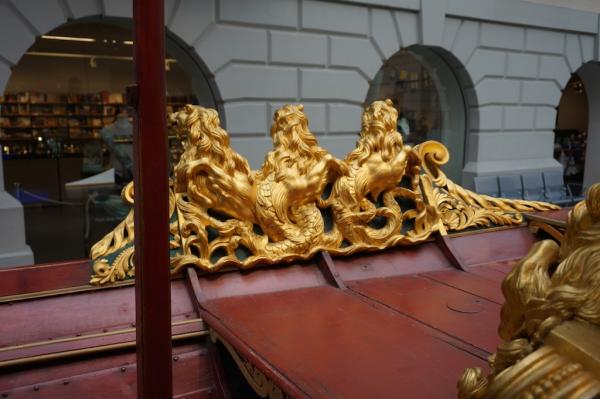
Druxey, did you mean with that, that they are on both drums. They did't run in sync, I will say one drum has 5 and the other 6 whelps. So only one pawl will work.
At most models you will see only the fore jeer capstan, on deck and with pawls. In my case it's the rear capstan and I read that there only the lover drum has pawel. That is what Doods & Moore wrote. Lavery ignores them and Goodwin goes strait from the ancient capstan over to the 1790 version with pawl rings.
-
Hello Mark,
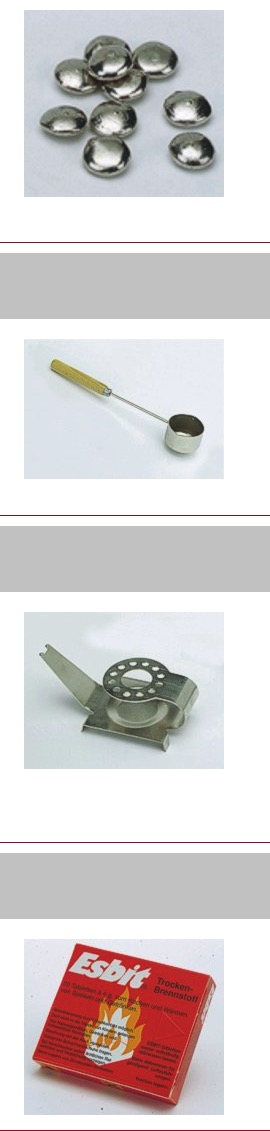
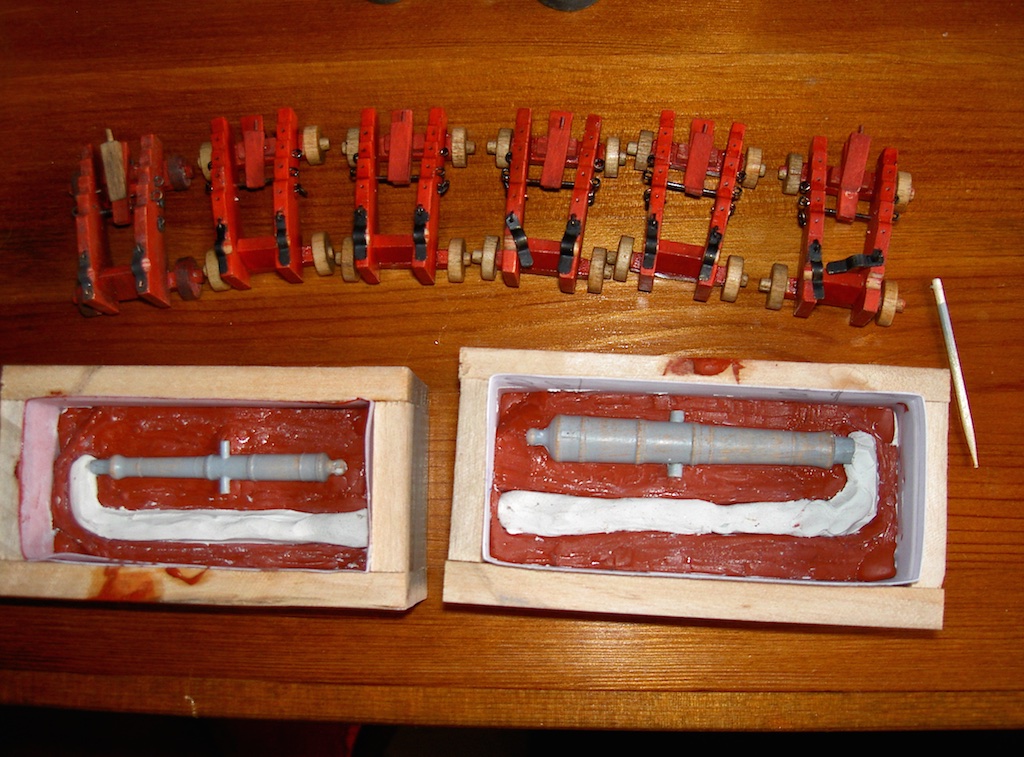
for melting the pewter I would use a propane torch. You need only 270-300°C, that is't so much. I had a look where I buy my articles for casting and there the sell even a melting gear with esbit. I have an LEE "Precision Melter" Electric Pot with thermostat control. http://www.trackofthewolf.com/List/Item.aspx/1194/1 May be you have a shop near by who sells something like that.
The small pellets in the picture are the Bismuth pellets. You should use 2% of them. I would use it, it makes the pewter harder and it should better forming. It's for the cannons may be not so necessary, but for buttons it is.

Because the rubber forms are soft, if you press to hard the cannons will not be round. Mostly I use two small boards to prevent this, or cover the form with plaster as you could see in the picture.
That is also what artist do with there forms. Before you look into your rubber form( with the master still inside), you cut away every part that hinders you to get it out of the plaster. Then you made, in this case, a two part plaster form. But if the rubber is hard enough, I think, it would't be necessary.
The air vents I cut also after I have made the form.
I wisch you good luck,
Siggi
-
Hello again,
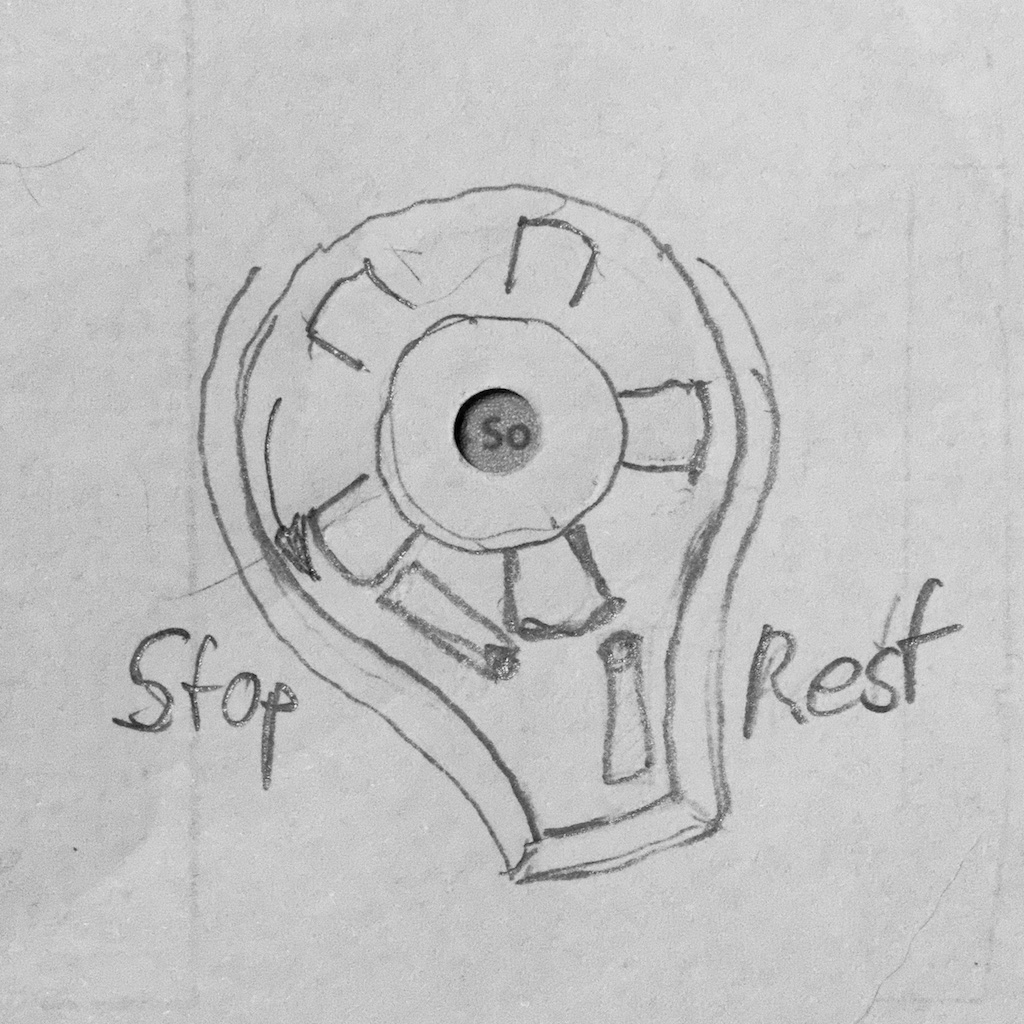
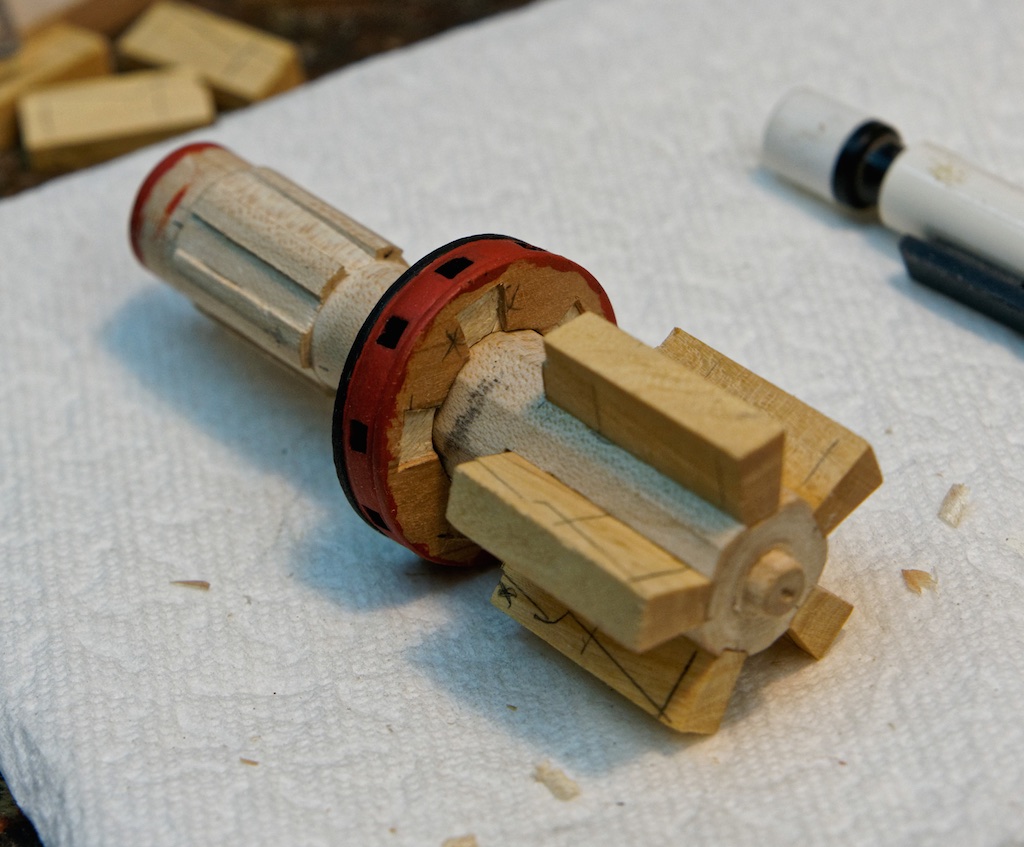
I have a question about the pawls. I could't find any description or picture, at which place they where installed.
Version 1, the one I prefer

and Version 2

I would prefer the version 1, because here the pawls are closer to the drum and in rest they are supported by the partner. I think that is also the reason that say are so long. Not to hold the pawls like in version 2. But I'm not sure.
The second question is, did the upper drum has also pawls? In one book I read no, but I could't find any passage that say yes. Only this picture of the for jeer capstan from the Bellona. I'm looking for the main/rear capstan.

Many thanks in advance,
Siggi
-
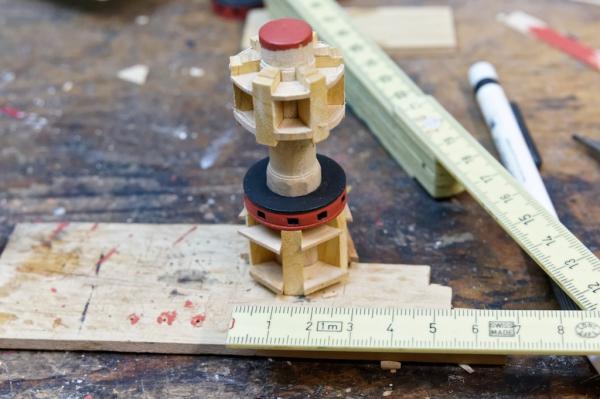
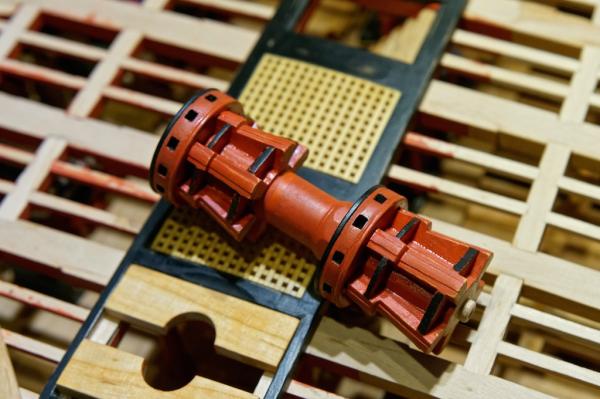
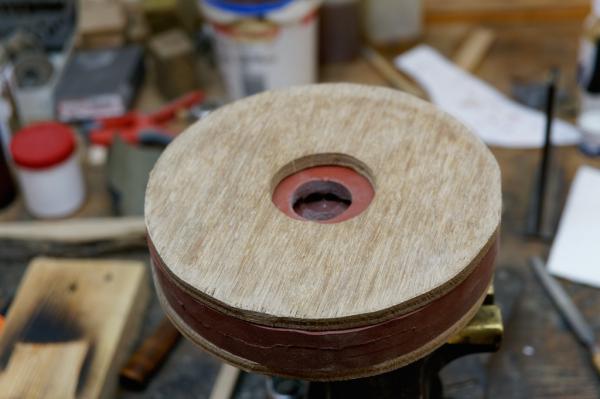
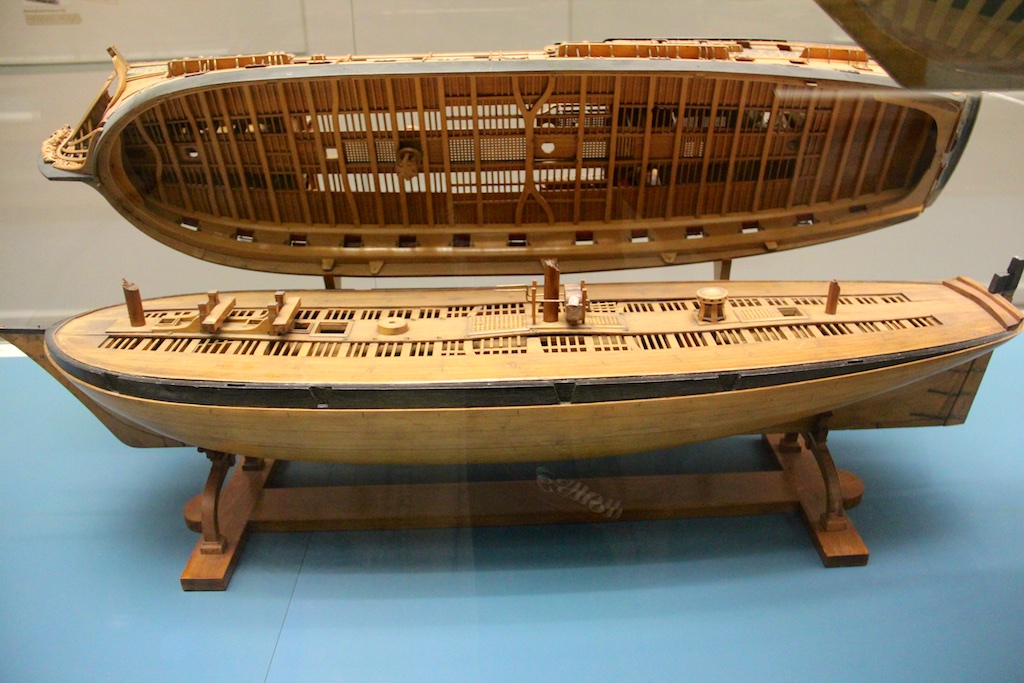
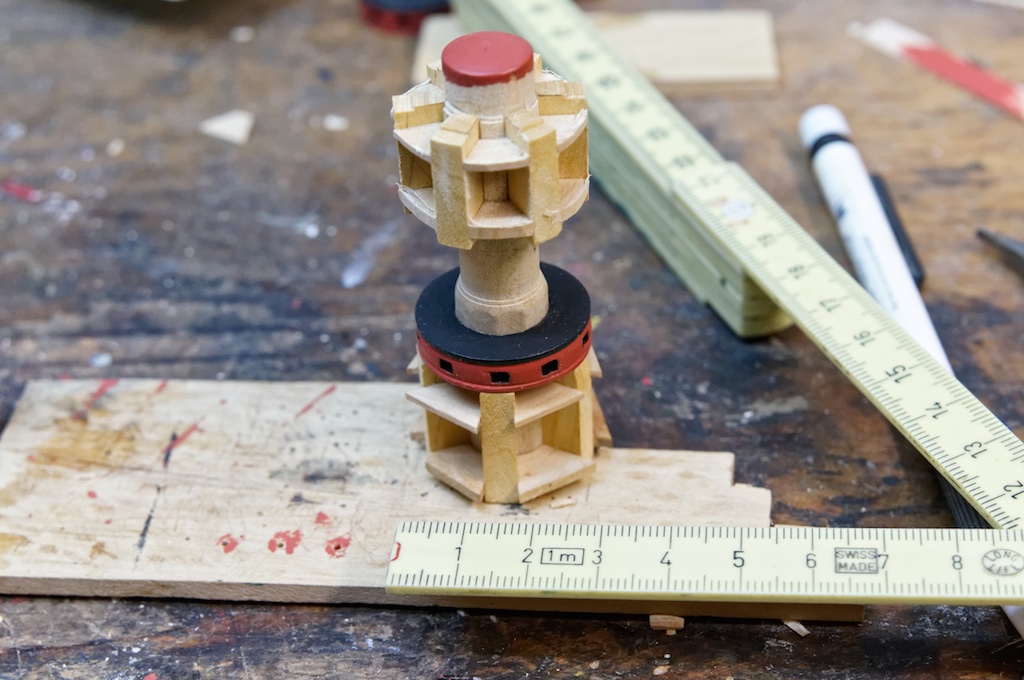
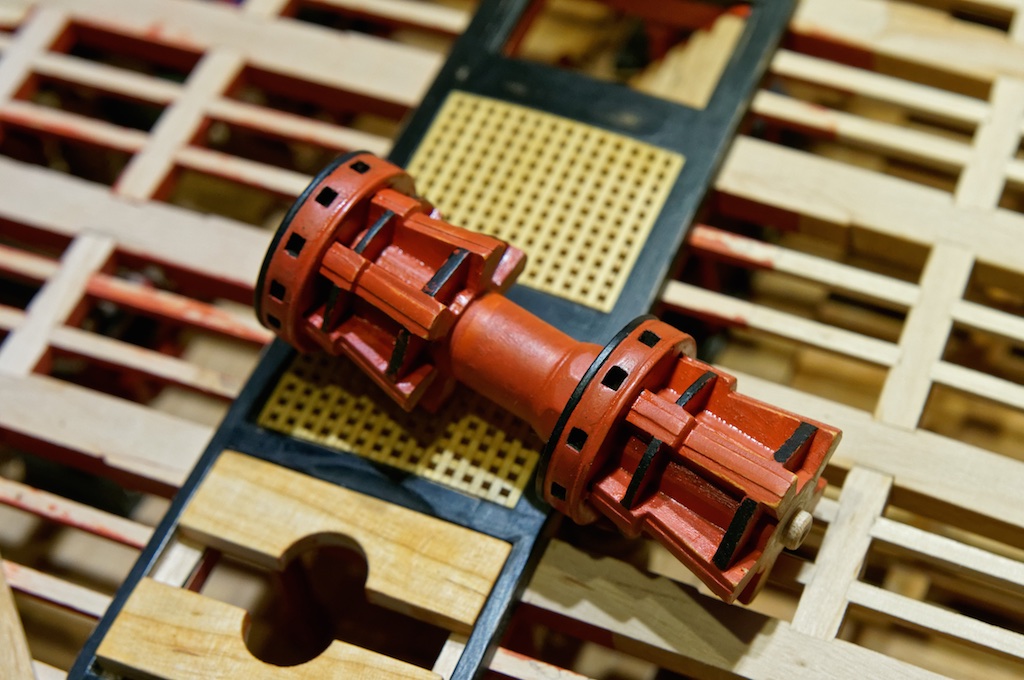
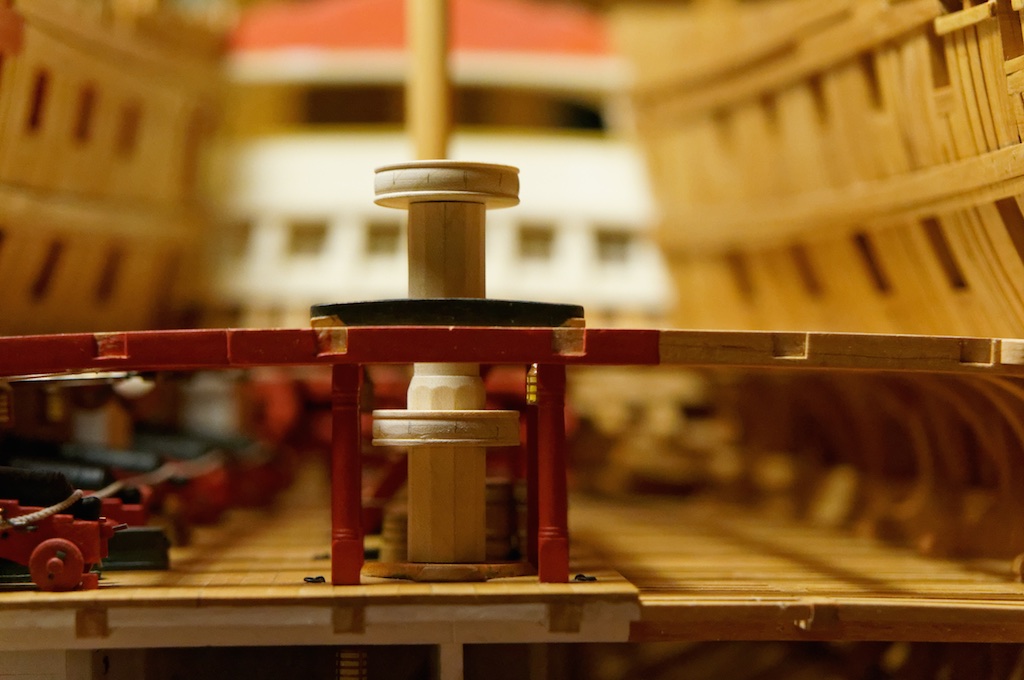
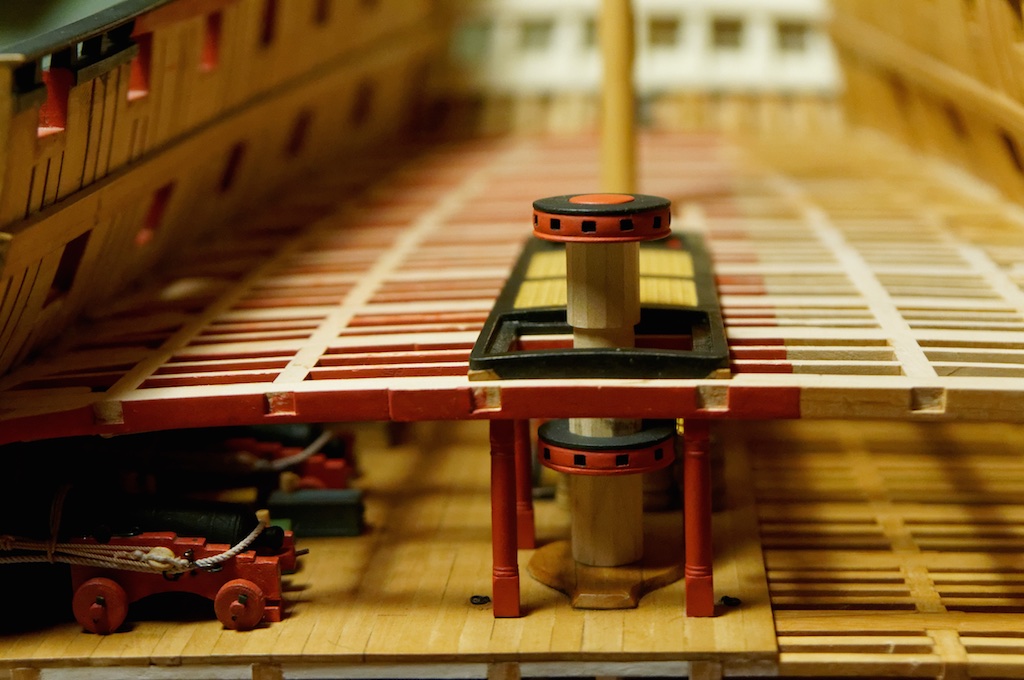
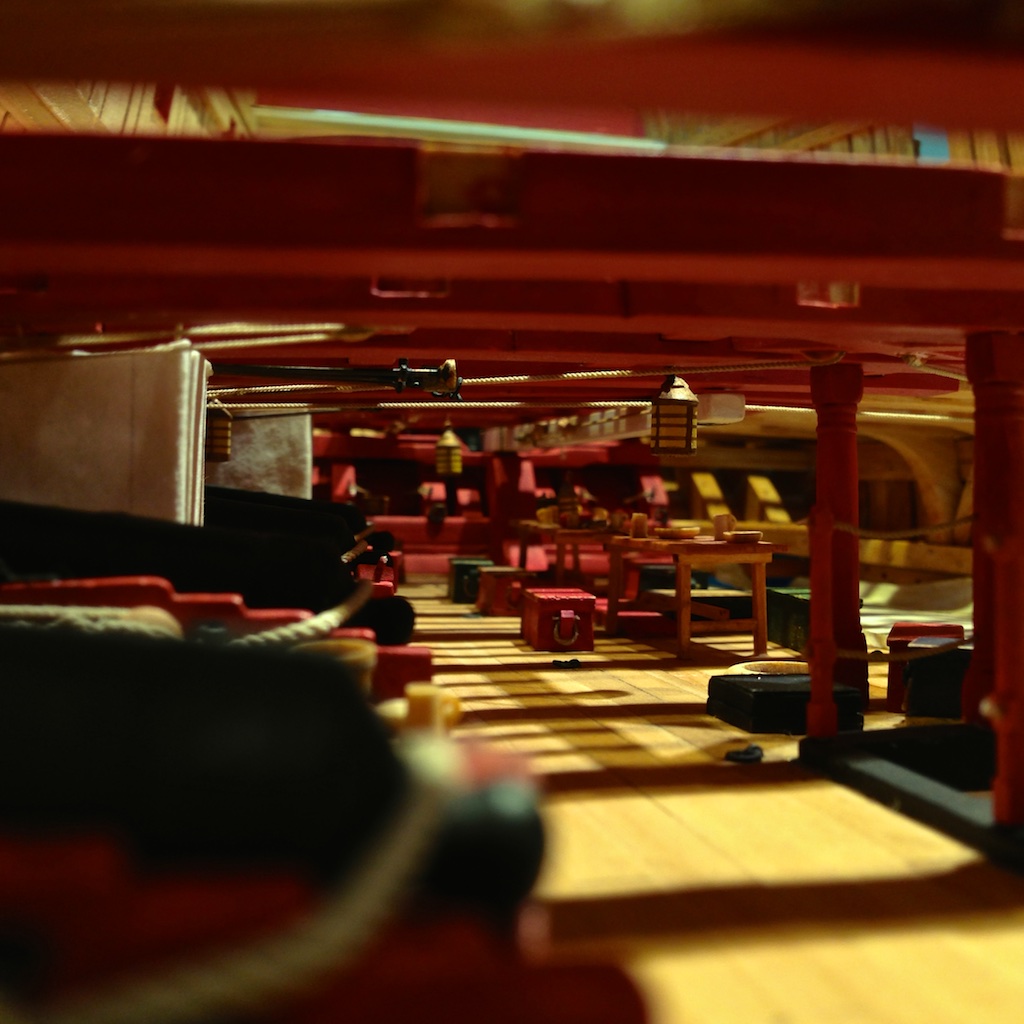
Hello, the capstan is ready! I think I must not explain the pictures, they say all.
Regards,
Siggi

-
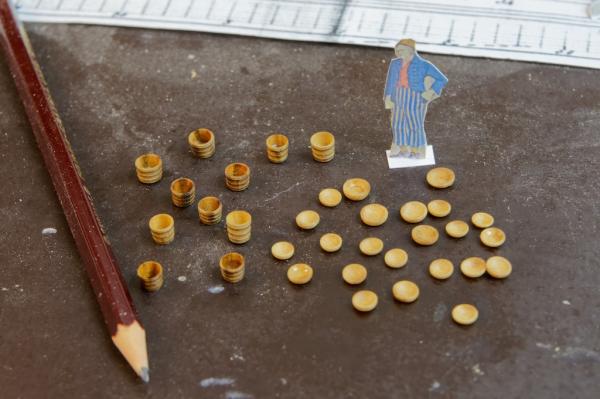
I'm glad that I'm not the only one who is sometimes faster then it is good for the project

No, I did't have such a machine. But once a friend asked me to cast coins for him. The smaller the projects, the harder they are to cast. So I build something I could put in my drill and then turning it at a slow speed and pour in the pewter.
In the middle is the pouring sprout. When I made the speed faster, most of the pewter went out at the side and I had a lot to do, to remove it from the walls and all around me. I hope you understand what I mean, but my english.
I think it would't be too hard to build something also for the cannons. But normally it would work as you have already done it. The bubbles are the great problem. If you stir to much, you have bubbles. If you stir lesser it will not harden evenly.
Would you later cast with pewter or stay with this material? Pewter flows better, because its heavier. But also here you could have problems with bubbles.
Keep trying,
Siggi
- daHeld73, Mfelinger and aviaamator
-
3
-
-
Thank you Nils and Mark,
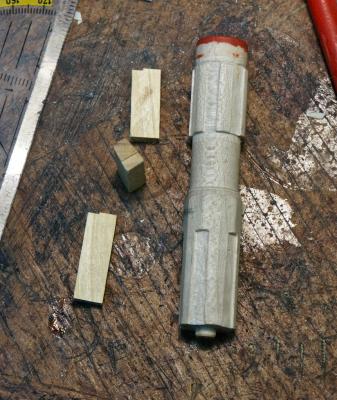
precise workmanship is your domain Mark, I'm more for shortcuts. The barrel is't octagonal, it's 10 sided and the upper part 12 sided. For 5 and 6 whelps. I made the hole in the lower drumhead a little larger, so I could get it just over the barrel. Later with the help of glue and color you would't see it.
Damn, now know it all

Regards,
Siggi
-
-
Hello,
thank you all for your kind words.
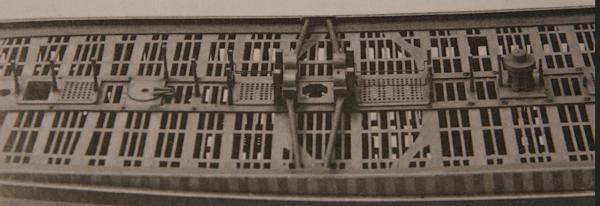
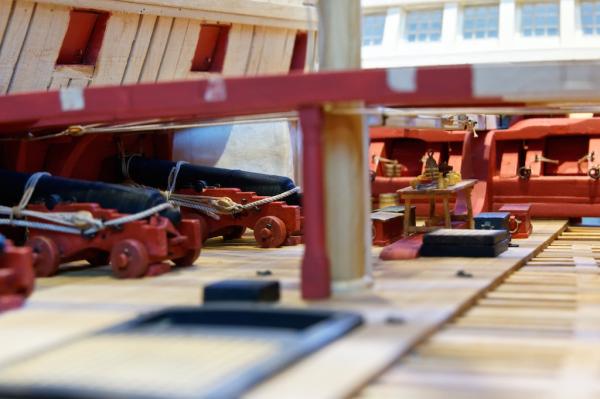
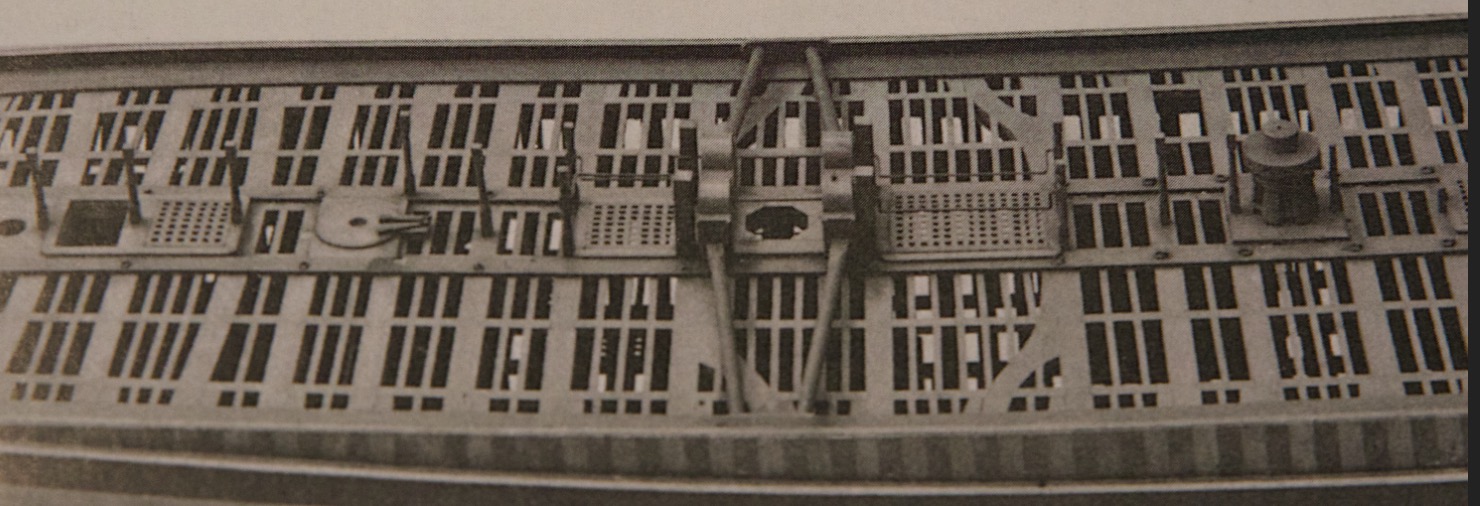
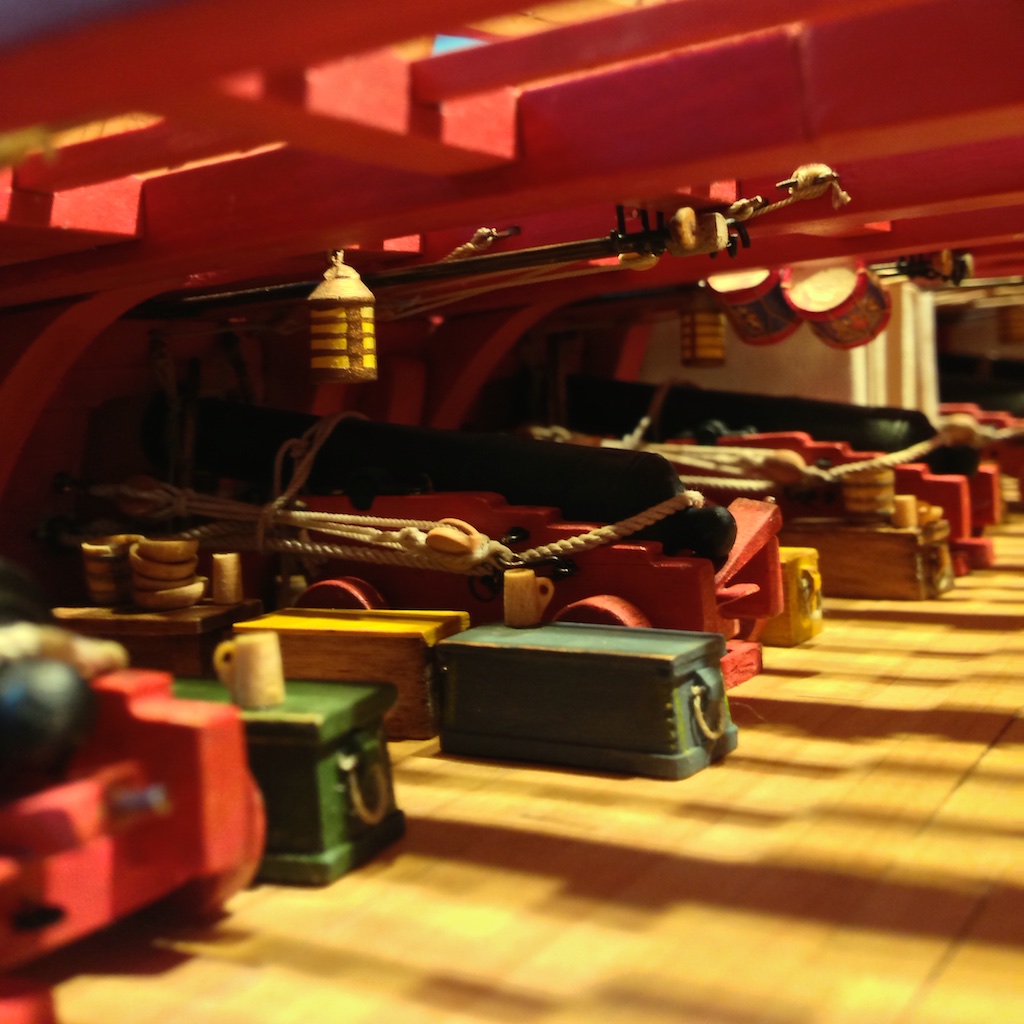
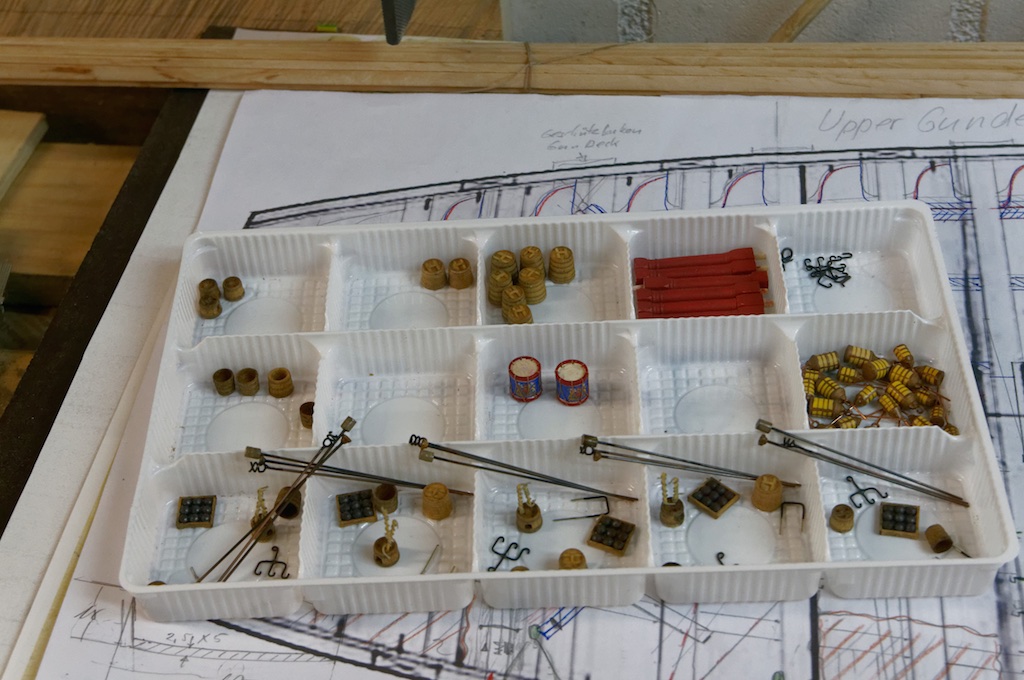
Mark and Gary, unfortunately did't I have pictures making all these small things, but I post some extra pictures of these things.
That was the see chest manufactory, I think I made them for the whole navy!

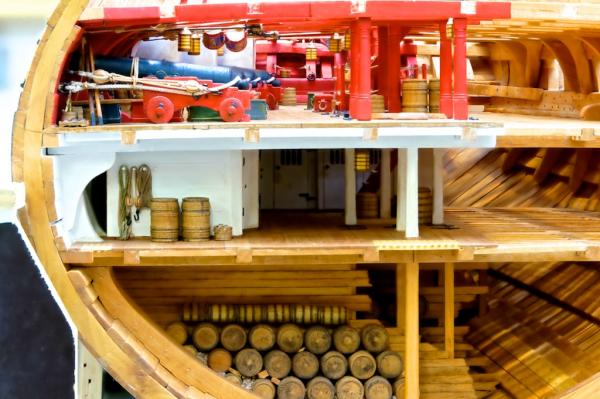
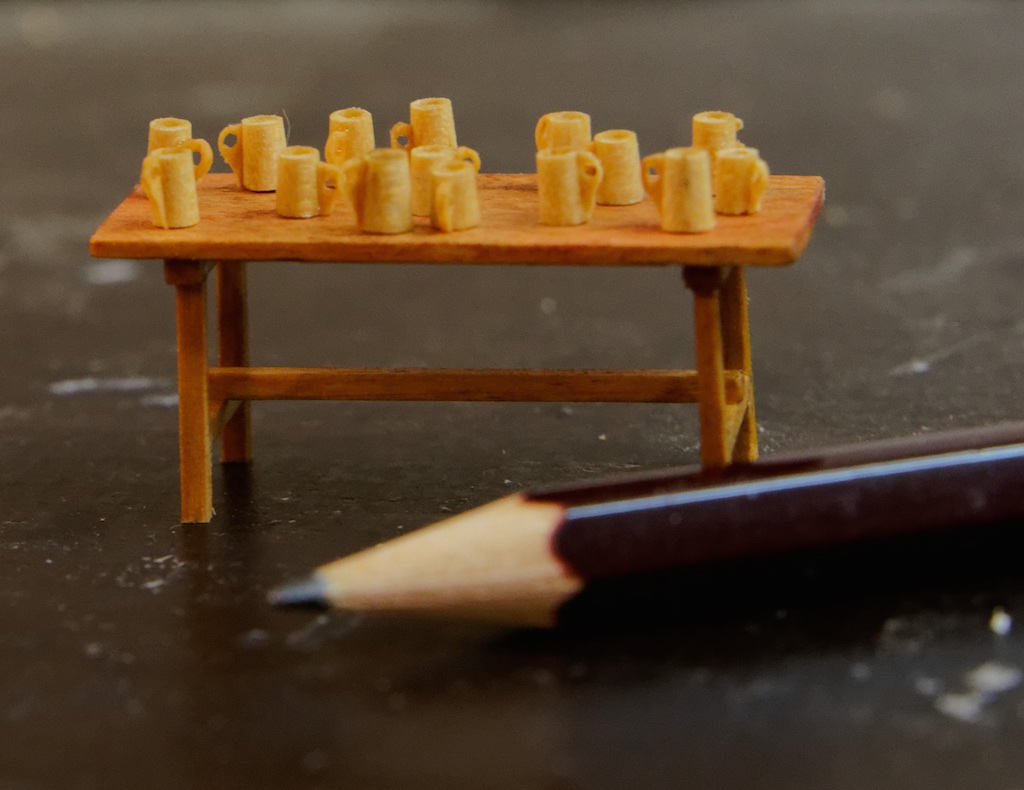
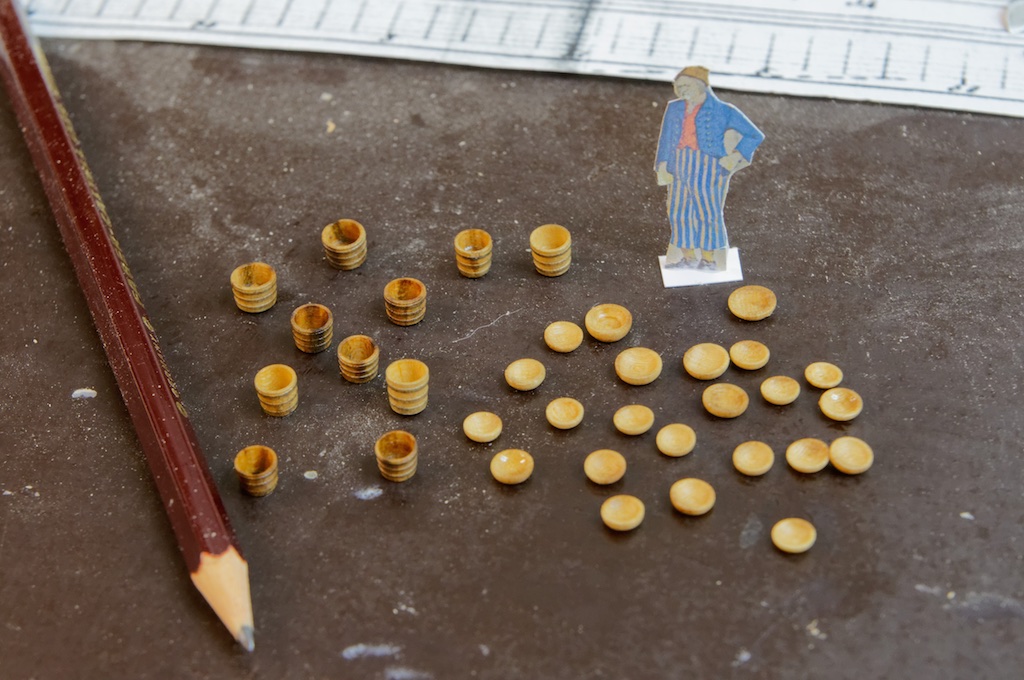
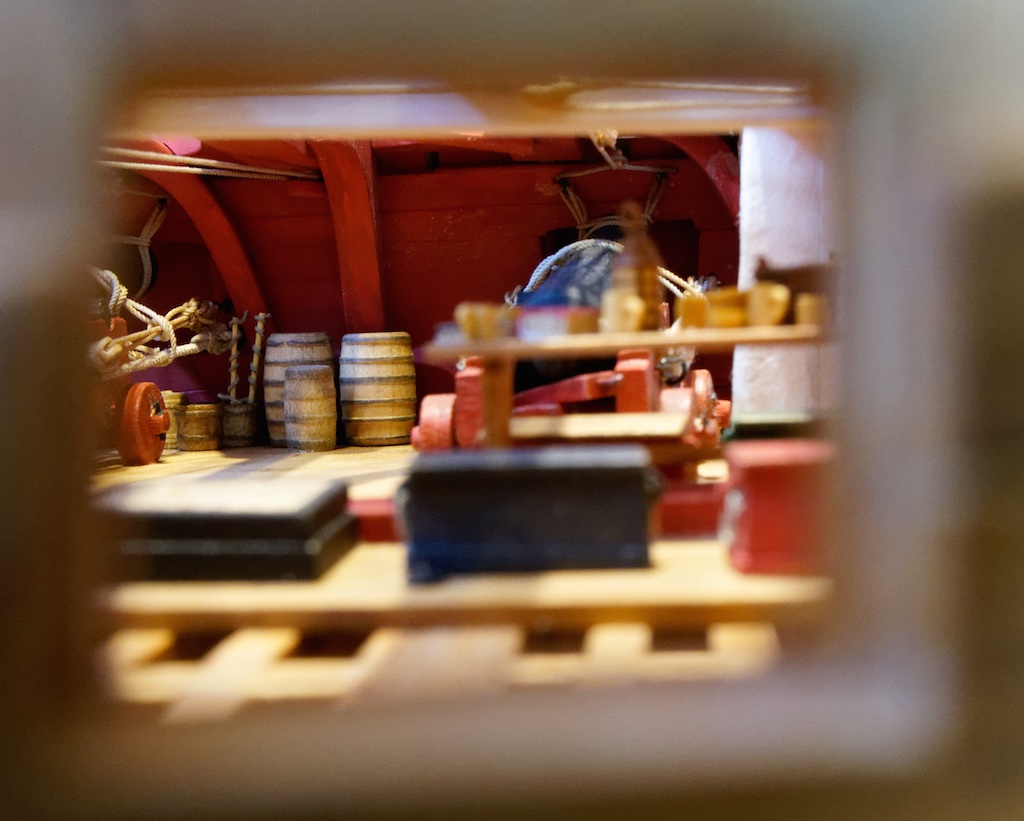
Cups, dishes and buckets for food
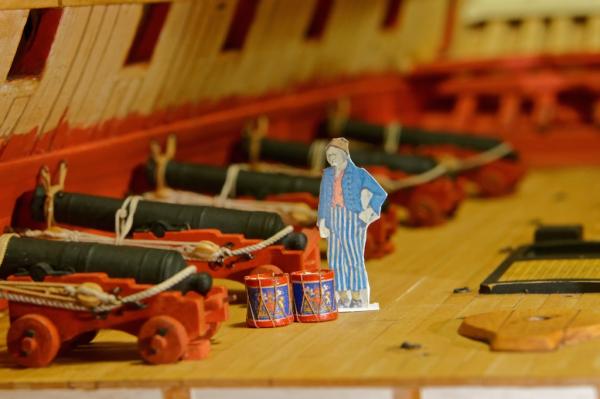
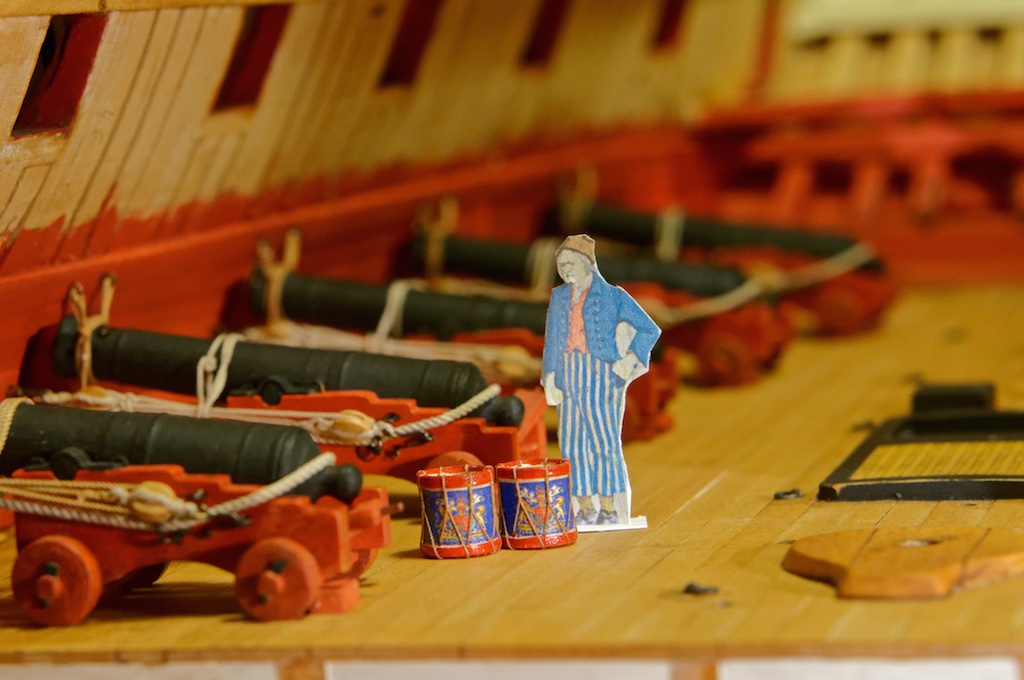
The drums. In this part of the ship live the soldiers.
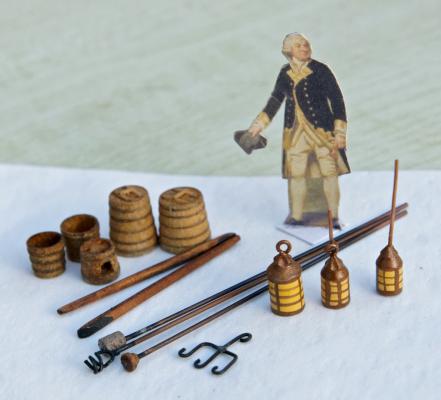
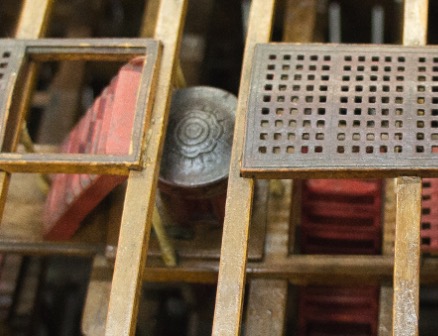
and all the other stuff, mostly for the cannons. Now I see that I have two water cisterns in the picture, a smaller bucket like these where for grenades.
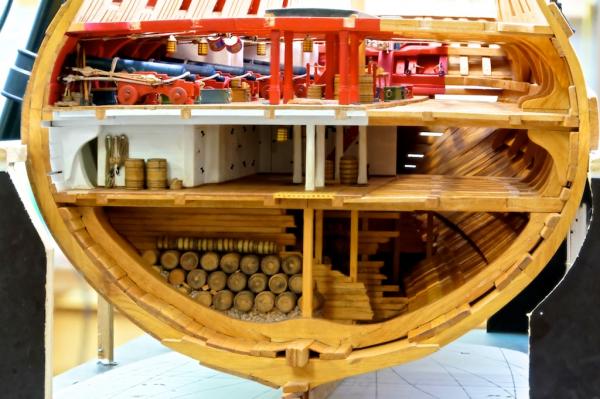
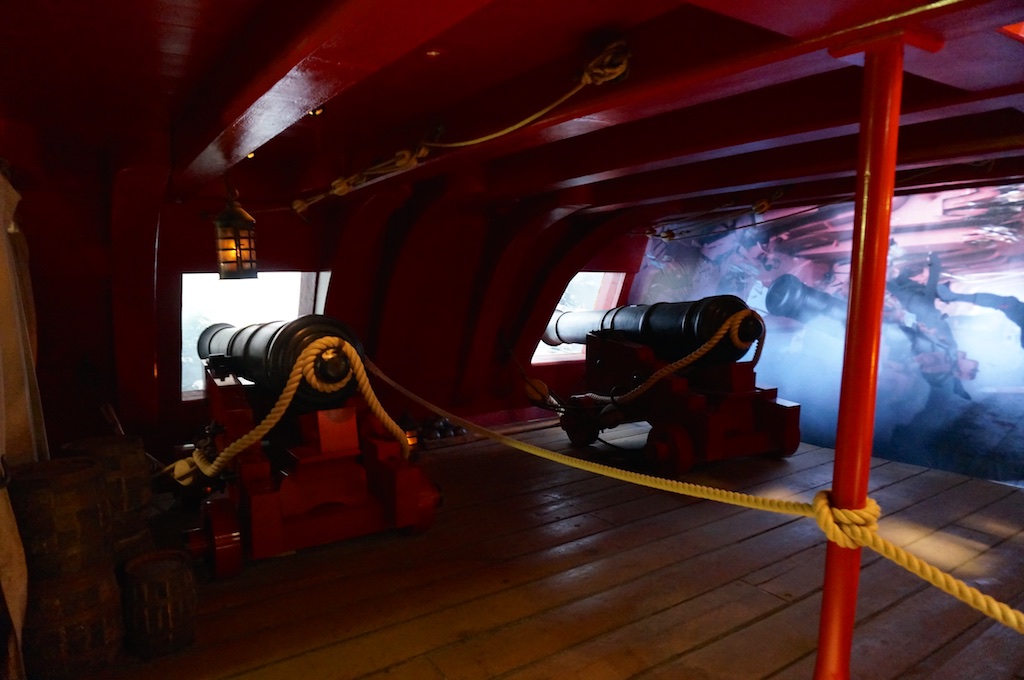
Today the sun is shining here, it's mostly a wonder after 14 days of rain and that was the opportunity to take pictures of the gun deck without neon light.
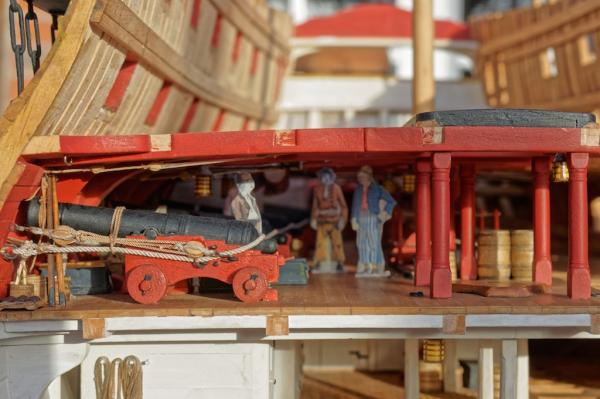
So looks the red paint naturally. It did't look soo red.
Best regards,
Siggi
- druxey, popash42, CaptainSteve and 14 others
-
17
-
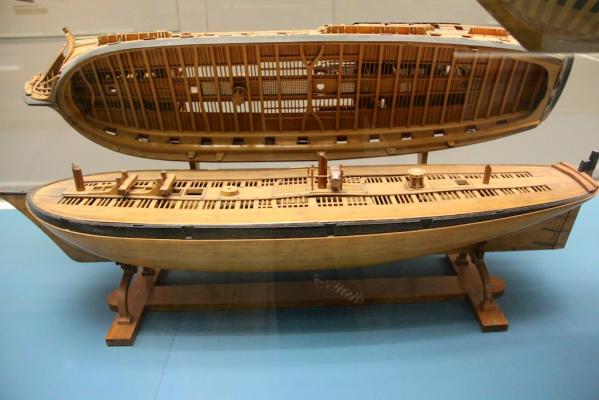
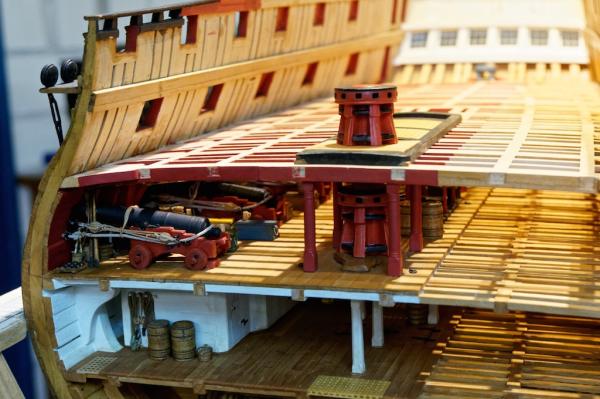
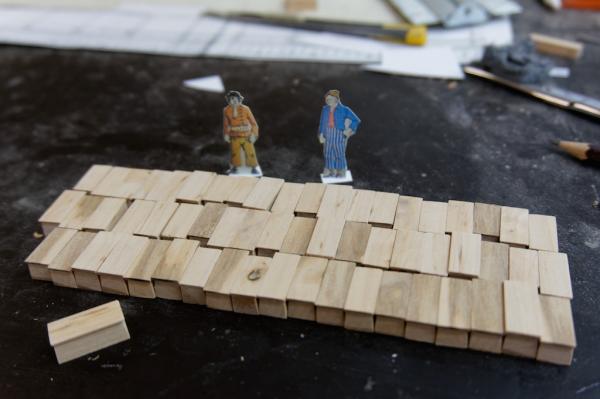
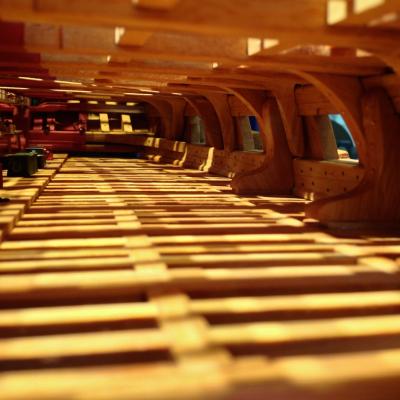
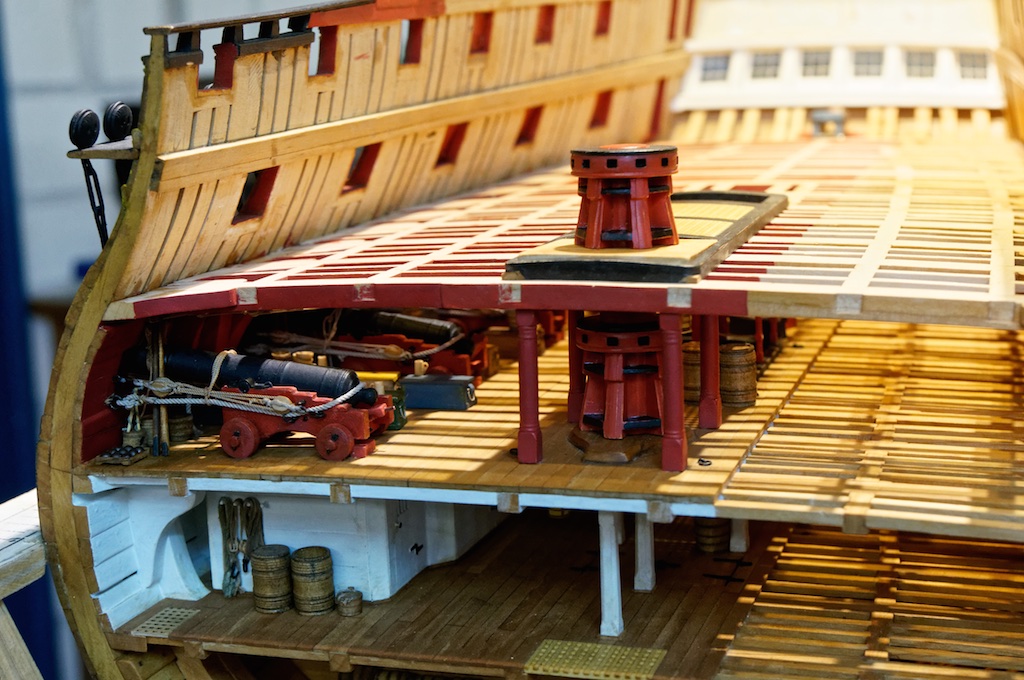
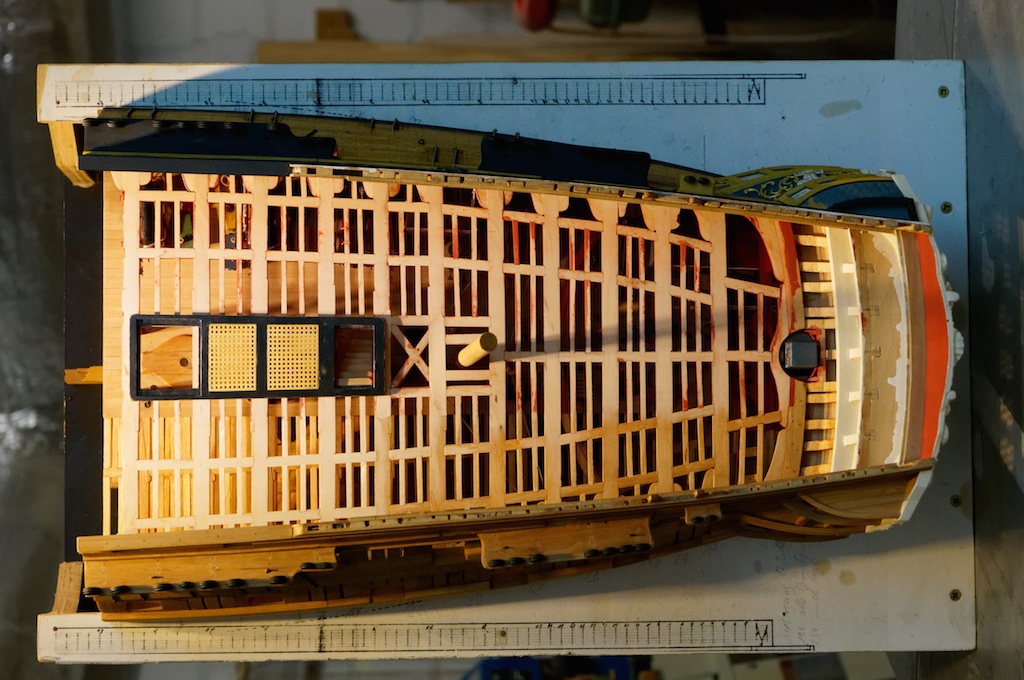
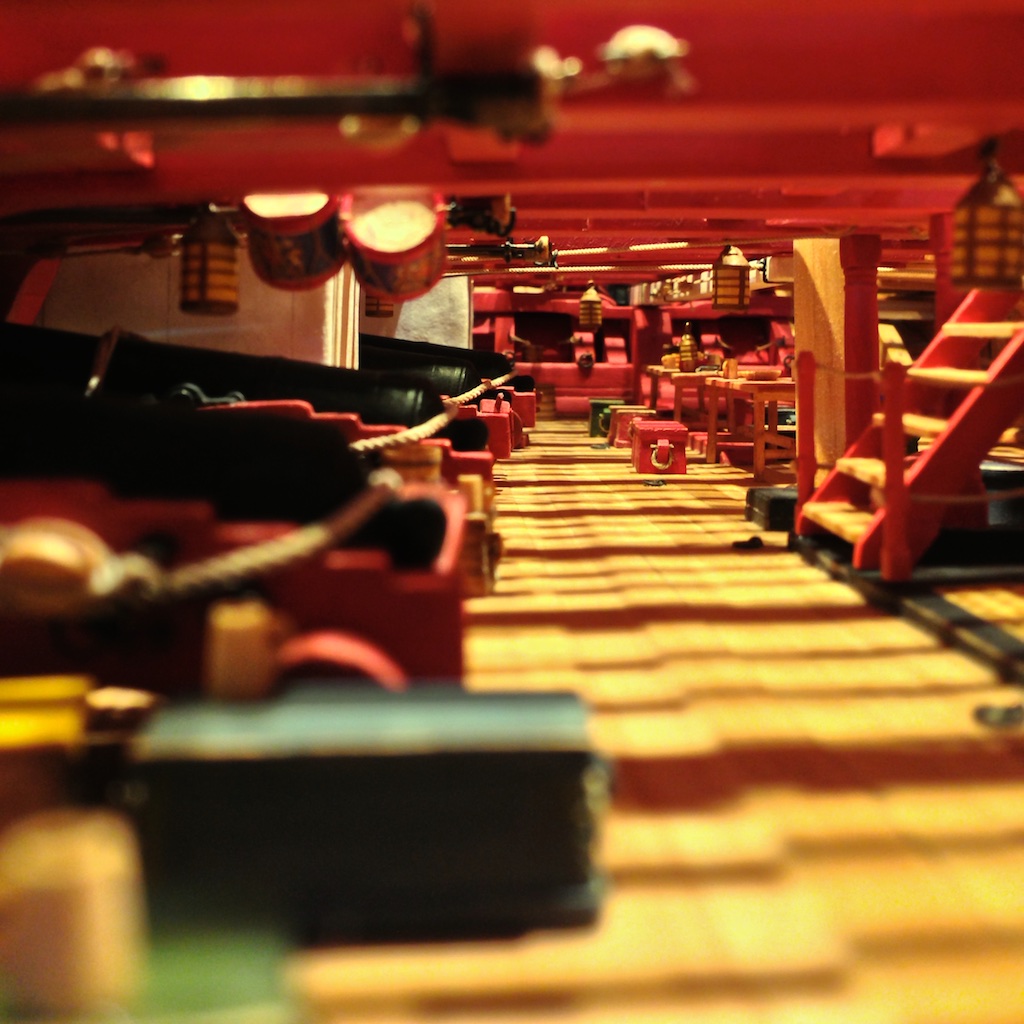
Hello,
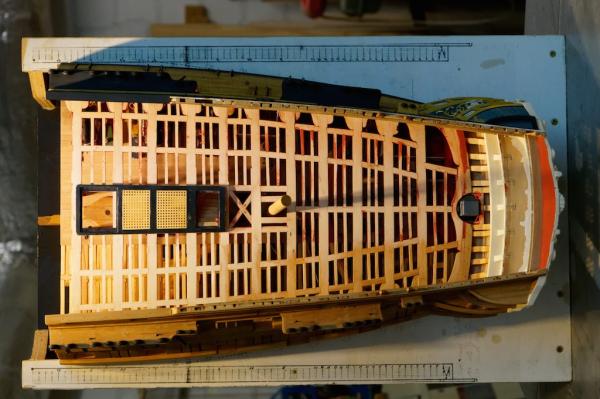
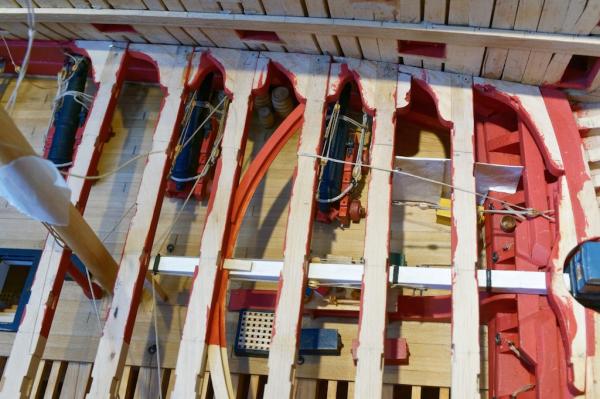
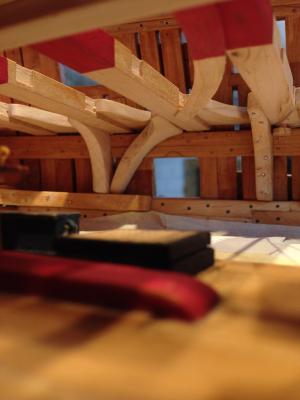
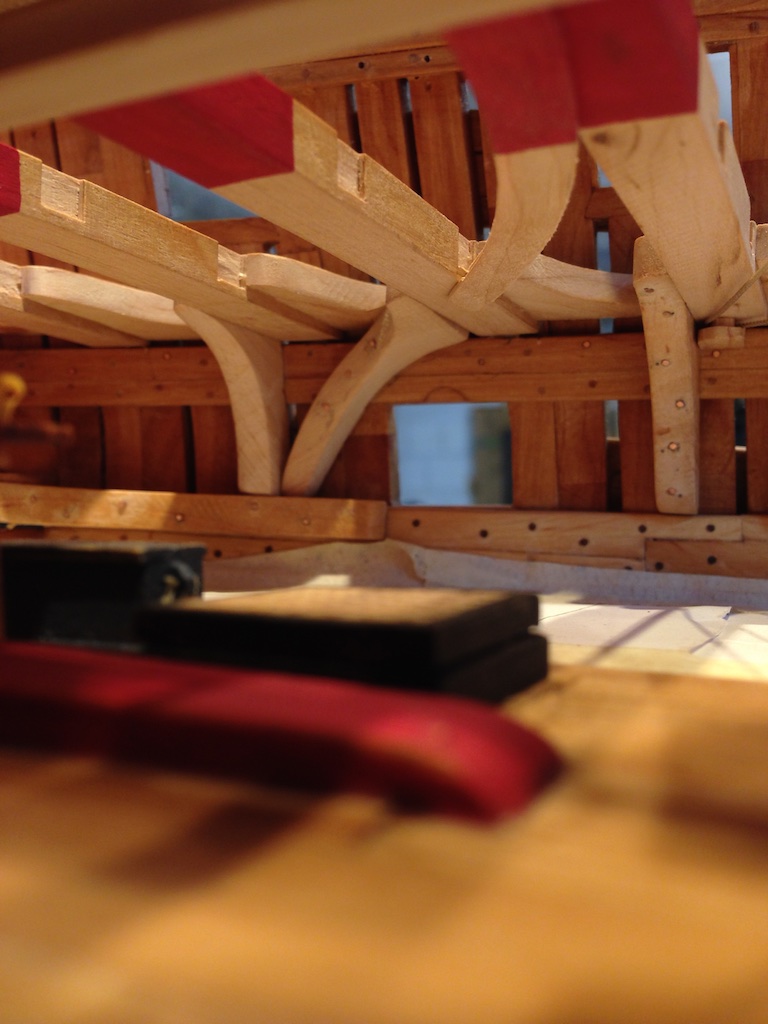
so I have the gun deck ready and it should't be longer for me. I have a lot respect for those who build the whole ship this way. With this I did't mean all the small things I build in, but the plain ship. These bent hanging knees where the hell. But for the next deck I will go an other way and set first the deck beam and then the cannons in. They where much in the way, but I'm learning
The following pictures I made again with my iPhone. Here is the red color a little to red. In reality it's more brown as in the first picture. I think it's the light.

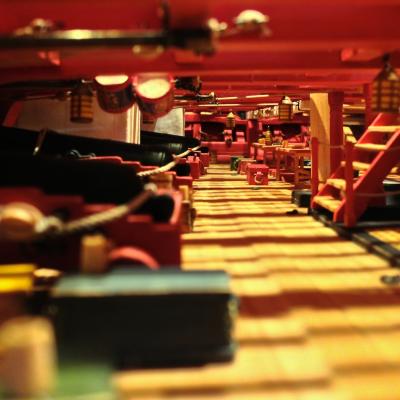
The next thing to build would be the capstan.
Regards,
Siggi
- AntiSpiral, dafi, Jeronimo and 19 others
-
22
-
-
Hello Mark,
the bark is still in Greenwich.
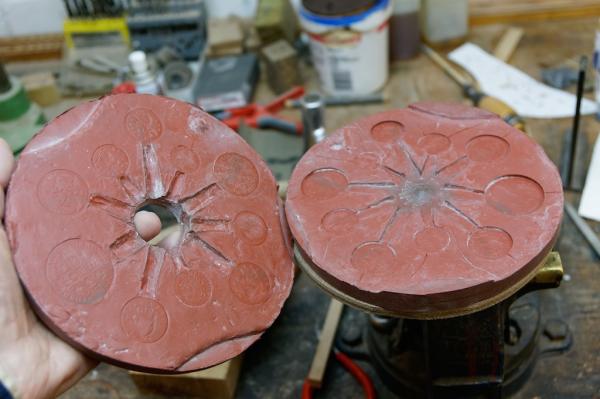
When I reread your question about what it's in that mold, it's the filling canal. You fill the cannon from the under side, so that the air could leaf to the top.
Regards,
Siggi
-
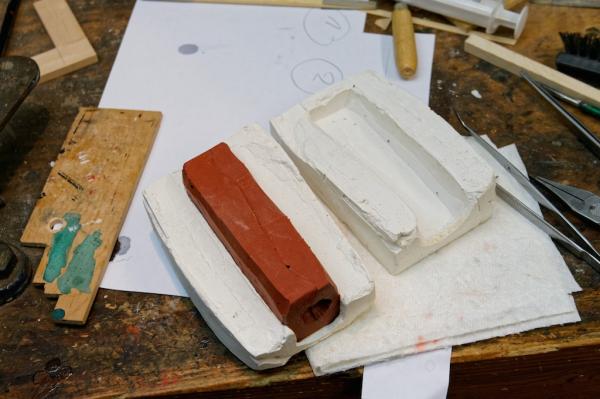
Mark, with that question you got me, or better my english. My translating program told me it's modeling clay, Plasticine or play dough. As children we had these things for modeling in all colors. I presst the cannons also in this material to make the under side of the form. Here I will make the upper side of the form. It's a good idea to put a stripe of paper around the wood form, then the cast silicon would't stick at the wood.

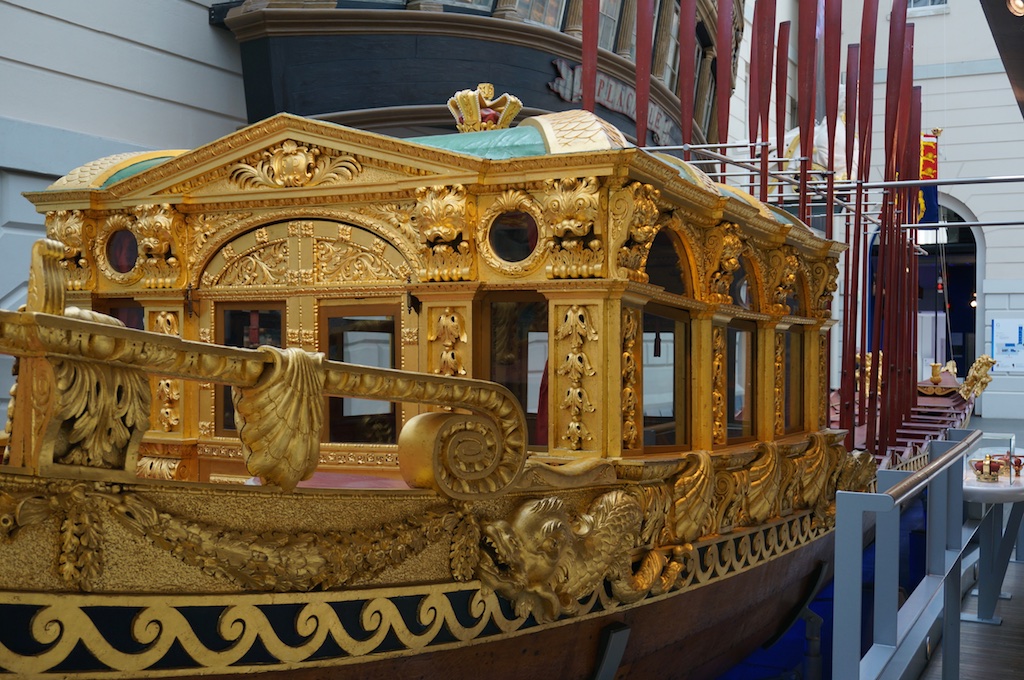
The cannons at Chatham, but I would't make the red so red, better is the english red as you could see at Prince Frederick's bark in the NMM.
Regards,
Siggi
- dgbot, aviaamator, daHeld73 and 2 others
-
5
-
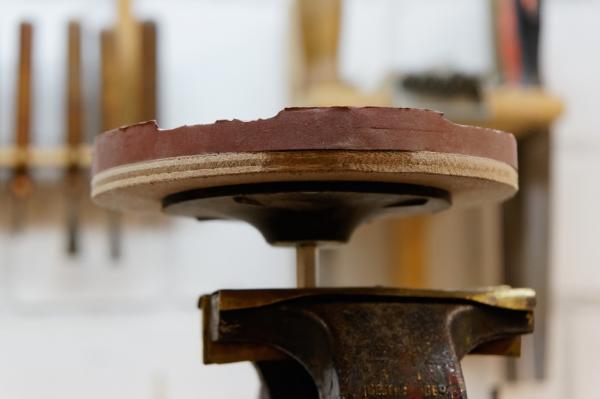
The bismuth makes the pewter harder, frost resistent and it should better cast.
Here a picture of my cannon foundry

Regards,
Siggi
- Jorge Diaz O, janos, aviaamator and 4 others
-
7
-
Really great workmanship, Mark. I could't do that in this quality.
When I compared your plan with my cannons, I found a real big mistake I made. But only at the 32 pounders, all other cannons are ok. I made mine on a wood lathe where I normally made things 1:1, free hand and cast them then in pewter. I don't know why that happens and why I did't noticed it earlier. Now they have to do it as they are.
Regards,
Siggi
-
Good morning Mark,
here it is now late afternoon, and I'm ready at the shipyard. But today I was lazy and did only some paint work and mix new red color.
But to your question. You mean these two hatches
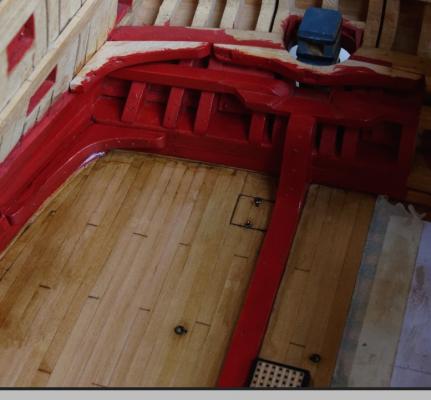
The one aft goes to the Ladies hole and the one with the grating to the bred room. At the plan it looked so
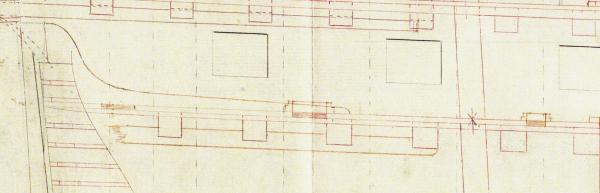
At the hatched to the bred room and forward to the aft magazine stairway is a rim drawn, but not to that of the ladies hole. So I thought that I made it this way. If you have to work there a cannon I think the rim would be in the way.
I dont know if I'm right with this interpretation, but I hope

Regards,
Siggi
- dafi, AnobiumPunctatum, archjofo and 2 others
-
5
-
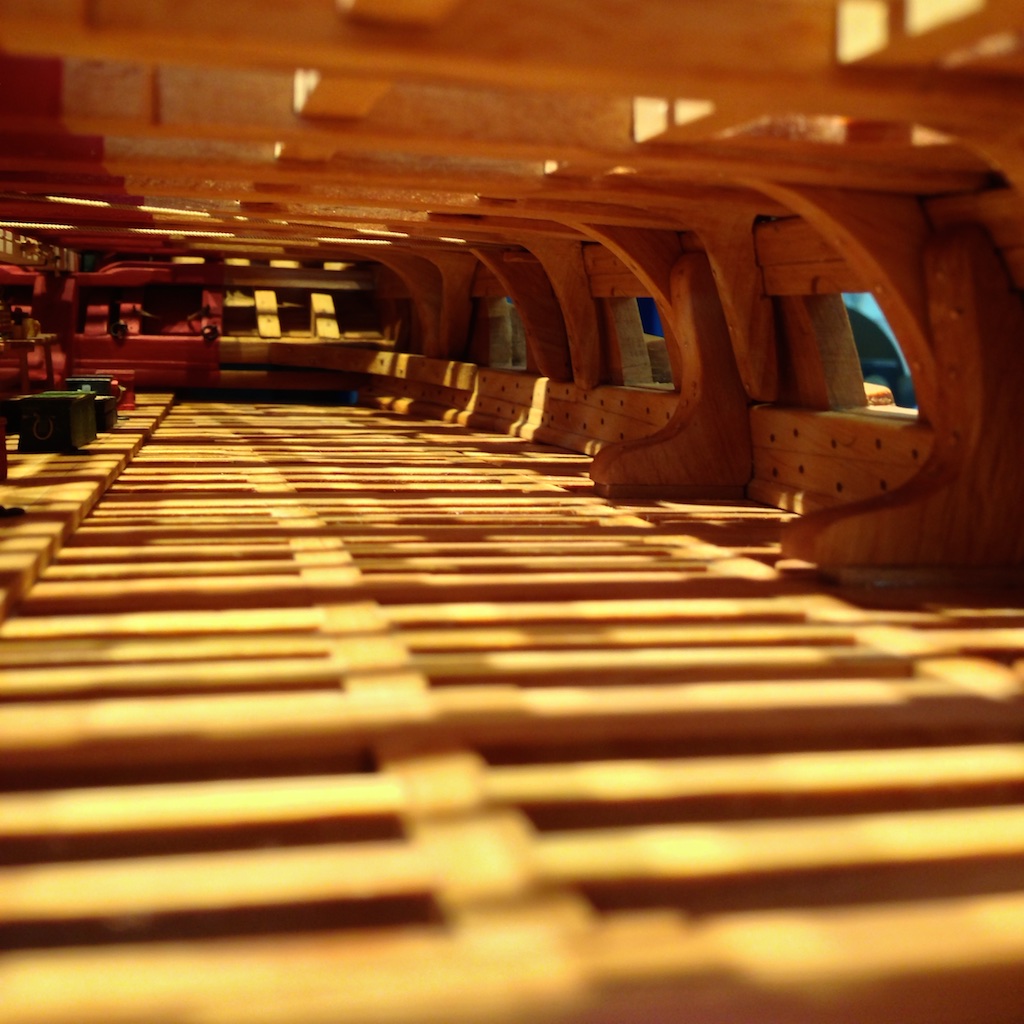
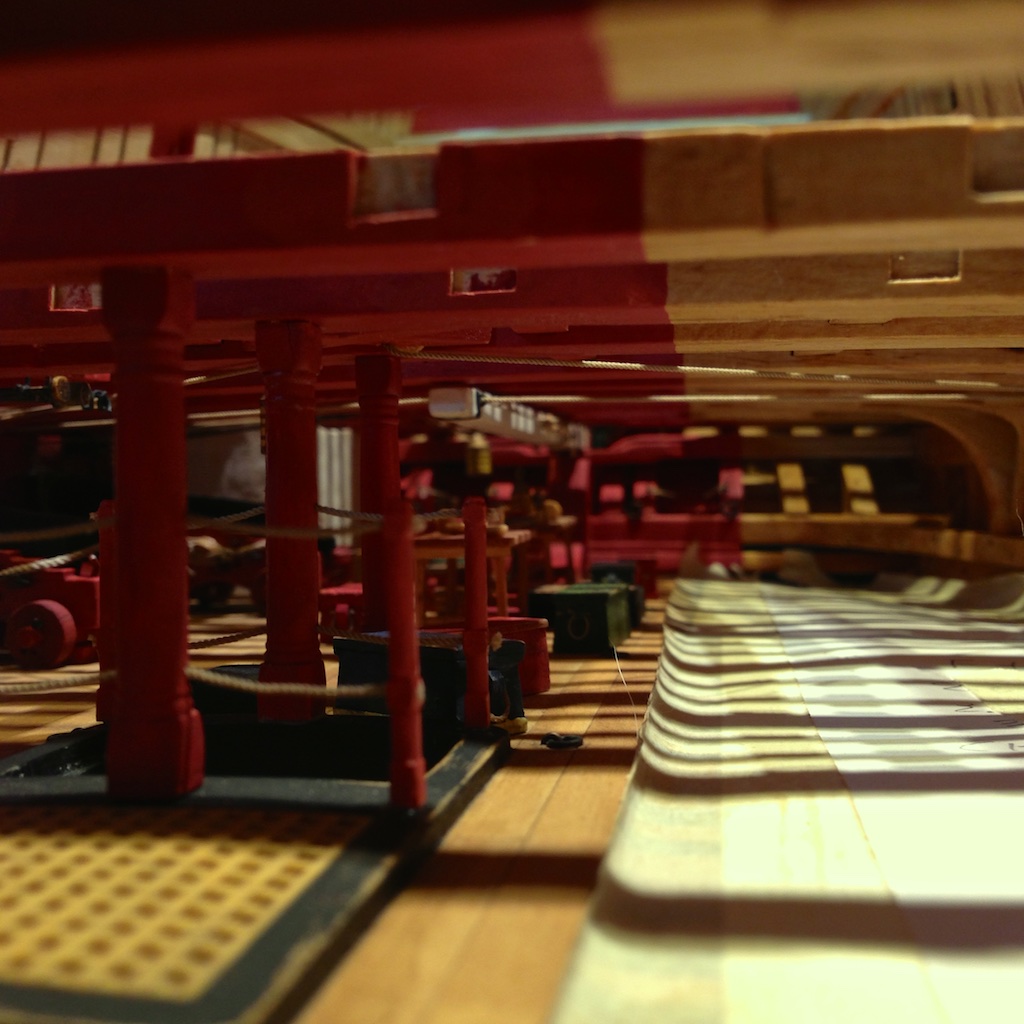
So, Christmas is over and the workers are back at the shipyard. Today I have installed the tiller. The next things would be to set in all the carlings and ledges in this part of the ship. Really difficult are the crocked hanging knees around the gun ports.
Enjoy the pictures.
Regards,
Siggi

- Jeronimo, qwerty2008, robin b and 12 others
-
15
-
Hi Mark,
James Doods & James Moore say in there book „Building the Wooden Fighting Ship" about this Bellona model: this model is particularly interesting because it shows that an innovation in the way the main wales were planked had been introduced by 1760. This method, known as anchor-stock waling....
And there I think they mixed up some things. According to Goodwin the anchor stock planking has even sides. The top and butt planking has uneven sides, but no hocks. Somewhere I read that this is named butt and hock, but I could't find it again.
The 1780 Bellona model has a straight conventionally waling and for the Superbe they made only one thick plank as wale! I used the top and butt.
Regards,
Siggi
-
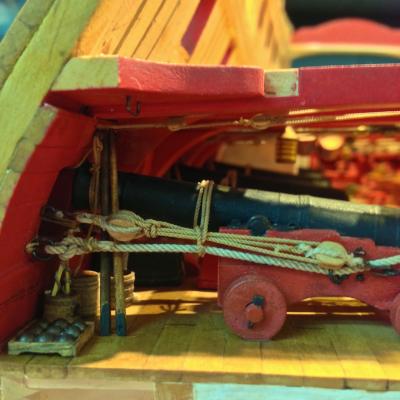
To the location of the trunnions I have a question. Did he say in witch direction the pendulous motion goes? If it goes down, as I would say, then it would be ok. That would press the cannon and carriage down at the deck and the cannon would not jump.
A good example as it should not be, you could see here: http://vimeo.com/109787499 I wouldn't stay near that cannon.
Yes, the powder would burn down continuously, but the most pressure is at the start, to get the cannon ball moving. When the bullet moves, the pressure releases the faster the ball moves and the walls of the cannons could be thinner.
For example, the Brown Bess has at the breech a diameter of ~ 34 mm and at the muzzle only ~ 22 mm, the wall is here only 1,5 mm thick.
Regards,
Siggi
-
The plans are looking great, I'm waiting for the first ready cannon. They must look even greater!
Don't worry about measurements, they had large tolerances in those times. For an example, the look plate of the Brown Bess musket had a quarter inch tolerance in length. Not two muskets where identical, because it was all made by hand.
Regards,
Siggi
-
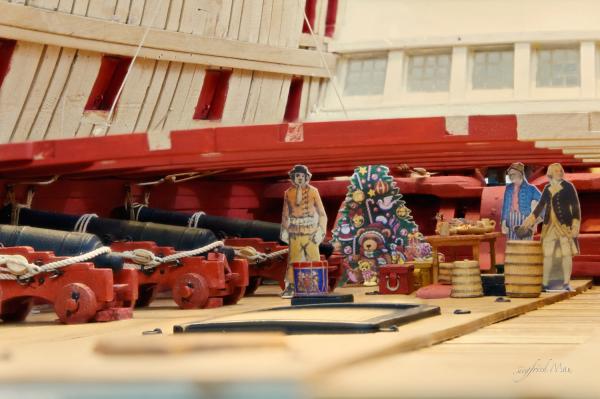
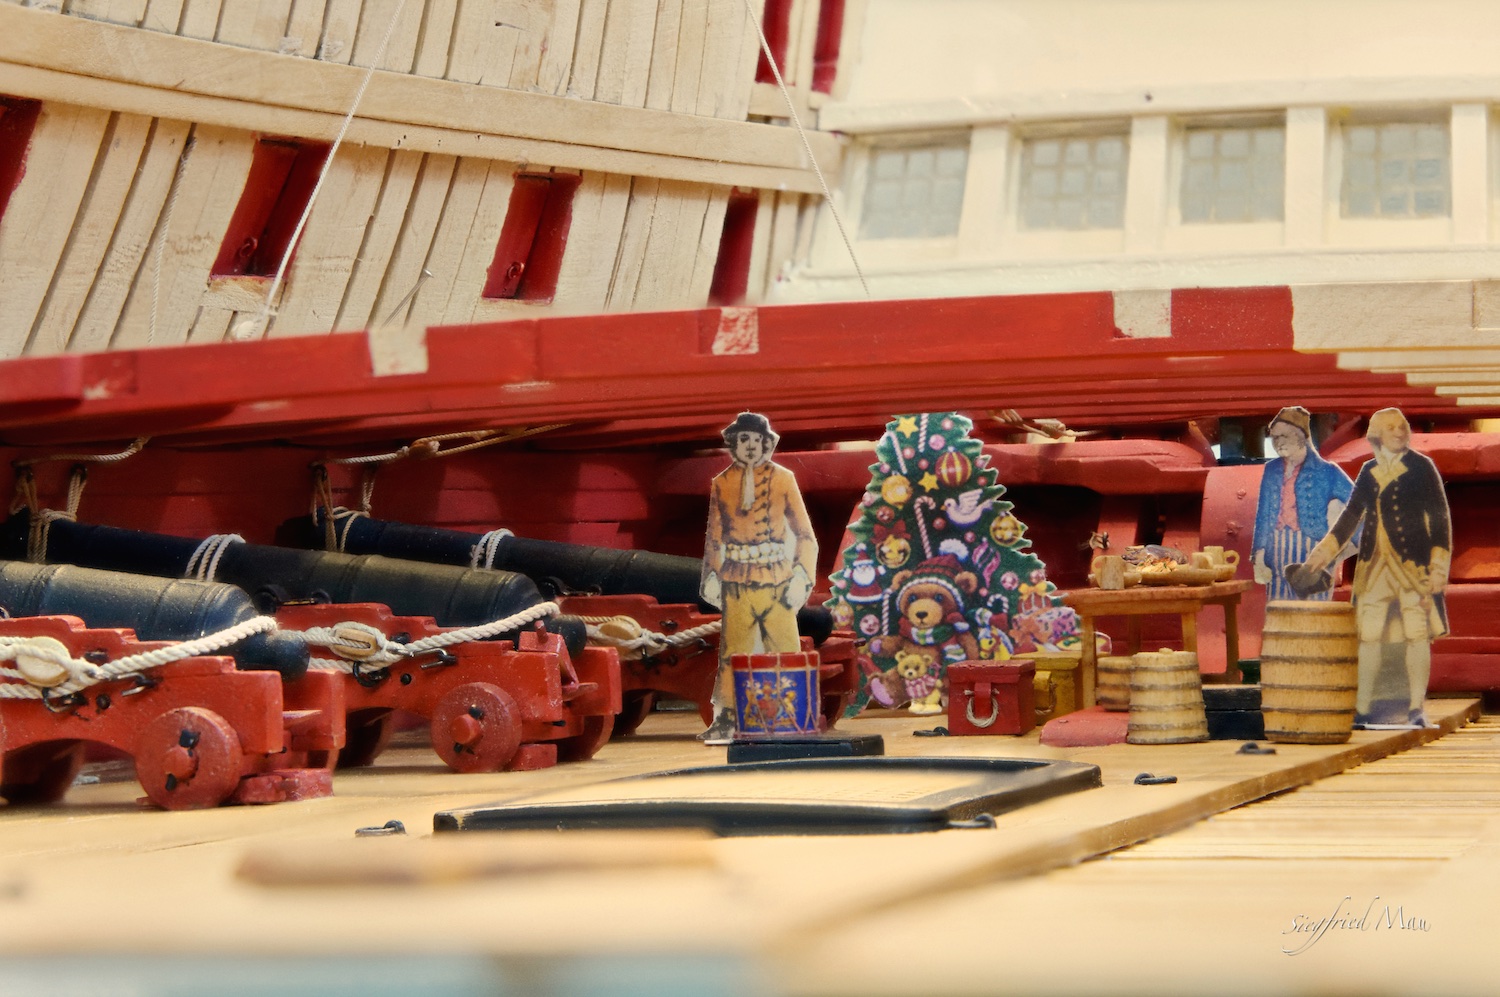
The captain, the shipwright (me, I'm at the iconograph and not at the picture) and the crew wish you all a
Merry Christmas and a Happy New Year 2015
Meanwhile I'm ready with all these small items for the gun deck and start now with the hanging knees for the upper gun deck and installing the deck beams.
Siggi

- CaptainSteve, dafi, NMBROOK and 8 others
-
11


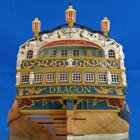
HMS Dragon 1760 by Siggi52 - FINISHED - Scale 1:48 - English 74-Gun ship
in - Build logs for subjects built 1751 - 1800
Posted
Robin, sitting at the sofa, having a beer after work, a cat at my knees, then I have time to think. I think yes they used both capstans. They had not only to remove the pillars at the gun deck, but also at the upper gun deck. So these capstans would be useless if they could't do that. For that short time, even when that are hours, it would't harm the ship, or they made something totally wrong.
That is Mini, she was the model for the rudder chewing cat at the stern
Regards,
Siggi