HOLIDAY DONATION DRIVE - SUPPORT MSW - DO YOUR PART TO KEEP THIS GREAT FORUM GOING! (Only 13 donations so far - C'mon guys!)
×


Piet
-
Posts
3,568 -
Joined
-
Last visited
Content Type
Profiles
Forums
Gallery
Events
Everything posted by Piet
-
 Ah yes. the Nils touch, real deck planking not photo printed on paper! Looks very good my friend. Cheers,
- 2,625 replies
-
- 2
-

-
- kaiser wilhelm der grosse
- passenger steamer
- (and 1 more)
-
Take care of your mother in law Nenad, she needs you now more then ever before. Also, don't neglect yourself. Give us an update once in a while. We'll wait patiently for your return to the CS and hopefully with good news about mom. Cheers,
- 4,152 replies
-
- 5
-
-
- cutty sark
- tehnodidakta
- (and 1 more)
-
Looks very nice Chris and thanks also for the explanations on the how to. Cheers,
-
Fantastic build Patrick, it was a joy watching your work of art come to such magnificent conclusion. Cheers,
-
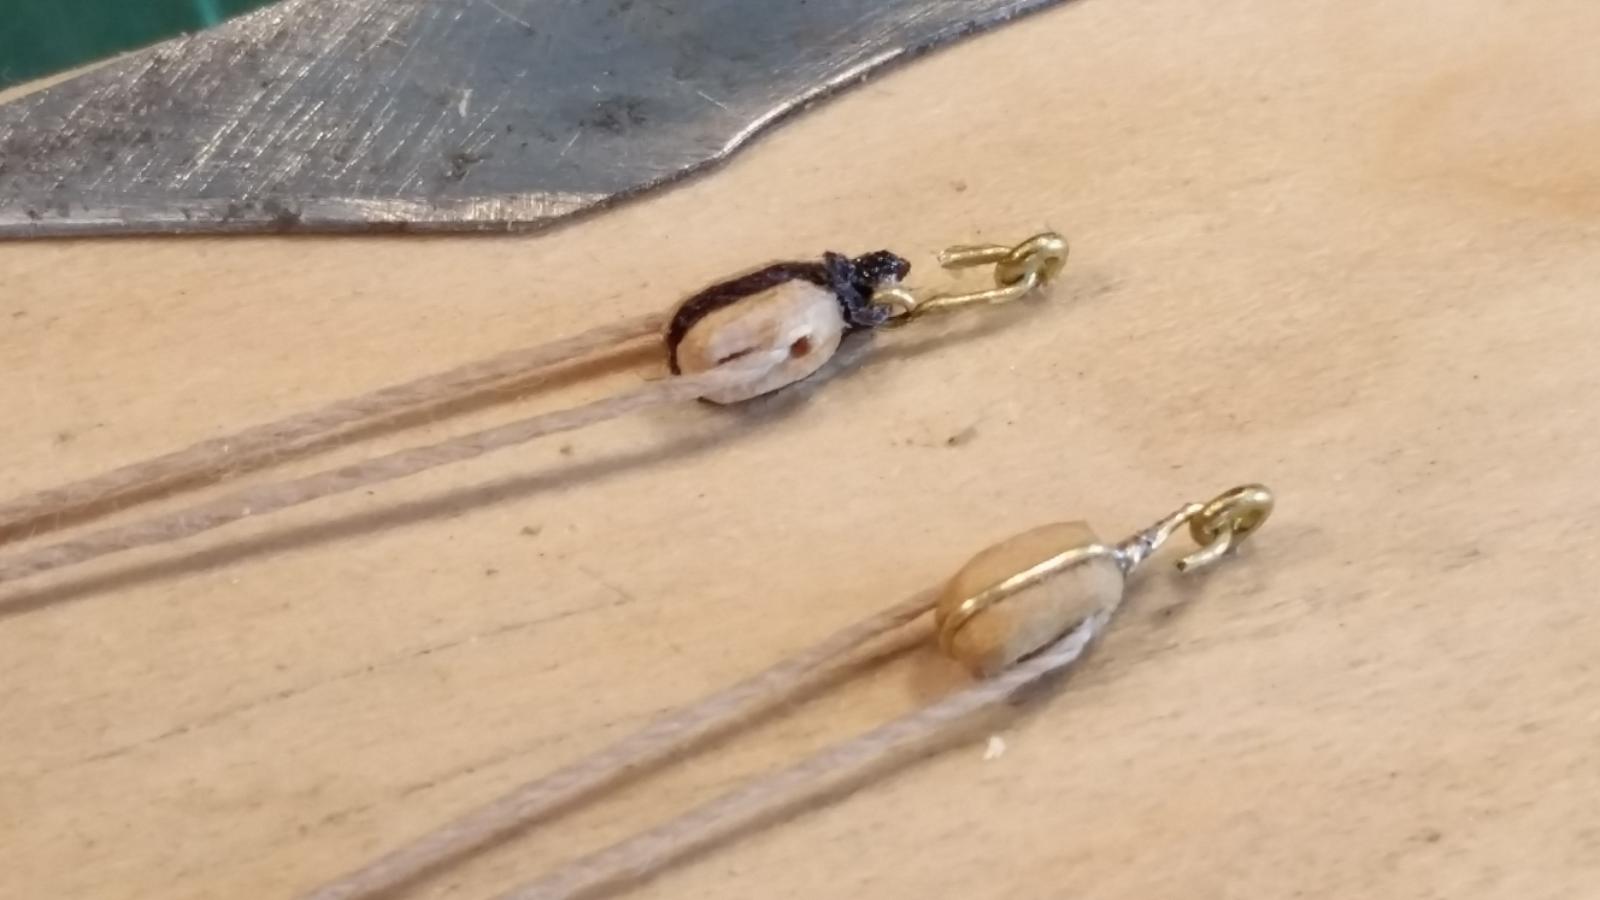
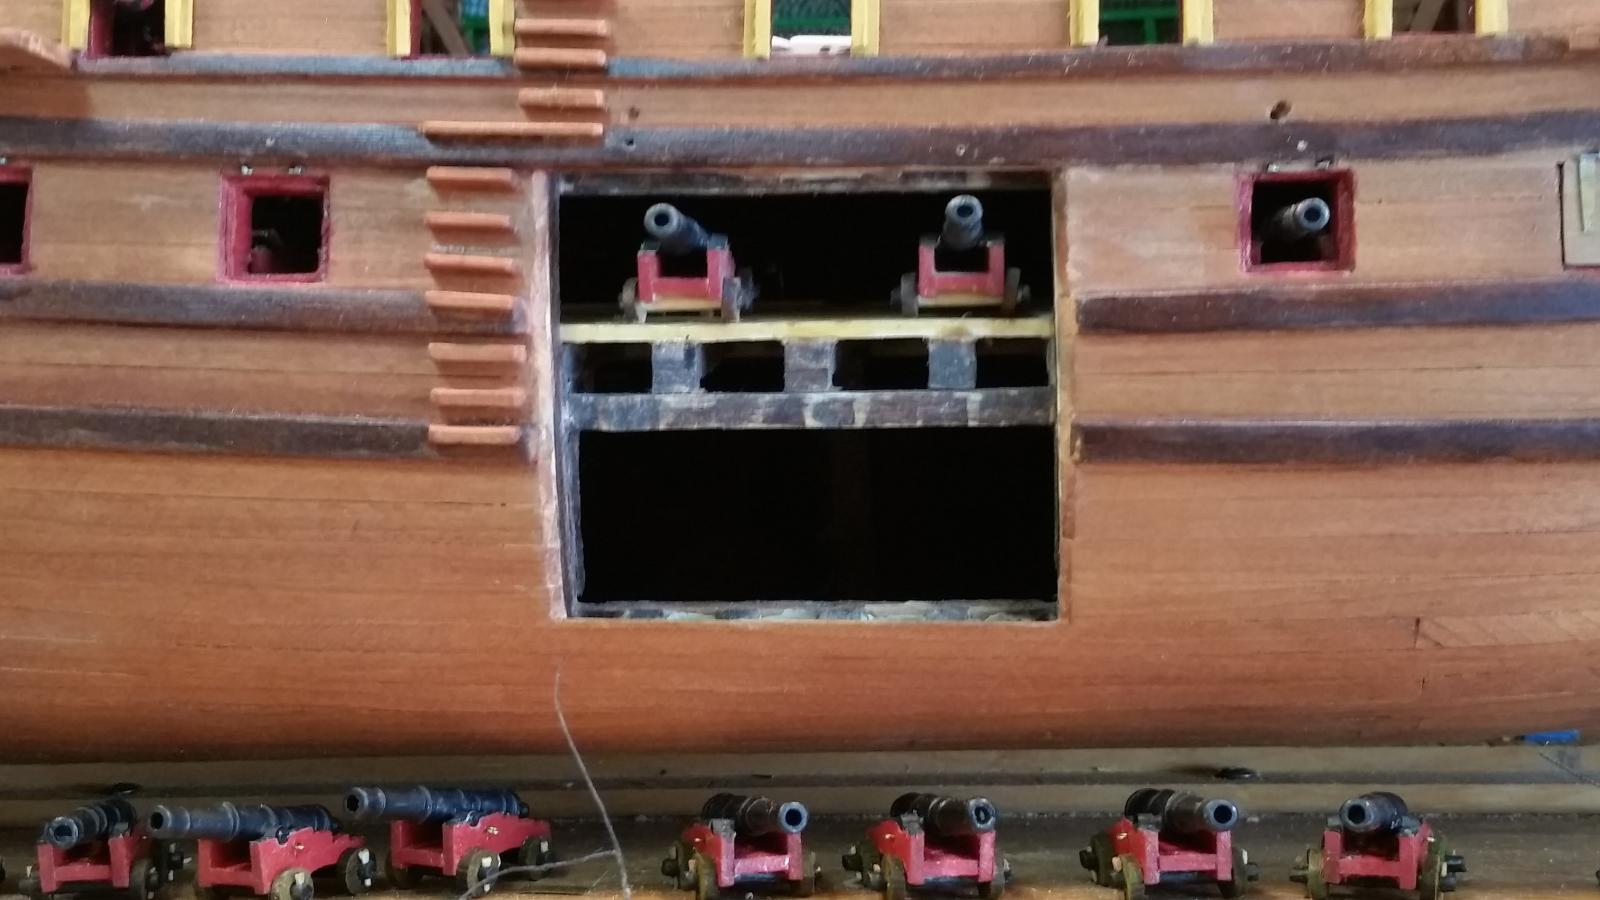
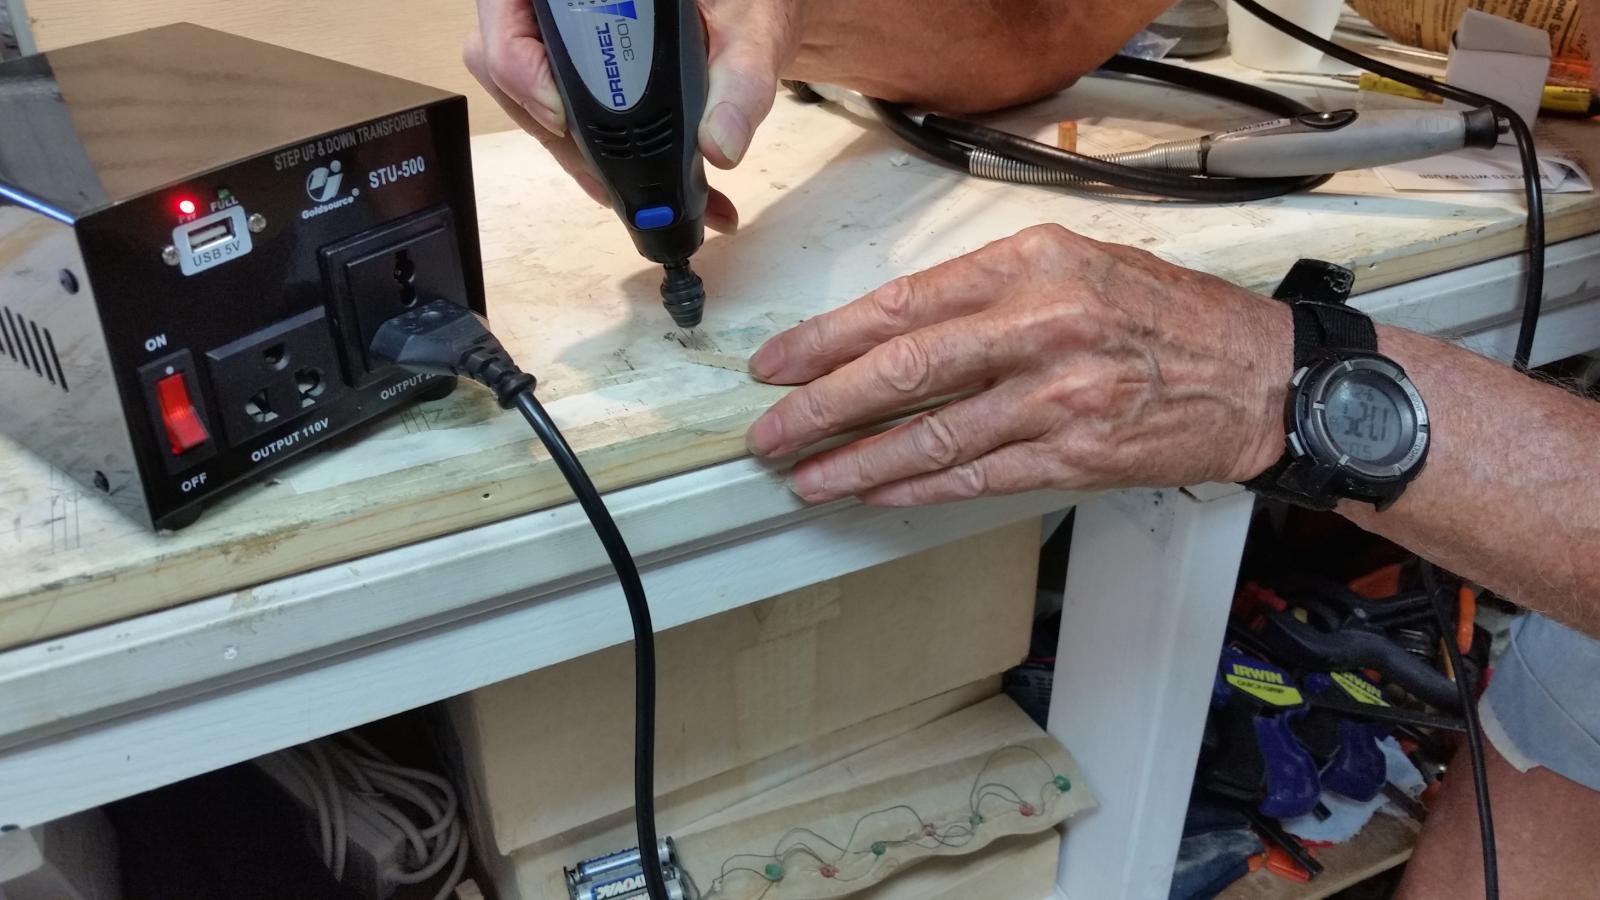
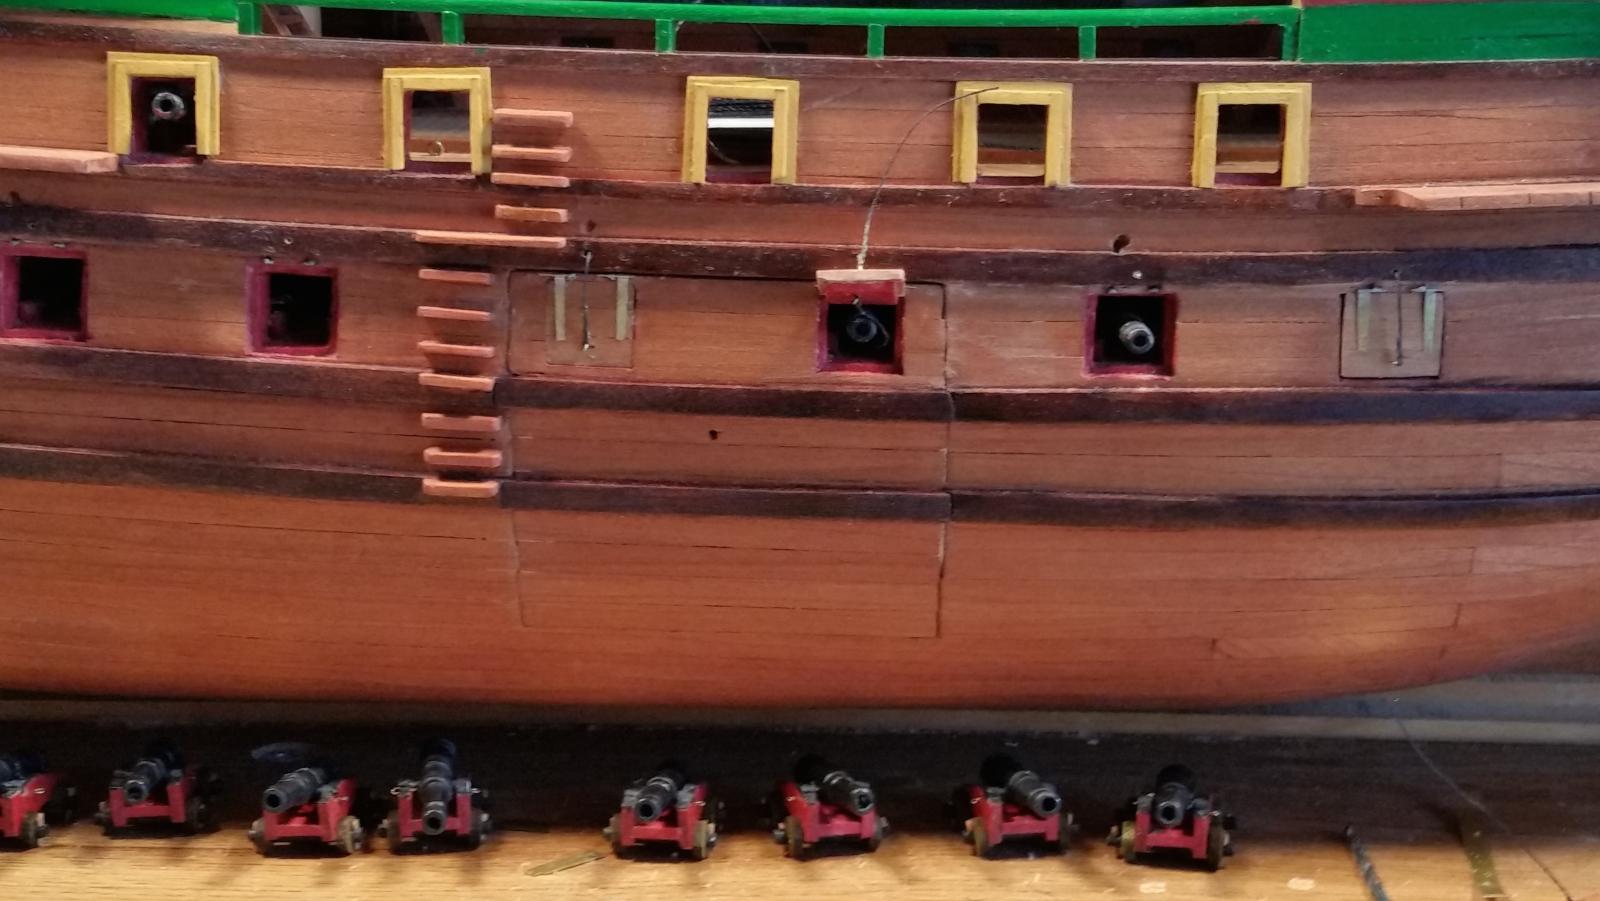
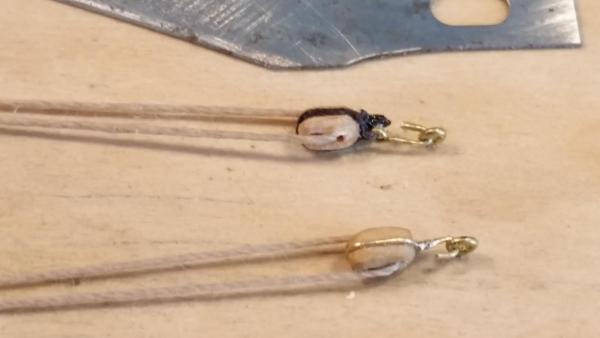
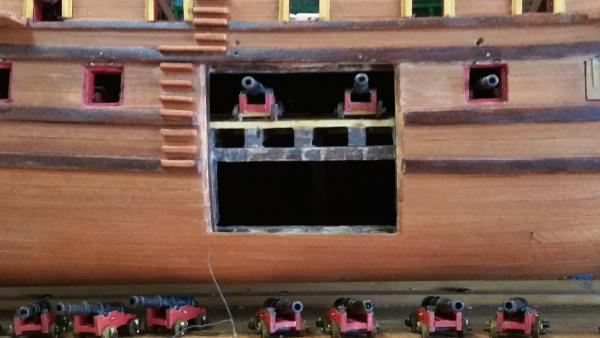
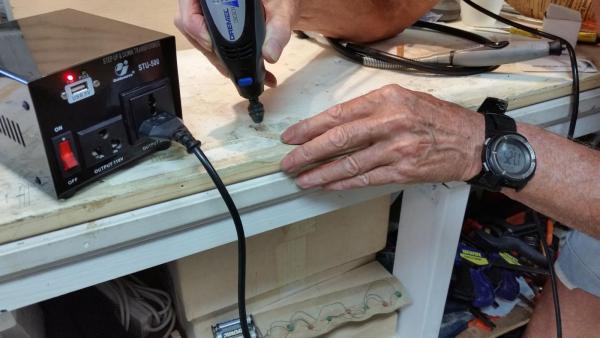
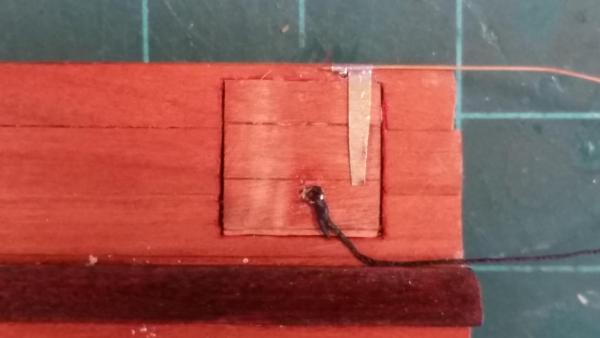
Today was mostly taken up with gardening. I had to cut back on the vines next to our house, in the vacant lot. They are encroaching on our property and a general nuisance. Then I had to mow the front yard and pull a few weeds there too. I didn't get to CA the gunport lid hinges though, I want to take my time with them. Instead i made a few more single sheaf pulley blocks, that makes a now a total of 12 out of the 32 I need for the center deck guns. Last week Friday I stropped two blocks to see if brass wire would work and look like compared to using black thread. There is to be a hook at one end so that makes the tread method a little bulky. I kinda like the brass but how to make them black. I can't use the blackening method because I have to tack-solder the end where the hook is. Yes, I made the strap and hook from one piece of 0.3 brass wire, rather then using a hook separate. I can try to use a VERY small brush and paint the brass black. Question is, what's all your opinion? Hmmmm, I'm wondering - - if I carefully paint the blackening on the brass, will it stain the blocks? Any thoughts on this from the experts? I'm attaching a photo of the port side hole open for yuns to see what I had in mind. The hold will be loaded with wooden barrels and perhaps bales of "stuff." Hey, it's supposed to be a merchant vessel and we need to have some cargo in the hold. This shows two pulley blocks, one is strapped with black thread and the other with brass wire. Don't forget that each pulley block is 5 mm long and about 2.5 mm wide. It's really not easy to make a respectable knot or fastening with thread. At this scale things quickly begin to look too bulky. Here is another view This show the opening in the port side of the hul where the plug goes to close it. Yes, everything still is in the rough state. It'll all be stained and or painted when all the work in that area is done. This is my handy dandy voltage converter for the 220 - 240 rated Dremel tool. Yup, I'm actually drilling a rope hole for the next single sheaf pulley block. Credit goes to my dear bride Gwen who took the photo. Cheers,

-
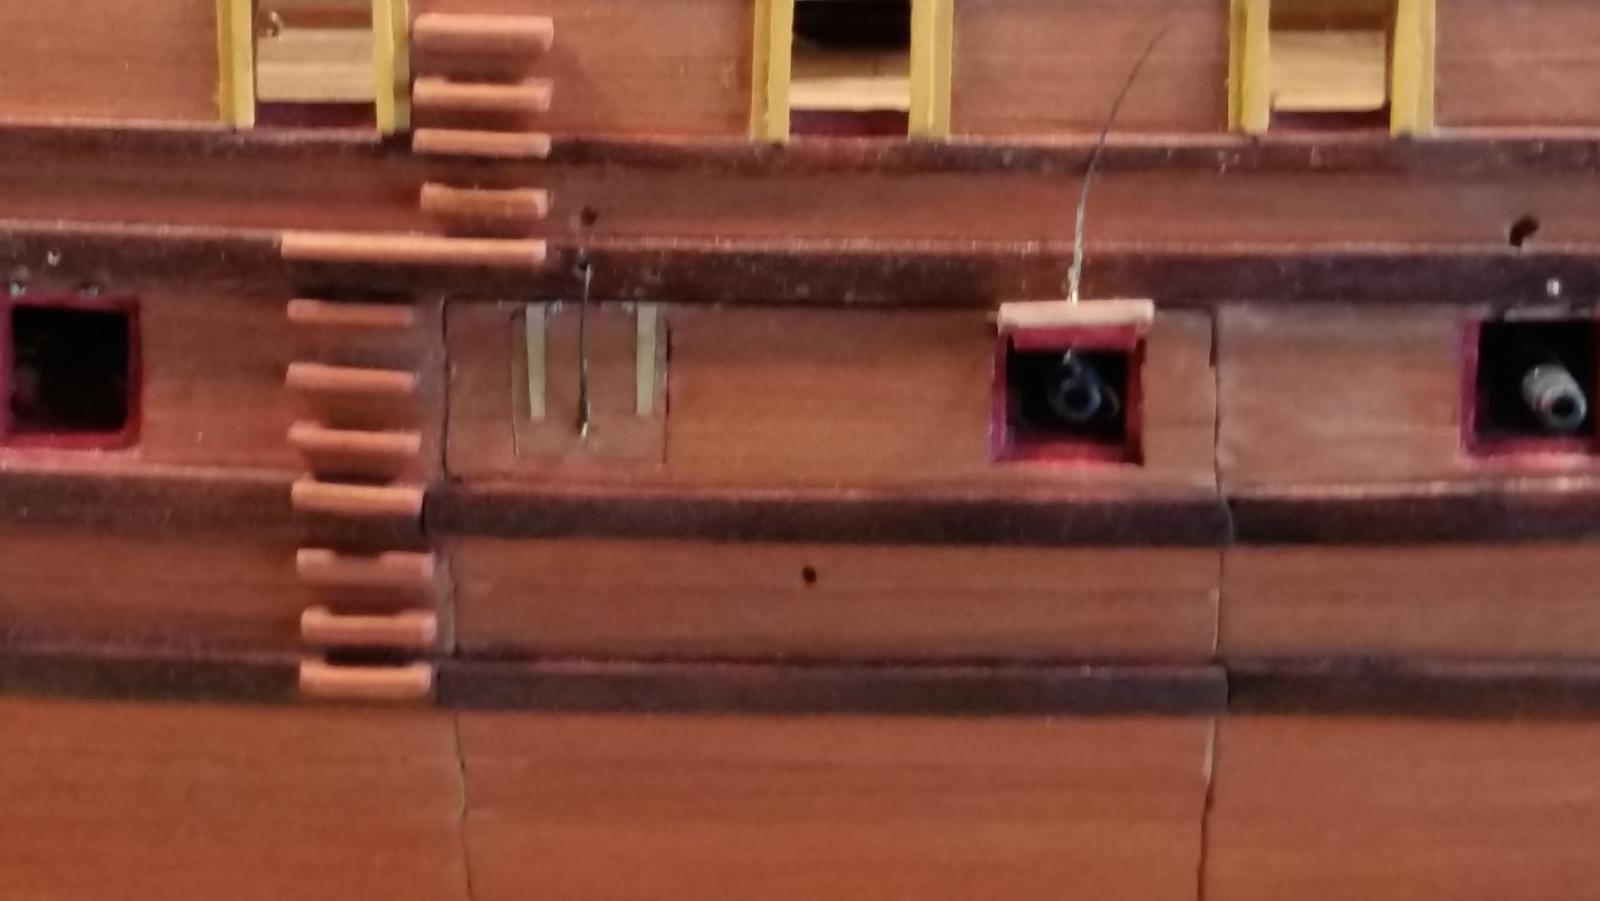
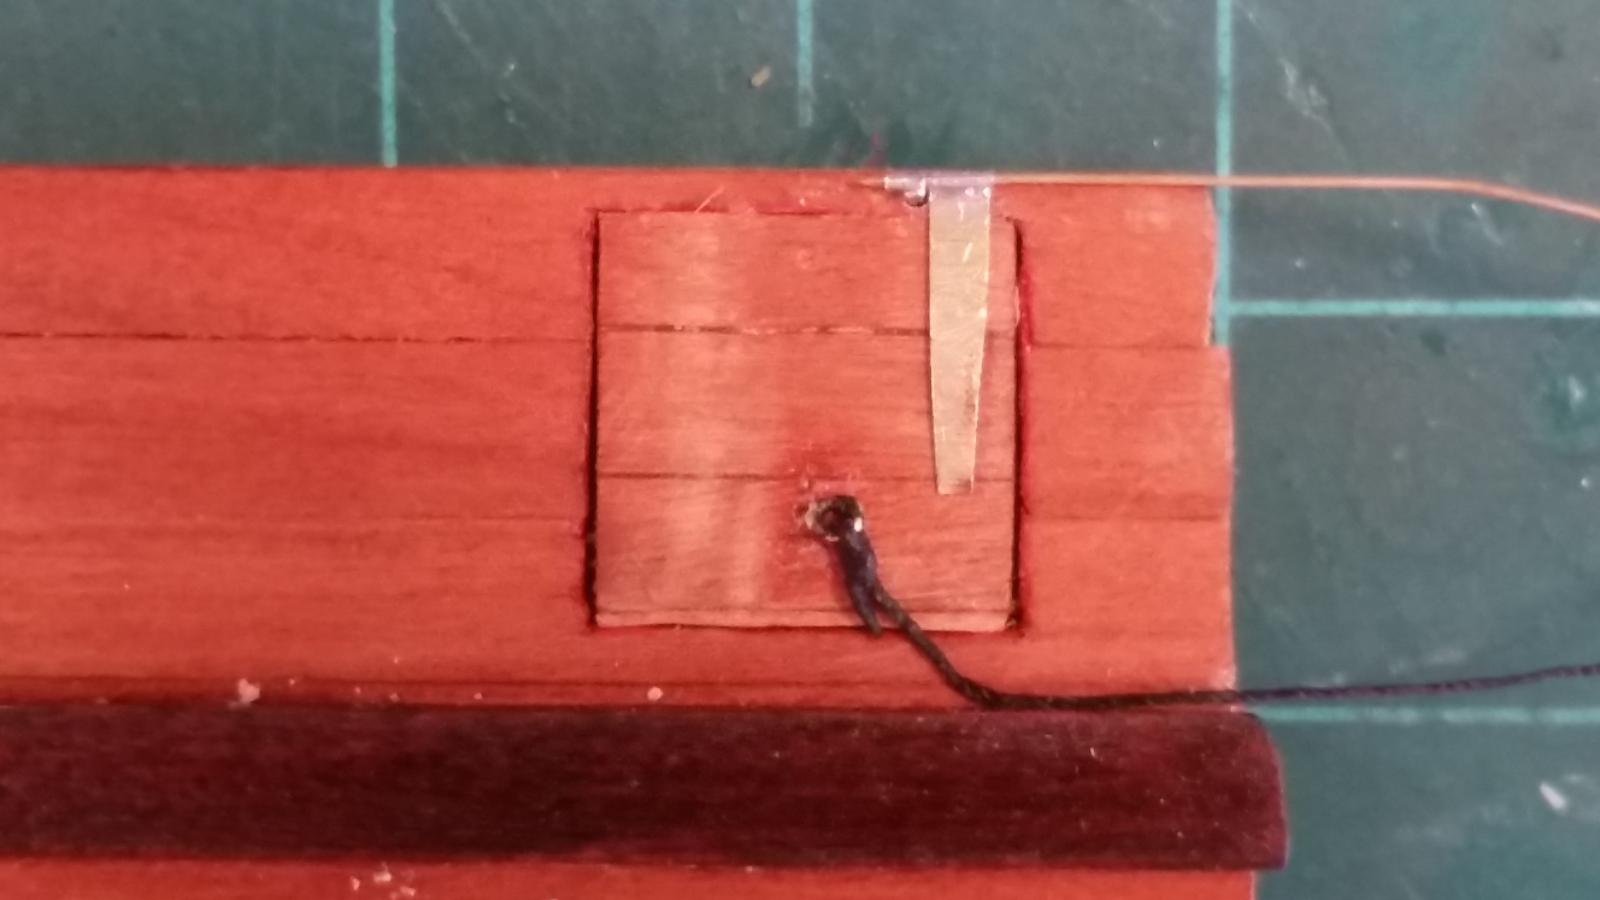
Thanks everybody for visiting and your comments, of course also my thanks to all who clicked the like button. Thanks Mark T, the plug goes up to the bottom edge of the lower wale. The porthole lid lifting rope goes through a hole in that wale. The hole you see between the two wales is for the water run-off from the deck. I made a big mistake in making this plug square. What I should have done is let its planking go sideways some into the hul planking, that way the plug is better concealed then it's now. It's too late in the game to redo it the correct way. In my next post I have added a picture of the hul with the plug removed. Yes Hans and Remco, I understand that Proxxon is a German company and like most everything made in Germany is good stuff, that was the reason for me buying my two Proxxon tools. When they are marketed here in the States they replace the motors and a few other electronic devices with 110 volt, 60 Hz units, at least that's what I am told. Also, and this is what I'm also told, these devices are made in China. The good part is that the repair "only" cost me $48.43. Still better then having to buy a new one. I really like this small tool, it fits nicely in the hand and has plenty of torque for light routing. Remco send me a Dremel hand tool that's rated at 220-240 volt, 50-60 Hz. I bought a converter that can change my 110 volt to 220 volts and apparently the 60 Hz doesn't bother it. I tried it out this morning and it works quite well, that you. When push comes to shove I can now buy German, English or Dutch made tools and plug it into my handy dandy converter, which is rated at 500 Whats. So yes, the question remains for the US marketed Proxxon tools, what's inside, German quality or Chinese stuff. Cheers to all,
-
Hello Dan, Incredible detail and my thanks for the tutorials. Intriguing materials you are employing, mostly strange to me except the wood and paper. I used to work strictly with metals, aircraft. I hope to be able to employ your methods and materials whenever I can build my father in law's ship he was captain on. That was a smallish coastal motor ship of the KPM (Royal Packet Company). I'll be making copious notes for sure. Cheers,
- 108 replies
-
- 3
-
-
- andrea doria
- ocean liner
- (and 1 more)
-
Outstanding, errr - - - outrages, incredible but - - umm - - did you put a propeller on the outboard Patrick? Kidding my friend, that's some mighty fine miniature work. Cheers,
-
Fantastic job you did on the deck JesseLee, bravo. Cheers,
- 1,306 replies
-
- 6
-
-
- syren
- model shipways
- (and 1 more)
-
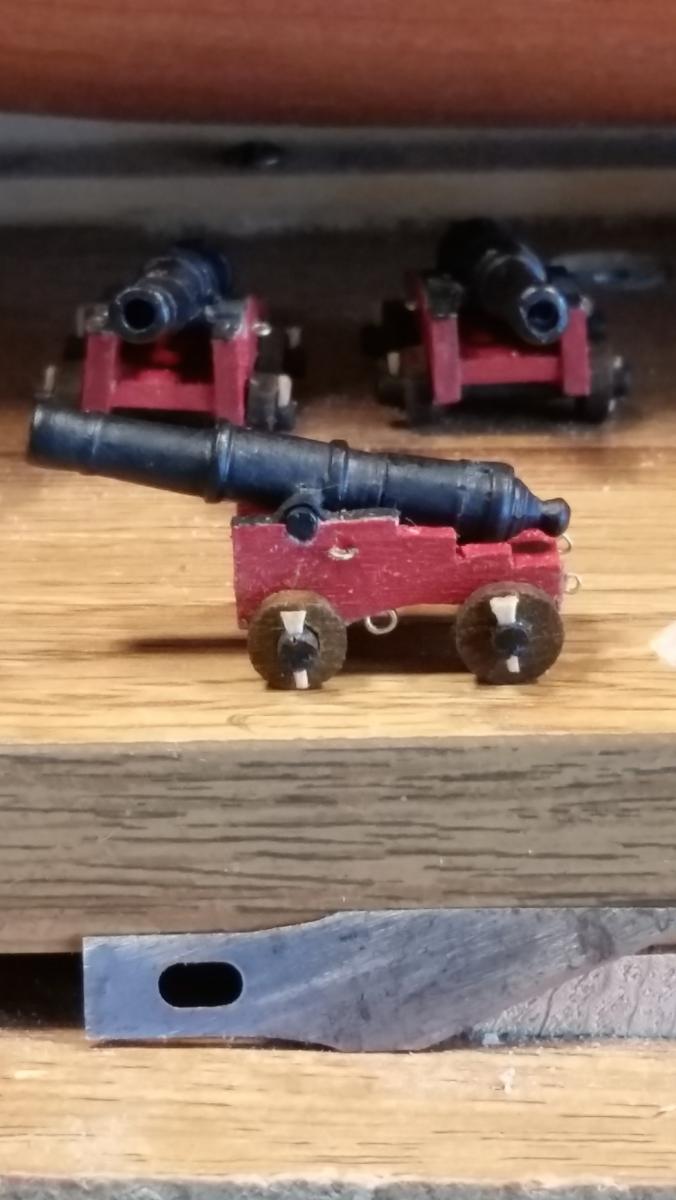
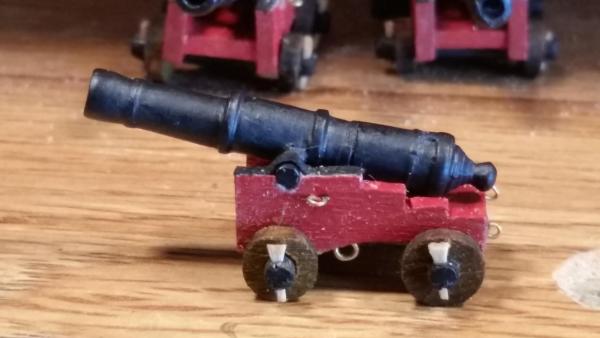
Hello everyone, hope all's well in your neck of the woods. It's still rather warm and humid here in Florida with a daily shower and T storms. Poor Ivanna the cat runs to her bunker, under our bed, as soon as she hears thunder. Doesn't like the rain either. I have been working on the ship though regardless of the heat and humdedity. Open the garage doors and turn the fan on. I managed to cement all the gunport lid hinge pintles into the hull AND the hardware to all 8 gun carriages. Today I tried to cement the gudgeons to the lids with two part epoxy but they won't stick. Don't know why. Next thing to do is to use gel CA glue. I'll try it first with some scrap and see if it holds. The problem with CA is that I need a few seconds to manipulate the gudgeons so they are placed correctly. With this tiny stuff that aint easy. I also made 6 more single sheaf pulley blocks and strapped a rope around one to see how difficult that's going to be. I even whipped the splice at the block end. I used the West Country method for this small diameter rope. The "rope" is rather thin, like the thread we use to sow buttons on clothing. I may have to go one size up though. For the whipping cord I took a thinner sowing thread of cotton over a nylon core. I unwound a small pieces of this thread and used the nylon core, it was VERY VERY thin but nice and strong. West Country whipping consists of a series of overhand knots. The way I did it is after one knot I turn the "rope" over and do the next not etc. till I have a about 2 or 3 mm done. A drop of nail polish and it should last for a long time. I am slowed down with making blocks because of my Poxxon drill/carving motor tool is still in for repairs. I was informed this afternoon that the motor had died. I'm just wondering how a motor of such a high quality tool can just die. If I had abused this tool I can understand but after infrequent and light use - - - I'm not impressed with Proxxon, this is two out of two Proxxon tools that broke after light and infrequent use. Okay, at least 'll be out "only" $48.34 for the repair, it's still cheaper then having to buy a new one. Here are a few pics of what I have accomplished in the last few days, hope yuns like it. This is just a trial piece. Whenever I I feel like it I'll use the next size thread and try to make it less bulky. I also have to strap an eyelet to a series of blocks. That'll be fun. The pulley block is 5 mm long and 2.5 mm wide, the rope holes are 1.5 mm apart. Glad that I have small hands and slender fingers, makes it easier to handle these small parts. This is to show how small the double sheaf and single sheaf blocks are. The reason for not doing serious block making is that I need that Poxxon tool in it's drill press gizmo so that I can drill the rope holes straight down. The two single sheaf blocks I lucked out with by drilling the holes pretty good using a small hand drill. It just takes too much time. This shows just a couple of the gunport lids with the gudgeons cemented onto them. I haven't tried yet if they are sticking okay. If not then we'll go the CA route. Bummer. This is a closer up pic of the removable plug with the gunport lid hardware cemented on. Yeah, The hull has taken a beating but I'll take care of that in due time. Cheers,


-
Willem Barentsz by ceestoorn - FINISHED
Piet replied to ceestoorn's topic in - Build logs for subjects built 1501 - 1750
Looking very nice Cees. Cheers, -
Well done John. They'll look great on the ship. Cheers,
- 2,250 replies
-
- 2
-
-
- model shipways
- Charles W Morgan
- (and 1 more)
-
Hi Dave, glad you settled on unpainted oak for the carriages. Cheers,
- 962 replies
-
- 4
-
-
- sovereign of the seas
- ship of the line
- (and 1 more)
-
Hello lextin, Yes, building multiple sheaf pulley blocks by laminating veneer is another method and works and looks really good. As far as help with rigging this ship I suggest looking at many pics. But you know that already. From what I see you seem to be handling it quite nicely. She's looking very nice. Cheers,
-
Thank you all for visiting the VOC shipyard and your very kind comments, it's much appreciated. Thanks also to all who clicked the like button. I'm so disappointed by not being able to use the hard solder set-up. When I get some time I'll try again with a different "hold-down" system. Then there is the fact that this thin brass stock loses all it's temper and re-tempering it must be done rather quick before the part cools off too much. I didn't get around to cement the hardware to the ship's hull, procrastinating a little I guess and playing with the pulley blocks. I discovered one of the reasons why I couldn't make them smaller as shown a few posts back. For the scale this ship they are still too large and the slot for access to the sheaves are way too long. Also, for the double sheave pulley blocks the sheaves were too far apart. I am now making the separation on the two sheaves much smaller. So you see - I'm still in the trial and error mode with them but at least I'm on the right tack. Well, perhaps tomorrow I can find some time to at least cement the pintles in, after I mow the front yard. With all the rain we've had the grass grows like a weed. Not complaining mind you Okay, almost bed time but forst finish my glass of red wine. Cheers to all,
-
Pirate Ship by JesseLee - FINISHED - BOTTLE
Piet replied to JesseLee's topic in - Build logs for subjects built 1501 - 1750
Well done JesseLee! Great job! Cheers,- 71 replies
-
- 6
-
-
- pirate ship
- bottle
- (and 1 more)
-
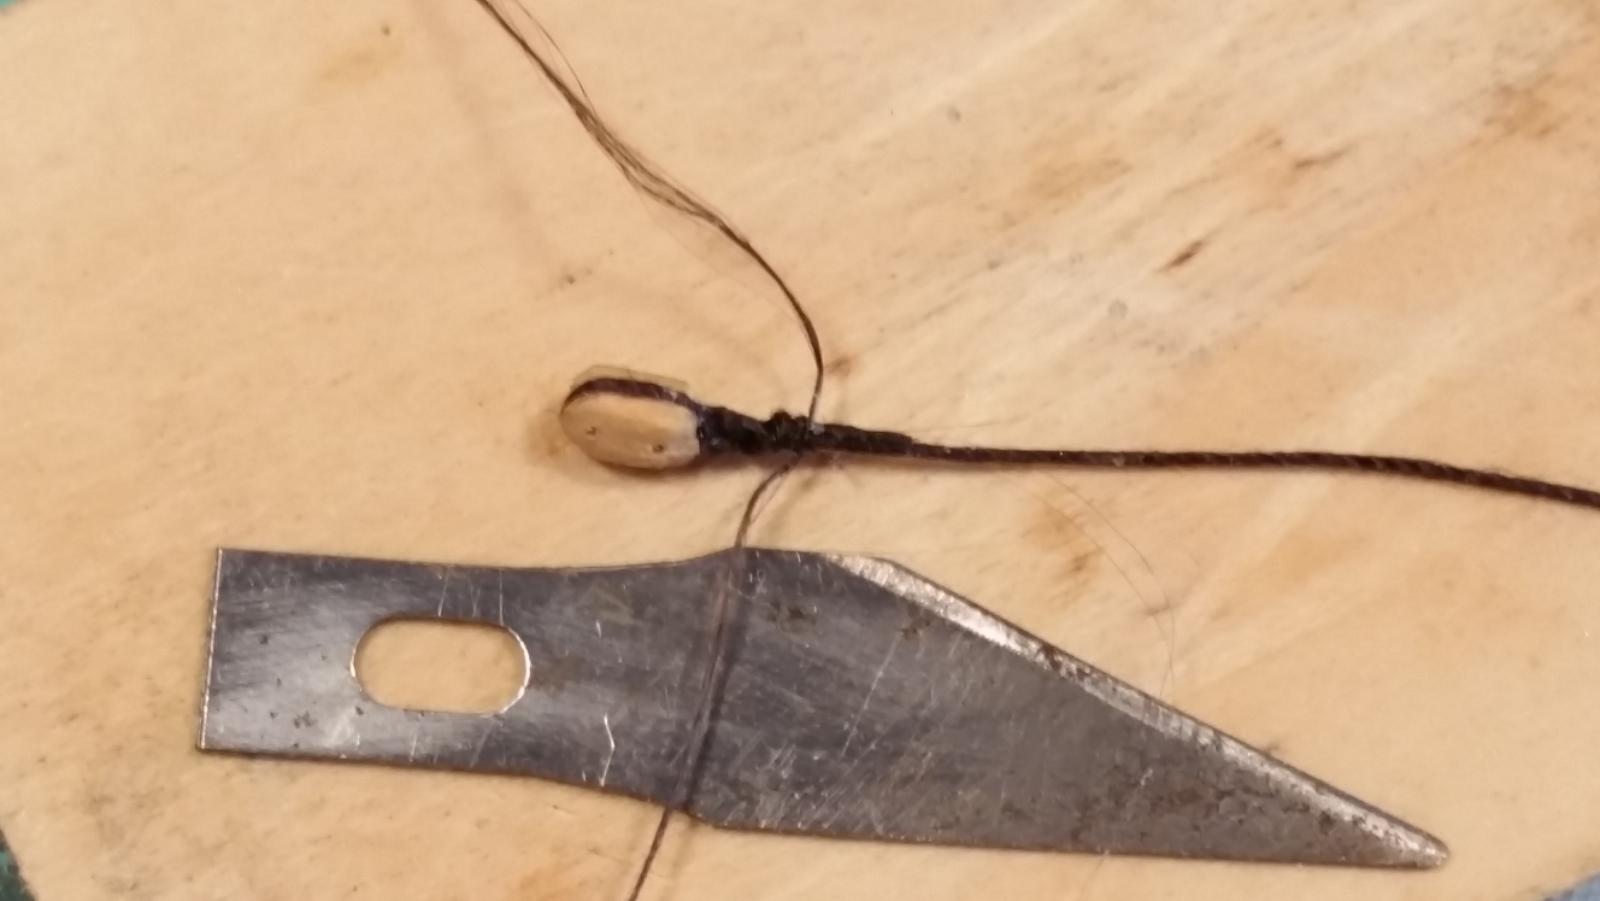
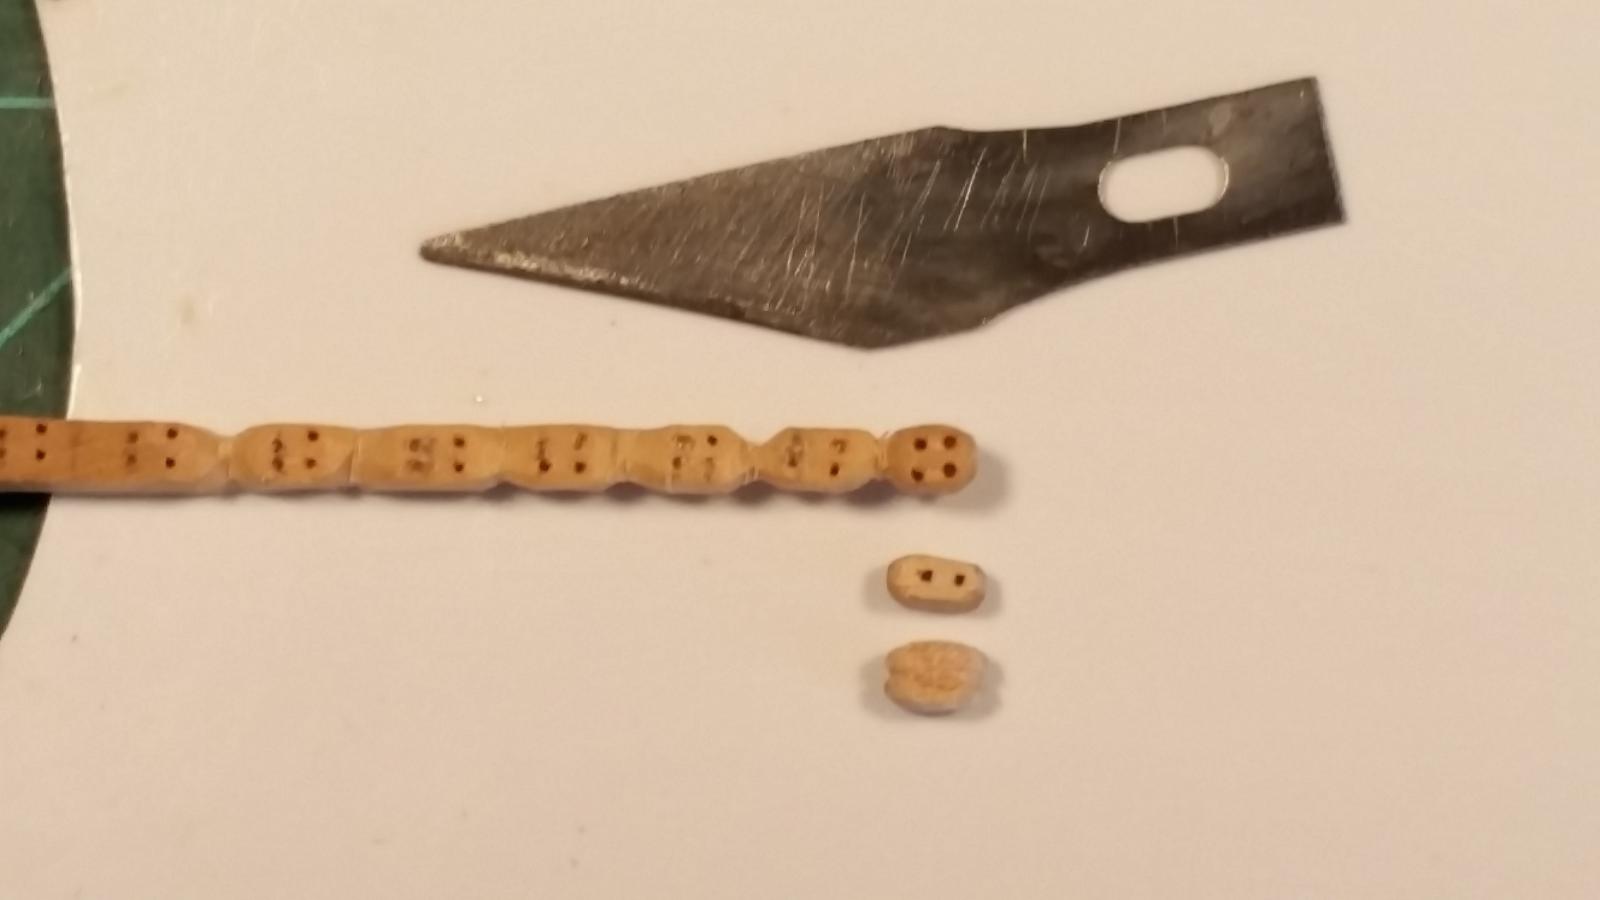
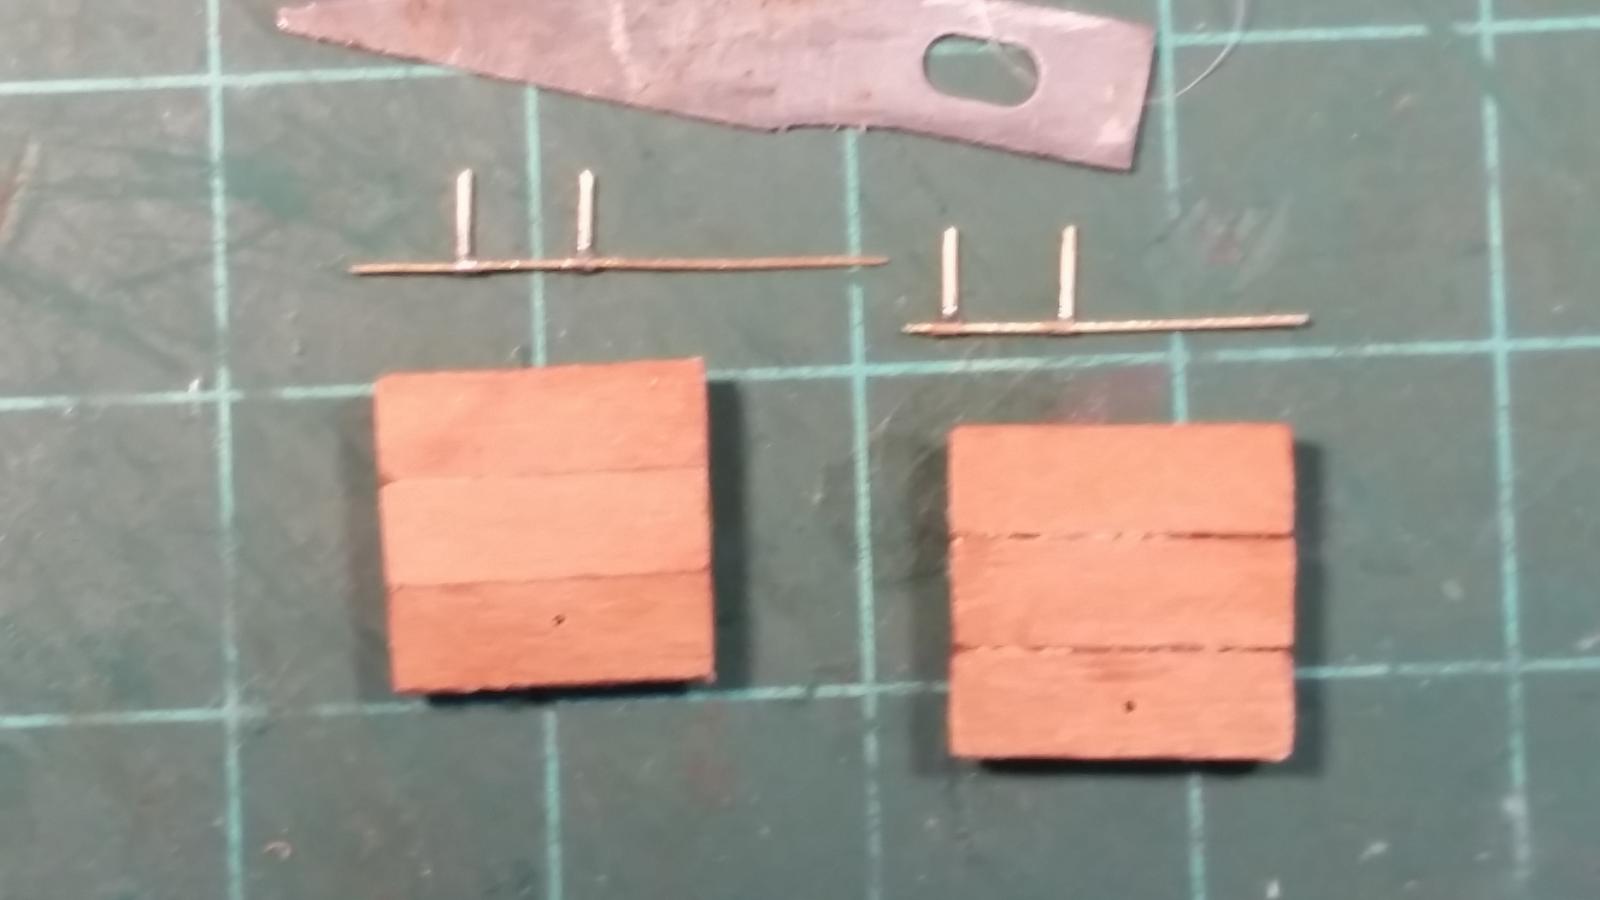
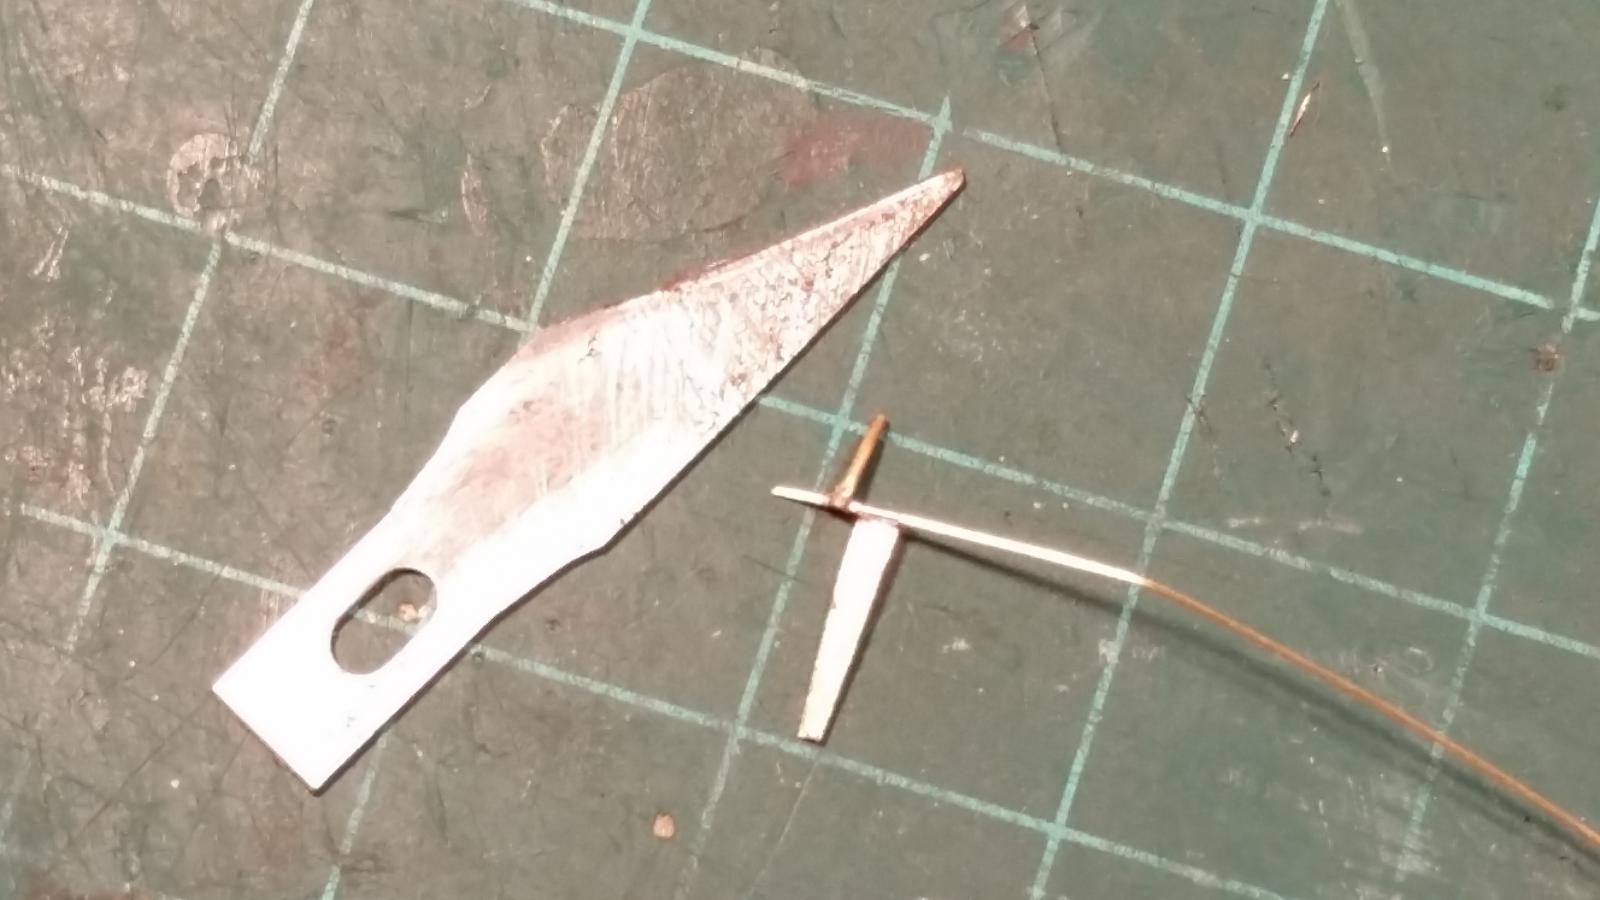
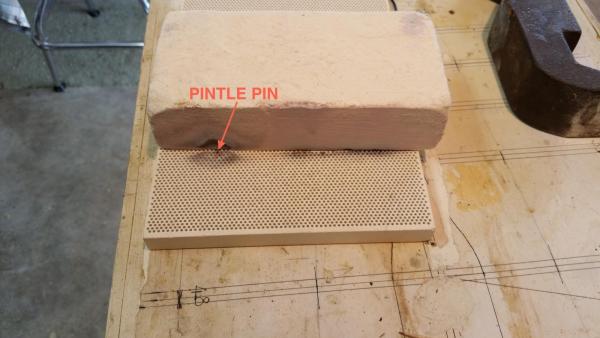
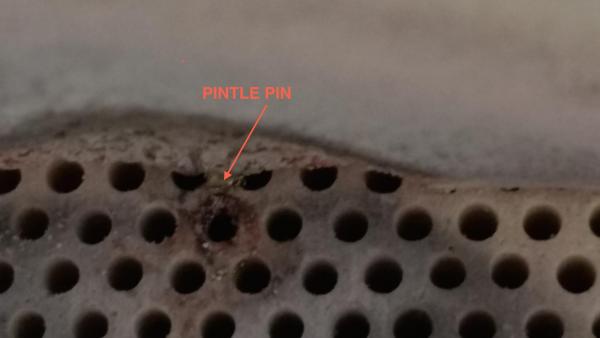
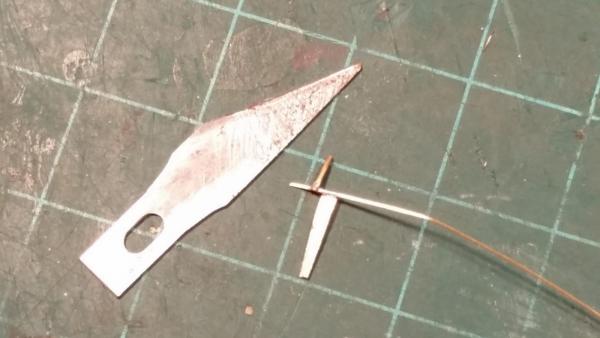
Completed all 16 pintles today that I started on yesterday or so I thought. As I mentioned in my previous post above to Carl, I had to go back to soft soldering them little buggers. This was not as easy as i thought though because of the size. I clamped the pintle bolt in a wooden clothe pin and held the cross piece with tweezers. Oh boy, several "twanged' away and I had to make new ones. Frustrating to say the least but after many hours of work I managed to solder all of them. Next came dressing then with a file to remove any excess solder and make the cross pieces smaller. Then running a #80 drill bit through the holes and clean them out. Yes, I used my newly bought hand drill for that. When i got to the last two pintles they just started to bend every which way. Turned out to be the two I managed to silver solder but the pintle bolts were just too soft and had to make them ever again. No sense in annealing these two, easier to make new ones. Then i thought how to cement them into the hull with each one lining up horizontally for the pintle to gudgeon hinge pins to line up. I figured that If I make a long enough "rod' for two of them I am assured of a good line-up. I can then also use these rods as the pins, after cutting them to size that is. The problem is that I don't have brass rod thin enough to go through these 1/2 mm tubes. I have some 0.32 mm brass wire that i had to "machine" down to 0.25mm. First I took a length of it and clamped one end in the vice and pulled on the other end to stretch it. This made it thinner and hardened it some. Still a tad too thick so i used a small file to draw it across the wire while rotating it. Very time consuming but hey, I'm on permanent "vacation." I next measured the holes for the pintle bolts above the gun ports. Funny thing is that the correct size drill bits are all busted. I found the broken one I needed (yeah, I save the broken ones) and filed a point to the broken end where the side flutes end. Lo and behold it worked. Leave it for a cheap Dutchman to do but beggars can't be choosers. So, I guess the moment has arrived to cement these pintles into the hull with slow-cure epoxy. Here are a few pics of what's done. This is me filing one of the pintles to size and removing the solder. That's my left hand thumb and fore finger holding a pintle. I used a small square file so it would fit between fingers that I used as a file guide. I tried a pair of pliers but that had a tendency to crush the delicate brass tube. I used the same method with drilling through the cross pieces. This shows one pintle pushed into the removable plug in the hull with a gun port lid installed and a gudgeon temporarily laid in place. I wanted to see if it would fit and work. It does. This shows my pintle cementing jig. I added the #11 blade and gun port lids for size reference. Cheers,


-
Thanks to all who clicked the like button, it's much appreciated and motivates me. Thank you George, Carl, Ian, Sherry and Patrick. Yeah George, this stuff is getting way too small for my hands to handle but so far I only got one minor cut in my finger. Hey Carl, I am using a cheapy "optivosor" and had to flip the second magnifier glass thingy up. With my 3X reading glasses I had to squint too much and eyes started to tear-up. Having had both cataracts replaced helped a lot but its still been a real strain for my 81 year old eyes. The heat from my little torch disintegrated the heatproof "stone" and kinda crumpled over the pintle. It's there though. You are right in that I could only silver solder one pintle because of that bleeping "stone." I tried a stone from the garden but that didn't work either. So, I reverted to soft-soldering. Good seeing you back in my shipyard Ian, thanks. Hi Sherry and cross-eyed ladies don't look so pretty - - - watch for the clock not to strike midnight Thanks Patrick for the compliment. You think I'm ready to build a miniature ship now? It's on my bucket list you know Cheers to all,
-
Great job machining there Ian, lovely work. Does my old machinists - tool and die maker heart good - seeing you make your own tools as needed! Cheers,
-
Tradition says red but you don't want that so my gut feeling is natural red oak or just plain oak. Cheers,
- 962 replies
-
- 6
-
-
- sovereign of the seas
- ship of the line
- (and 1 more)
-
Really nice looking fleet John, bravo. Cheers,
- 2,250 replies
-
- 3
-
-
- model shipways
- Charles W Morgan
- (and 1 more)
-
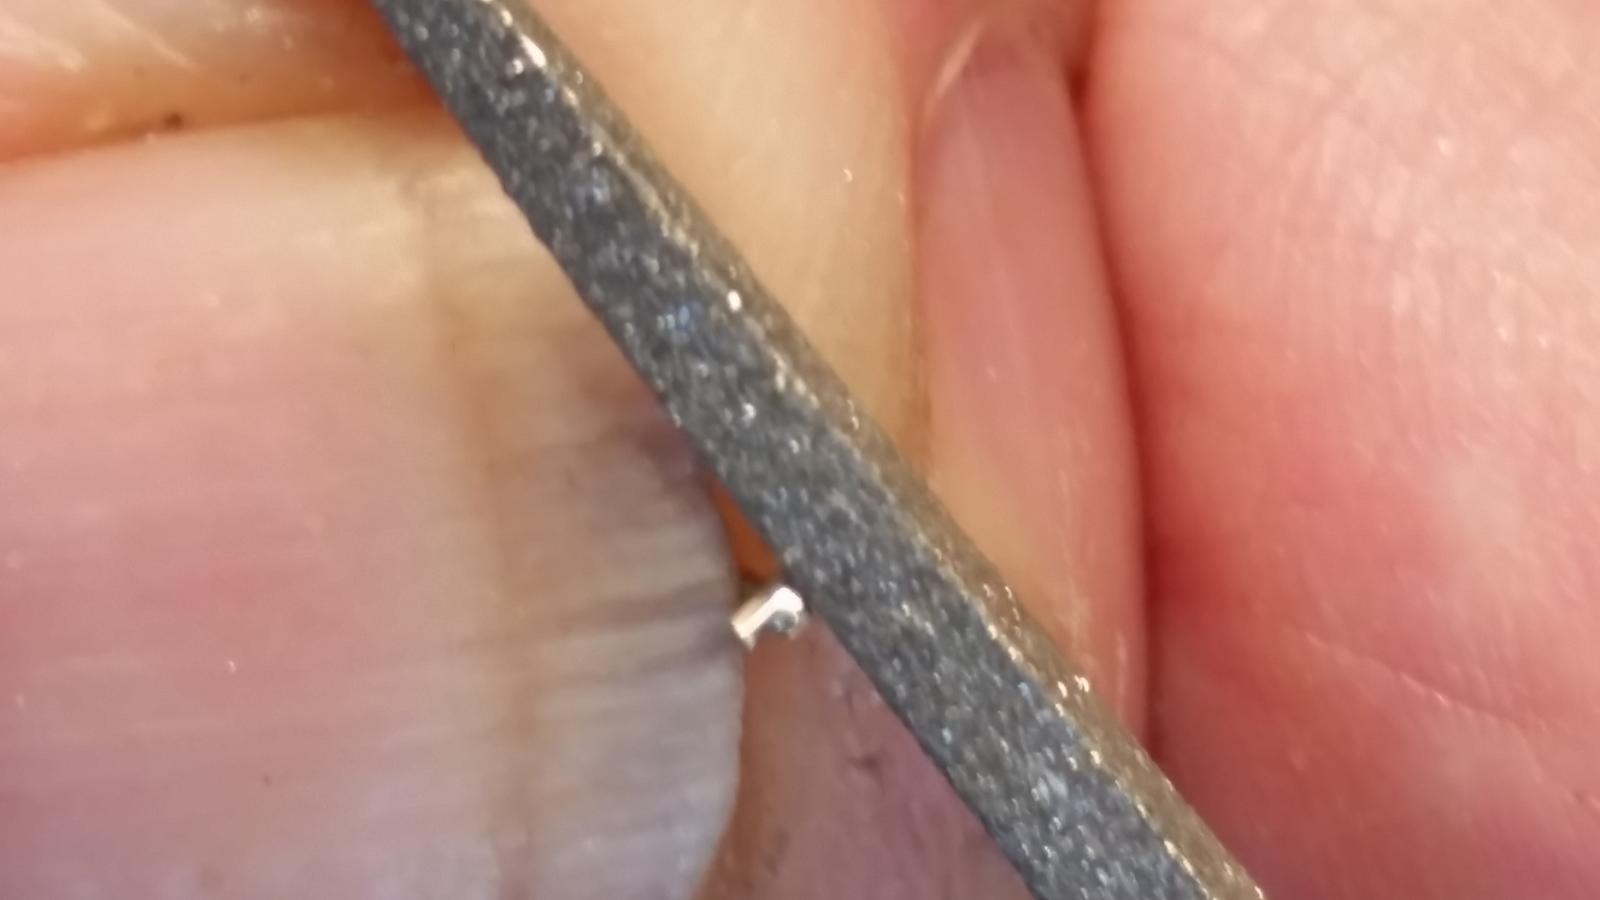
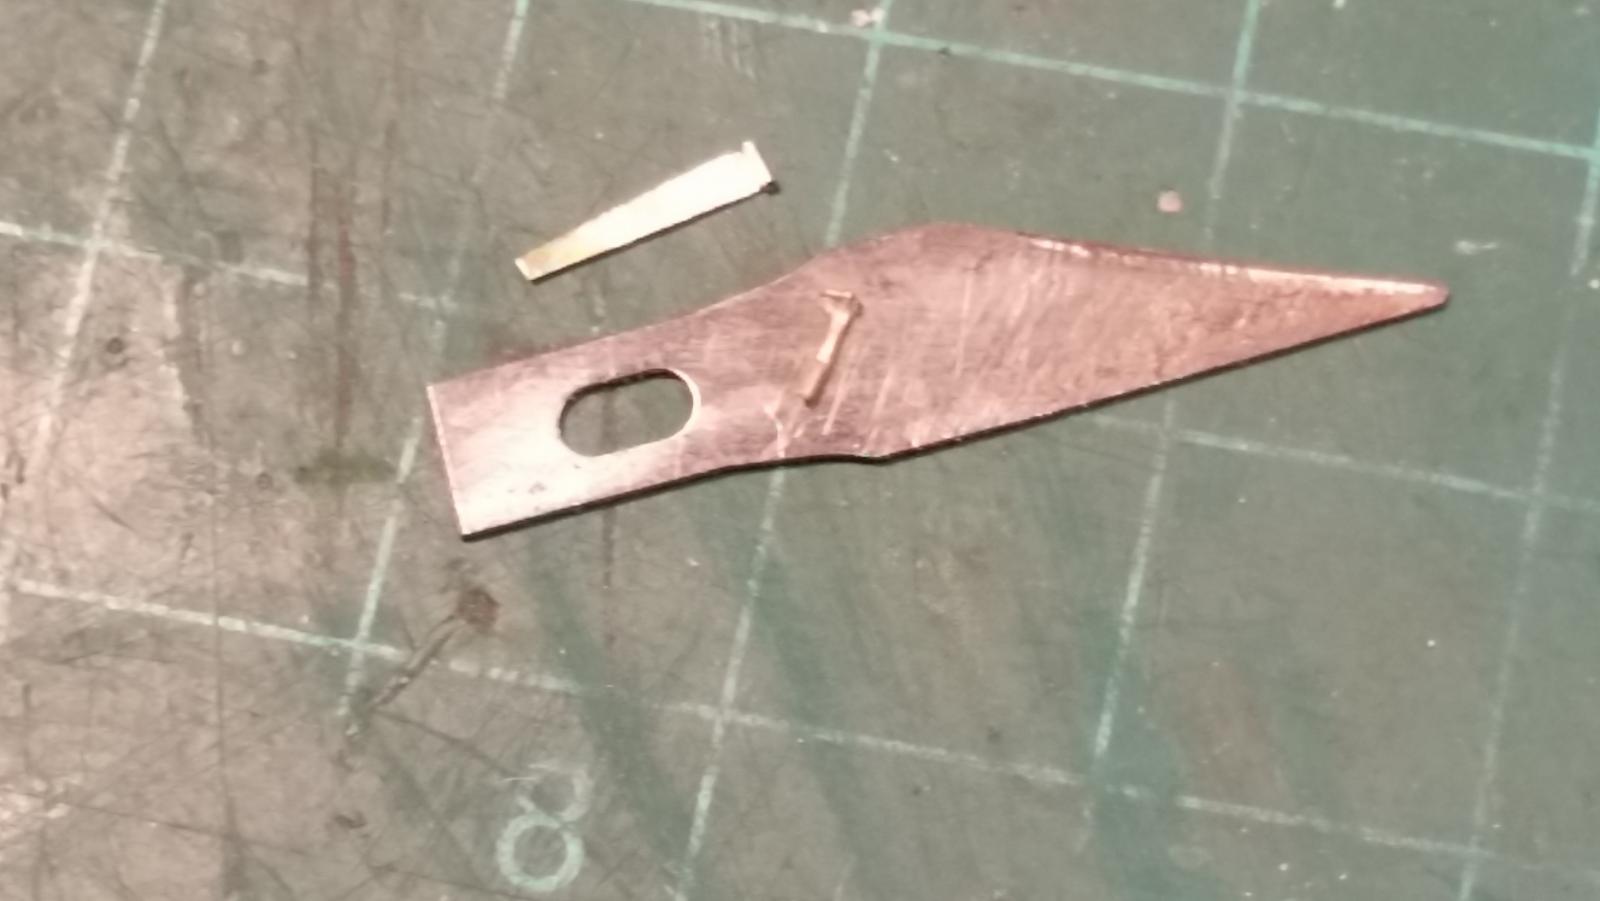
Hello al y'all and thanks again for the likes. Hey Carl, by the time I spend buying all the lumber and hardware to make my own like that I'll be out about the same amount of bucks as buying one from Dremmel but not half the fun. Just a minor update, although it required many hours of diligent woek. Been working on the gudgeons and pintles for the gunport doors. Making slow progress because they are so tiny. As mentioned some time ago, I am using 1/2 mm brass tubing for the hinge pins and that's a royal pain in the neck. I have to use the second additional magnifying glass in the optiviser which gets in the way sometimes. In any case, I managed to solder all the small 1/2 mm pieces of tubing to the gudgeon strips and filed them to "close enough for government work" condition. To get the small pin bushings square to the gudgeon strips was a nightmare. Did not succeed with all of them but once they are cemented to the doors it won't be too visible. Next i ran into a snag with the hinge pins. i thought i had enough brass wire that'll fit but nooooo, it was just a smidge too thick. So i took my little file and stroked some brass away, finishing with sandpaper. It worked! Next came making the pintles. I used the 1/2 mm brass tubing for the mounting bolts that go into the hull instead of the 1/2 mm brass rod. I filed a small flat spot to one end of a 15 mm length to hold a 2 mm piece of 1/2 mm brass tube. Of the 16 I needed I think I must have made at least 6 more because every time I picked one up with my tweezers it "twanked" away into never-never land. No use crawling around the floor or the workbench searching for them, they are just too tiny. By my way of thinking the brass tubing for the pintle bolts seems sturdier then the rods. We'll see when it comes time to install them to the ship. I only managed in making one pintle assembly and pinned it to one of the gudgeons, works great. Here are a few pics. If you squint real good you can see the pintle bolt with the cross tube on the end. Here I have placed the pintle on top of a #11 blade to show how tiny they are. Hurray for optivisers! Here i have temporarily pinned a gudgeon to the pintle. Next comes the "how to make the hinge bolts from my modified brass wire." Cheers,

-
Nice setup Carl! I've got a set of plans for a mini router setup similar to yours. Haven't made the time to build it, no real need yet for it. Yeah, we'll see what the Proxxon fix-it-shop tells me the damage is in $$ for the repairs. Oh well, it's only money and you can't take it with you. D'you have plans for that setup Carl? Hey, I'm lazy Cheers,