Piet
-
Posts
3,568 -
Joined
-
Last visited
Content Type
Profiles
Forums
Gallery
Events
Everything posted by Piet
-
From me as well - all the best wishes for your mother in law and hope the antibiotics help. Keeps trong my friend. Work on the deckhouses are progressing quite well, experience helps with the redo Cheers,
- 4,152 replies
-
- 6
-

-
- cutty sark
- tehnodidakta
- (and 1 more)
-
 Thanks everyone for visiting and your likes. Hi George, yeah, once I have all the pieces made soldering the brass bushes goes rather quickly. I reused the old "gudgeons" but had to clean them up and a bit. The blackening liquid I have is called "BLACKEN-IT" by A-WEST of Woodstock, Georgia. It's a light blue colored liquid. In one of my previous posts some others were suggested that may have additional metal uses. I'll try this one first and see how it works. Cheers,
 -
Hi Patrick, good to hear that everything went well in the stone quarry - - - must be a load off your uhhh - - mind? Speedy recovery my friend. Cheers,
-
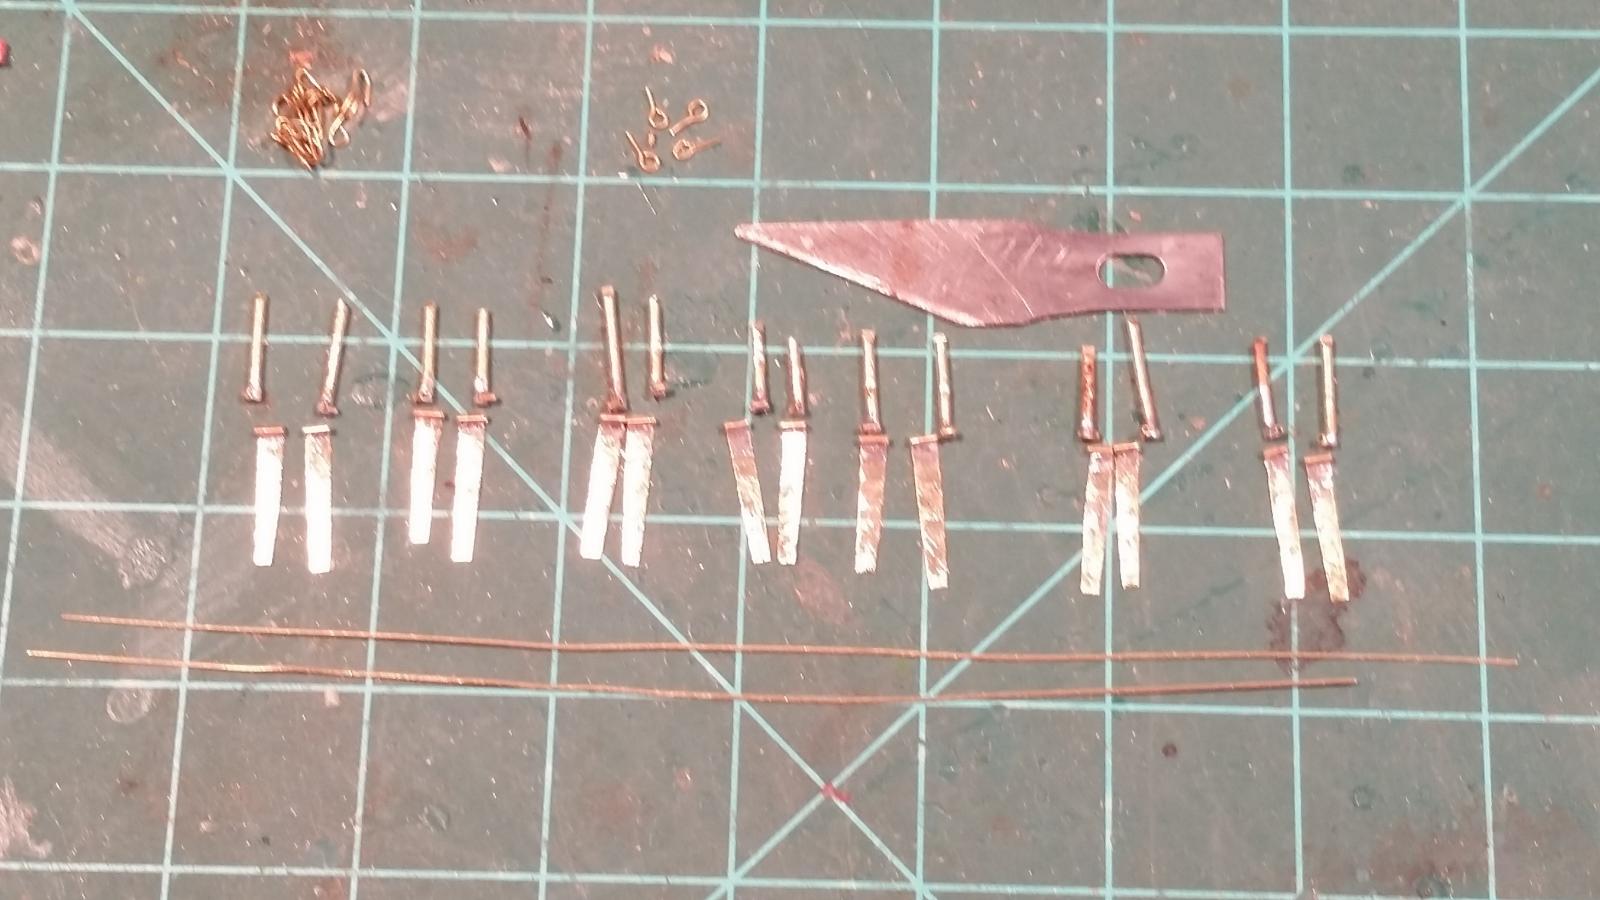
Thanks everyone for following along and your likes. Today I almost completed the gunport hinge hardware. Soldered the 0.5 mm pieces of tubing to the gudgeons and pintle pins, cleaned them up but did not cut the gudgeons to even lengths. I hope to do that Sunday and making plans for the installation. My test in using carpenter's structural adhesive works okay but really not what I want, besides, it's prone to being messy. So I'll stick with the two part epoxy cement. Once the lids are mounted to the ship they won't move anyhow. I'll try to blacken the gudgeons instead of painting them flat black, at least that's the plan. If it doesn't work then I'll resort to flat black paint. I used the same size brass rod for the pintle pins as the previous ones to fill the holes and for the cement to have a better grip. The two long brass pieces of wire are for the hinge pins. Cheers,

-
Good luck with the procedure Patrick and I'm sure that everything will be okay. You are in my prayers. Come to think about it, my prayer list is getting rather long so you better do okay. Cheers,
-
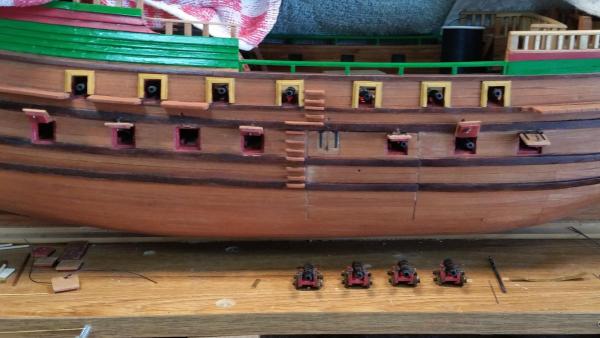
Well, as you can see in the picture below, I have made a start to modify the gunport lids on the starboard side. Actually, all of them are now removed and the lids are already cleaned. What bothers me is that the two-part epoxy cement does not hold worth a tinkers #&%^ ! As mentioned a few posts ago even CA doesn't hold worth a tinkers #&%^. I wish I have some of Boeing's or Douglas' structural adhesive. With that stuff you can actually glue an airplane together without rivets. But, beggars can't be choosers and I'll have use the two-part epoxy stuff. I woder how "liquid nails" would work. You know the stuff home builders use? Hmmmmmm - - - testing time, provided te tube I have is still workable. Okay, tomorrow I'll start making the parts for the gudgeons and pintles. I'm still asking myself why I'm doing this - - - making the lids movable but the cannons are secured to the deck and can't even close the ports. Will let yuns know how things are working out. Cheers,
-
First of all my thanks to all who clicked the like button, really appreciate all yuns following along. @ Remco: Easy for you to say - - just redo it - - - indeed Do you know what I have to go through? Cramped fingers and eye strain But - - - - - - yeah, I guess we'll redo it. @ Jan: he buddy, good to see you in the shipyard again. Yes and yes The question was me pondering - knowing what lies ahead and the final decision of doing it. Tore all of them off this morning! See next lost. Cheers,
-
Thanks Frank for your very kind comment and thanks to all for the likes, it's all very much appreciated. Well, I turned the ship around on the bench and without any mishaps too. Looked at the gunport hinges and yes, they are kinda big but not bad looking. Doubt krept in whether to yank tem off or leave well enough alone. Oh well, I guess I'll have to bite the bullet and make new 0.5 mm hinges. Not looking forward to it. I'll cement the upper deck gun hardware in the bulwark first on the port side. I couldn't get to them before but now that the ship is turned around they are easily accessible. Cheers,
-
Hi Patrick, what a bummer. I wish you a very speedy and painless evacuation of that troublesome stone. Be well my friend and all of us hope to hear some good news, no more stone! Cheers,
-
Just a minor update. I finally got the last troublesome gunport lid installed and working. it took three tries and also had to repair some collateral damage but it's looking okay for me. Recently I read a something about all gunport lids should be shown open and all at the same angle. Reason being esthetics and when the ship comes into the harbor it is made "ship-shape." This may be true for navy ships that come into harbor but my model is an armed merchant ship at sea. This model will have a series of sails set as if at sea thus my lids will be set at random angels. It would defeat the purpose of making the lids workable in the first palace. I have also continued my work on making the pulley blocks. I have now about 40 single sheaf blocks and 32 double sheaf blocks. I need 32 of each and theoretically I could commence mounting and rigging the canons. However, I looked at eight of the double sheaf blocks and found them too large. I'll he to remake them to suit my likes. There may also be a few of the single sheaf blocks to be remade. I am now ready to turn the ship around so I can work on the starboard side reworking the gunport lid hinges and replace them with the 0.5 mm ones. When looking at Chris Linden's Vriesland model the hinges on that model are also quite hefty and match the ones I originally made for the Surabaya. Am I tempted to leave well enough alone? Yup - - - I'm just a stubborn old Dutchman and now I must the starboard side the same, for esthetic purposes. Glutton for punishment Oh well, it's only time of which I have plenty off. Cheers,
-
WOW!! A double WOW! Cheers,
- 4,152 replies
-
- 5
-
-
- cutty sark
- tehnodidakta
- (and 1 more)
-
From all the pics the second to last really captures the beauty and elegance of the yacht, Nice work Patrick. Cheers,
-
Just got caught up with your very ambitious project Patrick. Looks like I have to find a seat in the balcony. She'll be a challenge alright but you are up to it. Cheers,
-
Beautiful work! No need to hide in dog house Nenad, go on top of dog house and yell "I did it!" Cheers,
- 4,152 replies
-
- 5
-
-
- cutty sark
- tehnodidakta
- (and 1 more)
-
Very beautiful work on the paneling Nenad, well done my friend. Cheers,
- 4,152 replies
-
- 4
-
-
- cutty sark
- tehnodidakta
- (and 1 more)
-
Thanks everyone for visiting, your comments and likes. Thank you Hans for the compliment - I really appreciate it. No, I haven't even given carvings a serious thought. I wanted to complete the guns and other things around the outside of the hull first. Then I'll have to start with the carvings. The shark and croc carving for the counter may just be the next project when I'm ready. Don't know yet wether it'll be from wood or Sculpy, I prefer wood though. That's also a question in my mind, what kind of wood to use. I prefer a harder sort like boxwood over the soft poplar or basswood. There are quite a few small carvings of dolphins, heads for the various pin rail bits and the bow lion. The shark and croc will most likely be a rather ambitious project for me, not that the others are easier, because I have never done any carving or modeling with clay. I'm flattered by you having saved my drawing of the shark and crocodile. I'm fine with that my friend. Just don't hold your breath Hans, it'll be a while yet before I'm ready to start carving. I did some cleaning yesterday on the outside of the hull, port side. There was some damage and a few spots with glue residue that shows up as whitish blotches. Some scraping and fine sandpaper took care of that and spot-staining. It's looking a little better. I also cemented the gun tackle eye bolts and hooks to the bulwarks and eye bolts to the deck with two part epoxy. One more gunport lid for the port side and then I'm ready to turn the ship around so I can redo the gunport lid hinges on the starboard side using the 0.5 mm brass tubing for the hinges. Not looking forward to it, it's been a very tedious job and perhaps not worth the effort. Oh well, it's a challenge and it'll look much better for the scale it's in. Cheers to all,
-
Good to see you back again at the table Remco. Your redo of the pump well looks fantastic, yes, I can see the improvement and bravo for tackling it. It seems that several of us are in the redo business Cheers,
- 1,215 replies
-
- 3
-
-
- sloop
- kingfisher
- (and 1 more)
-
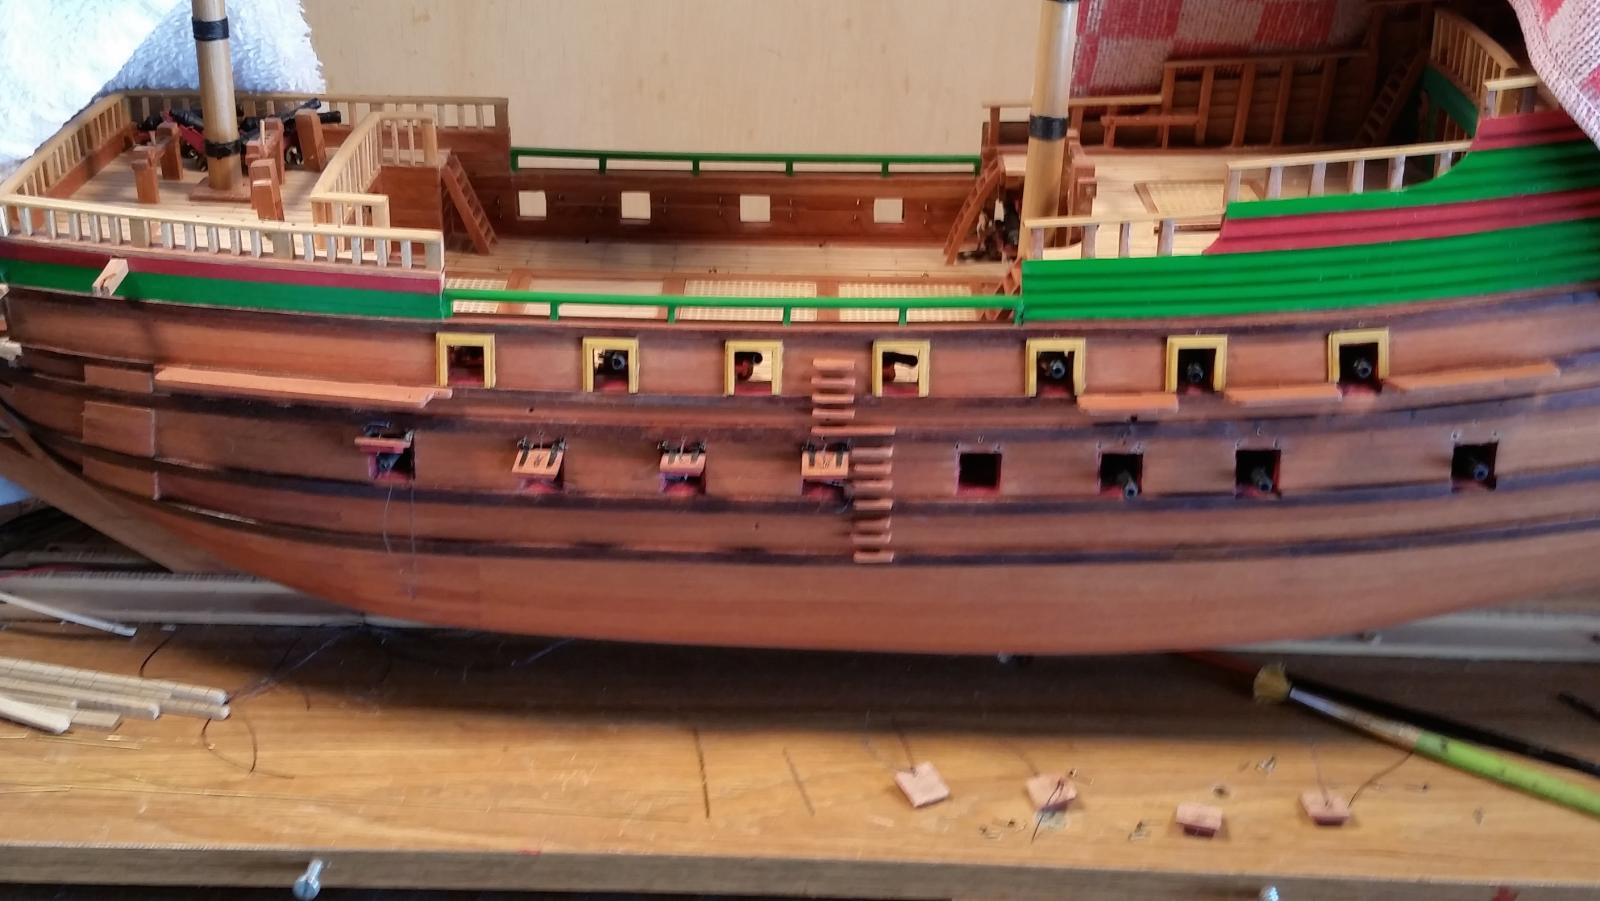
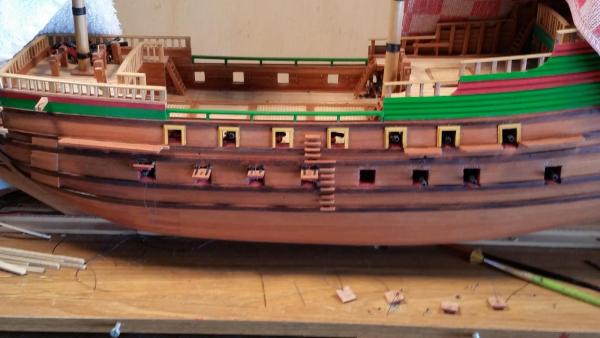
Hello everyone and thanks for your comments and likes, it's always much appreciated. Thanks Gunther, my wife is of the same opinion @ Mark T. Thank you as well and rusty is good - I think I had a wild idea to file the round brass wire flat to simulate wrought iron straps but where do I end detailing this thing to the nth degree I'll dunk it back in the straight stuff to darken it some more. However, I plan on ordering some of the other solutions and see if they work better. Thanks Patrick, All the comments from everyone is very encouraging - - - as you know. Hey Popeye, good to hear from you again. Yeah, I should have had my head examined making the gunport lids workable. Once they are on and the model is in it's glass house it's a moot point. But - - - it was a challenge to me to see if it can be done at this scale. In retrospect it was more trouble then worth the effort. Okay, I have been able to install all but one of the lids and even painted tem flat black. Could not do the blackening in-situ because of contamination of glue. Perhaps should have done the blackening before cementing them on - - hind side again. I had trouble with the CA and even the 2 part epoxy to secure the gudgeons to the lids. I have no idea why they gave me such a headache but in the end they stayed put with the epoxy cement. The one lid I need to remake the pintles and go through the whole process again. That'll have to wait for another day - - - I need to calm my nerves I took a photo of the port side for yuns to see and comment on. There is still a lot of clean-up and touch-up work to do including repainting the green to a more authentic color from the mid 17th century. Yeah Hans, I haven't forgotten. Cheers,
-
Very innovative on the sanding jig JesseLee. Deck and waterways look marvy. Cheers,
- 1,306 replies
-
- 5
-
-
- syren
- model shipways
- (and 1 more)
-
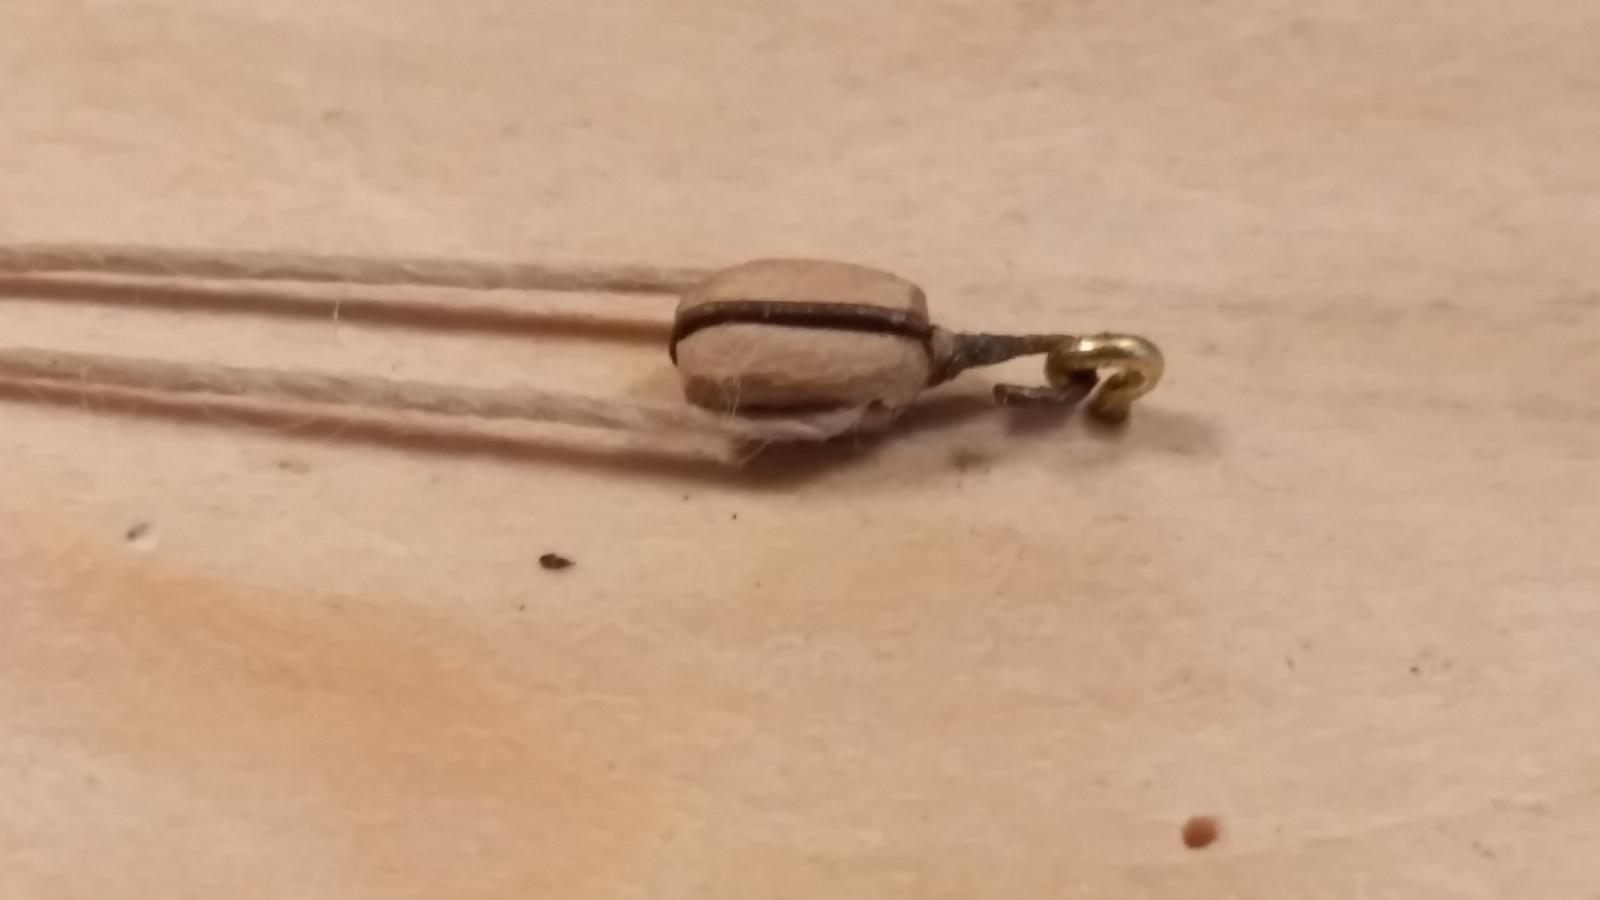
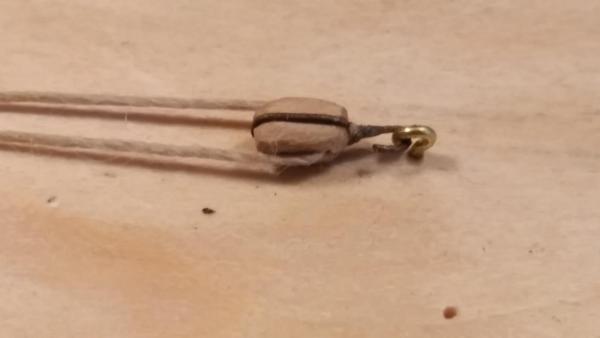
Hello everyone, Today I experimented blackening the brass strapping on the one pulley block I made, also as a trial. First I used the diluted batch and waited about 10 minutes. It did blacken it some but not as I would like it. It did not effect the wood, which is a good thing. Next I put it in the undiluted stuff and let it "cook" for a few minutes. It blackened it a little more and could be acceptable. But i would like it a little more. It could be that the stuff may have lost some its power, who knows. I'll be ordering the Novacan Black Patina, it seems to be an okay product. I also read up on Black Onix Patina that's good for all metals. I also took the bull by the horns and CA cemented the gudgeons to the gunport lids. That was a rather trying exercise that really taxed my patience. I could have used three hands but the Almighty Creator thought different about that Lucky though that I have rather steady hands and things worked out okay. One port's pintles were stopped up with the epoxy cement and I had to remove them. So, I'll have to remake two of them little buggers. Next will be cementing the cannons to their preinstalled carriages. There is still a lot of cleanup to do before I can put the poly on. I got a message back from ProxTech who informed me that they are having a problem fitting the new motor in the hand tool. It appears that the new motor is for the later models. We'll have to wait and see how they are going to fix it. They also informed me that this hand tool was made in Luxemburg and so is the replacement motor. That makes me breathe a little easier as far as quality is concerned. Okay, here is a pic showing yuns the blackened pulley block strap. Please give me your thoughts. Cheers,
-
Yes indeed Freek, he was lucky in that regard but he also applied himself to really get to know these boats, which the Navy recognized. His goal was to have a boat under his command but alas it was not to be. Cheers,
-
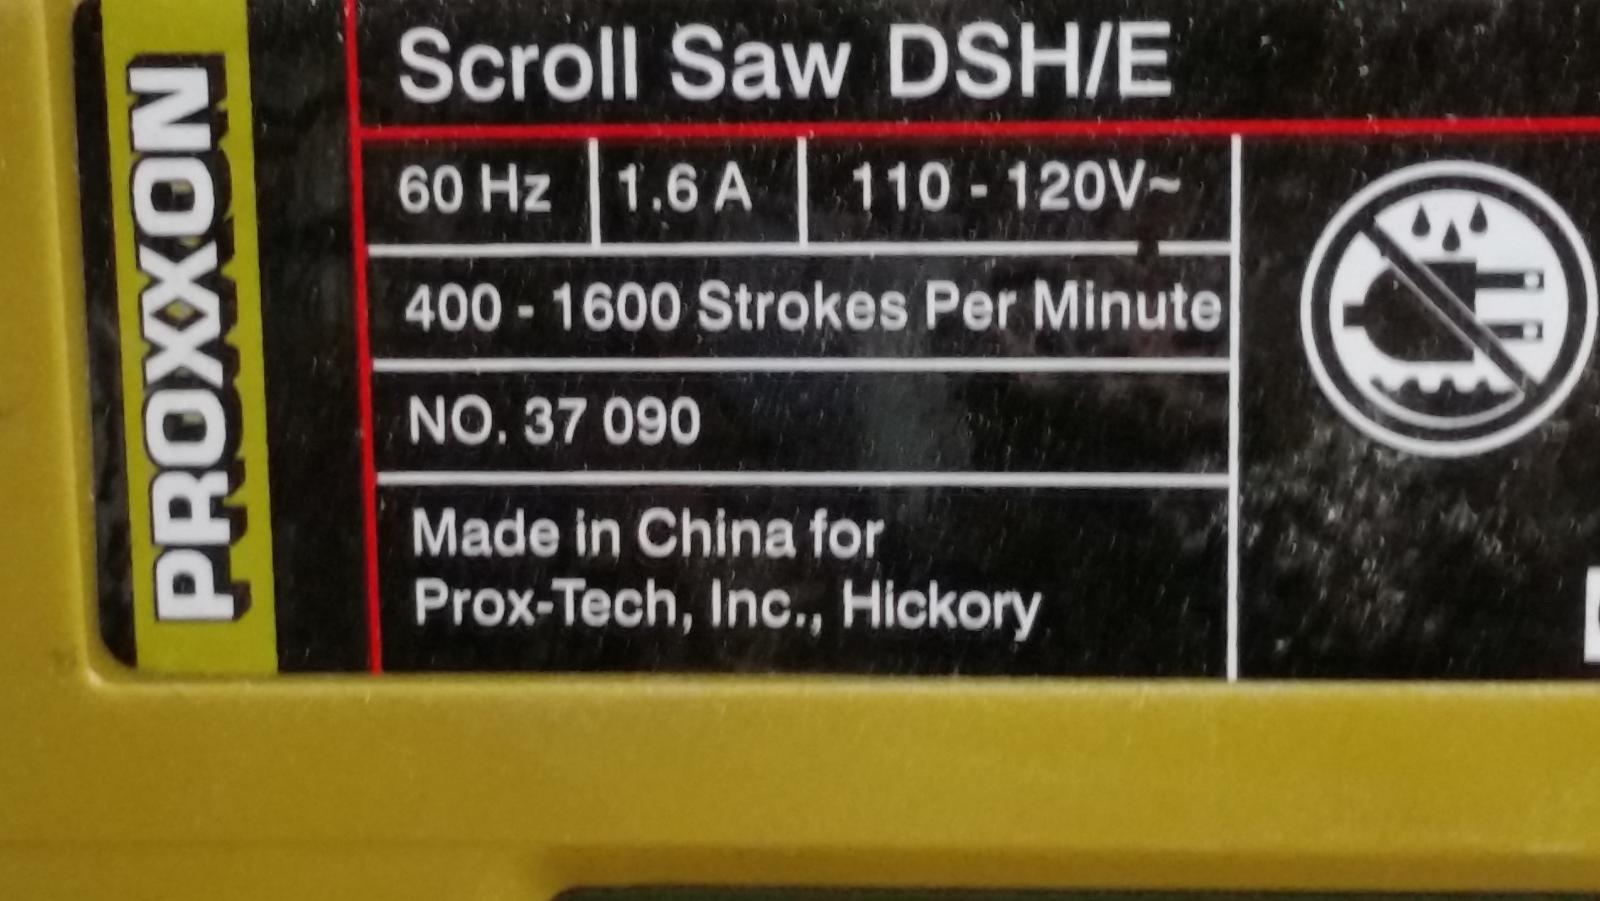
Thanks to Gunther, Hans, Peter and JesseLee for your comments and also to all who clicked the like button. I'm still seeking your overall opinion on which method I should pursue, brass hardware around the pulley blocks or thread. Please let me know. @ Gunther: The Scroll Saw DSH/E that I bought here in the States is made in China. I'll attach a picture I just made of the data plate. I don't remember from whom I purchased that unit but it failed about one year I bought it. Out of warranty of course. I had it repaired at ProxTech in Hickory, N.C. The charges were very reasonable and great people to deal with. My little hand tool is also repaired by ProxTech and also very reasonable. They asked if they could post a few pics of my models for their website and Facebook to show what Proxxon tools can do. Here is the pic of the scroll saw data plate. @ Hans: Thanks for the input but my blue fluid doesn't smell like Eau de Cologne though Mine is called "Blacken-It." I'll try it on one and see how the boxwood react to this stuff. @ Peter: Thanks for the link. I'll have to try and get the stuff they are using, it looks like what I need unless my blue stuff is the same or works okay with wood. @ JesseLee: Yeah, painting would be the last resort. Blacken it will also be a lot faster when I start the rigging. Cheers to all,