Louie da fly
-
Posts
7,990 -
Joined
-
Last visited
Content Type
Profiles
Forums
Gallery
Events
Everything posted by Louie da fly
-
 It is harder than doing it the way the kit manufacturers recommend. I stuffed up royally the first time I tried it on my Great Harry - but with time and persistence (and removing planks and re-doing it a couple of times) I got there in the end. Not a perfect job, but it set me up to do a better job on my next model. Steven
 -
Just found The Good Shepherd in a second-hand book shop and snapped it up. A very good read - really gets inside the head of the captain (who seems a bit like Hornblower with his self-doubts and pessimism - maybe Forester was like that himself?). I haven't seen the movie, and probably won't - it might spoil it for me. Regarding the A-M series, the atmosphere is brilliant and O'Brian's sailing scenes are very convincing. My own lack of maritime knowledge means I can't really criticise the accuracy of descriptions - but there is one thing that niggles. In several of the books he has Jack setting not only the spritsail (which, ok, was still just in use in Aubrey's time), but also a sprit topsail, which went out of use way before 1800. Like I said - it niggles, as everything else is so perfect. Steven
-
I wouldn't be putting the shields under the floorboards (apart from the fact that they'd be invisible) - water in the bilges would waterlog the shields, making them too heavy to wield, make the handles slippery, and cause the iron shield bosses to rust. That doesn't solve what to do with them, though. My own opinion is that they should be stored amidships, on the floorboards, but under the benches. That would leave space available for the oarsmen to row, and crew could stand on the benches to deal with the sails. Yes, there are tripping hazards if you do that, but sailors have dealt with much worse conditions at sea. Just my two cents worth (even if we no longer have two-cent pieces in Oz). Steven
-
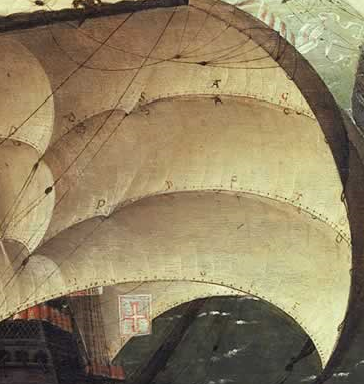
Thanks, Mark. Still a lot to do - I've just been thinking about what I should do next. Probably attach the bonnets to the courses - fortunately the painting of the Santa Caterina do Monto Sinia shows the way they were laced. Though this pic is a bit lacking in detail, I have a better resolution picture in a book and it's pretty clear. Then I guess I'll attach the sails to the yards. I've made the sails a little wider than the yard to allow for some "bellying". Though using individual robands is the correct way to do it, back in the day I didn't know that, and I'm going to attach them the way I did in the original incarnation, with a single continuous thread lacing the sail to the yard. Then glue the mainmast in place (finally!) and add some deck furniture to the weather deck - the hatch cover and the longboat. I can't do that until the main mast is in place, because I have to be able to see through the hatch to make sure the mast fits into the mast step properly. Then main shrouds and upper shrouds to main and foremasts, stays and backstays, and do the same thing for the mizzen and bonaventure; and only then will I start putting the yards in place and add the running rigging. Oh, and lots of flags and banners. Once that's done, I suppose it'll be nearing completion. A bit hard to believe after all this time. Steven
- 740 replies
-
- 7
-

-
- Tudor
- restoration
- (and 4 more)
-
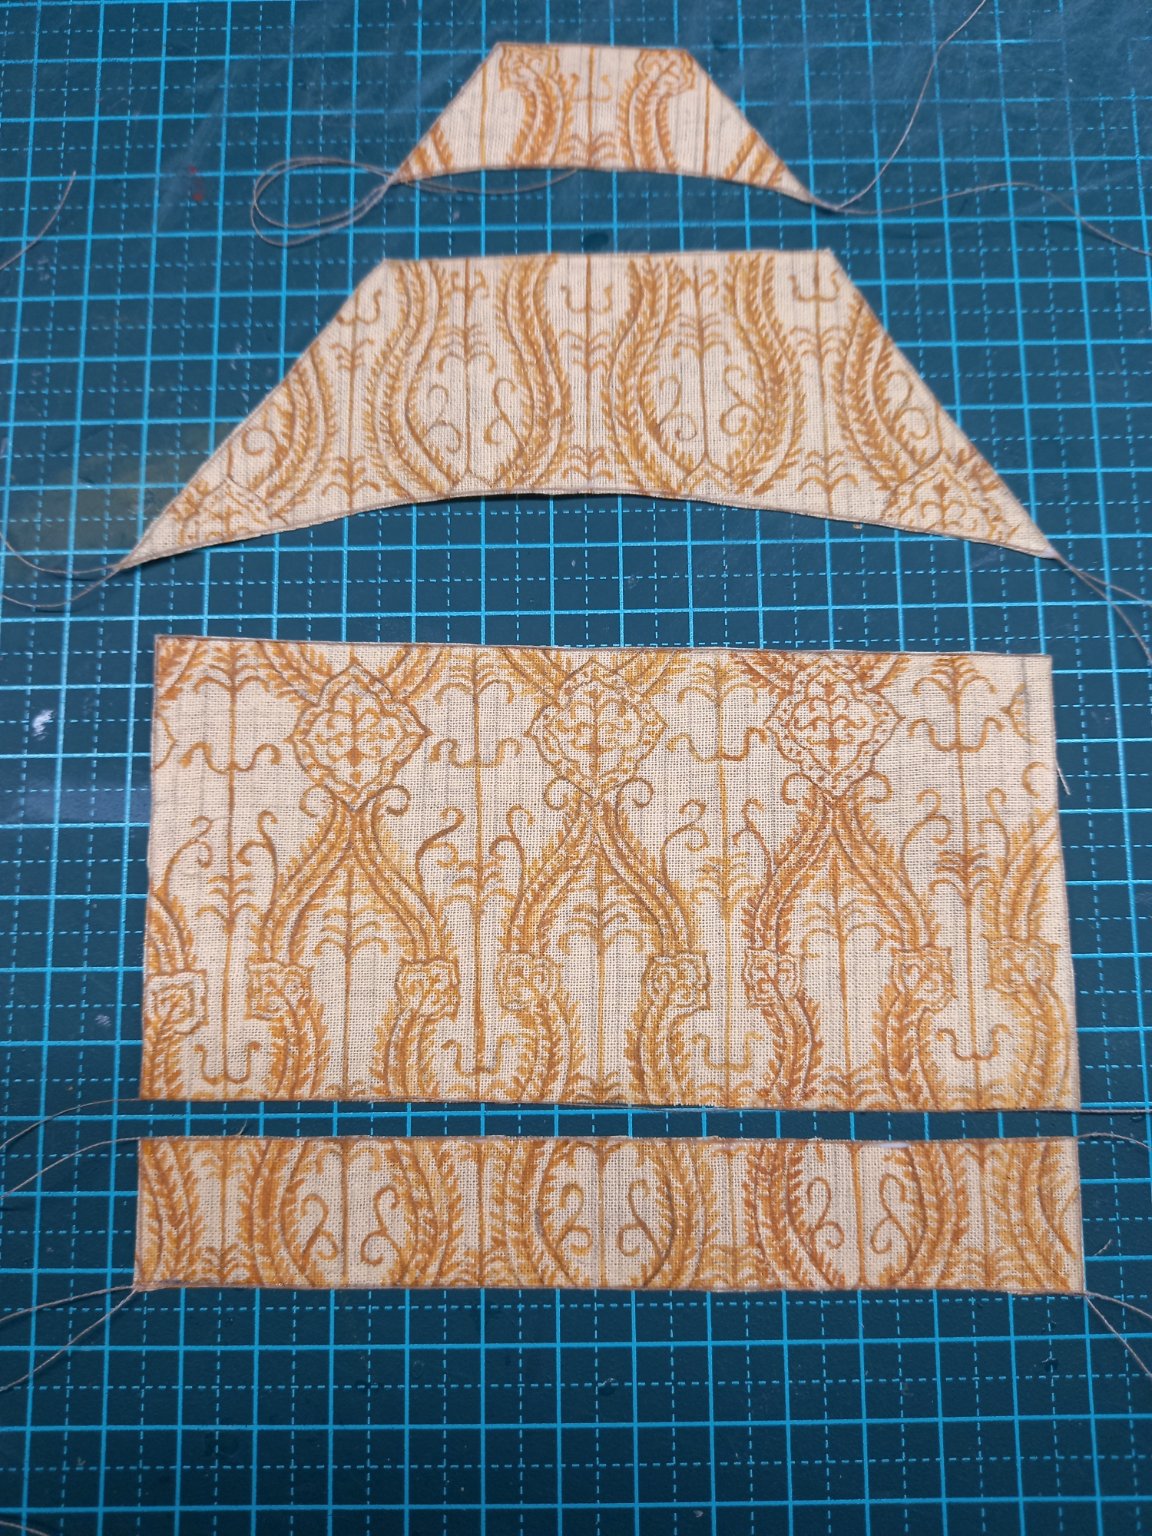
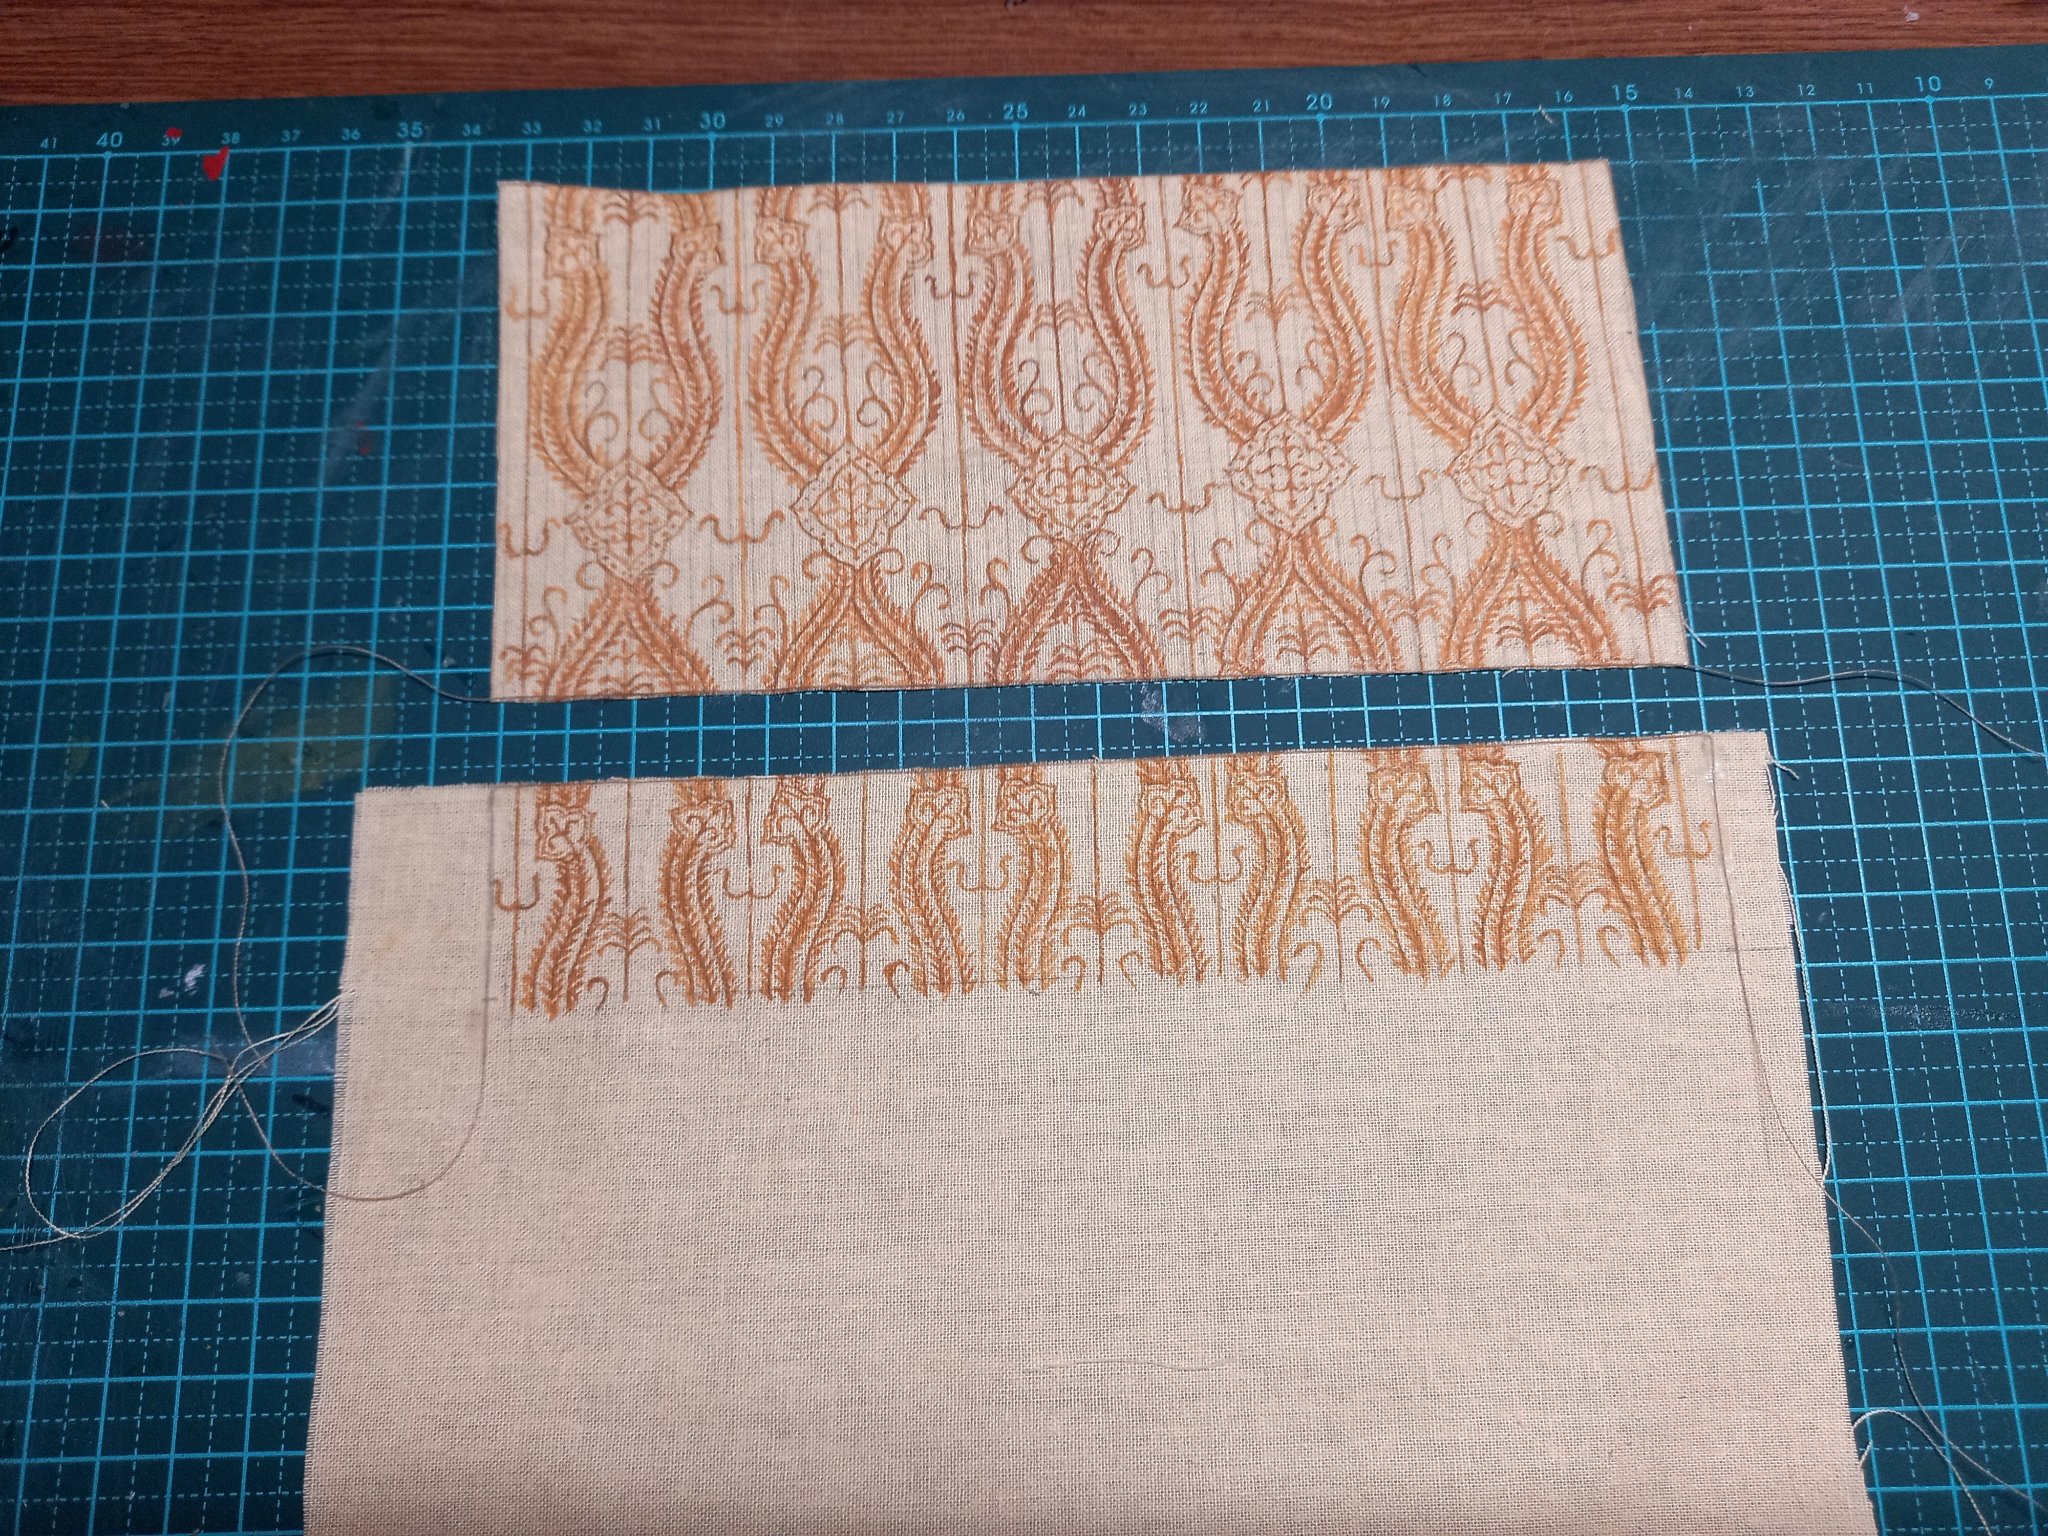
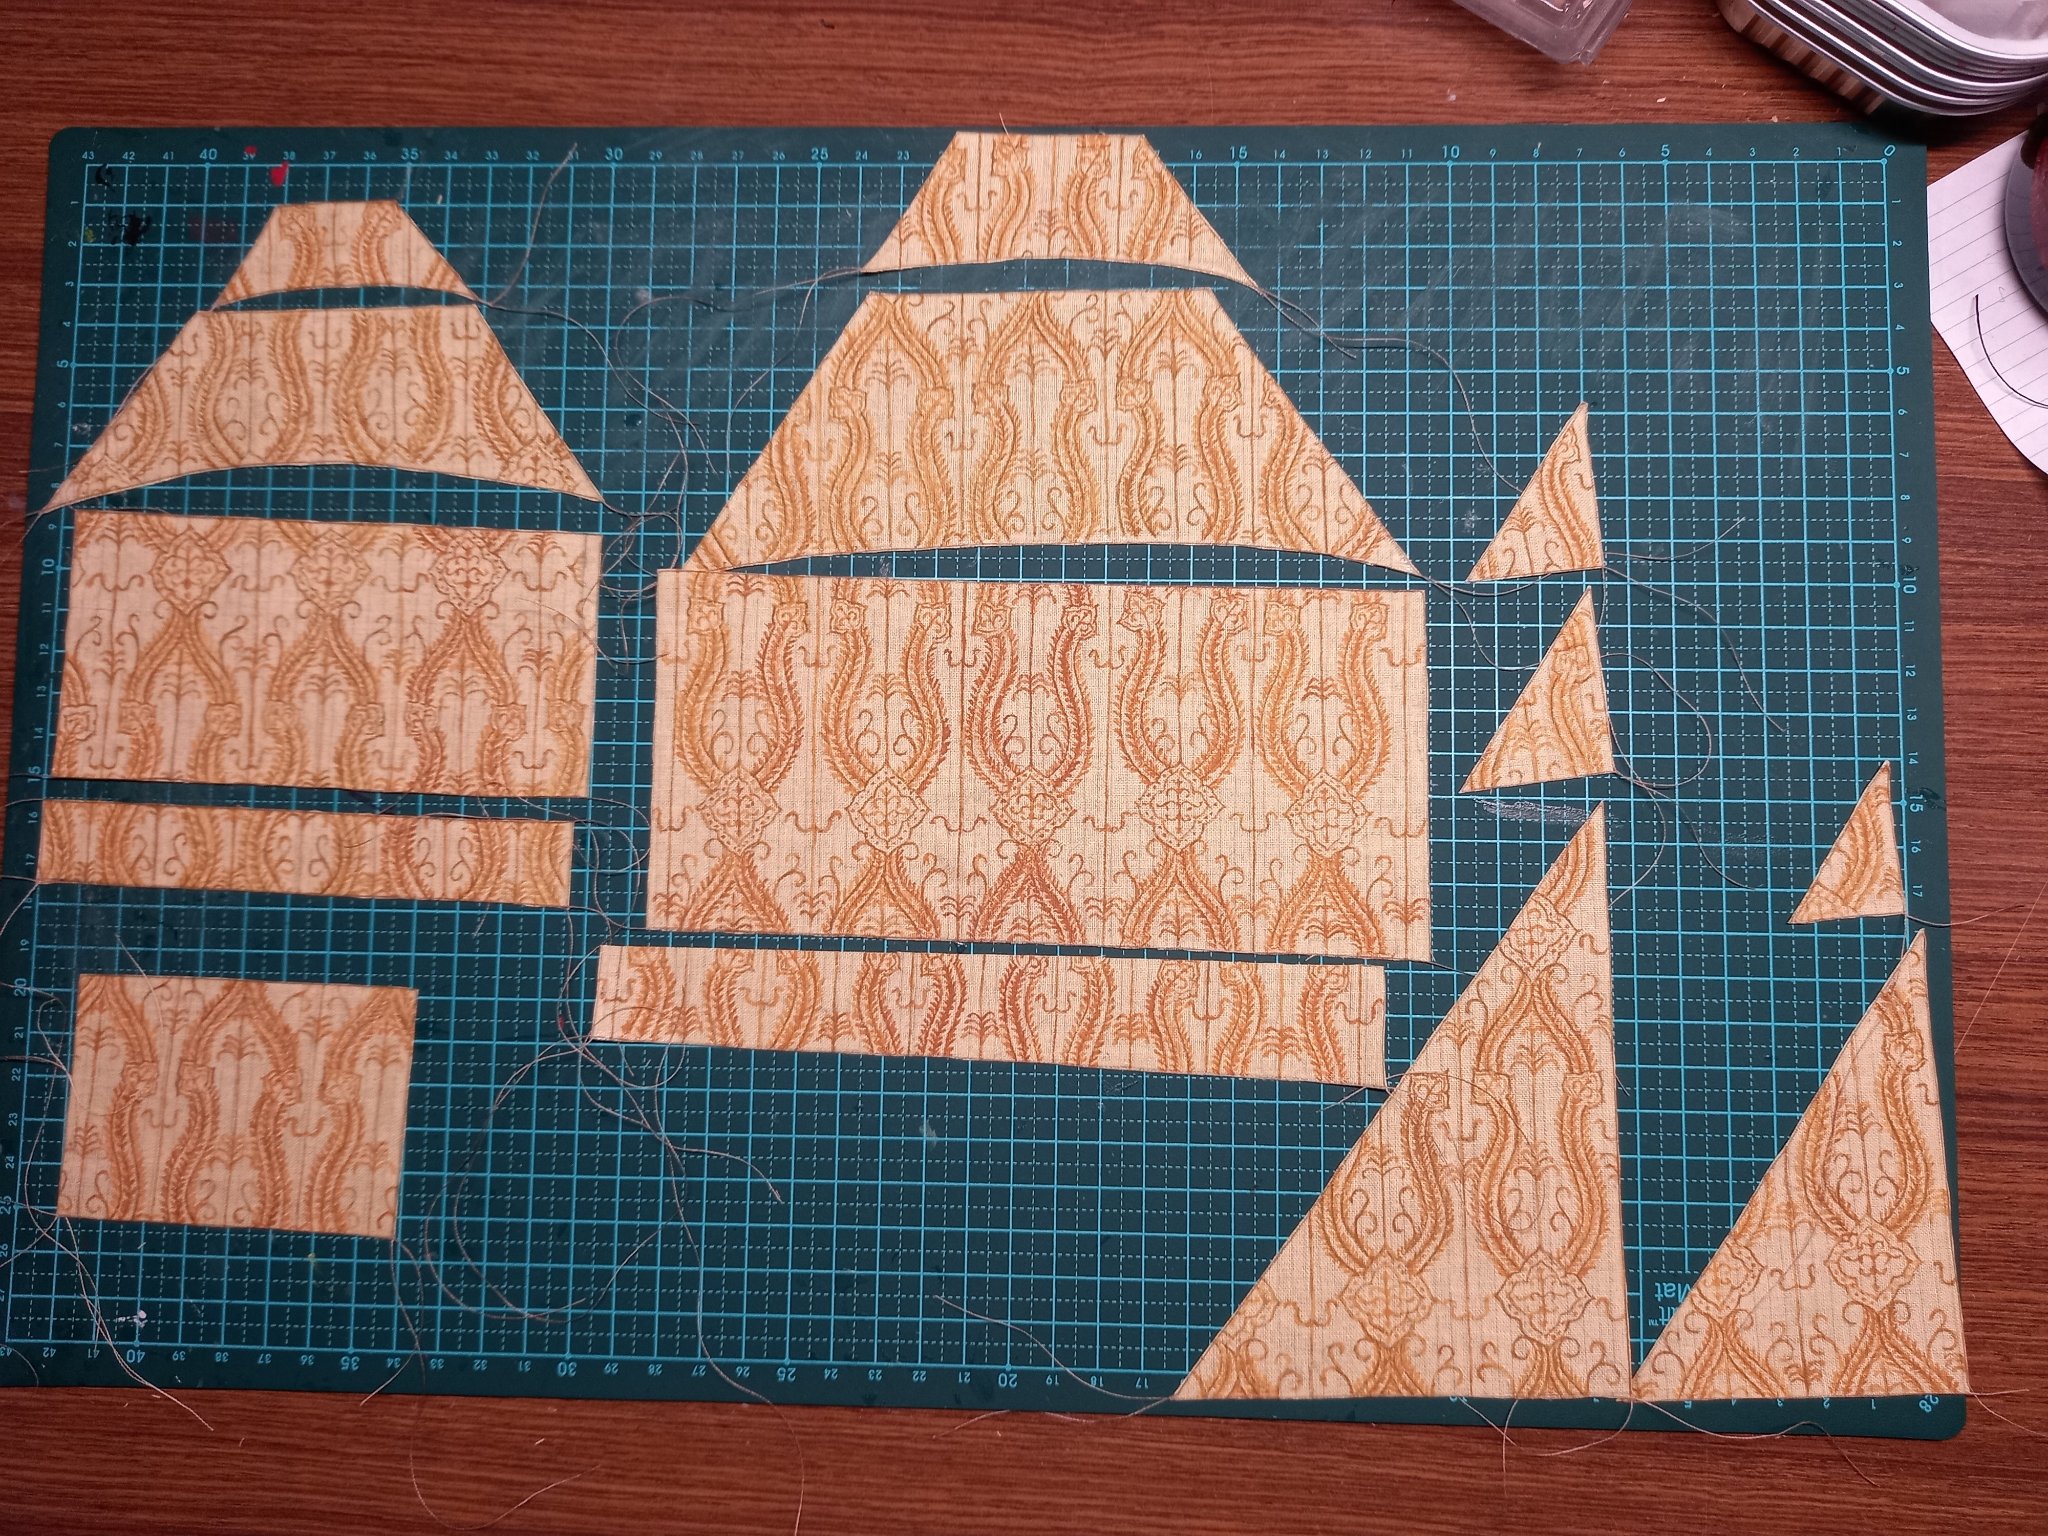
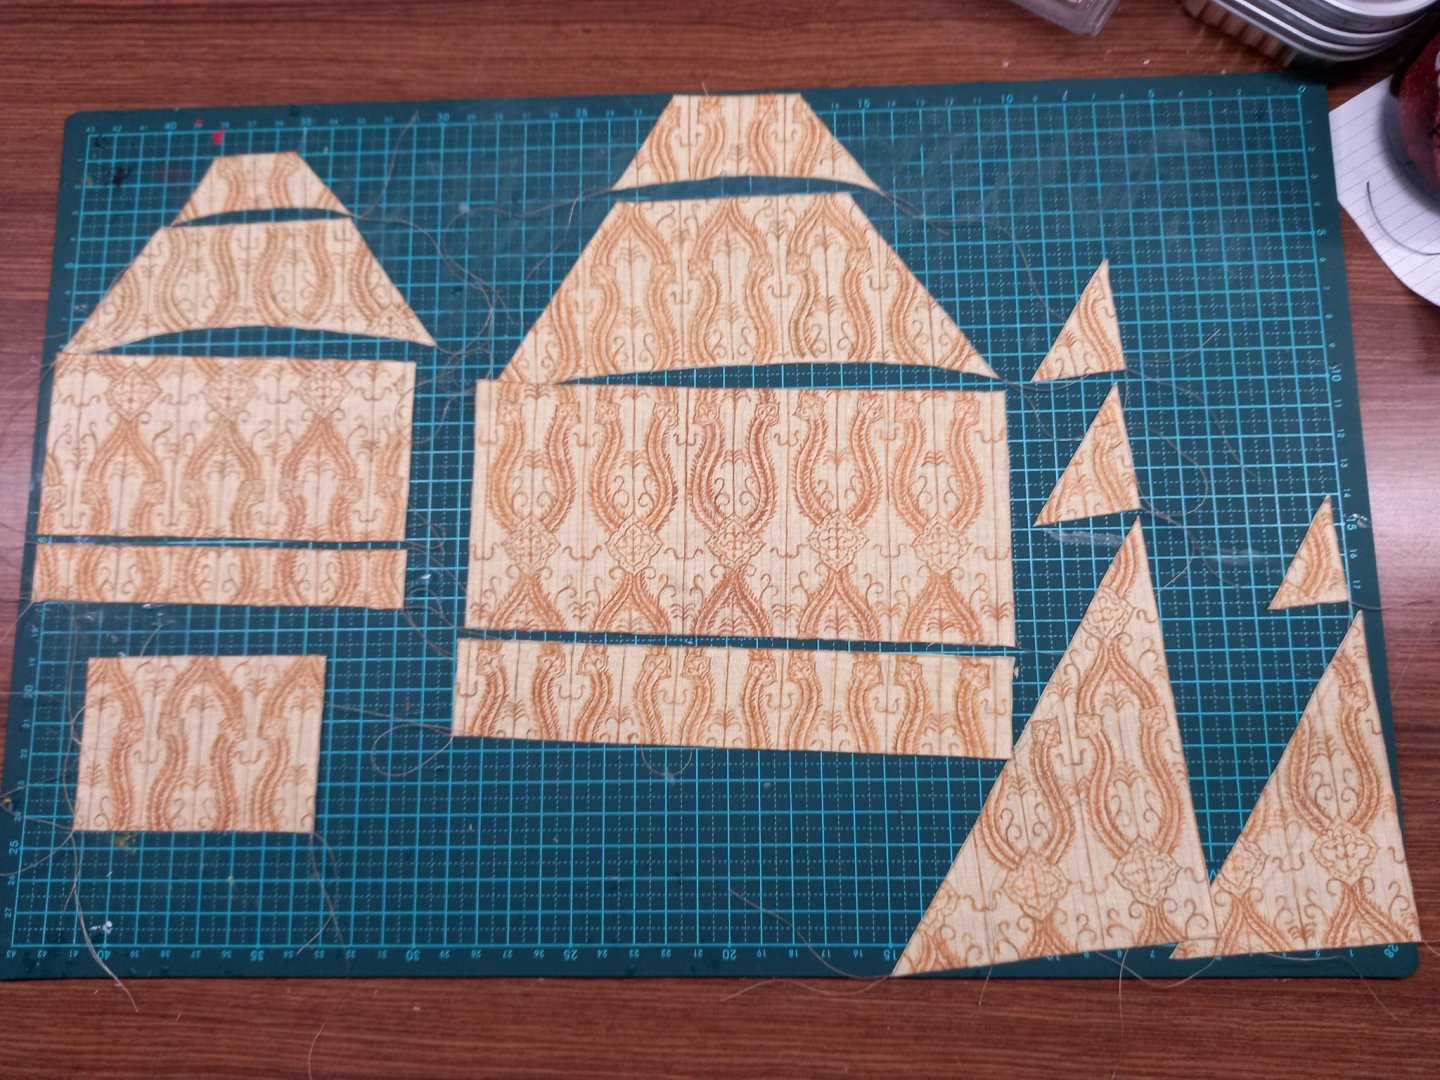
I've added boltropes to all the sails And cut them out Foremast sails, including bonnet for the forecourse: And all the sails - from left to right; foremast and spritsail, main mast, mizzen (including lateen topsails!), bonaventure mizzen Unfortunately I stuffed up the bonnet for the main course - first I made it too shallow, then I cut it on the wrong line, so the join between the course and the bonnet was not square to the sail. Fortunately I was able to trim the course to size, but the bonnet had to be re-made: And here are all the sails with the new main bonnet. And I've done the wooldings for the main mast: And the foremast: Just need to trim free end from the the top woolding, and clean up the glue, which is a bit intrusive. Steven


- 740 replies
-
- 13
-
-
- Tudor
- restoration
- (and 4 more)
-
Making good progress, ON. It takes a special kind of insanity to build a galley (don't ask me how I know). Steven
- 62 replies
-
- 2
-
-
- amati
- greek bireme
- (and 1 more)
-
You've done a magnificent job, Bolin. She really looks beautiful.Truly a model to be proud of, and it has been a very enjoyable build to follow. Steven
- 179 replies
-
- 1
-
-
- longship
- Helga Holm
- (and 1 more)
-
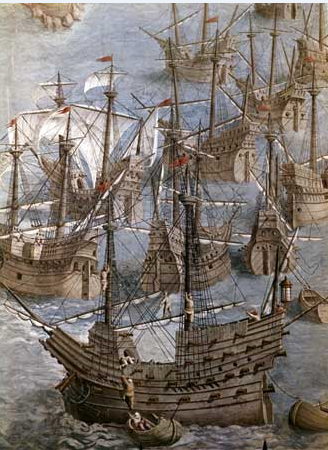
Amazing that you have so closely duplicated the look of this ship Detail of the painting Expedition to the Third Islands 1583. Royal Monastery of El Escorial. Work of Granello, Tavarón, Castello and Cambiasso. without (apparently) having seen the picture. You've really captured this look which I've never seen in any other model. Steven
-
Hi Bob. I was hoping I wasn't coming across as nitpicking. I think what you've done so far is very good and if I could just nudge a little in the direction of better accuracy - in time to give you the option, rather than after it was too late - that's really all I was trying to do. Regarding messages, if you're using the system correctly (the pair of "speech balloons at the top of the page), the person addressed needs to notice that there's a message addressed to him/her (it comes up as a notification on their page) before they reply. They may not have been on MSW for quite some time, or just not look at the top of the page, or whatever . . . But most people do reply when they see the message. Steven
-
New Member from Western Washington State
Louie da fly replied to Michael Jones's topic in New member Introductions
Welcome to MSW, Michael.That's a very nice-looking vessel - I have nothing but respect for people who build live-steam models. Do you have another project on the go? If you have, it'd be great if you started a build log. I'm sure a lot of people would like to see it. Steven -
Bob, that's a very nice piece of work. I feel I ought to comment, though, that the planking layout recommended by the kit manufacturer isn't how it was done in the real world. Not suggesting you pull everything apart and start again, but as your model looks like a double-planked model, for your second layer of planking you might like to consider this link which goes through the steps of duplicating the planking layout used in actual practice. It is more complex than the way the kit manufacturer says to do it, and you may decide to stick with what you're already doing. That is totally ok. It's your model, and you have every right to do it however you wish. Just thought I'd let you know in case you feel it might be worthwhile. The vessels of this period are a favourite of mine, and I always love to see another one being built. Keep up the good work. Steven
-
Swords were highly valued (and expensive) personal items - each would been in its scabbard, carefully wrapped individually in (presumably) oilcloth, and probably in the personal possessions of the individual owners. Only a few high status warriors would have owned them. Axes (single and two-handed) would have been more common, with spears the most common of all. Though those wrapped spear shafts look good, they appear rather too thick? They wouldn't in real life been thicker than maybe an inch an a half or two inches. Otherwise they would be (a) too heavy and (b) too hard to get a good grip on. After all, they usually doubled as "javelins" in battle, so shouldn't be too heavy to throw. The shorter ones would be no less than 6 feet long (though personally I never liked using anything that short - it put you too much within reach of the opponents' swords and axes); the longer ones more like 9 feet. Everything else looks absolutely brilliant. I'm very impressed. The barrels, the open "scuttlebutt", the chests - all add verisimitude to the presentation. Regarding the (unspecific) oilcloth bundles, I think they look best with the rope around them. The shields are a problem. Stacked like that on the deck they'd slide over each other and be all over the ship, the moment you got into the ocean swell. There's just no information available on how they were stored if not at the sides of the ship. Maybe tie them down with a net? Or perhaps store them under the oar-benches - amidships (so they didn't get in the way of the oarsmen) ?
-
That's amazing, mate! You've achieved a hell of a lot in just a year, and it was certainly worth the time spent. This is perhps the most beautiful model of a Viking ship I've ever seen . Steven
-
A small point - I think your spellchecker "corrected" Warring to Warren in the title. Unless there was a Warren States period . . . Steven
-
Great news. The more models out there that aren't just the usual generic square-riggers, the better (not that I've got anything against them, but it's nice to see the currently rather narrow focus open up a bit.) Steven
-
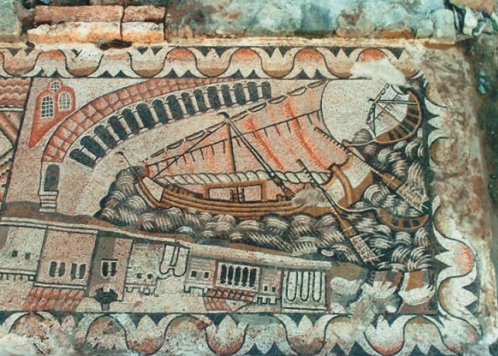
Possible, but in my opinion it would be fairly easily possible to represent a square sail, even if somewhat too narrow, in the space available, without having to slant the yard as shown. It seems to me if it quacks like a duck, it's a duck. There has been a lot of academic discussion of the origin of the lateen sail - not only where it first appeared, but when. It was thought for a long time that the lateen originated among the arabs and appeared in the Mediterranean quite late, but there has now been quite a bit of evidence suggesting a much earlier, Mediterranean, origin for it. What is particularly unusual about this example is the clarity of the representation and the early date. The next earliest representation I'm aware of is the 5th century AD Kelenderis mosaic, which strictly speaking shows a settee rather than a lateen; But certainly the overwhelming majority of representations of ships from this period show a square sail and I'd be very surprised if the Sea of Galilee ship had anything else. Steven
- 83 replies
-
- 3
-
-
- Sea of Galilee boat
- SE Miller
- (and 1 more)
-
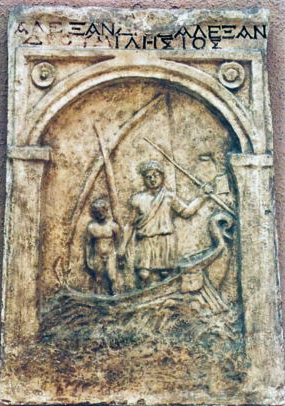
Though the lateen is now known to have been developed earlier than previously thought - as evidenced by this tombstone, dated to the second century AD this is the only evidence for such prior to the 5th century; all other contemporary representations I'm aware of show square sails. So a square sail is far more likely for the Sea of Galilee ship, which is dated to the first century AD. Steven
- 83 replies
-
- 3
-
-
- Sea of Galilee boat
- SE Miller
- (and 1 more)
-
Good thought, Pat, but the thread is pretty stiff and isn't all that hard to thread through. Just fiddly and time-consuming. Steven
- 740 replies
-
- 4
-
-
- Tudor
- restoration
- (and 4 more)
-
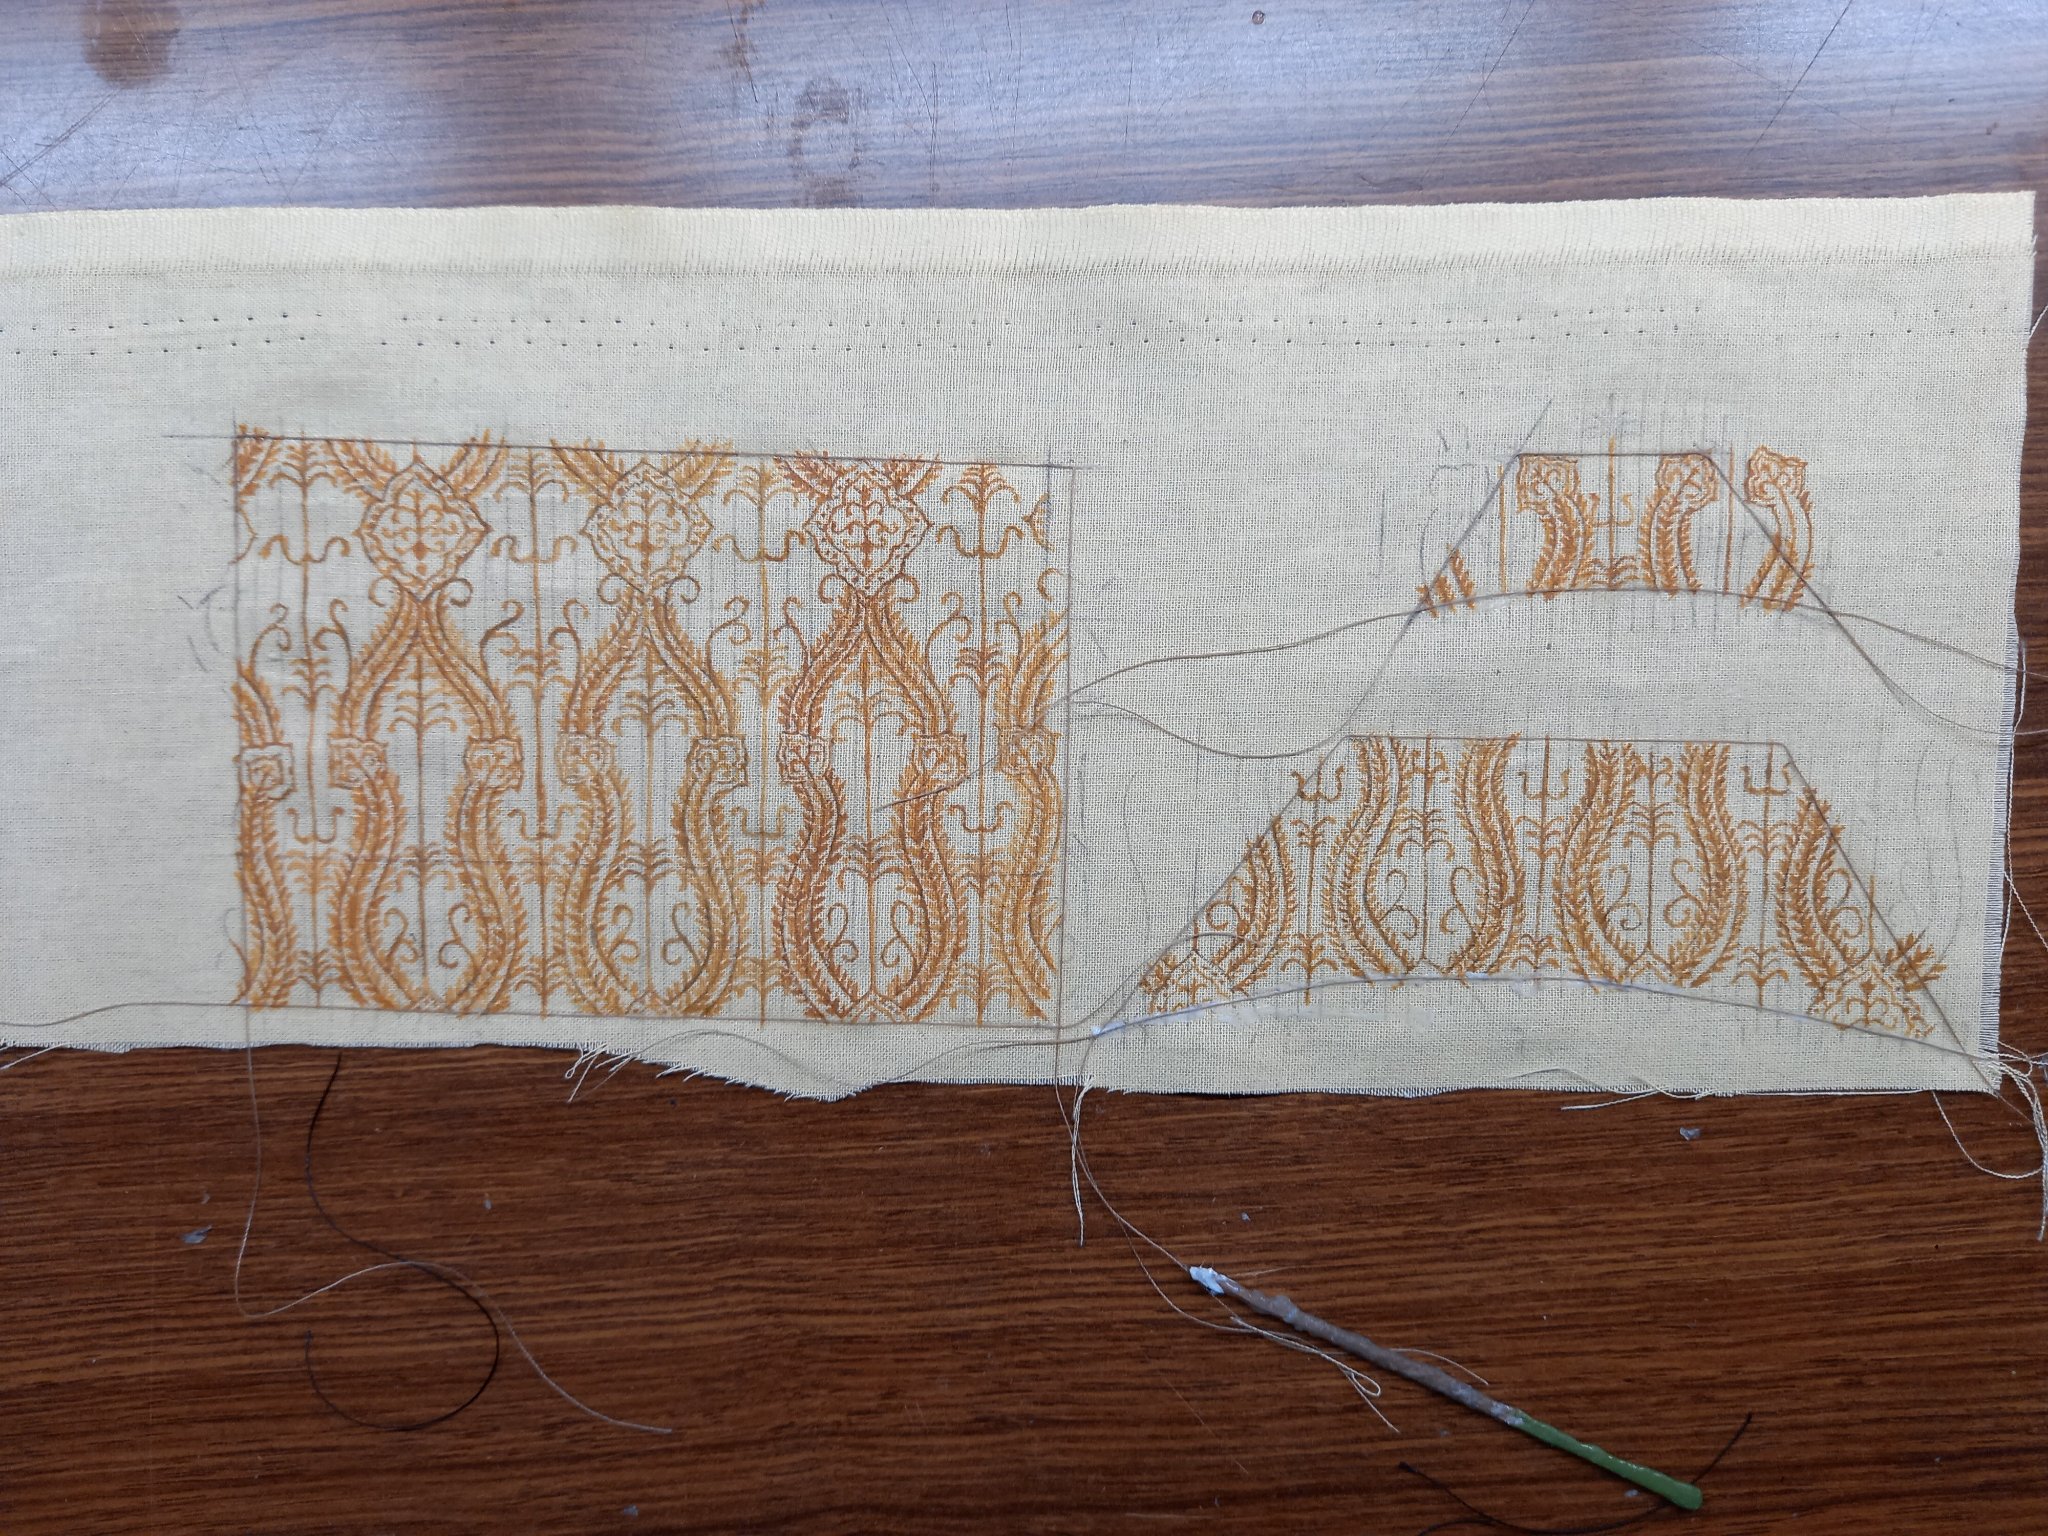
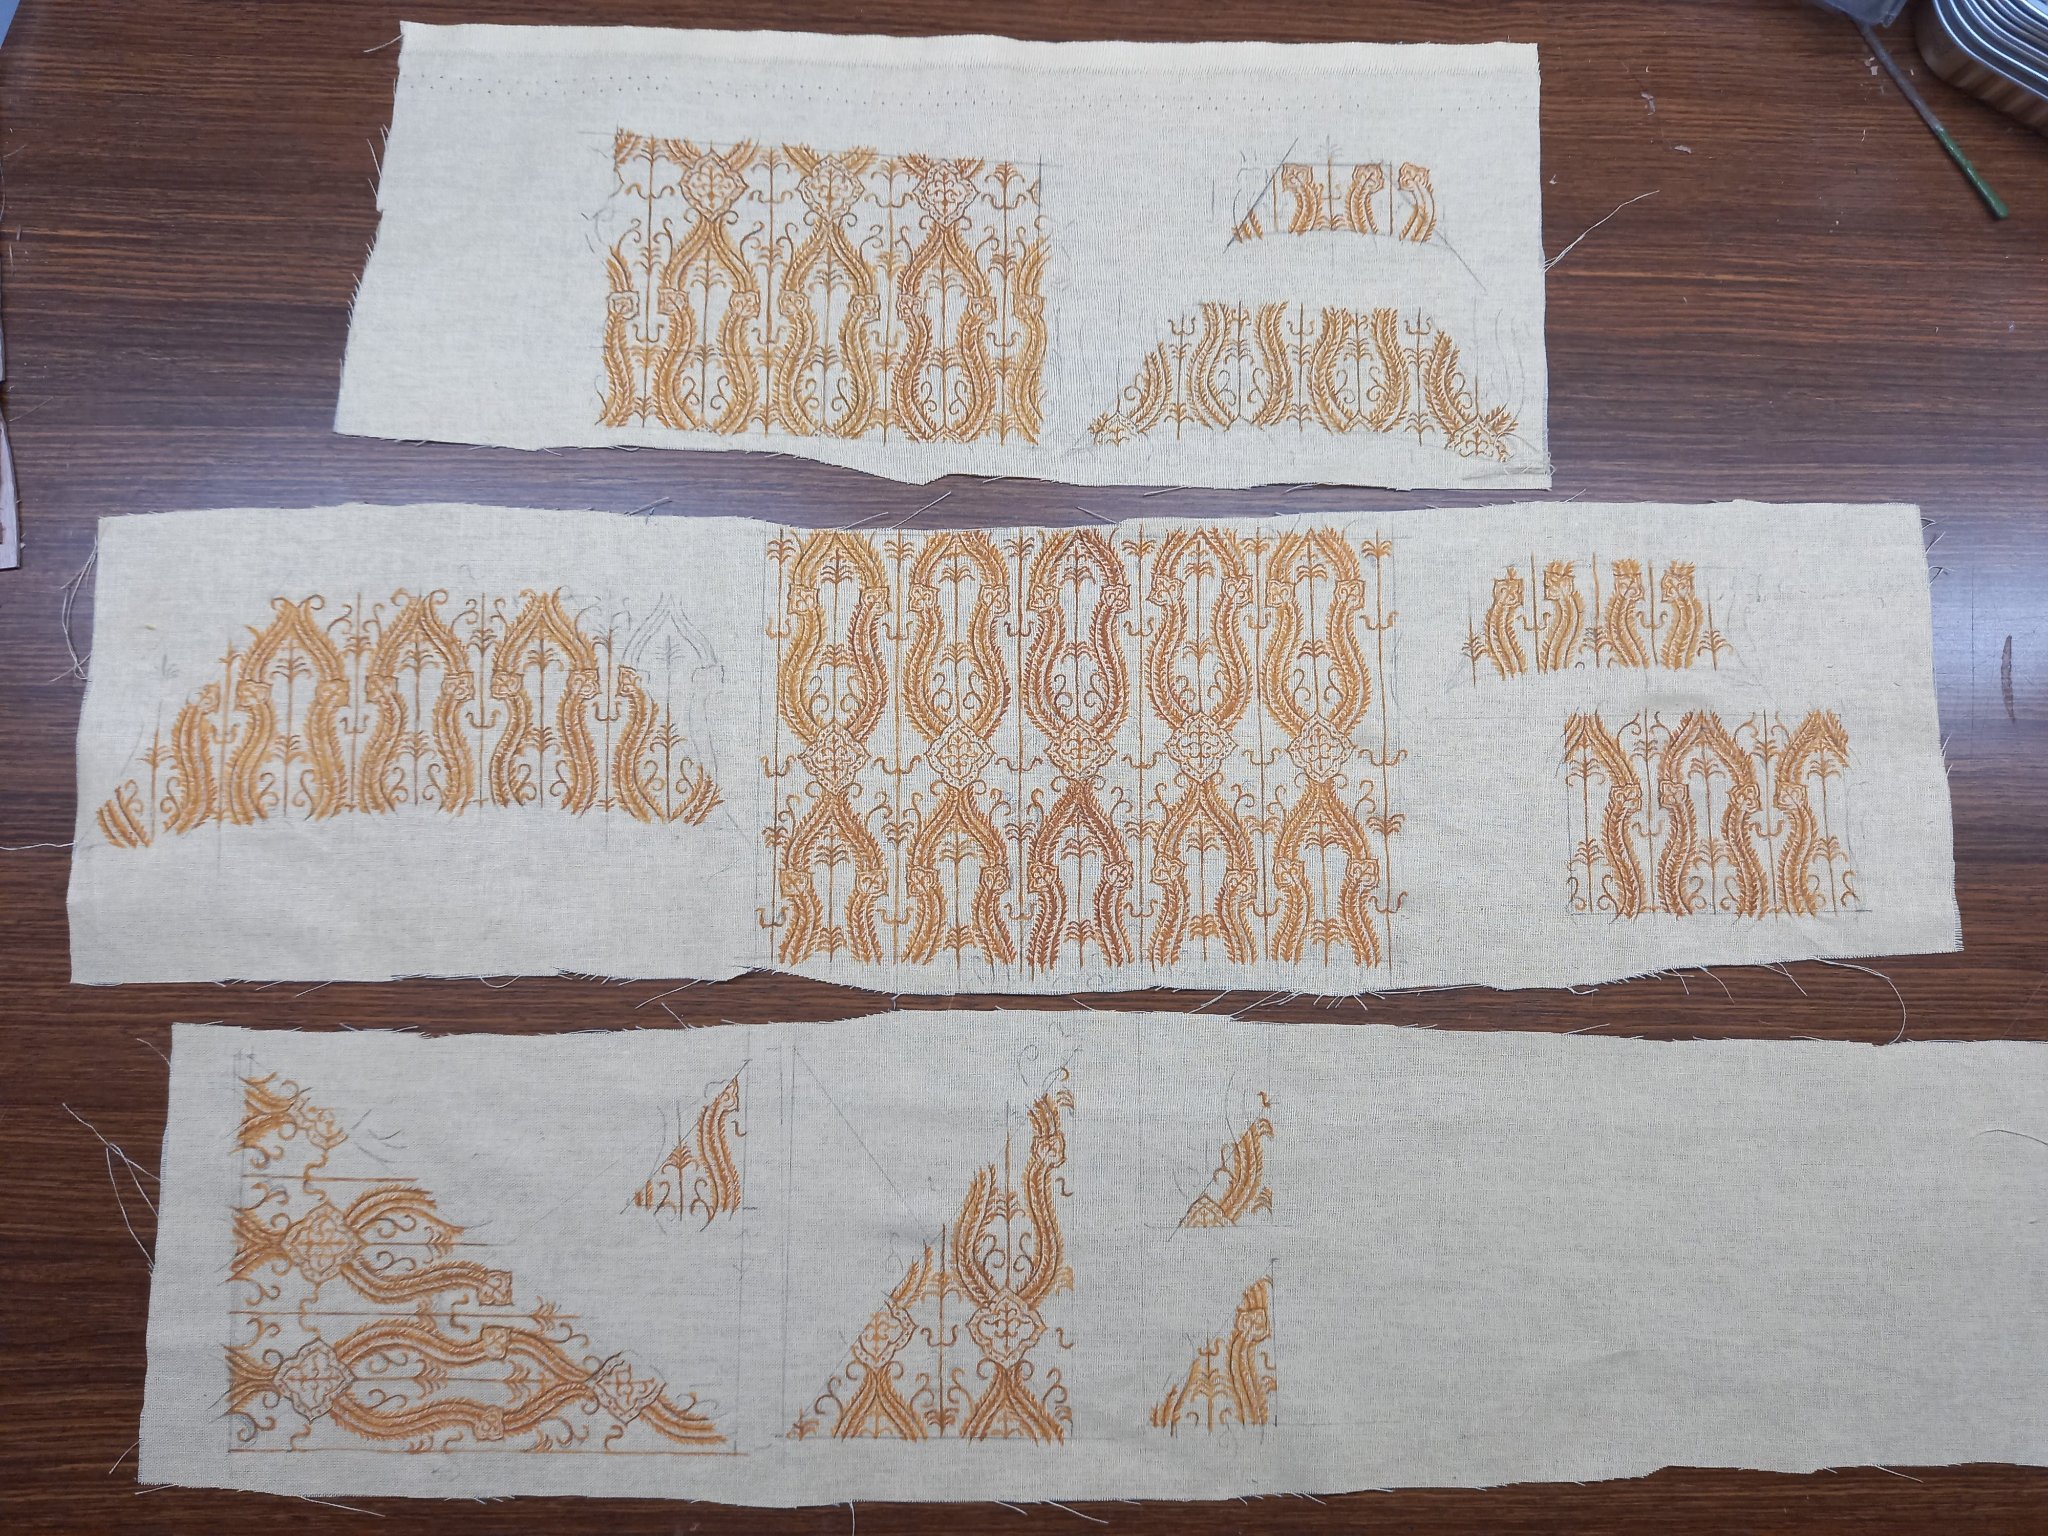
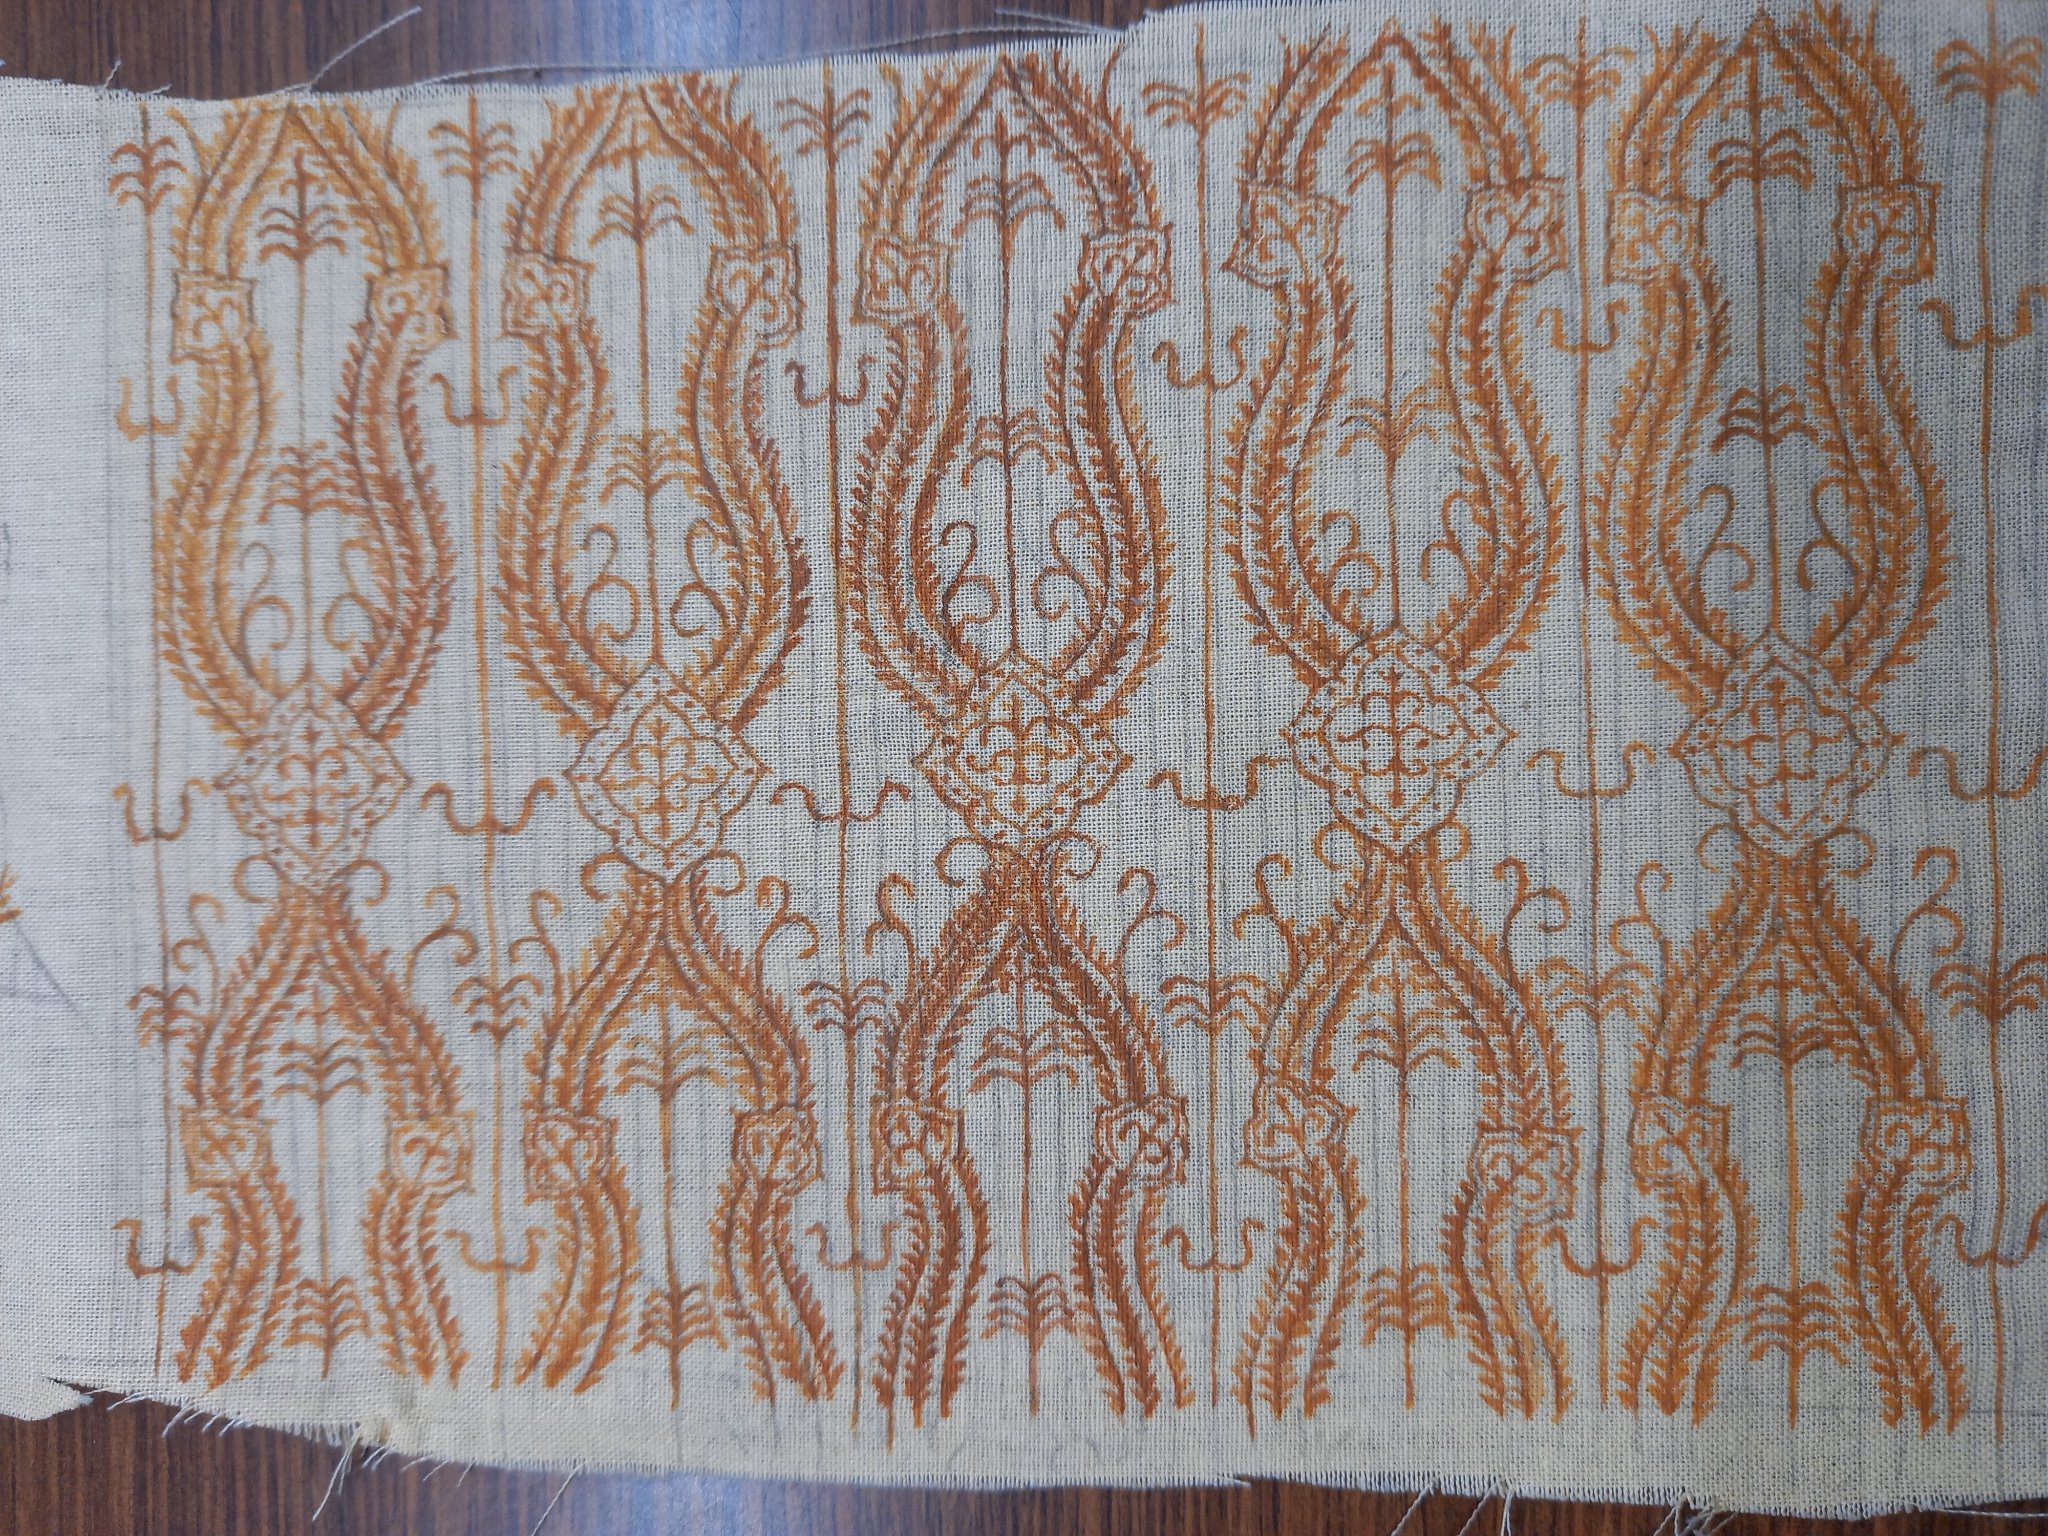
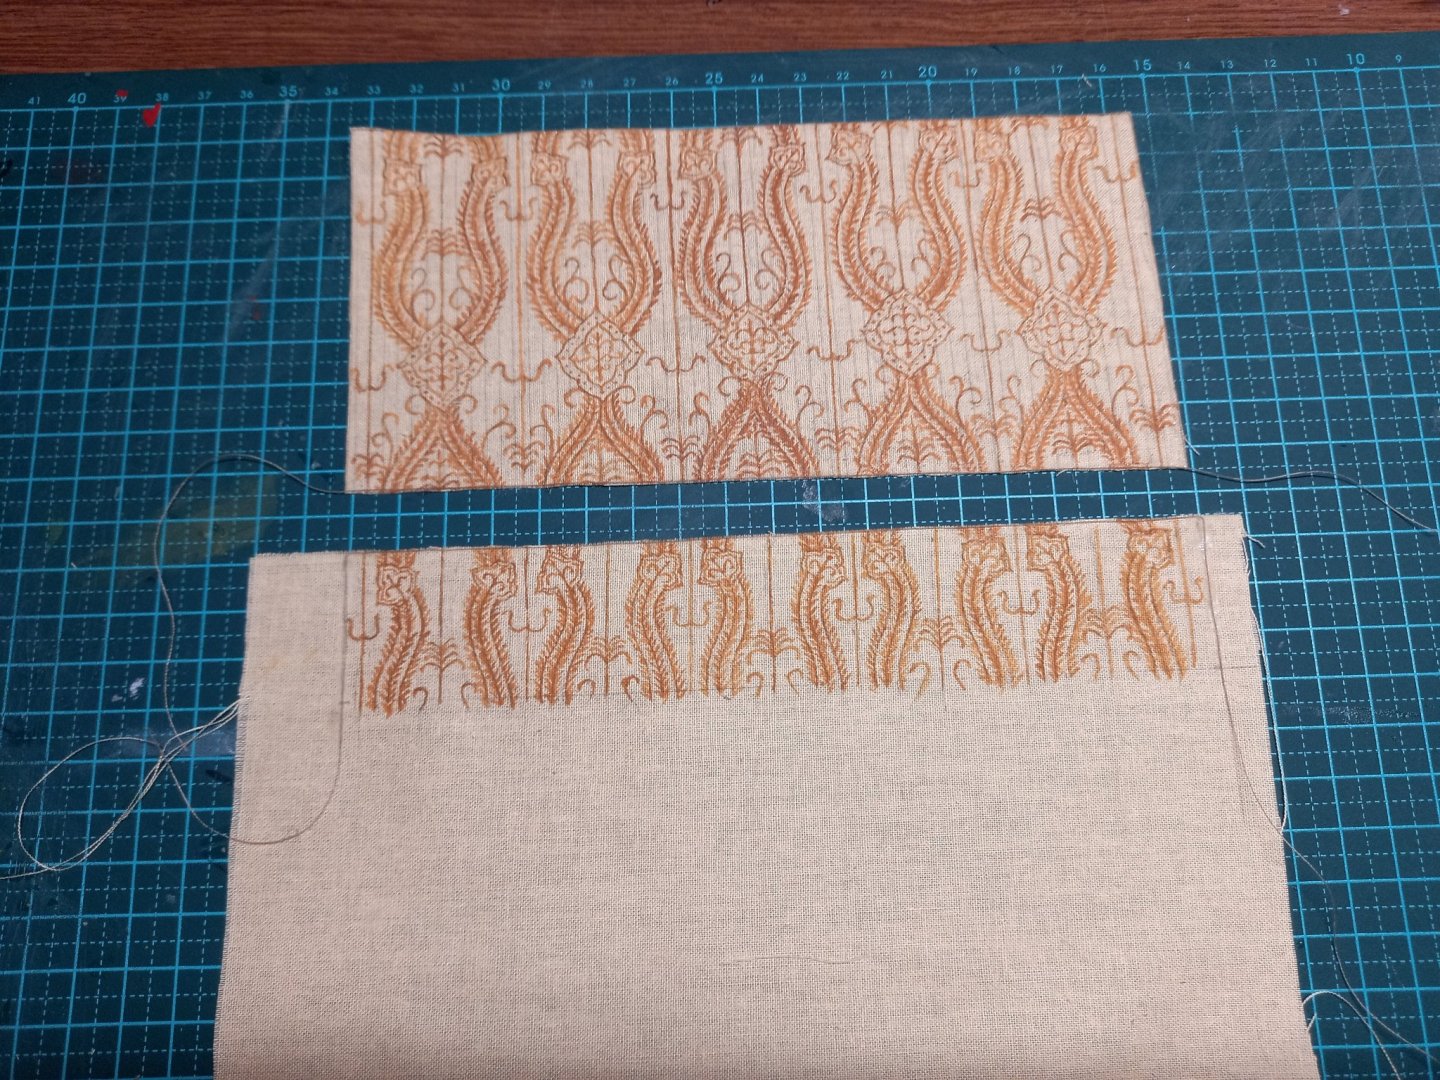
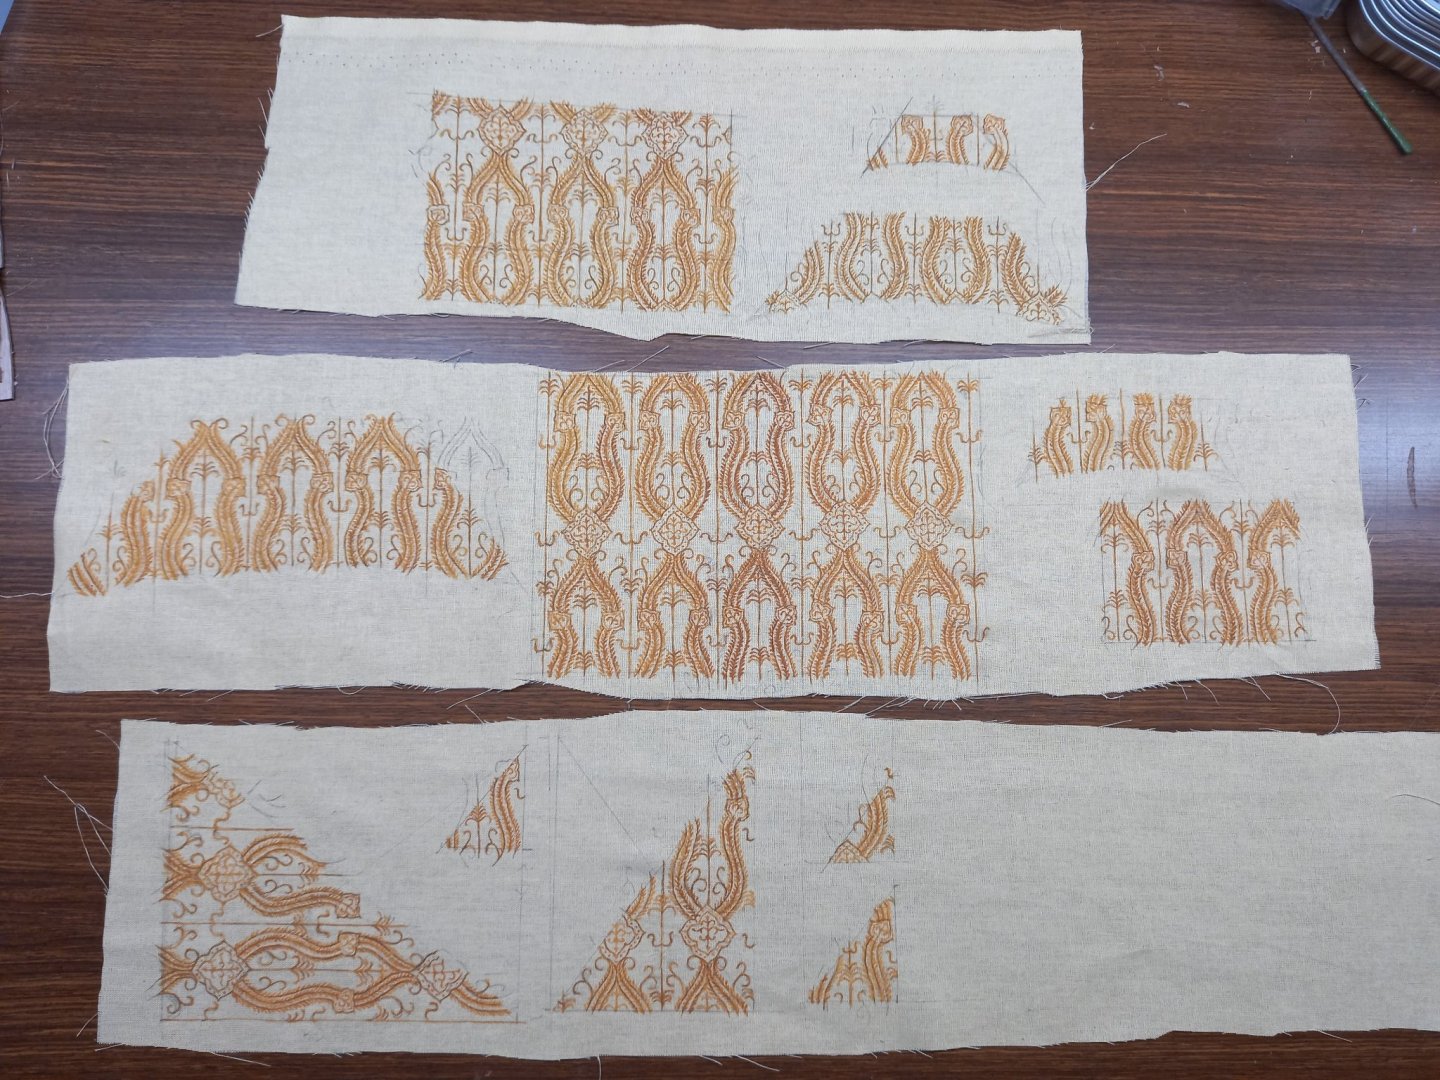
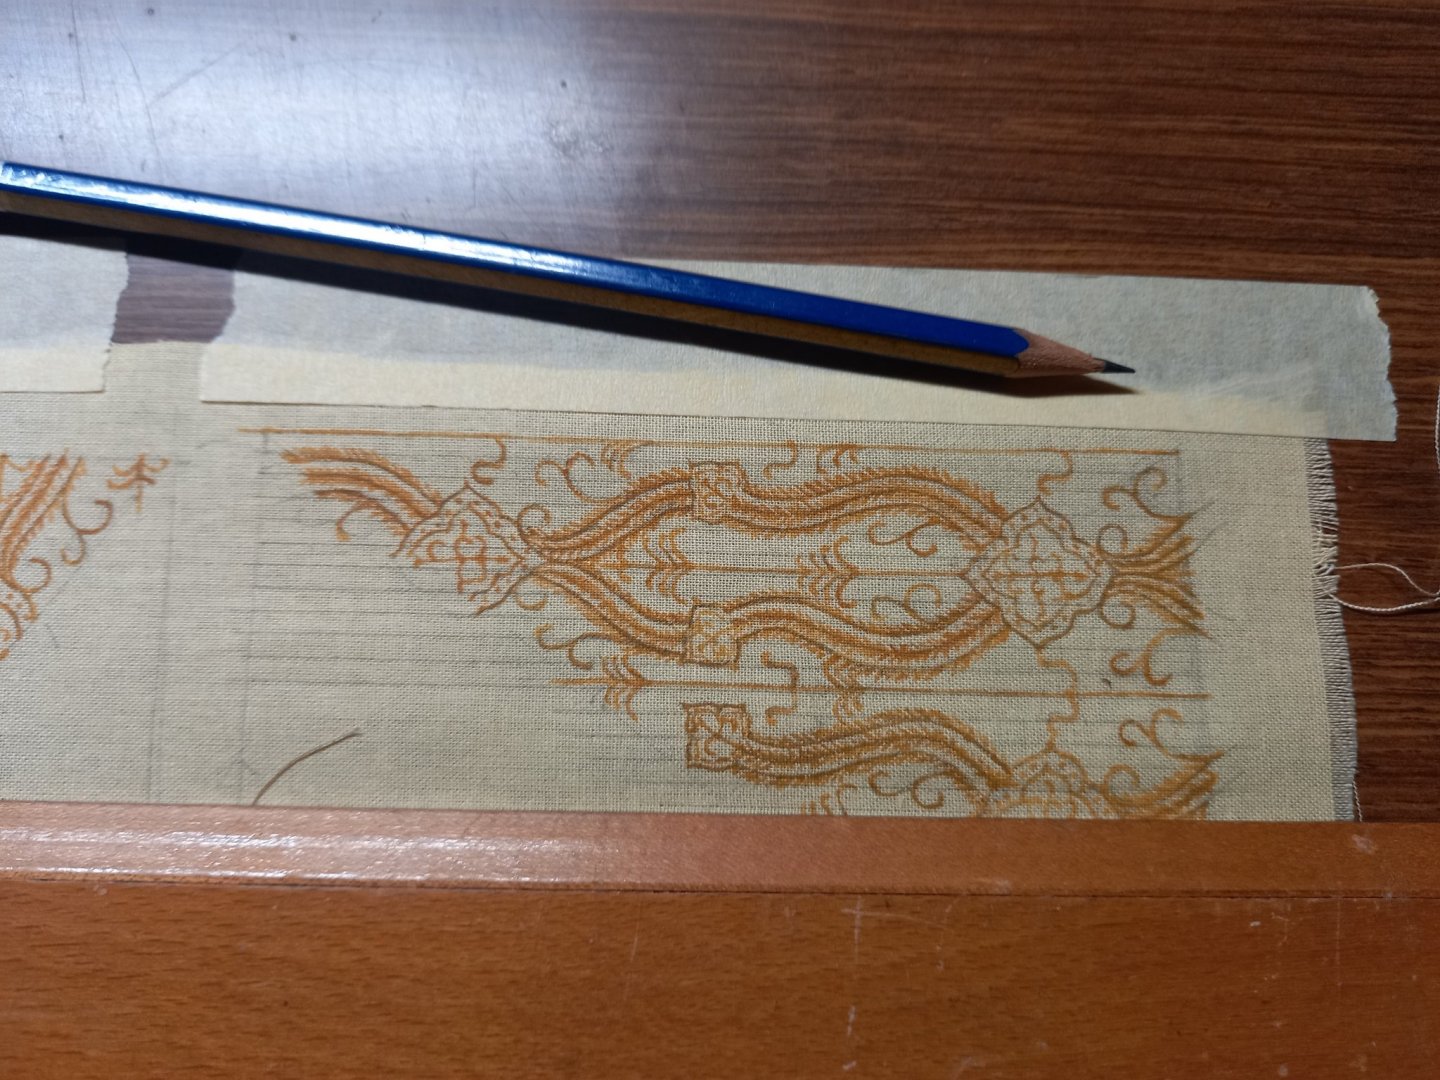
Thanks everybody for the likes and comments. The weave of the cloth isn't as coarse as the camera makes it seem, and apart from keeping my hand still (and taking frequent breaks so I didn't start making careless mistakes) it was just a matter of following the lines I'd traced on the fabric through the template. I used a very fine watercolour brush and watered-down acrylic paint. After all the paint was properly dry I went over the sails with a soft eraser to get rid of as much of the remaining pencil marks as I could. I'm now in the process of adding bolt-ropes (photos later) - by gluing cotton thread to the edges of the sails with PVA (white) glue. I did a test piece first and it worked well. Once the glue is properly dry, I can cut around the outside of the bolt-ropes - doing it this way means the sails don't warp and lose their shape (particularly the lateens, which are cut diagonally across the weave) after cutting. I developed this technique on my previous build, the lateen-rigged dromon. Steven
- 740 replies
-
- 6
-
-
- Tudor
- restoration
- (and 4 more)
-
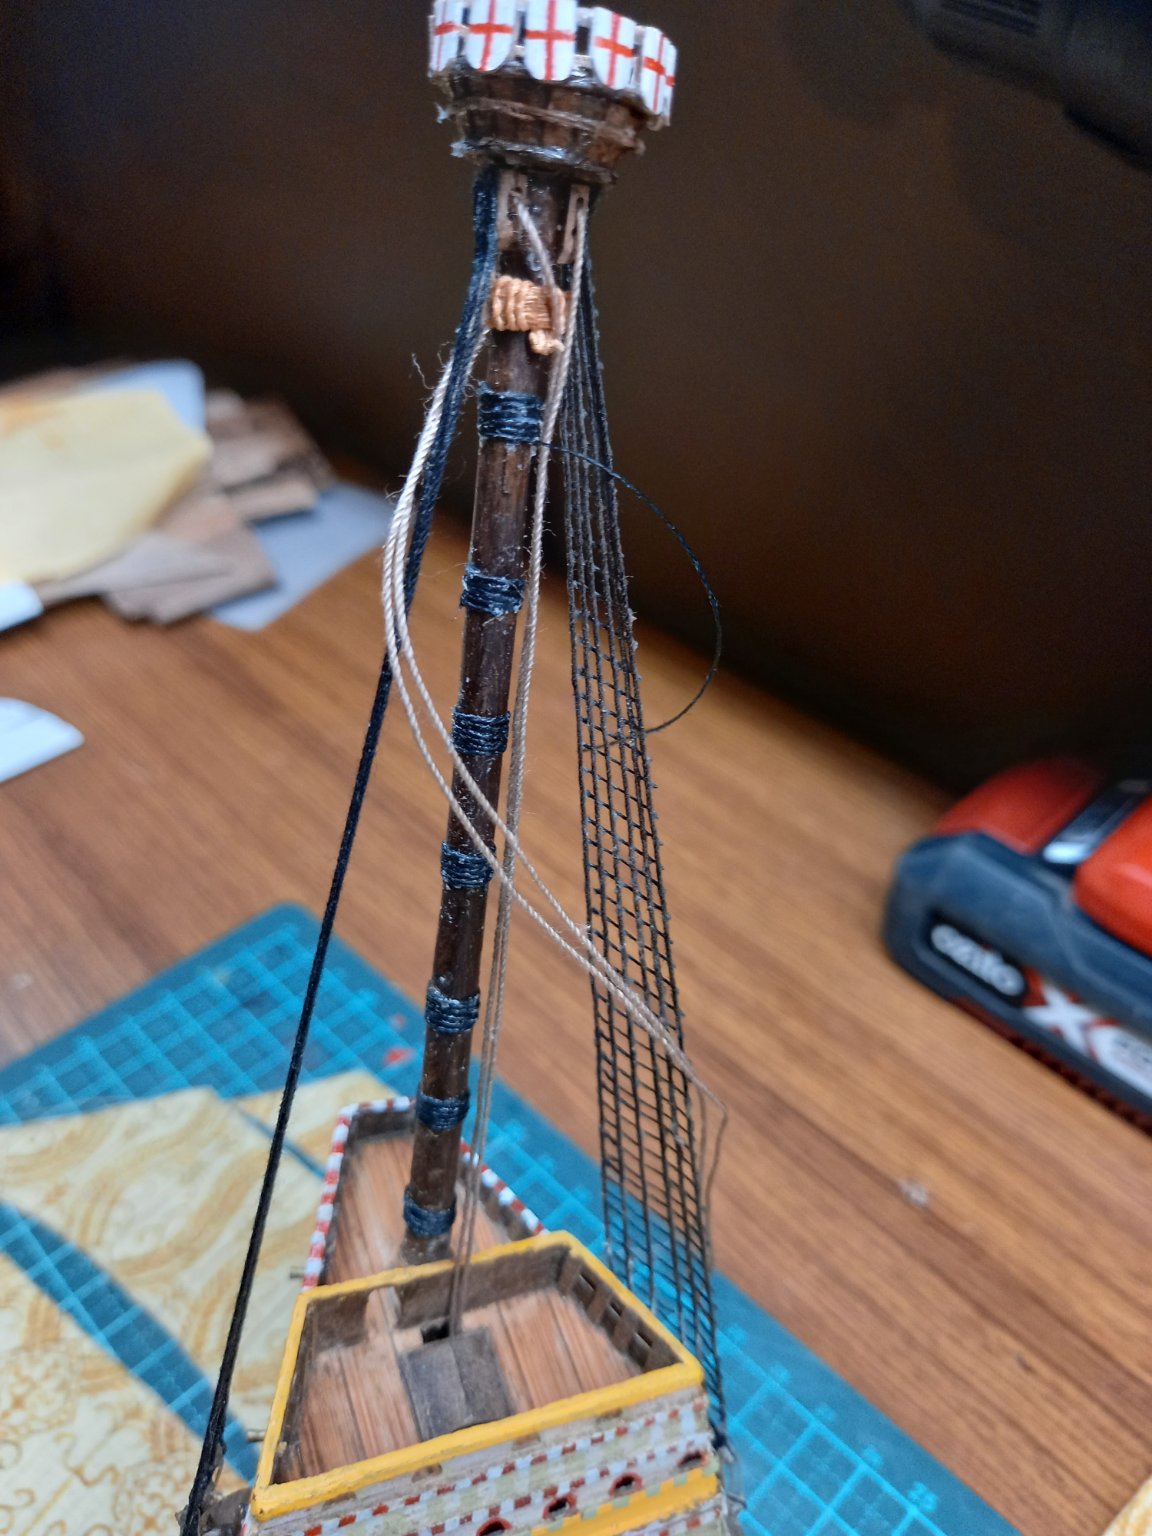
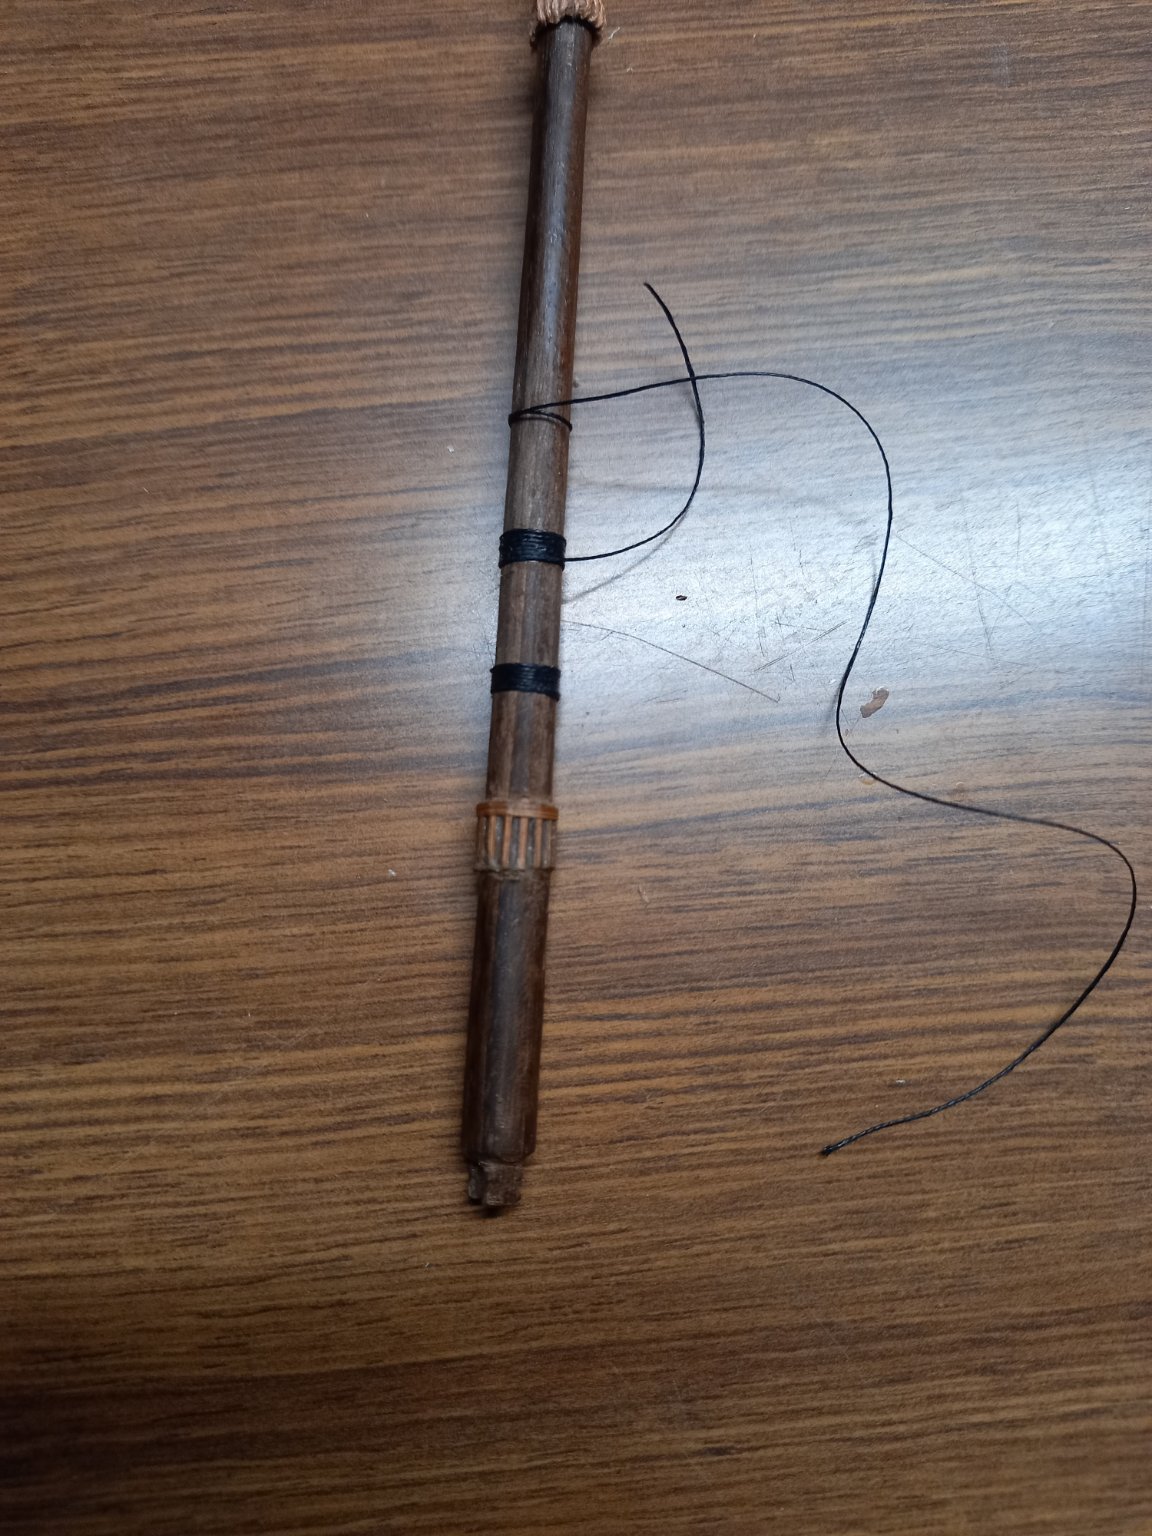
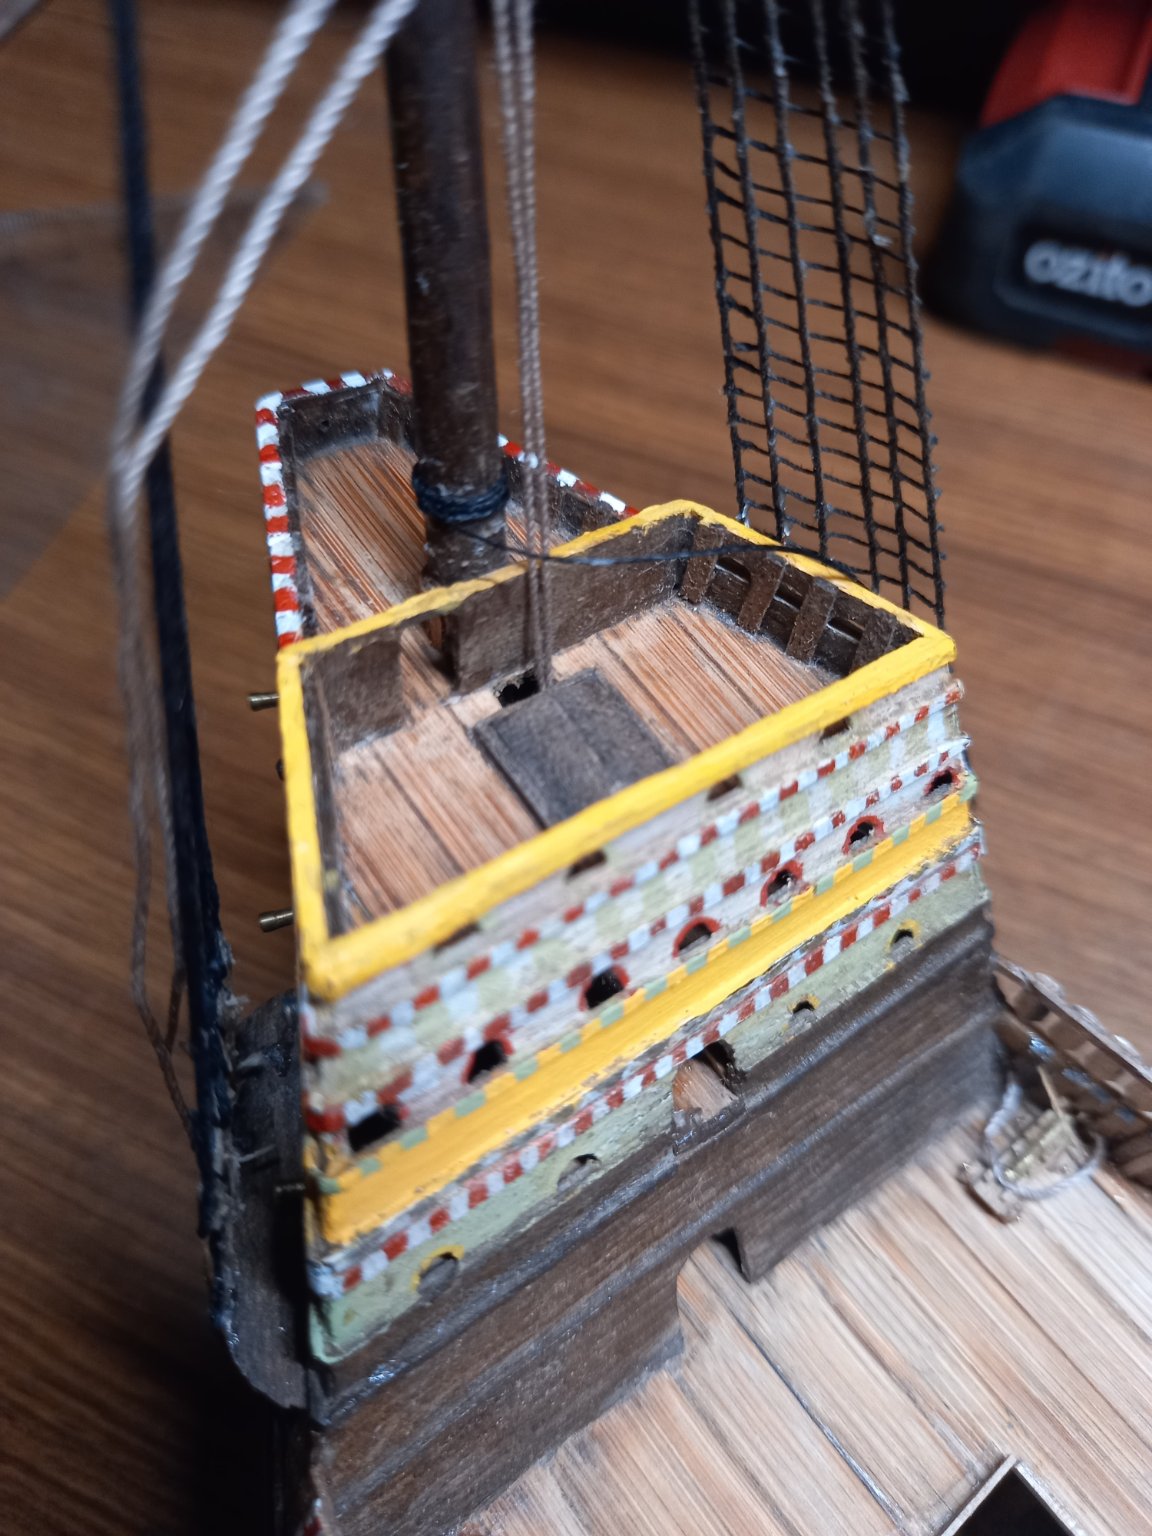
It's been a while since I posted any progress. It's taken some time to get things done. Well, here are the sails all painted . . . A bit of variation in the colour - a result of having to mix the paint up in separate batches, as it dries pretty fast. But not too bad, overall. I'm pretty happy with it. At this scale I wasn't prepared to do separate cloths for the sails or do stitching to indicate it - instead I did what I did back in the day - mark the joins with a 2H pencil. Looks pretty good. I had forgotten to add the wooldings to the main and foremasts. Not too much of a problem with the main: But as the foremast was already in place (when I was removing everything else to fix the ship up, I'd been unable to remove it without causing damage) I should have put the wooldings on before I added the shrouds. As it is I'll have to thread the cord around the mast past all the shrouds and the tyes for the foresail. It sucks a bit, but it just takes a bit more work. First one under way - a few more turns still needed. Steven


- 740 replies
-
- 13
-
-
- Tudor
- restoration
- (and 4 more)
-
Sounds like a great project. Looking forward to seeing your progress on this one. Steven
- 83 replies
-
- 2
-
-
- Sea of Galilee boat
- SE Miller
- (and 1 more)
-
Oh, yes - those old favourites, like "Mama hat mir gesagt, ich soll nicht kommen" Steven
- 130 replies
-
- 4
-
-

-
- wütender hund
- hanseatic
- (and 2 more)
-
I think you're right, mate. Just have another go at it. My own workshop is littered with first attempts - it's part of the learning process. Here's the tripod and cauldron for you, And here are the dimensions and some construction details: http://warehamforgeblog.blogspot.com/2020/04/oseberg-tripod-and-cauldron-refining.html Steven
-
HMCSS Victoria 1855 by BANYAN - 1:72
Louie da fly replied to BANYAN's topic in - Build logs for subjects built 1851 - 1900
Brilliant work, Pat. That's just beautiful! Steven- 1,013 replies
-
- 5
-
-
- gun dispatch vessel
- victoria
- (and 2 more)
-
Looking good so far. I look forward to seeing the progress on this. Steven
- 179 replies
-
- 2
-
-
- longship
- Helga Holm
- (and 1 more)