Louie da fly
-
Posts
7,990 -
Joined
-
Last visited
Content Type
Profiles
Forums
Gallery
Events
Everything posted by Louie da fly
-
Yep. This is Perth seen from Kings Park, a native bushland park of over 4 square kilometres (about 1.7 square miles) set aside over a century ago on Mount Eliza, overlooking the city and the Swan River. Steven
-
Or vice versa - and Perth has really great beaches (and weather - it only rains in winter) Steven
-
Actually, I was being ironic. Just had several days of miserable weather, heavy wind and rain. It appears there's a permanent raincloud over Ballarat (you can see it as you approach) as over Duckula's castle. Steven
-
Welcome from sunny Ballarat! I like your avatar - Father Jack, unless I much mistake. If you're just starting out, I'd recommend you start with something relatively simple so you can develop your skills and make something to be proud of without biting off far more than you can chew - such as HMS Victory or the Vasa. Yes, some people have managed it as a first build, but too many find it heart-breaking and fall by the wayside. See and I grew up in Perth (south of the river - Attadale - wouldn't be able to afford to live there now). Say hullo to the river for me, will you? Good to have you aboard! Steven
-

Speedy Relief from the Doldrums!
Louie da fly replied to David Lester's topic in Wood ship model kits
David, I think everybody hits the doldrums at some point or another. The solution depends very much on what caused the doldrums. In my case I get easily bored with repetitive activities - making the same thing over and over again, all identical. Sometimes it's my own fault - did I really have to carve 48 wooden oarsmen for my dromon? Could I have just built the ship without a crew? Other times there's no escaping it - a ship has a lot of blocks, deadeyes etc etc and you have no option but to make lots of things all alike. But yes, it's easy to get stale, too. I once read that the way to avoid getting Alzheimer's is to continually develop new neural pathways, by doing new and different things. If you find yourself getting stale, it might be worth trying a scratch build. It's certainly a lot more challenging than doing a kit. And you could try moving from POB to POF - that will give you a whole lot of new problems to solve! But it sounds to me that you've found your own solution to the doldrums, which should keep you going for a long time into the future. Good luck with it. I wish you every success. Steven -
Welcome to MSW! I'd agree with mtaylor in recommending you start a build log for your Polaris. It's a great way to get help and advice from other members, and maybe avoid problems or mistakes that others can alert you to. And a good way to make friends in the forum. And we get to see your build under way! The instructions are here: If you have some photos of your model in its earlier stages, include them and give us a short intro. Best wishes, good to have you aboard! Steven
-
Hi and welcome to MSW! The scale for 4.5 feet would be 1:28. You might like to play with that a bit - perhaps 1:30 (which is 2'6" to the inch) and would be a bit over 4'2". But I would agree with allanyed that it would be a lot easier to get this all to work if you built a simpler ship - perhaps a naval cutter like the Cheerful? Good to have you aboard Steven
-
Here's the rest of how I make my wooden blocks. Adding the strop. Wrapping the strop around the block - I tried two ways of doing it - one with the block still attached to the main bit of wood; the other with it already separated. It turned out to be harder to carve the block with the strop attached than to do it the other way around. Then a thumb knot in the strop at the bottom of the block. And complete: Steven


-
Well, that's given me a lesson in German - I'd been thinking gestalt meant "the whole" of something (like holistic). But of course, "whole" is ganze, isn't it? (as in the famous Richard Tauber song "Dein ist mein ganzen Herz" (Yours is my whole heart) or the even more famous "Diesem Kuss der ganzen Welt" (This kiss to the whole world) from Beethoven's 9th Symphony. Druxey, this way of doing the robands is much easier and quicker than doing it properly, and I have the excuse that I did it that way before. Here you can see it from the back. The "joining thread isn't really all that obvious unless you look at it close up. Steven

- 740 replies
-
- 11
-

-
- Tudor
- restoration
- (and 4 more)
-
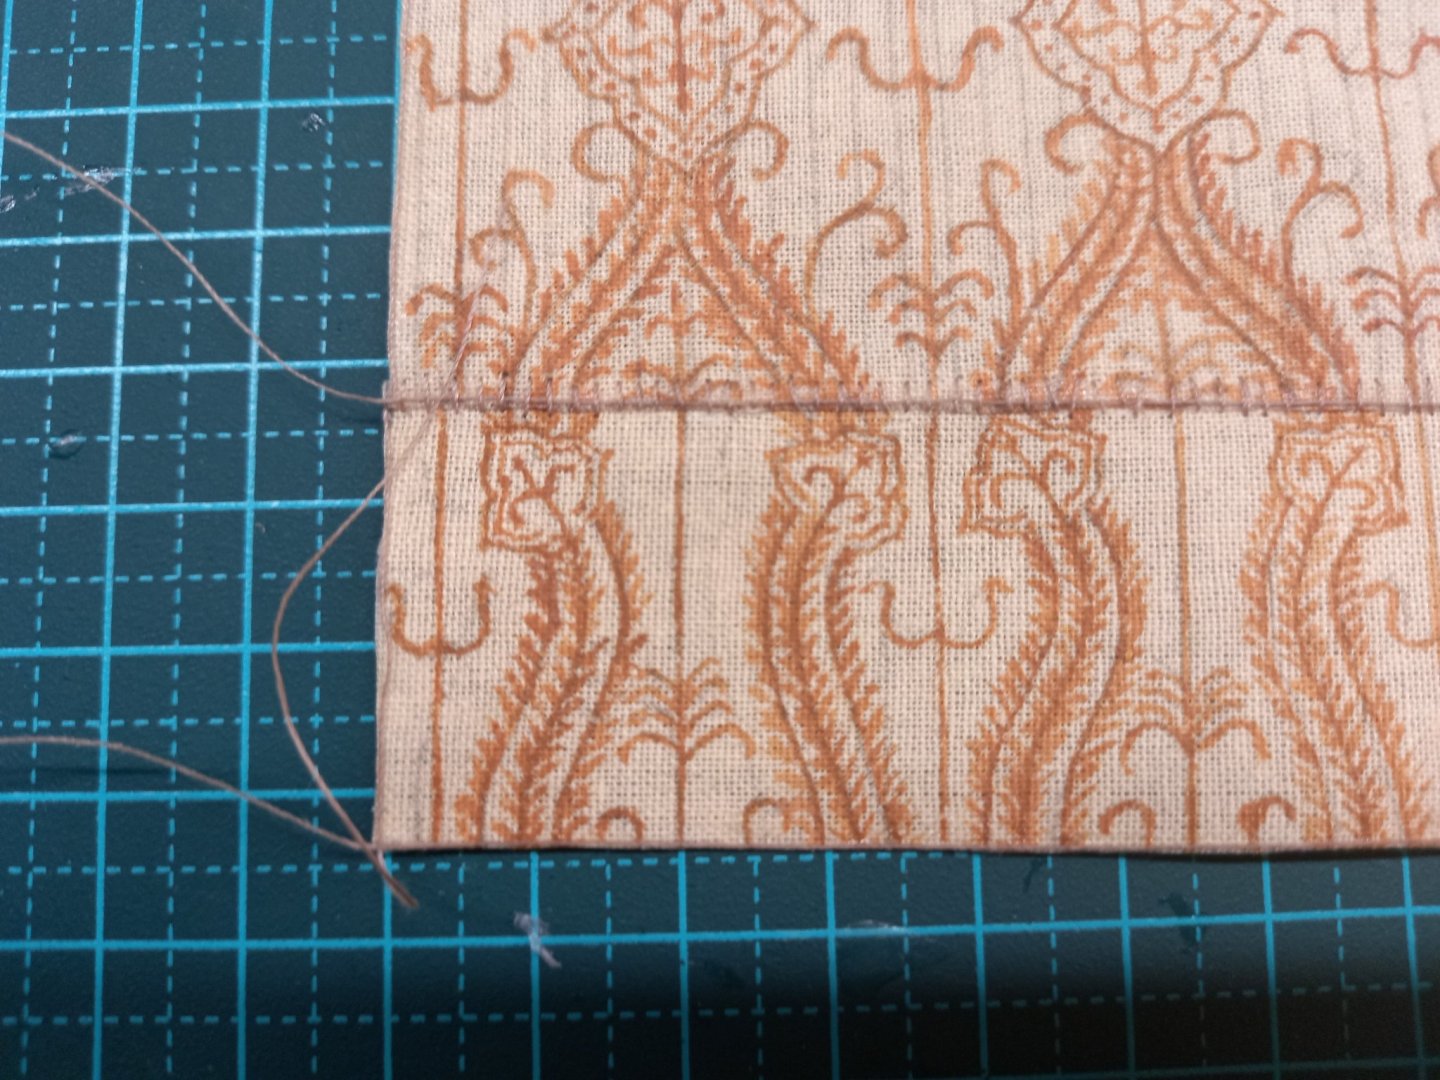
The course and the bonnet in the original were made from a single piece of fabric. The transition between them was done by pulling a number of threads out at the join. It did seem to work, but this time I've made them separately and laced them together. The "robands" were done the same way both times. The thread joining them is at the back of the yard. Steven
- 740 replies
-
- 4
-
-
- Tudor
- restoration
- (and 4 more)
-
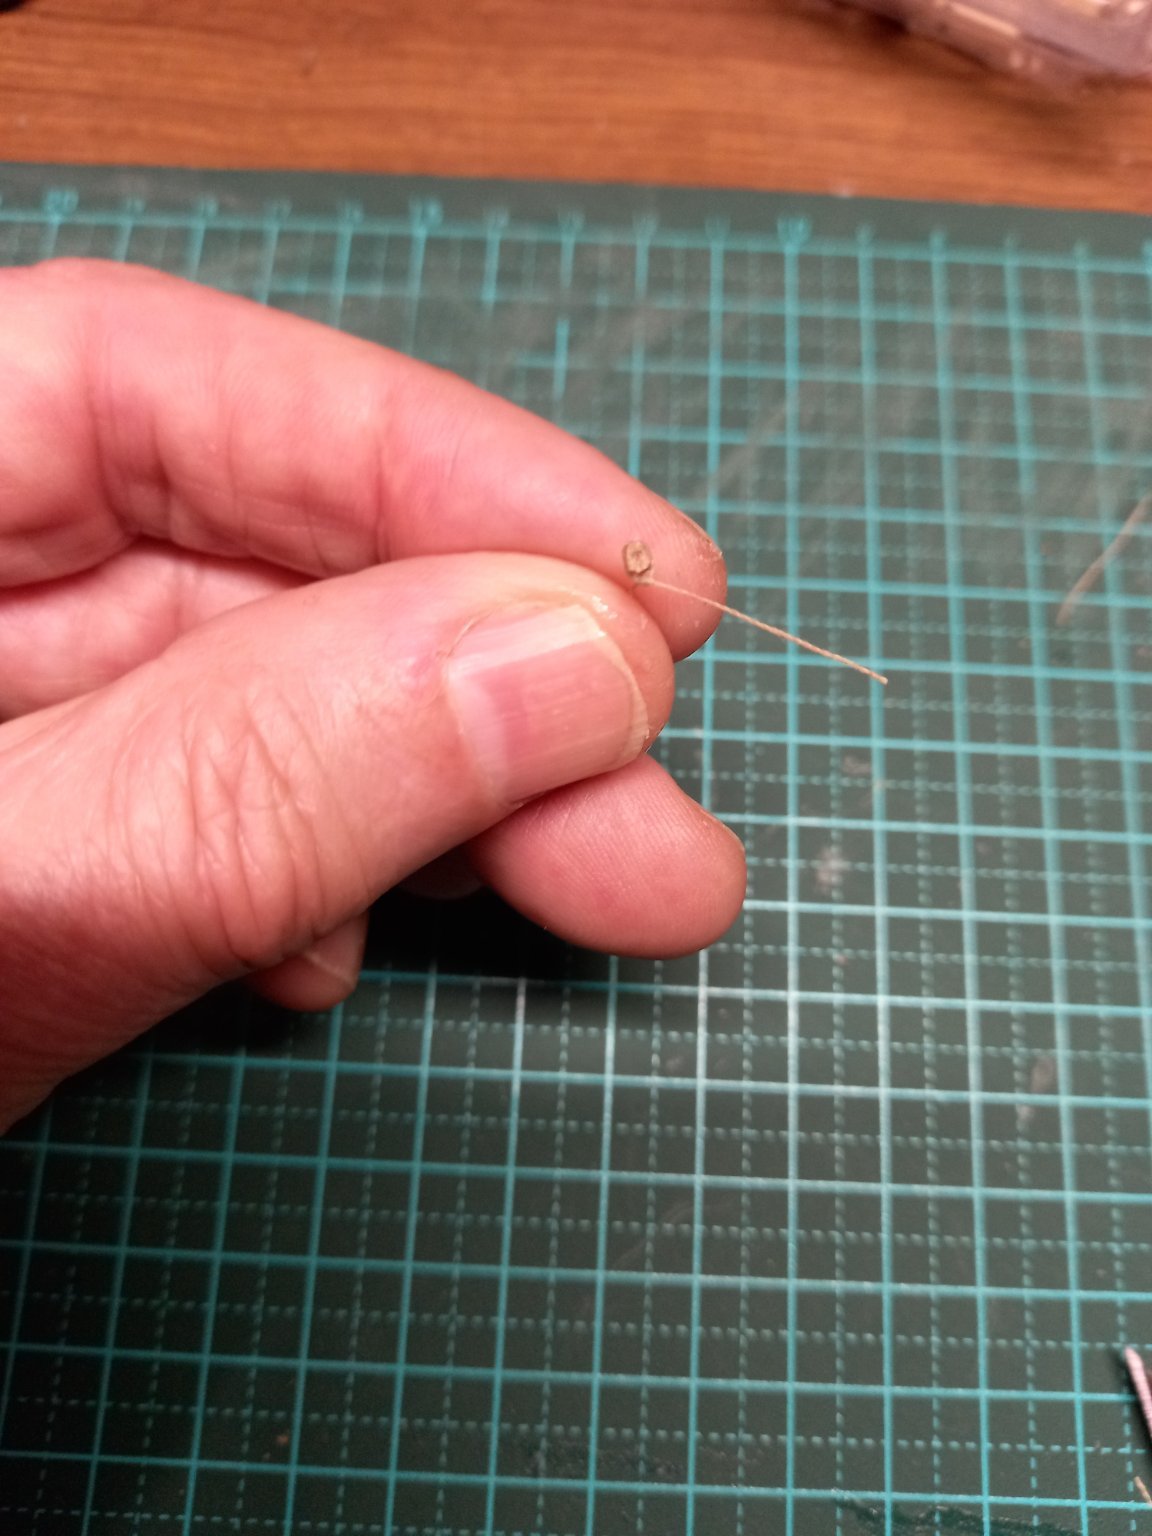
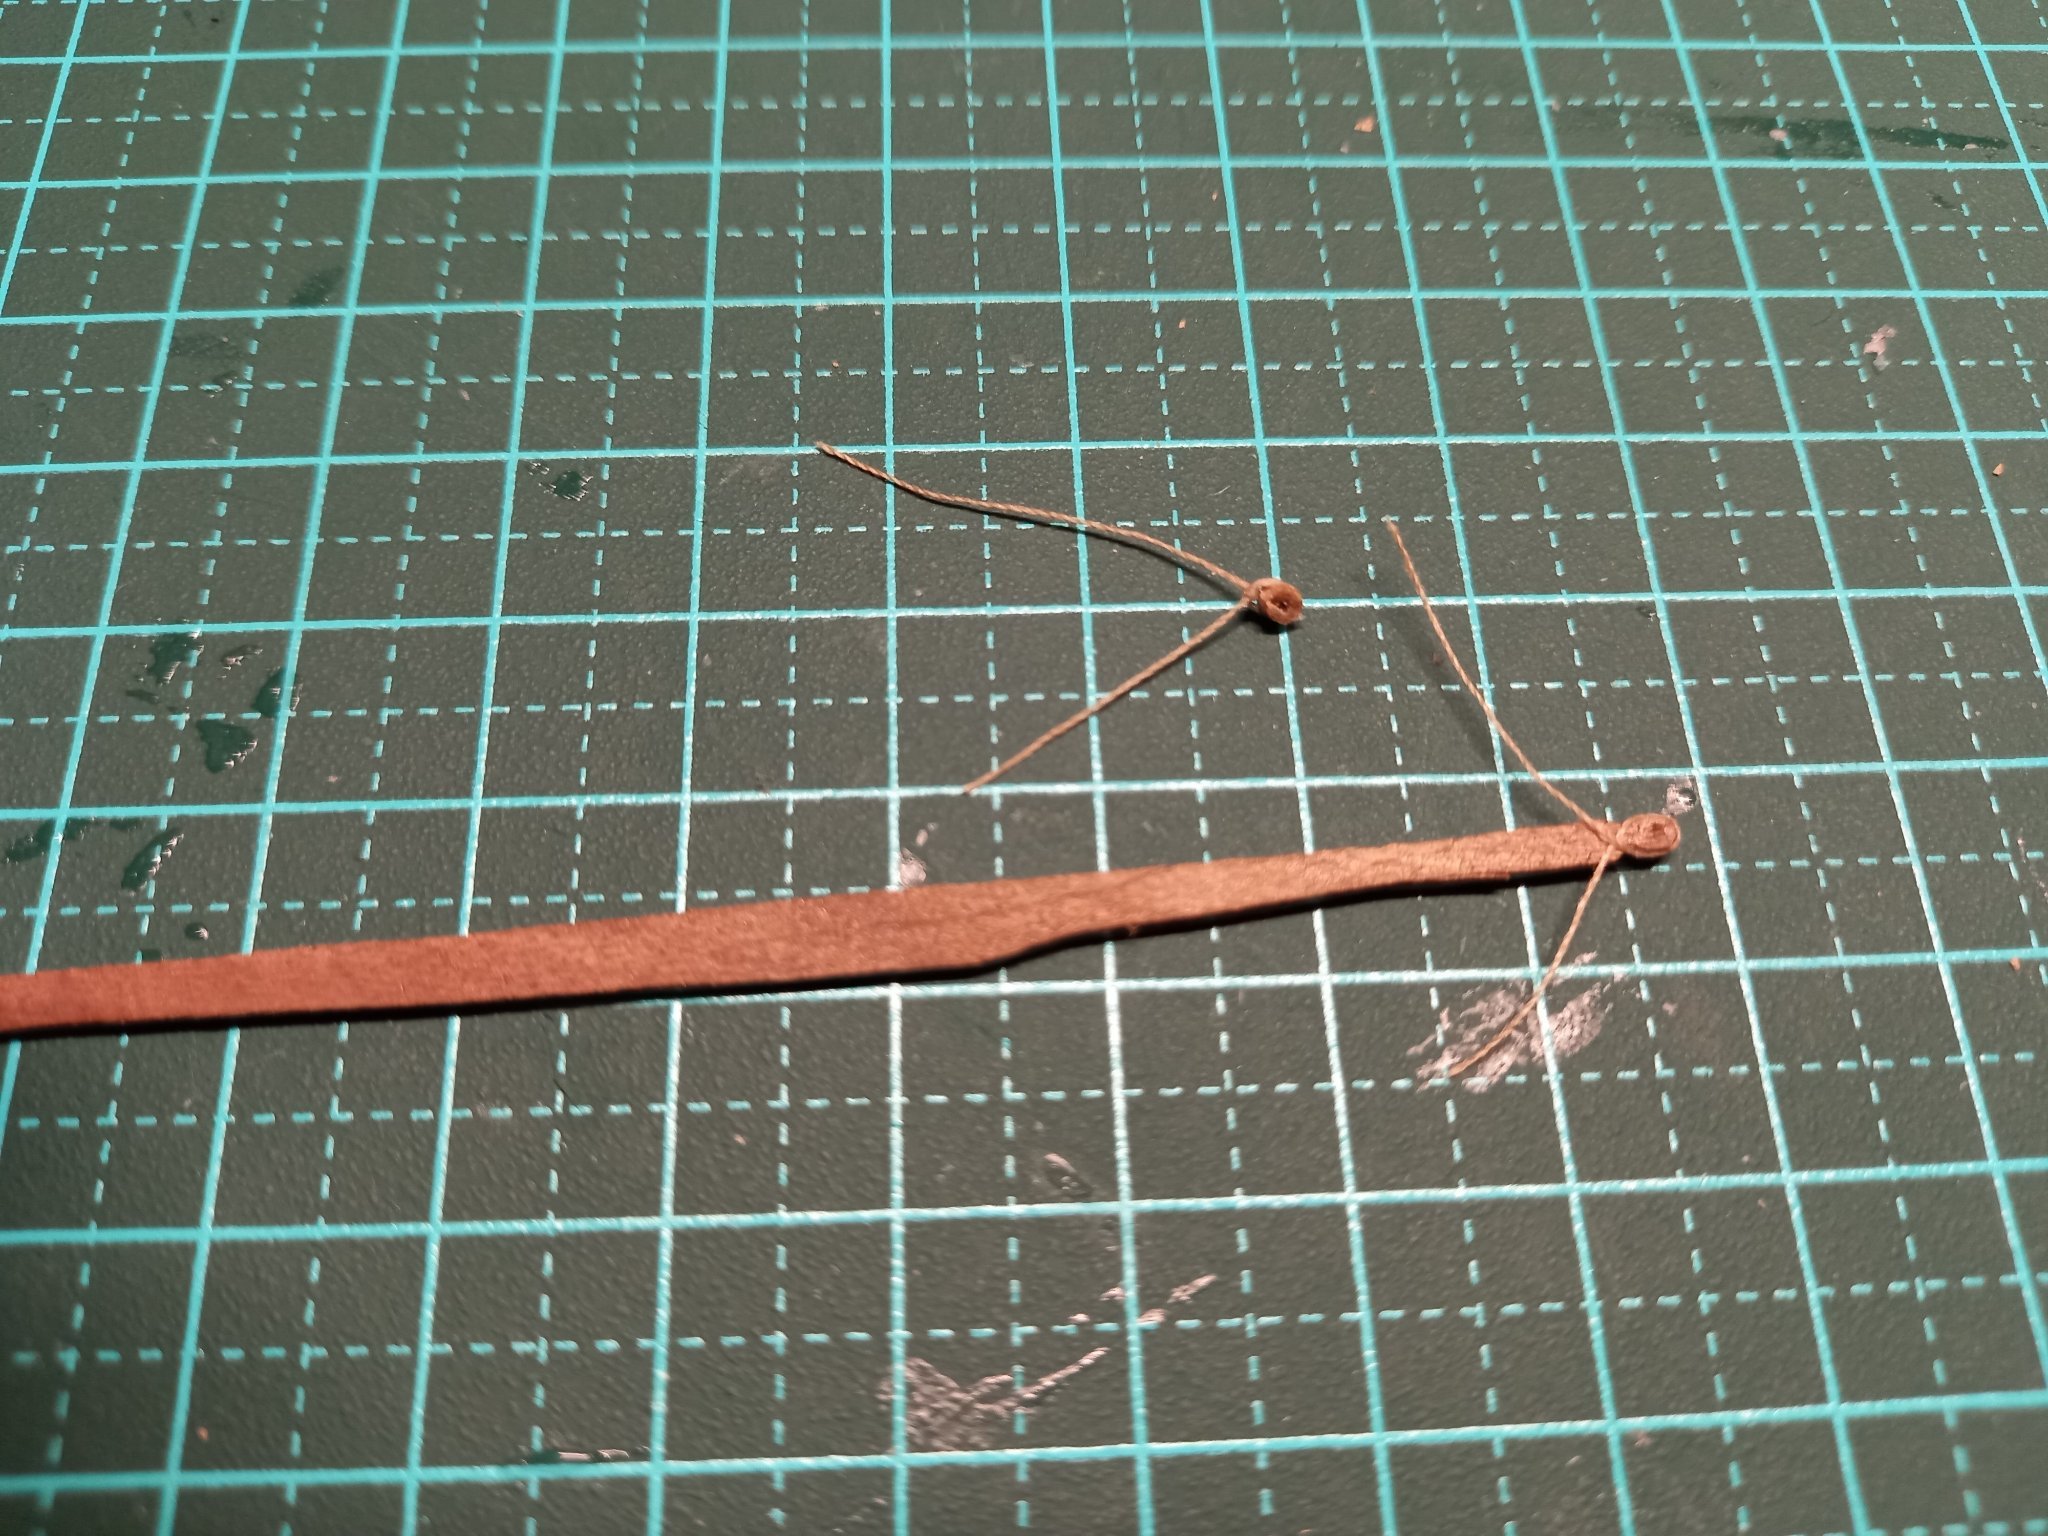
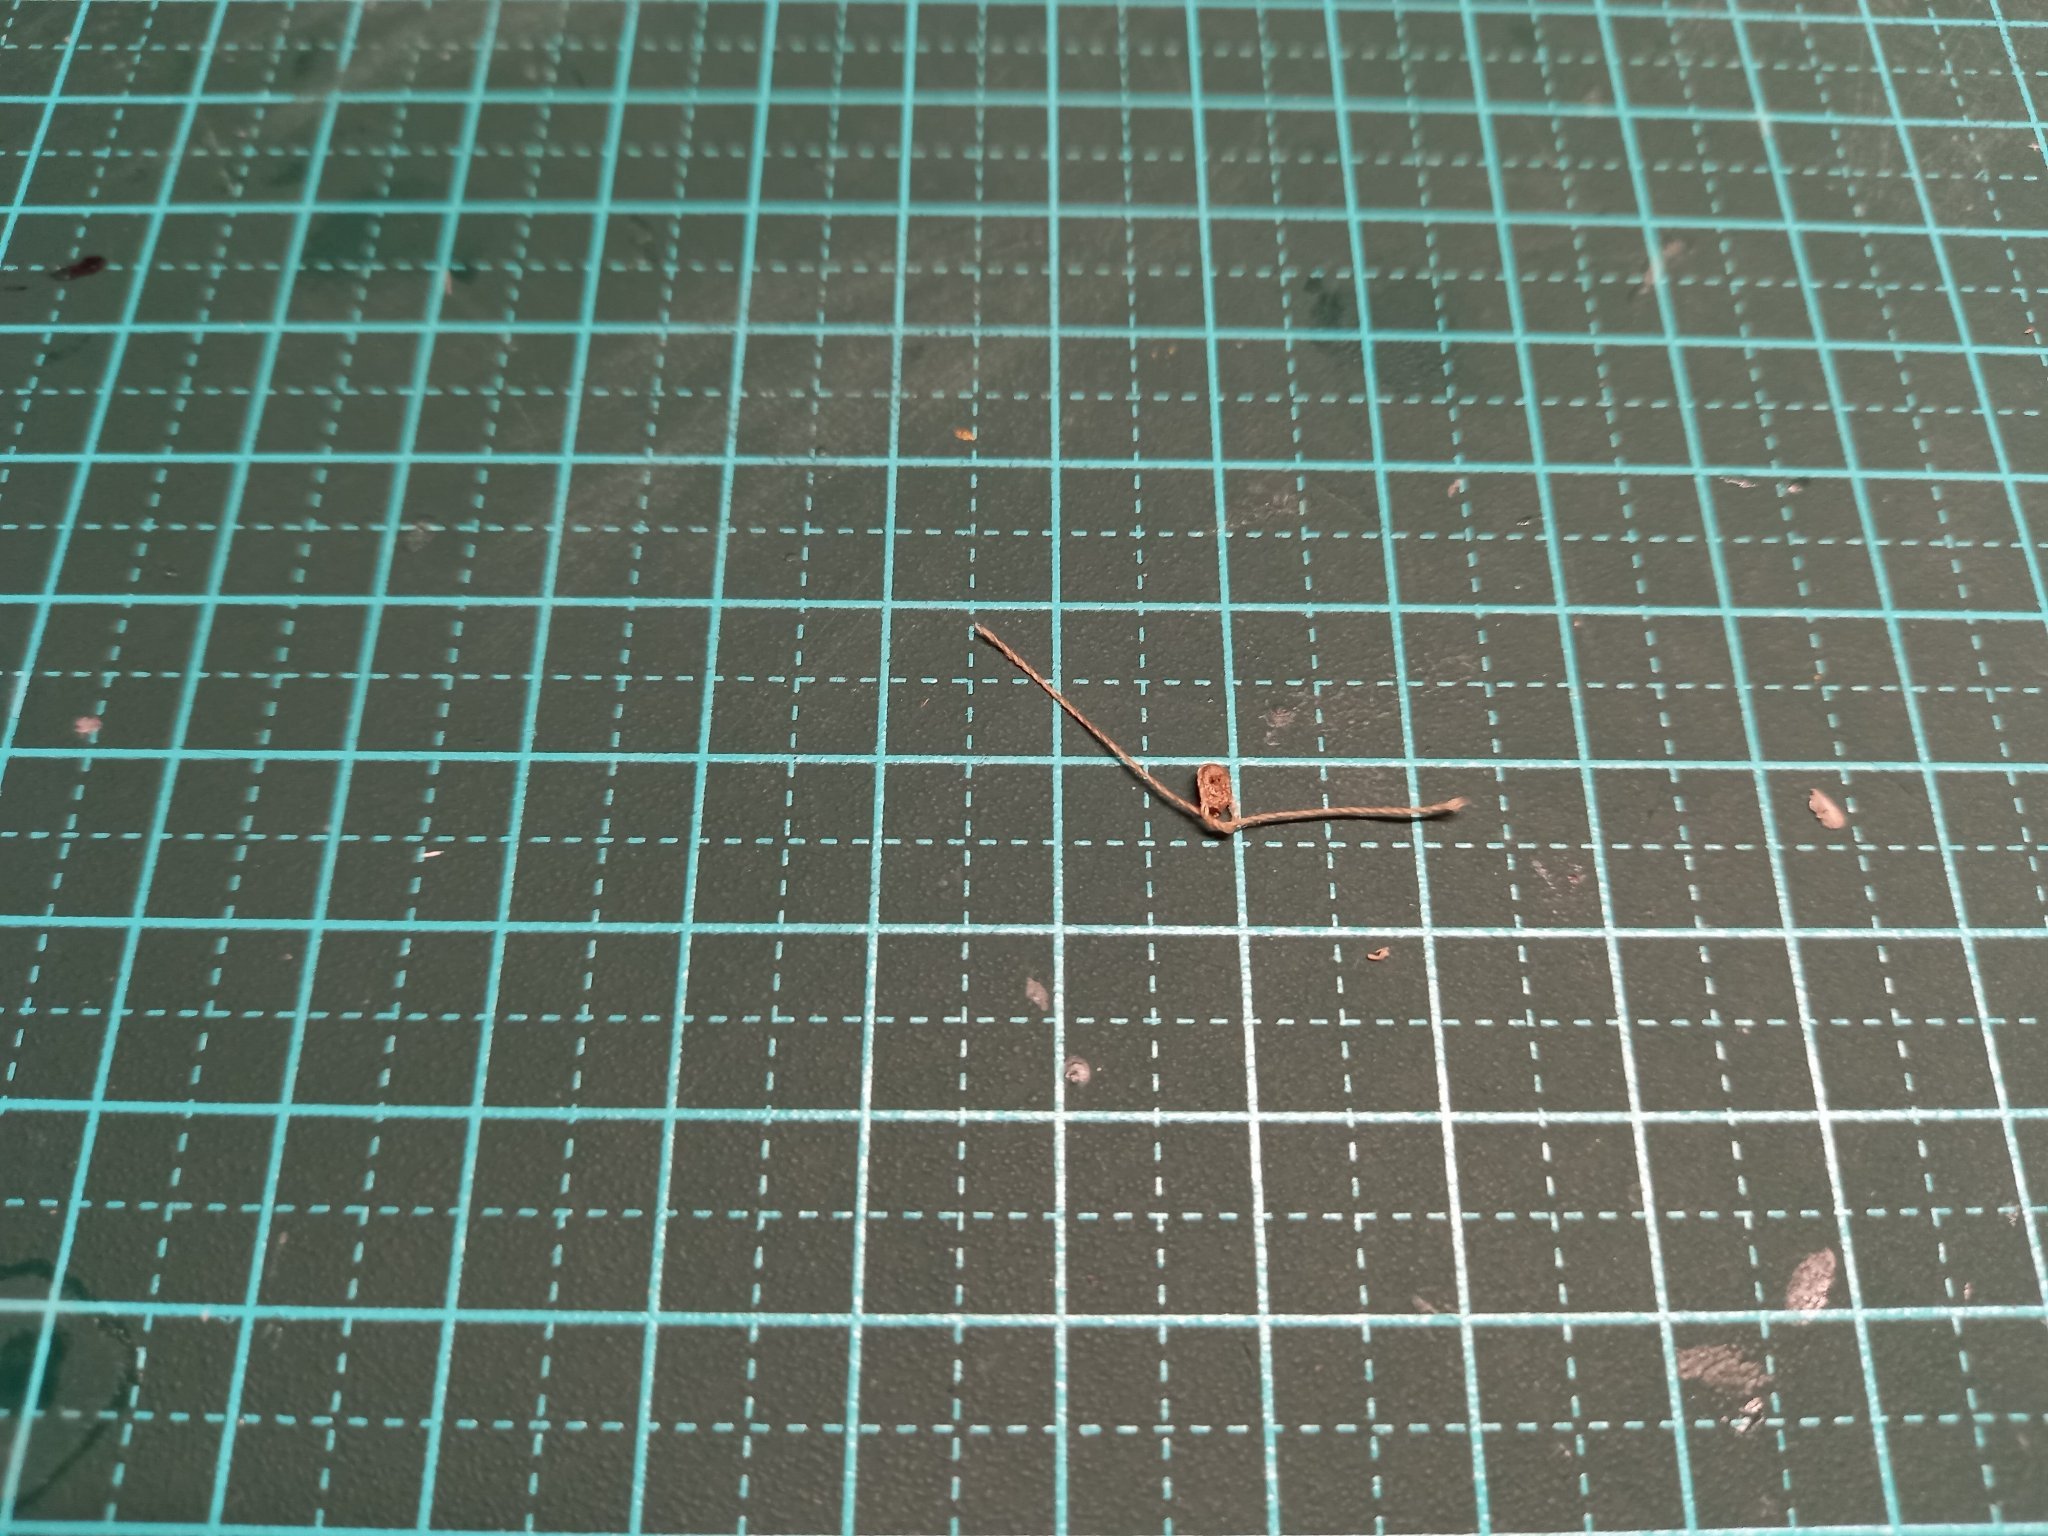
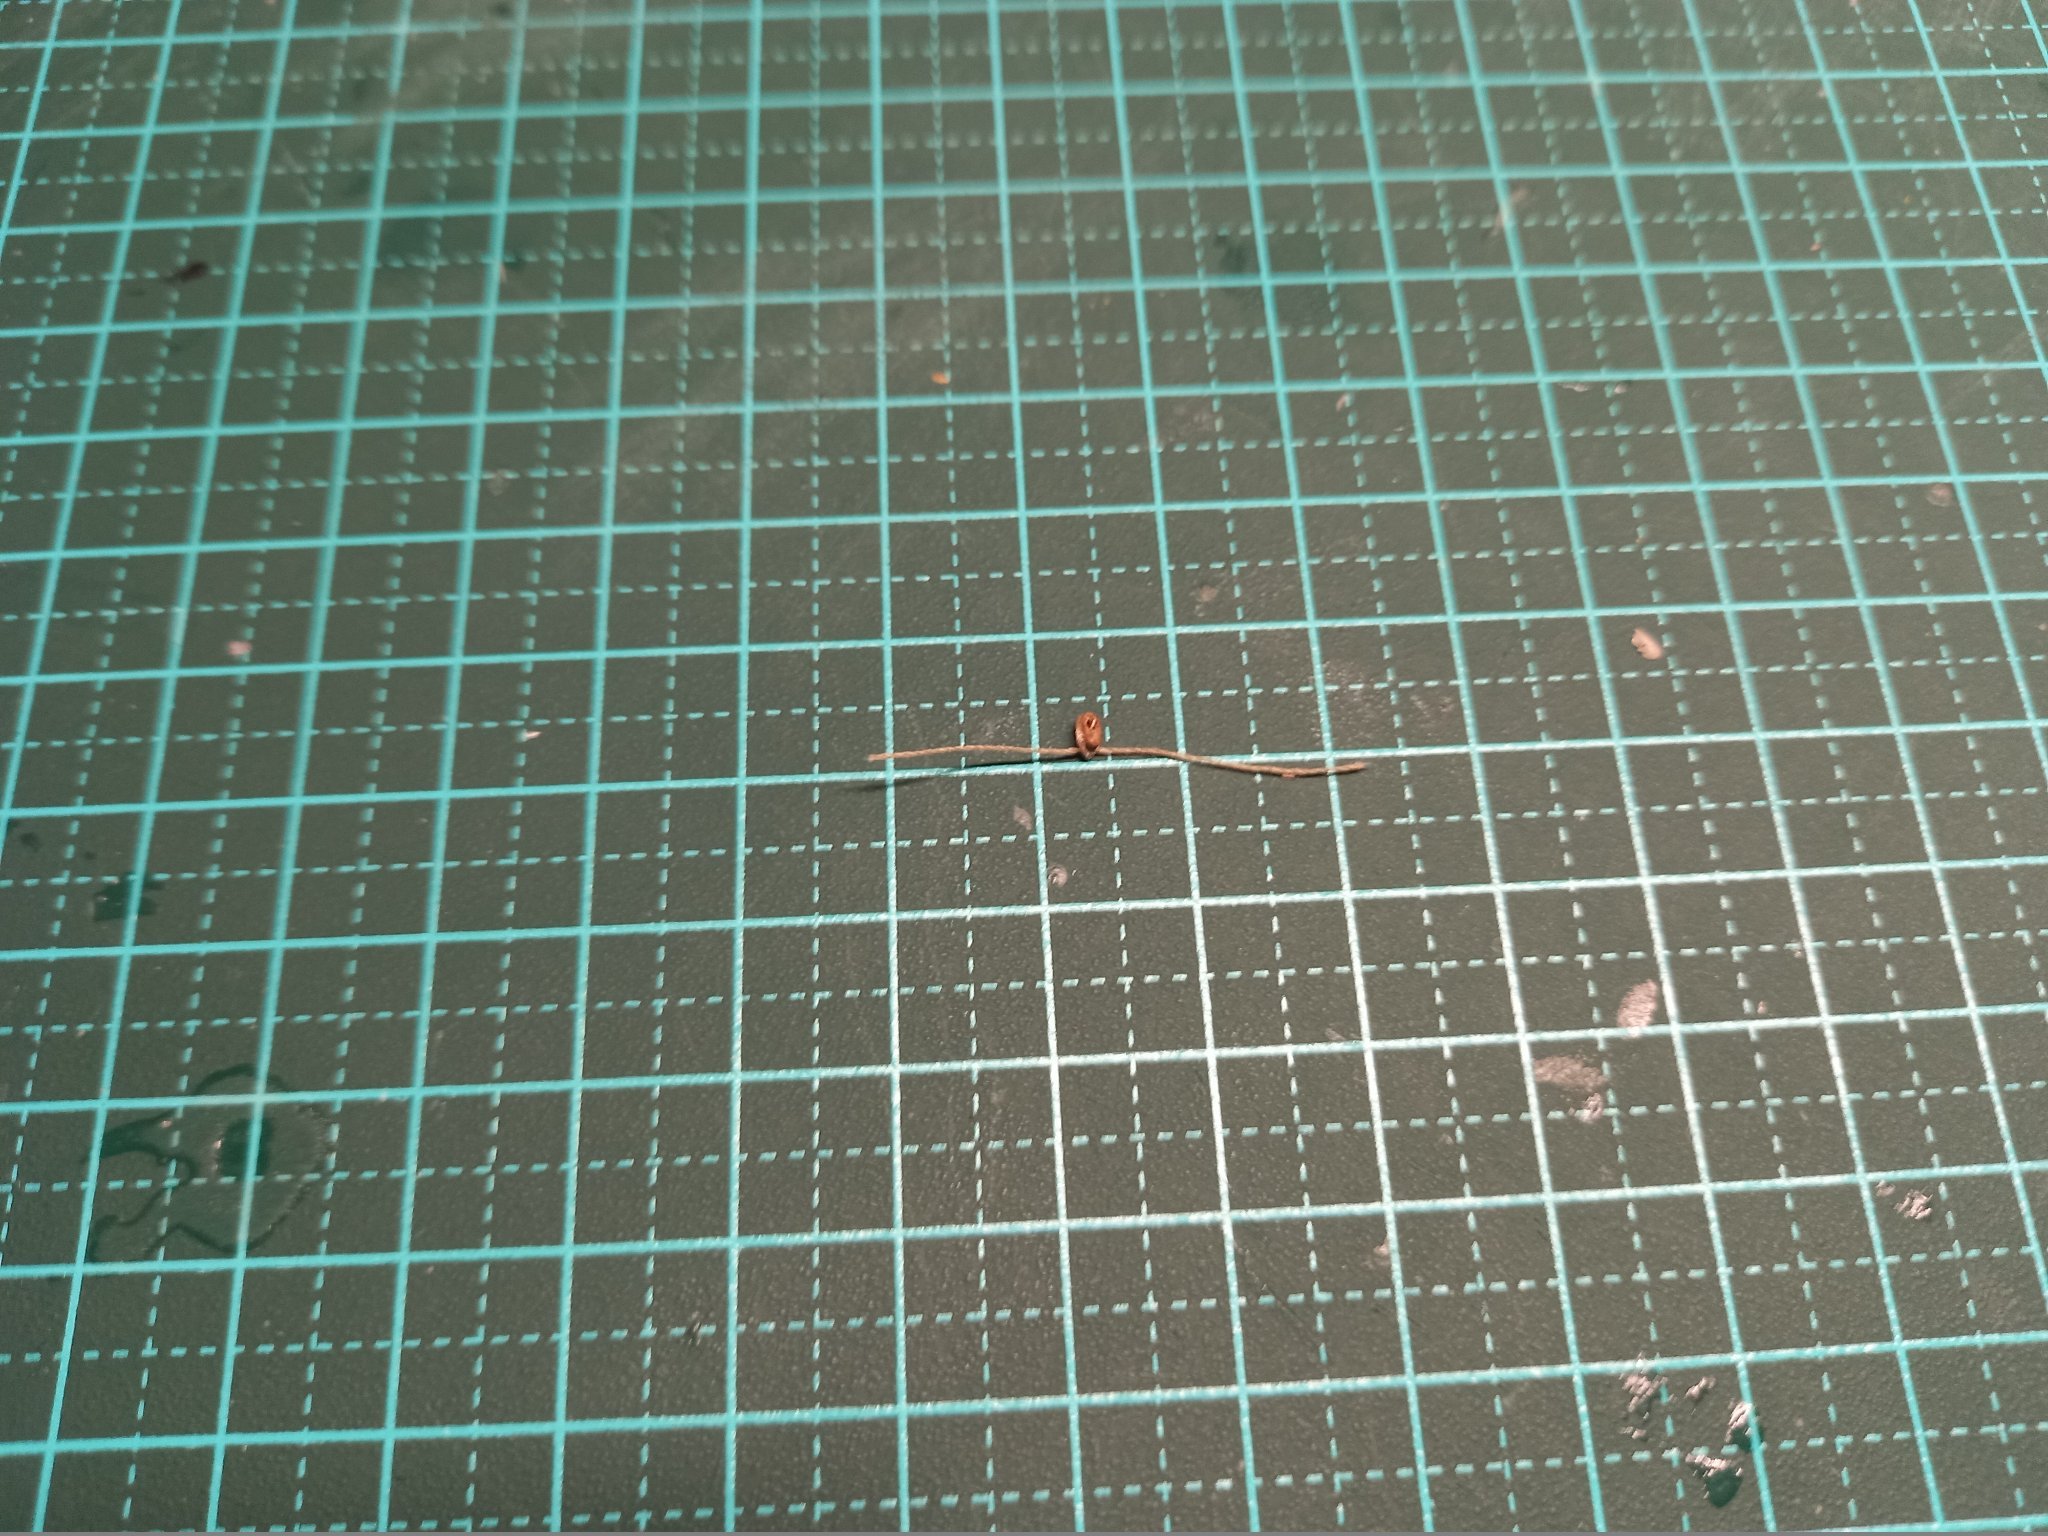
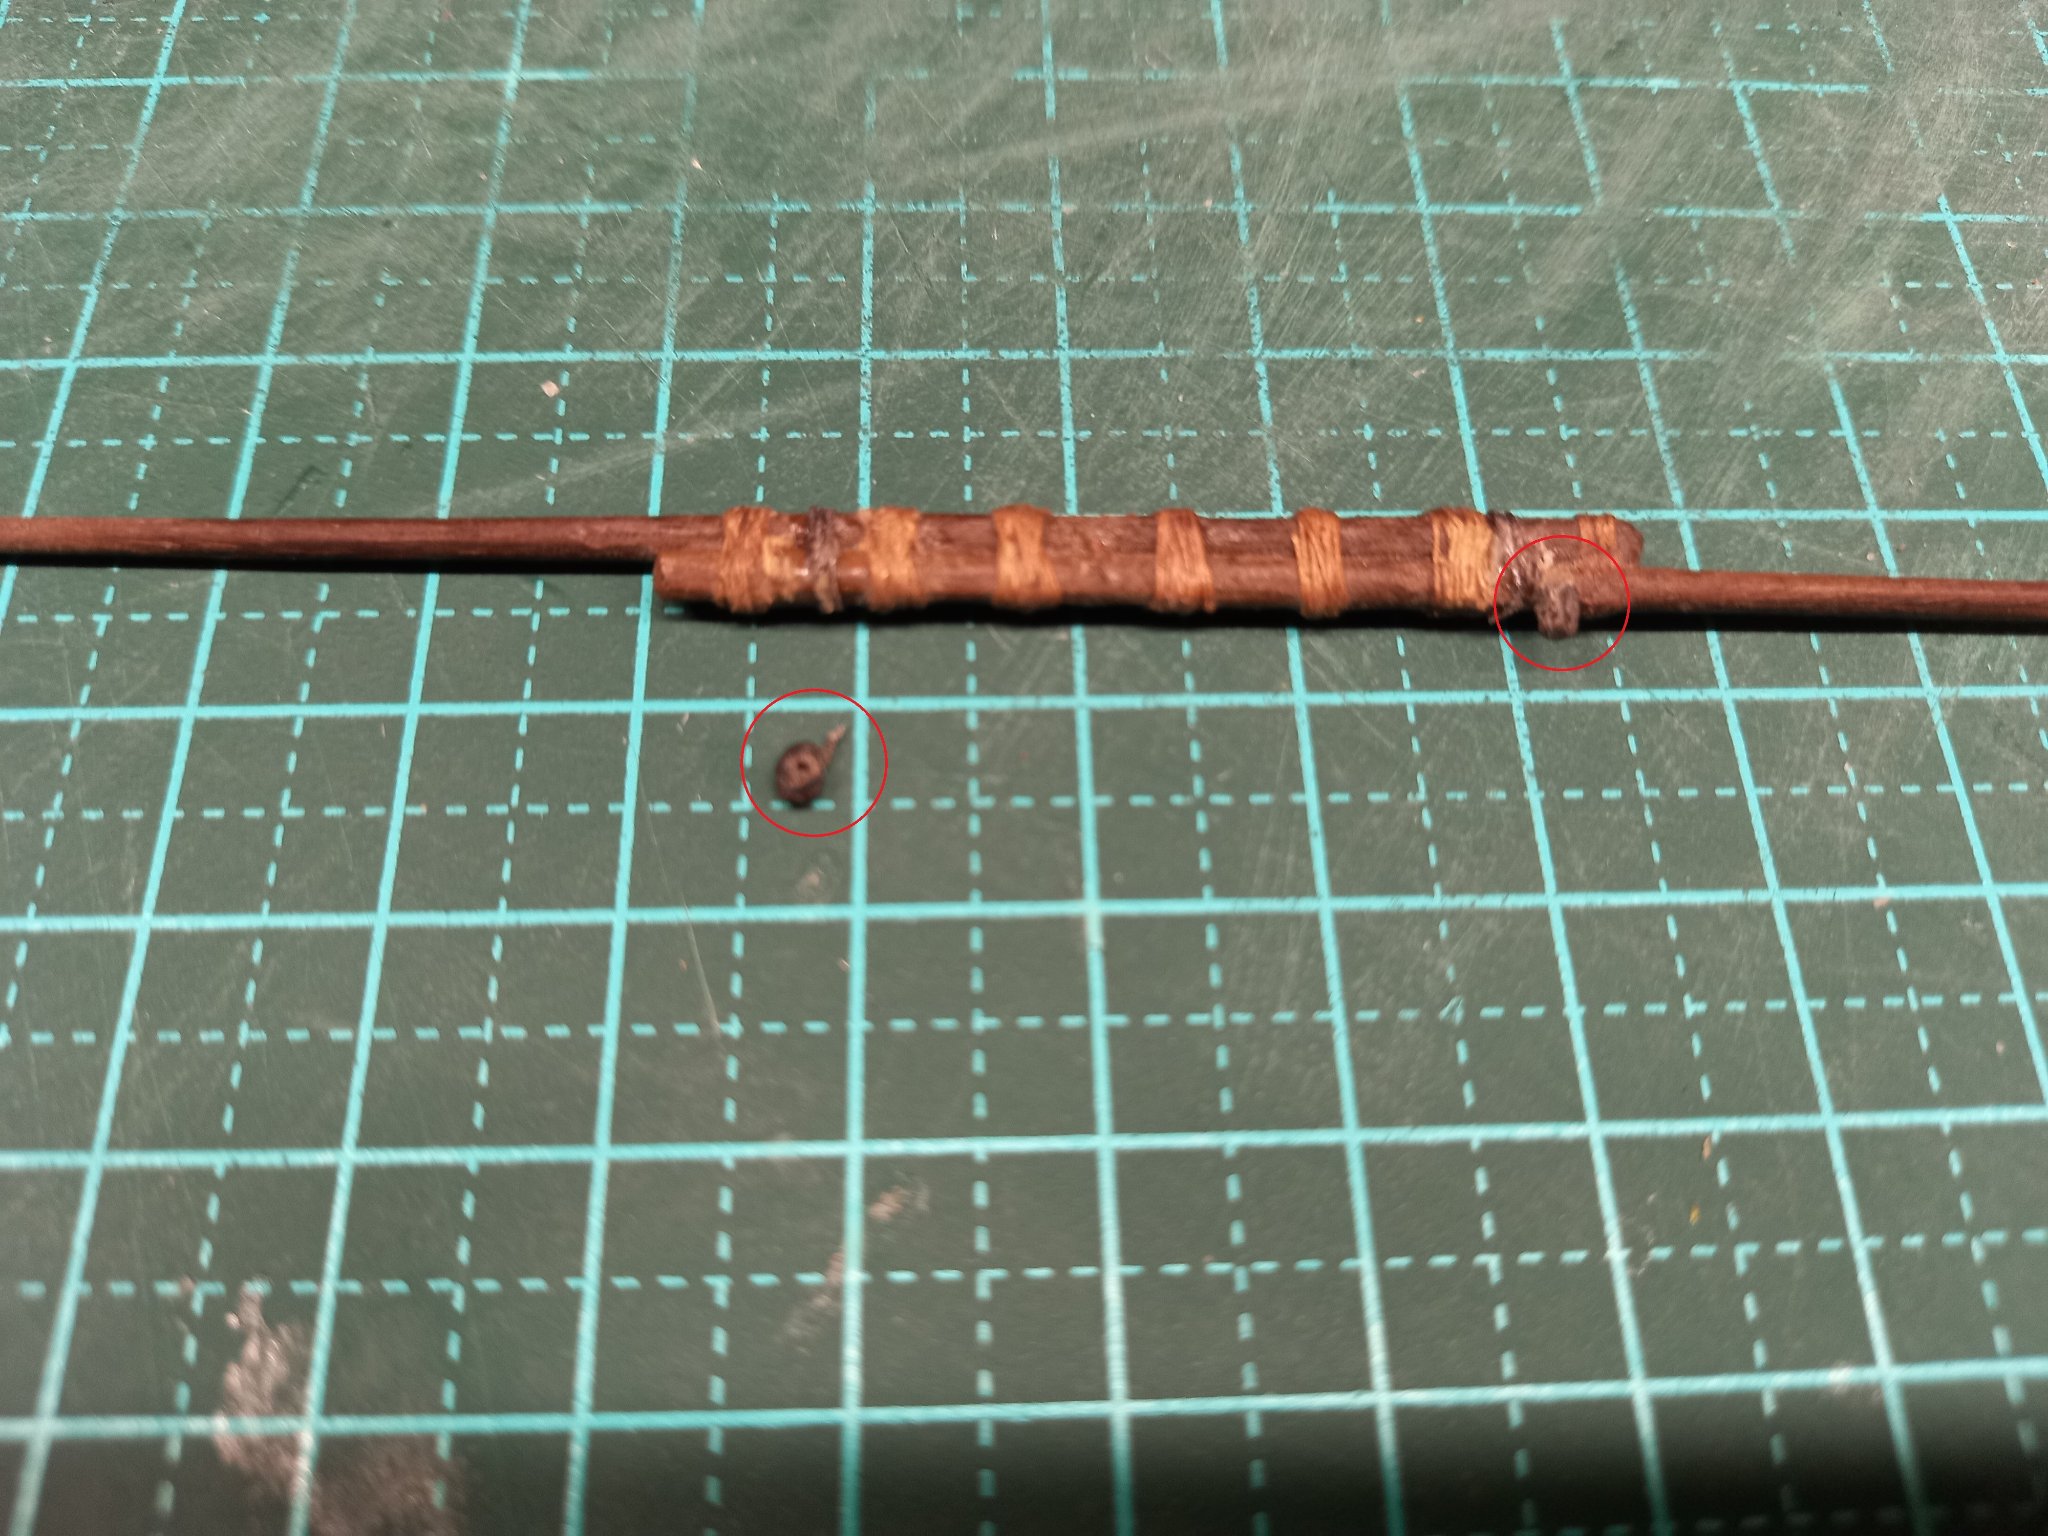
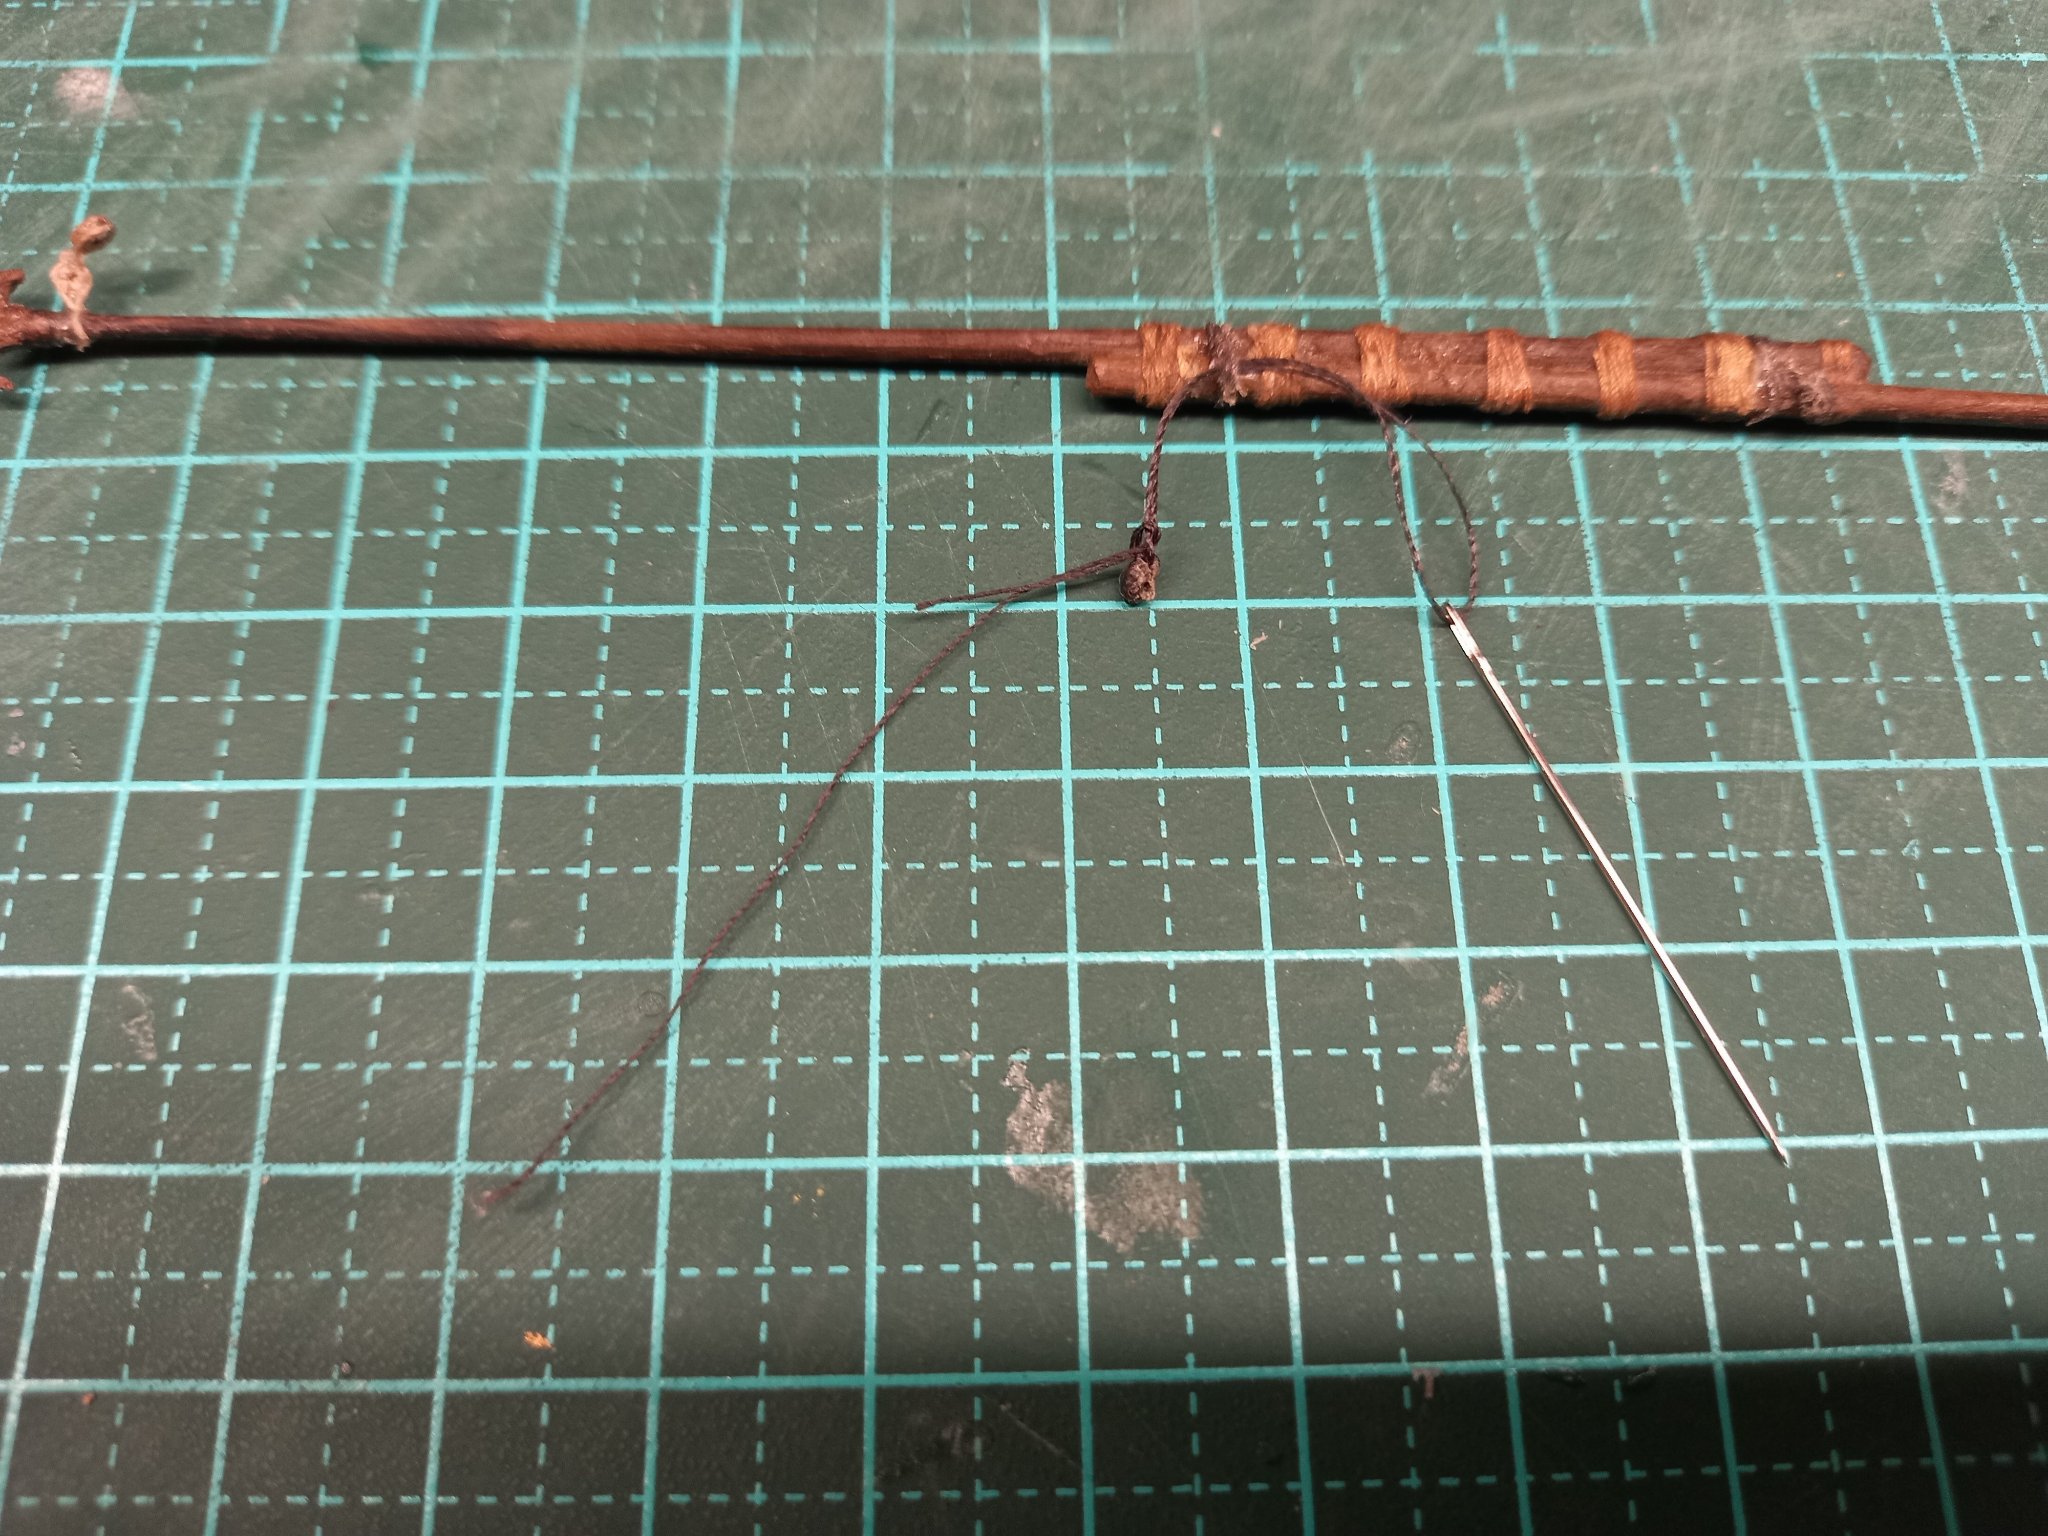
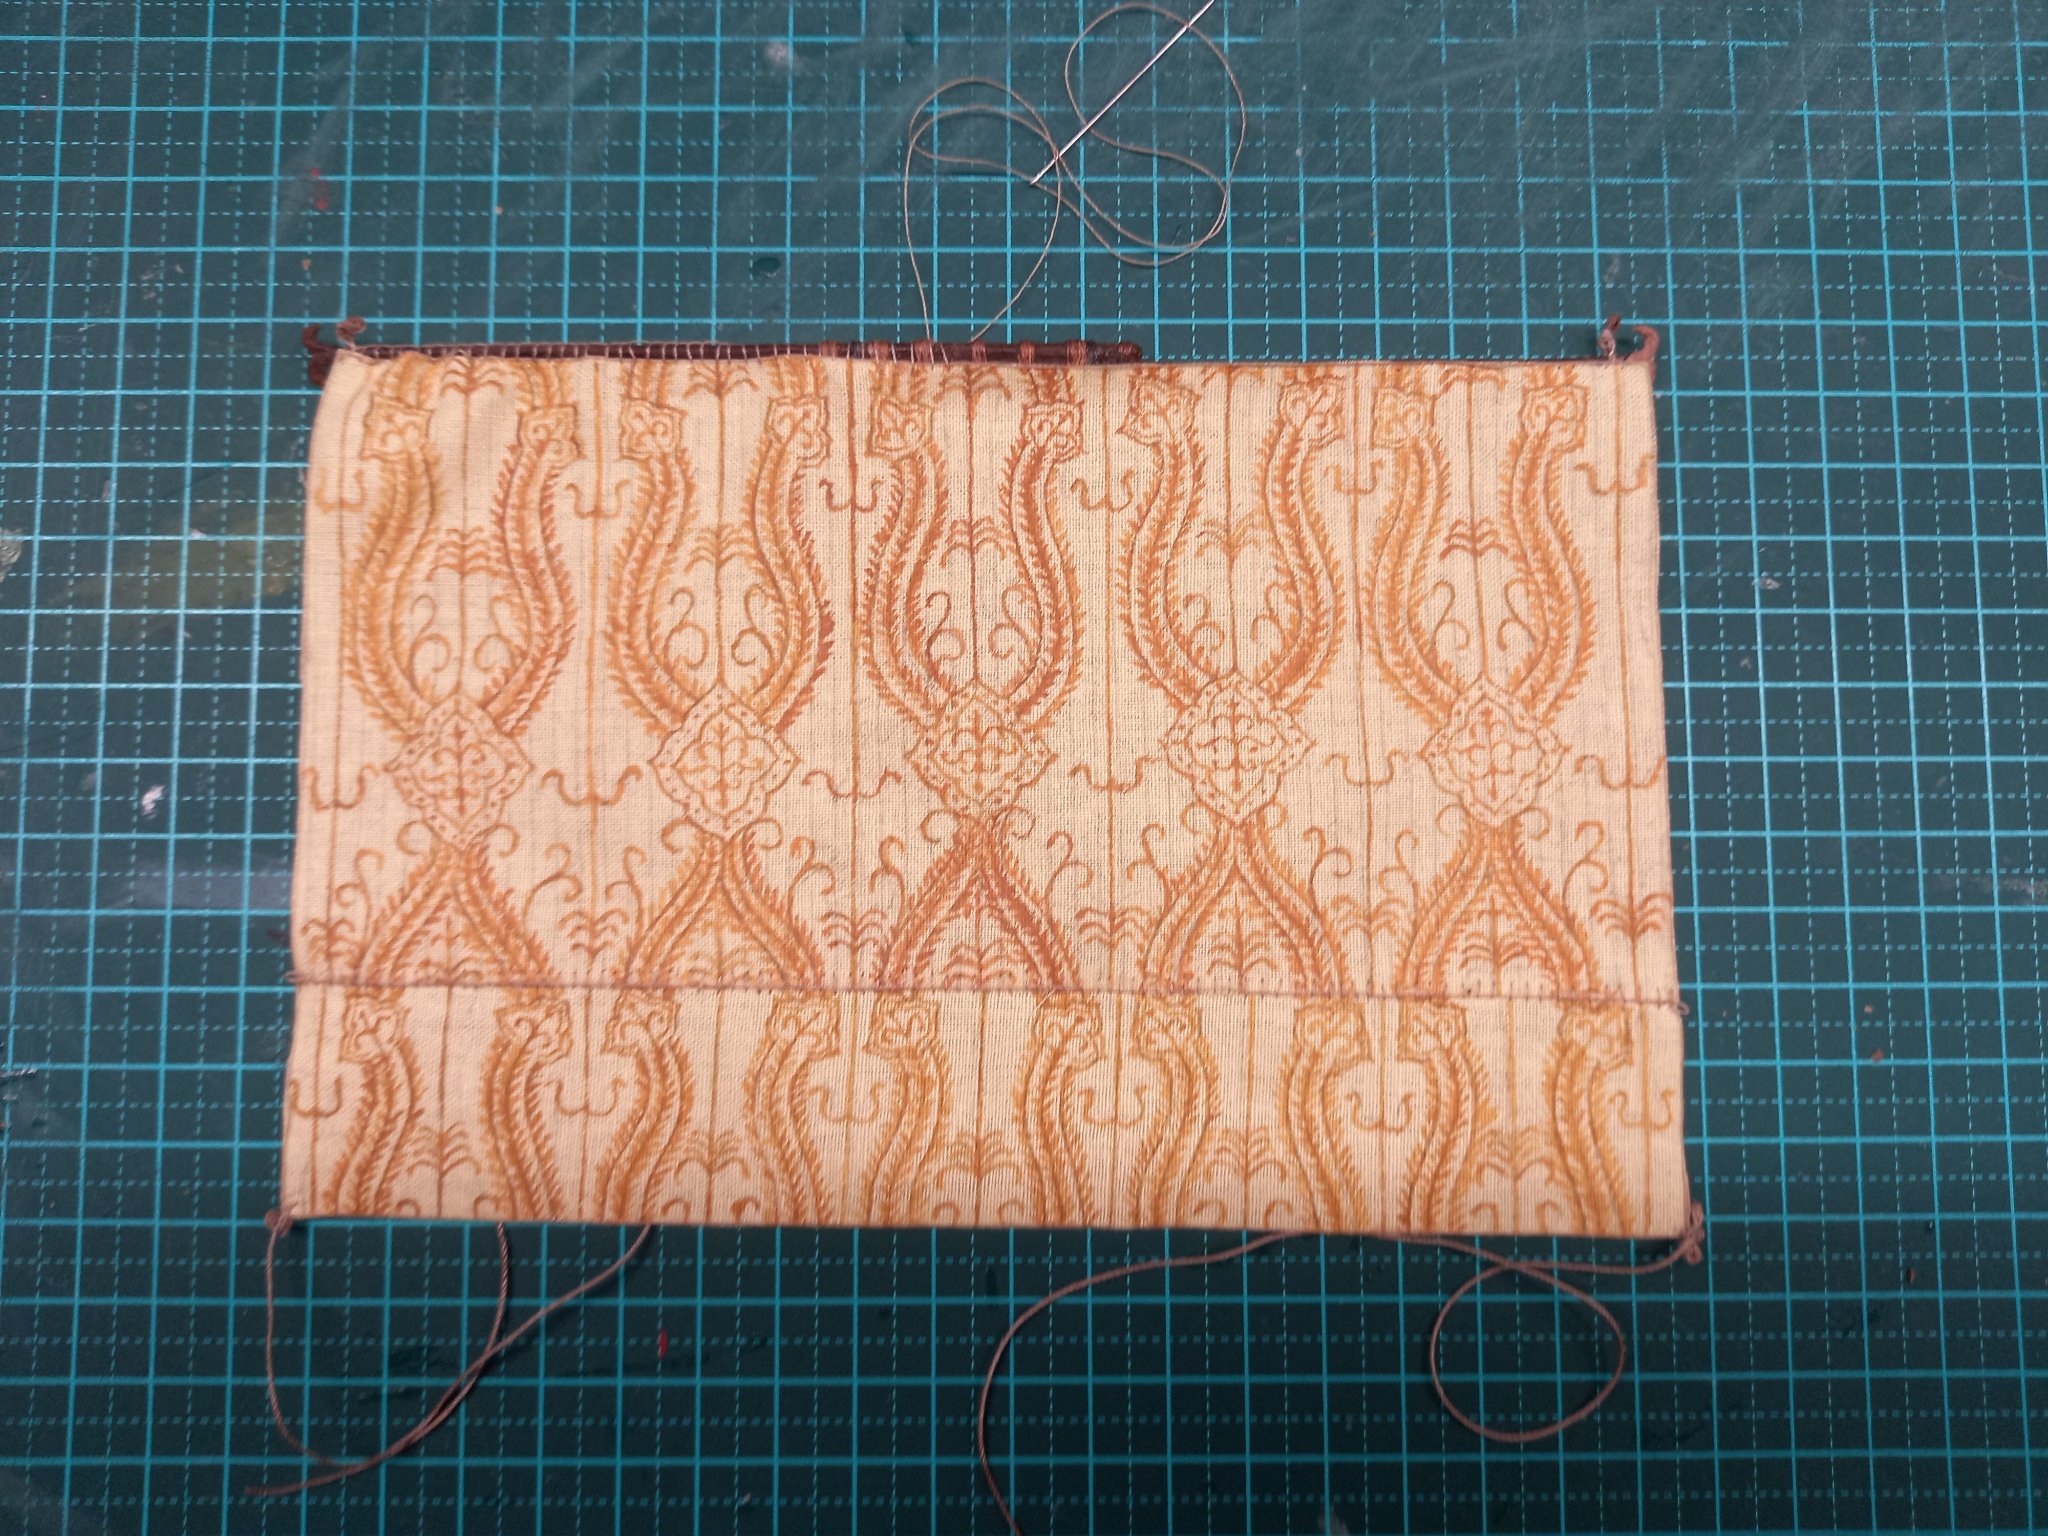
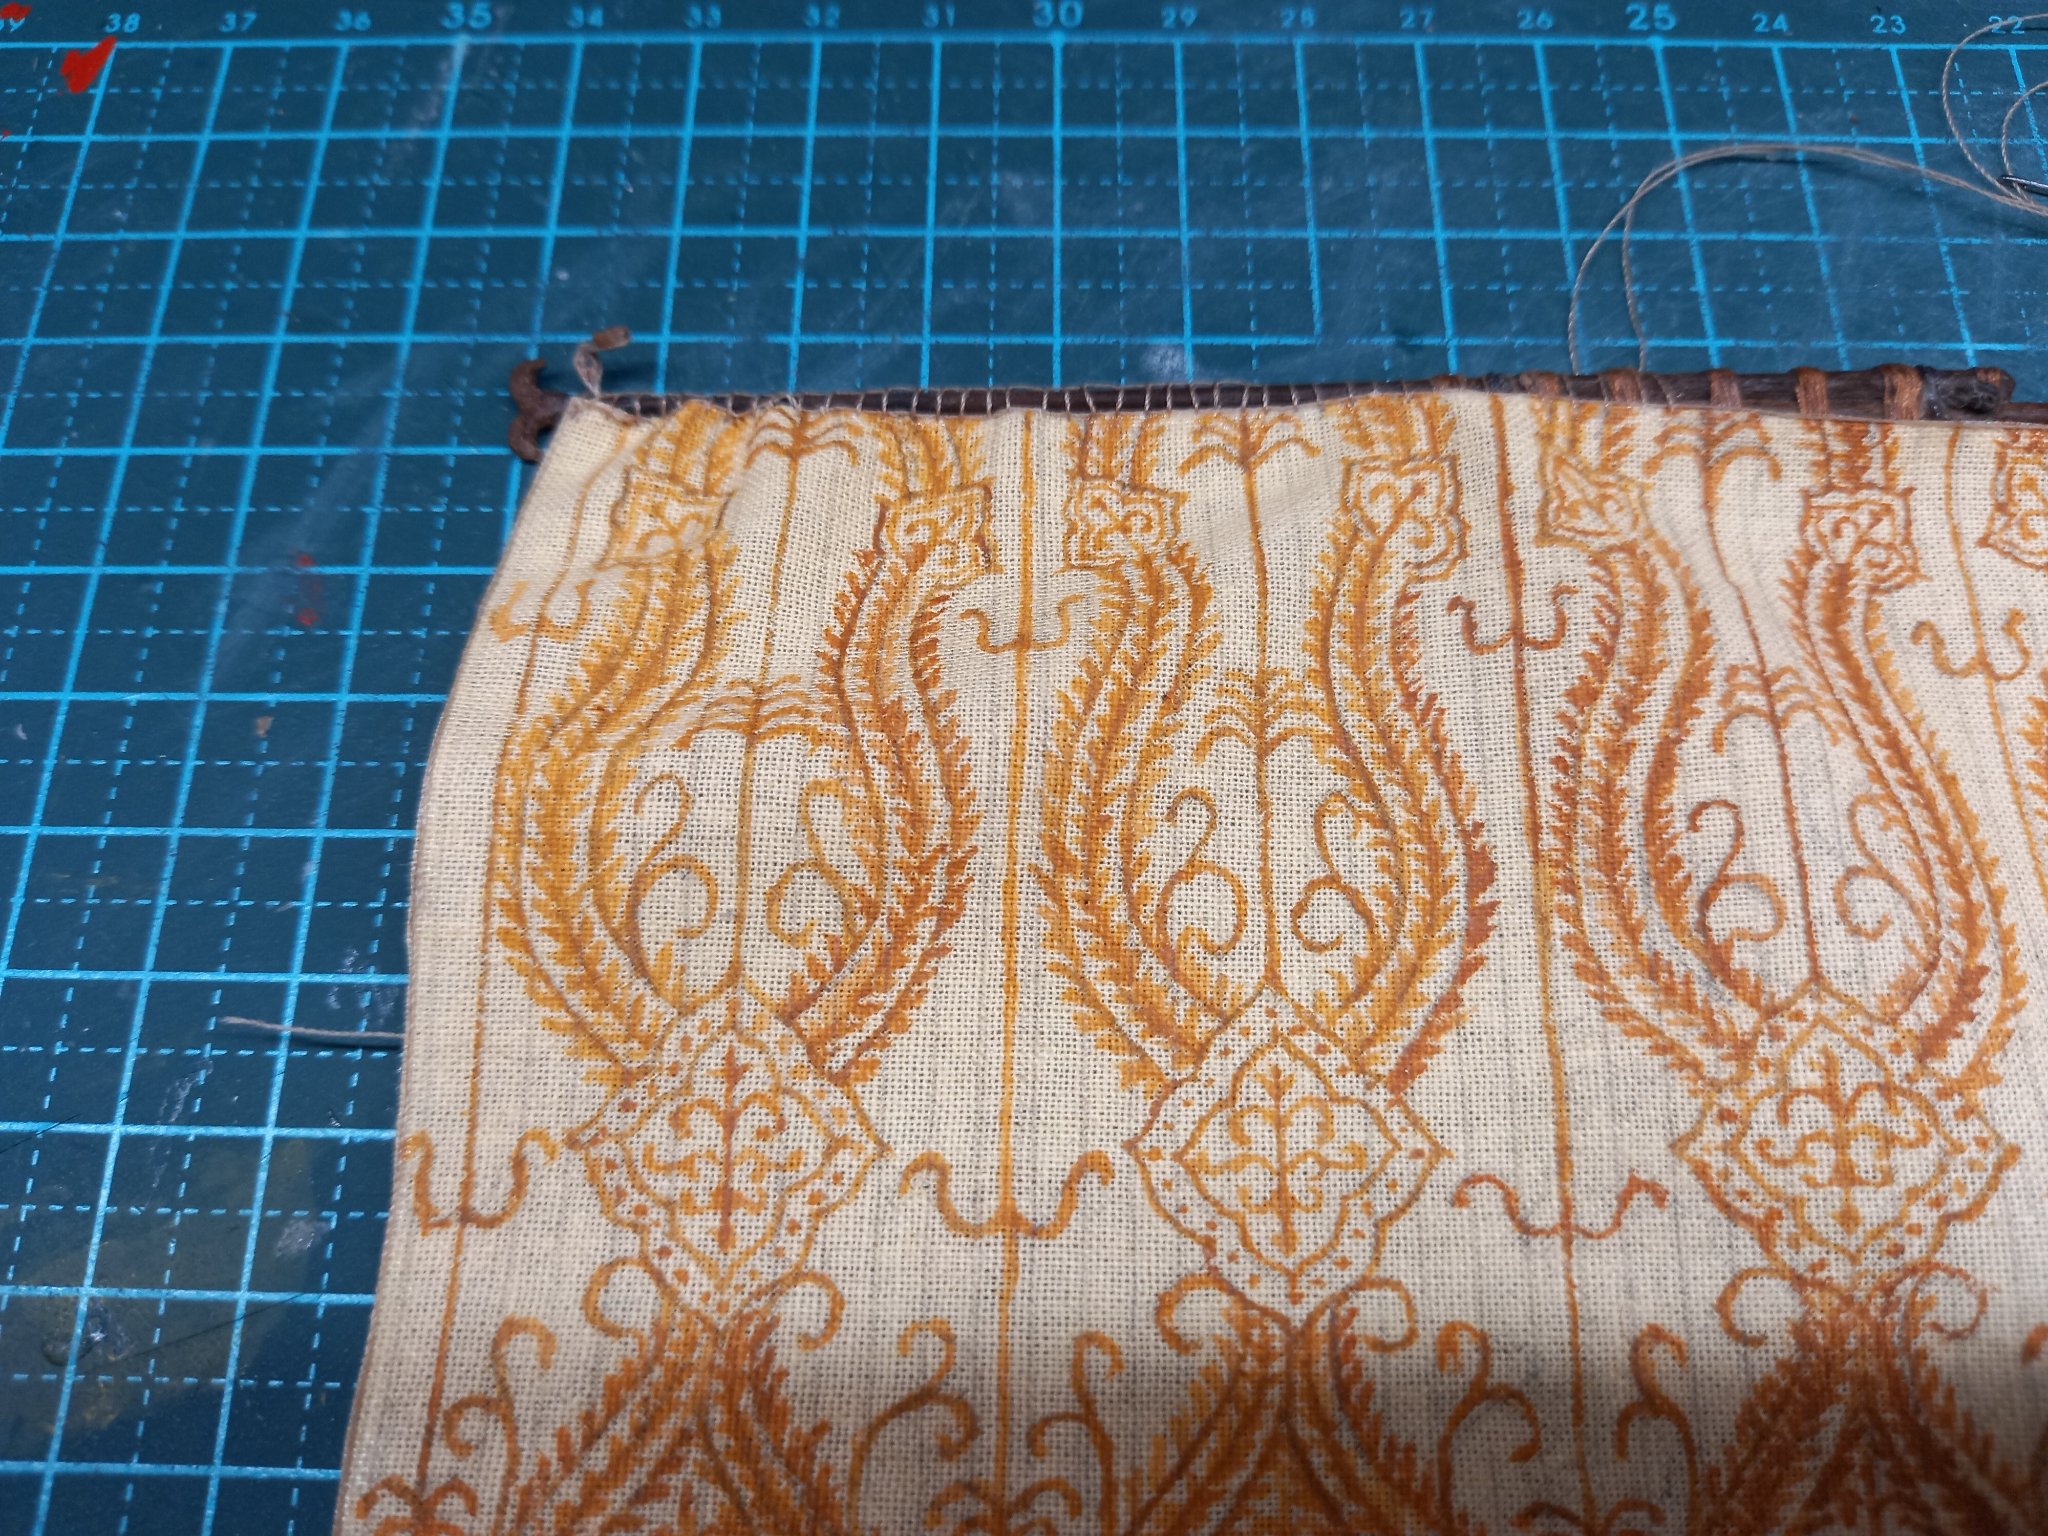
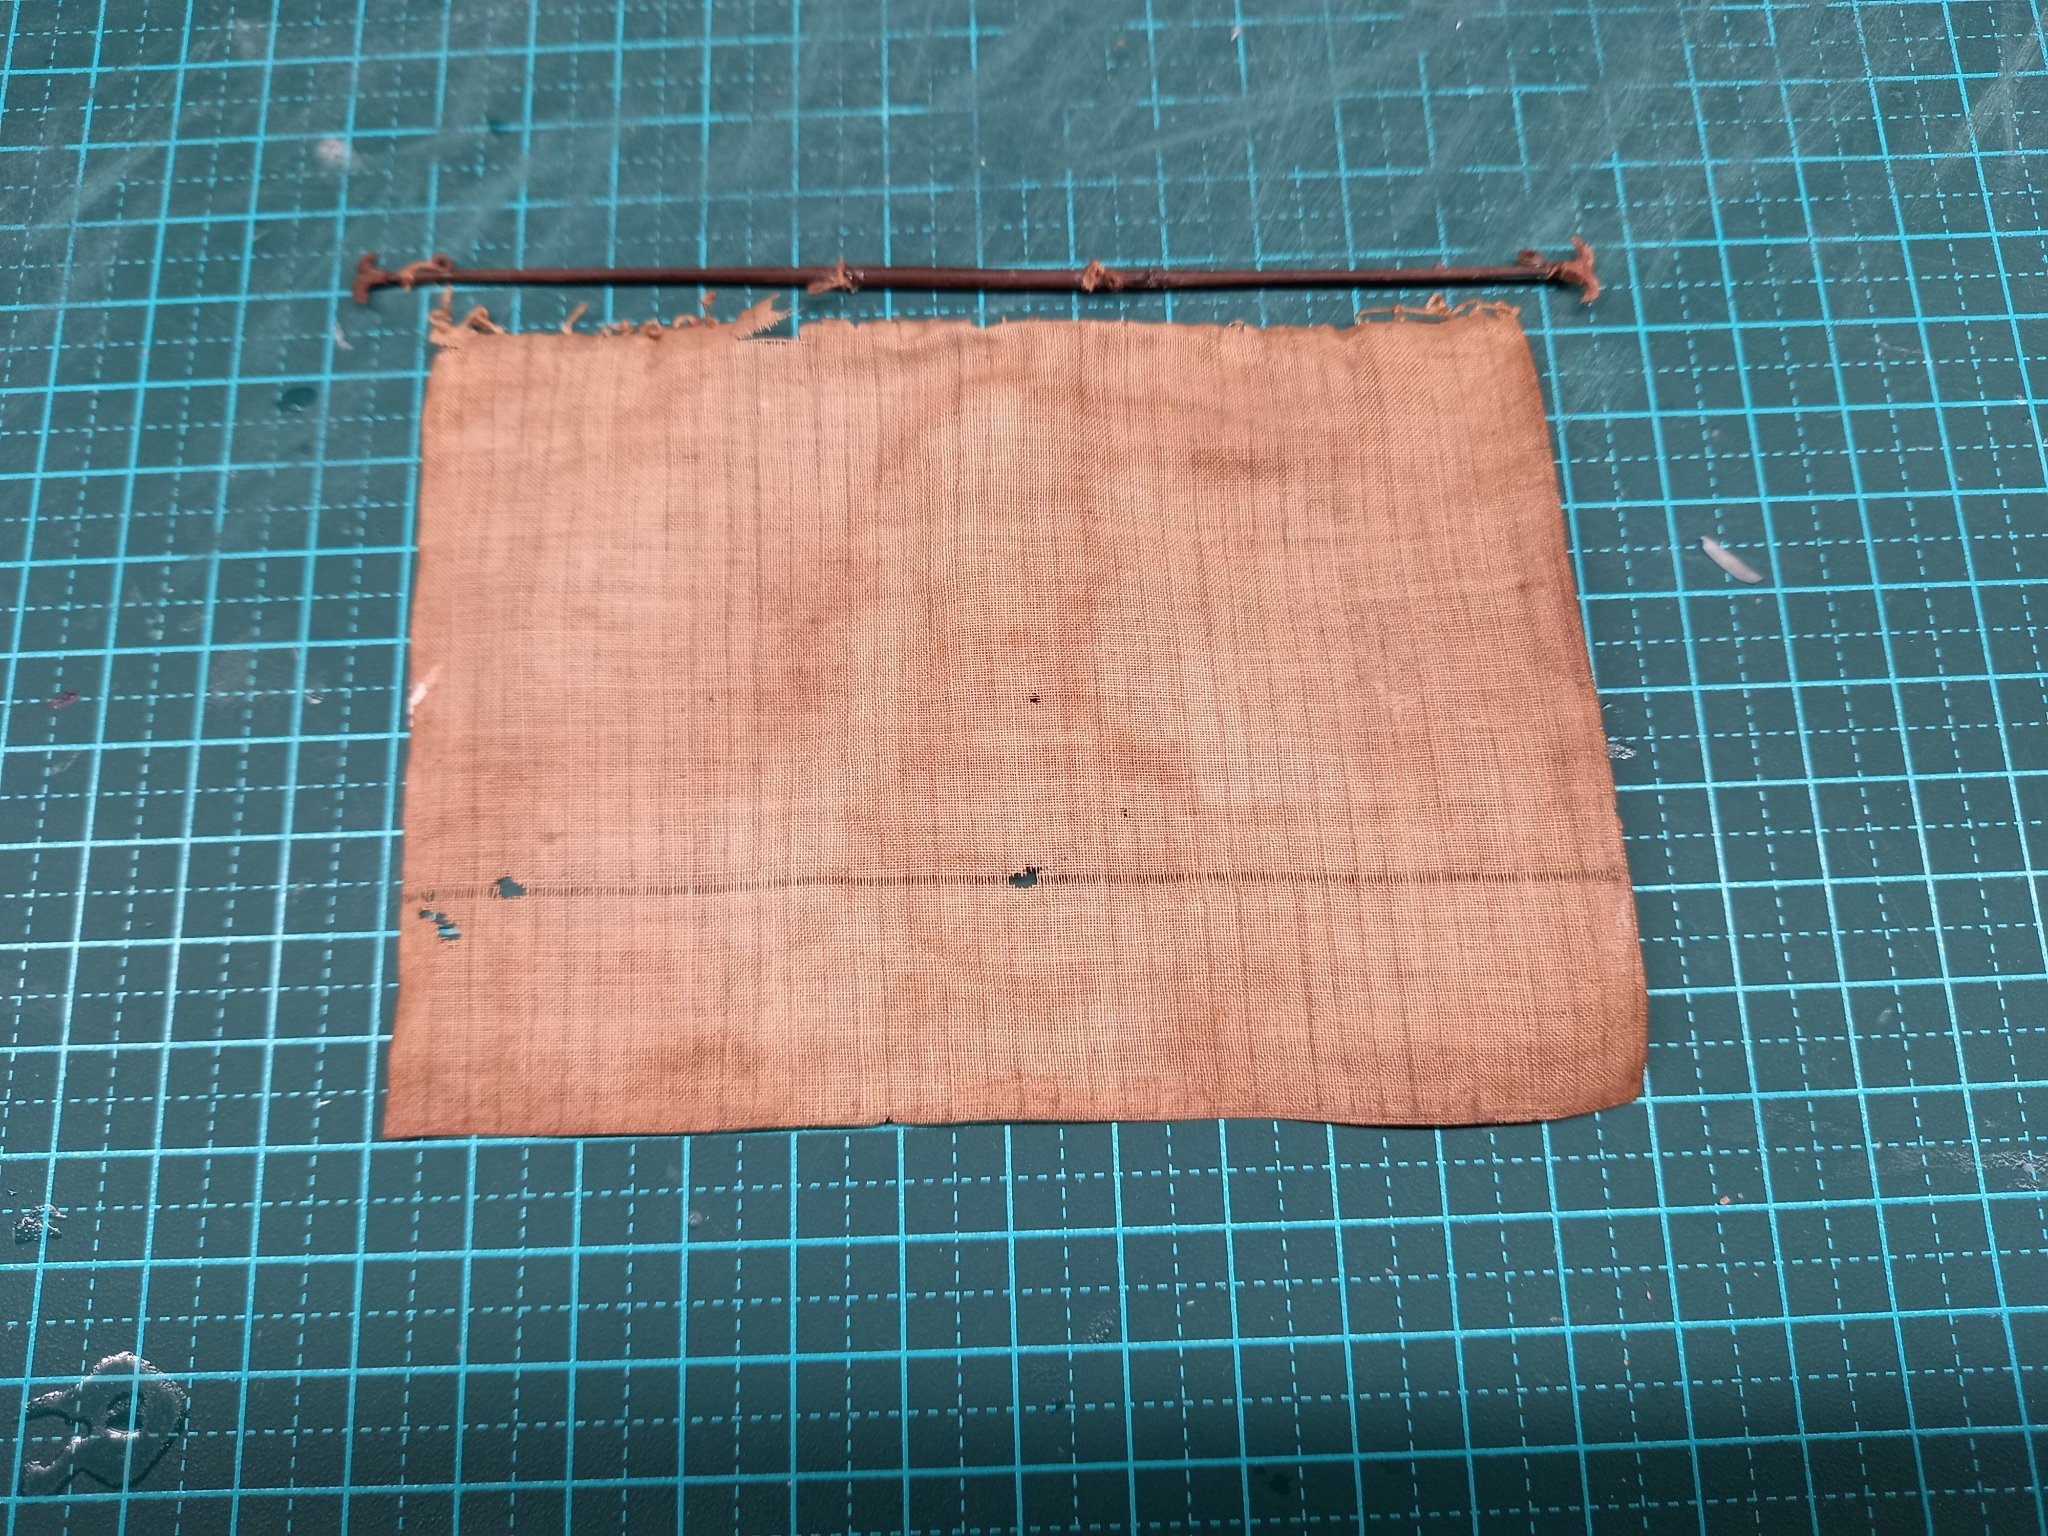
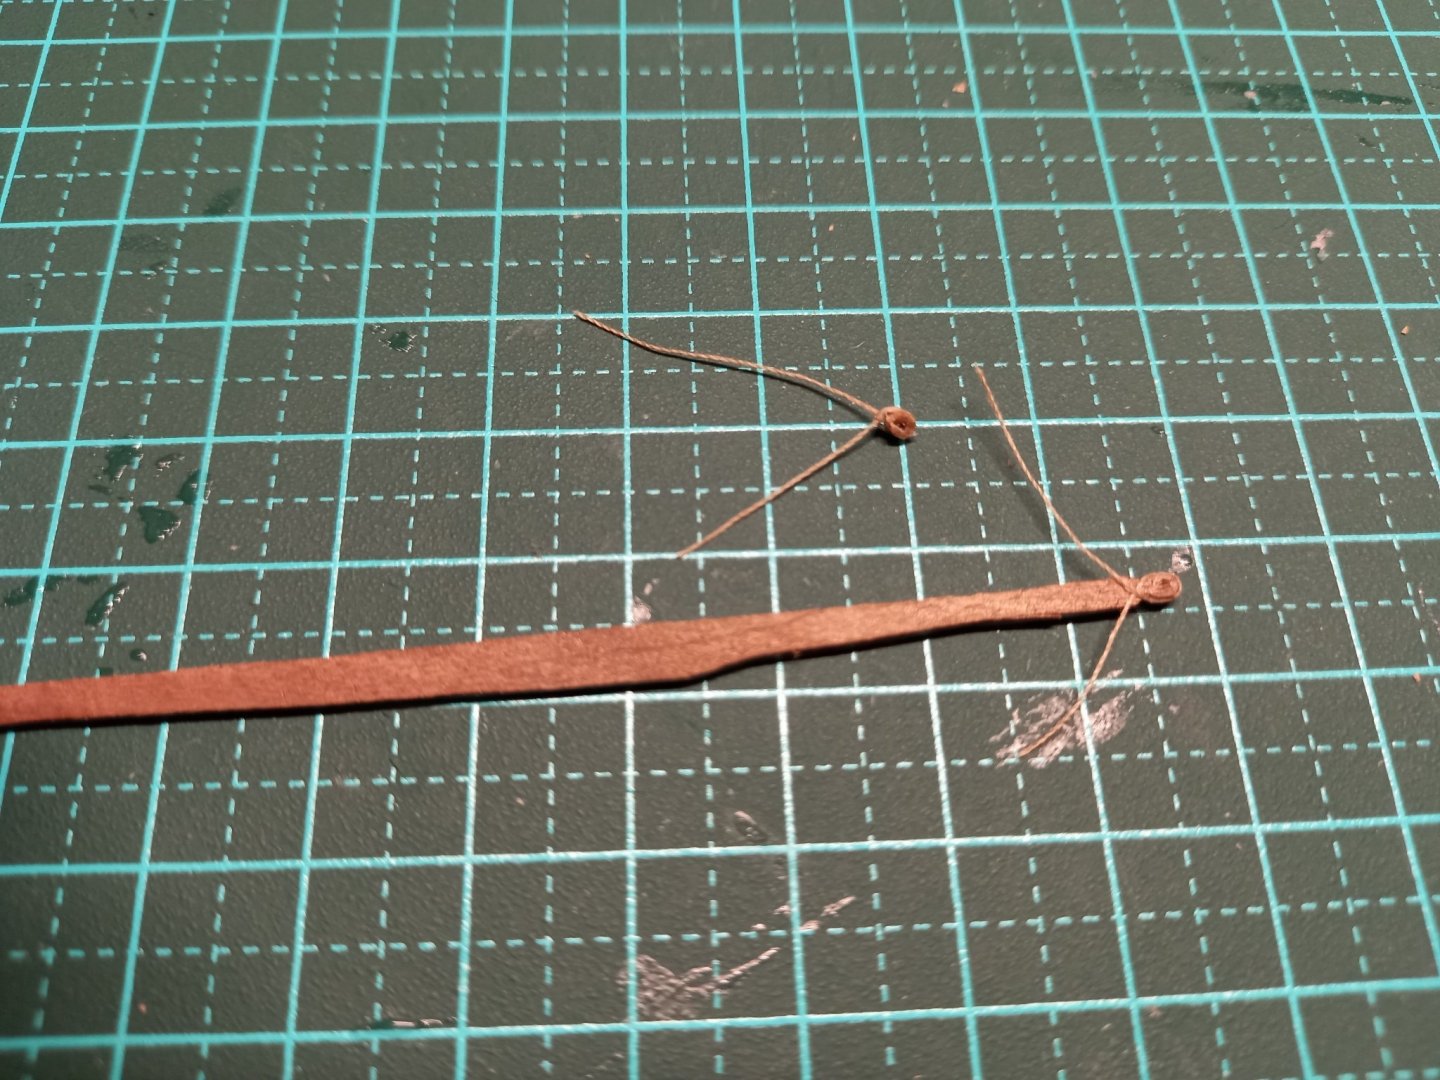
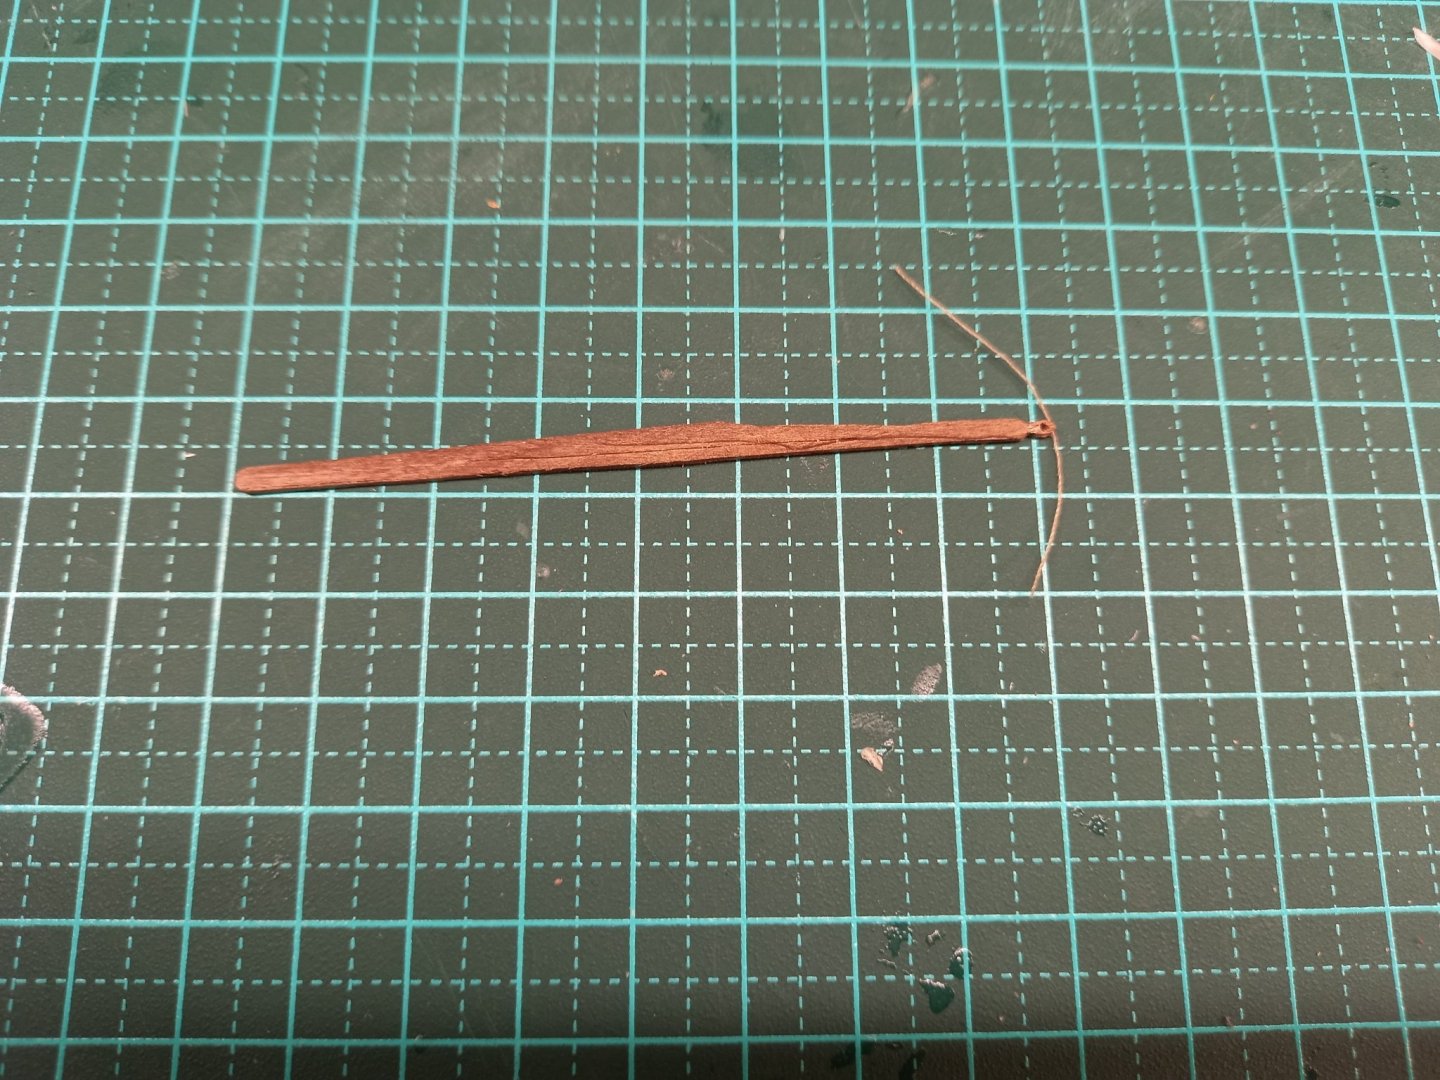
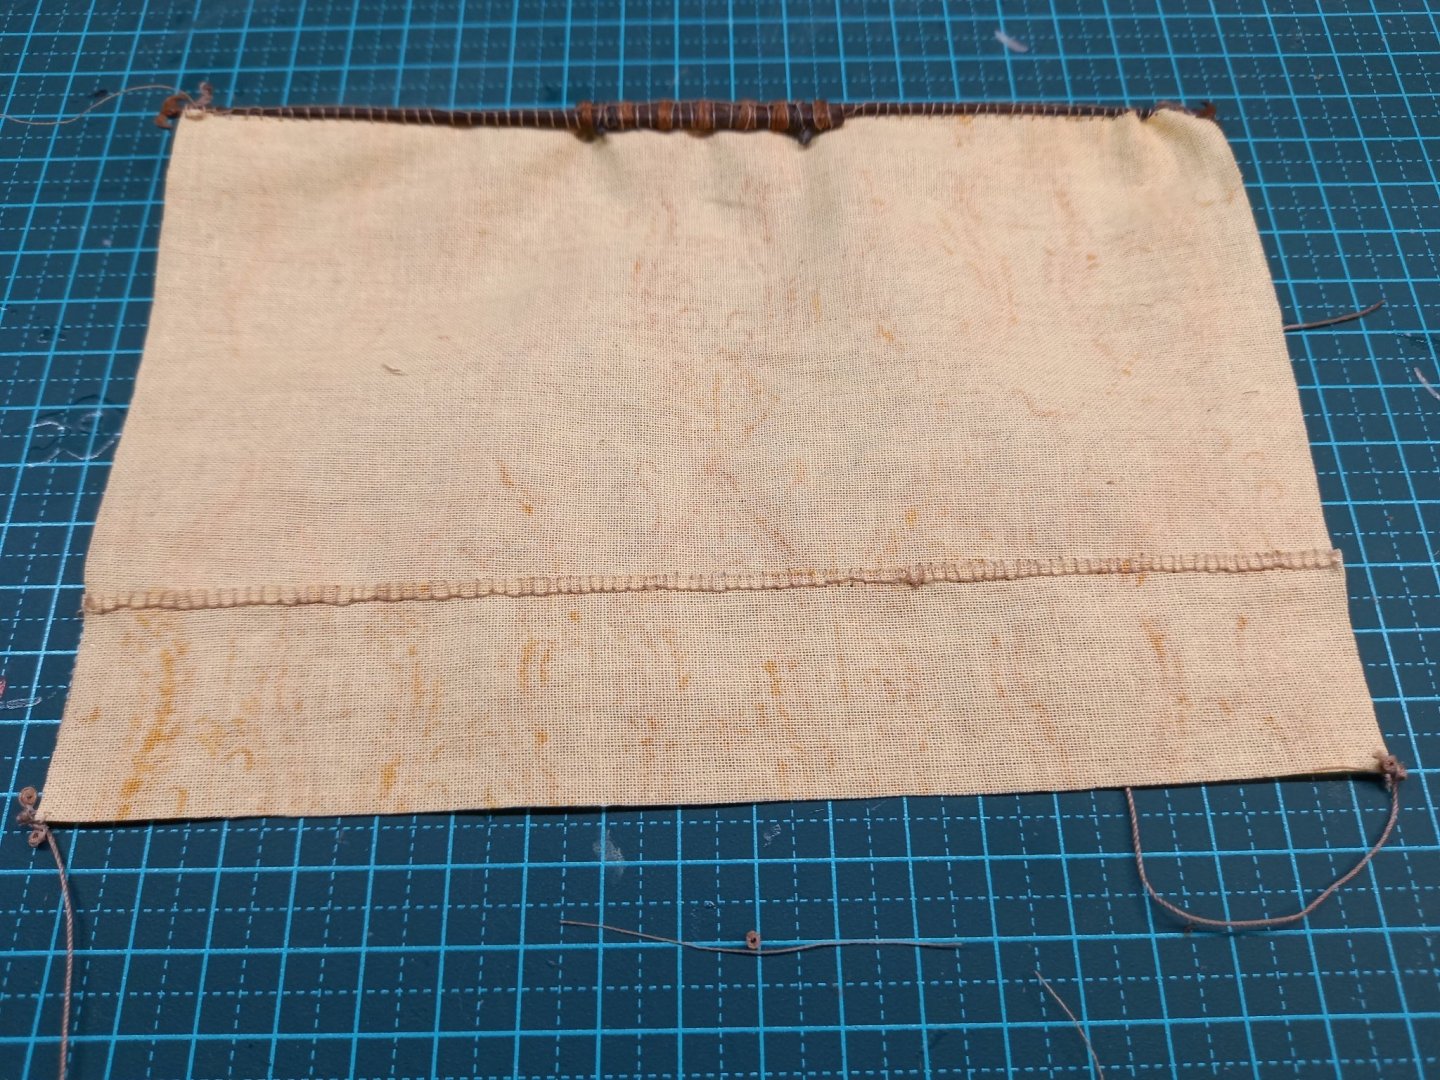
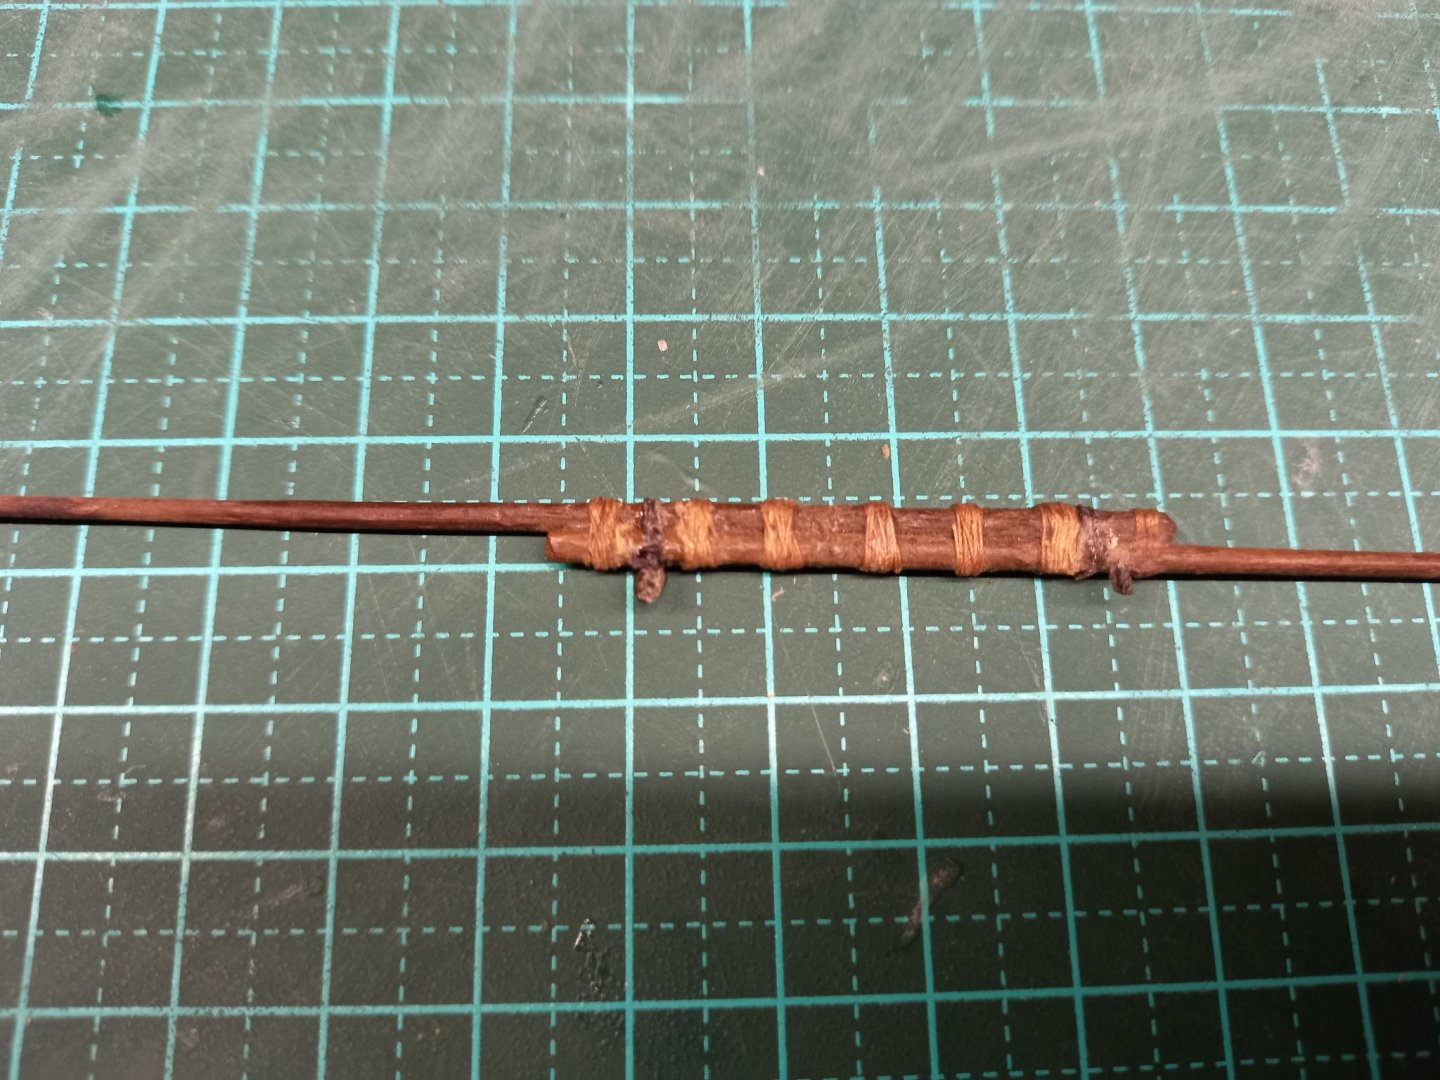
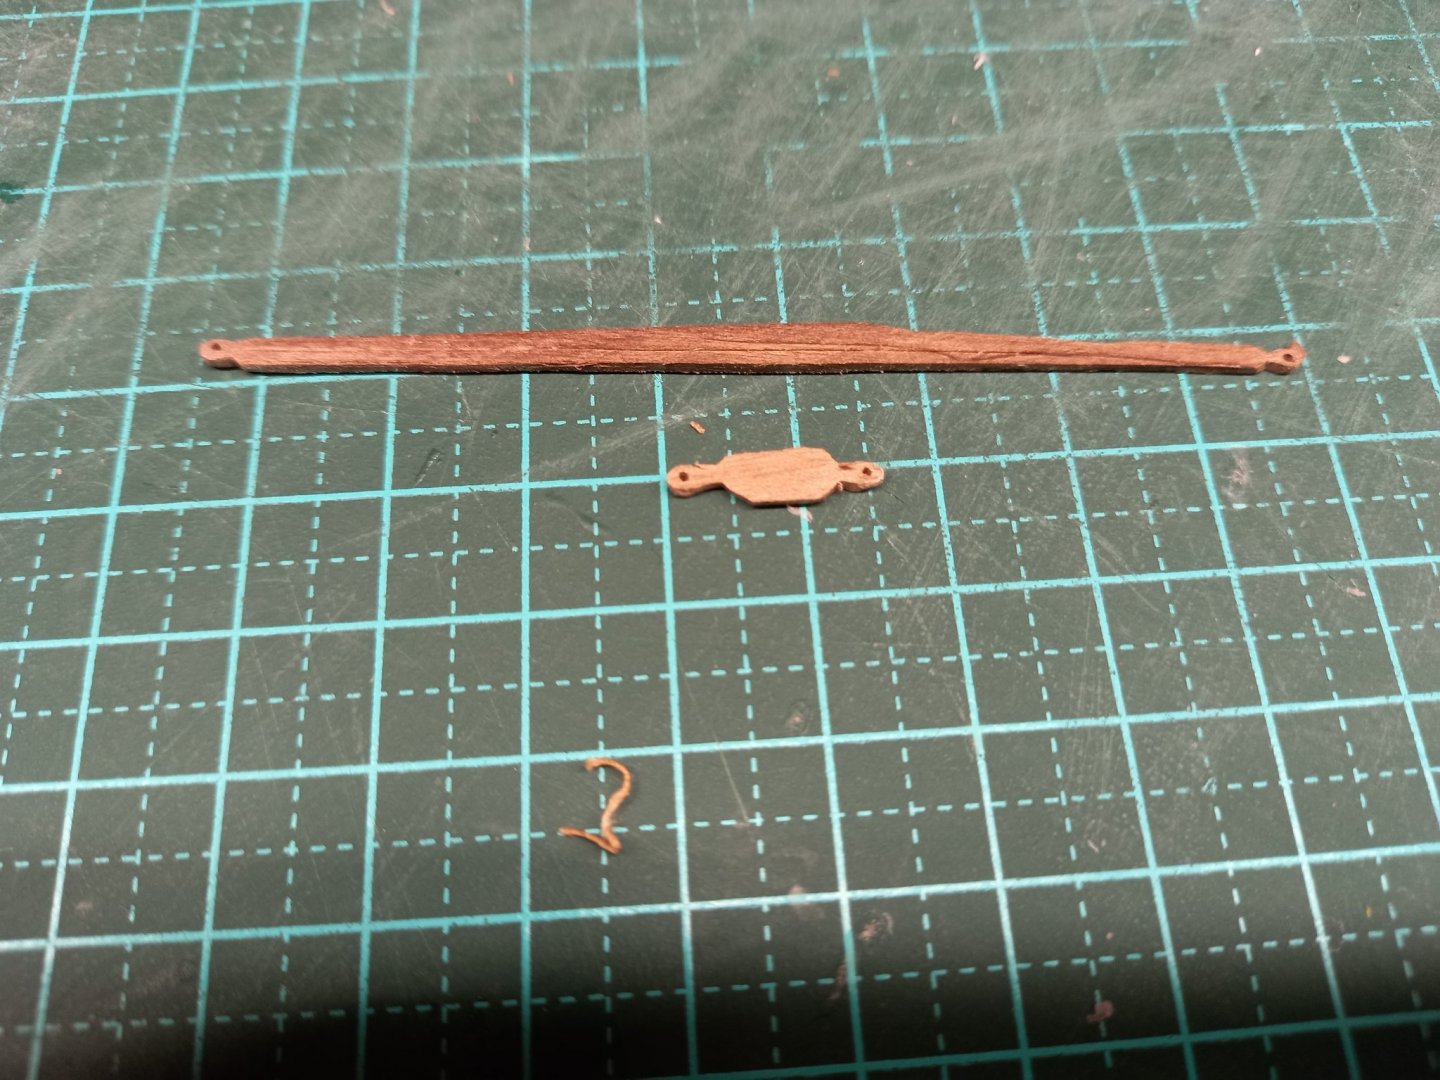
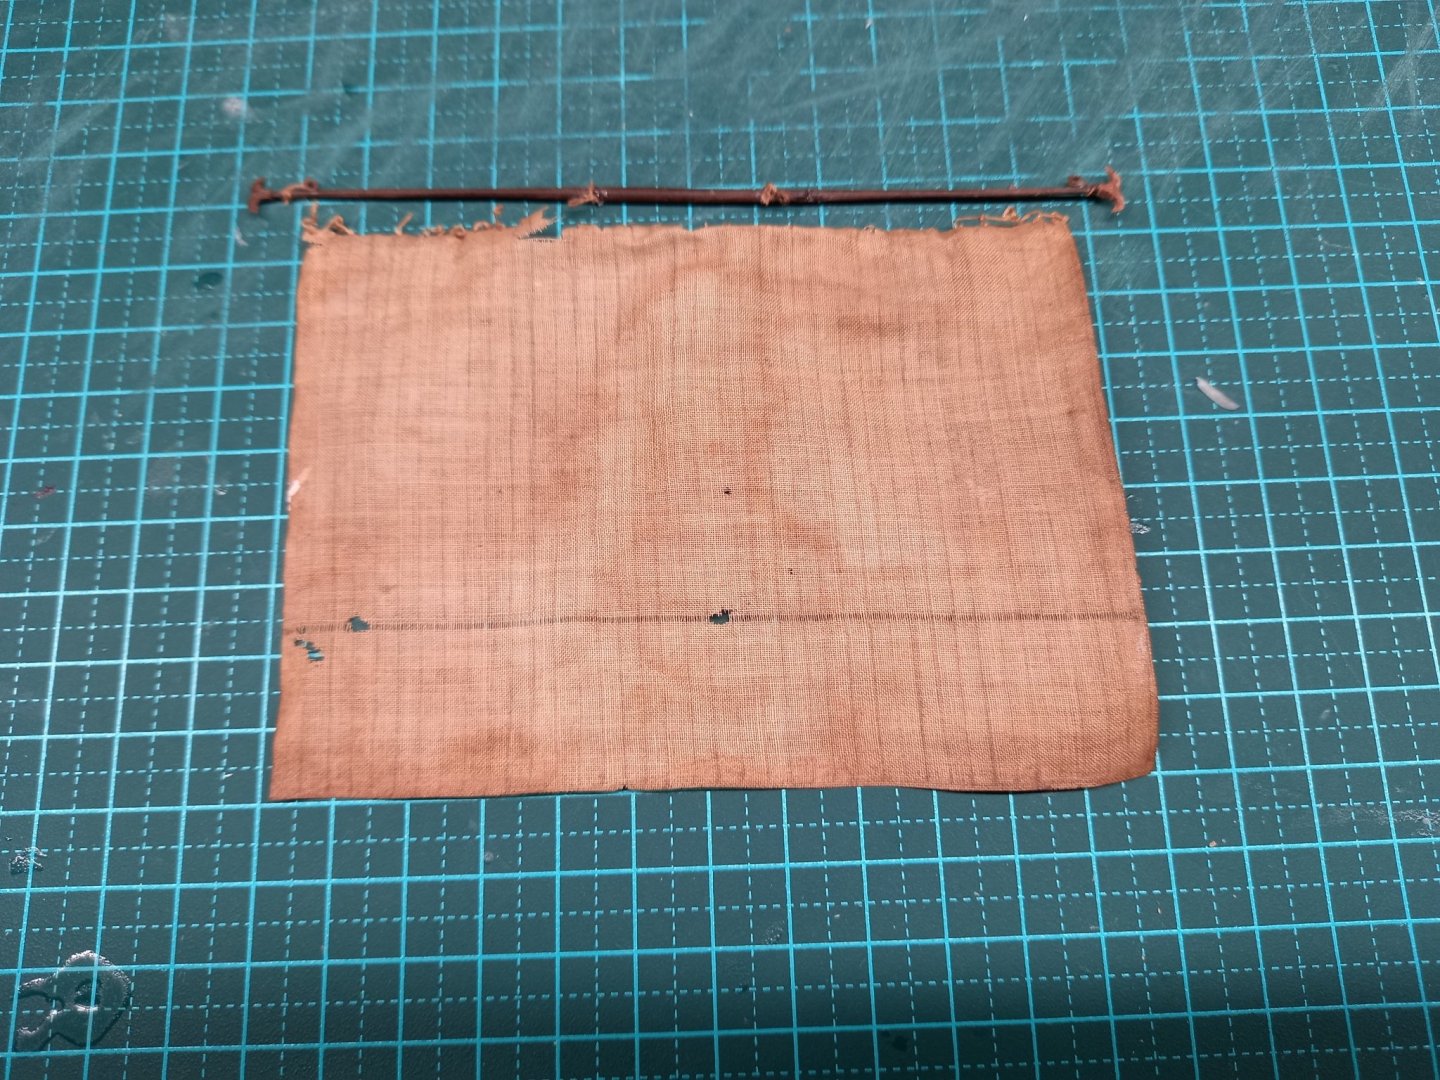
Ok, I've fixed up the mainyard. I was just pushing a needle through one of the blocks to make sure the mainsheet would pass through, and the thread that held it to the yard broke. Though most of the existing blocks are made of wood, this block is one of the few I made by wadding up cotton thread with glue to make a sort of ball, and pushing a needle through to make a hole in the centre. I had the choice of making a new one - either of wood or more balled up cotton (which I'd rather not do, as I'd like to keep as much of the original build as possible) or somehow replace the supporting thread. After a bit of thought inspiration struck. Thread through the body of the block (it's just cotton after all) and sew it on, through the thread that's already wound round the yard. Note also I've added the blocks for the topsail sheets and the mainyard lifts. The picture below gives you some idea of how I've been making my wooden blocks - drill a hole in a bit of wood the right thickness, then carve around the hole and sand smooth, finally cutting the block off the end of the bit of wood. And here is the main course being sewn onto the yard. As I mentioned earlier, I'm following my original procedure of using a continuous thread, rather than separate robands (just too difficult at this scale). And complete - very long and laborious - I had to undo my stitches time after time, and the loop in the thread kept catching on things over and over again . Now the old, brown, moth-eaten forecourse being separated from its yard. I had to remove quite a bit of fabric and thread that had inadvertently been glued to the yard. Once I'd done that I discovered a break in the yard, so I had to repair it - just a matter of gluing up the break and holding it still until the glue dried. And now, ready to begin sewing the sail to the yard. Note, the blocks for the topsail sheet are already there, but I do still need to add the blocks for the foreyard lifts. This rigging stuff hurts my brain. I'm really not very good with getting a gestalt view of how it all works and inter-relates, and I have to plod through the procedure little bit by little bit - often going over and over the text to make sure I'd really got it. Slow, small steps. Steven


- 740 replies
-
- 12
-
-

-
- Tudor
- restoration
- (and 4 more)
-
Very nice work, Tim. I'm very impressed, and tempted to try this method. But as I've already started in wood (see below) I guess I'd better continue that way. Steven

-
My model's at 1:200 scale and I'm in the same boat as you (oops! Sorry!). I've given up on making blocks this size with sheaves or even a pair of holes to make a fake "sheave". Just too difficult, and considerable danger of splitting. I've compromised with accuracy and used hearts instead of blocks. I make them individually. I drill a hole in a piece of wood the correct thickness, then carve around it to make the block. I don't know if there are ready-made blocks out there for sale that are small enough for you. I'd be very interested in seeing what other people have to say. Steven

-
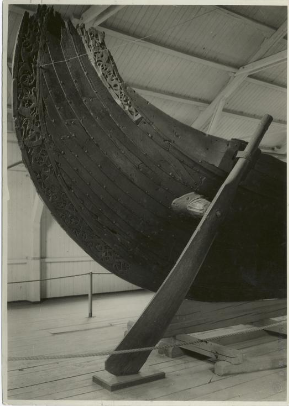
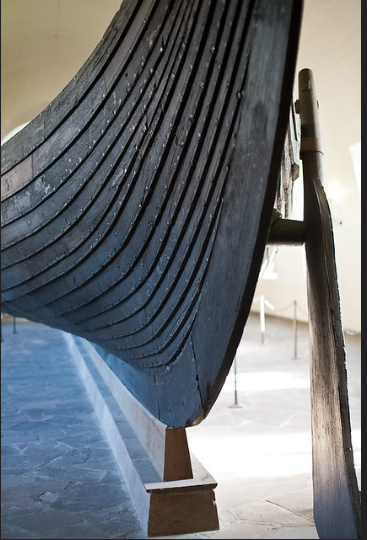
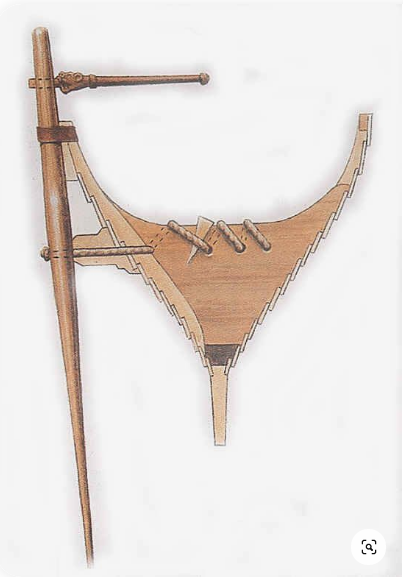
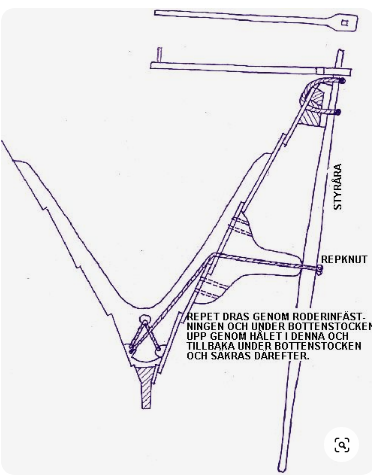
That's very interesting indeed, Dick. Apart from knowing in a general sense that the Gokstad ship used a withy for the rudder, I hadn't really thought about the mechanics of the apparatus in detail. What you've done certainly looks workable. The withy would probably season in place, but retain a reasonable amount of flexibility (I think the reason willow is used for wattling is the fact that it does retain a fair bit of flexibility - IIRC in wattling it's usually allowed to season, then soaked before being used). [Edit - correction - I'm pretty sure wattling uses green willow - it's basket weaving, that uses soaked seasoned willow] Steven
- 186 replies
-
- 2
-
-
- keelless
- reverse clinker
- (and 4 more)
-
Hi Dick, I've done a bit of wattling, though not with willow. I know green timber is far more flexible than seasoned, and splitting a withy down the centre makes it easier to bend. However, I wouldn't recommend that for the job you have in mind. IIRC the Gokstad rudder was held in place by a fairly hefty withy (just a single piece) passing through both the rudder and the ship's side and right angles, and its flexibility (even though seasoned after all that time in use) allowed quite a bit of vertical pivot in the rudder, though looking at pictures of it I do wonder if my memory is correct. The sectional diagrams seem to show a rope Do you have some kind of idea of how you plan to construct your rudder-fixing? A diagram of what you have in mind would be very helpful. Steven
- 186 replies
-
- 6
-
-
- keelless
- reverse clinker
- (and 4 more)
-
"Trireme Olympias: The Final Report" (book)
Louie da fly replied to Smile-n-Nod's topic in Nautical/Naval History
Smile-n-Nod, thanks very much for this. I've downloaded it and now I'll have to spend time going through it with a fine-tooth comb. Wonderful stuff. Steven -
I seem to recall the Gokstad ship's side rudder was attached by a withy (I was going to write "with a withy", but that just sounded silly . . .) Beautiful work as usual, Dick. I love the way you've solved the problems that go with such an adventurous speculative design. If the hulc was really built with reverse clinker as theorised, I imagine it would be very like this model ( but bigger, of course ) Steven
- 186 replies
-
- 1
-
-
- keelless
- reverse clinker
- (and 4 more)
-
Thanks for all the likes. Druxey, currently the main problem is getting my head around how everything fits together, and that's just for the courses. SO many lines and blocks, and I'm just hoping I don't paint myself into a corner, forgetting to put something in at the right time and having to somehow squeeze it on later. Oh, well, back to Anderson again. I think the lifts are the next thing to look at. Pretty sure I've worked the halyards/tyes out. Steven
- 740 replies
-
- 5
-
-
- Tudor
- restoration
- (and 4 more)
-
Cathead, I think what you've worked out is perhaps the very best possible arrangement, given the constraints you're working with. The stacking of the shields and the idea of "roping them in place" works very well. You can see the shields (otherwise all that work painting them would have gone to waste) but they get in the way as little as possible; it's definitely a practical way of arranging them without obstructing the working of the ship. I think you've got it! The bundles of spears look quite a bit better, as well. What particularly impresses me about this build is the added details - chests, barrels, shields, spears etc - that add so much realism to the look of the thing. One feels one could step on board and sail off across the Atlantic. I agree about "Vikings". I watched the first episode and was so disgusted by it that I never looked at it again. Haven't seen the other show so I can't comment on it. Ian, yes we do know that Viking shields had bosses. Just about every Viking shield find (and the Gokstad ship had shields all along both sides) has a boss - the only ones I know of that don't have a hole where the boss should be. And there have been many bosses found without the shield board, which has presumably rotted away. Also contemporary art shows round shields with bosses, both in a Viking context (rare), but also their contemporaries, the Franks and English had very similar shields - always with bosses. The boss was a hollow iron bowl, nailed or rivetted to the shield board over a hole on the centre into which the hand fitted. There was a handle across the hole for the hand to grip. Contemporary art shows the shields being held this way, not with arm straps. You can see diagrams of the way this worked at http://members.ozemail.com.au/~chrisandpeter/shield/shield.html This is probably the best exposition for the layman of the state of knowledge regarding Viking shields. Peter and Christobel are friends of mine and have been re-enactors since about 1986. They are very hot on authenticity and they have put a tremendous amount of research into all kinds of aspects of Viking life - their re-enactment gear is amazing. Steven
-
That's beautiful work, Druxey (as usual). I've arrived late and only just seen this. Just amazing. Very impressed. Steven
- 433 replies
-
- 5
-
-
- open boat
- small boat
- (and 1 more)
-
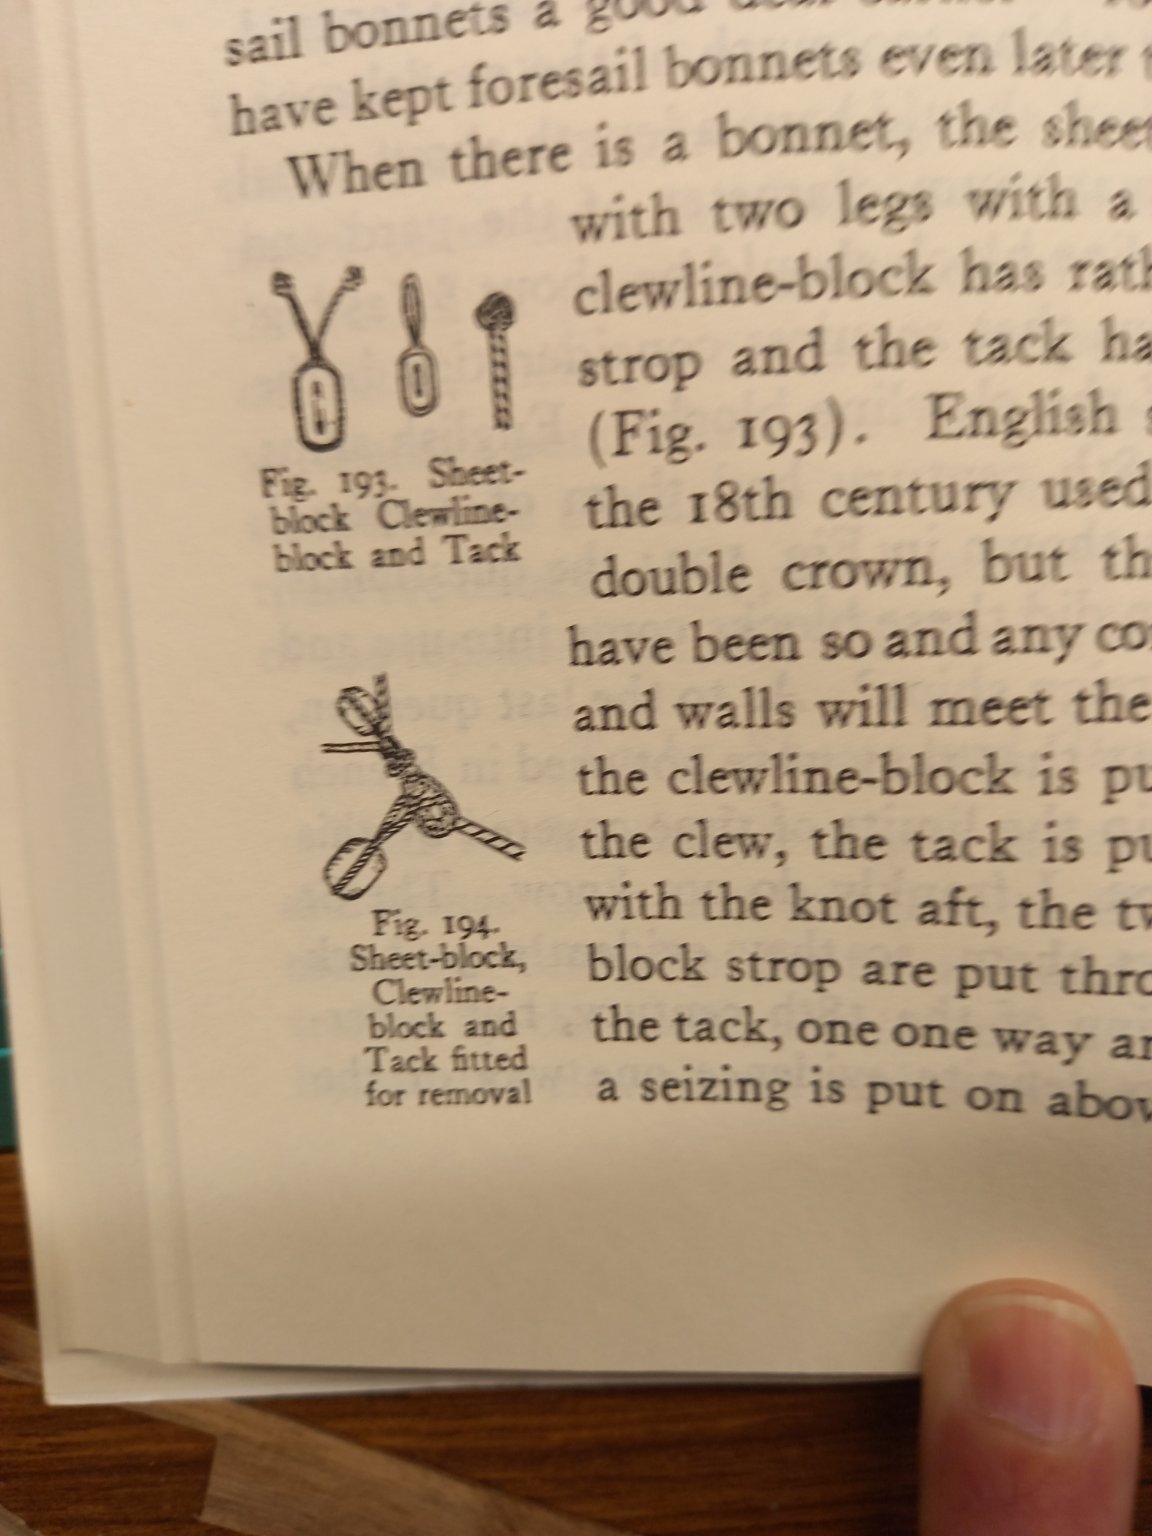
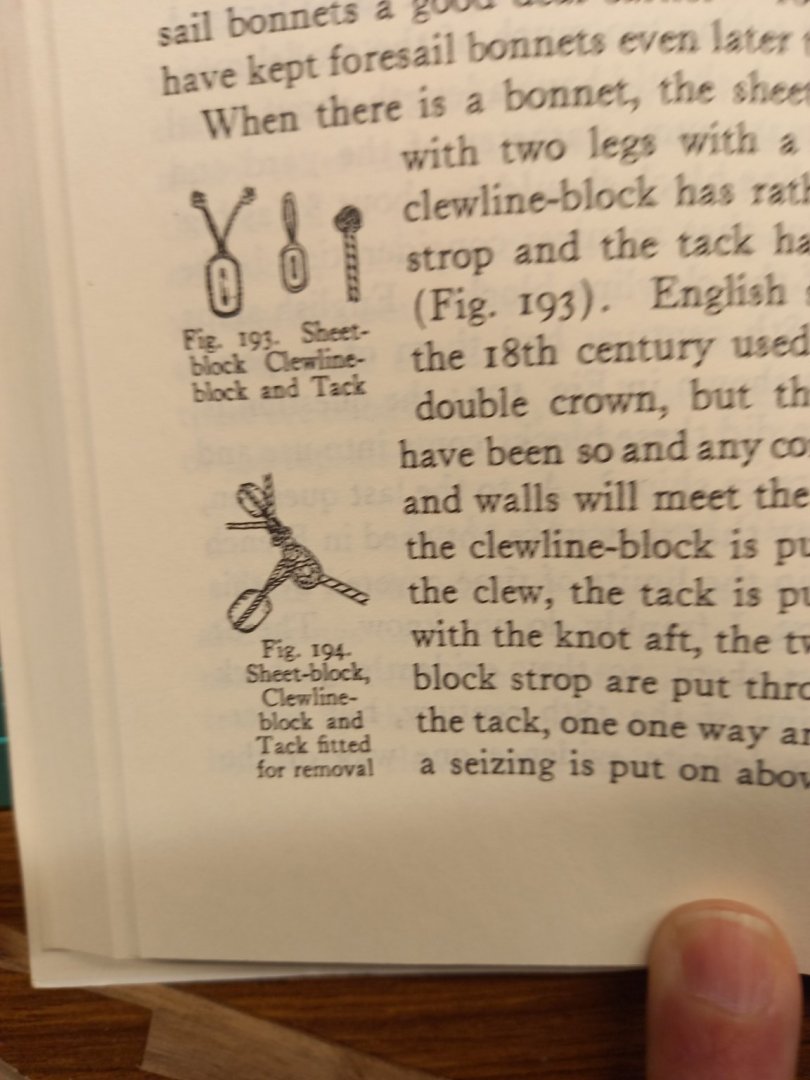
I'm slowly getting into the rigging, mostly using as my guide Anderson's The Rigging of Ships in the Days of the Spritsail Topmast, which, though it mainly deals with ships of 50-100 years later than mine, still has a lot of info that is relevant, and is often the only source apart from Mondfeld and contemporary illustrations. Sheesh! So much to learn. My brain hurts. But if I take it slowly, item by item I expect by the end of it I may have advanced from a state of utter confusion to one of relative ignorance. Here's Anderson's diagram of the rigging of the clew of the courses. And here is what I've done. From the top, clewline block, tack and sheet block. Note at 1:200 making actual blocks is basically impossible, so I've compromised with hearts which are simpler but carry out a similar function. This was really difficult to put together and for the next three course clews I'm thinking of working out a streamlined method which ends up with the same result. Steven
- 740 replies
-
- 14
-
-
- Tudor
- restoration
- (and 4 more)
-
Don't load up on tools too soon. Many modellers get excellent results with a pretty basic set - I like to use a No. 11 blade scalpel or craft knife, LOTS of clamps of various sizes and types, you'll need tweezers, glue (I use white glue mostly but CA (super glue) to glue wood to metal). A drill (maybe a dremel). Probably I've missed quite a bit but others will be able to advise. Steven
-
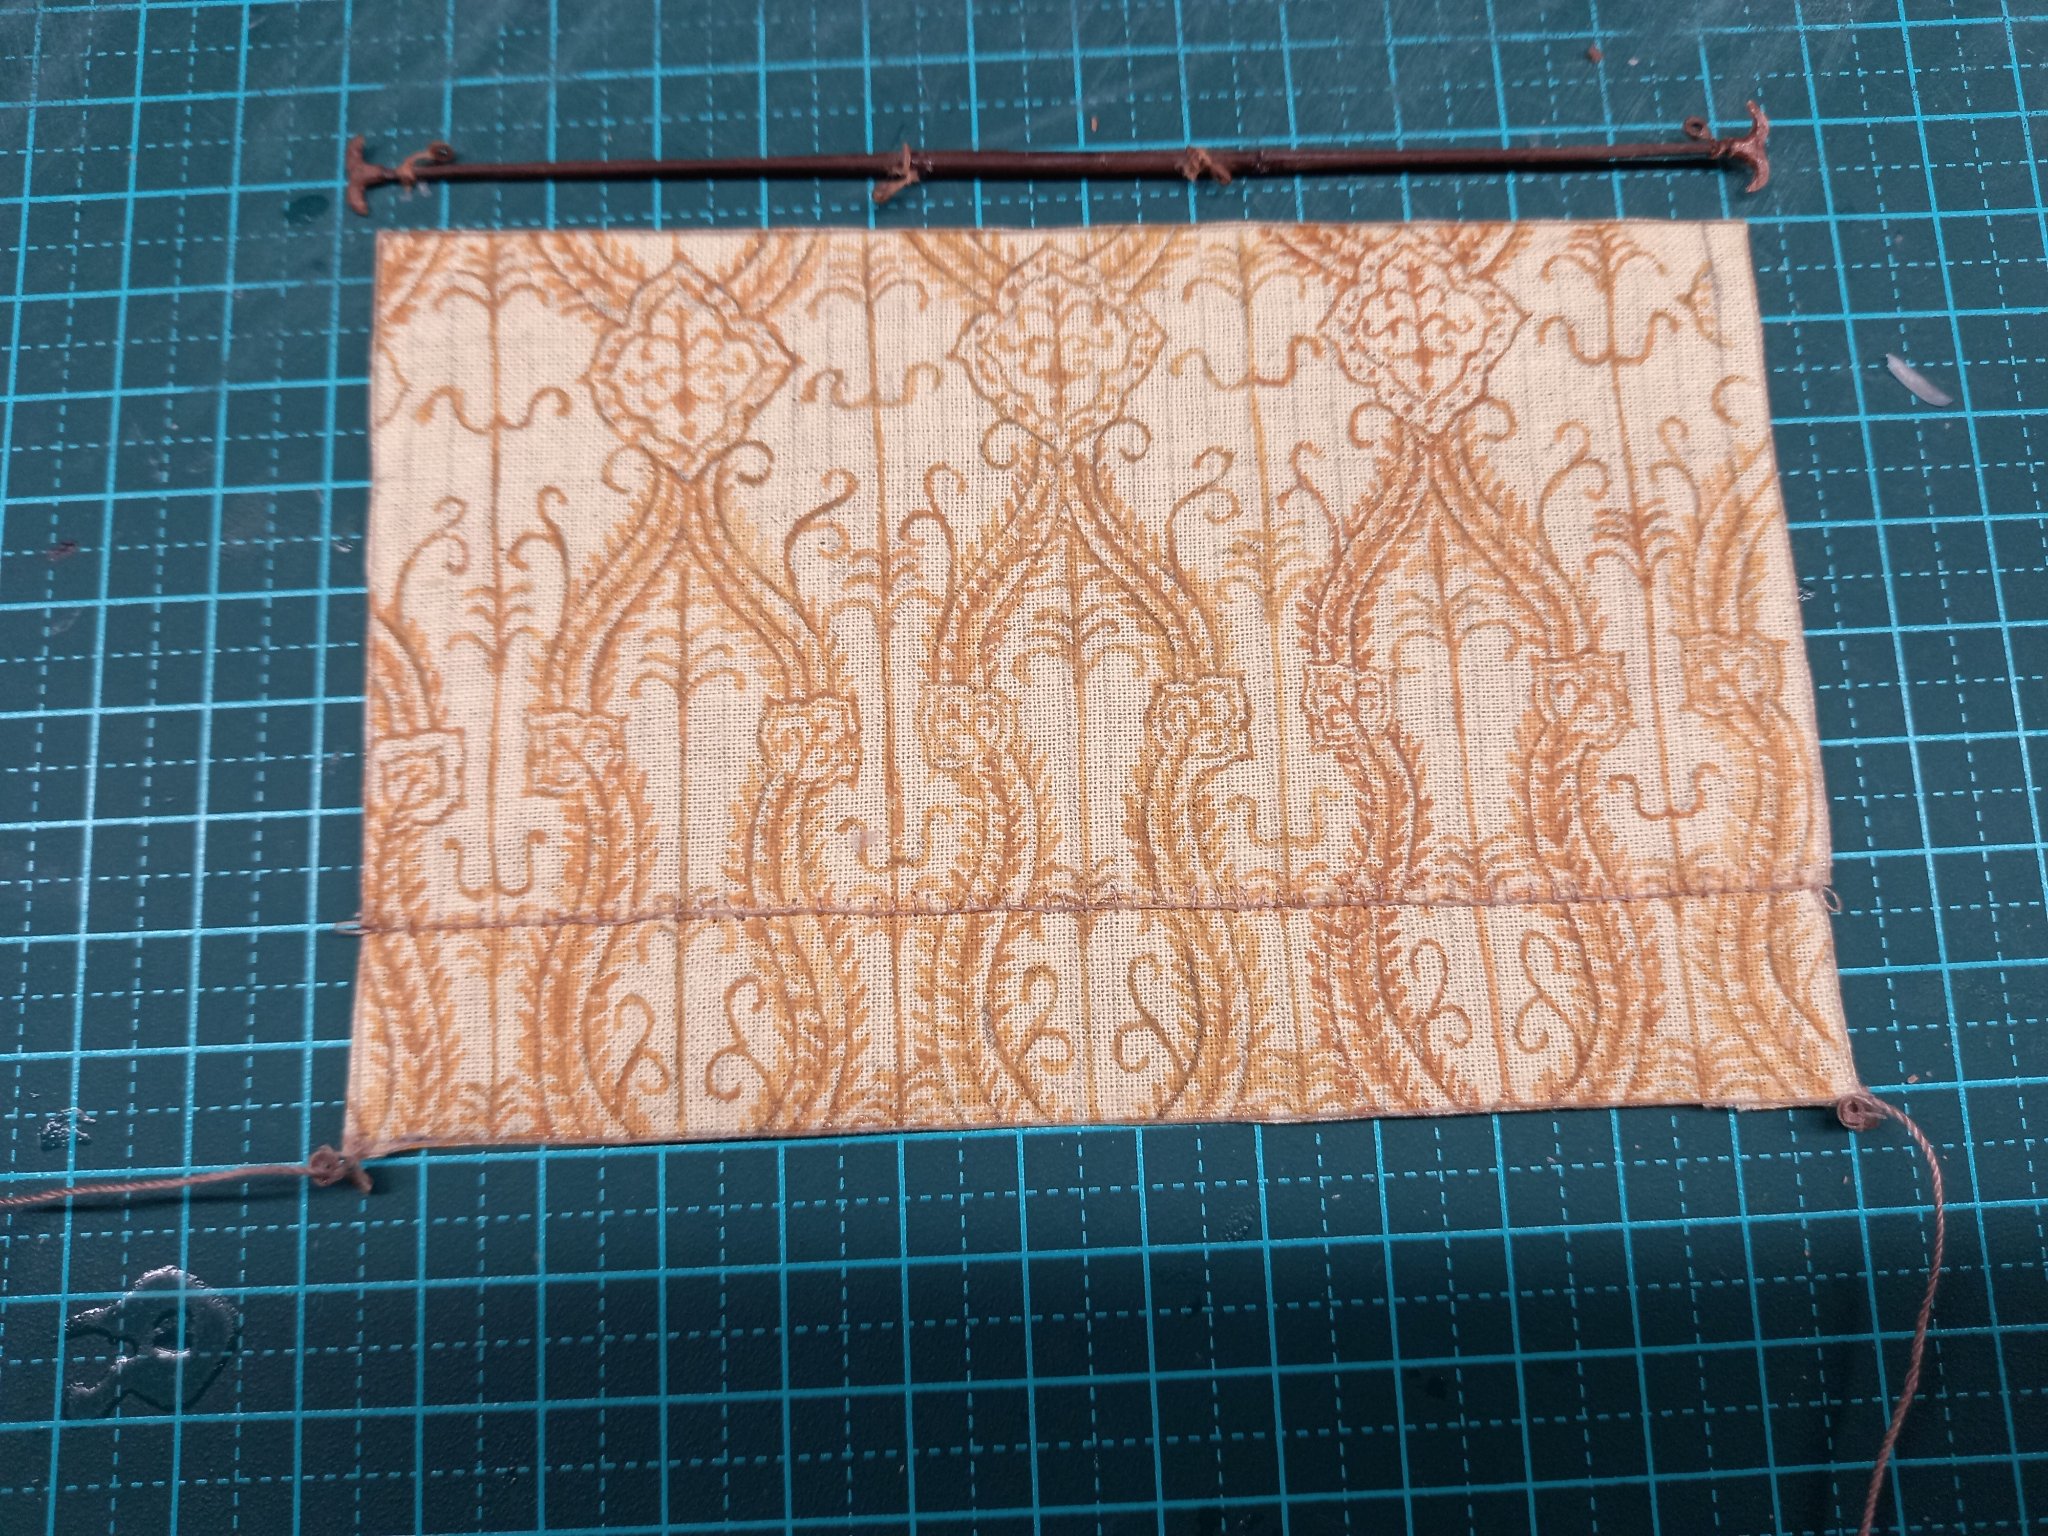
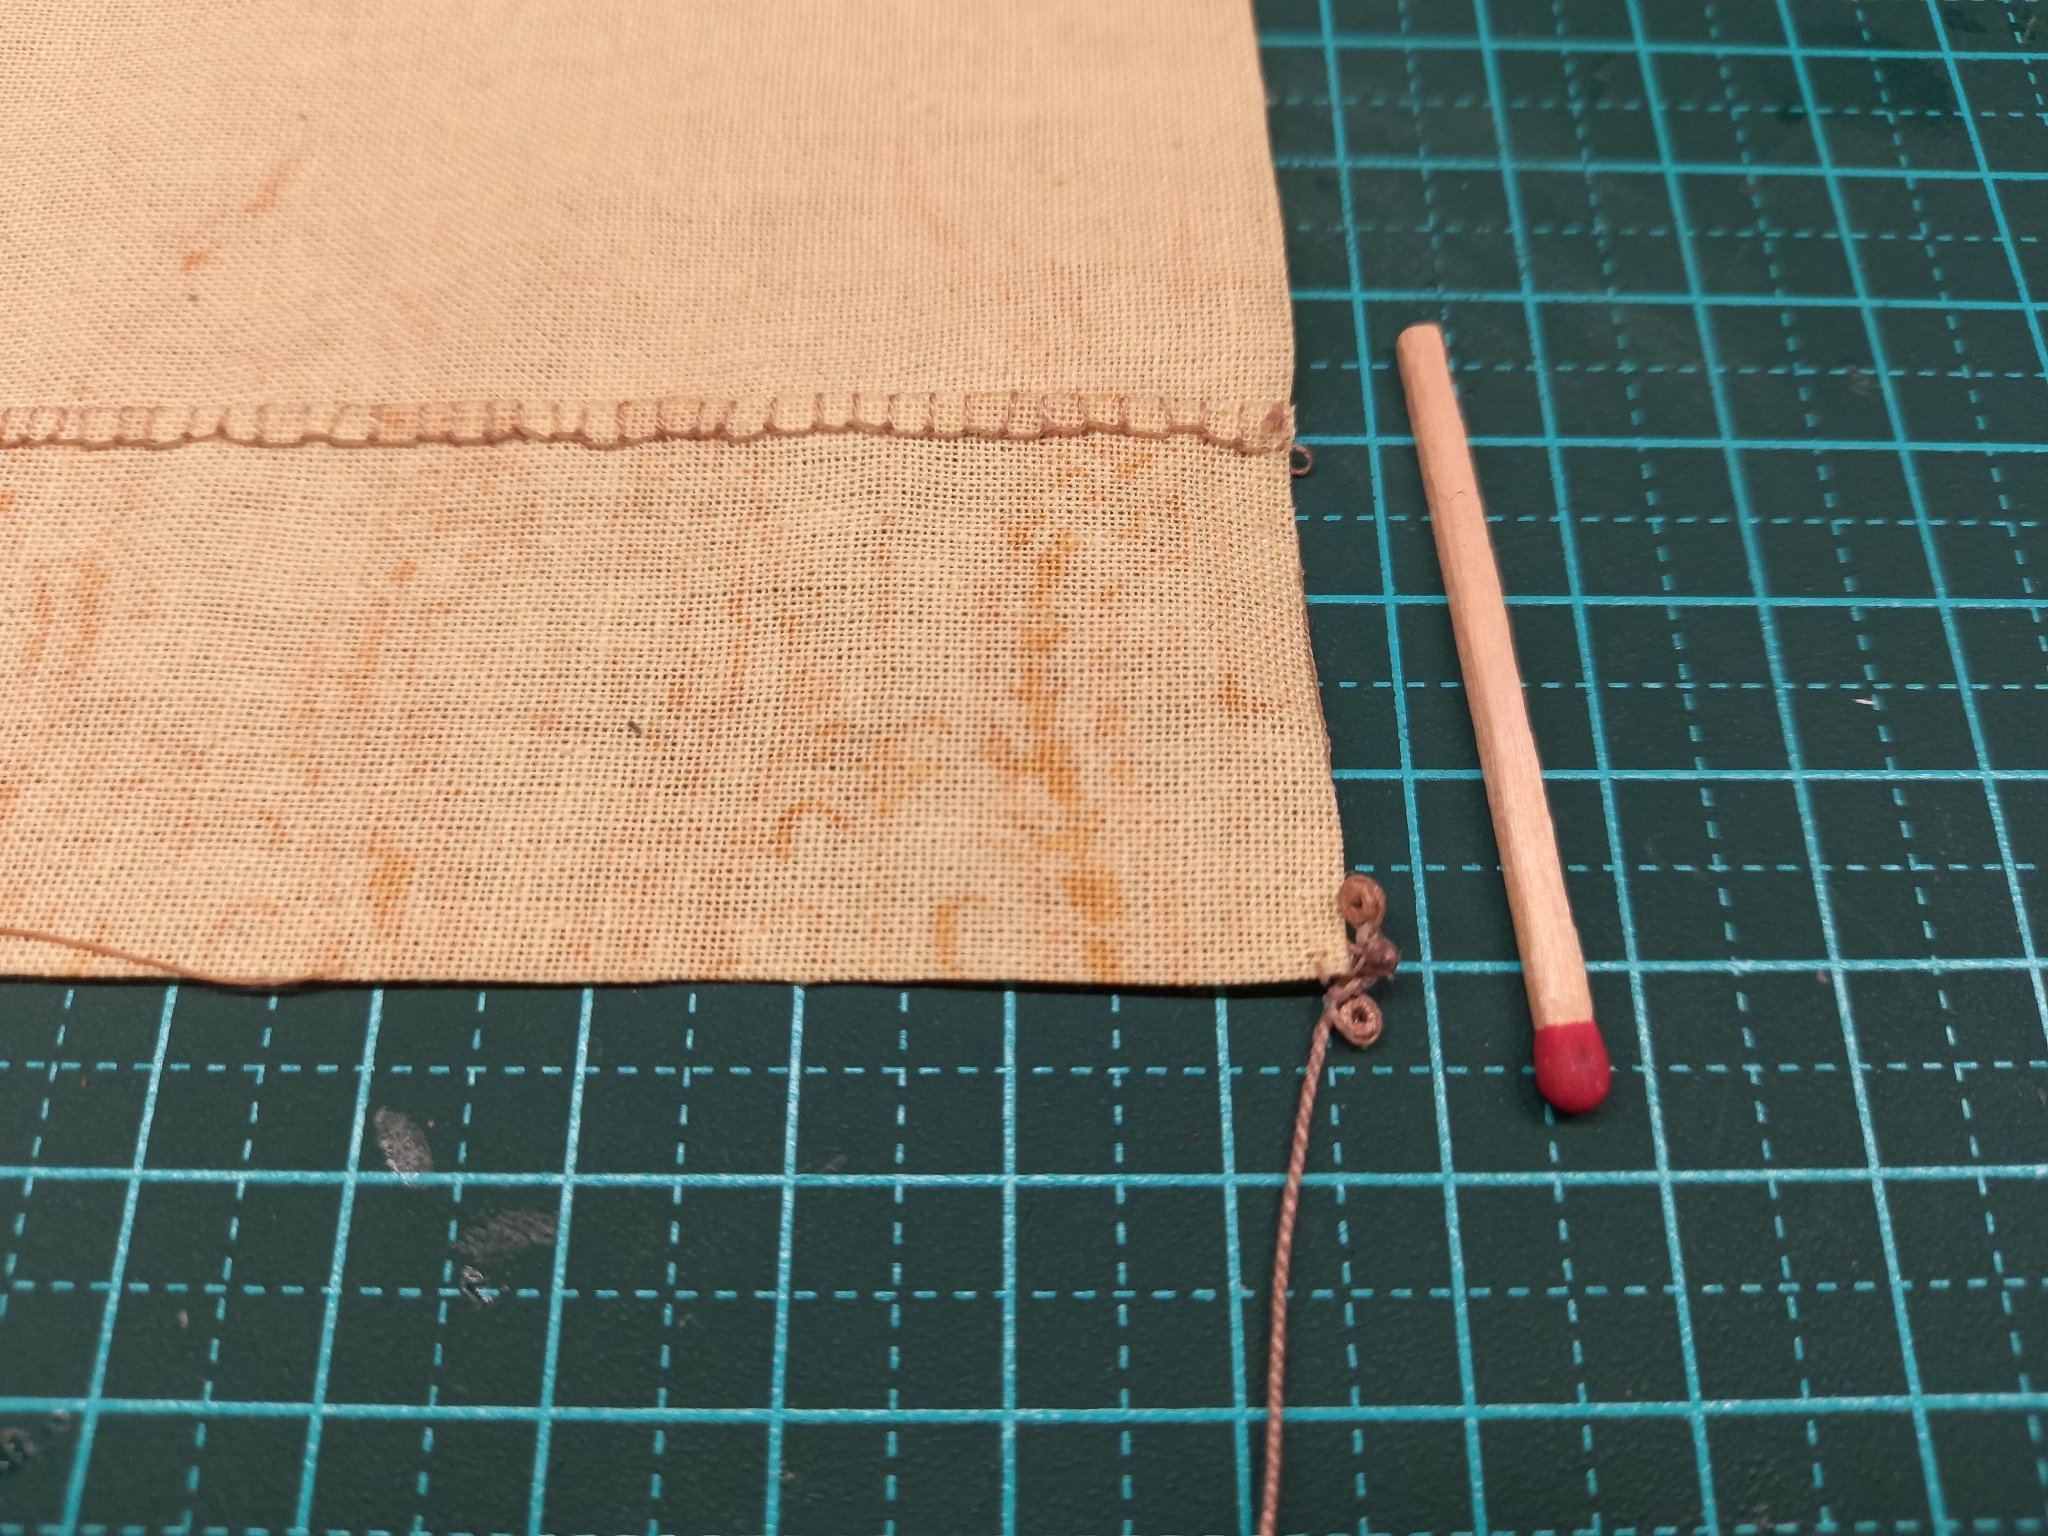
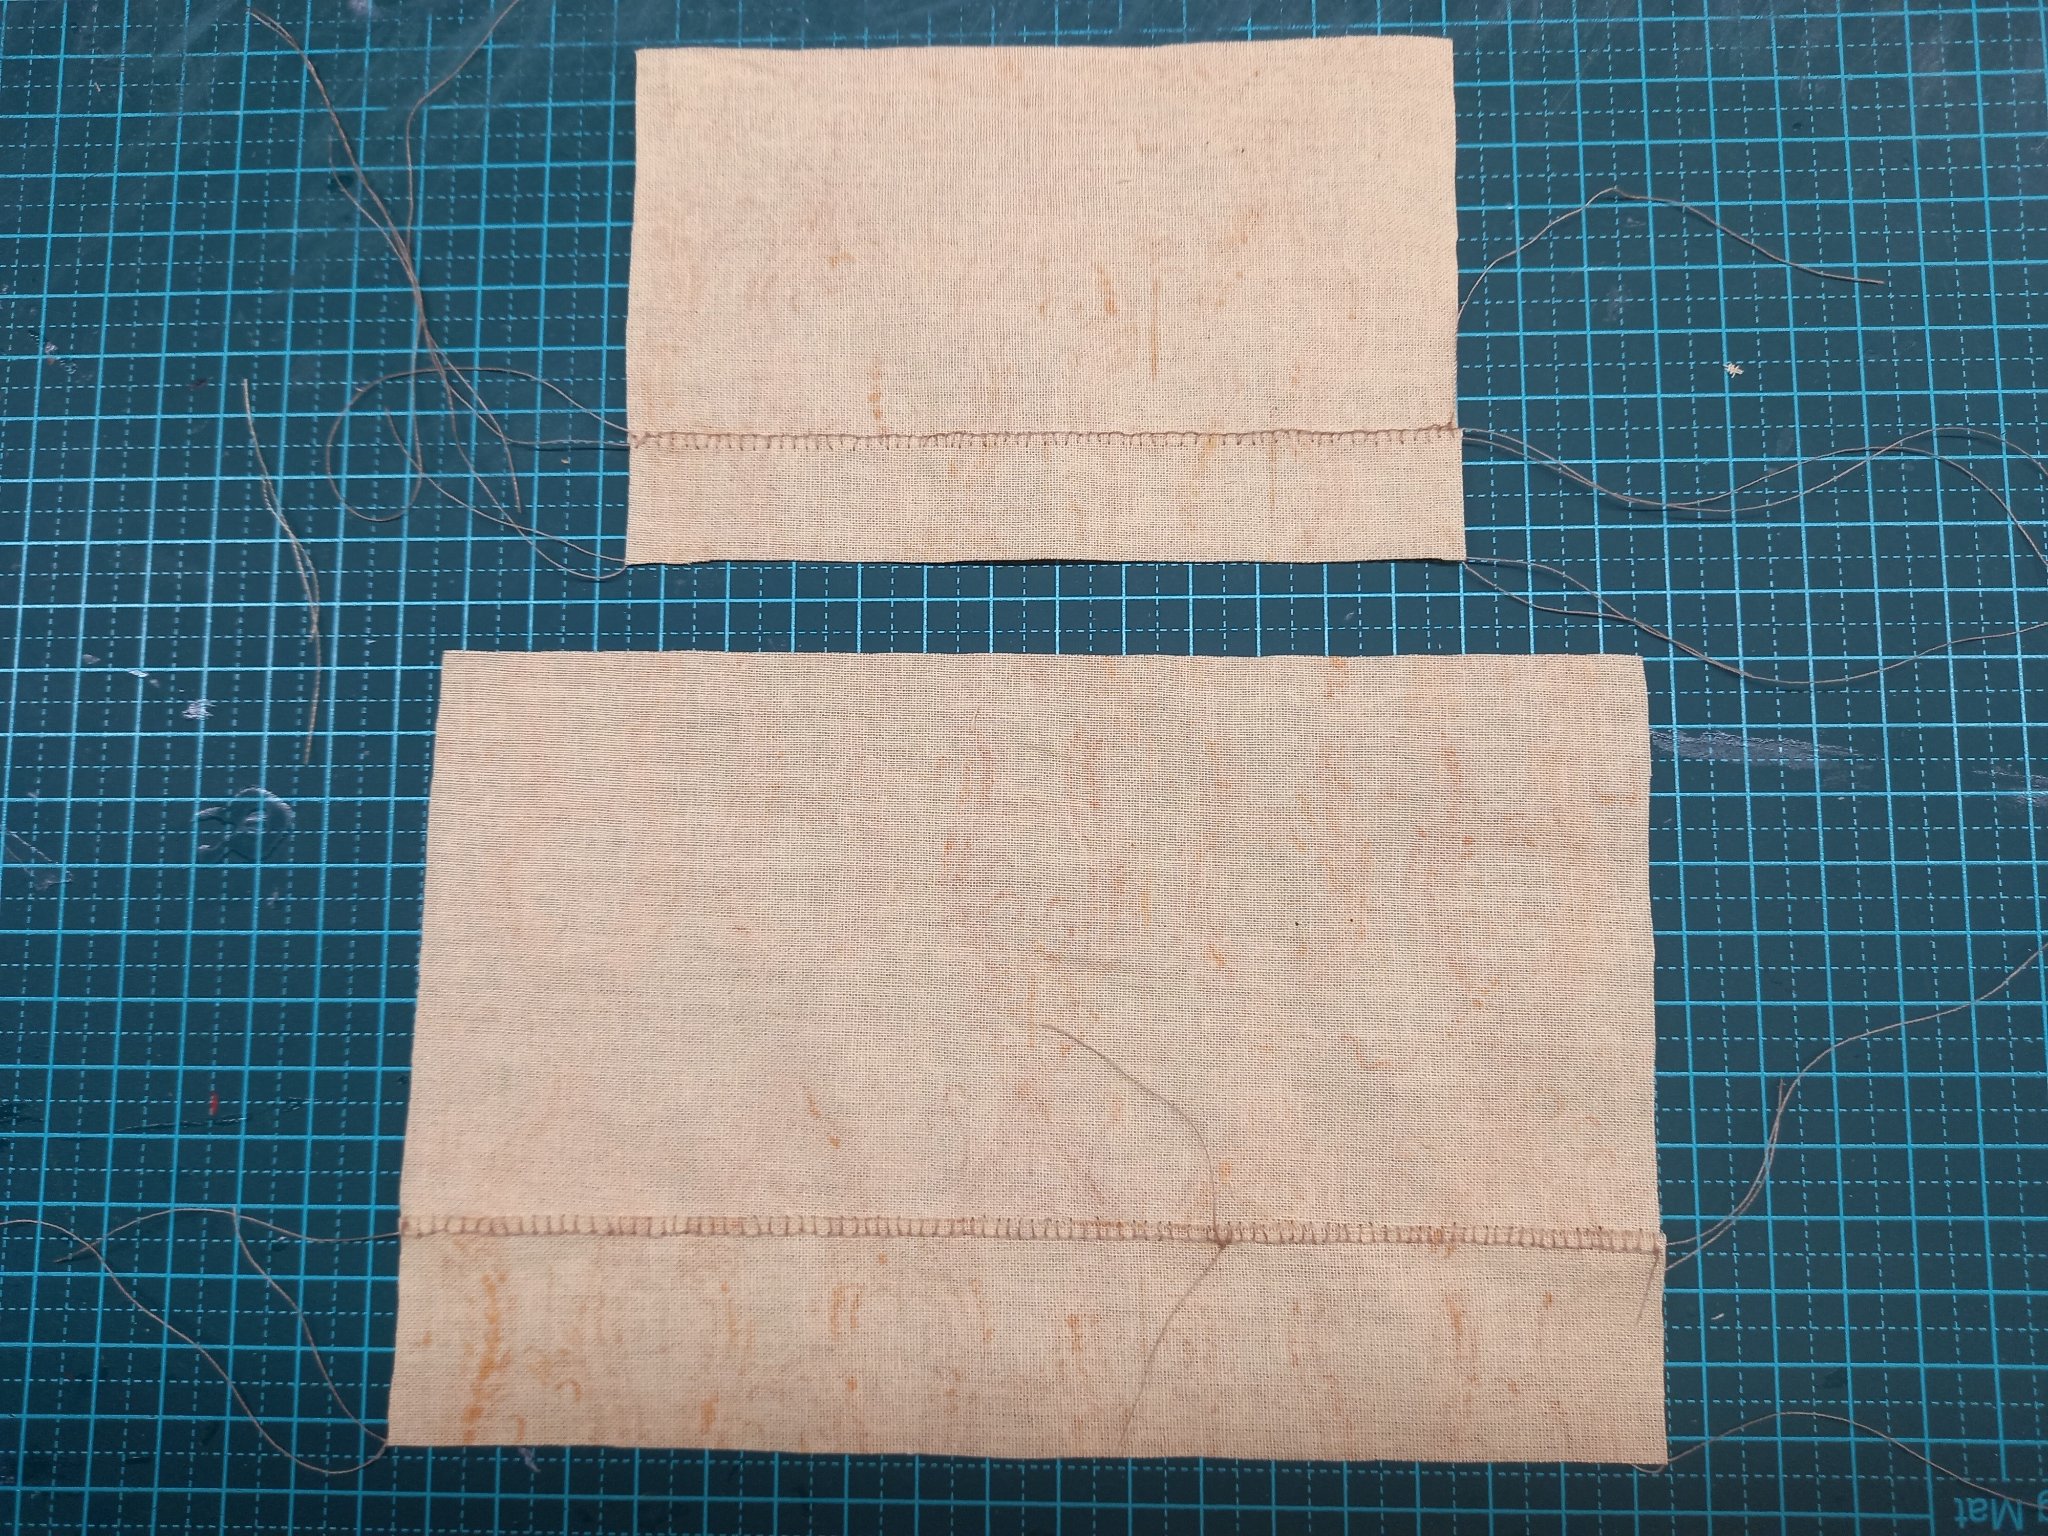
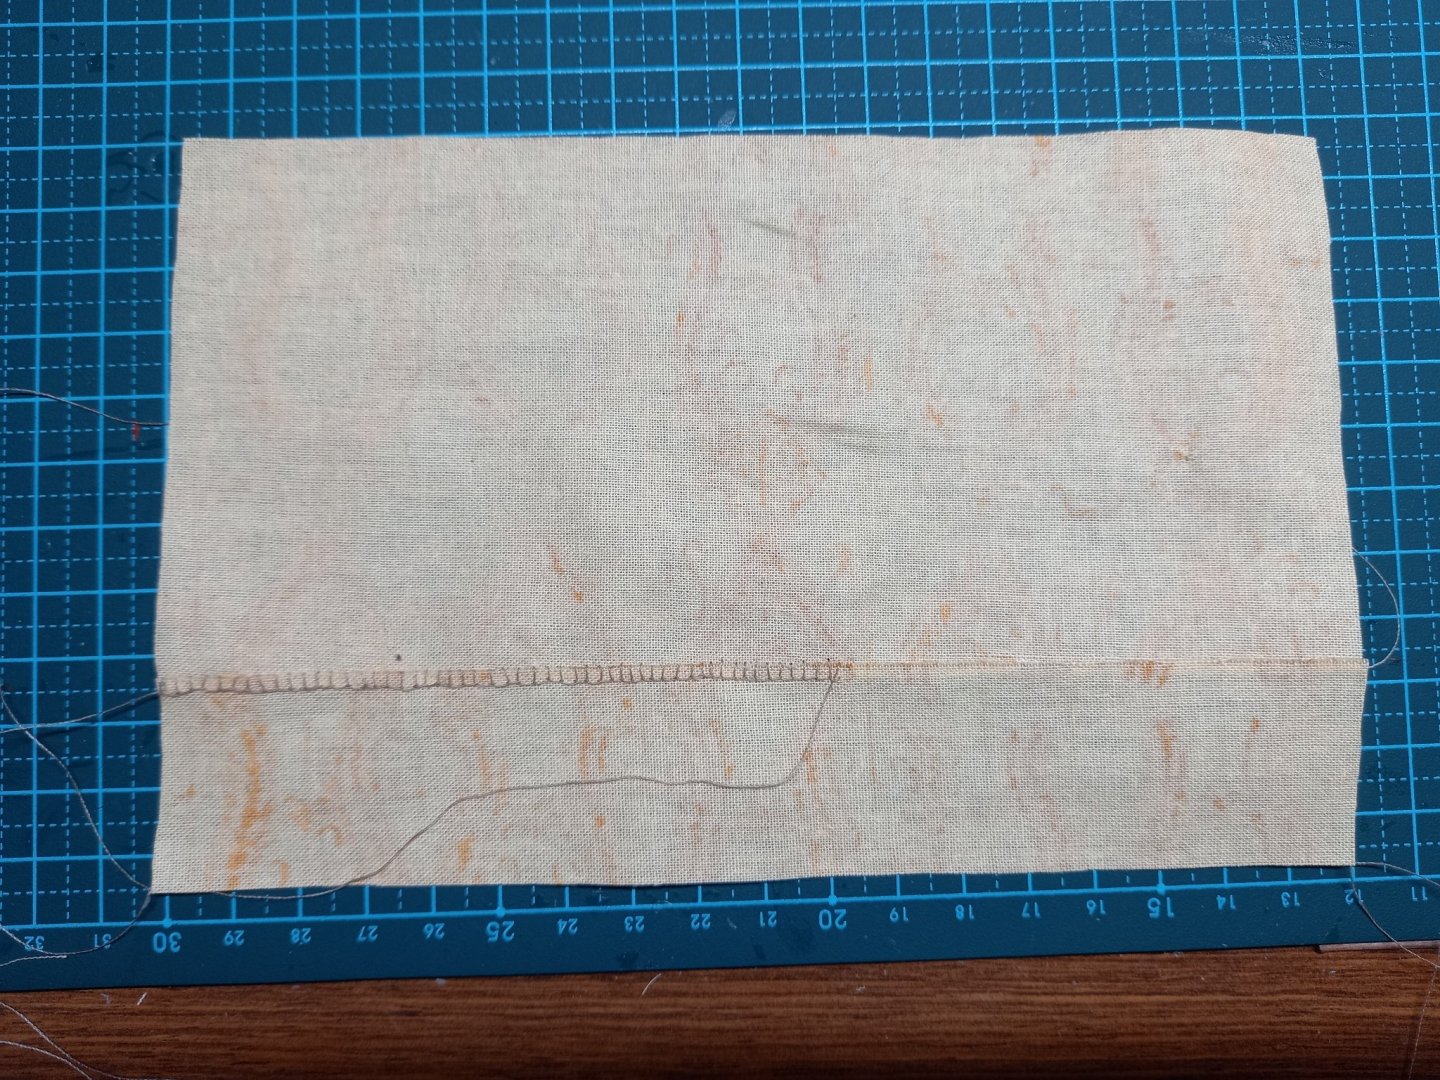
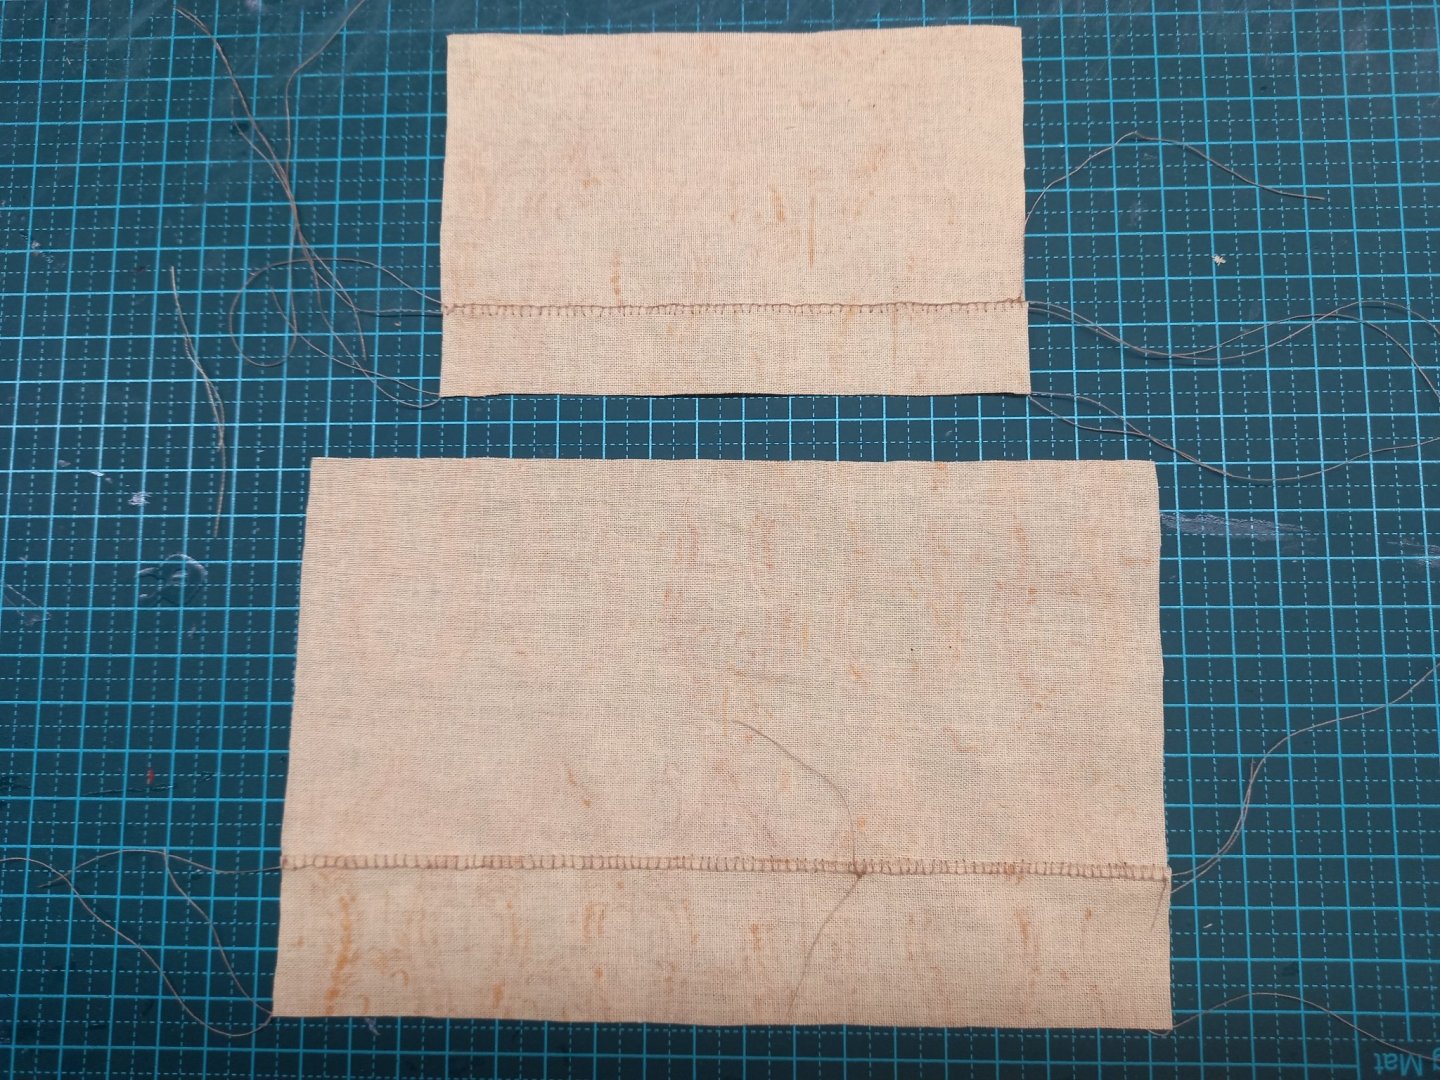
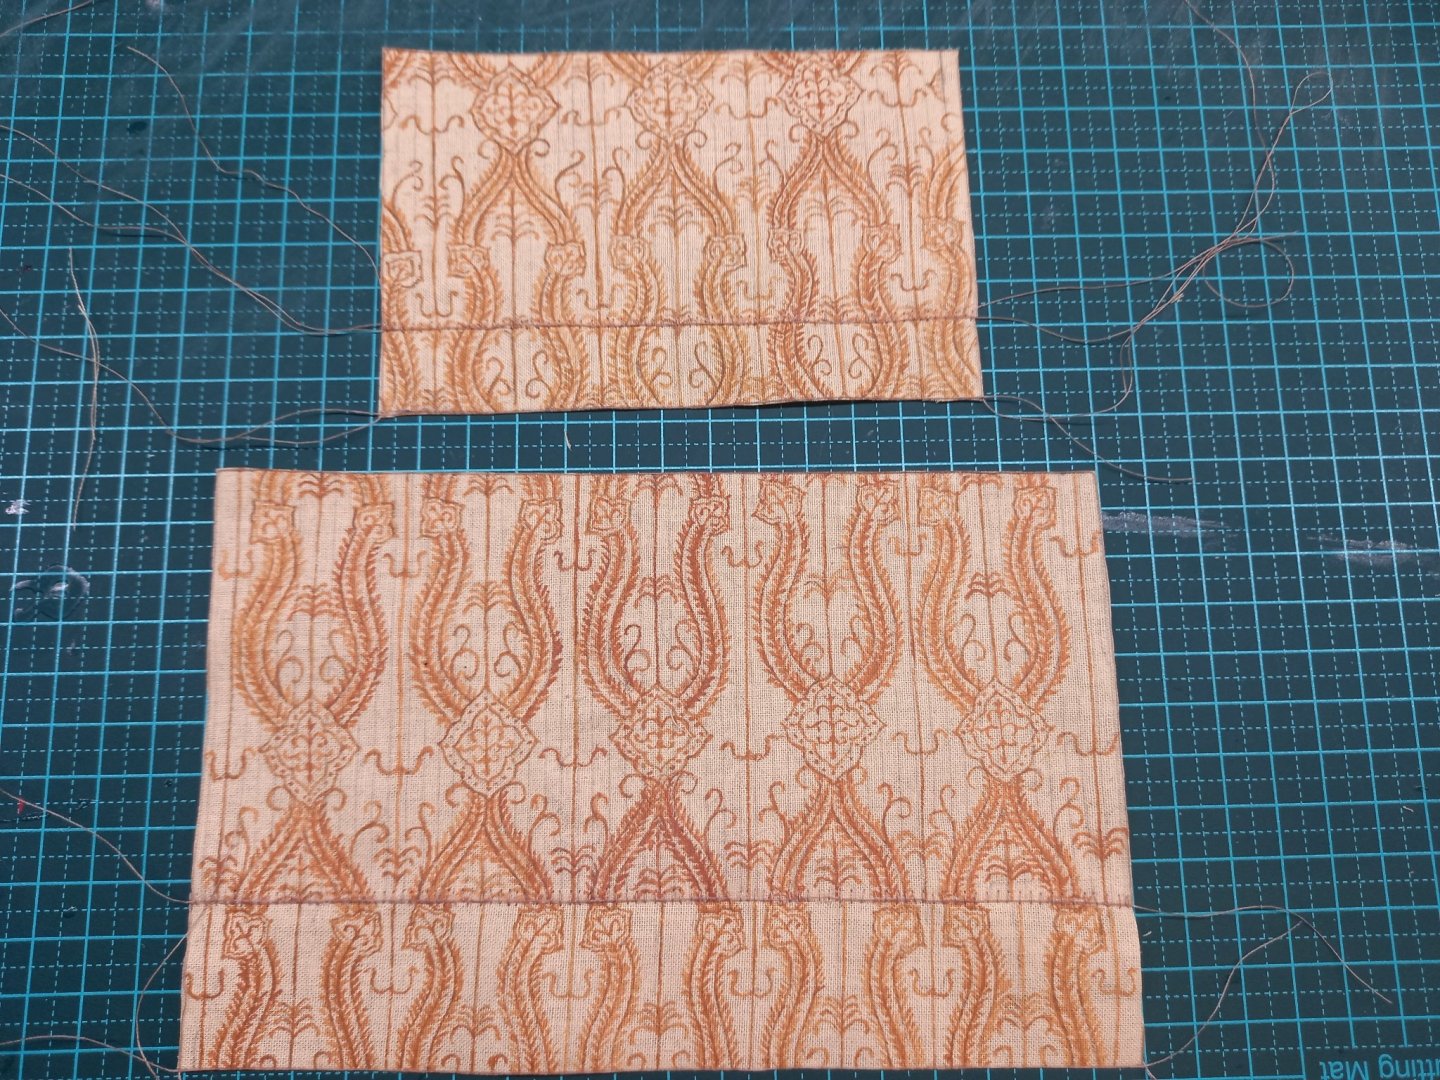
Bonnets "stitched on". Actually I cheated - I glued the bonnets to the bottoms of the courses with a bit of overlap before I started stitching - I couldn't see any way otherwise that I could hold everything together as I stitched - I'm not all that good at sewing. And that's really not the way it was done back in the day, though it looks enough like it for the job at hand. Here is the main course with the bonnet attached and the sewing partly done, seen from behind. (The funny thing is the stitching seen from in front pretty much vanishes into the pattern painted on the sail. Almost feels like "All that work, and nothing to show for it"). Here are the two sails with bonnets seen from the front And from behind. You can see the join between the two lots of stitching on the main course, where I ran out of thread and had to start again with a new thread. I took the opportunity to start from the other end (so the end of the glued join between the course and the bonnet didn't come adrift just as I was getting to the end of the stitching). And here's a closer view of the stitching on the main course, seen from the front. I'm pretty happy with the consistency of the stitching - not perfect, but I think this is as good as I'm likely to be capable of. As a first attempt the forecourse was not too bad, but as I got better with the main course I'm considering re-doing it. The question is whether there's any point doing so. Are the inequalities in the stitching bad enough to warrant re-doing it, considering the back of the sail really won't be visible when the model is on display? Fortunately, those are the only two bonnets. Steven
- 740 replies
-
- 13
-
-
- Tudor
- restoration
- (and 4 more)
-
Welcome to MSW, Laggard. I'd agree with the advice above, but I'd also highly recommend you start a build log for your model. The instructions are here - I think most people starting out get rather intimidated by the quality of work they see on other build logs and are a bit nervous about starting one of their own. Don't be. This forum covers the whole range of skill levels, from total newbie to the demi-gods of ship modelling. And a build log enables others to see how you're going and what you're doing, and give help and advice in getting the right result - and sometimes help you avoid going off on the wrong track. And you can ask questions of more experienced modellers about problems you encounter on your build (having a log gives you somewhere to post pictures of what your question is about). And don't worry about making mistakes. We all do it. The more experienced modellers just make more interesting and complicated ones (!). Don't expect your first model to be perfect - it won't be. But with a bit of patience and application you'll be able to make a model to be proud of. And the next one you make will be better. And have fun with it. That's what it's all about. Best wishes, Steven