David Lester
-
Posts
679 -
Joined
Content Type
Profiles
Forums
Gallery
Events
Everything posted by David Lester
-
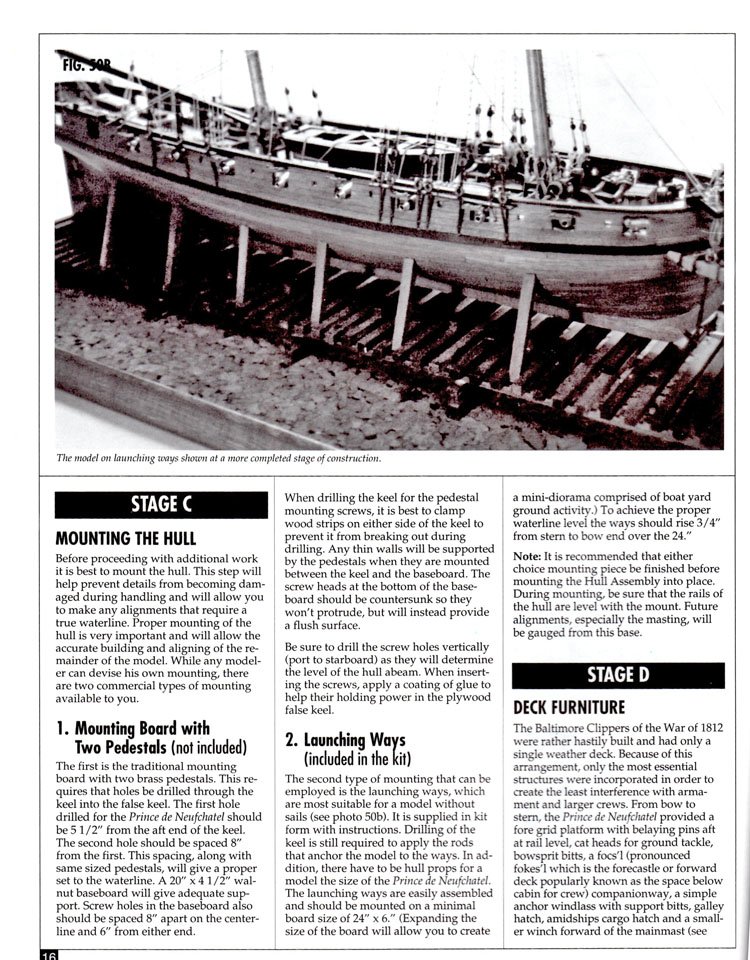
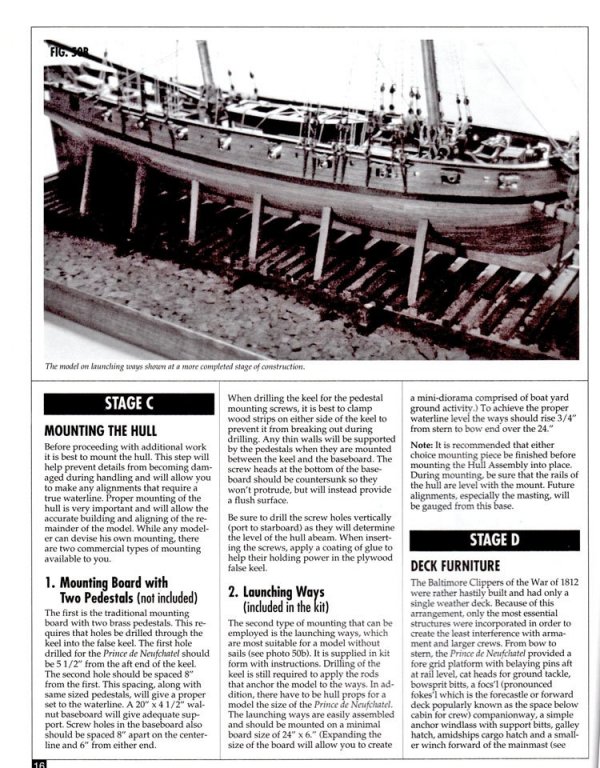
 Hi Dave, I really like launching ways to display a model and am always on the look out for designs myself. There seem to be mostly ugly ones out there and for my money I think it's hard to beat the design with the the Armed Virginia Sloop and I mean the one in the photograph, not the one described in the instructions - oddly enough they aren't the same. Bob gives very good instructions on building the photographed version in his practicum. There is a launching ways with my Prince de Neufchatel as well. It's different from the AVS, but I think it's an attractive option too. The instructions for it are a bit sketchy, but at least they match the pictures. I'm planning on using this design for this model. The stock for the AVS was 1/4" and the stock for this one is 3/16". The pictures below aren't very clear, but I think sufficient to get the idea. David
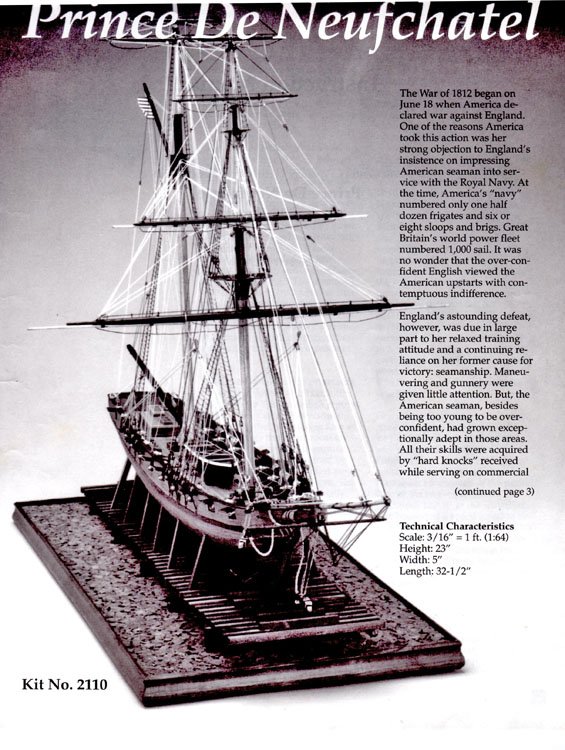
-
Hi Don, That's a very beautiful hull. Is a barque a little like a clipper? Looks like it might be, probably the rigging would be the main difference? I like the look of your gluing technique; I think I'll try it on my next one. David
-
Good Morning, Hi Don, thank you for your comments, I am not offended in the least, in fact I welcome your observation as it triggers for me a conversation that I probably should have had before now. For me, in my limited experience, rigging falls into three categories, not two. The standing rigging, primarily stays and shrouds, and it clearly should be black. The running rigging such as halliards, sheets, lanyards etc which clearly should be natural. But I also find a third category and that's all the rigging that I'm not quite sure if it's standing or running and whether or not it should be black or natural. The kinds of things that fall into this category for me tend to be: the line used to seize blocks to eyebolts, the lanyards on deadeyes - usually it's natural but sometimes it's black like on the Constitution, ratlines - again I've seen both colours - usually black, but it's natural the Victory, footropes, and of course these pendants to which the braces attach. I think there are other things that have made me wonder too, but I can't just bring them to mind off the top of my head. I'm still relatively new to this and have not quite weaned myself off of Bob Hunt's practicums (I'm close, but not quite all the way - there's still hope for me yet) and I have noticed a fair bit of inconsistency in them. For example on the AVS, he shows the use of black line for the footropes, the deadeye lanyards and the pendants for the braces, which is how I modeled it. However, for the Rattlesnake, he shows natural line for all of those things, included those pendants. The kit's instructions don't indicate one way or the other, so again, I just modeled it as per the practicum. In both the AVS and Rattlesnake practicums he shows some blocks seized with black line and some with natural line and I'm not sure why he's done it that way or if one is more correct than the other, and I'm guilty of some inconsistency myself in this department. Again, thanks for your input, Don and I would certainly welcome others' thoughts as well. Thanks, David
- 67 replies
-
- 2
-

-
- rattlesnake
- mamoli
- (and 1 more)
-
Good Morning Everyone, Some more progress to report. I've finished the standing rigging and am working my way from bow to stern on the running rigging. This will be a pretty boring report as everything is going smoothly without areal problems and I haven't even been called upon to come up with a fix or work-around for anything! The Mamoli rigging plans are quite good and easy to follow, but one complaint I do have and it's the same complaint I have with the Petersson book is this. They show the starting and ending points of a certain line, but not always the route it takes between the points. And they tend to show each line in isolation, so it's not always clear which lines should pass in front of others etc. So to a degree, I'm just using my best judgement and choosing the straightest most direct route where the line doesn't have to rub against anything along the way and trying to avoid lines crossing one another. David
- 67 replies
-
- 4
-
-
- rattlesnake
- mamoli
- (and 1 more)
-
Ropewalk
David Lester replied to Worldway's topic in Rope Making/Ropewalks's Rope Materials and parts resources
Thanks for the input everyone. David -
Ropewalk
David Lester replied to Worldway's topic in Rope Making/Ropewalks's Rope Materials and parts resources
Gregory - that line looks beautiful to me, and it appears to be about 1mm in diameter. How many strands of sewing thread is that and what do you do make smaller lines? Thanks, David -
Ropewalk
David Lester replied to Worldway's topic in Rope Making/Ropewalks's Rope Materials and parts resources
I too have been thinking about a ropewalk and when the time comes will probably buy the MS one or perhaps Chuck's when it is available. However..... I can't quite grasp several things about the process. So, working on the premise that there is no such thing as a stupid question, I would like to ask the following: I have read as many posts as I can find and I cannot quite understand what type of thread to work with or how to control the sizes of the lines. It seems that garden variety sewing thread is one option, but how does one obtain a wide variety of sizes in the the finished product. Our local sewing store sells one thread - Gutermann 50. So if I make a three-strand line from it, that will give me one size of line, and presumably the smallest line I can made. Then if I twist three of those together that will give me a second size of line and then three of those will give me a third size line. Is that it? Can I easily obtain more than those three sizes? I also see that some people use DMC cordonnet and perl threads, which I believe are crochet threads. But crochet threads already come a wide variety of sizes, why not just buy a variety of sizes and use them directly? Sorry if these questions seem lame, but any input would be welcome. Many thanks, David -
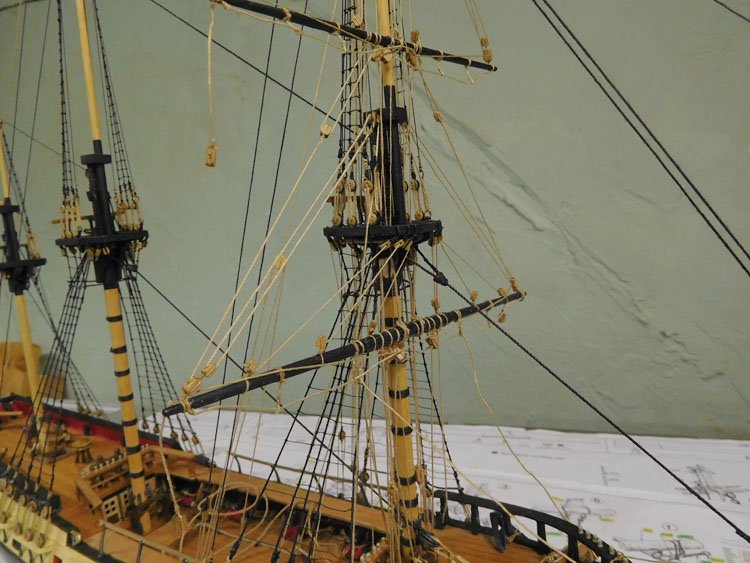
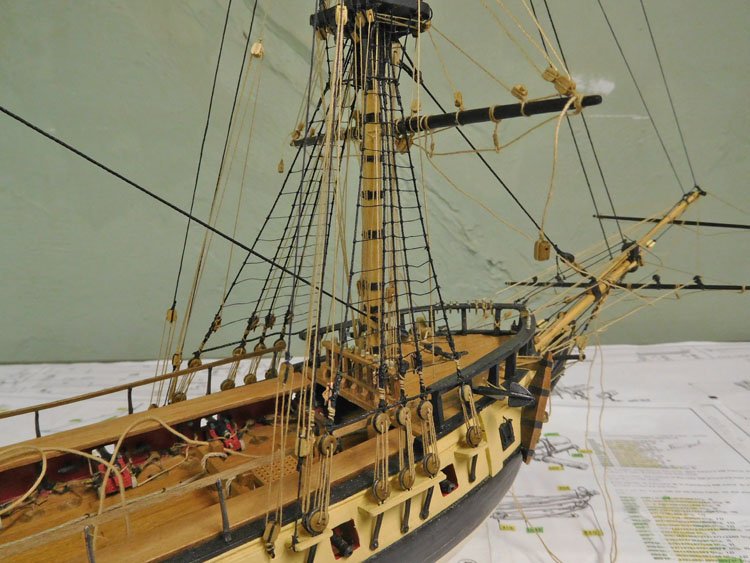
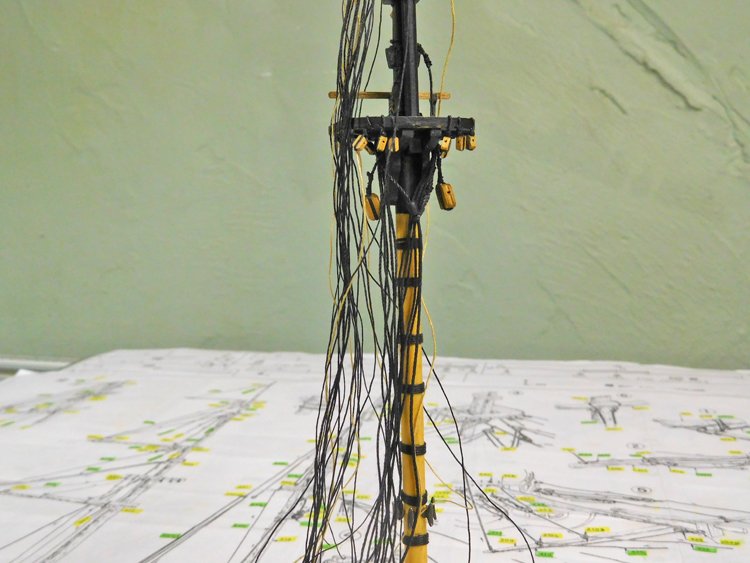
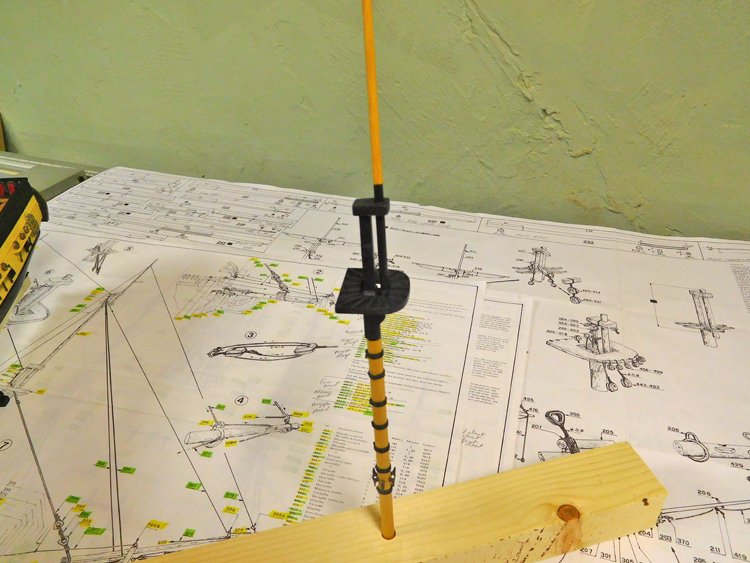
Hello All, I quick update. I've been making slow but sure progress on the rigging. It's all going very smoothly, which of course means little to talk about in my update. I had one minor setback. I mounted the fore mast and attached its standing rigging and then proceeded to mount the main mast. It was only at this point I noticed that the fore mast was tilting to starboard. It was a result of the two holes (main deck and forecastle not lining up 100%.) It didn't really show up at all until the main mast was in place and then it seemed to really show up. I slept on it for a day and then decided to free the fore mast of all its standing rigging, remount it and re-rig it. As a result I decided to put the mizzen mast in place before proceeding further to make sure all were true to each other. In the second picture you can see some of the numerous split ring arrangements in the rigging. Taking the advice of some forum members, I started soldering them and it is really the only way to go; otherwise the lines just keep finding the gap. I was pleasantly surprised to find that it isn't too hard to do and it takes just the tiniest sliver of solder to close the gap. I'll touch them up later with a small dab of flat black paint (as well as the edges of the mast top.) So that's it for today. Thanks again for comments and likes. David
- 67 replies
-
- 7
-
-
- rattlesnake
- mamoli
- (and 1 more)
-
Hi Dave, I'm really looking forward to working on this project. Its history means quite a bit to me. It was made by the father of one of my best friends and he used to show and explain his many ship models to me when I visited their house as a kid. It's really what got me interested in the first place, although the bug lay dormant in me for many years. My friend tells me that this particular model was his dad's first model and he remembered that it "came in a box" whereas all of his subsequent models were scratch built. This one has to be over 50 years old. I think it's important to limit repairs to only those necessary and not make gratuitous changes or "improvements" which will detract from the integrity of the model. The challenge will be to identify the fine line separating the two and stay on the right side of it. Again, thanks all for input and advice. David
-
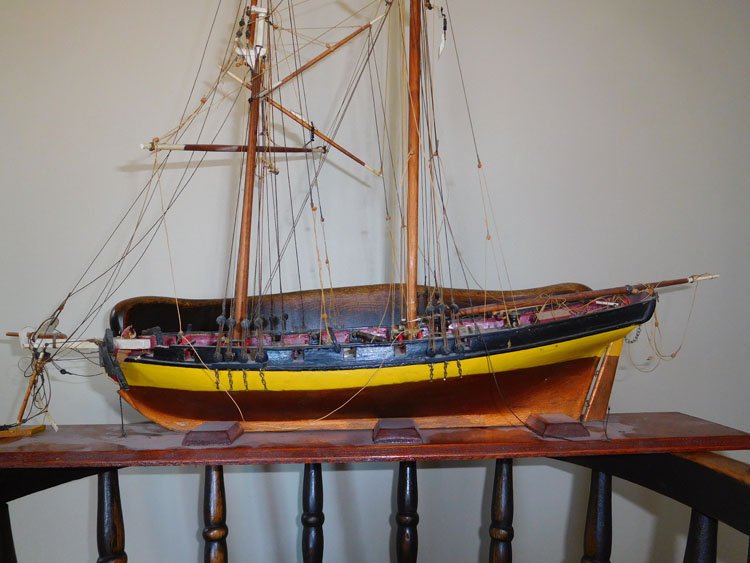
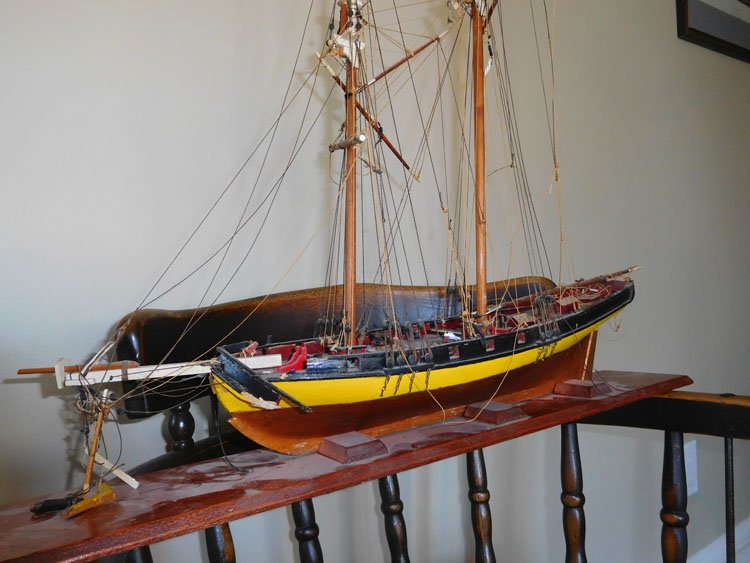
Thanks for all the input everyone. Russ, I think that your suggestion that this is an American topsail schooner is dead-on. I've since searched American topsail schooners and all the pictures I could find, especially of the specific rigging, confirm it. Your suggestion about Marine Model Co and AJ Fisher. was also quite helpful. I now believe that what I have is Marine Model's 'Virginia Privateer' kit #1083. There's very little information about Marine Models out there, but I did find where someone is offering on ebay a partially built vintage Virginia privateer and it is almost certainly the same model as I have. So, I'm very happy to now be armed with this information and know that I will be able to find the resources I need to restore the rigging more-or-less correctly. Thanks again, David
-
Hi Don, Very beautiful job on this interesting model! David
- 653 replies
-
- 3
-
-
- trabakul
- marisstella
- (and 1 more)
-
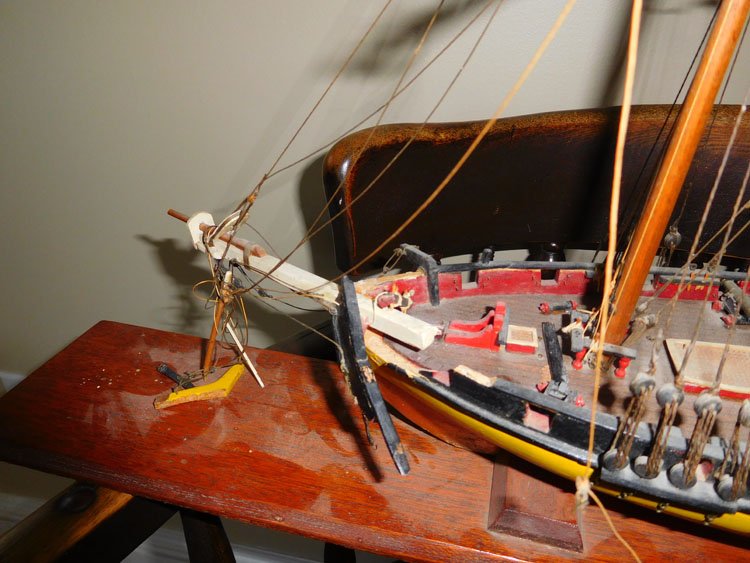
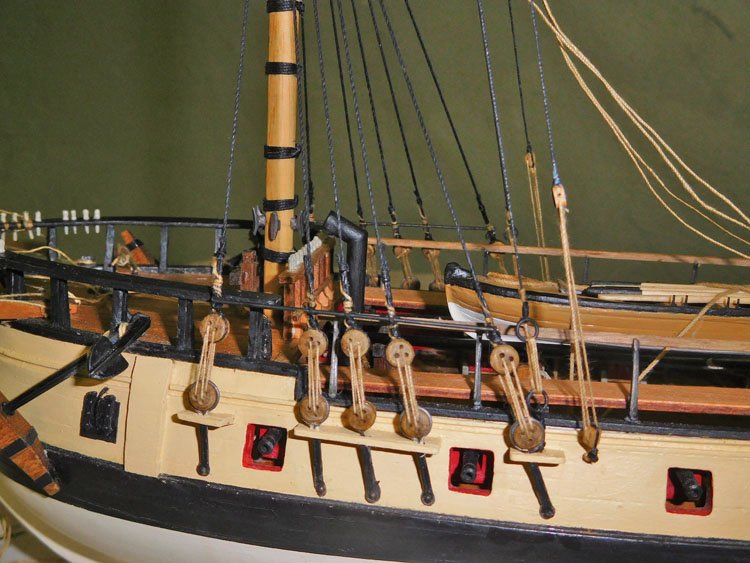
Thanks for the input guys! I'll do some more checking out on-line with your comments in mind. I notice that the bowsprit is square - is that an indication of anything? I cleaned some of the dust from the deck and took a good look at it. It isn't planked; it's a solid surface and he's very nicely painted or drawn the caulking lines on. I think it's going to look great. There are no ratlines - do you thing that's intentional, or simply unfinished? Thanks again, David
-
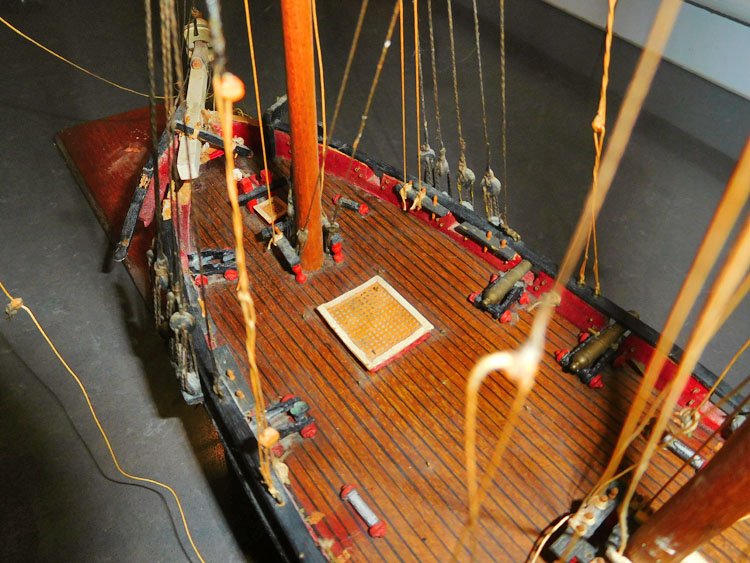
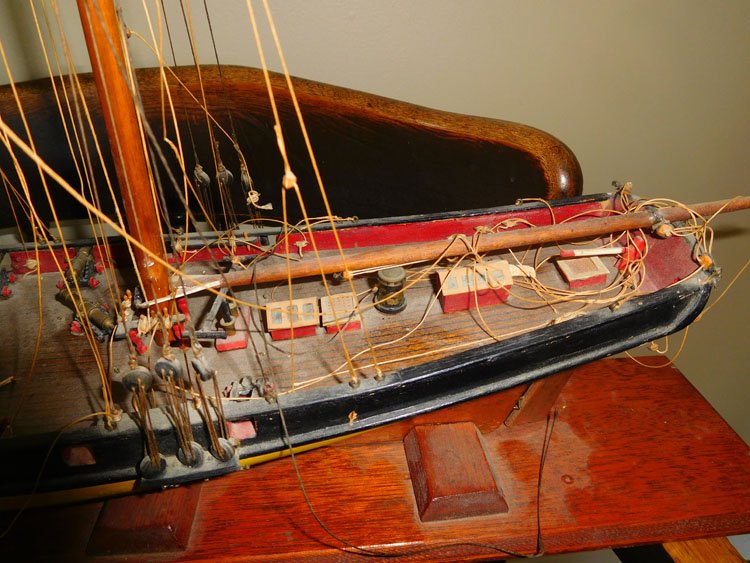
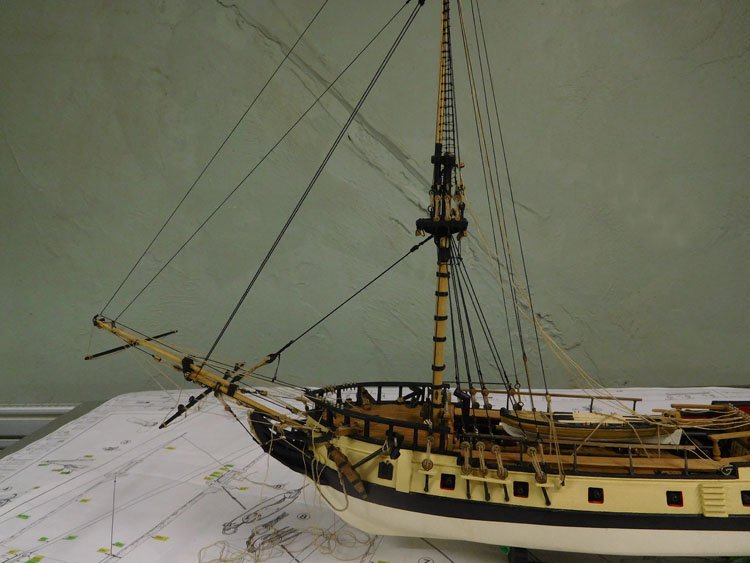
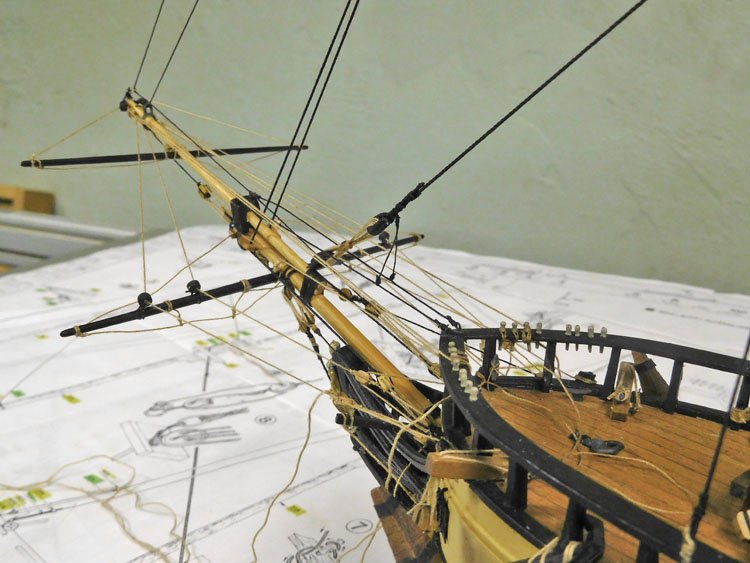
Hi All, In my Rattlesnake Revisited post I referred to a model that I was given on the weekend that is in a sorry state of repair. I don't know what ship this is, or even if it's a specific ship or just a generic representation. This model would be about 50-60 years old and appears to me to be scratch built. It has a sold hull. My limited knowledge would suggest to me that it's a brigantine and perhaps an American privateer, but I may be wrong. It has either 14 guns or 16 if you count the two stern ports. Does anyone have any thoughts on what this might be. Some pictures below, dust and all. Many thanks in advance for any input.
-
Thanks Mark, That sounds quite plausible to me. David
-
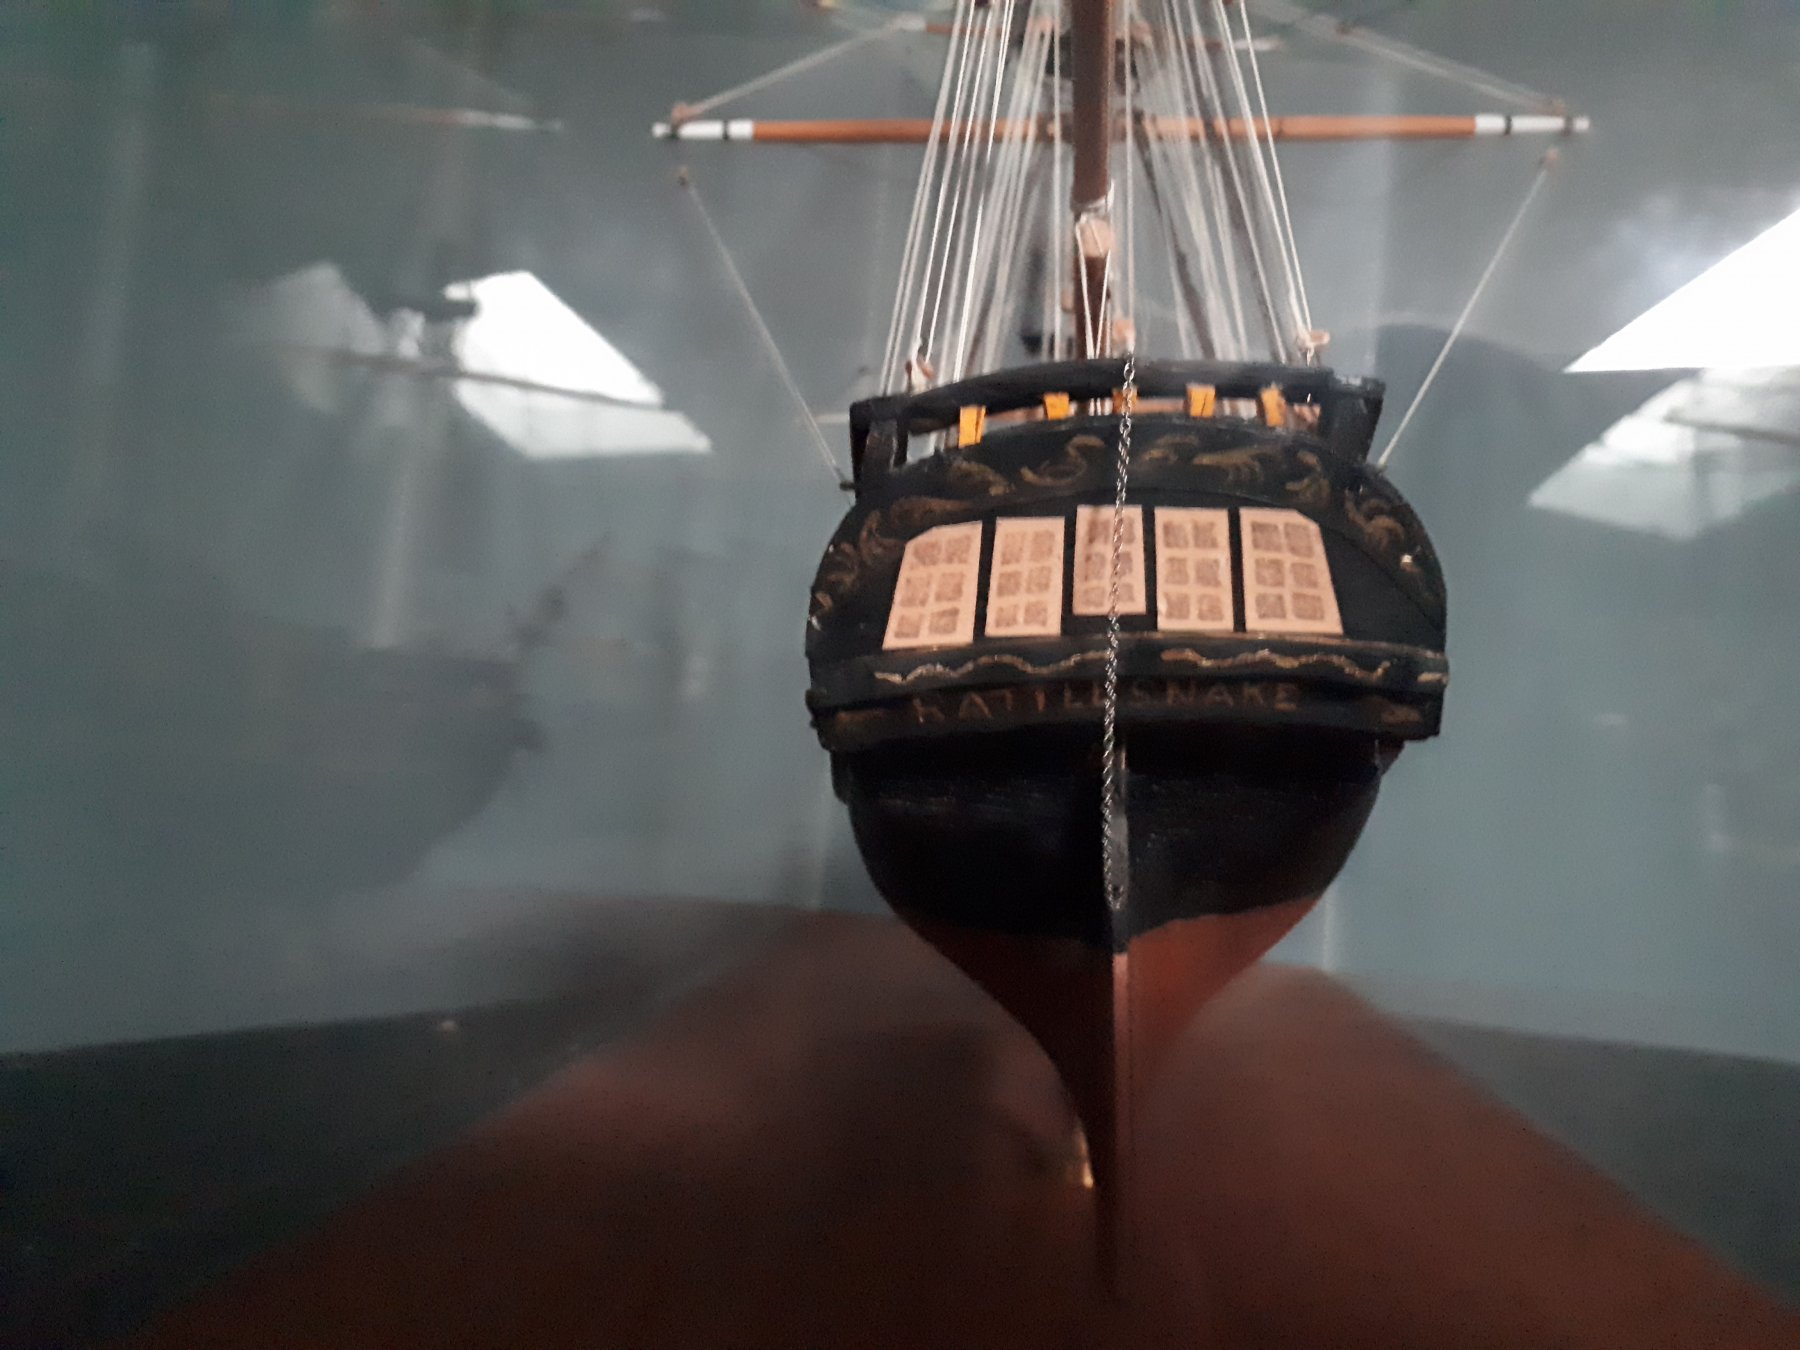
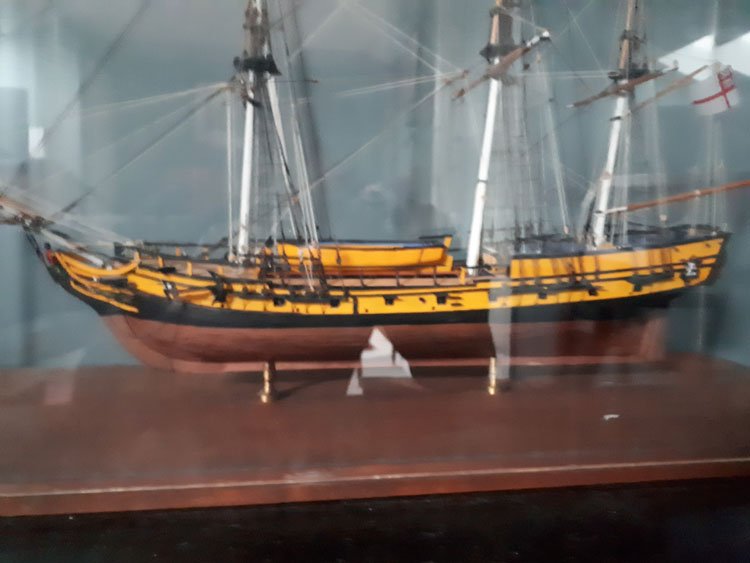
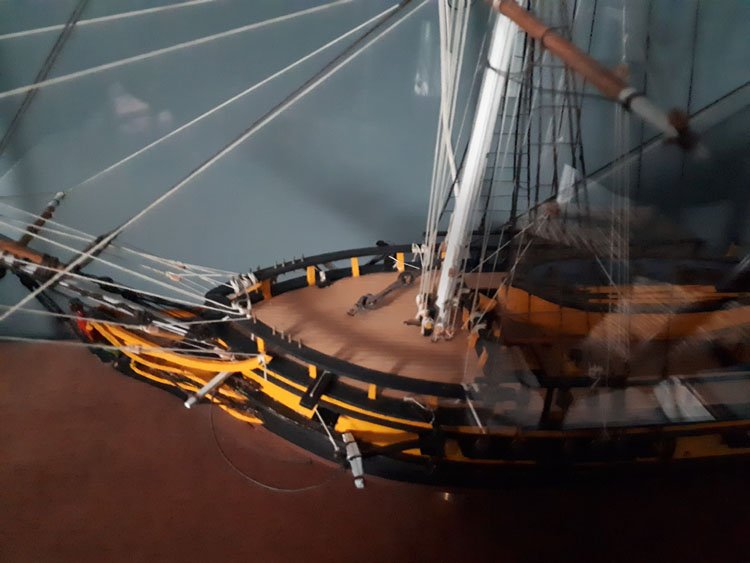
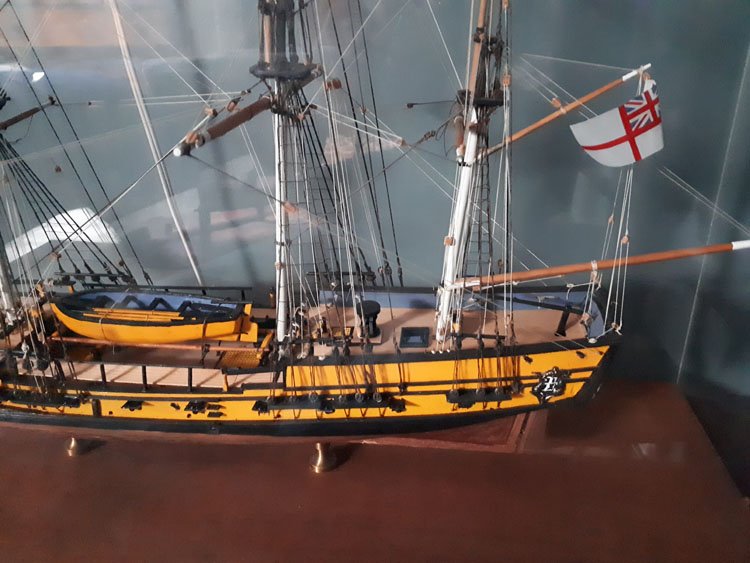
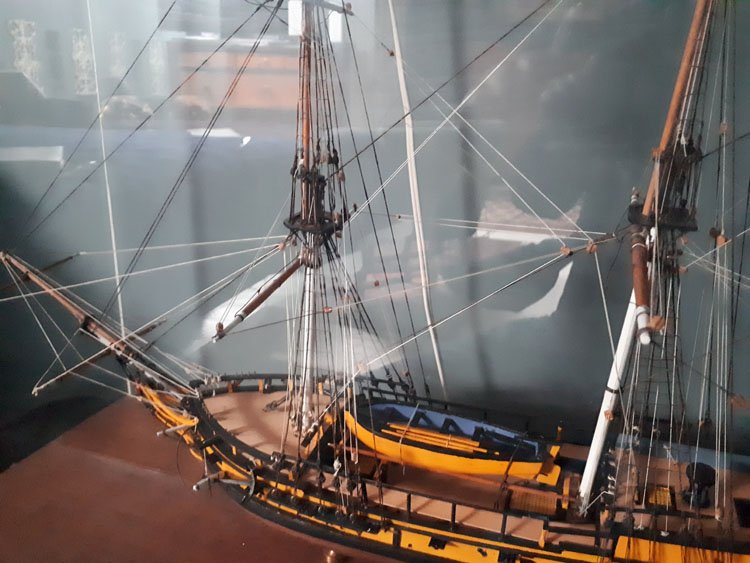
Good Morning All, My first exposure to model ships came when I was a kid, maybe 10 years old. My best friend's father built them and I was mesmerized by them whenever I went to his house. They lived in a large old mansion with a fireplace in every room and a ship model on every mantelpiece. His dad knew I was interested in models (plastic cars and planes,) so he would show me his work space and tools and supplies. I know he told me the names of all of the ships he had modeled, but I didn't remember any of them except one - the Rattlesnake - because what kid could forget an intriguing ship's name like that. Decades later when I started modeling ships myself, I decided I had to build the Rattlesnake as a kind of tribute, which I am currently doing. This past weekend I had the opportunity to re-connect with my old friend who has just returned to Canada after many years of living and working abroad. He had retrieved his belongings out of storage, set up his new house and when I visited, I could hardly believe my eyes. He still has his long-deceased dad's Rattlesnake (and one other model which I'll talk about in a separate post.) I always imagined all the models to be long gone, but apparently all of them have survived; his siblings have the others. Here are some pictures of it. The quality of the pictures isn't very good, as the room was quite dark, I only had my cell phone with me and I had trouble with glare on the glass case, but I think you can see it well enough. The last time I saw this model was over 50 years ago. I was pretty excited to see it again. I know he built many of his models from scratch but I'm not sure about this one. Many of the details are very similar to my Mamoli version. While his stern painting isn’t as fine as it might be, the rest of the workmanship looks pretty good to me, especially the rigging. I was interested in the flag he placed on it, which I believe to be the British White Ensign or St. George's Ensign. I understand that the Rattlesnake was an American privateer, was captured by the British and introduced into their fleet as the Cormorant. It seems a bit odd to me that he's showing it with a British flag and still bearing the name Rattlesnake. I don't know enough about naval history to know how these things transpired. That ensign would never have been flown by an American ship, would it? Was it the practice for an opposing navy to immediately raise their flag on a captured ship? Is this a legitimate way to have modeled this ship? or was he just taking artistic license? I'm kind of curious about that. I'm also curious about the blue colour of the bulwarks. I have never seen them painted blue before. Again, is there some legitimacy to this or is it more likely that he just happened to have some blue paint kicking around? Does anyone have any thoughts? Anyway, that's my Rattlesnake story. My friend gave me the other model that he had. Unlike the Rattlesnake, this one is in very poor condition and he's hoping I can restore it and it's mine to keep! Neither of us knows what ship it is. I'll post pictures of it separately to try to get some input from some of you, but I'd like to do a little research on my own first, to see if I can narrow it down a bit. In any case I'm pretty pleased to own it regardless of what it is or what condition it's in. David

-
Good Morning, I've made some more progress on the rigging. The standing rigging is finished on the bowsprit and foremast (except for ratlines) as well as some running rigging on the bowsprit. I'm using the line that came with the kit for the running rigging. It seems to be quite decent. It's a nice khaki colour and is good to work with. No black line came with the kit - they suggested colouring the khaki line black - but instead I used black line left over from my Constitution build, which is from Blue Jacket if I remember correctly. The kit supplied deadeyes are of acceptable quality, but the blocks are not, (in fact, so bad as to be laughable) so I've replaced them something a little better. Everything is moving along with in a straightforward way with no issues to report. David
- 67 replies
-
- 8
-
-
- rattlesnake
- mamoli
- (and 1 more)
-
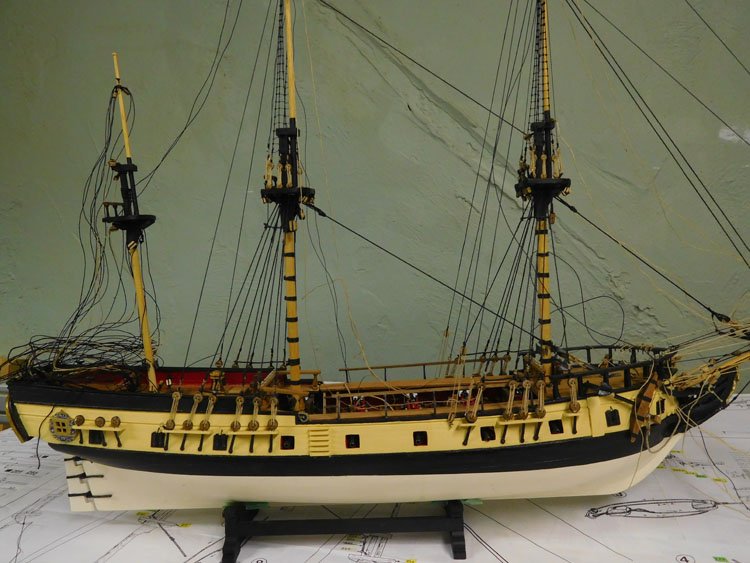
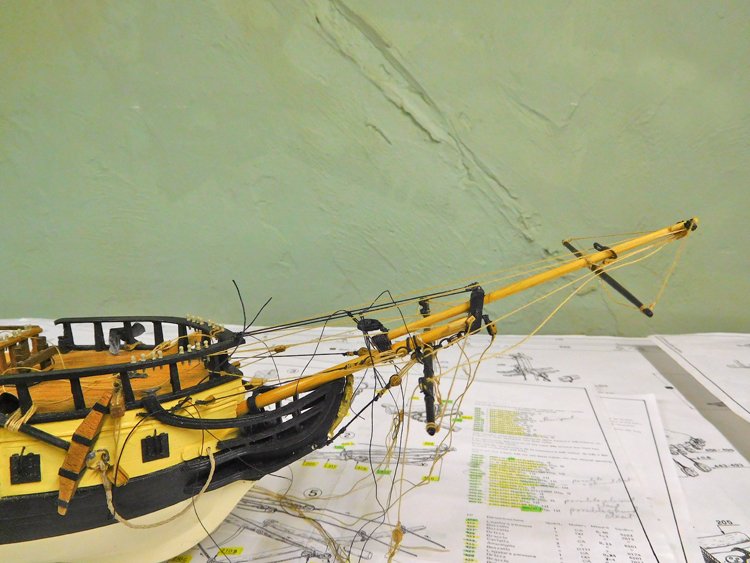
Hello Everyone, I've been making some progress on the rigging stage. I've build the three masts and as well as the bowsprit and have attached much of the rigging to them. I've been working on rigging the yards, but by way of taking a break from that, I mounted the bowsprit and began attaching what rigging I could that doesn't depend on the foremast and its stays being in place. (Still a few loose ends to tie down yet as you can see.) The instructions with the Mamoli kit are especially good with respect to the rigging and I'm really enjoying working with them alone and not referring to my practicum at all. While I found the practicums to be very helpful for my earlier builds, I'm now finding it more fun to tackle this stage on my own. I had earlier expressed some frustration working with those little split rings and the line always tending to find the gap and come free. I had thought that soldering something this small might not be practical, but several of you indicated that that's the way to go. This afternoon I experimented and had great success! They are not too difficult to solder at all and it certainly solves the problem. David

- 67 replies
-
- 8
-
-
- rattlesnake
- mamoli
- (and 1 more)
-
Split Brass Ring Frustrations
David Lester replied to David Lester's topic in Masting, rigging and sails
Thanks for all the suggestions everyone, and so quickly! I've ordered a pair of those "jumpring pliers" from Fire Mountain that you suggested Kurt. I have ordered copper foil from them in the past and was going to need more for my next project anyway, so killed two birds with one stone and ordered both. So, now we'll see how I make out with the soldering. Thanks again, David -
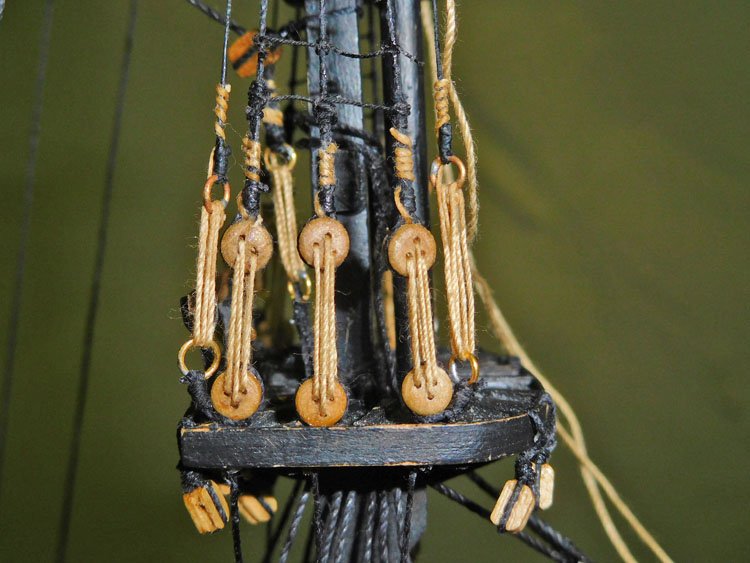
I'm looking ahead on my rigging plans for my Rattlesnake and notice quite a few instances where lines are attached to small brass rings. In the past, I've always had a difficult time with these rings. It seems that no matter how hard I try to close the ring, the line always manages to find the gap and the ring comes free. Is soldering an option for these small rings when there's a line running through it? Are there specialty pliers that will crimp them tighter than ordinary pliers? What do others do keep these pesky things in their place? Thanks, David
-
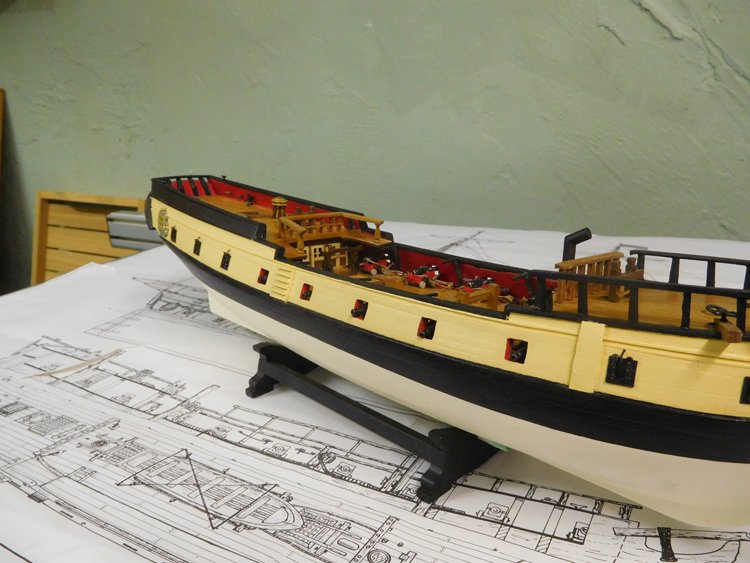
Thanks guys! Doug - I've basically copied the colour scheme of the MS version of the kit which shows black and pale yellow. I have used model paints for everything except the yellow, which, to be honest, is just some left over house paint I had kicking around. My favourite model paint is Model Master but I have to drive to Whitby to find it (about 45 minute drive from home.) I tend to stock up on the basic colours (black, flat black, red, white etc.) when I'm there, but then improvise for everything else, such as I did for the yellow. David
-
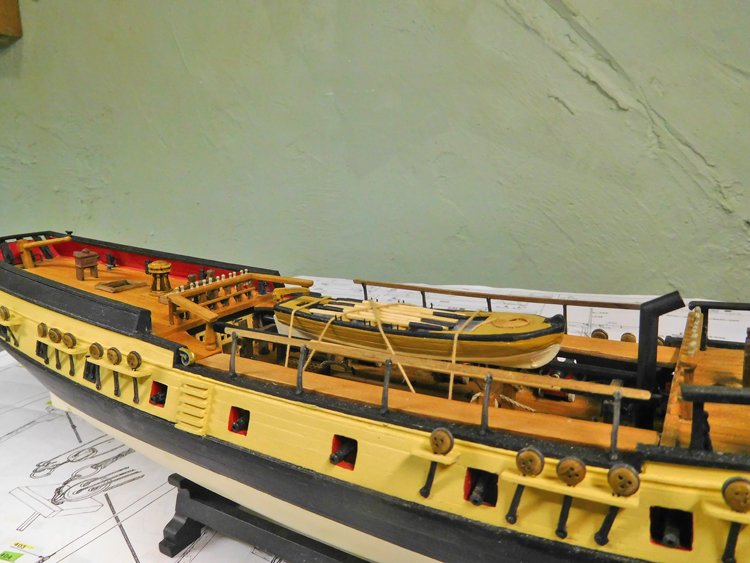
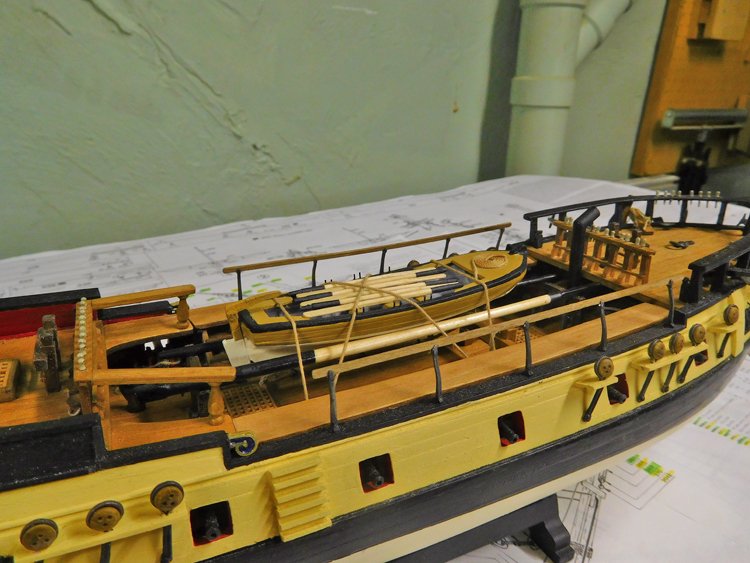
Hello All, Well I'm back from by UK trip and have had some time to work on my Rattlesnake. I've been focusing on the boat. I've had to do a fair bit of improvising here. It's a cast metal one that comes with the kit and I think it's just a generic boat as it bears little resemblance to the one in the plans and in any case the plans are a bit vague on its details. I have Bob Hunt's practicum and while he gives a lot of detail on finishing the boat, the one he starts with is a nice wooden one which I assume must have shipped with this kit at one time. Finishing this metal one like he did the wooden one didn't seem all that practical to me. So I relied mostly on the photo of the MS version of the kit and have copied it as much as possible with the results that you can see below. I didn't make oars for the boats on my Constitution, but decided to give it a go here. I used the Don Robinson method and it worked beautifully - just stick the end of a dowel in a vice and squeeze. Follow it up with a little clean-up and you have a pretty credible looking oar. Thanks for that tip Don! With that little project finished, I started in on the masts and have finished the fore mast. Everything was very straightforward here without need for much comment. I don't anticipate any issues as as I work my way through the rest of the masts and yards. After a very cool and wet summer, we are now having the most glorious weather you can imagine. Temperatures have been in the high 20's with blue skies! David
- 67 replies
-
- 7
-
-
- rattlesnake
- mamoli
- (and 1 more)
-
Hi Derek, I spend a lot of time re-doing things too. My rule of thumb is if I know I can do a better job, then I re-do it, and when I know it's the best I can do, even though it might not be perfect, then I live with it . When I do less than my best, it's almost always because of impatience. Your Bluenose is looking very nice, and I'm sure you'll be able to get a satisfactory job on the frames even if it means doing only one or two at a time. A standing-height bench is the best in my opinion. I have a high bench as well as a high stool and I alternate between standing and sitting. Hours seem to pass like minutes! David
-
Hi Dave, Your model is looking absolutely beautiful. David
-
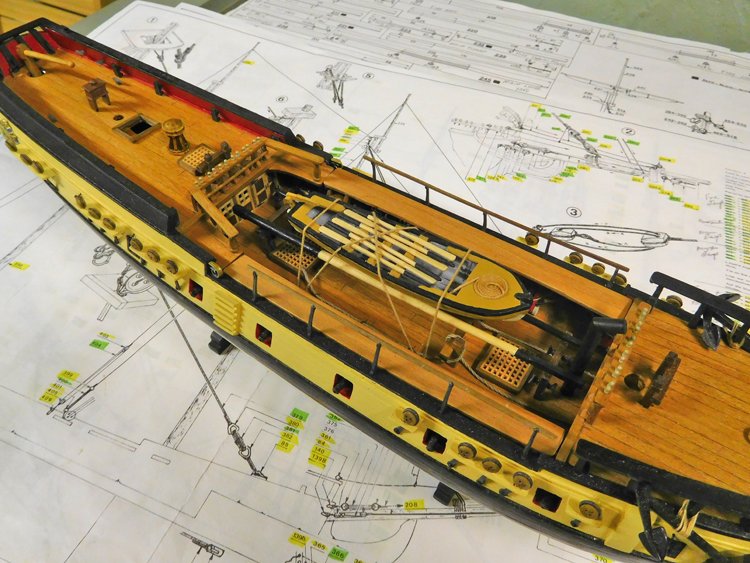
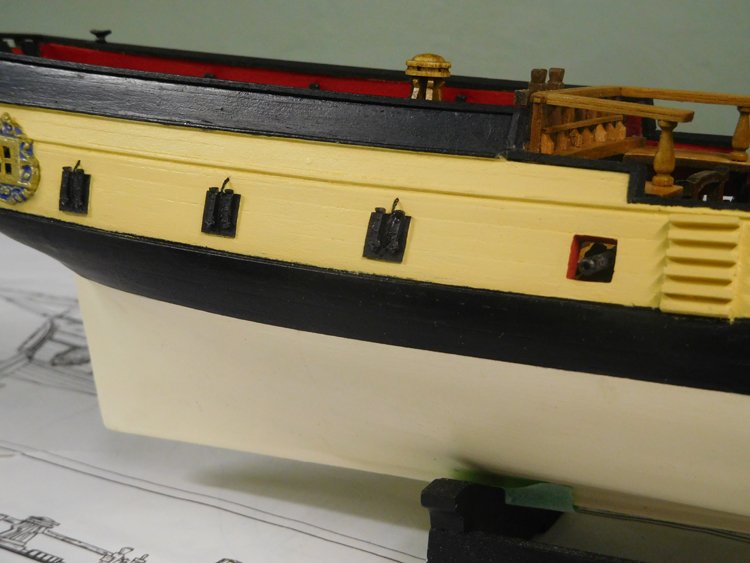
Good Morning, A brief update this morning. I've pretty much finished adding all the deck details. The last thing was the gun port covers. I chose to show half of them closed liked the MS version photograph. I ran into a small problem though. I carefully made the covers by adding planking to the base piece for each one. Then I carefully fit each one to its opening and sanded them flush. As it turns out, I fitted them too well and and sanded them too flush, so that it was virtually impossible to distinguish them from the rest of the hull. When I painted them, it looked as though I had simply painted them on. It would have been better if I'd fitted them more loosely and maybe let them sit proud a little bit. I didn't feel like cutting them all out, so I made new thin ones from .5 mm stock and glued them to the surface. Probably not as good as properly fitted ones, but certainly better than what I had and I've decoded they're going to be acceptable. So next will be the channels, railings and rudder. I'll be absent for a couple of weeks though, as we're off to Scotland and England. A visit to Portsmouth is on the agenda and I'll a little worried as it was a visit to Boston that got me fired up about the Constitution. I'm not sure that I'm ready to tackle the Victory, but I'm afraid its impact on me might be beyond my control! David
- 67 replies
-
- 5
-
-
- rattlesnake
- mamoli
- (and 1 more)