DONATION DRIVE - SUPPORT MSW - DO YOUR PART TO KEEP THIS GREAT FORUM GOING!
×


GuntherMT
-
Posts
2,213 -
Joined
-
Last visited
Content Type
Profiles
Forums
Gallery
Events
Everything posted by GuntherMT
-
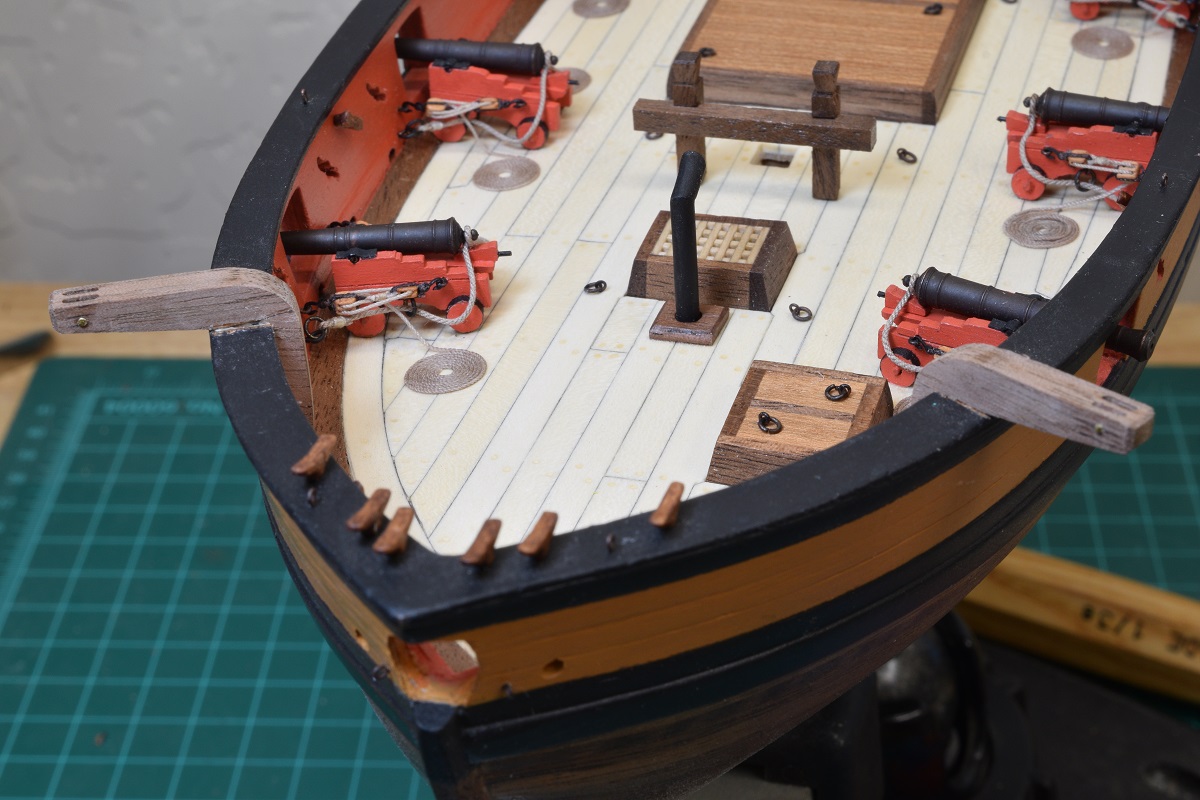
To add to your lexicon of ship stuff - the round blocks with the 3 holes are called "Dead eyes", and the wire (or rope) that connects them to the hull are the "Chain Plates". In some models they are wire, in some they are actual chain, and in some they are iron (usually brass in the models) bands. Your rope solution looks quite good actually, and connecting them with the brass nails is a very common way of attaching them. Nicely done.
-
I thought it looked way too nice to be basswood!
-
Looking great. What wood are you using for the lower hull?
-
Simply stunning work Keith, thank you for sharing.
-
Great detail. What do you use to attach the PE to the other brass, just CA glue, or is there something special? For that matter, what do you use to attach PE to plastic or resin?
-
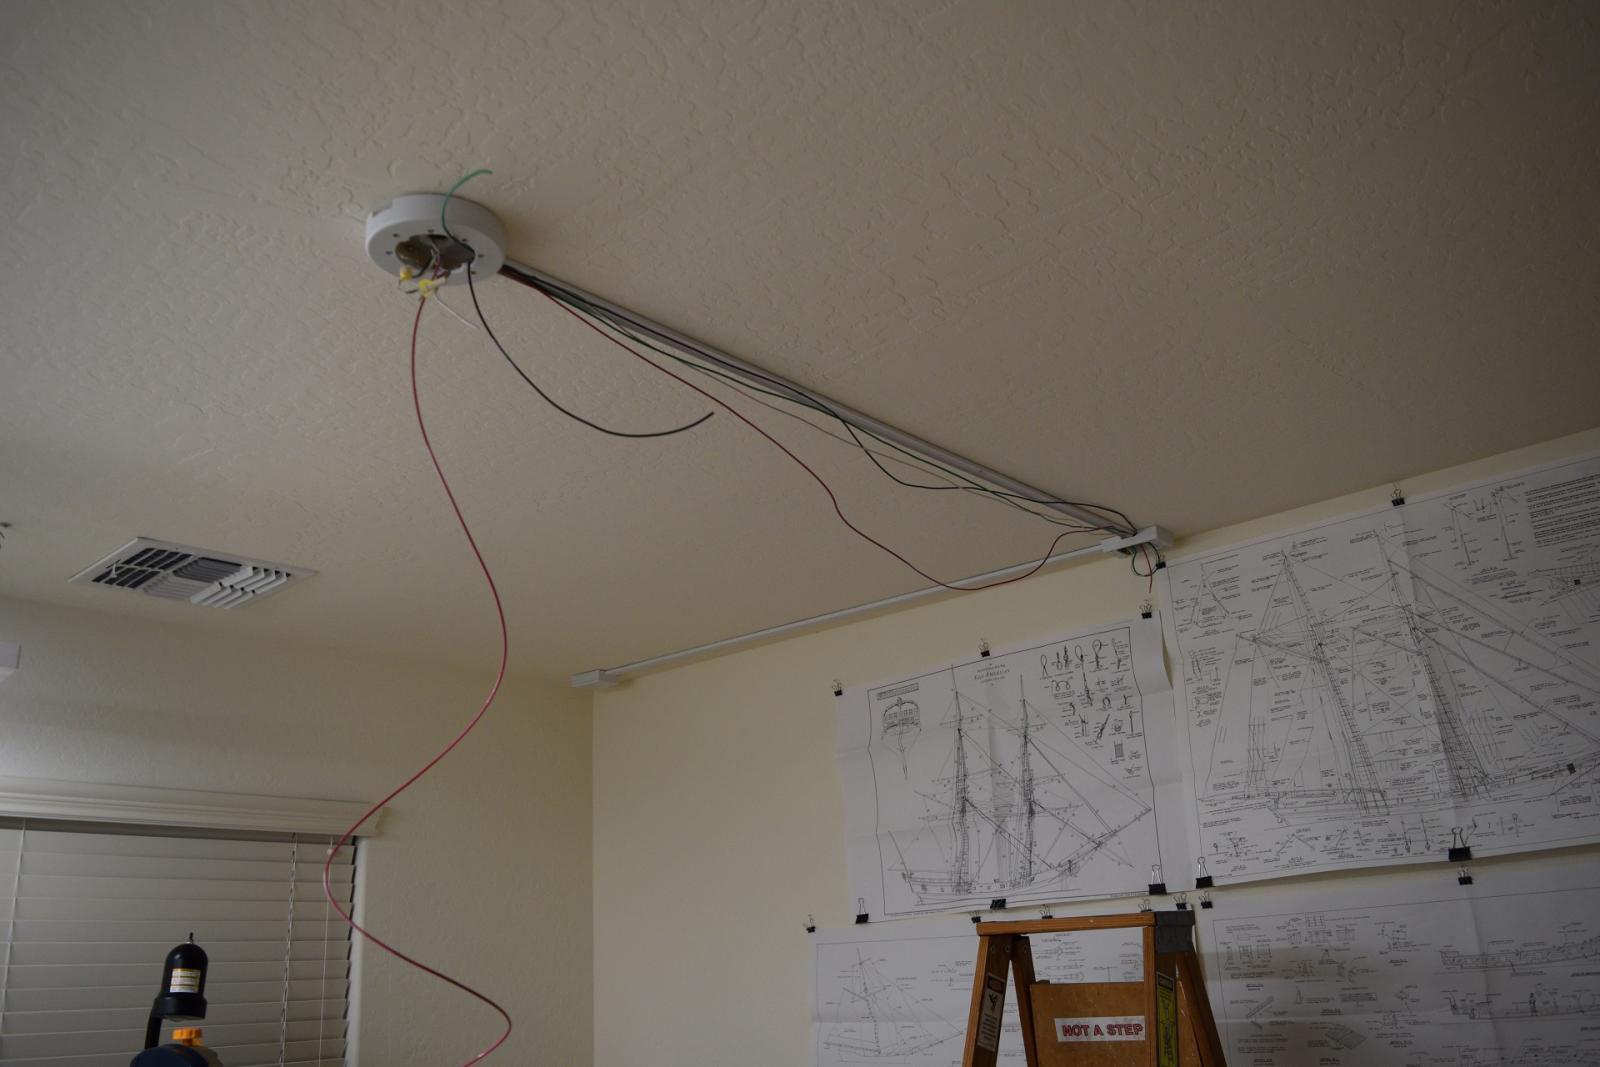
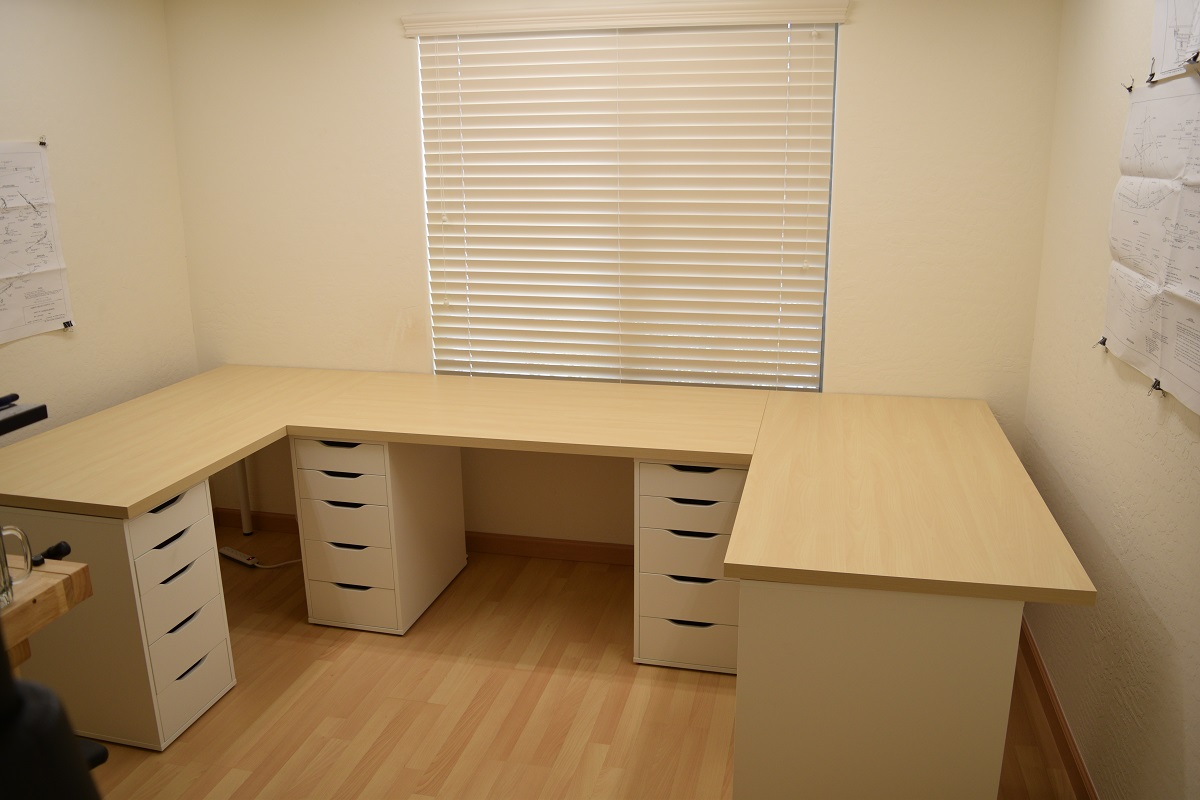
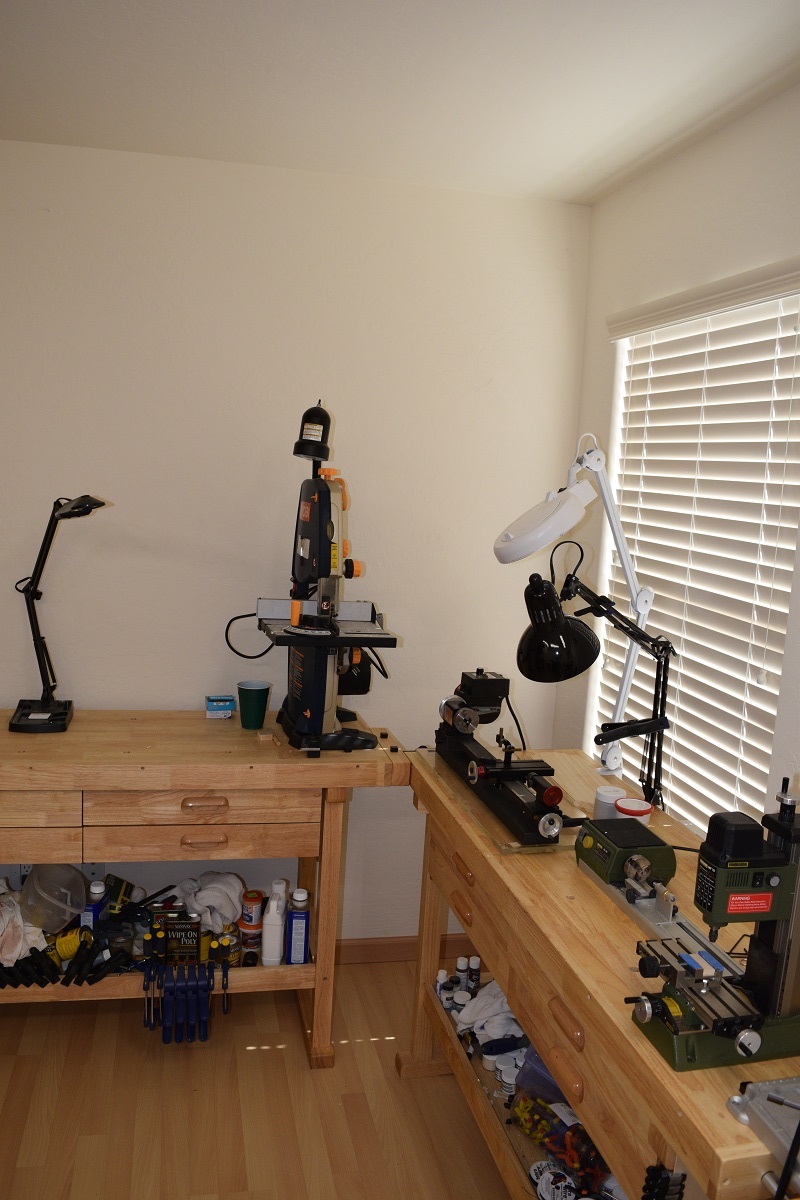
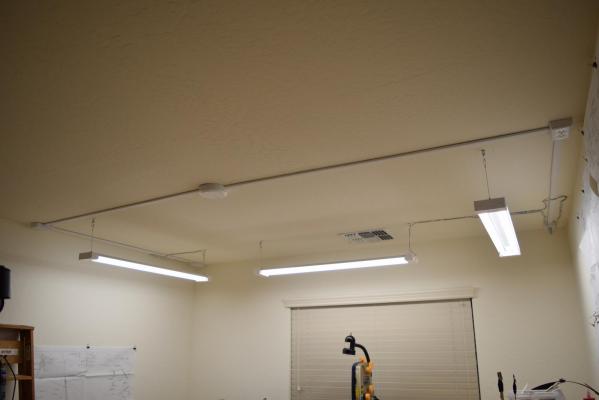
As some (or all) of you may have gathered by now, I'm quite easily distracted by "shiny things". My most recent distraction was that I finally decided that I needed to finish my work room, which required quite a bit of re-working. First I removed the temporary hanging lights I had rigged, and spent far more time working over my head than I have done in a very long time, which reminded me that working on overhead stuff truly sucks. I used Wiremold to tap two circuits out of my overhead light fixture (was wired for a ceiling fan that was never installed in this room). I then hung 3 awesome LED light fixtures from Costco (3700 lumens each @ 4000K, for only a 30 watt draw), these are all wired to the same circuit. So much light, it's awesome. Next up, launched into a furniture assembling marathon, and replaced my two 20" deep, very crowded work benches with 3 x 30" x 60" surfaces, allowing me to move both existing work benches to the back side of the room and dedicate them to my ever-growing collection of power tools. Thanks to Frank for pointing me at Ikea for these fantastic table-tops and shelf units. I still have to mount two more of these LED fixtures, which will be on the other circuit so they are separately switched over the two work benches, but that will come later. I've got a ton of work now just to get organized into the new area, since everything has to be relocated to the new drawer units under the new work area. Hopefully my next update will have actual ship progress again, now that I'm pretty much done with the room layout (and there is no room left for any other additions).


- 831 replies
-
- 18
-

-
- Armed Virginia Sloop
- Model Shipways
- (and 1 more)
-
Fantastic work on those slats Frank. Going to have to take a good look at them Saturday, as I had no idea that those were built up that way.
-
I'm beginning to think that ship modelling is just an excuse for you to experiment making new tools and jigs.
-
When you are looking at it in person, the scale of the pin-rails doesn't really jump out at you as a problem. Instead how tiny the belaying pins are is what grabbed me! I think once you get them all half (or more) covered in rigging and rope coils, that it will be a non-issue visually.
-
Amazon is one of my best friends. I should own their stock. I found this set very nice, as it comes with 5 of each size, in a nice case that has plenty of space to label each spot with both metric and english measurements for easy reference, and you *will* break those little buggers. http://www.amazon.com/gp/product/B002O0G0ZS?psc=1&redirect=true&ref_=oh_aui_detailpage_o07_s00
-
Only if you'll be writing me a check to cover the cost!
-
It's sort of funny Frank, I never actually noticed the kevels when I was actually looking at the ship. It's strange how the eye is drawn to specific features, and others are just missed, yet they really add to the overall look of the project. I look forward to re-inspecting the ship and looking at those kevels tomorrow!
-
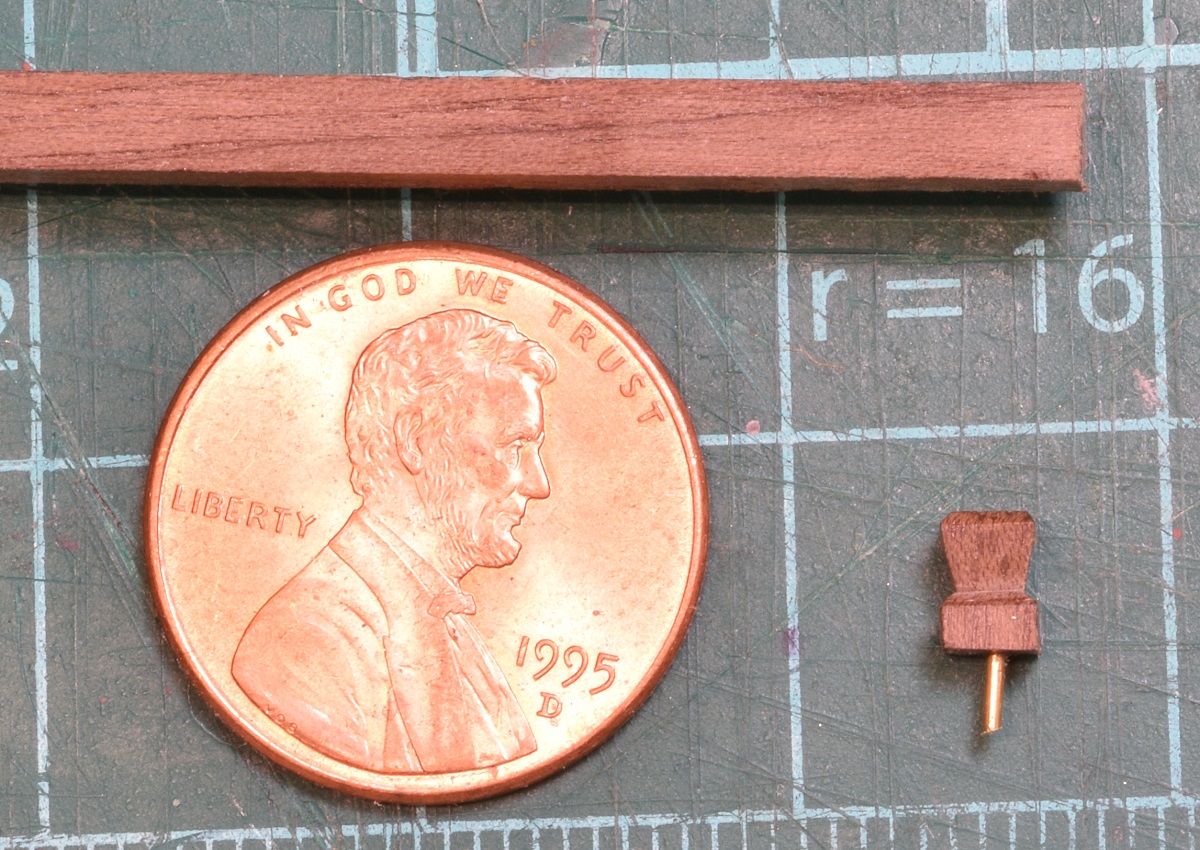
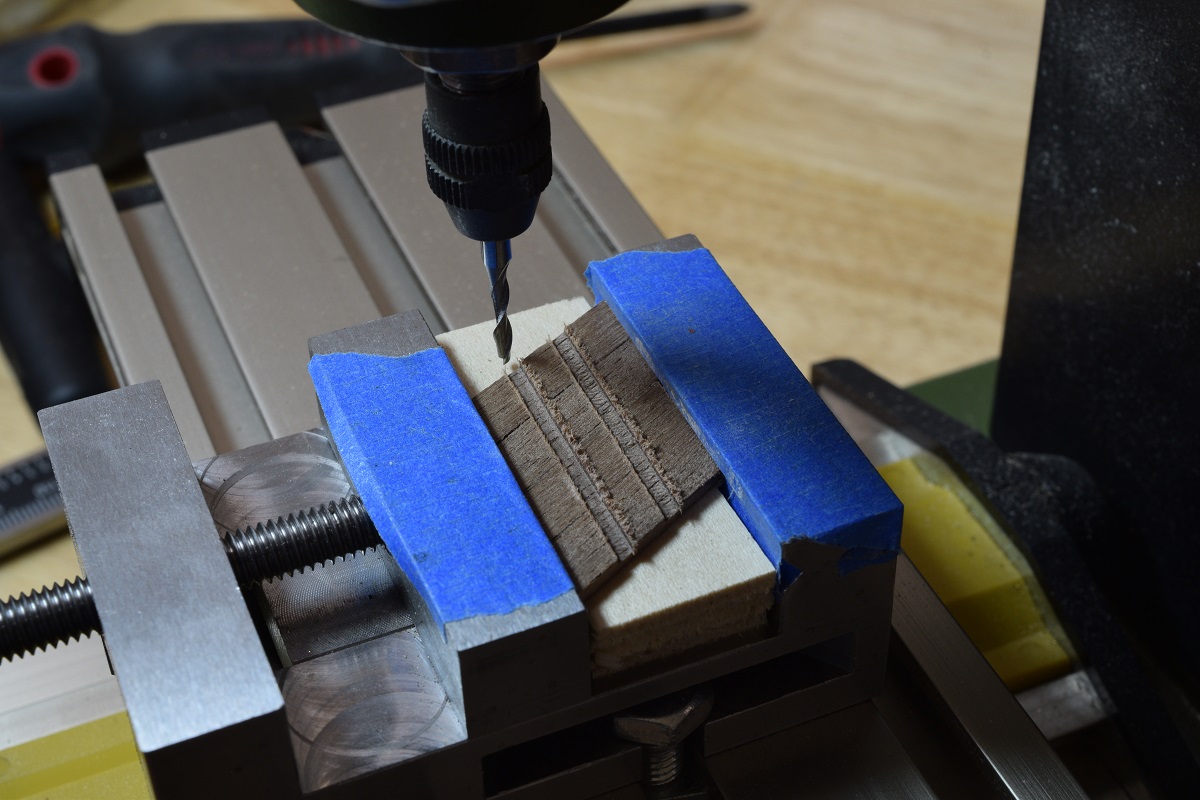
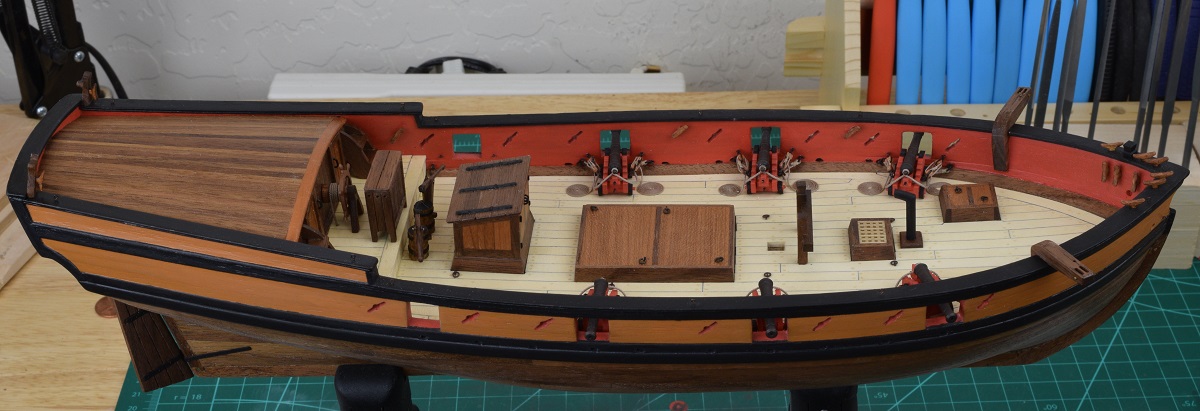
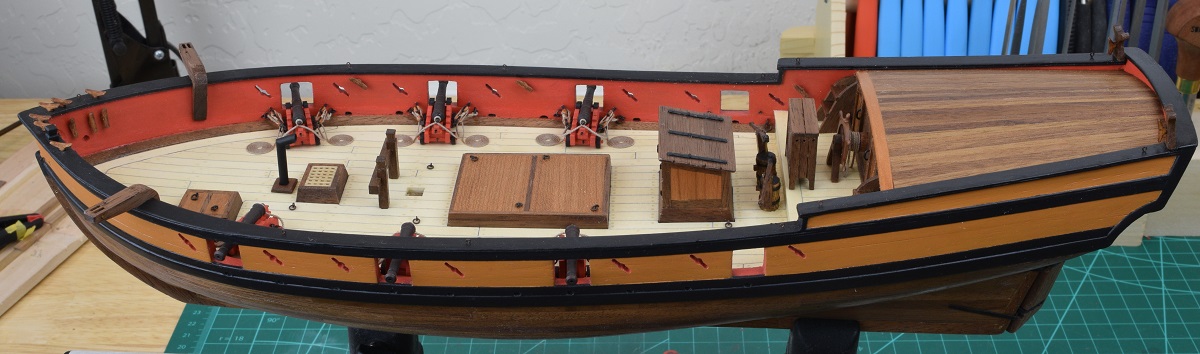
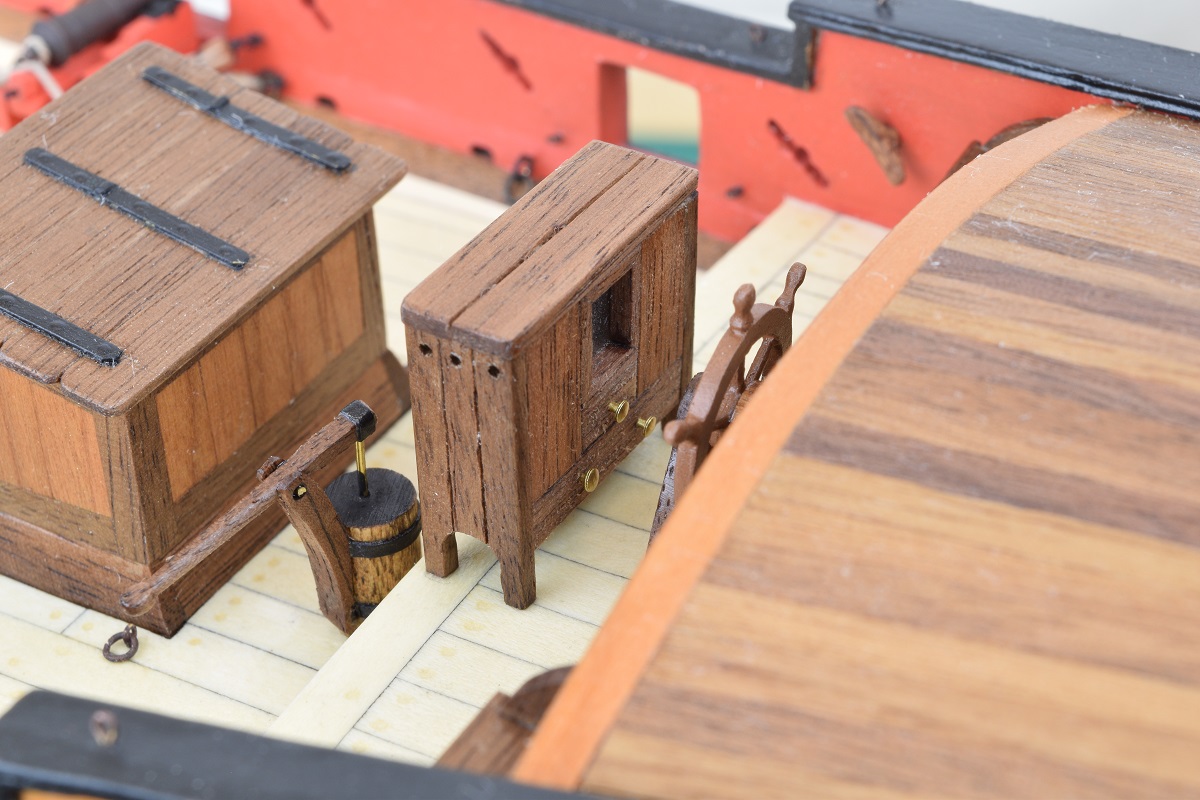
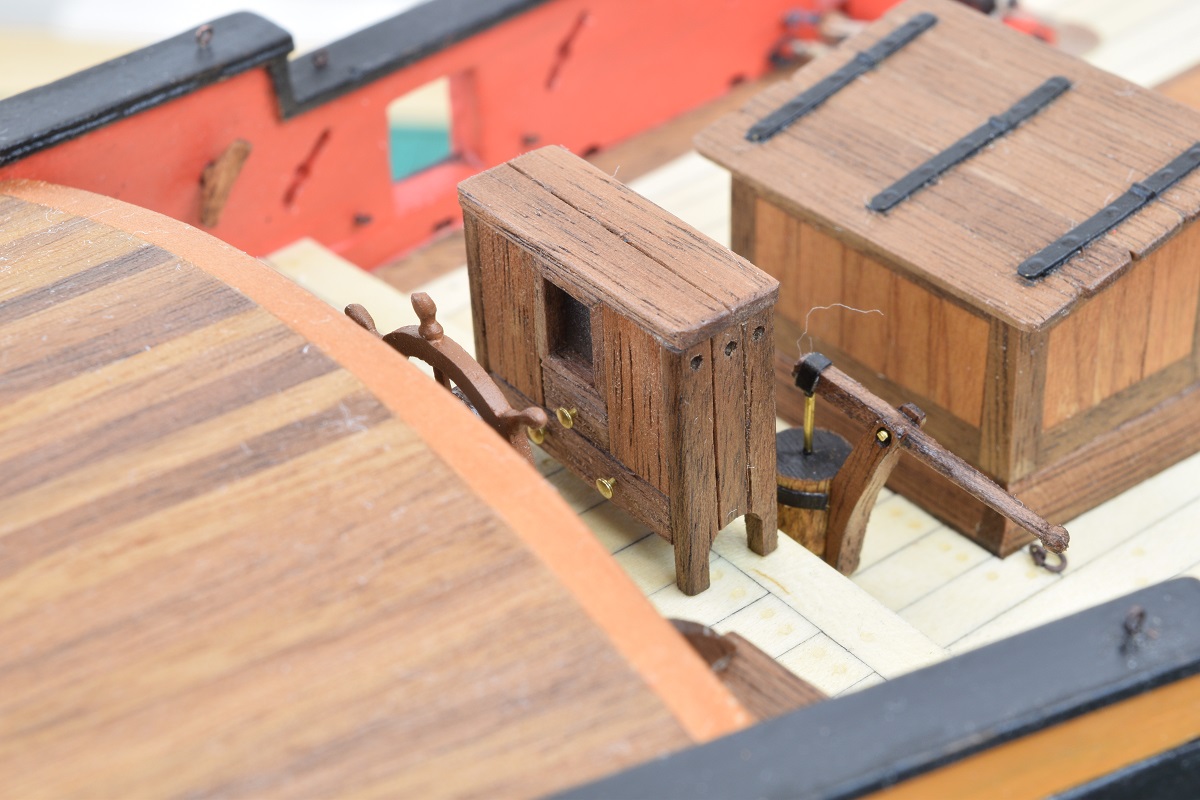
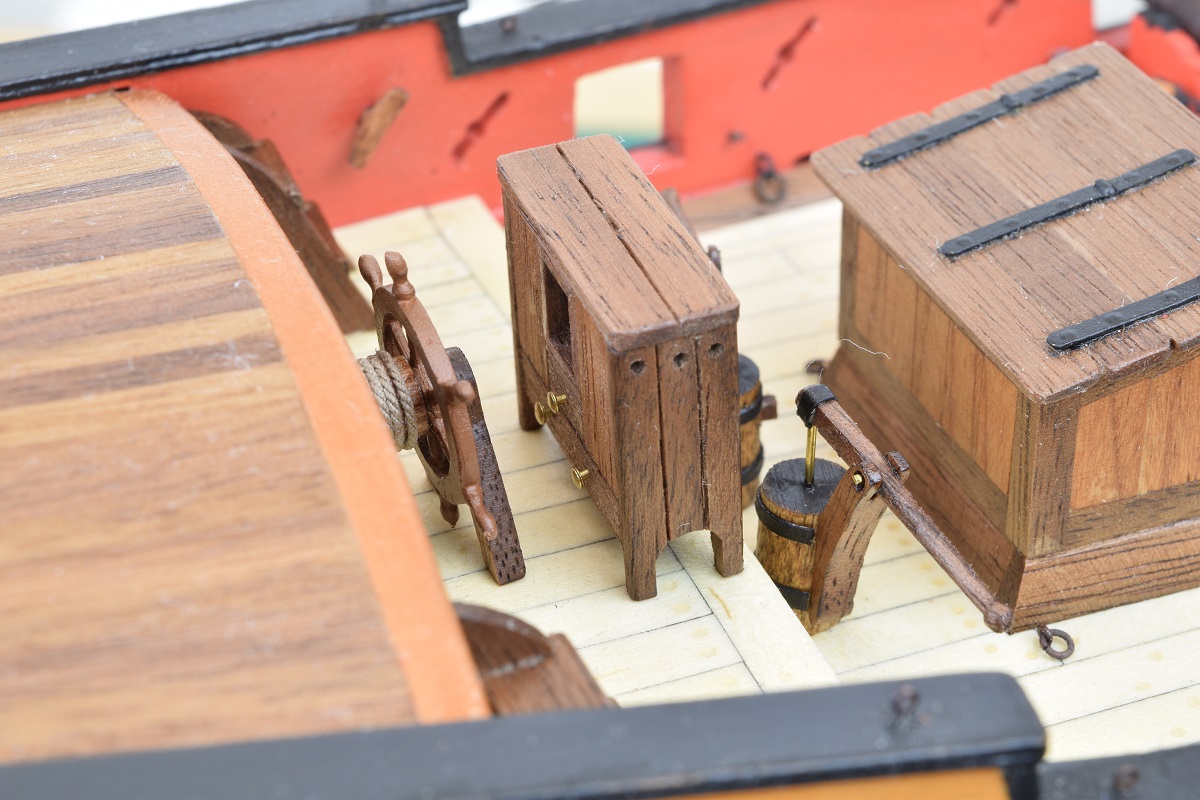
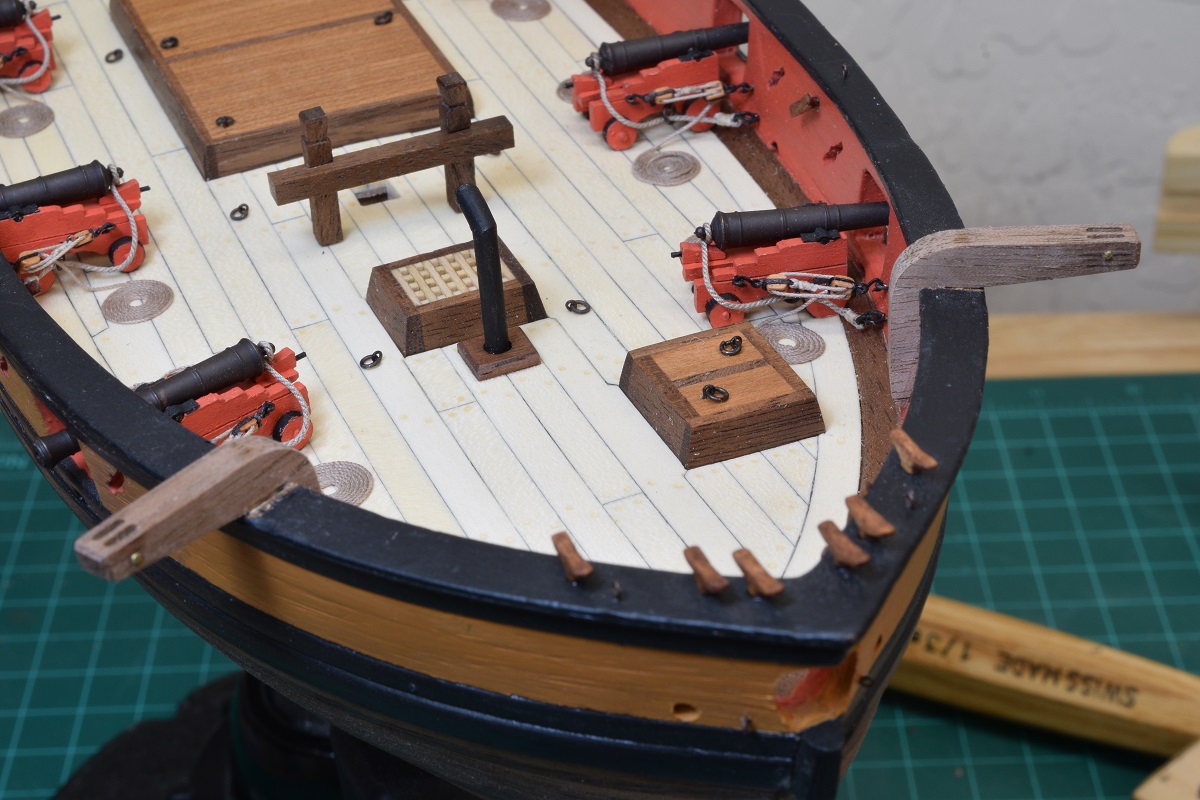
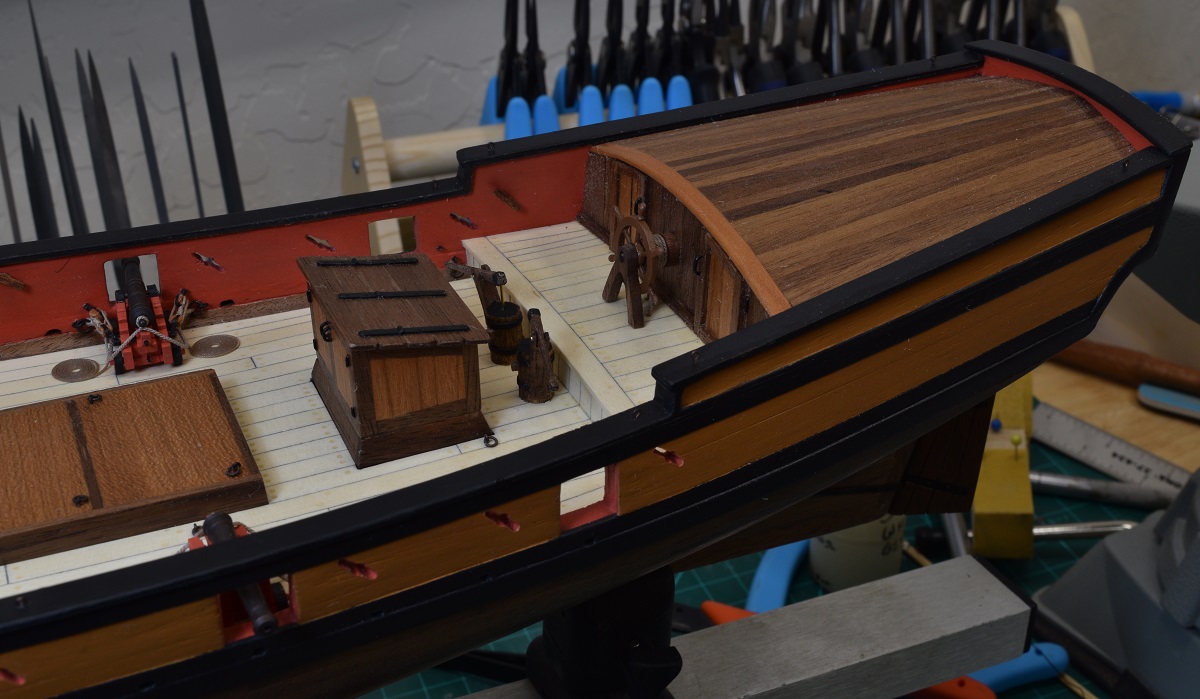
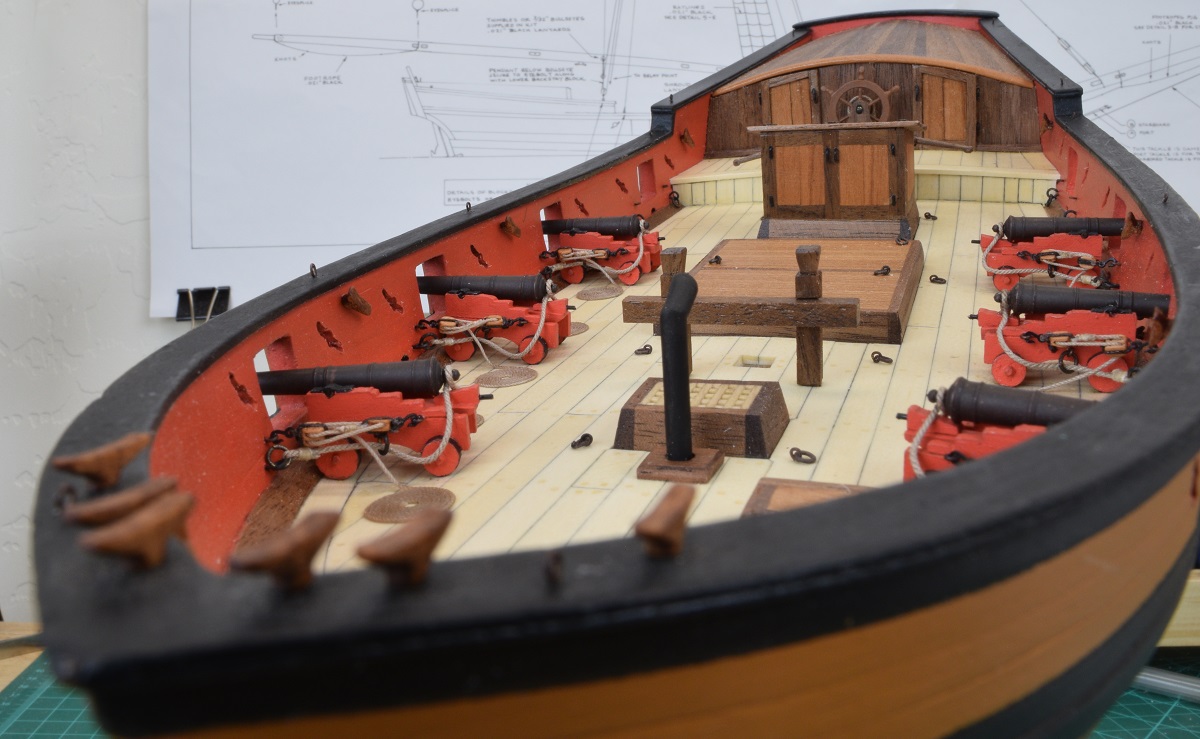
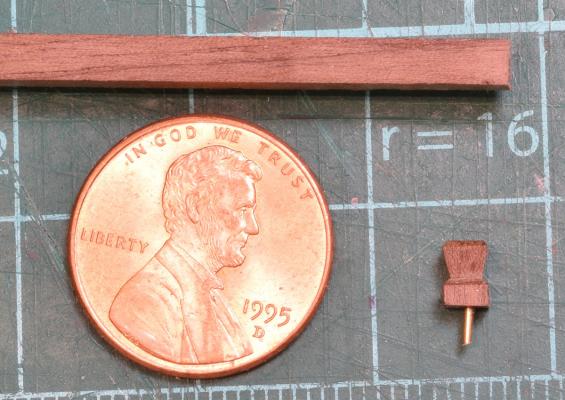
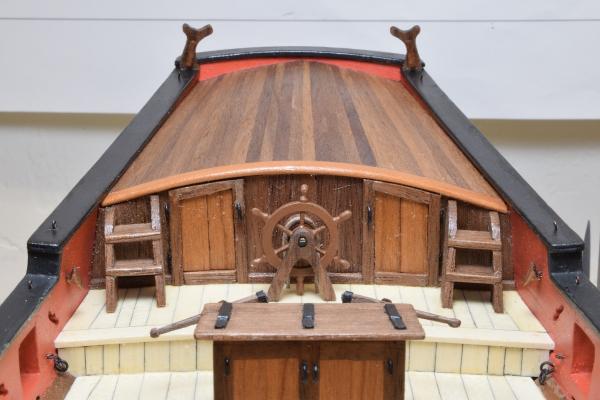
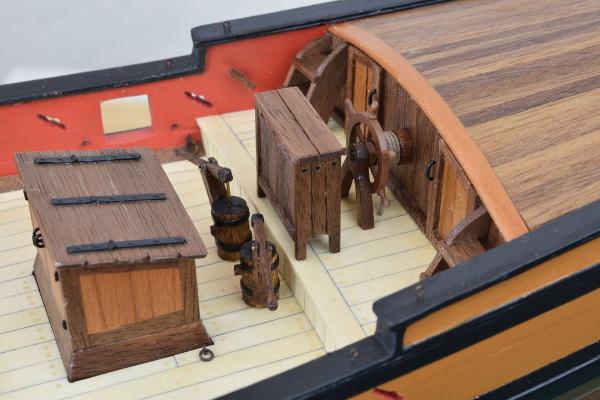
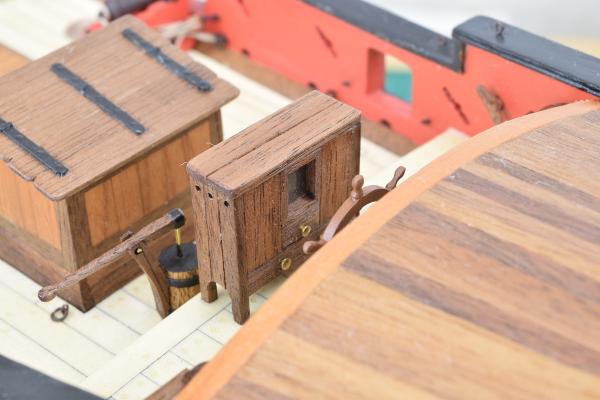
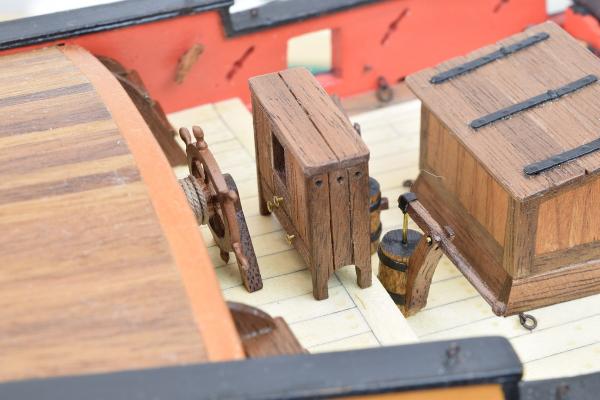
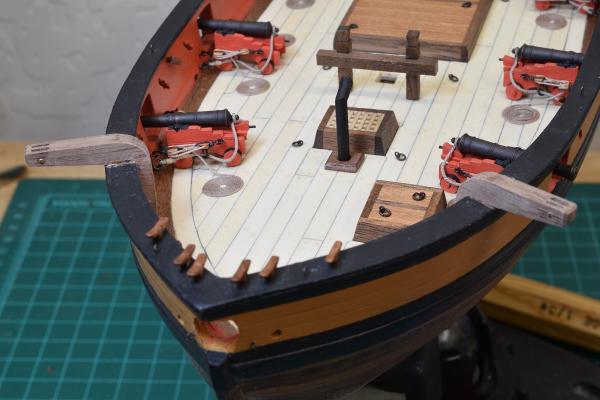
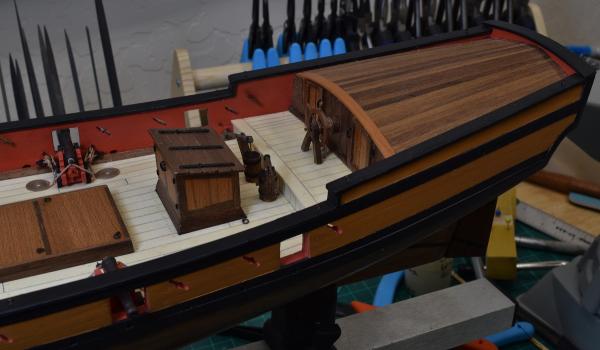
After the catheads, I decided to make a timberhead, which came out pretty decent for my first try. Only made the one for now, need to make 5 more. I made this using a barret file for shaping. Next up was the stairs. I made an angle in my little planking jig to make the ends parallel based on the bottom angle on the ladders, and then used the mill to cut groves for the treads. I'm not very happy with how they came out, but they do look much better just staring at the boat than they look in the pictures. I'll ponder whether to make some new ones to replace these. I then made and placed the boom crutches, which can be seen in the above photo, and then assembled the binnacle. Fairly happy with how it came out, but I mis-placed it just slightly, but since it's pinned, I think it will stay here! Shots of the overall ship as it sits now, and close-ups of the binnacle. Still to go - 5 more timberheads, the pedestals for the swivel guns, and the channels and chain-plates. After that we start looking at masts and rigging!


- 831 replies
-
- 19
-
-
- Armed Virginia Sloop
- Model Shipways
- (and 1 more)
-
Larry, I wouldn't worry about this too much until you've gotten rigging on one of them. The belaying pins on my Carmen are super out of scale, but you can't actually see any of the rigged ones since they are almost completely covered by the rope! If you are planning to add rope coils hanging off the pins as well as properly wrapping the rope around the pins to belay it, you may find that your pins are almost completely hidden as well, so the scale won't matter visually at all, as long as you don't place any pins in empty belaying points.
-
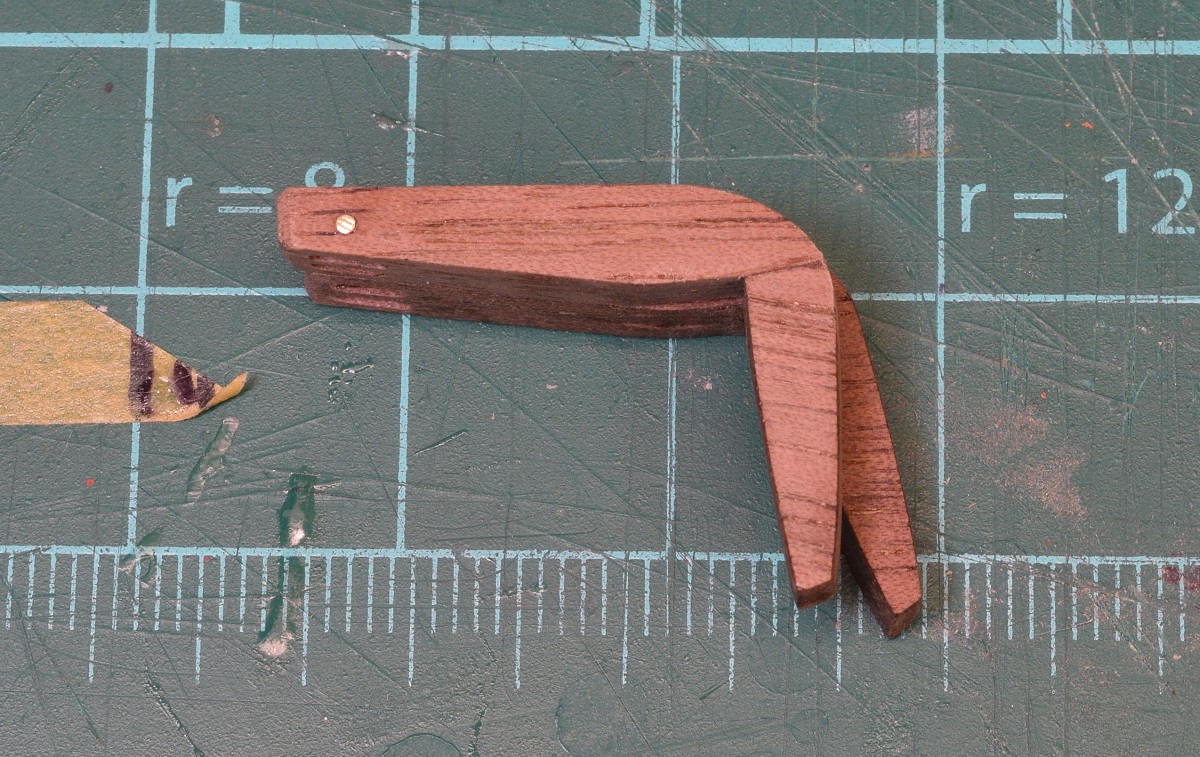
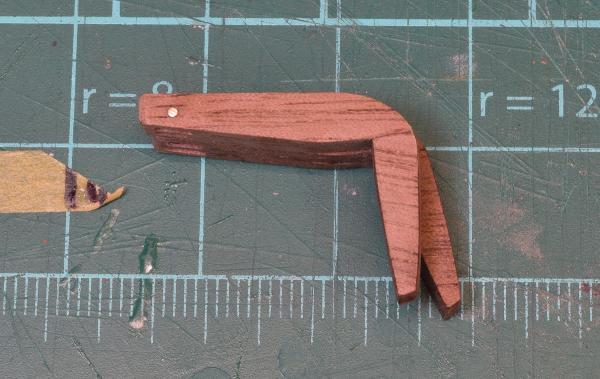
The catheads turned into an unexpected issue. The angle built into the laser cut parts appeared to be completely wrong. When the 'flat' on the bottom of the cathead was placed on the cap rail per the plans and instructions, the base was standing proud of the inside of the bulwarks near the deck by about 1/4". Not sure if they are cut wrong, or if I somehow managed to get the angle on my bulwarks that far off of what they should be. The solutions that I could think of were: 1) Cut an angle into the cap rail making the catheads stick up at an angle more severe than that shown in the plans. Issue being that I was not sure the cap rail had enough thickness to actually support that angle, and the base of the catheads on the bulwarks would be lowered, possibly enough to interfere with the waterway. 2) File the bottom of the cathead to make it fit, again causing a fairly steep angle, and presenting issues with how to shape the bottom edge of the cathead once that much of and angle was built into the 'flat'. 3) Modify the catheads by separating them into two pieces right at the corner, and changing the angle. Issue - getting them aligned properly upon re-assembly, and making the join neat enough to not be visible on completion. I eliminated #1 almost immediately, as if it didn't work right, I would have the problem of wrecked cap rails which would be a huge task to replace. #2 seemed to be a problem with the shaping and the angle both. So I went with #3. Using the UMM micro-saw, I carefully sliced the cathead into two pieces, right at, and parallel to the 'flat' where the cathead would sit on the cap rail. I then filed the piece that would go on the bulkhead, a little bit at a time, test fitting until I hit the right angle, and to keep the mating surface reasonable close through the entire process. I then drilled a small hole into the bulkhead piece, and inserted a small brass nail cut to leave just the pointy tip exposed. I then pressed the two pieces together carefully aligning them. The tip of the nail gave me a point to drill the hole into the top piece, and I then replaced the pointy brass nail with a slightly longer one cut to be a pin to help secure the two parts together. I took a picture after the first one was complete, overlaid on the one that was still unmodified to show how much angle I changed. Seemed to work ok, so I cut the other one and followed the same procedure, and then mounted them both on the rail. Right after that I realized I forgot to drill the other hole in the cathead for the rope. Doh! So I carefully drilled out the other hole while supporting the cathead with a finger. Issue defeated. I'll decide after I finish all the knightsheads and swivel gun supports whether these will be painted per the instructions or left natural, as I'll need to do a fair amount of touch-up painting where I removed the paint to get a good joint between the bulwarks / cap rail and the catheads.

- 831 replies
-
- 19
-
-
- Armed Virginia Sloop
- Model Shipways
- (and 1 more)
-
Looking good. You'll love the rope when you get it, and will be happy you made that decision. It was the first (and only) 'change' I made to my first ship, and one that I've never even come close to regretting!
- 440 replies
-
- 3
-
-
- niagara
- model shipways
- (and 1 more)
-
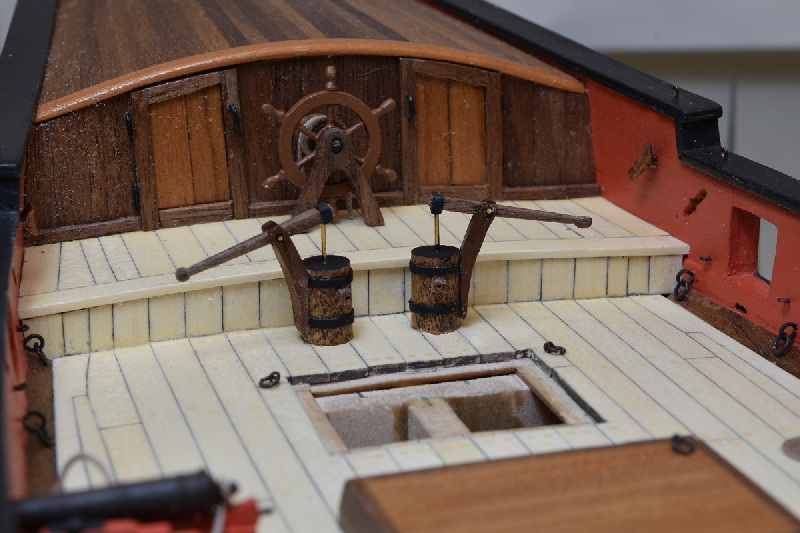
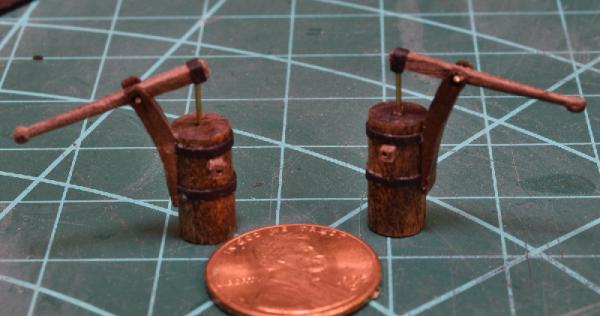
Wow, lots of likes and comments. Thank you all very much. Nigel, the only stain used on the model is the cleats, the barrel of the ships wheel, and the body of the pumps. Everything else is just wood or paint with clear poly. You won't be plagiarizing me, the pumps are built exactly per the kit plans with the exception of using paper for the bands instead of brass, so go right ahead!
- 831 replies
-
- 4
-
-
- Armed Virginia Sloop
- Model Shipways
- (and 1 more)
-
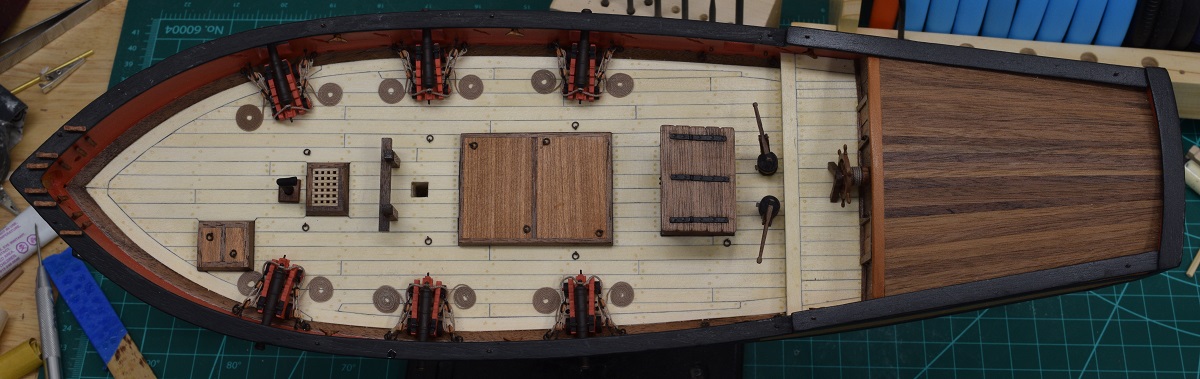
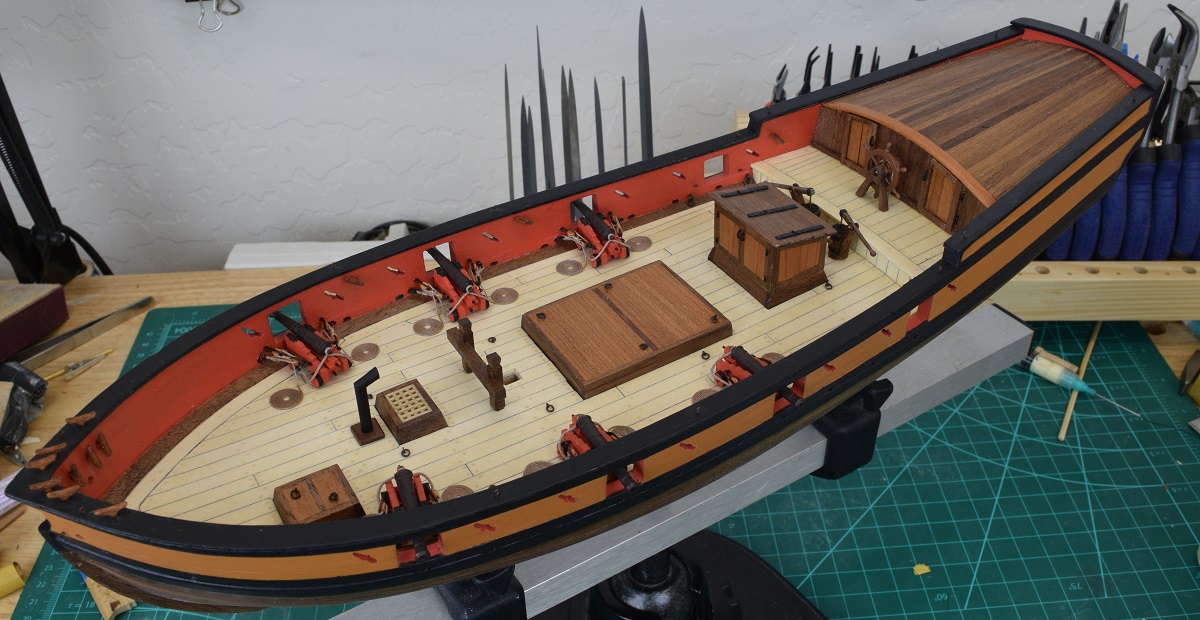
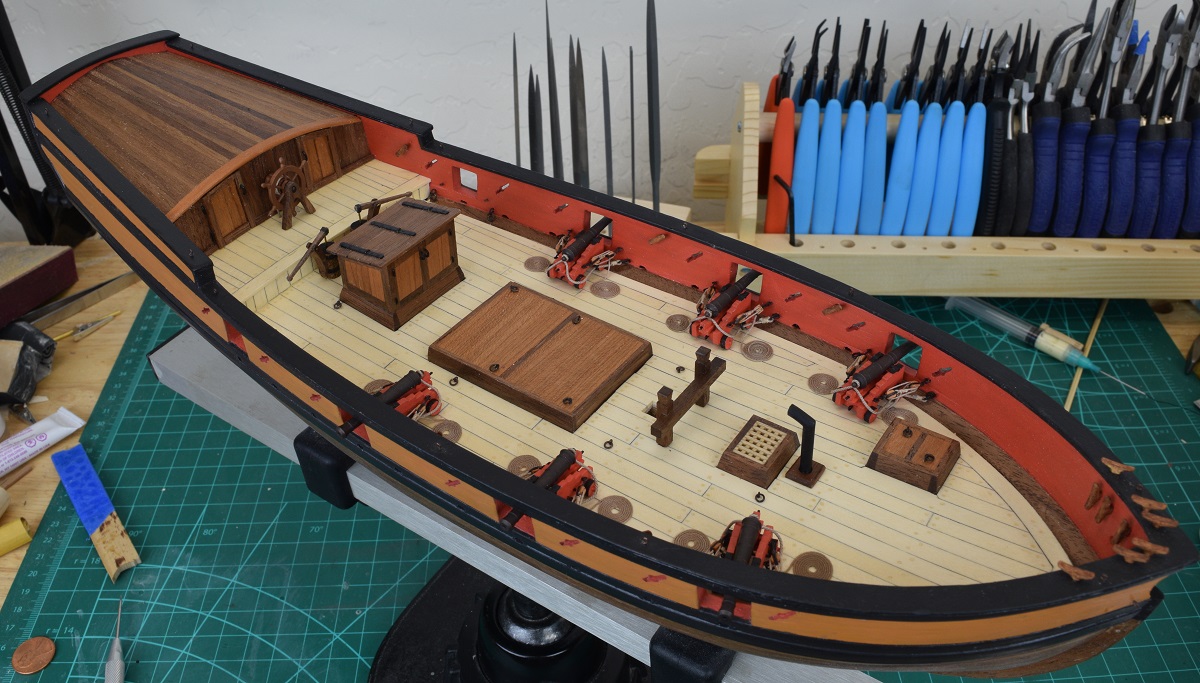
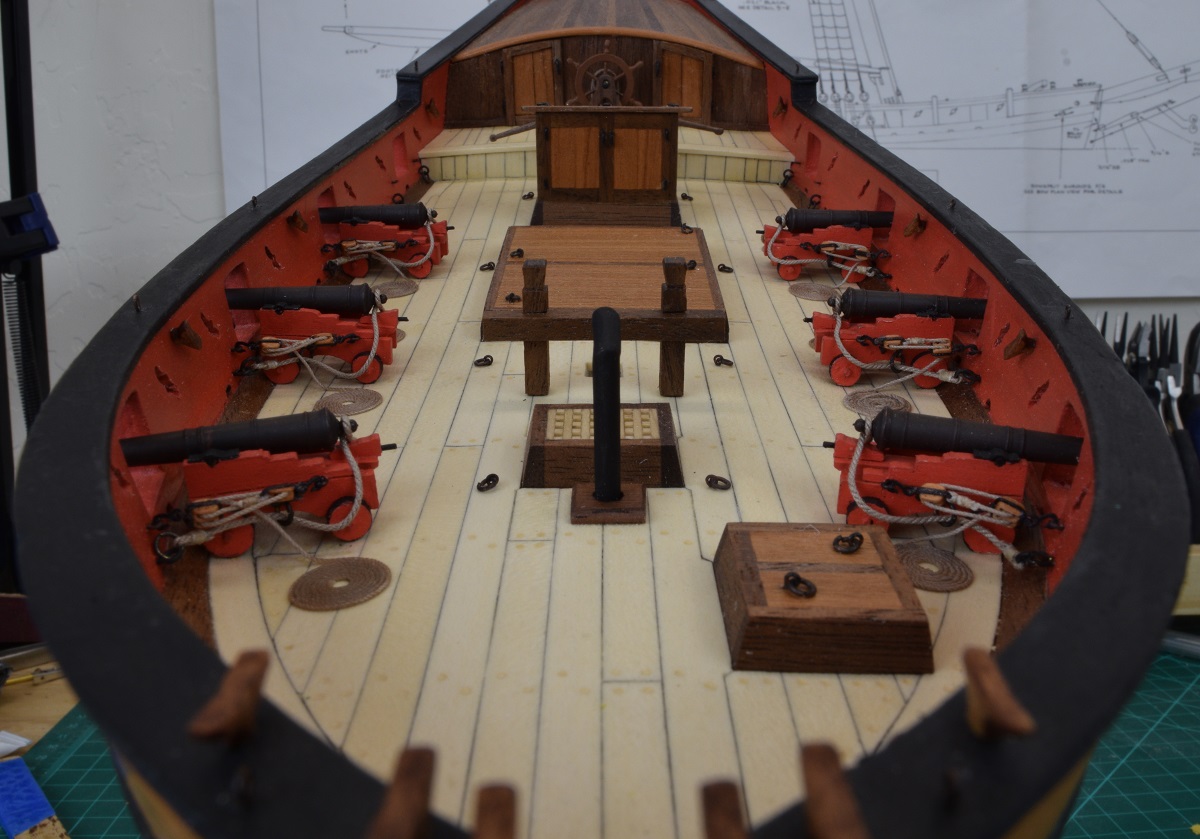
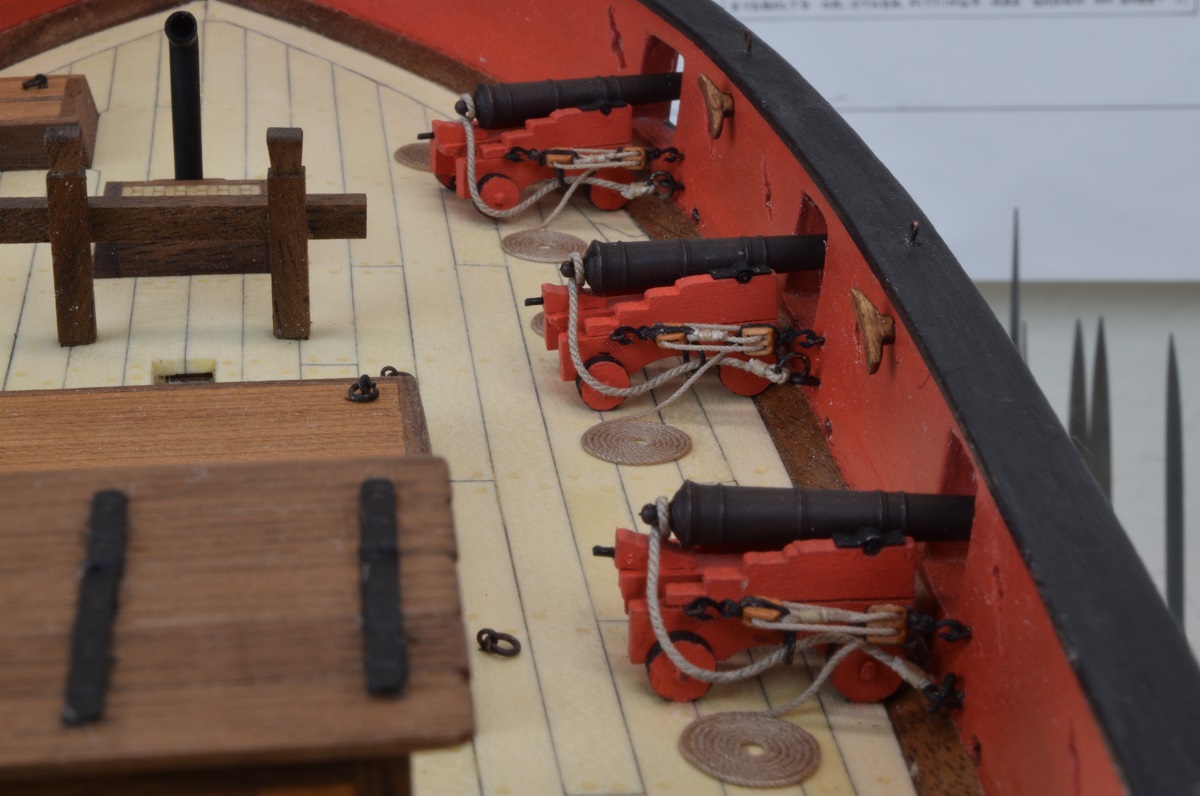
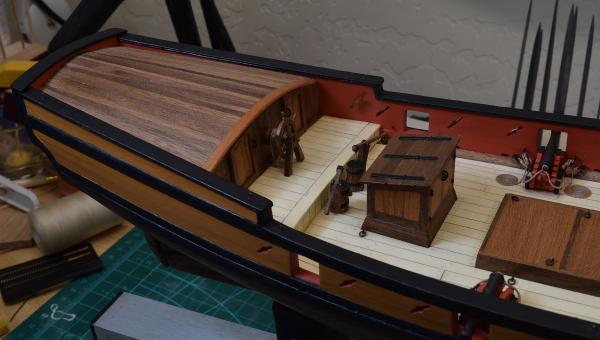
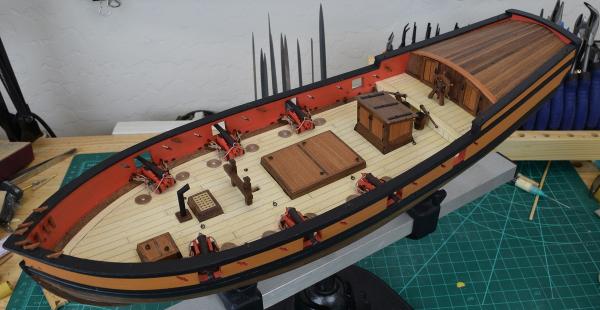
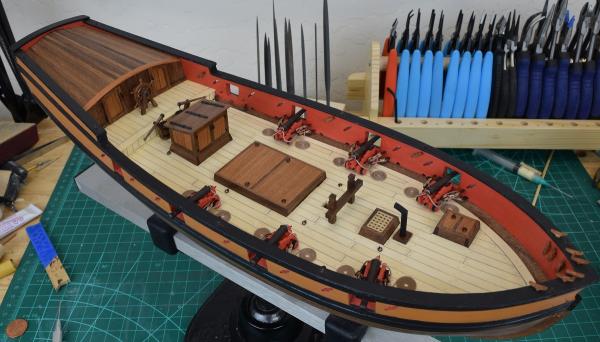
Thank you all for the likes and comments. Now that the pumps are done, I finally installed the companionway in it's permanent home. And then I buckled down and did it. All the guns are rigged. Woo!


- 831 replies
-
- 24
-
-
- Armed Virginia Sloop
- Model Shipways
- (and 1 more)
-
I really need to get a good set of dividers, it's one tool that I see used often, to good effect, and yet I've never managed to pick up a set for myself.
- 440 replies
-
- 2
-
-
- niagara
- model shipways
- (and 1 more)
-
I agree Ken. It's just hard to get a hook in that scale to look right, because they'd be friggen tiny compared to what we can seemingly make. That's why I used the 3mm hooks from Syren, but they are pretty fragile and require a very small rope to thread through the hole. Ditch one, or both, whichever looks best to your eye, since ultimately, that is what matters most! I like the pin location system. I really thought about that, but in the end I couldn't figure out a really good way to locate where the hole in the deck needed to go, so I just glued them directly to the deck. In theory they shouldn't be taking any strain/stress once all the rigging is done, so shouldn't need the pin.
- 440 replies
-
- 3
-
-
- niagara
- model shipways
- (and 1 more)
-
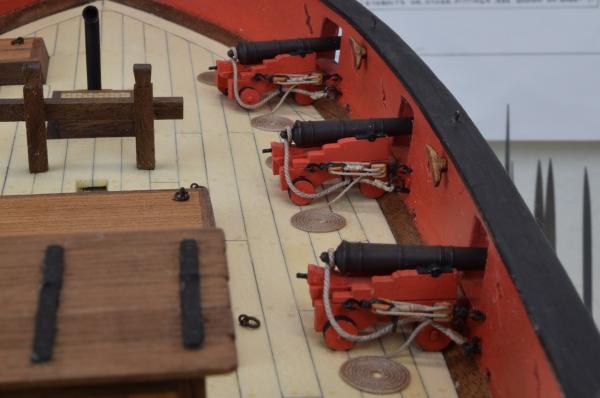
I am gluing my cannons down after the breaching line is secured to the bulkhead, but before the out-haul tackle, since it's located with hooks and I can simply drop it into the eye bolts and then tighten it up. Having the guns secured when I do that is very helpful. Note that I learned the hard way. If your wheels are painted, take out a sanding stick and move the gun back and forth on it to get a clean paint-free wood surface for the glue to adhere to. A couple of my guns I didn't do that with were very easily knocked loose, and it's a LOT harder to sand those wheels when the carriage is firmly attached to the breaching line!
- 440 replies
-
- 1
-
-
- niagara
- model shipways
- (and 1 more)
-
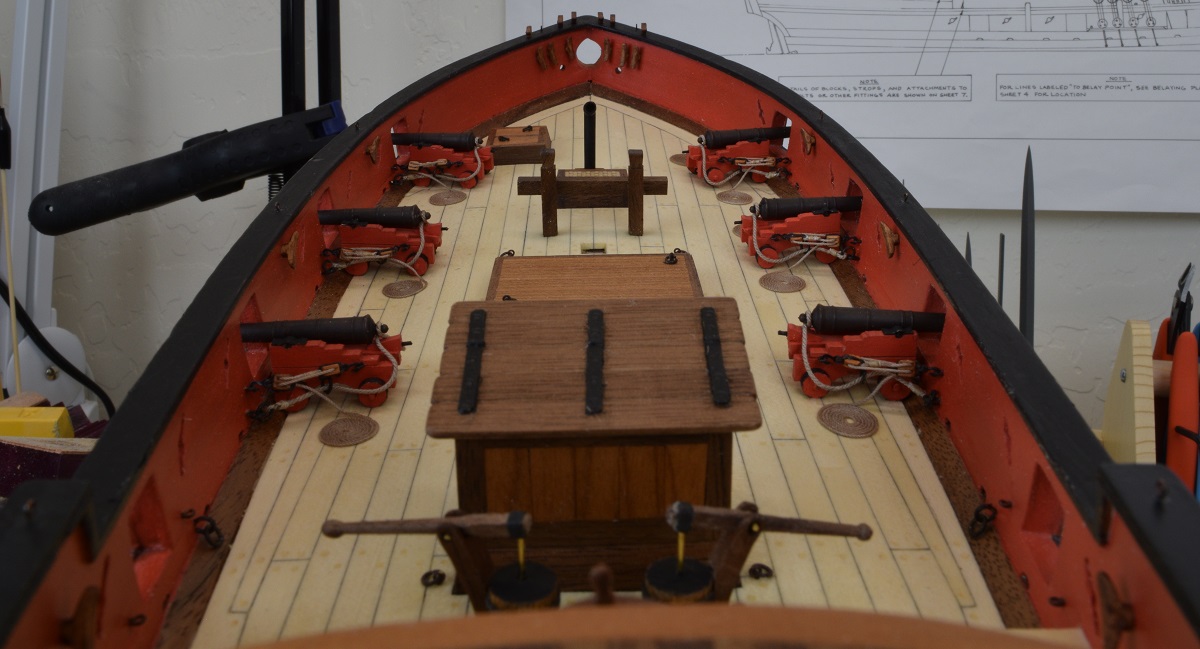
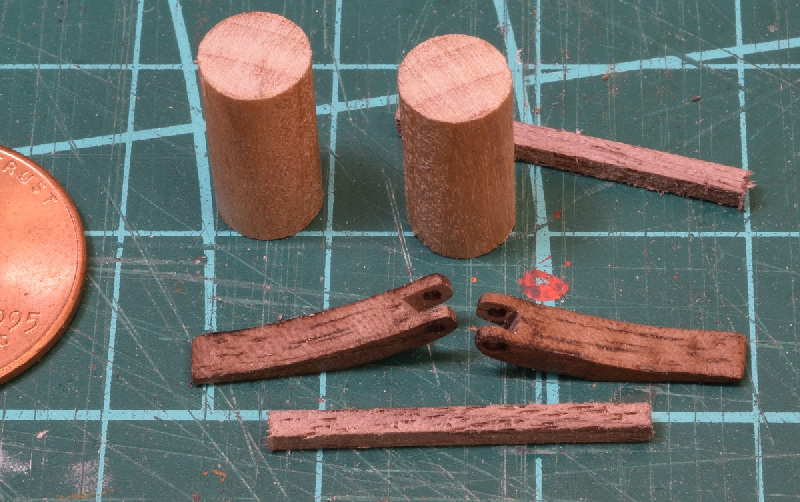
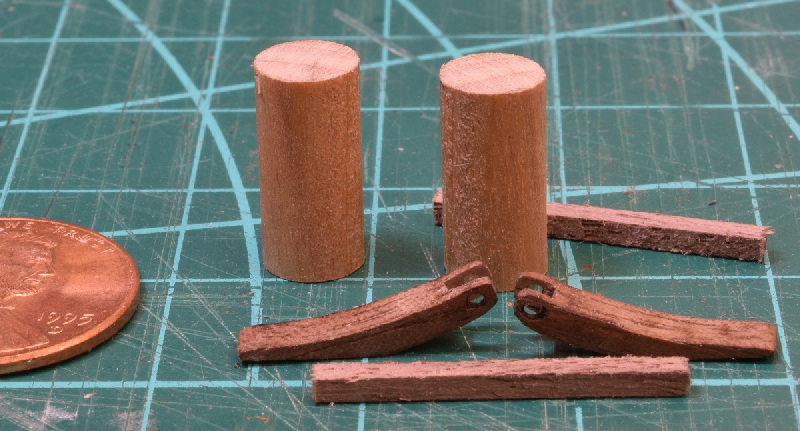
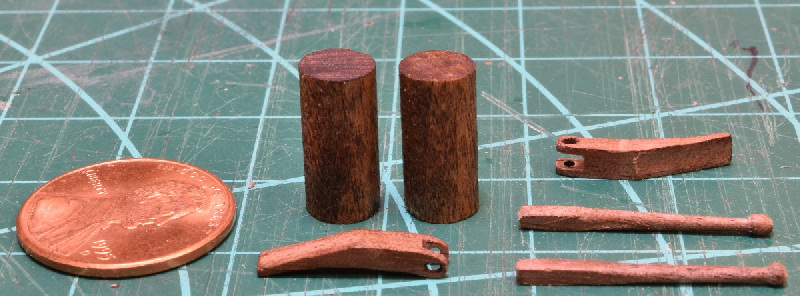
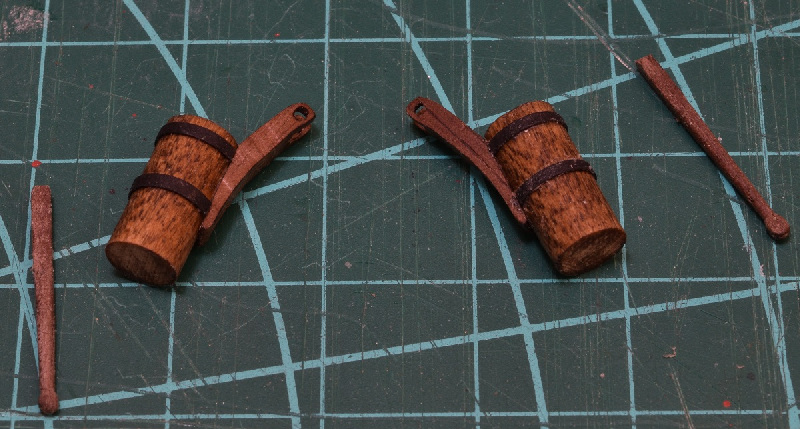
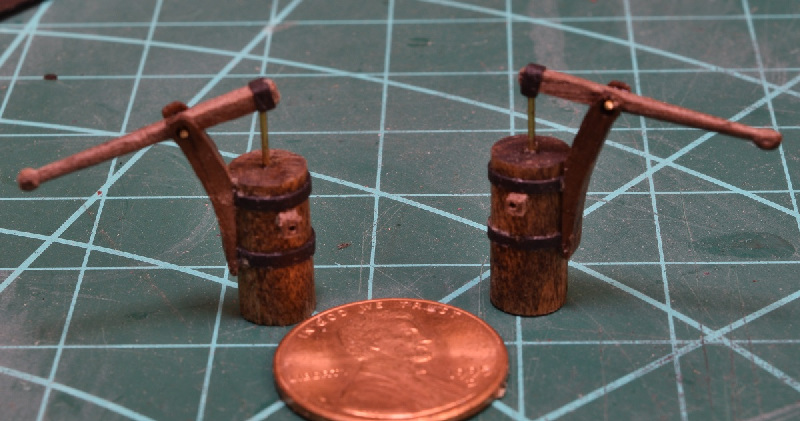
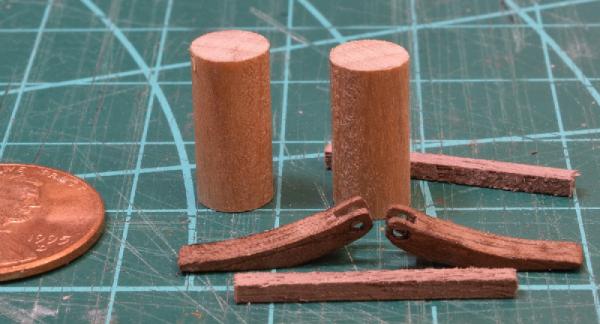
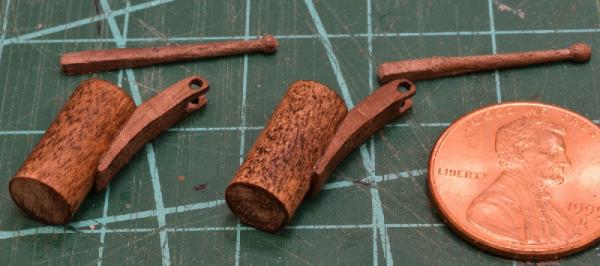
Went back into the workshop and made the pumps. The kit used to include walnut dowel for the pump bodies, but at some point they changed it and only give beech dowels, so they required staining. I used card-stock for the bands instead of brass, because it's so easy to work with and it is painted black anyway. I used the hard brass nails from my Carmen kit for the rods and handle pivots instead of the softer brass rod from the kit. It's slightly smaller diameter, but not enough to really change the visual look at all.


- 831 replies
-
- 20
-
-
- Armed Virginia Sloop
- Model Shipways
- (and 1 more)
-
Actually didn't use the lathe at all for this, I used the mill!
- 831 replies
-
- 1
-
-
- Armed Virginia Sloop
- Model Shipways
- (and 1 more)