GuntherMT
-
Posts
2,213 -
Joined
-
Last visited
Content Type
Profiles
Forums
Gallery
Events
Everything posted by GuntherMT
-
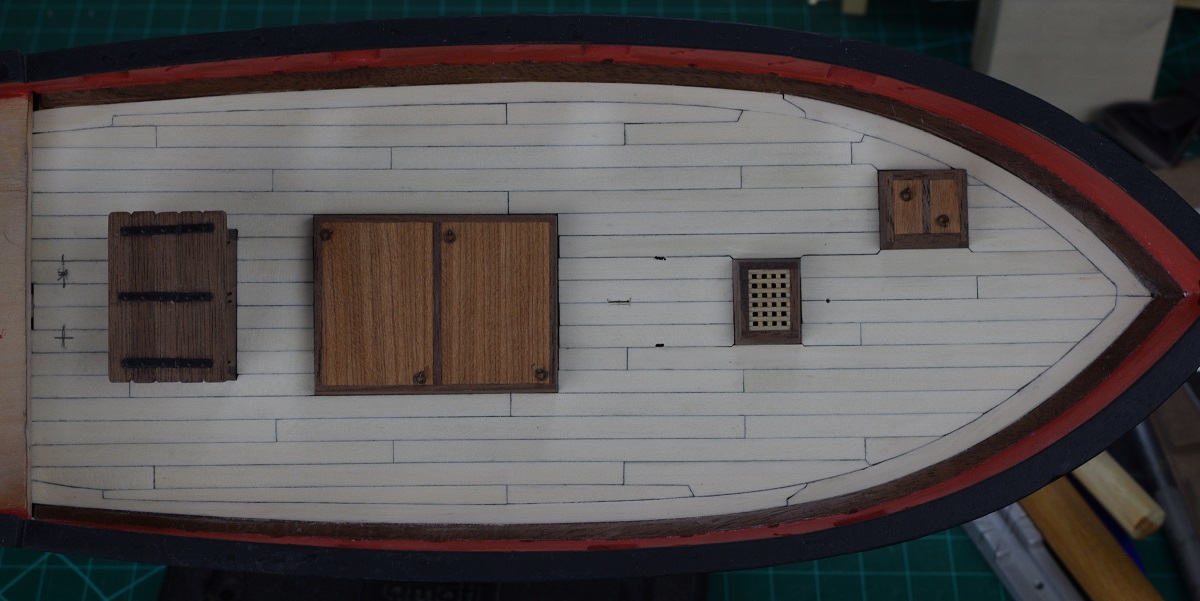
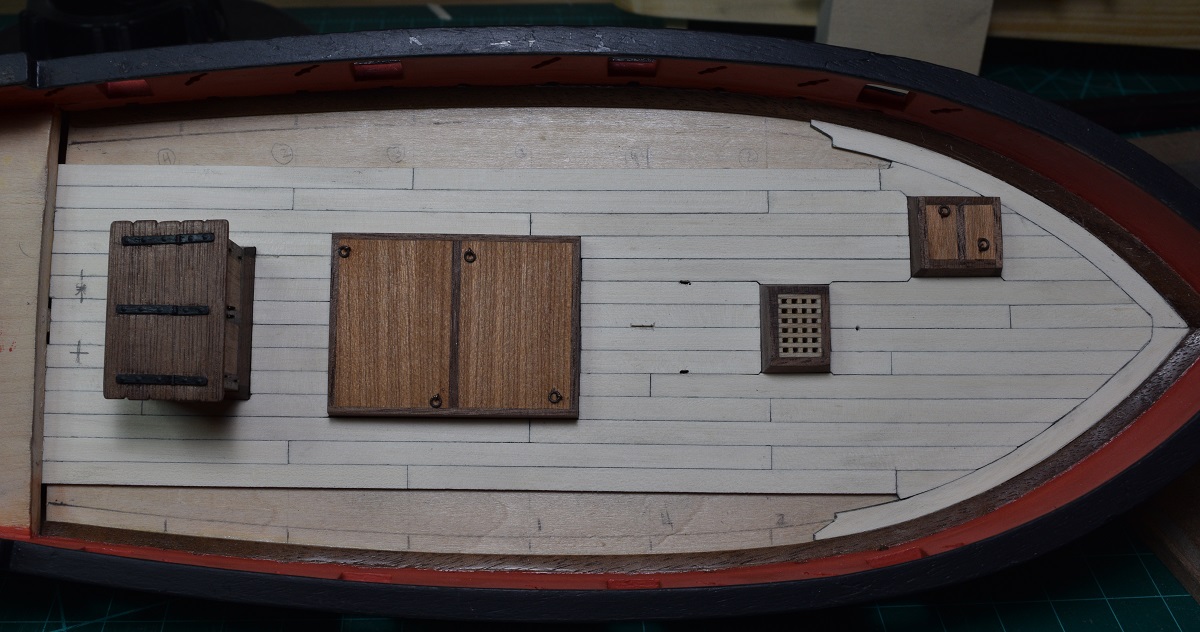
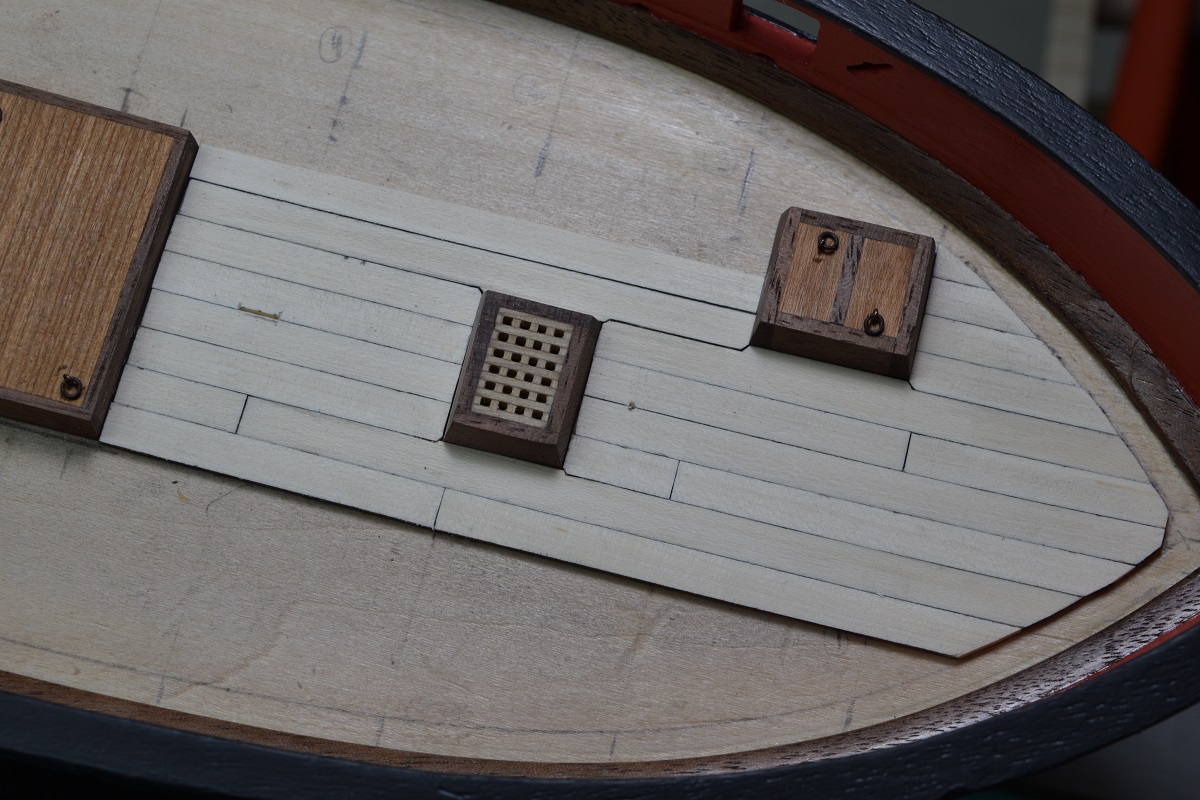
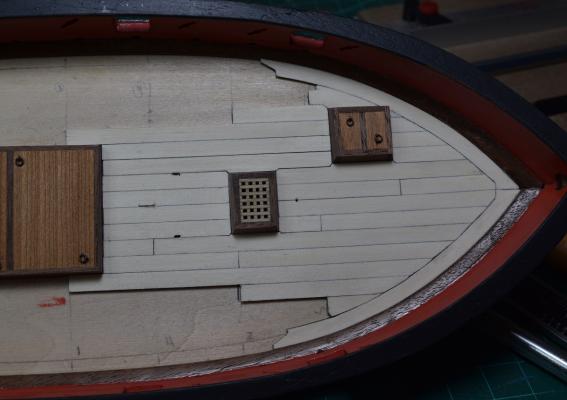
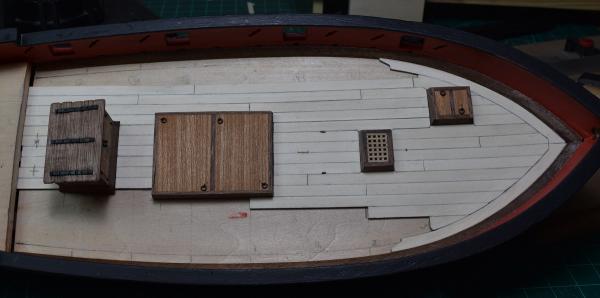
Thanks everyone for the kind words and likes. The main deck planking is all placed. I learned a number of things doing this, and in retrospect I would have done a few things differently (where the butt-ends landed, I should have started the hook & scarf at least one, and probably 2 planks earlier), but overall I'm fairly happy with the final results. Now I need to plank the quarter-deck, and then do a full scraping and get a couple coats of poly down (oh, and open up the holes for mast, stove pipe, etc.) before drilling a bunch of little holes! I also need to make some small adjustments to the main hatch, and re-poly all the deck furniture which is all still just sitting in place, not glued.


- 831 replies
-
- 20
-

-
- Armed Virginia Sloop
- Model Shipways
- (and 1 more)
-
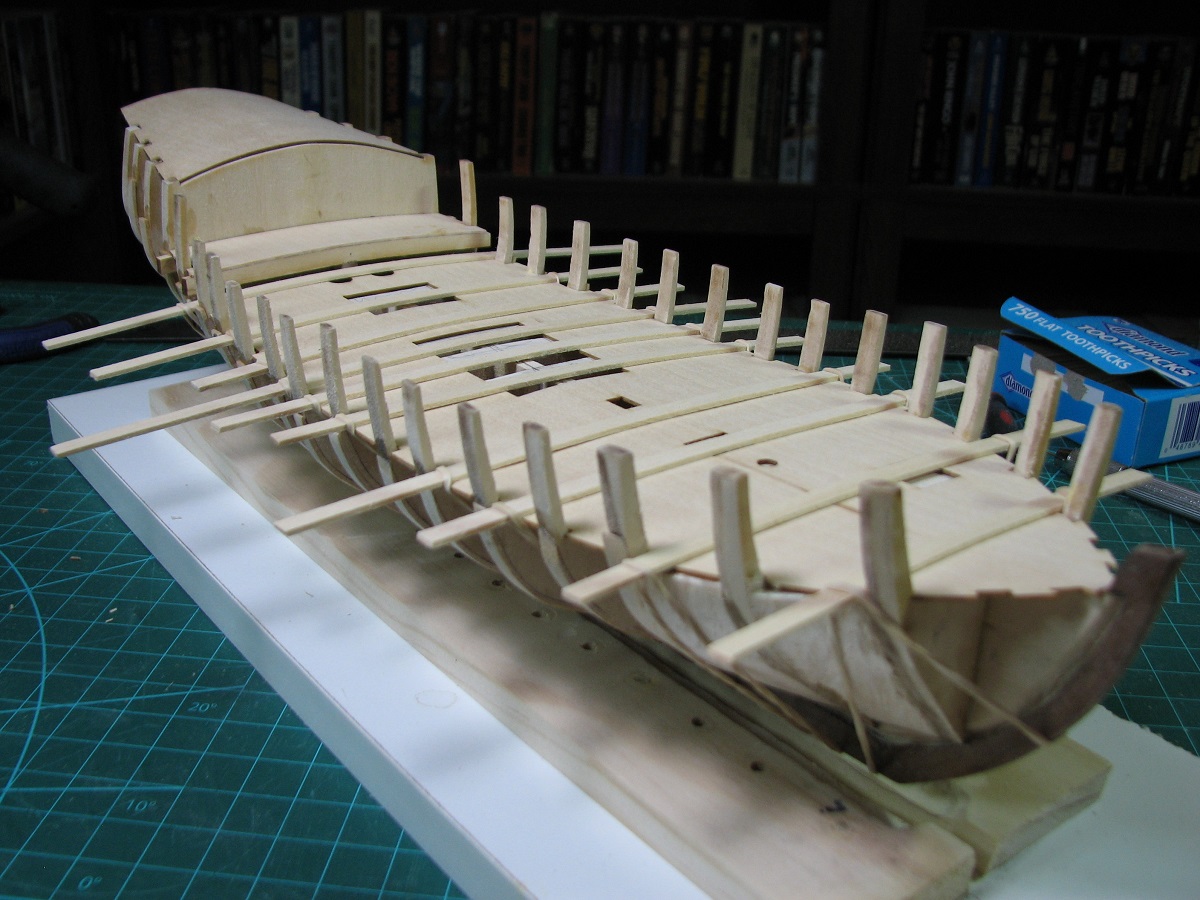
I'm not familiar with that model/ship, but I wouldn't think that the dipping fore/aft would be right. There should be camber where the center is high and the sides are lower, and there may even be a fore/aft 'sweep' where it goes up fore and aft, but I would not expect it to go up and down or be 'wavy' like that. Just going off of the pictures it doesn't look to me like you have the top of your bulkheads faired properly to allow the deck to lay correctly. Is there a good side-view in your plan sheets where you can see the deck-line to compare it to what you have?
- 31 replies
-
- 1
-
-
- le hussard
- artesania latina
- (and 1 more)
-
Is your deck really thick, or is that just an illusion from the photo? I used a simple system of rubber bands and planks to hold my false-deck in place for gluing, it gets planked much later (it's what I'm working on now actually). Depending on how thick your deck actually is, and how much force it takes, this might work for you also:
- 31 replies
-
- 1
-
-
- le hussard
- artesania latina
- (and 1 more)
-
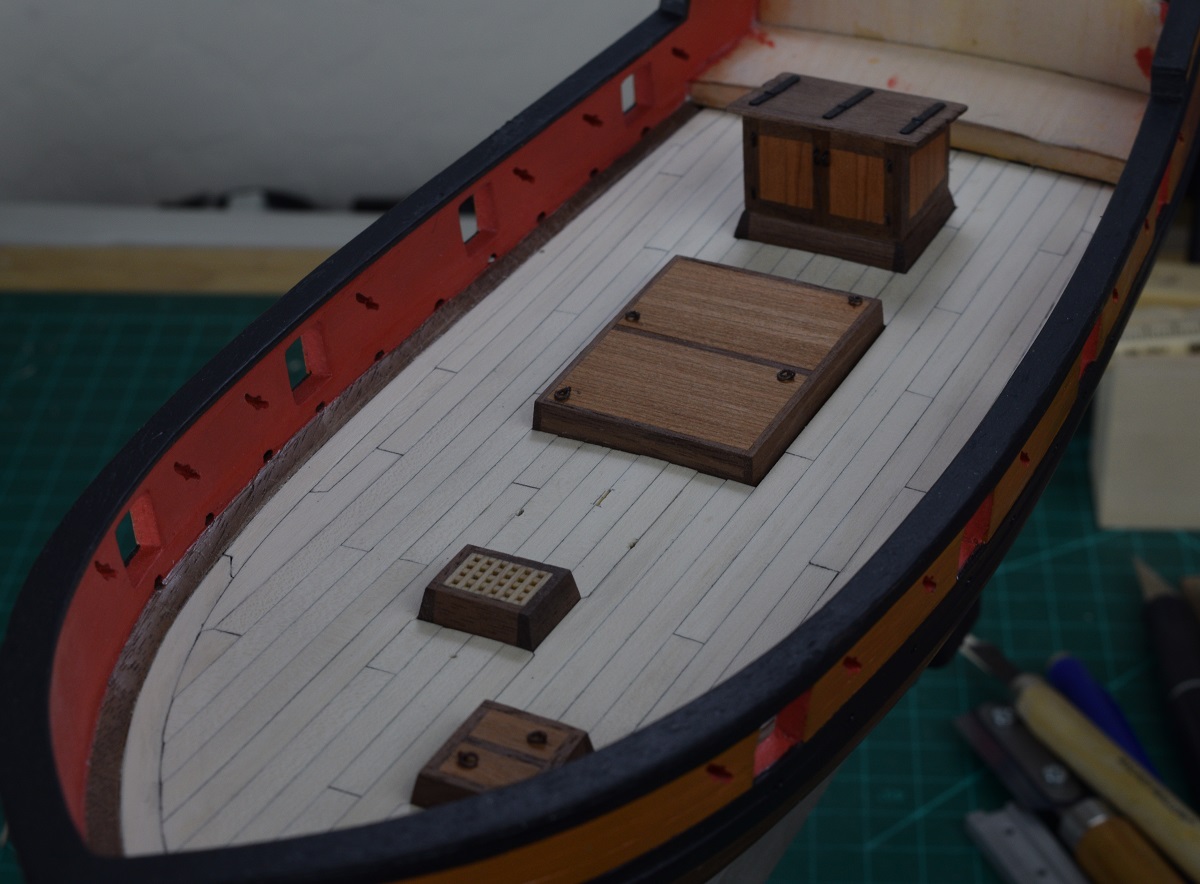
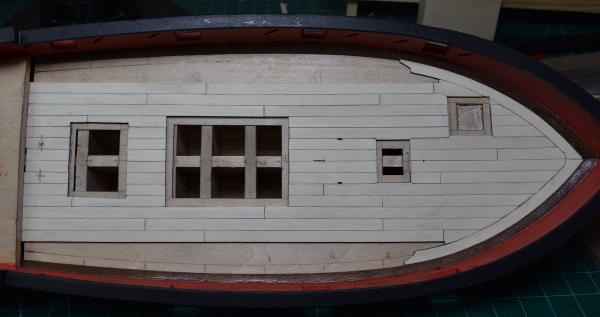
The planking continues at a fairly slow pace as I've only had a few hours to work on it a couple nights this week due to work and other draws on my time. Still pleased with the results, and haven't had to remake too many things (yet), but from here on out almost every plank will be hand cut from wider stock, so the potential for terrible results will increase greatly! I hope to cut the margin strakes, and maybe even finish the main deck planking tomorrow, but we'll have to see how slowly it goes as I cut all the custom fit edge planks. Photo's!


- 831 replies
-
- 17
-
-
- Armed Virginia Sloop
- Model Shipways
- (and 1 more)
-
Is there a better #11 blade handle
GuntherMT replied to roach101761's topic in Modeling tools and Workshop Equipment
I just got it, so the jury is still out. -
Thanks for the pictures Chuck, your work is a pleasure to look at. To add something to what Richard said, if you can use "Daylight" light instead of warm or soft white in the area that you are taking pictures, the color will be more natural without depending on your camera (or post) to make adjustments. Photography studio lighting uses 5500k temperature bulbs if I remember right, and "Daylight" bulbs are around 5000k (or it's the other way around). Soft white and warm white on the other hand are 2700k and 3400k I think. The other way you can get better lighting is to simply use a flash, which will overpower most other lights in the room. To get good flash lighting though it's typical to need to use remote or bounce flash, because a built-in flash will normally cause reflection issues. Both the 2nd and 3rd photo's look pretty good to me though, the 1st and 4th appear to have too much green tint, so if you just replicate #2 or #3 I think your photo's will be just fine.
- 1,051 replies
-
- 1
-
-
- cheerful
- Syren Ship Model Company
- (and 1 more)
-
Is there a better #11 blade handle
GuntherMT replied to roach101761's topic in Modeling tools and Workshop Equipment
I got this from Amazon for $6.00 - http://www.amazon.com/gp/product/B0006HVRPO/ref=oh_aui_detailpage_o00_s00?ie=UTF8&psc=1 It's an X-Acto soft countoured handle and it has the single-slot blade grip instead of the X type. It's also got a raised spot on the handle to keep it from rolling off the desk. -
Ah, that's good stuff to know if I ever want to try a trick like you did there. Thanks!
-
Nice job on the boat Ken. Look forward to seeing your work on the Rattlesnake!
-
Gorgeous work Keith. Curiosity though - why did you point out 'not Titebond' as far as glue, is there an issue with Titebond?
-
Nicely done John. Your log is making me look forward to seeing the real CW Morgan next October at the conference!
- 2,250 replies
-
- 2
-
-
- model shipways
- Charles W Morgan
- (and 1 more)
-
Hi Dave, I'm pretty new to this hobby, but one of the first 'aftermarket' decisions I made was rigging line. I throw out the kit rigging line and get line from Syren. At some point in the future I may go down the road of making my own, but for the time being, I'll let Chuck make superb line and just buy it from him.
-
Sorry to see you are stopping the log, I've enjoyed following along on a build that is very different from my own. Best of luck to you, and hope to see is completed at some point.
-
Thanks, it's holly from Hobbymill.
-
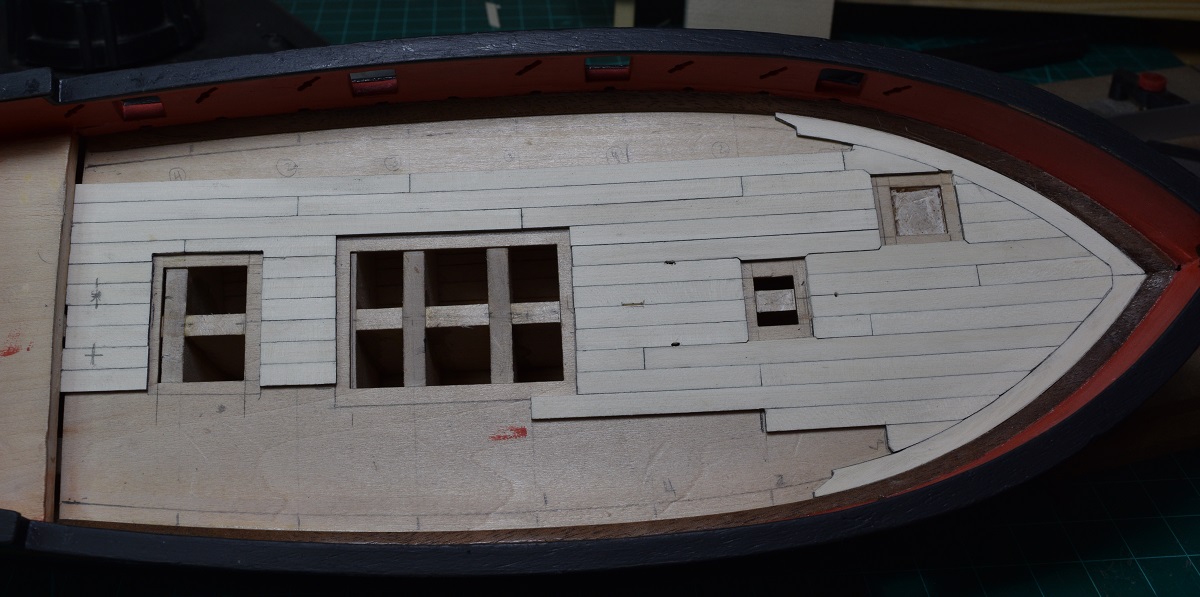
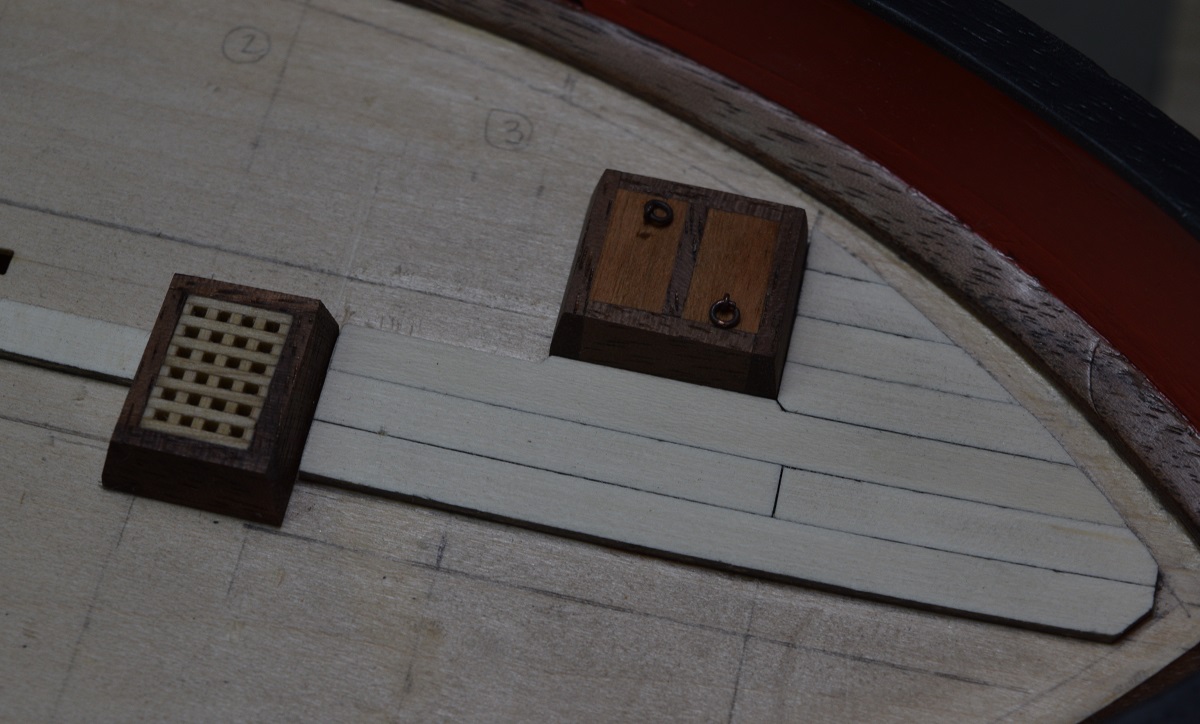
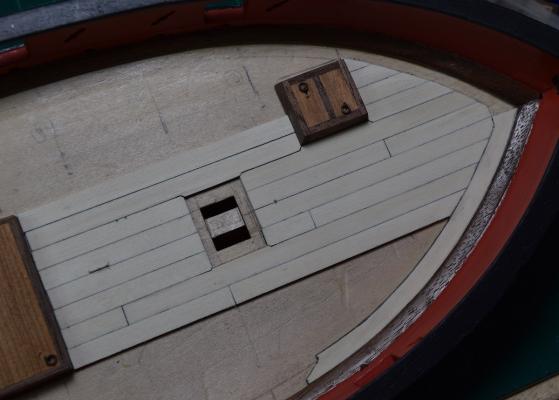
Thanks for your encouragement and likes folks. Puttering along with the deck planking now, the custom shaped planks alongside the hatches are pretty slow going, especially since I've had to remake 2 of the 3 along the way, but I think the end results will be worth it, I'm really liking it so far, and this holly is just wonderful to work with, it just blows basswood away, even ignoring the 'looks' part. I think I'm going to place the margin planks very soon, instead of waiting until after the deck planks are in, as I've decided to go with hook & scarf planking into the margin, instead of nibbing, as that wasn't prevalent in ship building until 40 or more years after the date of this ship (see discussion on nibbing in the planking sub-forum). Since hook & scarf deck planks don't require the margin plank to be cut into, I think it will be easier to get a neat mating to it with the deck planks if it's in place first. Thoughts on that?

- 831 replies
-
- 13
-
-
- Armed Virginia Sloop
- Model Shipways
- (and 1 more)
-
Gorgeous detail work, thank you for sharing!
-
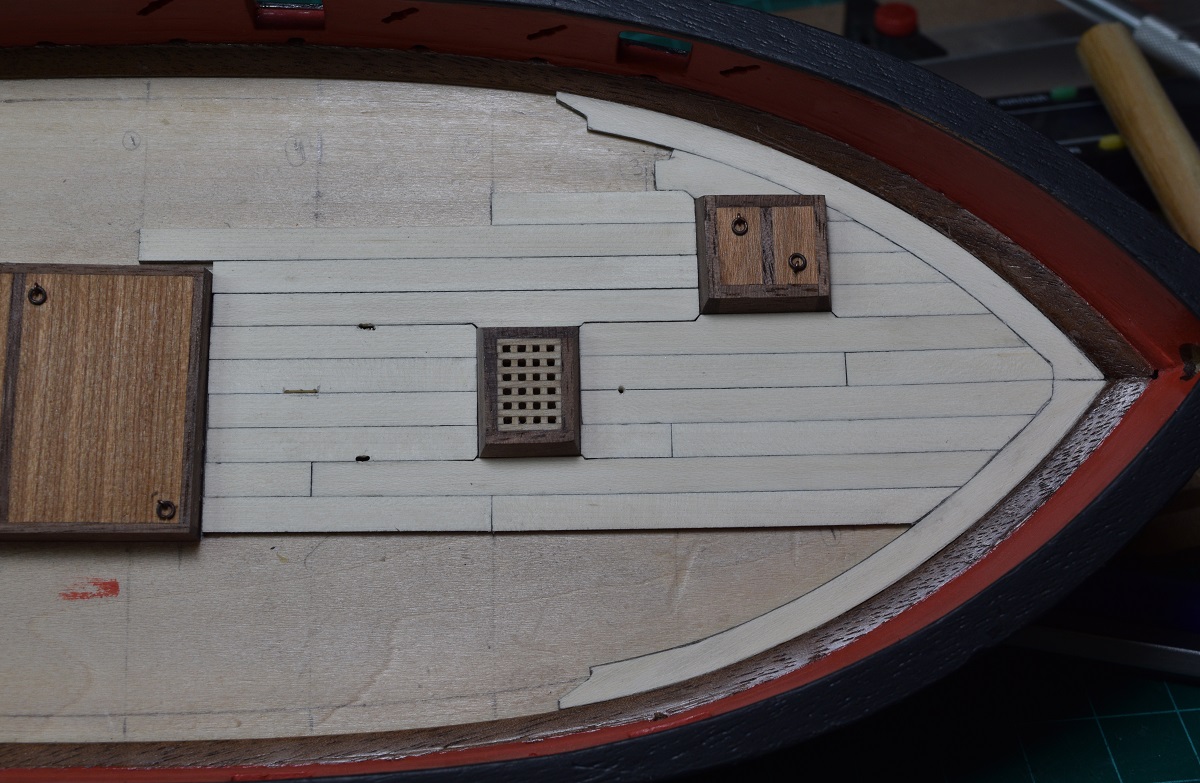
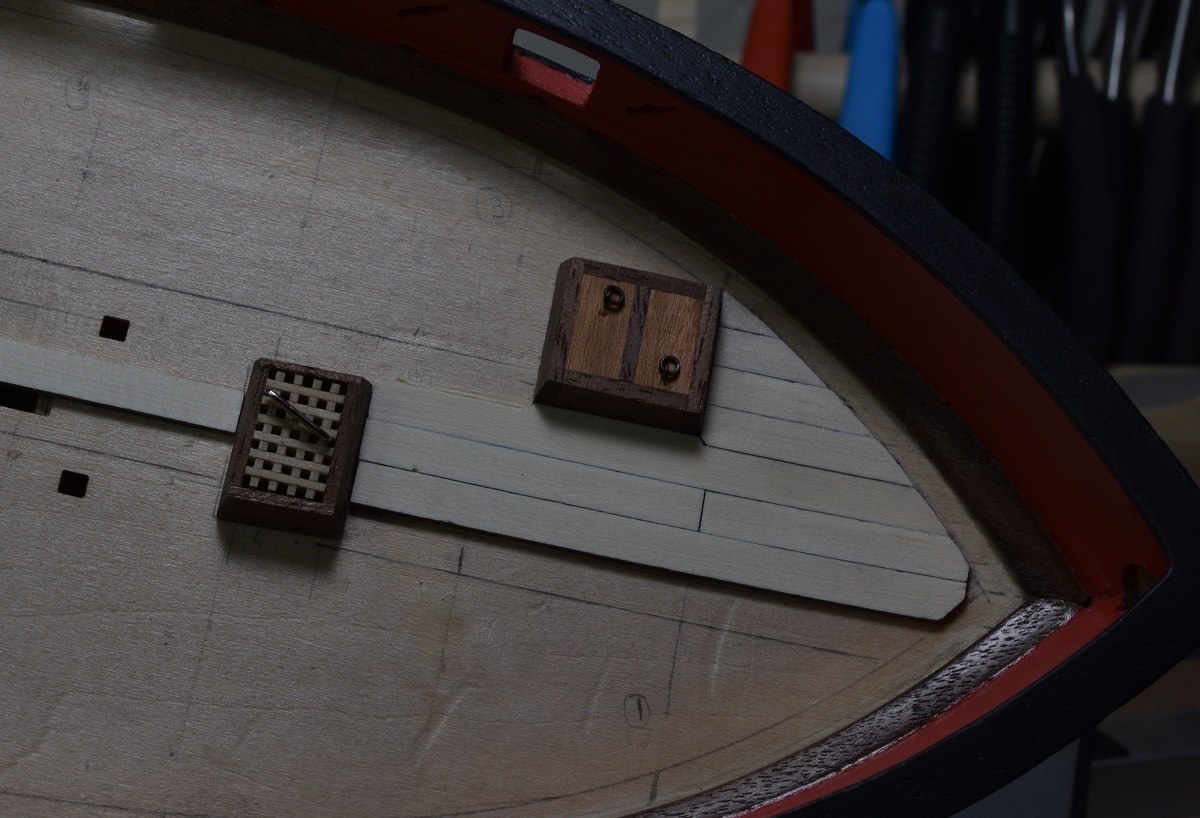
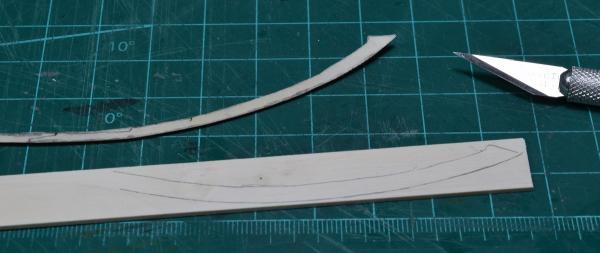
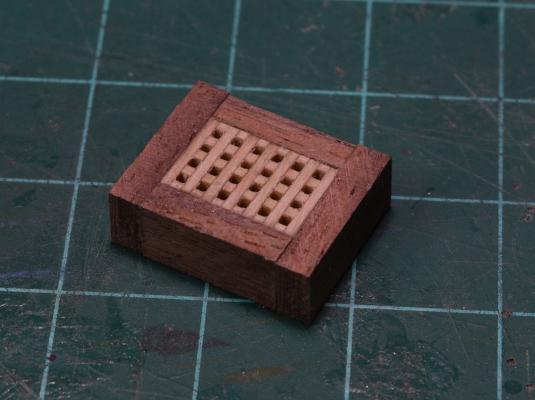
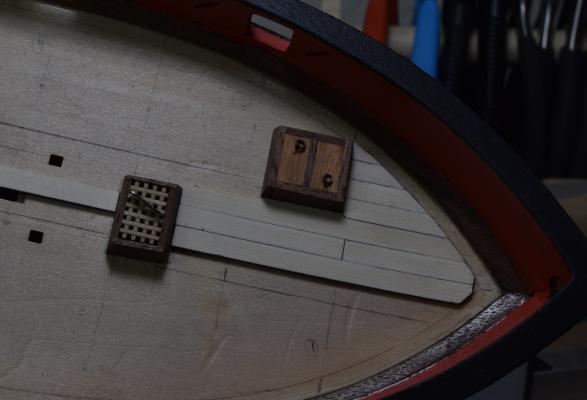
Thank you all for the suggestion, tips, and likes! So I decided that the advice to go with the outside border on the grating was the way to do it, so I simply abandoned the measurements from the plans, and winged it (shocking, I know)! Instead of measuring anything, I first cut the pieces and built a new grating. I had barely enough grating material left to make one long and one short piece after this, so I figured that it had better work out! I assembled the new grating on some reversed masking tape to hole it together for assembly and gluing. After finishing the grating and gluing it together with fast CA, to make the coaming I simply used the grating itself to mark the length of the two 'inside' ends, and cut them. I then glued them to the grating, and after letting the glue set, I sanded the exposed ends until they were perfectly flat with the grating edge. I then used the new assembly to measure the wood for the 'outside' pieces of the coaming, and glued them to the grating assembly. I then beveled and sanded the entire new assembly, and then checked the measurement on deck. It was slightly larger than the original galley hatch, so I used a chisel and carefully trimmed back the already glued deck planking, filed the new edge flat with a riffler file, and then trimmed the final bit needed off of the single plank on the other side until it was a snug fit. I then slapped on a coat of poly, and ta-da! Here is the new galley hatch sitting in it's future home. Mission success!

- 831 replies
-
- 22
-
-
- Armed Virginia Sloop
- Model Shipways
- (and 1 more)
-
Sorry, but I'm not familiar with this model (I'm only now working on my 2nd model myself), so I really don't know.
-
Be careful trying to match the tops of your bulkheads to the outside lines on those plans, as the plans you have pictured are from above looking down on the deck, and the width of the ship will continue to widen above the top of your bulkheads and deck into the bulwarks (framing above the deck). From the upper left photo, it appears that the bulkheads actually match very closely with the deck level on the plans. It's hard to tell on the stern, since the model overlaid on the plans is covering it up because of the reinforcement blocks, so I can't really tell where the deck edge is under it.
-
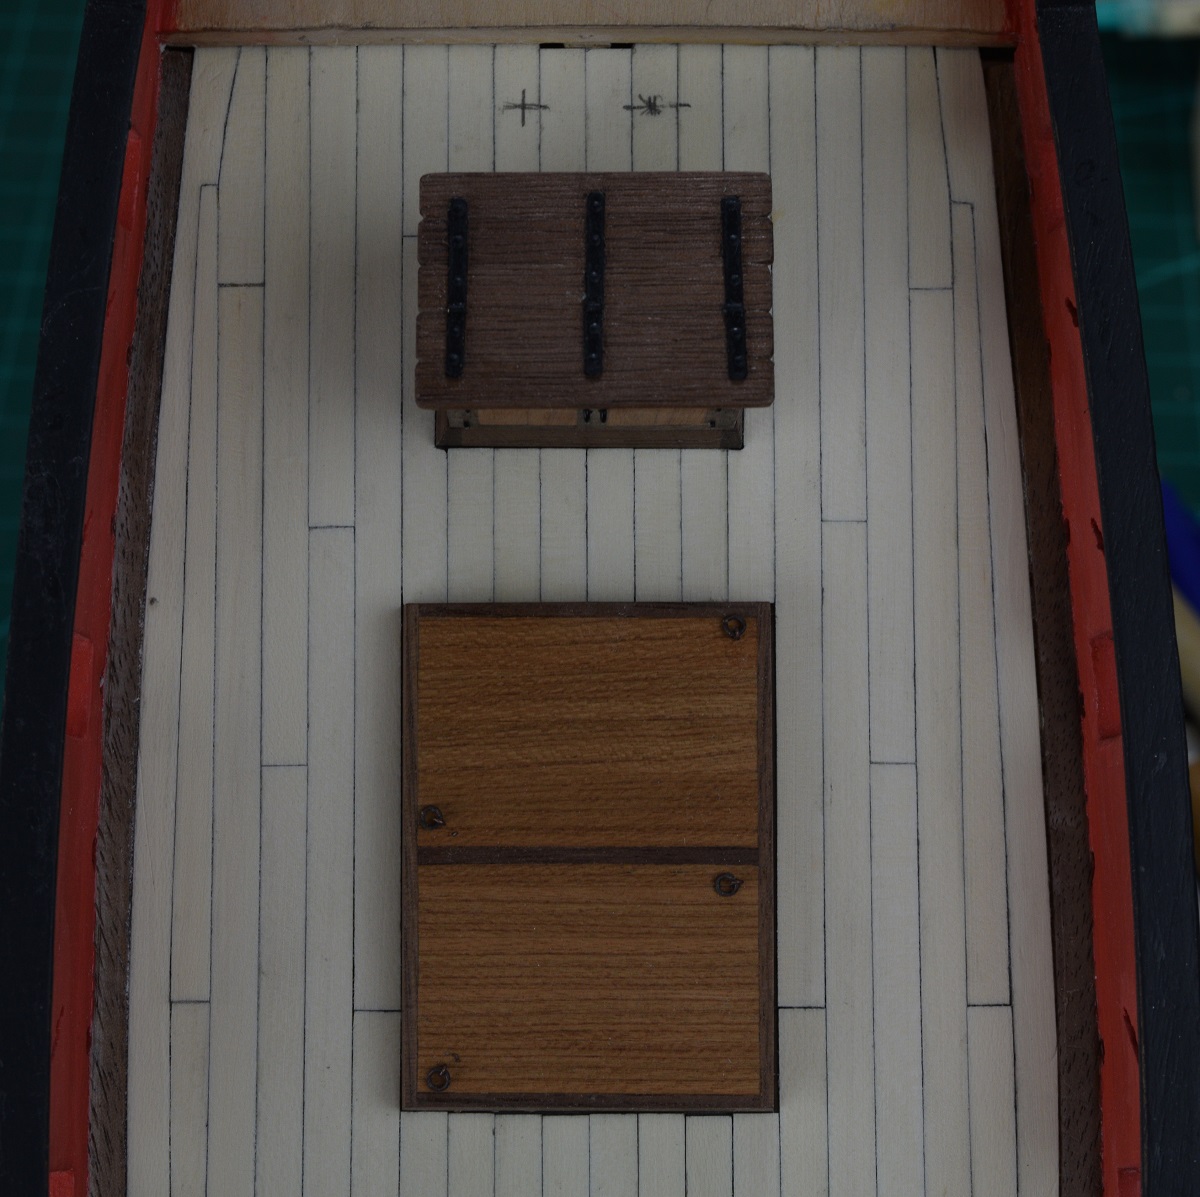
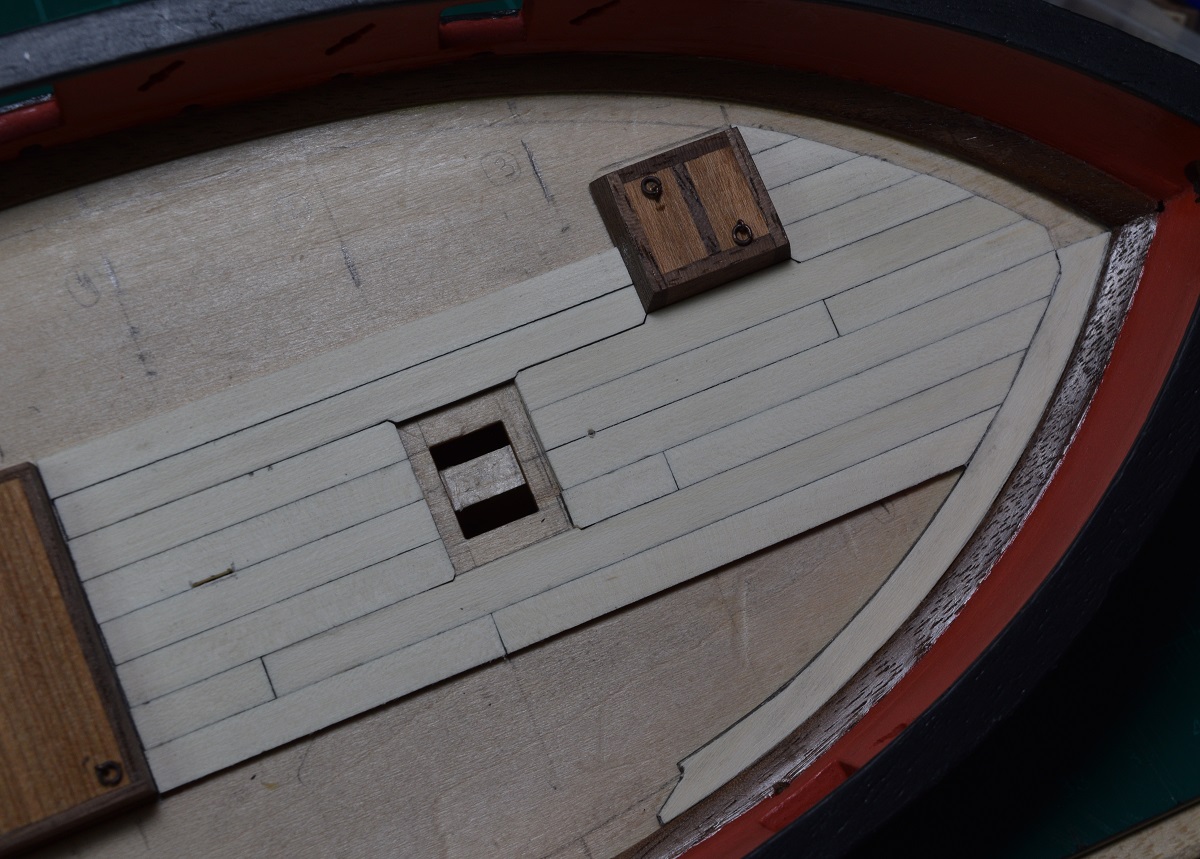
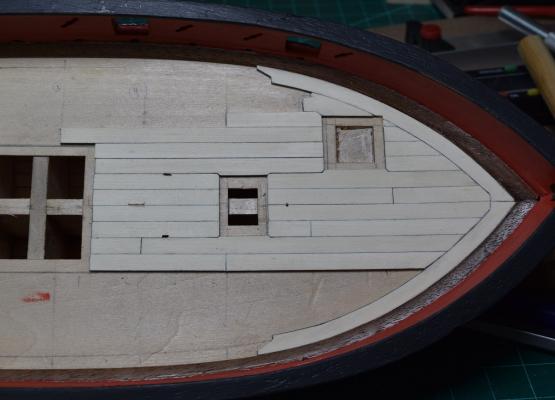
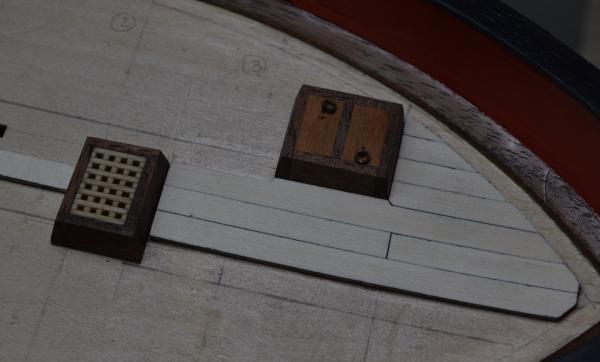
So I figured out what is wrong with the galley hatch. It isn't the grating, it's the coaming itself - it is ever so slightly out of square, and I'm not sure why. Measured from 2 corners it's square, but from the other two it's not. I messed up a tiny bit somewhere, but it's enough that my eyeball catches it as being 'off'. As a result, the planking won't match up correctly unless I fix it, so the next order of business will be making a new galley hatch tomorrow night. I don't think I can make it with the grating having the outside edges like Frank suggests, as the grating material isn't the right dimension for it (works great across the short side, but doesn't work across the long side). I would have to go off-size on the plans to make that work, so I'm not sure I'm going to try. I'll take a fresh look at it tomorrow before I remake it to decide. I can't really explain why, but I really do enjoy doing the deck planking. It's going well so far, and I'm not going per-plan at all, rather I'm sort of emulating stuff I've seen in various builds here. We'll see how it works out long term, but I like the first little bit. The hatches are not glued, they are just being used to the planking fitment, which is why I need to remake the galley hatch now, because I need it to be right before going any further with the deck planking.
- 831 replies
-
- 5
-
-
- Armed Virginia Sloop
- Model Shipways
- (and 1 more)
-
Glad they came through for you with the deadeyes John. Going to be finished in no time!
- 2,250 replies
-
- 2
-
-
- model shipways
- Charles W Morgan
- (and 1 more)
-
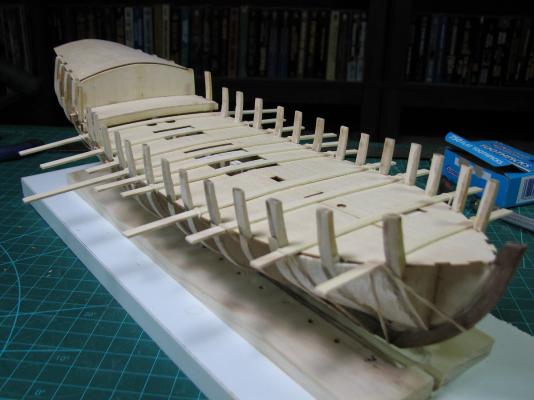
I have this kit on the shelf, so I'm happy to see someone else starting on it and will be following along. For fairing, I'd suggest adding bulkhead reinforcement so that there is less chance of breaking a bulkhead, but I'm sort of hamfisted, so you may be fine without that if you have a lighter touch. You can see the sort of reinforcement I'm talking about in my AVS lod, there is an index in the first post. I'm on my phone or I'd just give you a link. There are some great guides on fairing as part of some of the planting tutorials which you can find in a sticky post at the top of the planking subforum. Good luck!
-
That's quite a kit, neat video showing everything in it.
-
Thanks Frank, it will be a while before it gets glued down, and no real reason I'd need to glue it until the end really if I wanted to leave it loose. Thanks.