mugje
-
Posts
917 -
Joined
-
Last visited
Content Type
Profiles
Forums
Gallery
Events
Everything posted by mugje
-
 Thanks JeffT! Good to hear you experienced the same
 -
Thanks...I thought of that too...it would look the cleanest I think maybe even remove a millimeter of the stern post itself...that wouldn't influence too much with the rudder etc I think...will look into that
-
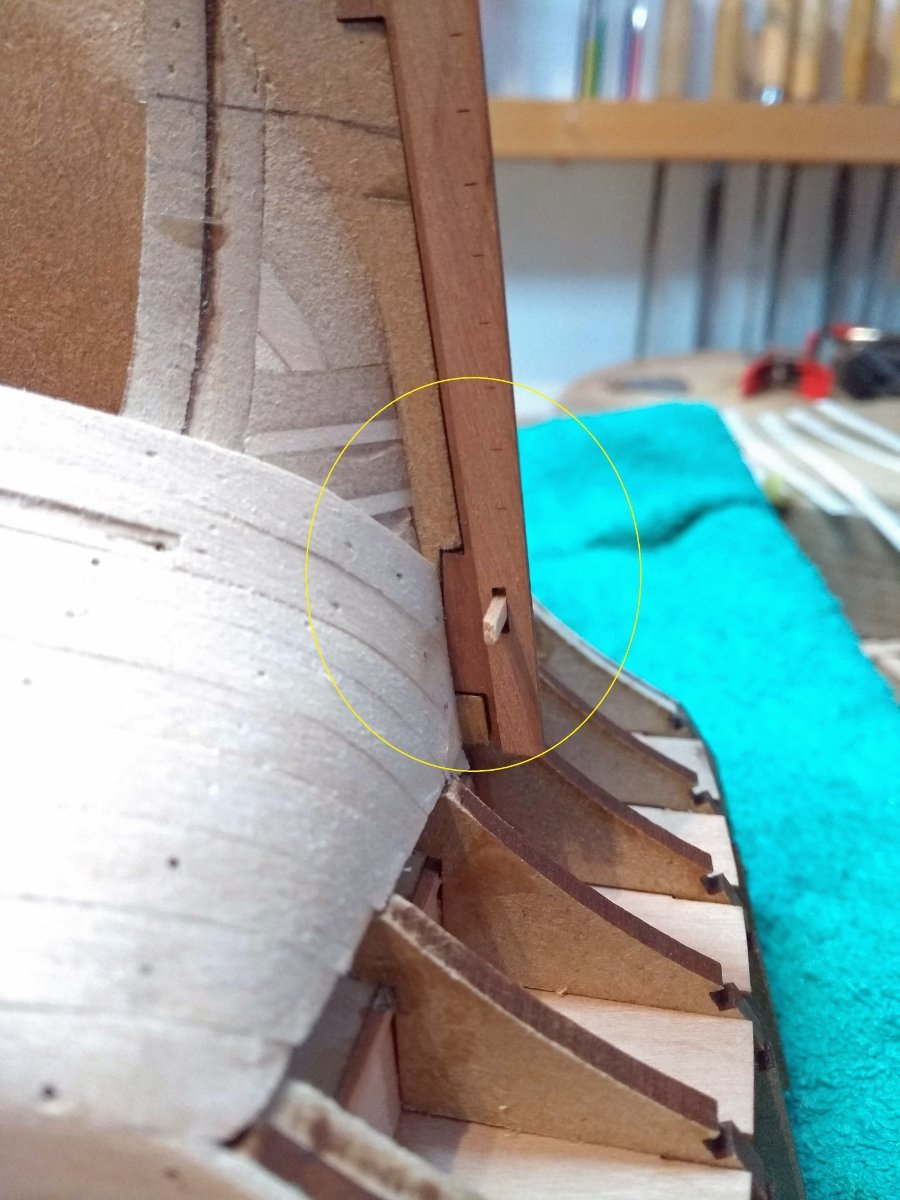
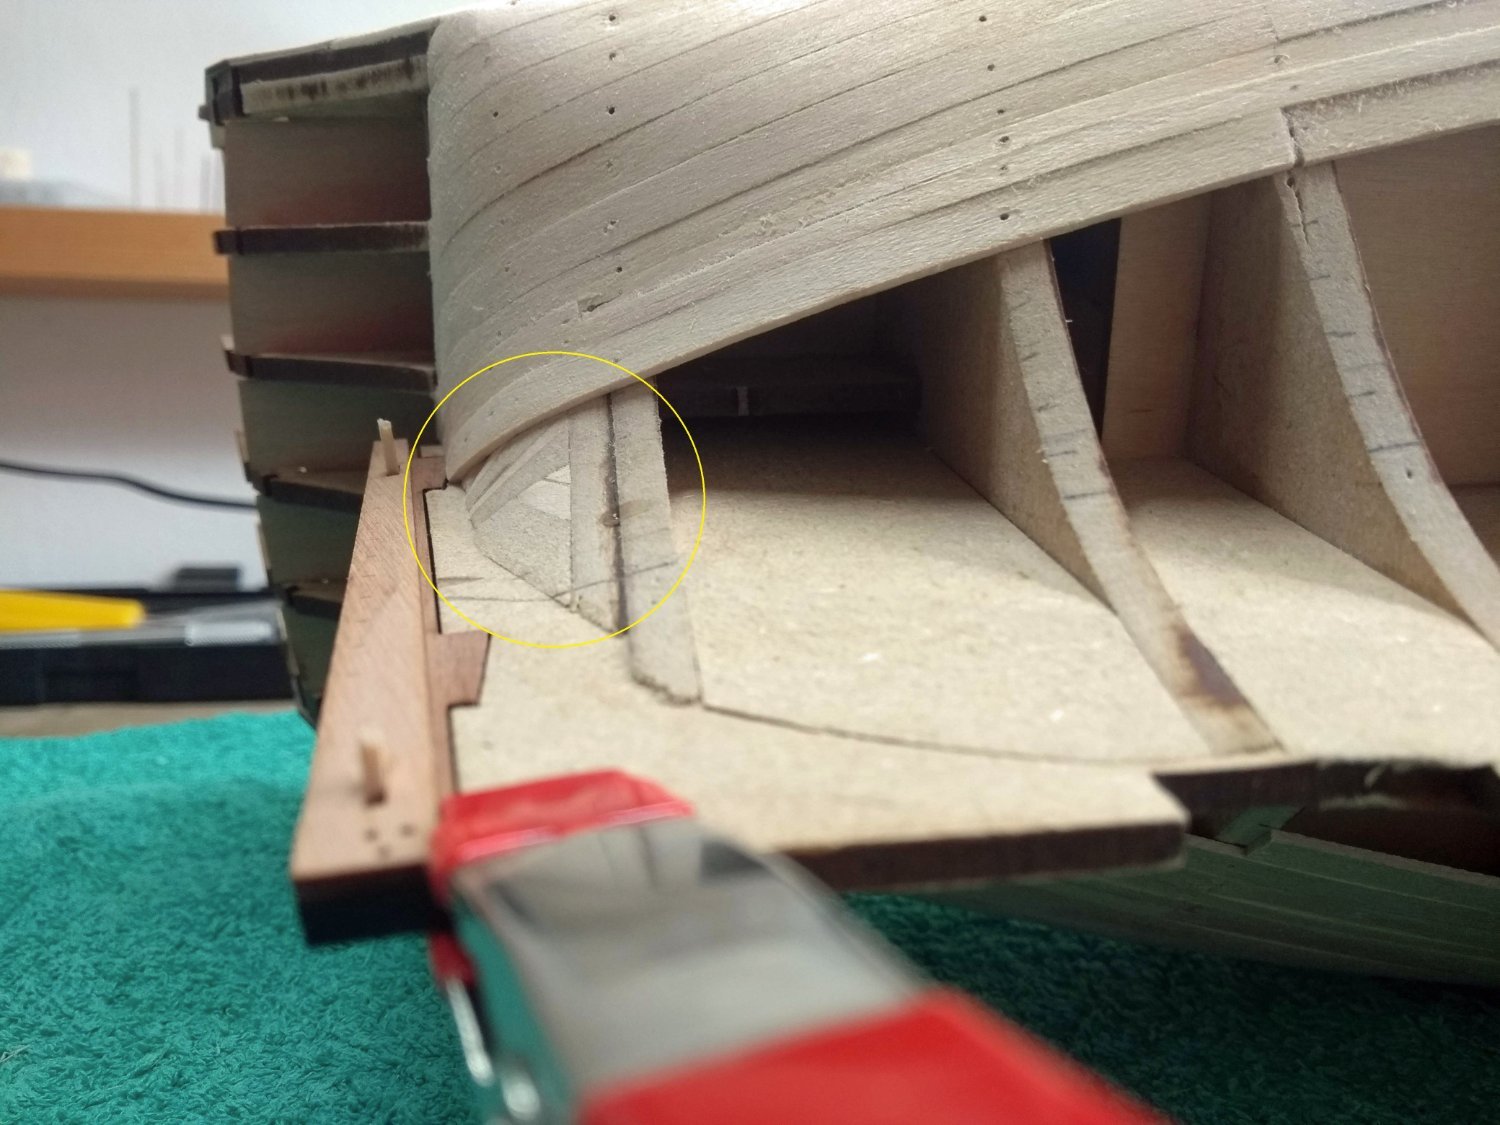
You mean...sort of widen the lasered pattern that goes on top the stern post? Or kind of a ramp where the second layer can lay on top of. (sorry for the bad English ) Yeah I saw it too in more build logs that it isn't really that much different, but in almost no build logs it wasn't really visible how the second layer ends there you would almost think that there would be space underneath the pear plank that connects to the rudder post pattern. I will look further into it
-
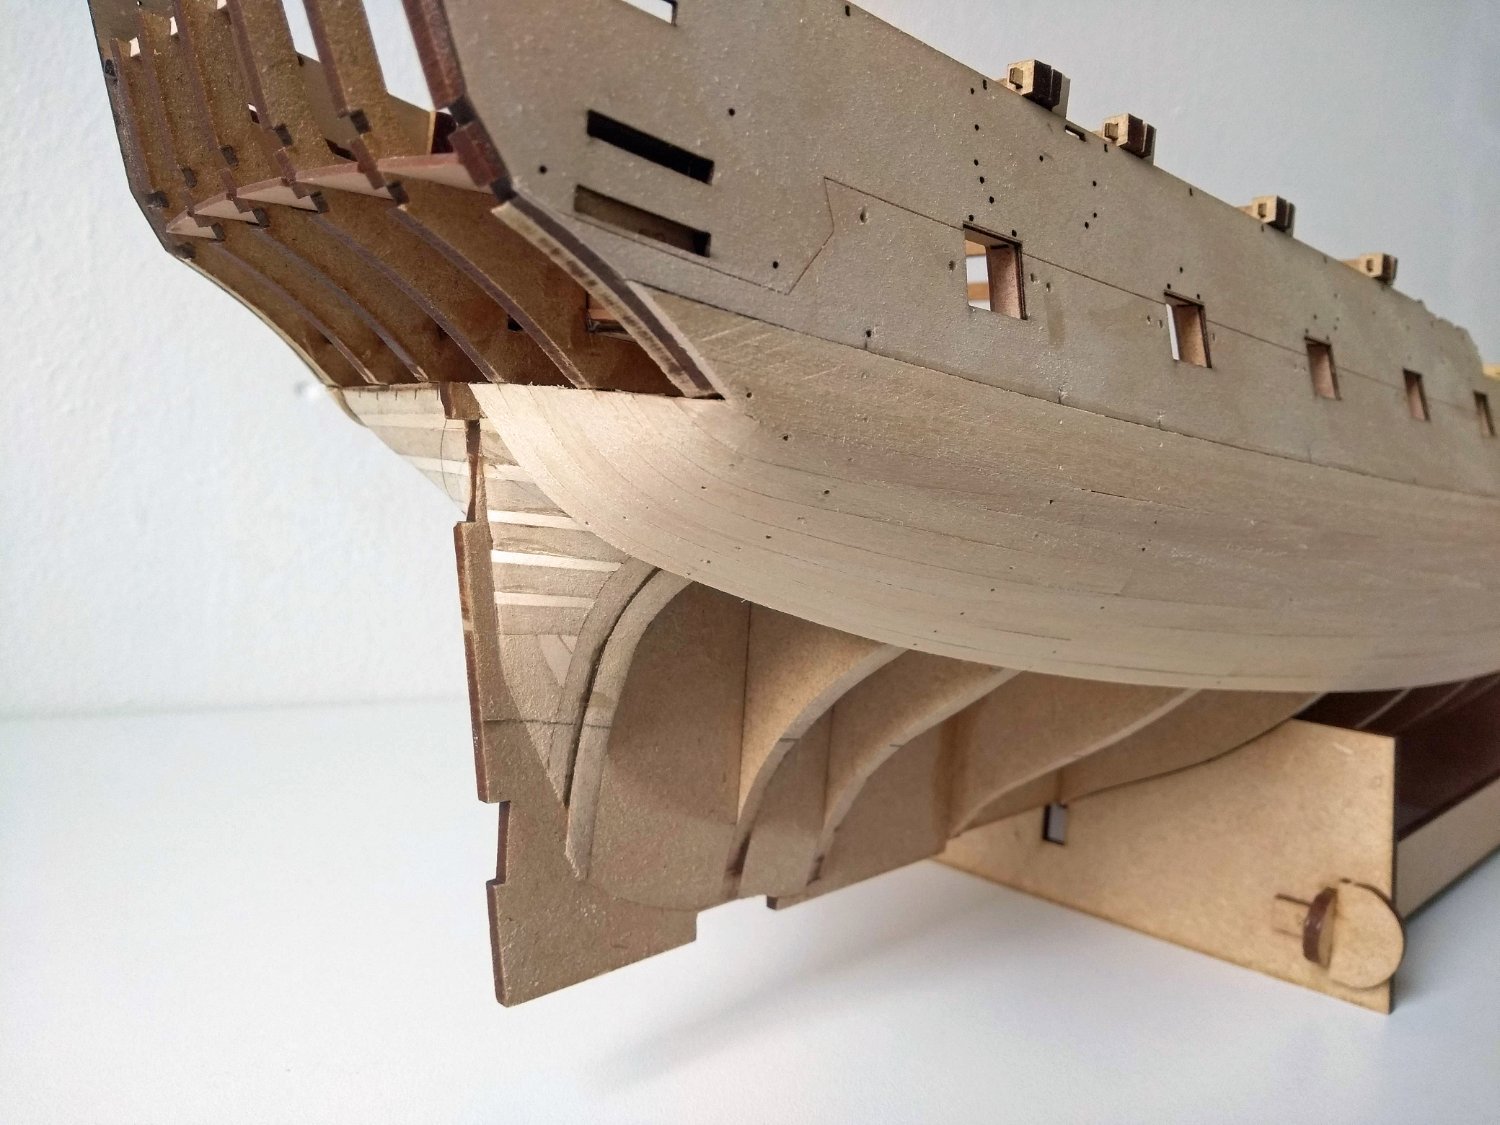
Okay people...not an update but some questions...still working on the first layer of planking (lot's of experimenting ) I have a hard time picturing if the corner and angle of the sternpiece is right. And couldn't find a clear example in the other logs that could help me visualize it. Maybe a bit difficult to explain, let's see if I can make it clear. I temporary placed the rudder post with his pattern so I can see where the second layer of planking would end. And when you look at my pictures...there is quite a gap between first layer of planking and the rudder post pattern. Much larger then the 0.8 mm thickness of the pear planking 😄. So if I would lay the second layer of pear on top of the first, there would remain quite a gap to cover. I thought...i'm going to adress it now, maybe there needs some changes in the stern piece and now it's not all covered in planks. Maybe there is to much roundness in the stern filler piece? Also...do you guys think the part with the yellow circle in the picture below is faired enough? And not to round? I thought...maybe it needs to be a bit straighter to get a smoother transition to the MDF keel.


-
Congratulations on your succes Chris! Working on your Sphinx now...your succes doesn't suprise me when I see the quality of it in comparison with the more traditional manufacturers, but take care in managing you and your wife's energy
-
That looks amazing! I really do like the change in colors of those beams...the white and the red on the sides
- 635 replies
-
- 2
-

-

-
- Indefatigable
- Vanguard Models
- (and 1 more)
-
Thanks Gregory, but I think I will go for the boxwood. How more I look to the combination with the pear the whole ship gets a nice warm tone in my opinion. So I think I will settle for that
-
Yeah the pear would be for the outer hull of the Sphinx. I will look into the Holly and see how that looks for the deck otherwhise I will go for Boxwood. I Will send you a e-mail one of these days with what I would need. Thanks for answering already
-
I think I need some of that lighter pear stuff...but my laptop hasn't got the right screen colors, so i'm going to compare it on a friend his computer. So you don't have maple in stock? I need some deck planking for my Sphinx...now I saw that Blue Ensign used Boxwood for the deck planks...maybe that's a option for me to if you don't have the maple. I think Boxwood and Maple are "yellow-ing" a bit the same over time, so maybe it doesn't even matter that much.
-
Have fun with this great kit! I enjoy it a lot working on it
-
Welkom!
-
Revenge 1577 by Loracs - Amati - 1:64
mugje replied to Loracs's topic in - Kit build logs for subjects built from 1501 - 1750
Agree with the other compliments....that is a lovely planking job! -
Congratulations! Fantastic result! Hard to believe it's just mainly paper...
- 26 replies
-
- 2
-
-
- Seahorse
- De Zeven Provincien
- (and 2 more)
-
Fantastic! It looks so good in the natural light!
-
That looks beautiful! So neat and tidy
-
Thanks Peter!
-
Thanks Rick!
-
Man you are doing such a fine job with this ship in that scale! The hull planking is really nice! And good details overall
-
Don't think it's overkill to tackle this ship in the way you do. Learning the process by just doing it, even on a little ship like this will help tremendously in understanding it and refine your skills.
- 148 replies
-
- 3
-
-
- Vanguard Models
- Cutter
- (and 2 more)
-
Thanks AJohnson...it looks neater than it was when I see a crack or seam, I fill it immediately with some glue and sawdust, so it looks maybe real good, but there were here and there some seams. And that's okay ofcourse...good practice this first layer
-
That's sweet!
-
Thanks B.E. And everyone else for the likes
-
Thank Theodosius. I found those curves in my previous planking experiences one of the most difficult parts to get right, so this time I spended a lot of time to understand what happens there under her booty, instead of just doing something and hoping for the best
-
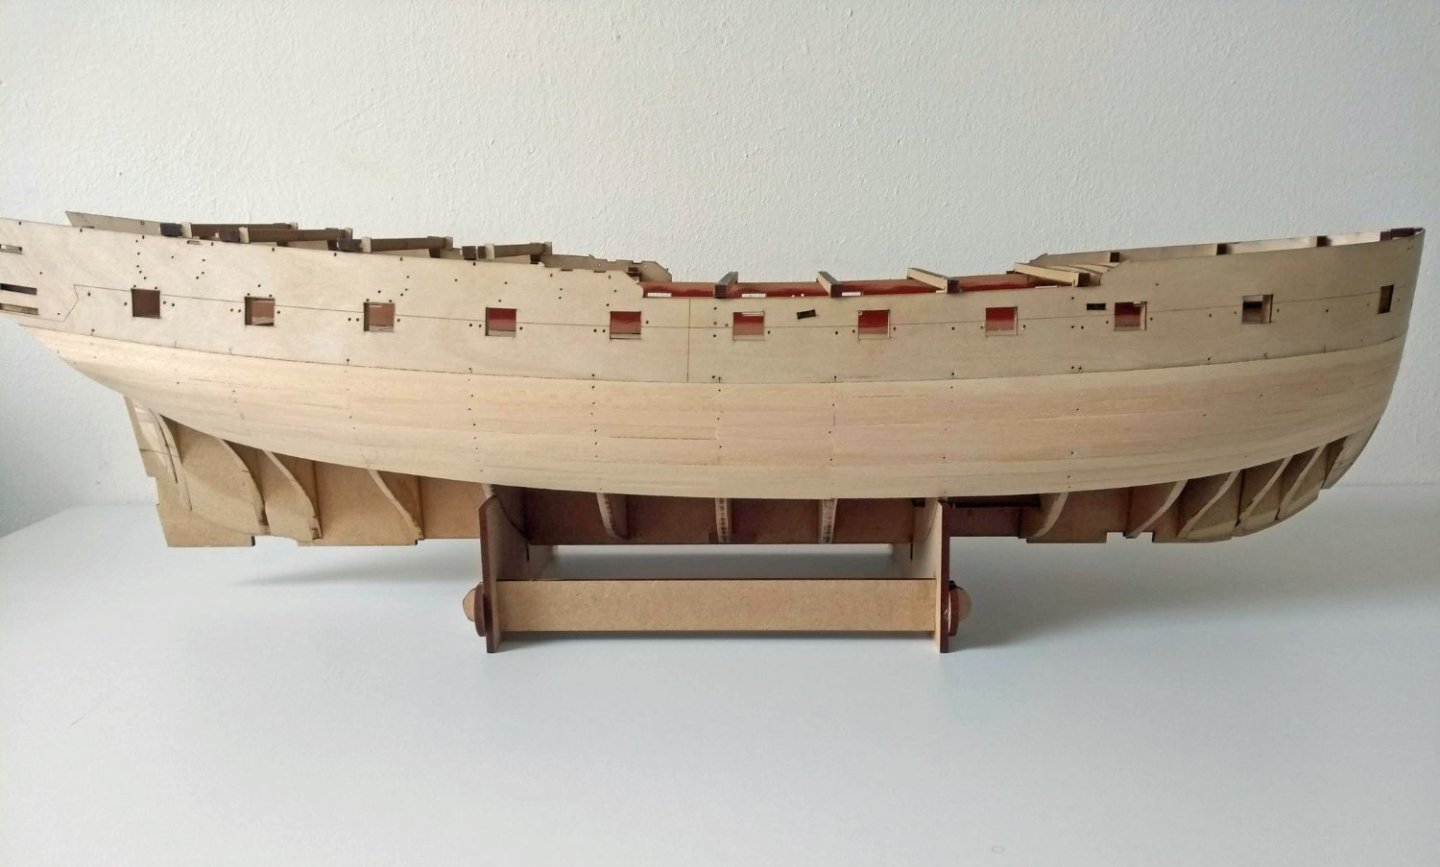
First band at starboard side filled...gave it a light sand with a coarse grit paper...nothing close to finishing, but only the rough spots cleaned up. Now further with port side.