Thistle17
-
Posts
1,054 -
Joined
-
Last visited
Content Type
Profiles
Forums
Gallery
Events
Everything posted by Thistle17
-
 Mark I just discovered your work. The subjects, both of them are a treat to the senses. Experiencing both "worlds" is better yet. Your work is exceptional! Joe
 -
I had this unhappy event back in the 1980's with my Bluenose model. I had that powdery white dust all over the encased model. Two years ago I removed the affected elements, cleaned them up and repainted the one's I could salvage. They have yet to go back on the model as I was waiting to see if the problem would return. I have kept them inside a plastic case with no ill effects evident. To address the problem with the encased model I drilled 3 vent holes at the top of the back of the case and provided some venting in the case floor hidden by a name plate support. Since doing so I have had no sign of metal breakdown. I even installed a miniature muffin fan controlled by a timer to see if that would do the trick. It seemed to do the job. So then I went completely to passive venting and that has worked as well. My case is glass on sides, front and top with mahogany framing. I have suspected the floor of the case might be part of the problem as it is mahogany plywood. They use formaldehyde in the plywood adhesive so watch out for that. Joe
-
I stand corrected then. Can,t stay in business with that reputation. They are unreliable at the least and fraudulent at the worst. I will never use them again. Joe
-
I could not agree more with Greg and David. I have the entire collection including the 4 years of the annual publication. They are a treasure of some of the finest model ship building out there. Thank you for the reference on the Advance Book Exchange. Joe
-
Atlantis by Thistle17 - FINISHED - Robbe
Thistle17 replied to Thistle17's topic in RC Kits & Scratch building
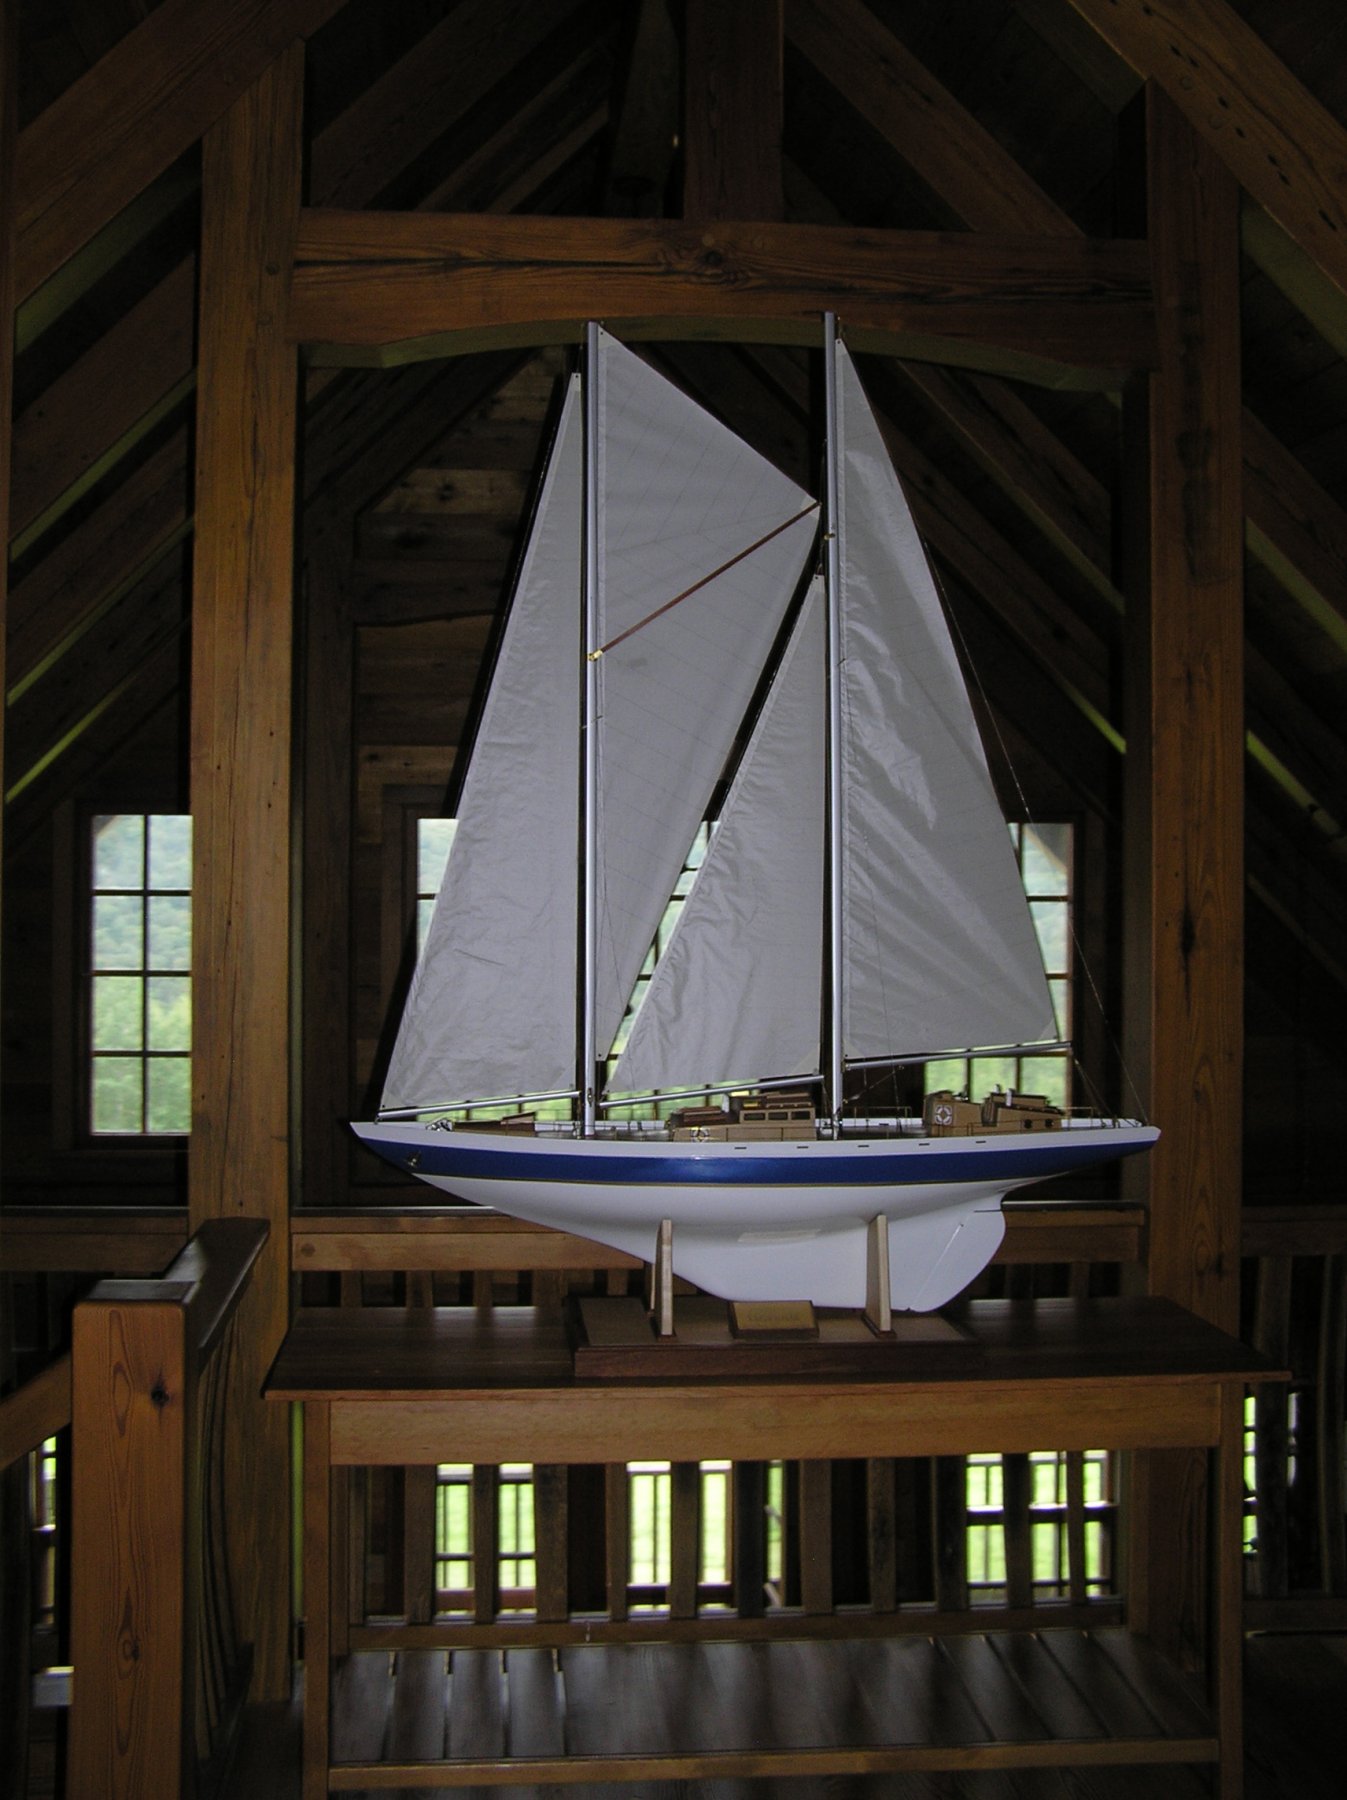
Tuesday 9/11, not a day to remember the delivery of "Herself" aka Atlantis to its new home south of Naples NY. It took nearly 6 hours to re-rig the model on site even with all the prior preparation and use of previously mentioned fittings from Du Bro. I had only moderately taken up the shroud and stay tension in the early rigging cycle so when at the new site it became somewhat of a problem to do so and get the masts aligned correctly. There is a clever adjustment in the mast tops which enables final shroud adjustment so that brought it all into alignment . Running rigging re-installment and cleanup accounted for the balance of time spent. This model build/conversion has occupied much of my attention for 20 months. The owner is delighted with the model and expressed her appreciation for its completion as it has a lot to do with memories of her late husband. That in itself was a reward for me. So here is a final picture of it in place and the lovely owners home. This was more than a model build for me it was an opportunity to meet a new friend.
-
Welcome to this great source of model ship building! You are fortunate to live in an area rich in outstanding modelers aplenty. Check out the NRG site for groups there. Do look them up and do visit the many museums in your area. Joe
-
Byrnes thickness sander
Thistle17 replied to rtibbs2018's topic in Modeling tools and Workshop Equipment
We are a society of "accumulating things", yet when you work with quality products such as the Byrnes line of tools it is not so. I have owned, for example the Preac table saw. Which, in itself was a decent product, but limited. Now that I own both the table saw and thickness sander I have come to appreciate them more with each use. They are peerless! Joe -
Atlantis by Thistle17 - FINISHED - Robbe
Thistle17 replied to Thistle17's topic in RC Kits & Scratch building
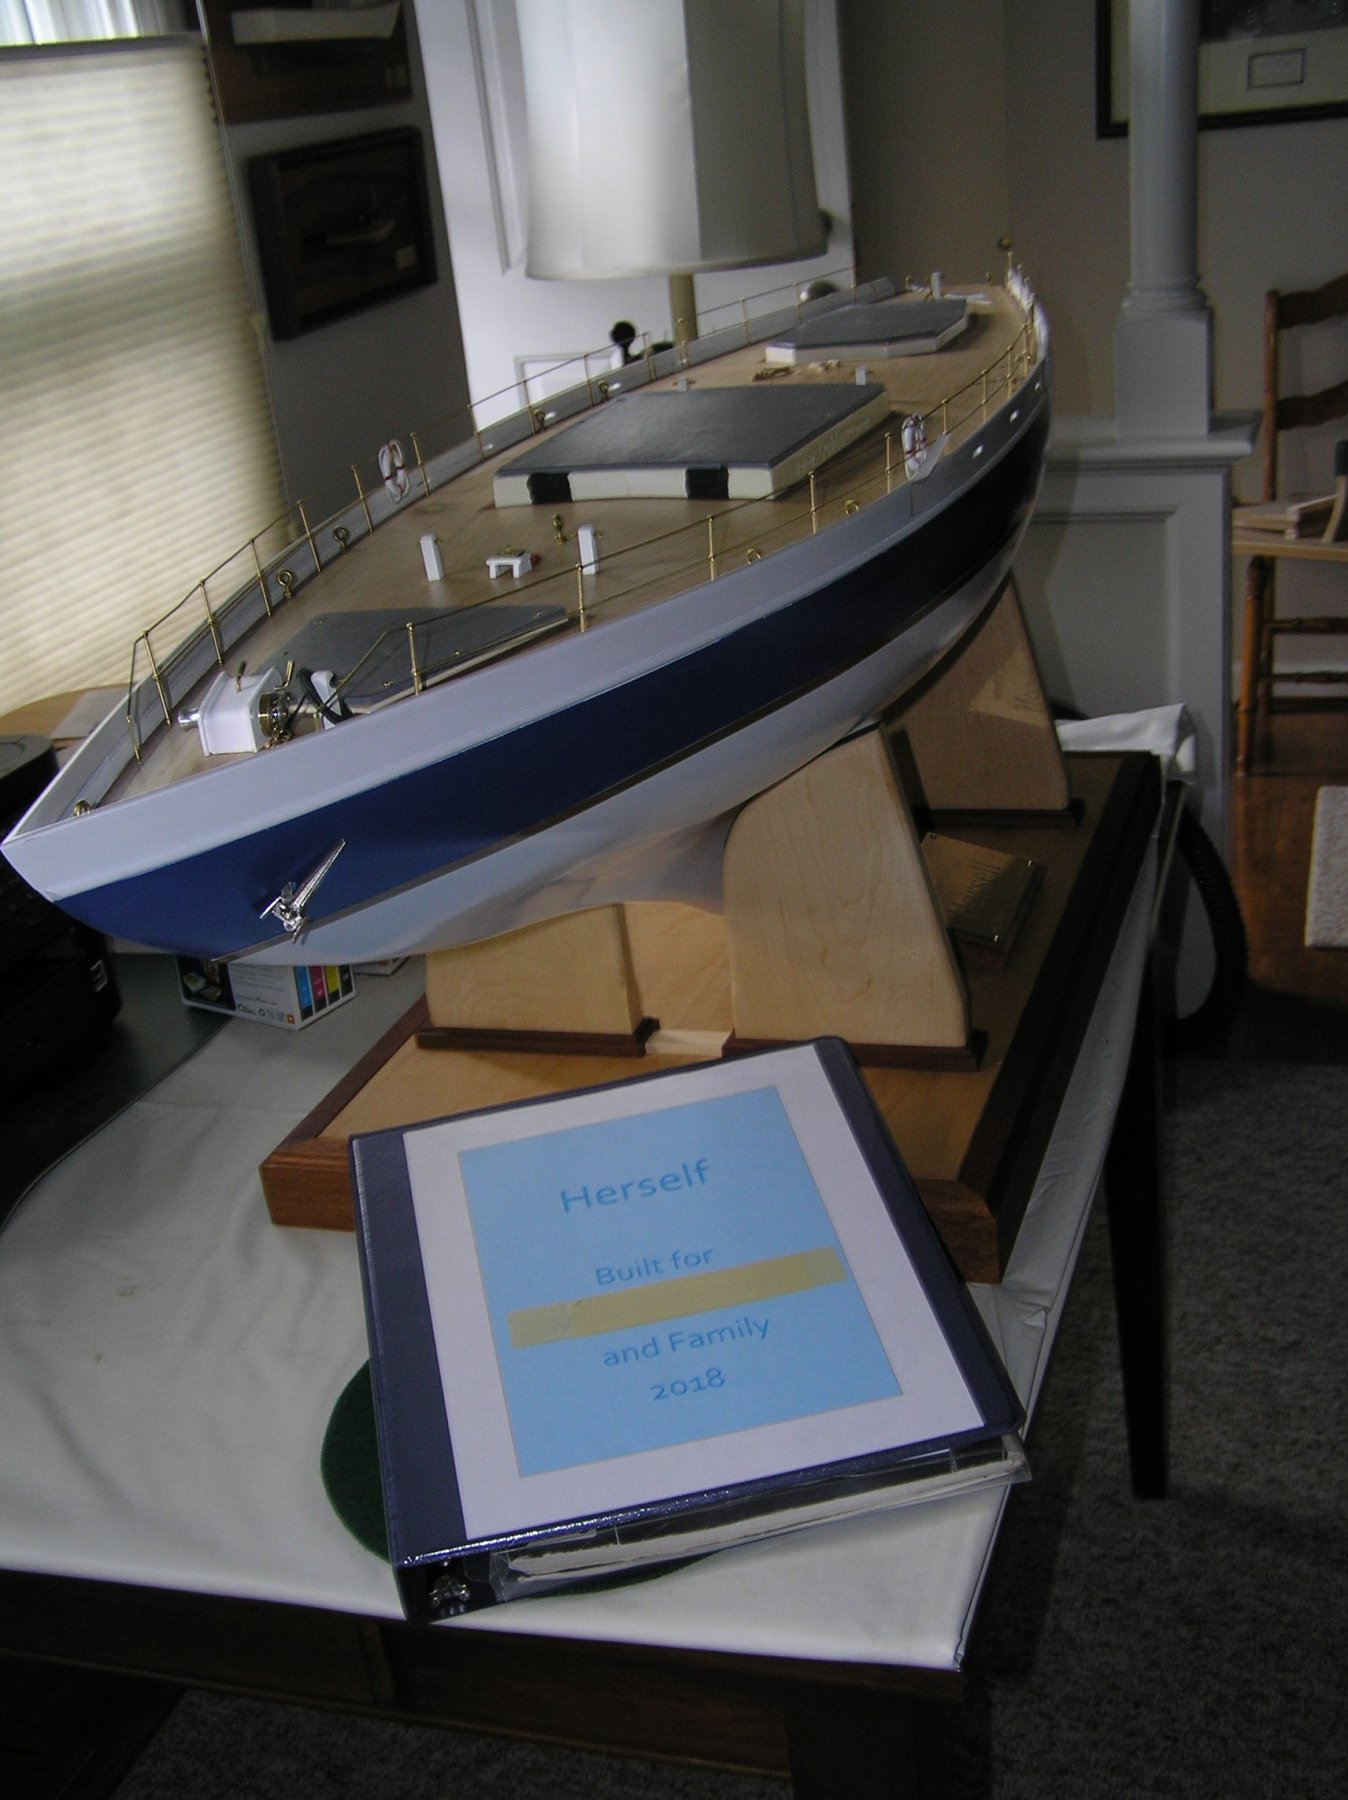
After nearly 1 year and 9 months "Herself" is awaiting departure for its new home. The new stand has been assembled and varnished. A brass identity plate was crafted at a local trophy shop. The deck furniture has been packed up and tools are ready to go. I prepared a build "brief" as well. I was unable to access this build log to export text but I was able to export some of the key photos and added abbreviated text which speaks generally to the build. I also included materials used and parts purchased for future reference. As I had indicated the table and sails were delivered the prior week and await the model delivery and re-rigging. I have given the owner dates into October that work for me. So now we wait. In the mean time it is back to Cheerful! Joe
-
Chuck your strategy makes a good deal of sense. It would seem to lessen the front end rush and provide a continued annuity stream as well. joe
- 421 replies
-
- 6
-

-
- medway longboat
- Syren Ship Model Company
- (and 1 more)
-
The accolades just keep coming don't they. Me thinks if I add even more than I have, in the past, they will overflow your "kudos" jar. What I would reflect on is your marketing strategy, deliberate or not. Not only do you possess an incredible level of creativity and craftsmanship but you have found a way to connect with the community at large like no other. In doing so you have generated such an avid following and interest for your works. It is exciting to follow your thread and this future offering may exceed your fondest wishes, I fear. It was a good pick to start with. I await patiently your release of the product but I have no illusion about the fulfillment dilemma to come. Joe
- 421 replies
-
- 9
-
-
- medway longboat
- Syren Ship Model Company
- (and 1 more)
-
Recommendations For A Good Milling Machine
Thistle17 replied to Thistle17's topic in Modeling tools and Workshop Equipment
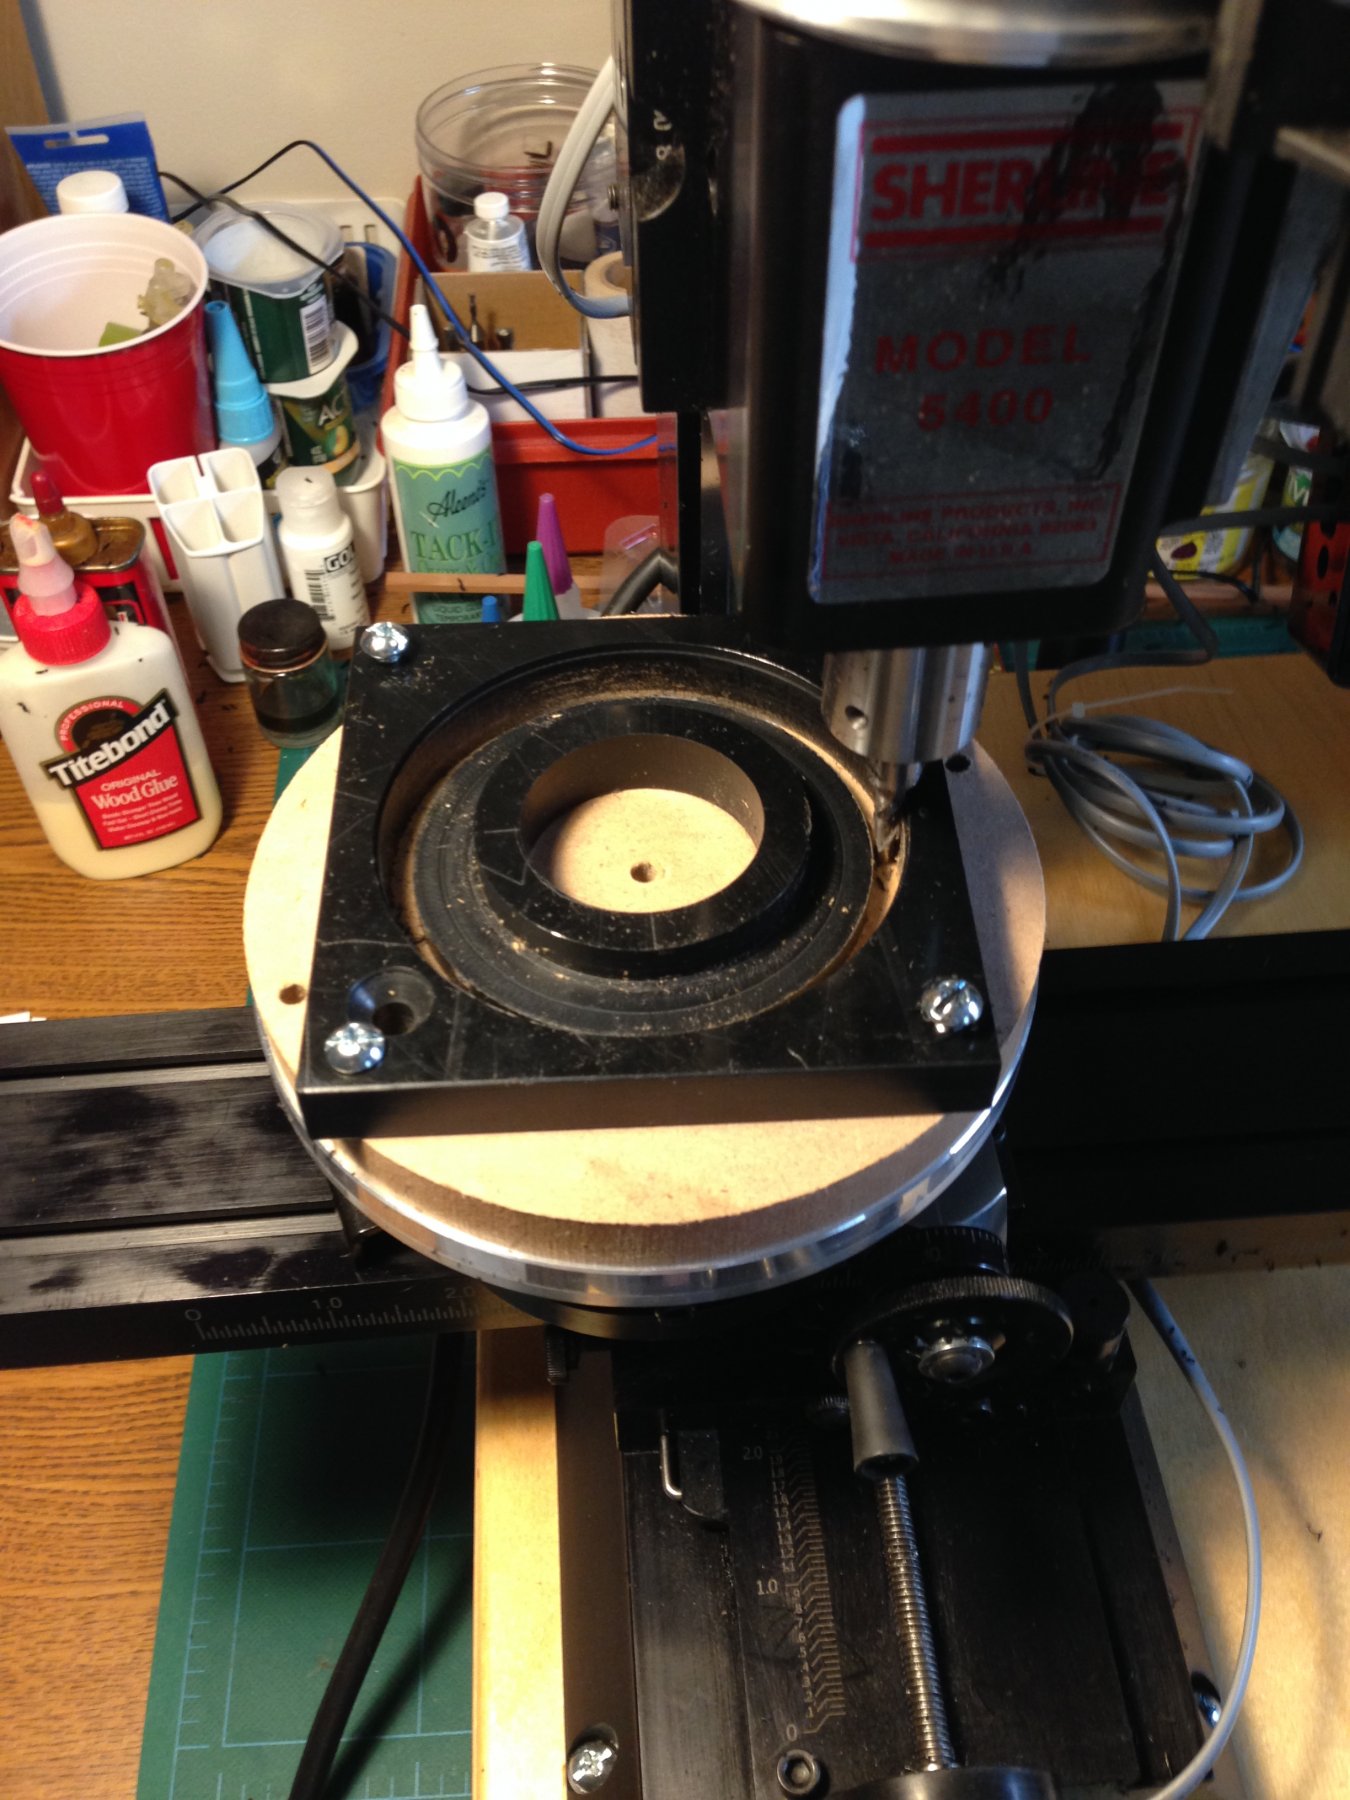
Now this has nothing to do with ship modeling, but if you will, it has everything to do with the versatility of the Sherline Mill. Recently I bought the 4" rotary table and tooling plate for the mill as my first accessory. From several sources I had read how useful it is and this immediately proved to be so. Now I am not a skilled machinist so you folk that are, will probably consider this elementary, but for a novice like me every use of the mill is a discovery and eye widening lesson in use. The rotary table can be mounted to cross slide in a traditional manner or can be mounted 90 degrees to the cross slide/table. This does require an additional part which I have yet to order. Sherline also offers a tail piece to mount in a similar manner. I had to make a 3" wide collar for a repair of a glass table top that was damaged in a wind storm. I used a 5" piece of Delrin bolted to a sacrificial plate which in turn was bolted to the tooling plate I had also ordered. I reasoned that if I centered the desired piece on the rotary table assembly and positioned it so that it was dead centered to the milling head tooling I could then index it in the 'X' axis 1 1/2" away (never touching the 'Y' positioning) I could cut an acceptable disc and receiving hole in the stock piece with accuracy and ease. Again this is just more testimony into the applications of the Sherline Vertical Mill. This machine is a joy to use so if you are holding back in its purchase....DON'T, it is such a great machine! Joe
-
Atlantis by Thistle17 - FINISHED - Robbe
Thistle17 replied to Thistle17's topic in RC Kits & Scratch building
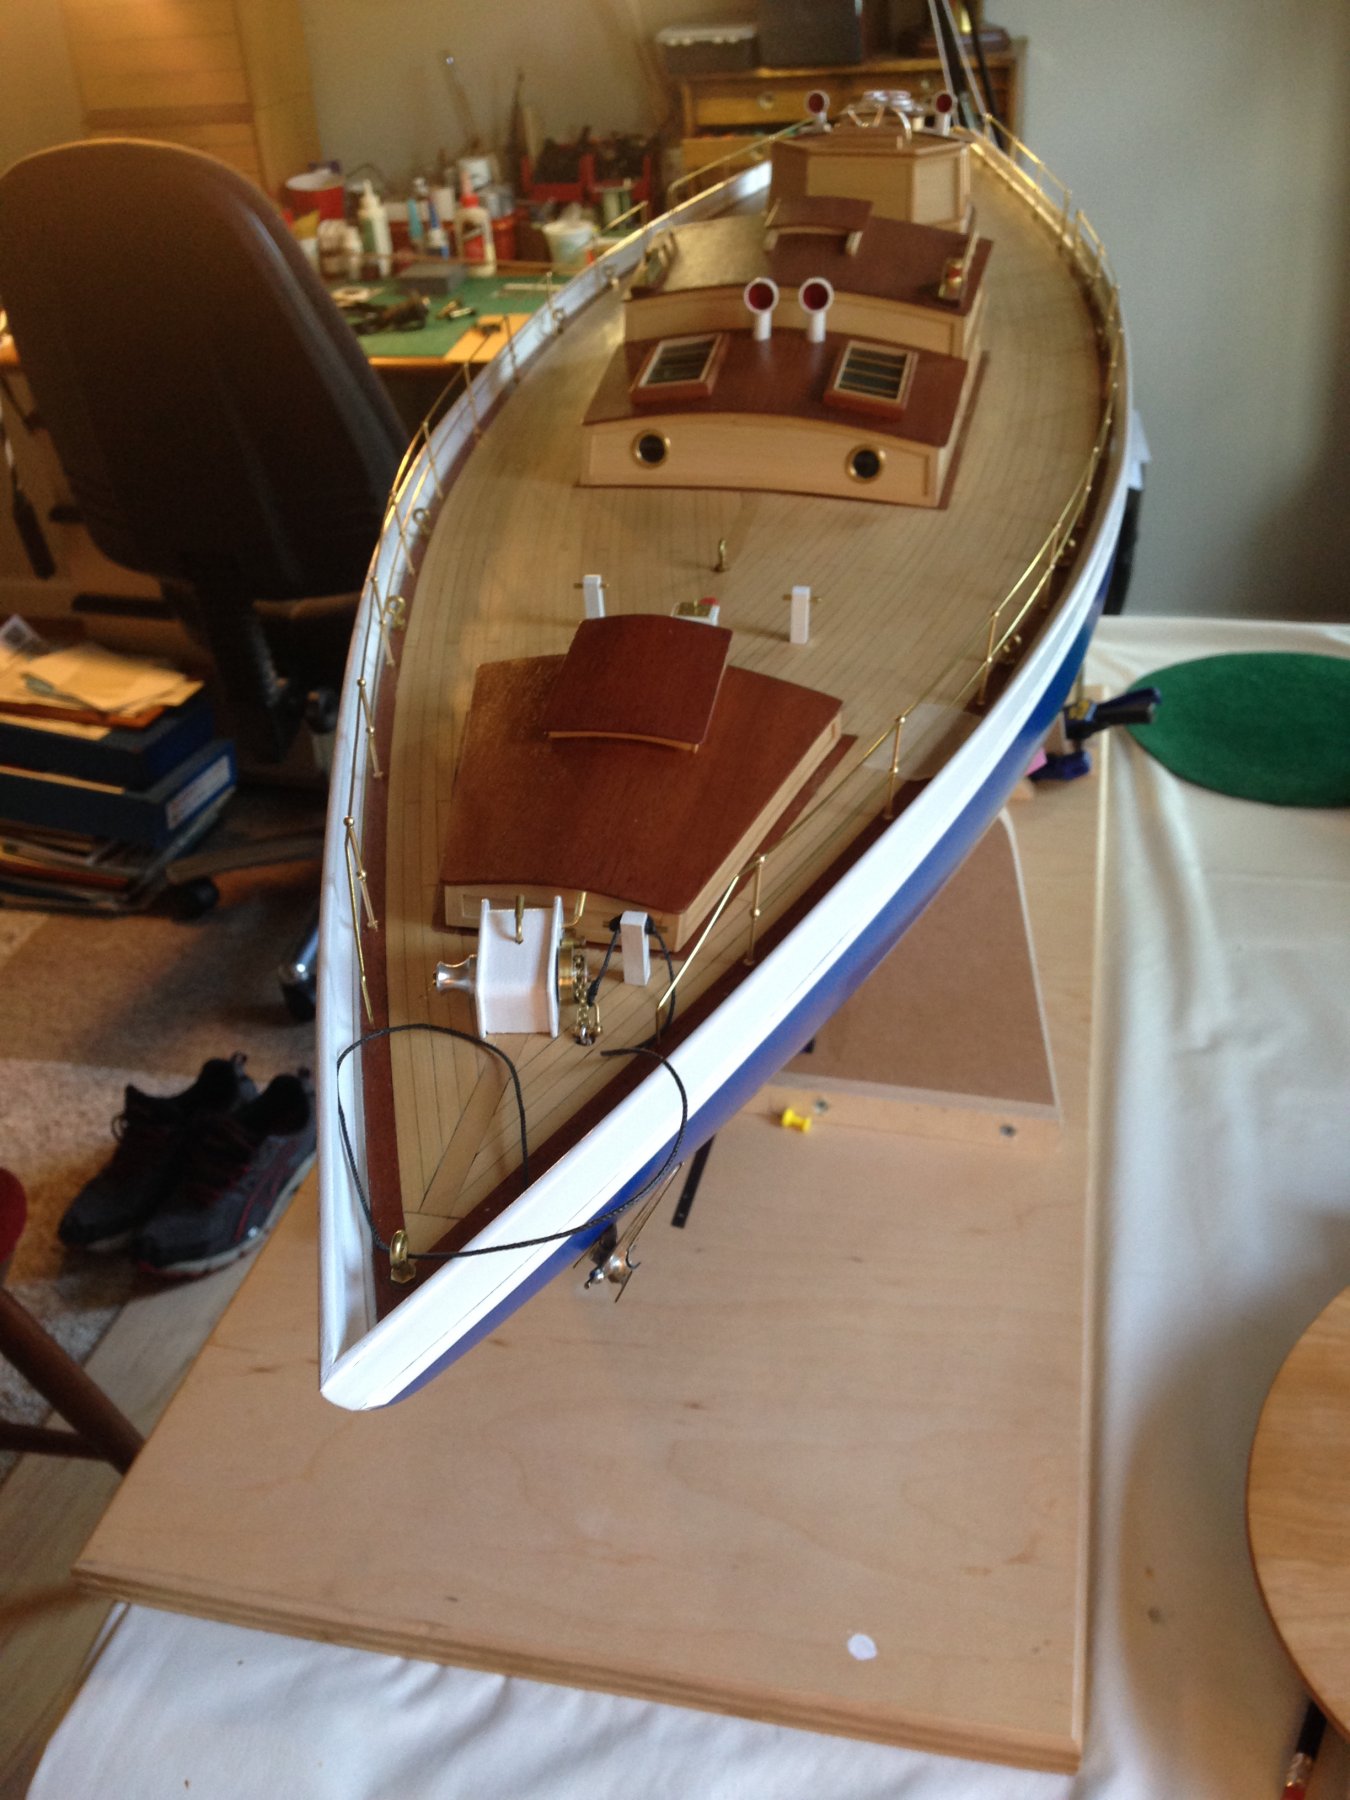
Here it is August 22 and it is finally going to happen i.e. I will deliver the table and the sails tomorrow. Last week there were torrential downpours in the Finger Lakes area of NY state that made the dirt road ( better described as a cow path) up the hillside improbable. Nearly 70 homes were destroyed or heavily damaged one lake over from Canandiagua Lake nearby. Cars, some homes and propane tanks were washed into Seneca Lake. As you may know these lakes were carved out by the last glacial period and for the most part are surrounded by high hills making runoff a major problem when such an event occurs. In the mean time I have assembled the new model stand and completed some last minute touch ups to the model. I hope to deliver that over the next 2 weeks. -
Recommendation
Thistle17 replied to Jaeon's topic in Building, Framing, Planking and plating a ships hull and deck
Here is what I would do at first blush. Check the keel or false keel against the prints. If you find it correct I would infill the inside of the stem and modify the outboard edge of it to have a uniform stem along its form. If the stem is correct then work the false keel. at the point of disagreement in a similar manner. Joe -
Bare Koala if you have the notion to go full scale someday take the time to visit this web site Acorn to Arabella and follow the saga of building a 38 foot ketch. While many of the structural components in model building are no different when you go full scale the "horsepower and ingenuity" needed is a different story. Joe
-
If you haven't toured this thread where you placed this query do get a look at some of the clever jigs people have made for this wonderful tool. They even extend the saw's use even further. Joe
-
From my experience I would add the rip fence extension and the miter extension at a minimum. If you have the $$$ add in the sliding table as it allows one to make cross cut parts repeatedly and safely. I have yet to find need for the tilting extension table as a surrogate for the absence of a tilting arbor. Joe
-
Atlantis by Thistle17 - FINISHED - Robbe
Thistle17 replied to Thistle17's topic in RC Kits & Scratch building
Hard to believe it is now August and I have yet to deliver the model. That is the bad news but there is some good news. The table is done and is scheduled to be delivered this week. The table is 5 feet long and 2 feet wide and will fit the model nicely. The model will be named "Herself" which has been the request of the owner so the plaque will be made up this week at a local trophy shop. "Herself" has been de-masted and all rigging is tagged for hopefully easy re-rigging. The table and sails will travel separate from the boat as my vehicle just isn't big enough for all. I have also developed a build log in note book form for the owner in the event future work is needed. Materials (wood, adhesives, paint etc.) has been documented. The model does look a bit anemic at this point as you will observe. Apart from function sails do make a difference!
-
Mark welcome to this forum and the world of ship modeling. I hope you find it engrossing and worth the investment. There will be anguish and quiet satisfaction along the way. It is part of the journey but always know that is normal. I have built the Bluenose from the original A.J. Fisher of the 1980s and it was my first endeavor. Yes there was some do overs but the lessons learned carries on . She is a beautiful model. Joe
-
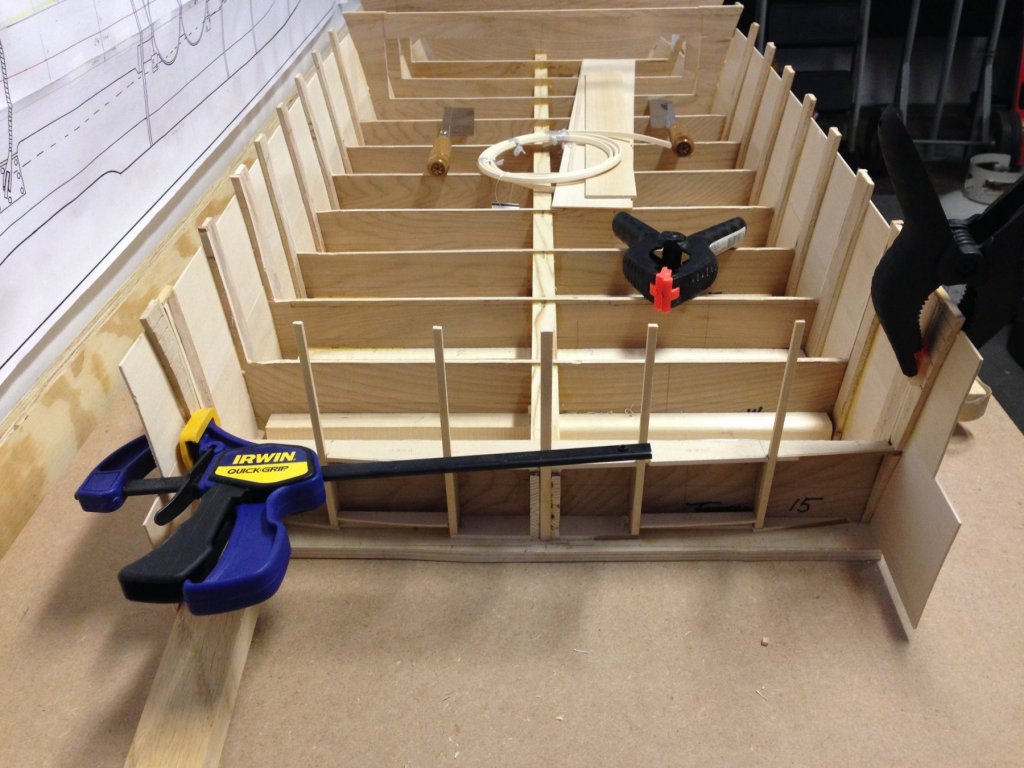
Here is a somewhat better view of the transom work. The thrust ports have been installed at the waterline and intermediate lateral and vertical re-enforcement has been added to the area. We are nibbling away at the build spending just a few hours each week, currently focused on the transom and fairing/filling the bulkheads forward of station 8 and bow which has been built out with with balsa fillers. This area is still a bit rough but should be "picture ready" next week. The photo doesn't depict the transom gentle contour and vertical angle but hopefully with the skin added next time one will get a better idea of the aft section of the hull.
-
Modeling work on the PBR has been creeping along this summer with vacations and all. Over the last 2 weeks we have had volunteers come in and work on the transom area and preparing the aft part of the hull for final skinning. The first picture shows the bulkwark excess material cut away from the stern up to station 8. A flush cutting hand saw was used to pare down the bulkwarks to the floor. There was negligible deflection of the bulkheads when the excess was removed. By measurement it was less than a 1/16 inch. This will be compensated for when the deck is in place. The second picture is of the transom frames glued in and trued. We will be "skinning" the transom next visit and move forward to start the bow fairing which has been filled in with balsa blocking. By any standard things still looking a bit "raw" but I predict that that will quickly change as the skin is applied. Hopefully we will have this done for our opening meeting in September and we can get others on board for sub assemblies.


-
I seemed to have lost the Winne project baseline build definition. I had assumed you were doing a beta build to prove out the design for Chuck/Syren. Is this not the case? The question arises (over the laser work) as I had assumed I was witnessing a true beta build. I hope this is clear. Joe
- 607 replies
-
- 5
-
-
- winchelsea
- Syren Ship Model Company
- (and 1 more)
-
Recommendations For A Good Milling Machine
Thistle17 replied to Thistle17's topic in Modeling tools and Workshop Equipment
Yes Wefalck as I understand it is designed so. I can't tell you how impressed I am with the design of the machine, the accessories offered and the service of Sherline. and I thank you for your 90 degree suggestions. I will certainly put them to good use. I logged on just now to extol the virtues further of this tool. In making a table for the Atlantis model I have had to bring on line another router table to fashion the legs. I bought a 1/4" aluminum mounting plate that was supposed to fit my router and allow a built in lift from the table top. When I assembled the plate and router I ran into an interference problem for the lift tool and the router plate, pre-drilled access point. I thought about filing the plate and living with a functional albeit awful looking access hole. In the "now what am I going to do" moment I thought of the vertical mill. It took a little bit of thinking but within just a few passes I had a clearance hole I could be pleased to look at time and time again. This is just more testimony of this wonderful tool! Joe -
Recommendations For A Good Milling Machine
Thistle17 replied to Thistle17's topic in Modeling tools and Workshop Equipment
Someone had said to me on this thread that I would invest as much in accessories as in the original cost of the mill. I think I am going down that rabbit hole. I just purchased the Sherline rotary table for my mill. I also purchased the tooling plate as well. Interestingly the rotary table was on sale on their web site so that was fortuitous. The 2 other recommendations they make to further increase the versatility of the mill is to add in the right angle support (for the rotary table) and the right angle tail stock attachment. Now I can see the usefulness of both but I would appreciate hearing from others on how useful these elements are. Joe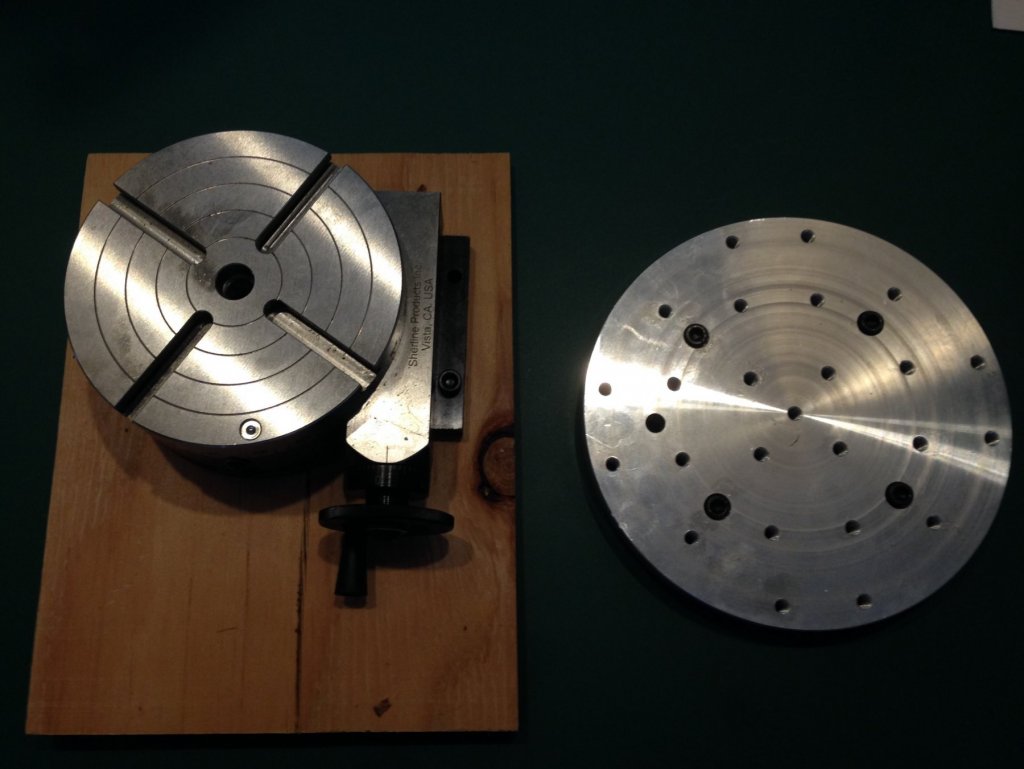
-
Michael as I follow your reconstruction I can't help reflecting on those "passers by" that will casually observe your incredible work. I think but a few will appreciate the talent, ingenuity and work you are accomplishing. I certainly do! Joe
- 749 replies
-
- 7
-
-
- albertic
- ocean liner
- (and 2 more)
-
Only additional comment I would make at this point is that your work product is museum quality in my opinion! In regard to trailboards. If you are considering relief carving I would suggest laser etching. I witnessed a very convincing demonstration of laser etch, at reduced power, that inscribed a beautiful stern banner on a model part. A drawing was scanned into Corel Draw and converted to a laser file that was compatible with the unit. Just a thought. Joe