Thistle17
-
Posts
1,054 -
Joined
-
Last visited
Content Type
Profiles
Forums
Gallery
Events
Everything posted by Thistle17
-
You are not alone with losses like this. We all share the experience. I have had luck with the internet seeking even parts for a model from a defunct manufacturer. So broaden your search to forums out there. There has to be someone who can help. Oh and" Y'all gonna love it here" as they used to say to me (a Yankee) when I lived in Texas. Joe
-

Atlantis by Thistle17 - FINISHED - Robbe
Thistle17 replied to Thistle17's topic in RC Kits & Scratch building
I just completed what I believe will be the stand for the model. As I am anxious to work the table itself I have to get past this element hastily to deliver the model soon. Nothing is glued up yet and the assembly parts need final sanding. As I stood back and evaluated the stand I did realize one element I may have to revisit. Although the environment where this unit will live is a controlled environment temperature and humidity swings can't be guaranteed. I might say the same for the model. The stand uprights are about 6" wide and I think over time they may blow out the delicate trim around them. I hate making service calls! Hmm! Joe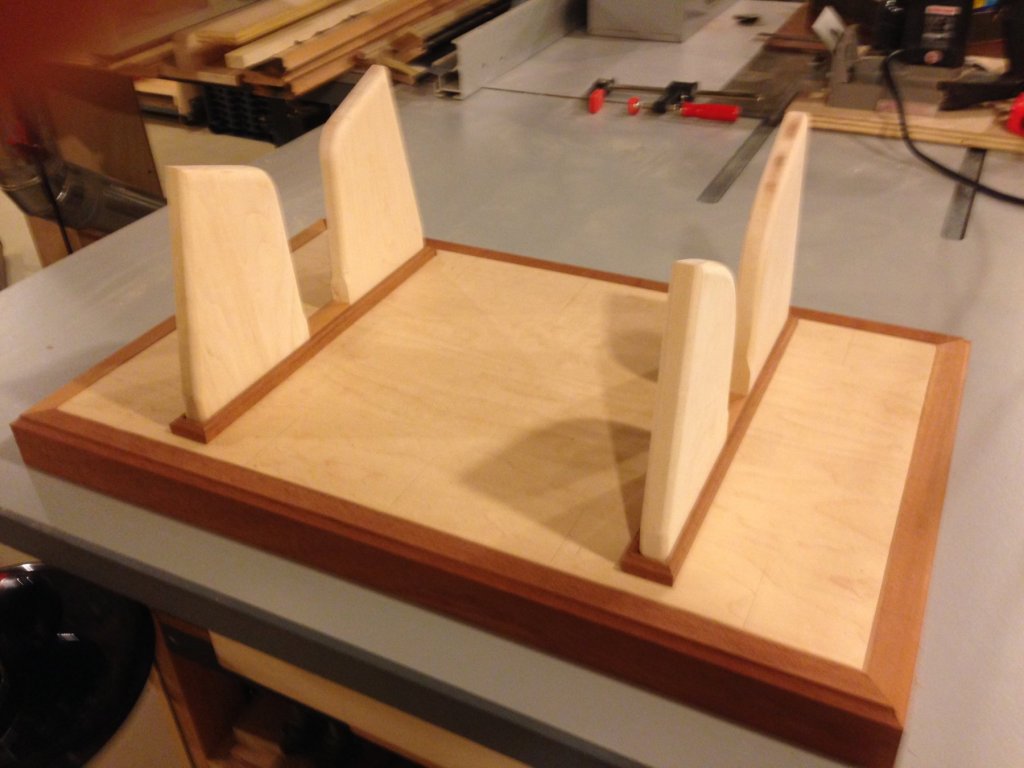
-
Atlantis by Thistle17 - FINISHED - Robbe
Thistle17 replied to Thistle17's topic in RC Kits & Scratch building
I finally met with the client today. It is the first time she has seen it. Modestly I say she loved it! That made my day! We decided it is prudent to step the masts and reassemble it at its new home about 35 miles south of Rochester. While that will require about a 2 day effort at the site, it is the safe way to its new home. All running and standing rigging will be identified and its termination points will be identified as well. I am now working on a stand for the model and it is being done in mahogany trim and a maple platform. With the trim it will mimic the deck treatment and should not be a detraction. I have pulled out the lumber for the table and that will be started and hopefully finished not too long after the stand. Since the environment where the model is going is rustic (yet nicely done) I am using quarter sawn Douglas Fir for the table. The face grain is beautiful but the side grain is a bit distracting so the legs have to be made as 4 separate wedges glued together. The rest of the table will be straight forward apron and top construction. As a final touch a plaque will be made for the model and named by the owner. Then I will have my first build declared a finished product! Joe -
In an earlier life I was in real time software development. There was a saying within the team; "You can tell much about the developer by the sharpness of his tools". That fits so well when I witness your work. Jig making is an art form of itself.It goes beyond creating a single point object as it has to be flexible, adaptable and of course useful beyond a single objective. You bring it to such an astounding level of utility. Joe
- 749 replies
-
- 7
-

-
- albertic
- ocean liner
- (and 2 more)
-
Mike you are truly gifted and prolific! I am also amazed at your beautiful photographs. They tell the story in such splendor. May I ask what camera you are using? Joe
- 452 replies
-
- 4
-
-
- cheerful
- Syren Ship Model Company
- (and 1 more)
-
Jeff I am not an expert at planking but have learned a lot from those better than myself. In reading your post I have to presume you are trying to avoid spiling or at the least, minimize it. I have tried Chuck's method of heating and force bending the planks with less than good results. In the demo he did in his video I think (guess) he was using 3/64 planking (a fat 1mm). Wood doesn't bend in 3 planes as I have been taught so that may be a good limit to keep in mind. In my mind spiling is unavoidable but can be mastered. I have been tutored by a fine modeler and have been allowed to capture his NRG presentation of a number of years back on our web site. It is in our RESOURCES segment under SHOP NOTES Part II on Planking. Our web site is www.modelshipwrightguildwny.org. His pictorial presentation is easily understood. Mind you we are not the first nor last word on hull planking but you may find the references within helpful. My 4 cents. Joe
-
Shean it may be a long drive but if you can attend the July 28th seminar in the flyerI referenced, it may be a good way for you to meet everyone. The title of the seminar is a bit misleading as it will be a pretty complete expose' on how he built the Sultanah for the country of Oman's new museum. It is a 1:24 scale model of incredible work. It may be worth the trip for you. Do let us know as we have a few more seats available and it is right off exit 45 on the NYS Thruway. Joe
-
Thanks Chuck I will behave myself and do my best to do this project justice. Joe
- 421 replies
-
- 4
-
-
- medway longboat
- Syren Ship Model Company
- (and 1 more)
-
Nice design, nice assembly support, nice product. Simply put VERY NICE. This should be a fun build and not a career in its making! One question; when it is ready to release do you plan on releasing to all those who have signed on for the group build all together or are they going to be "put in your store window" and it will be a first come first served" basis? Just wondering given the Barge experience. Joe
- 421 replies
-
- 2
-
-
- medway longboat
- Syren Ship Model Company
- (and 1 more)
-
Shean! We have a group of modelers in Rochester NY. Please visit our site www.modelshipwrightguildwny.org to get a sense of who we are. If you are near we would certainly enjoy your participation as we have all levels of skill and interests in the group. We have a member in Syracuse and one in Buffalo. They commute to our monthly meetings. We also have a member in Lisbon Portugal that will be coming to the US to give a seminar on July 28th (see our EVENTS and TOPICS OF INTEREST on the web site to learn more). If you can make it, there would be a warm welcome awaiting you! If you wish Joe
-
Ivan is this not an amazing venue for modelers? By the responses so far you have reached out to nearly the other side of the world. Welcome and very nice work on the plastic modeling. If you have not touched base with the IPMS (plastic modelers) do so, many are in your league. We have a chapter here, near Rochester NY. Joe
-
Requesting feedback for future MSW Group Projects
Thistle17 replied to Chuck's topic in Group Projects on Model Ship World
Chuck, that was a really good explanation and now I understand the precepts of such an endeavor. I will continue to monitor the voting and participate when all decide. Joe -
Requesting feedback for future MSW Group Projects
Thistle17 replied to Chuck's topic in Group Projects on Model Ship World
Although I await the Winne from a personal standpoint I don't think it would be a practical "group build" from our club standpoint. If "group build" were interpreted at that level. Certainly at the larger meaning of "group build" as it applies to MSW it would be most interesting. I would add that not having participated in the Triton project maybe I have got the notion wrong. I have been keen on a group project for our club as we have quite a cross section of talent and experience. I would like to see a more manageable project that holds the interest of the more experienced and yet is not a daunting task for the less accomplished. Why not a cross fertilization or teaming of talents? I am going to stick my neck out here. Here goes. For example, I have seen the drawings of David A's Hayling Hoy. It is a beauty. So here is a design, with a book yet. What is missing is something like a starter kit. Before there is too much of an eruption let me say that I am only using this as a stalking horse. Maybe there is a nugget of an idea here. And then again maybe not. Joe -
Rusty can you elaborate on the weathering powders use. I am not familiar with them. I see the "raw" resin castings. Then I see the applied castings. Is it a one step process? Joe
- 120 replies
-
- 6
-
-
- queen anne barge
- Syren Ship Model Company
- (and 1 more)
-
Mike your work is not only inspirational but instructional as well. The collaboration between design and design verification is such a wise process, not well conducted by others. Thank you for leading the way. This is truly going to be a classic offering. Joe
- 607 replies
-
- 5
-
-
- winchelsea
- Syren Ship Model Company
- (and 1 more)
-
Vinne: You neglect to say what you are building. That said, I suggest you look at some examples on this web site. Look at EdT's,Young America clipper starting at page 76 where he begins working the shrouds. Also if you look at the Syren's,Cutter Cheerful you will see not all shrouds are served completely. Hope this helps. Joe
-
Atlantis by Thistle17 - FINISHED - Robbe
Thistle17 replied to Thistle17's topic in RC Kits & Scratch building
CDW I am at a loss to what you were referring to. Are you referring to the dust on the roof of the main cabin or do you see something I have missed. I would not be surprised as I have been looking at thus model way too long. Joe -
She is a beauty Ian. Mine is sitting on a shelf waiting for my attention once again so your pictures here give me a boost to get back into it. Lovely work. Joe
- 51 replies
-
- 3
-
-
- cheerful
- Syren Ship Model Company
- (and 1 more)
-
Nuno welcome. We have a "distance" member of our modeler's group from Lisbon. He is a proffessional modeler but very helpful and friendly. I will send you an e-mail through this site and if you are near him it might be a prosperous meeting. Joe
-
Atlantis by Thistle17 - FINISHED - Robbe
Thistle17 replied to Thistle17's topic in RC Kits & Scratch building
In preparing the lanterns for the main cabin I realized I had placed the reflectors backwards i.e. pointing the open area to the stern. These were corrected before adding the lanterns. I experimented with painted wood lenses for the lanterns today. In the background you will see the stern lantern with a chock of mahogany semi carved and fitted in the lens area. It was convincing enough for me to abandon turning down the acrylic rod I originally intended to use.The wood infill was carved and sanded down and painted with Floquil colors and then coated with glaze. I am now headed to the wood working shop to make a model stand and restart the display table. The model is quite heavy with the 45 pound ballast so the stand has to be substantial but not too over powering. I have made templates for the uprights and will cut out and assemble a full size model and try it out. I haven't been in the basement for some time and it is especially hard when the weather is so nice outside. Joe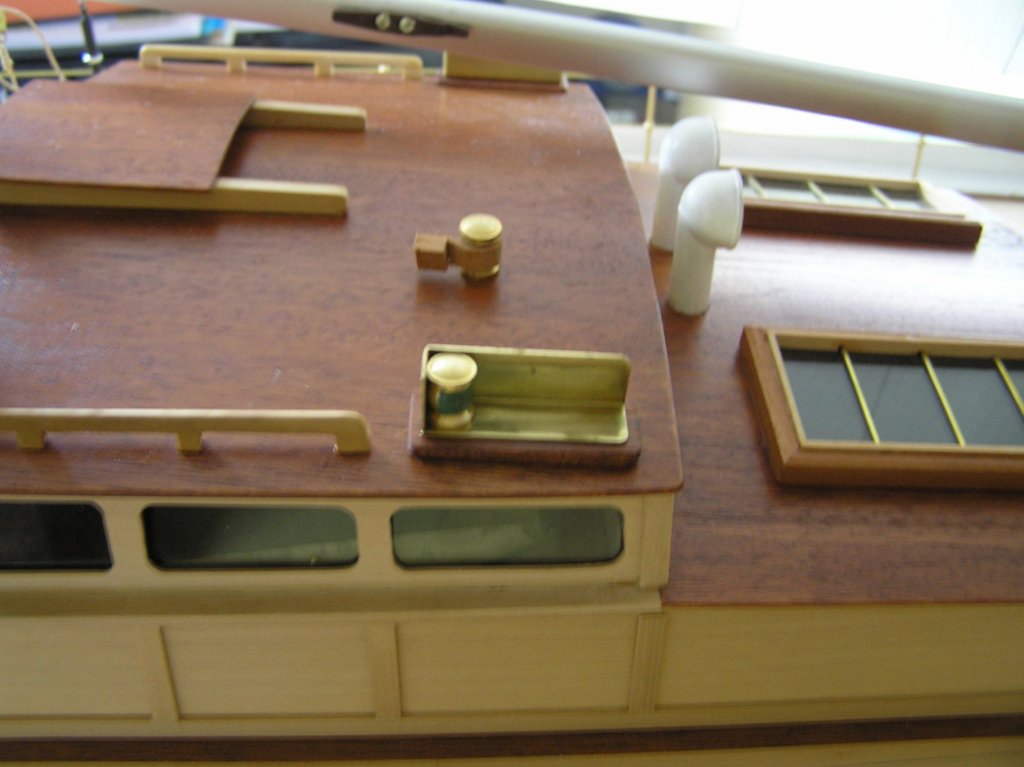
-
Welcome Mike! Do not be intimidated by this august body of modeler's feats. Let it be an inspiration and motivation to you. The forum is friendly and supportive all you have to do is ask. There are many reference books out there but your background in modeling will give you a good startng point. The friendship sloop is a beautiful model and if you can get your hands on an out of print Time/Life book called The Classic Boat it will reward you with some fantastic pictures of a restored Jarvis Newman, Friendship called Dictator. I modeled a half hull of this vessel based on the coverage in the book. Joe
-
Frank your work is an inspiration and to me as well as many others I imagine. Metal work is not one of my strong points so your detailed photos are quite instructional to me. If I haven't mentioned I am especially fond of skipjacks so it is a delight to follow the progress. Joe
-
Atlantis by Thistle17 - FINISHED - Robbe
Thistle17 replied to Thistle17's topic in RC Kits & Scratch building
Thanks David I really appreciate your feedback. This project has not been without its problems and redo's. At first I was going to use the materials supplied but as the model grew on me I just couldn't use the cheap die cut kit parts. And as time went on and I got to know the client I had to deliver something worthy in honor of her late husband. Joe -
Atlantis by Thistle17 - FINISHED - Robbe
Thistle17 replied to Thistle17's topic in RC Kits & Scratch building
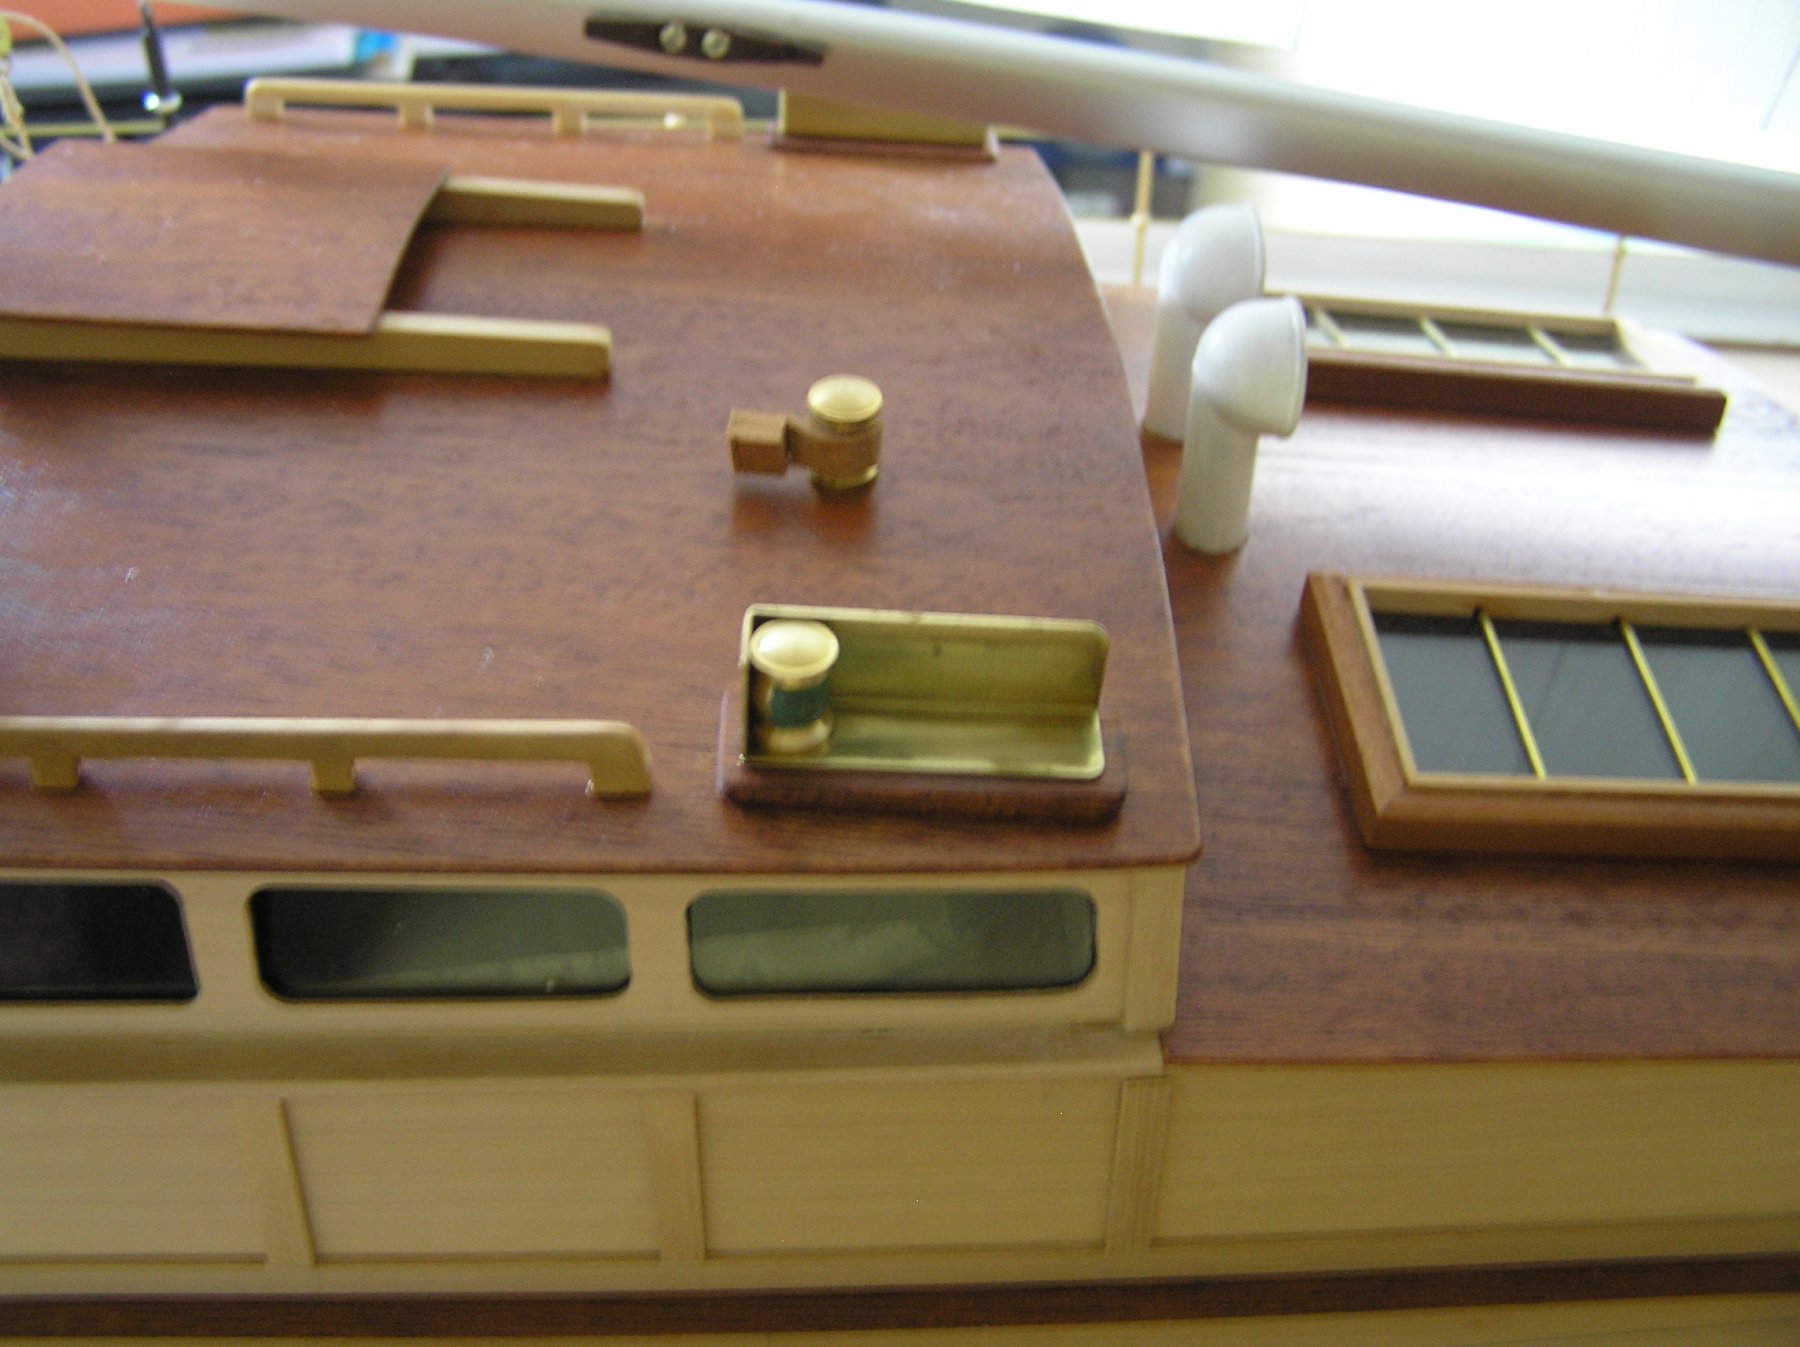
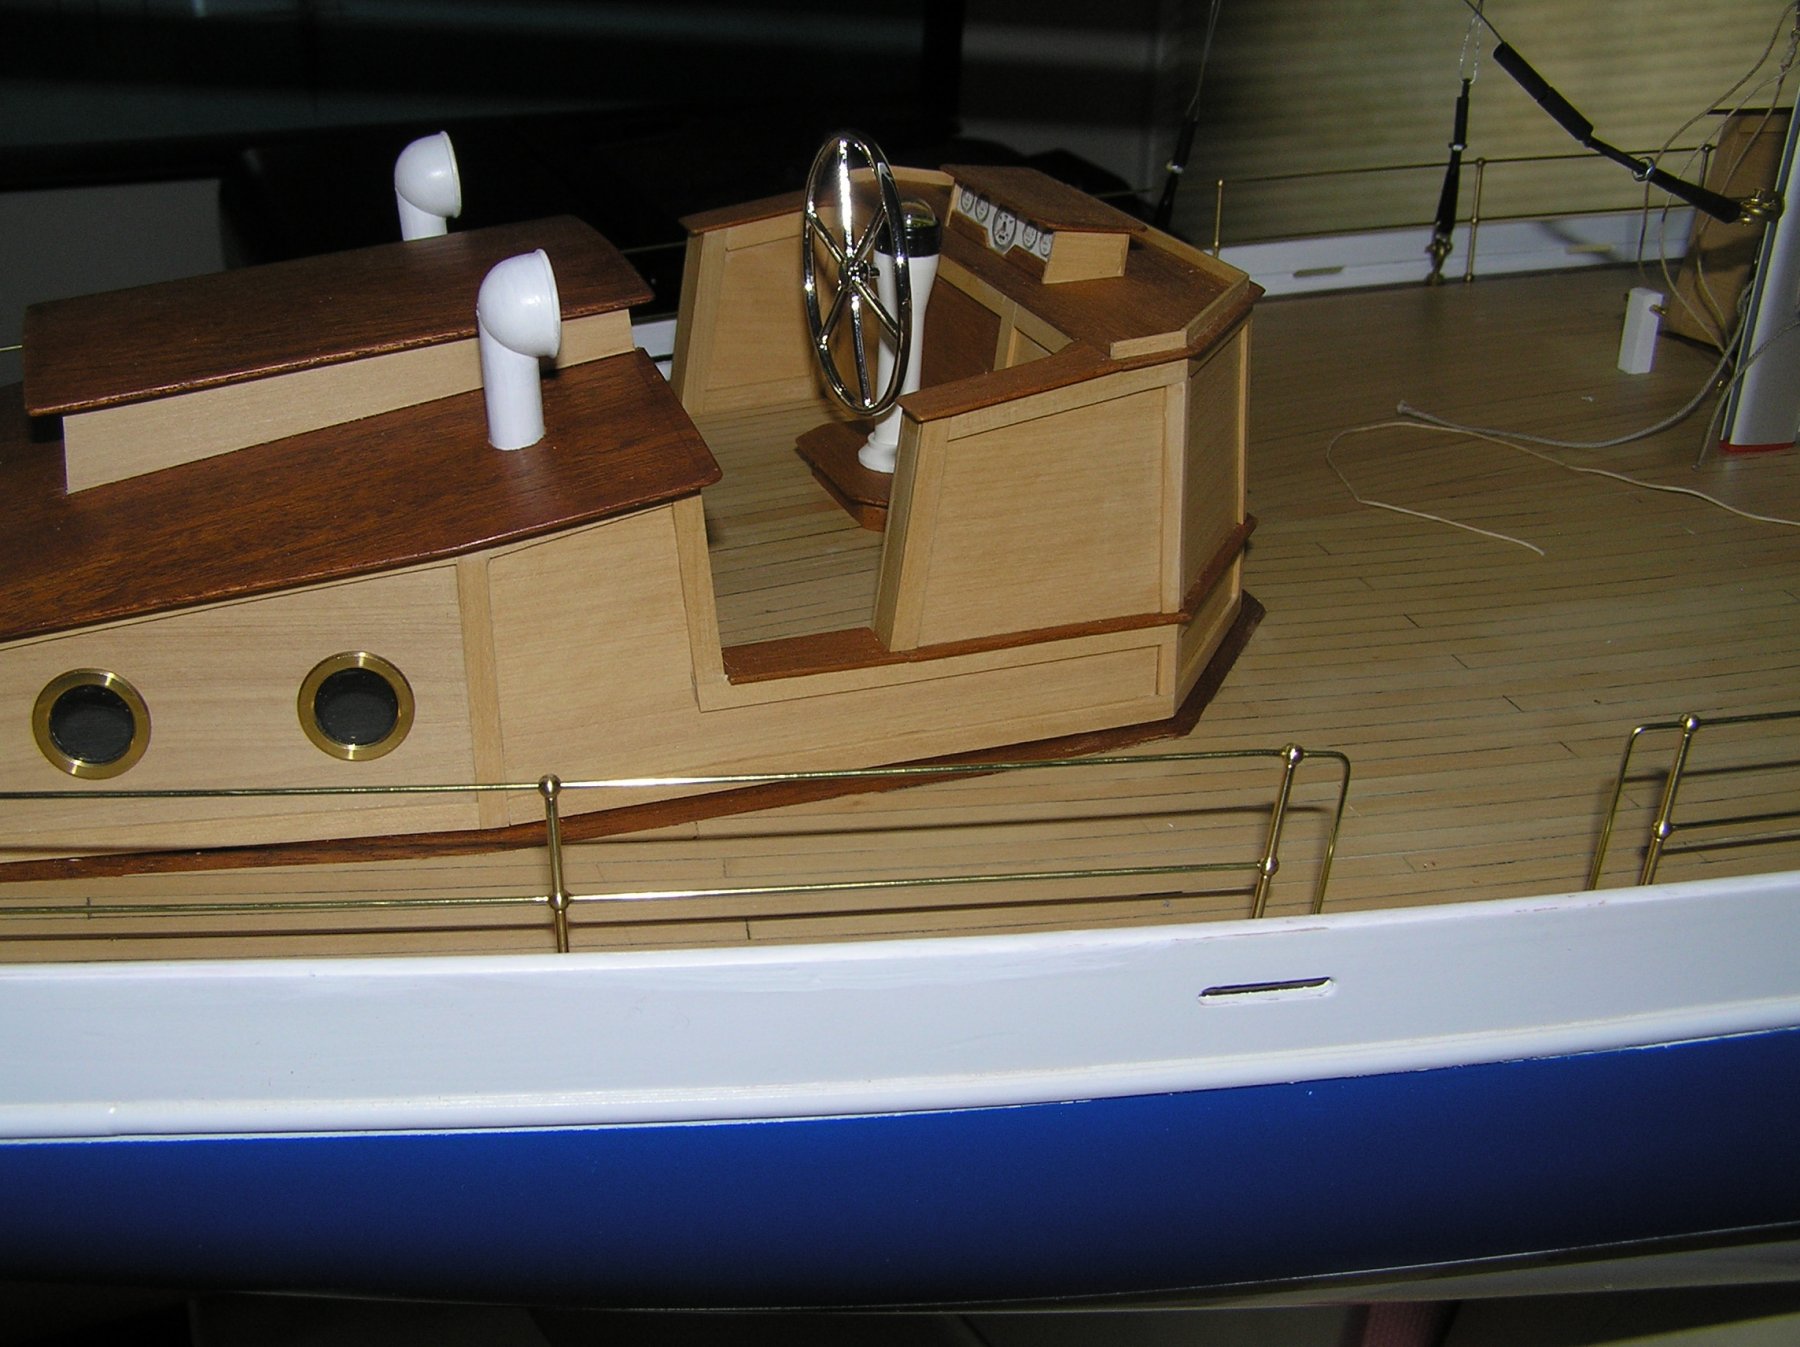
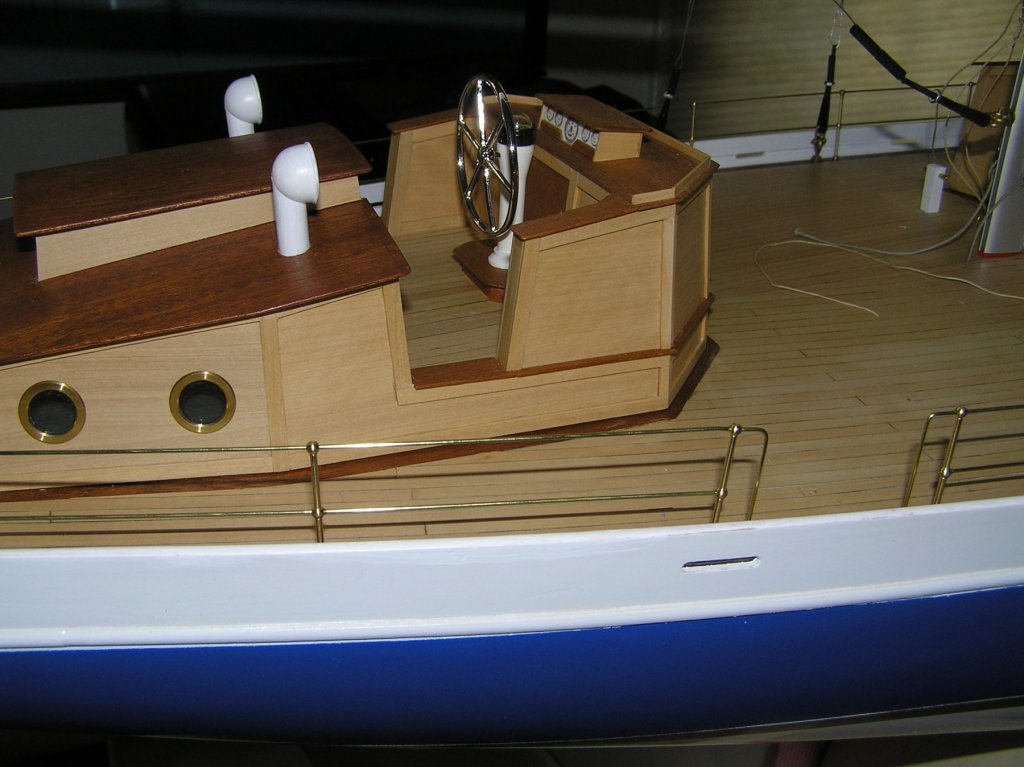
After nearly 1 1/2 years of time I can finally see an end point. Not that I have been constantly working on this for that period of time, mind you, but it does take effort to carve out time and then have the focus and what I call the head set to get things done. I am sure others have the same problem. The first photo shows the "very close to finished" main cabin. Smoked grey plexi-glass has been installed in the larger windows, the grab rails were installed after fabrication on my vertical mill and the running light holders have been installed. The lanterns for these did not come with lens so the remaining task is to fabricate them. I have some plexi-glass rod that I am likely to turn down and cut to solve the problem. Oh yes they have to be painted (green and red). Even the seemingly simple tasks get involved. Hmmmm. I think I stated earlier that there were no logical running rigging terminations other than on the main and fore masts cleats. That only provided 4 points of tethering. So I borrowed from another model of mine the notion of using bitts to tie off the remaining rigging. Note that all rigging is not terminated correctly nor is there any coiled lines attached. There is a reason. I meet with the owner this coming week and we will ultimately decide on the method of transportation to its final destination. There are 2 possibilities; (1) step the masts and re-rig after delivery (that will require about 2 days of work) or (2) bite the bullet and get a suitable van to transport it fully rigged. I will tidy up the deck a bit and see what comes of the discussion. The second photo is meant to show the final result of the stanchion terminations. I had related that since the stanchions were screwed into the deck and aligned that feeding the brass railing wire through them and then terminating them into the deck was just not going to happen without some unpleasant results. So, as shown the upper railing were cut so that 1/2 of the upper stanchion hole was occupied by it. The other half of the hole was filled by a separate piece of bent brass rail that was terminated in the deck. I did not solder any of the junctions, rather I used thin CA applied with a micro glue applicator. It was surprisingly effective and neater than what I could have done with a soldering iron. Joe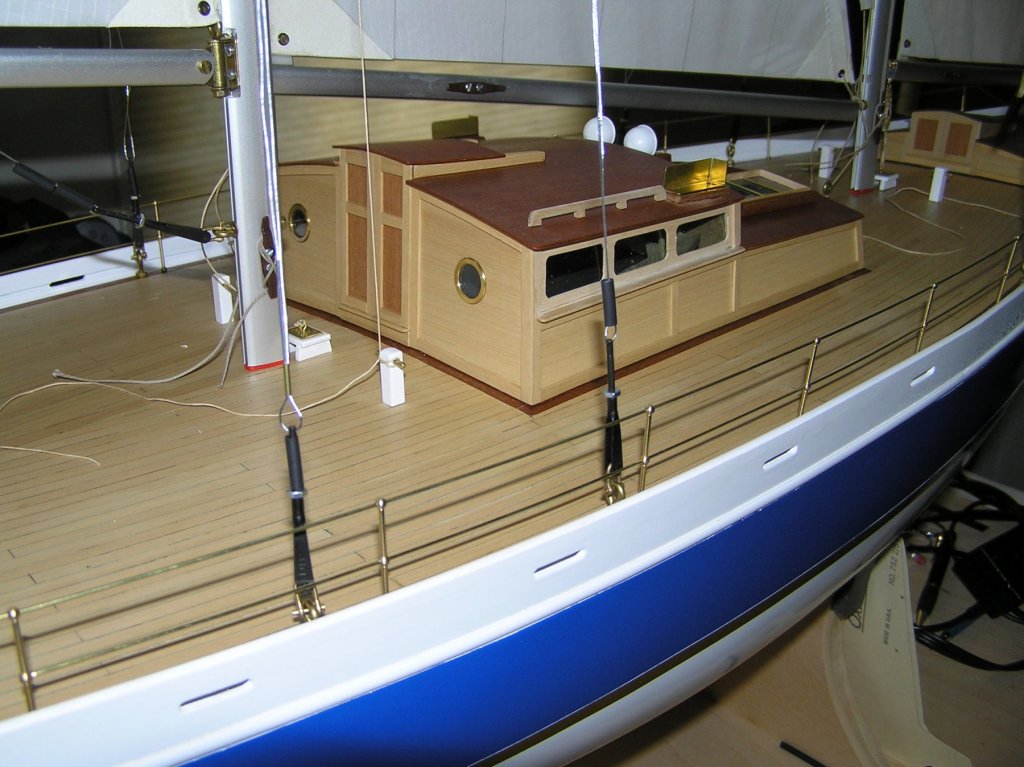
-
Jason truly does a great job. We need to preserve and support Crown and Syren and I wish we could get Wood Project Source back. Joe