Thistle17
-
Posts
1,054 -
Joined
-
Last visited
Content Type
Profiles
Forums
Gallery
Events
Everything posted by Thistle17
-
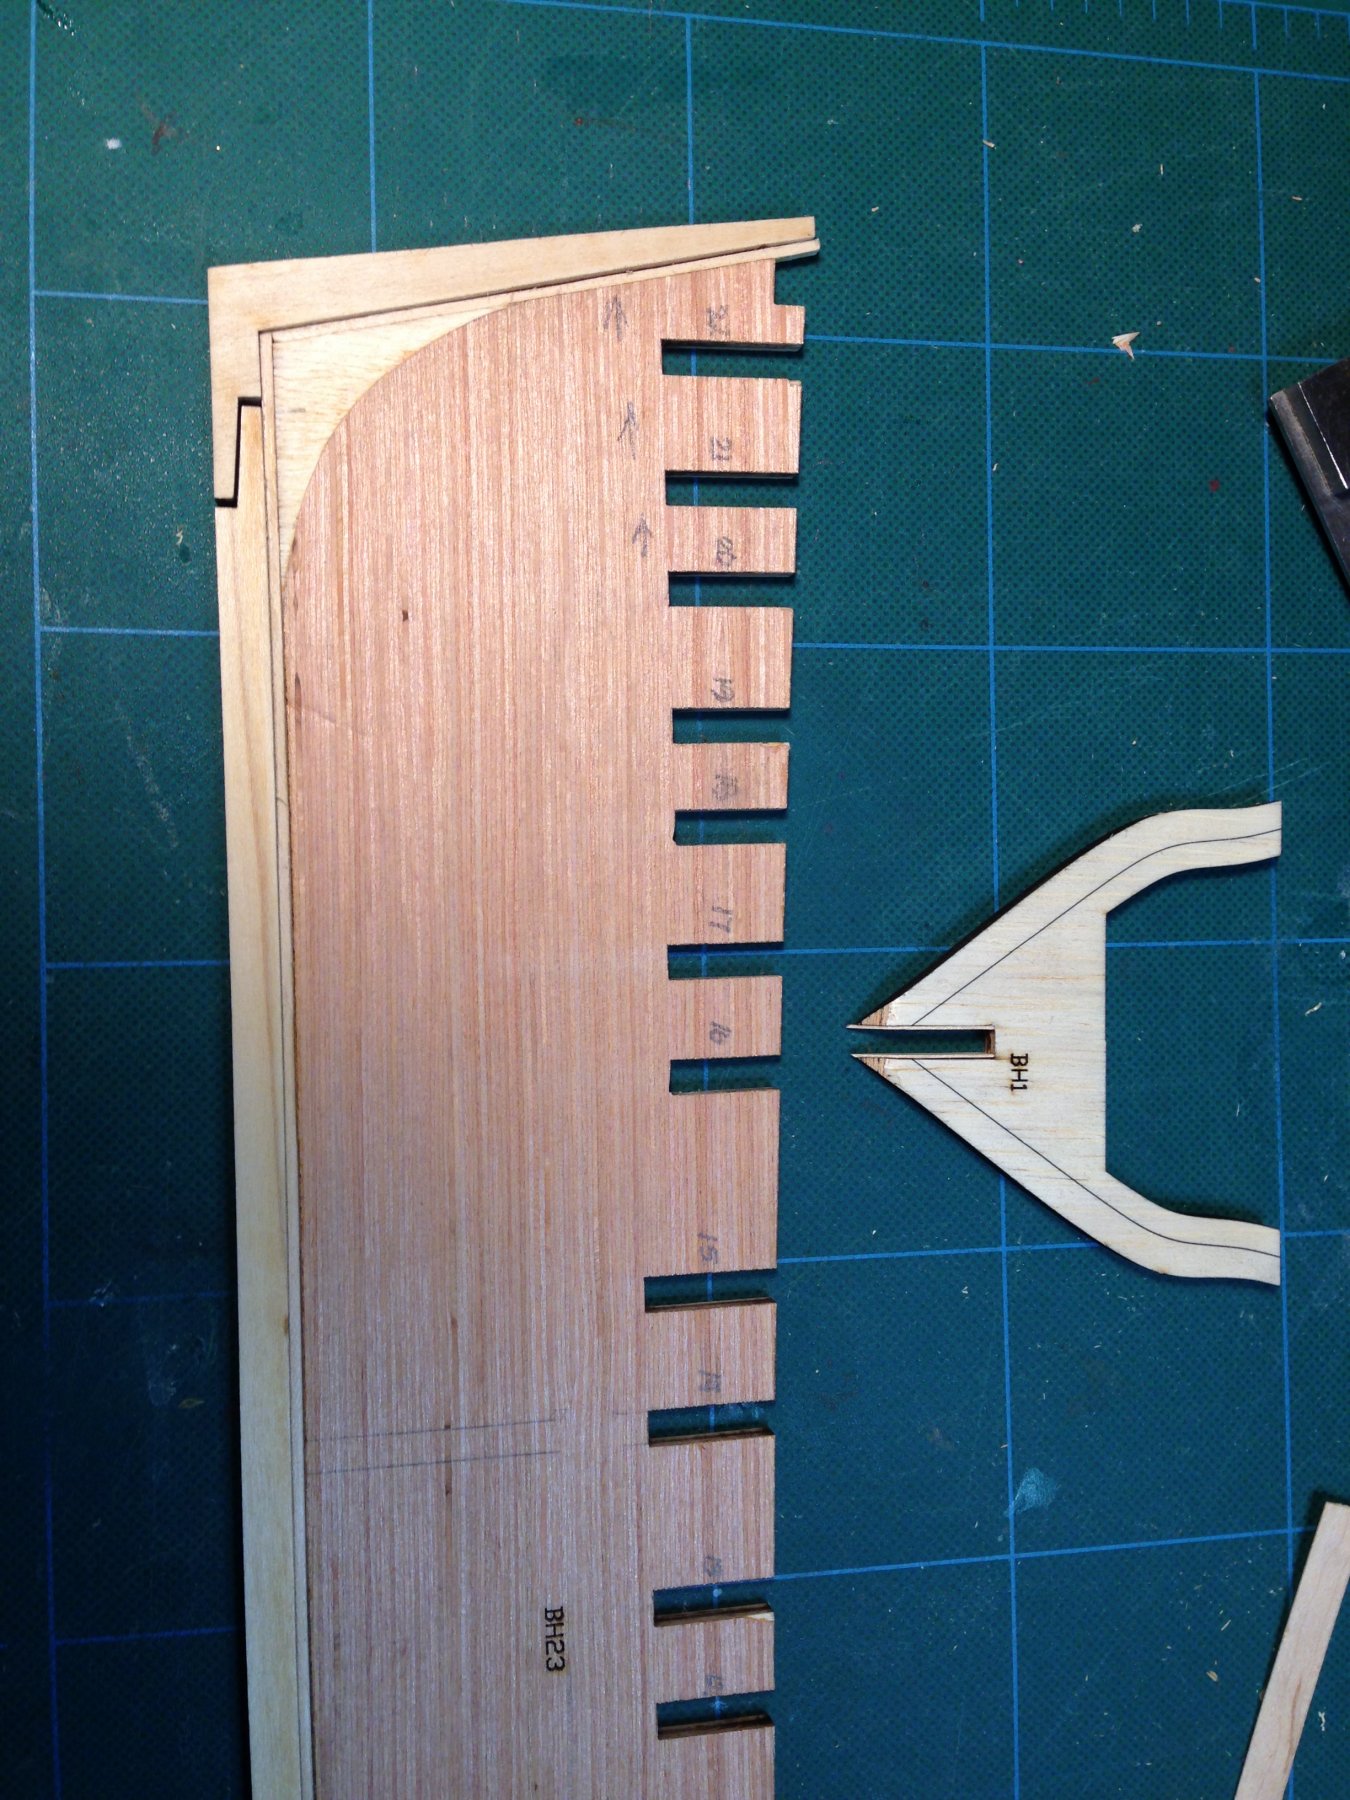
 At this point all bulkheads have been adjusted for the slot discrepancy and are a slip fit onto the former. In thinking ahead I thought it a good idea to add witness marks on each bulkhead for the gun port sills and headers. I am using the former topside height (basis of the gun deck) as a datum. Also observing that the bulkheads are flat (no camber) across the beam I could pull the vertical measurements off the profile in sheet 1 of the drawings and transfer them to each bulkhead image on the ensuing drawing sheets. Then overlaying each physical bulkhead I could transfer the vertical dimensions accurately to each bulkhead. Maybe a bit anal you say. Well maybe so but in so doing I stumbled onto a conundrum. The forward and aft most bulkheads do not match the drawing profiles. In the stern area the profile is quite a bit off (wider than the drawing in the area from wales upward). In the case of the bow the profile is slightly off but the bulkhead is taller than the drawing. Amid ships they seem to conform much better. Something got lost in translation here. To me the design drawings are the reference! Not knowing how the bulkhead profiles were translated to machining instructions I can not understand how this deviation has happened. If the drawing profiles were scanned in and "curve/segment" adjusted to achieve conformance such as in Corel Draw I might expect some small difference but certainly not what I observed. If the drawings were produced via a "CAD" system then the machining output files certainly would not create such an obvious difference. Has anybody out there observed this problem? Is there yet another revision of this kit produced post 1Q 2015? Joe
 -
You have a passion for this work don't you? You do such justice to this pursuit so much so that your work can be said to be artful! Joe
- 152 replies
-
- 1
-

-
- medway longboat
- Syren Ship Model Company
- (and 1 more)
-
Jim I saw you were lucky enough to get in the Medway release. I tried nd will now have to be patient until I am as lucky. In the mean time Cheerful and this build will be my focus. Joe
-
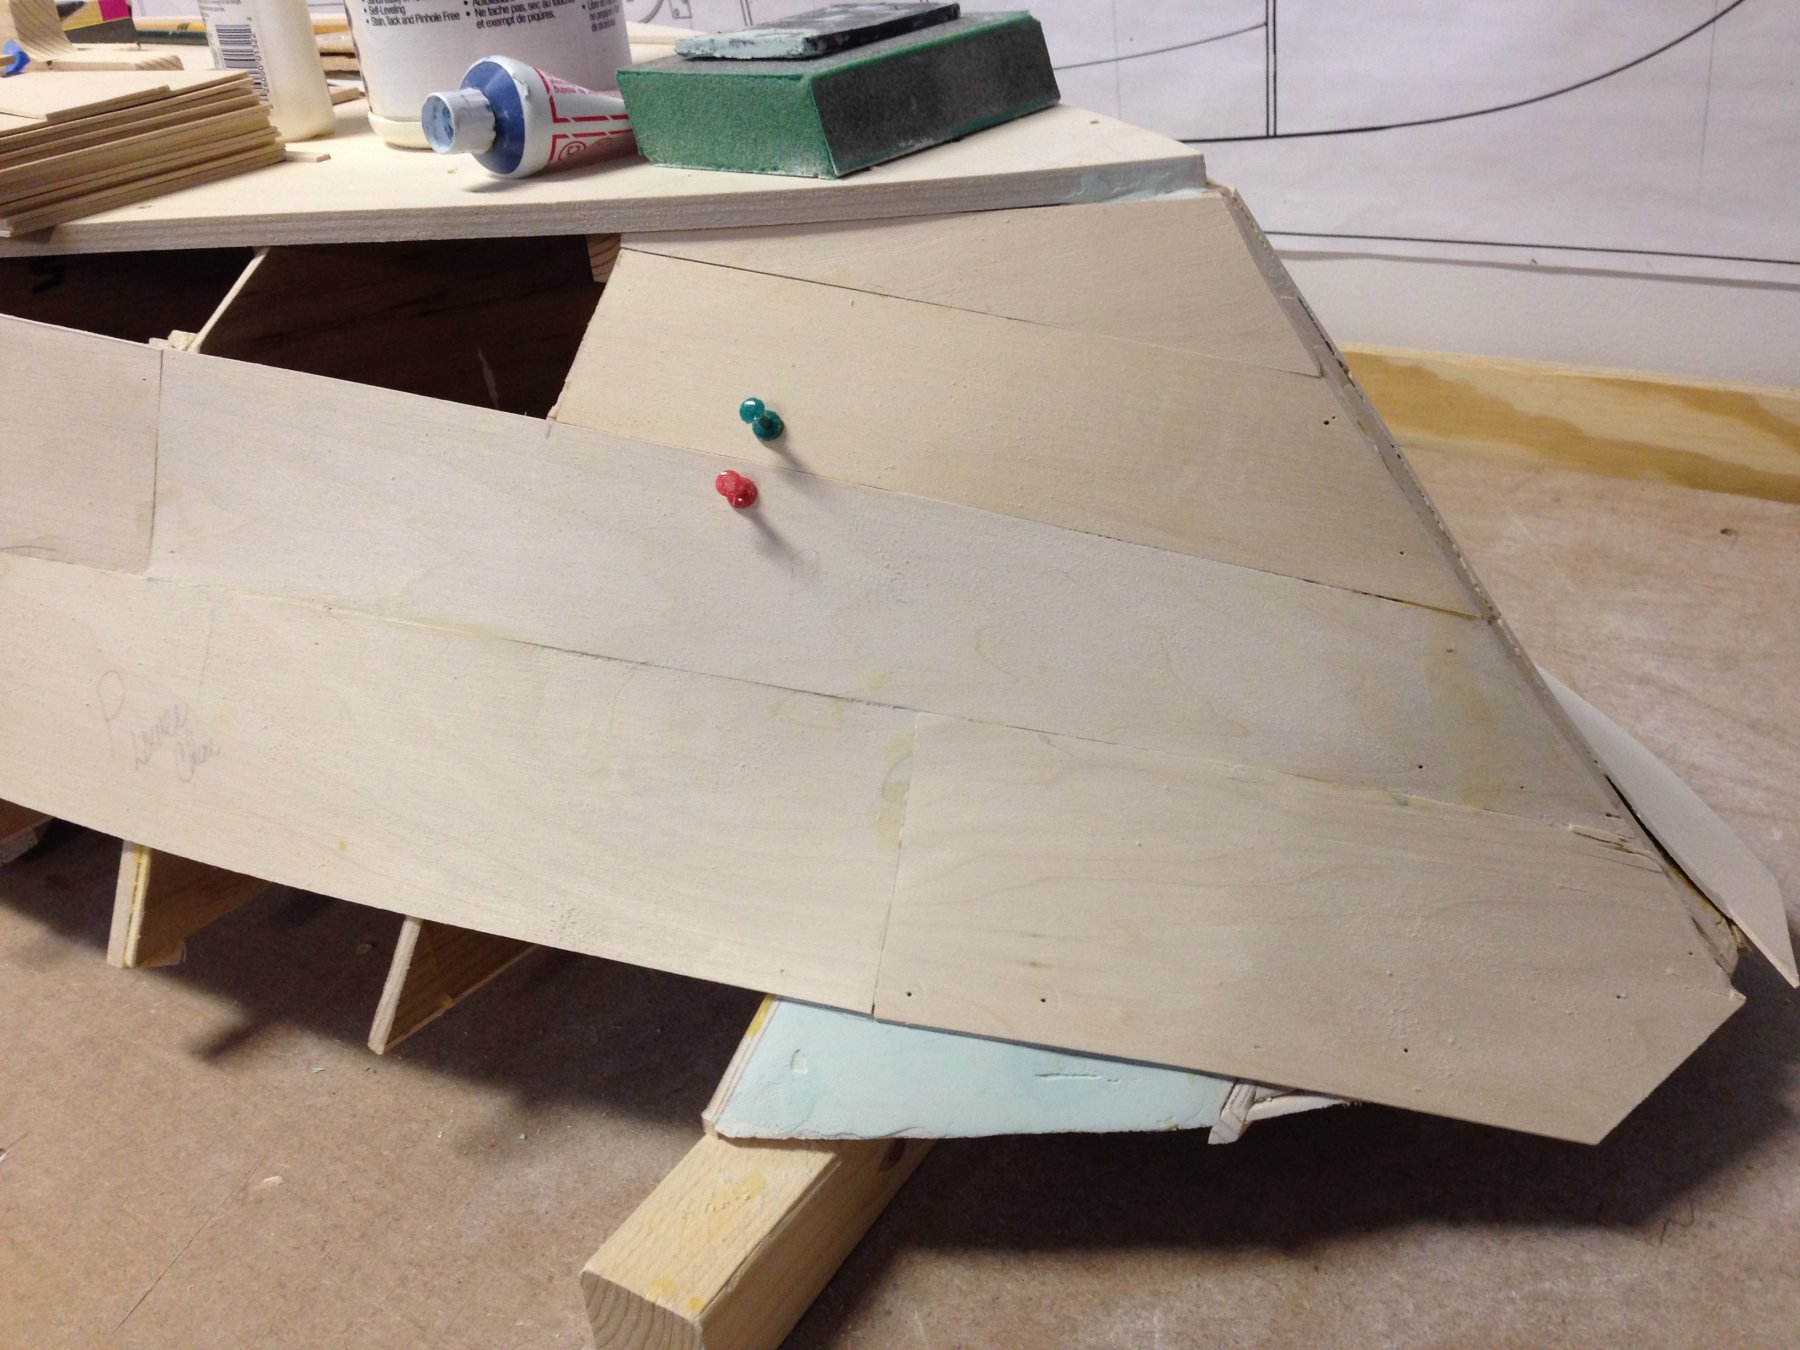
There just might be a Wood Duck in here after all. Today we added more bow skin on both port and starboard. This area was broken into 2 segments as the chine area goes from dead flat aft the terminating bulkhead to a twisted contour forward. It was reasoned that this would be easier to gain conformance. The remaining, dead flat, chine area will be infilled after we turn the hull over and add some backing braces. In contemplation of a finish surface today I explored our local hobby shop and priced out fiberglass and resin. The cost is to run about $50 but may be the right direction given the skin weakness. There is enough material to do the entire shell, deck included.

-
Thank you Bob your kind offer it is very much appreciated. More on the build: Having freed the former, bulkheads, stem, stern and keel from the pre-cut sheets I trial fitted the bulkheads and found that the bulkhead slots were over machined in comparison to the former. The slots were some 40 thousands wider than the former thickness. To correct this I had some furniture veneer that I applied to each side of all the bulkhead slots. This made for an uncomfortable interference fit so I monotonously sanded to a slip fit. This to my ire took about 5 hours of sanding and fitting. I also discovered that a number of the bulkheads did not seat flush with the top of the former so these bulkhead slot were filed to achieve a flush fit. Unfortunately they now reach into the rabbet area so further trimming is required. In applying the stem, keel and stern post I discovered that I am shy the rabbet strip thickness (on the stern) such that the stern and keel interlock along the former. Looking ahead since there will be a copper bottom applied to the hull I will just cut the stern piece and add a longer keel member. Let me reiterate. My title for this log has the word "bashing" in it. That did not mean I was bashing the designer or the manufacturer. I am just responding to the events of this build journey.

-
INTRO As I open this log I find myself a bit conflicted as to what I could possibly add to curious or future builders of this admiralty model from Model Shipways. The kit was delivered in January of 2015 and as I understand it, this vintage addressed many of the early kit anomalies from the 2013 introduction. I had seen the designer's prototype version and had an opportunity to be mentored by him on his research sources and the construction. As further impetus for the project I used Essex as a research subject for a group presentation. At the outset I thought I had ample sources of reference for it's build, however as I delved deeper the dissonance I discovered over a number of sources almost caused me to rethink a build. The topic and my findings are covered on our web site www.modelshipwrightguildwny.org under Topics Of Interest. I opened this kit recently as I needed a subject for a January 2018 display/demo for the Strong Museum here in Rochester, N.Y. On January 12th and 13th they are engaging families with a pirate theme and one of our members, with publicity in mind, approached them to determine interest. They responded with an invite. I chose this subject for the event as Essex in some ways was a "pirate" in her last days marauding English whalers and merchant men in the southern Pacific before meeting her capture. I plan to display/demo the build from the former on up on my rendition of Ed Tosti's building jig. THE BUILD I will not spend time in reviewing the kit contents as others have done a very good job on that score but I will comment on certain aspects of the kit as I journey down this build.
-
Bob I walk a fine line here. Sam is a good friend and very helpful. He has taken some shots over his bow in regard to this kit and anything I say is basically a comment related to manufacturing and control of process. He spoke to our group in early 2016 on kit development and proofing. That is why I think Chuck Passaro is so smart to have trusted people perform beta builds. Chuck's big advantage as well is that he is designer and manufacturer. Sam as you so aptly communicated did not have this control. My early 2015 version of this kit has started slow as the former and bulkheads do not match up well. All bulkheads had to be adjusted so as to fit nicely to the former by adding veneer to the bulkhead slots. In comparison the bulkhead slots are .21 while the former is 0.168 thick. I have spent about 5 hours adjusting those slots for a slip fit. Undaunted I move ahead. BTW this 2015 version does not provide the access below gun deck for further detailing either. Not sure I will move in that direction as of this time. Thank you for your kind offer of help. It is always easier when someone has plowed ahead of you. I will consider your suggestion and not muddy up your log with my woes but if allowed seek your guidance as I move ahead. Joe
- 1,477 replies
-
- 1
-
-
- essex
- model shipways
- (and 1 more)
-
Atlantis by Thistle17 - FINISHED - Robbe
Thistle17 replied to Thistle17's topic in RC Kits & Scratch building
Well I said I was finished, but not quite as I forgot to add the foremast flag. Of course it has to be the Irish flag as she was re-christened 'Herself". I found a nice, slightly fluttering, Irish flag that I was able to reduce and flip about the flag pole and fold over. It is quite acceptable but now I am having to find a suitable paper (weight) to copy it on that will pass through the printer. Joe
-
We haven't gone down a "rat hole" on this project it just has been a slow and somewhat frustrating process to get the hull skinned. We have as of today come to a point where the bow is skinned above the chines. I must say I am hesitant to post this picture because it looks pretty ugly. Using 1/16 Basswood has yielded mixed results. In retrospect strip planking of some nominal width may have been a better strategy than 3 inch sheets. Adjacent sheets where one lies atop the other tend to not lie in the same plane in part due to the relatively large spacing of bulkheads. We can fix this by gluing in stiffeners on the inside of the hull once we turn it over. We are still optimistic that we can make this ugly duckling look much more acceptable by applying a surface application of an automotive body glazing to fix any imperfections. I stopped at an auto body supply house nearby and I was delighted that the owner was willing to work with us to this end. He is also willing to work with us to get the right color of the hull. That was great news. We are also mulling over use of a model weight fiberglass cloth and resin to skin the hull. It is pretty messy but may give the hull a rigidity we may need. Joe (The open area is the chine area to fill in. It does disappear between the 2nd and 3rd bulkhead so there will be some hull contouring there. The light blue compound in the bow area is Rage, filler. It sets up too fast even with a minimum of hardener so it is not suitable for any external hull finish coating.))

-
15' Dinghy by Bedford - FINISHED - 1:1 scale
Thistle17 replied to Bedford's topic in Non-ship/categorised builds
I just read your que comment and want to offer in some small way to your desire to build Caroline. I just became aware of this site which offers her carvings you may wish to consider. https://www.ebay.com/itm/HMY-Royal-Caroline-1749-Scale-1-50-33-Pear-wood-Carving-pieces-Wood-Ship-kit/253177119950?hash=item3af28844ce:g:2VMAAOSwaSZaFEcj:rk:158:pf:0 One of our members is building her and is considering this product. Joe -
15' Dinghy by Bedford - FINISHED - 1:1 scale
Thistle17 replied to Bedford's topic in Non-ship/categorised builds
Here is the link for this publication: https://smallboatsmonthly.com/ Joe -
15' Dinghy by Bedford - FINISHED - 1:1 scale
Thistle17 replied to Bedford's topic in Non-ship/categorised builds
Superb work and outcome. What a joy to see her come to life. I still have an itch to do a small boat such as yours. Have you ever thought of writing an article for Wooden Boat. You may know they even have a "offspring" for Small Boats. Joe -
Bob I just discovered your build log of Essex. Just beautiful! I have opened up my 2015 version of this kit from Model Expo today to get ready for a display/demo at one of our local museums. I too plan a bit of bashing of this kit as I just don't like basswood for many modeling applications. Sam is a member of our local group and has been enlightening me on the research aspects as well as modeling. You give me inspiration and drive to continue the journey. Joe
- 1,477 replies
-
- 1
-
-
- essex
- model shipways
- (and 1 more)
-
Thank you Valeriy, not having built a model with an epoxied hull, I did not appreciate that factor as well. I always learn from others on this site. I will follow your work and eagerly learn. We have a member in our group who builds military watercraft of this era and I have alerted him to your log as well. Joe
-
I am just catching up to this build and find it fascinating and your execution is superb! When Druxey asked the above question I recalled Mowll's work in Ship In Scale; (Nov/Dec 2014, p12-25) using the same method. Your answer now clinches my thoughts about this method. Given that you can apply laser machining to the keel halves it, further makes sense to me. This as you show enables the bulkheads to be linearly and perpendicularly placed accurately. If indeed the keel half's are twisted from their plane datum one can compensate for the problem by selecting wood orientation. Oh to have access to such a technology! Joe
-
CA adhesive, which one do you use?
Thistle17 replied to Modeler12's topic in Masting, rigging and sails
Here it is nearly 11 months later and I am now working my Cheerful model. I have to admit that my planking results have left me wanting better results. So for the 2nd time I have ripped off the boxwood planks P & S above the wales and have started. In spite of what I said above, I used CA glue prior as I did not wish to wait for the set time of PVA. So here is the question; if one wishes to remove old planking and refit new what is the recommended way to treat the frames prior to reapplication of new planks with CA? I have sanded the bulkheads and removed any noticeable traces of surface CA. What I have been wondering is, should I wipe down those bulkheads with a good dose of acetone fist? I hesitated since I intuitively think, maybe erroneously, that I will dilute the CA that remains and it will seep further into the bulkheads. As a postscript I will add that on the 1st and 2nd plank removal that the planks did seem positively attached to the bulkheads with just prior sanding. What I am worried about is long term adhesive integrity. Joe -
My top 4 most useful tools
Thistle17 replied to Tim Moore's topic in Modeling tools and Workshop Equipment
Mike the planes from Veritas are great for many tasks. For example when I am tapering planks I put them in a hand made wooden holder, proud of the holder surface and use the block plane to trim the planks to a predetermined width. I always leave the line marking the trim point and sneak up on the final dimension via trial. The shoulder plane can be used on concave surfaces if you cant the plane to the direction of travel. The shoulder plane is also good for cutting rabbets as its blade runs right up to the plane side. The chisels are good for close in trimming and I have even used them for cutting off planking from longer stock. These are all examples there are many more. In any case for any tool you need to hone the blades. Out of the box they work but not as well as after honing. I keep a piece of leather close by and hone the blades frequently while working with just a few passes with a honing paste. Lee Valley has Happich Simichrome Polish. Joe -
You give me hope and inspiration at the same time Rusty. As you know I am still working on Cheerful. Or should I say struggling with Cheerful. That planking above the wales is hard to do and your build (observed up close) sets a standard for me. The hope comes from yet more experience with my planking. I have ripped the starboard planks off for the second time and will start again. So when you relate your set backs it just strengthens my resolve. Joe
-
Do come aboard Kortes. I think if you may have already realized what a rich source of model building techniques, projects and general information sharing there is here. I was just thinking of my early experiences with the NRG some 40 plus years ago. I was a newbie and was intimidated by the works of others at the NRG Symposiums and even ran aground with some less friendly members who were not willing to share. That is not the case here by any stretch of the imagination. Also do share some pictures of your work. Joe
-
Rusty in the back of my mind I have been thinking this build could be a good topic for a future meeting. Also I would like to entice others within the group to do a group build as this is not only a classic but is such a good vehicle to understand so many aspects of model ship building without a long term engagement. Next meeting maybe you could expound on your impressions of the project. Joe
- 152 replies
-
- 1
-
-
- medway longboat
- Syren Ship Model Company
- (and 1 more)
-
Bulkhead faring
Thistle17 replied to W4LKR's topic in Building, Framing, Planking and plating a ships hull and deck
W4LKR this seems to be a recurring problem on many kit models. I have kept the sub floor of the bulkheads and the false keel in the correct plane to not complicate the hull shape. I then add material to the outer portion of the bulkheads to enable matching up to the rabbet line. It is then a matter of fairing the hull through sanding using a batten sighting procedure to bring the hull fair. Joe -
Alan they call it "good old yankee ingenuity" on this side of the border. What do they call up there? Clever work. Joe
-
Welcome to this forum Dan. If you haven't already get in touch with Kurt Van Dam of the Nautical Research Guild you have some of the finest modelers in the country from that area. Joe
-
Of course Lou the most obvious place to look right under my nose. Thank you. Joe
-
I have heard good things about this product. However I have found that the availability can be a problem. For instance in western NY there are few places to purchase them. If you are lucky enough to have a retailer you may find they keep a minimal selection. If anyone has a good source of the colors please let us all know. I would like to try them out. Joe