HOLIDAY DONATION DRIVE - SUPPORT MSW - DO YOUR PART TO KEEP THIS GREAT FORUM GOING! (Only 20 donations so far - C'mon guys!)
×


Canute
-
Posts
6,370 -
Joined
-
Last visited
Content Type
Profiles
Forums
Gallery
Events
Everything posted by Canute
-
 Check a model railroad shop that stock garden railway items. They may have people in 1/24 scale. The garden RRs are anything from 1/32 to 1/20 scale cars & locos. They use the same track gauge. Very confusing to us more conventional model railroaders.
- 308 replies
-
- 2
-

-
- finished
- model shipways
- (and 1 more)
-
Nice frames, Mick. And a smart move to go for the optivisor; can't have too much light and adequate magnification.
- 504 replies
-
- 2
-
-
- washington
- galley
- (and 1 more)
-
Might try a sepia tone. Different colors will look interesting.
- 106 replies
-
- 2
-
-
- Japanese boat
- Wasen
- (and 2 more)
-
Nice touches all around, Clare. Well done. The b&w shots look period perfect.
- 106 replies
-
- 1
-
-
- Japanese boat
- Wasen
- (and 2 more)
-
Slog, thanks for that great tip. I'll have to get some.
- 80 replies
-
- 6
-
-
- choctaw
- heinkel models
- (and 1 more)
-
George, I think so. The edge coloring subject is one often discussed on paper-modeling forums, from what I've been reading. Probably will need more coats. I'm applying color with an alcohol based marker, not paint. Not much pigment applied there. I've used these markers to color basswood structures, and end up doing several applications. But it does work. The coloring is more like a wash than a coat of pigment.
- 80 replies
-
- 5
-
-
- choctaw
- heinkel models
- (and 1 more)
-
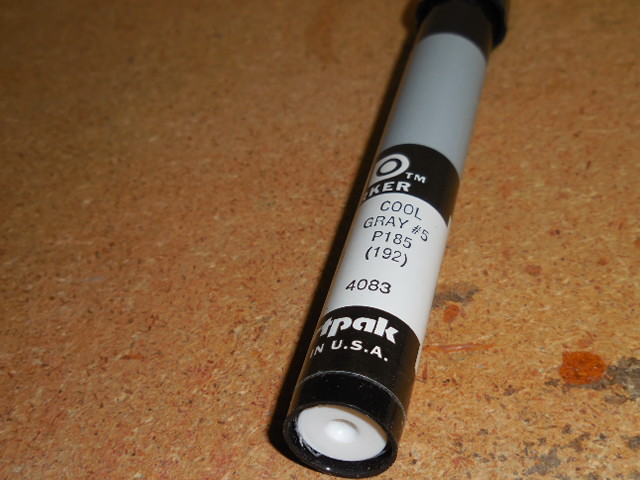
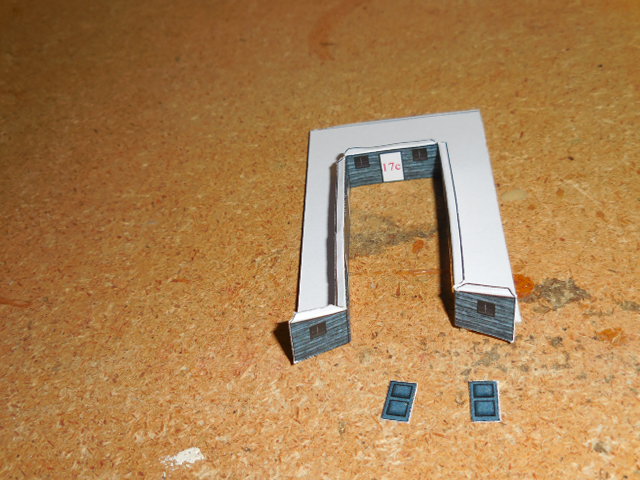
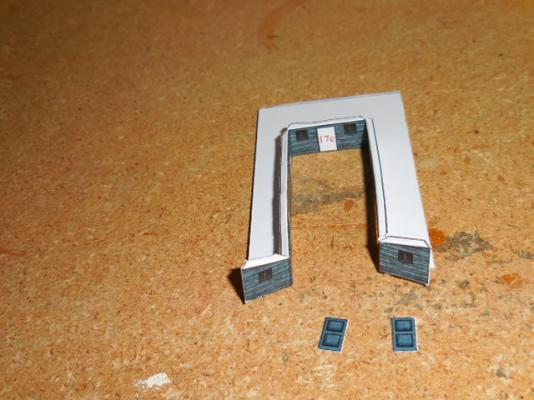
I colored the edges of the hull skins with a Cool Gray #5 I have. There are 10 different cool grays (bluish tint) and 10 warm grays (brownish tint). They get darker with higher numbers. Looked OK when I first did it, but after it dried it looked too light. The edge stands out, though not as bad as a white edge. Glued up the first 4 hull skins, on the bottom only. I'll glue up the sides when it's all one piece. You can see how the marker, which is alcohol based, bled into the paper. On the printed side it's not obvious, but it is too light. I think I need a #10 cool gray or a black marker. Also started gluing up the compartments that sit between the paddle wheels. They even have five separate doors. Only the far, inside, end is glued, so far (the visible 17c end). Still studying the stern parts; not yet ready to apply any glue to those 2 parts.

- 80 replies
-
- 11
-
-
- choctaw
- heinkel models
- (and 1 more)
-
Really like the diorama, Jonny. And the Lily pics are nice. Sounds like she's fitting right in.
- 188 replies
-
- 1
-
-
- Sherbourne
- Caldercraft
- (and 2 more)
-
Jack, I like that rotary! N-scale is tough. I have an HO one, unbuilt. Thanks for the support.
- 80 replies
-
- 4
-
-
- choctaw
- heinkel models
- (and 1 more)
-
Reflections, Jerry. Simple physics. Shiny stainless acts as a mirror. "Taint turning transparent. Capeesh?
-
Patrick, George and Carl, thanks for the support. The PDF will be handy, Carl. I did reinforce the connection of the paddlewheel section to the deck, with some wood strips. Butt joints aren't very strong. The cabin area between the paddles will also get some bracing too. It helps to hold the paddlewheel housings square, so should get some strengthening. I'll glue up the hull skins later and see if my process will work. I think I have a technique to bend, fold glue and attach those last two stern sections. Crossed fingers on this one.
- 80 replies
-
- 6
-
-
- choctaw
- heinkel models
- (and 1 more)
-
I know how you feel, Jonny. My laptop (running Vista) is teetering on the brink. Fortunately, I have my desktop too, so I can pick out a new laptop after due deliberations with some computer tech buddies. One's an 80 yr old wizard, the other is a 19 yr old computer communications major. I may go for a Win 10 machine.
- 188 replies
-
- 1
-
-
- Sherbourne
- Caldercraft
- (and 2 more)
-
George, it's going to be "fun". I'm cutting out some parts for the section between the paddlewheels and have to add separate doors into these compartments. I'll take some more pictures once I figure out how to manipulate the stern parts. The beta build doesn't delve too deeply in constructing this part of the ship. Gotta put on my thinking cap here.
- 80 replies
-
- 5
-
-
- choctaw
- heinkel models
- (and 1 more)
-
Great job on your stern-wheeler. The paddle setup looks great. Enjoy your vacation in Yellowstone.
-
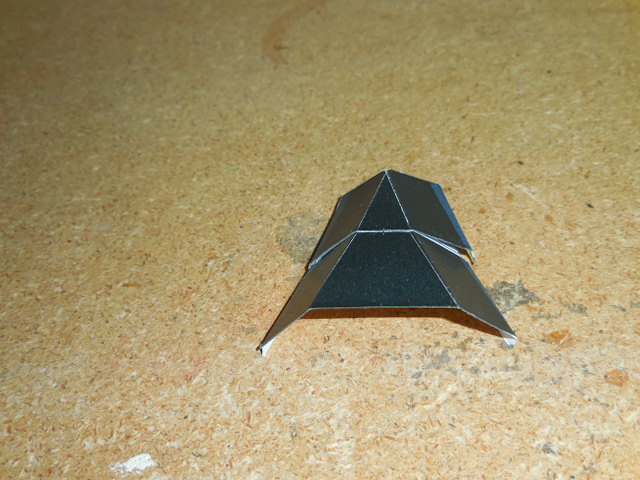
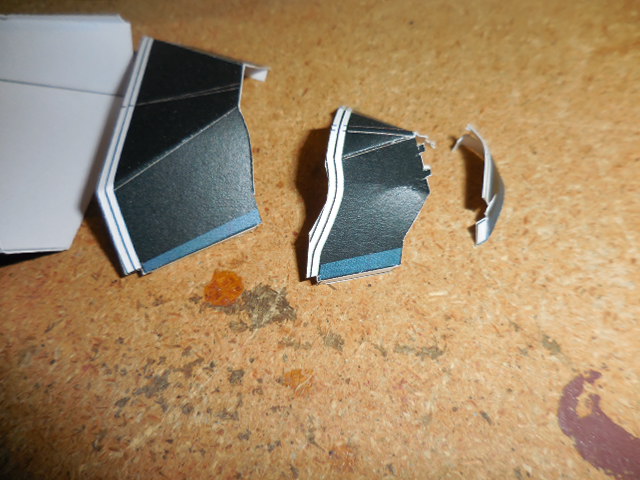
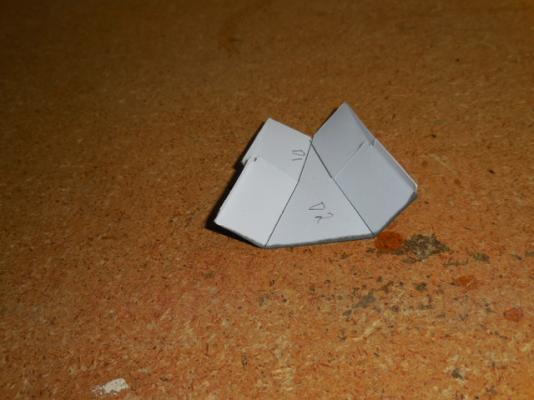
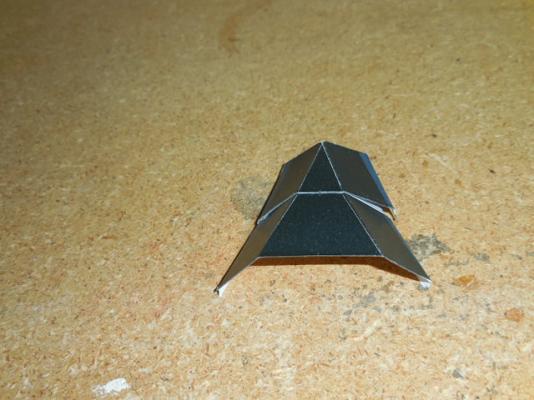
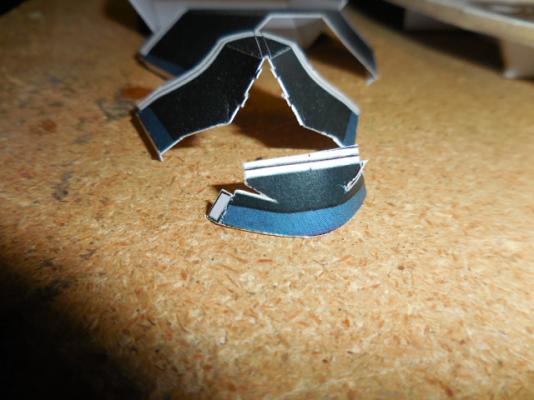
Finished slicing and dicing my hull components. Some of the cutoffs looked like the debris from punching holes in an old IBM card. Upon further review of the beta build , I realized the hull sections were glued together and then attached to the bulkheads. Looks doable, except for the small stern segment. I have to figure out how to bend, curve, glue and fit into the hull section ahead of it.The little black projections on the section in front of the stern are the rudder attachments. That section will have some fun curves. The tab on the stern section somehow fits under the rudder attachments. The blue-gray segment on each section is the part of the hull closest to the deck. These are the segments at the stern. I may have to trim some of the gluing tabs to get the hull skin to fit around the bulkheads. I plan to touch up the cut edges with some cool gray Pantone markers I have. Cool grays are bluish, so it should work on the armored areas.They've worked real well for me in the past on wood as a stain. I'll test before I take a flyer with them, however.


- 80 replies
-
- 13
-
-
- choctaw
- heinkel models
- (and 1 more)
-
Shipyard H.M.S. Wolf, 1754 - 1:72 Scale Laser Cut Kit
Canute replied to catopower's topic in Card and Paper Models
Good idea to include a parts layout map, to check on your parts. An index is also good. -
Chris, thanks for your comments. This is way back on the list of "want to dos". My skills need to get further along first. I've had to deal with some pretty spartan instructions as a kit building model railroader, so I've learned some skills at interpreting "instructions". Guess this little brig isn't very popular.
-
Jonny, I'll follow along.
-
Could the gang comment on this kit? Is it an early Caldercraft or a later Jotika kit? How are the instructions? Is the wood in need of replacement? Haven't seen any builds of this ship. May want to build this one down the road, since it ties into some of the nautical fiction I've been reading.