HOLIDAY DONATION DRIVE - SUPPORT MSW - DO YOUR PART TO KEEP THIS GREAT FORUM GOING! (Only 13 donations so far - C'mon guys!)
×


Canute
-
Posts
6,365 -
Joined
-
Last visited
Content Type
Profiles
Forums
Gallery
Events
Everything posted by Canute
-
 Jonny, head for the museum while you're in town. Spark some "creative" juices and all that.
 -
Amen to that. I check & double my numbers. Hate screwing up the simple stuff.
- 255 replies
-
- 1
-

-
- granado
- bomb ketch
- (and 2 more)
-
Nice fix, Mike. Tearing up the transom was a brave move.
- 452 replies
-
- 3
-
-
- cheerful
- Syren Ship Model Company
- (and 1 more)
-
Jesse, what did you use to cut the sanding jig, a router bit?
- 1,306 replies
-
- 3
-
-
- syren
- model shipways
- (and 1 more)
-
Cutter Cheerful 1806 by rafine - FINISHED
Canute replied to rafine's topic in - Build logs for subjects built 1801 - 1850
Bob, that's some beautiful workmanship! Well done.- 525 replies
-
- 2
-
-
- cheerful
- Syren Ship Model Company
- (and 1 more)
-
Get a organic solvents breathing mask. I use one when painting or using some glues, like superglue or contact cement. Get them at your favorite home supply place. Replace cartridges as shown in their instructions. And vent your work space/shop. Something as simple as a box fan should do unless you're using the stuff to clean car parts. Large volumes of the solvent - do it outside the house for peace inside the house. Don't tick off the Admiral!
-
Carolina Blue = Sky Blue to the rest of the round world.
- 209 replies
-
- 7
-
-
- cheerful
- Syren Ship Model Company
- (and 1 more)
-
Looking for a Bench Top Drill Press
Canute replied to FlounderFillet5's topic in Modeling tools and Workshop Equipment
They have a very nice micro saw: http://umm-usa.com/onlinestore/product_info.php?cPath=21_28&products_id=35 I've had one for years and it works well.- 31 replies
-
- 3
-
-
- Drill Press
- Microlux
- (and 1 more)
-
My condolences to the Admiral for her loss. Tiny will be waiting for her across the "Rainbow Bridge" one day. Nice back story with your diorama, Jonny. The ship and setting are excellent! Well done.
- 188 replies
-
- 2
-
-
- Sherbourne
- Caldercraft
- (and 2 more)
-
Richard, same here. My condolences, mate.
-
Jay, it's etched permanently in my being. I watched the Twin Towers being built in the late 60s, while in college. And as an Emergency Manager for the the state of New Jersey, I watched them fall. The heroic 343 firemen and medics who ran into the buildings, along with NYPD and Port Authority police were true heroes that day. We continue to mourn the 3,000 plus folks who died that day. We must never forget this dastardly act.
-
Carl, you're right! make sure you use Catopower's Yakatabune build. He has translated a lot of the early instructions for us Japanese language challenged folks.
- 80 replies
-
- 3
-
-
- choctaw
- heinkel models
- (and 1 more)
-
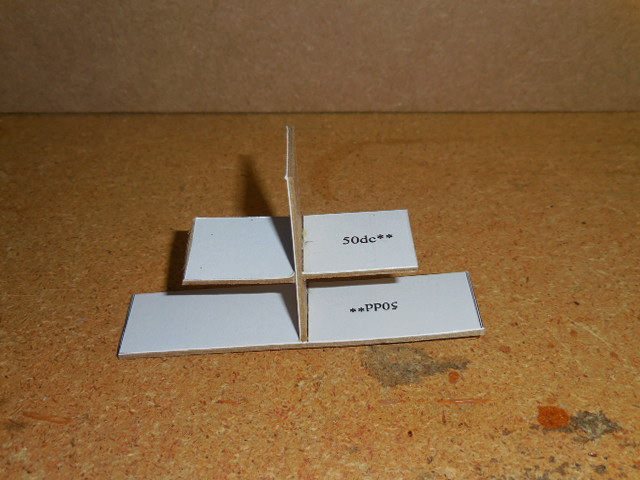
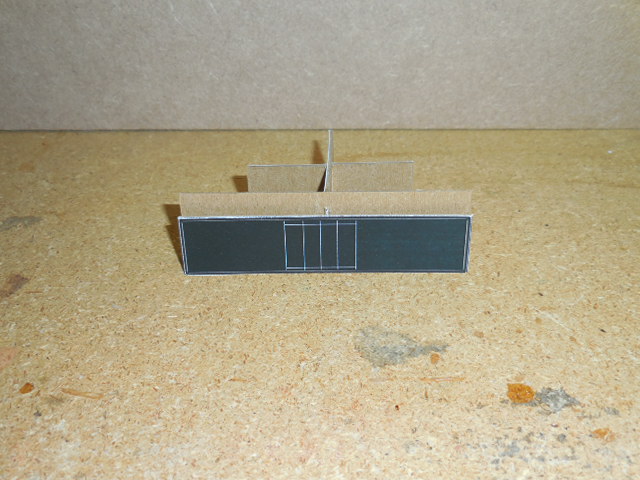
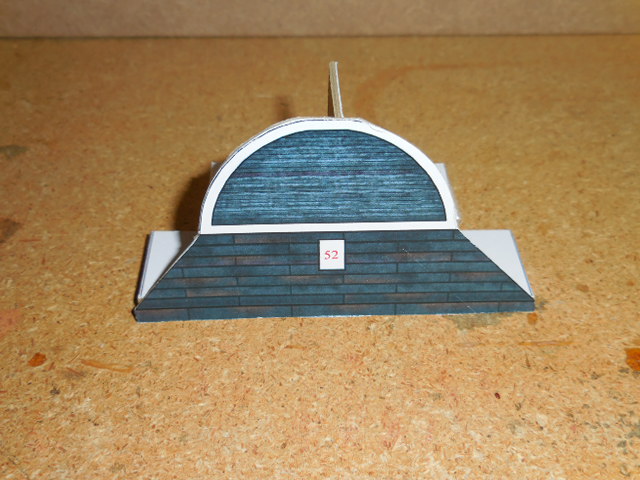
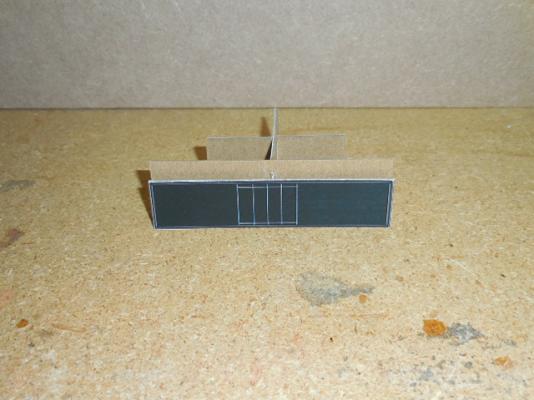
Picked up a set of cool grays and black Faber Castell Pitt pens and promptly went to my shipyard to color some edges. Thanks for the steer, Slog. They look good. I touched up all the parts I had previously used the Chartpak pens on. Continued gluing up the hull skins and still puzzling over the stern pieces. I think I have a fix, but I'm going to try it with some re-positional glue first. Also began the paddle wheel housings. Paddle housing support Paddle wheel attachment point, bottom of support Exterior paddle housing. The white semi-circle gets another overlay, but its both an inside and outside cut. I'm looking for a good, smooth semicircle here, with a flat at the top of the paddle. There will be an observation platform perched on top of each paddle wheel housing. The red 52 on the housing is the location for a 3 piece bump-out, glued over that spot. The instructions aren't text, just pictures with numbers and arrows pointing in approximate locations. Thanks for reading.


- 80 replies
-
- 11
-
-
- choctaw
- heinkel models
- (and 1 more)
-
Nice metallurgy primer. Thanks.
-
Check a model railroad shop that stock garden railway items. They may have people in 1/24 scale. The garden RRs are anything from 1/32 to 1/20 scale cars & locos. They use the same track gauge. Very confusing to us more conventional model railroaders.
- 308 replies
-
- 2
-
-
- finished
- model shipways
- (and 1 more)
-
Nice frames, Mick. And a smart move to go for the optivisor; can't have too much light and adequate magnification.
- 504 replies
-
- 2
-
-
- washington
- galley
- (and 1 more)