HOLIDAY DONATION DRIVE - SUPPORT MSW - DO YOUR PART TO KEEP THIS GREAT FORUM GOING! (Only 75 donations so far out of 49,000 members - C'mon guys!)
×


ccoyle
-
Posts
10,459 -
Joined
-
Last visited
Content Type
Profiles
Forums
Gallery
Events
Everything posted by ccoyle
-
You are oversimplifying the issue. It's not just a matter of copying a kit design -- the broader issue is something called intellectual property infringement, or IP theft. Manufacturers can get themselves placed on MSW's list for one or more reasons: copying an existing kit desgn using published plans or monographs to design a kit without obtaining the proper commercial licensing from the publisher of those plans aiding and abetting the sale of such kits (i.e., facilitating the sale of stolen IP). Doing any of those things will get a manufacturer (or seller) banned regardless of whether some of the kits produced by that manufacturer may be original efforts. The staff at MSW, along with many rank-and-file members, have been doing what they can to combat IP theft for going on two decades now, so trust me when I say that we are far more versed on this topic than you are at the moment. Some of the kits you have described as "not copied" are in fact well-known (and documented) examples of IP theft. As for what to tell the wife, I would tell her the truth -- there's no shame in admitting that the kits were purchased in ignorance of the IP issue. That's happened to many of our members, who are happily now much better informed on the topic. It's really quite simple: either you agree with us that IP infringement is theft and therefore immoral and act accordingly, or you don't. If the latter, then just know in advance that any builds of the kits you have thus far mentioned will not be allowed on our site. I sincerely hope you judge rightly.
-
 I have only seen them online, but the artwork and drawings look good. They are available from Orlik and Model-Hobby, assuming you can get them to ship to the US in the current duties & tariffs climate. Card Army, a newer publisher, has just released a 1/200 heavy cruiser RM Trento. This is their first ship after a run of five aircraft. Their kits appear to be like Halinski kits on steroids -- even the float planes have internal framing, engines, and detailed cockpit interiors! Trento can be purchased by itself or as part of a set along with 7 sheets of laser-cut frames and 12 frets of laser-cut details -- a bit too rich for my blood.
- 106 replies
-
- 1
-

-
- digital navy
- v108
- (and 3 more)
-
When I check on build logs like this one, part of me always wants to shout, "Dude, slow down!" 😉
-
Very nice work!
-
That's an odd assumption to make. That is a decor model. If that's what your friend's model looks like, then your friend has a decor model, not a scale model built from a kit. If you want to repair a decor model with scale fittings, that's your prerogative -- just be warned that whatever scale fittings you purchase will not be in the same 'scale' as your friend's model, because that model is not built to any scale.
-
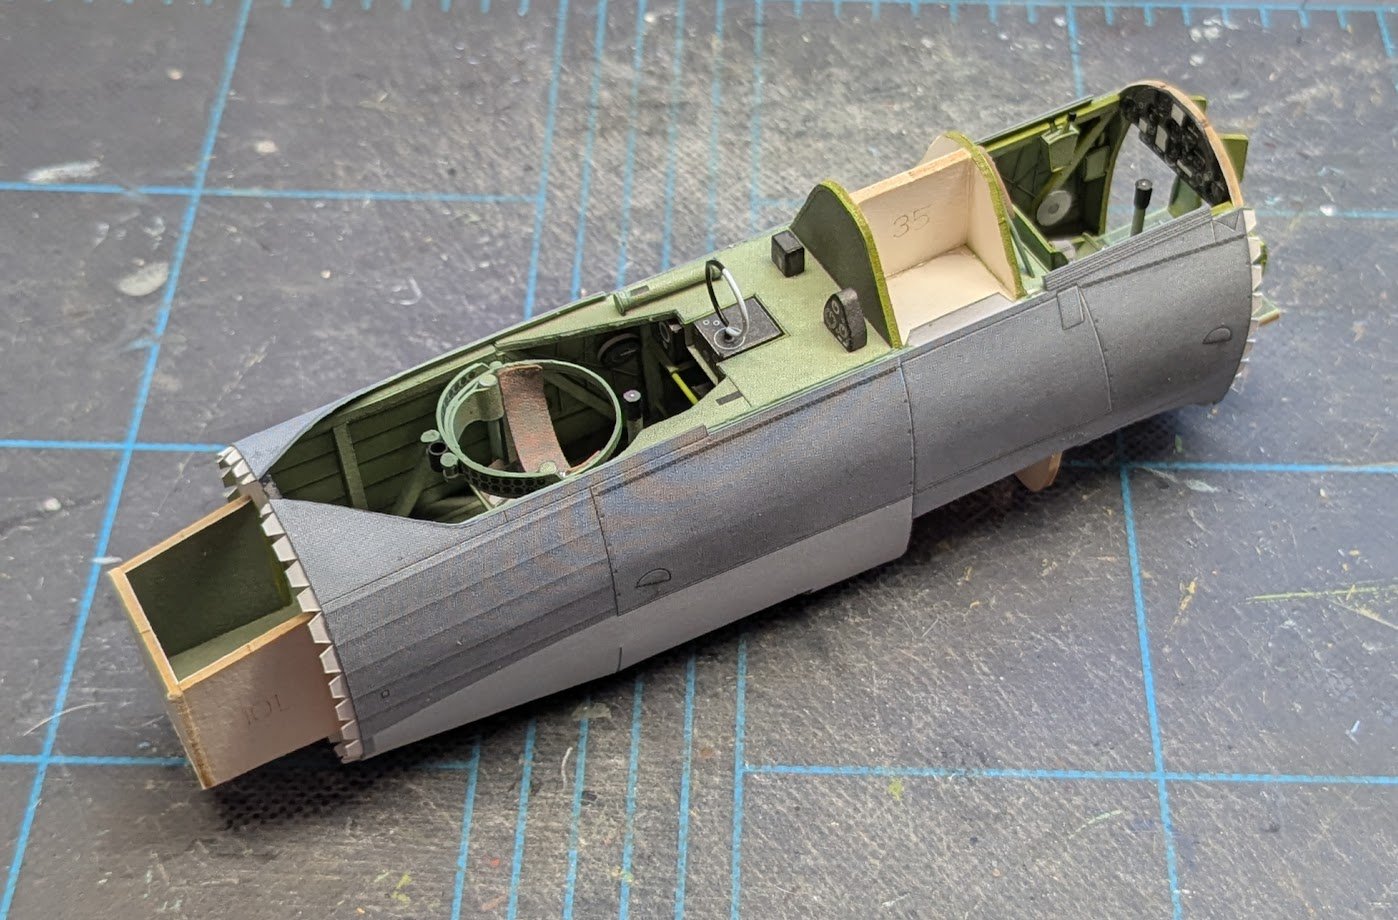
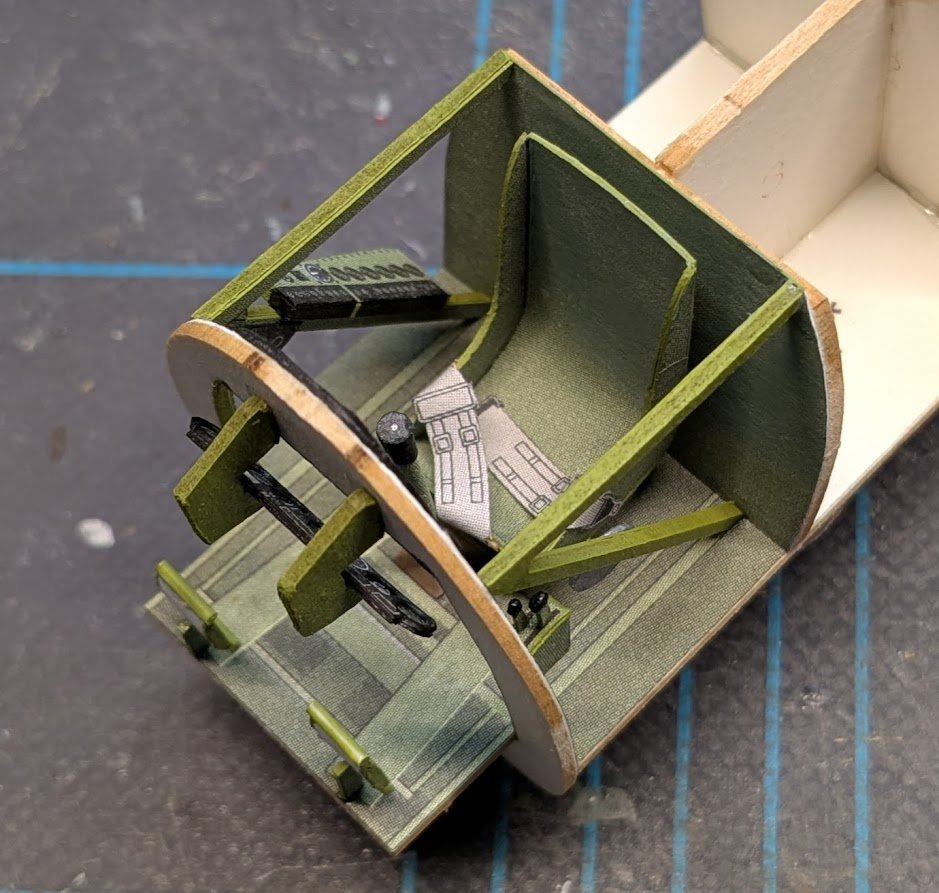
Gunner's position finished -- this was a very fiddly structure to make. And inner cockpit skins added. Always a bit of an anxious wait to see if the outer skins will fit properly. 😬


- 92 replies
-
- 18
-
-

-
Have a look at this topic: This is not a good sign. Fregata Espanola simply means "Spanish Frigate" -- this is a generic label that was slapped on myriads of mass-produced decor models. I'm inclined to believe that your friend's recollection of the model's provenance is inaccurate.
-
There are a smattering of Fletchers available from other publishers (Halinski, for example, offers USS Heerman), plus some tin cans from other classes as well. Unfortunately, from my perspective, the detail sets available for those kits are mostly available in PE brass -- and I do not like working with PE. I really enjoyed building HMV's USS England kit, for which I purchased the then-available 3D-printed resin hull -- a real game changer. Sadly, the only other kit for which such a hull was available was HMV's HMCS Agassiz. I generally don't enjoy building multiple examples of the same subject, and I have already built the 1/100-scale Agassiz from Modelik, so the HMV kit holds little appeal for me. In any case, the resin hulls were offered through Shapeways, and I don't think that site is in the aftermarket parts business any longer, so AFAIK the resin hull for Agassiz can no longer be purchased. Darius Lipinski designed both HMV kits, and I've had no word of whether he has any other projects in the pipeline, which is too bad, because I'm sure I would jump at the chance to build another small WW2 warship, e.g., destroyer, destroyer escort, sloop, etc.
- 106 replies
-
- 2
-
-
- digital navy
- v108
- (and 3 more)
-
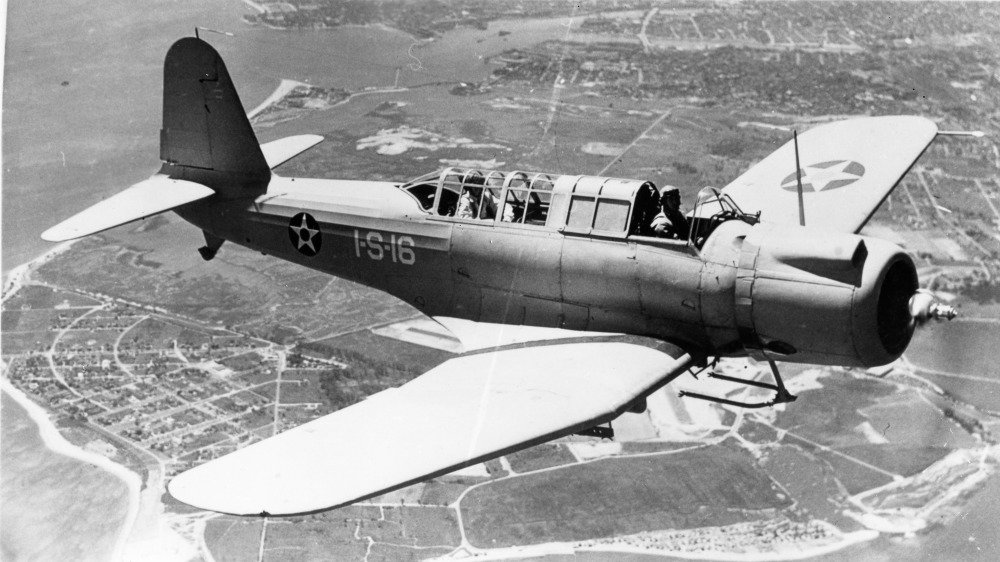
And a ton of electronic gear, an uncomfortable-looking seat, no forward visibility, and a single .30 caliber machine gun in case he had to deal with the business end of a Zero. 😮
-
The forward end of the radioman's position is finished. I indulged myself in one easy upgrade here -- the RDF aerial in the kit is just a flat, printed piece, which didn't look right to my eye. I replaced it with a wire loop.
- 92 replies
-
- 14
-
-
Hi, John. Please see our seller's guidelines here -- members would likely find some photos and payment options helpful.
-
Moin, Willi! I was an exchange student in your neck of the woods -- or at least not too far from it (Aurich). Just add the relevant text either before or after the photo. Those are indeed some very nice models!
-
Finishing is important. The question of how long it takes to finish is not nearly as important!
-
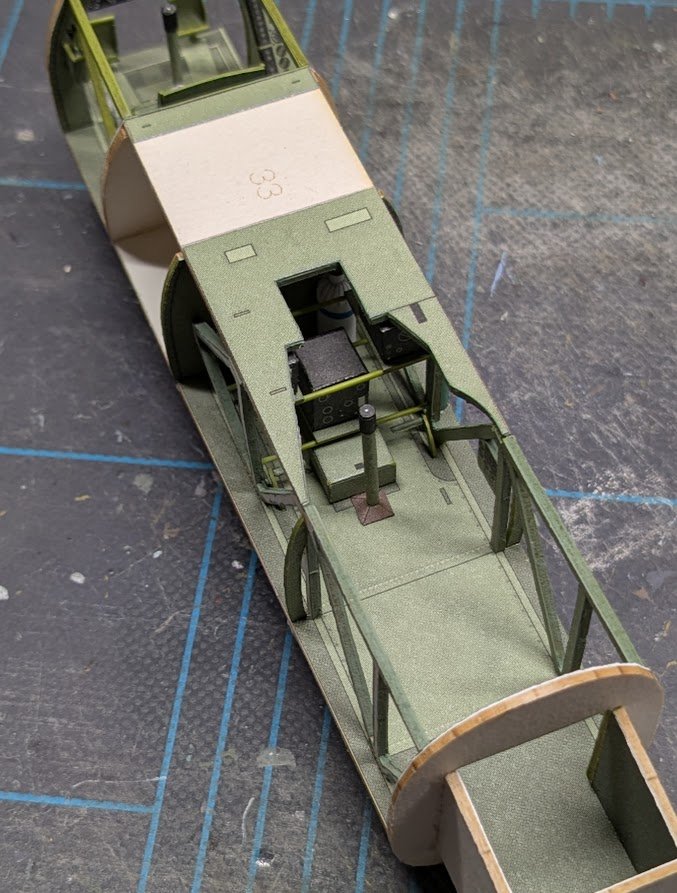
Work continues with the aft cockpit . . . . . . after which the top deck is added. That's all for today!

- 92 replies
-
- 15
-
-
-
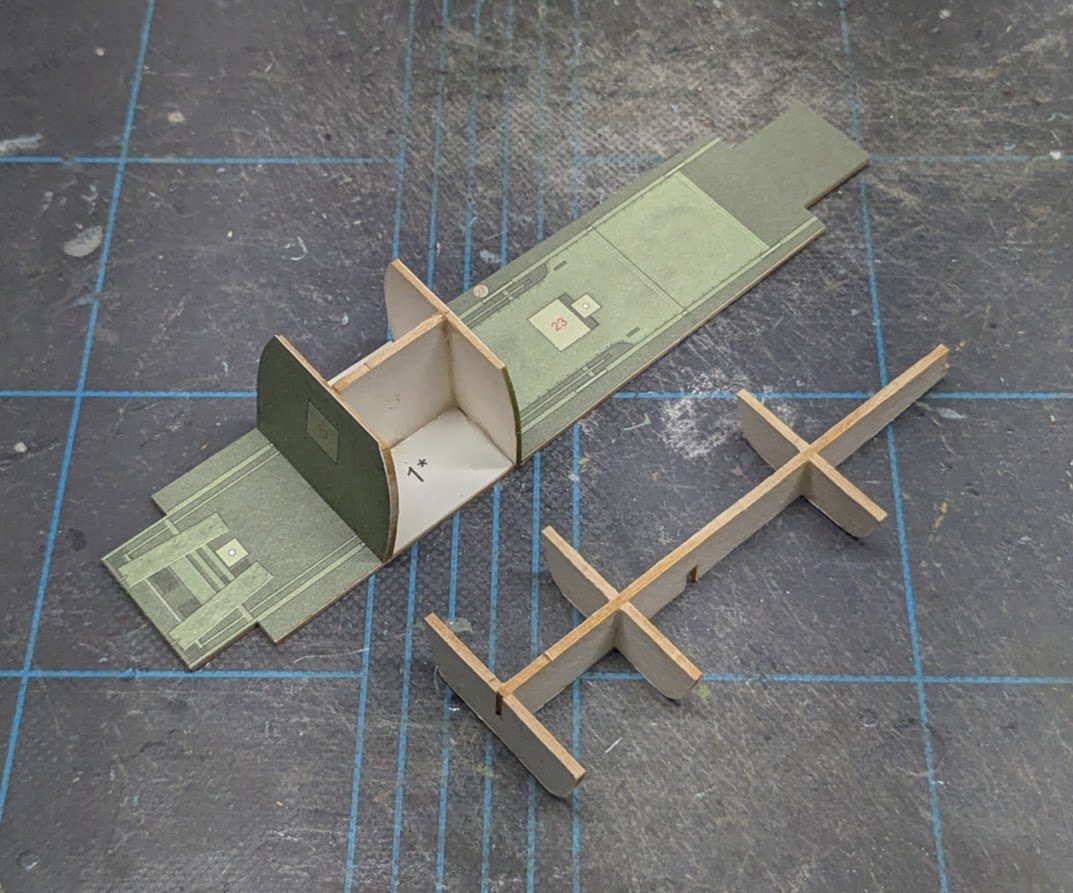
These are pieces from the laser-cut frames set. The material is called pulp board. It's commonly used for making coasters.
-
Goodness, I'd forgotten you had one in progress! I went back and checked it, of course. This one is actually a repaint -- Pawel did an earlier version in pre-war colors.
-
The first step in getting your question answered is to make sure you post it in the right area: Don't worry too much -- I moved it for you. 😉
-
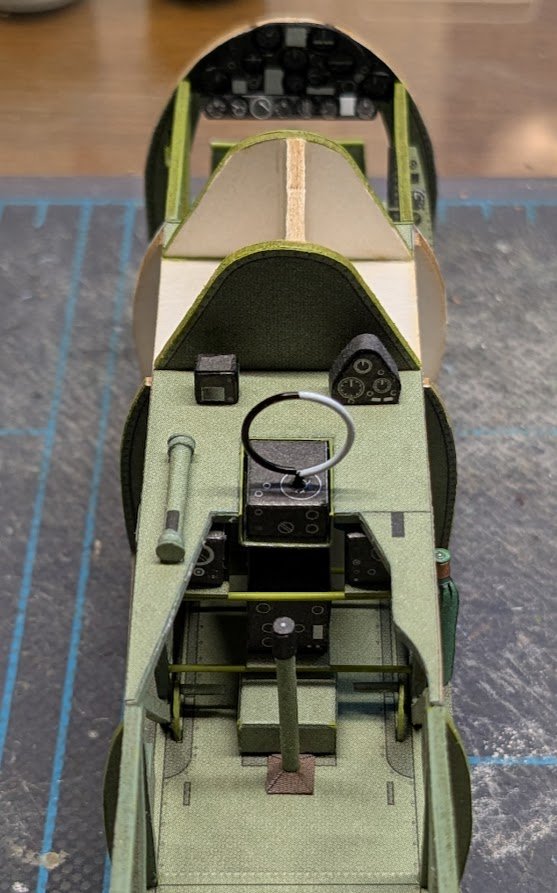
Here are the various forward cockpit elements prior to gluing them together . . . . . . and afterwards. Instrument panels have been 'glazed' with cellophane tape and optional kit parts.


- 92 replies
-
- 18
-
-
-
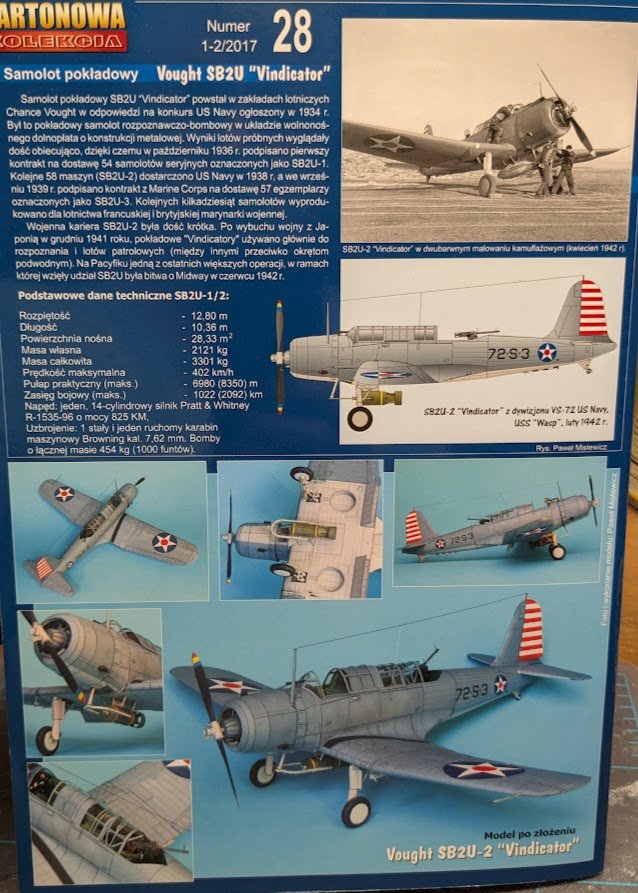
Yes, brave, but not torpedo bombers. You're thinking of the various squadrons that flew the Douglas TBD Devastator. SB2Us did fight at Midway, but as land-based dive bombers flown by VMSB-241. The twelve Vindicators operated by VMSB-241 flew three strikes between 4 and 5 June, suffered six aircraft lost and five damaged, and scored no hits. Captain Richard Fleming, one of the SB2U pilots (VMSB-241 was also operating the SBD-2) earned a posthumous Medal of Honor for his actions against IJN Mikuma on 5 June; USS Fleming (DE-32) was named in his honor.
-
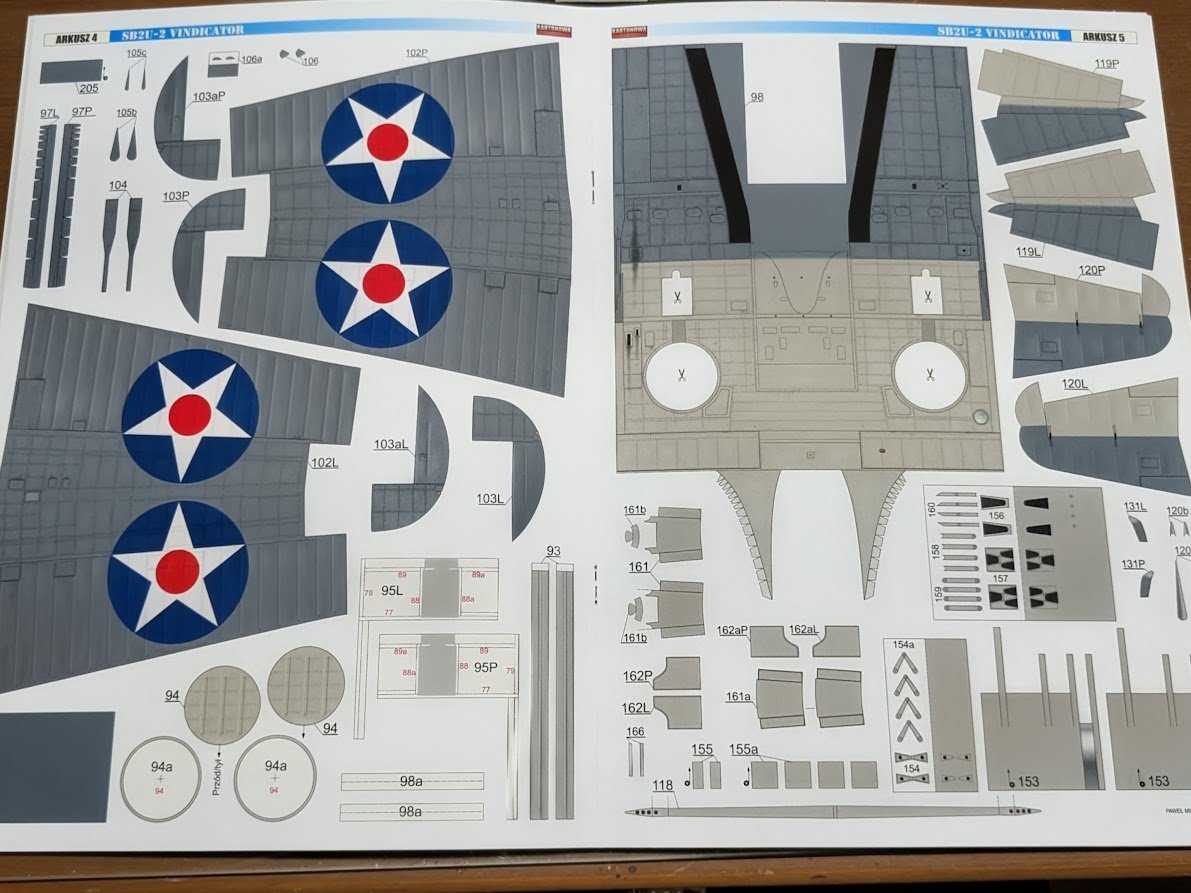
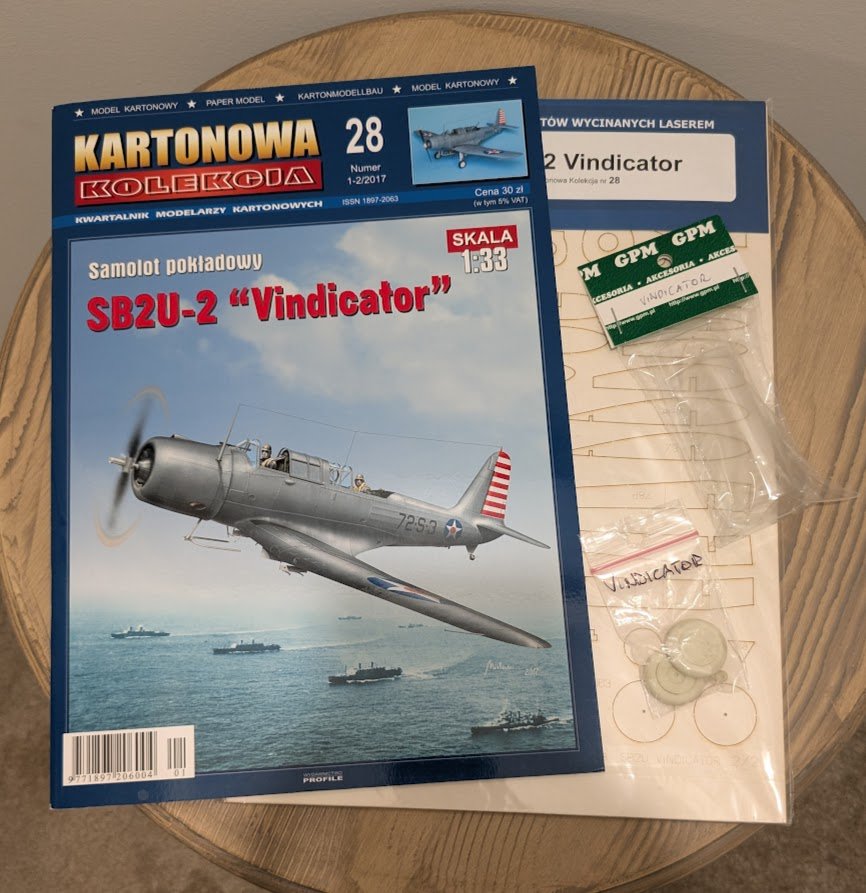
Welcome to the start of another adventure in card modeling! I had to stare at the pile for several days to decide on what to build next, but the SB2U finally won out. From Wikimedia Commons I won't bother with retelling the Vindicator's history, which most of you are probably already familiar with. Interested parties can read about its underwhelming wartime service here. Nevertheless, it was the US Navy's first monoplane, carrier-based dive bomber, and it wasn't a bad-looking airplane, either. It will pair up nicely for display with my completed F4F-4 Wildcat. Plus, it's even kind of ship related, so it deviates less from our forum's task and purpose than some other choices might have. The kit is another Pawel Mistewicz design from Kartonowa Kolekcja, and looks to be every bit as good as Pawel's other excellent designs. Pawel had seriously upped his artwork skills by the time he got around to designing this kit, which depicts an aircraft from Scouting Seventy-Two aboard USS Wasp in February, 1942, operating in the North Atlantic. The squadron flew the Vindicator until June of that year before transitioning onto the Douglas SBD-3. Lots of excellent diagrams, as usual. The back cover has some great photos of the prototype model. First cuts have already commenced. Now that I've started in on this project, I feel quite good about the selection and am looking forward to hopefully doing this kit justice. As per usual, I have the optional laser-cut frames, molded canopy, and resin wheels. Hope you enjoy following along!

- 92 replies
-
- 15
-
-
Congratulations on finishing your model, Jared! And I can say "yes and amen" to your wisdom shared in post #412!