ccoyle
-
Posts
10,594 -
Joined
-
Last visited
Content Type
Profiles
Forums
Gallery
Events
Everything posted by ccoyle
-
 Some people might think that the same two-color scheme applied over and over again to every type to enter service would be kind of boring, but it's such an eye-pleasing combo that it makes everything look good! Throw in some roundels, recognition bands, unit badges, and kill tallies and, as the English would say, "It just works!"
 -
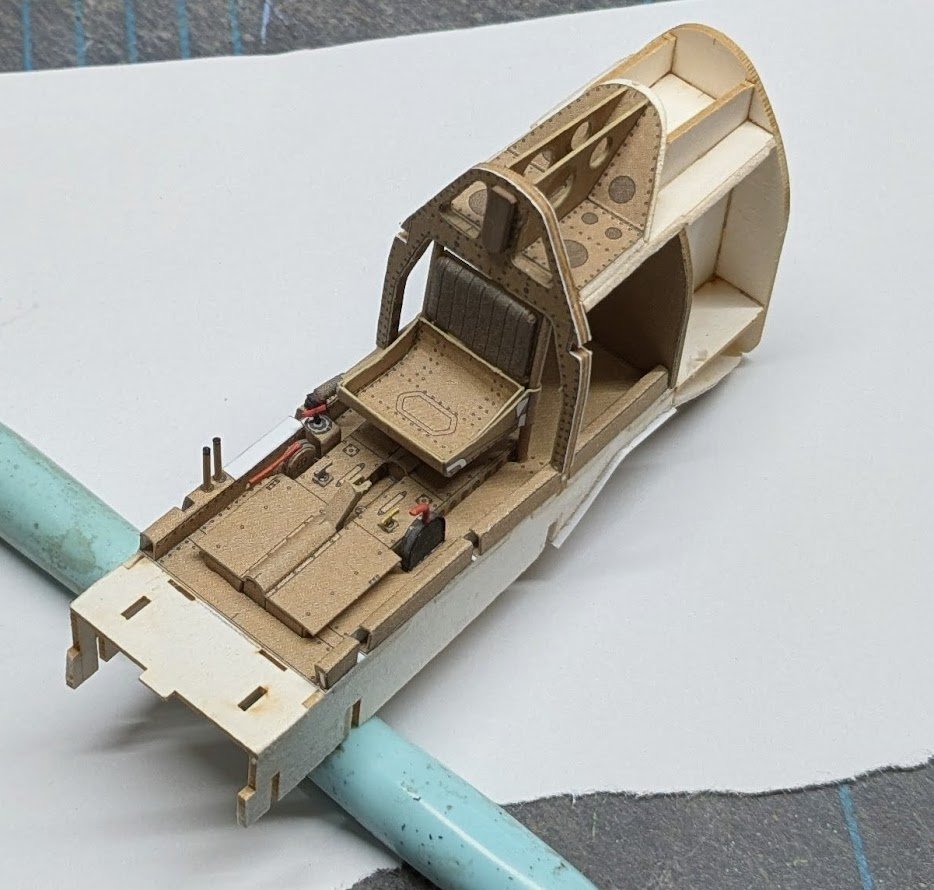
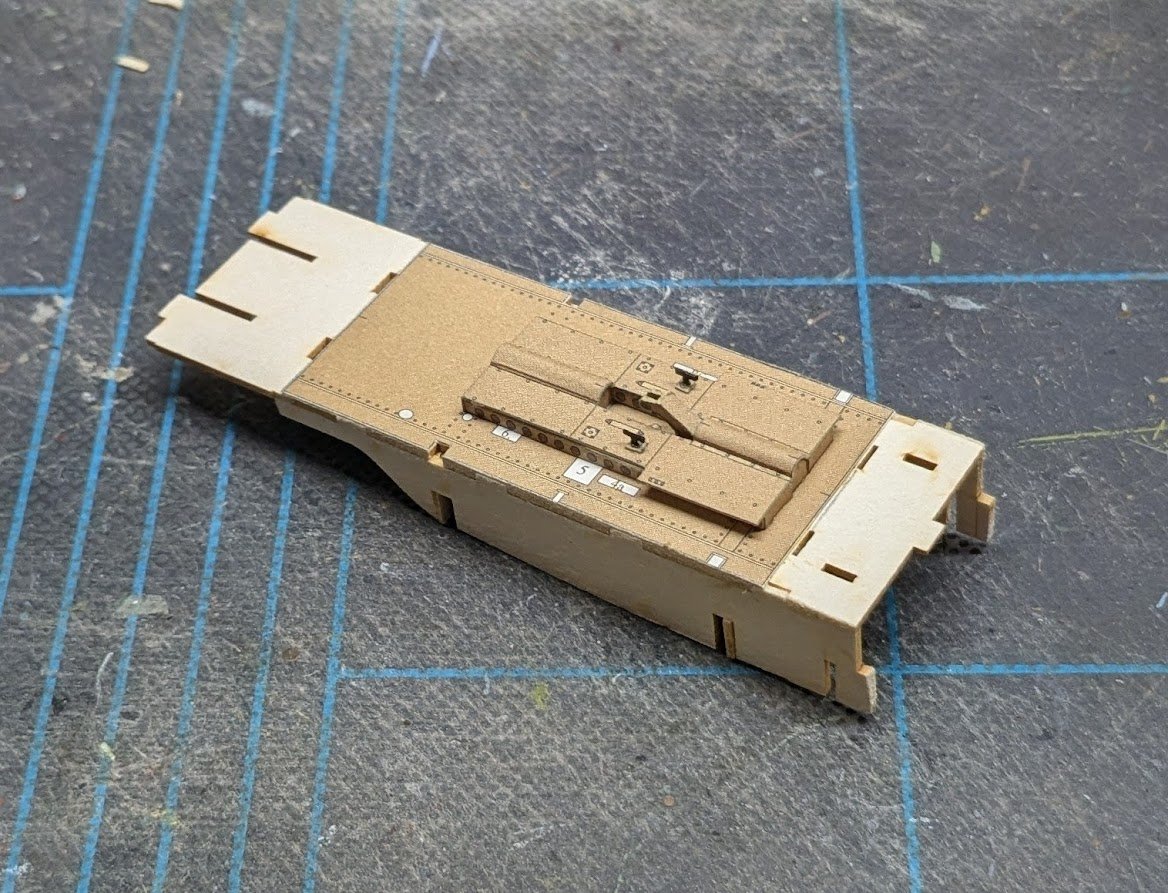
Working on the seat. This is just a test fit. It's one of the more complex seats I have worked on. The seat itself has brackets that attach it to the support poles instead of attaching directly to the poles or to a bulkhead. The bottom portion of the seat, where the pilot's chute would sit, is a bucket within a bucket; I could not get the inner bucket seated completely inside the outer bucket, a fault that you can see in the photo. I touched up the portion of the inner bucket that protrudes. This will of course be virtually invisible in the cramped, finished cockpit. I still have some fiddly bits left to do.
- 97 replies
-
- 16
-

-

-
Fixed your title for you!
-
Hope you were able to move some merch?
-
Herzlich willkommen, Andreas! Wir bitten unsere Mitglieder, auf Englisch zu schreiben. Ein Online-Übersetzer genügt. Ich wünsche dir viel Erfolg bei deinem Projekt! We ask that our members please write in English. An online translator is sufficient for this purpose. I wish you much success on your project! Cheers!
-
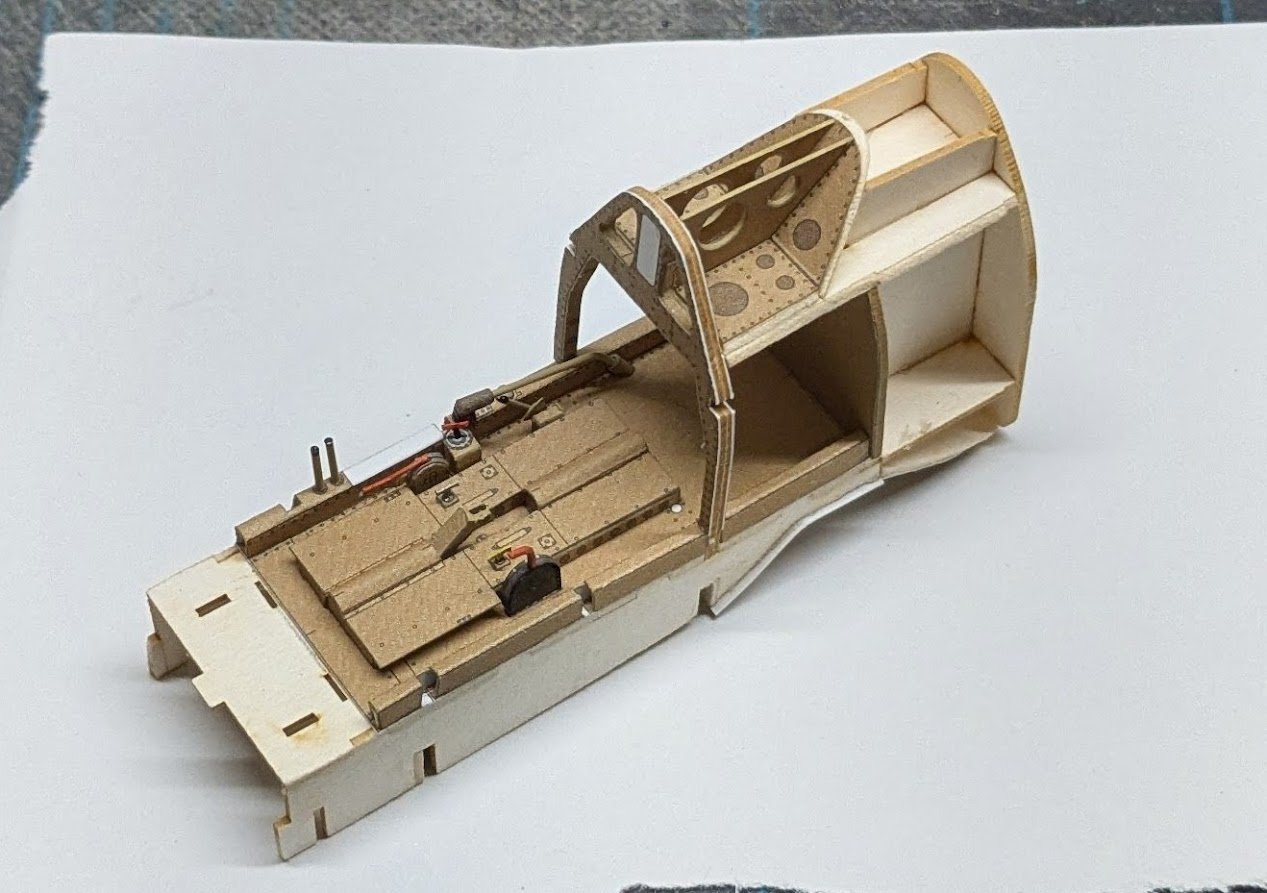
Slowly, a cockpit rises from the ashes. Except there are no ashes of course -- cuz that would be bad, especially for a card model! 😝
- 97 replies
-
- 16
-
-

-
You have done very well to this point!
-
You're dating yourself! I loved those shows, too. They're why I built the old Revell kit of Cousteau's PBY.
-
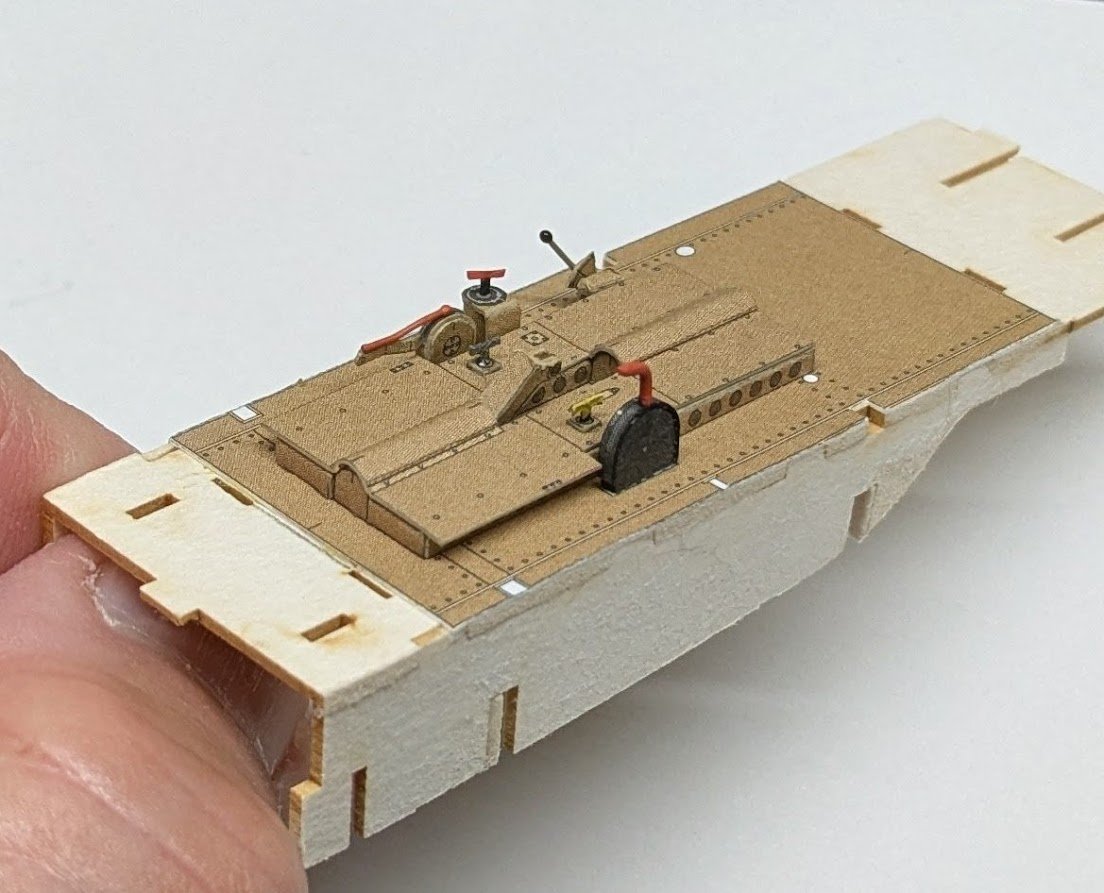
Slowly adding levers and T-handles. Believe it or not, 14 parts have been added since the last photo!
- 97 replies
-
- 18
-
-
-
Not at all! Many modelers have chosen subjects associated with favorite films or books.
-
Basswood Strips
ccoyle replied to DGraley's topic in Building, Framing, Planking and plating a ships hull and deck
To go along with my earlier Hobby Lobby suggestion, if they have strip stock at all then it's probably part of a Midwest display, along with sheet stock and filler blocks. Come to think of it, hardware stores sometimes carry Midwest stuff as well (e.g., Ace, but probably not Lowe's or Home Depot). -
Catching up on your build -- everything looks wonderful!
-
I did a search and was actually kind of surprised by how many pond yacht topics we have posted here. Some of them are concerned specifically with rigging. Comb through them and see if you can find something to get you started in the right direction. https://modelshipworld.com/search/?q=pond yacht&quick=1
- 1 reply
-
- 2
-
-

-
It is indeed! Wait until you see the rudder pedals. 😵💫
-
Another subject I remember fondly thanks to building one as a kid. Don't remember which kit it was.
-
Alo and welcome aboard! Certainly, there are some folks here that place great value on historical accuracy, but by no means all! This is a hobby, so participants should first and foremost have fun building whatever they happen to be building, making it as accurate as their abilities and interest allow. There is no requirement here for builds to meet some threshold of quality or accuracy in order to be shared, so please be encouraged to show us your work if you ever feel so inclined. Cheers!
-
Basswood Strips
ccoyle replied to DGraley's topic in Building, Framing, Planking and plating a ships hull and deck
Try Hobby Lobby, if you have one nearby. -
The latest to begin the Model Shipways 3 kit set
ccoyle replied to Taken Aback's topic in New member Introductions
I was in Gatlinburg two weeks ago -- first time in your great state! -
Great idea! Something a little off the beaten path always makes an interesting diversion.
-
The latest to begin the Model Shipways 3 kit set
ccoyle replied to Taken Aback's topic in New member Introductions
You're welcome! And thanks for that bit of encouragement! -
Getting Started: From Dollhouses to the USS Constitution
ccoyle replied to Jasennord's topic in New member Introductions
Welcome aboard! -
Ya can't rush a Halinski build, partly because there is always a large number of parts to slog through, and partly because Halinski designs can be terribly unforgiving of error creep, so proper fitting and gluing is essential.
- 97 replies
-
- 15
-