HOLIDAY DONATION DRIVE - SUPPORT MSW - DO YOUR PART TO KEEP THIS GREAT FORUM GOING! (Only 75 donations so far out of 49,000 members - C'mon guys!)
×


ccoyle
-
Posts
10,459 -
Joined
-
Last visited
Content Type
Profiles
Forums
Gallery
Events
Everything posted by ccoyle
-
 In all seriousness, I think I built mine back in the days of pinching Crayola markers from my kids. I think I may even still have the gray one somewhere. These days, I would much prefer something like the AK markers I purchased a while back. Sadly, the set included only one or two shades of gray, and nothing in the usual nautical grays.
- 106 replies
-
- 3
-

-
- digital navy
- v108
- (and 3 more)
-
Sounds like a great trip! Believe it or not, I still haven't been north of Charlotte since moving to SC ten years ago!
-
Browsing Experience
ccoyle replied to mrcc's topic in Using the MSW forum - **NO MODELING CONTENT IN THIS SUB-FORUM**
And I thought I had a lot of tabs open! 😮 -
Do you mean Oregon pine? That is a regional name for Douglas fir. It was very commonly used in West Coast ship building, it being a very large and straight-trunked tree, which made it a prime source of long, straight-grained planks. Most of the West Coast schooners that have been in the news here on the forum lately were built of Doug fir.
- 33 replies
-
- 4
-
-
- gaff sloop
- restoration
- (and 1 more)
-
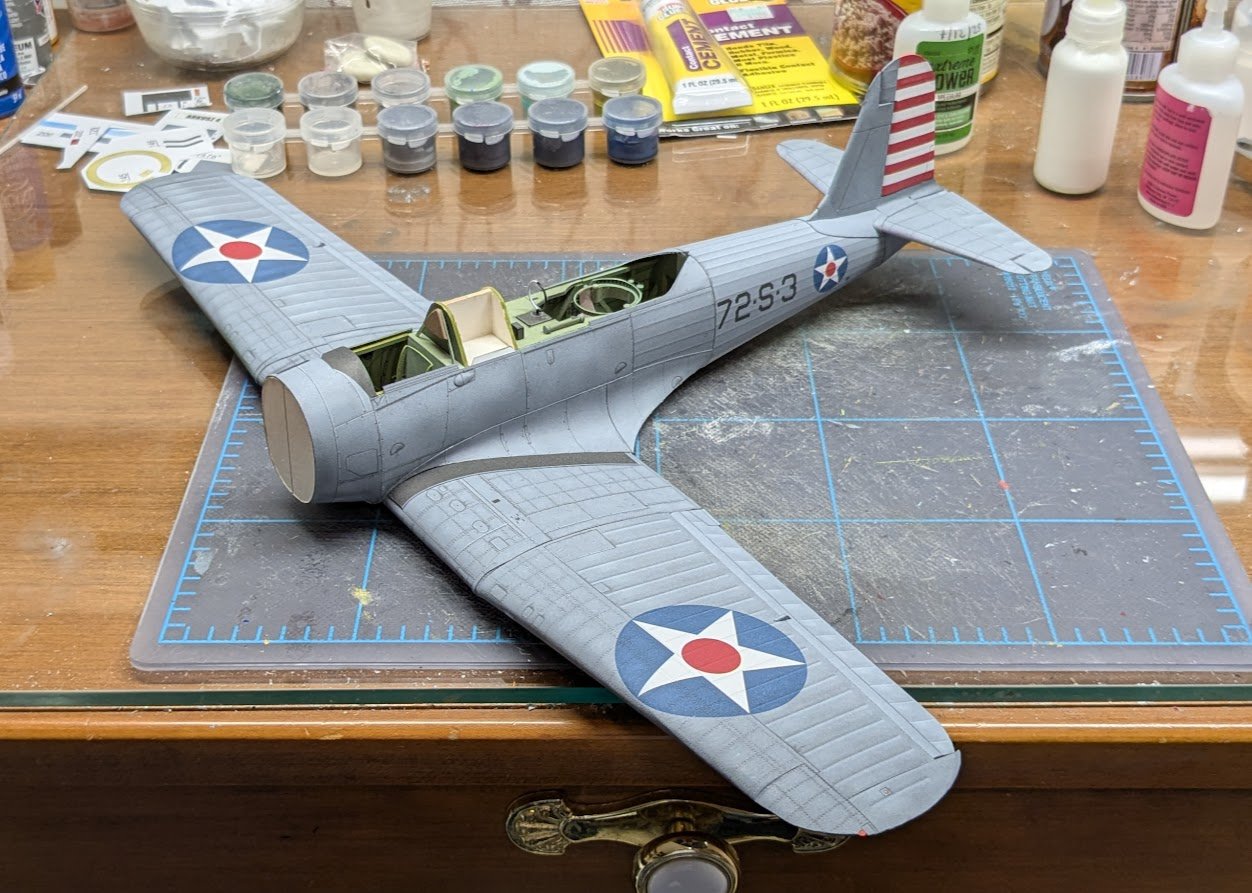
Made quite a lot of progress since the last update. First, I got the engine mated to its bulkhead and the forward fuselage ring done. You can see some of the cowl rings in the background. Next, all of the cowl rings were shaped and closed. At this point they still need a little final shaping. Here the cowl rings have been added. I had a problem with the last ring because I didn't realize that it was supposed to angle back into the cowl opening instead of forward. I made a few cosmetic boo-boos in getting it repositioned. I also overlooked that there is a printed interior cowl piece. Fortunately, as this photo suggests, the interior is difficult to see, so the interior piece's absence shouldn't stand out. A couple of exhaust stubs and an air scoop later and the forward fuselage was ready to mate to the rest of the model. Finally, the .30 cal mount was completed. It's just loose-fitted for this shot -- I will remove it while I work on the canopy. I had originally planned to display the gun in the stowed position and have the aft canopy closed, but the diagrams were unclear on how to configure the mounting to make that possible, and I could find no helpful images online. Displaying the gun deployed means that the rearmost canopy section will need to be separated from the rest of the canopy in order to display it in the open position. That's it for now!


- 92 replies
-
- 15
-
-

-
Not much -- which is why I'm going to pass on super-detailing this one.
-
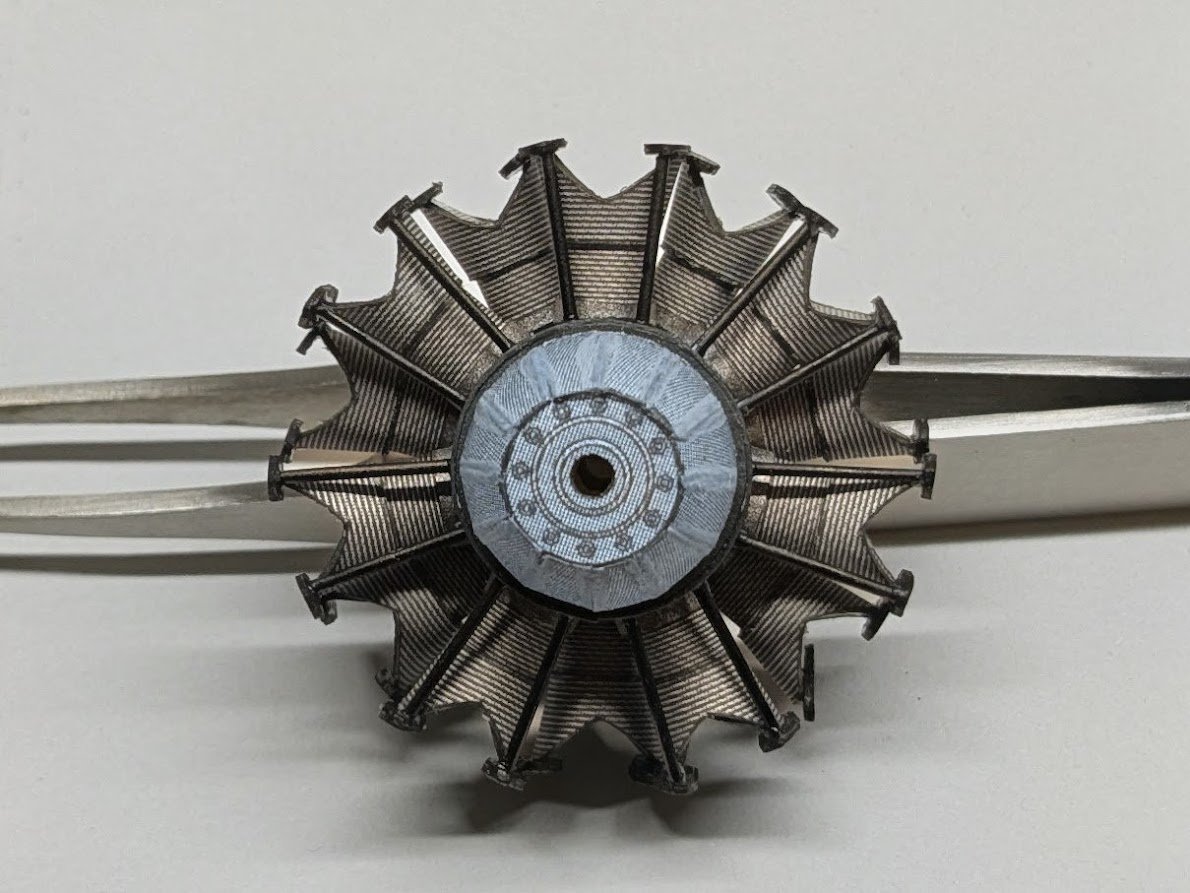
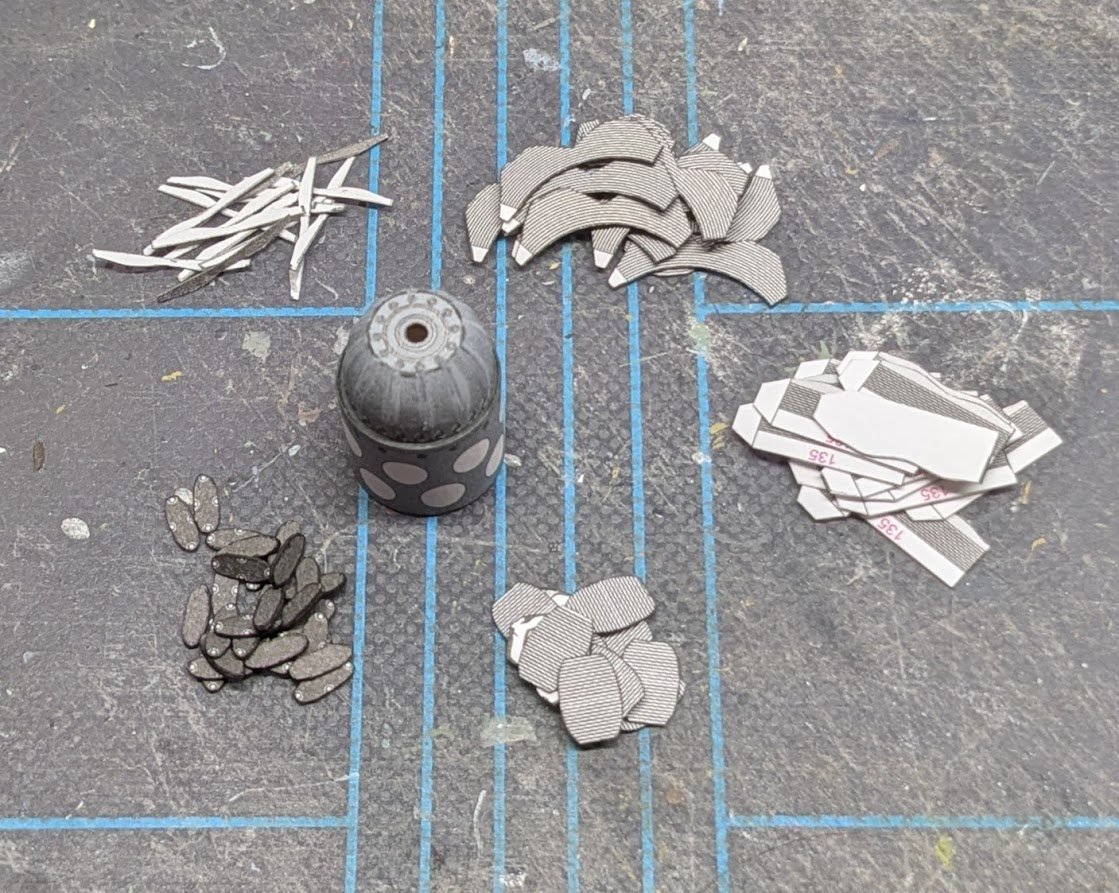
I got the engine block built and all of the paper parts for the cylinders cut out -- fourteen cylinders at six parts each = eighty-four parts to cut out. After that I started rolling cylinders, but I only got two done before my brain died. 🥴
- 92 replies
-
- 19
-
-
-

-
Anyone out there working on a card model?
ccoyle replied to gagliano1770's topic in Card and Paper Models
Ooh ooh! I know what it is!! -
Welcome aboard!
-
Bristol Bulldog by Danstream - Airfix - 1/48 - PLASTIC
ccoyle replied to Danstream's topic in Non-ship/categorised builds
Sorry, the 'there' in my post was in reference to my sneaking in the English spelling of color. I haven't actually built a British aircraft in any of those schemes, though I do have one in my stash (Hawker Nimrod). -
The coloring on this kit is really very good, and I agree that the plane has pleasing lines -- unlike, say, the SB2C, which I also have in my stash. I like the early-war light blue over gray scheme, and I already had suitable edge coloring paints left over from my F4F-4 build. The blue just needed a little lightening. The 30-pen set I purchased earlier from AK included a shade called "deck tan" which is a pretty close match for the underside gray of this kit.
-
Bristol Bulldog by Danstream - Airfix - 1/48 - PLASTIC
ccoyle replied to Danstream's topic in Non-ship/categorised builds
Can't help but love the various RAF peacetime fighter squadron identification colour (see what I did there?) schemes of the 1930s. -
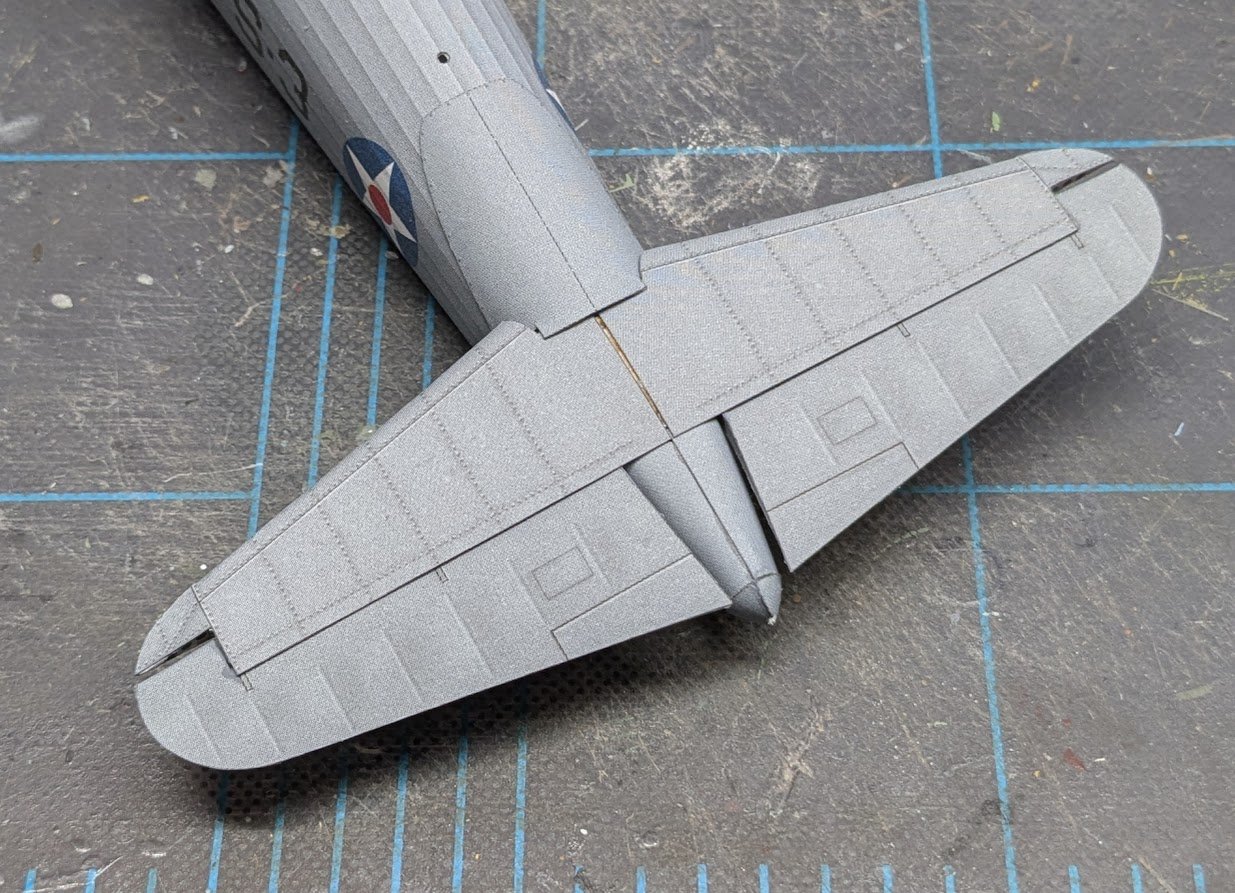
This one was an integral part of the fuselage spine.
-
Welcome aboard!
-
Open up the editing pane. At the bottom is a tray containing all the photos you have uploaded for that post. Click the 'X' to delete any unwanted photos.
-
You shouldn't miss too many. Not too long ago, the moderators went through all the build logs (an enormous task) and tagged all of the existing logs. Was it a chore? Yes, it was -- but y'all are worth it!
-
Sounds vaguely ominous! 😬 In this instance, I think any kind of doubling technique would adversely impact the scale of the part -- but your description of the process is intriguing! I can easily envision this conversation going down at the Coyle household later: Mrs. Coyle: "Honey, what are you burning?" Me: "Me? Nothing. Why?" Mrs. Coyle: "It smells like melting Ziploc bags in here." Me: "Hmmm. Can't imagine why." 😝
- 106 replies
-
- 5
-
-
- digital navy
- v108
- (and 3 more)
-
Beauty is in the eye of the beholder. If you like painted models better, then paint them. If a paying customer wants bare wood, then leave it bare!
-
Clare, I did mine by cutting out first, then soaking in CA. Are you familiar with what the Poles (I believe) call the 'woodpecker' cutting technique (if I'm remembering the name correctly)? For anyone reading, this consists of cutting by means of a series of up-and-down strokes rather than the usual dragging of the blade across the paper. Each vertical stroke only makes a cut about 0.5 - 1.0 mm long. Normal cutting strokes tug at the paper's fibers, which is not a problem on large parts but can pull very small pieces apart while cutting them. The vertical cutting stroke greatly reduces such tugging-and-tearing.
- 106 replies
-
- 4
-
-
- digital navy
- v108
- (and 3 more)
-
Tain't likely to happen. Auxillary ships are not the most popular subjects, though we do see one on the market every now and then. I can't recall ever seeing an ammo ship, though. BTW, I learned to ski on Mt. Shasta!
- 106 replies
-
- 2
-
-

-
- digital navy
- v108
- (and 3 more)
-
I think you mean the 25 pdr? I did that one as a kid -- thinking about it made me realize how long some of the Tamiya kits have been around. 🤔