


toms10
-
Posts
928 -
Joined
-
Last visited
Content Type
Profiles
Forums
Gallery
Events
Posts posted by toms10
-
-
17 hours ago, Snug Harbor Johnny said:
Nice approach on those pins, Tom. I find that my UniMat mini-lathe has come in handy many times over the years, and a three jaw 'universal' chuck comes in handy for working on round stock
Hi Johnny
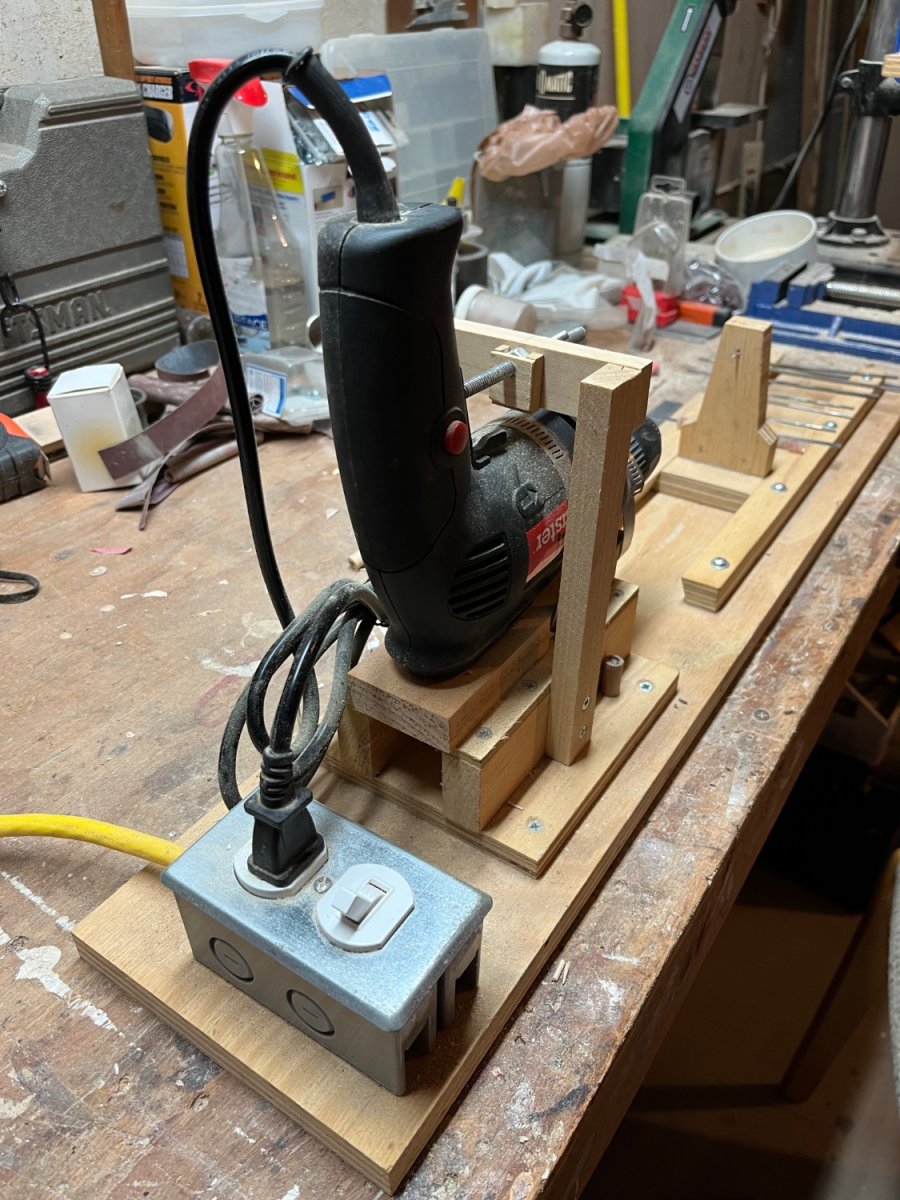
I went the ultra low tech route or should I say ultra low cost route with regards to a lathe, at least for now. The Morgan is only my third build and I did not want to spend money on all sorts of tools if i wasn’t sure I would continue. I seemed to have been bitten by some bug that makes me want to continue so in the future I will most likely make some investments. In turn that may also help speed up some of the processes instead of doing a lot of things by hand.
Herre are some pics of my lathe investment. Scrap wood I had laying around for the bed and gibs. A $15 drill from Harbor Freight and a left over electrical box and light switch from a previous house project. Full disclosure, I have an old Toolkraft table saw (was my dad’s and is now 50+ years old) that I used to make the wooden items.
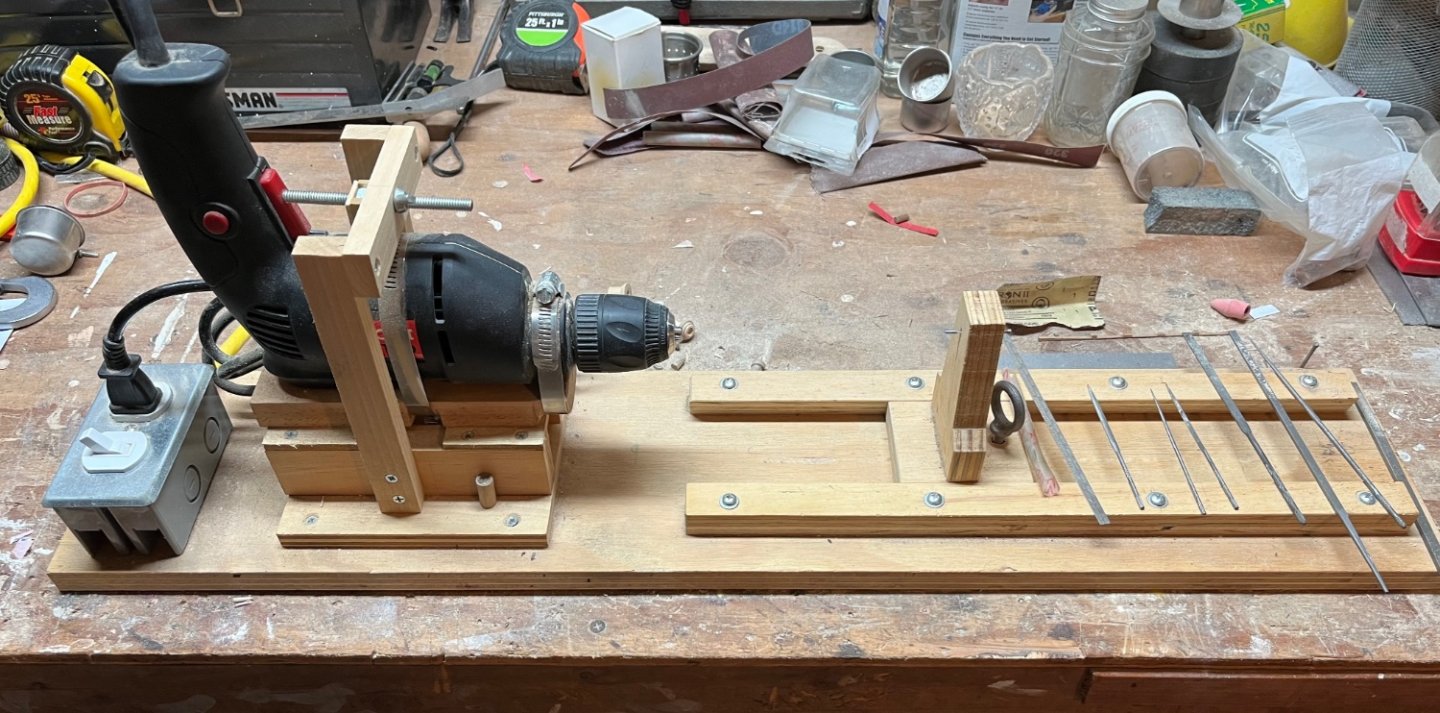

Note the high tech speed adjustment screw set up on the drill trigger. 😂😁👍. I had to use all that engineering college stuff for something!
Tom
-
17 hours ago, TBlack said:
Nice brickwork. I'm in awe of your ability to get the spacing and color just right!
Tom
Hi Tom
Thanks for the kind words. It’s all smoke and mirrors. 😂😜
By the way, our club (Connecticut Marine Modelers Society) had its monthly meeting last week and James mentioned you were at the workshop in Annapolis. That must have been a great time seeing the model collection and learning techniques from the “pros”.
Tom
-
4 hours ago, Snug Harbor Johnny said:
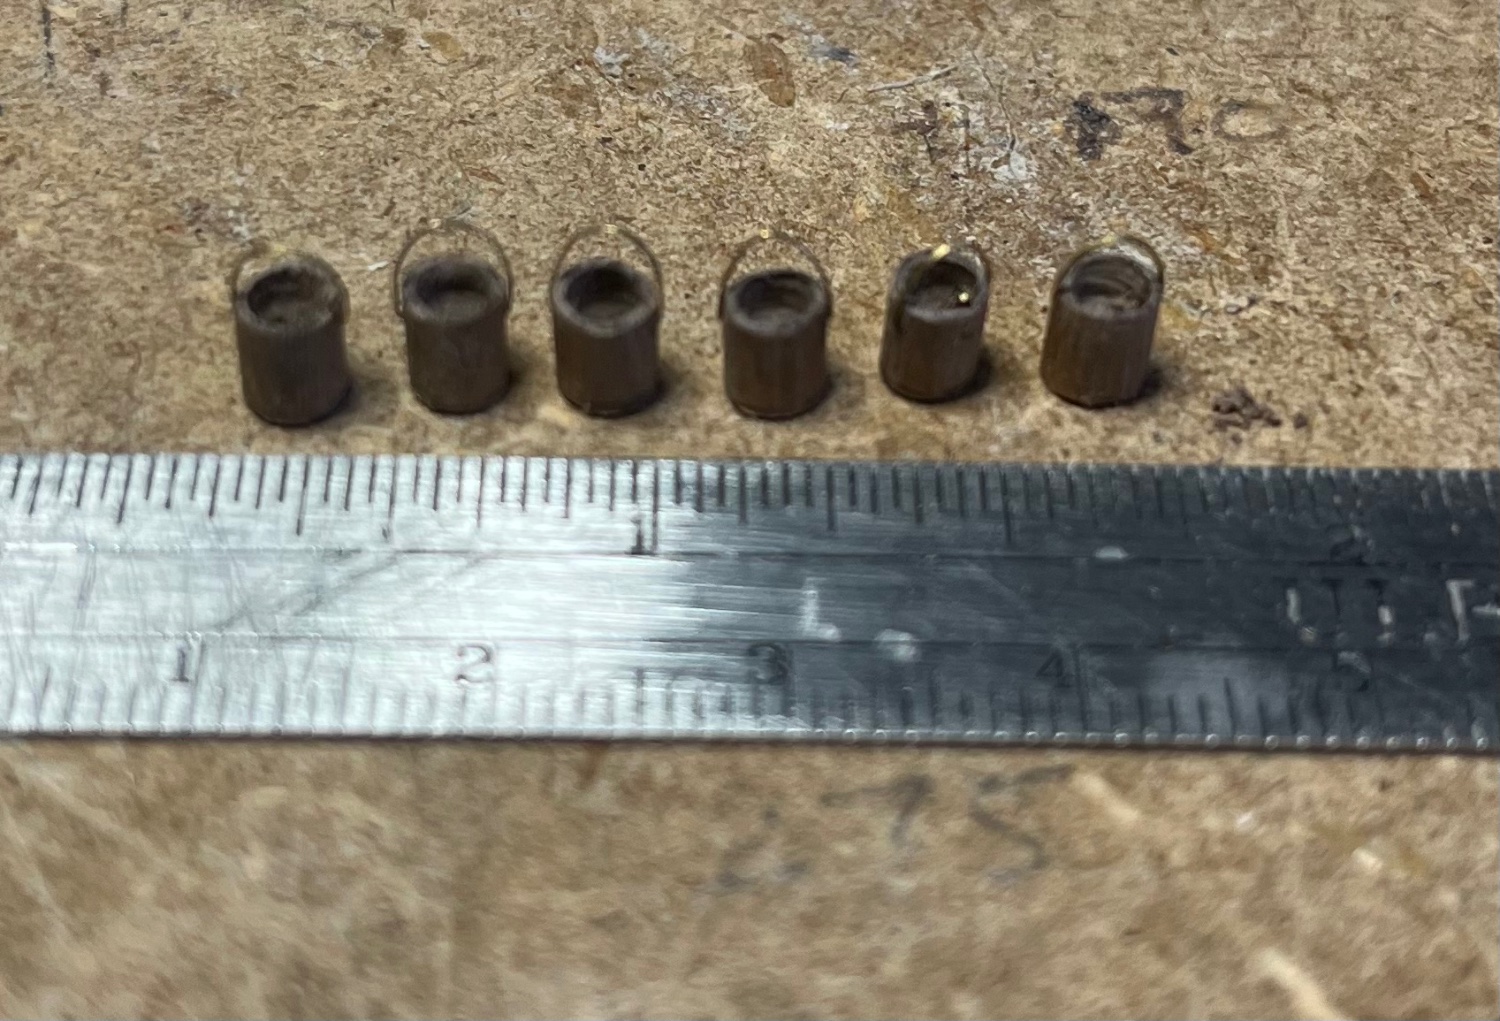
What did you use for belaying pins? brass escutcheon pins? 'Looks like a handy solution since many kit-supplied belaying pins come too short and too 'fat'. I rather like brass touches on a model ... no need to paint or finish since time will slowly put a brown patina over bare brass surfaces. All you need is time.
Hi Johnny
For the belaying pins I use brass brads. I put them in a drill style homemade lathe and filed the heads down and shaped them a bit. The diameter of the brad was about .025 to start so I just cleaned them up so they ended up about .020.
As for using standard paper and reacting with the copper, there is actually a layer of sizing between the leaf and the paper. In theory the metal shouldn’t come in contact with the paper. You do bring up a good point though. I will take heed of your advice on the next one. But then again, 50 years from now I probably wont be worrying about it. 😜. If one of my daughters takes up modeling it will be a good restoration project for them. 😂
Tom
- mtaylor and Snug Harbor Johnny
-
 1
1
-
 1
1
-
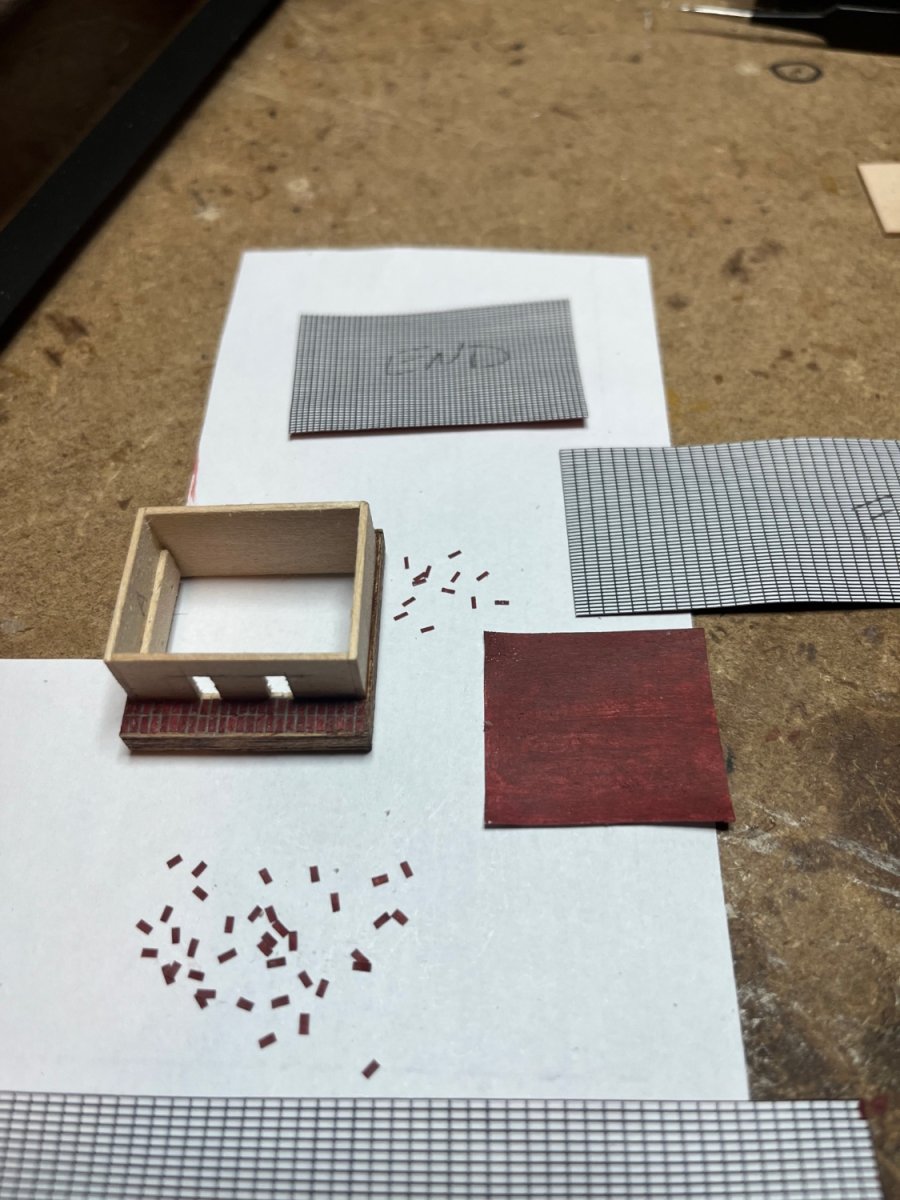
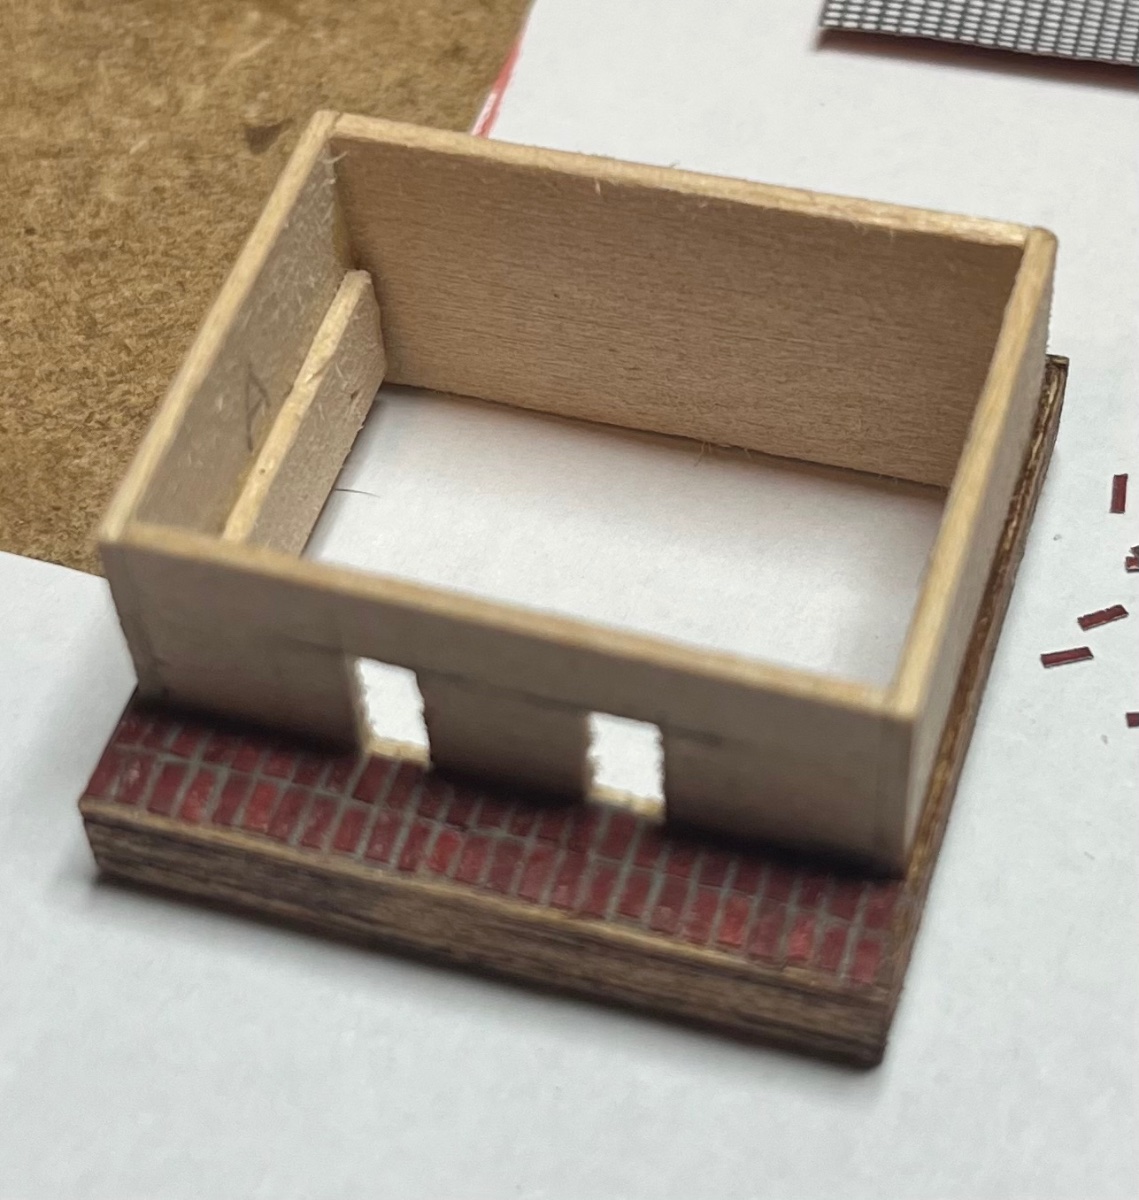
Starting to work on the tryworks structure. First step was to figure out how to make bricks at 1:96 scale. An actual brick measures 2 1/4” high x 7 5/8” wide x 3 5/8” deep. That makes my scale brick .023 x .079 x .037. I decided to try printing a grid on regular 20# copier paper and then paint the back. Borrowed this idea from sail making on my Leopard build.
I have 3 different grids depending on how the brick is positioned. I used a scalpel and steel straight edge to cut the grid into strips. Then the strips were cut to the appropriate brick view length. This resulted in tiny little bricks which look like confetti for mice. 😂
Pictured below are bricks looking down at the top 3 5/8 x 7 5/8 (lower group) and next to the tryworks are bricks looking at the front 2 5/8 x 7 5/8”.

Below is the front step with top view bricks layed in place. The mortar is supposed to be 3/8 wide in full scale which comes out to about .004”. I am eyeballing what seems to look good proportionally. If anyone wants to check when I am done - have at it. 😜😁

I am pleased with the results so far. Next is to do the rear step. Then all 4 sides with the 2 5/8 high brick. Tedious work but I think the realism is worth the effort. Just when I recovered from placing a thousand plus copper tiles I get to do microscopic bricks. This must be the “journey” part I keep hearing about with this hobby!😂
Tom -
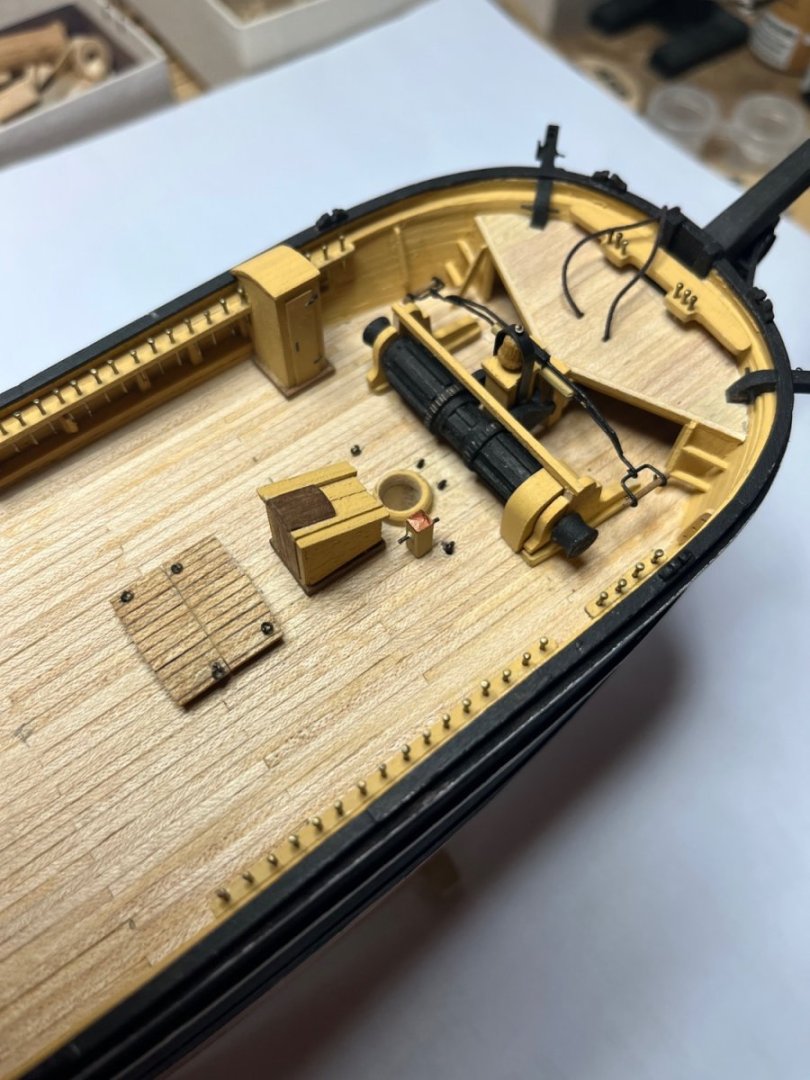
Boat bearer supports and stanchions in place. Harpoon racks are full and buckets in place.
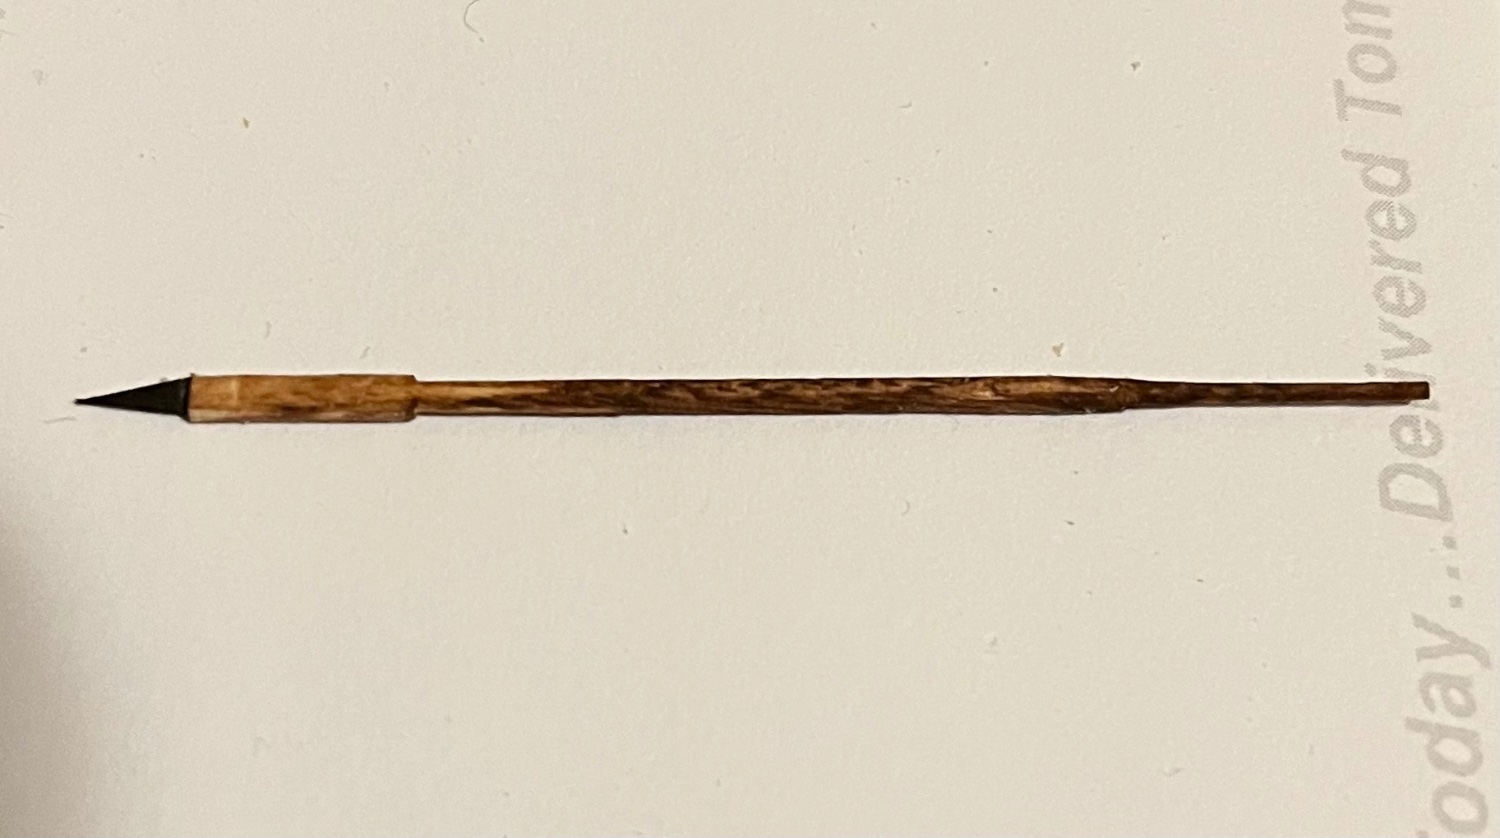
The harpoons are made with toothpicks filed down to scale at the tail end that is the part that sits in the rack. The middle section will be covered by the rooftop and unseen so I left those diameters larger but small enough to fit side by side in the rack. Not pretty but it serves the purpose.
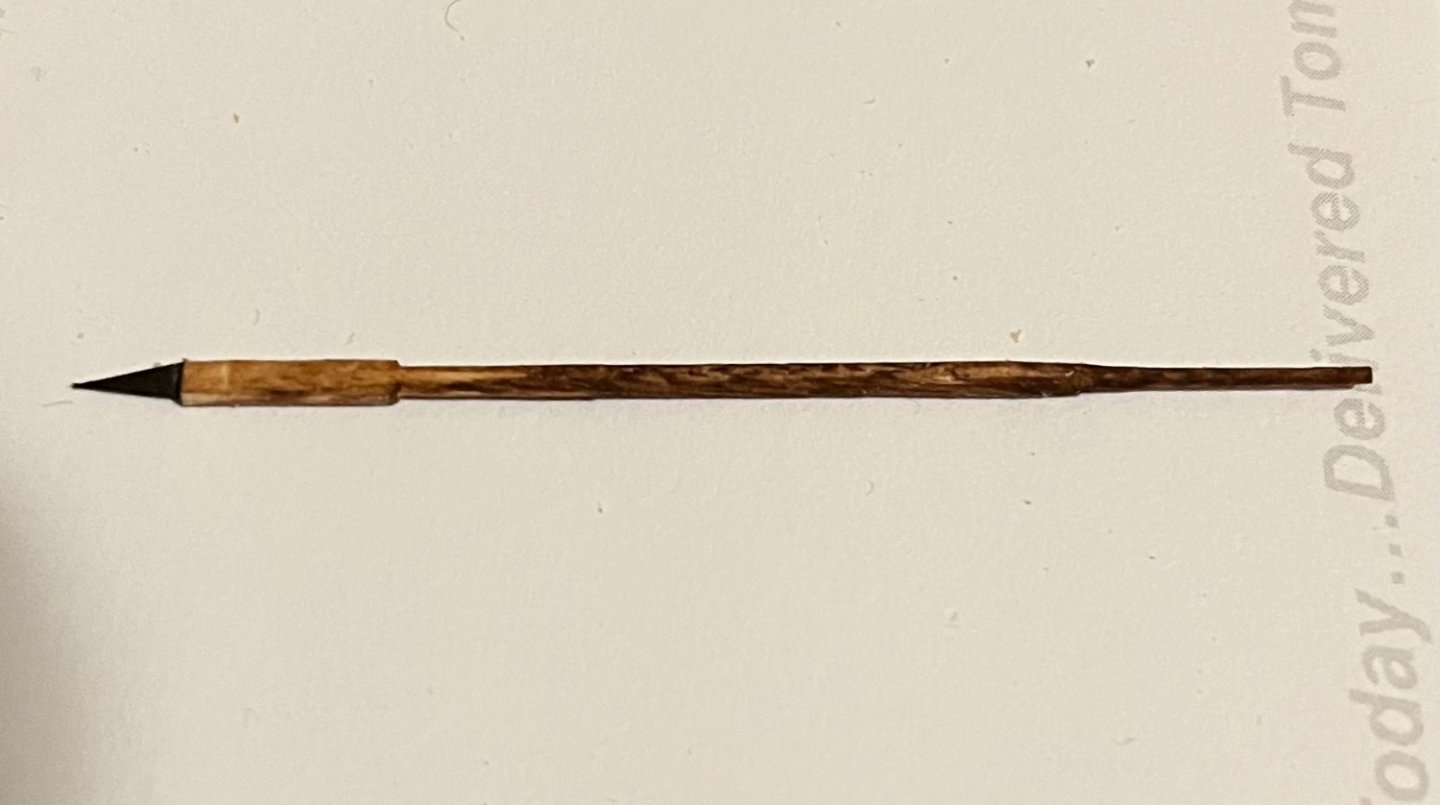
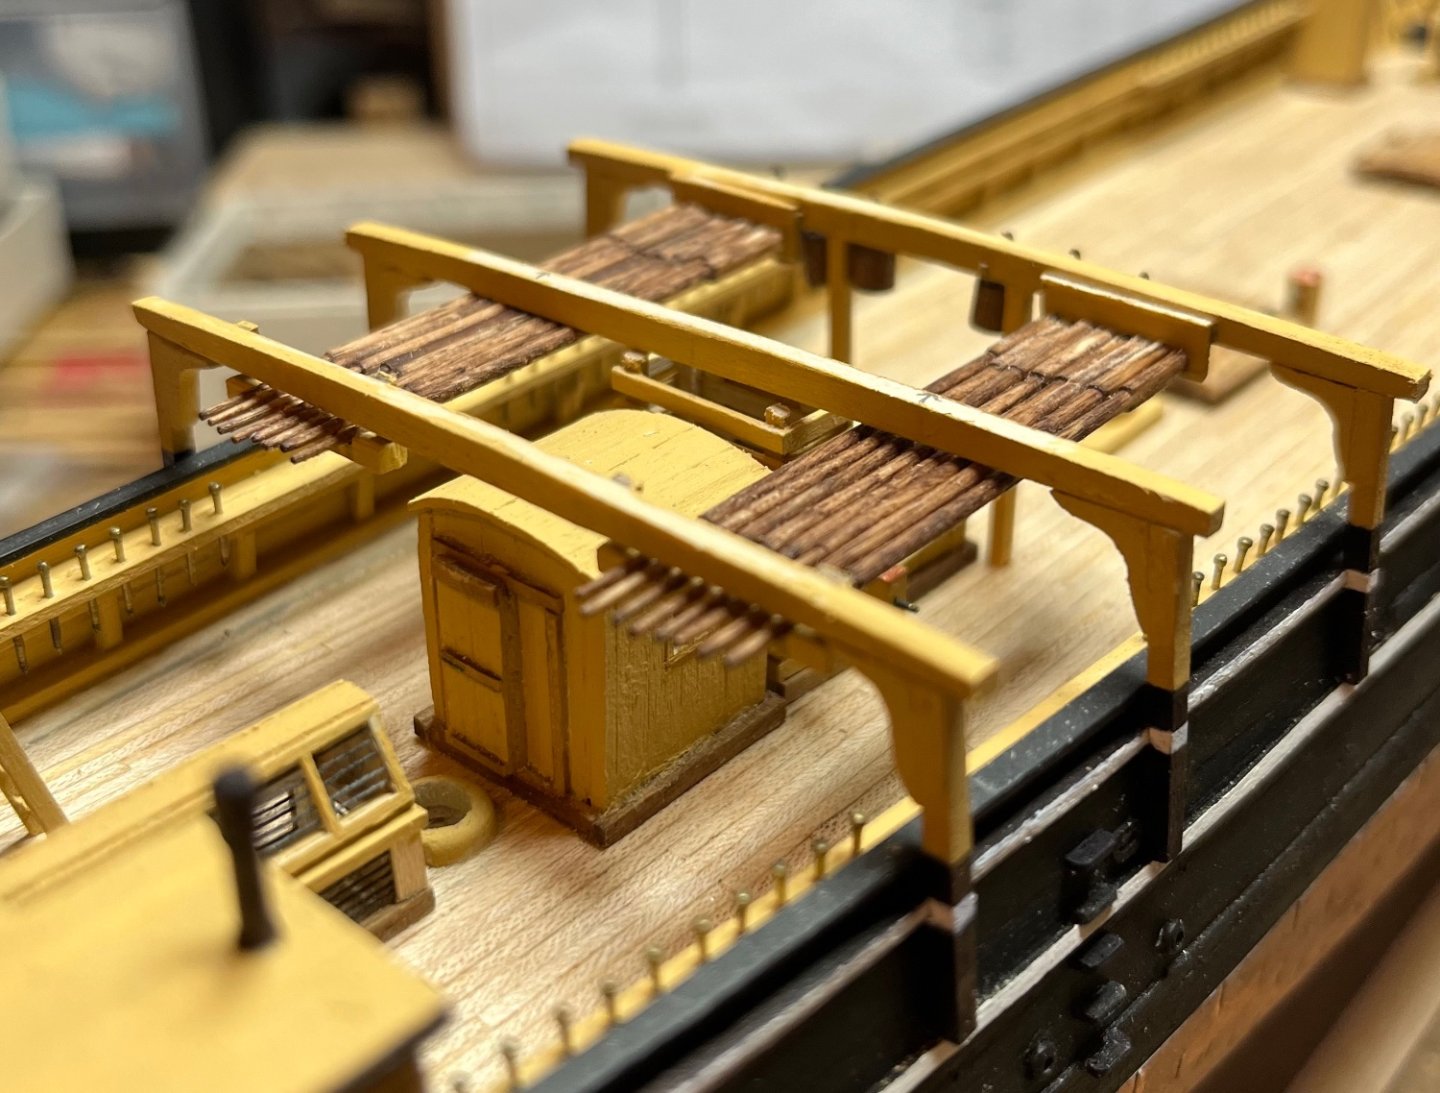
The blade tips are placed through slots in the front hanger. You only see the tips coming through the front. For the tips I used some card stock (index cards) and cut them into an isosceles triangle. I put a small slit in the end of the toothpick and inserted the tip. I then prayed the tip through the rack. The end result simulates the harpoons placed in the racks. The buckets then are hung on the front beam.
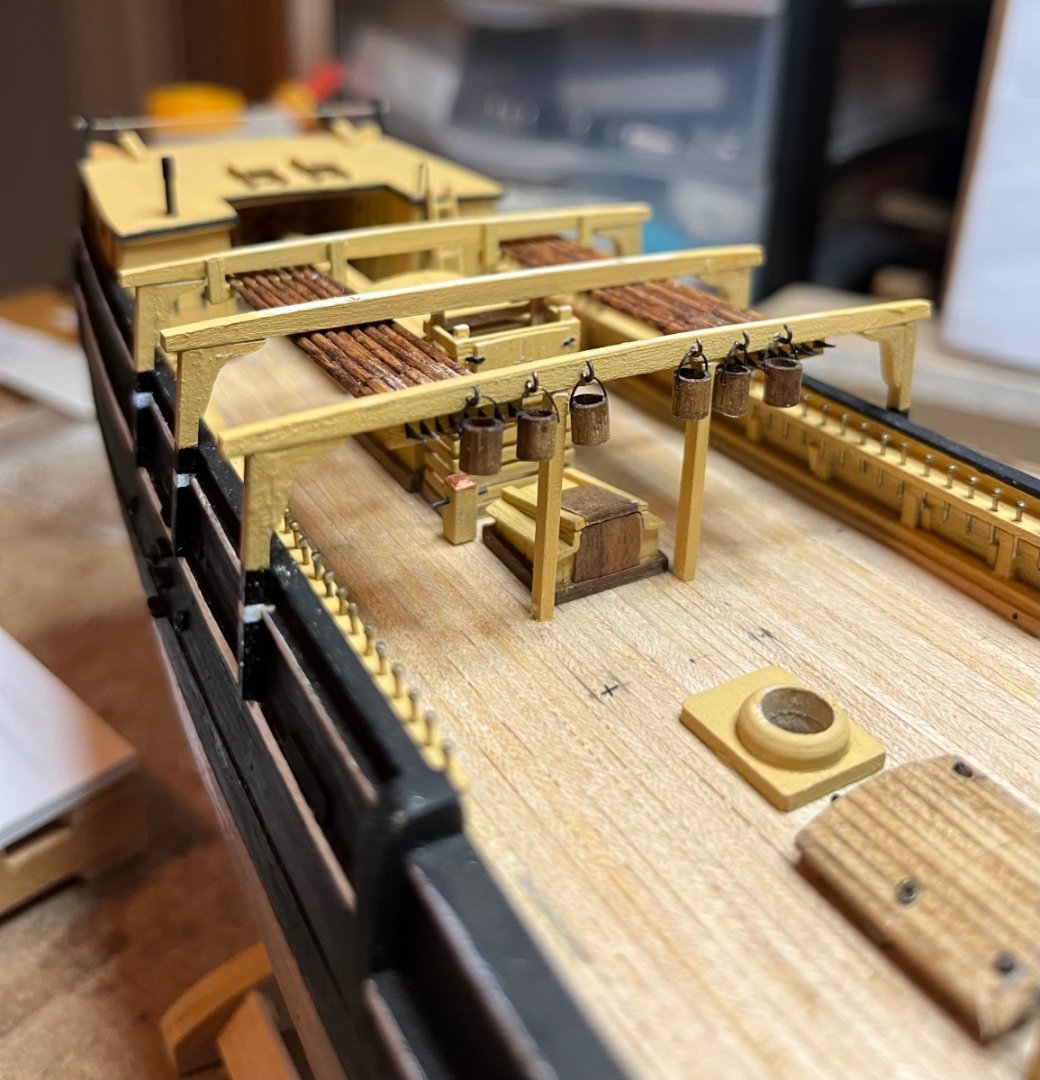
When all is said and done I think it does the job at 1:96 scale. I will finish up the roof but wait to attach it. I still have some eyebolts and assorted small things to place on the bulwarks. It would have been easier if I put those in first but I forgot about them and got excited about putting in the supports. That’s okay though because it would not be the first time I did something the hard way. 😜😂
Tom
- GrandpaPhil, John Ruy, Jack12477 and 2 others
-
5
-
1 hour ago, TBlack said:
Well, Tom, you can always bring the model to the conference at whatever stage it's in. We'd love to see the real thing.
Tom
I don’t mind showing it at club meetings and such but I would rather wait till it is finished before I show it at a conference.
Tom -
Hi Papa
It is looking good. Maybe a local pet store has an octopus you could borrow for a bit!😂😜. Keep at it. Your Morgan is turning out great.
Tom
-
Made some tiny check that, very tiny buckets that will hang from the forward beam of the shelter/boat bearer. Amazing how many details and side diversions keep popping up as I go along. 🙂

I was hoping to finish in time for the next Northeast Conference in April but that doesn’t seem probable right now … unless my boss lets me work on it during working hours. 😜😂. Yeah right, well there is always the next show.
Tom
-
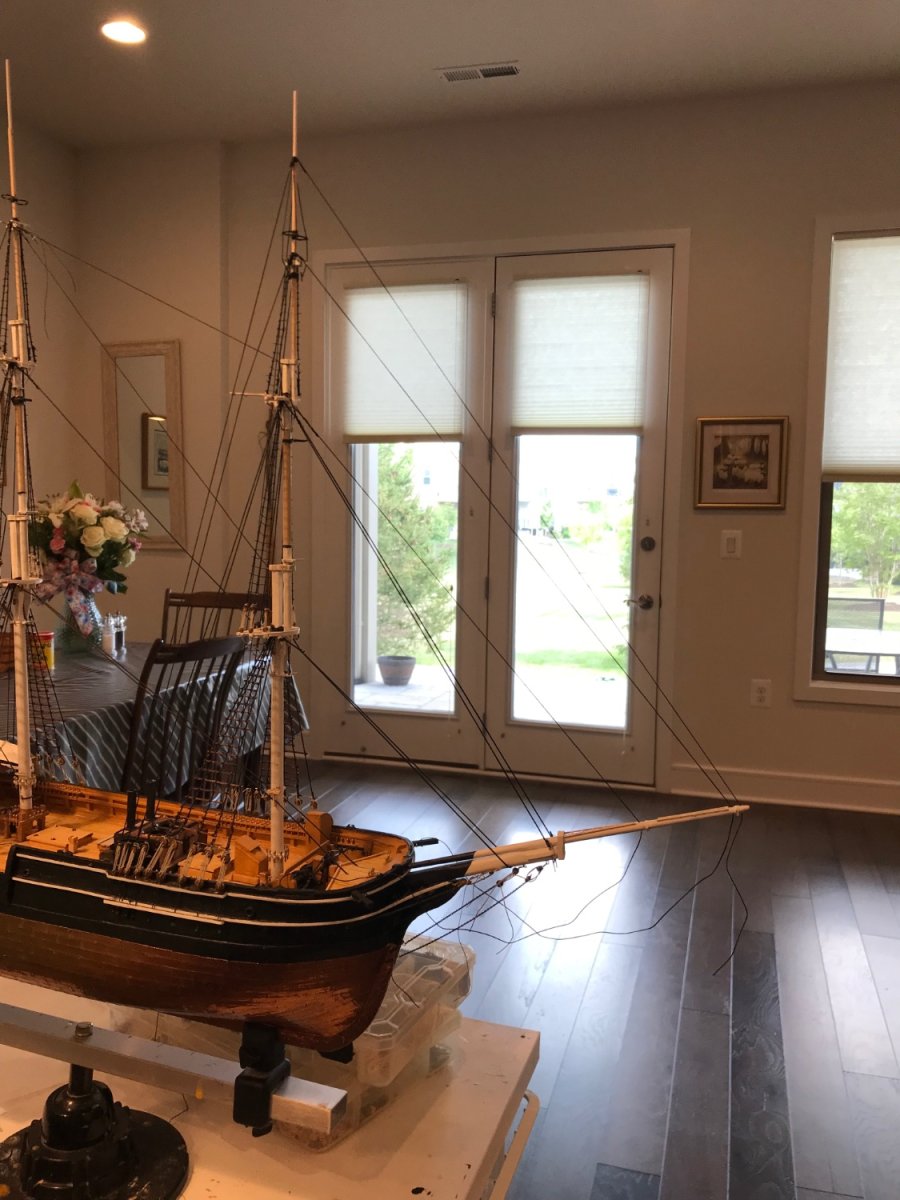
8 minutes ago, Papa said:
The fore mast is now rigged up to the royal. The flowers on the table in the background are for our 56th wedding anniversary last Saturday.

Congratulations on both the rigging and your anniversary!
Tom
-
Thanks JJUSNRET. The skylight was a bit of a challenge. I usually try to build each piece as it would be done at actual scale. I found that this is often easier than trying to “fake” the build with shortcuts. The end product usually comes out better.
As for the skylight, I built the framework and then glued black threads to simulate the iron bars. Finally I put thin strips (.015”) to cover the ends of the threads to make them look like the were actually inserted into the window frames. The end pieces had little grooves filed into them to allow the thread to fit in and let the wood strips lay flat on the framework. That was probably a bit of overkill at this scale but that’s how I probably would have done it at full scale.
Glad my log is helping someone. I do most of my learning from the logs here on MSW. That is what makes this site so great!
Tom
-
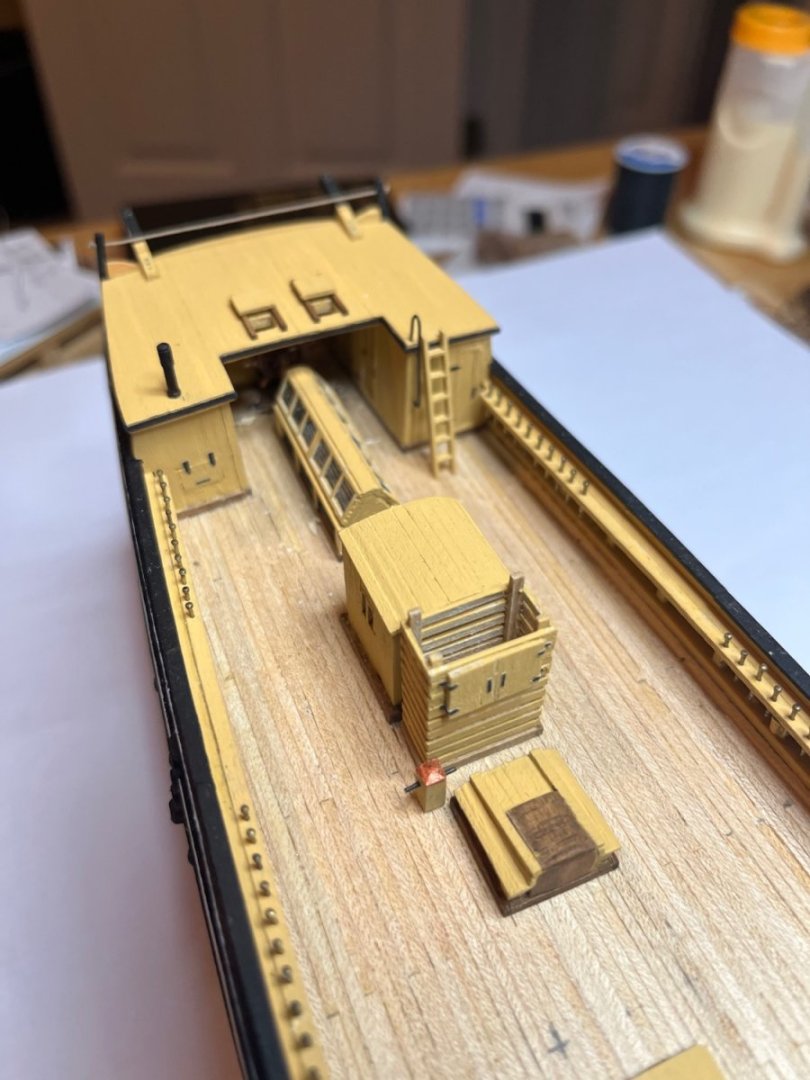
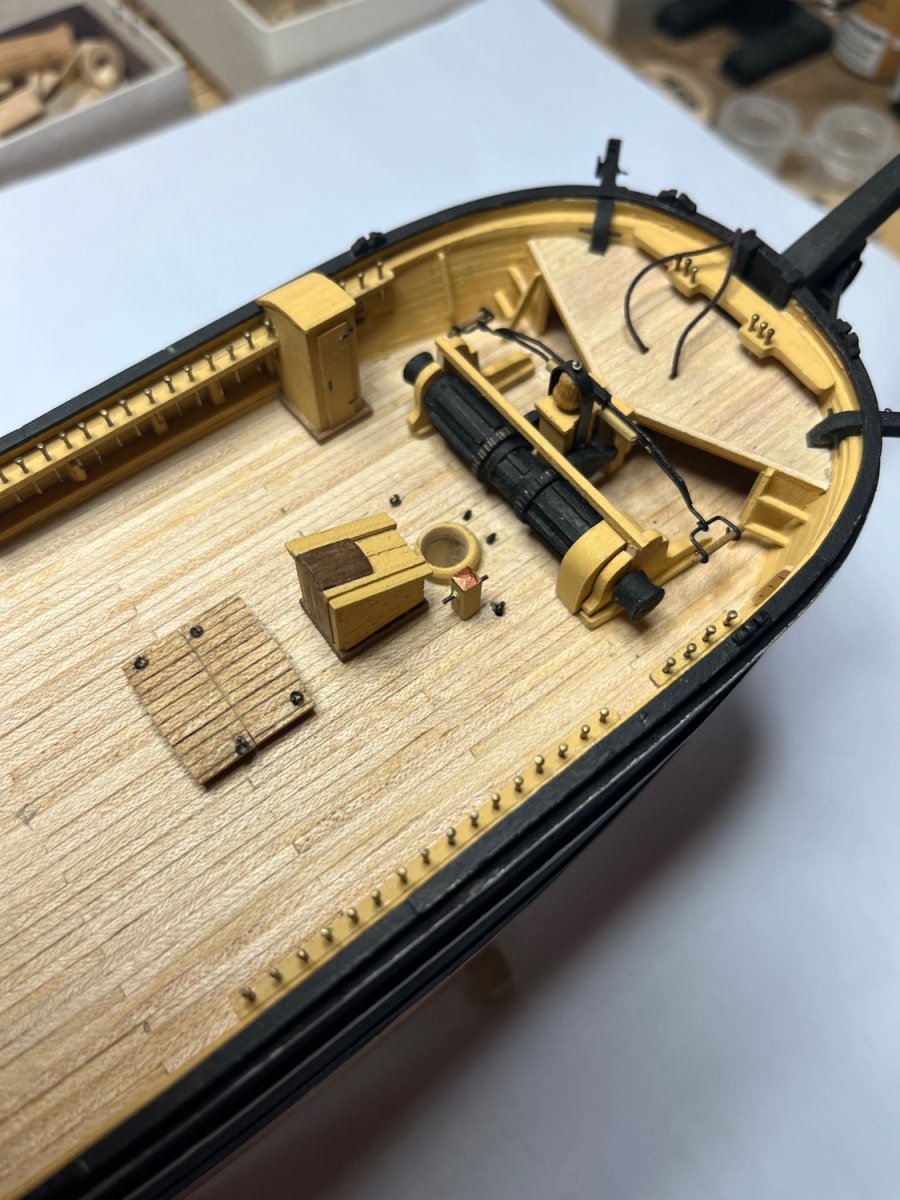
Managed to get the deck items I built a while ago mounted in position. Tryworks and boat bearer platform over the deckhouse are the next “big ticket” items. Slow but steady.

Tom
-
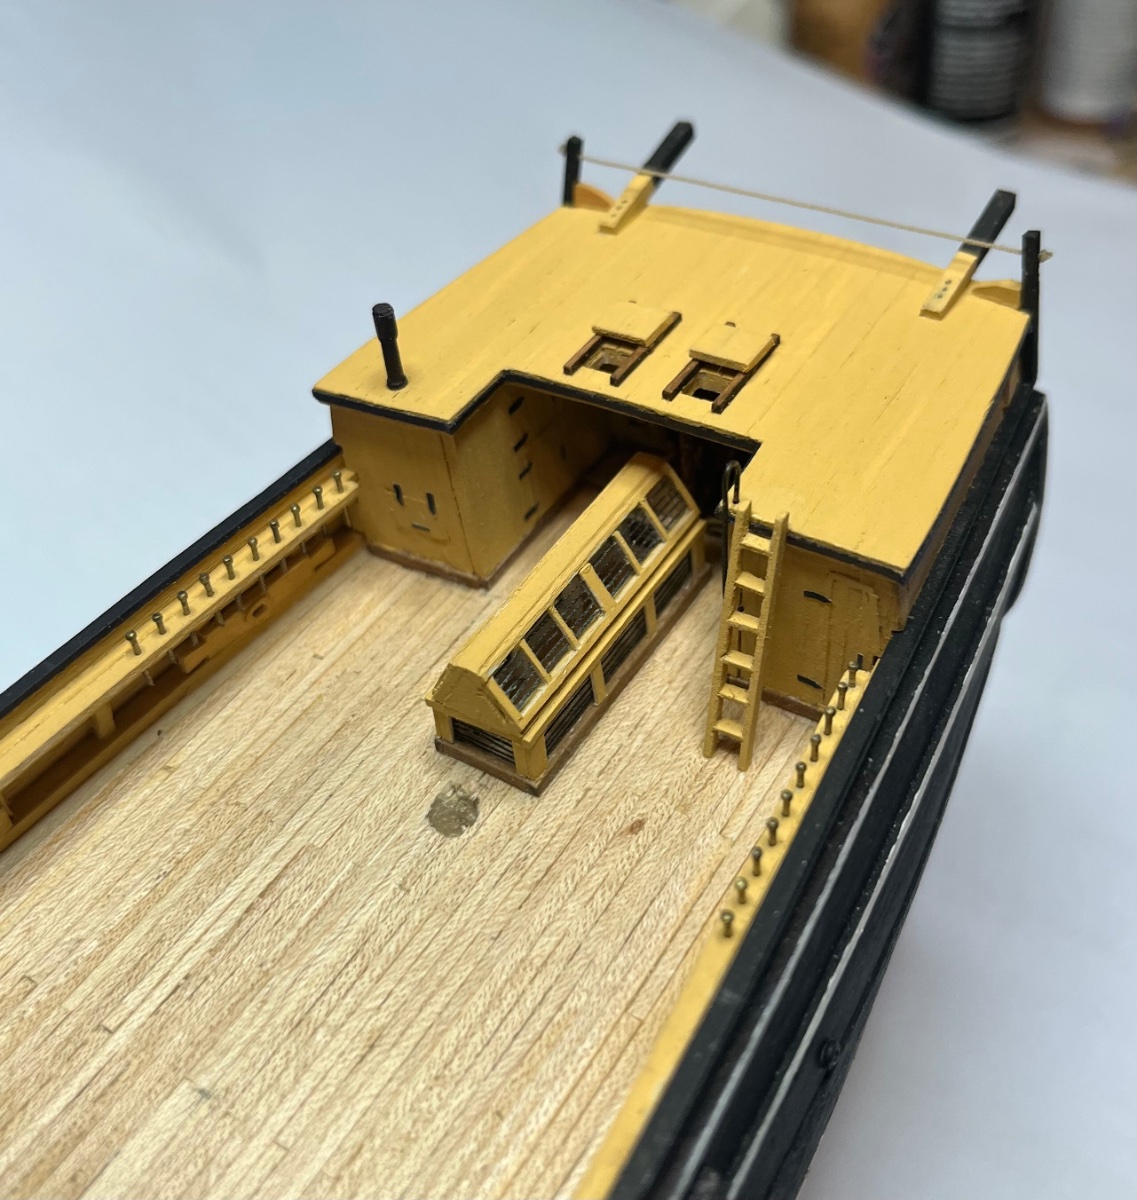
Other than some blocks and cleats mounted to the davits, the hurricane house is complete.

Now I will work my way forward with the other deck pieces. That gaping blank space on the stern is just screaming for the sculpted eagle. 😱. Maybe give it a shot after the deck stuff. 😁
Tom
-
Since we are in the middle of hurricane season, I thought it best to get the hurricane house house constructed. Without a roof it isn’t going to be much help but the weatherman said it would be calm the next few days. Should get the roof in by then. 😜😁

Tom
- GrandpaPhil, David Lester, John Ruy and 3 others
-
6
-
I am far from an expert but shouldn’t the shrouds be fixed to the channel with deadeyes and chainplates? Shrouds are standing rigging and are not held with blocks as far as I have seen but then again I am only working on my third model. I don’t think I can call myself knowledgeable yet.
Tom- Ryland Craze and mtaylor
-
2
-
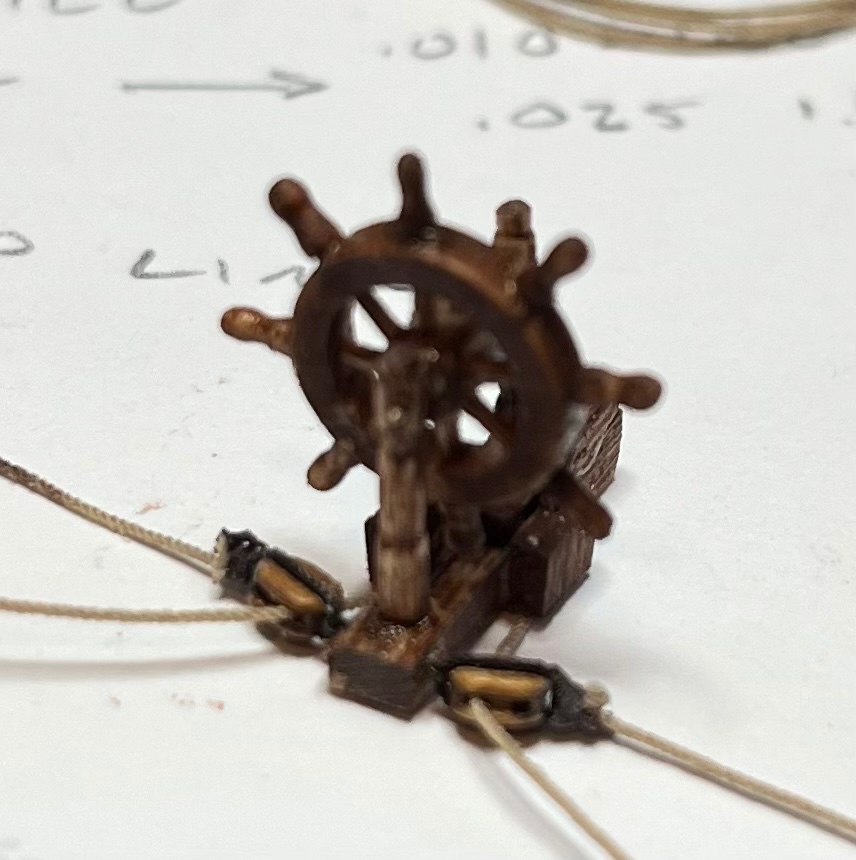
42 minutes ago, rookie said:
Yes the helm is awkward
I ended up buying a brass wheel from UK that had to be assembled
The AL Kit has a completely different helm attached to deck like 'normal' helm
Hi Rookie
One of the problems with building at 1:96 scale is it is hard to buy anything that is proportional. But then again I enjoy scratch buildIng. On the plus side the scale allows for a model that more easily fits into a room for display. Everything’s a trade off. 😜. This is the first time am I am building at this scale and for me, this is definitely as small as I want to go.
Tom
-
-
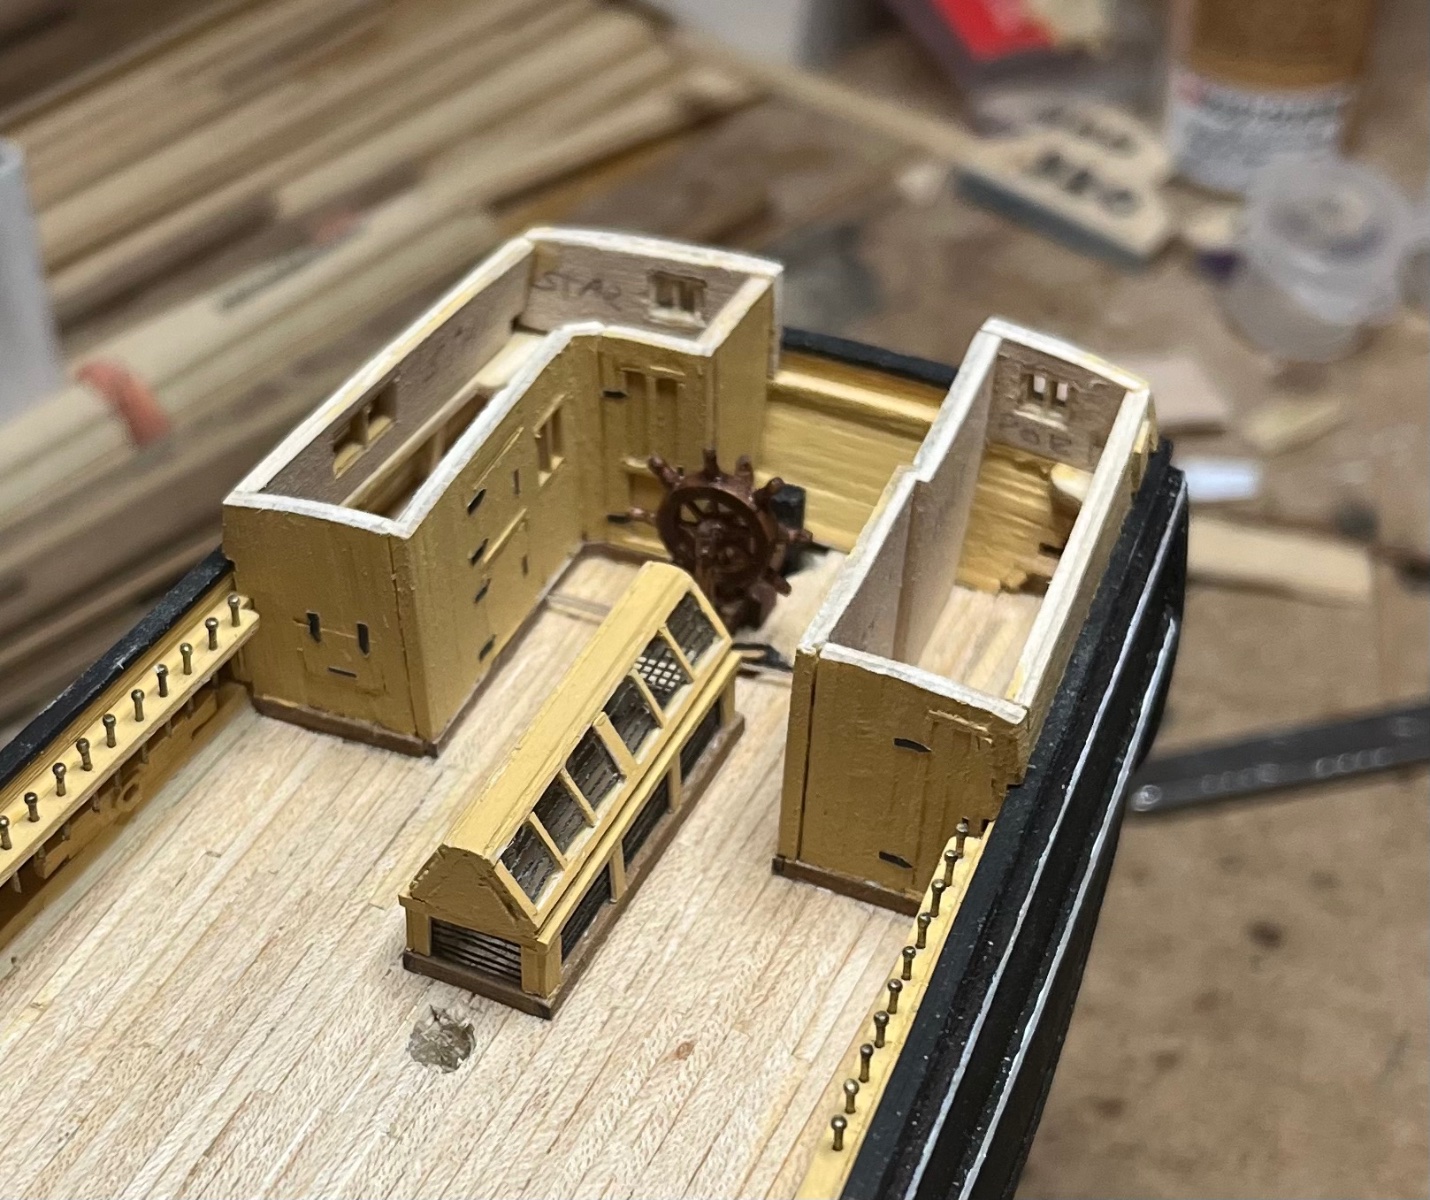
Life has been keeping me pretty busy lately but I did manage to build a tiny helm. It took a couple of tries but I think I finally got it. It was a lot of work for something that is going to be mostly obscured by the hurricane house roof and sky light, but I know it’s their and that is what counts. 😜😁
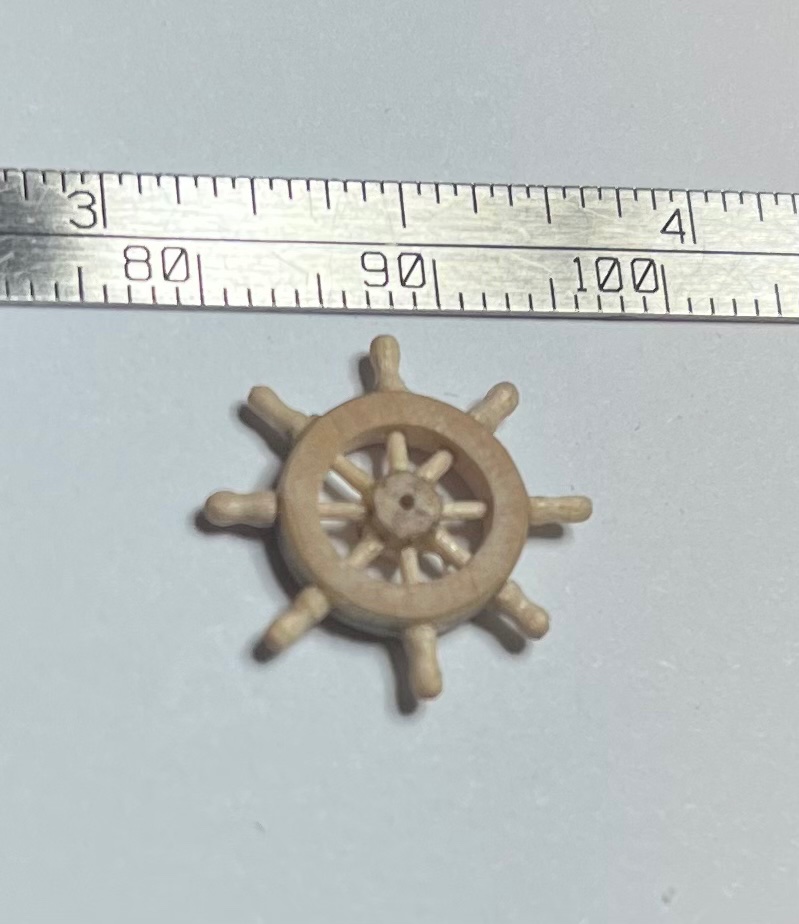
I can start to put some of the deck structures in place after I finish up the posts and such that the helm is mounted on. I am still not “feeling it” yet to try sculpting the eagle on the stern but in time I will find the courage I’m sure. 😁😜
Tom
-
Hi Papa
That’s not hard to do. There are a million lines. 😜 I actually think that putting those on after the heavier lines for the mast are in place and set. On my last build the back stays loosened up an became slack after all the others lines were set. Had to redo a few of them.
Tom -
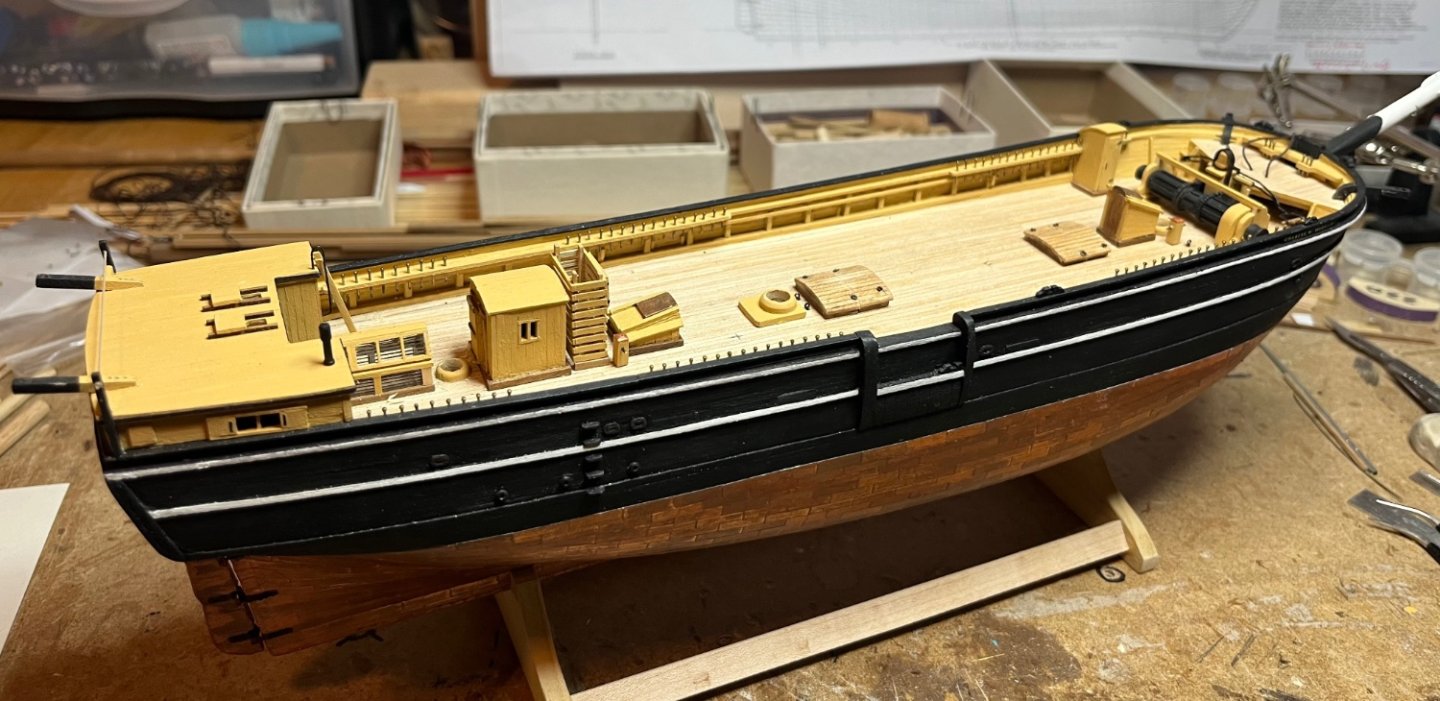
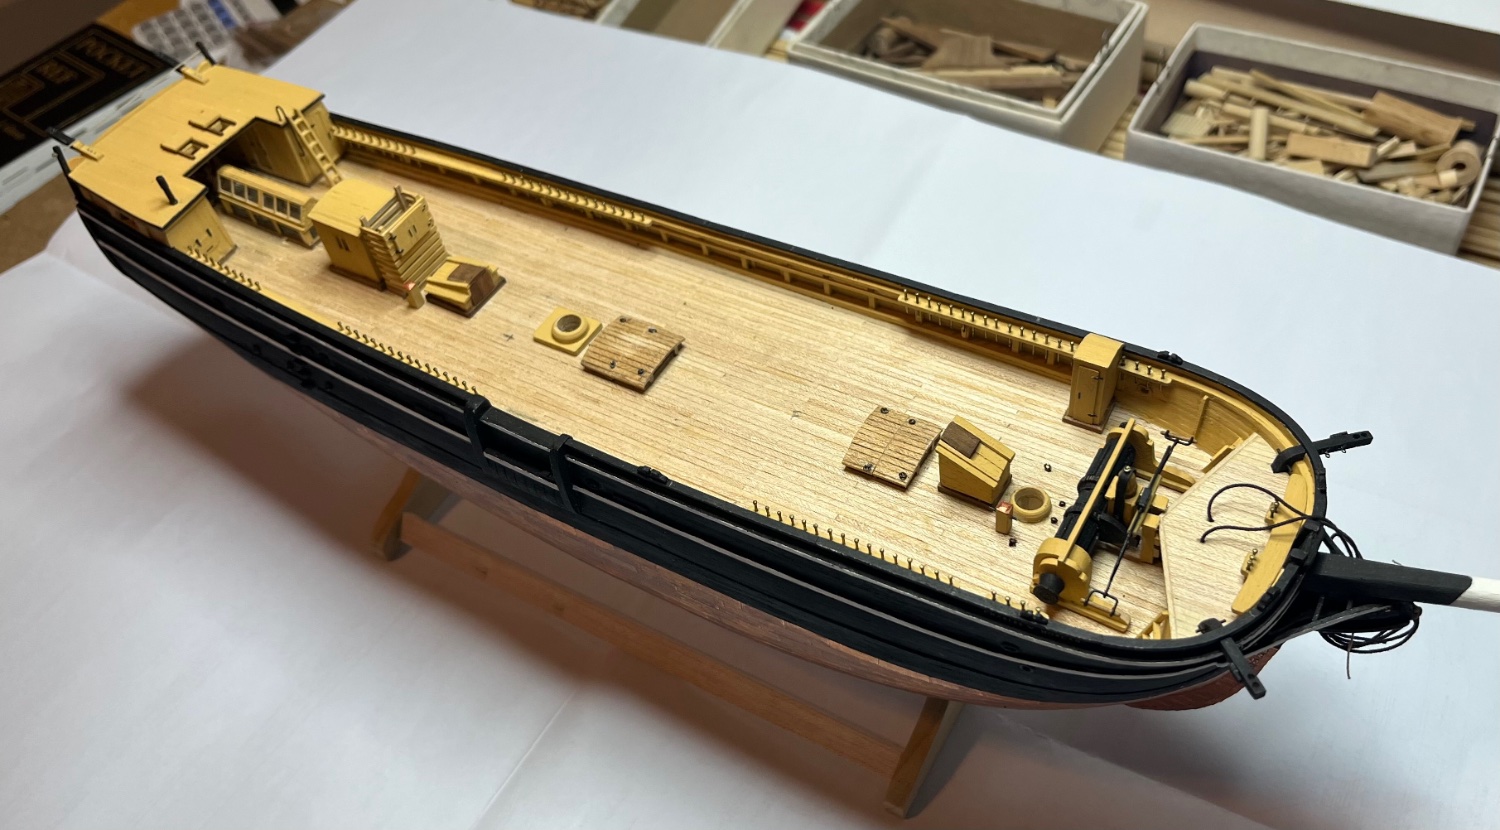
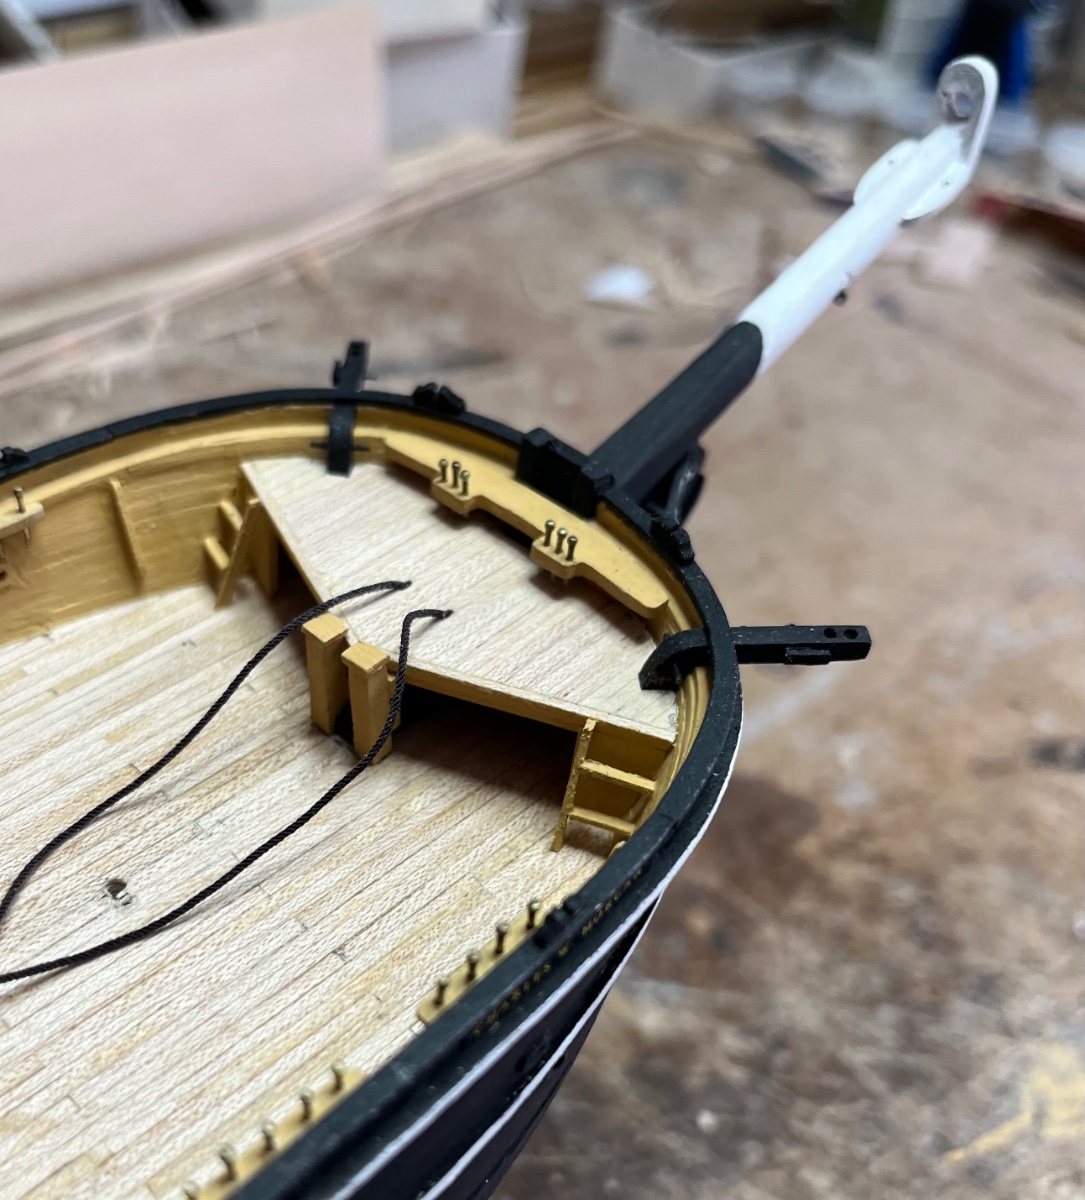
Summertime progress is slow but happening. I managed to get the hull mounted to a stand which will be painted black after I finish putting in the deck pieces. Also got the anchor deck secured in place.
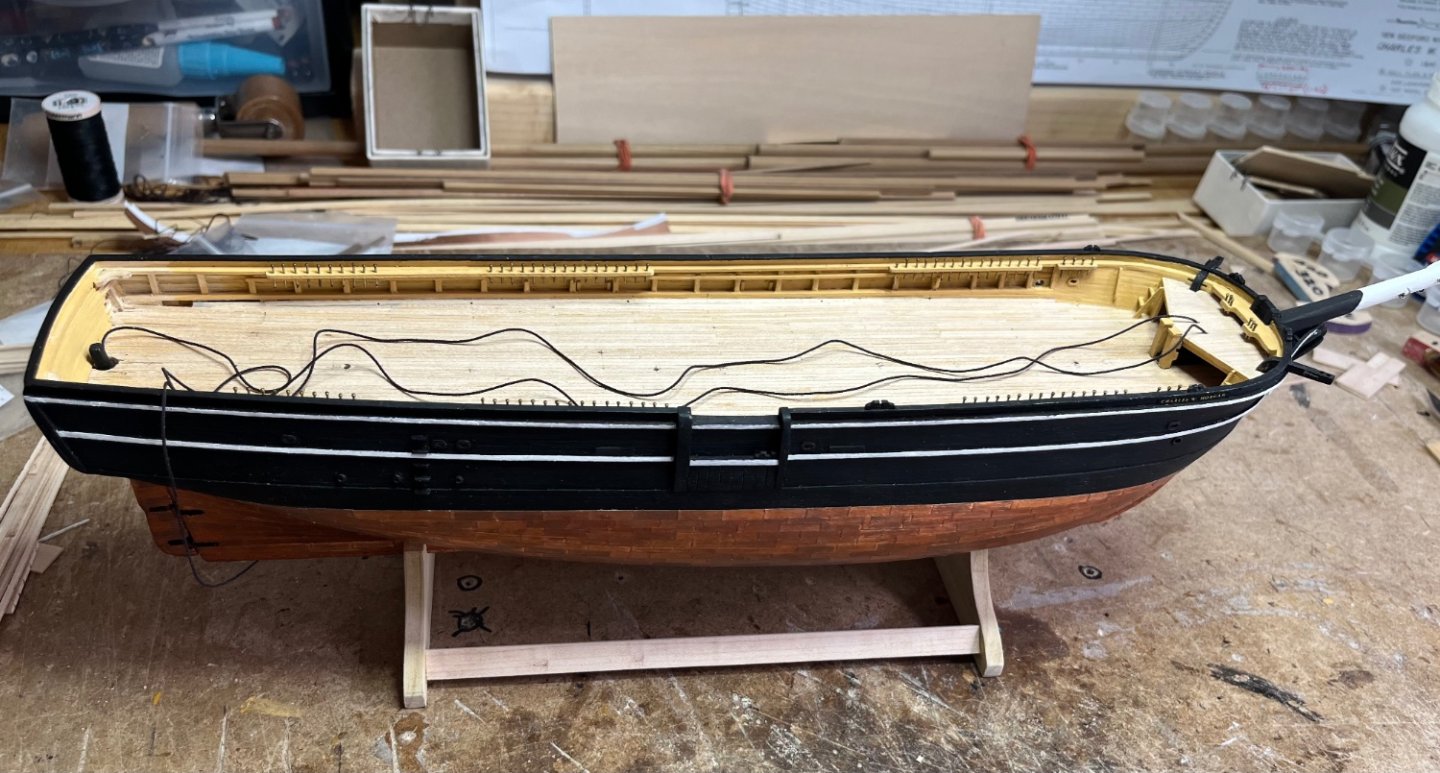

Sure makes it a bit easier having the real boat only an hour away. Using the videos and pics I took the last few times I was there to verify the more “difficult to understand” parts of the drawings. 👍Tom
- David Lester, mtaylor, rcweir and 5 others
-
8
-
-
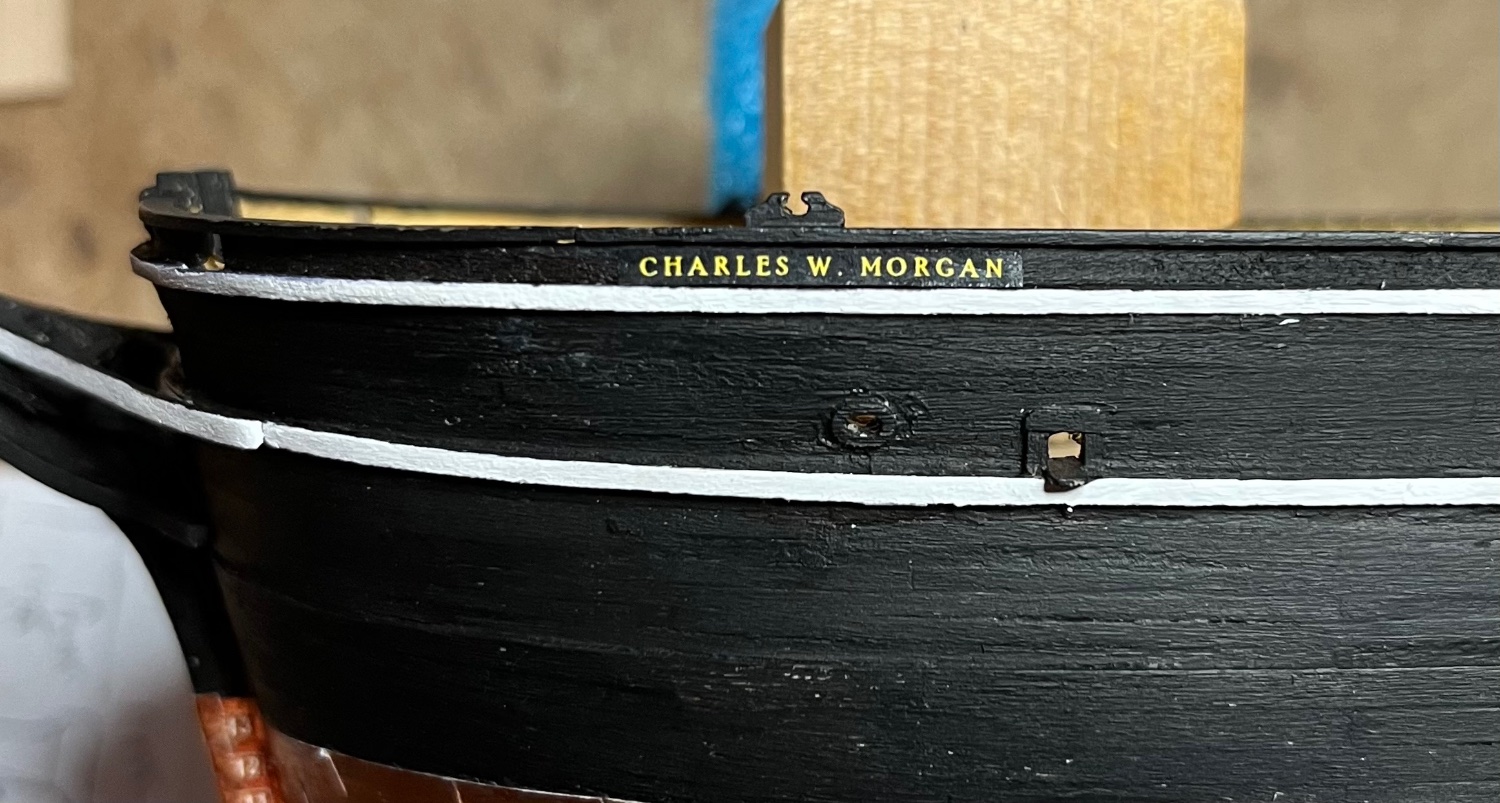
Hi Rookie
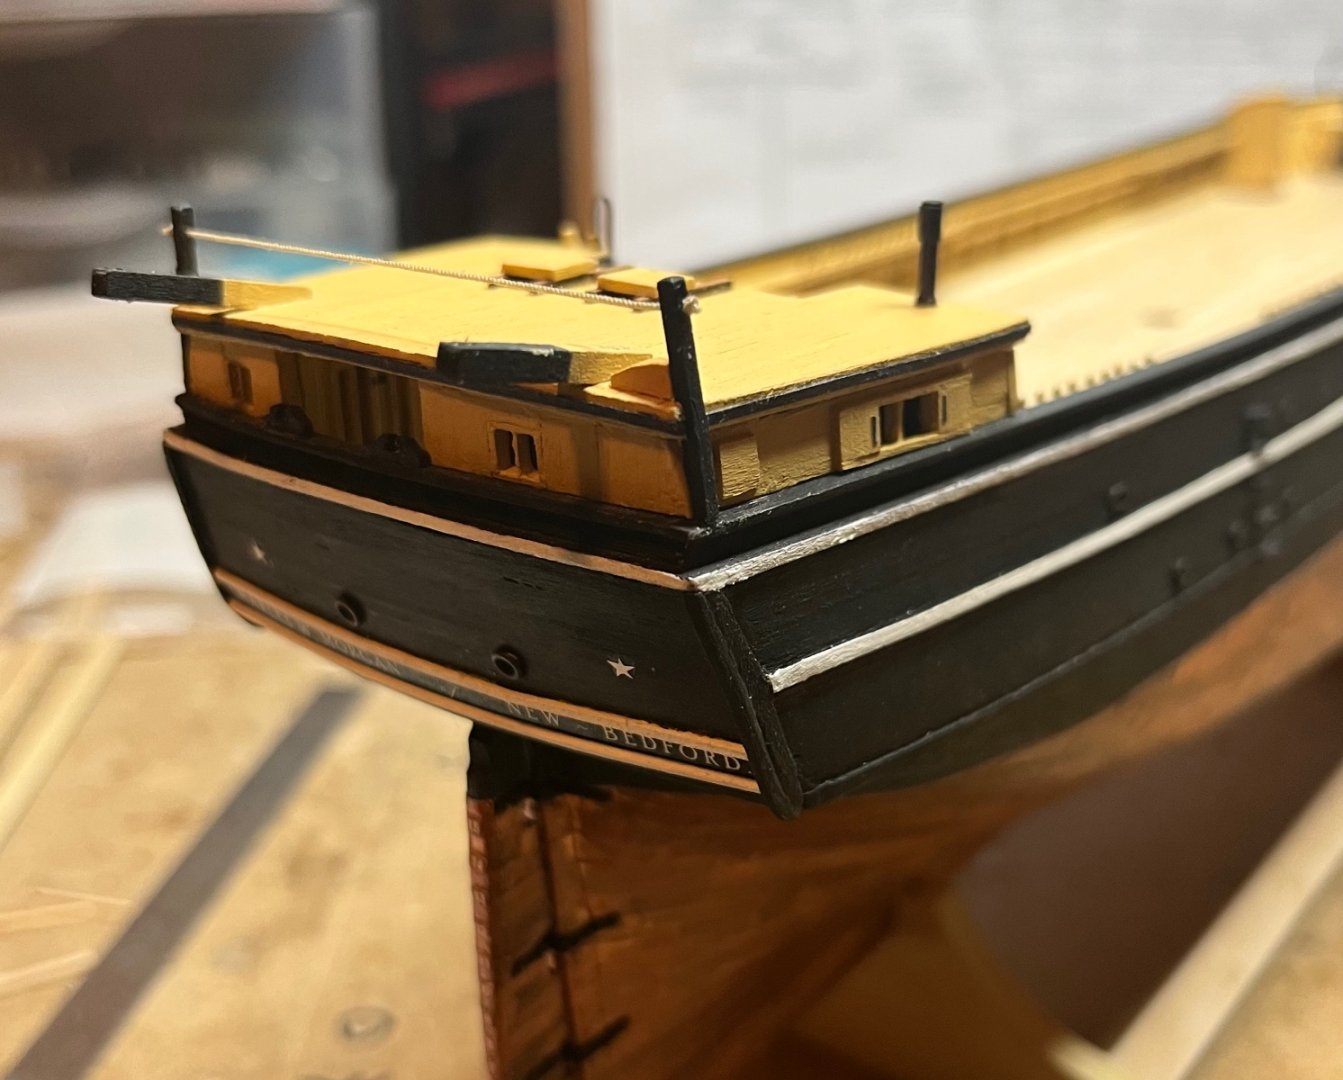
i did the lettering using Microsoft Word. I used white font on a black fill. Can also do the same using Excel. I played around with different fonts and spacing till I got what I needed then just printed it on standard 20# copier paper. Cut it out with a scalpel and glued it to the hull. Luckily on this boat the background is black so it was easy to match.
I did find that you need to use a color laser printer. An inkjet will bleed into the paper a bit which becomes a problem when working with tiny fonts. The gold color letters on the bow bulwarks isre only a 4 size font, the stern letters are 6.
Tom
-
At last I finally have an identity!

 Just make a couple of stars and what I am sure will be countless attempts at the eagle carving and the stern will be pretty much complete. 😁
Tom
- GrandpaPhil, CiscoH, BETAQDAVE and 7 others
-
10
-
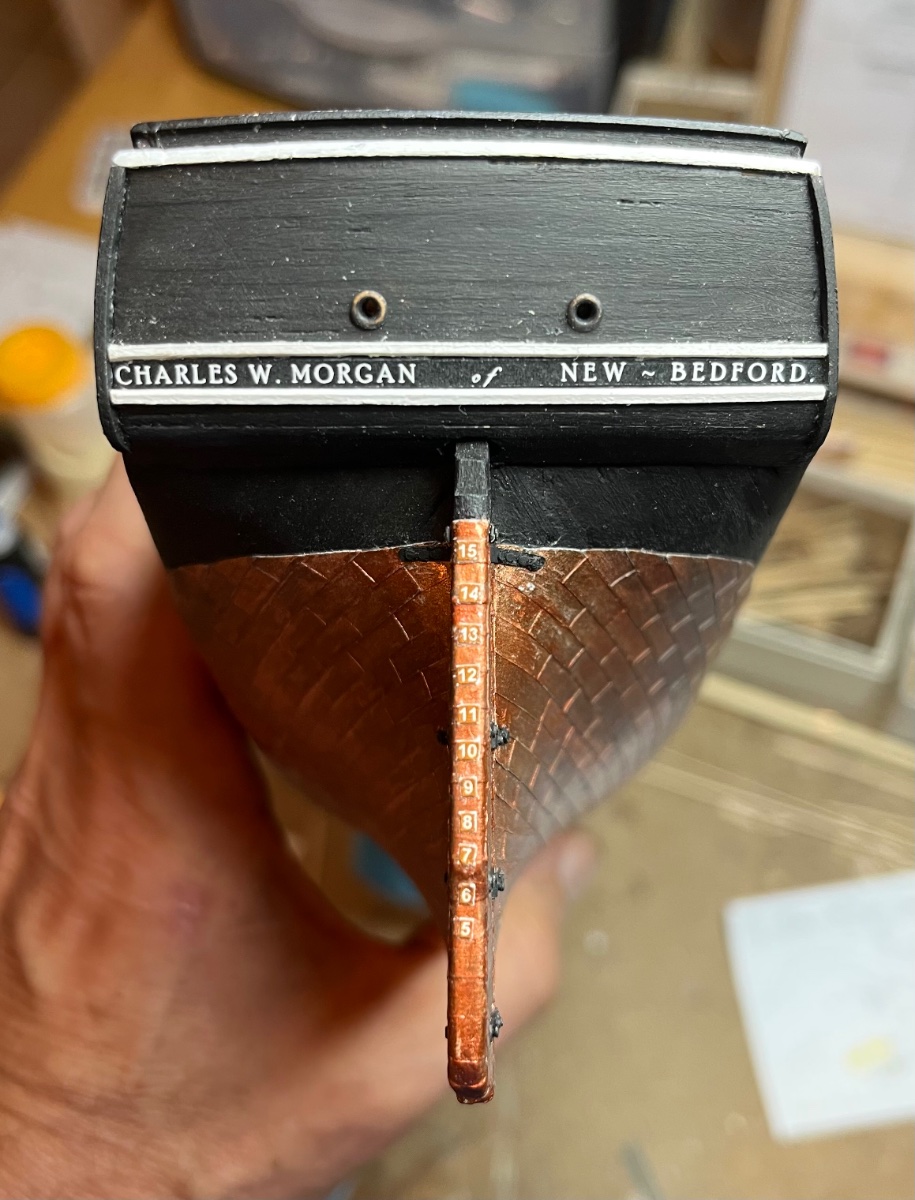
Hi Tom,
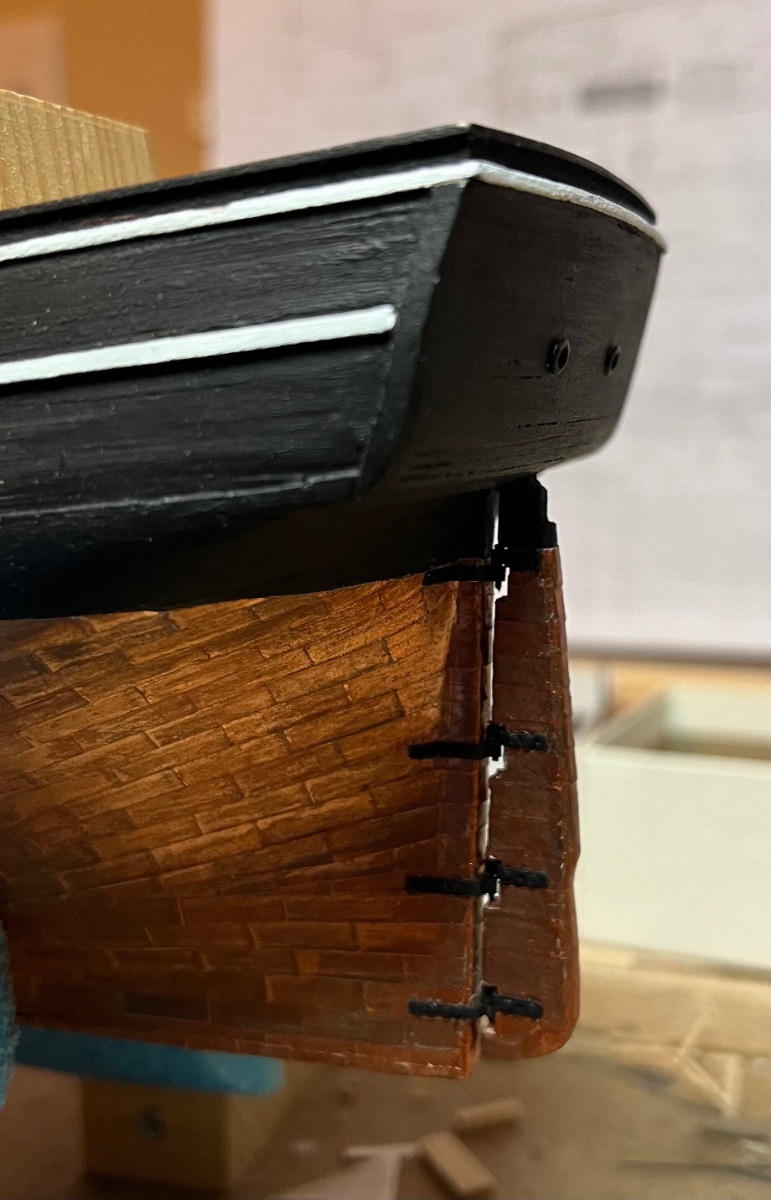
Yeah it was a bit "fiddly". I put that one in last. The lower hinges were more straight forward and easier to line up. They end up holding the rudder in place while I located the holes for the top hinge. Then tapped the brads into the holes to hold the hinge in place.
Tom
-
Fashioned some rudder hinges and attached a rudder over the weekend. It took several shots at making the hinges but finally got a set that looked respectable…. At least to me. I must admit this part was not as much fun as I would have liked it to be. Clotting the thin brass strips and properly forming them got a bit frustrating at times. 😕

I guess I will work on some of the stern details while I can still easily manipulate the hull around.
Tom


Charles W Morgan 1841 by toms10 - FINISHED - 1:96 - POB
in - Build logs for subjects built 1801 - 1850
Posted
John
You are more than welcome to have at it. I use it to taper all my masts and spars. It is plenty accurate for modeling. When I need a square section on a mast or spar, I actually file a square on the dowel and the add little “planks” on that to build it back up larger than the diameter of the mast. This technique worked great on my Leopard except for the upper spars which were quite small in diameter. The results come out the same as starting with a square piece and then planing it into an octagon and the sanding it round and it is a bit faster because there is less wood removal.
Let me know if you need any more pics or descriptions. Sometimes making tools is as much fun as the actual model, and you can’t beat the price. 😜😂
Tom