


ca.shipwright
-
Posts
483 -
Joined
-
Last visited
Content Type
Profiles
Forums
Gallery
Events
Posts posted by ca.shipwright
-
-
Geoff,
Is it an iX or an i8? How do you get to the level? I would have never thought of this in a hundred years,Thanks for sharing this.
Your Connie is coming along great. My is number 3 on the ways.
- Geoff Matson and Altduck
-
 2
2
-
11/28/2017
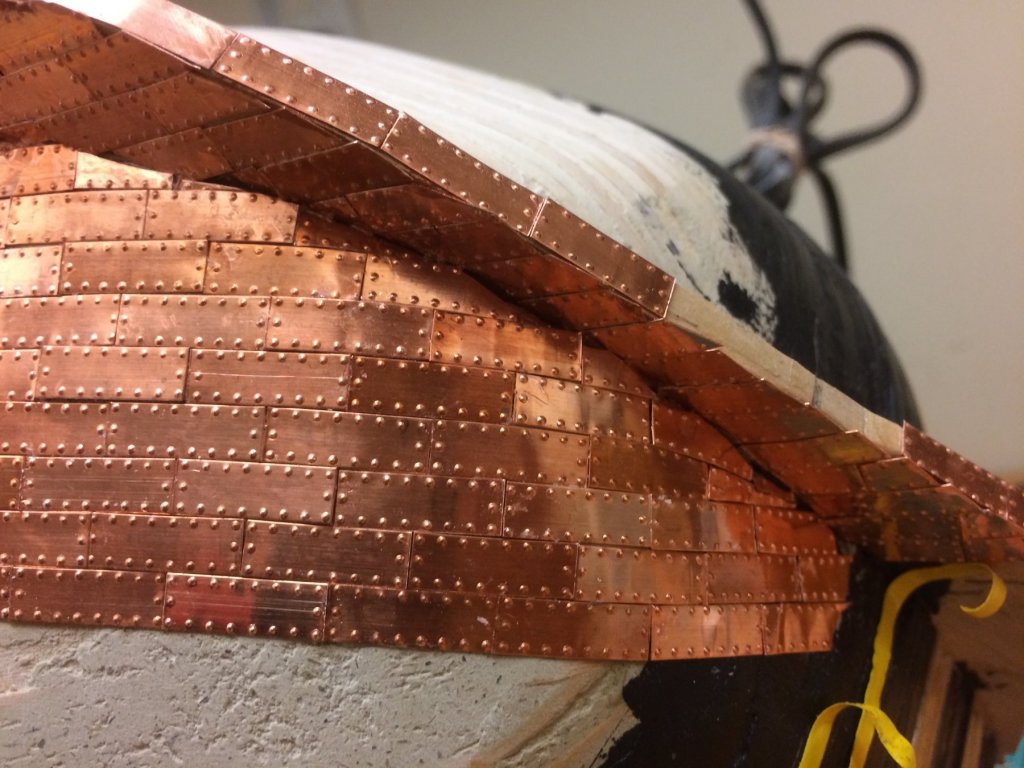
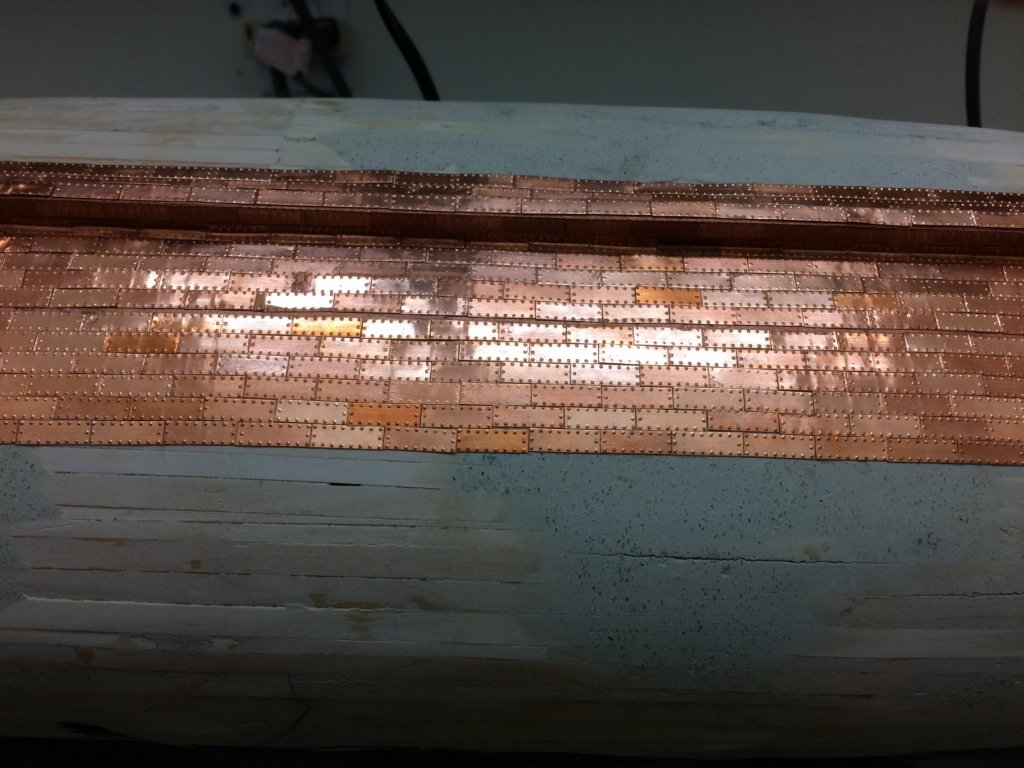
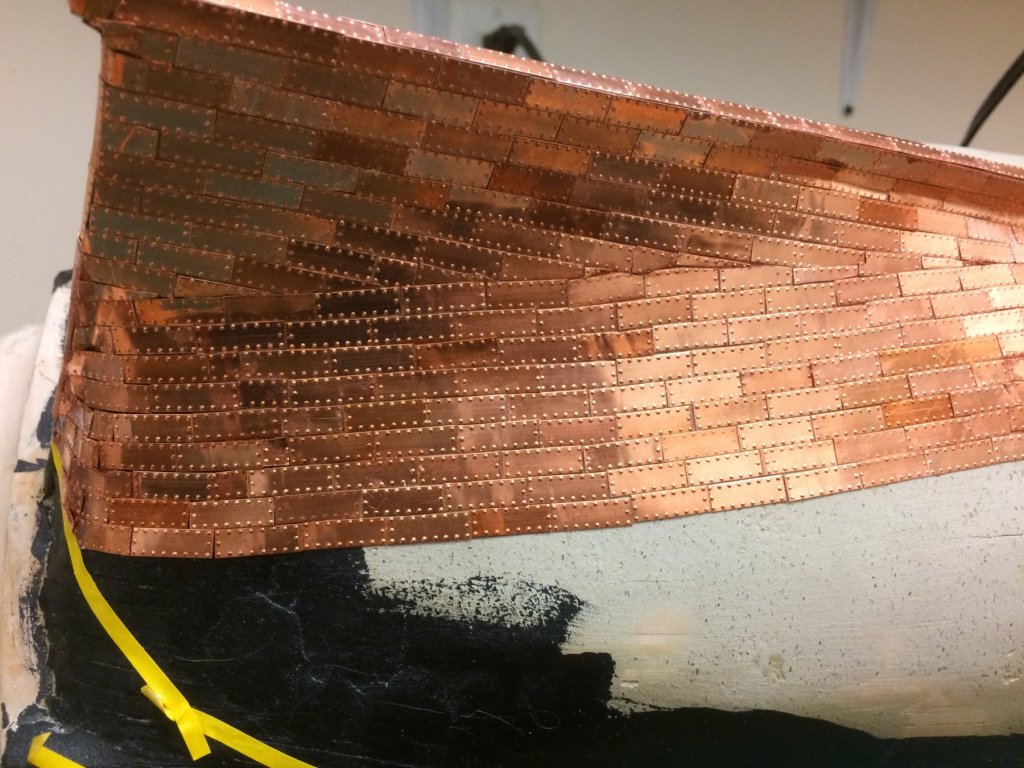
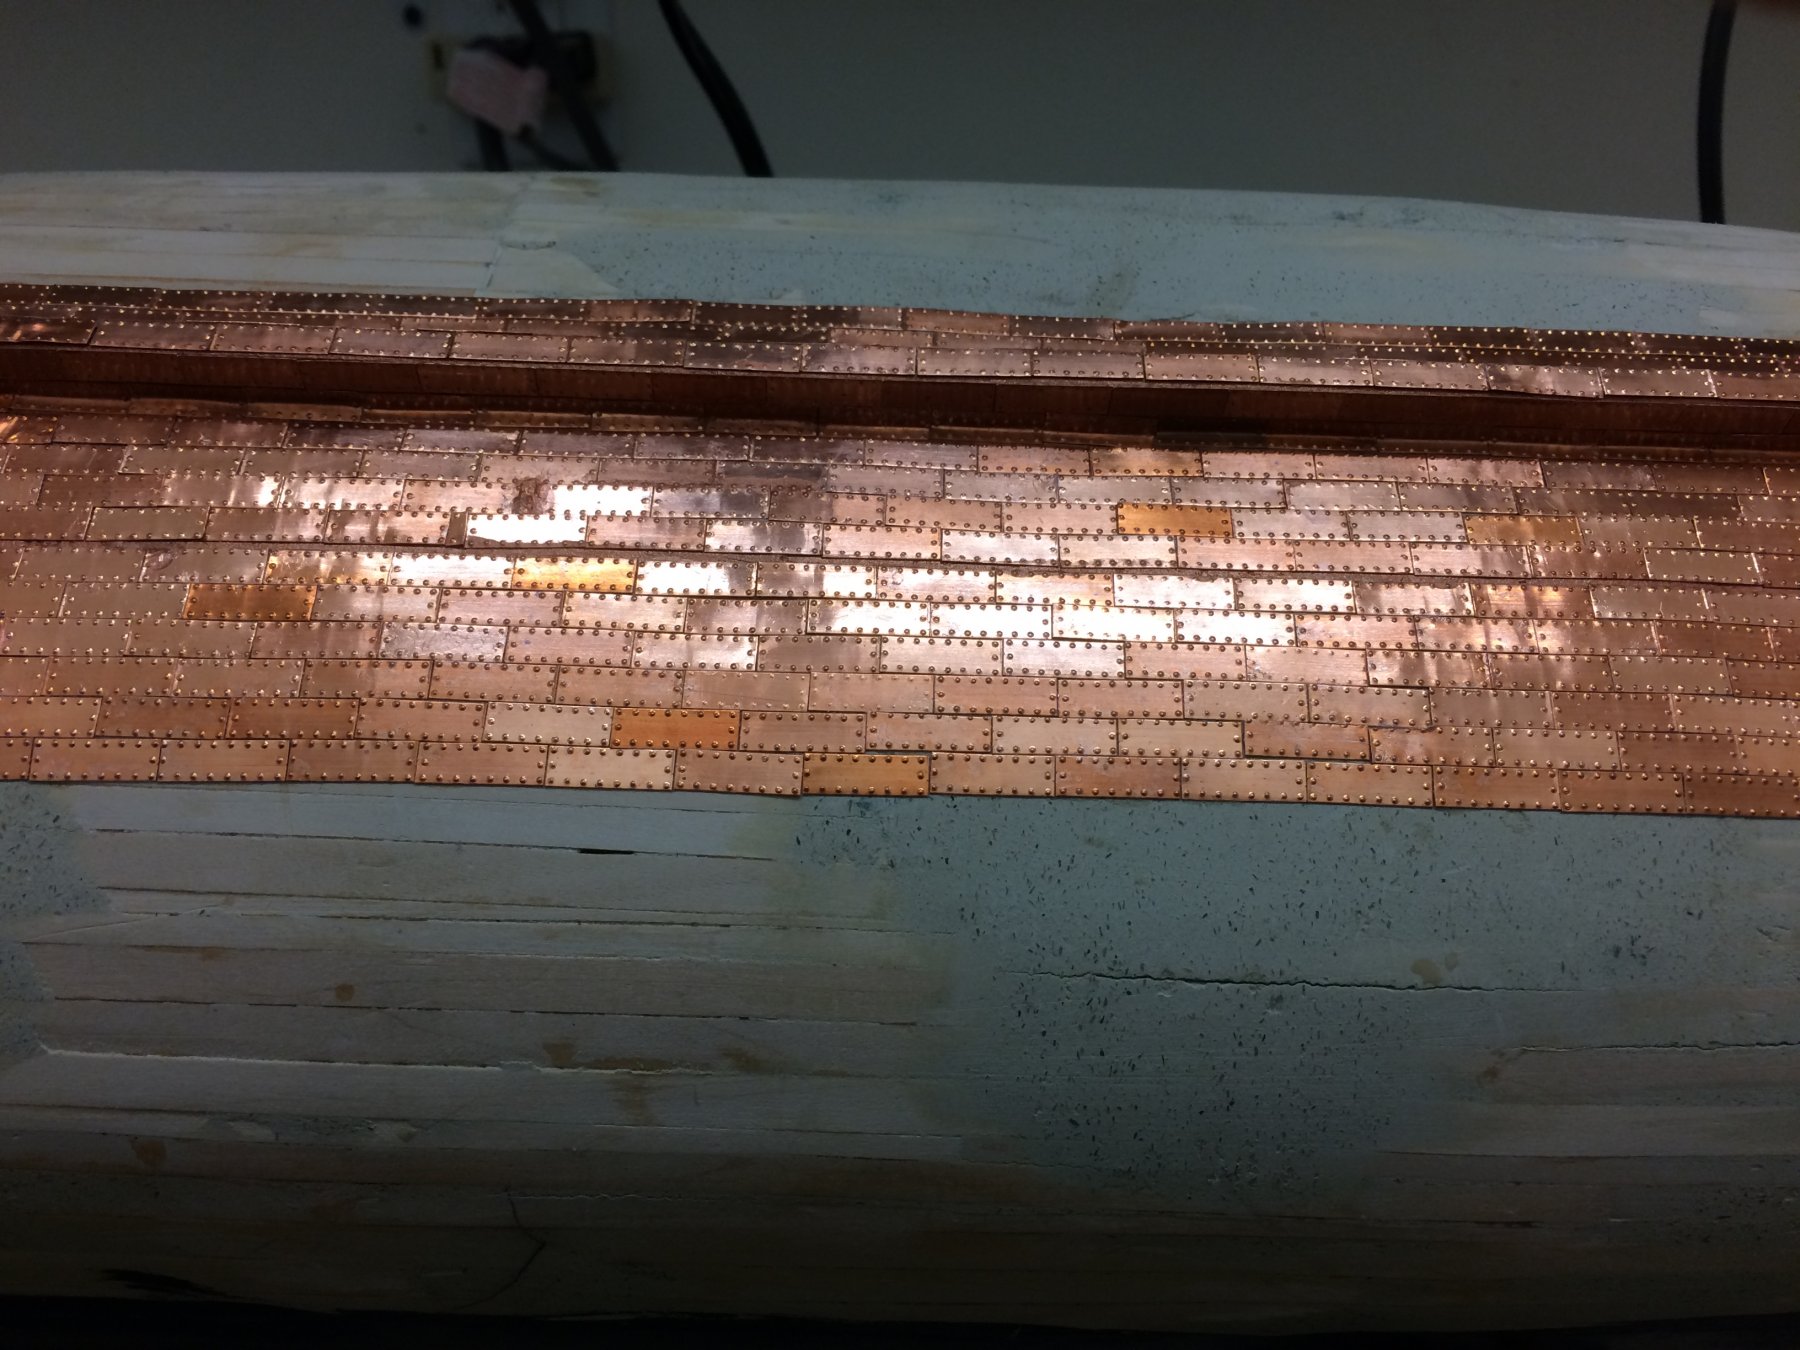
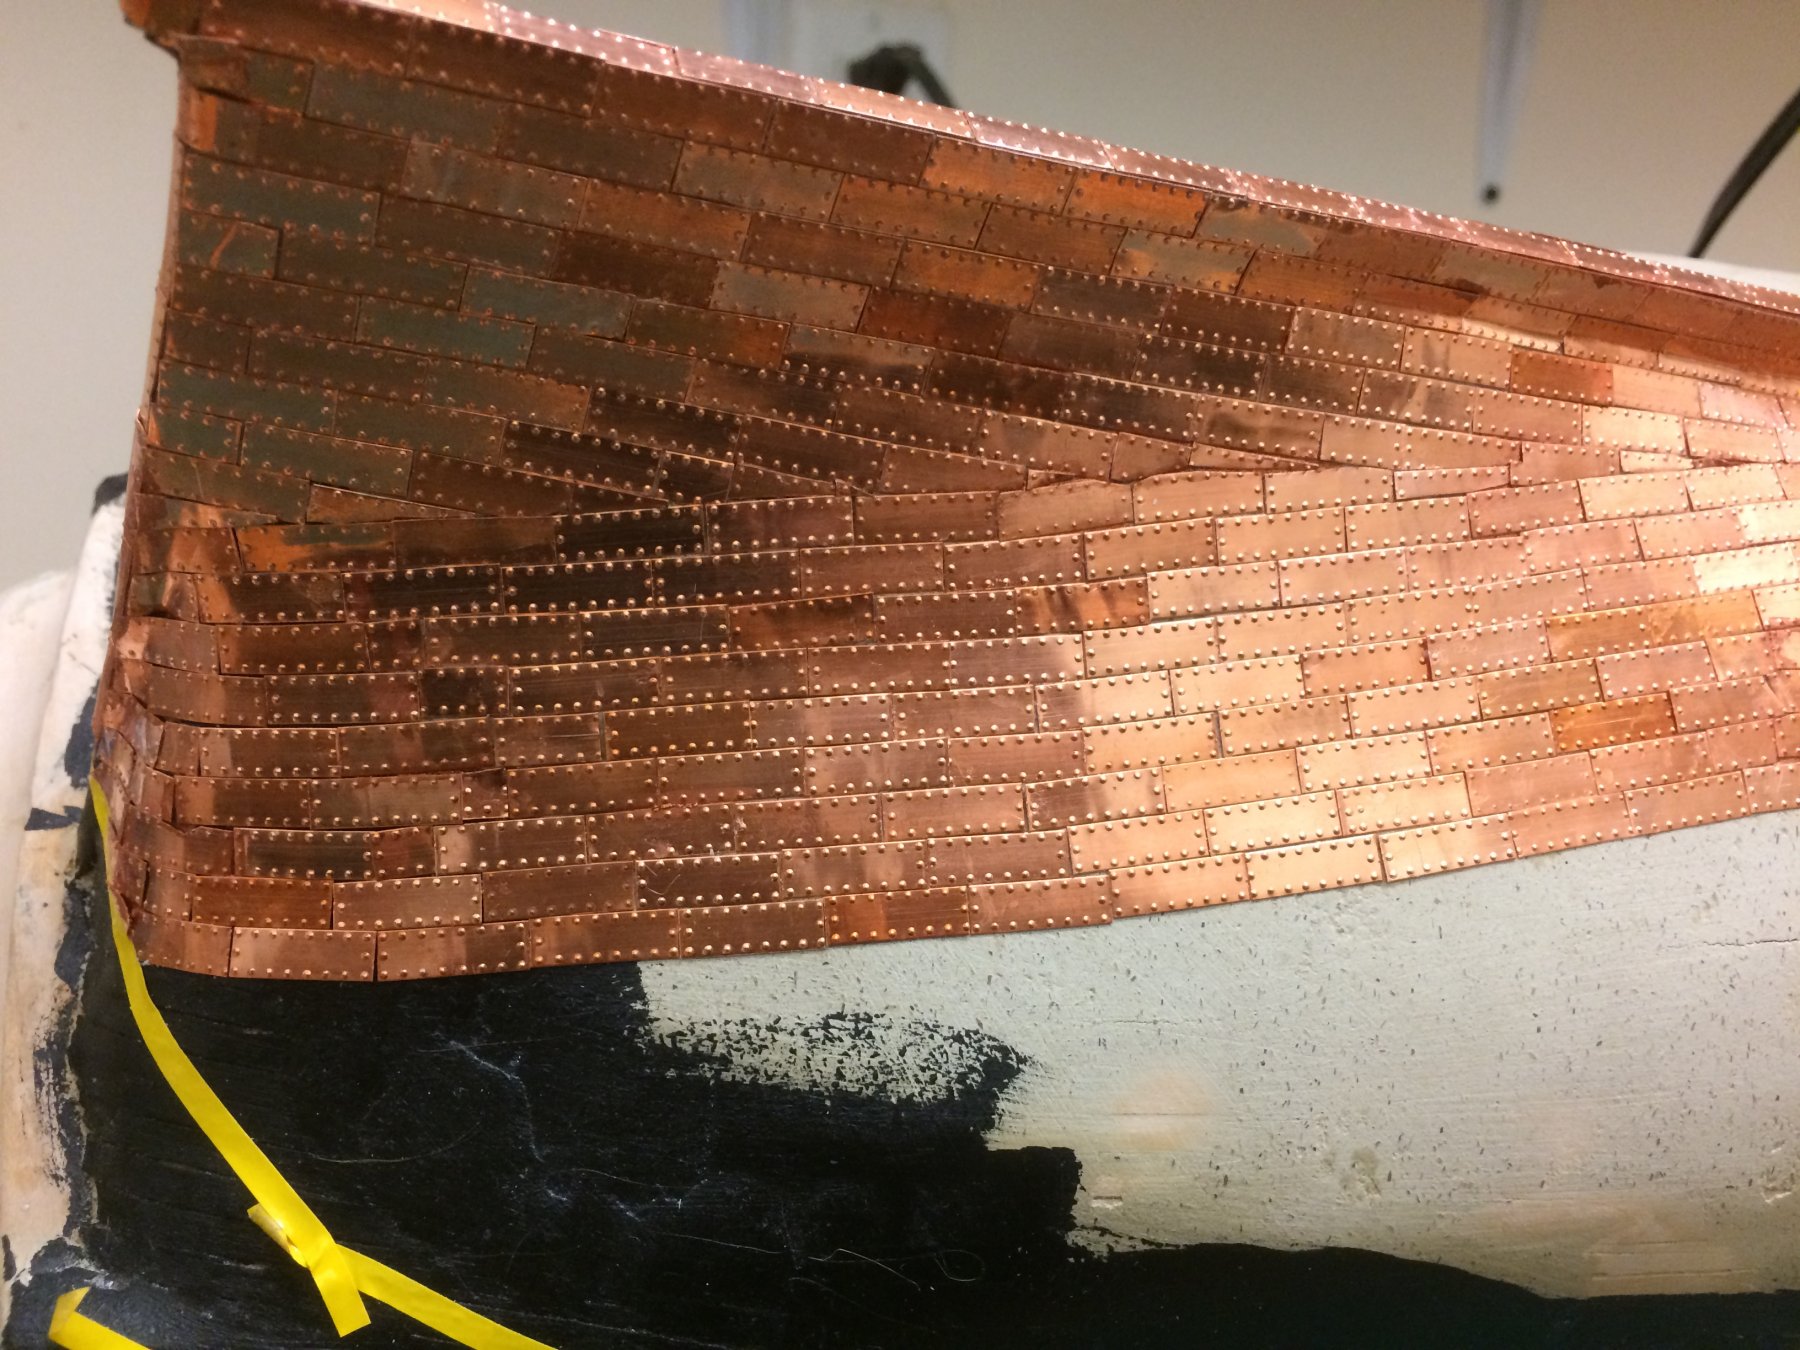
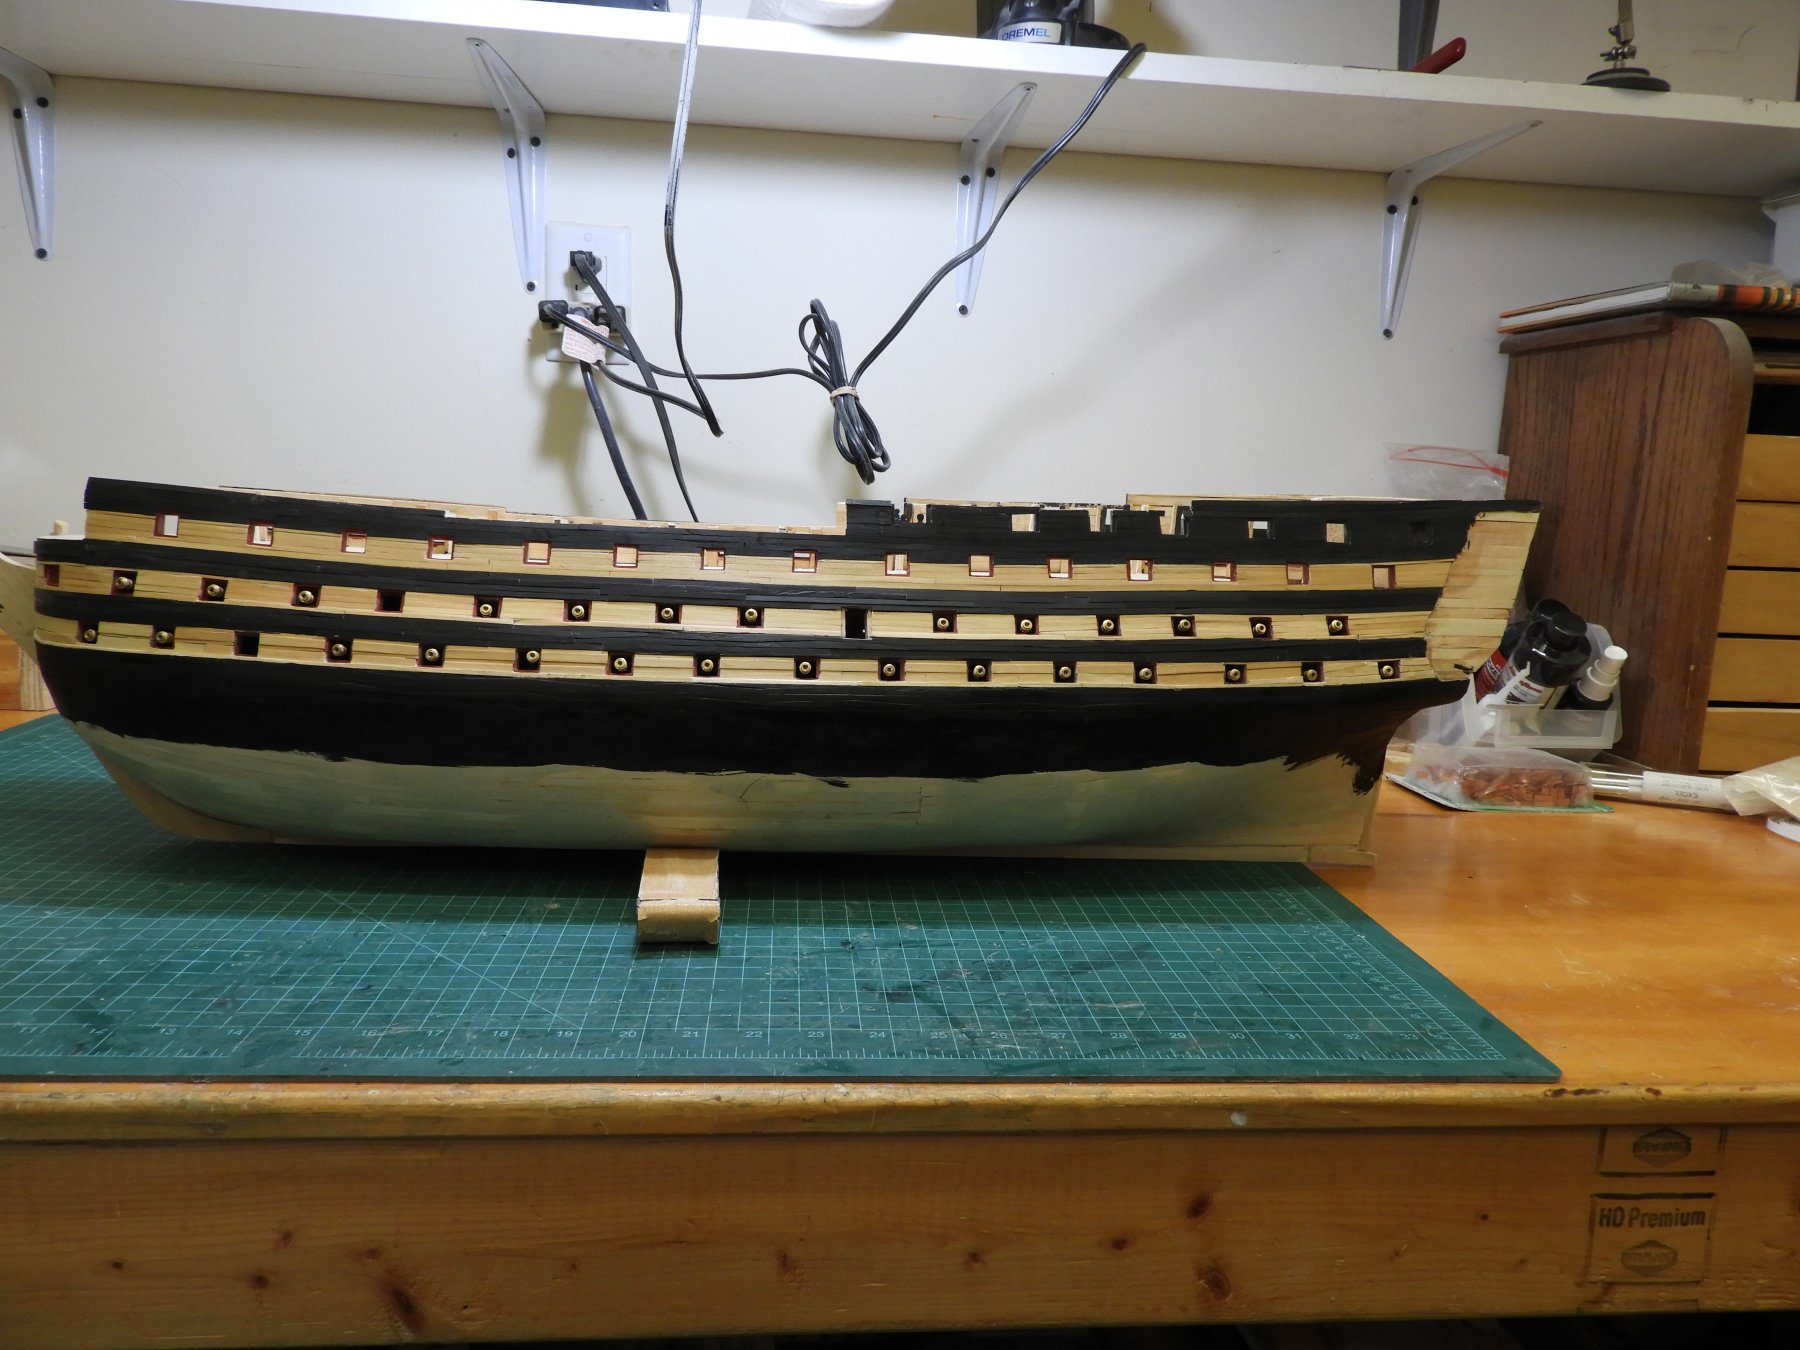
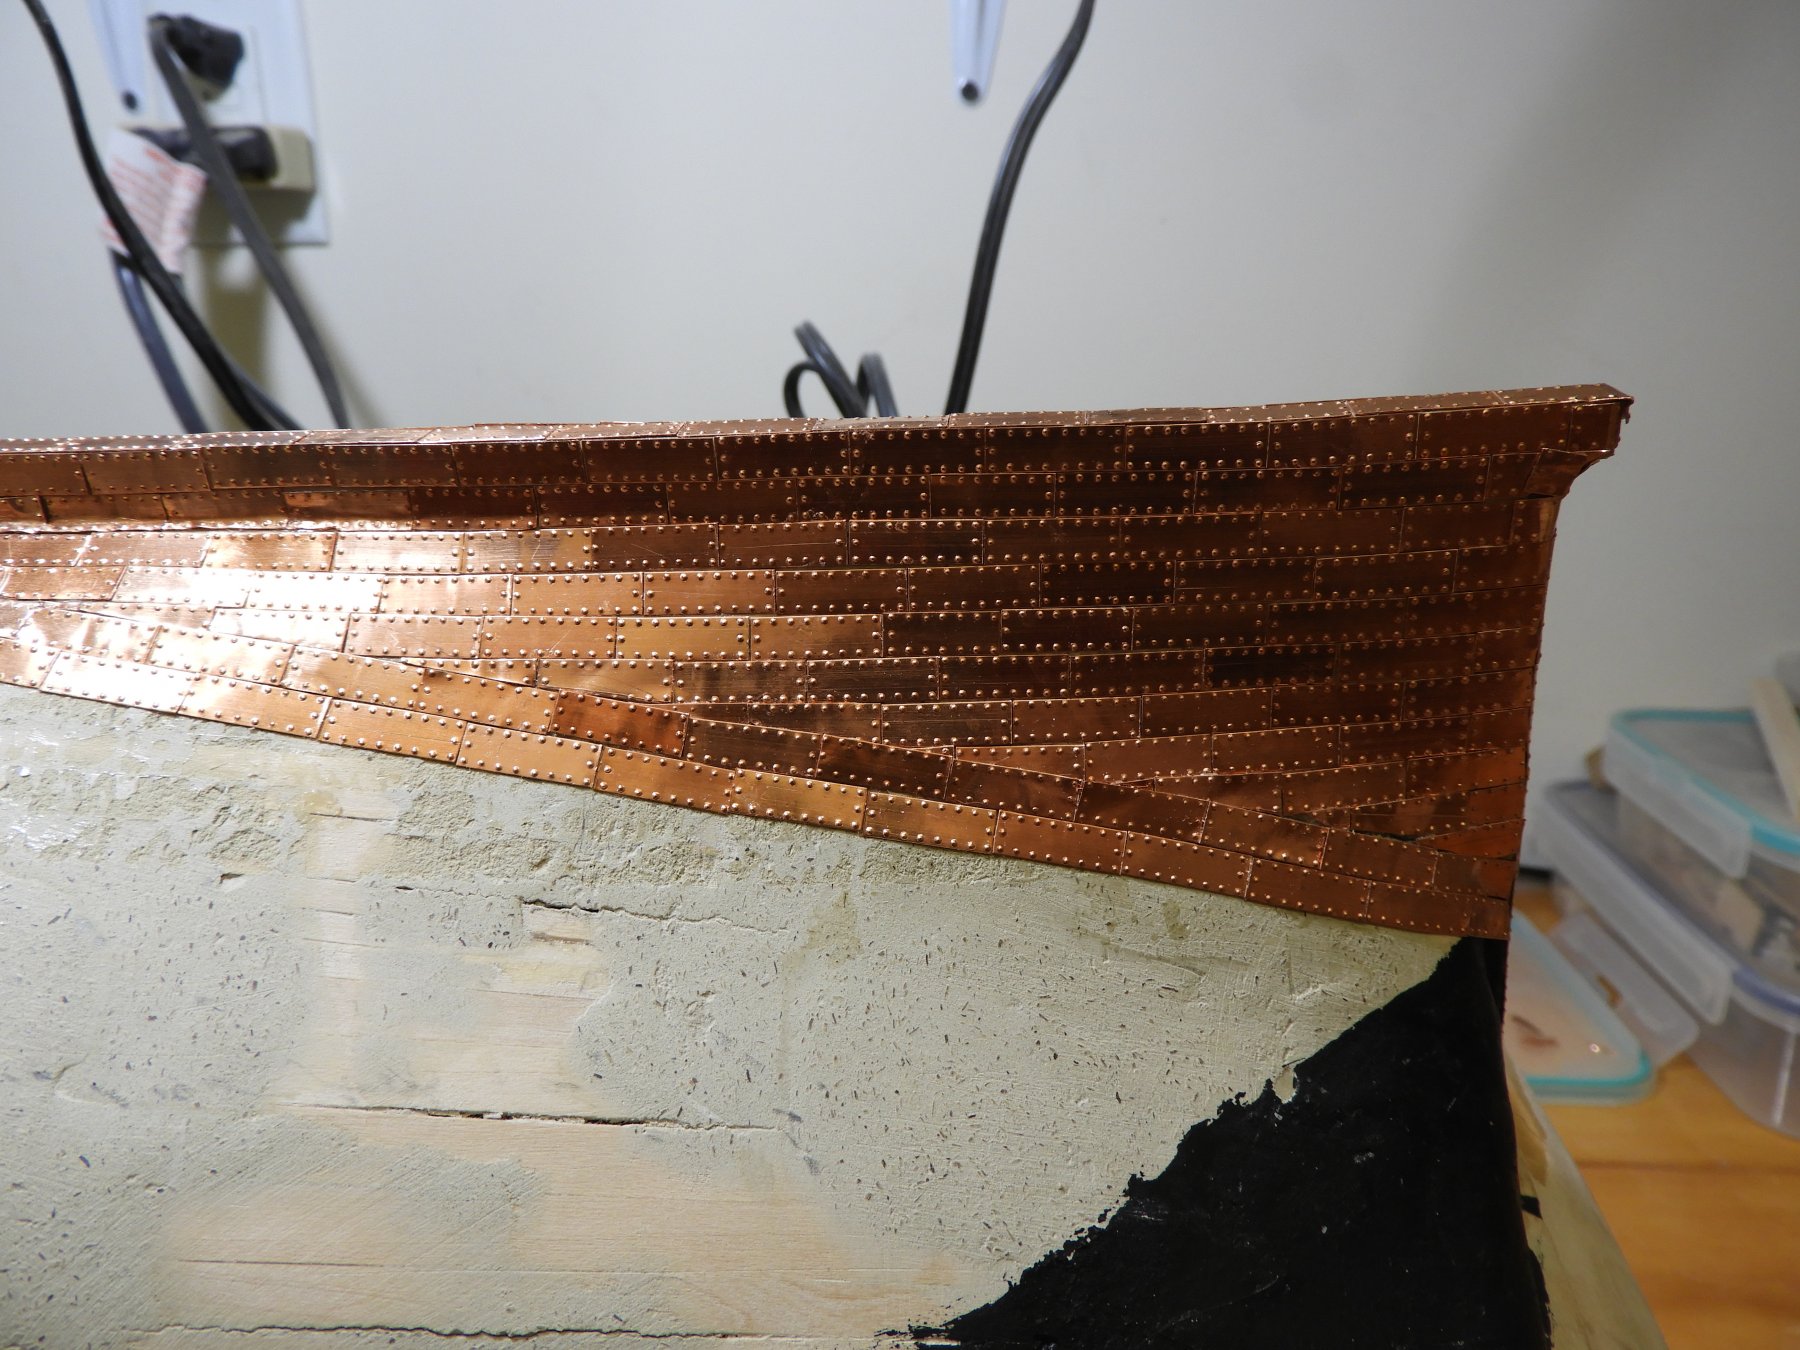
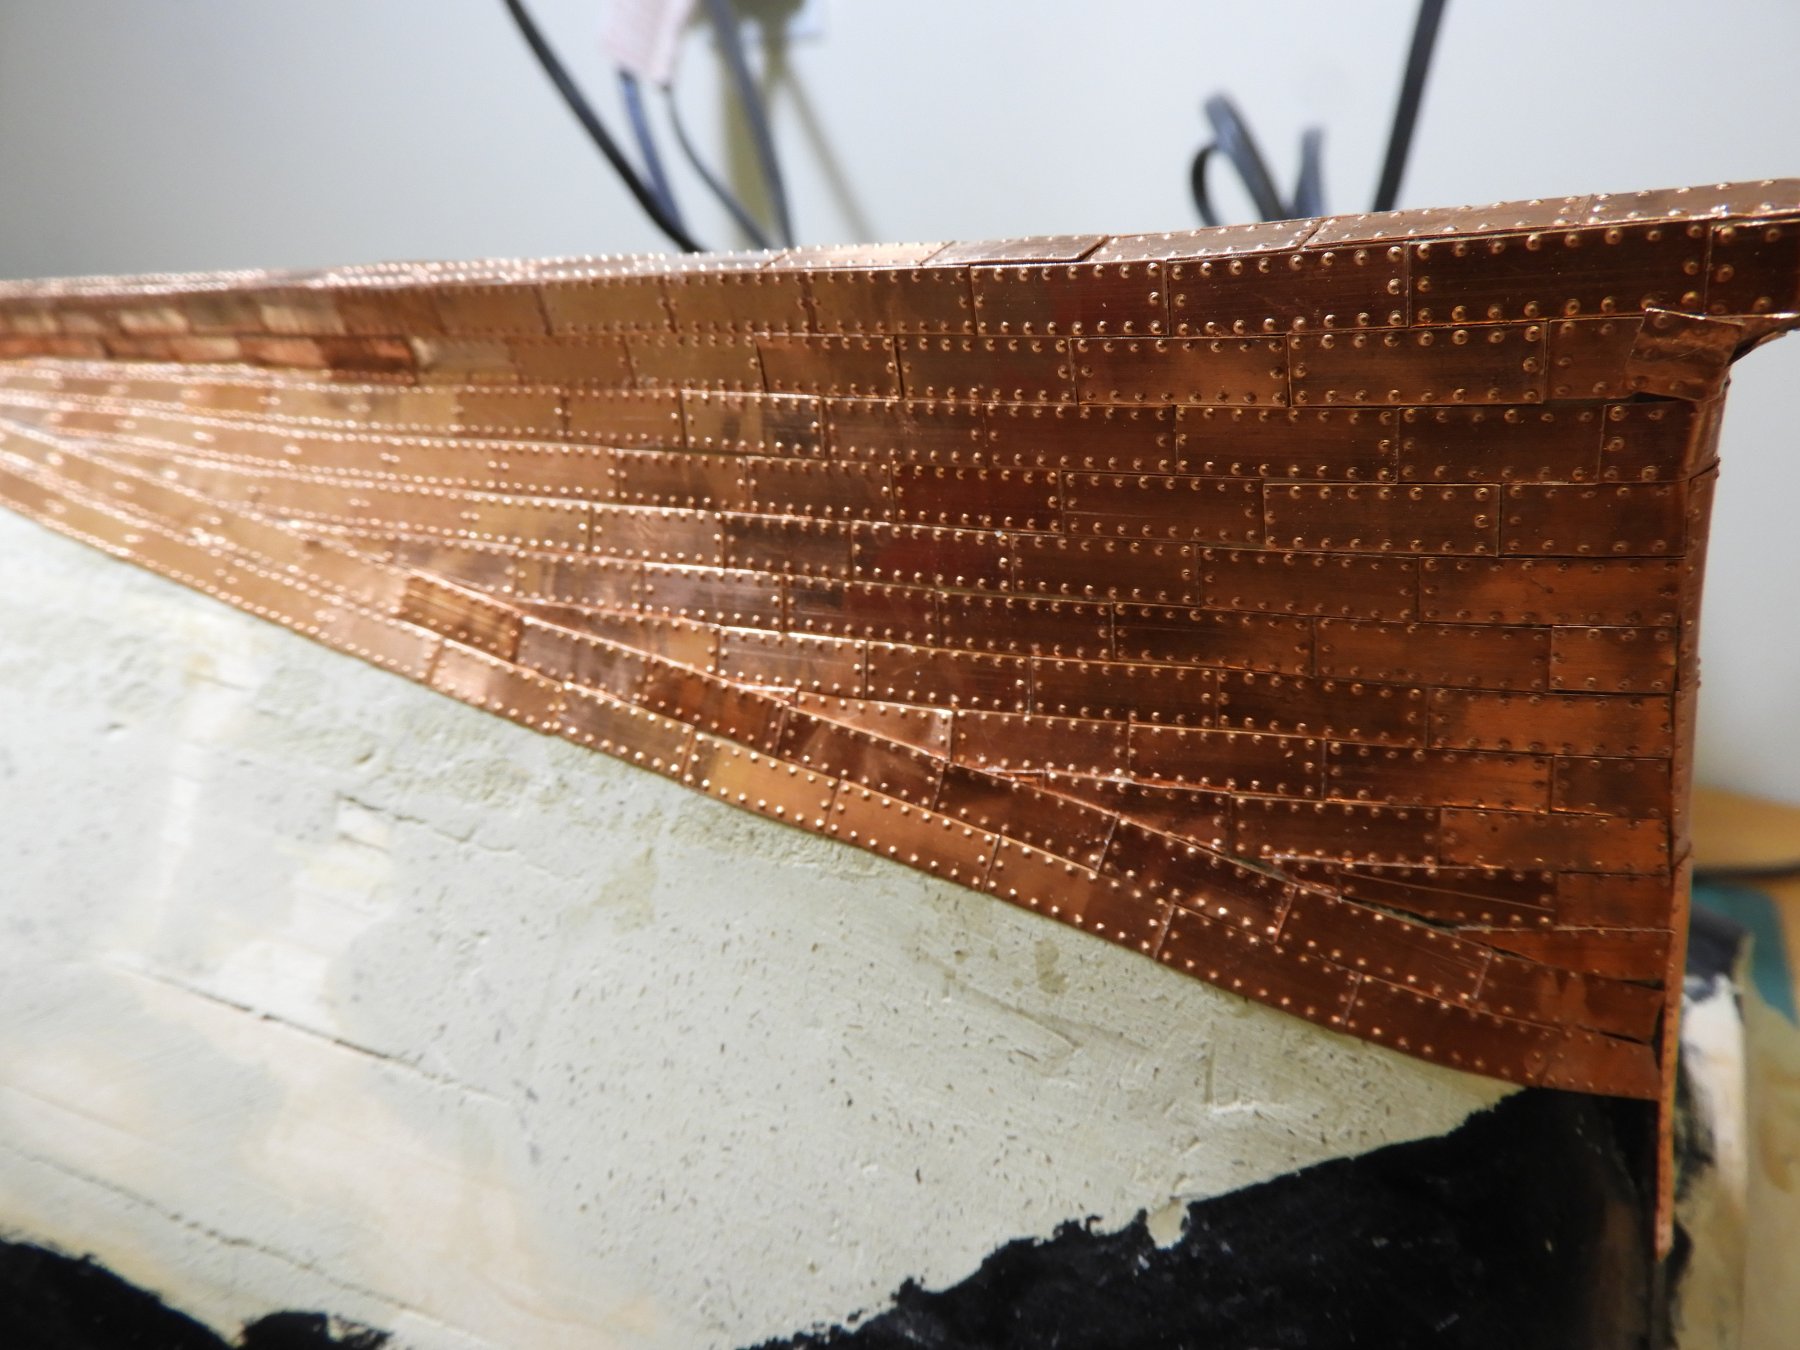
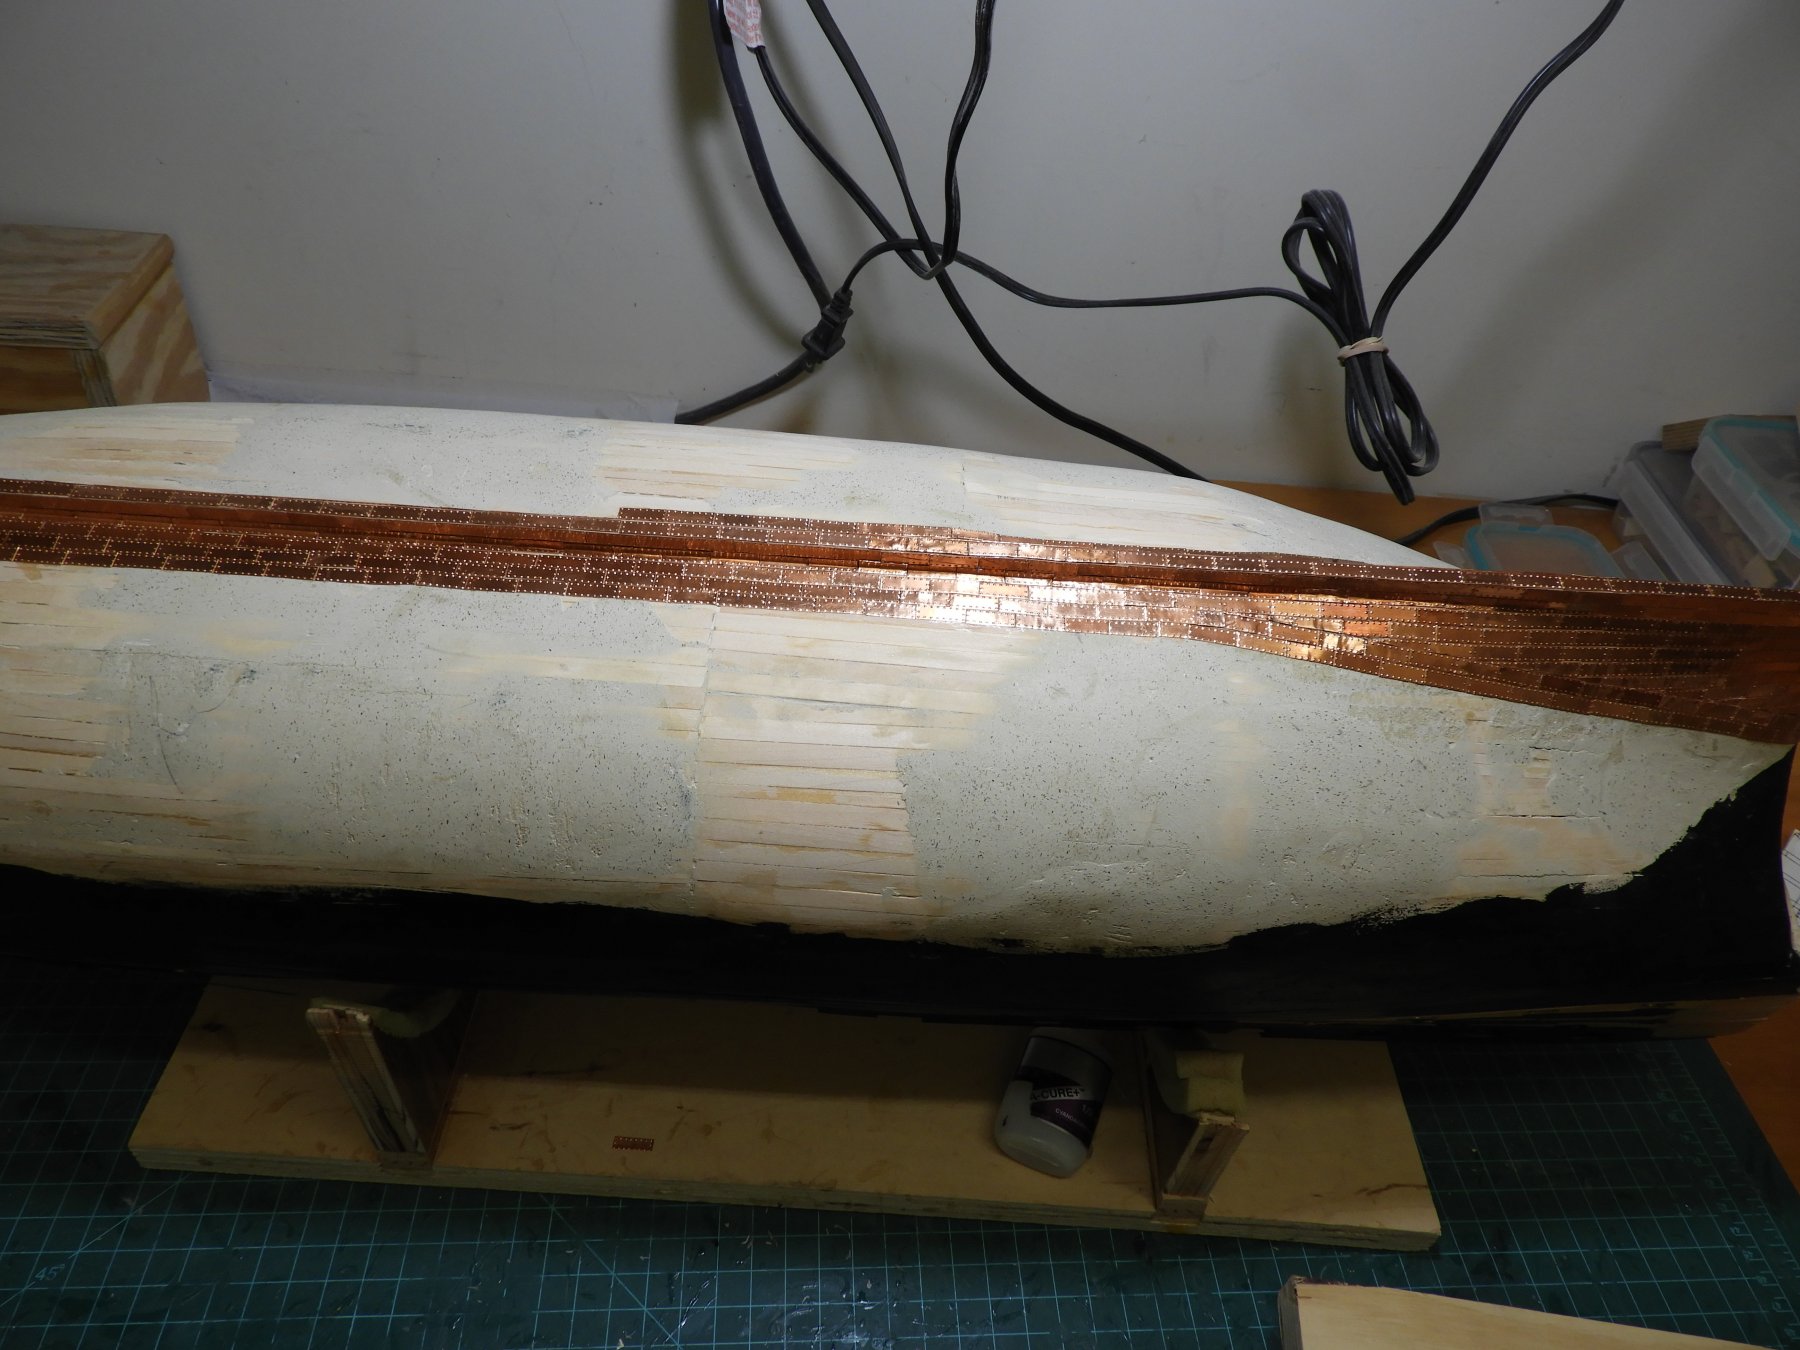
Just a short update on the coppering. This task is definitely the never ending story. I try to get three rows of the plates installed each time I work on the ship. The constant squeezing of the tweezers in one hand and the glue bottle in the other leads to some serious hand aching – like a repetitive motion injury. Three rows is just about all I can handle at one time.
I try to break the work session into several tasks. Planking the upper gun deck is one of the these tasks. Making the hatch comings another. I also mill the wood that I will need in future chapters. Holly for deck planking and Swiss pear fir the hatch comings.
I am using Temaya metallic copper paint to fill in some of the gaps where the plates don't align well. Not a real good fix, but, better than seeing the raw hull, light or black, showing through.
Here are some photos of the coppering.

- catopower, GrandpaPhil, clearway and 1 other
-
4
-
Fantastic work.
Gives new meaning to "two years before the mast."
-
E J,
Beautiful hull. You must have an extraordinary steady hand.
Regards
- Elijah, mtaylor, popeye the sailor and 1 other
-
4
-
-
-
-
-
You can use some acrylic paint in a light grey color. Dilute this until it is the consistency of milk. Put a light coat on and let it dry thoroughly. Take a piece of metal (I use a #22 or #25 blade) and scrape the surface in one direction gently until you get the color you want. There will be variation in the color. But, that adds to the reality of the weathering.
Hope this helps
- mtaylor, thibaultron, Canute and 1 other
-
4
-
Bill,
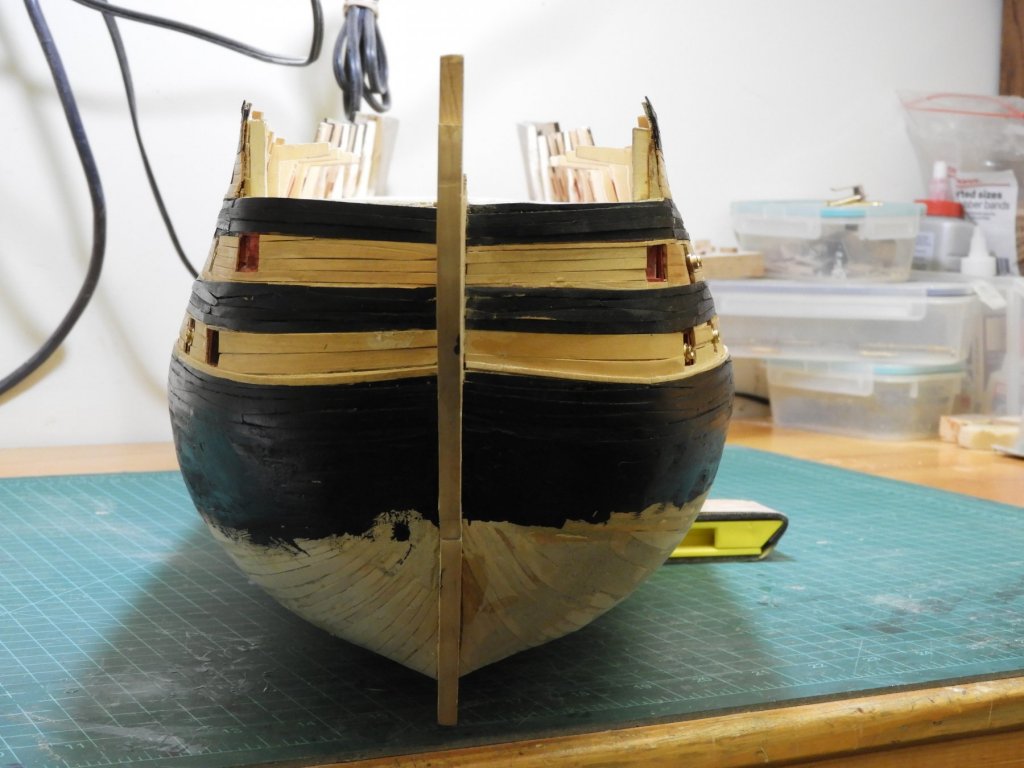
QuoteI do have one question. It appears that you are putting in a series of wales, but I can't see any in photos of the real ship in Plymouth. I like them very much. Do you have any information that I might be missing?
The only way you can really see the wales in on a head on bow view. The chain wale, (upper) and the 2nd wale are just a little thicker than the hull. The next wale down, the main wale, is some what thicker. The bottom wale is anchor stock and thicker yet but doesn't show as well as the bottom is blended into the hull planks. You can see them in McKay's AOS book HMS Victory or McGowen's Book, HMS Victory her Construction, Career and Restoration on pp. 160-161, if you look real close.
Hope this helps
- popeye the sailor and Erik H
-
2
-
HI Erik,
My 738 was used also in 2005. As you can see, it sat on the shelf until I thought my skills were up to this challenge. Happily, I am now enjoying this build. The owner included a laser cut accessory package from sales@doubleolaser.com consisting of the stern galleries, the large stern piece, various moldings, and what I think may be part of the head assembly. They are all cut in the appropriate relief patterns. I don't know if they are cutting this any longer. But they are well looking into.
On another note, I noticed that you have the quarter deck installed. Are you not going to detail the upper gun deck? It will be almost impossible to set the guns, hatches, etc., on the upper gun deck with the quarter deck installed.
Enjoy you build- it is a biggie.
Regards
-
Hi David,
Your level of detail is the most complete I have ever seen. Just out of curiosity; how great is the magnification you are looking through, if you are using any at all? And, how close does that put your eyes to your hands?
Regards
- Old Collingwood and Vinnie
-
2
-
Robert,
I am sitting here laying planks on the main gun deck as I look at your main gun deck on the computer. I must confess that I am having the same arguments with my self as to when is enough, enough. I confess that I do like the look of the end of plank tre nails. But, only if they are done with exquisite neatness as you have done. I don't think I have the steadiness to get this done and have just about decided to skip this item. With all the rest of what is going on around the busy main gun deck, I don't think they will be missed. As for the single tre nails every foot on the planks; I definitely think this is overkill.
The model looks great. Keep on going and continue to stimulate me with your skills
Regards
- Richardjjs, Robert29, leginseel and 1 other
-
4
-
-
-
-
Brian,
The way I understand this is that you have a bulkhead where the edges are 1/6th in fore or aft of the center depending on which way you mount this bulkhead. Personally, I would do nothing to the bulkhead except mount it in the center keel, making sure that both edges of the bulkhead are the same distance from the bulkheads fore and aft. This will insure that this bulkhead will be square to the center keel. This 1/16 in discrepancy will disappear when you fair the hull.
It will be of no consequence and you won't have to worry yourself silly over this. We all have a tendency to overthink some problems. It's only wood and just about everything can be fixed.Regards
-
-
Erik,
Good job on the kit out of the box. I am building the 738 kit using Bob Hunt's practicum. The practicum probably triples the amount of work needed to build this kit. But, it builds out into a great model. Good luck on you build. I will be following along.
Regards
-
10/4/2017
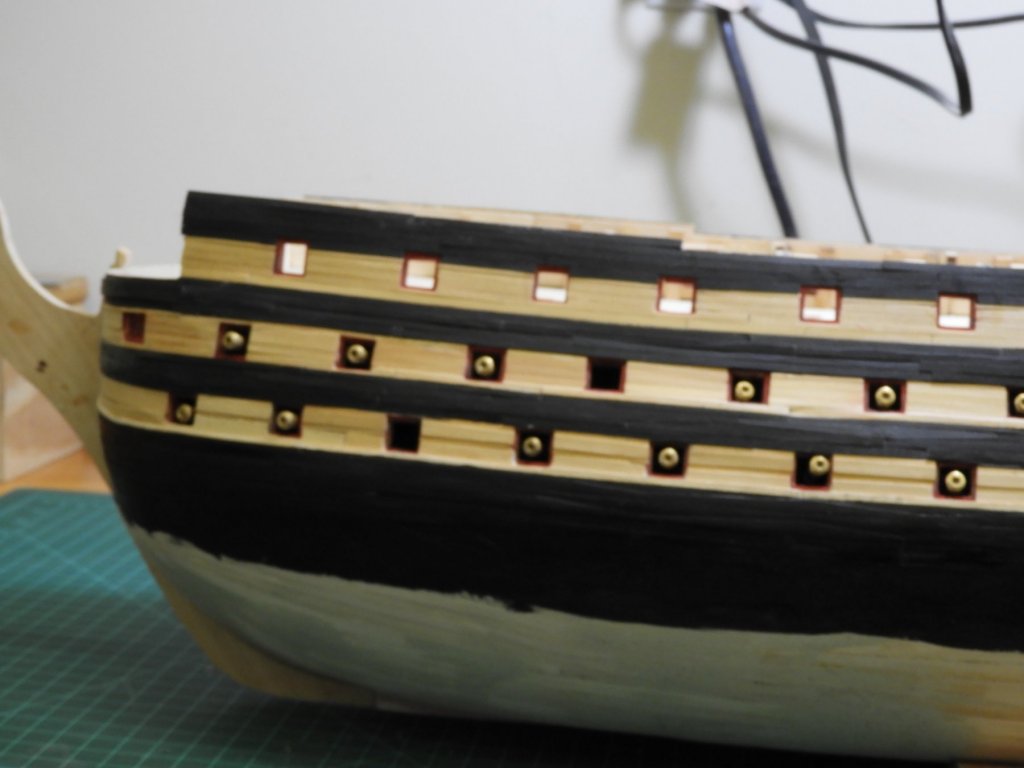
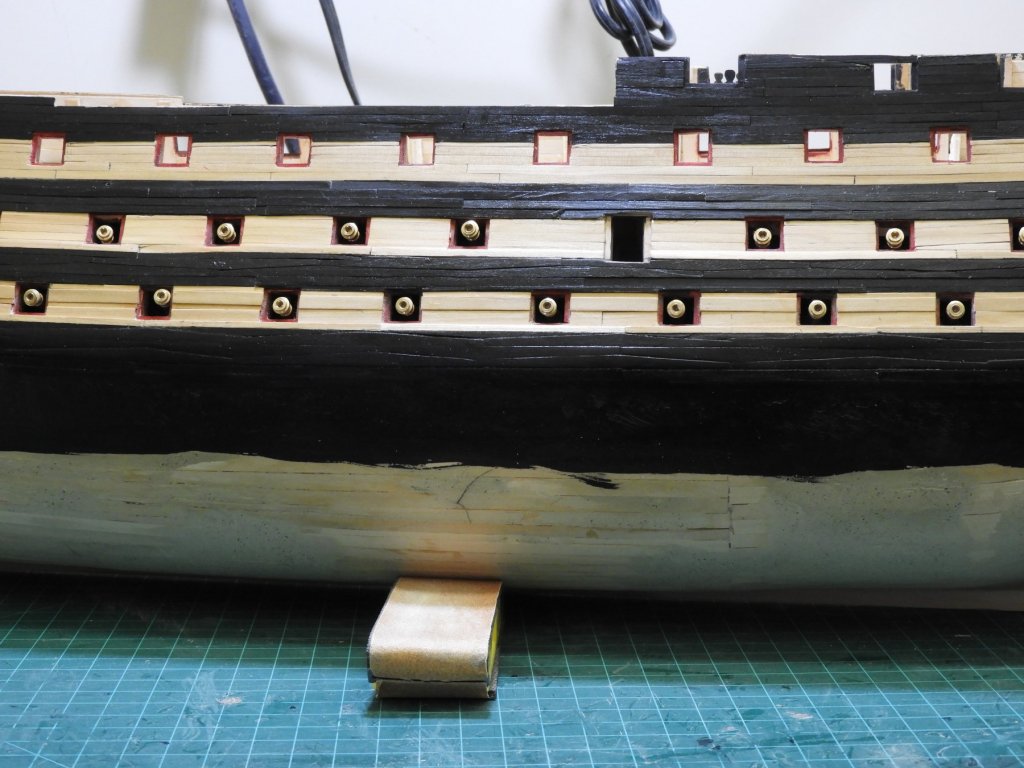
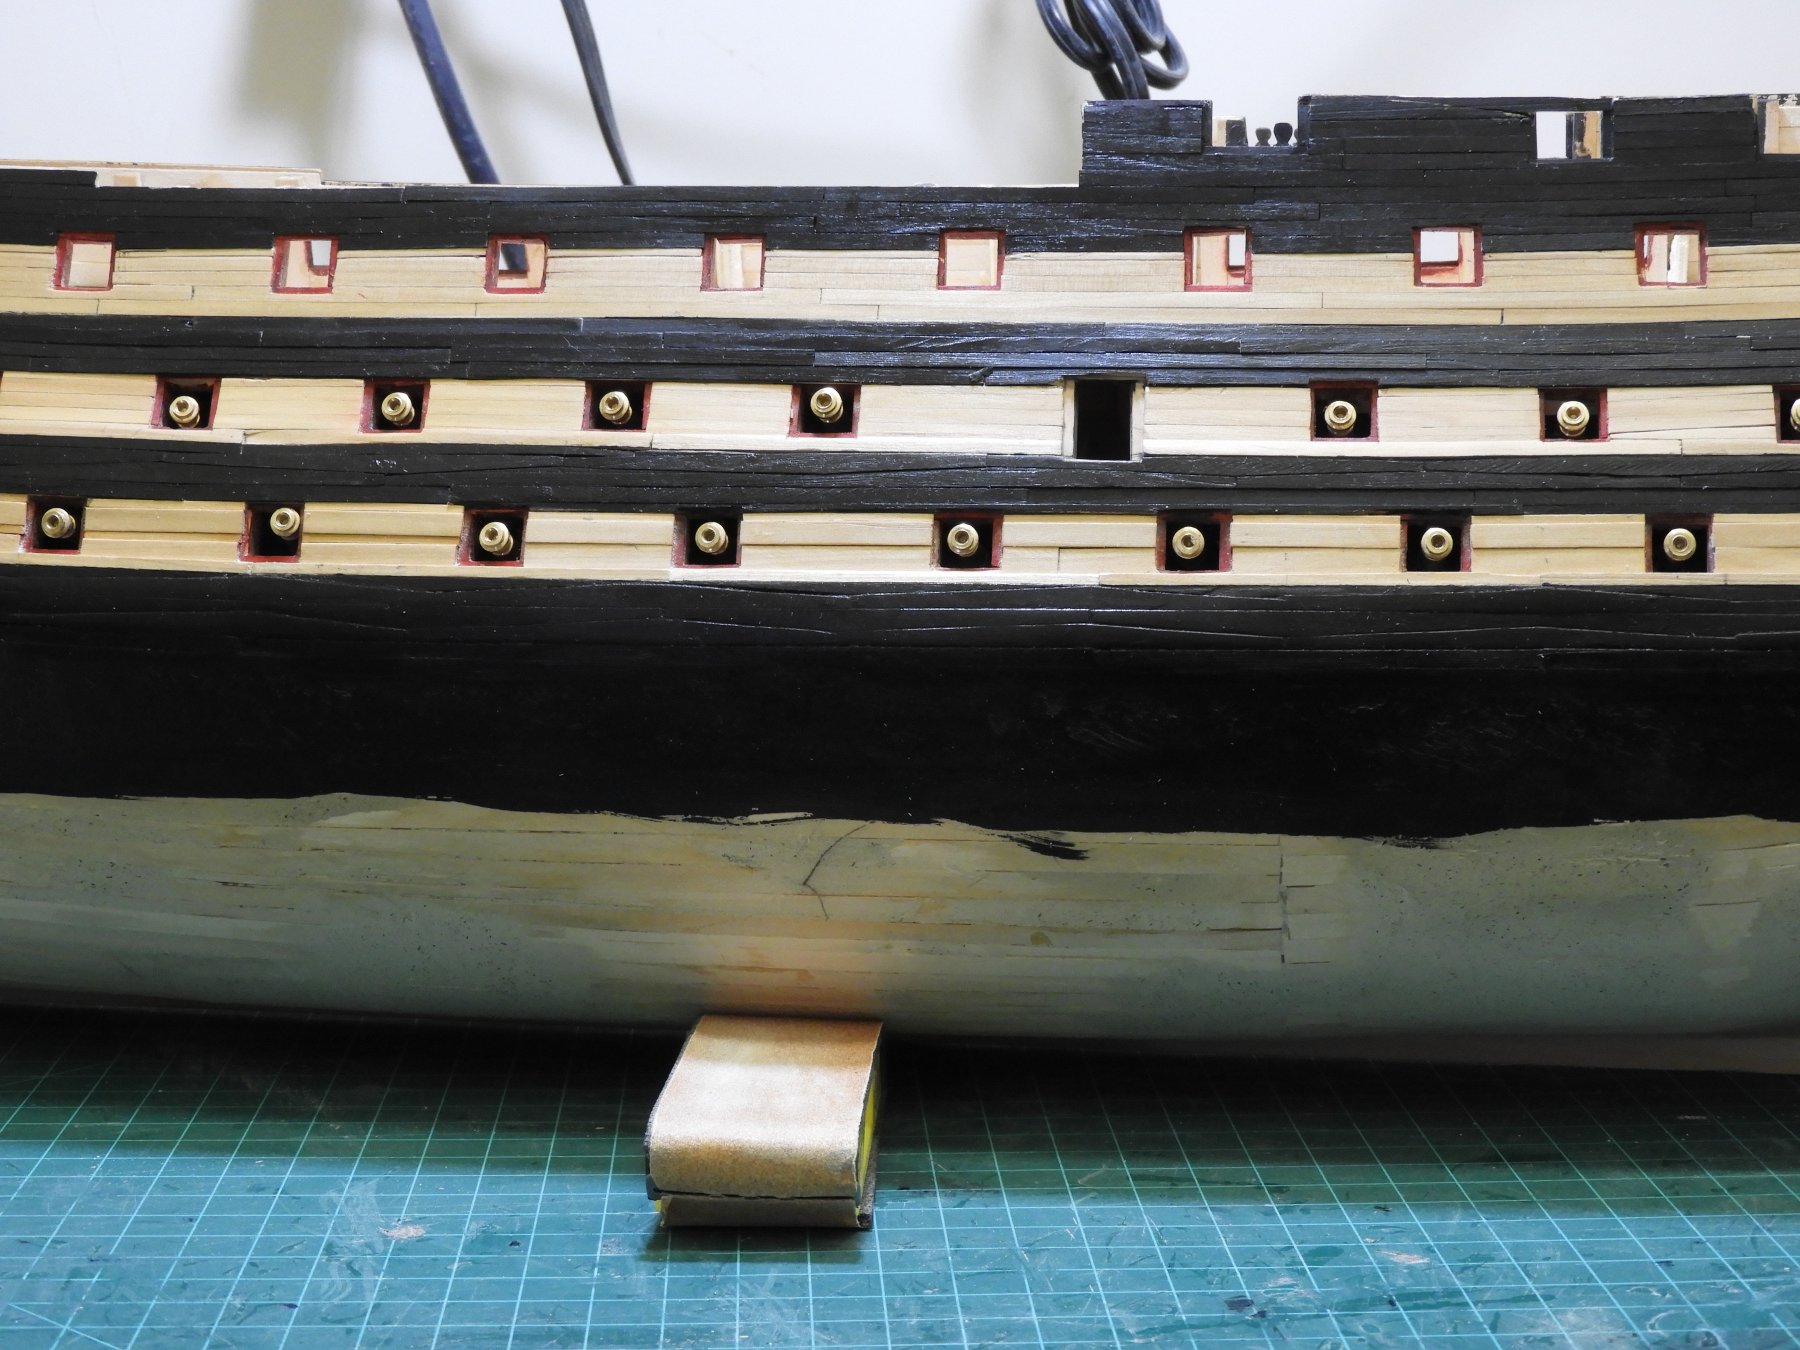
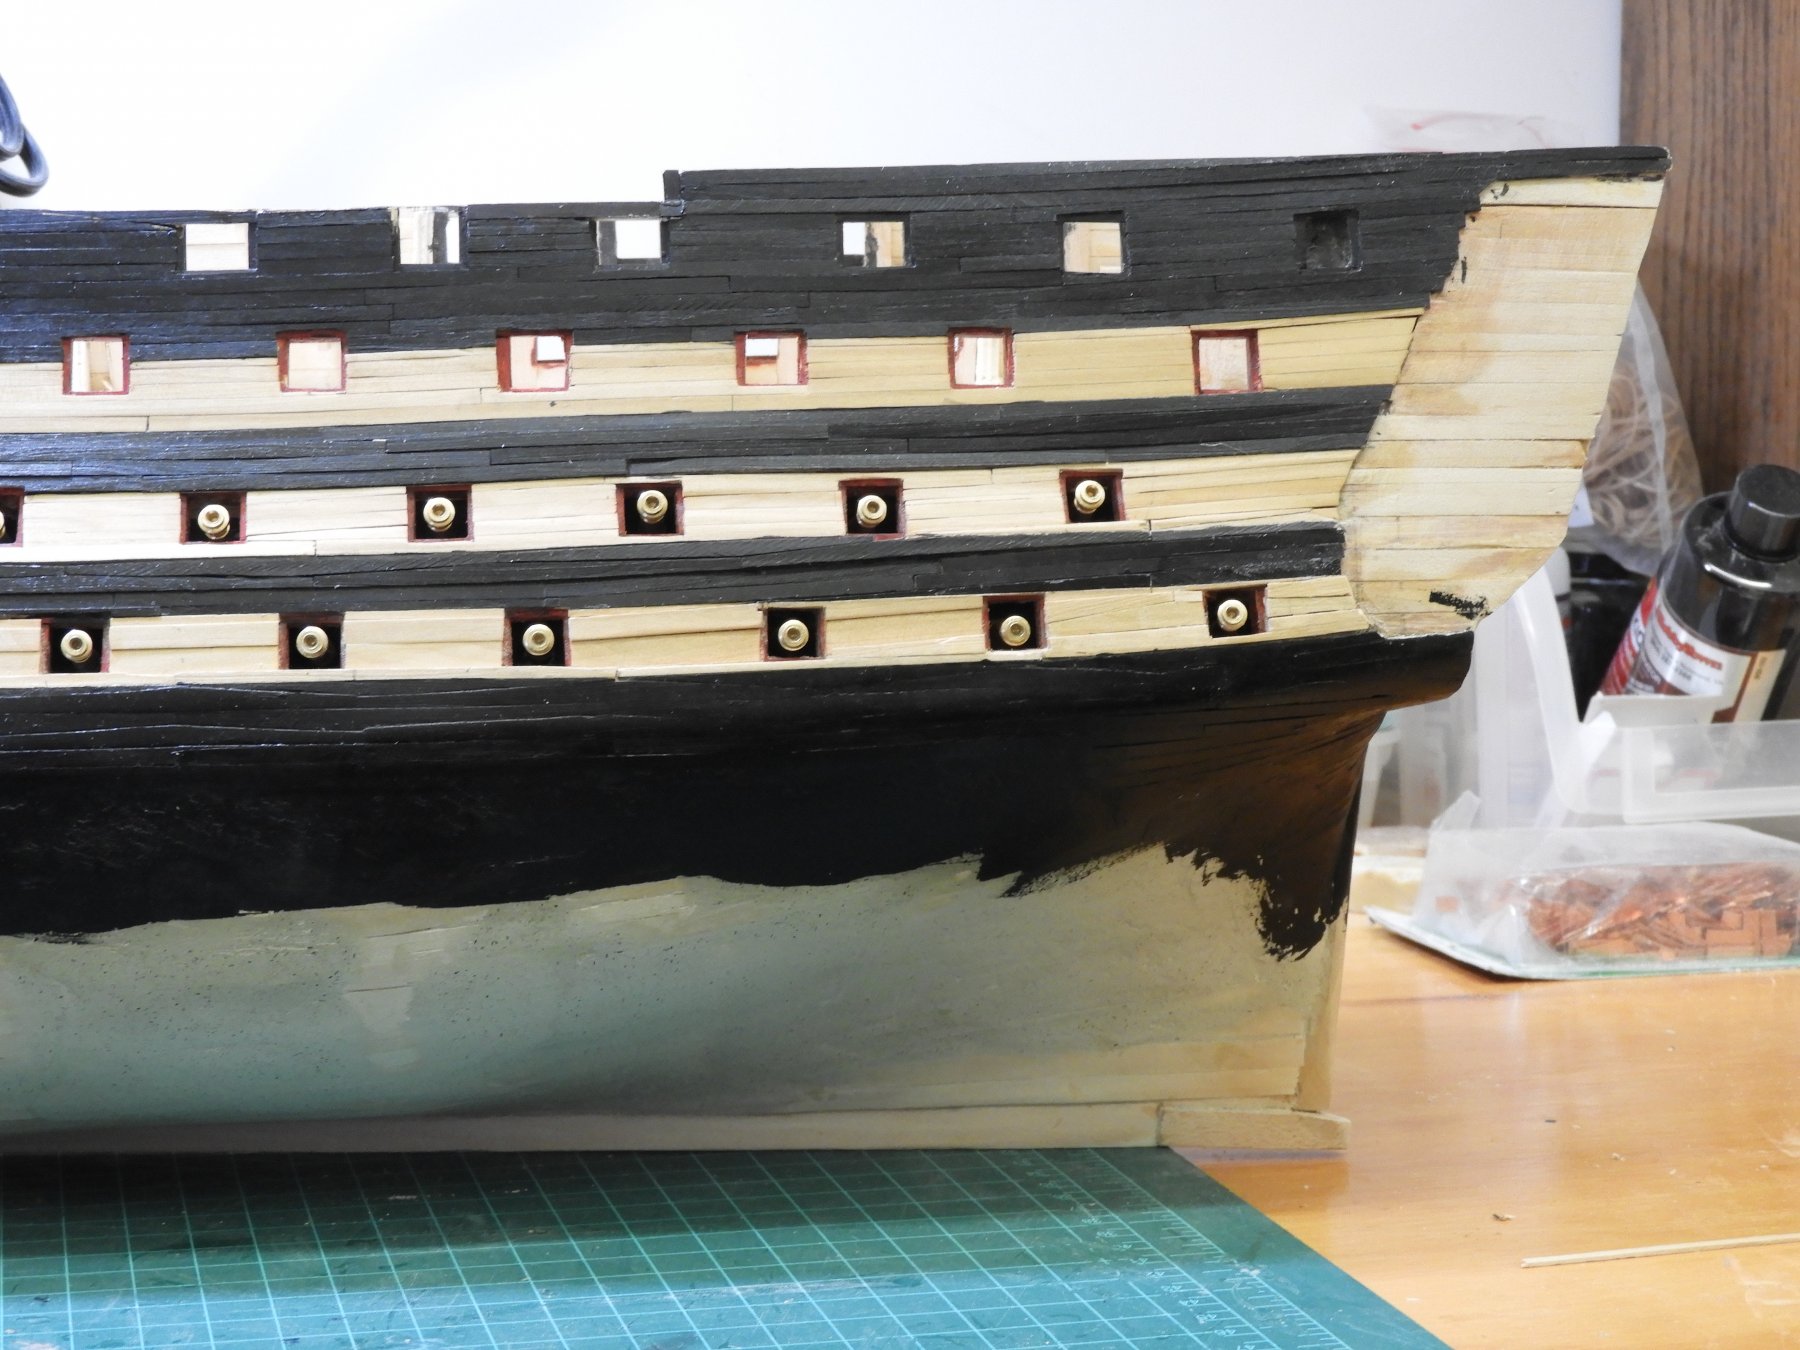
Finally completed the planking of the hull. Completed the lower wale anchor stocking. Installed the diminishing plank and blended the plank into the hull. Planked the stern area, bending the planks into the wing transom and stern post. Blended these planks into the hull as well. Ebonized the hull for an inch or so below the waterline using the India ink. Everything got another coat of wipe on poly. Did whatever ebonizing touch-up which was required.
Finally completed the planking of the hull. Completed the lower wale anchor stocking. Installed the diminishing plank and blended the plank into the hull. Planked the stern area, bending the planks into the wing transom and stern post. Blended these planks into the hull as well. Ebonized the hull for an inch or so below the waterline using the India ink. Everything got another coat of wipe on poly. Did whatever ebonizing touch-up which was required.
4 of the cannon have become detached. 2 of them have come out of the backing piece. They will glue back in easily. The other 2 came out attached to the backing piece. Luckily, I was able to get these out through the stern. These will not be able to be reinstalled ini the original manner. I am going to make a plug sized to the gun port, glue the cannon to the plug and glue the whole thing into the gun port. This should be OK since the gun port lid will hide most of the repair
Now it’s time to open the copper plates. I have been told that the Mantua kit is short a good amount of plates. I tried to make some plates using ¼ inch sticky backed copper tape using a ponce wheel. These don’t look anywhere as good as the Mantua plates. The alternative is to make a stamping jig that will stamp the nail head pattern and either cut the individual plates off the strip, or, lay strips of stamped plates. They also come out a little larger than the Mantua plate which is 6 x 15 mm ( a little short of the ¼ inch width). The Mantua plate also has the nail heads embossed on all 4 sides. This means you install them by butting them up against each other without overlapping. I tried this with a test set and it really works very easily using CA and just sliding them into place. We will see what we will see.


-
Great idea for squaring the cogs with the Phillips head. Thanks for sharing
- Elijah, thibaultron and Overworked724
-
3
-
Dave,
Good to see you back. I'm almost finished with my Victory hull planking Then, it's back to Endeavour for rigging. Your log makes a very handy reference for my build. Look forward to seeing more of your work soon.
Regards
-
You are so fortunate to live close by HMS Victory and be able to visit any time you want. I was fortunate to spend 2 full days touring the ship with 2 friends and a private guide. I experienced my most important historical moment while standing on the quarterdeck. I suddenly realized that Victory was older than my country. What a treasure she is.
-
OW,
Just a little nit pick.
Look at photo 1 of wales at the transom. Port end grain is parallel to the transom. Stbd is angled. The same is shown in photos 2-4. You may want to correct this if this is not to due camera distortion.
Coming along very nicely. I'll get back to my Sultana one of these days. My Victory really has me hooked right now.
Regards
- thibaultron and Elijah
-
2


Le Soleil Royal by EJ_L - FINISHED - Sergal - Scale 1:77 - 1669 Version
in - Kit build logs for subjects built from 1501 - 1750
Posted
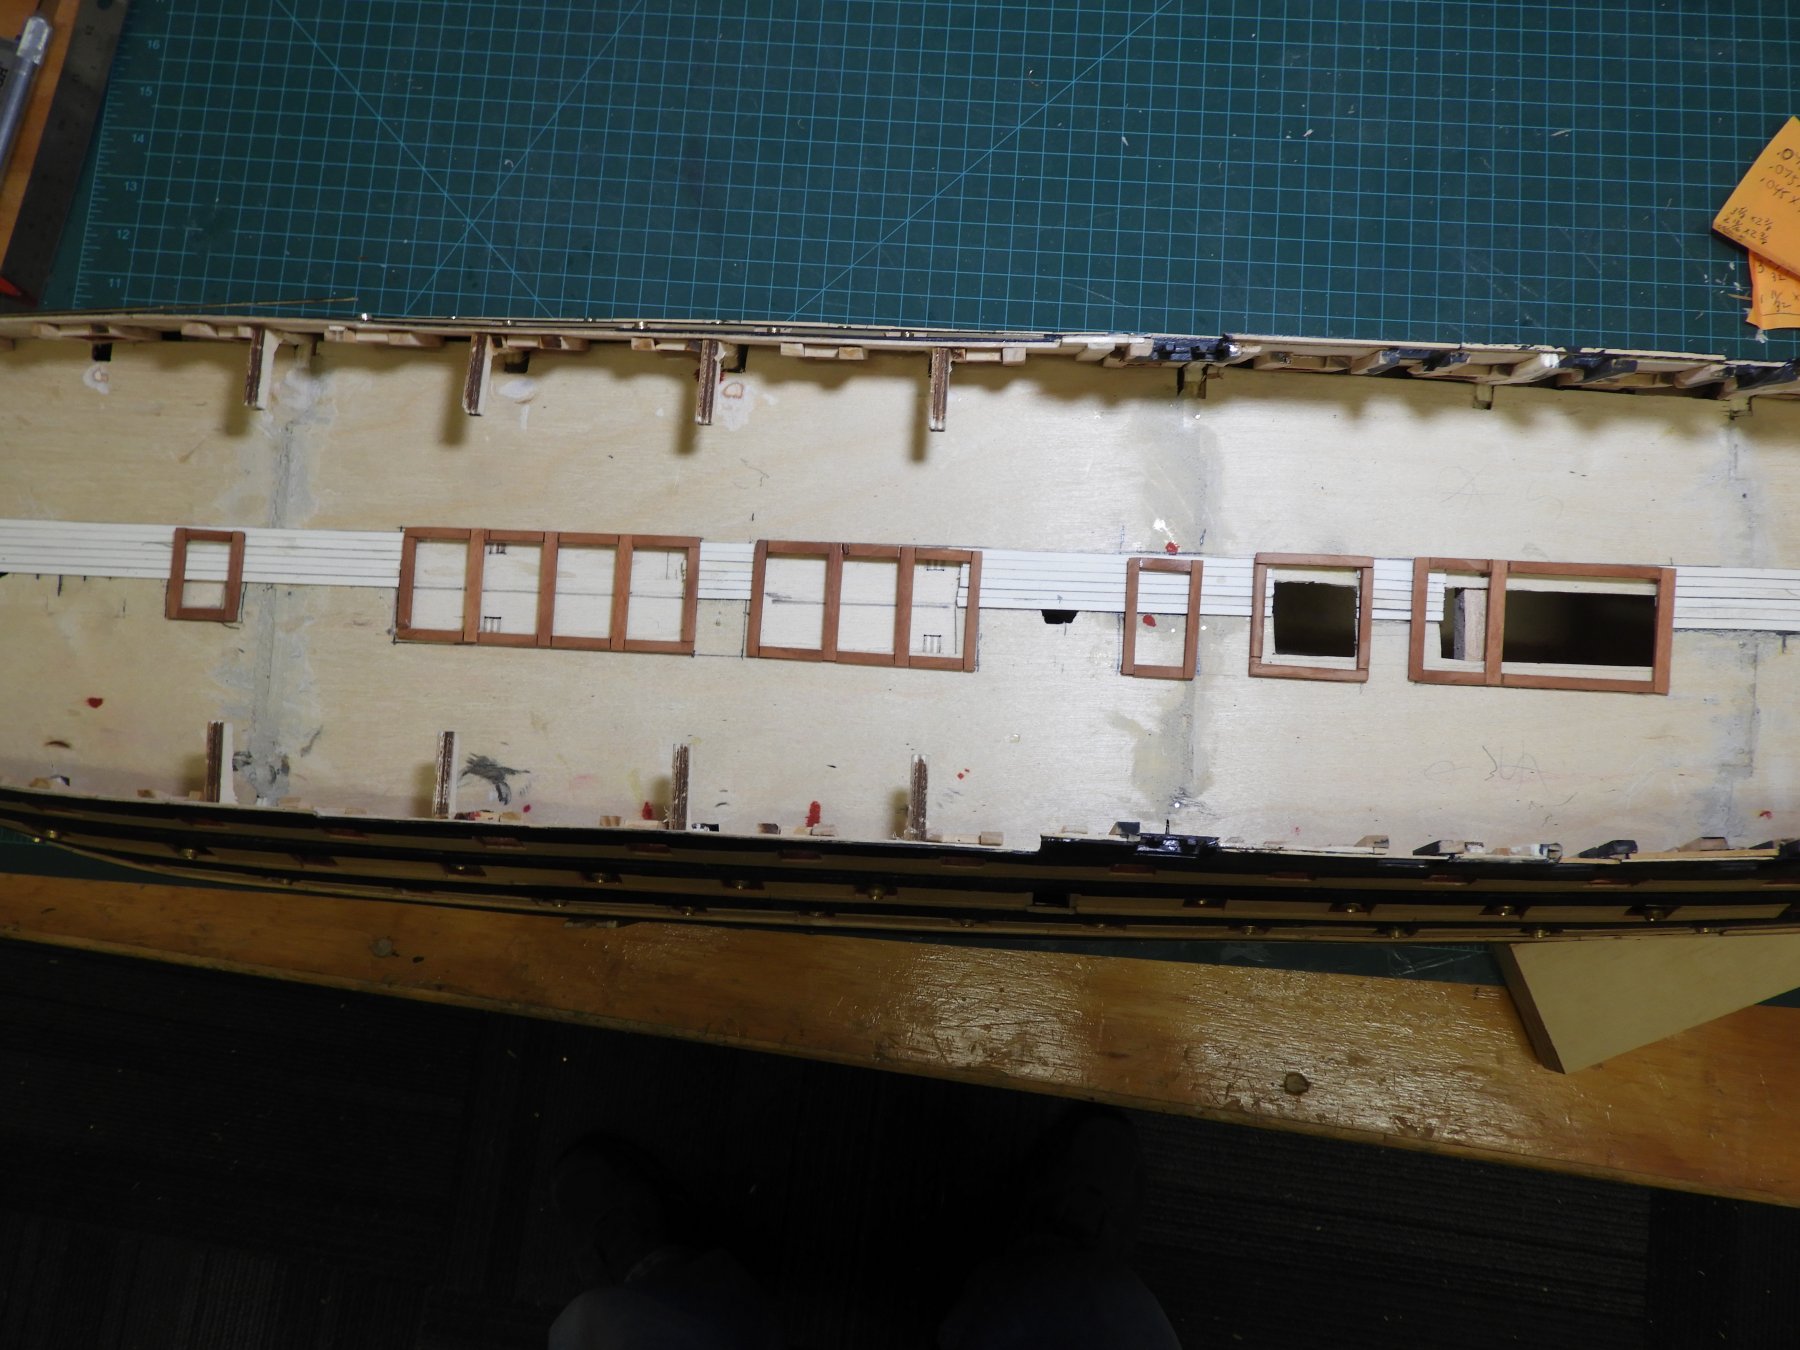
Superb engineering and execution on those windows. This is definitely and add-on to the how to file that I keep now that my memory seems to be trashed.