


mattsayers148
-
Posts
685 -
Joined
-
Last visited
Content Type
Profiles
Forums
Gallery
Events
Posts posted by mattsayers148
-
-
Thank Russ, Ken, CH, Sam, HH, Mark and to everyone who beat the like button like a red headed stepchild. Your encouragement and support are greatly appreciated.
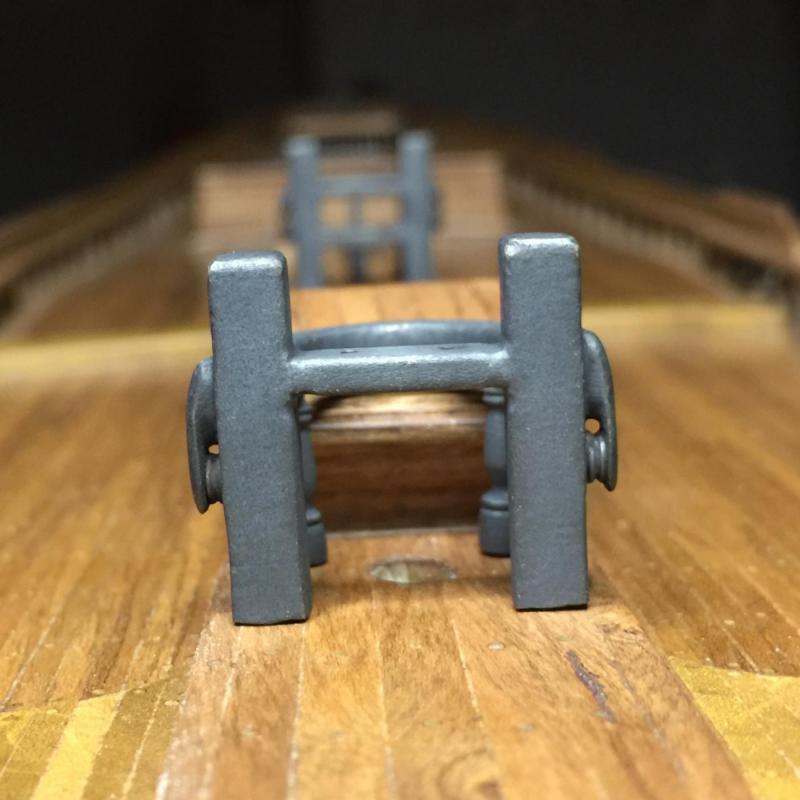
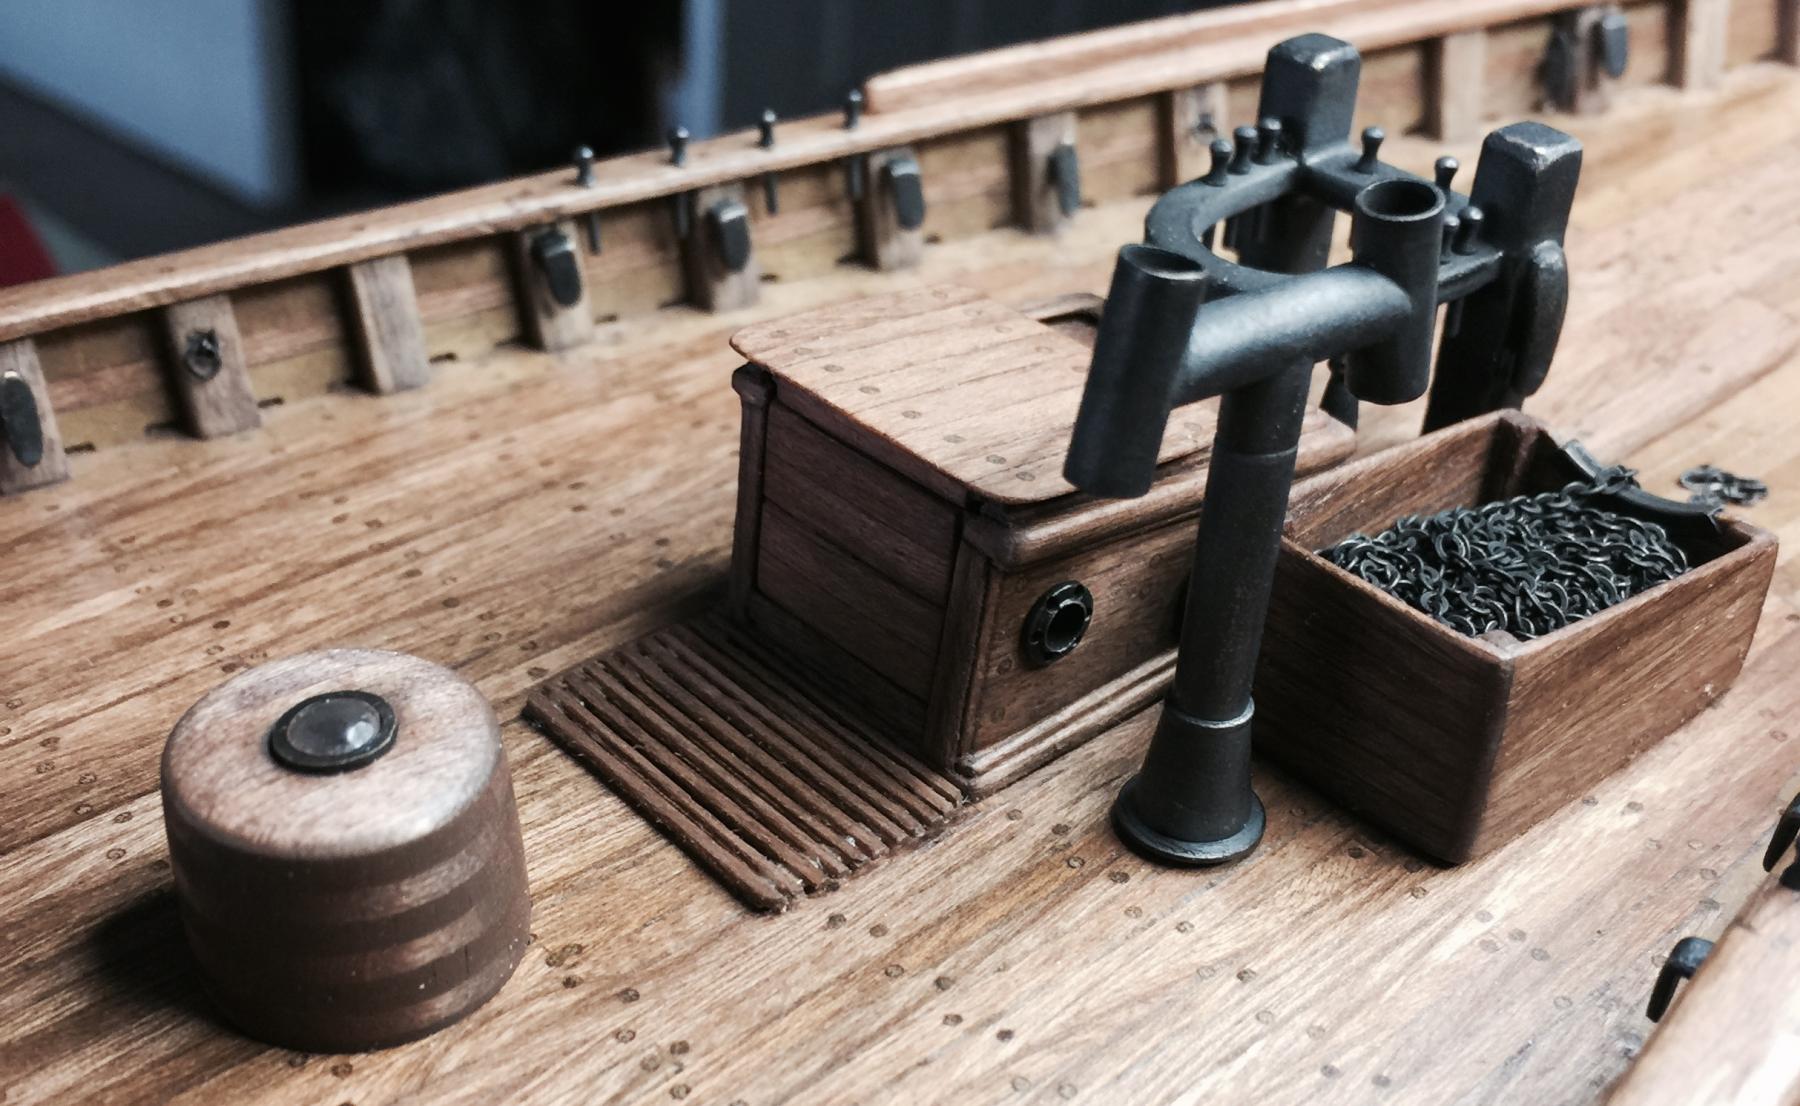
Work on the deck fixtures has been progressing along fairly well. Quarter bits, chocks, belaying pins, galley light, smoke stack, seine roller and chain box with 90 fathoms of chain.


I finally broke down and bought Chapelle's book
The American Fishing Schooners, 1825-1935. An incredibly detailed listing of ships and their parts are of great help. I wish I'd bought it in the start.
So next on the list is the windlass and all it's parts. Thankfully Chapelle's book is quite detailed for this. Onward!
- gerty, russ, CaptainSteve and 13 others
-
 16
16
-
First off, you're doing an incredible job. I seem to remember wondering why no rat lines. I still am not sure exactly why not. There was discussion about the possibility of rope chairs like this....

There wasn't much room for living quarters so I'd be inclined to think that the rigging would accommodate a smaller crew.
- Canute, Larry Cowden, mtaylor and 3 others
-
6
-
Thanks Russ, HH and to everyone for hitting the like button.
So I bought myself a new soldering iron for Christmas and began on some little projects. The main and fore fife rails were wooden, but I decided to make them out of brass and blacken. Thick pads were installed in the designated spots at the mast holes, later on for the windlass as well.

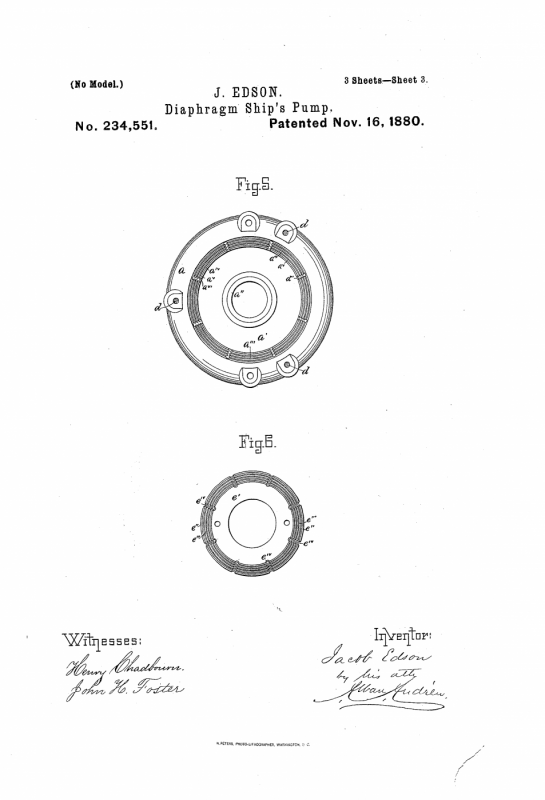
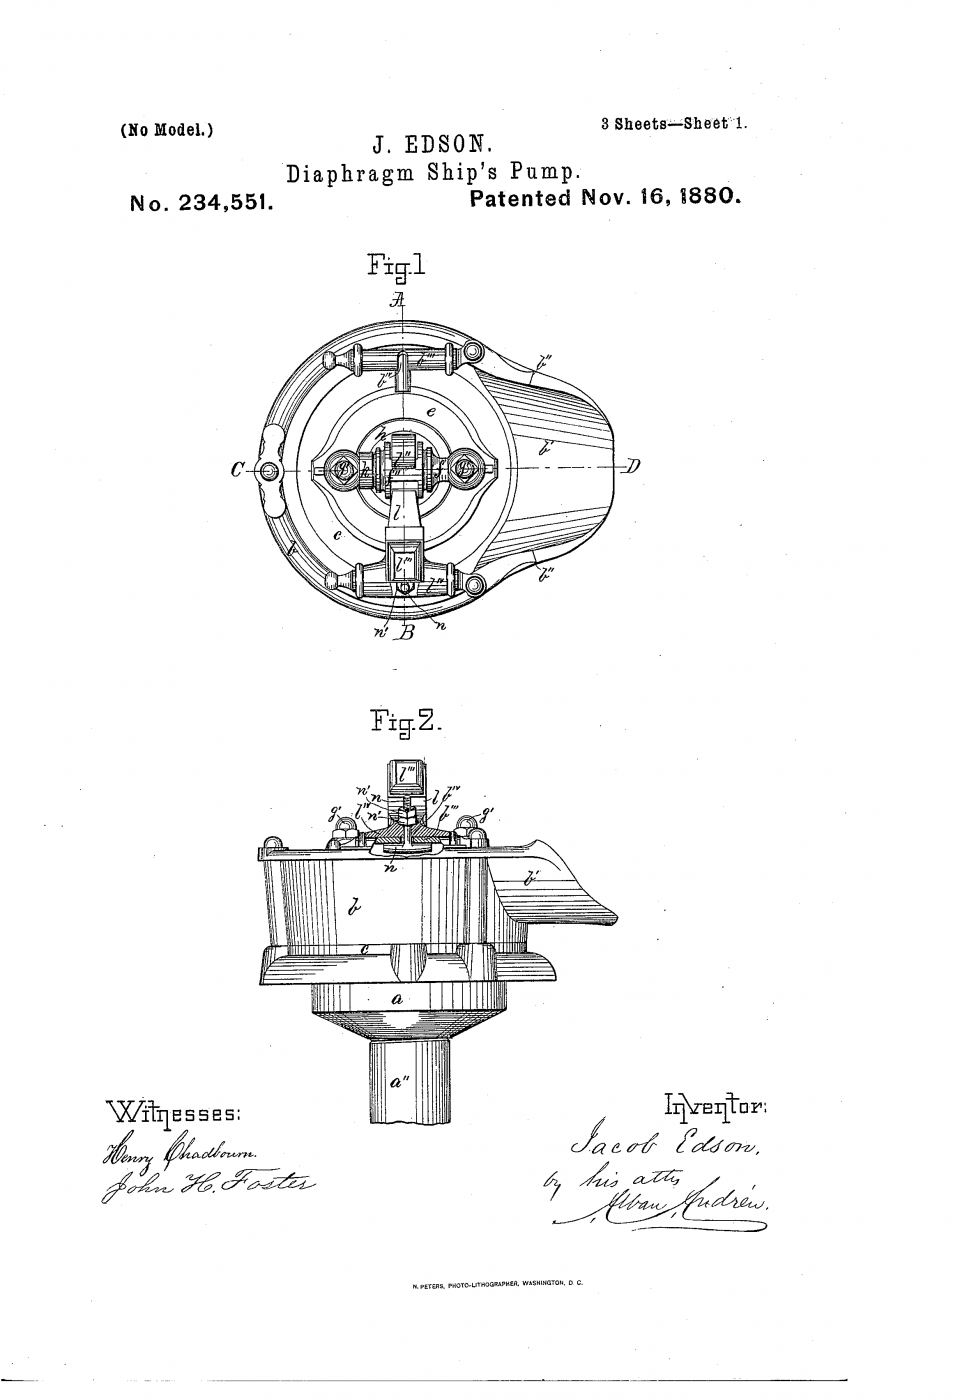
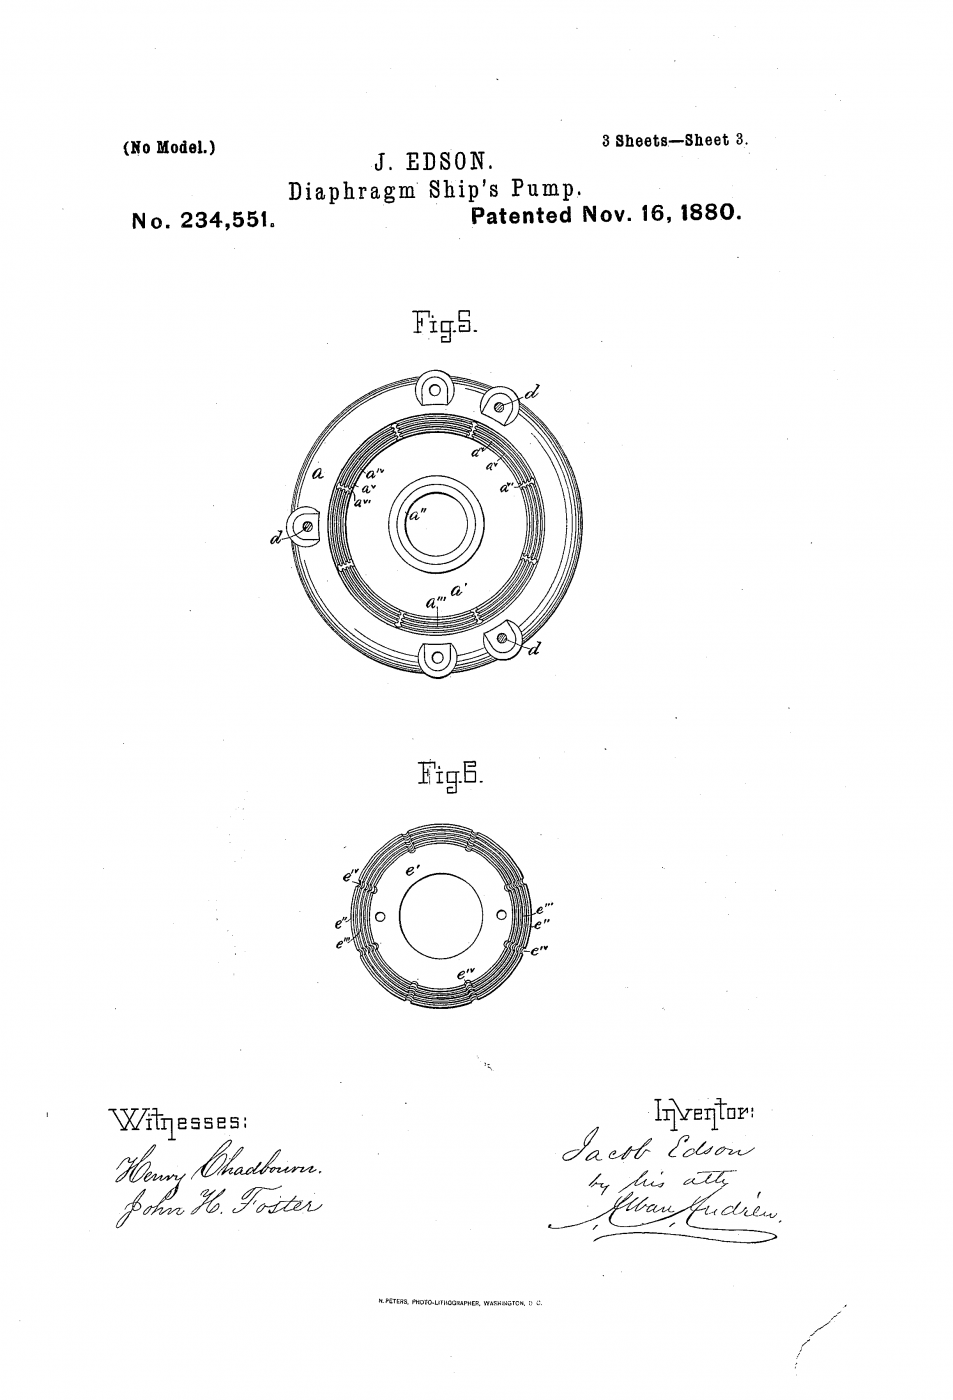
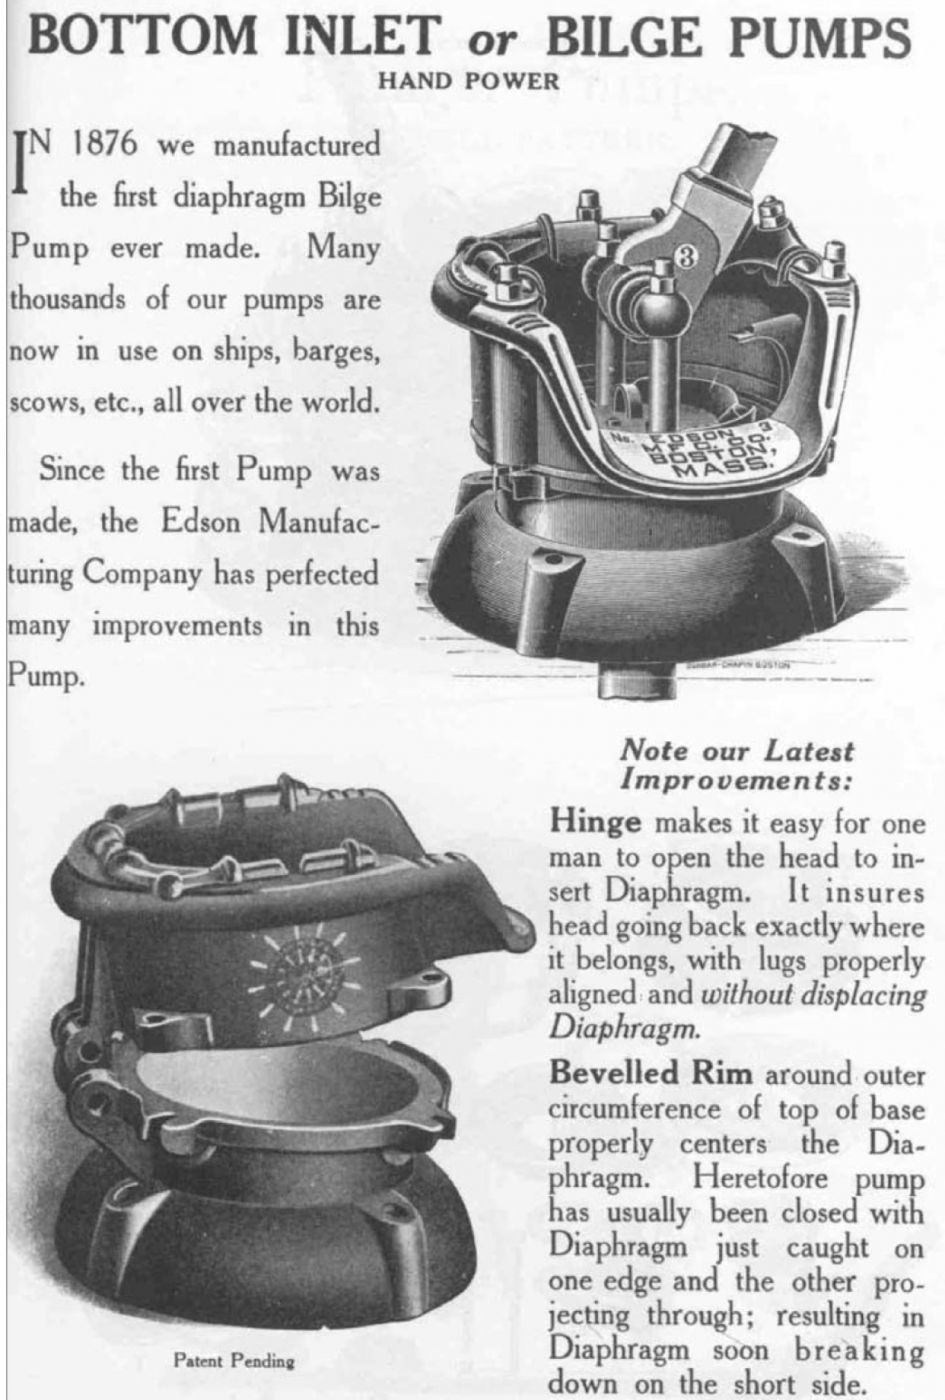
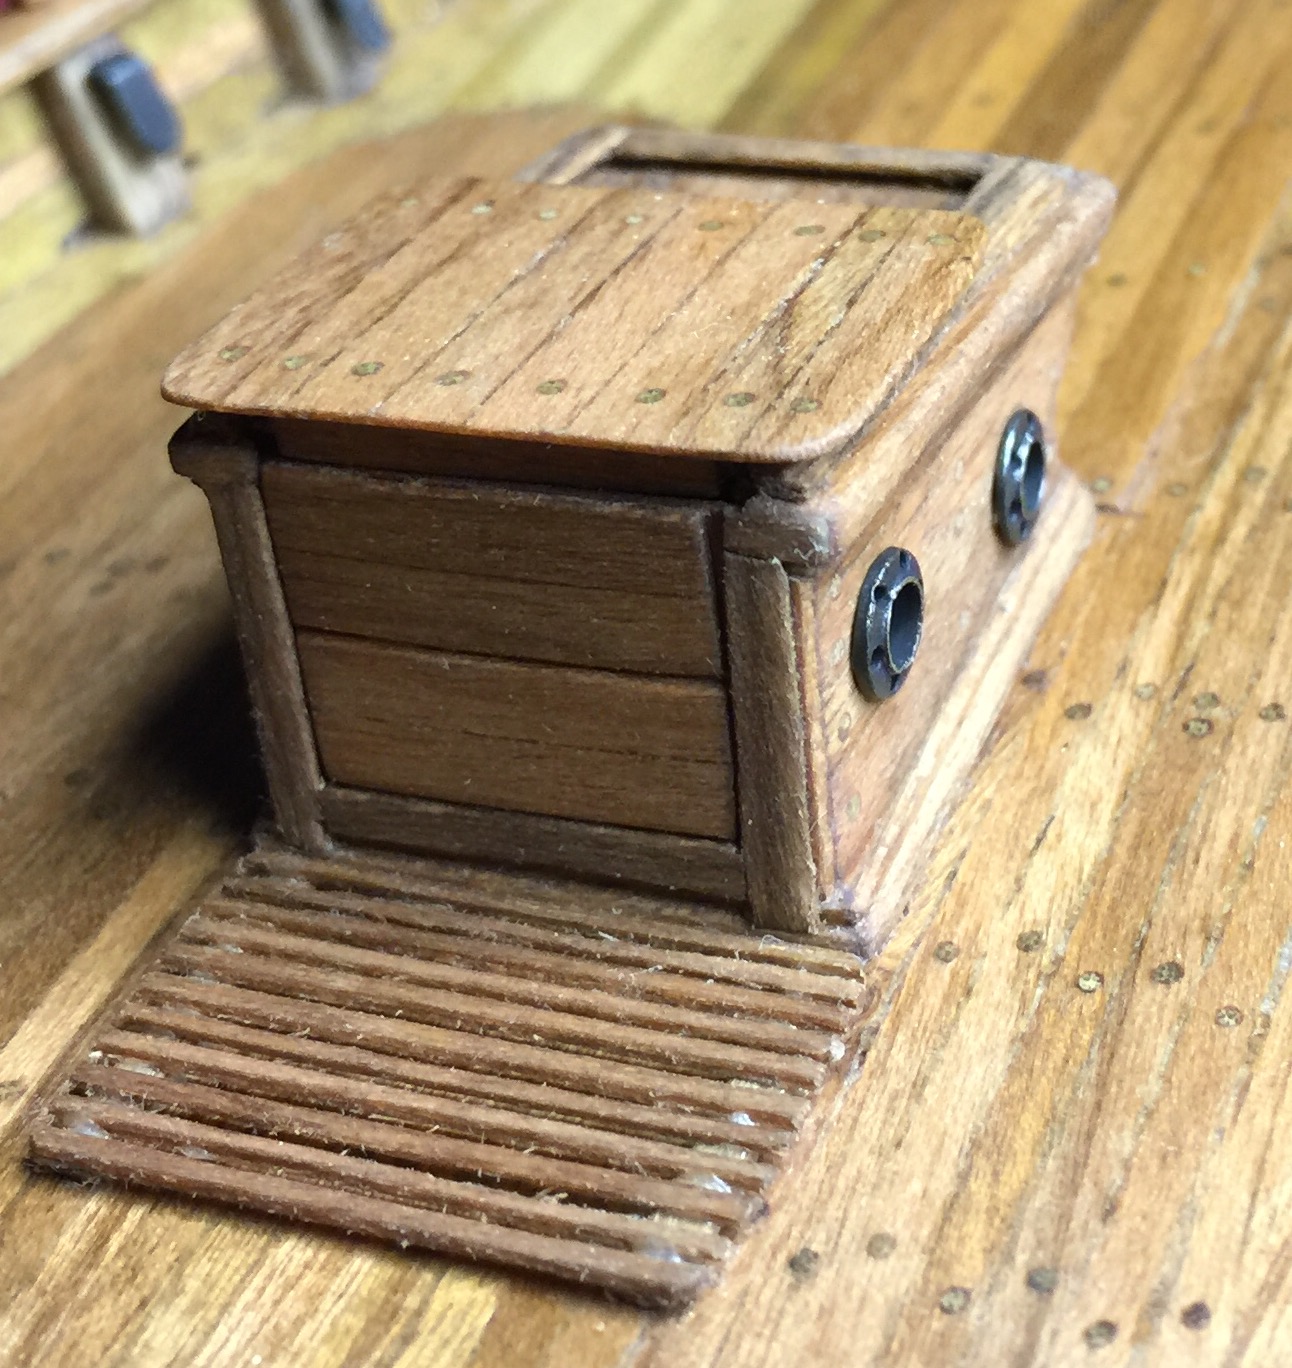
Next up are the two bilge pumps. I found the patents as well as an advertisement drawing for these which greatly help in their construction. Even with my new iron, these proved to be quite a challenge. If I wasn't careful enough, soldering one spot would cause catastrophic collapse of the entirety. But after many attempts, the resulting pumps didn't turn out too bad.

The handles were finished out with a half hitch spiral. And yes, the pump action does function. Thanks again to everyone for your encouragement and support. Here are the patent images.


-
Awesome job CH! From what I remember, the supplied rigging diagrams are fairly accurate. They are, however, not the order best to follow. It's way easier to do the standing rigging first. This way all of the serving is out of the way for the most part, and these heavier lines help stabilize the masts. Onward!
-
Thanks Steve, Russ, CH, HH and to everyone who hit the like button.
Hubac's Historian, I picked up a set of ten diamond needle files at Harbor Freight for under $10. They seem to be holding pretty well.
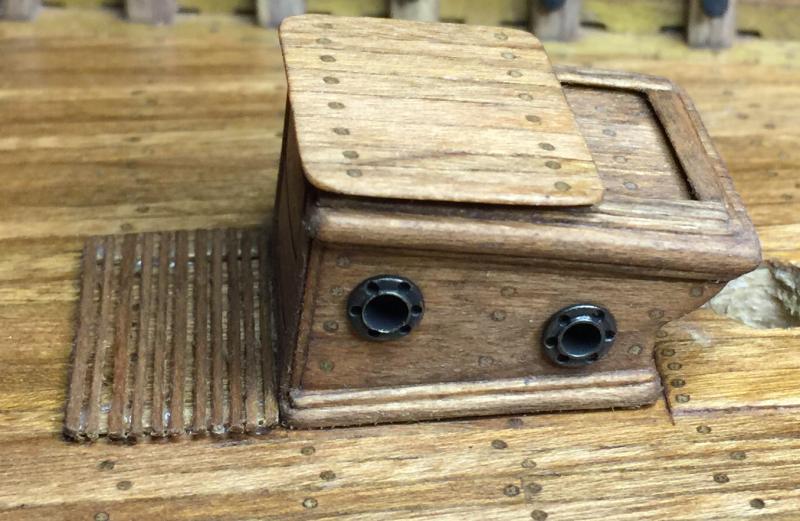
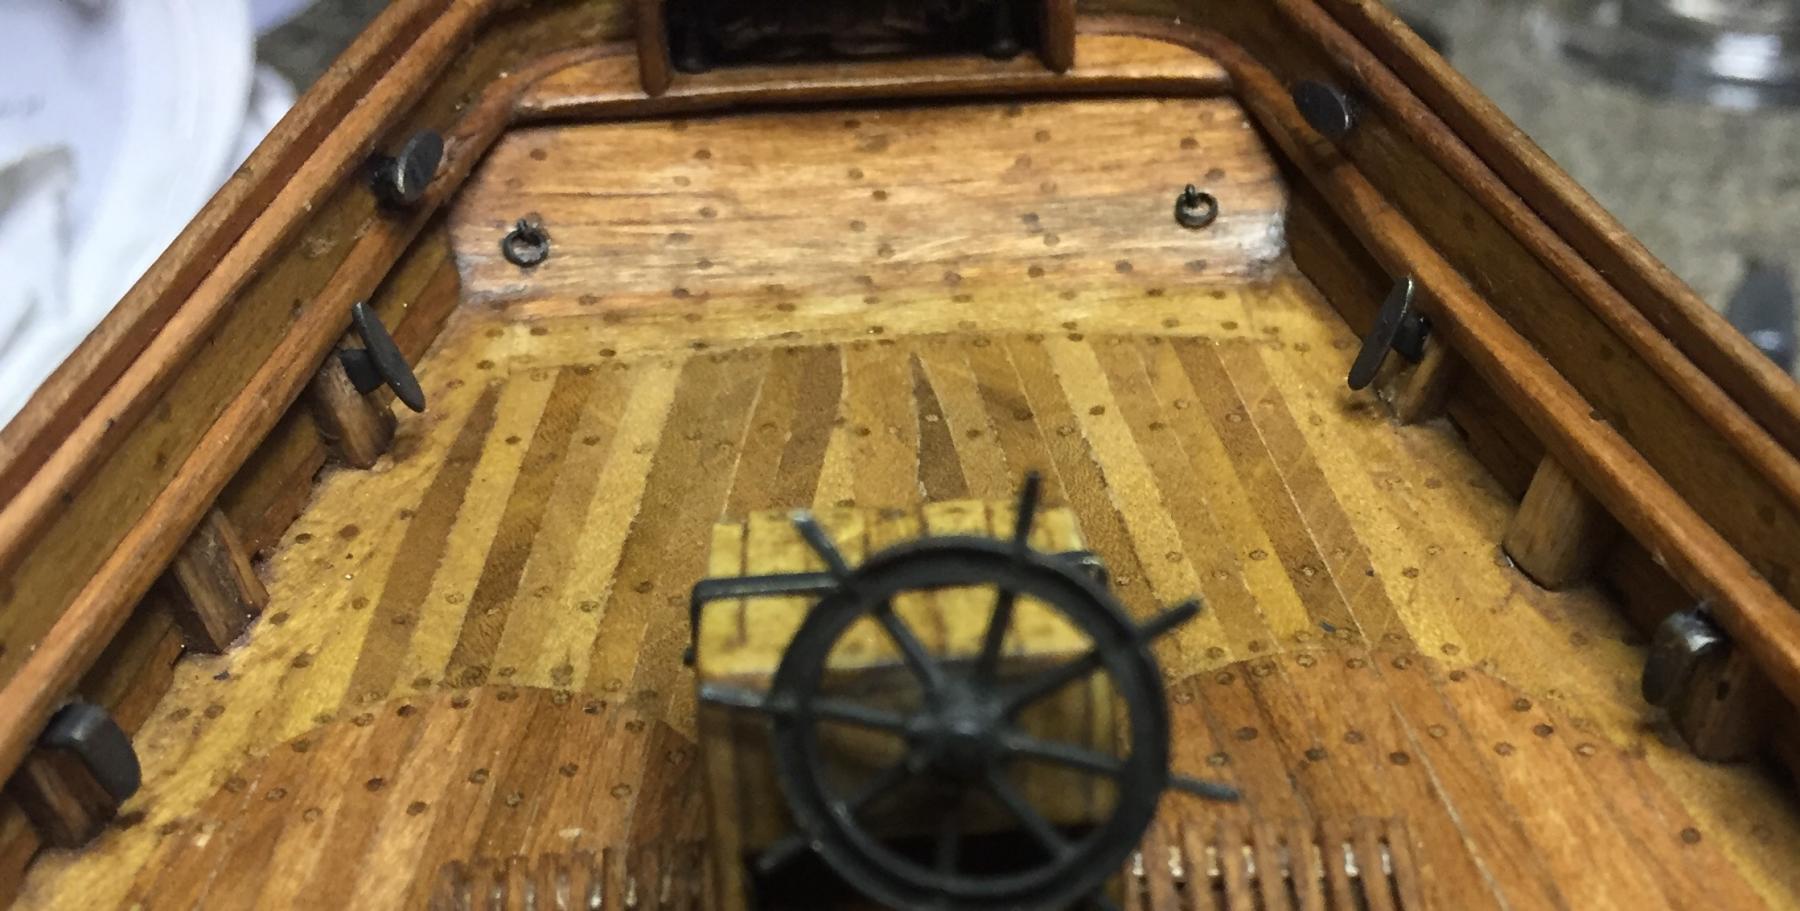
Finished up the fore companion way. And yes, both companionways have removable panels.


During my installation of all of the cleats and eyebolts, I snagged and broke my wheel, so this is wheel 2.0.
-
Looking awesome as usual CaptainSteve!
- Canute, mtaylor and CaptainSteve
-
3
-
Excellent!!! I don't have any tools small enough for that!
- mtaylor, CaptainSteve, Salty Sea Dog and 1 other
-
4
-
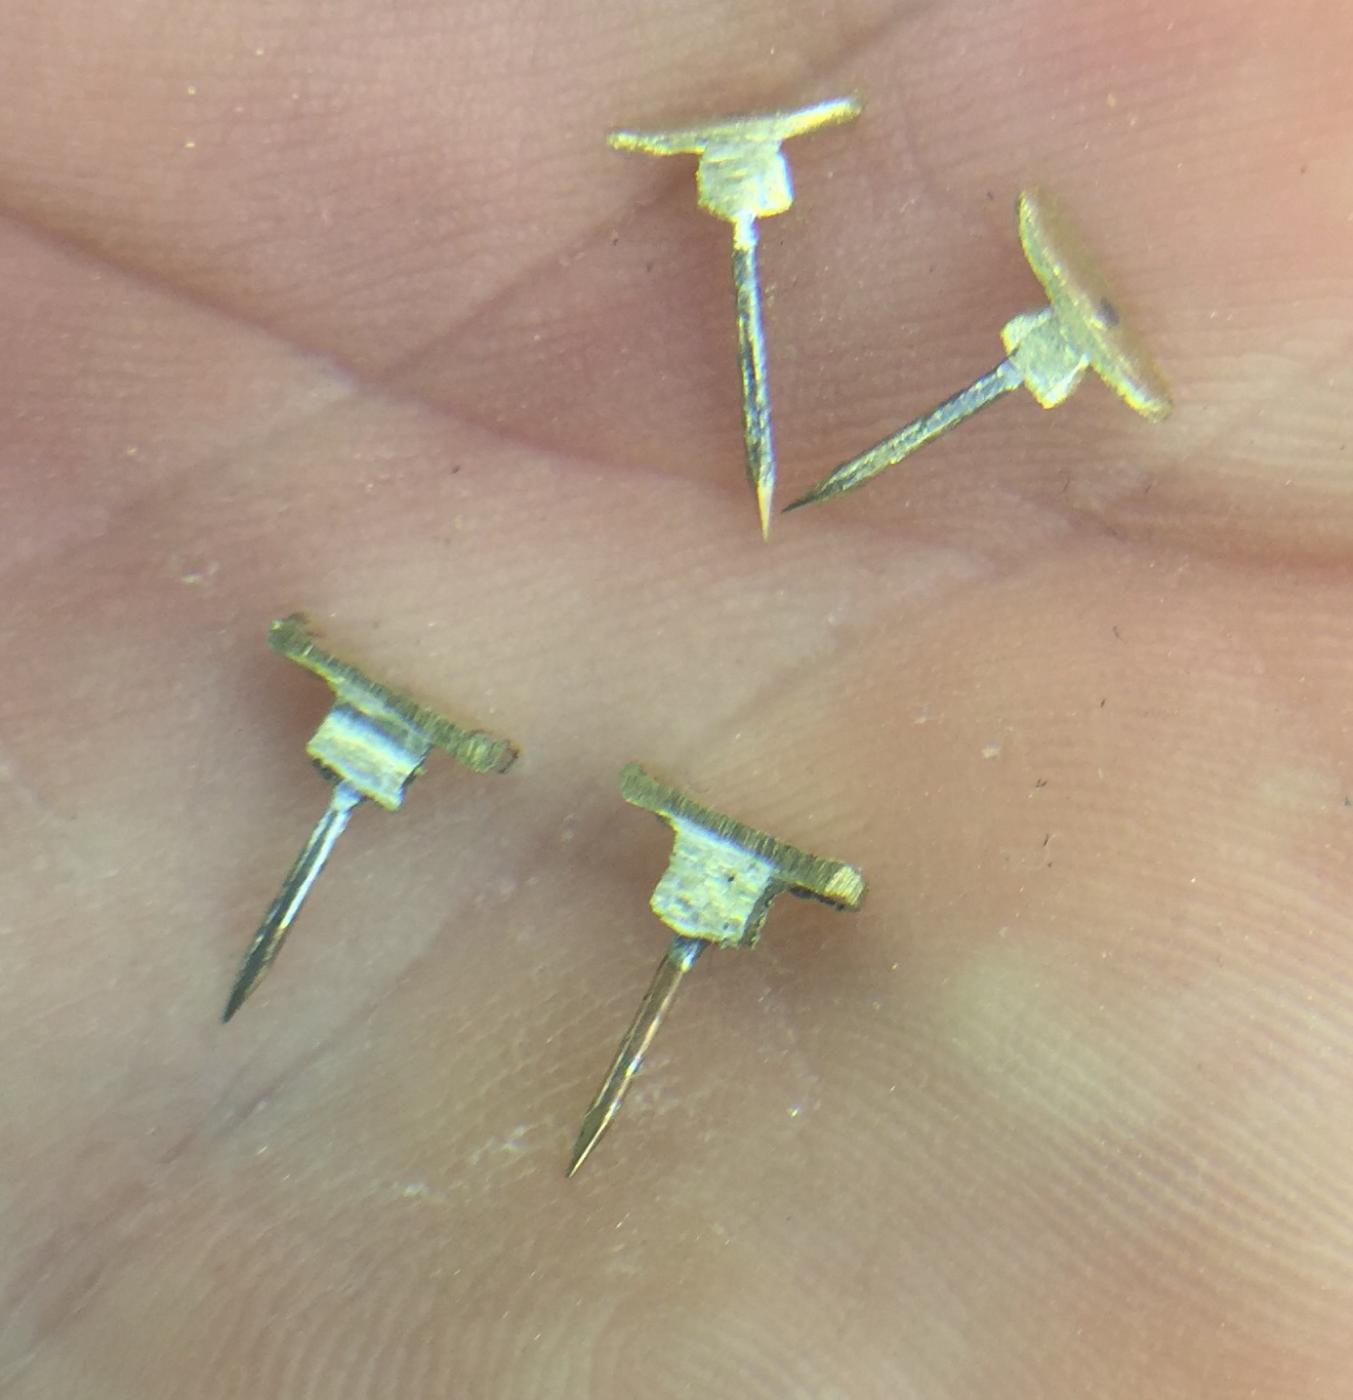
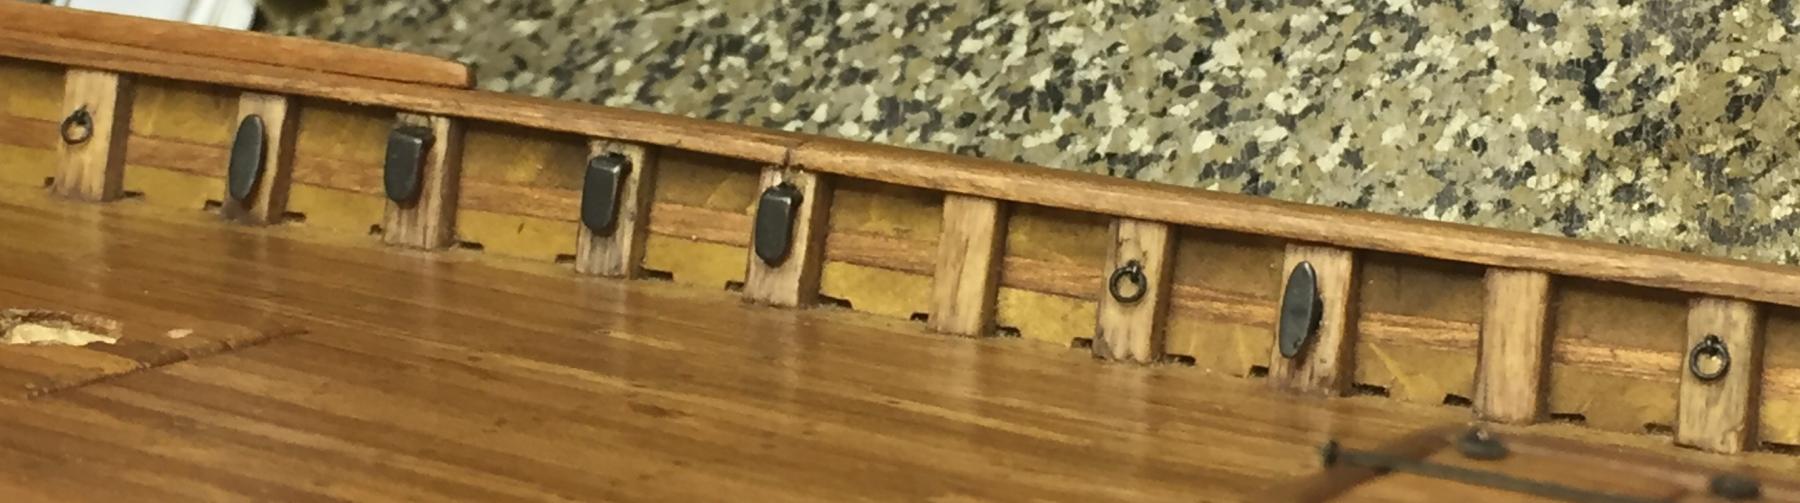
Thanks CH, Gary, David, Hubac's Historian, Buck, Mark and all those who hit the like button.
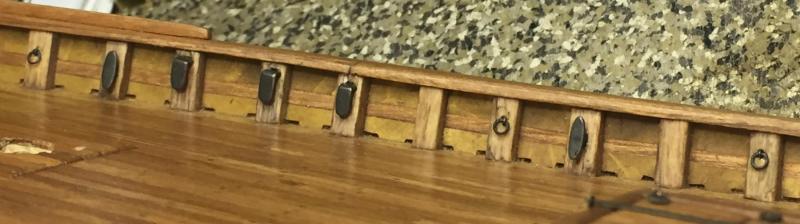
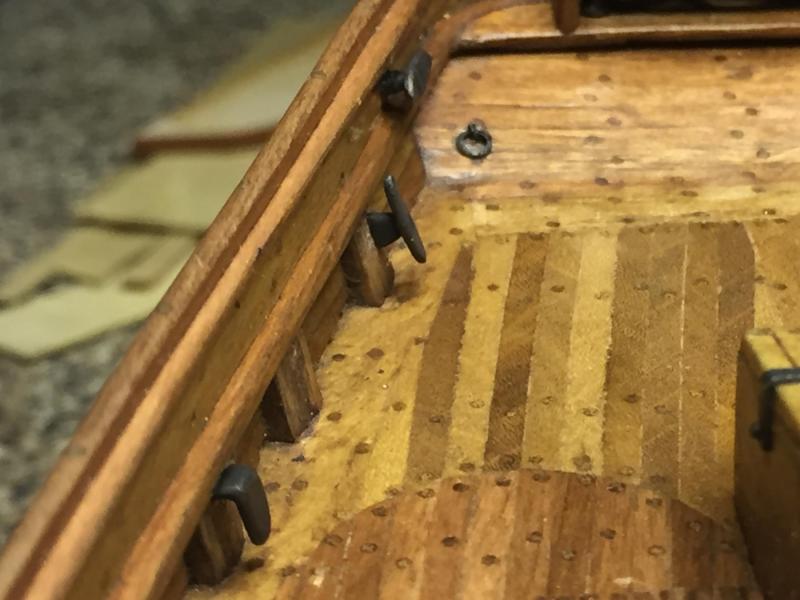
I know the hunk of metal looked strange so here's the result of a lot of filing...cleats(the [ shape was so they curve slightly up). The point also make for an easier install.
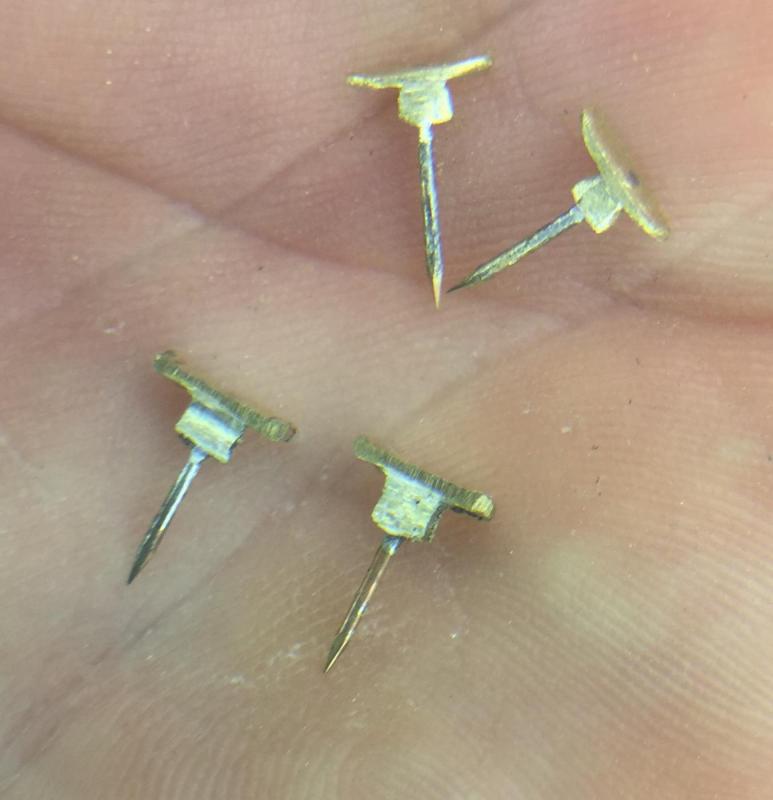
Added to those are snatch cleats and the eyebolt to finish out the tie downs on the rails.

Thanks for everyone's support and encouragement..onward!
- CaptainSteve, Canute, russ and 11 others
-
14
-
-
Thanks CaptainSteve, Buck and everyone for beating that like button like a redhead step child, or me.
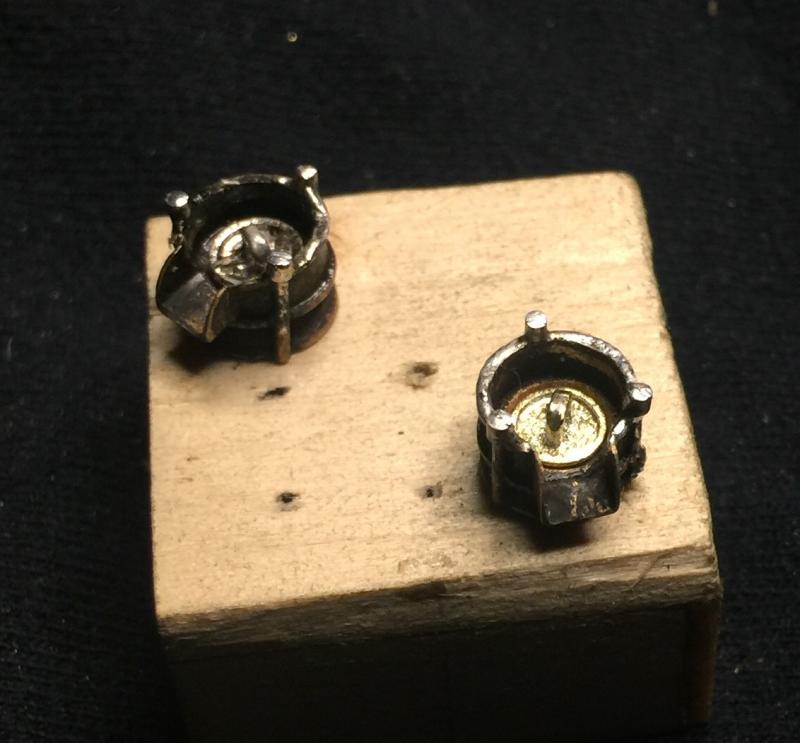
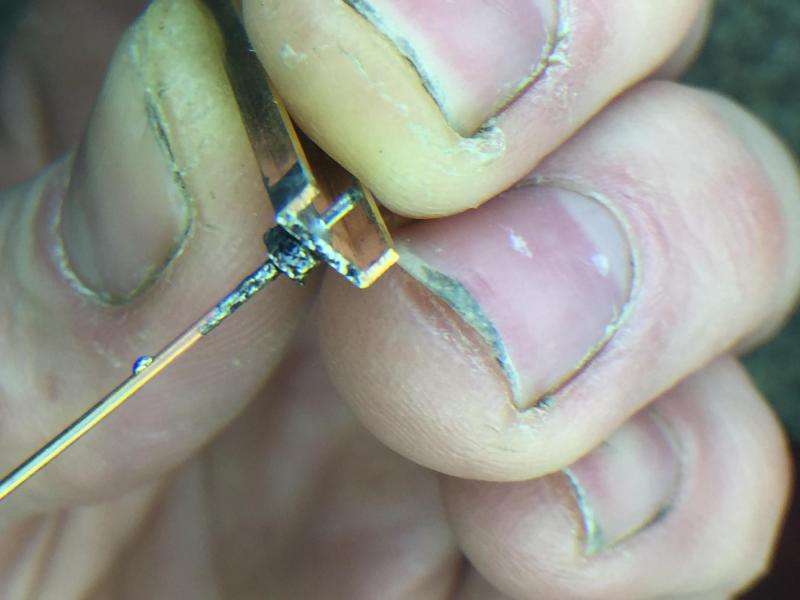
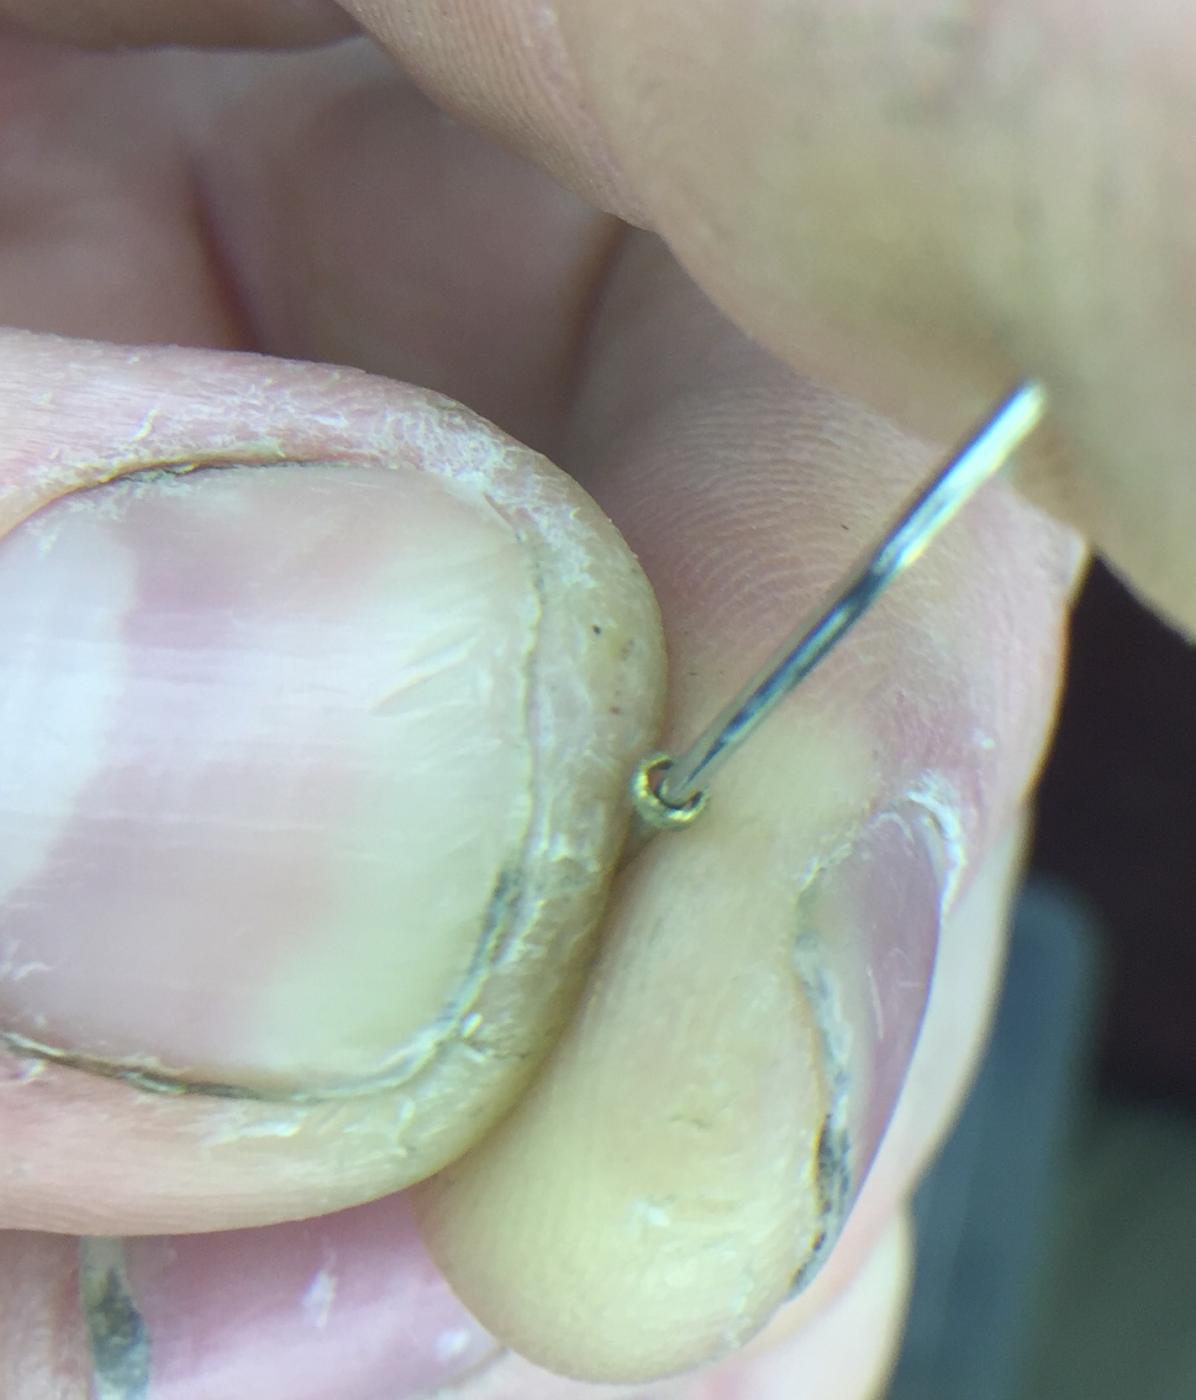
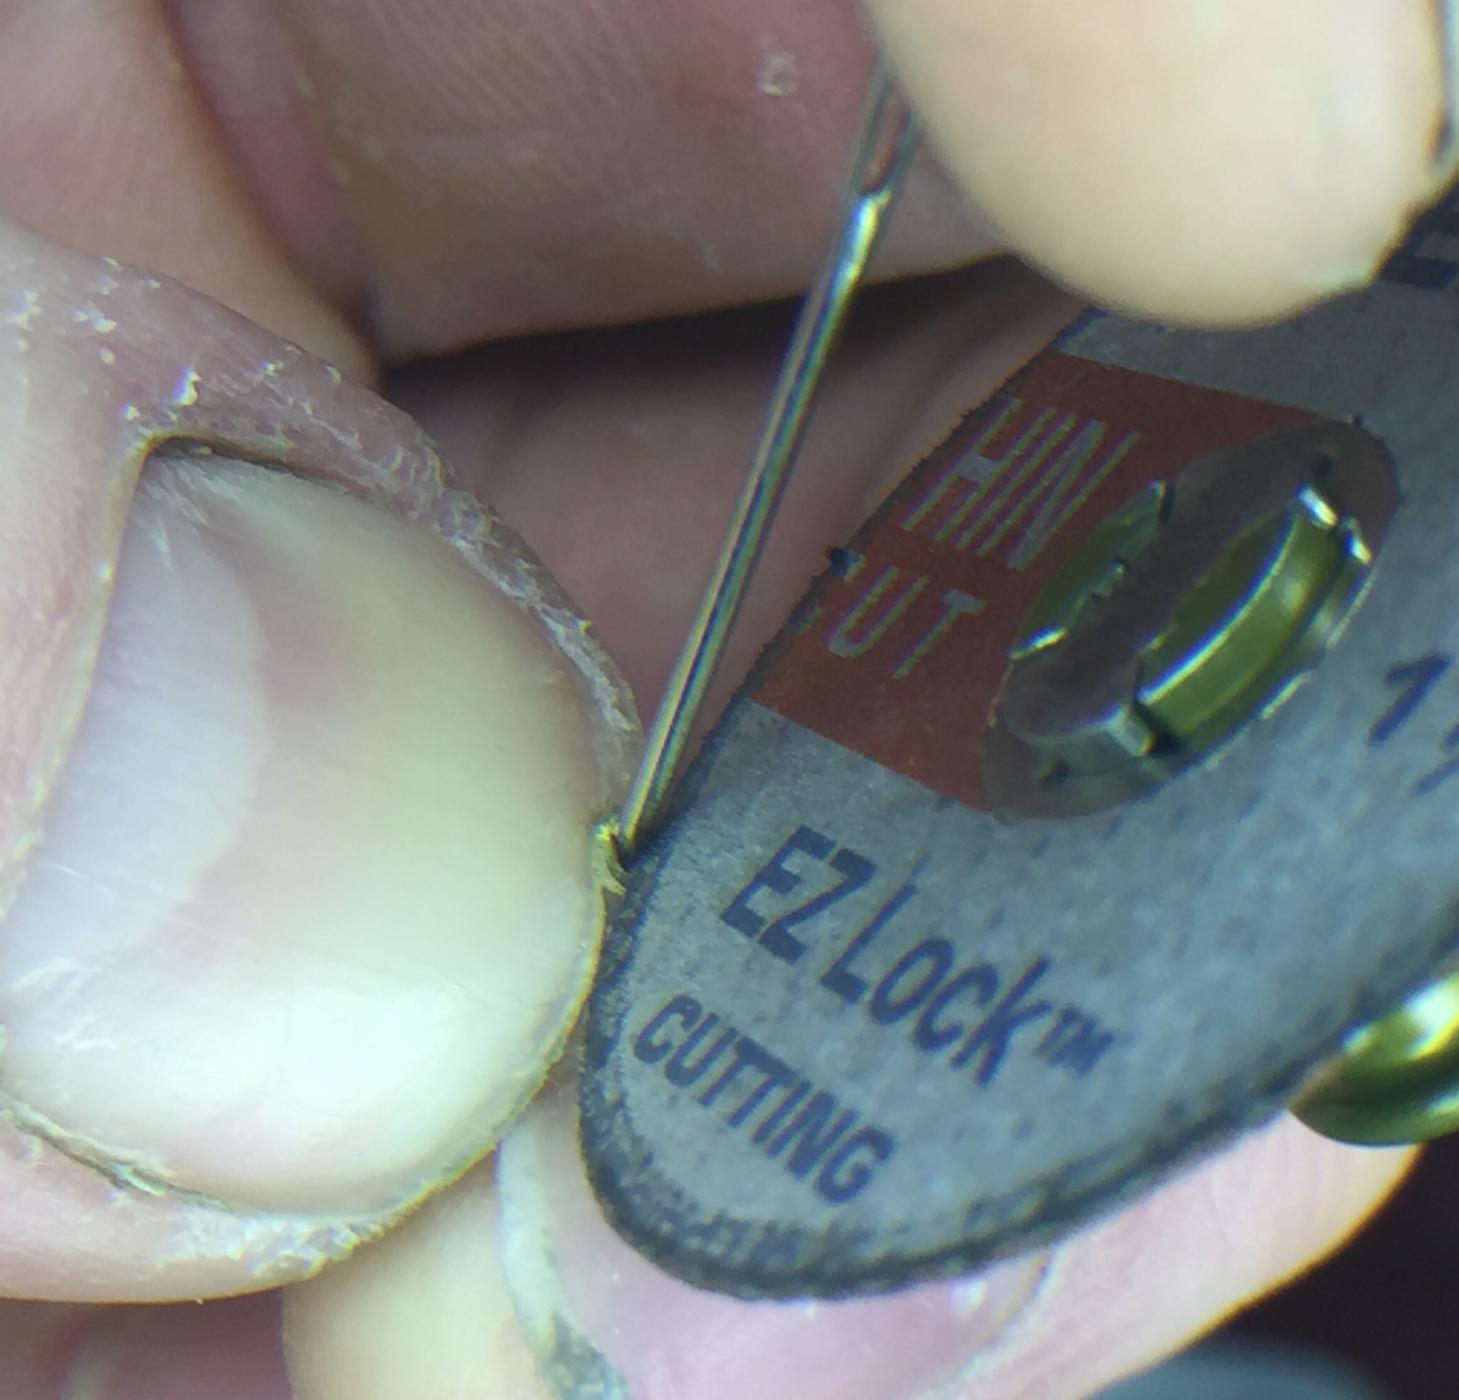
Buck, if I've left any doubt over my sanity, this should remove it. So these cut rings are slid onto a metal rod slightly smaller than the ring. Then I hold it like this...

I then gently use my grinding wheel to thin the ring. It takes a very light touch to get the ring spinning. I grind it to desired thickness(.015 in) while keeping the rod around 1:00 and the disk around 2:00. Only my nail is touched by the ring to make as little friction as possible. Then I drop the rod and grinding wheel almost horizontal. Again, gently, oh sooo gently, make contact with the ring and flow in a half circle. Easy huh? Until you get cocky and burn a hole through your nail. Once again, I got to talk like a sailor!

Anyone want to guess what this is going to be?
- Elia, Salty Sea Dog, Jack12477 and 11 others
-
14
-
Hey CH, I had to look back in my notes to find this one. The shrouds(standing rigging) is 0,8mm, the running rigging is 0,5mm and the lanyards are 0,25mm. Hope that helps. If you or Mrs. CH have sewing, knitting or crochet thread, or know someone who does, here are the thread sizes: 0,8mm = size 3 / 0,5mm = size 10 / 0,25mm = size 30. I use these exclusively, mostly since my other hobby is fine thread crochet. Six cord mercerized is a must. These can all be acquired on eBay or Etsy for pretty cheap. A DMC cordonnet special size 30 has 216yds so it goes a long way. Sorry Chuck, don't mean to step on your toes.
- CaptainSteve, mtaylor, FriedClams and 3 others
-
6
-
Another little tidbit, evening things out for railing. I made and installed all of my stanchions after the deck was completed for a more even sand job. I made this little jig with the same concept as marking the waterline, just from the deck instead. I drilled holes to my desired height, inserted a piece of .5mm pencil led, and made a nice even mark at the underside of the railing. Everything was cut long and then sanded down to the line.

I made the sanding jig with filler blocks on one end. This block section was monitored continually to stay on centerline of the deck. This way the rail stays true to the decks curvature, not the work table as in marking the waterline.

- russ, FriedClams, CDW and 12 others
-
15
-
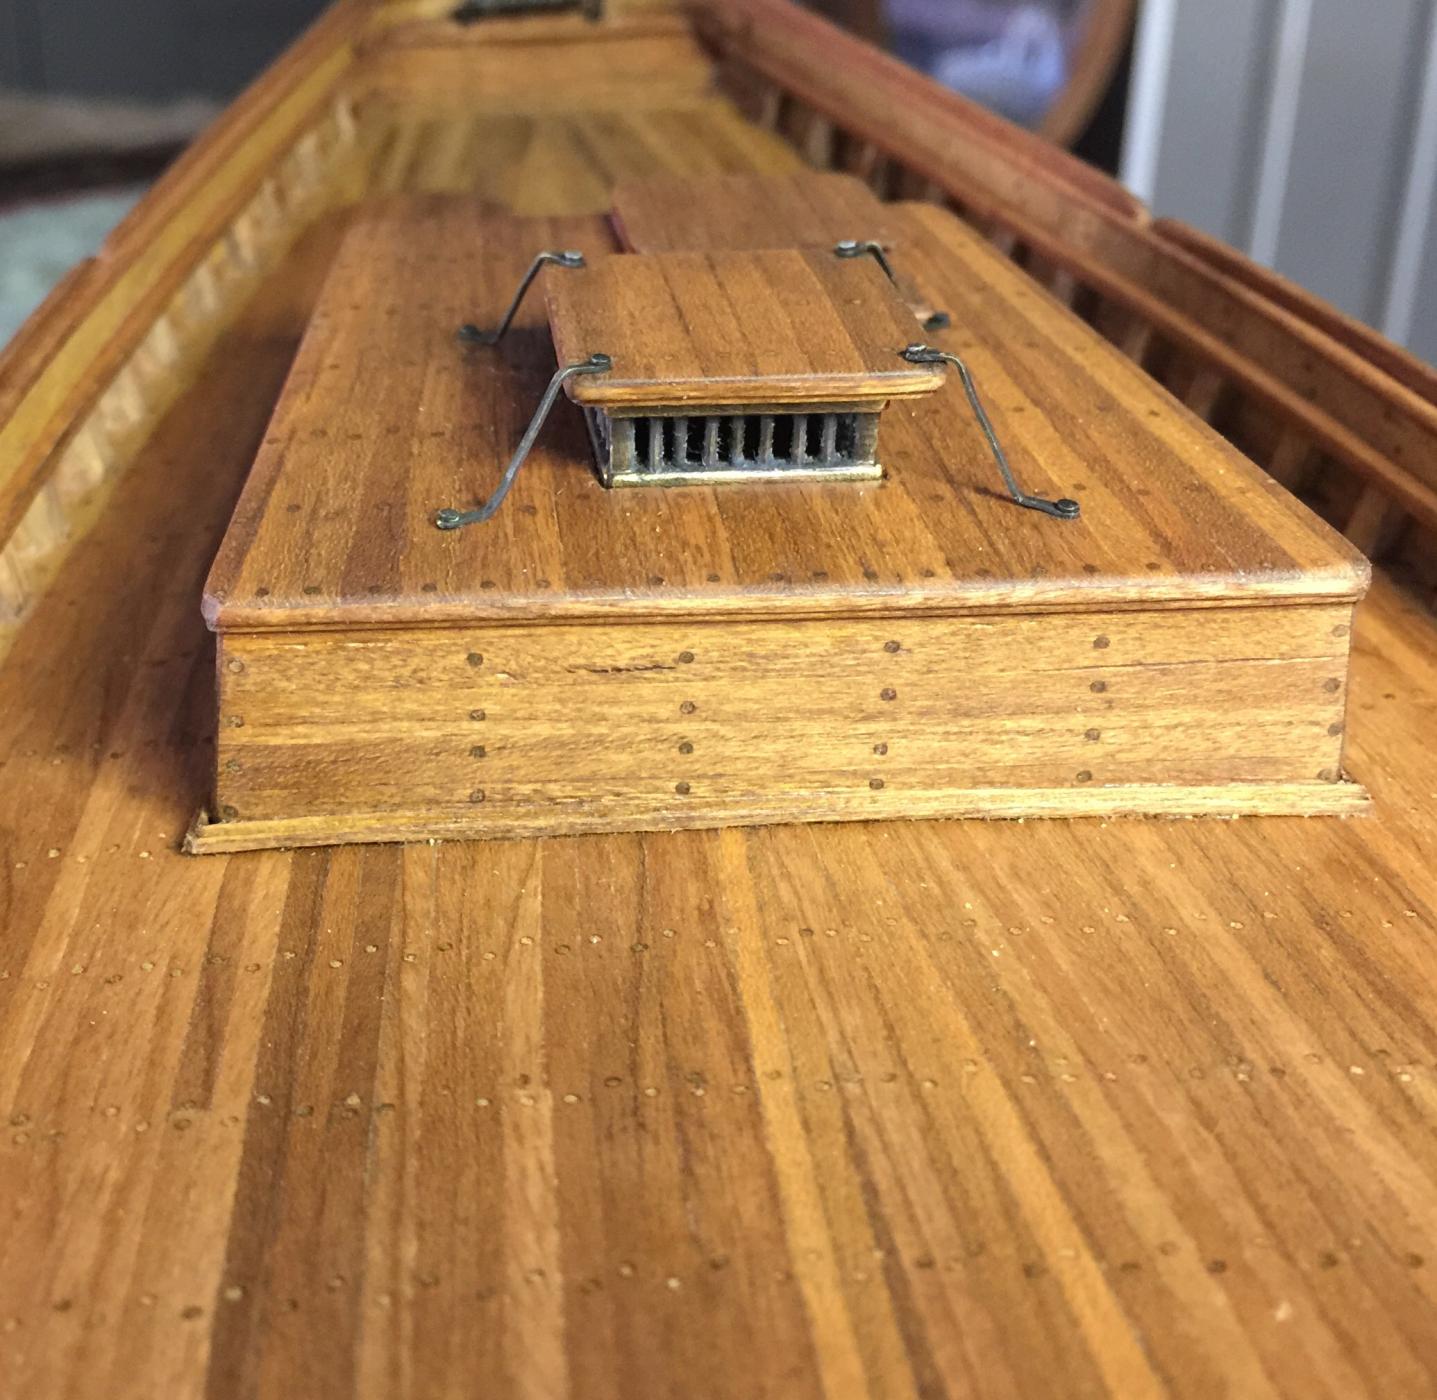
"Batten down the hatches!" Don't get to say that very often. Just thought I'd give a little update, midship hatches made and battened down.
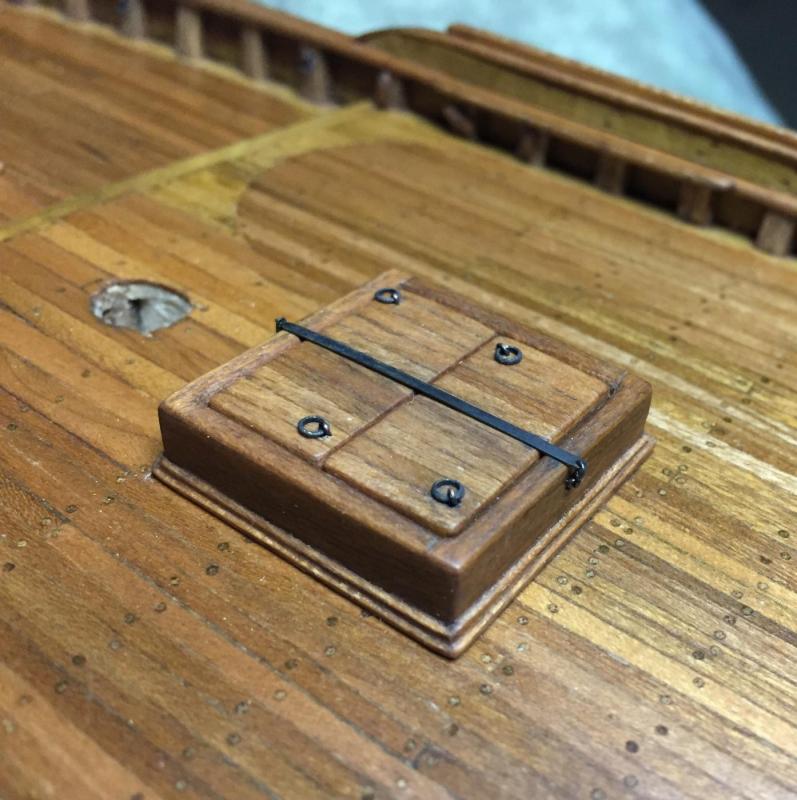
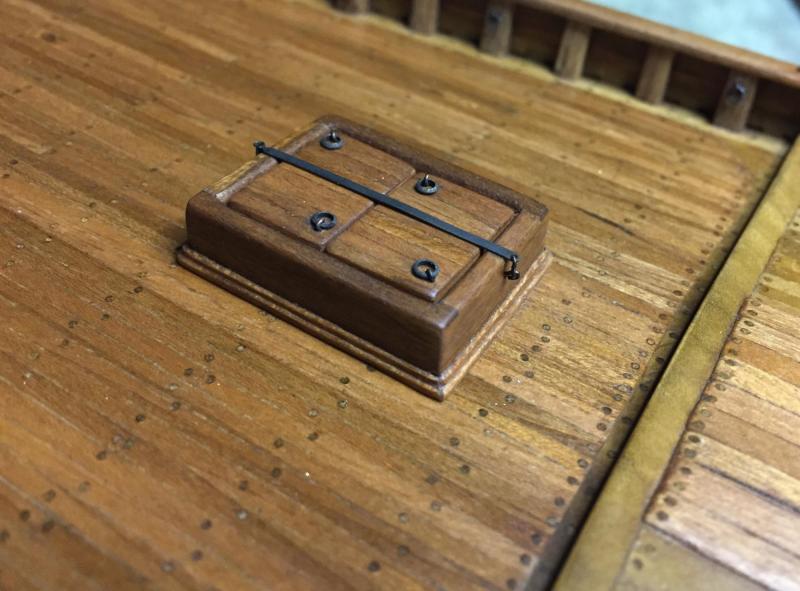
I've never liked the looks of the ring bolts I've made in the past, so here's my new and improved method. I cut the rings from brass tube and the bolt out of copper wire. This way the rings are solid, not cut like the manufactured ones. The twist is buried so it's unseen.

-
Thank you CaptainSteve, CH, Mark, Elia, Frank and for all the likes.
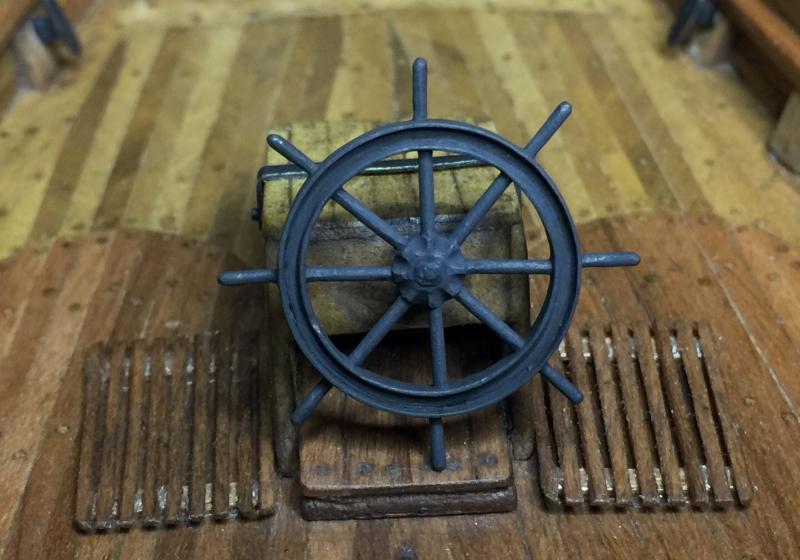
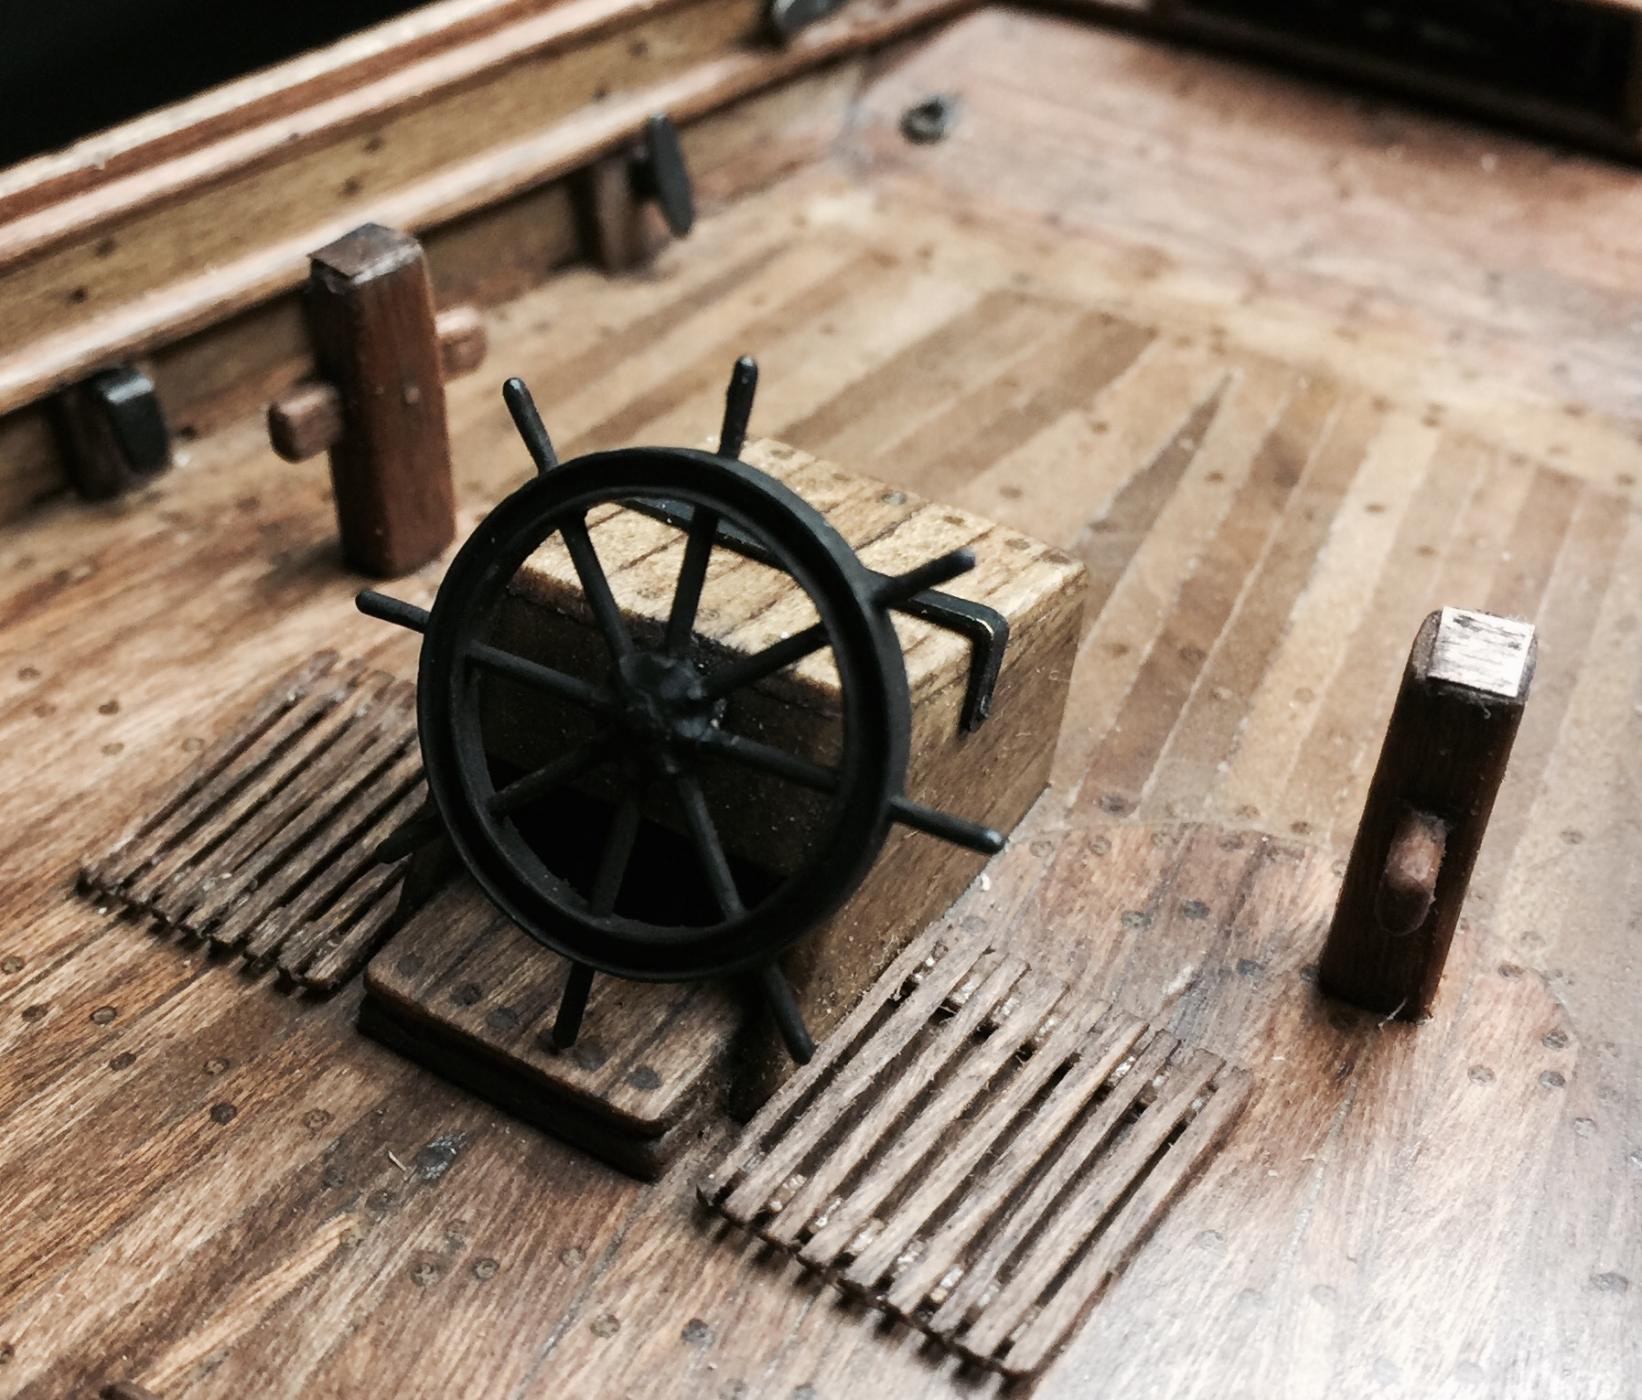
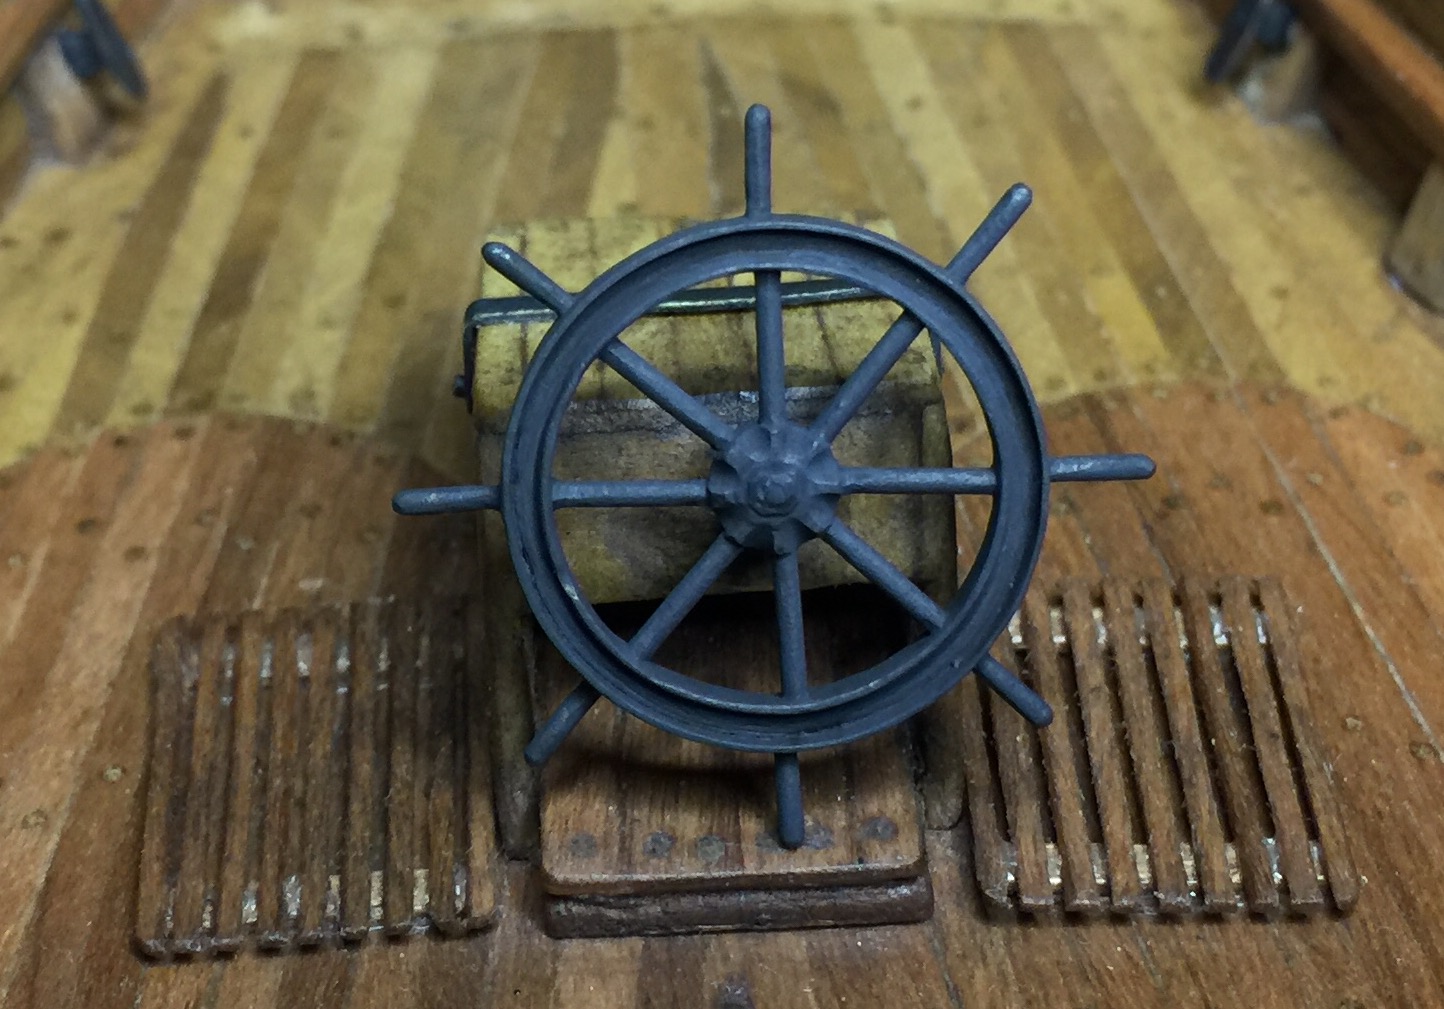
Elia...the rim and hub of the wheel is made from four pieces each. The rings that touch the spokes were drilled out for the spokes to fit into. On the rim a ring was put on the outside to lock spokes in place, on the hub one was put on the inside. Then one more thin ring and a wider ring to complete the i-beam shape. Then it was all soldered. Holes were drilled in the outmost ring and handles were soldered into them. The shaft was then put through the hub, capping it with three separate rings for the washer and bolt.
Pretty simple huh?
- Elijah, Jack12477, CaptainSteve and 4 others
-
7
-
Excellent job CH! It looks really nice with the natural wood color. I was actually surprised when I rigged mine that the instructions weren't too bad. I color coded the rigging to keep each size separate. Of course I referred to the Young Sea Oficer's Sheet Anchor as the authority over Corel's instructions. When rigging I also soaked the thread tip with CA. When it dried I cut a sharp angle to it, essentially making it a firm needle.
-
Thanks Jack, Mark, Ken, David, Michael, Richard and to those who hit the like button.
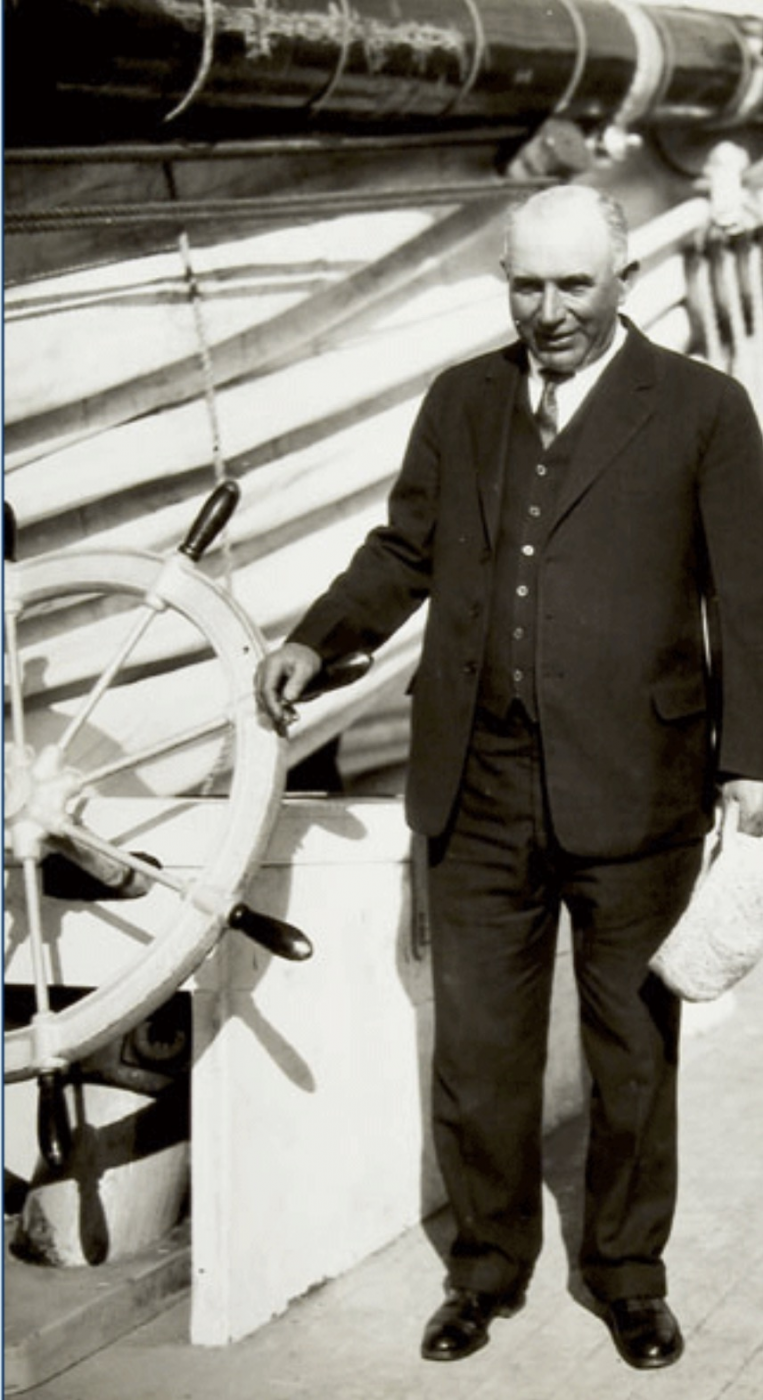
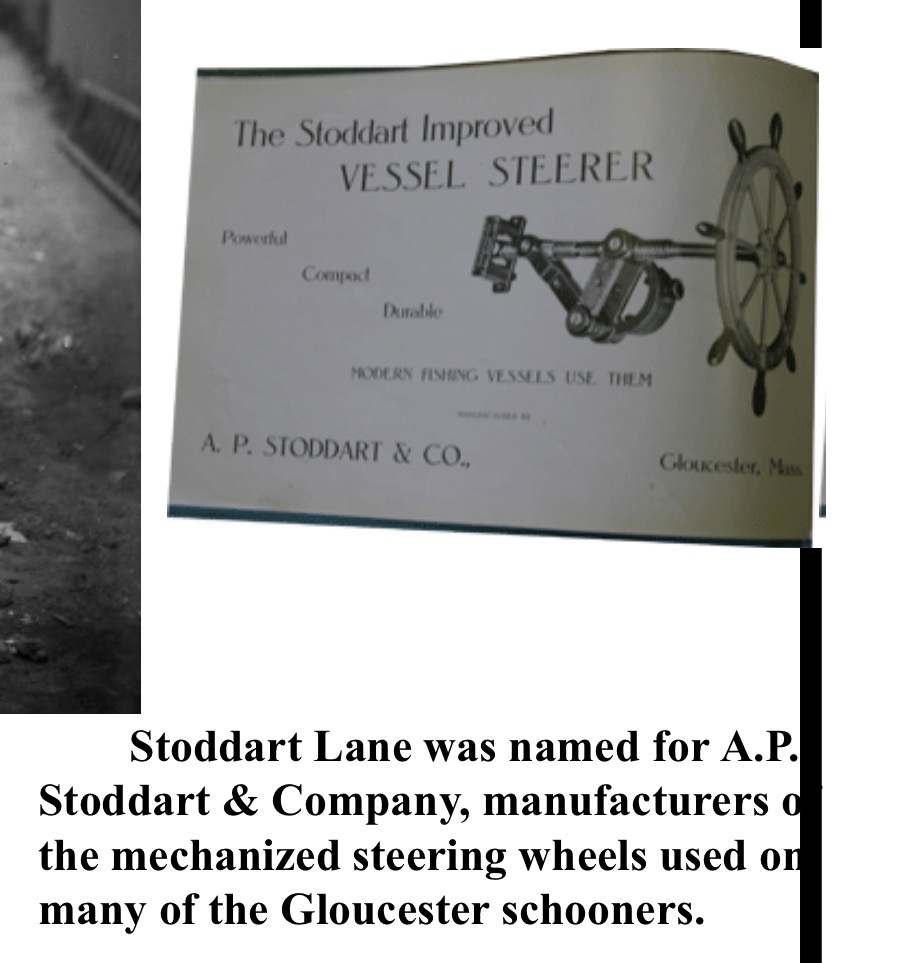
A P Stoddart
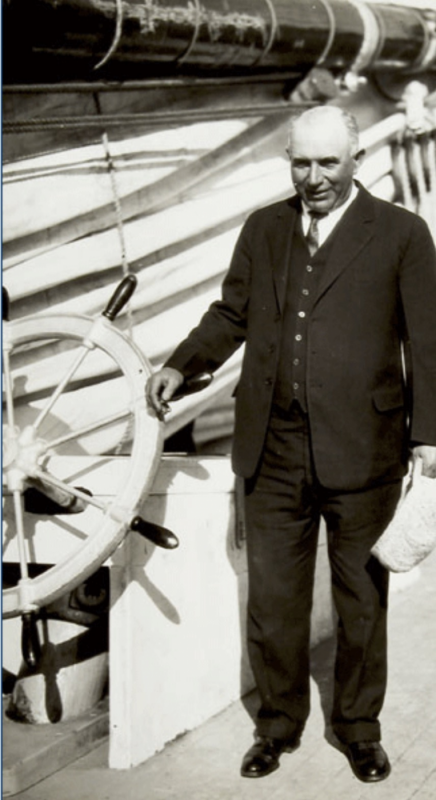
This era and area(Glocester) turned out a lot of new inventions and ideas, giving way to motor power and phasing out wind power. The Stoddart Co was one of these. There was the worm drive and the Stoddart improved vessel steerer.
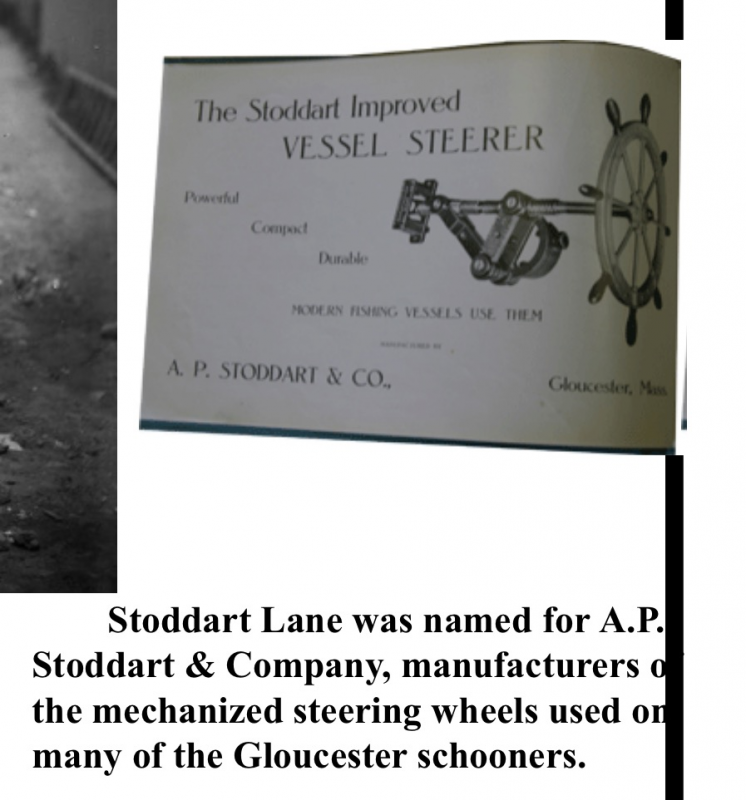

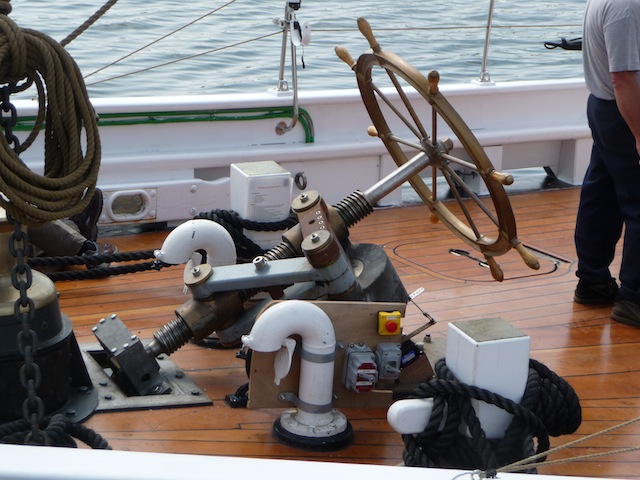
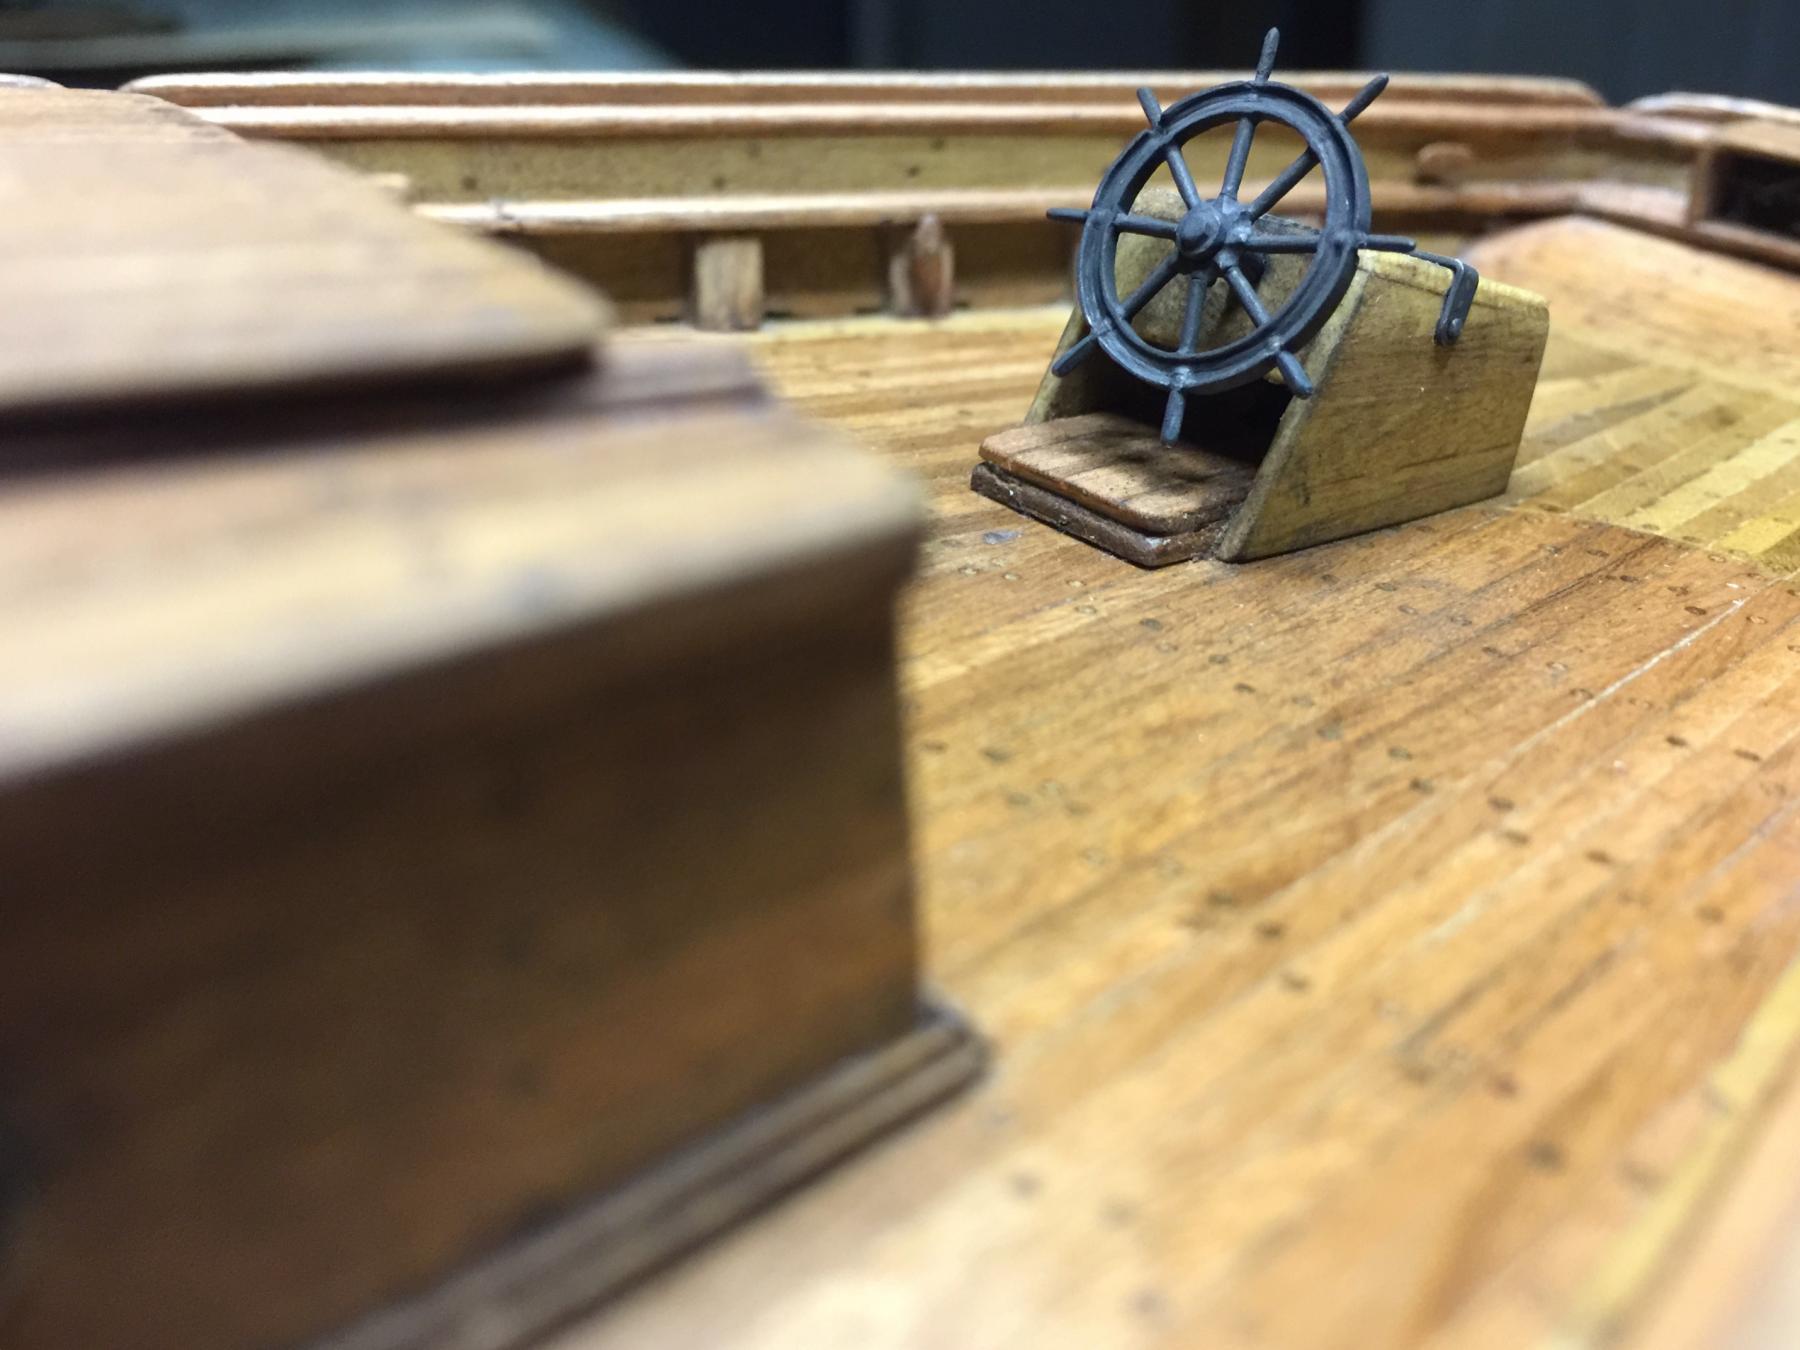
The thought crossed my mind to attempt to replicate this complex mechanism, which was soon dismissed, mostly because it all gets covered. So here's my attempt at a more realistic wheel than the kit provided part. There's over 20 pieces to this wheel which proved to test my soldering skills, I have much to learn. Maybe I should send it off to Buck to have him put the Stoddart logo on it.
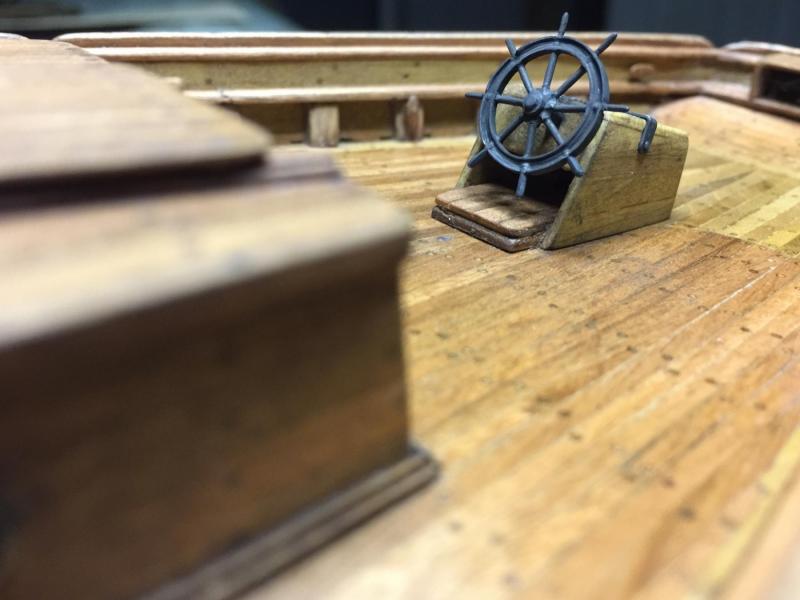
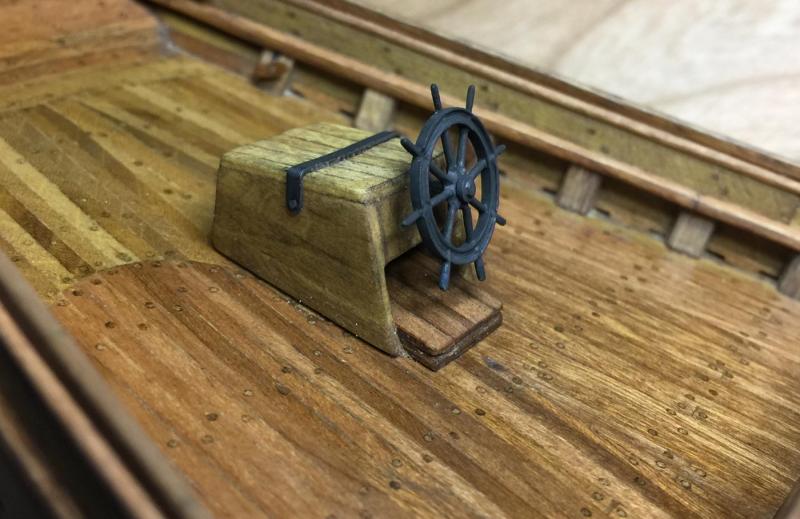
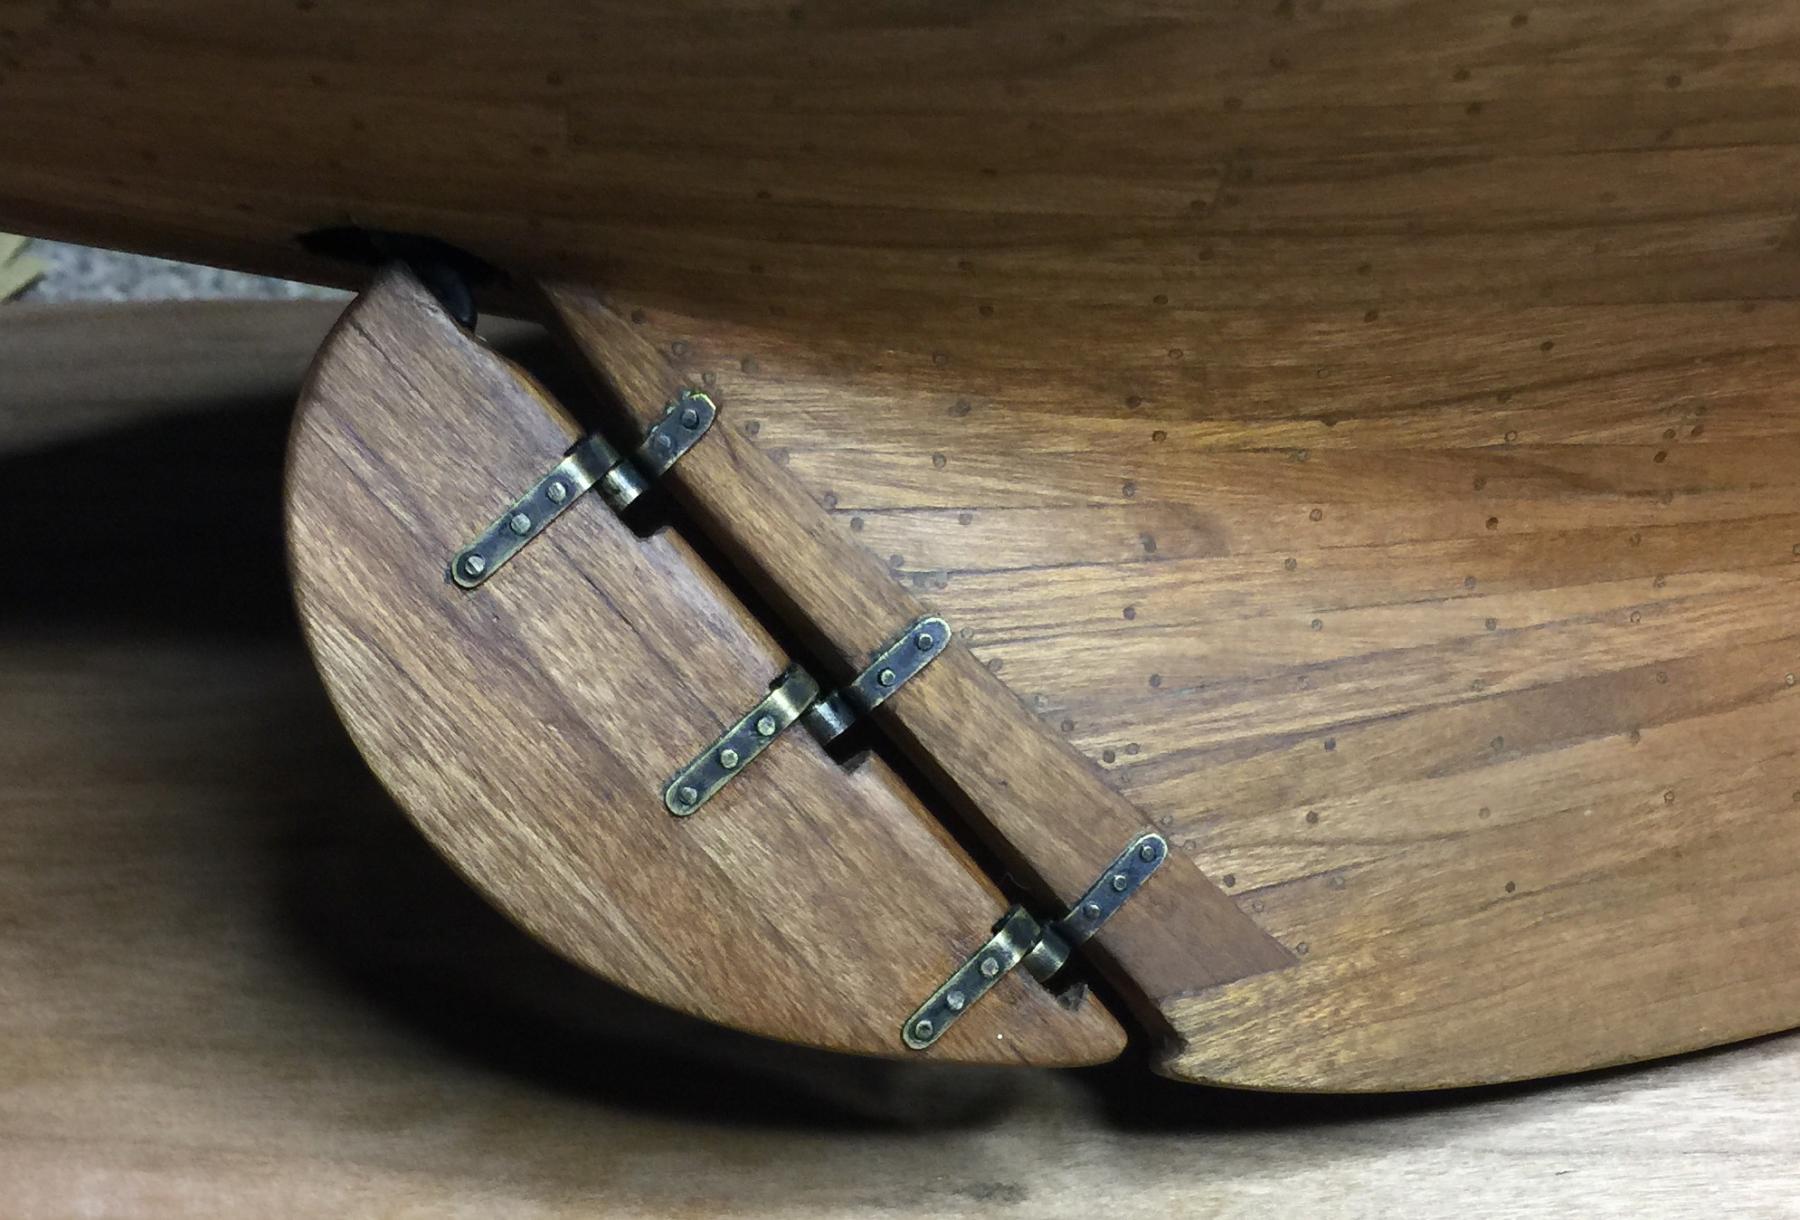
This was the second rudder with pintles and gudgeons I made, having made the first rudder 1/2 as thick as it should be. Also I decided to apply Cherry Minwax to the cherry and poplar, giving it a more subtle contrast.

Onward!
-
Just getting caught up on things after(and still) a very busy year. Thanks for the kind plug by the way.
You are on a great path with this build by adapting things with a less than helpful instruction list. I had to rely on learning from others and my own errors, tossing the instructions to the wayside. I ended up taking a look at as many USRC's as possible, regardless of the tonnage, to get a 'feel' of what was done during this period. Then I made things to 'look and feel' right.
My hat goes off to you to use what's provided in the kit. The castings were, well, crude and not to scale. I found it easier to use real dimensions for each item and scratch build them all. Today with the use of computers, the dimensions often are different in real life than from the plans. So I would imagine back then as well, shipbuilders made it work and changed things here and there.
I would suggest to not glue the rings in yet. When you start rigging it's easier to hold the blocks and loosely run the rigging through them. Then they can be glued down and tighten the rigging once they're set. I like cog's drawing of attaching with a baton, another way could be to whip the rope to the underside of the channel. This should make it large enough to hold it in place and not look too bulky.
Excellent job!
- ggrieco, CaptainSteve, mtaylor and 2 others
-
5
-
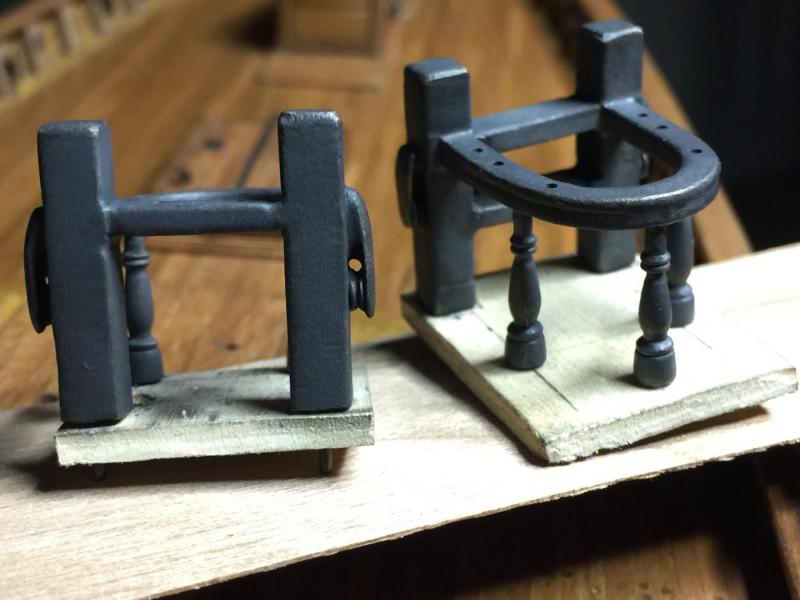
Finally got caught up on your junk boat, wow! Things are looking absolutely incredible! I've found that if I make a little 'stick' man and put him on the deck once in awhile it helps me see things in perspective. I like the little windlasses and I bet if you make a stick man there's room for the little guy to run around. Great work again my friend!
-
Once again I bow before the master! So incredibly awesome!
- mtaylor, Mirabell61, Jack12477 and 1 other
-
4
-
-
-
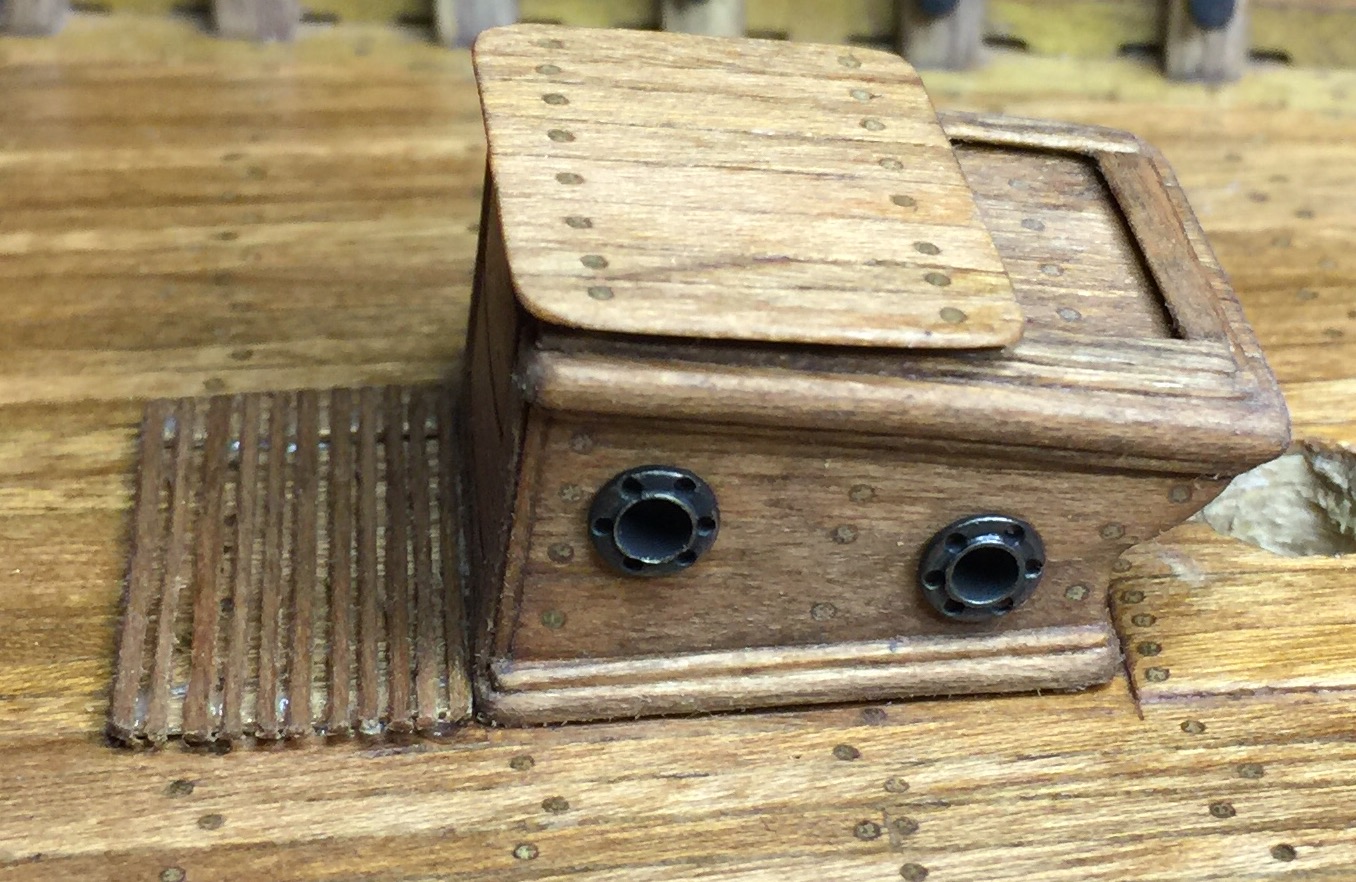
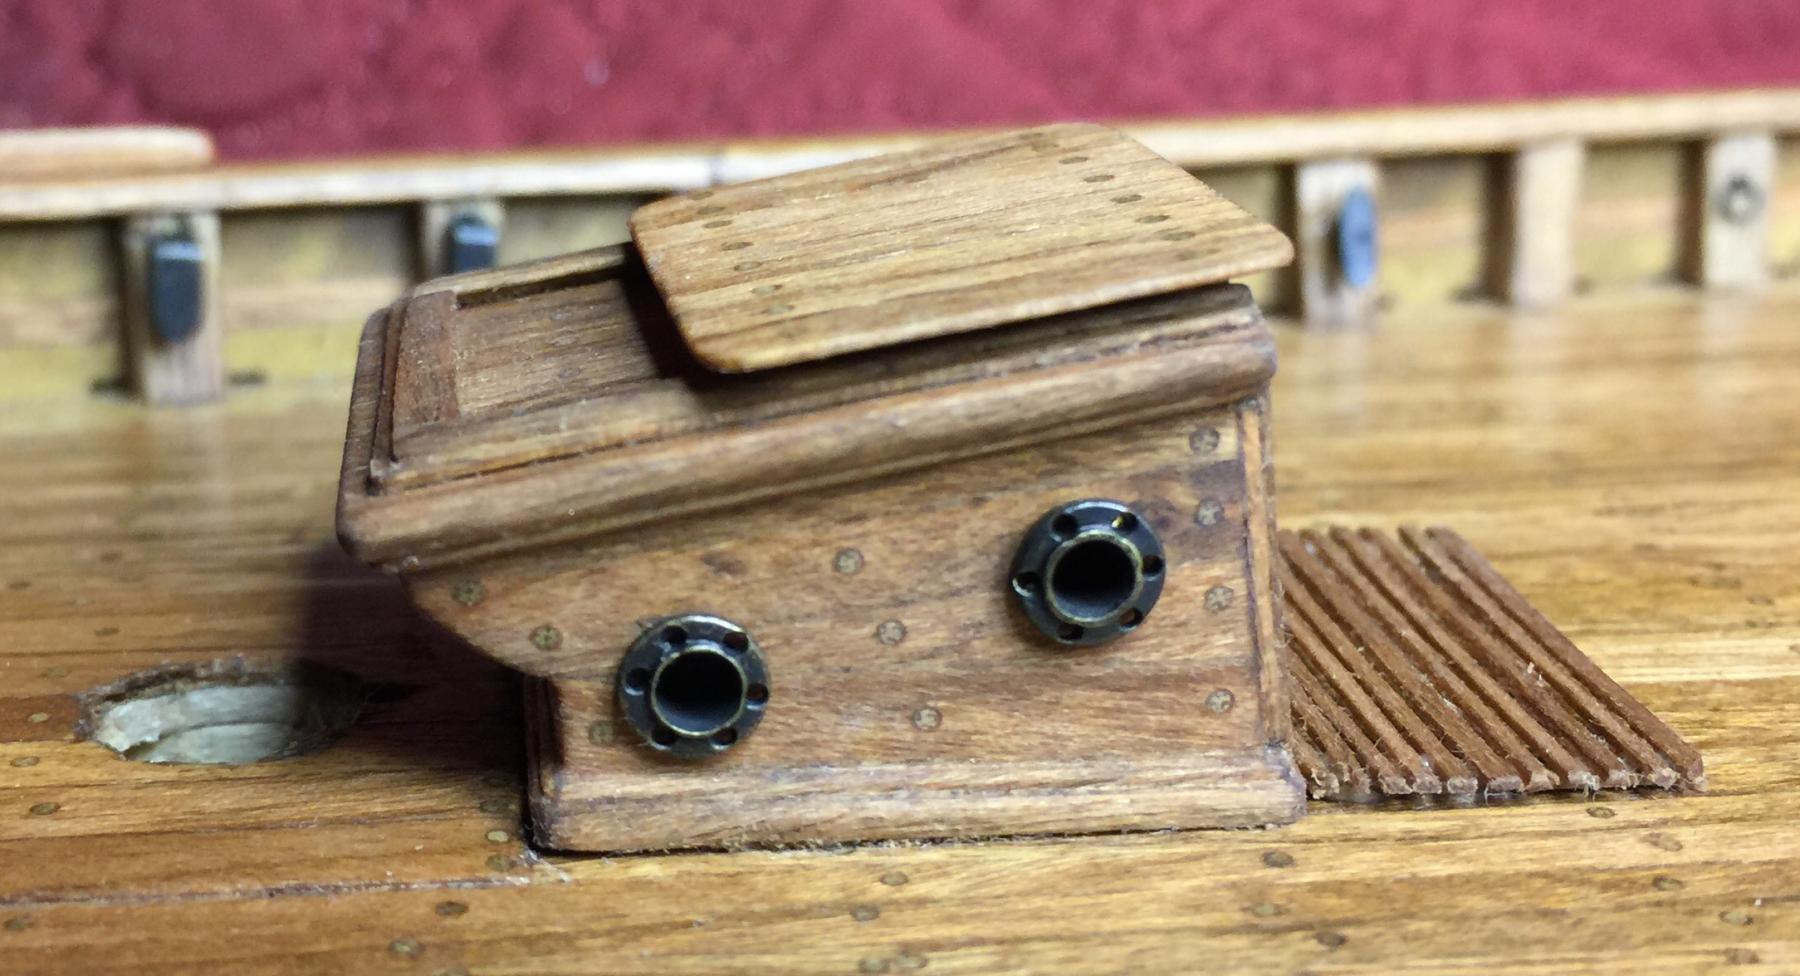
First off, many apologies for my lengthy absence. It's been an extremely busy summer having spent the last few months working nights, double shifts and on the road. Right when I think life's back to normal, bam, another curve ball.
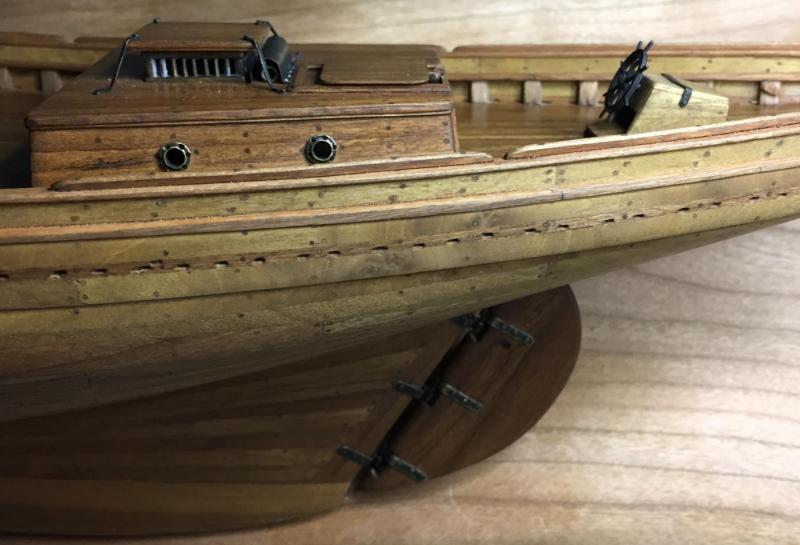
I've been able to steal a few minutes here and there so here's a few updates. The rails are done along with the trunk cabin.

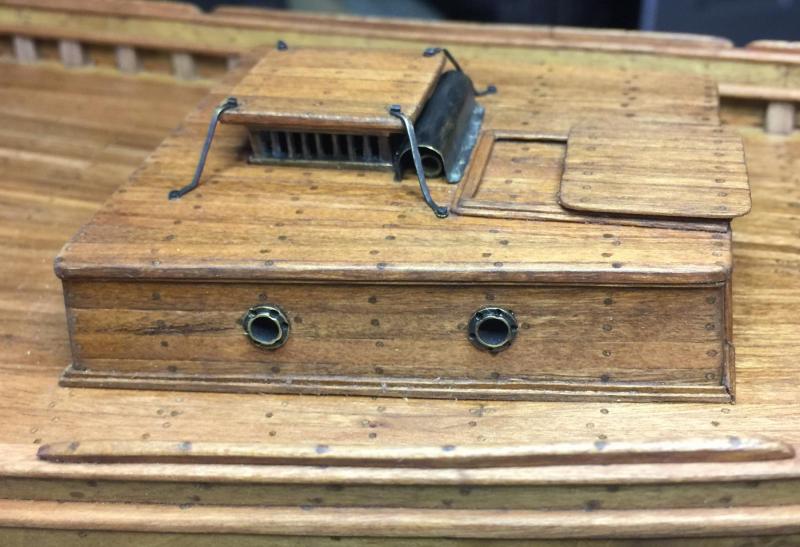

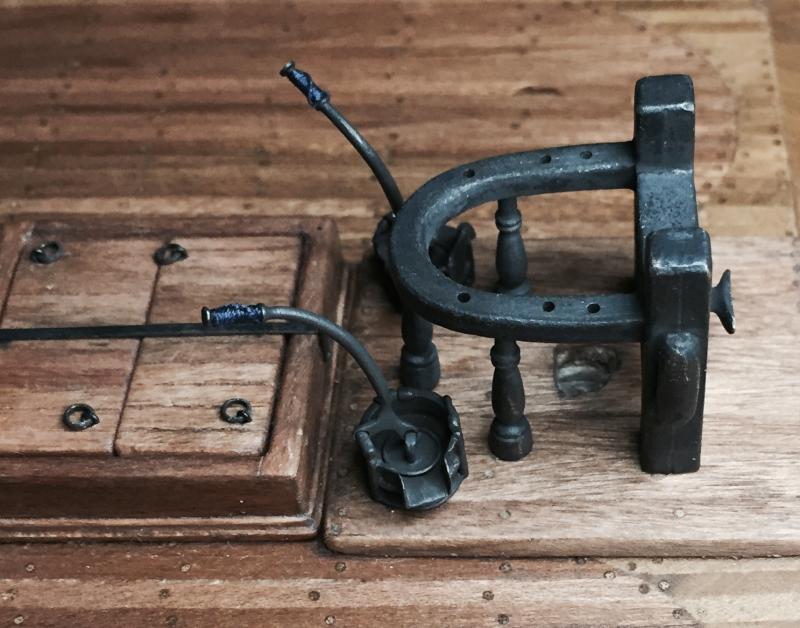
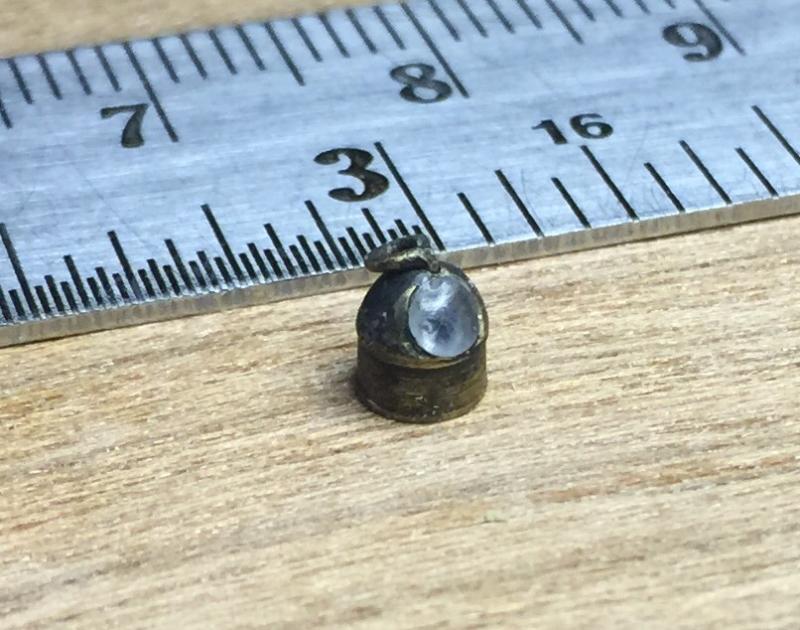
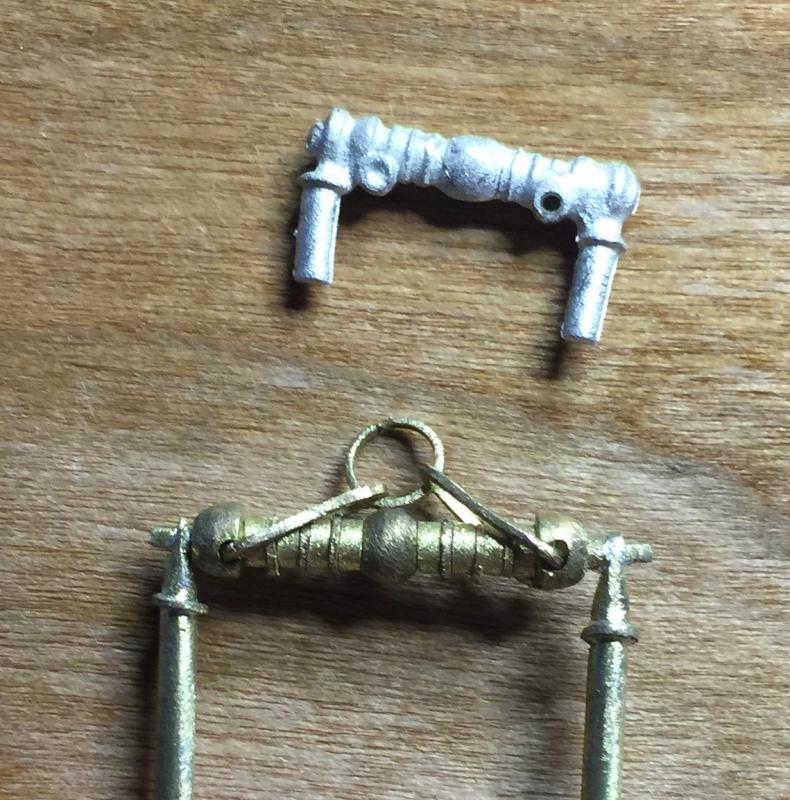
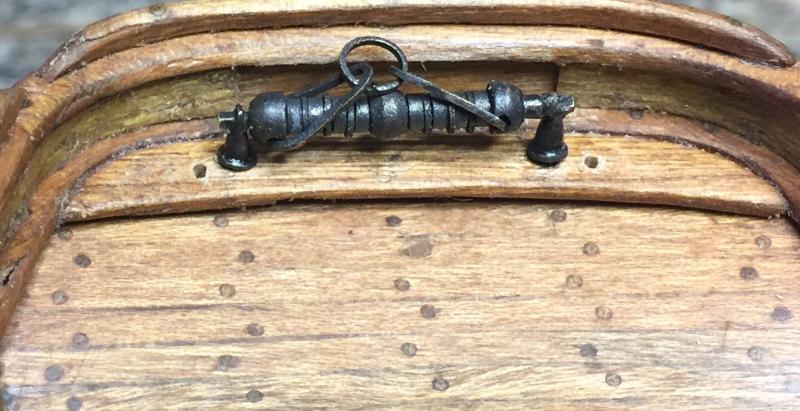
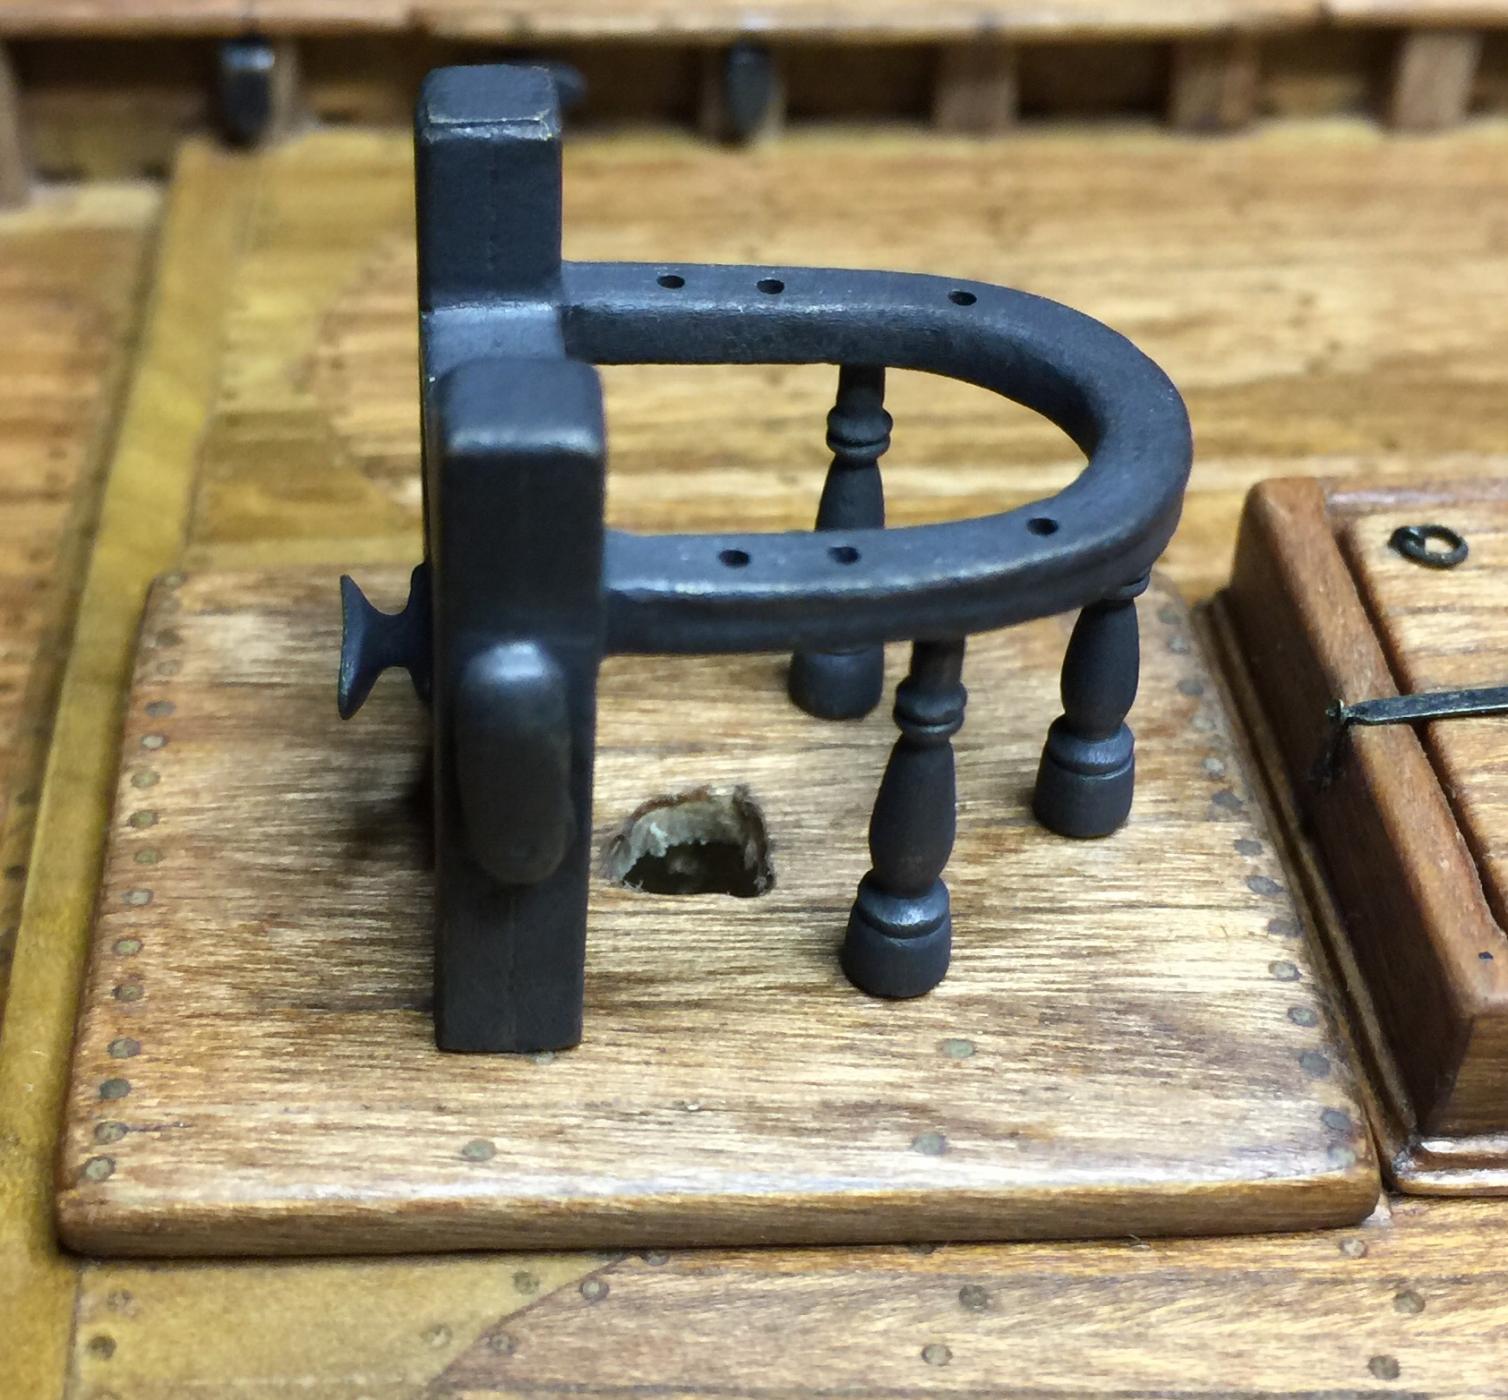
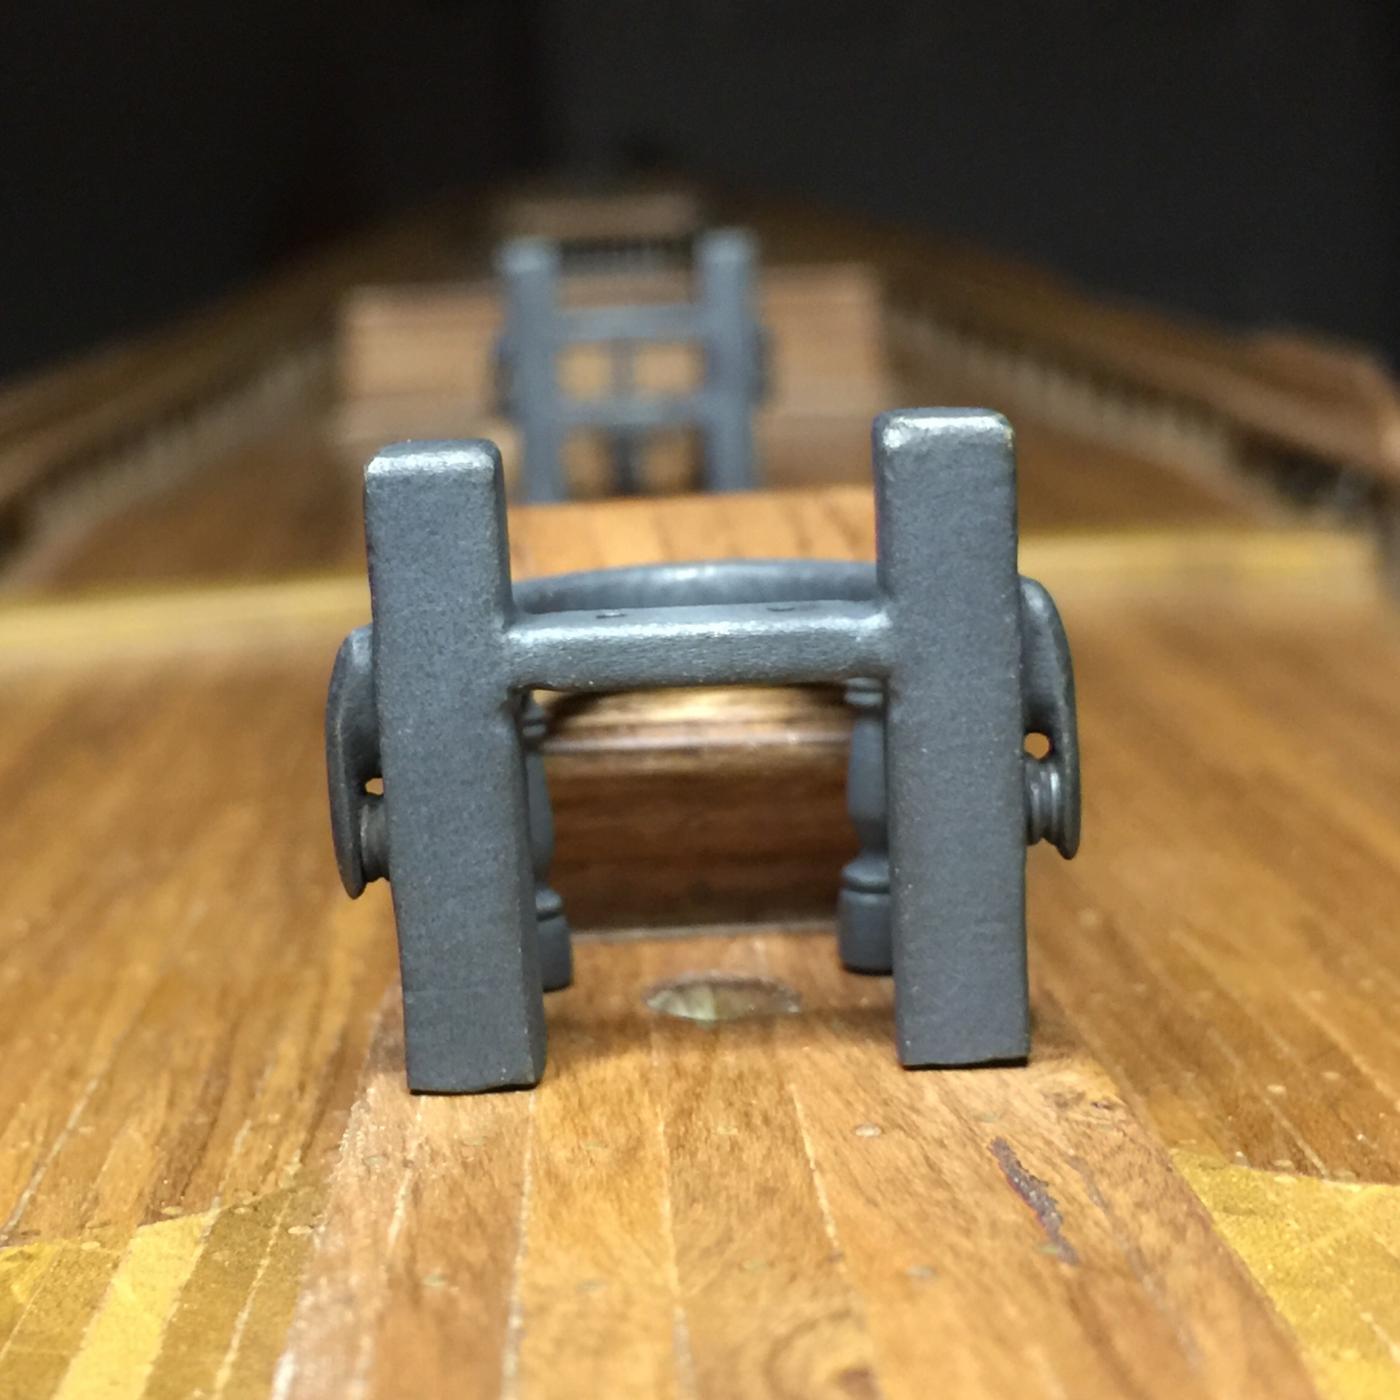
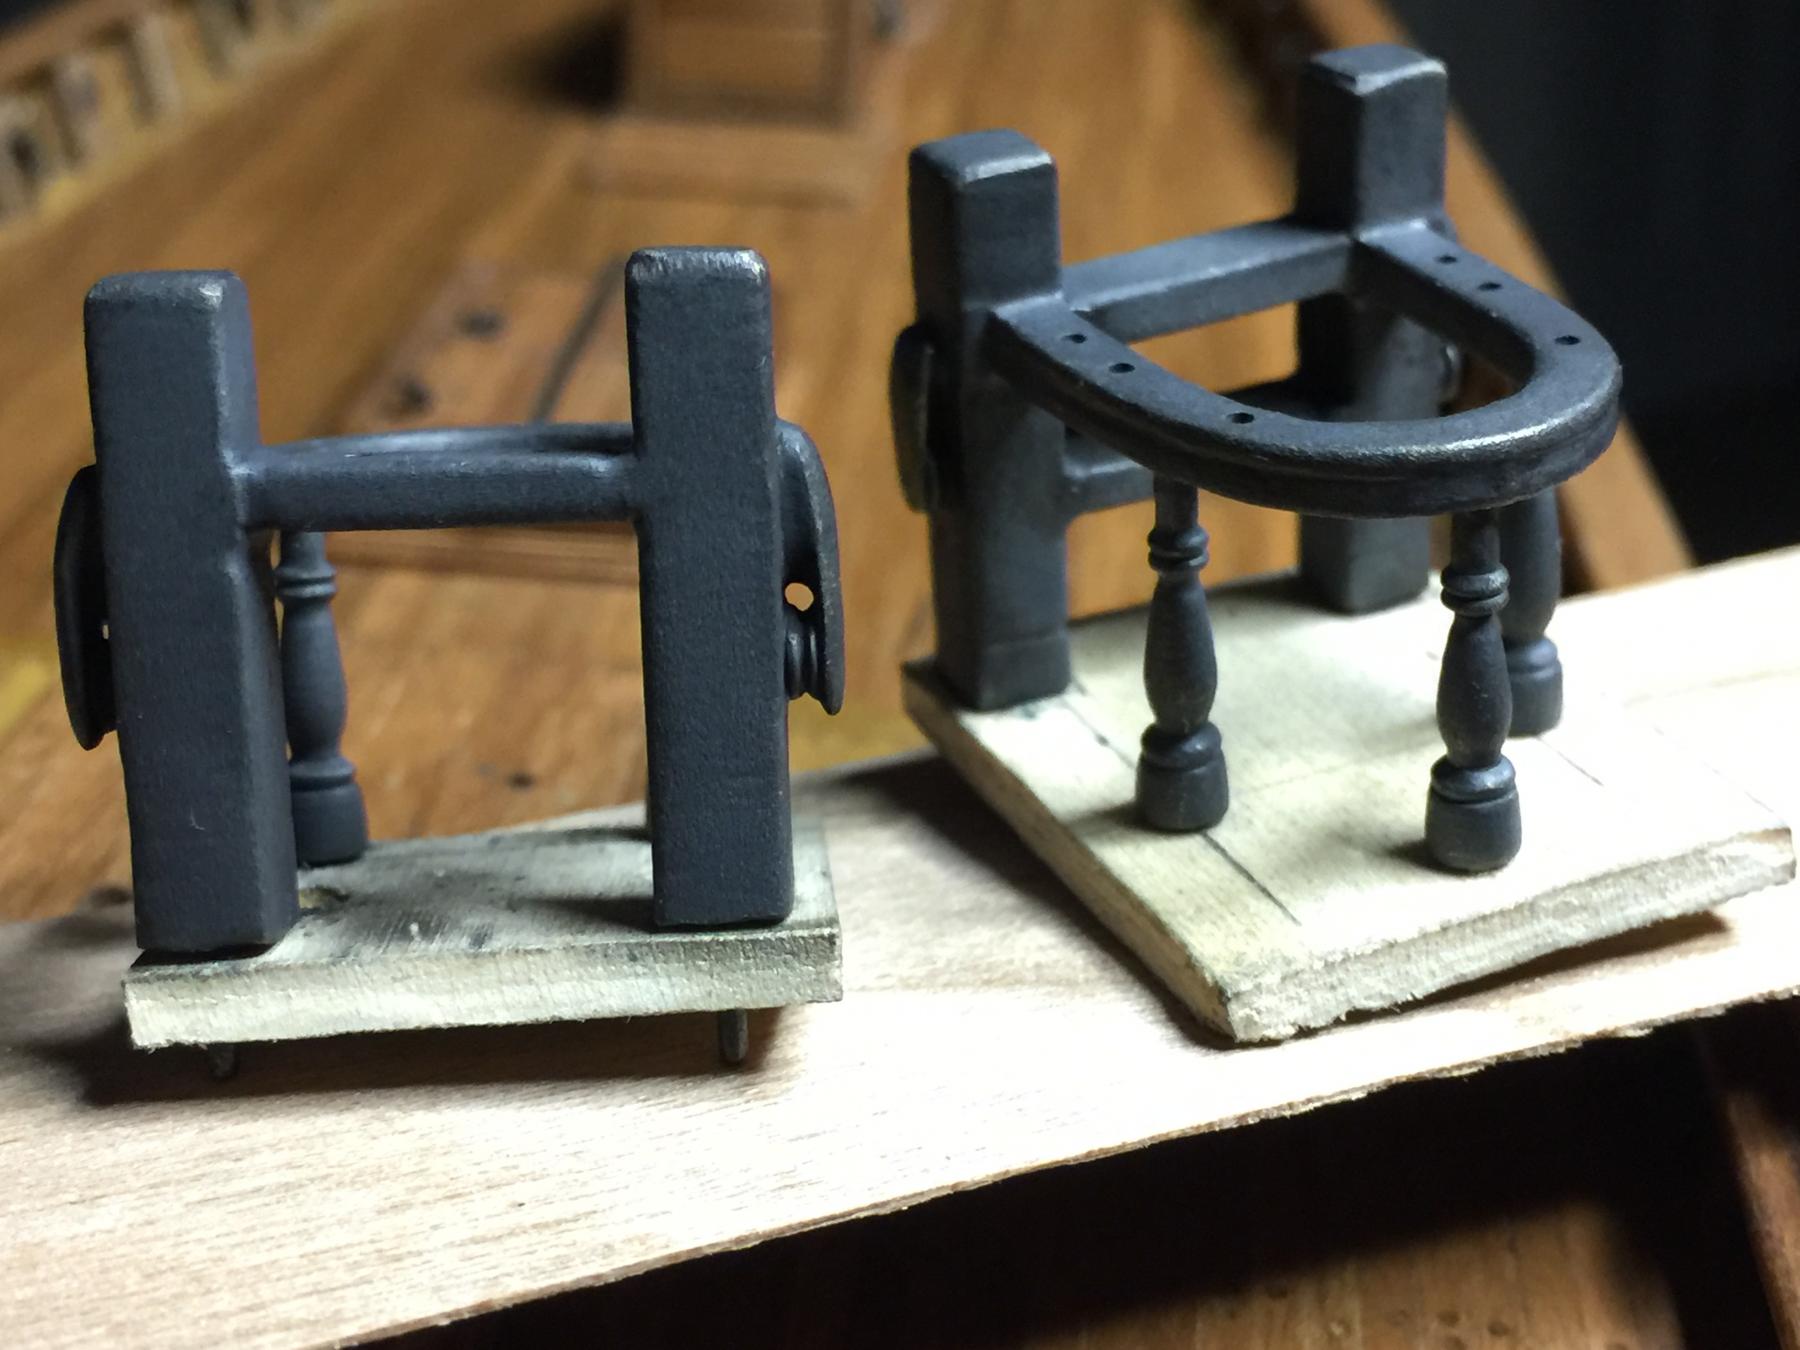
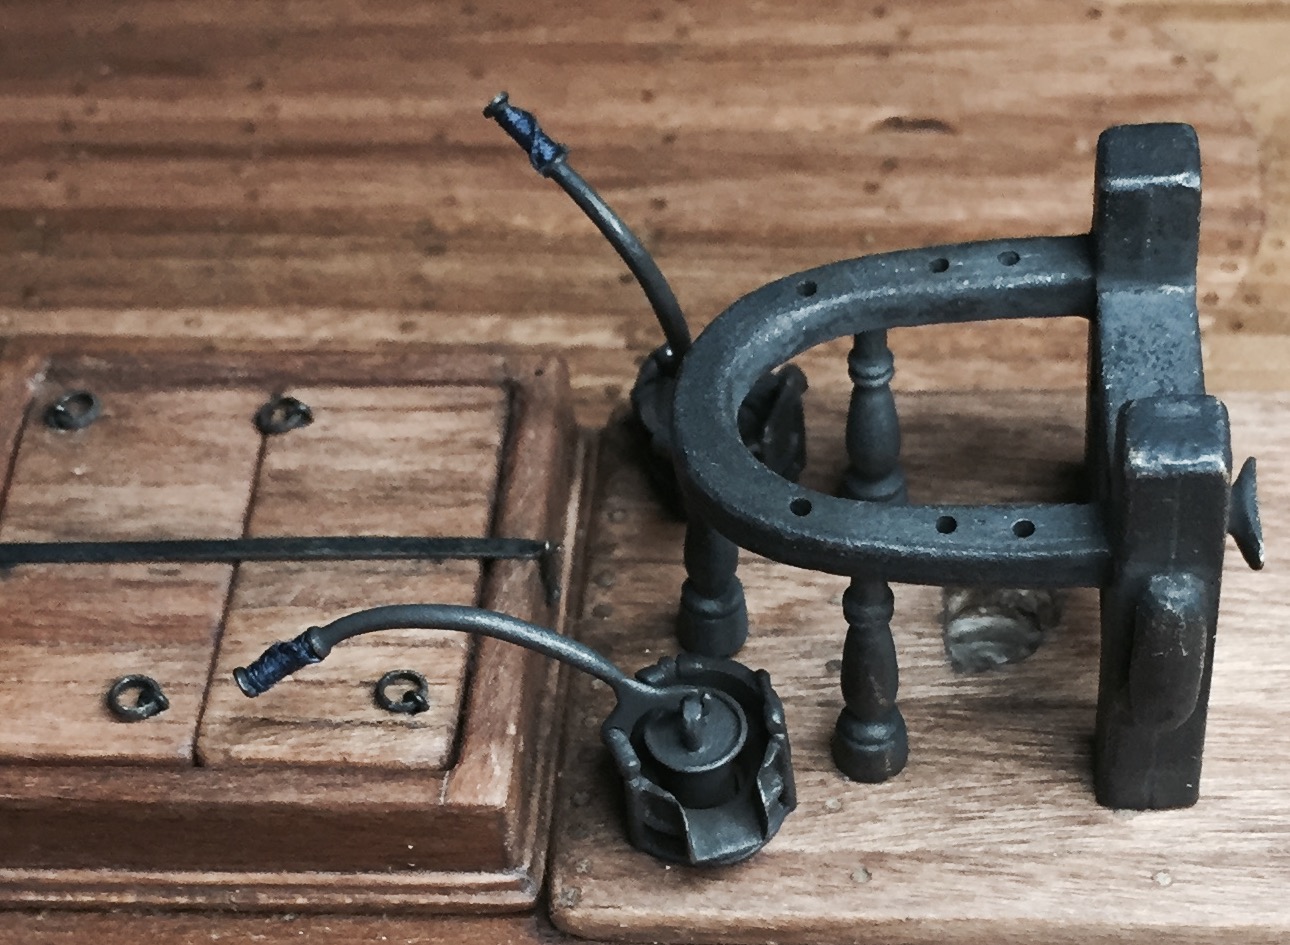
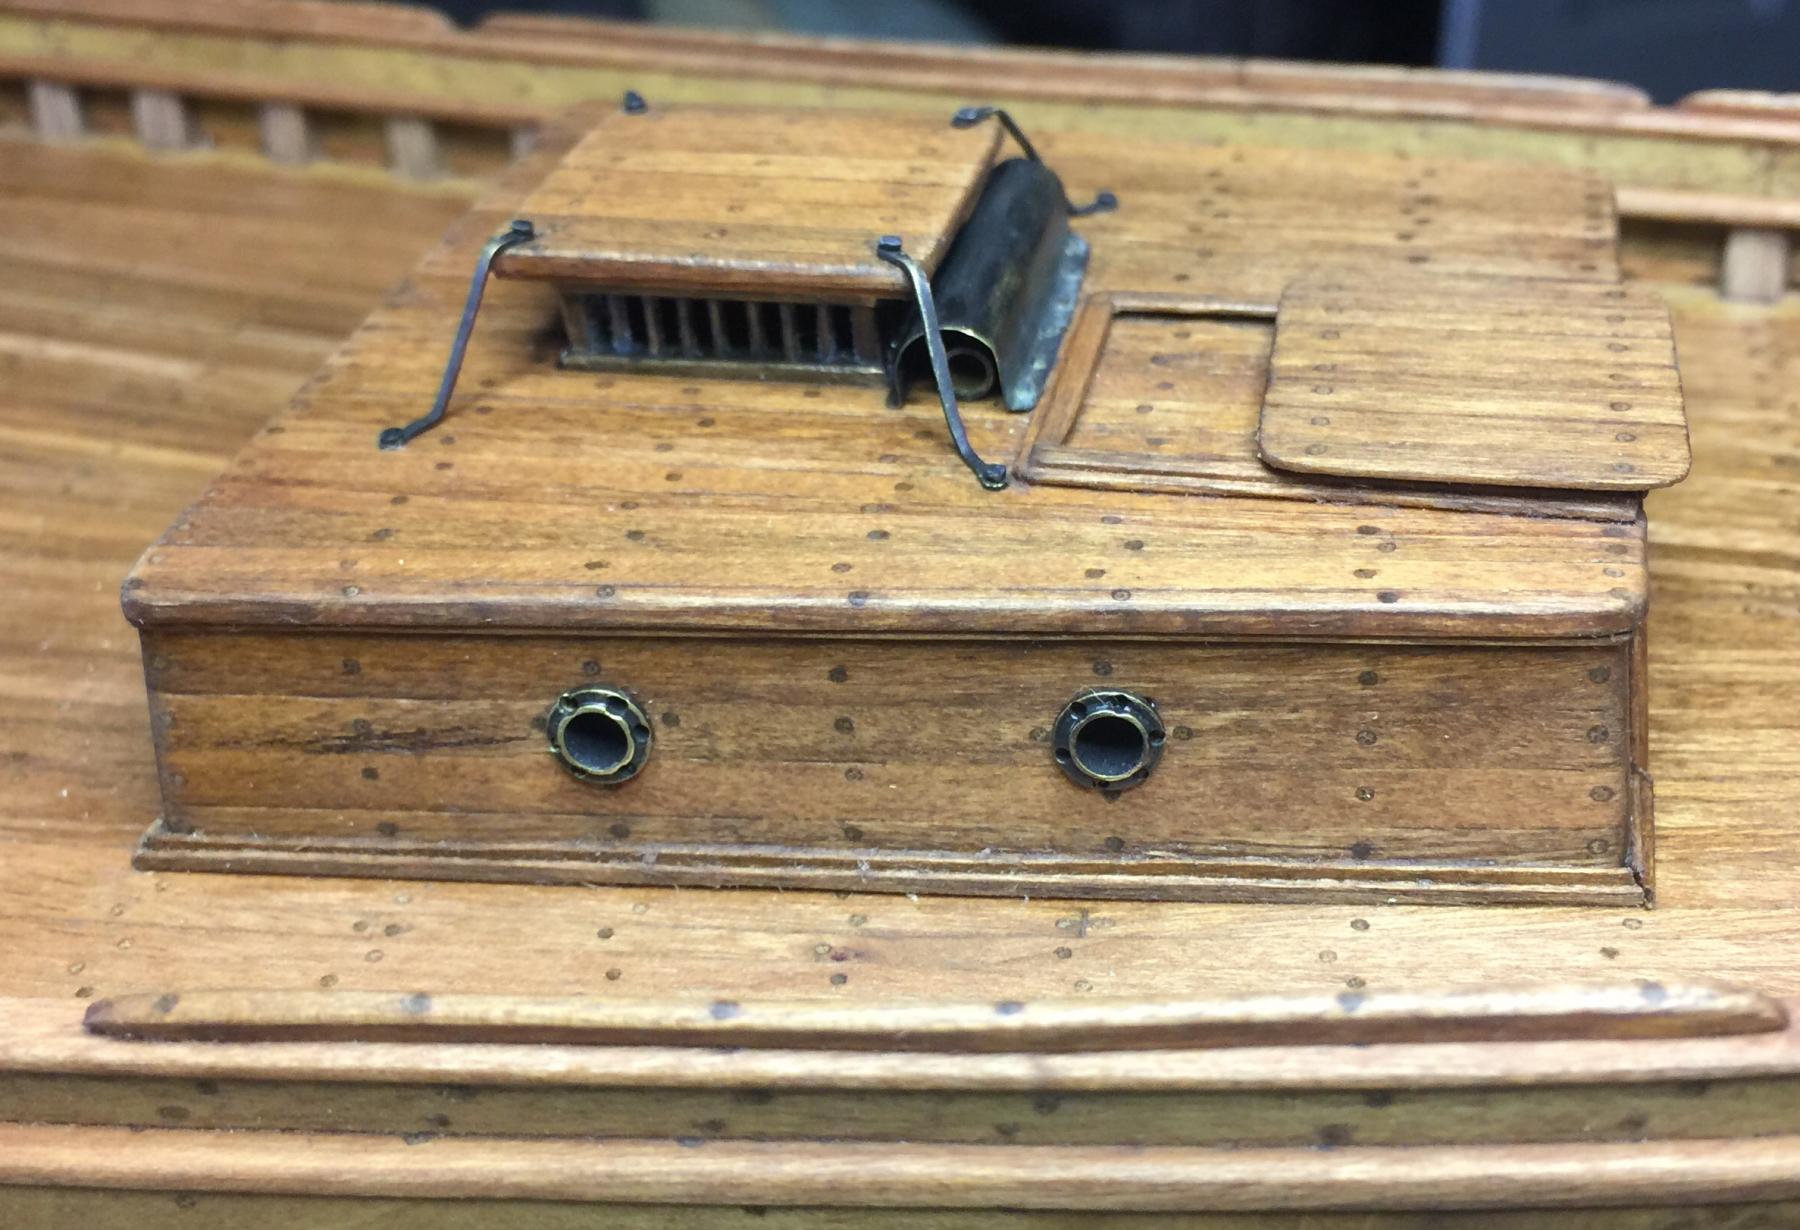
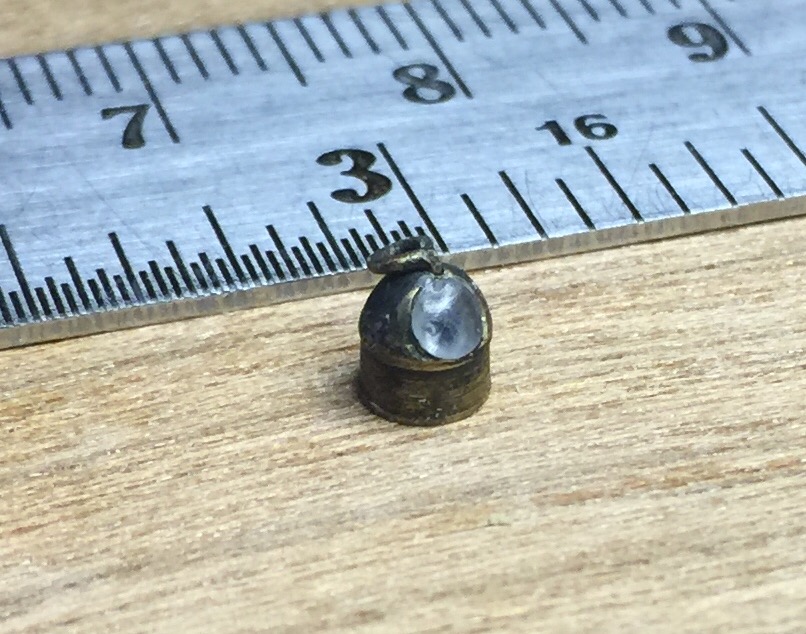
Being 1:48 scale will allow for a lot of miniature items for me to practice on. This is the portable binnacle...
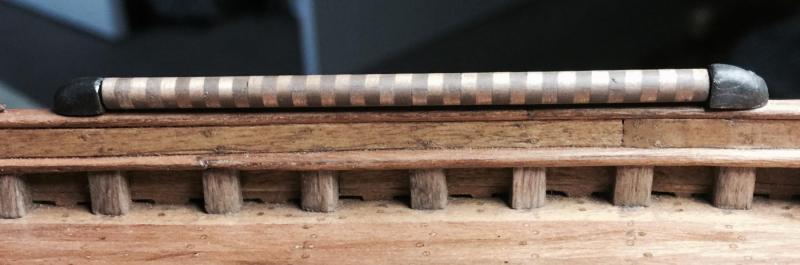
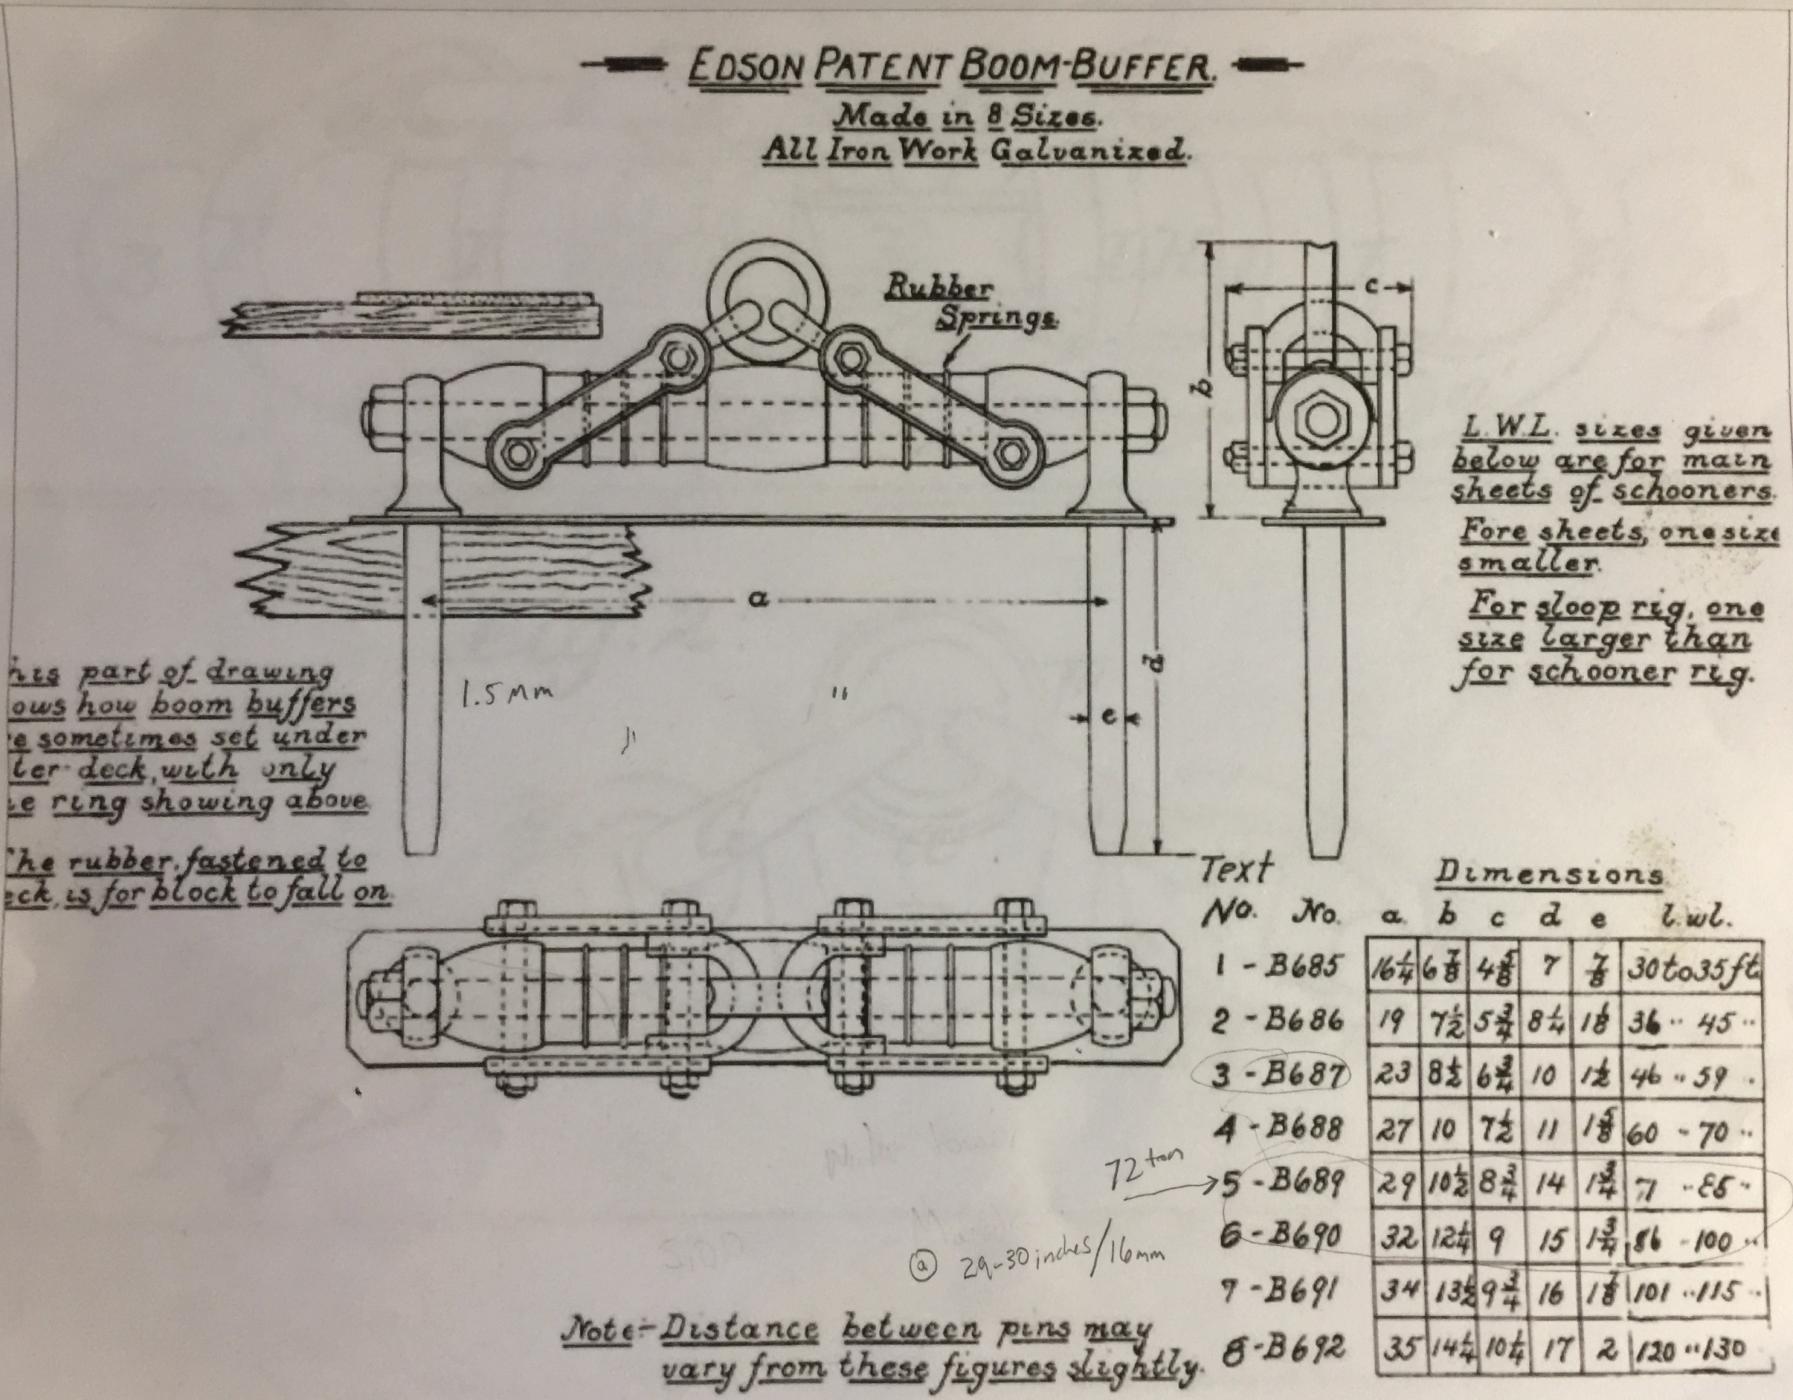
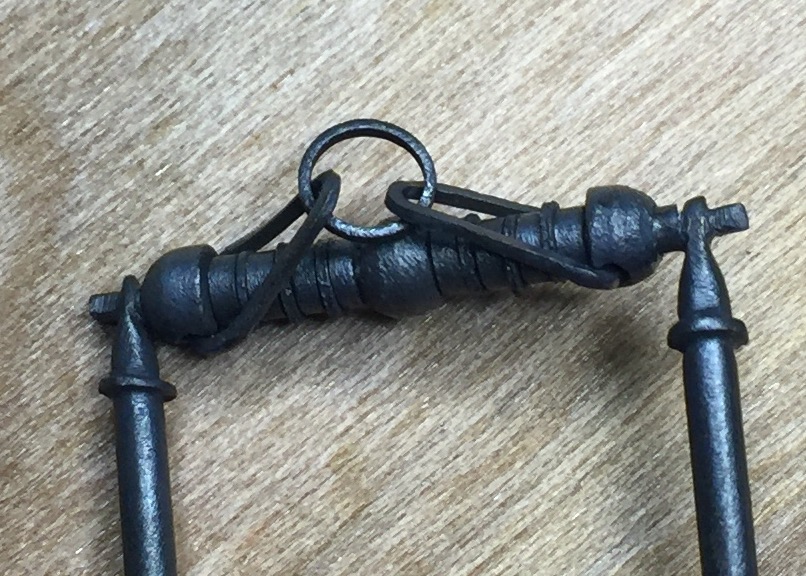
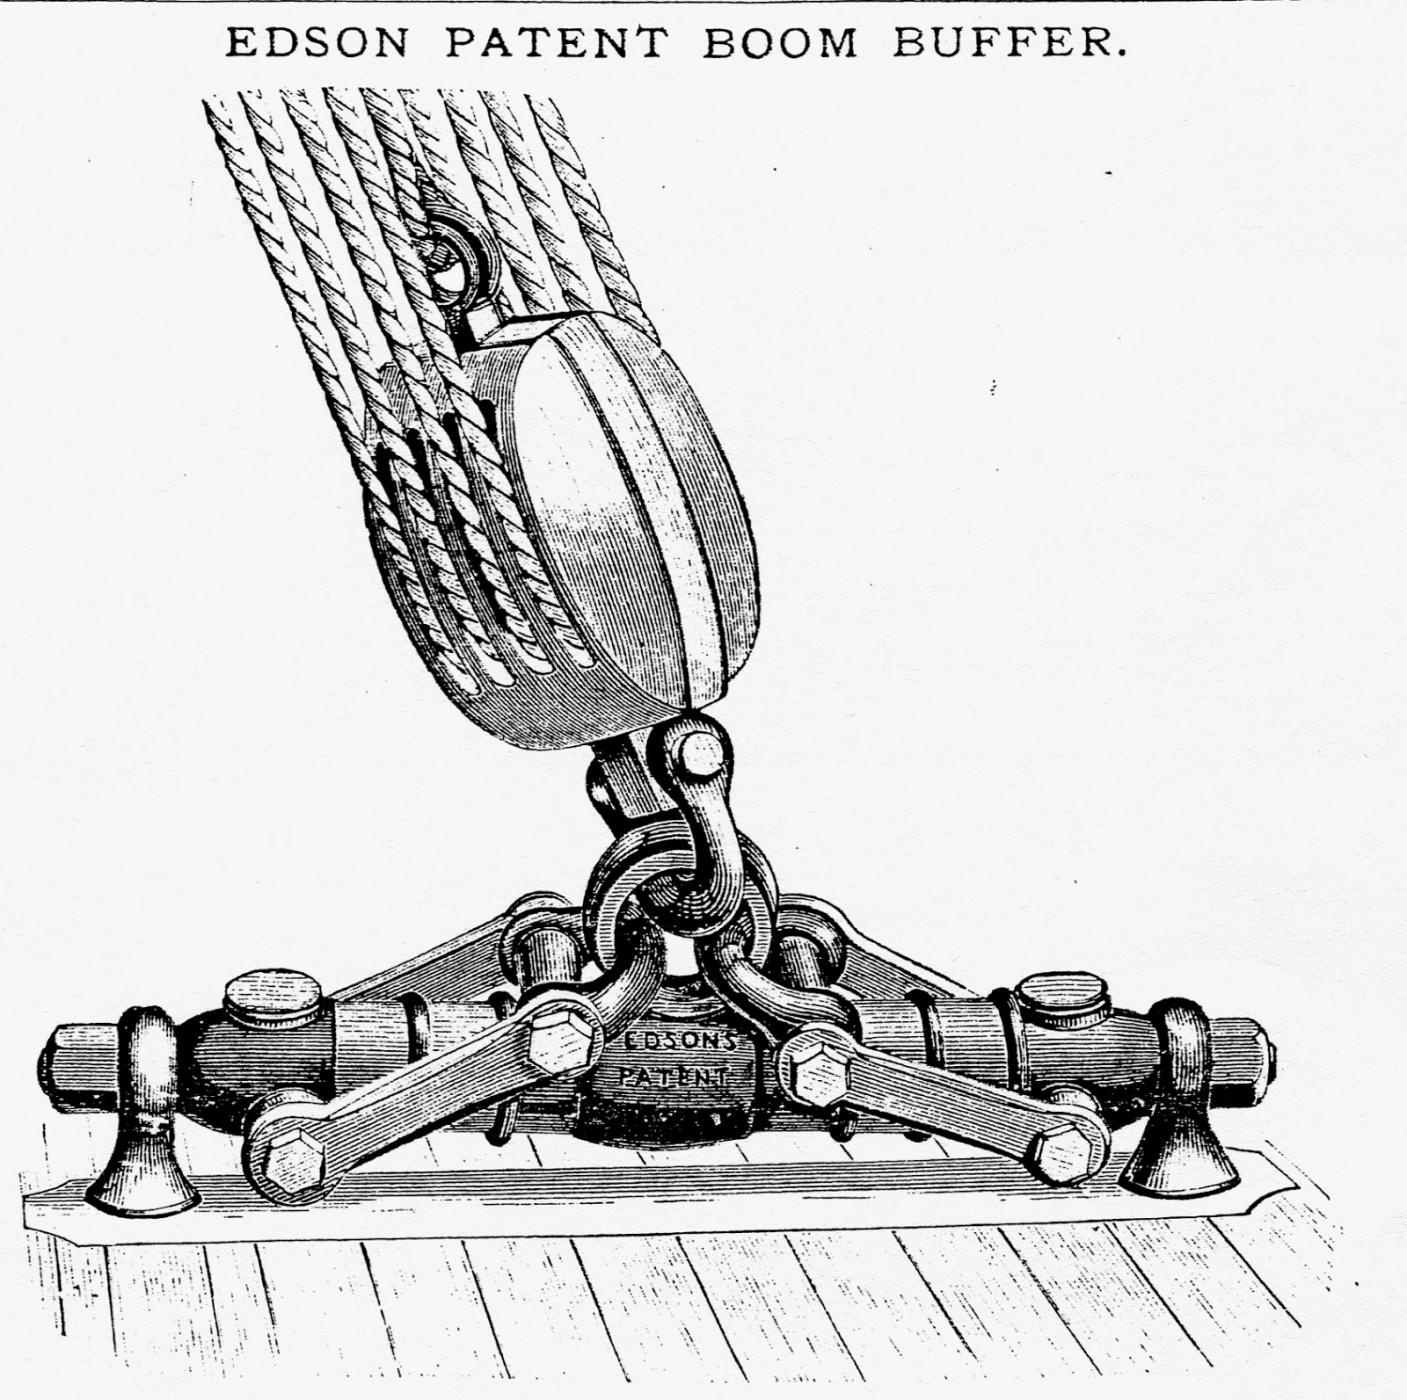
The pictures of the Edson Patent Boom Buffer were a bit small and difficult to decipher so I found this image with nice detail and sizes marked.
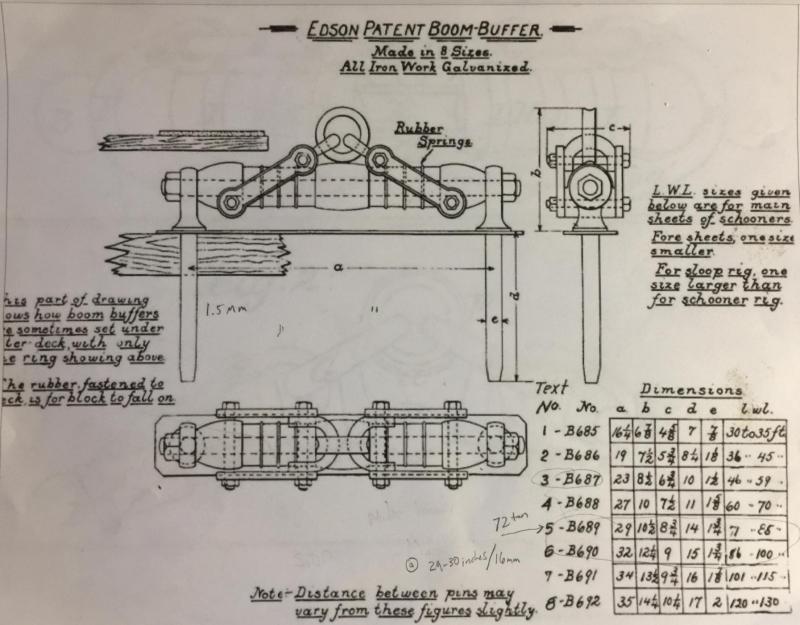
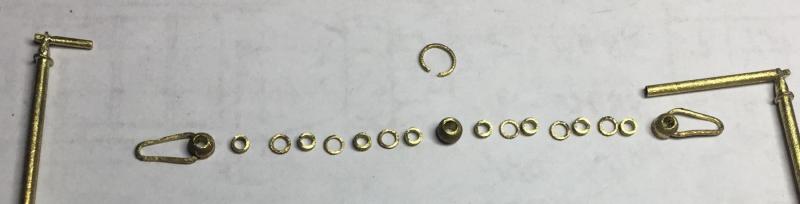
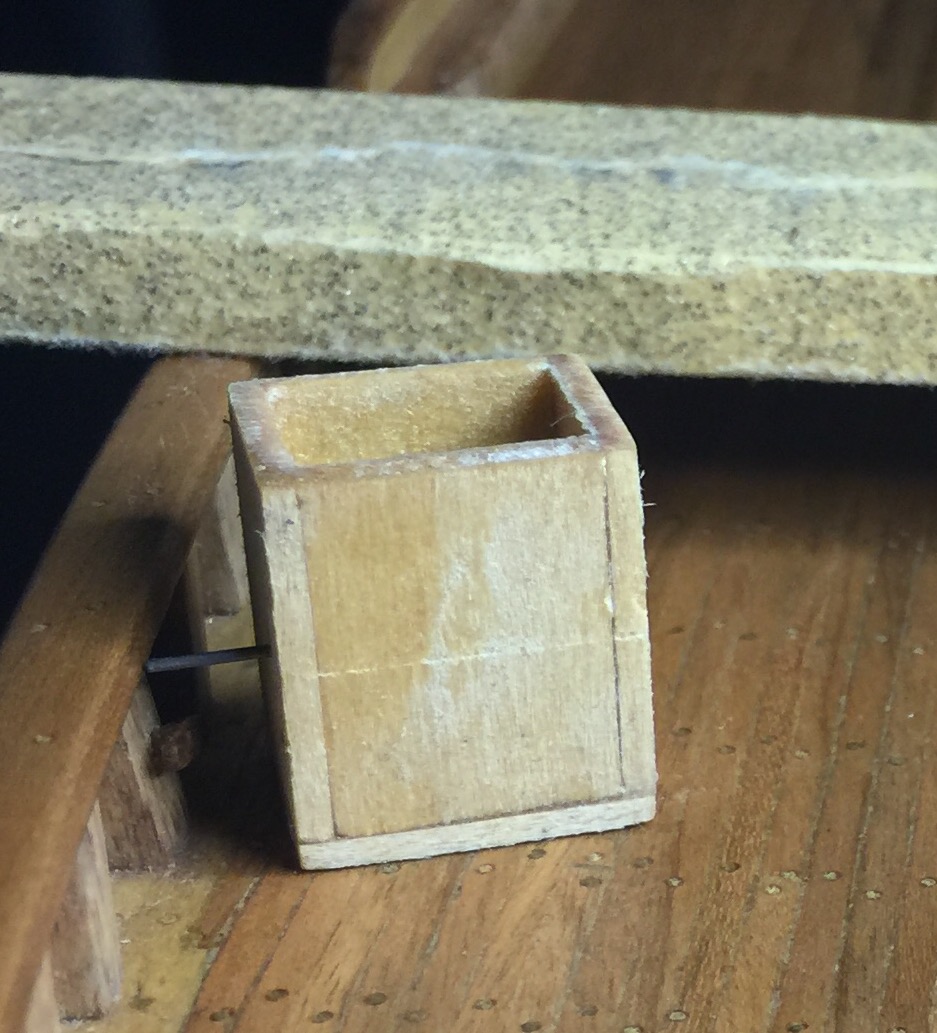
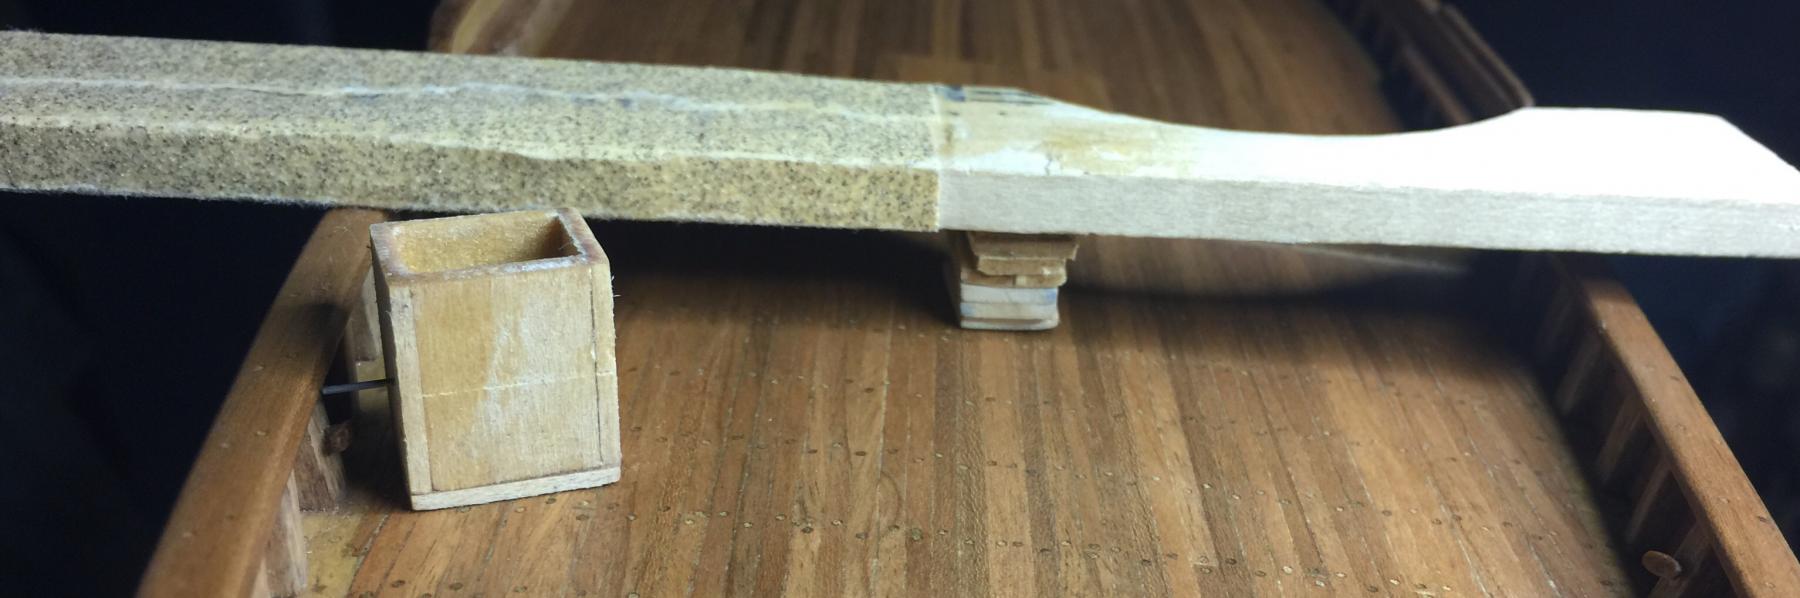
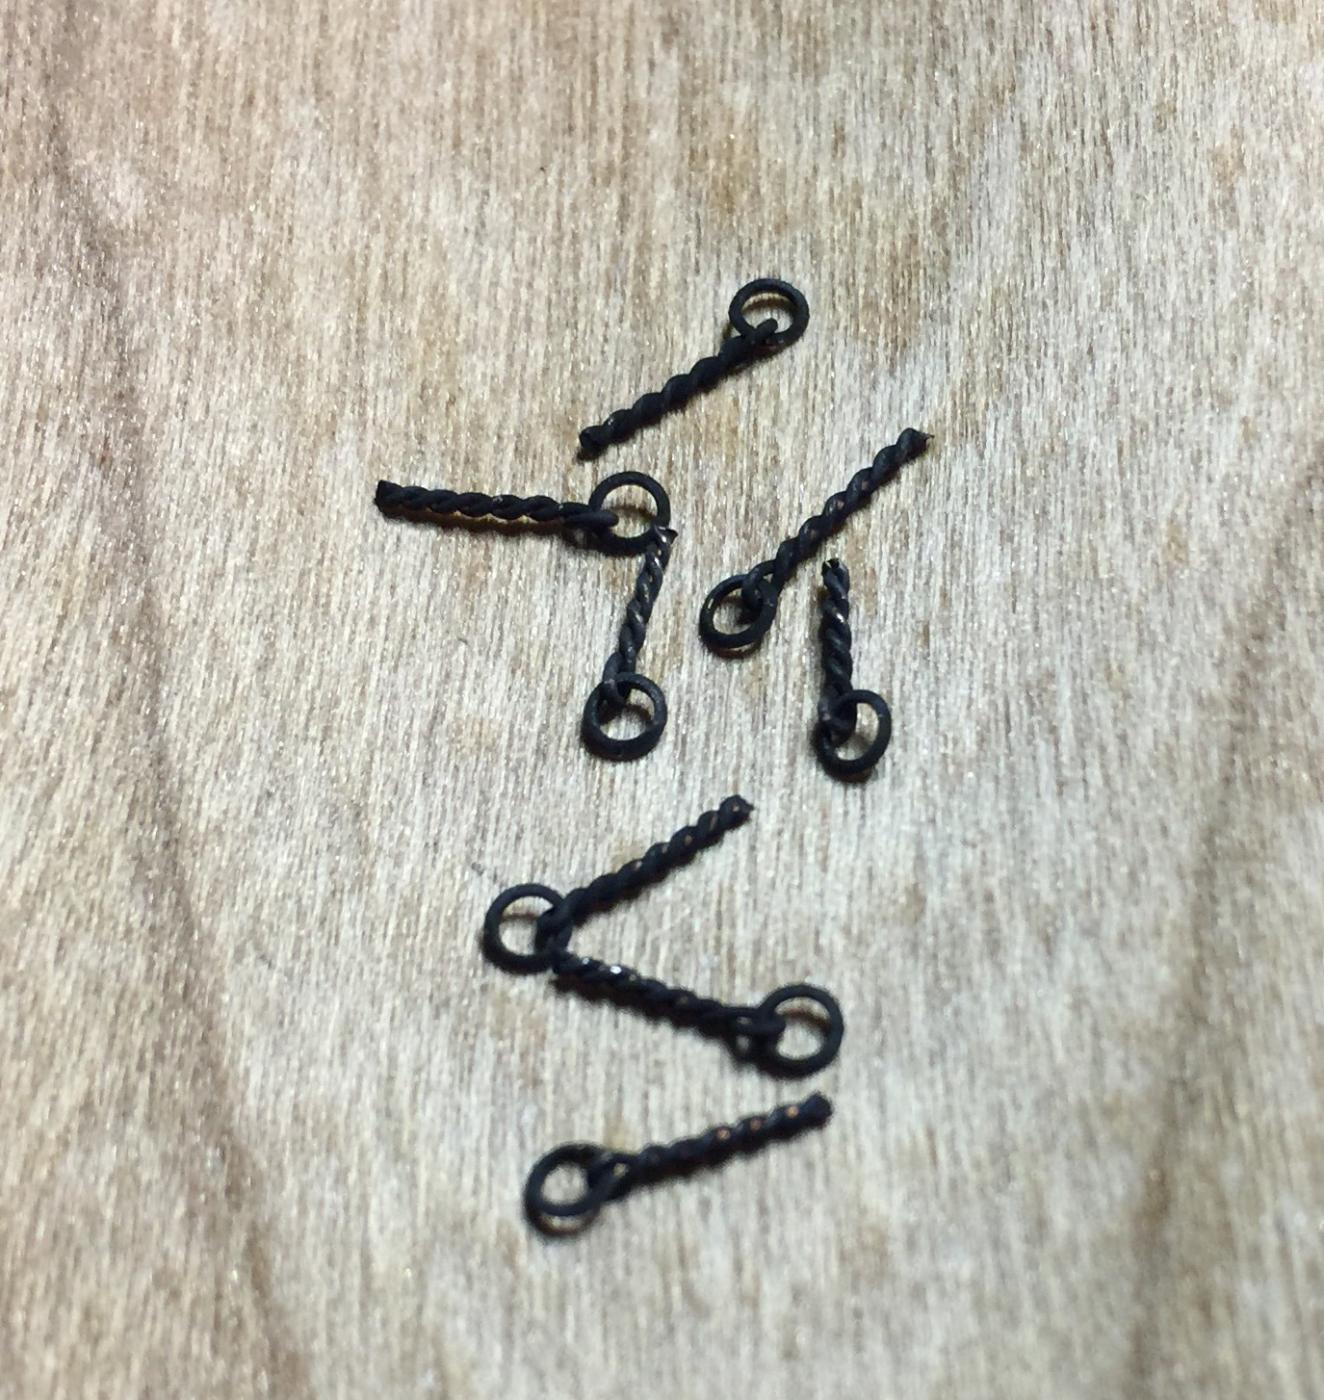
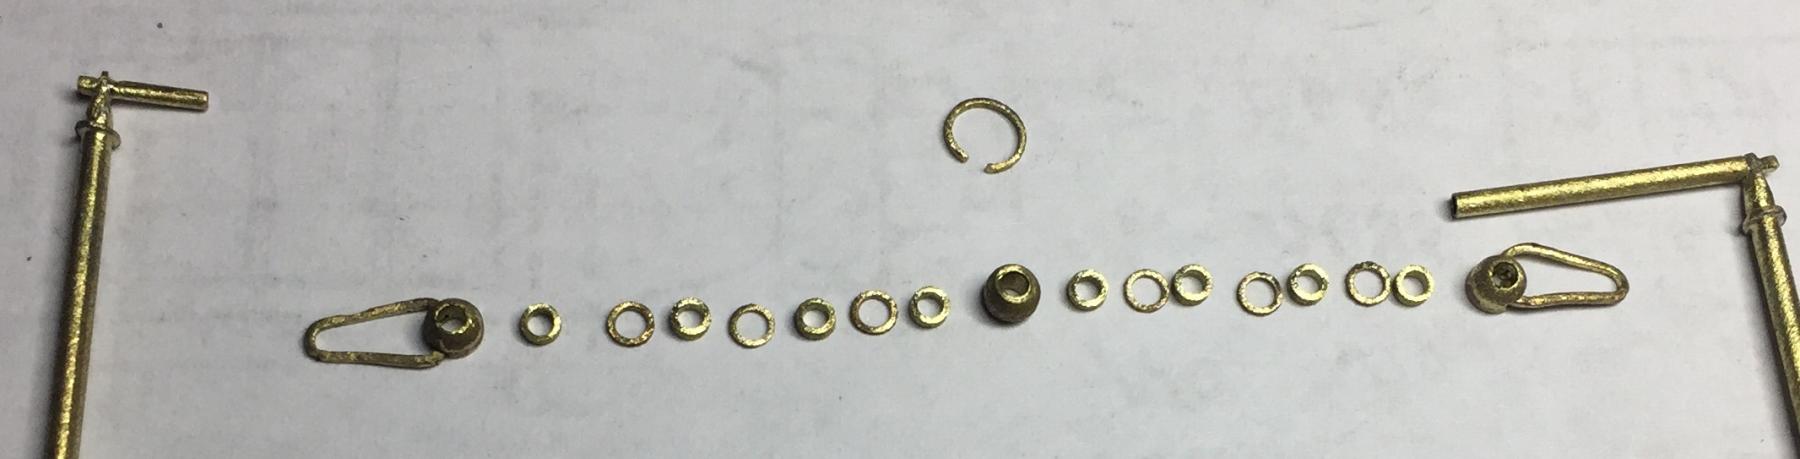
Many tiny rings were made and assembled to reach a boom buffer that's as close as I could get. I'm in the process of making a jibber box that allows the boom buffer to be seen.

My plan is to work from stern to bow. The next project will be the wheel, wheel box and rudder(along with pintles and gudgeons). I'm sticking with the original sail power, omitting the exhaust pipe and propeller assembly.

-
-
You did an excellent job Brian, well done!
- Sexyauthor and mtaylor
-
2


Benjamin W Latham by mattsayers148 - Model Shipways 2109 - 1:48
in - Kit build logs for subjects built from 1901 - Present Day
Posted
Thanks Russ, CaptainSteve, Gary and for everyone who hit the like button.
Gary, I use Casey's Brass Black. I lightly buff out the first dipping, the hit it again and let it sit overnight before I buff it out again. This helps the black hold better.