KeithAug
-
Posts
3,986 -
Joined
-
Last visited
Content Type
Profiles
Forums
Gallery
Events
Everything posted by KeithAug
-
 Looks almost finished Nils. Love the detail. Are you on a mission to finish it before the new year?☺️
 -
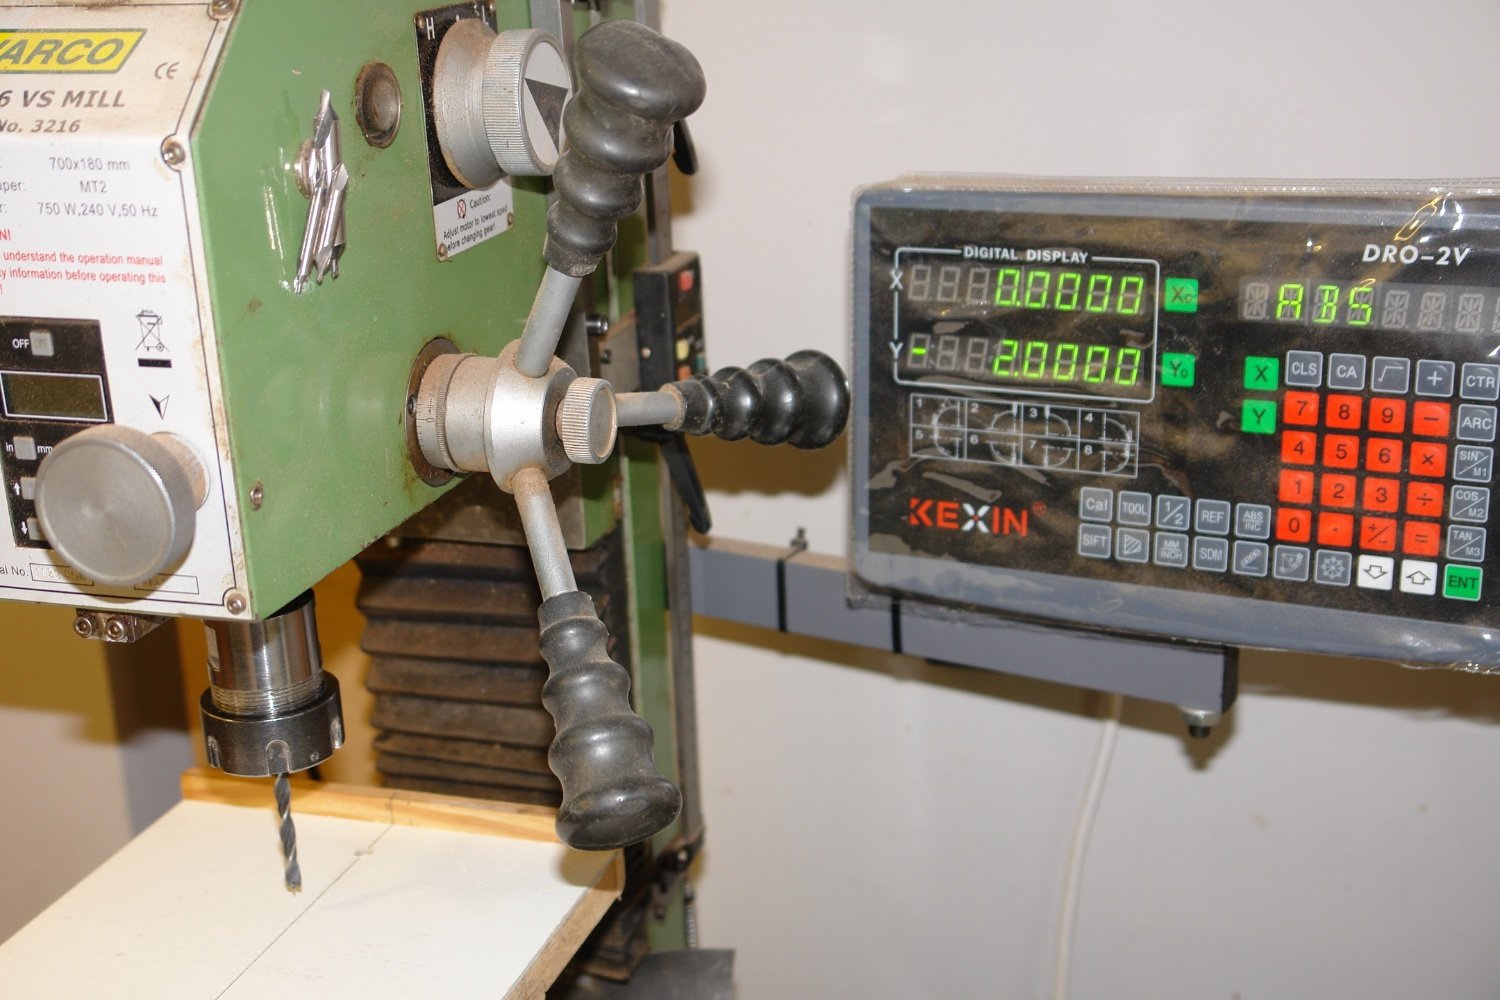
Hmmm! you are probably right Phil - the admiral agrees with you!😬 Unfortunately Bob I wasn't in a position to be able to study the surgical instruments. I'll ask what they use on my next visit. Possibly Tom but the set up time would probably be longer. My plan is to cut the slots using a home made table saw sled thus avoiding all the clamping that would be involved in using the mill. Thank you Nils.
-
The pipework is well impressive. 👏👏👏
-
Looking very cute.
-
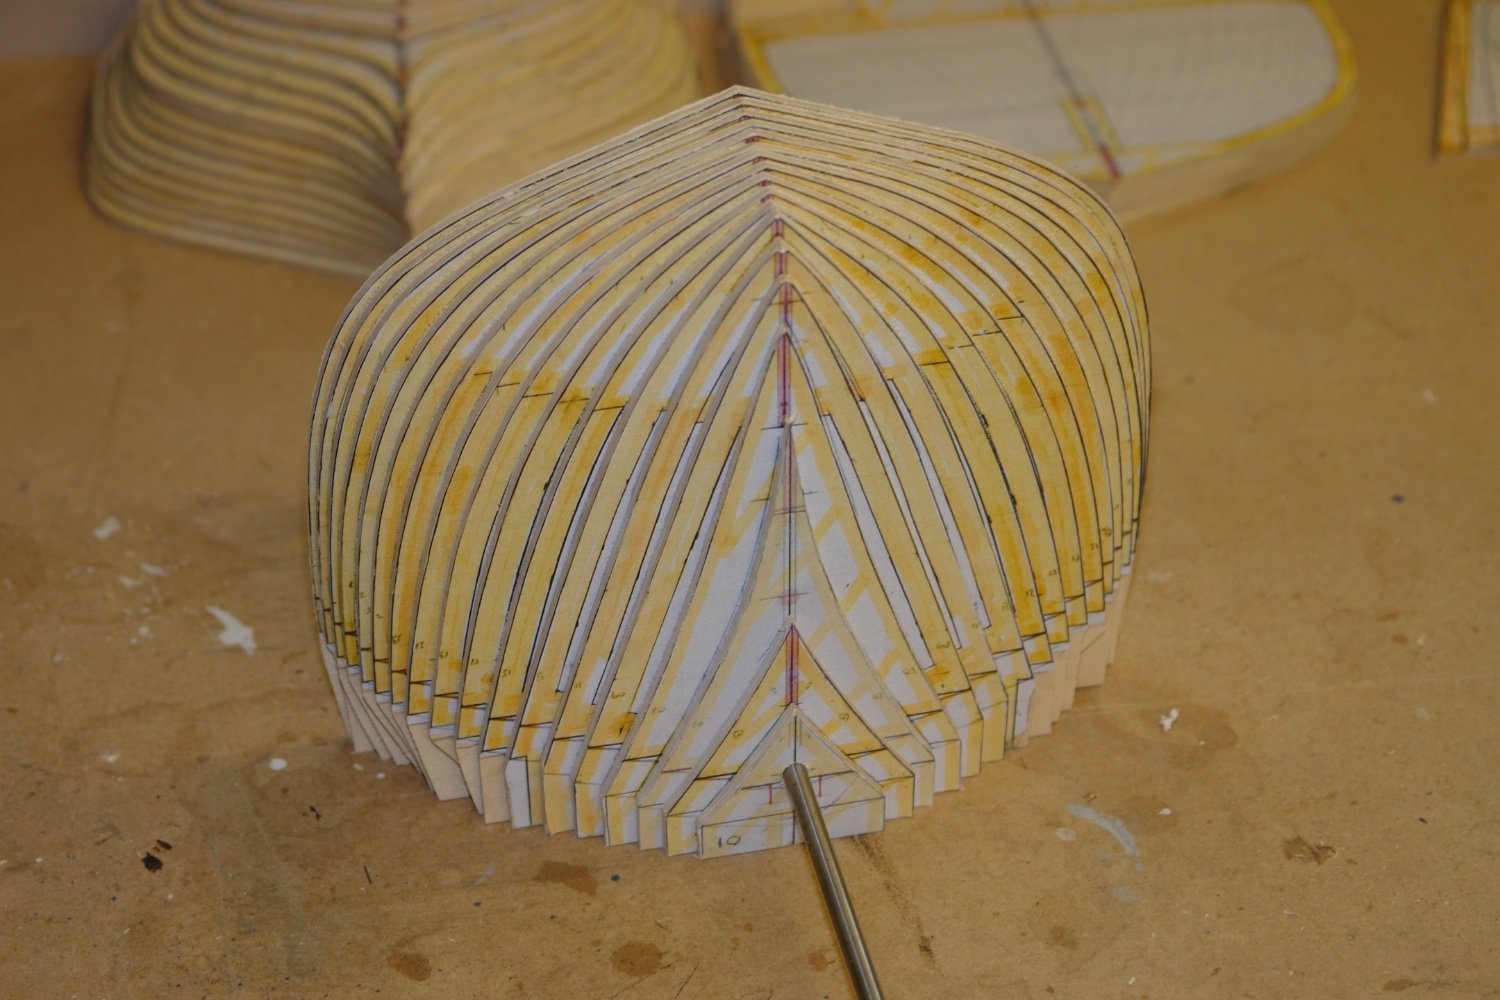
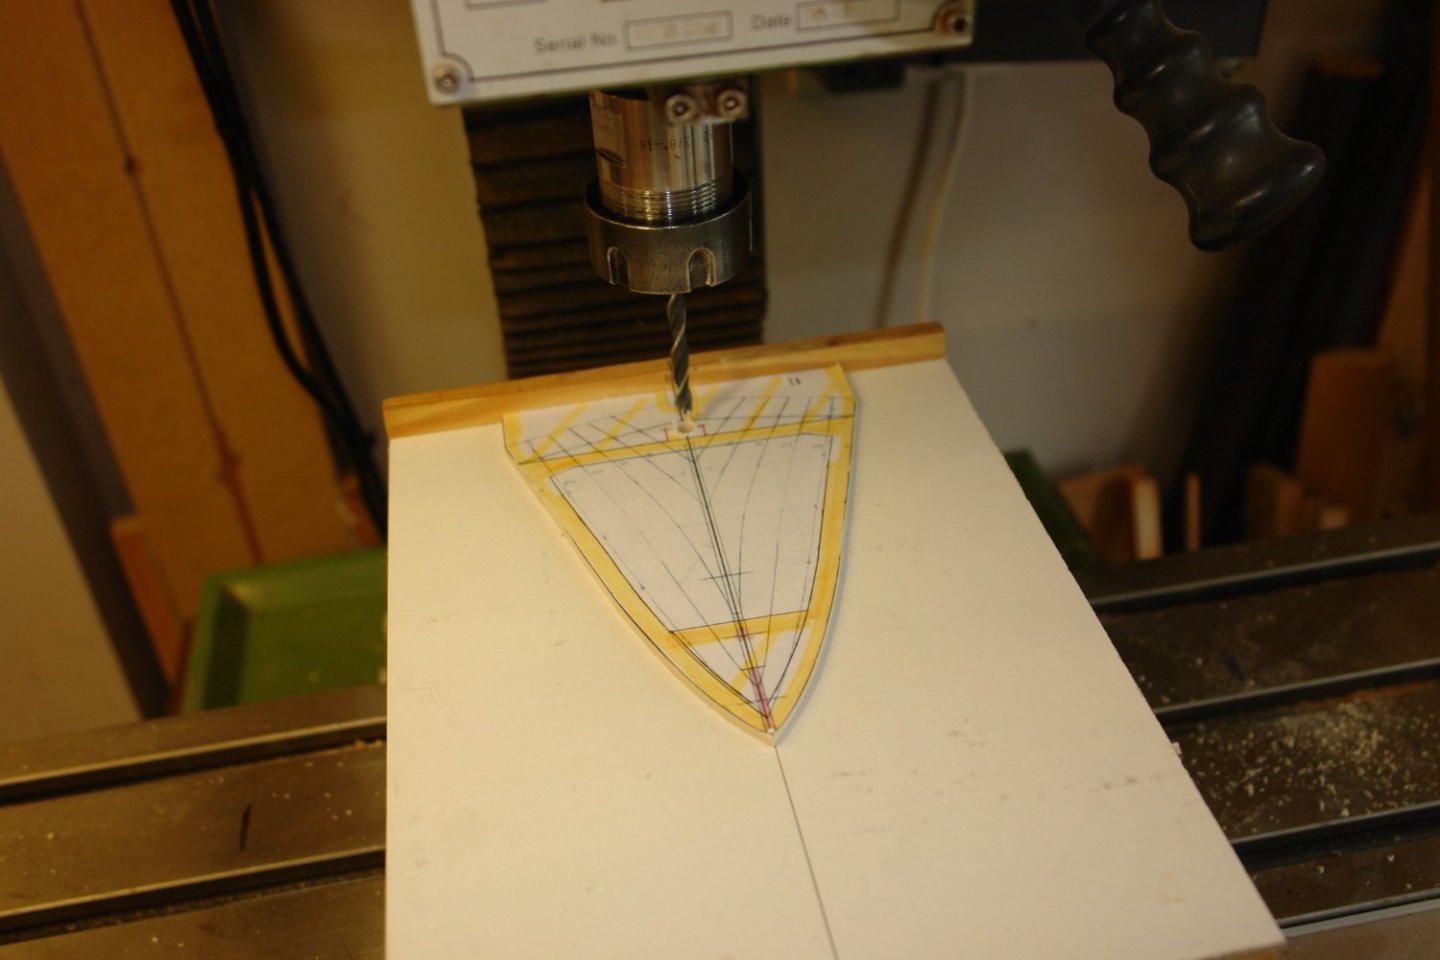
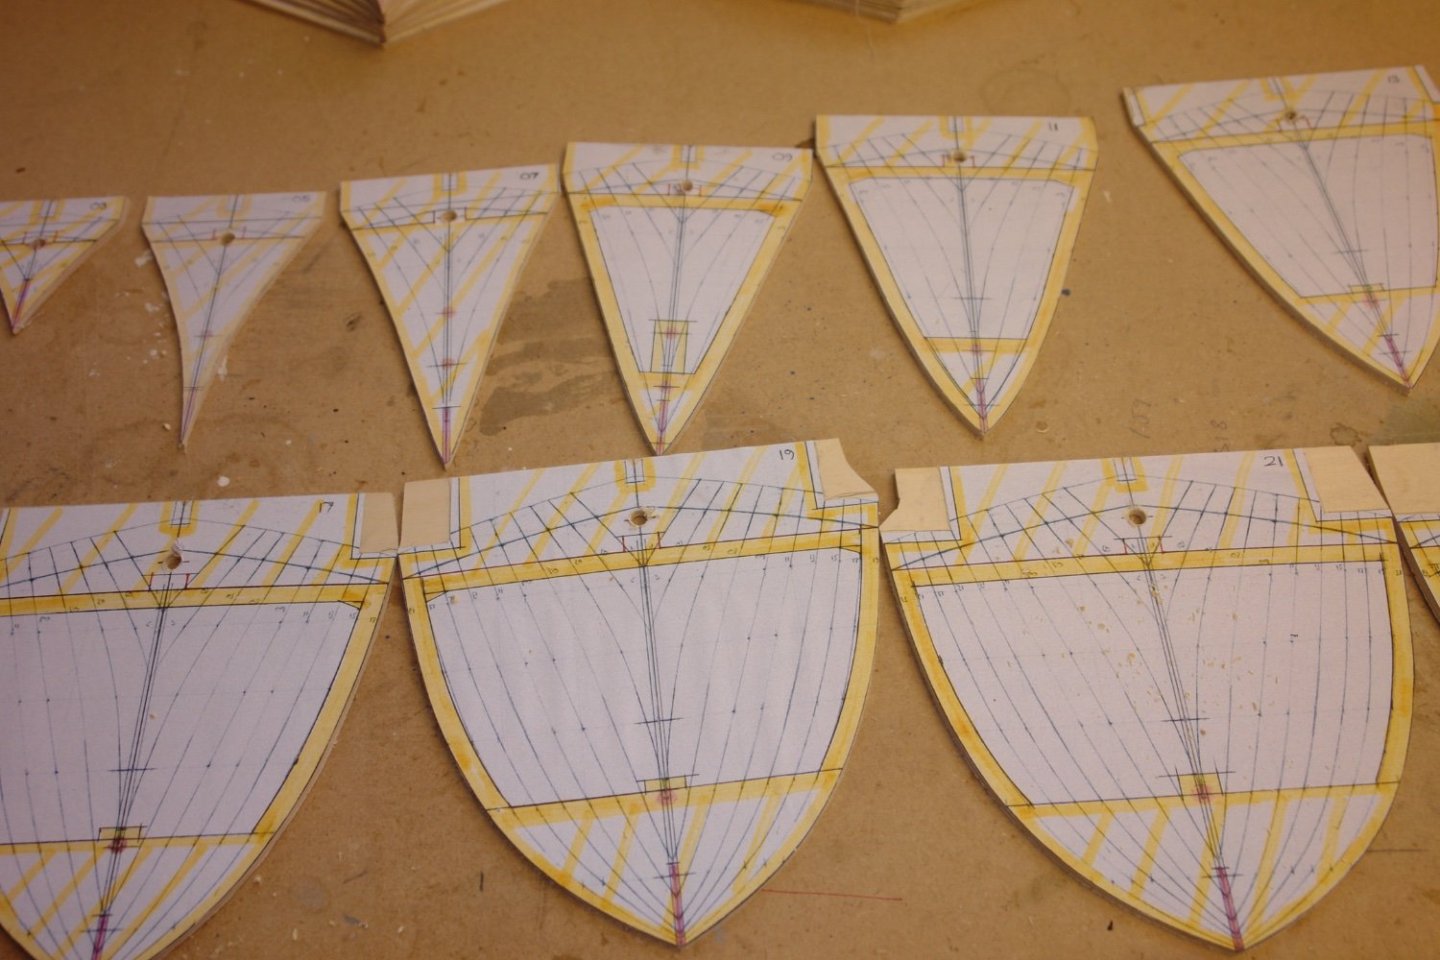
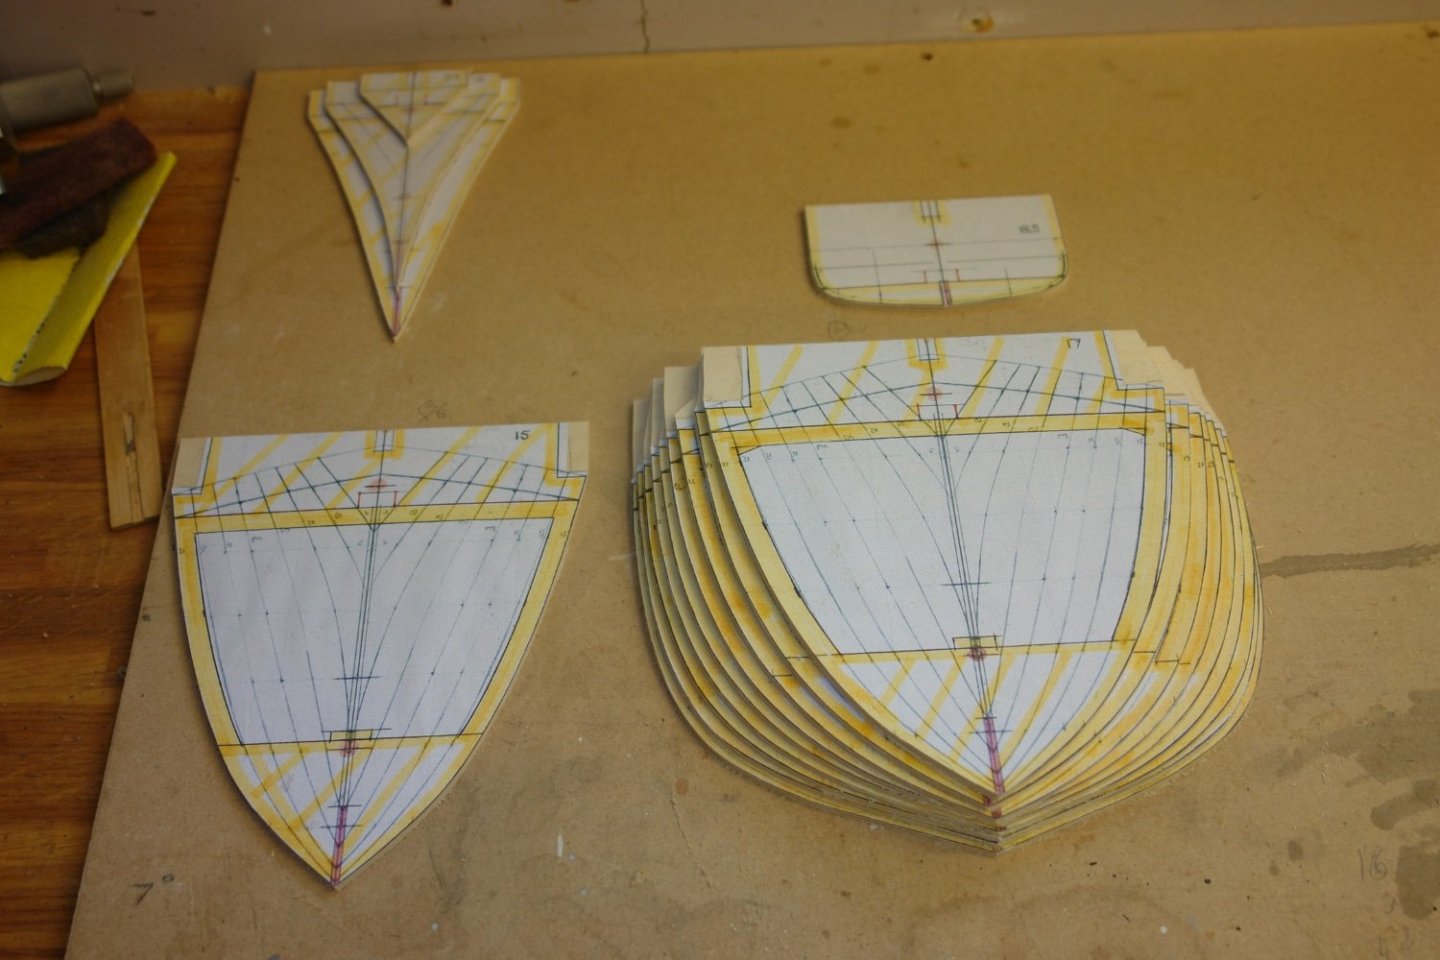
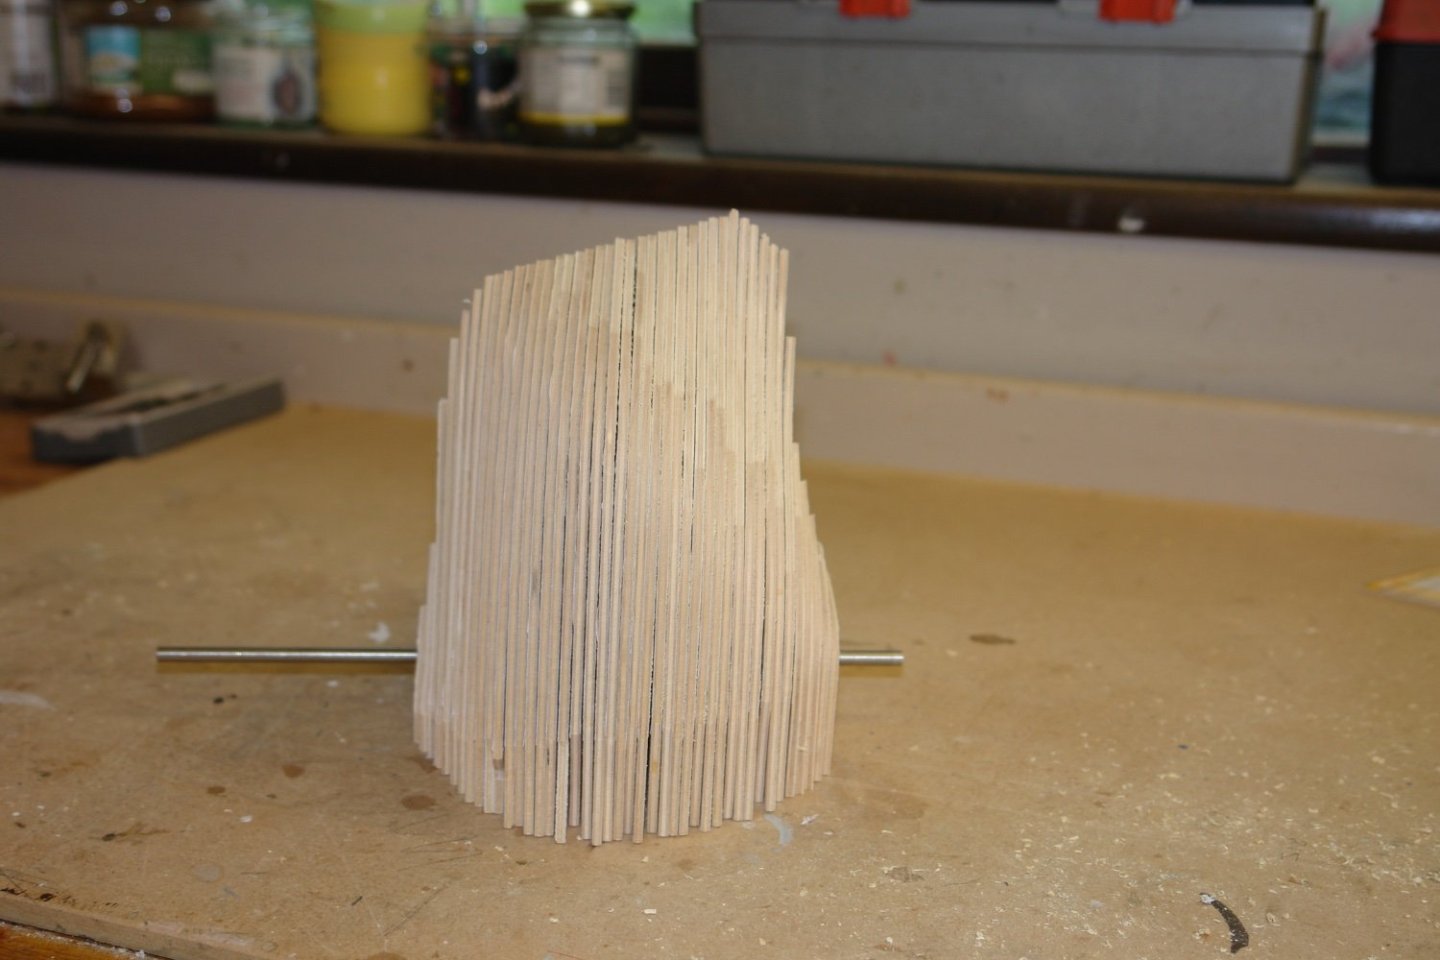
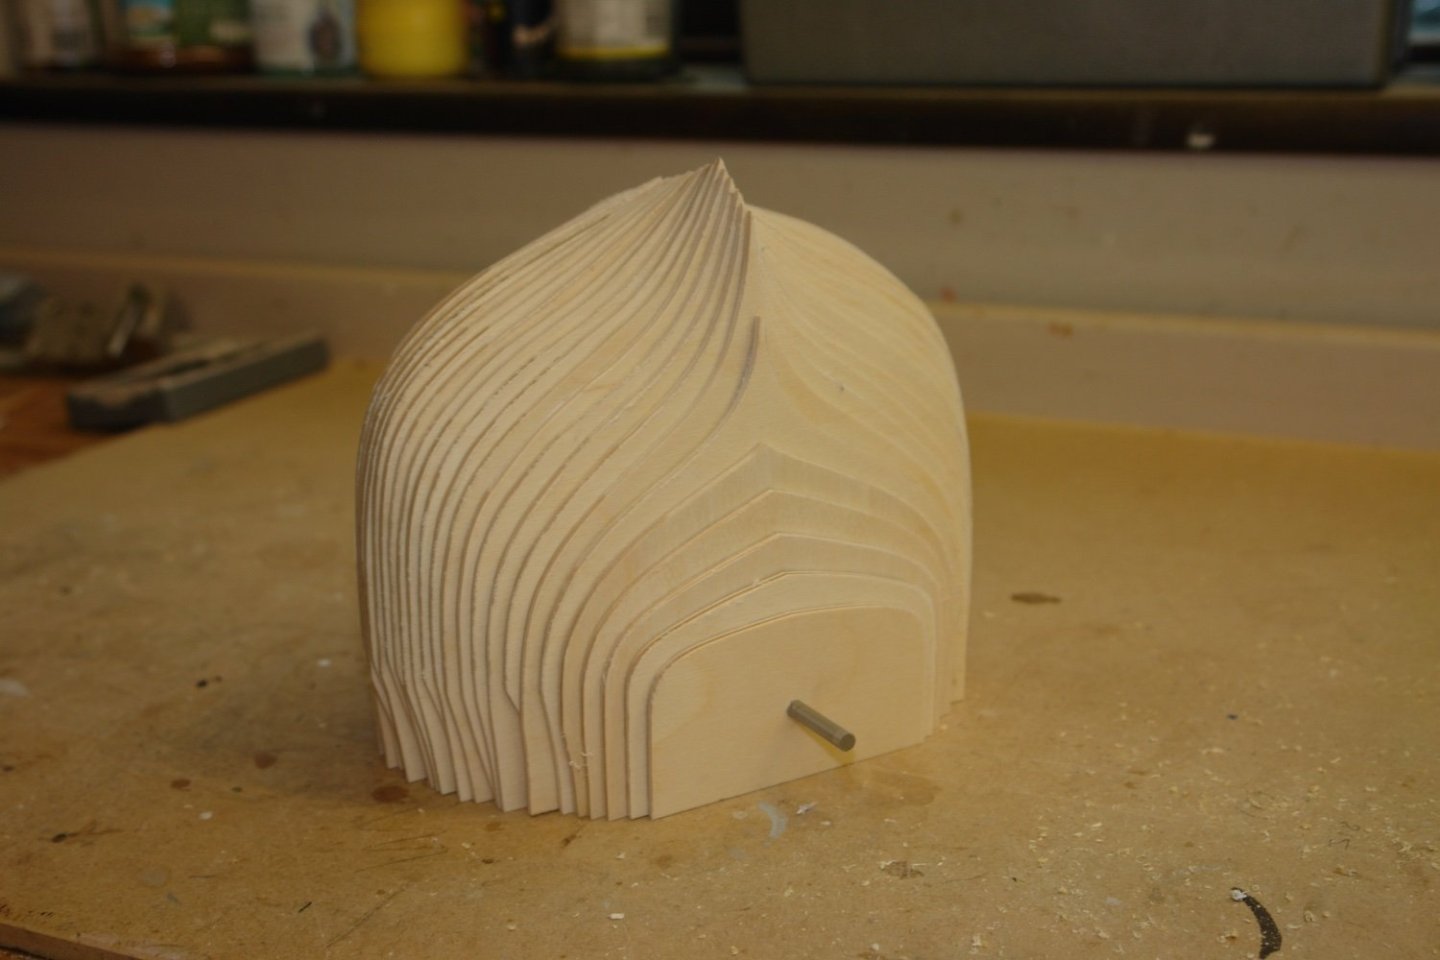
I continued my push to make progress and spent a chilly day in the workshop. Having cut the frames I set up the mill to accurately drill the 6mm alignment holes. I started by mounting a cutting board in the mill and milling the datum edge of the board to give a true "X" axis datum. The first set of holes were then drilled from this datum with the "Y" axis locked. I progressed like this until the first set of alignment holes were drilled. I then assembled them on a 6mm silver steel rod to check the correct hole positioning.


-
Unlikely Andy. More likely to be a new dress and jewellery. I'll look very fetching on boxing day.
-
Yes John - they are a millstone around my neck and I suspect that if they buy me stuff it will only be because they want to borrow it.😐 Thank you Pat.

-
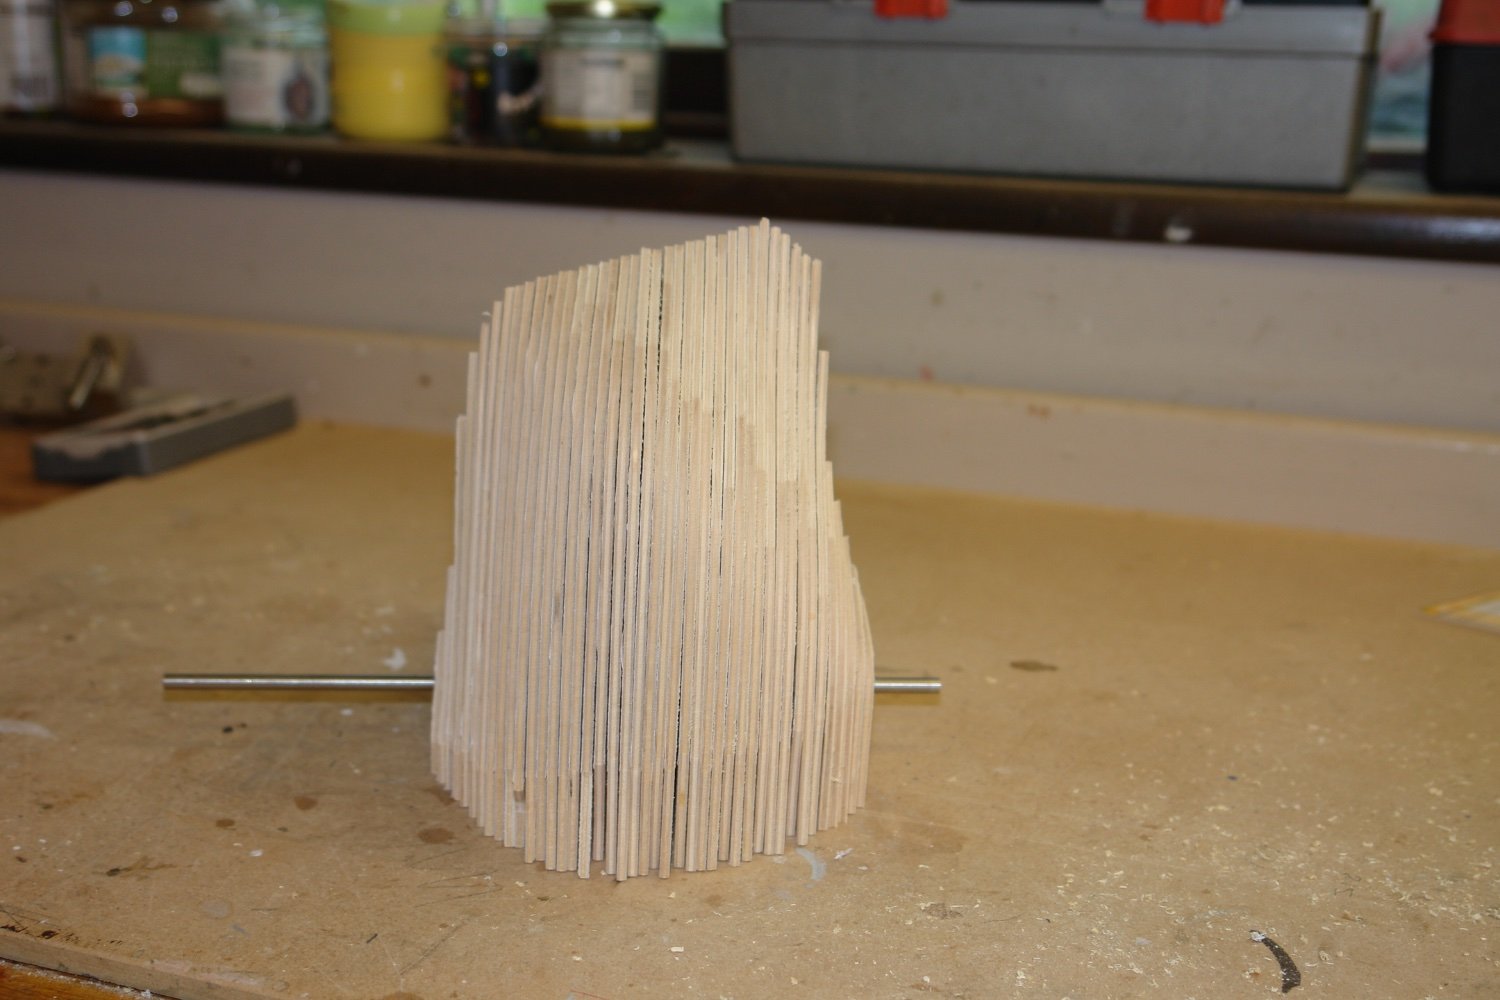
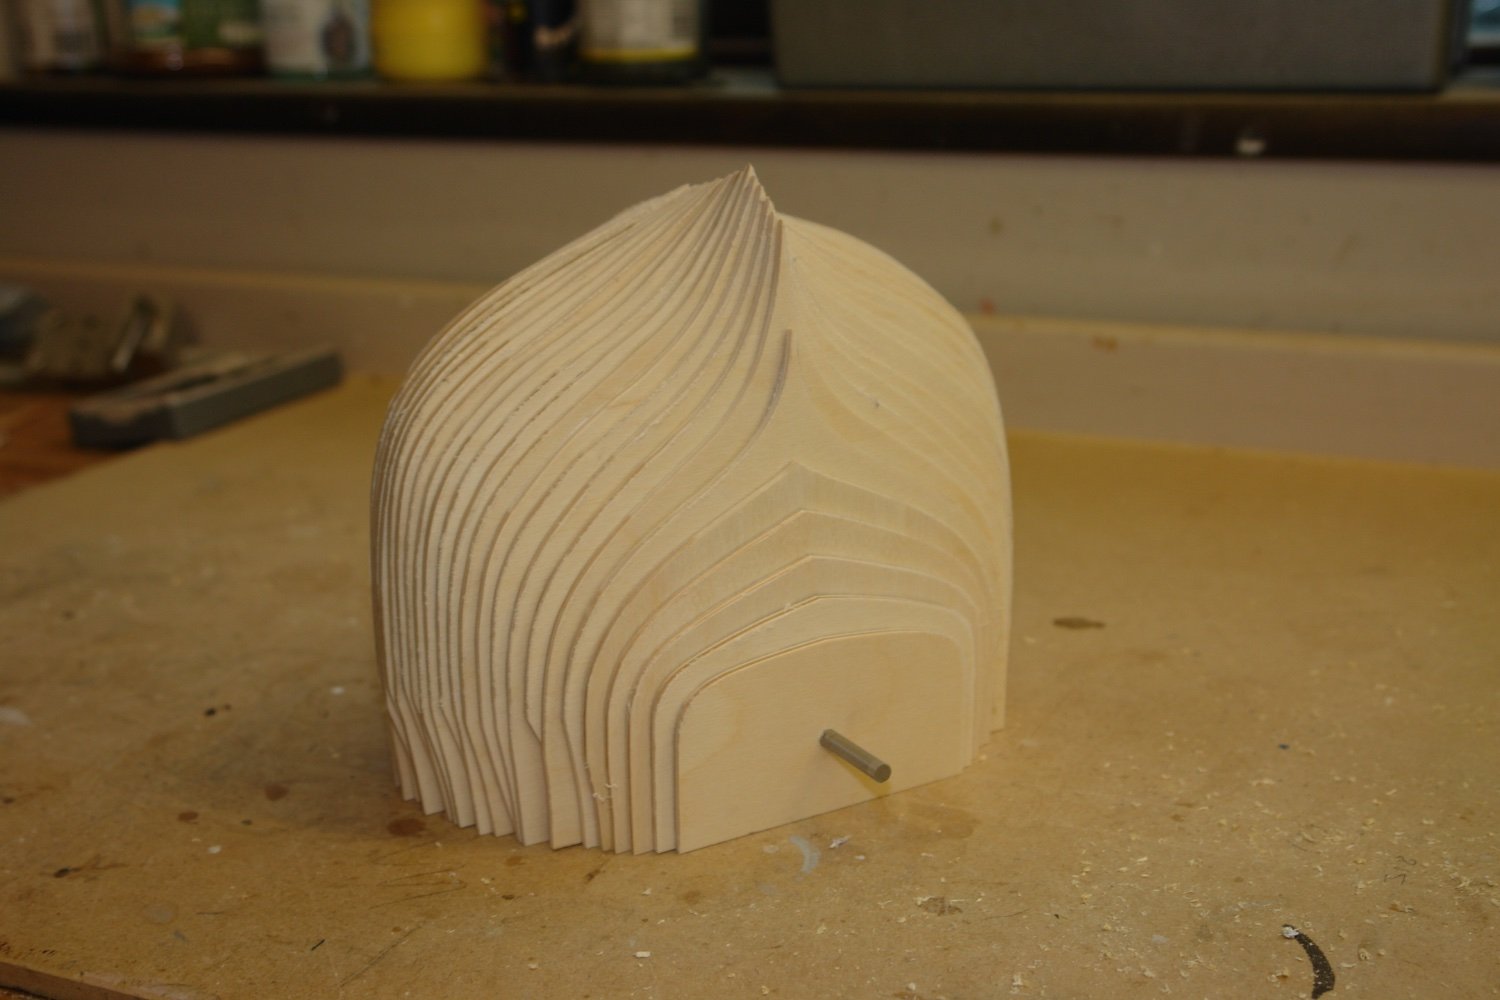
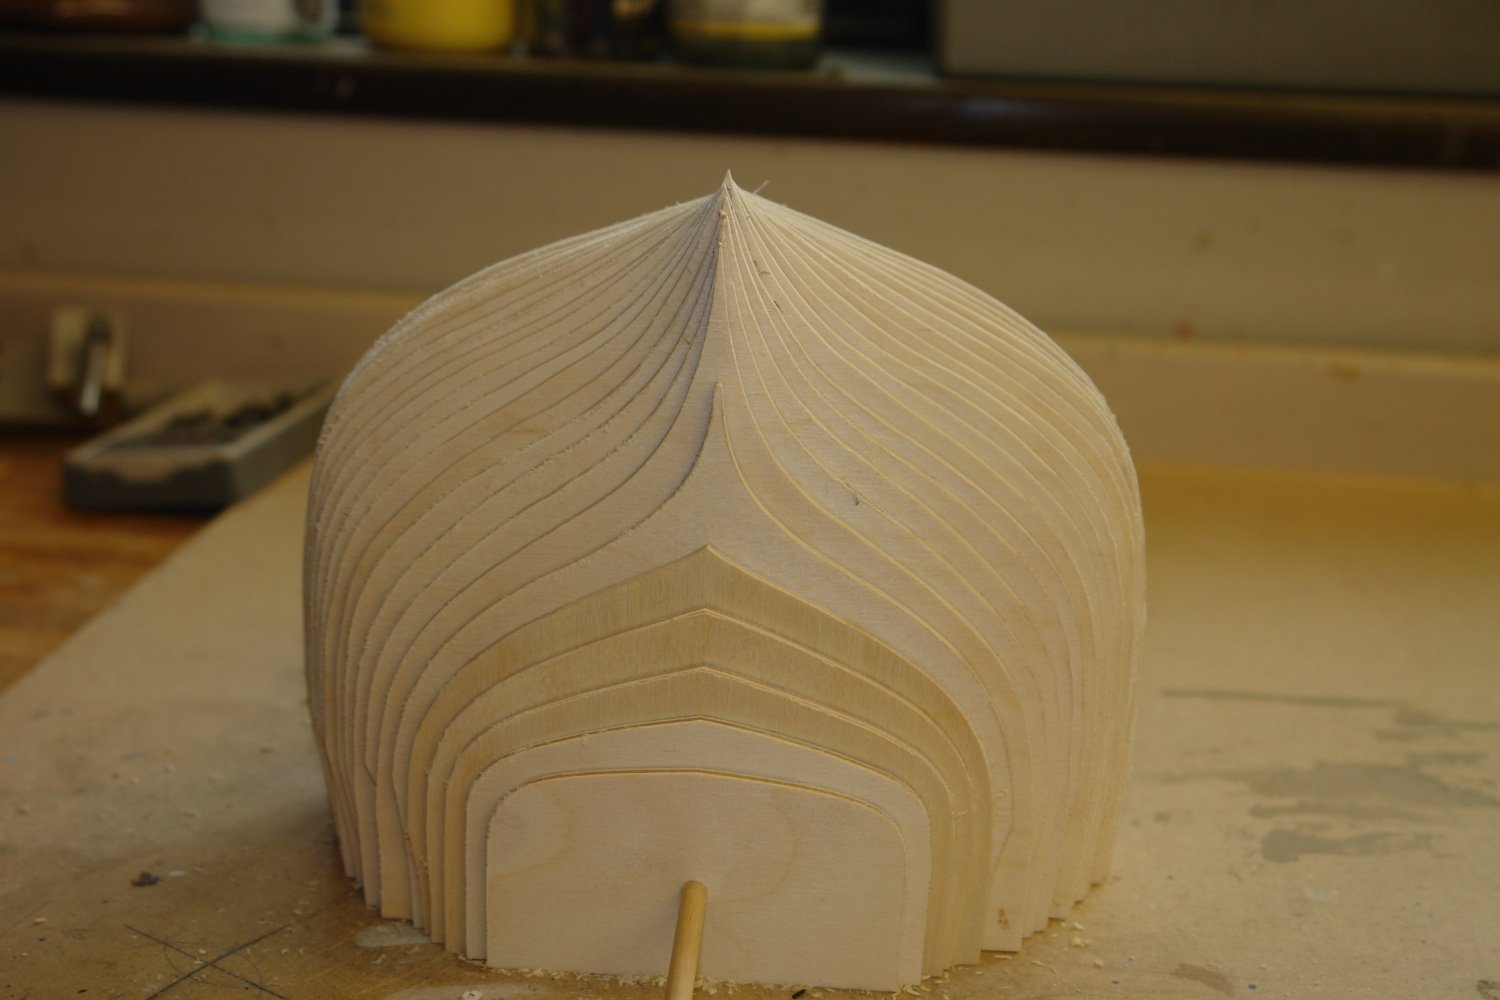
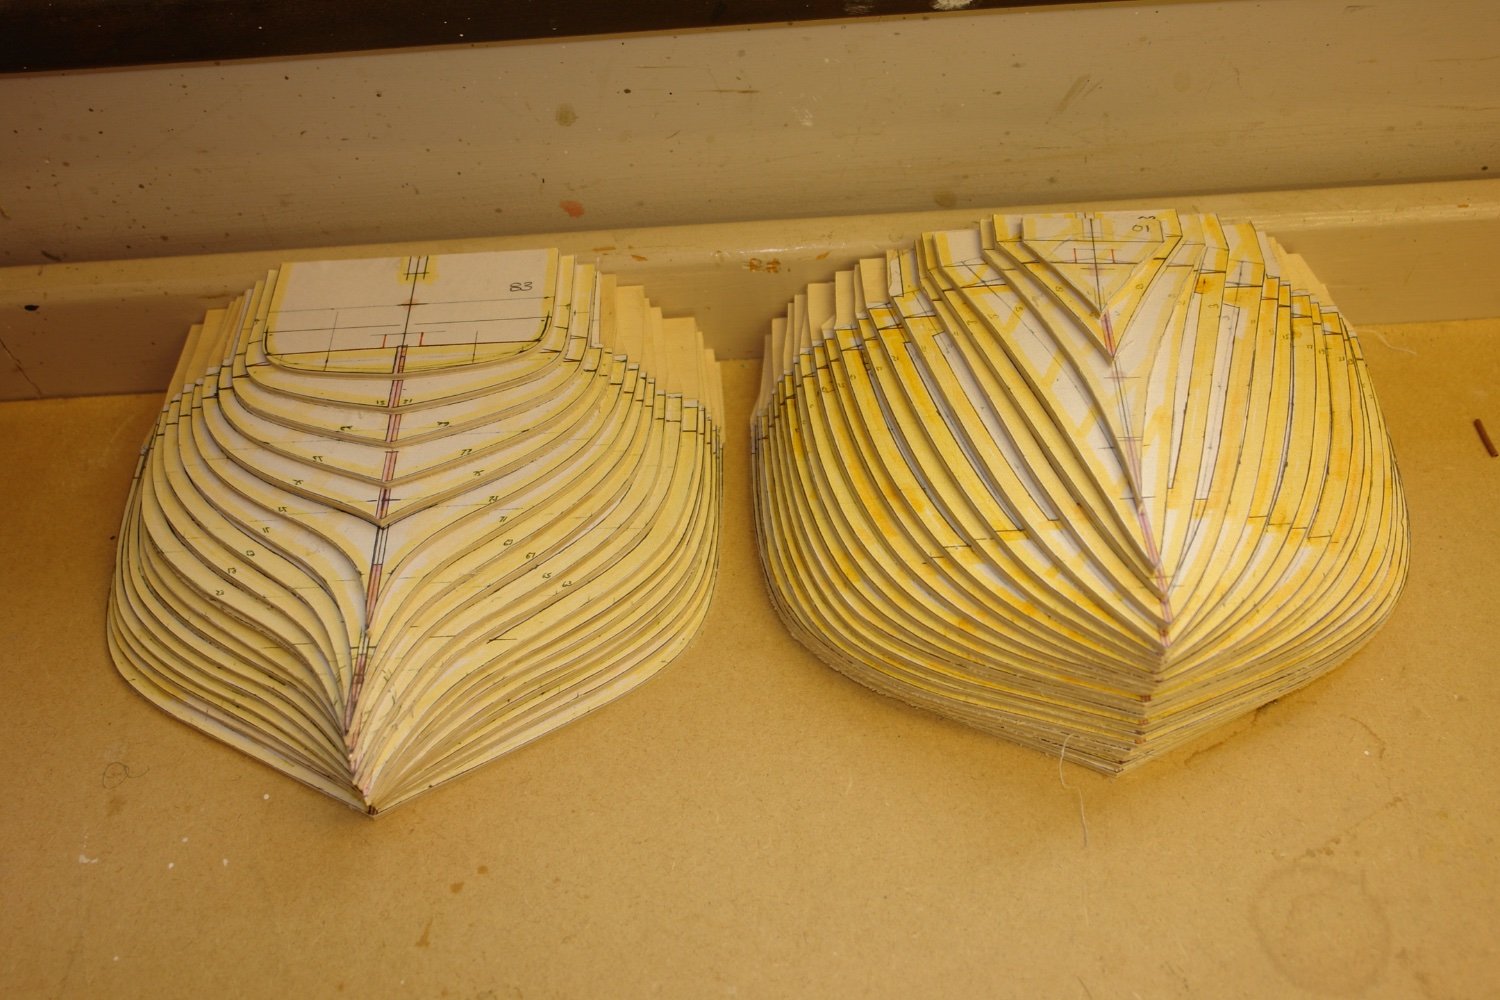
Fortunately I completed my first 2 week dust free sentence on Monday. I don't yet have a date for the second eye so I though I had better "make dust while the sun shines" - well actually it has been bucketing it down for weeks but you know what I mean. And so it was time to power up the scroll saw to test out the good eye. I partially cut out 42 frames. I cut about .020" on the waste side of the hull lines and then sanded back using the disk and spindle sanders. Only the hull outer profiles are cut at this stage. The up-stand for the baseboard isn't cut and neither are the keel slots, deck profiles or the inner profiles. I still have a lot of work to do but at least I made a start. Christmas is fast approaching and the family are turning up a week tomorrow. So only a few workshop days available until the new year when presumably the second eye will disrupt progress.

-
HMCSS Victoria 1855 by BANYAN - 1:72
KeithAug replied to BANYAN's topic in - Build logs for subjects built 1851 - 1900
Maybe it's you that got it wrong PAT. 😜
- 1,021 replies
-
- 6
-

-

-
- gun dispatch vessel
- victoria
- (and 2 more)
-
HMCSS Victoria 1855 by BANYAN - 1:72
KeithAug replied to BANYAN's topic in - Build logs for subjects built 1851 - 1900
I think they also cook the Christmas turkey on the Barbi wearing Tshirts and shorts while knocking back tinnies. How do they expect Santa to operate his sleigh when they insist on celebrating Christmas in the middle of summer. All very strange!
- 1,021 replies
-
- 6
-
-
-
- gun dispatch vessel
- victoria
- (and 2 more)
-
Valeriy, Is the originals hull plated and riveted?
-
HMCSS Victoria 1855 by BANYAN - 1:72
KeithAug replied to BANYAN's topic in - Build logs for subjects built 1851 - 1900
An even better idea - the festive season should be amazing. Glad to hear things are improving but this increases the incentive to have as many cocktails as possible before you are completetly better.😁- 1,021 replies
-
- 4
-
-
- gun dispatch vessel
- victoria
- (and 2 more)
-
HMCSS Victoria 1855 by BANYAN - 1:72
KeithAug replied to BANYAN's topic in - Build logs for subjects built 1851 - 1900
Pat - you could do some sanding and make use of them while you have the opportunity. 😁 It must be quite frustrating do the quacks have a solution?- 1,021 replies
-
- 4
-
-
- gun dispatch vessel
- victoria
- (and 2 more)
-
The good one😀 The deck fittings are very neatly done. Were the hatch bolts individually marked or do you have some secret technique for getting them so precise?
-
Very nicely done.
-
From the earlier posts I had wondered about how well the hull would turn out. I shouldn't have worried - it turned out really nice.
-
Yes it's quite amazing isn't it Phil. I felt sight discomfort at times during the operation but no real pain. I guess the eyes don't have many nerves to register the pain. Before the operation my biggest worry was the thought of seeing the scalpel heading toward my eye. No one told me that the operating light would be so strong that I wouldn't see any of the surgical procedure / instruments. All a piece of cake really.
-
Eric - I had assumed it was intentional. My guess is that many of these working boats would have been built quite roughly. A high quality finish might detract from the authenticity of the finished model.
-
HMCSS Victoria 1855 by BANYAN - 1:72
KeithAug replied to BANYAN's topic in - Build logs for subjects built 1851 - 1900
Oh dear Pat - I hope it wasn't too bad and recovery was rapid. I guess we will all get it at some time. Over here we seem to have settled into annual autumn vaccinations. Flue one arm covid the other.- 1,021 replies
-
- 3
-
-
- gun dispatch vessel
- victoria
- (and 2 more)
-
Richard - anything involving dust - mostly housework.😀 Thank you all for the good wished. I am going to create the manufacturing drawings for Cangarda's screw, rudder and rudder post today. At least that will make me feel a little useful.
-
Yes Brian - Cataract surgery is fantastic. I'm glad to hear it worked so well for you. I'm looking forward to getting the other side done.
-
Lovely draughting work Andy. Frame 3 is quite revealing of the "fineness" of the bow.
- 174 replies
-
- 2
-
-
- Vigilance
- Sailing Trawler
- (and 1 more)