KeithAug
-
Posts
3,980 -
Joined
-
Last visited
Content Type
Profiles
Forums
Gallery
Events
Everything posted by KeithAug
-
 That seems like a sensible approach. As for myself I plank with hardwood cut from very old furniture. I don't experience problems with shrinkage but the wood can be quite brittle and will break if the curvature is too great.
 -
Thank you Rick - as co author you will need to be chairman of the judges panel. Or should that be chairperson - you can never be sure in this PC age! Thank you John and Andy.
-
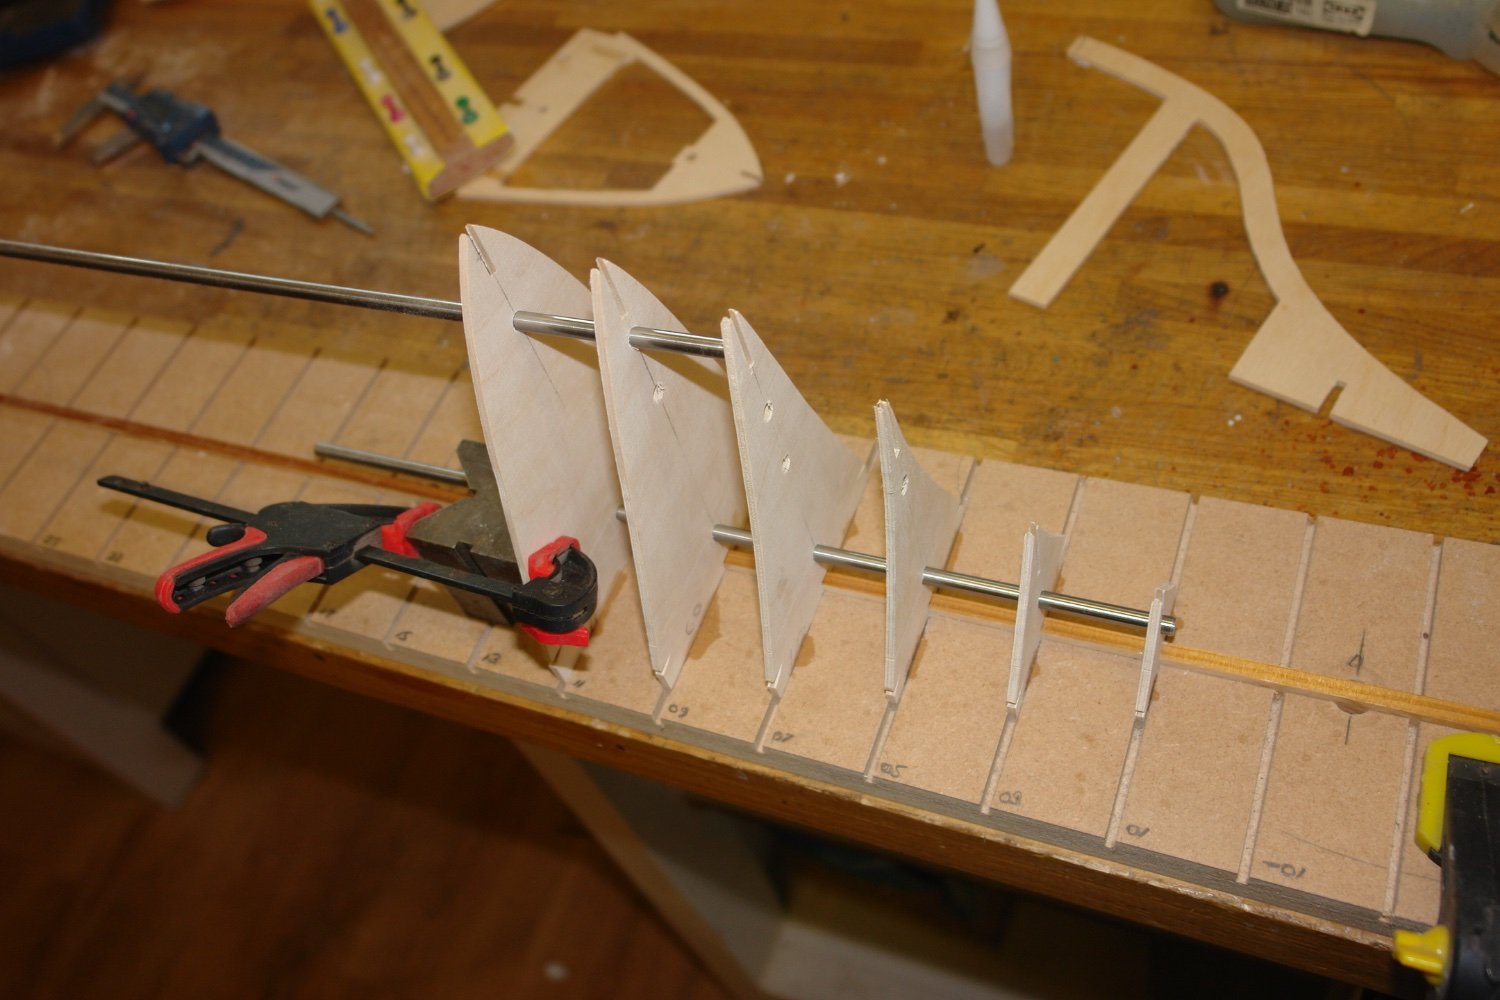
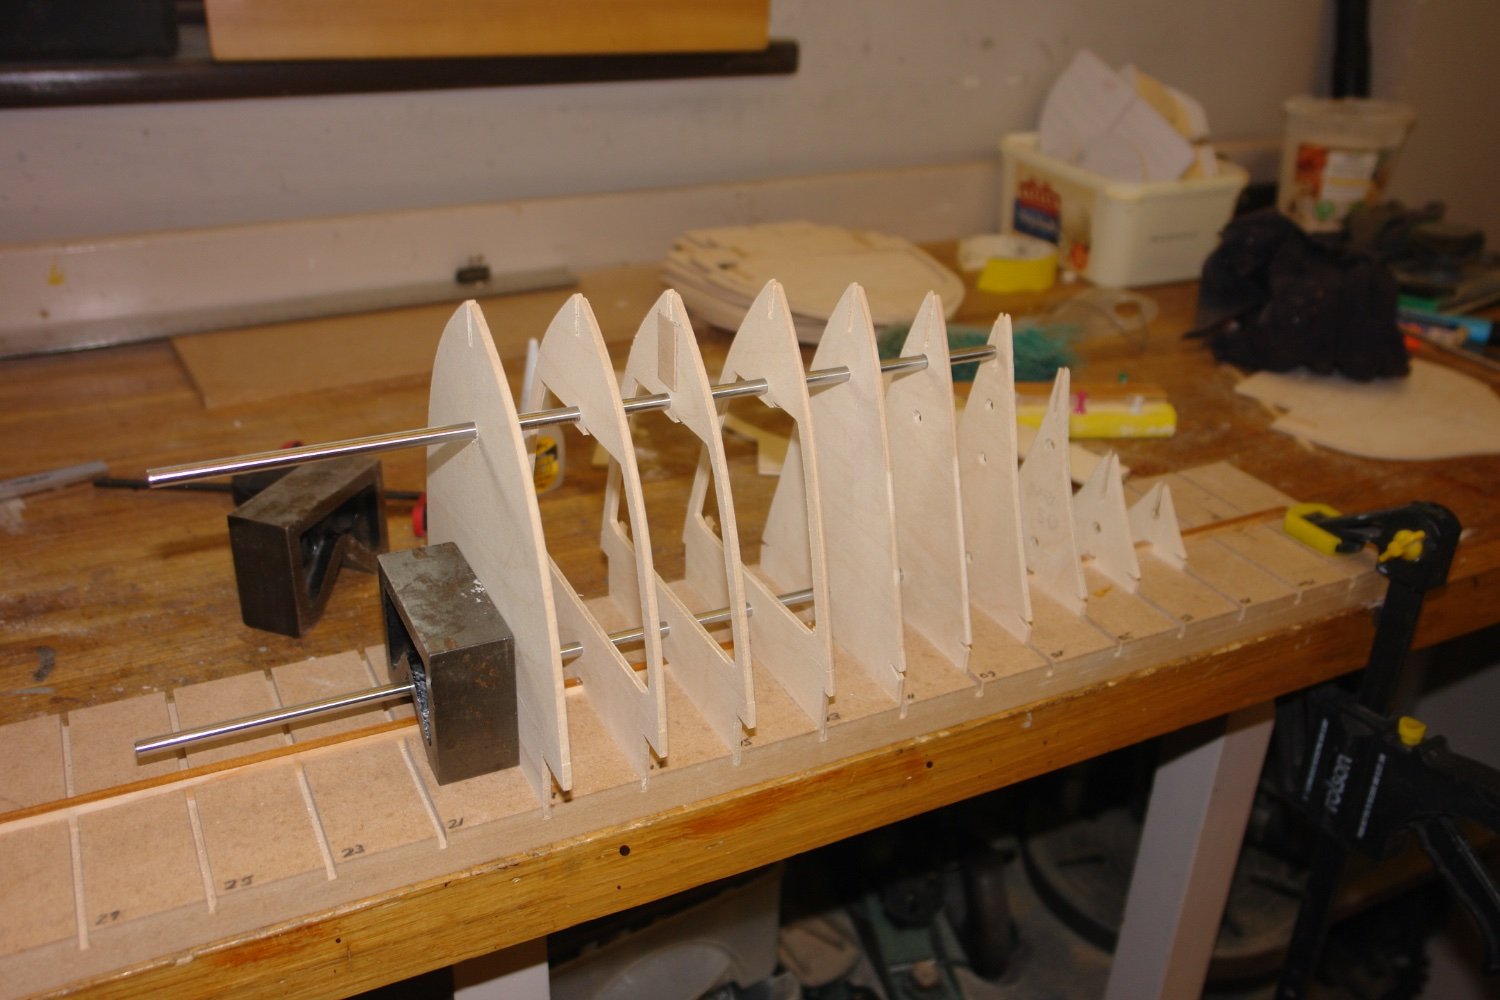
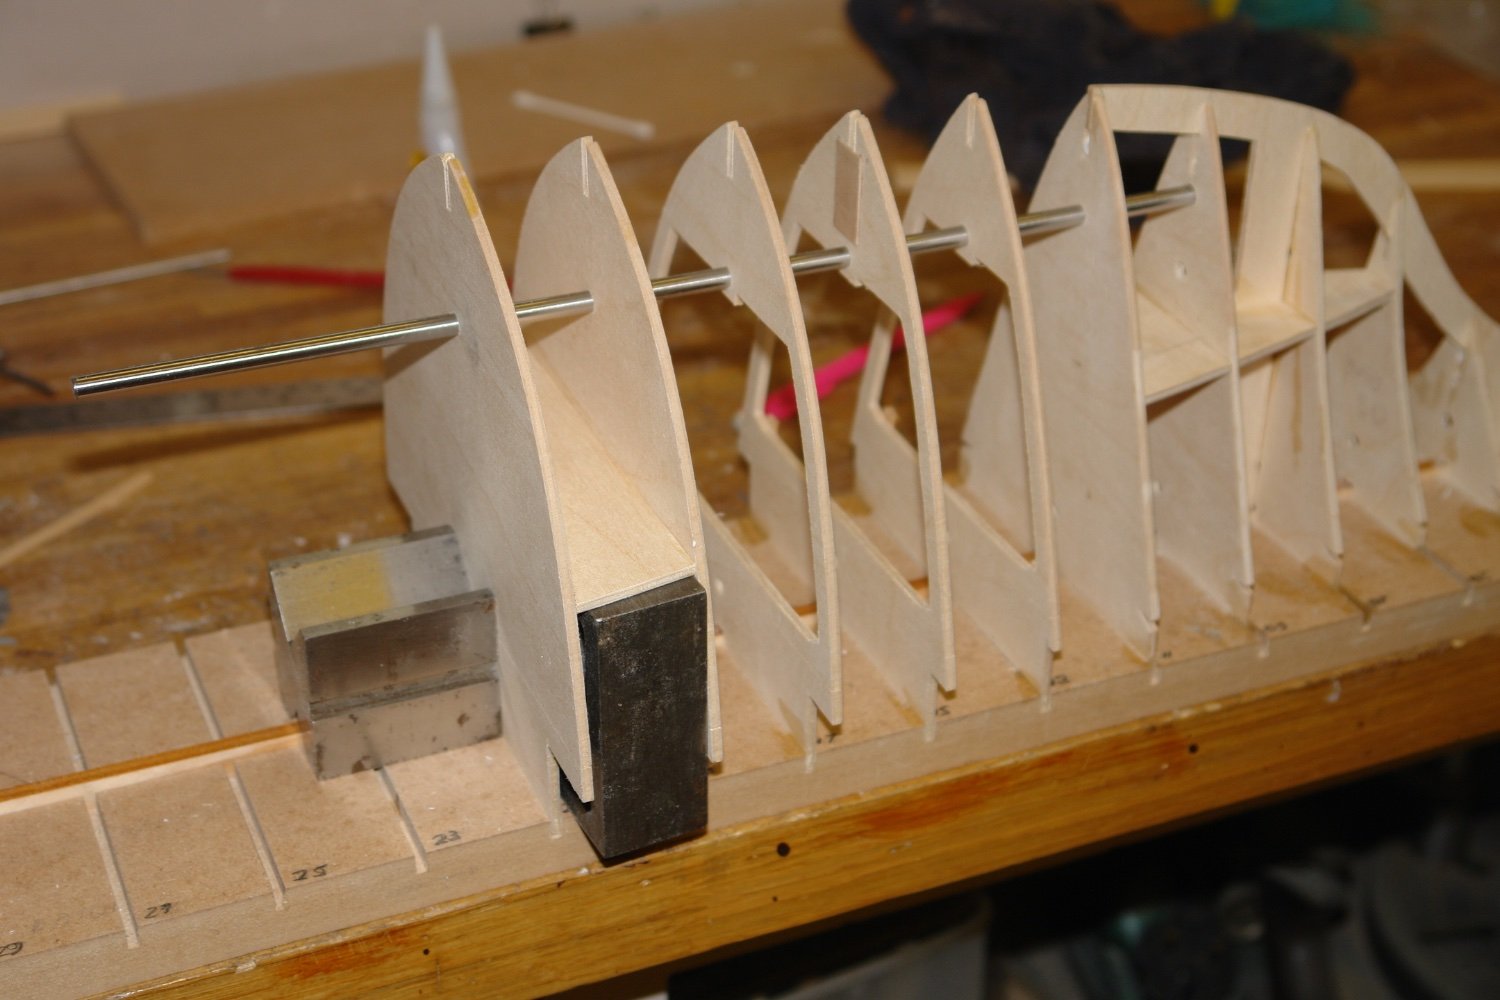
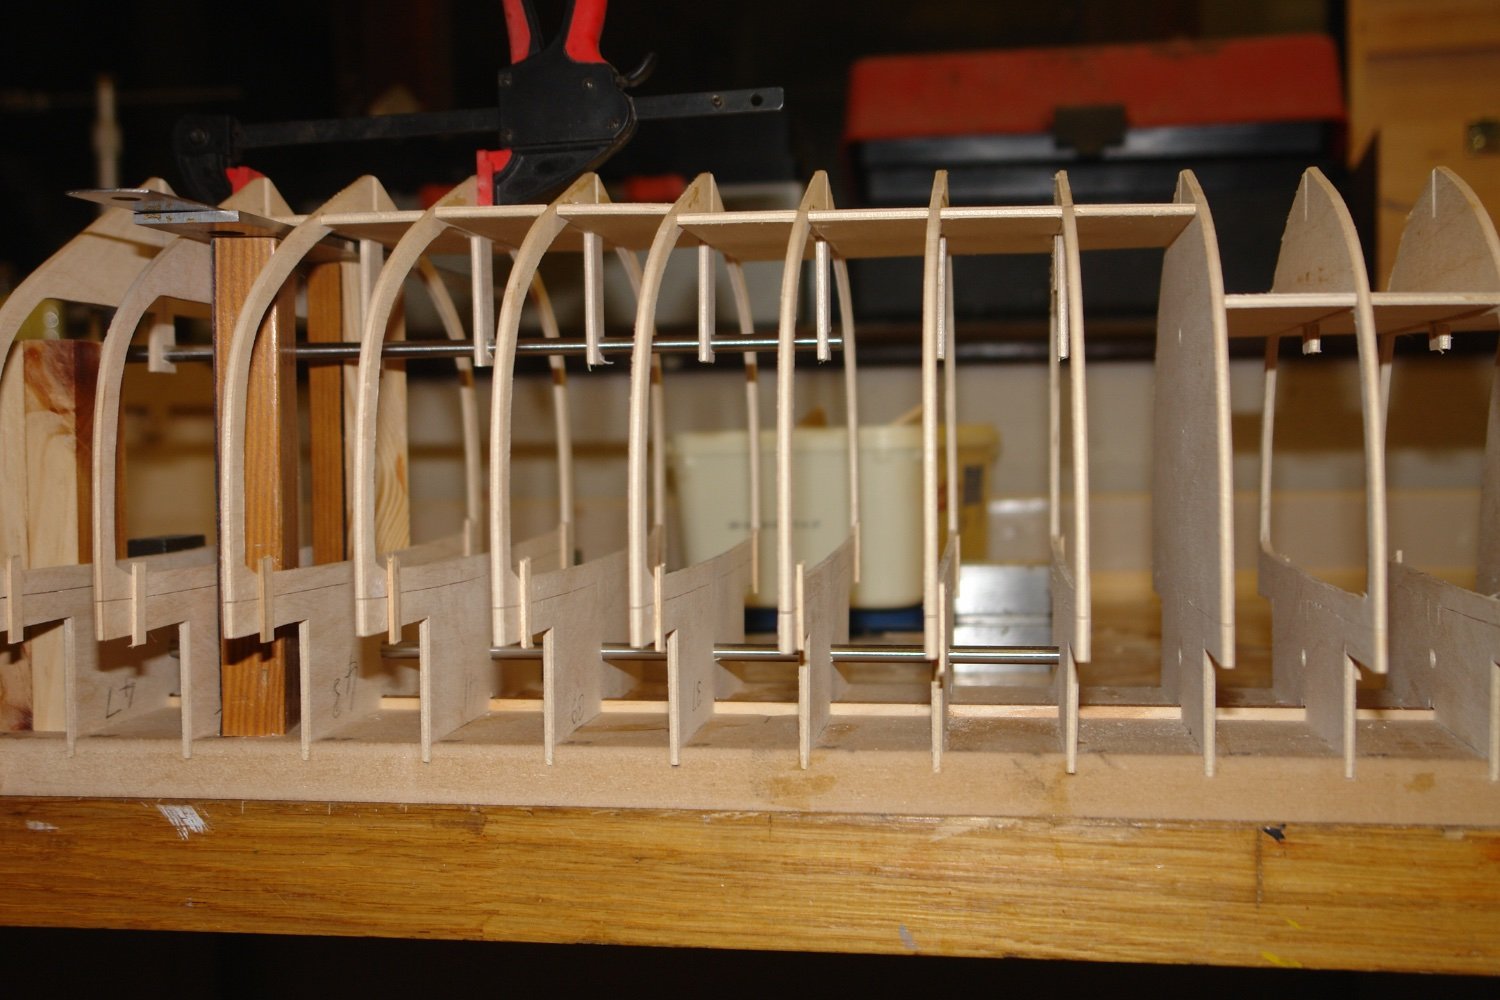
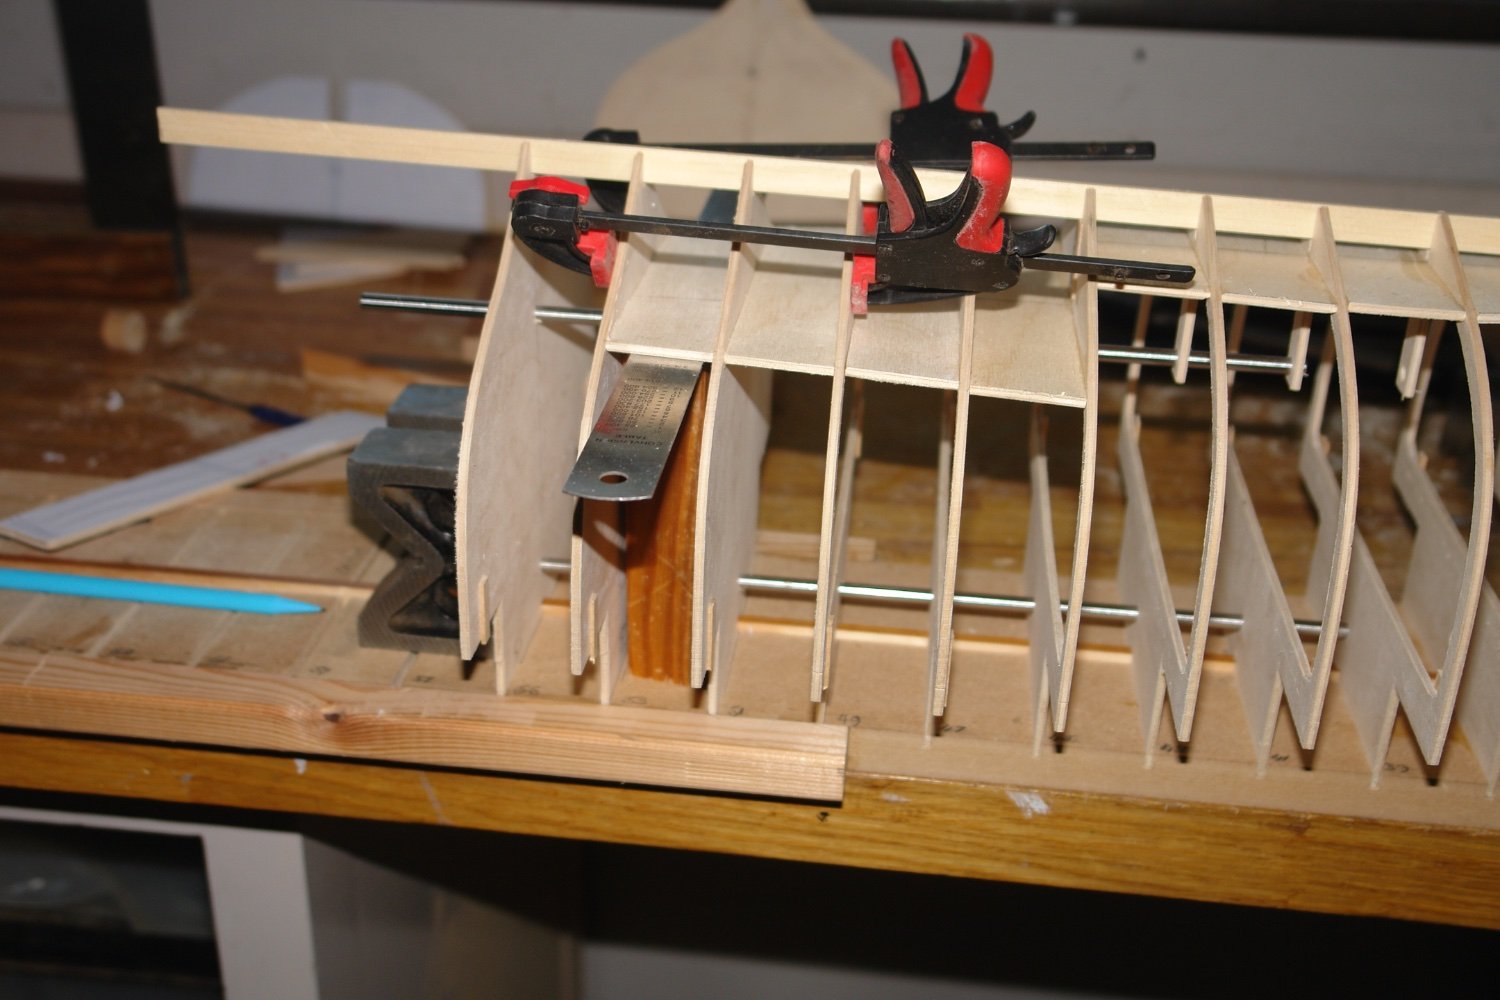
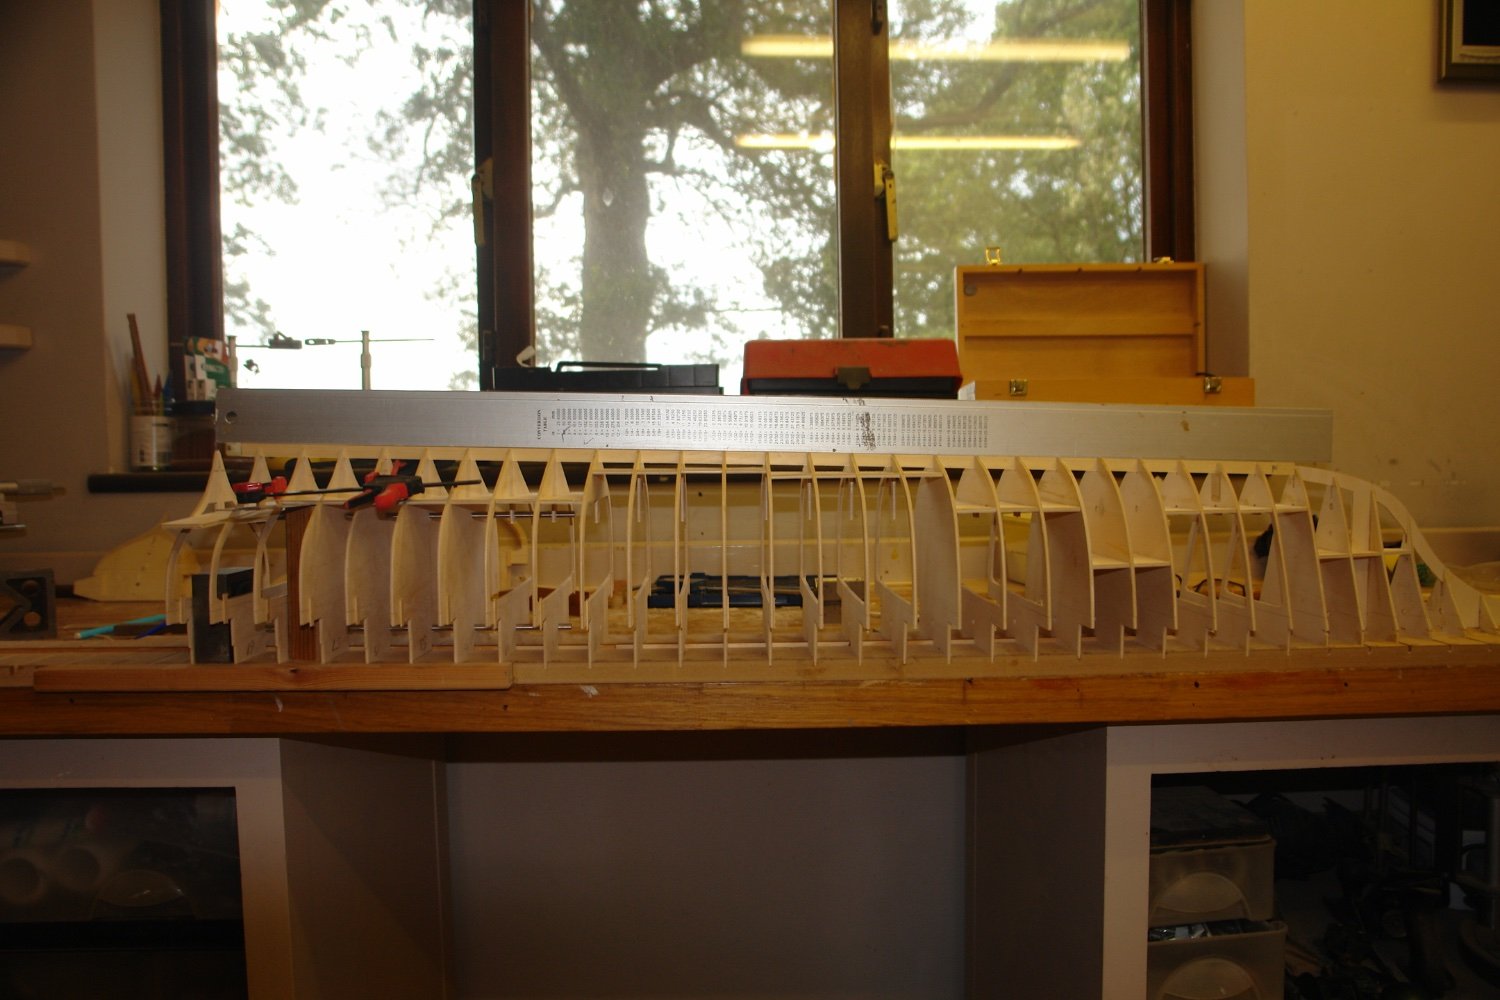
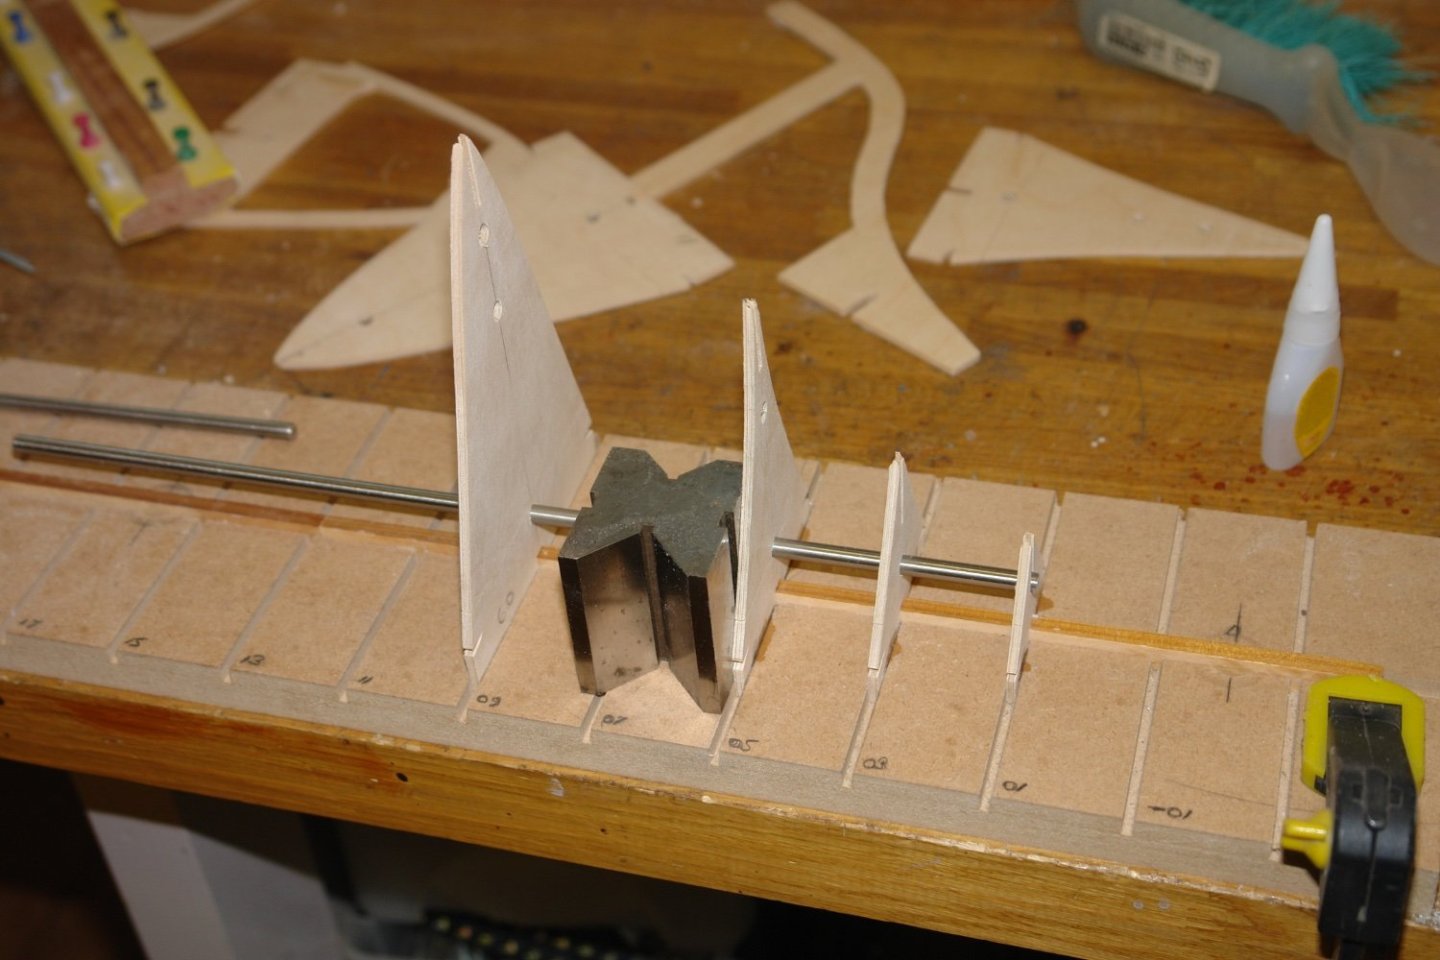
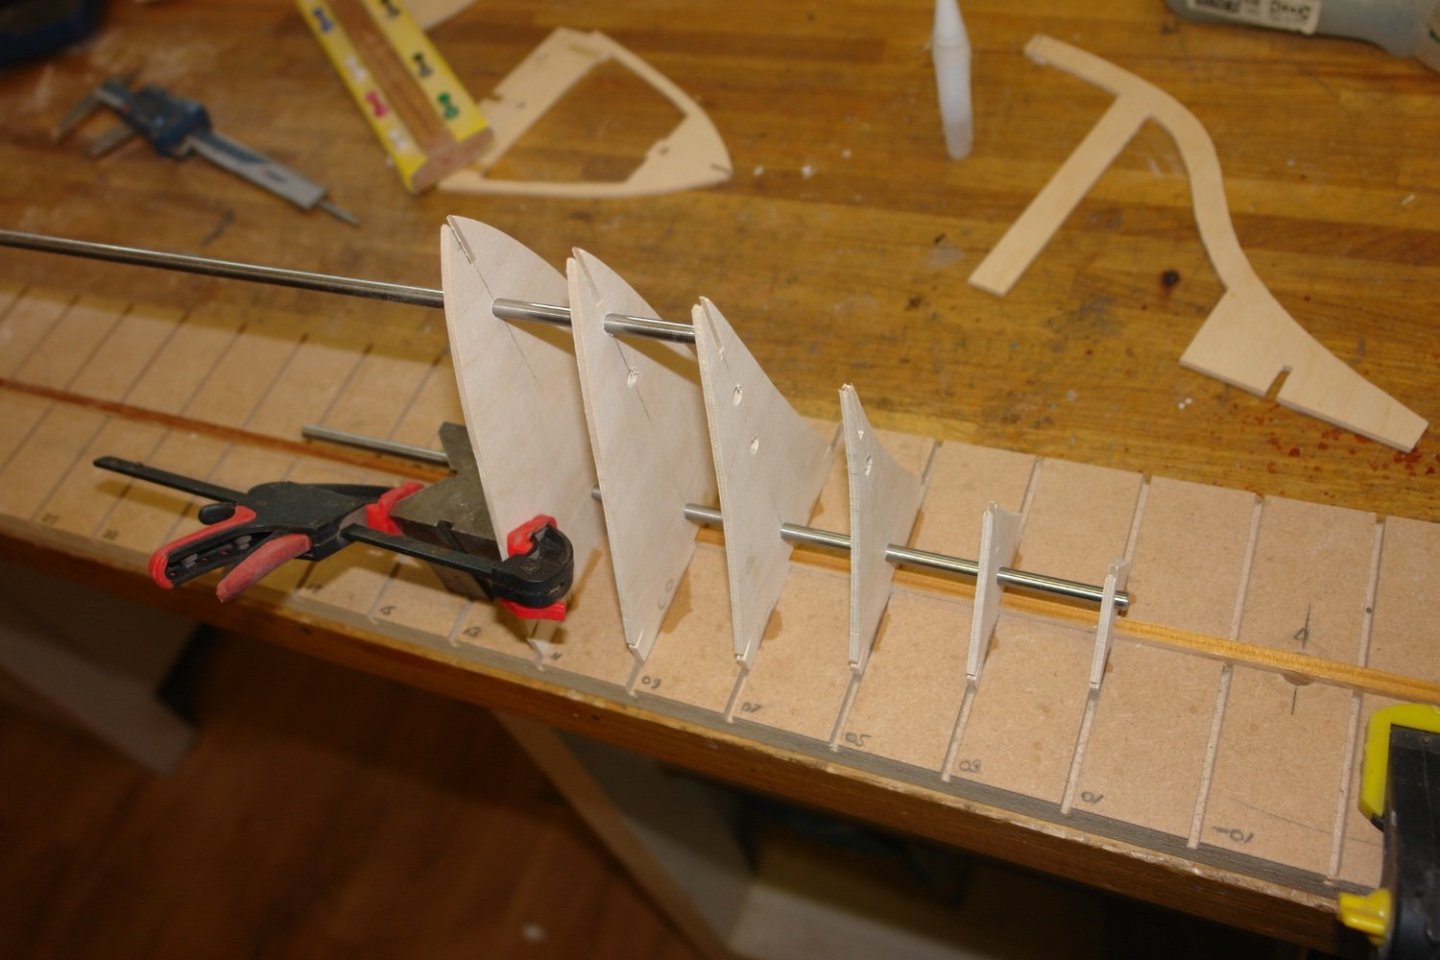
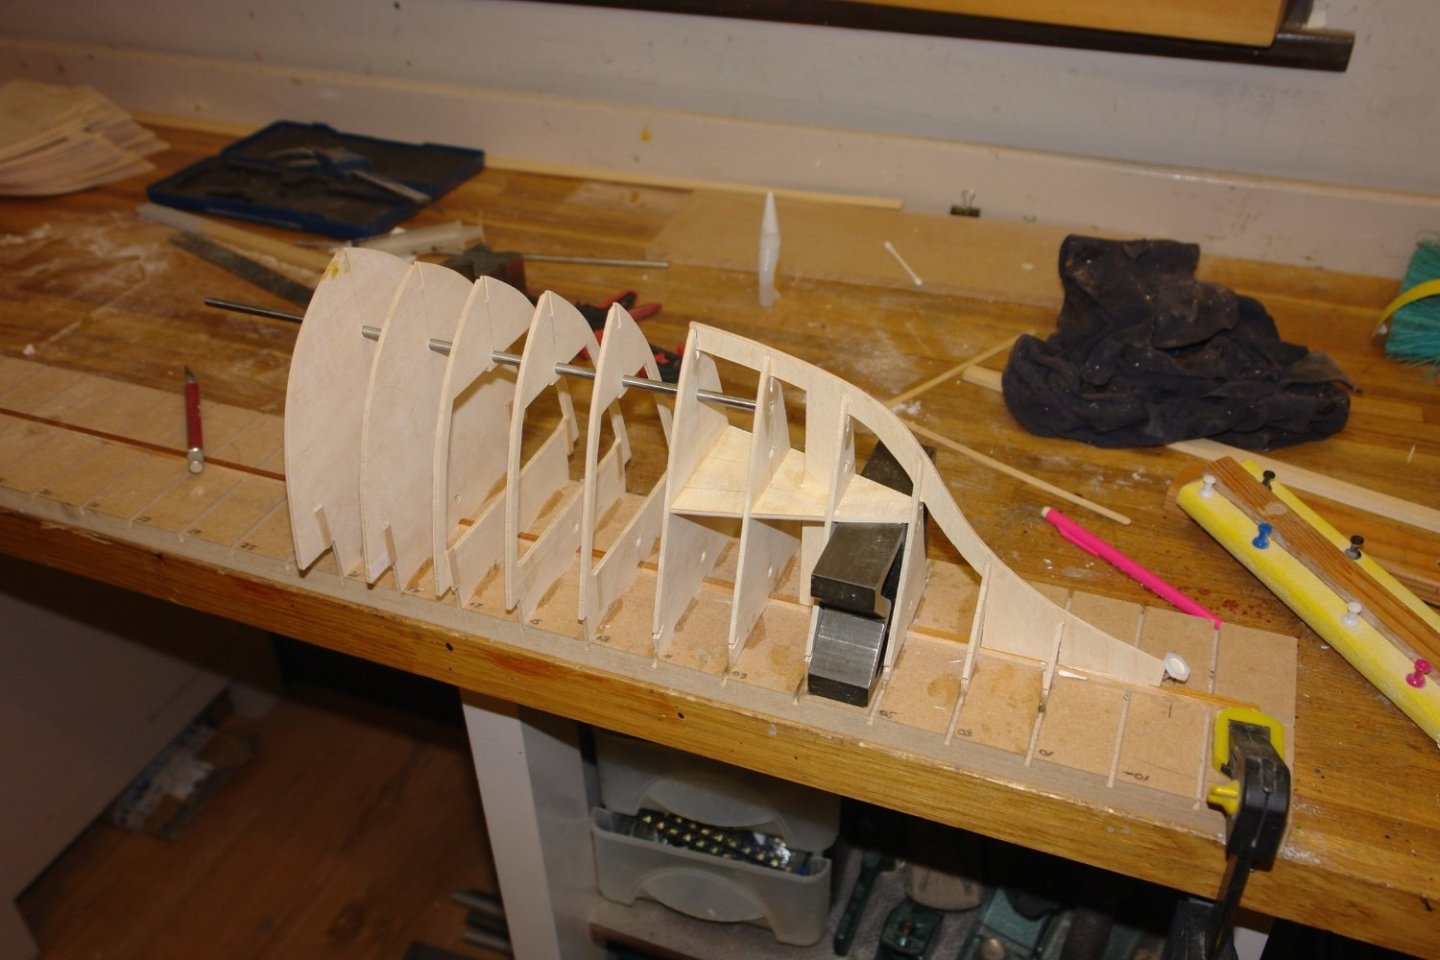
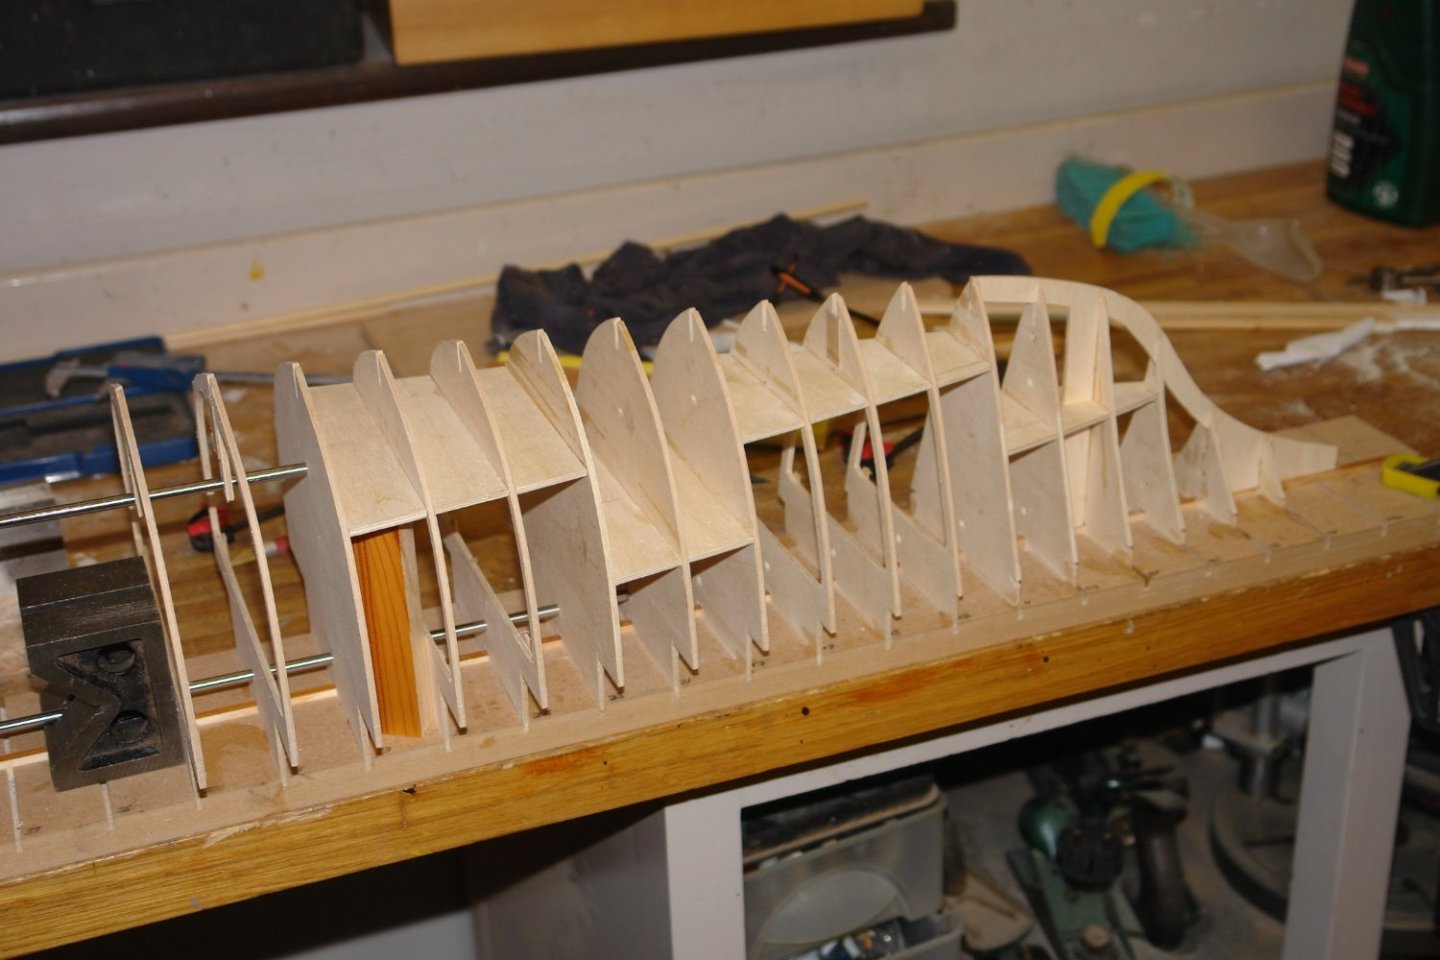
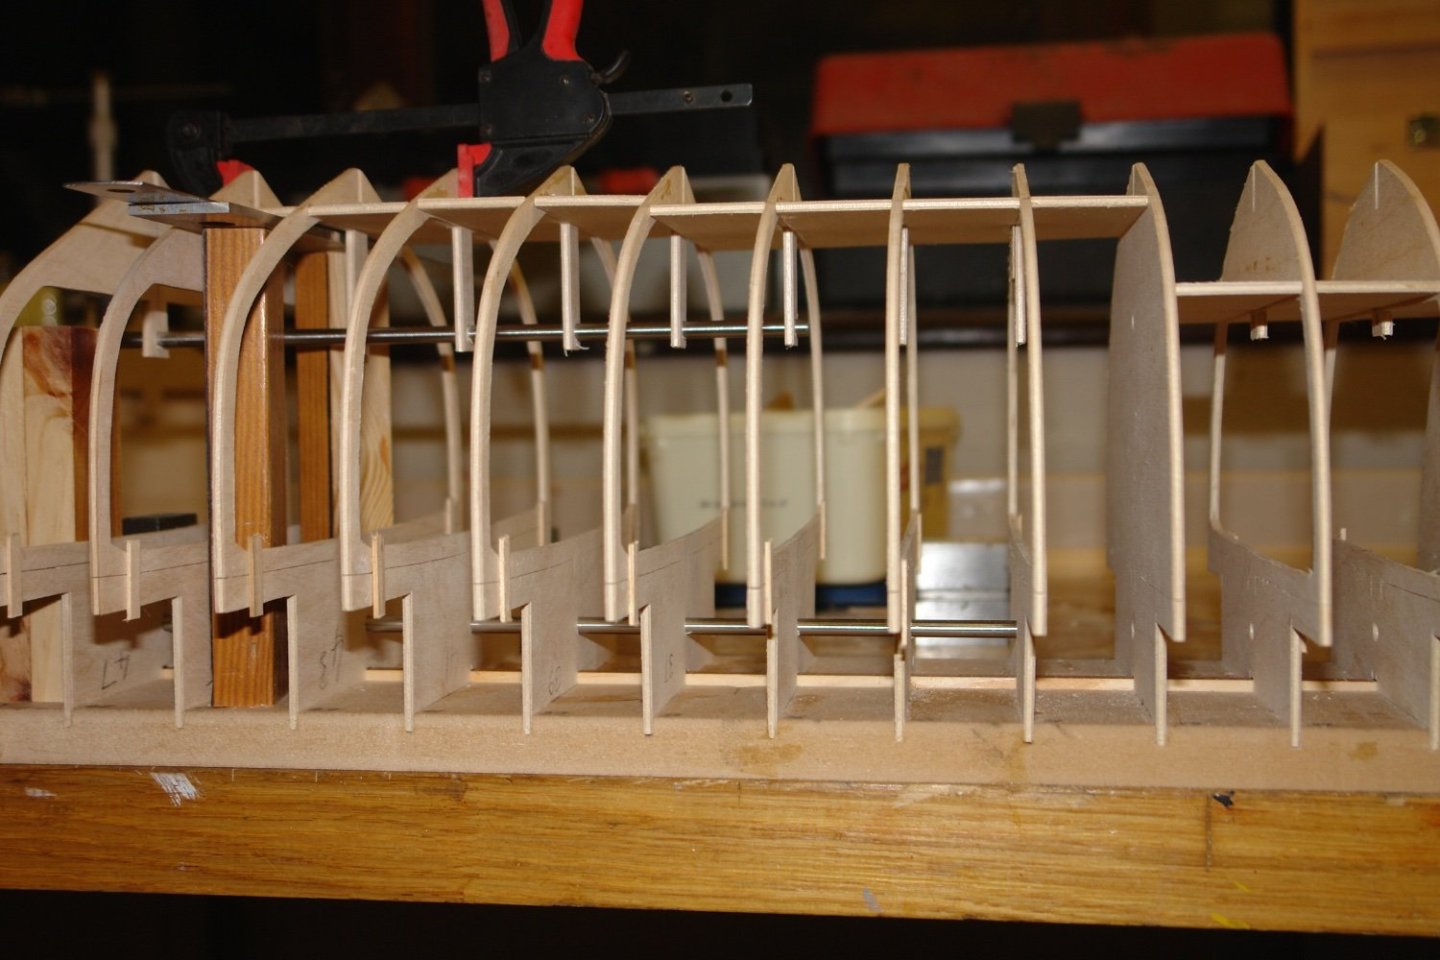
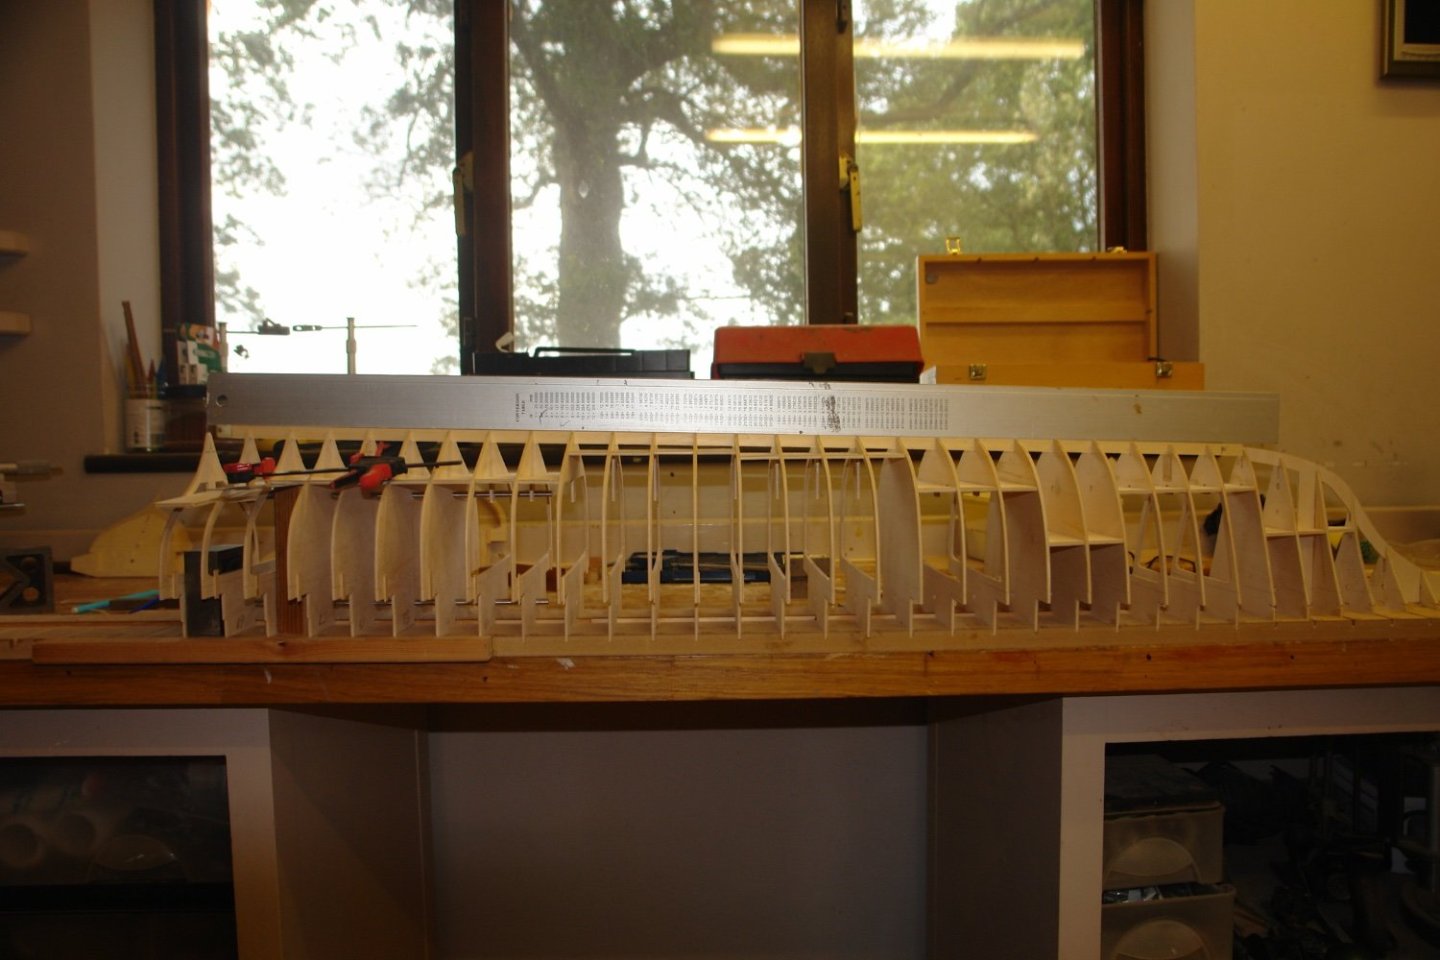
As I said in another post earlier today the workshop heated up to a sweat inducing 10c this week, so I made the most of it and did some shipyard work. To be honest if the workshop drops below 10c the PVA glue takes an absolute age to set and even then the bond strength seems weak. At least that is my excuse for slow progress. Anyway it was time to start glueing the frames into the building board. In the following sequence of shots you can see how I am using various blocks to get the frames vertical. I am also using the rods to ensure the alignment of the frames both top and bottom. As I am progressing along the hull I am installing horizontal bracing frames. Where I want to retain the option for doing some below deck detail the bracing is put in at the below deck floor level. Where the below deck won't be visible I am putting the bracing in where it maximises rigidity. As I progress I slide the alignment rods progressively rearward. After a while I got this far.


-
Ian - good tip thank you.
-
After all, she is your baby.🙂
-
Same here Andy - the workshop broke the 10c barrier this week. That looks like a hell of a lot of scrolling - plenty of opportunity for eye strain. I am look forward to seeing how it all goes.
- 174 replies
-
- 3
-

-
- Vigilance
- Sailing Trawler
- (and 1 more)
-
George - Roger is correct. Scroll saw blades don't usually break a lot. you should have a look at your set up. George - Allan is also wise. I think it would make life easier for you if you put in more frames, particularly at the bow and stern. Filler blocks are also a good option.
-
Ian - as the planks are being covered up then let the hull tell you the answer. In general wider planks can be used on flat sections and narrower on more extreme curvatures. My advice would be make a start on planking and after a few planks decide if its going well and then adjust the width up or down as you see fit.
-
Yes Ian - My advice would be to cut right through where you have scored the line leaving only about a half inch at either end of the line to maintain the attachment to the up-stand. When you come to cut the hull from the base board cut it off some where near your letter B. Then remove the remainder of the up-stand by cutting through the "half inch" attachment areas. Have a look at posing 212 on my Cangarda build for further detail / options.
-
Valeriy - very net. The more usual term for the chimney is either a funnel or a smoke stack, but who am I to comment as I don't speak a single word of Ukrainian.
-
Wonderful eagle 👏
-
The planking is really well done Hakan - the hull looks very professional. As for the workshop - I have been giving mine a miss as the wall thermometer says 4.5 centigrade. It has been a bit cold out side but temperatures bounce back to plus 6c today, so the worksop may get more affection this week.
-
Ian - this might provide some guidance. https://www.building-model-boats.com/model-boat-motor.html
-
Ian - it is quite soft but no where near as soft or furry as balsa. An alternative would be Lime. Both would work reasonably well as a foundation for fibreglass. You can look here http://modelshipworldforum.com/resources/materials_and_tools/Modelling_Woods.pdf on the MSW web site for recommended woods and their uses. However the best approach is to do what you are comfortable with in the knowledge that if it doesn't work you can always rip it off ant try something else. Basswood
-
Ian, ply is more difficult to sand than basswood but in principle there is no reason why it can't be used. I assume you don't have the means of cutting your own planks from basswood? You are going to find that the planks will need to tapered to fit on the frames - wider at the middle of the boat and narrower at stem and stern. Also to get smooth curve round the hull the need to be relatively narrow - probably no wider than 5mm. Some may need to be even narrower.
-
We modellers do live an exciting life, don't we. 🙂
-
She looks immaculate - probably better finished than the real thing.
-
Nils - excellent work - I like the way the crew and passengers bring your models to life. I worry about the blond lady, she looks like her reserve of stability is somewhat suspect. She would be advised to take a step back from the rail.
- 330 replies
-
- 10
-

-
-
Hello Ian - welcome to MSW - I use Pritt Stick - and then peel / sand it off. I would suggest basswood for planking. You may find 3mm balsa planks are a bit too fragile when it comes to shaping - particularly if the frames are widely spaced (as they tend to be on Model Boats plans). If the spacing is wide balsa planks will tend to "straighten" between the frames producing a series of flats. Have a look here for wood. https://www.slecuk.com/allcategories - Decent service and reasonable cost. I had a look at your railway model link. You shouldn't find ship modelling too much of a transition. Keep asking questions, MSW is a friendly and helpful place. Good luck.