-
Posts
3,986 -
Joined
-
Last visited
Content Type
Profiles
Forums
Gallery
Events
Everything posted by KeithAug
-
Another interesting subject. I will happily follow along.
- 313 replies
-
- lightship
- Feuerschiff Elbe 1
-
(and 1 more)
Tagged with:
-
Keith What a difficult time you are both having. However I am thankful Maggie has passed the first critical hurdle. The medics do wonderful things these days so hopefully recovery will go well. My thoughts are with you both.
-
Brian - prompted by the above I should have been more explicit about the soldering. I solder with a variable temperature iron (typically set to its default setting of 320c) - although in the past I have used a fairly basic Weller single temperature soldering iron. I have never set fire to the jig - just some light charing at worst. I have never tried a torch for soldering brass wire of circa .050" or less diameter because I have found it unnecessary. I tend to solder with lead free solder wire of about 1/32" diameter. It is pre fluxed but just to be sure I always add a dab of plumbers soldering flux. This tends to work well for making guard rails.
-
Interesting jig Andy. I haven't seen its like before.
- 174 replies
-
- Vigilance
- Sailing Trawler
-
(and 1 more)
Tagged with:
-
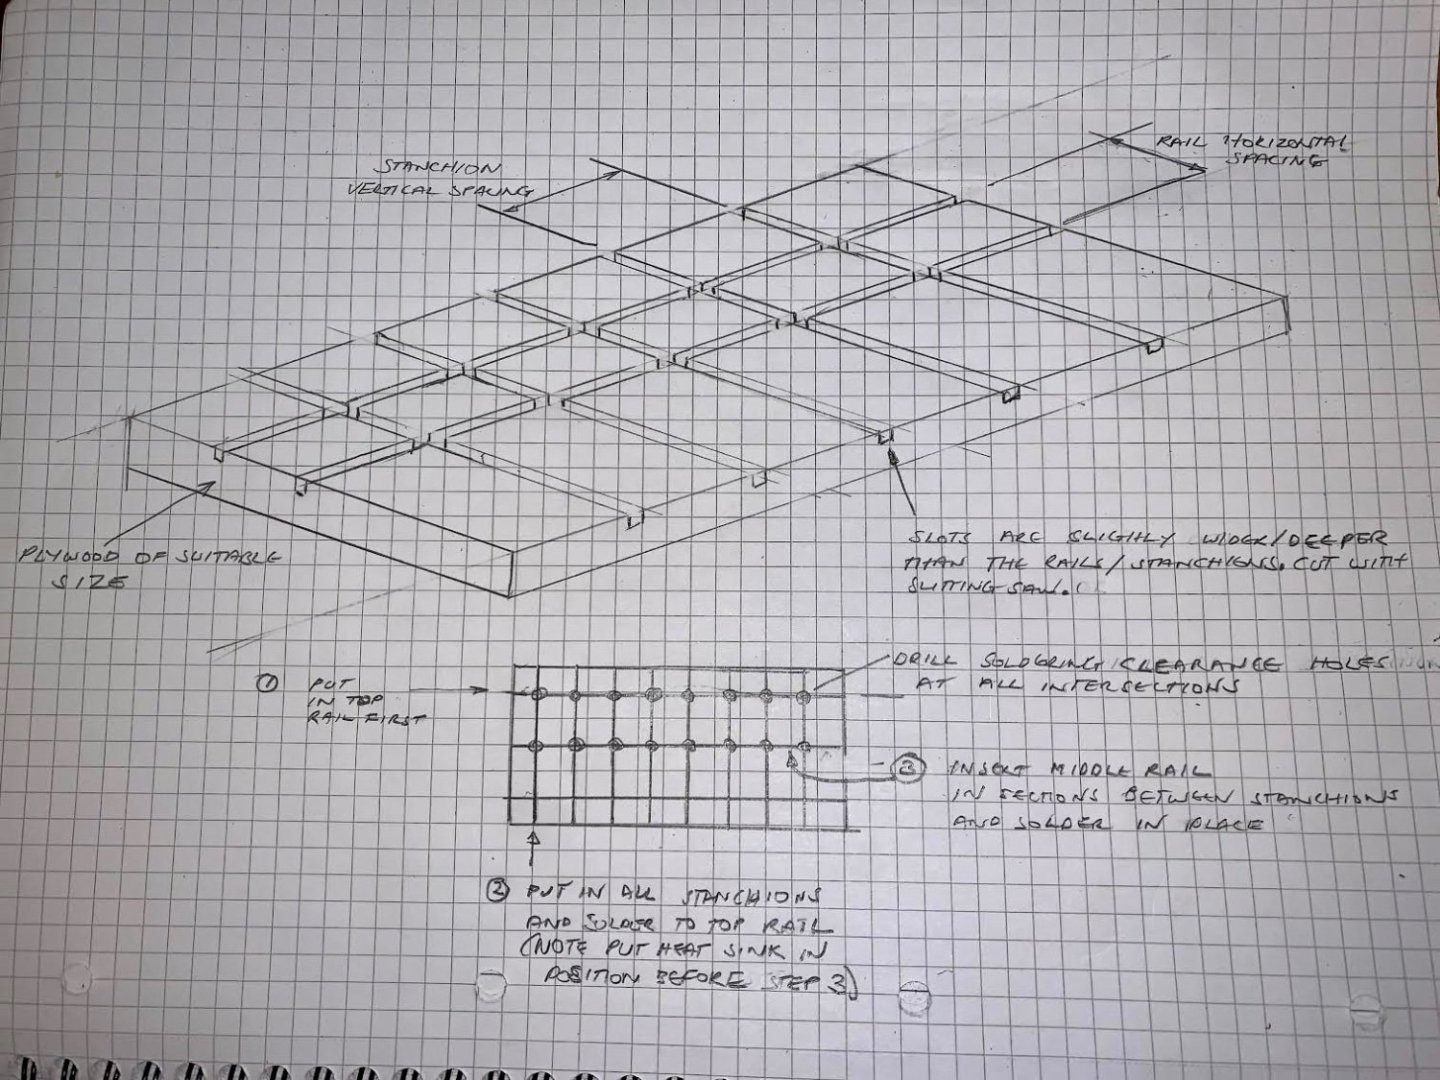
Brian - I would tend to make a simple plywood jig for this type of operation as follows:- The slots in the plywood are most easily made with a slitting saw on a small table saw - e.g. Byrnes. If the top / middle rails and stanchions are of different diameters use different slot widths. Drilling holes at all the intersections provides clearance for access by the soldering iron tip. The 1, 2, 3 sequence probably makes most sense as continuous runs of the top rail and stanchions will give the best visual effect. The grid of slots accurately controls the position (uniformity) of the finished guard rail. I hope this makes sense? Let me know if it doesn't. Feel free to ignore it if you find a better solution.
-
That is hell of an extensive update Brian - and all those laser cut pieces are making me jealous. As for the rails, is styrene going to be durable enough? Presumably if she is going into a case it will be OK. The dusting could be problematic if it is not being cased. I have a way of getting the brass option very regular if you are not wedded to the styrene option. Let me know if you are interested.
-
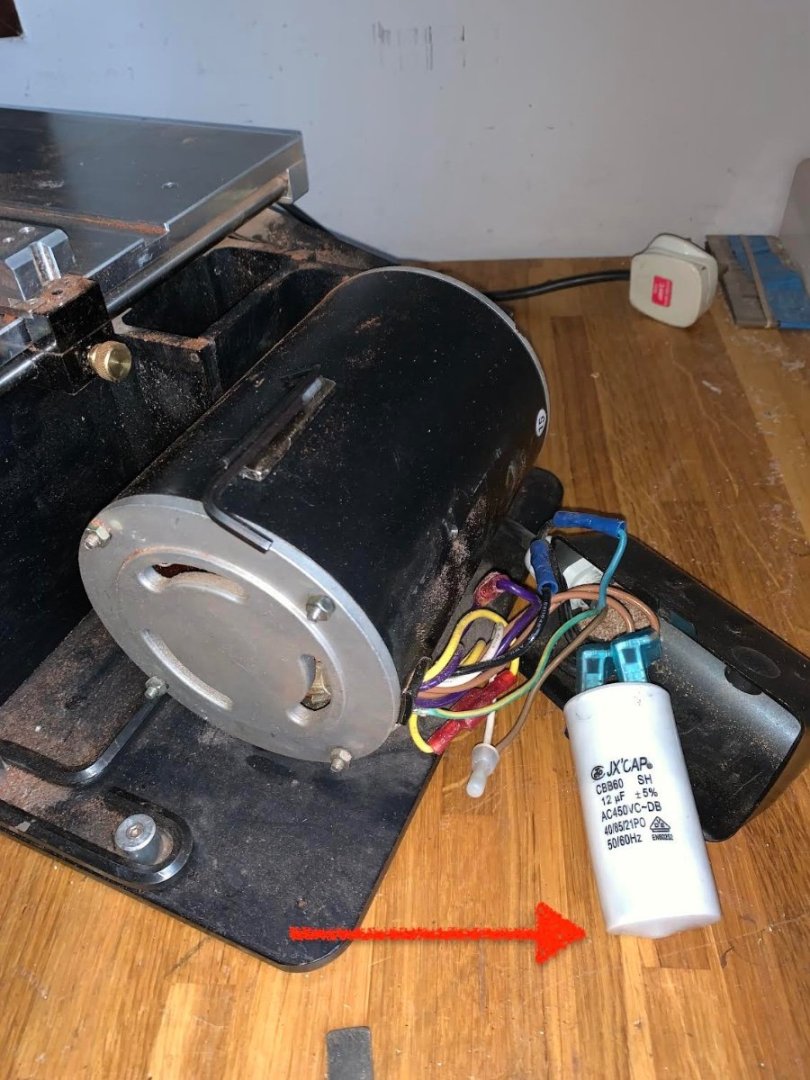
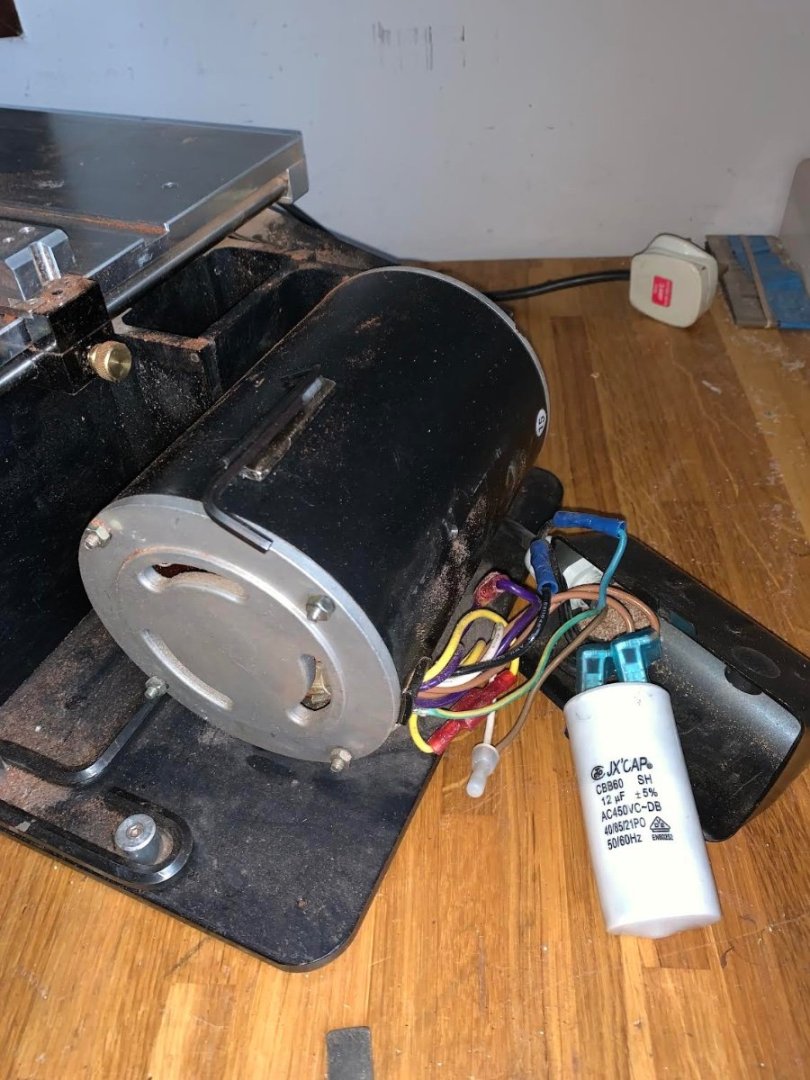
Thank you Keith and Gary. I was going to have a productive day in the workshop but it was not to be. My somewhat recently neglected Byrnes saw decided I didn't love it any more so it threw a sulk and after a few hesitant attempts at starting it threw in the towel. If I manually kick over the blade it angrily bursts into life and bites my prodding stick. Ooch! I think I need to buy a new CAP (maybe a bowler). At least I have learned summat (Yorkshire dialect). the 40/85/21 means that its operational range is -40c to 85c and it will withstand 21 days at 95% relative humidity at - 40c. P.S. Note to self - remember not to lick the terminals - it may be less dead than it is pretending to be.
-
Wonderful overhead shots Eberhard. She looks magnificent - that is apart from the crews dereliction of duties on the rope work. Have they been on the schnapps?
-
She looks wonderful in her case Nils. Must watch the film again.
- 330 replies
-
Eric - I have to agree with Brian - those clamps are enormous. Did you run out of clothes pegs? Deck looking good.
- 393 replies
About us
Modelshipworld - Advancing Ship Modeling through Research
SSL Secured
Your security is important for us so this Website is SSL-Secured
NRG Mailing Address
Nautical Research Guild
237 South Lincoln Street
Westmont IL, 60559-1917
Model Ship World ® and the MSW logo are Registered Trademarks, and belong to the Nautical Research Guild (United States Patent and Trademark Office: No. 6,929,264 & No. 6,929,274, registered Dec. 20, 2022)
Helpful Links
About the NRG
If you enjoy building ship models that are historically accurate as well as beautiful, then The Nautical Research Guild (NRG) is just right for you.
The Guild is a non-profit educational organization whose mission is to “Advance Ship Modeling Through Research”. We provide support to our members in their efforts to raise the quality of their model ships.
The Nautical Research Guild has published our world-renowned quarterly magazine, The Nautical Research Journal, since 1955. The pages of the Journal are full of articles by accomplished ship modelers who show you how they create those exquisite details on their models, and by maritime historians who show you the correct details to build. The Journal is available in both print and digital editions. Go to the NRG web site (www.thenrg.org) to download a complimentary digital copy of the Journal. The NRG also publishes plan sets, books and compilations of back issues of the Journal and the former Ships in Scale and Model Ship Builder magazines.


