Cathead
-
Posts
3,522 -
Joined
-
Last visited
Content Type
Profiles
Forums
Gallery
Events
Everything posted by Cathead
-
 While no expert, I've personally found that I like to do both. An initial blackening in highly diluted solution, followed by painting. The blackening seems to rough up the surface slightly and the paint grips better and looks more natural than when applied straight to brass. I've also used primer followed by paint but that ends up thicker than I like.
 -
Quality instructions or not is a HUGE divider for kit manufacturers. There are only a handful that really bother to do it right. The rest are a sink or swim mentality.
-
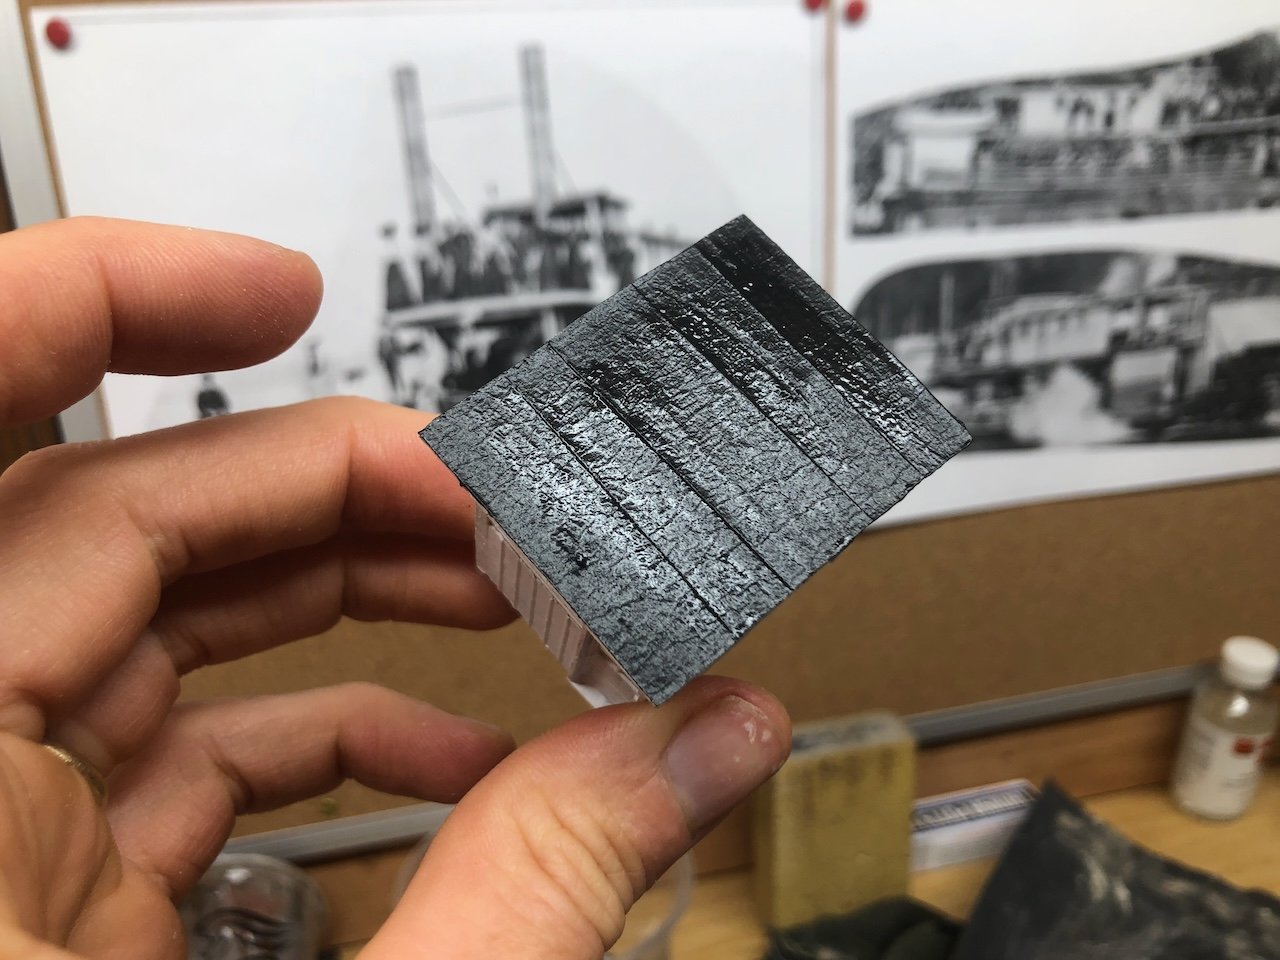
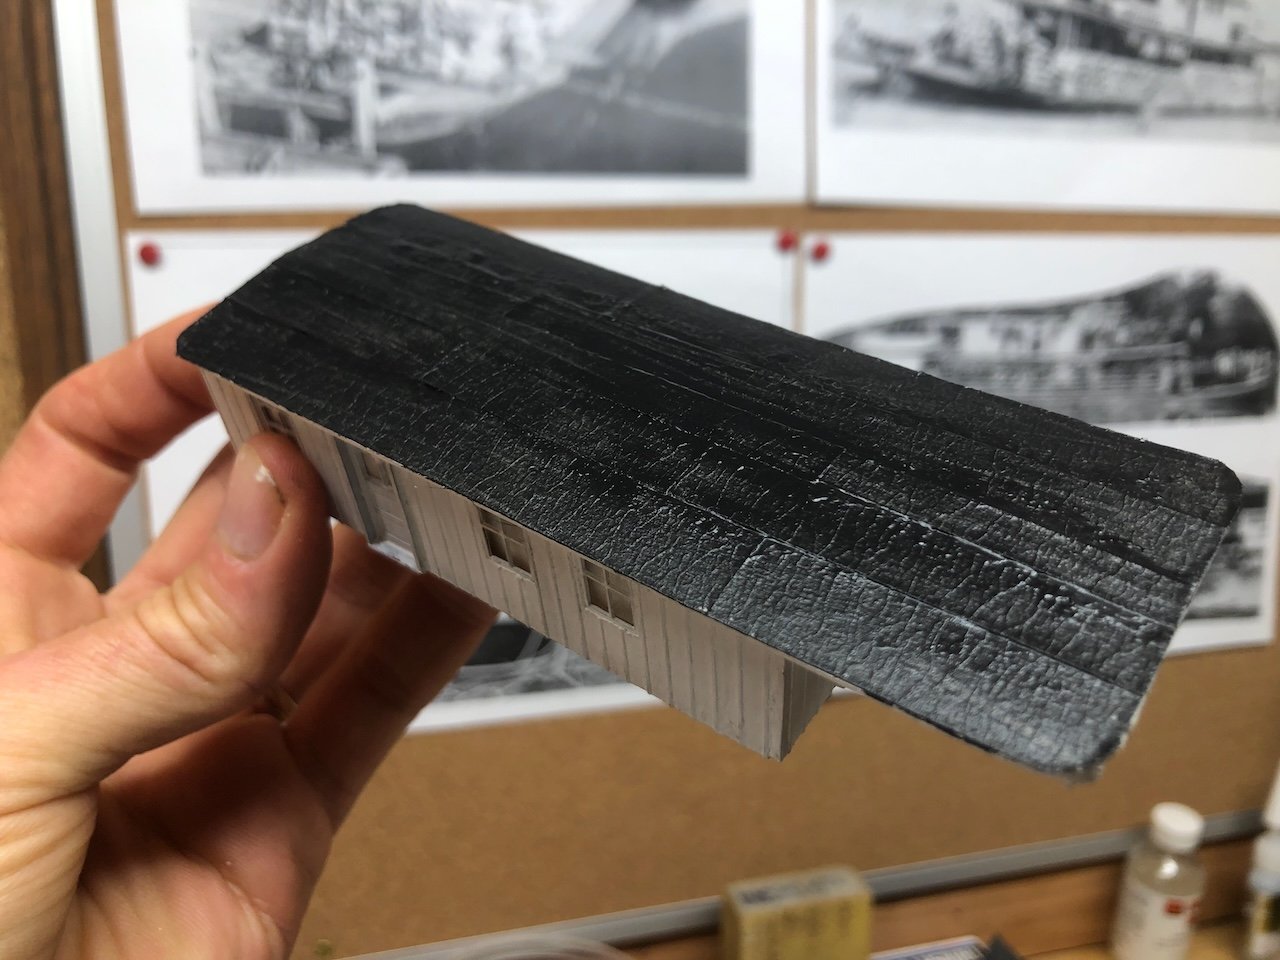
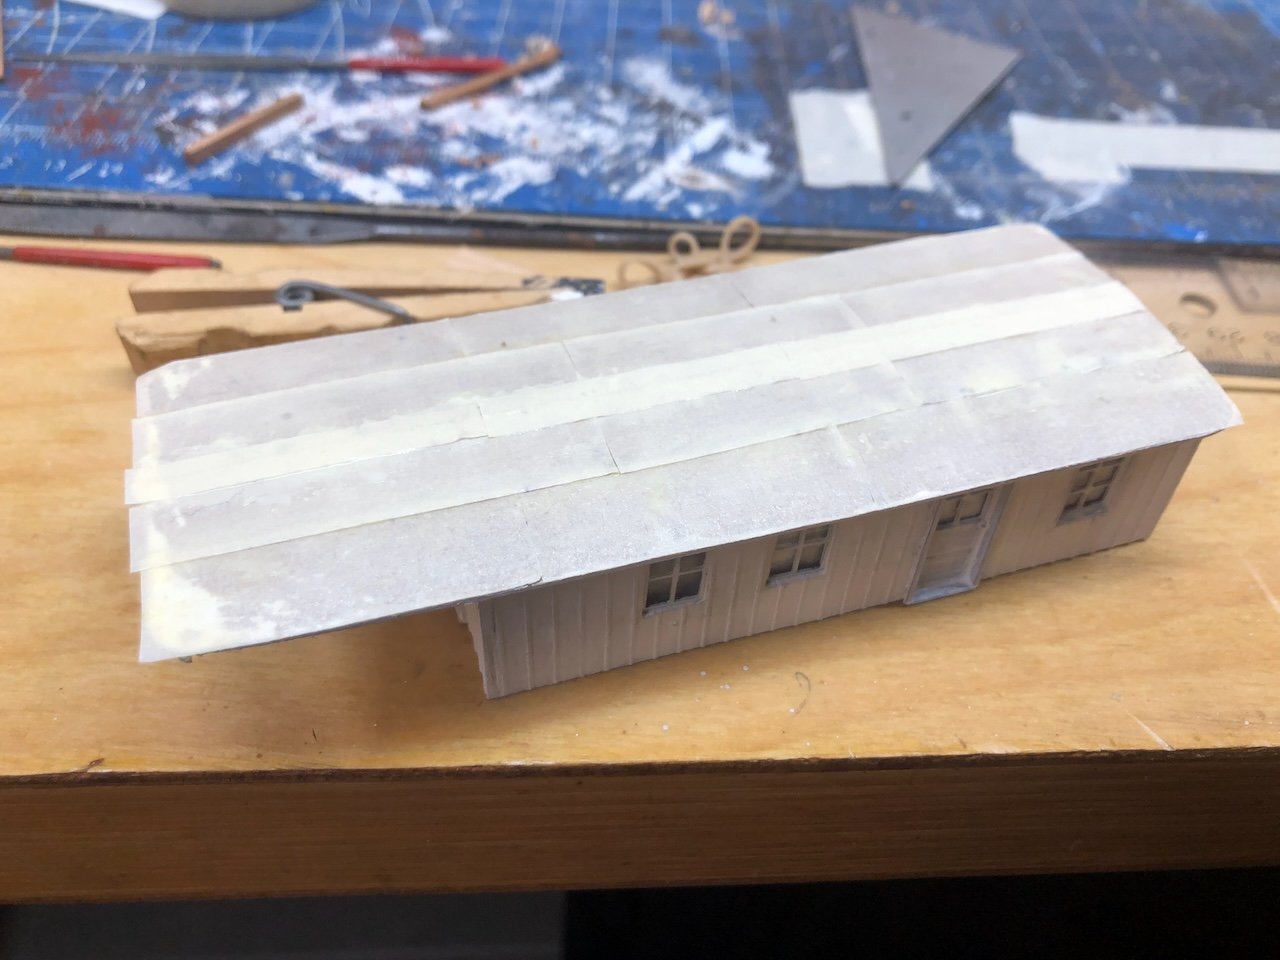
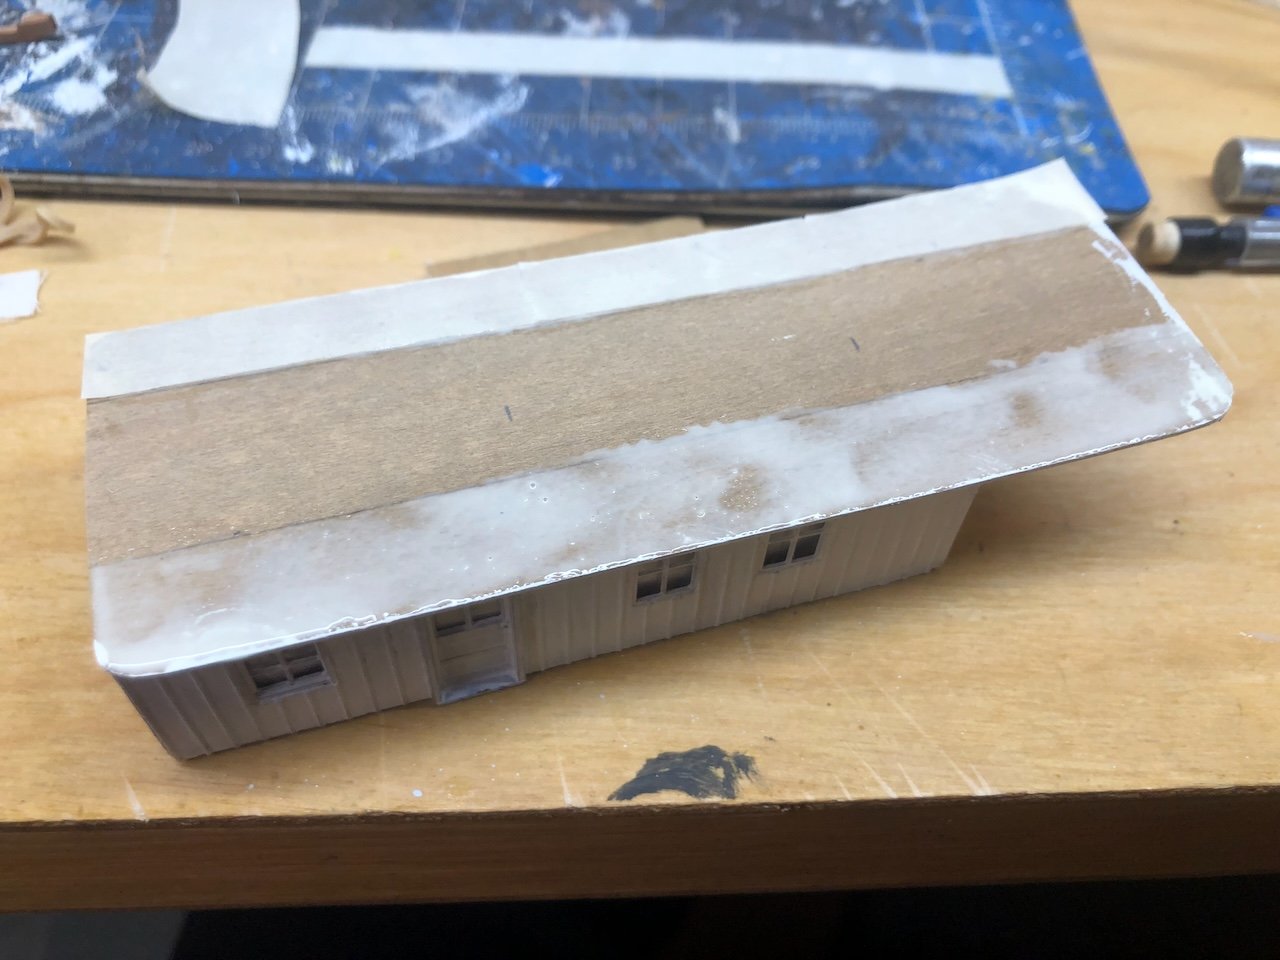
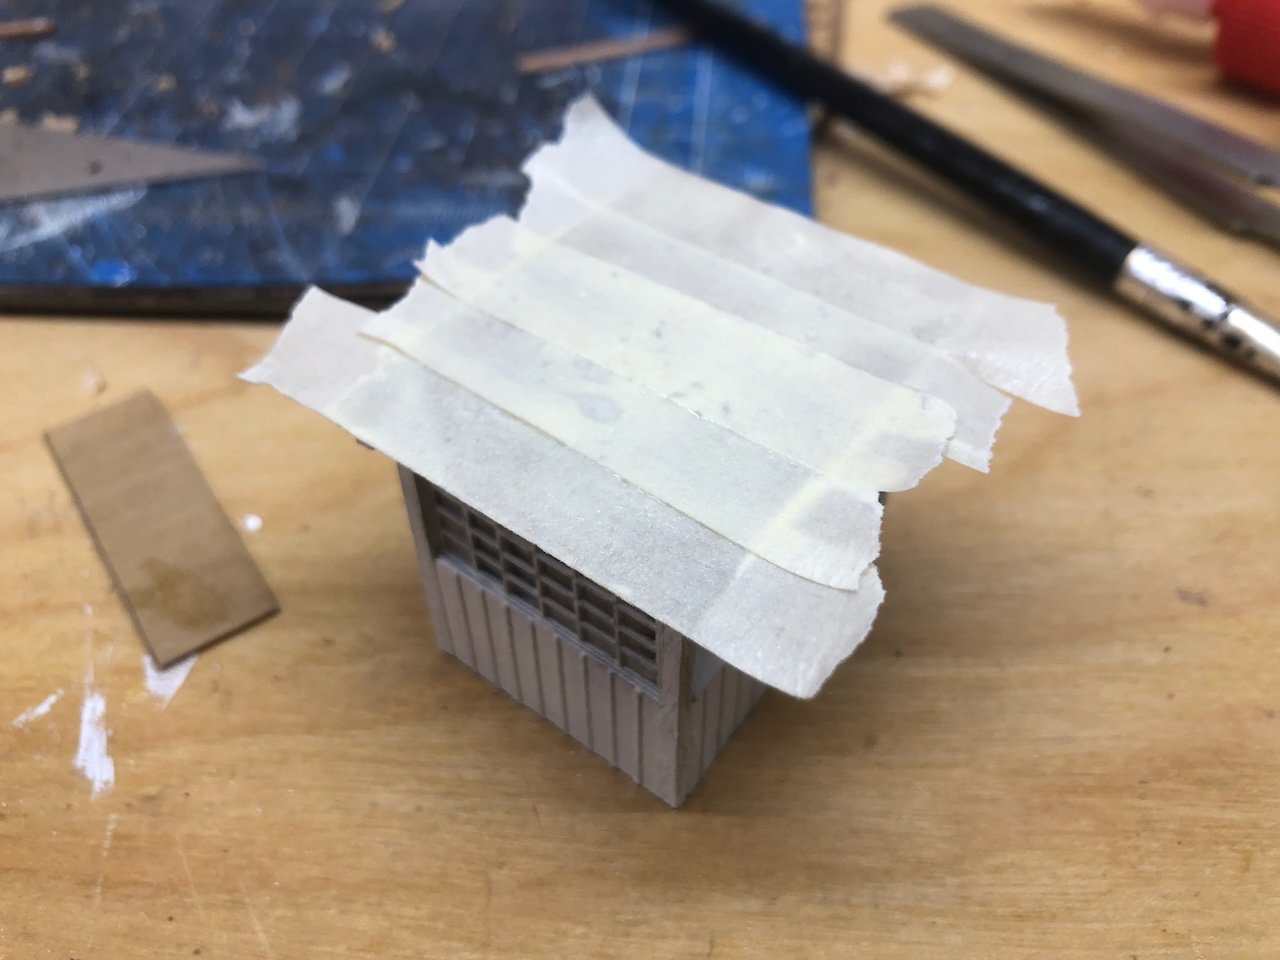
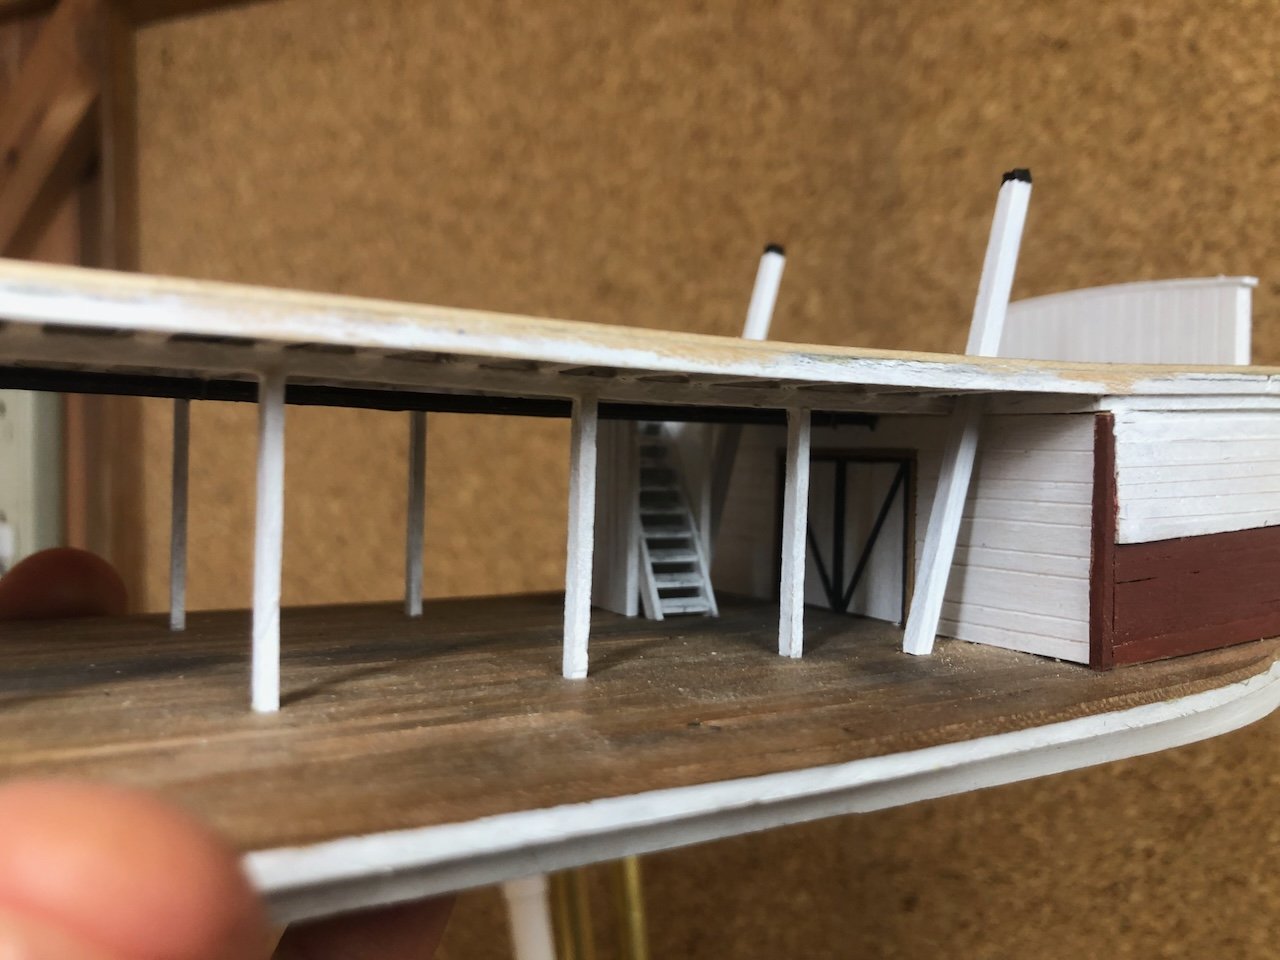
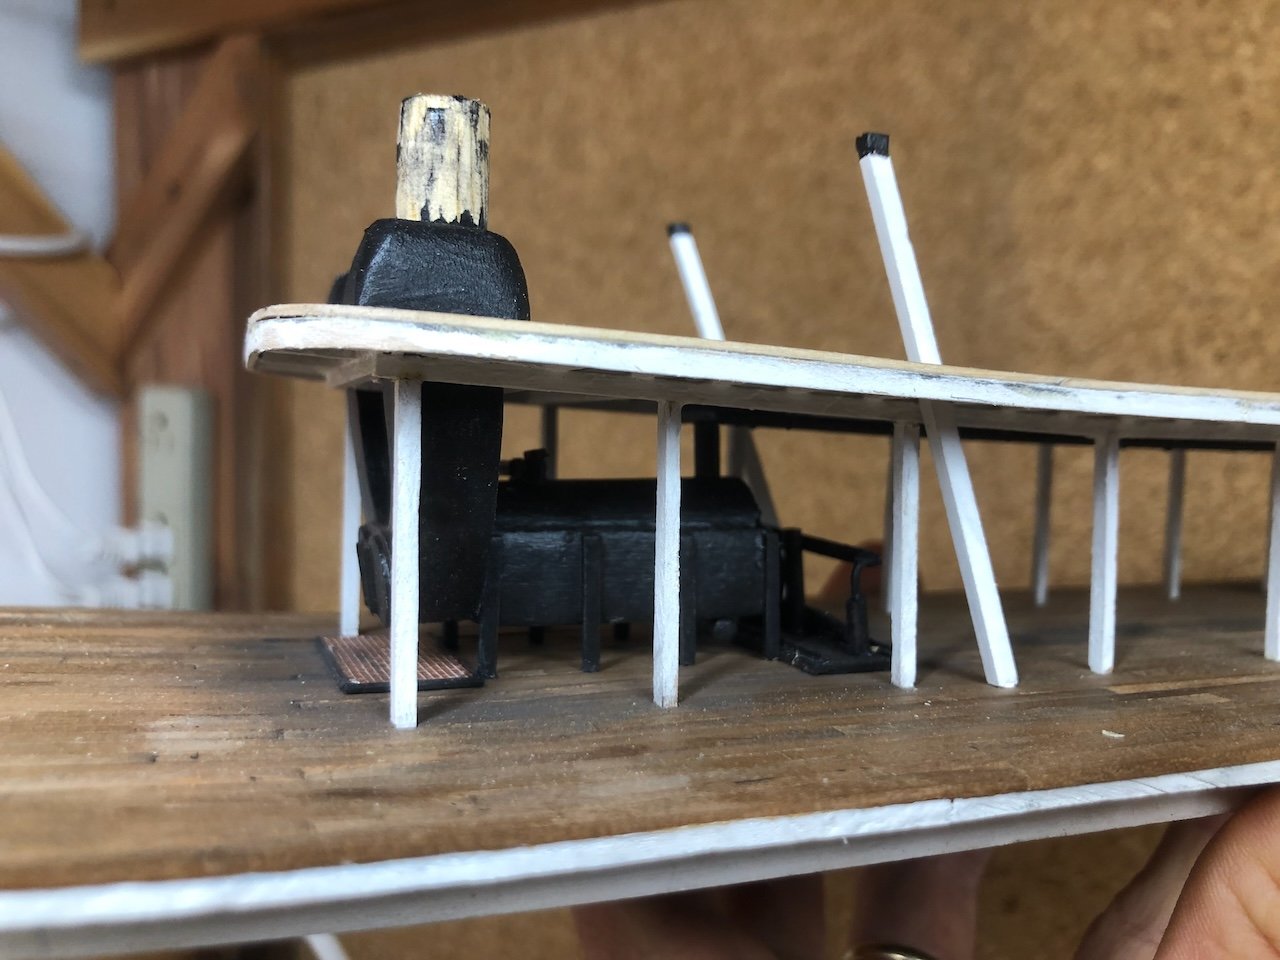
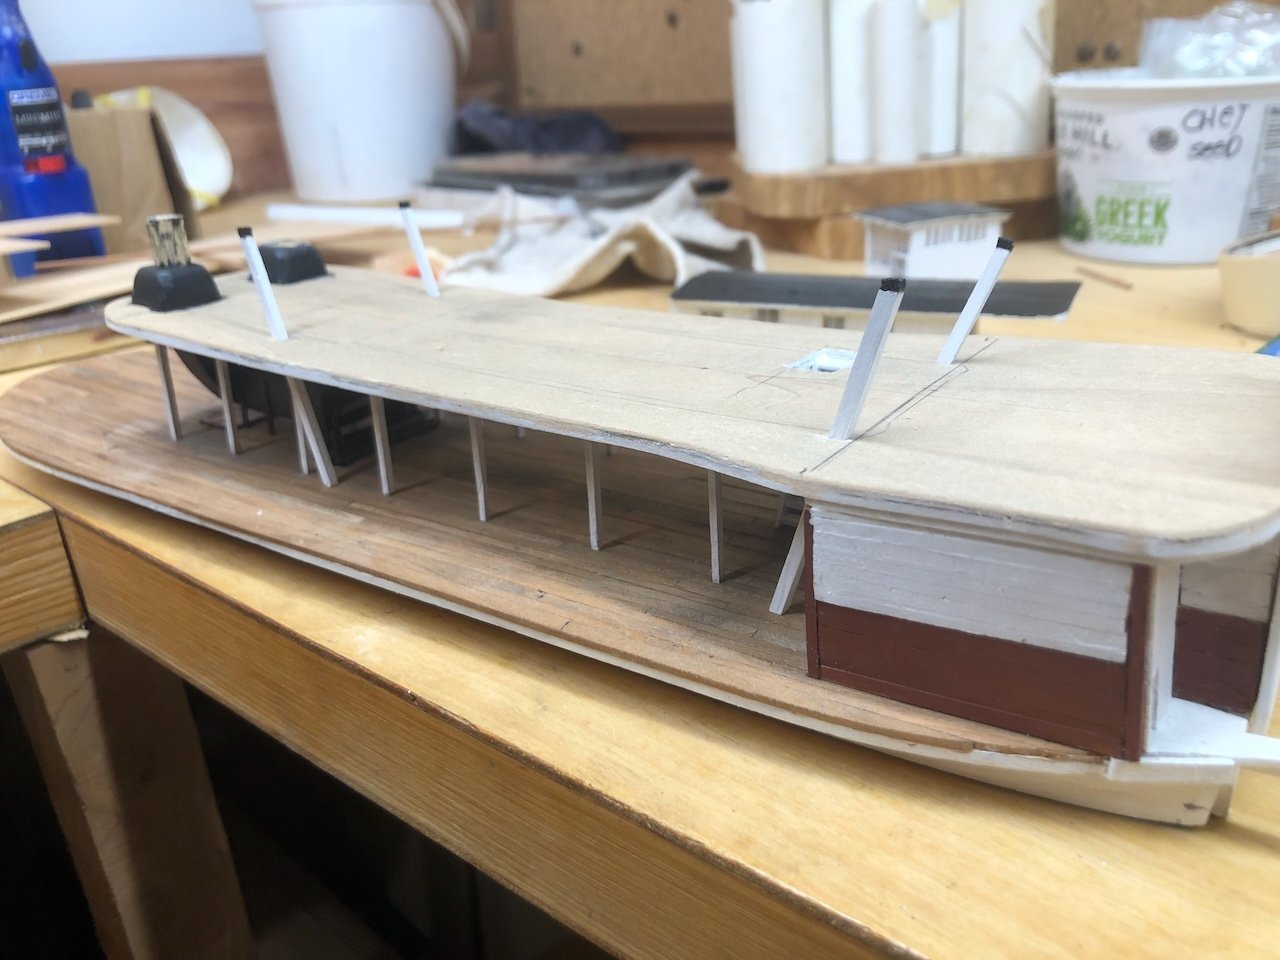
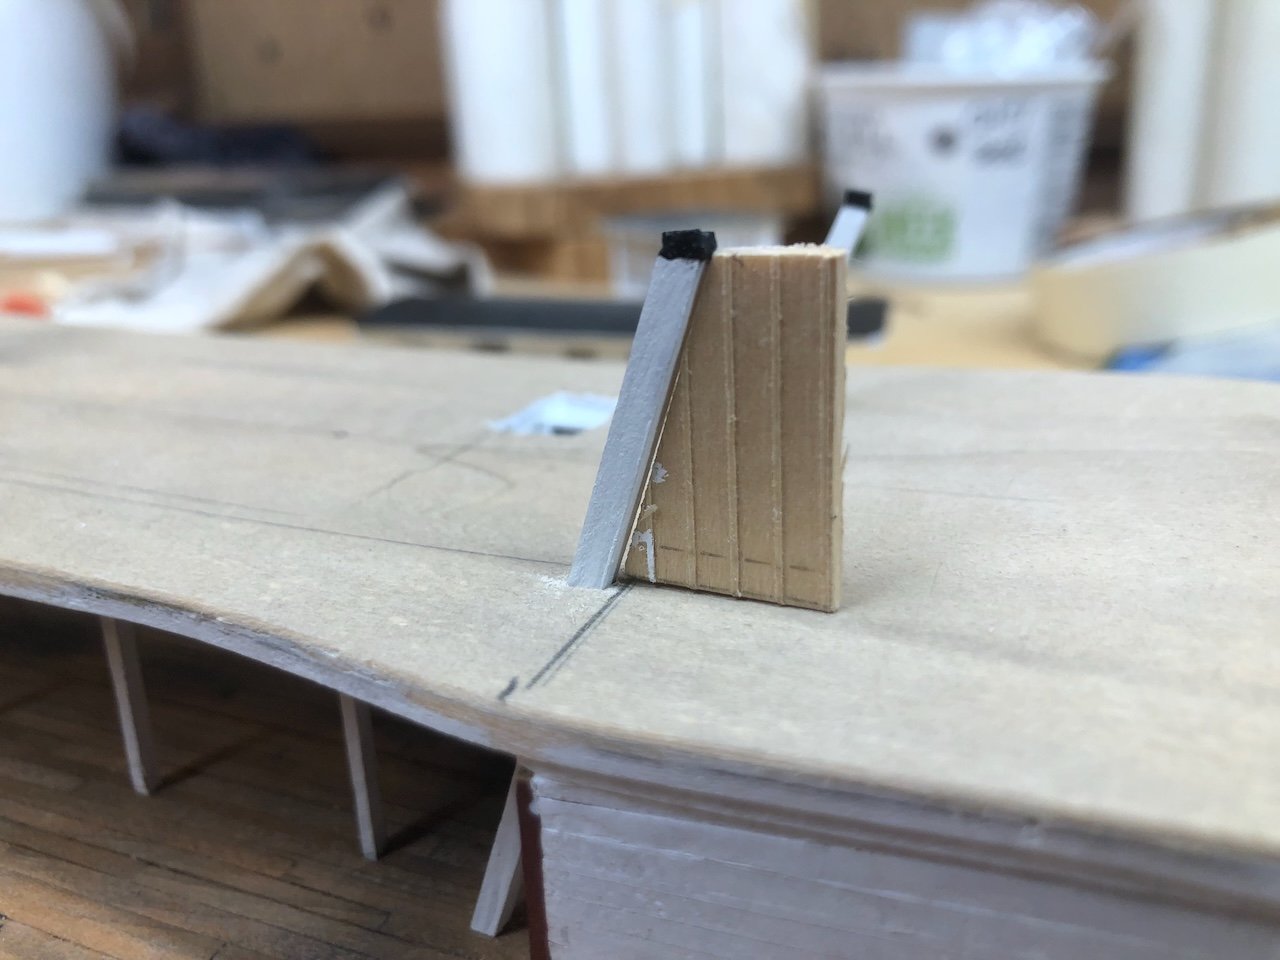
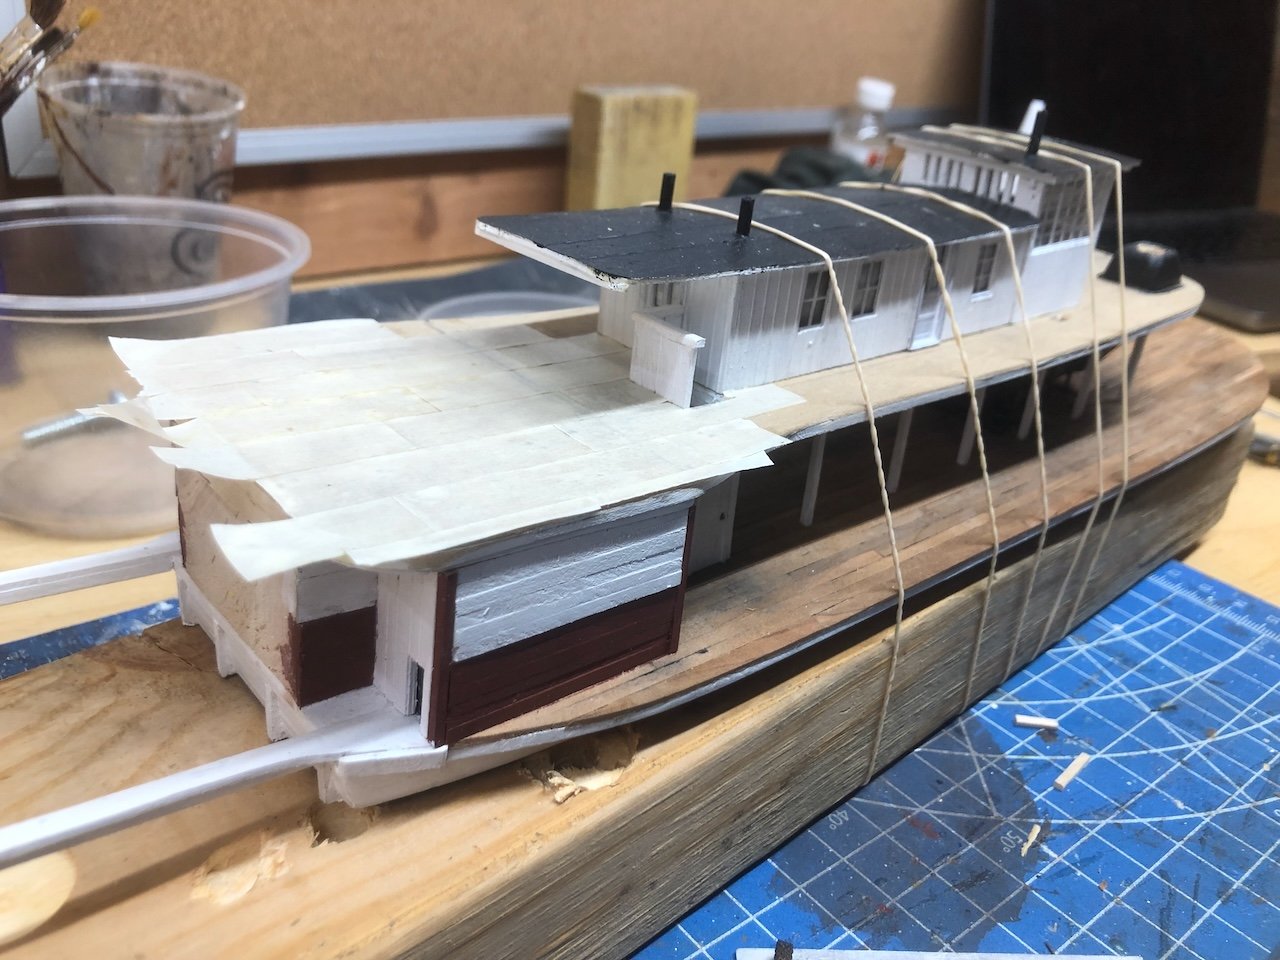
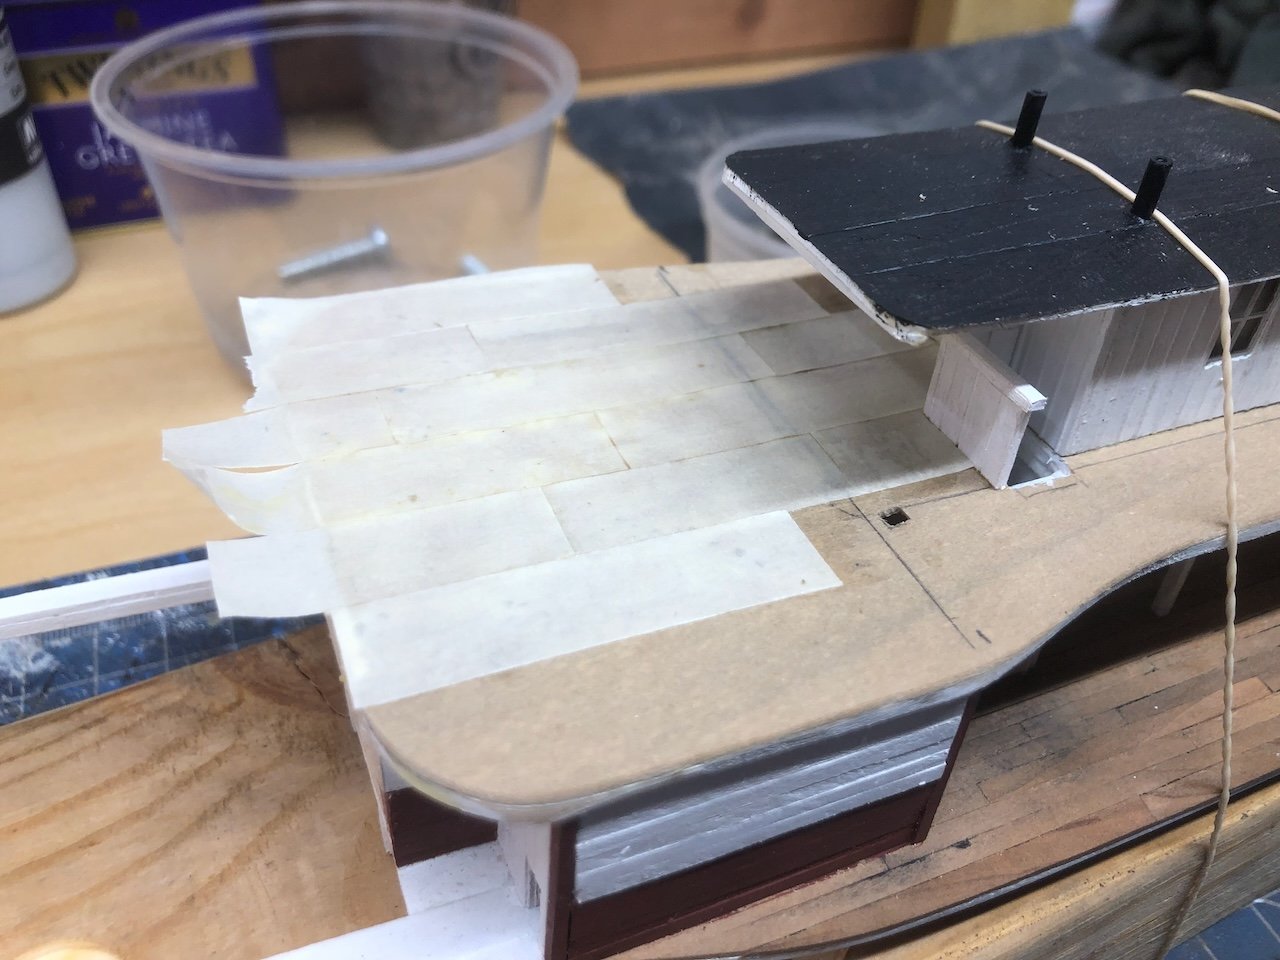
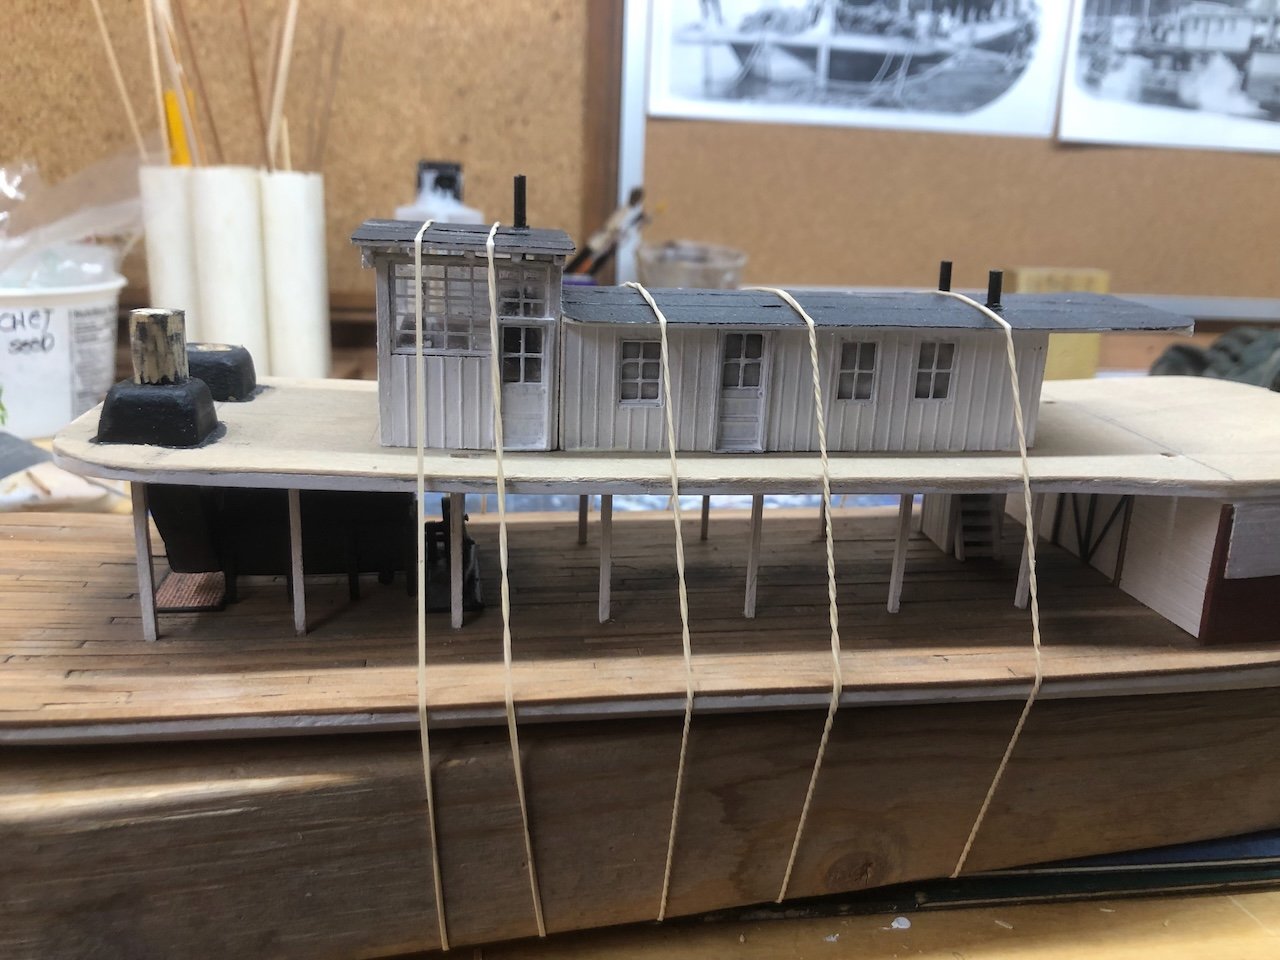
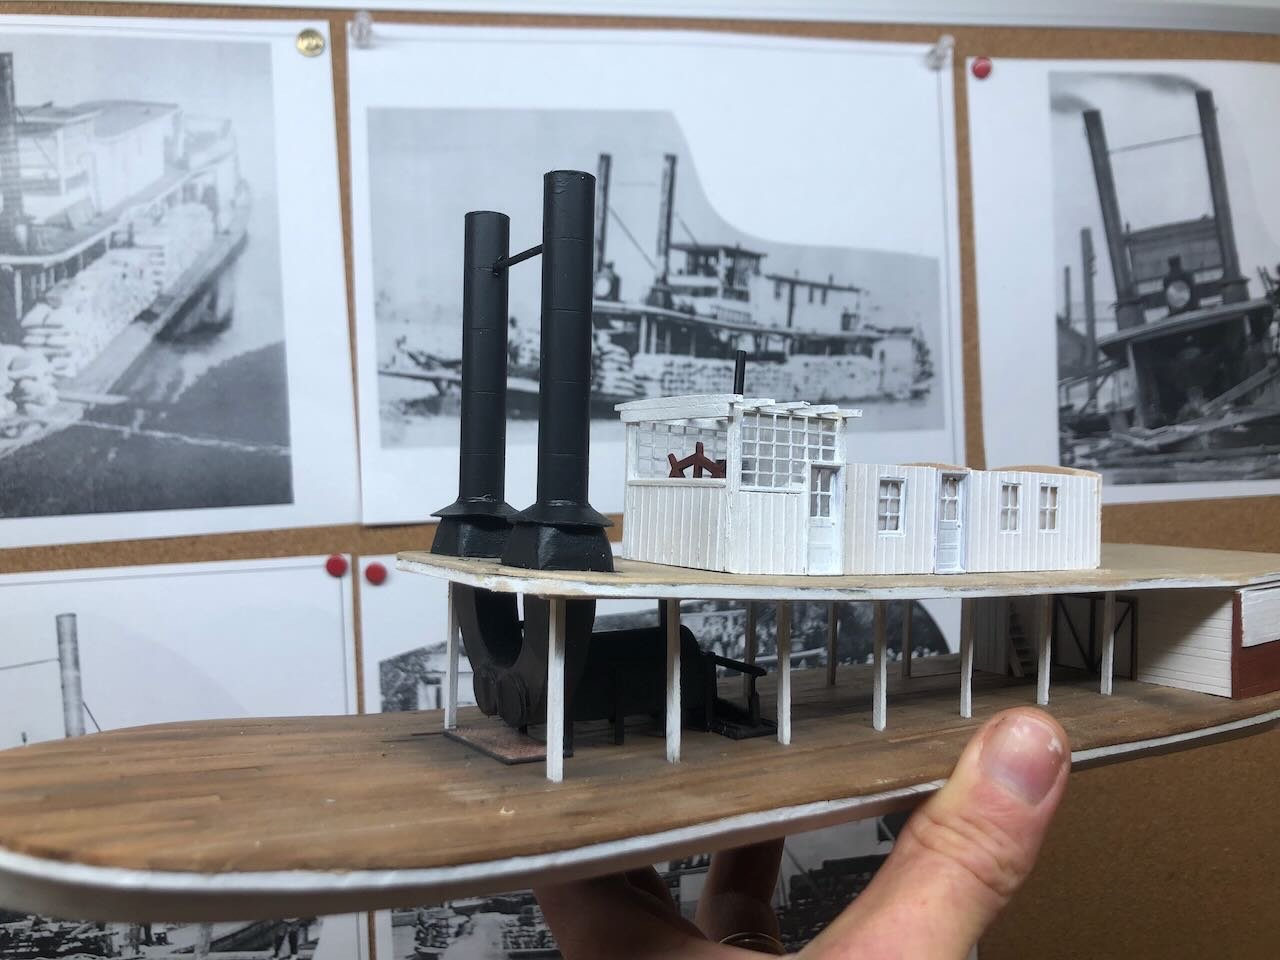
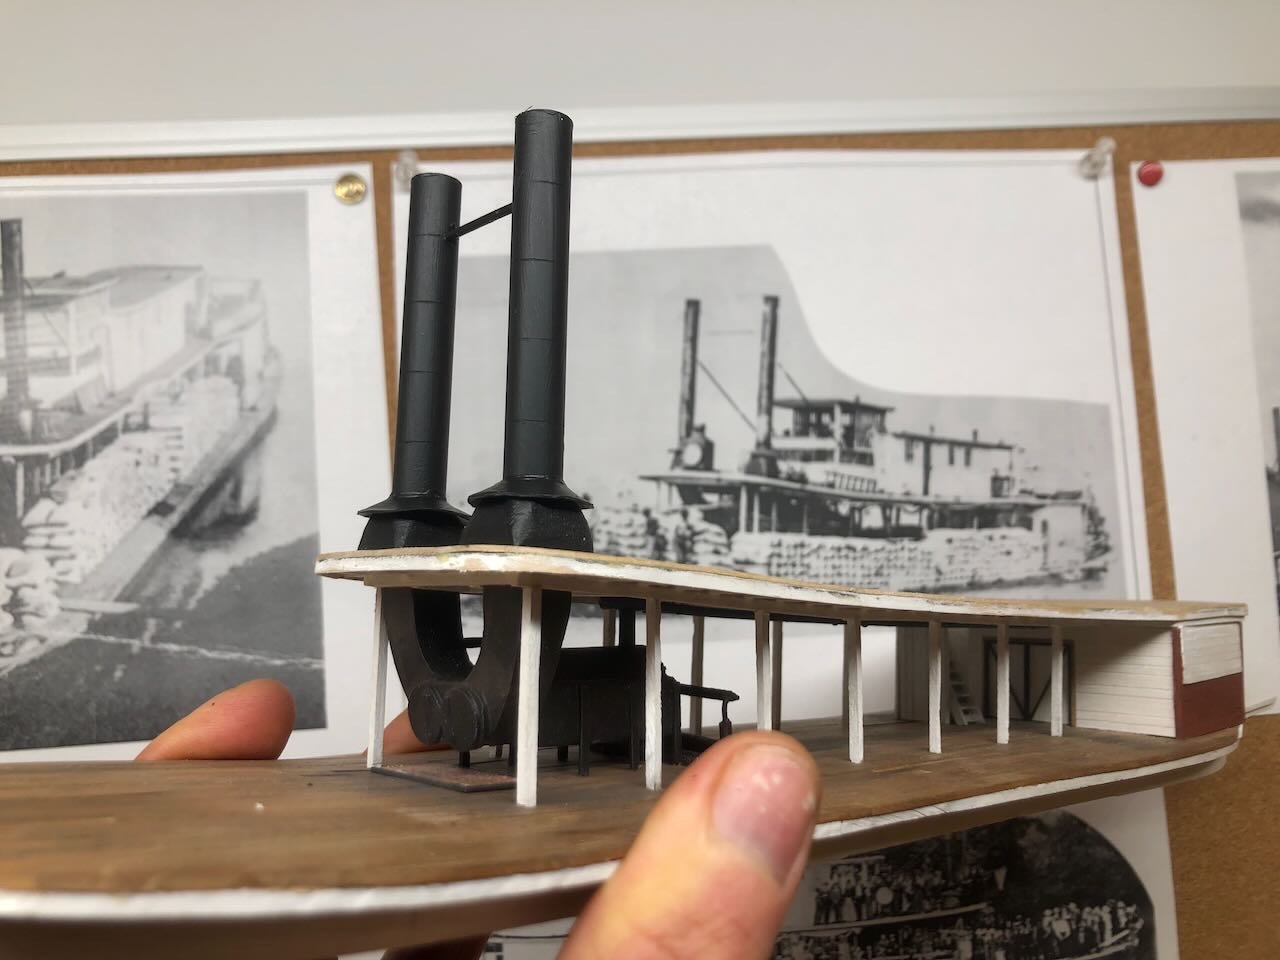
Time for a big dump of progress photos! I completely failed to take photos of building the roof for the pilot house and cabin, but it wasn't complicated. I just cut a thin sheet of wood to the shape I wanted, spread glue on the "rafters", and secured everything with rubber bands. The photo story picks up again as I applied the simulated canvas. I used the same method as I did on Arabia: strips of masking tape held down with a thin layer of wood glue. When that's dried overnight, I trim the edges and paint it. It's held up perfectly on that last model, I really like the texture, and it's more forgiving to work with than tissue paper or silkspan or other options. Plus it's dirt cheap. Here's a sequence showing the progression of slightly overlapping layers on the gently arching cabin roof: And the same for the pilot house: I'll use some pastels to weather this a little, dull it down, and give it some subtle variation in tone. In the meantime I worked on laying out the support posts for the hog chains, which needed to be carefully situated to run just along the outside edge of the cabin roof. So I marked the final location of the cabin and carefully laid out where I wanted the posts to go through the boiler deck. Then I drilled a series of small holes and used a sharp knife tip and then small files to make the final shape: I then made a simple jig for the angle I wanted the posts to sit at, and used this to set them up. Here they've already been cut and painted. The black tips are meant to represent the iron caps that actually held the hog chains onto the wooden posts. And here are a few shots of the fore and aft hog chain posts resting in place (not yet glued); you'll notice I temporarily removed the chimneys to avoid any possible damage as I worked on all this: I also built the assembly that goes over the stern, which I'd left off until now since it rises above the boiler deck and I didn't want to bump or snap it while doing earlier work on the deck. Finally it was time to start attaching things for good. Here I've glued down the cabin and pilot house (big step!): And while that was drying I got started laying down the "canvas" on the boiler deck, working up to the aft part of the cabin. I'll let this all dry completely before proceeding up either side of the cabin. A close look will also show that I built and attached the little L-shaped guard wall around the staircase up to the boiler deck. Once all the boiler deck canvas is laid, I'll (re)cut the hog chain post holes, paint it carefully (trying to avoid the cabin walls), then attach the stern piece. At that point the model will really be coming together though a lot of detail work remains to be done (not to mention the paddle wheel, which I'm dreading). Thanks for reading (or at least skimming) through that big dump of updates!
- 393 replies
-
- 24
-

-

-
Great story and instantly familiar. I'm actually in the process of doing the same thing to my Peerless, but lucky me, there's no Texas so there's nothing to attach on top of the roof. Definitely an easier fix than some roof coverings, love how you turned that into a positive.
- 158 replies
-
- 1
-
-
- chaperon
- Model Shipways
- (and 1 more)
-
USS Cairo by Zetec - FINISHED - 1/50 scale
Cathead replied to Zetec's topic in - Build logs for subjects built 1851 - 1900
Hey, great to see you're still working on this. Nice progress! -
Honestly I'd considering getting some cookbooks from a library if you can. Online recipes have gone down the tubes, full of unnecessary padding and online search no longer rewards quality. So glad to hear of continued progress!
-
I agree, having a pleasant workspace that you want to spend time in is an under-appreciated aspect of modeling (or regular work, for that matter).
-
One of the things I love and occasionally fear about this hobby is the opportunity for constant learning. It can be both maddening and rewarding to recognize a need or desire to improve on something one's already done! You're doing a great job of keeping this balance in stride and your work looks great!
- 59 replies
-
- 1
-
-
- Alert
- Vanguard Models
- (and 1 more)
-
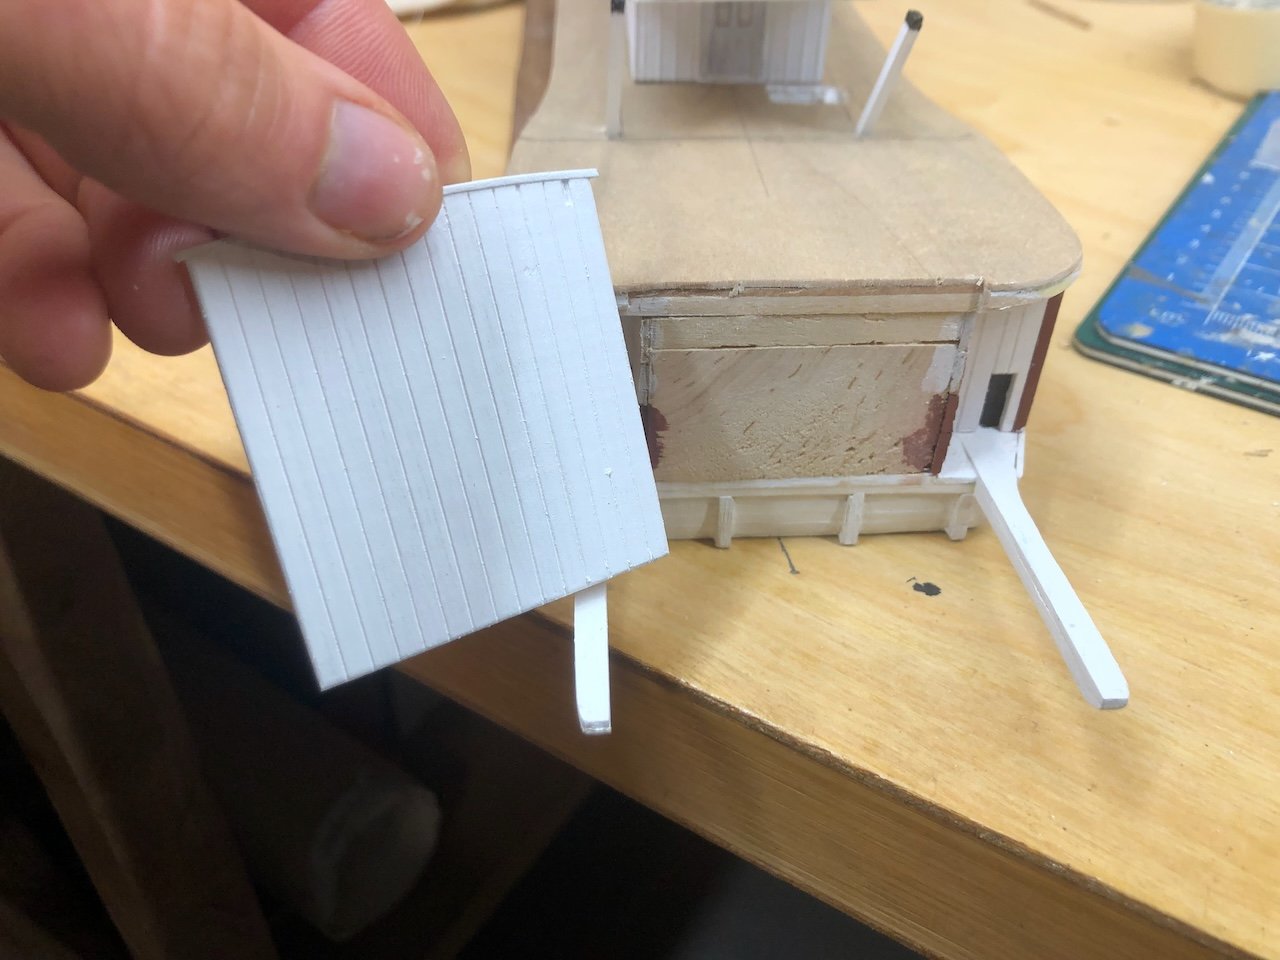
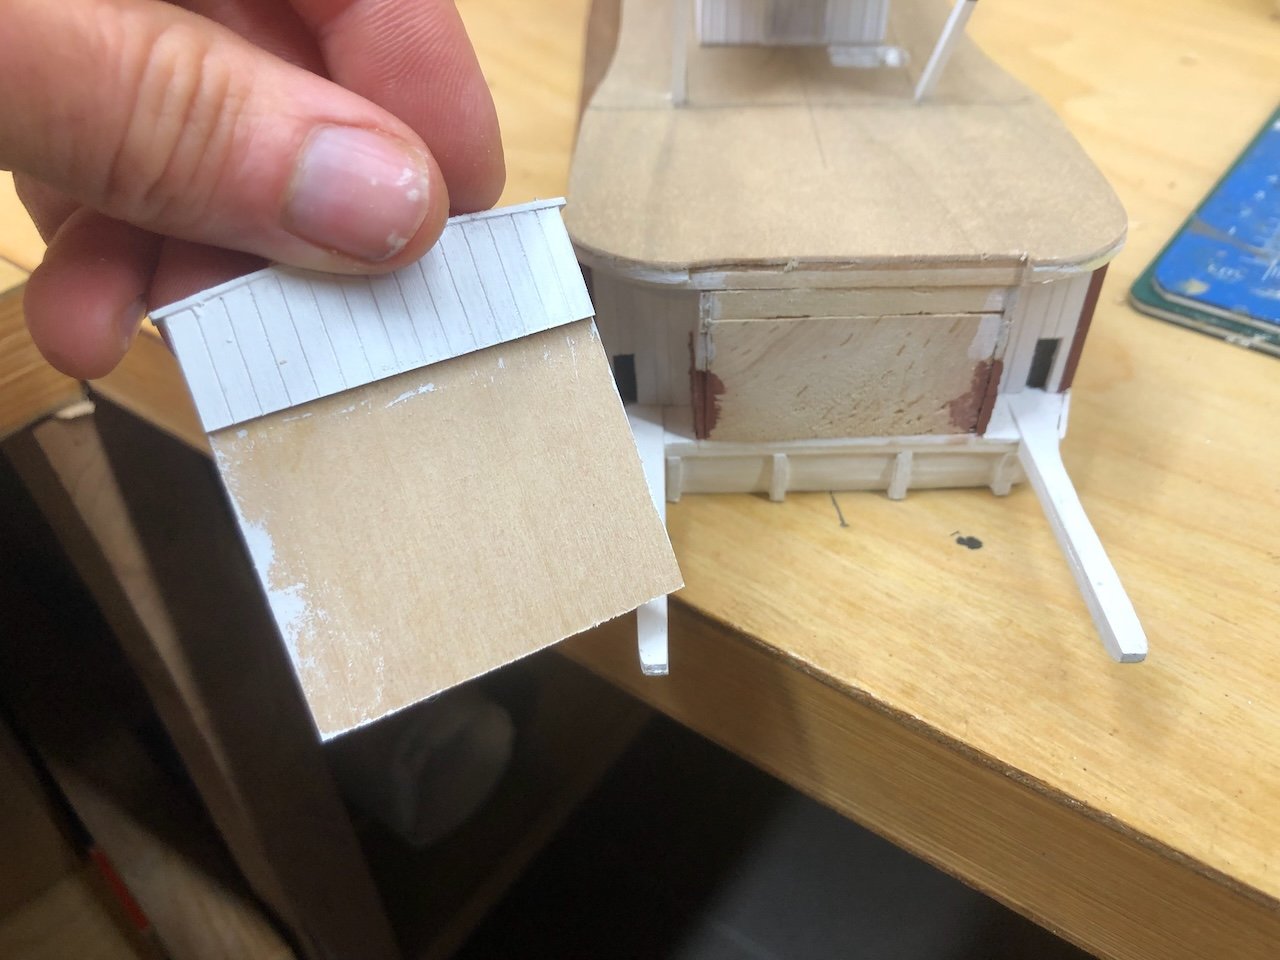
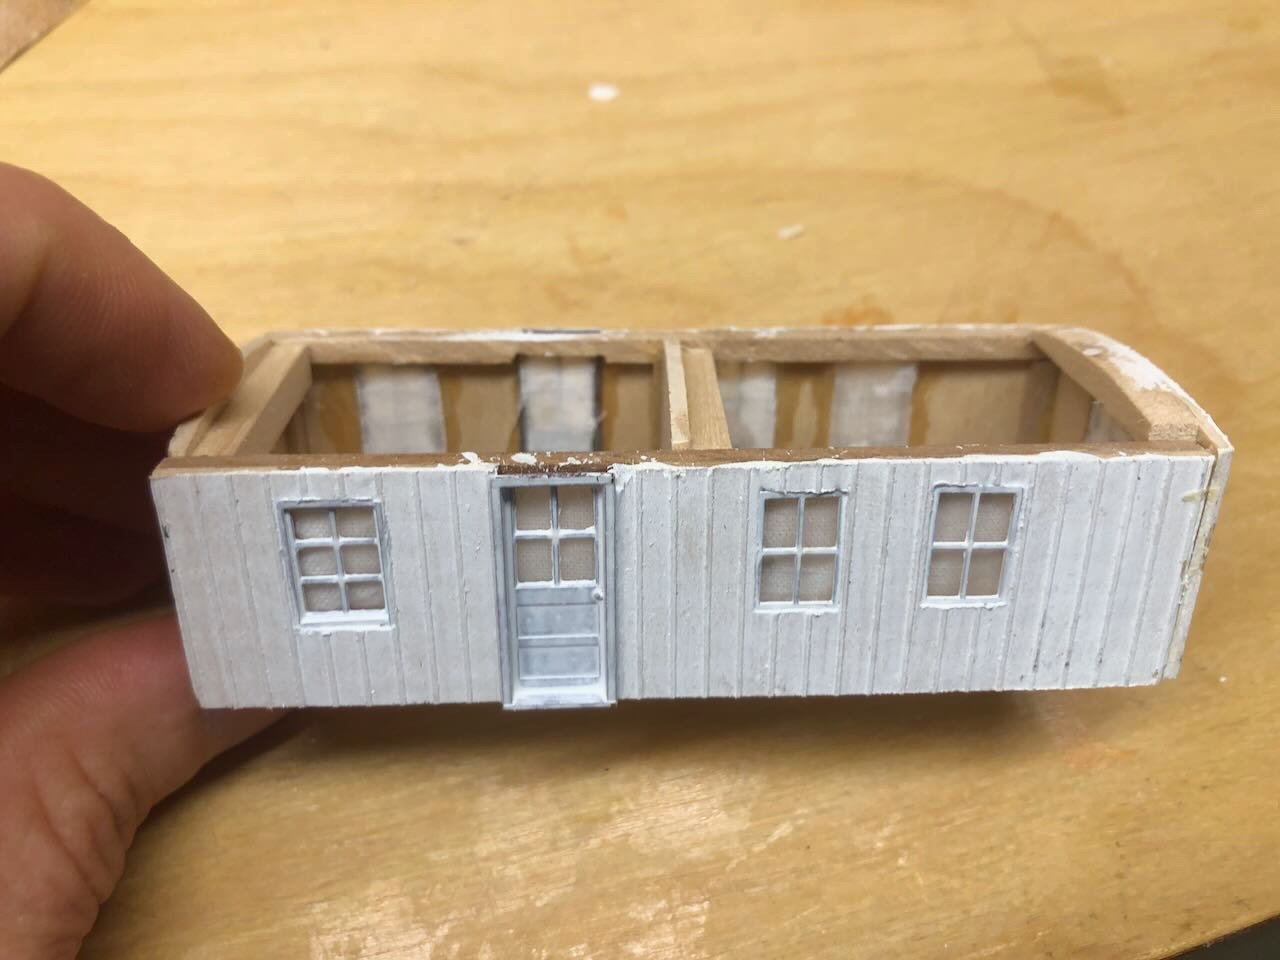
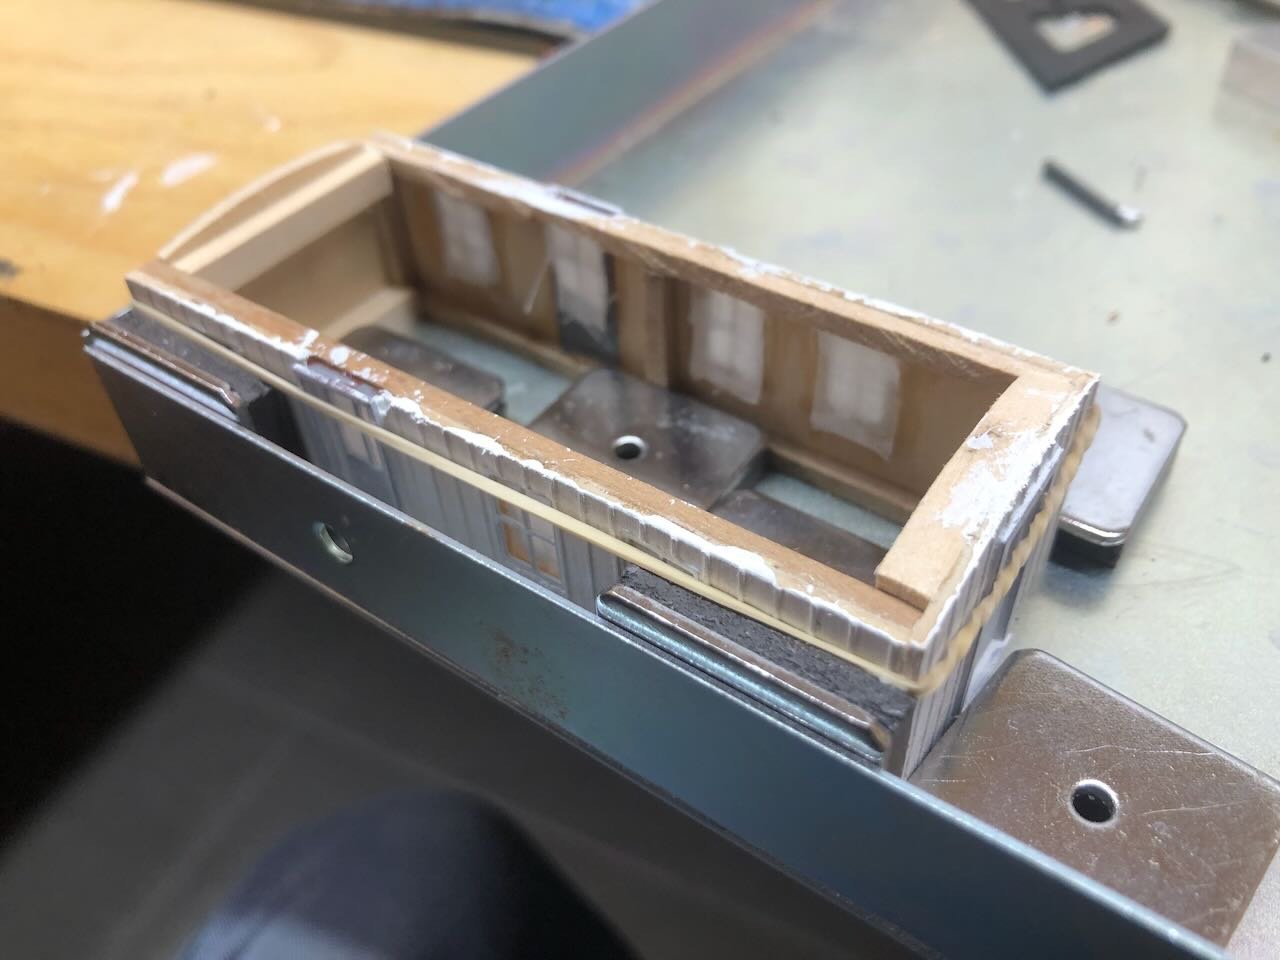
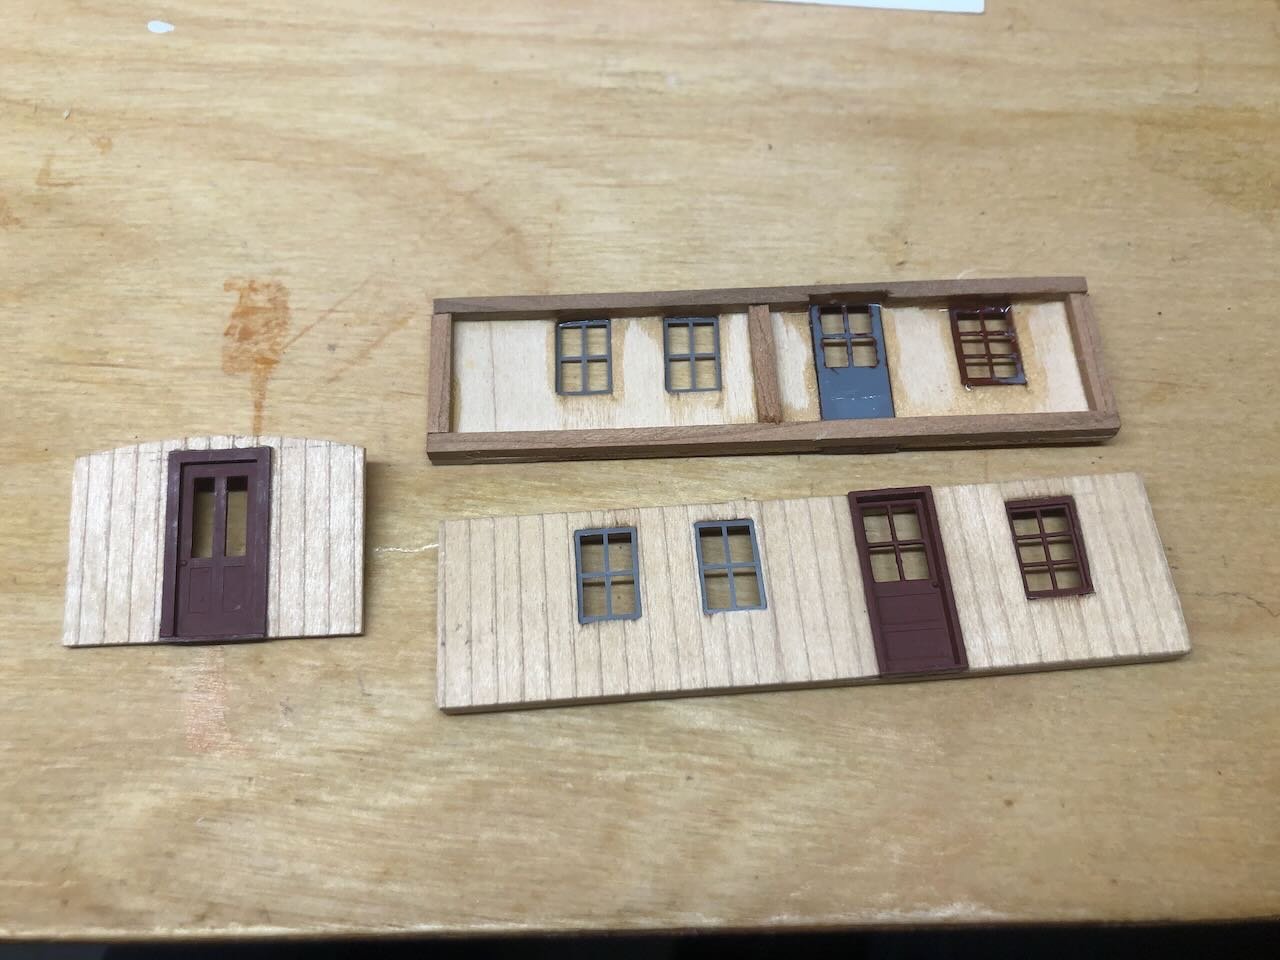
Well, I said I'd work on either the hog chains or the main cabin, and for once I stuck to the plan. Building the rest of the cabin was mercifully straightforward, to the point that I didn't take many in-progress shots. I used some sheets of board-and-batten wood left over from past model railroad projects to lay out the walls, and scavenged close-enough windows from my scrap box. Here are the walls well underway, showing the bracing in the back and the carefully cut-and-fit holes for inserting the windows: I painted everything white, then glassed in the windows the same way as the pilot house (CA plus scrap clear packaging), then added shades using some old sailcloth material from a past ship kit. When that was done, I assembled the structure using my magnetic squaring jig: And here's the result: Here's the cabin test-fit on the rest of the model, with relevant photos in the background: It's been stressful around here lately and I needed a simple project that didn't require too much thought. This fit the bill perfectly. Doing the roof should be easy, too. Then I'll mark its location carefully and start laying out the hog chain braces. Thanks as always for following along and giving feedback, whether through likes or comments. You all keep me going!

- 393 replies
-
- 21
-
-
Bienvenido a MSW! I spent a fair amount of time in Chile in 2018 and wrote up a thread on all my maritime explorations. Nothing you probably don't already know but you might enjoy seeing an outsider's perspective. The best advice I can give is to start with something simple and build your skills from there. If you get in over your head it can do more harm than good. The complex dream models will still be there when you're ready for them.
-
Sorry for the slow response, I'm catching up on MSW after a busy stretch. You've done such a nice job with this kit, I hope you enjoy displaying it for many years to come. Thanks for sharing the journey with us!
-
Your work looks lovely, but I feel obliged to point out that it's "winch", not "wench". The latter has a very different meaning that makes the above paragraph unintentionally hilarious (especially the deep sea line)!
-
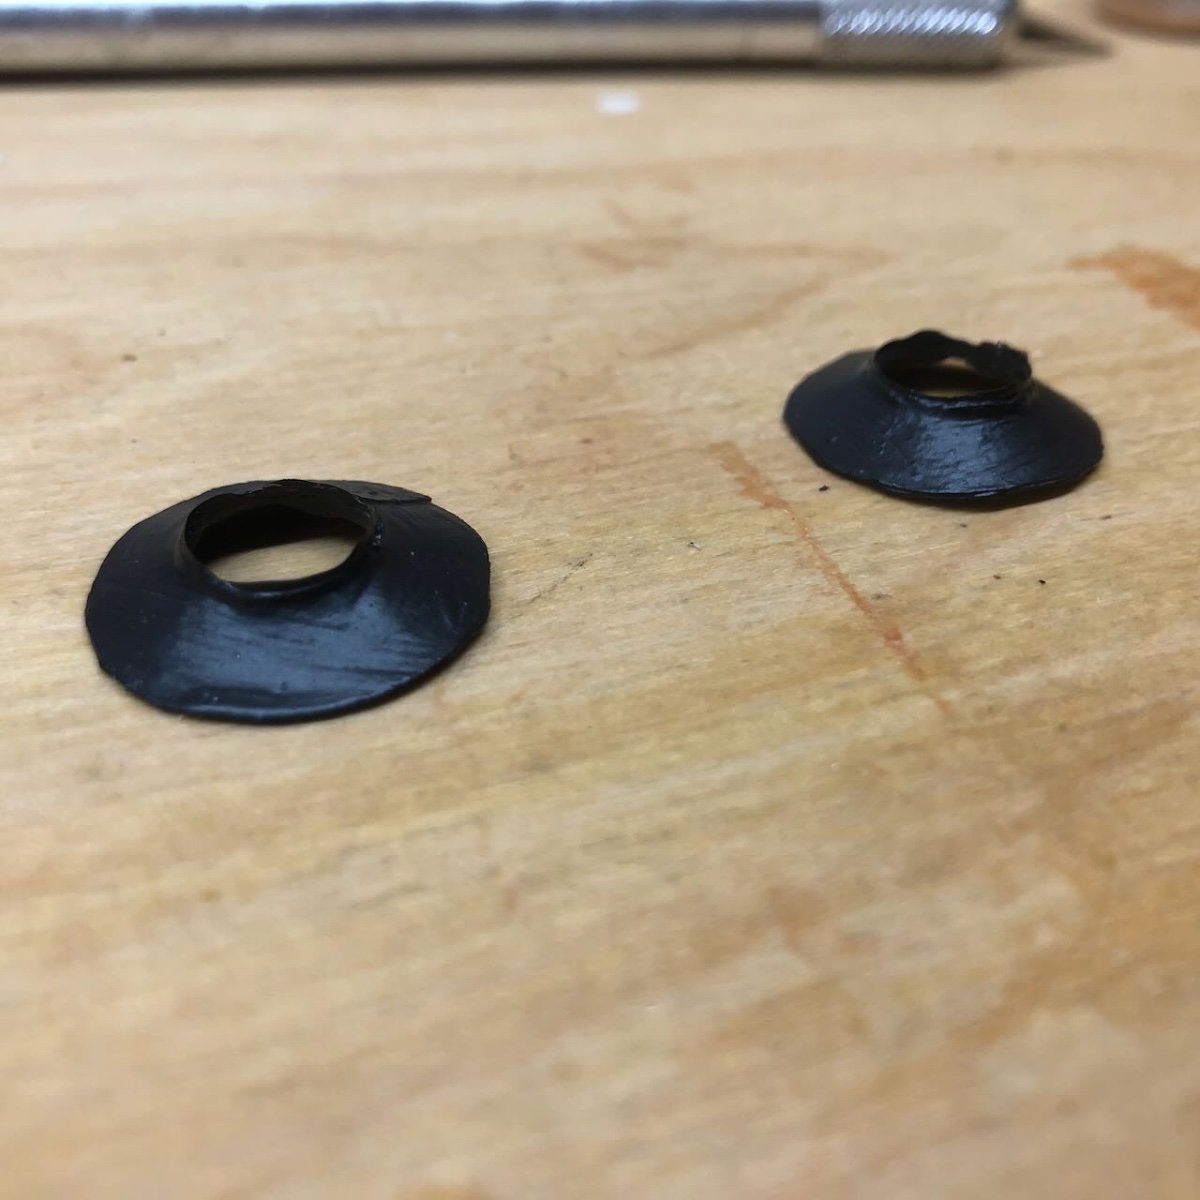
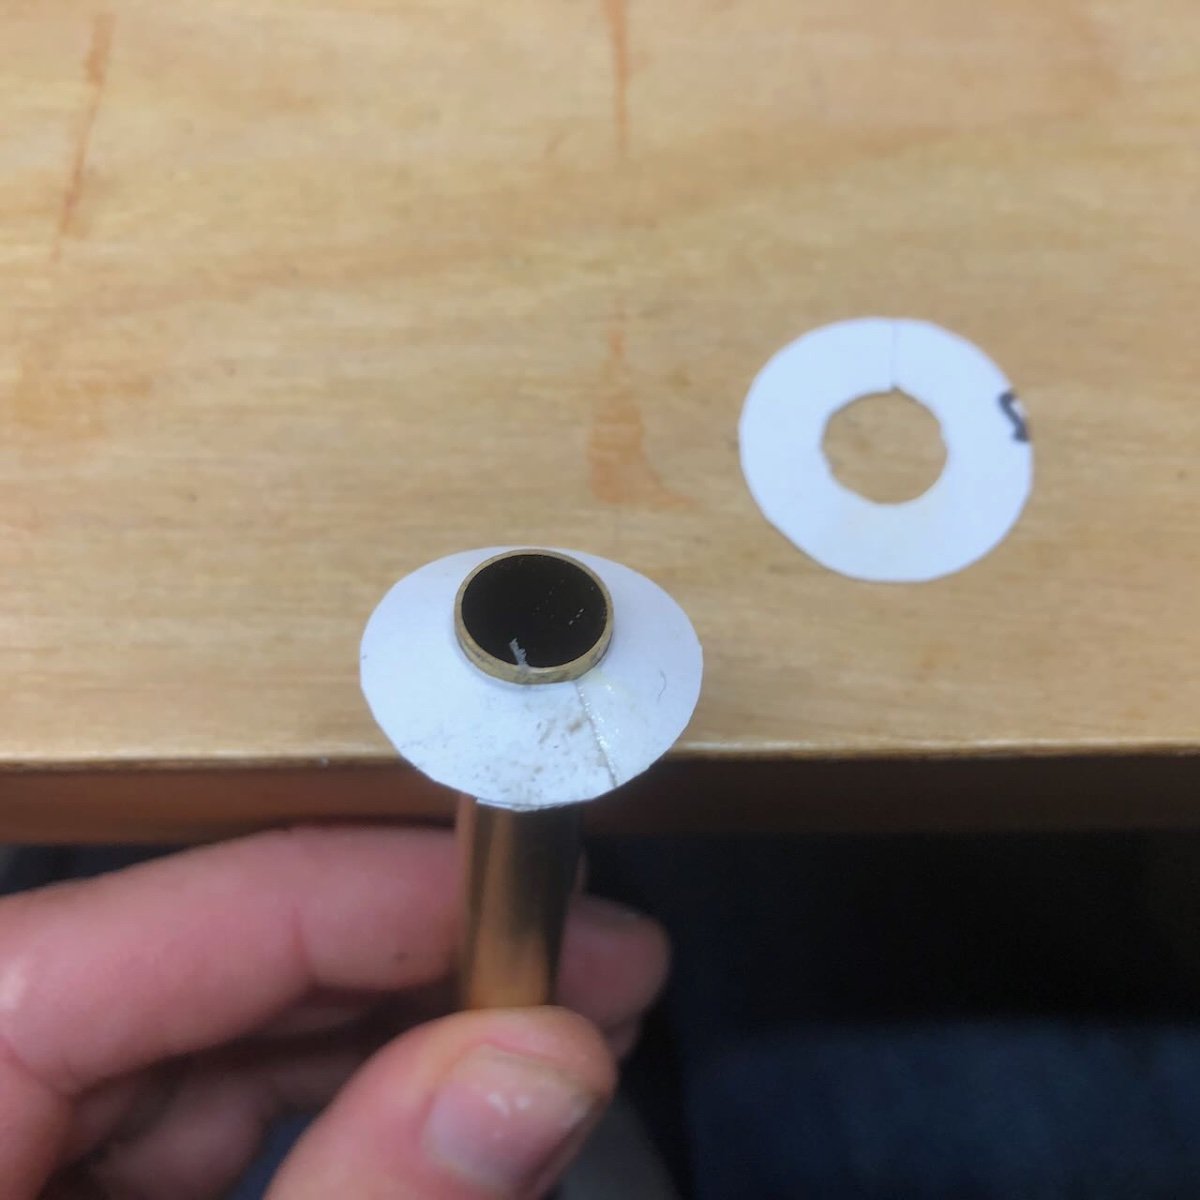
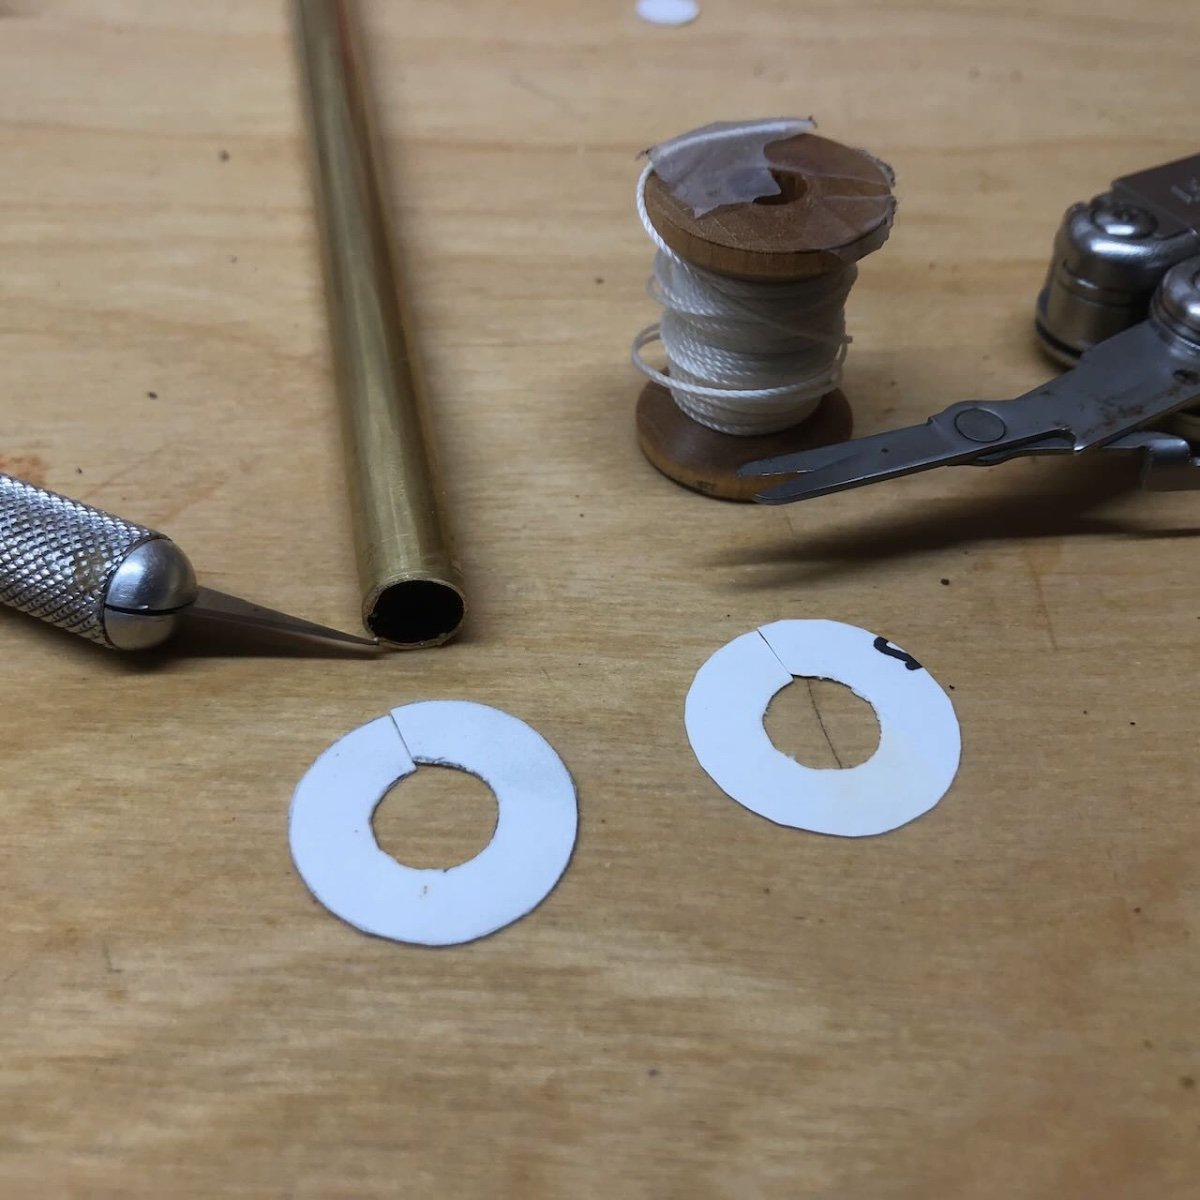
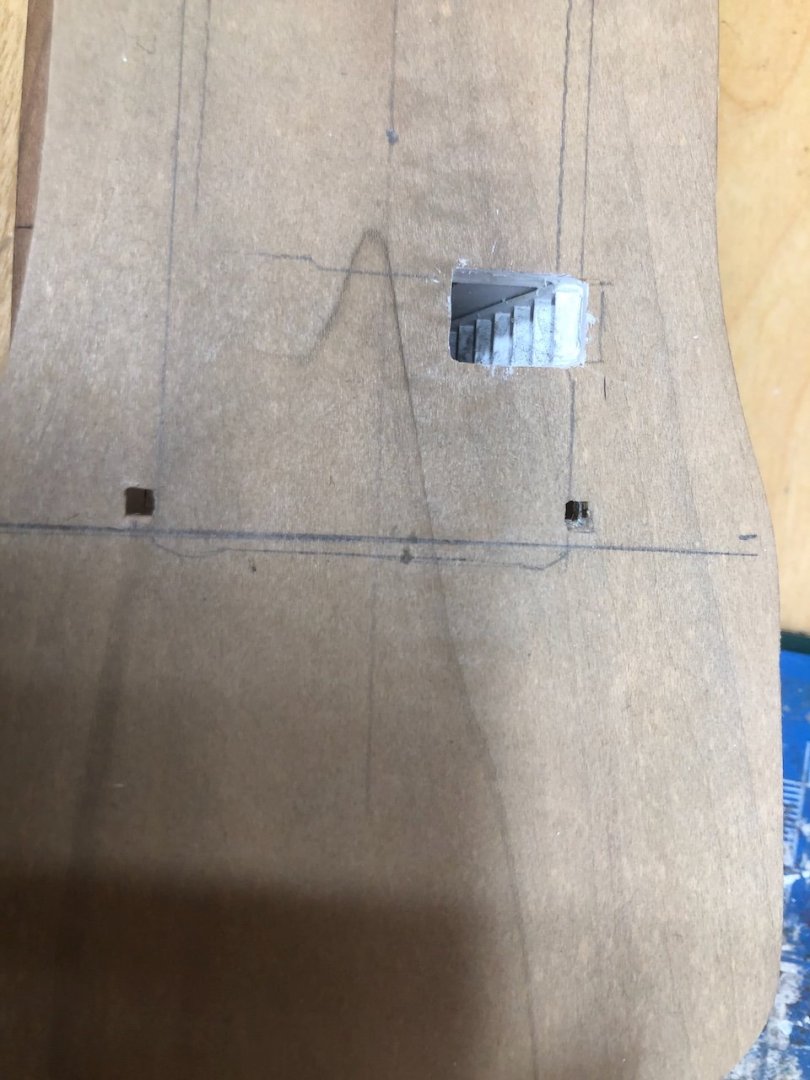
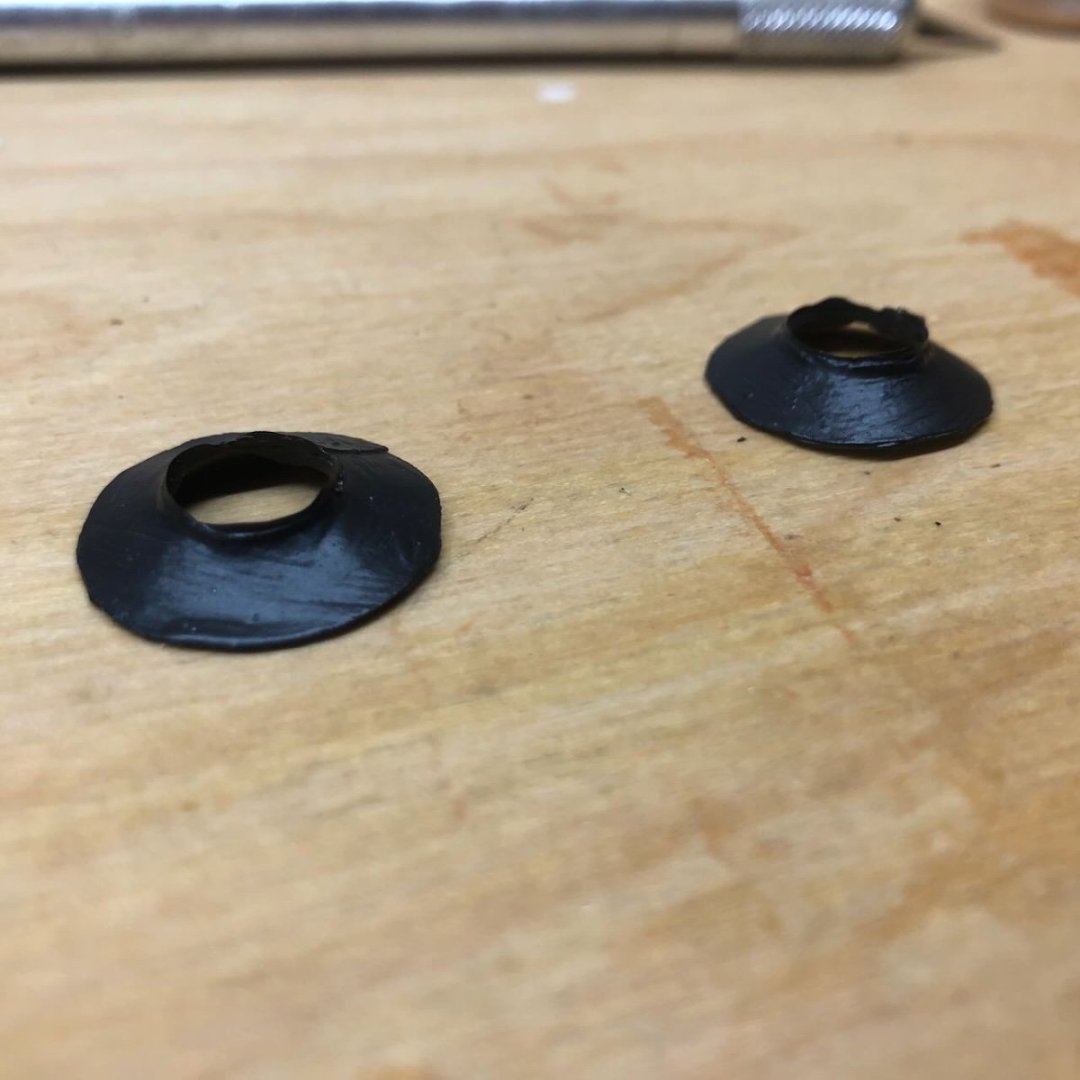
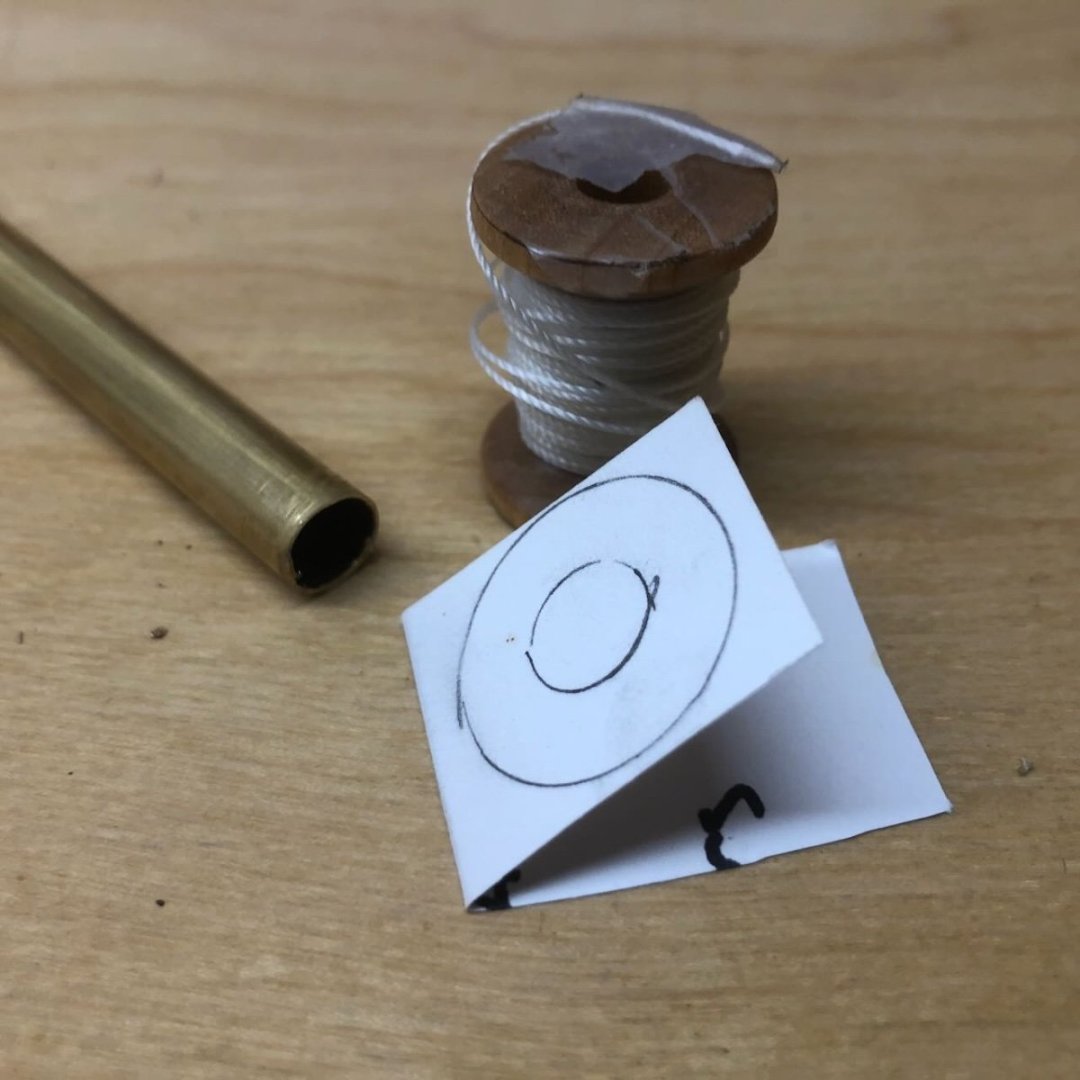
Wefalck, I don't have any kind of lathe. In theory I know what you mean, but I wasn't up for trying the old electric drill lathe trick, at least not until all other options had been exhausted. As it turned out, Brian's method of using cardstock worked like a charm. Much better than the styrene I was trying to use, which didn't want to bend properly and was too thick (the joint stood out like a sore thumb). First I figured out what outside radius I wanted and looked for something to use as a pattern. Turns out a spool of cheap rigging thread from a former kit was perfect. So I traced that outline onto some paper, then traced the inner outline around the right size of brass tubing. This is a basic index card. Notice that I was sneaky here and folded the stock over to get two comparable discs. Some previous experimentation had convinced me that one layer wasn't stiff enough. So I used the kindergarten trick and cut two out together, making their boundaries more consistent than trying to cut them out separately. I could have glued the two halves together before cutting, but intentionally didn't. I thought that would make the overlapping joint too thick (more noticeable) and also make the stock stiffer and harder to bend (why the styrene wasn't working). So I spread some glue on one end of the ring, then formed it around the brass tube until I had the angle I wanted: When both were independently glued up, I smeared glue on one whole surface and sandwiched them together. This worked great, giving me a stiffer final result with the appearance of a single layer (finer joint). I then painted them with thick black paint, which when dry stiffened them even further. And here they are test-fit on the model. Much better than anything I'd tried before. Lots of internet points for Brian! Any card modelers reading this are shaking their heads and thinking "we could have told you that!". Thanks for the advice! Even when I don't take it or go a different way, it makes me think and helps me learn. Next I need to start laying out the rest of the main cabin, and/or laying out the support posts for the hog chains. We'll see what I feel like doing when I next have time to work on this.


- 393 replies
-
- 17
-
-
-
I've lost it....need a refresher to get my confidence back
Cathead replied to bigcreekdad's topic in Wood ship model kits
Another option is to look for a kit that has pre-spiled planks (usually laser cut). I believe Dusek does this for some models, and I saw a lot of praise for Master Korabel kits well but I'm not sure it's easy to get their kits these days as the maker is Russian. -
Wefalck, thanks, I'd figured that out in theory but was struggling with putting it into practice. I'll definitely try Brian's method with card stock. I'd tried thin styrene but it didn't cut or fold cleanly enough. And thanks for the pictures, I'm also very visual.
-
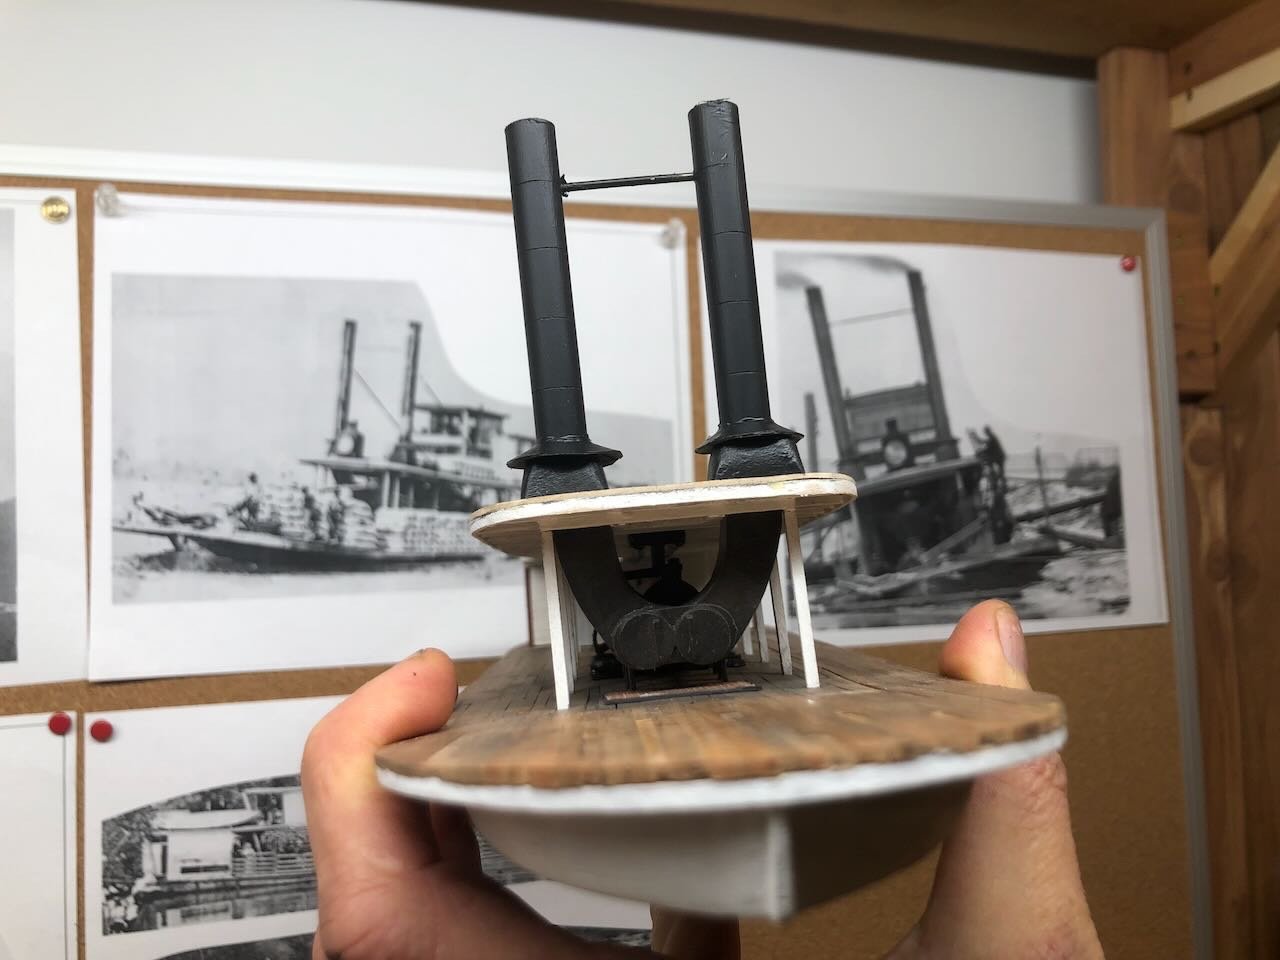
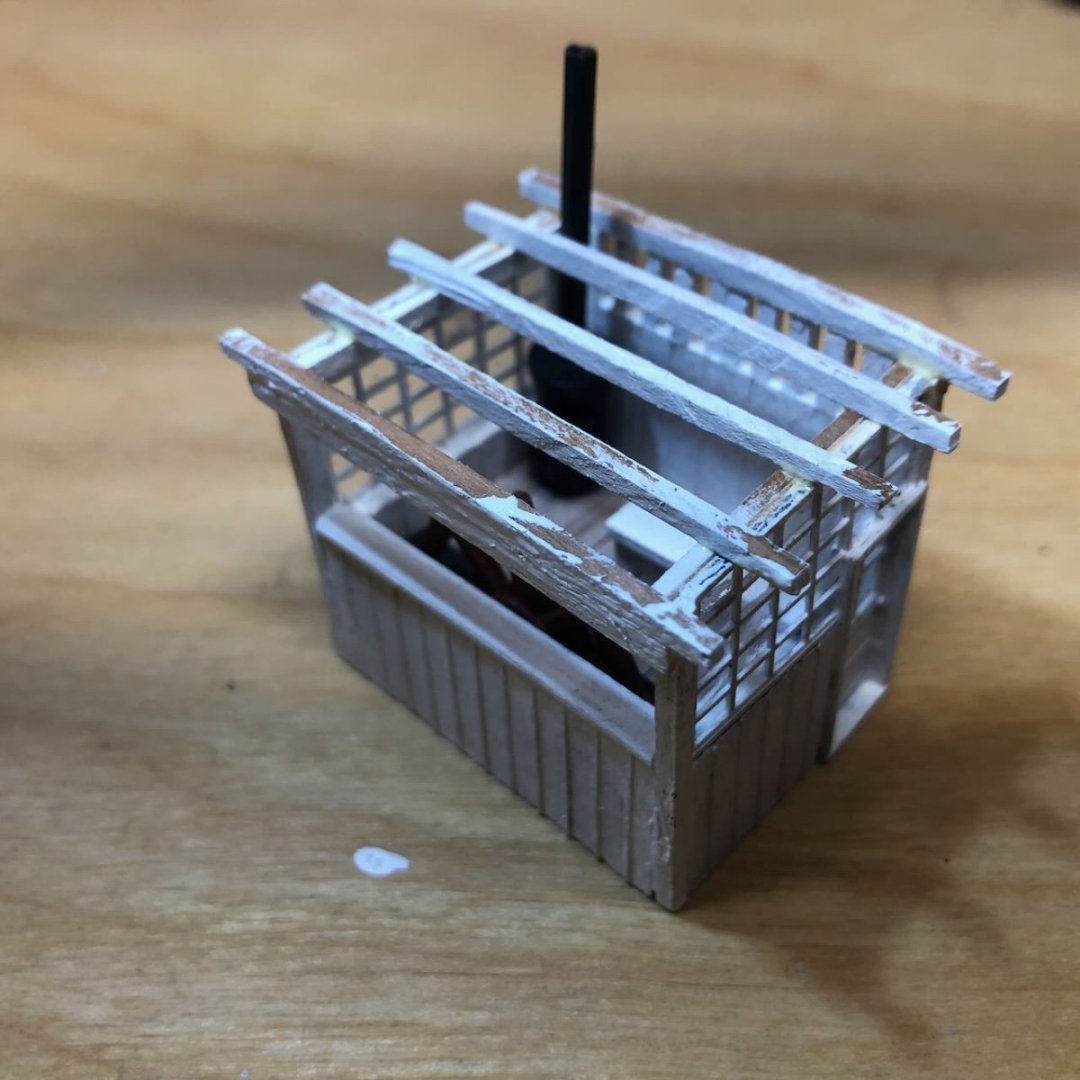
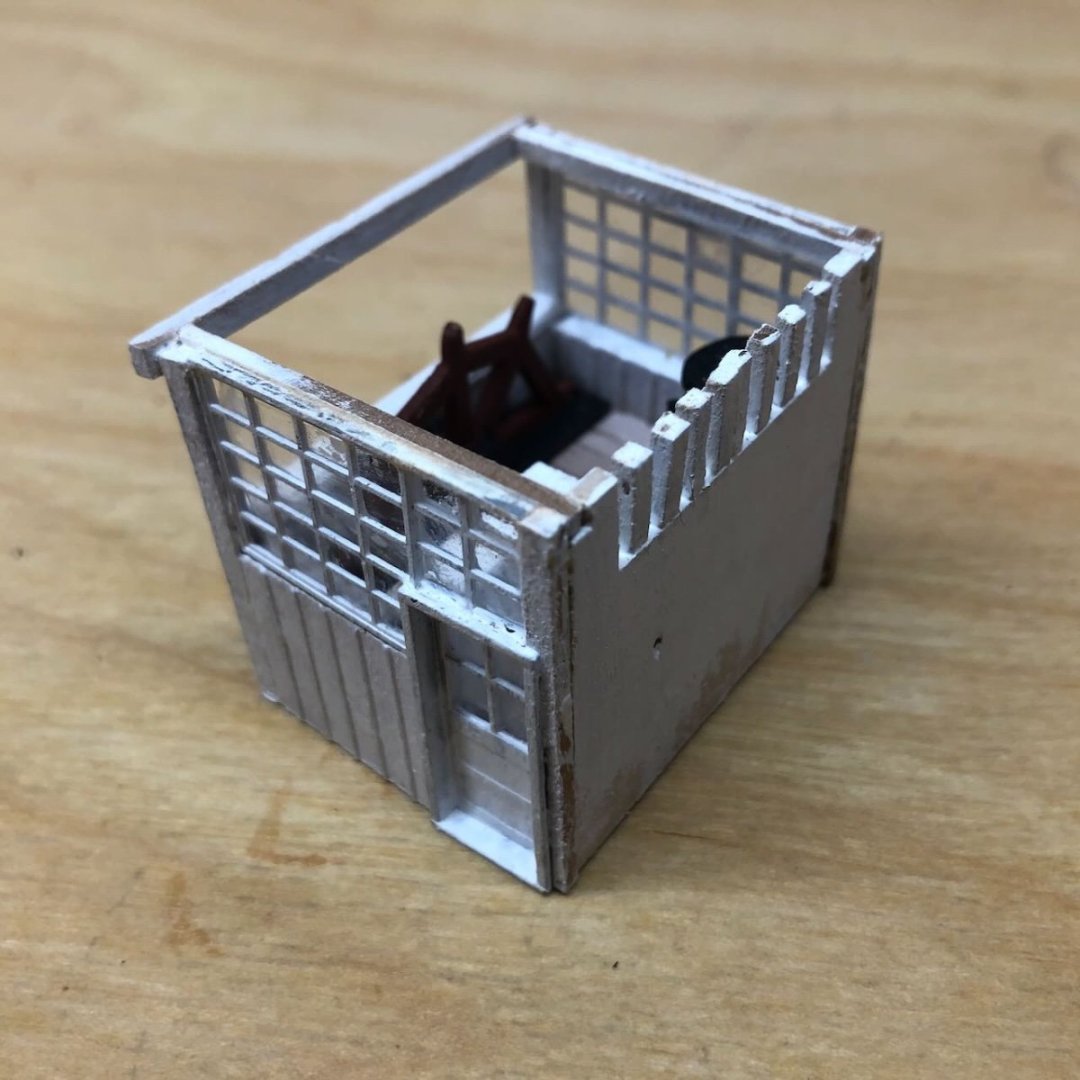
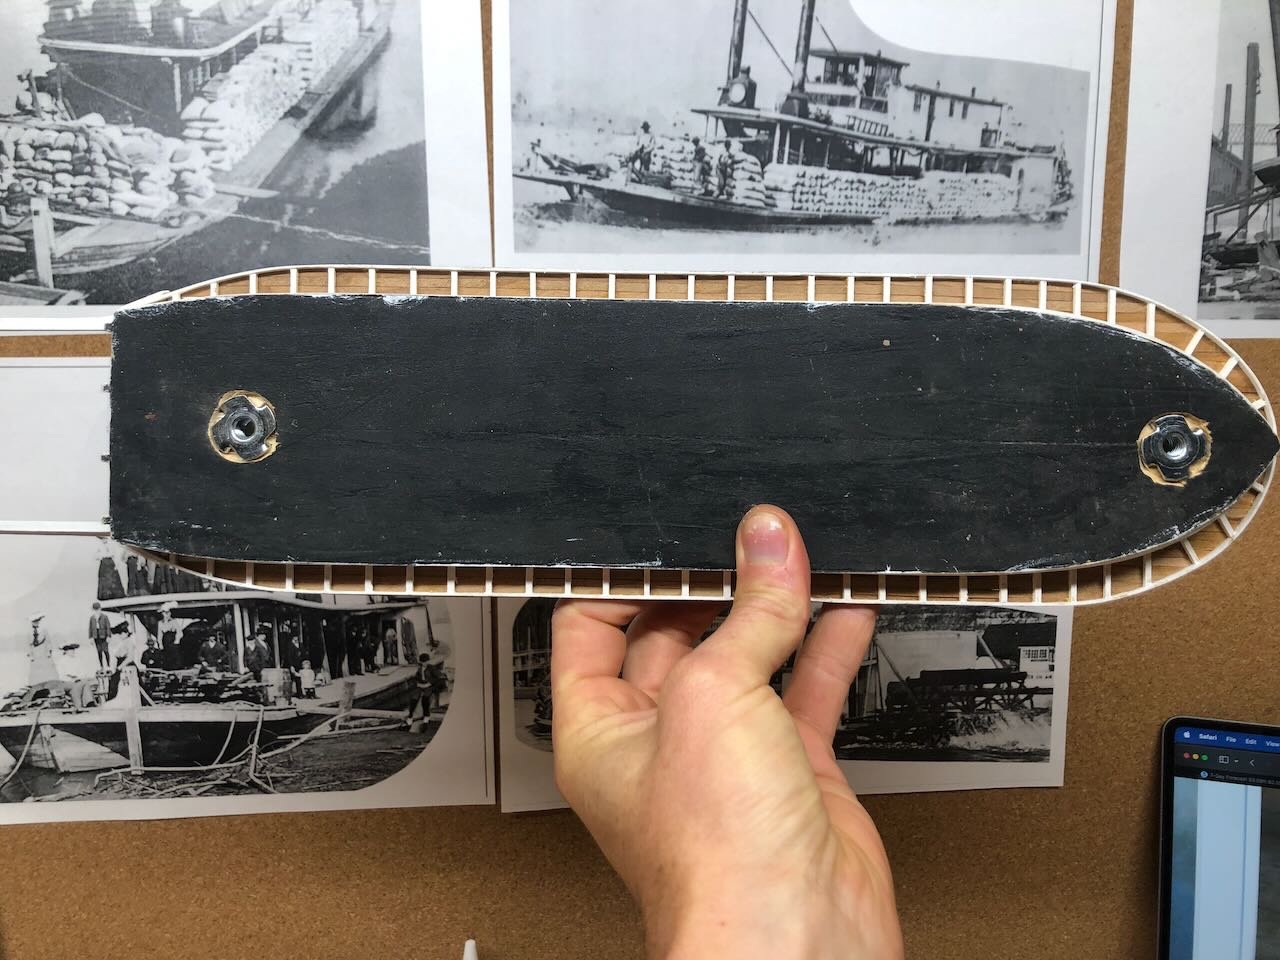
So here's what the new stacks look like. Still not attached permanently so don't worry about their exact orientation. I still have to figure out how to make the little rain shields (I assume that's what they are) that sit between the chimneys and the broader heat shields; you can see them clearly in this image: I've tried a few things and none have looked good. On to the pilot house. Here's a bit more progress, showing the ubiquitous wood stove in the corner, and the back wall added. This had an unusual window pattern that you can see here: And some rafters added: Better late than never, I added some hardware to the bottom of the hull so the model could be bolted down to a base if desired. I should have done this much sooner, and now was the last chance while I could reasonably work on it upside down (before more delicate structures were added). That's all for now, but it's progress. Thanks so much for sticking with me!

- 393 replies
-
- 19
-
-
Yes, I also found the need to adjust a few. It's likely that'll occur in any kit, so it ends up being part of the learning experience. Nice work so far! For what it's worth, Toni is a woman.
- 16 replies
-
- 4
-
-
- half hull
- Half Hull Planking Project
- (and 2 more)
-
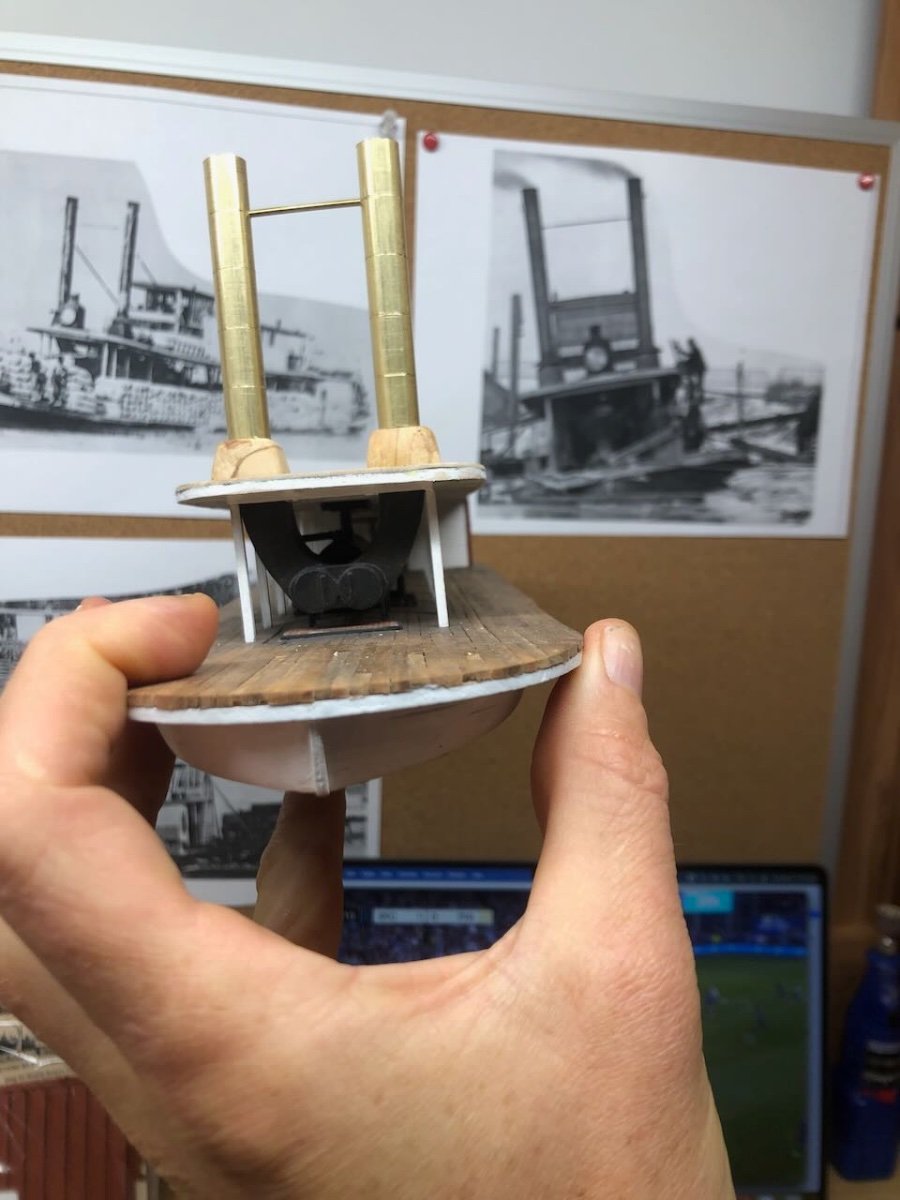
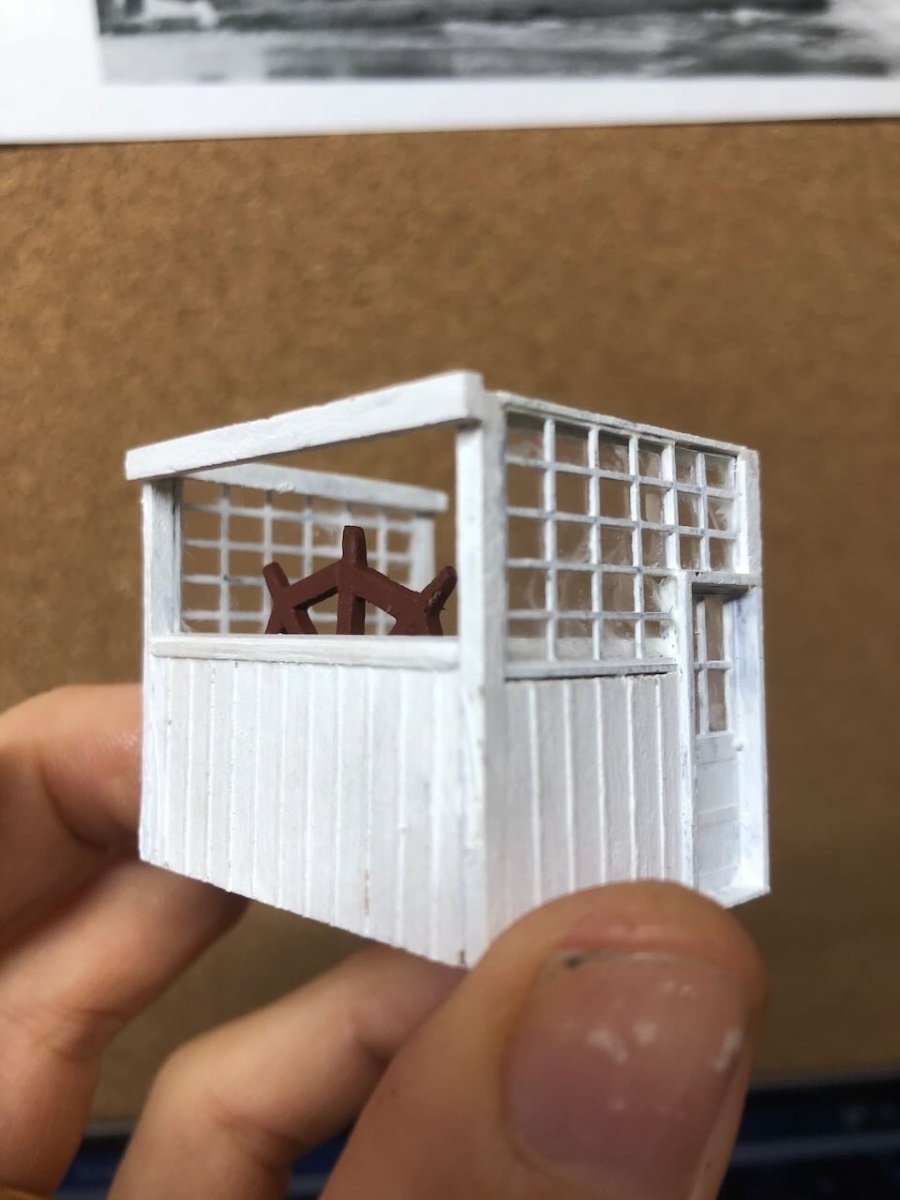
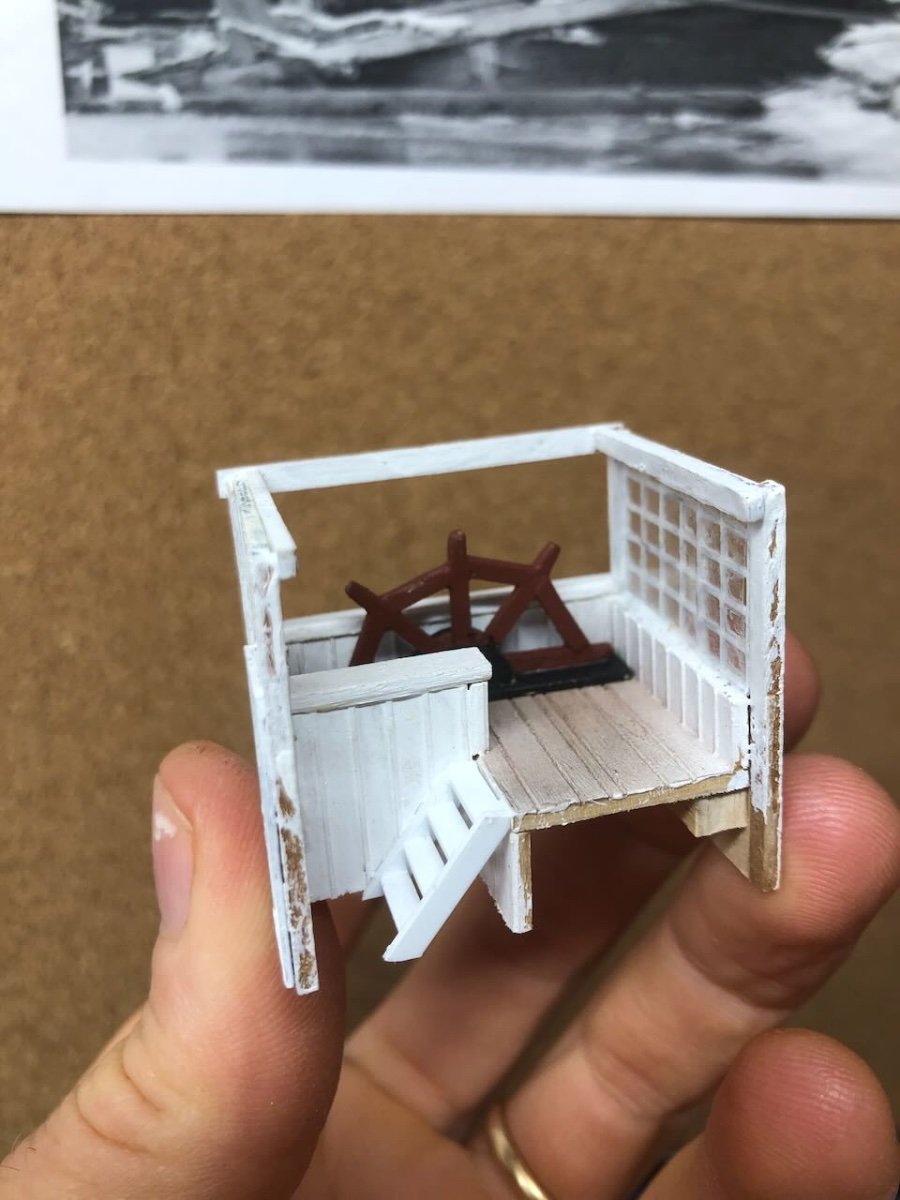
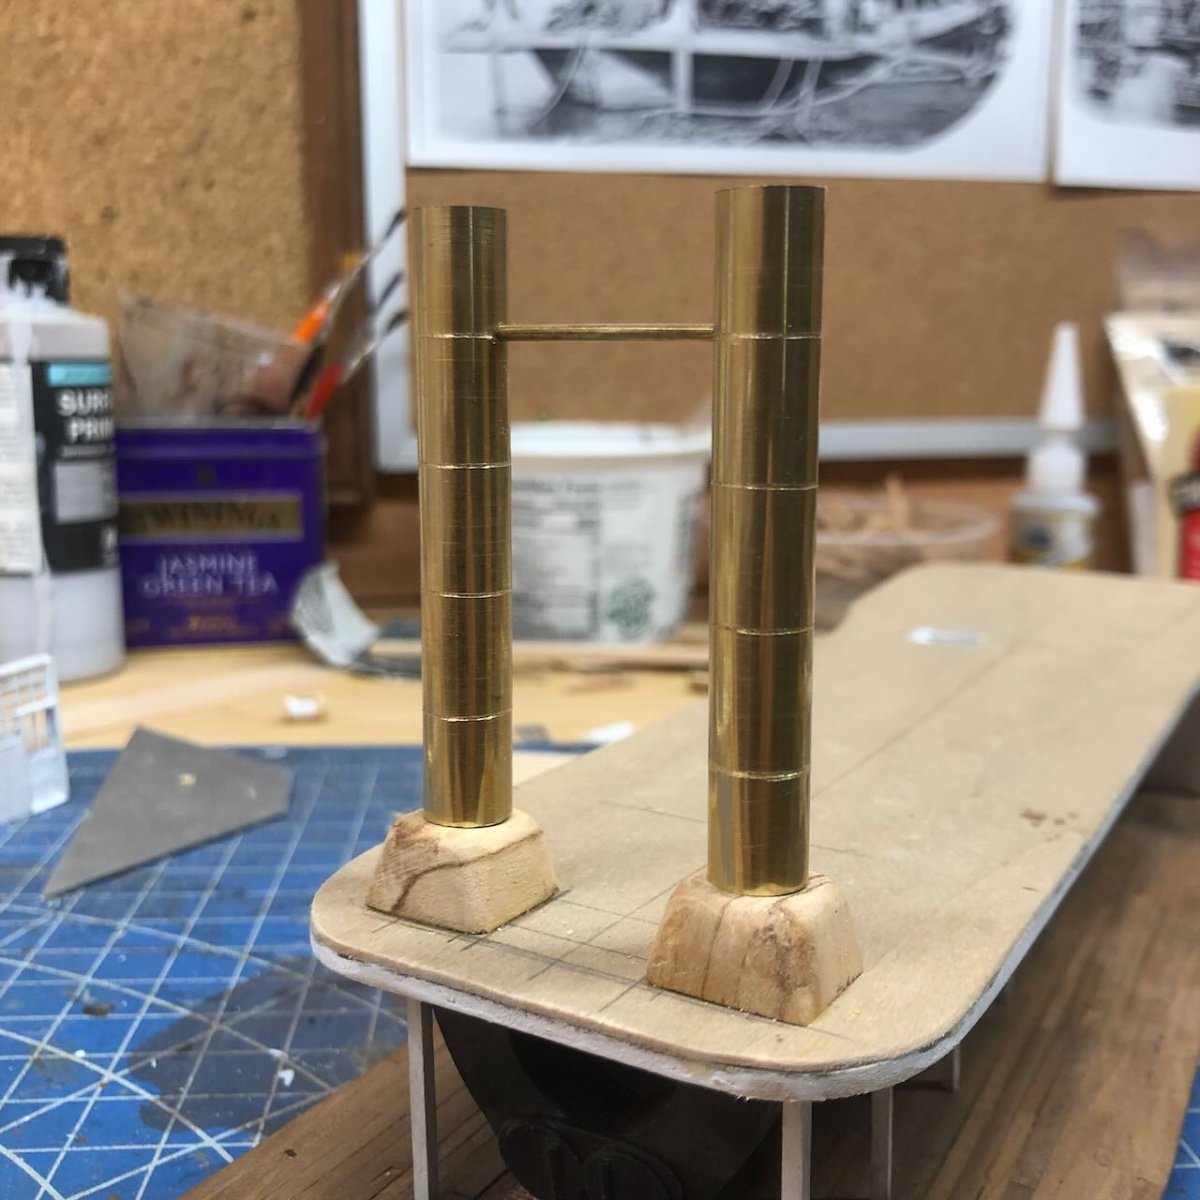
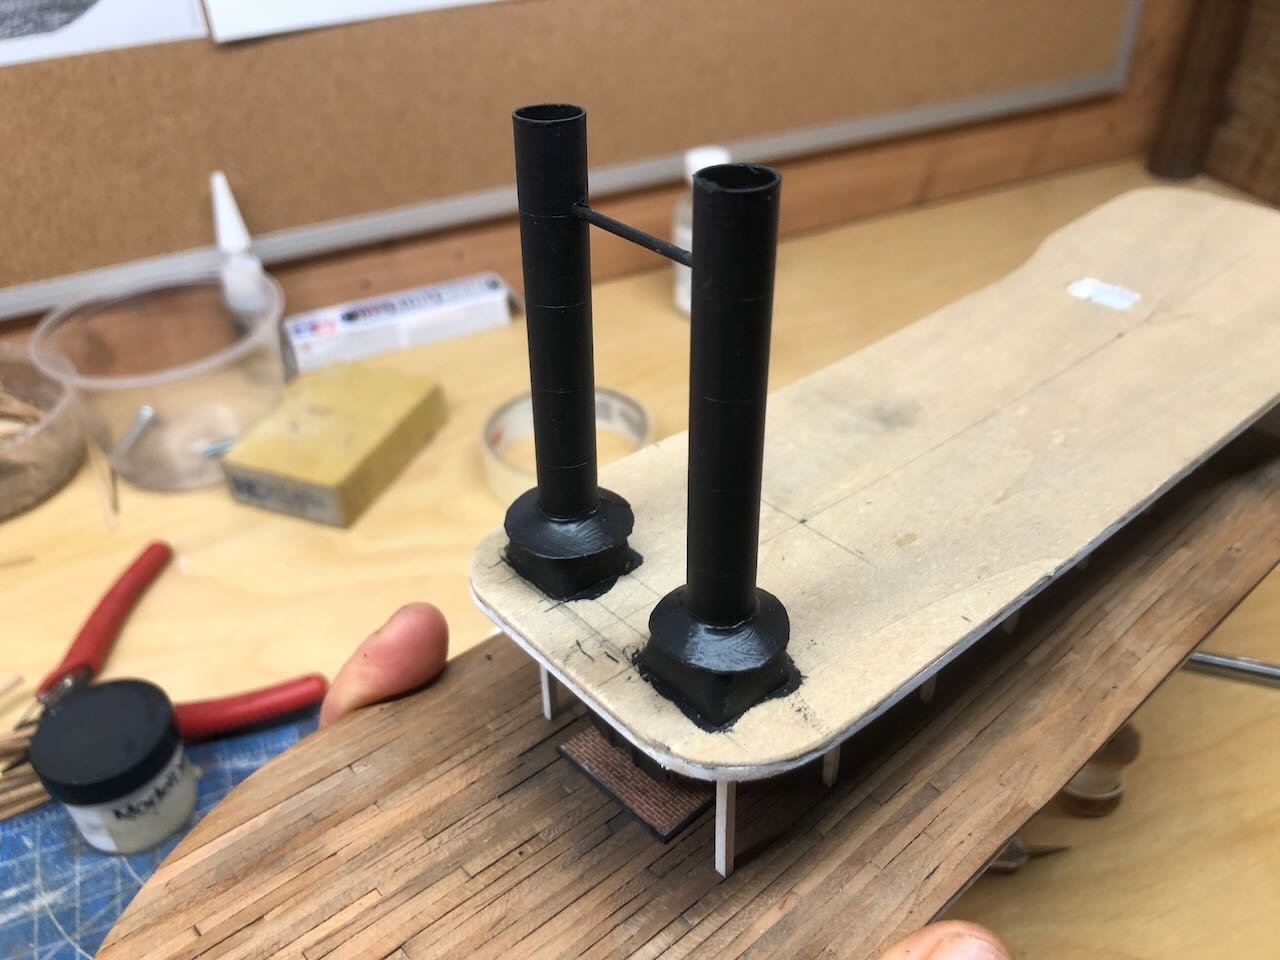
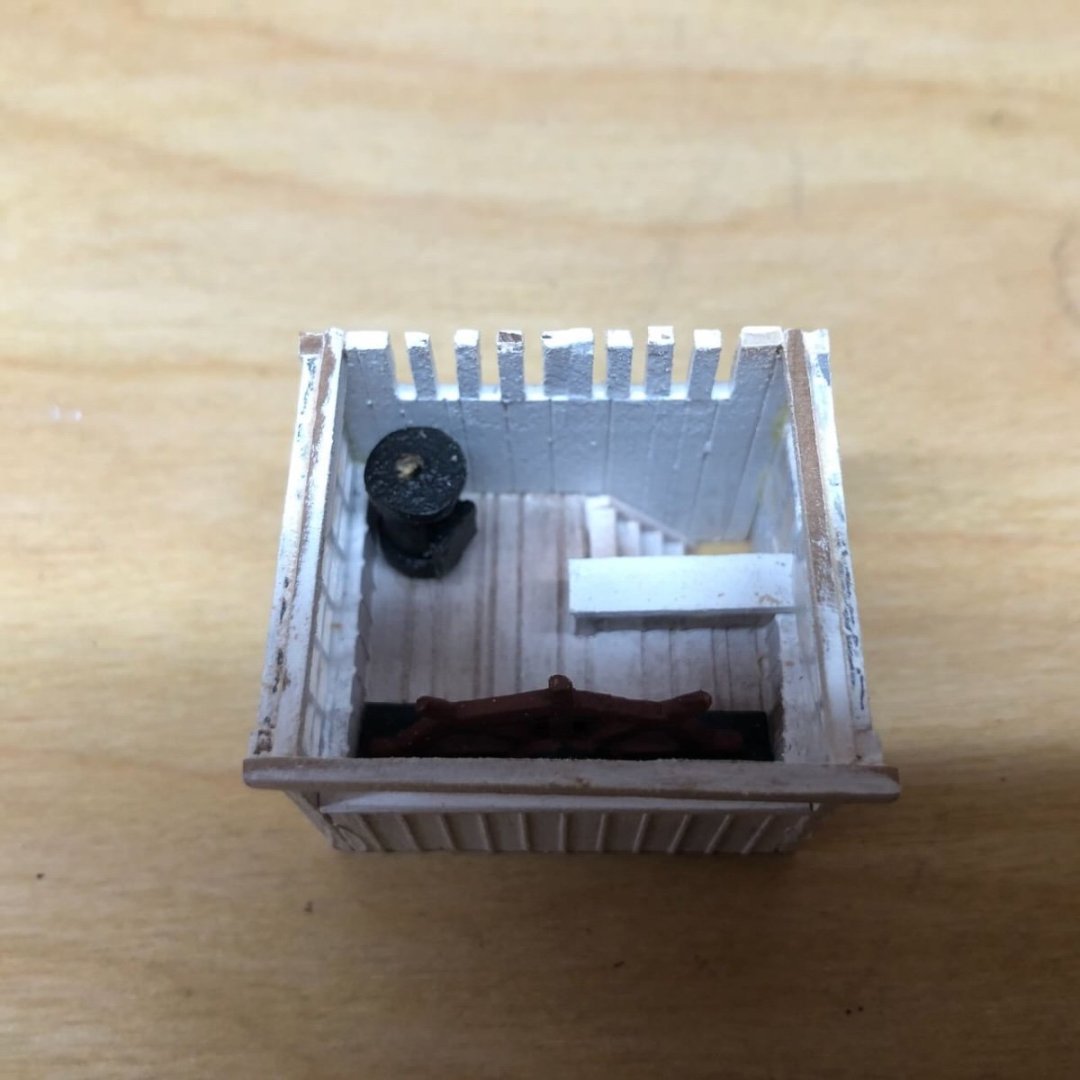
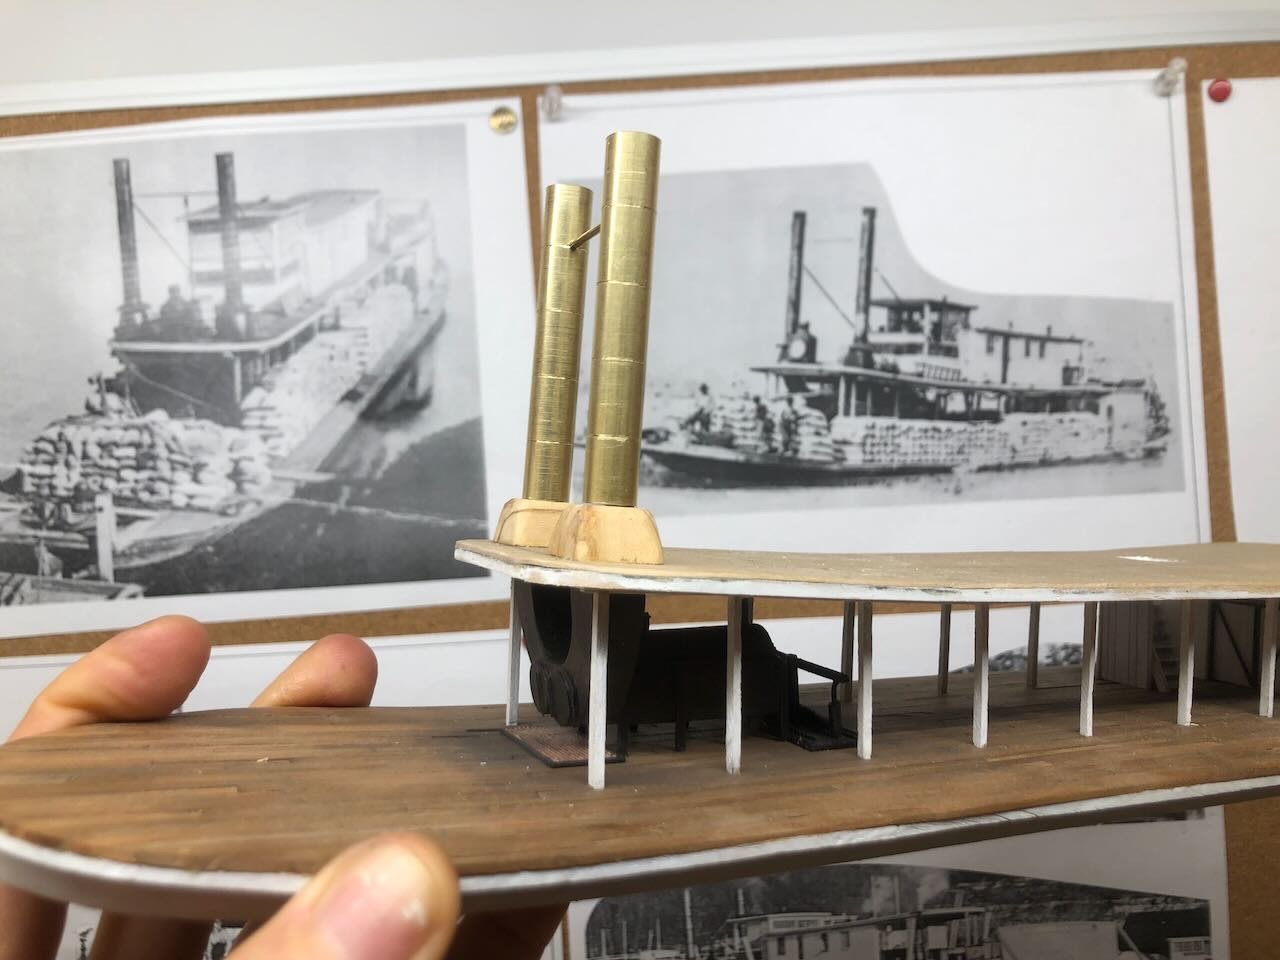
All right, you lot got your way! I went to the hardware store and got some brass tubing to play with. Here's the resulting second draft of the chimneys. I scored them using a razor saw to simulate the joints. I shaved/sanded a wooden plug to fit tightly in the bottom of each so they'd sit and attach properly. Don't judge their exact angle, they're just sitting there as a test-fit. I also moved forward on the pilot house; here's its current status. I used some clear plastic and CA formulated not to craze plastic. Not entirely happy with the outcome but it's too late now. Guess it looks like old glass. It'll certainly blend into the background of the finished model. Sharp eyes will notice that I simulated the gap into which the lower half of the wheel vanishes by just putting down a thin dark piece of wood. It'll be barely visible in the finished pilot house and I didn't think building in the full gap and wheel was worth it. I still need to weather the steps to match the pilot house floor. Next up I need to decide whether to try blackening the brass, or painting it with primer and then black paint. Also whether to try roughing it up with fine sandpaper or leaving it smooth. Will do some test pieces since there's tubing left over. Thanks for pushing me to improve my work!


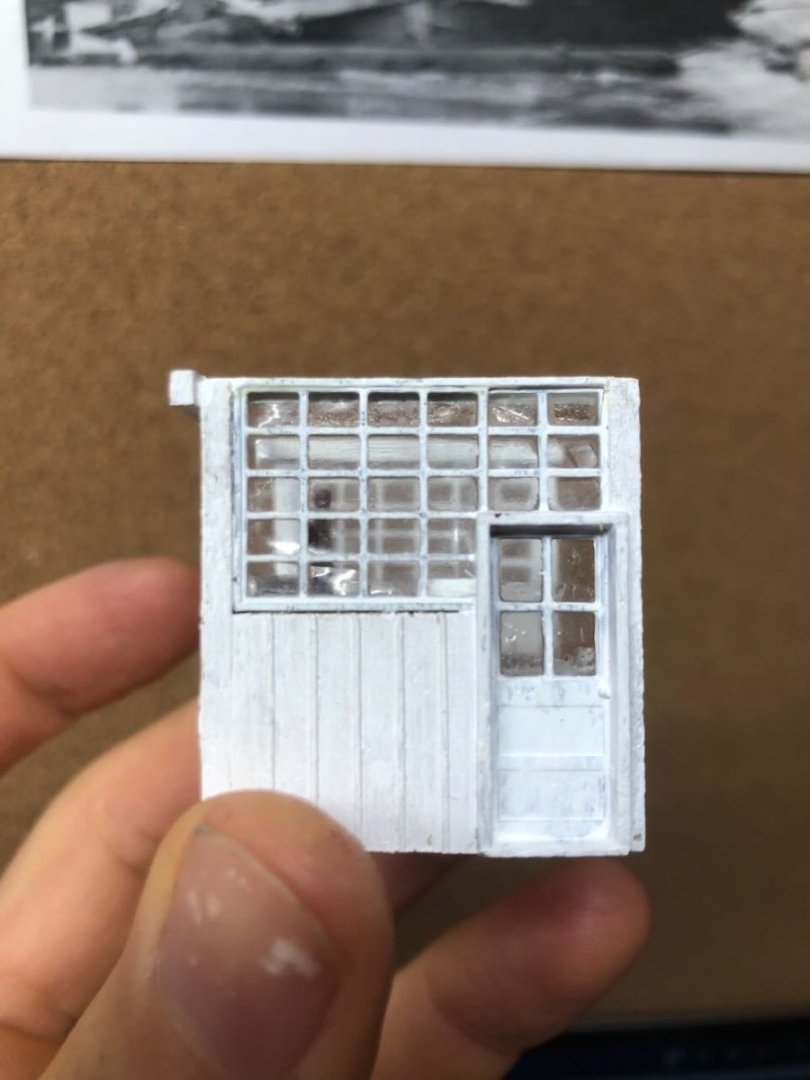


- 393 replies
-
- 25
-
-
-
You're not the only one, I did a bunch of things differently, too. Diverging from the instructions is part of model-building!
-
Just a quick note on fires, I'm in winter on the opposite side of the world, but we're under what the US calls "Red Flag Warnings" today and probably tomorrow, with near-record high temperatures, gusty winds, and a long-running drought parching fuels. Ironically, there's also been a lot of prescribed burning in the area lately, taking advantage of more benign but conducive fire conditions (my wife spent all Saturday working a big one). Back on topic, I'm very much looking forward to seeing how you apply your typical artistry to the silk span.
-
Good grief! With attention to detail like that, you can be my accountant any time! As an Earth scientist, I'm glad NCAR is in such good hands.
-
Thanks so much for finding the time to keep us updated in what's an overwhelming period. We're all here pulling for you both.
-
Lots of input to consider here, thank you! One note, Roger, great idea, but there isn't any natural mica within probably 800 miles of here!
-
John, good feedback. I think my pilot house is more open and the panes wider, so the plastic would show more. Maybe I'll mock up an example and show photos both ways so we can all judge the options more accurately.