HOLIDAY DONATION DRIVE - SUPPORT MSW - DO YOUR PART TO KEEP THIS GREAT FORUM GOING! (78 donations so far out of 49,000 members - C'mon guys!)
×


amateur
-
Posts
3,523 -
Joined
-
Last visited
Content Type
Profiles
Forums
Gallery
Events
Everything posted by amateur
-
Billing Boats Zwarte Zee - rare find
amateur replied to popeye the sailor's topic in Wood ship model kits
Ps: billings shows the ship (dating from 1963) in her post 1971-livery. For the older ships I do like the original style better: Although pre-internet, there are quite a lot of pics (mostly general overview) available, as this one was once the pride of the Dutch tugs: largest and strongest on the seven seas . On every model-exhibition in the Netherlands there was a separate section ‘zwarte zee’, next to the sections: ‘smit Rotterdam’, Furie and ‘Happy Hunter’ Jan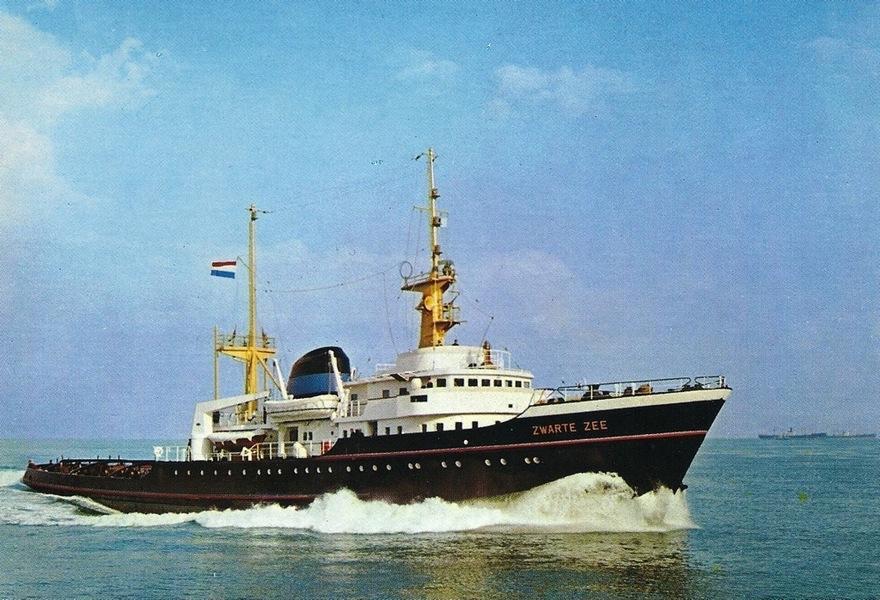
-
Billing Boats Zwarte Zee - rare find
amateur replied to popeye the sailor's topic in Wood ship model kits
I guess it is a late seventies/early eighties version. Have been looking at it quite often, but slightly out of my budget (in those days). And once budget was abvailable the shop had the other Smit-tug on offer I only had (long ago) a paper 1:300 version. the wood in my kit was not basseood, it was all obechi, a bit dry, a bit brittle (fun to cut the windows ) With respect to fittings: Billings in those days had almost no ‘specific’ fittings. It was standard railing, standard anchors, standard bollards, standard everything. (And a lot of cheap plastic). Checking on the drawings what you need and just buy/make it is easier than scouting an old box of fittings. Jan -
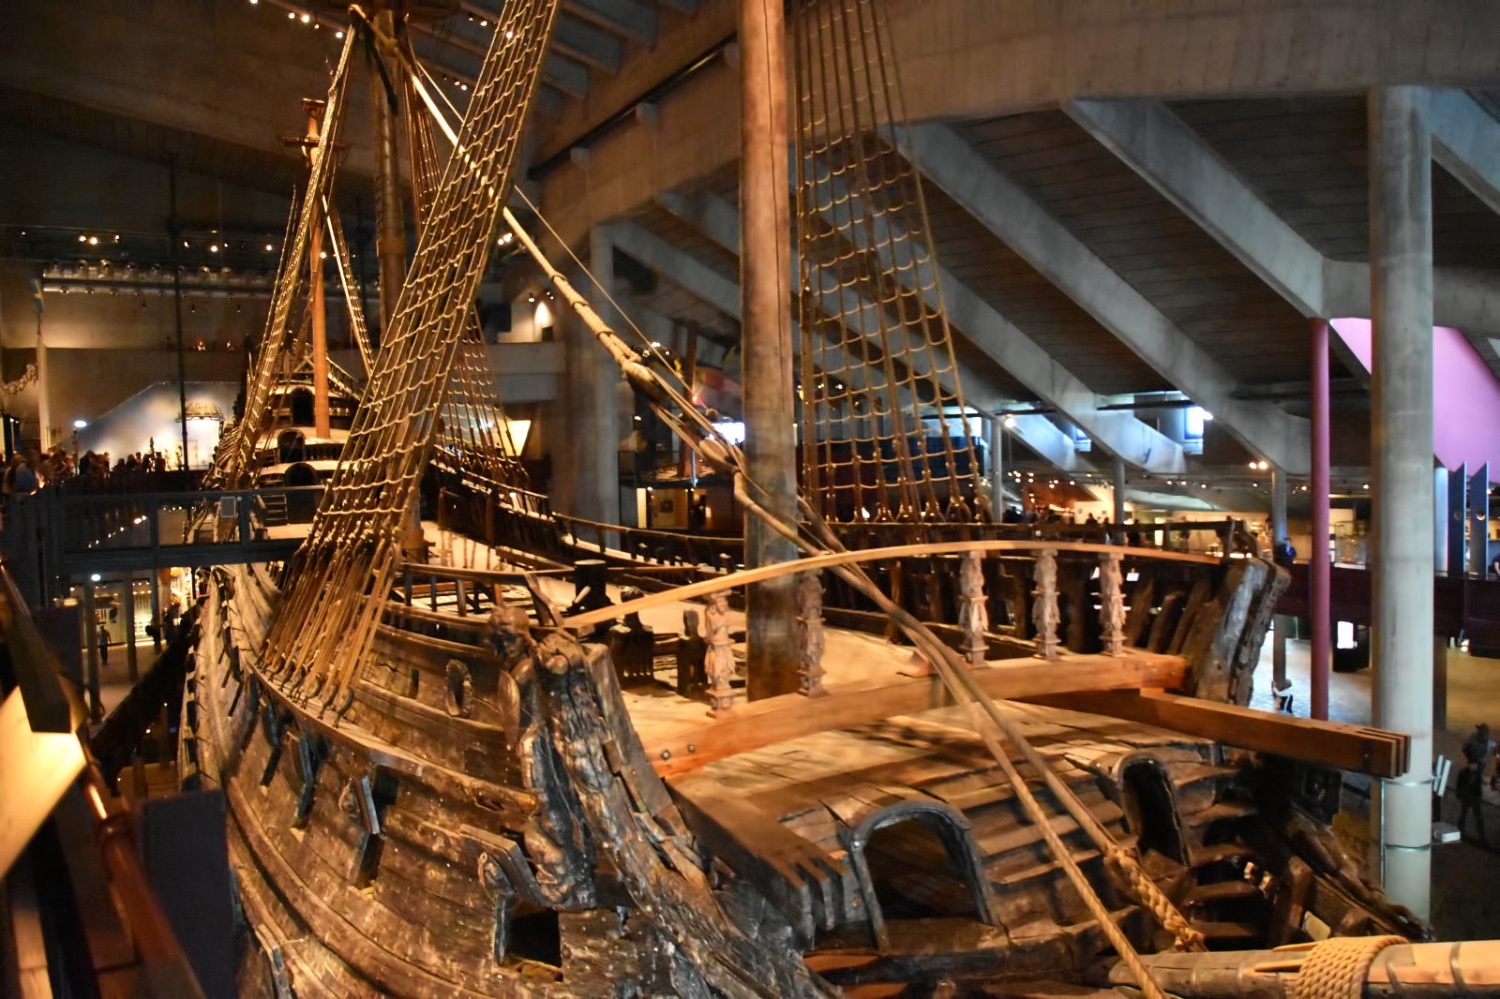
I can follow your reasoning, but I never saw pictures of Dutch ships showing this setup. Also, this pic shows the setup as found on many Dutch pics. The only thing I can’t find wether or not Vasa has a gallion-knee that has a hole through which the collar goes, or that it is just around the bowsprit. But I don’t know how much of the stay-setup survived. Perhaps they vhoose this setup only because of the Dutch pics…. Jan

-
I don't understand your mainstay setup: in Stockholm, the staycollar is (as so often in ships of this era) not going into the deck. see this pic on wiki: The Vasa from the Bow - Vasa (ship) - Wikipedia Jan
-
Btw nice Duth Northsea fising vessel. google hoogaars arnemuiden for some inspiration jan
-
And: which BP do you mean: the 2017 yacht, or the three masted pirate ship? Jan
-
Hi Phil, can’t help you on your question, but I would suggest renaming your topic into something more specific: ‘How many sails on Black Pearl’ or something like that. That will trigger a larger response than just ‘sails’ Jan
-
You can also find a lot of info here: https://warshipvasa.freeforums.net/ It used to be a rather small, active group of vasa-researchers and builders (including Fred Hocker of the vasa-museum). Over the last two years activity died down vompletely, and the last post dates 6 months back. Still: lots of detailed info hidden over there. Jan
-
Better than the original Hope you will show us more of your art and wizzardry! Jan
-
I have seen e youtube of a fairly large RCmodel of Prins Willem (same period, slightly latger) and it looks ad if the mizzen is set more or less just to please the eye. It just goes with the wind. Not sure about the spritsails… Jan
-
Swivel guns
amateur replied to tlevine's topic in Discussion for a Ship's Deck Furniture, Guns, boats and other Fittings
Does it help to browse the NMM_collection in Greenwich? Some of the models have the swivel posts installed. Warship (1741); Sixth rate; Sloop; 24 guns | Royal Museums Greenwich (rmg.co.uk) (at least, I think those six posts on the poop are swivel posts) Or have a look at Chucks Winnie: Syren Ship Model Company|Boxwood ship model rigging blocks|Ship Model rigging rope |turned brass cannon| Chuck Passaro Jan -
Nope, google picture search killed the game…. Jan
-
Hi Valery, I don't know whether it has been asked earlier, but do you build your models in commission, do you offer them for sale after finishing, or is this 'only' for your own fun? It is certainly great joy for us watching this magnificent model grow. Jan
-
How long does the pressire-cartridge last? Jan
-
Don't think it is useful to continue this thread: Peter's first post dates 2018, his total post-count is 2, and his last visit to MSW was early 2020..... The 3D pictures are parts from shapeways: Ships - Shapeways Miniatures Not a kit, but parts you can use to upgrade your own scratch model Jan
-
Thanks: the version my shop sells is labelled 'heavy', so I think I can deduce which is which Jan
-
With respect to the EZ-line: Do you use the thin (0.25mm) or the "thick" (0.5 mm) version? Jan
- 98 replies
-
- 10
-

-
Or he needs starting a very large, very complicated model with lots of tiny parts, so that he is busy at least three weeks. Having said that: actually I like these slightly less complicated models more than the very complicated ones: they have the looks and feel of a good model, and they are not afraid of showing that they are made of paper. Jan
- 98 replies
-
- 10
-
-
We all got that time-out message. As usual: the mods told us what was going on as soon as they were aware of the problem. As soon as the site is down, the facebook-page of MSW is their way of communicating with us. Jan
-
Blinking with my eyes, and you’re half done already. looking good Jan
-
Sometimes I wonder why there are not more model kits of these type of ships. They are so beautiful. Apparently kit makers (and buyers) prefer another victory over a cruiser like this. (I know, there is quite a lot out there in the plastic/resin-world, but that is way outside my skillset, as is scratch building one of these beauties) Jan
-
DEVICE TO FINISH ROPE ENDS TO HANG ON BITTS AND BELAY PINS
amateur replied to Peter6172's topic in Masting, rigging and sails
Somewhere in Edt's log of young america there is a jig for that last method. Couldn't find it, but also works very well. Jan -
Surely there are some polish speaking people around here? Jan
-
Make a copy, and try before you cut the real thing? Jan
-
Help with masthead and topsail pole
amateur replied to modeller_masa's topic in Masting, rigging and sails
Got it. I checked pastors again, but there is no indication of a fixation at the lower end of the pole. (Also not in the other pictures) My guess is as good as yours.... Jan