


amateur
-
Posts
3,535 -
Joined
-
Last visited
Content Type
Profiles
Forums
Gallery
Events
Everything posted by amateur
-
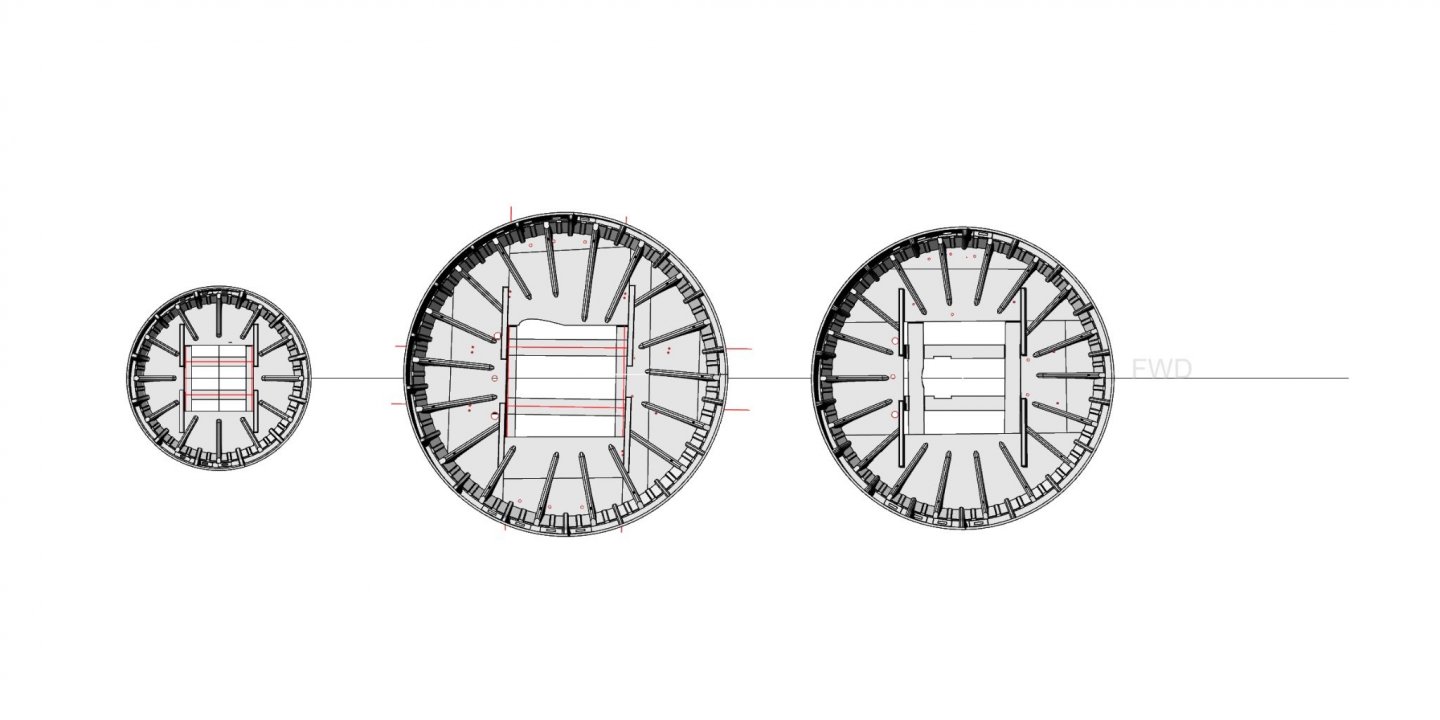
Hi Marcus, that drawing is not showing the profile of the windlass, but the cross-section of the ratchet-wheel. Hence the weird appearance. Jan
- 17 replies
-
- 2
-

-
- windlass
- Dutch model
- (and 2 more)
-
Hi Marcus, To complicate things: are you sure it is an 8 sided windlass? Quite often the Dutch use(d) 6-sided ones. I don't have much experience in this type, but I think working from the thickest part is the easiest: plane the whole thing 6 sided, starting from (almost:) ) square stock (you can use the sides to mark the part that has to be removed). Then you can mark the thinner ends of the windlass. Finall, remove the middle part, and replace by that iron 'gear'. I found making two identical parts more difficult than making one, and splitting it. btw the square holes for the spokes are in the outer part, and not, as in your picture in the thicker middle part. Jan
- 17 replies
-
- 2
-
-
- windlass
- Dutch model
- (and 2 more)
-
Couple of years ago, Fred Hocker posted a drawing of the tops of Vasa. They show a number of holes. The line went in a straight line, and where it hit the top, they made a hole. (Size depending on rope thickness)
-
The problem is: going outside the tops to the side does not work: the lines would need to cross through the standing rigging, and chafe at the outside of the tops (tops being fairly wide) depending of where the line starts, and needs to end, it is going through the lubbers hole, or through a hole made in the floor of the top. See eg edT's log on the Young America showing how it was done in the American Clippers. Jan
-
Hi, Welcome here! I know the first pic isn't shipbuilding, but can you tell us slightly more about it? Jan
-
Your display has also been upgraded (and will be certainly more space consuming than the old "display on a dusty shelf" Did you only clean the model, or did you completely rework the paint? Jan
-
Papegojan 1627 by mati - FINISHED - 1/48
amateur replied to mati's topic in - Build logs for subjects built 1501 - 1750
I should have read Matti's post somewhat closer: the depiction f the anchor comes from the manuscript or drawings by Otte Blom, who studied the Zeven Provincien (like Dik) However, Blom never published his work. After his dead, his manuscript and drawings were published on this site (Dutch only) http://www.otteblom.nl/ The anchor drawing can be found here: http://www.otteblom.nl/tekeningen/tekeningen/95-00-06_t.m._95-00-09.pdf/ Btw this style of 'simple buoys' is also found on the socalled Hohenzollern Model of a Dutch two-decker, i.e. a rather large ship. Jan -
Papegojan 1627 by mati - FINISHED - 1/48
amateur replied to mati's topic in - Build logs for subjects built 1501 - 1750
He uses at least three books: I recognize (in 180) the book by GC Dik, on the Seven Provinces, the book by Ketting (in post 187), on Prins Willem, he mentions Hovings book on the ships of Abel Tasman, but the pics in post 203 I don't remember seeing them, so that is probably from a fourth book. i can look for hours to those pics in the last post. New details every time I look. Jan -
I should restart building myself: the only thing I do is looking at very nice models of others Having said that: I'll put up a chair here (not back row, as my eyesight is not sufficient for that anymore ) Jan
-
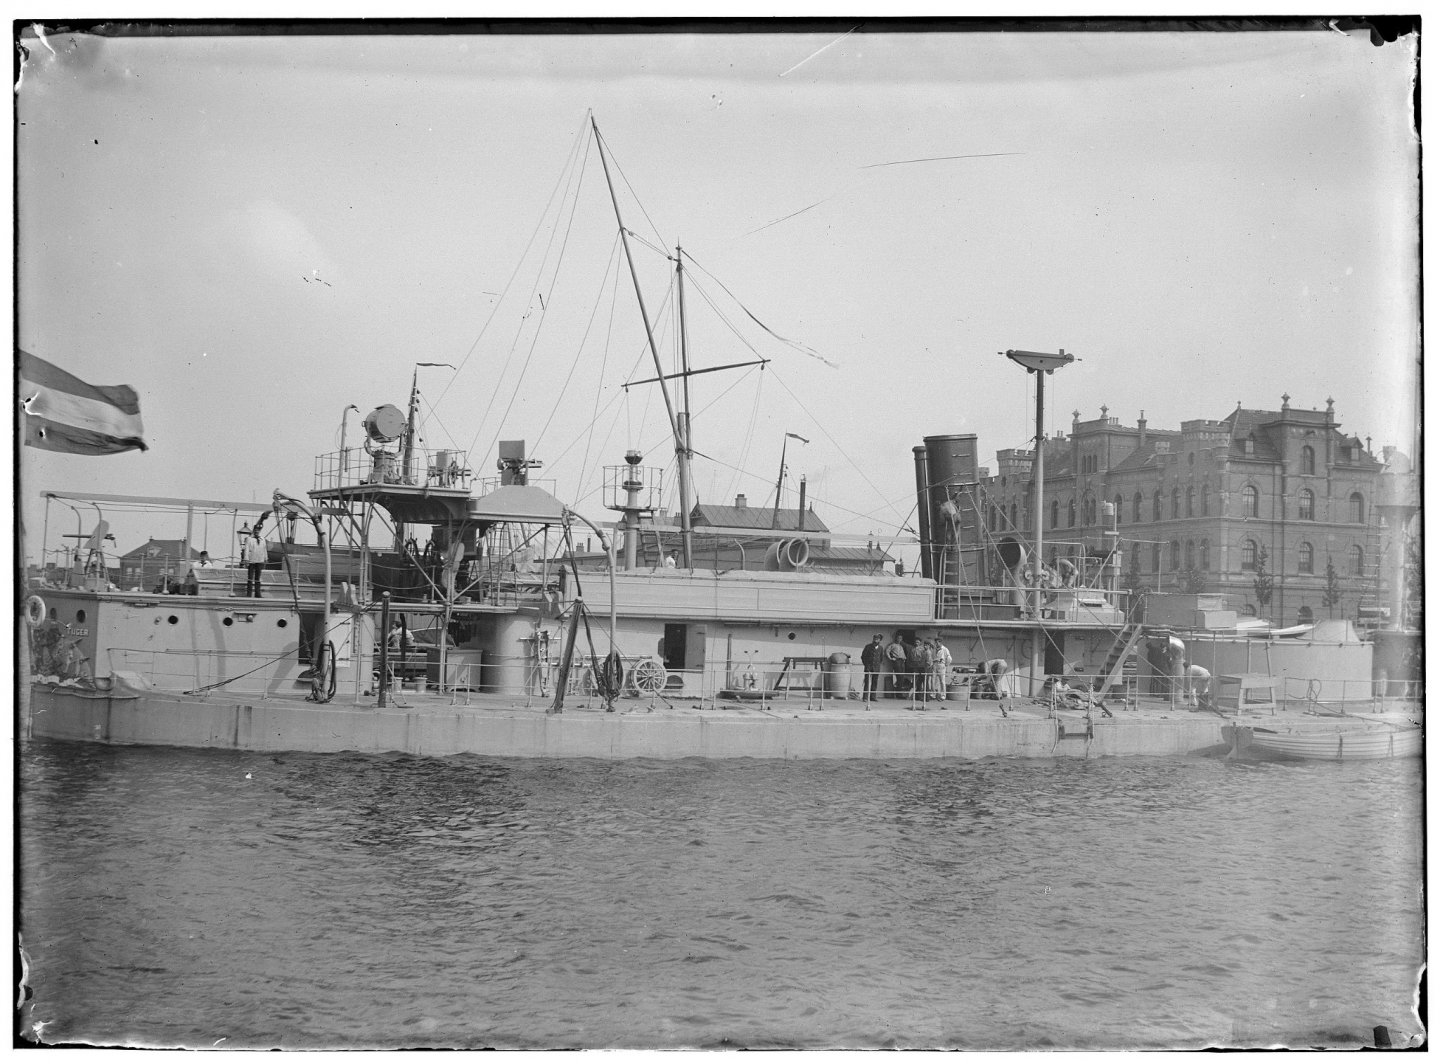
I checked on the navy-drawings: you loose. There is no internal backup system, and what you see is the main steering system (and nog the backup). At refit, they moved the wheel a bit more formward (and chanched it to a double wheel: you can see it in the pic I posted). But it didn't matter too much: these ships where not designed to engage in battle: they were used in the river-mouths, where the guns of the coastal batteries couldn't reach. They were manouvred in place, anchored, and 'cleared for battle'. No steering required. The concept was never tested in actual battle, it was mainly a paper concept, designed at the ministry of warfare..... and: your model turned out very nice! Jan
- 45 replies
-
- 4
-
-
- Tijger
- Paper Shipwright
- (and 2 more)
-
How to seize a block to an iron band
amateur replied to Laggard's topic in Masting, rigging and sails
Hi Laggard, A last word on this discussion: you keep asking ever more detailed questions, people take time and effort to answer your questions , and you drop out of this discussion without saying ‘thanks’, and saying something that can be interpreted as ‘I don’t bother your answers and advice, I am going to do it my way.’ I don’t know how others feel about that, but I think it’s not very kind….. Jan -
How to seize a block to an iron band
amateur replied to Laggard's topic in Masting, rigging and sails
Somewhere onthis forum was a nice illustration of those fake splices (but where....) the idea is to use a needle to get the rope once or twice through its own strands, use a little bit of glue (normal pva will do), and form the "splice". this will work provided the rope is made of natural material (otherwise the pva will not hold), and second: don't forget that there is no need to apply too much tension to your model's rigging. (Otherwise you run the risk of untying the 'splice'). Jan -
http://www.schiffsmodellflaggen.de/deutsch/Katalog/katalog.html Jan
-
A critique of the works of Nicolaes Witsen
amateur replied to Philemon1948's topic in Nautical/Naval History
I did not say plagiarism: I said ‘starting point’ Jan -
A critique of the works of Nicolaes Witsen
amateur replied to Philemon1948's topic in Nautical/Naval History
A remark on the books you mention: the book by Dik (although interesting enough), is hardly to be considered a book on Dutch shipbuilding. Dik's intention was to build a model of the Zeven Provincien, and his research was primarily focussed on this specific ship. Besides, as his intention was not writing a scientific book, he does not (at least explicit) give alternative solutions for puzzles and problem he encounters. With respect to the drawings he gives, they are quite strongly inspired by the drawings of Wagner/Winter of the socalled Hohenzollern Model in Berlin. Ketting main focus was to describe the model of the Prins Willem in Amsterdam, using this specific model as a basis of presenting some information of shipbuilding. Again, a very nice book, but not a thorough study of Dutch shipbuilding. I know only one book by Kamer, and I am not very impressed by that one. The books by Hoving I know, the one on Witsen is a nice one to get an impression of what Witsen wrote, but as Philemon somewhere in his postimgs remarked, it is an inteoduction to Witsen, not a study into the question whether what Witsen writes was correct, or whether or not alternative methods existed. It certainly is not a comparison of design principles used in different periods/regions. (And whether or not variations in methods/principles lead to marked differences in ships build) Jan -
A critique of the works of Nicolaes Witsen
amateur replied to Philemon1948's topic in Nautical/Naval History
Wiki knows everything (almost): https://en.m.wikipedia.org/wiki/Cornelis_Jan_Witsen His father was perhaps interested in shipbuilding, but he was no shipwright. (And also in this family, professions tended to be handed over from father to son: both were Mayor of the city of Amsterdam ) Jan -
A critique of the works of Nicolaes Witsen
amateur replied to Philemon1948's topic in Nautical/Naval History
Nicolaes Witsen writes n the preface to the book that he could not have started this work had he not come across some drawings and writings of his father Cornelis Witsen, because he (Nicolaes) himself had no pratical knowledge of shipbuilding. He does not, however, mention that he did gather knowledge by visiting his father at his work, or by upbringing. Which looks strange: most professions used to be handed over from father to son... But: although he states that he found some designs and notes from his father, he does not state that his father was a shipwright himself. Jan -
I have this one in my increasing stack of card models. The amount of very small parts lowered my initial enthousiasm, so I did not start..... Dutch navy had a couple of these ships, but none was ever used in action. They were notorious for their bad handling in choppy sees (as the North See happens to be most of the time) The Rijksmuseum has a designmodel of the ship: https://www.rijksmuseum.nl/nl/collectie/NG-MC-1239 And as far as I know there is only one pic of the original: Davids model is -timewise- somewhere between the model as designed, and the picture of her as shown: the ships were at some time modified with a machinegun platform and a searchlight platform, and repainted in a rather dull, boring grey. Jan
- 45 replies
-
- 5
-
-
- Tijger
- Paper Shipwright
- (and 2 more)
-
Macro photos with an iPhone
amateur replied to Tomculb's topic in Photographing your work. How to do this.
Another possibility is, when you point yiur camera in the direction of something, putting two fingers on th screen, and zooming in. On my Ipohone, you can get a magnification of up to 5 times. (don't know in which version this functionality was introduced.) Jan -
But for the late reply of Steven I would have missedthis one. What a nice (understatement ) lttle model this is! I like the ships of this era: you see modern times coming, but it is not really there. How did you make the flags? Just printed double sided, or...? second question: you showed two other ships you started, but I cant find the logs of those. Did I miss them, or didn't you start a log? Jan
-
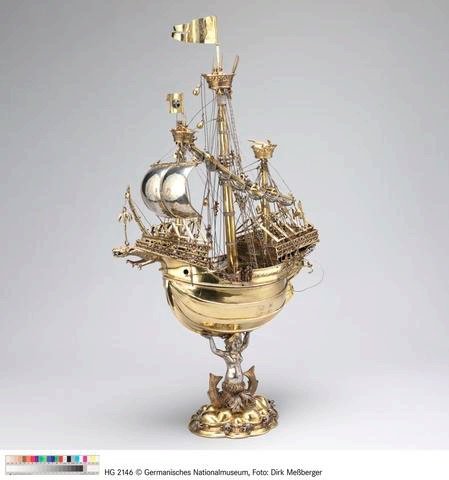
I checked the schlusselfeld Modell. kind of carrack. Dating from 1503, 80 centimeters high, almost 6 kilos silver. Jan
-
Sorry, the guy doesn't give a reference. http://www.die-kartonmodellbauer.de/index.php?thread/10799-messerschmitt-bf-110-4-r8-1-33-halinski/&pageNo=3 at the end of the page. He is a rather good builder: don't know how he does it: no sloppy sides, no fibers at the edges, no glue where it does not belong, just perfect.... (and the partsize of those halinski kits is mind blowing) Jan
-
Bit late, but I have seen some builders on a german forum to use double sided tape. Glue th thing to the inside of the canopy, cut the windows, and next peel the protection layer. Bit fiddly, but it seems to work. And yes, I will check whether or not I can fins a refer nce for the double sided Jan


