amateur
-
Posts
3,535 -
Joined
-
Last visited
Content Type
Profiles
Forums
Gallery
Events
Everything posted by amateur
-
Wren by amateur - FINISHED - 1:1- CARD
amateur replied to amateur's topic in Non-ship/categorised builds
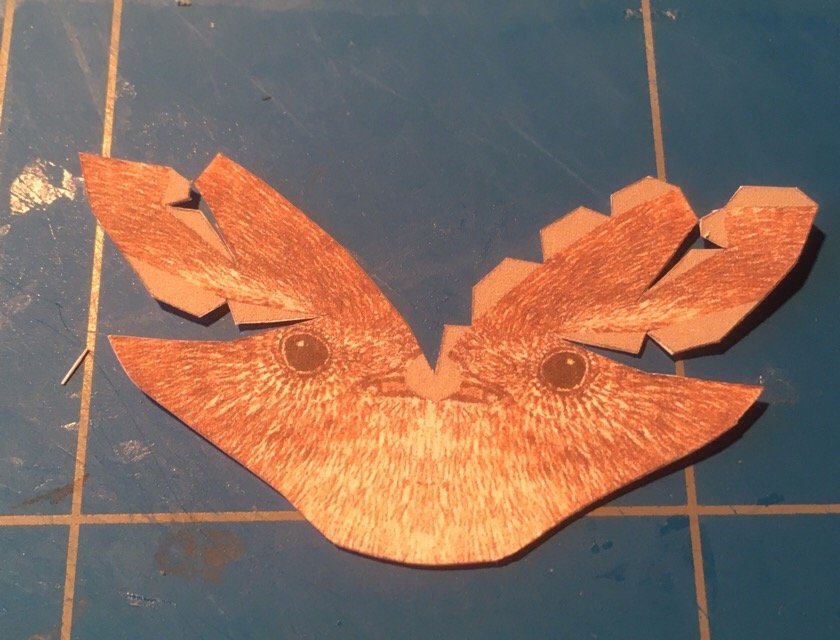
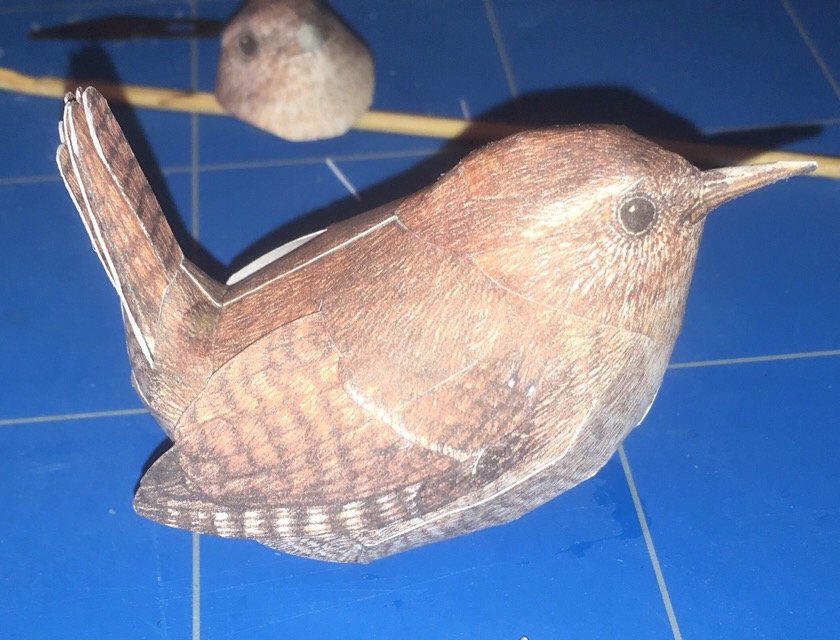
Almost finished (but not completely: the bird needs a brach to sit....) First, a tail next, a new head (the first one didn't fit without damaging the body) and finally, the marriage of all parts into a proper bird I took a branch from the garden, but that didn't work: a real bird doesn't need a horizontal branch. This one does..... Jan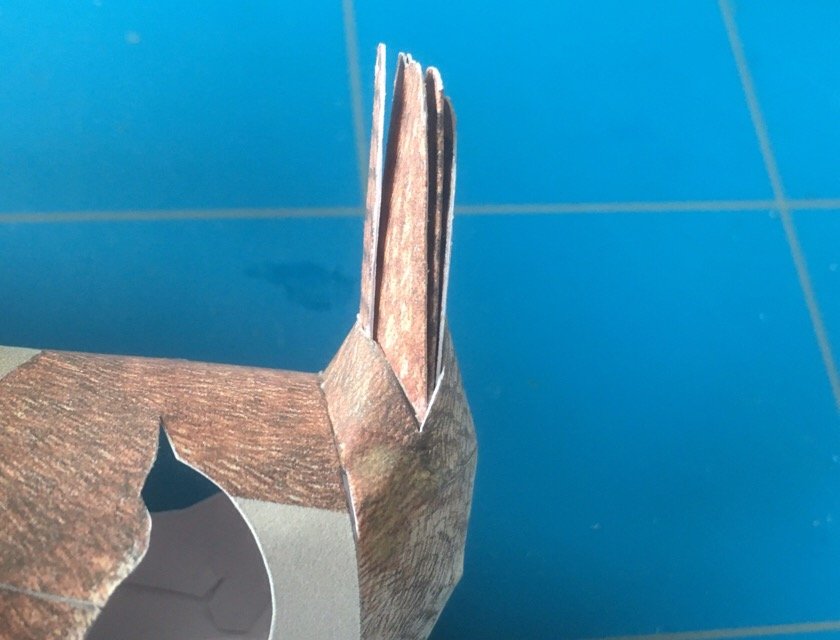
-
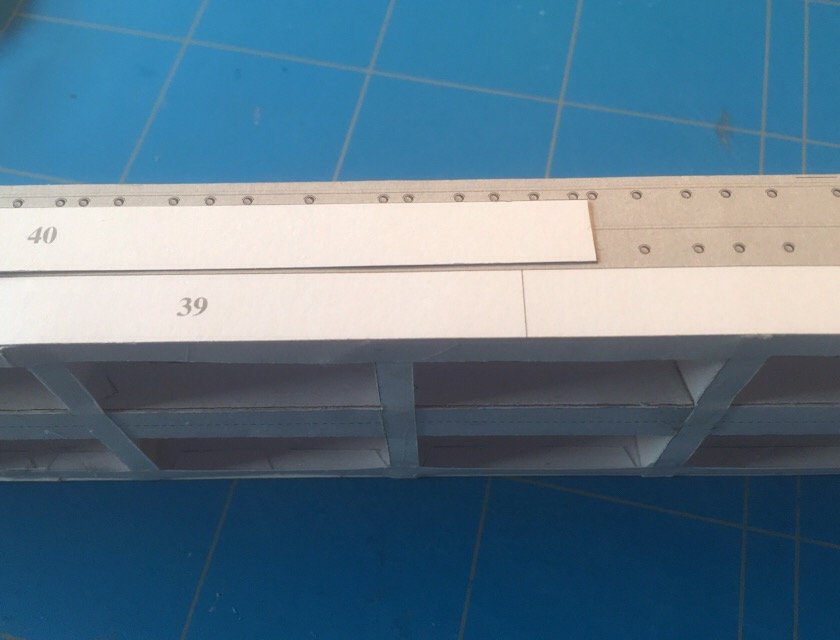
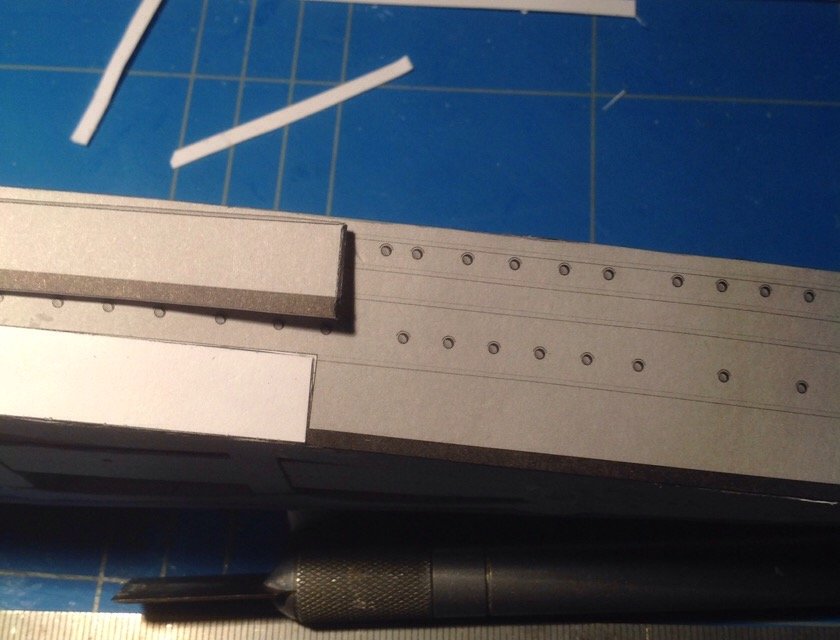
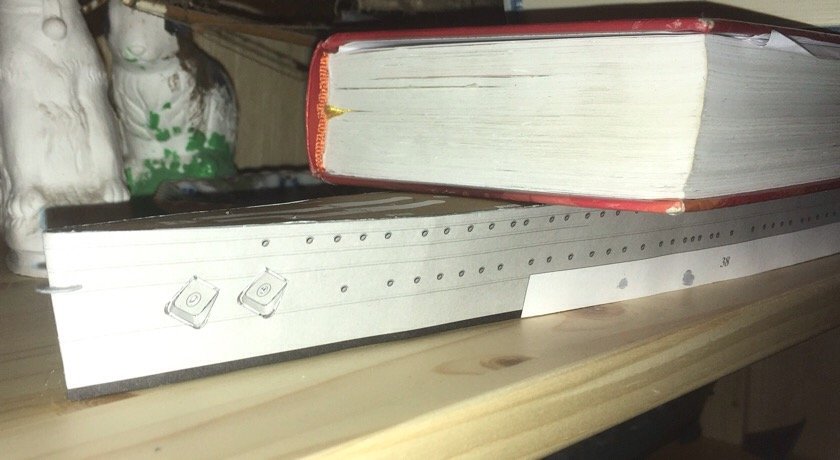
JSC made me almost despair: the hull-design is a bit ricky, as there is no way to check the length of the hull: the deck seemed too long, the hull-skins were definitly too long. The armour belt is made of two layers, the first one wass too long (by exactthe amount of lenght I removed fro. The skin-parts, so that made me think.... what if.... One hour of thinking and trimming later, the whole centimeter was down to a three milimeter the problem of this layer over layer, is that the hull gets a bit 'wavering': the hull skin tends to bend inward between the frames. So I cheated a bit to get the thing straight again: matchsticks do wonders. and so the beast has its starboard-side finished. and no, I am ot going to do any PE ladders, windows, eyebrows aboe the windows or anyrhing else. No, I will not go there (not yet, at least...) Jan

-
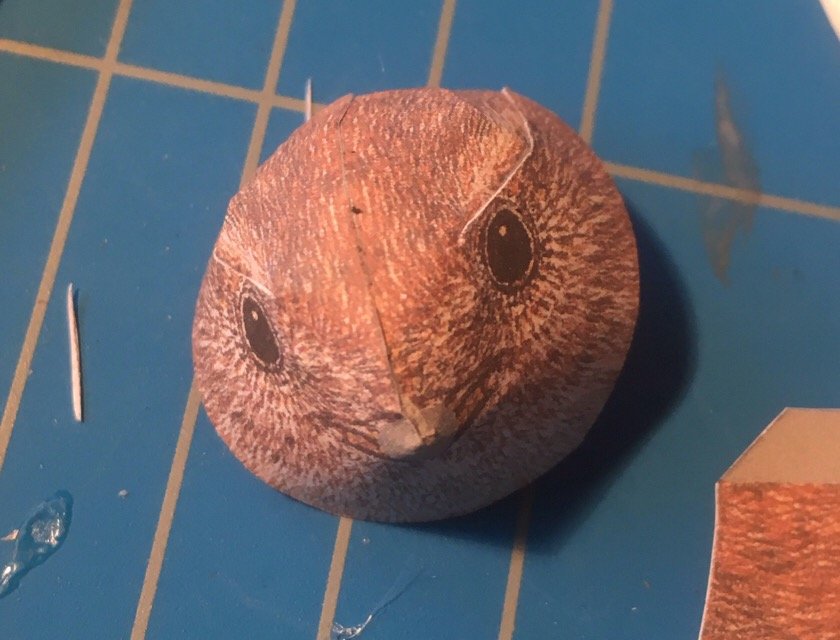
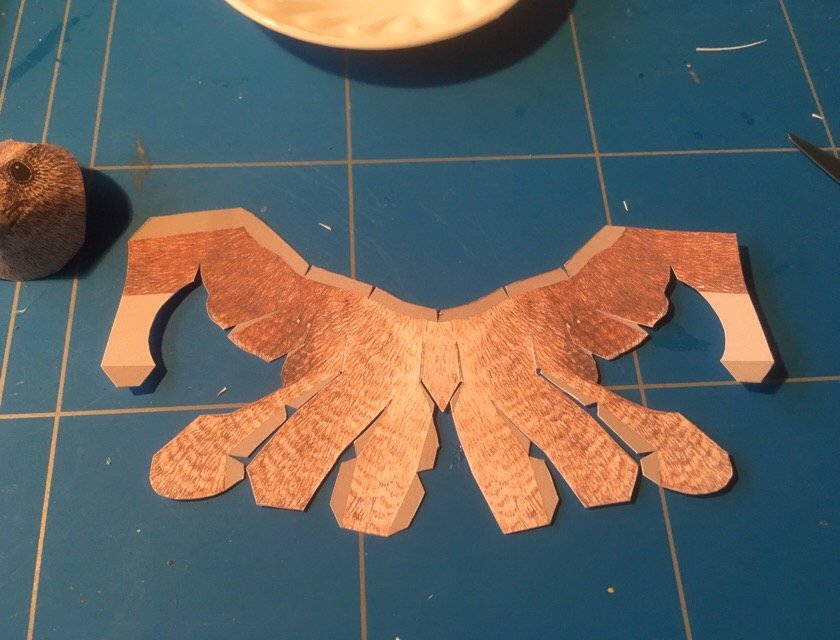
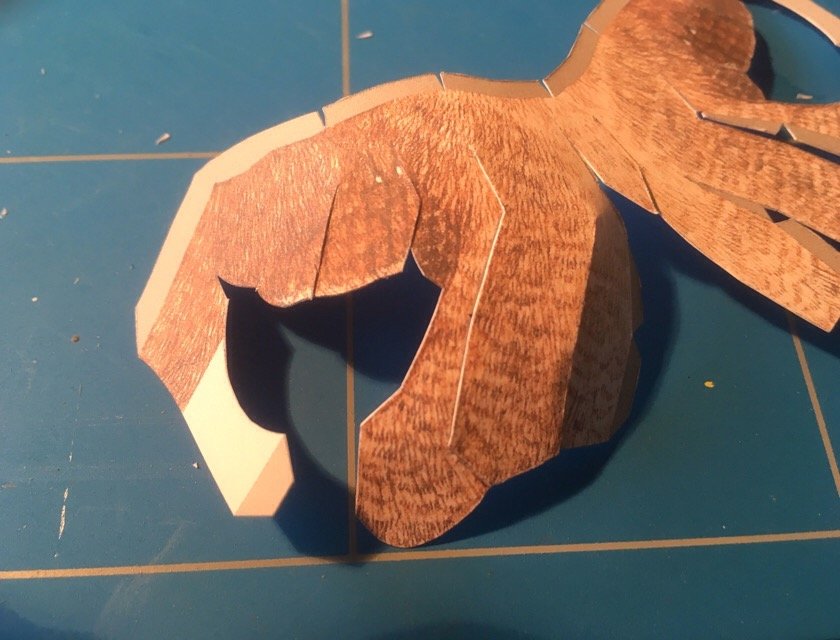
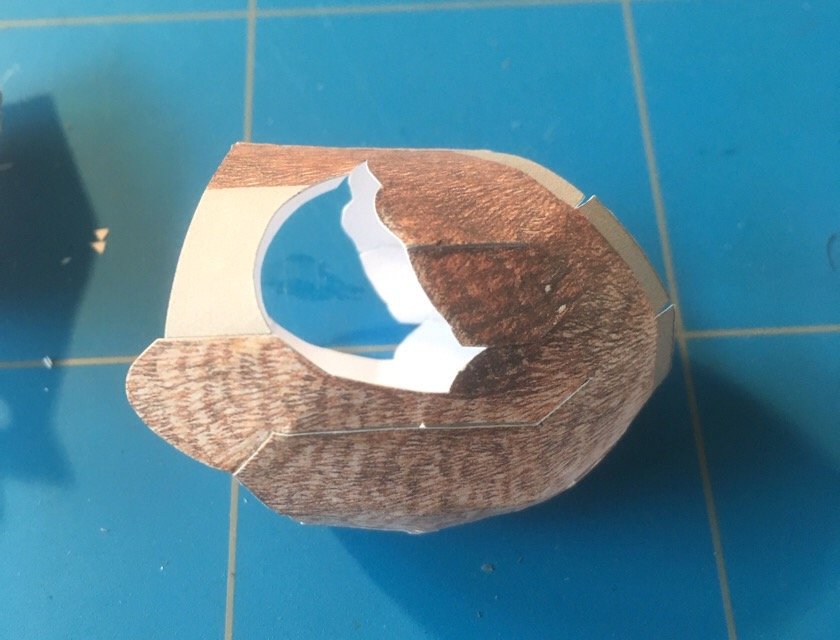
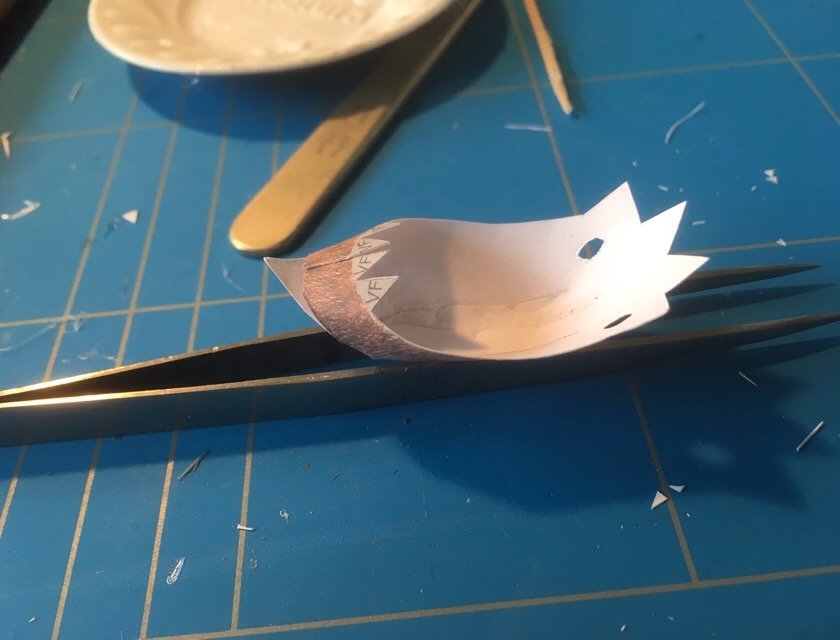
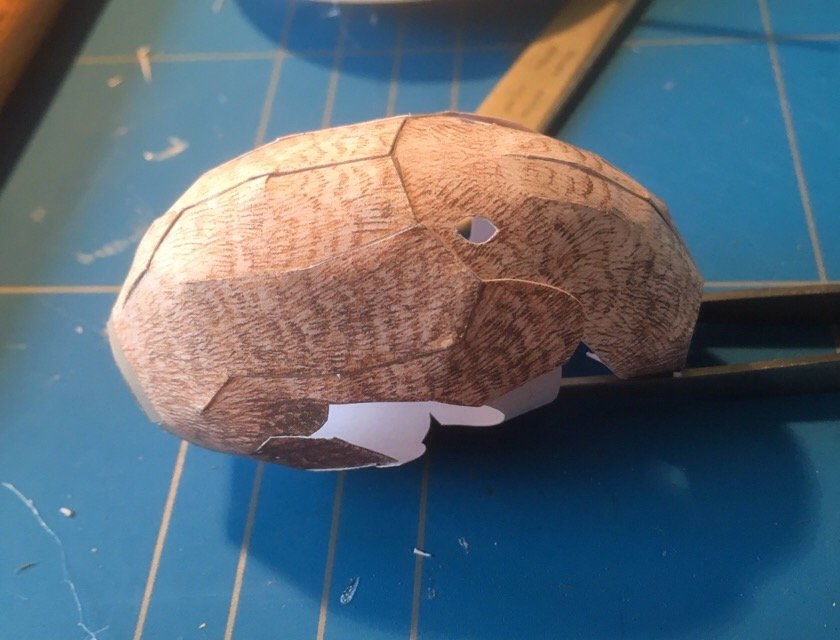
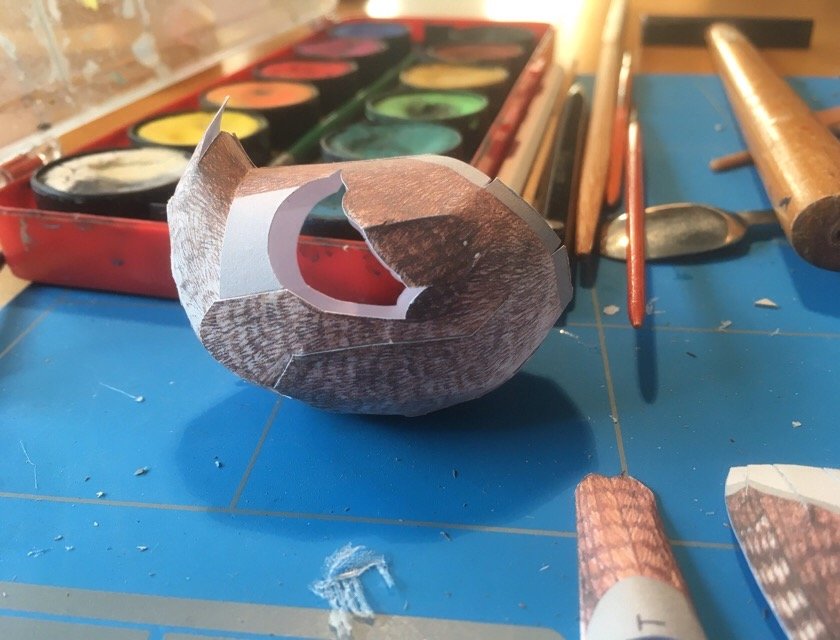
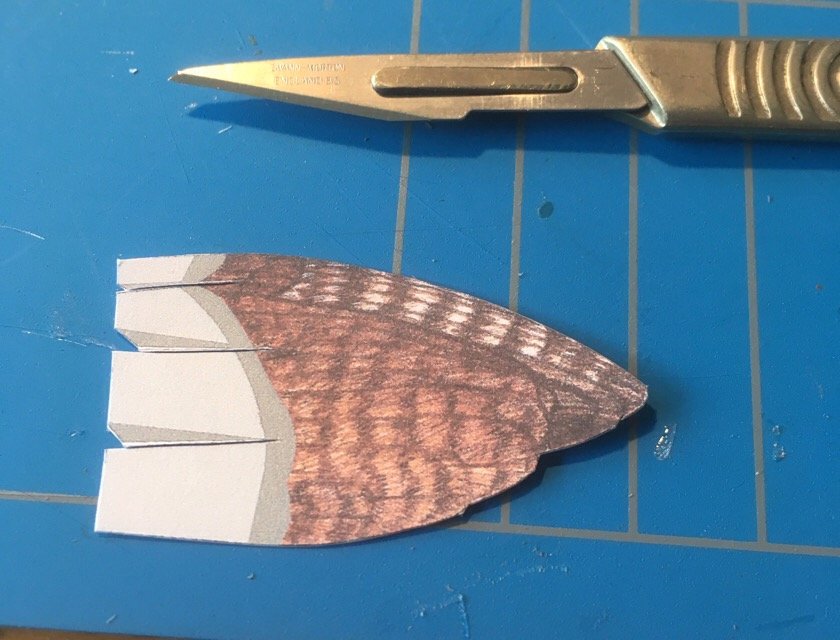
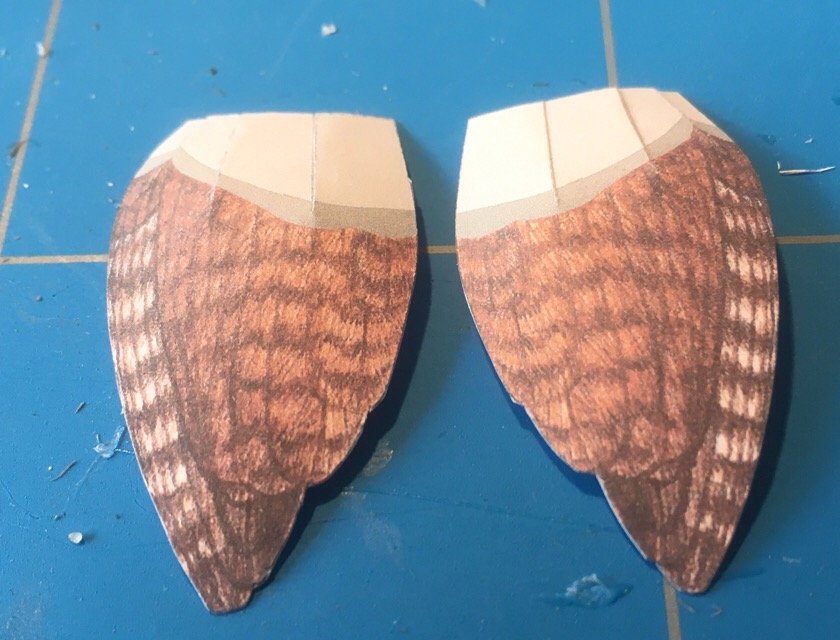
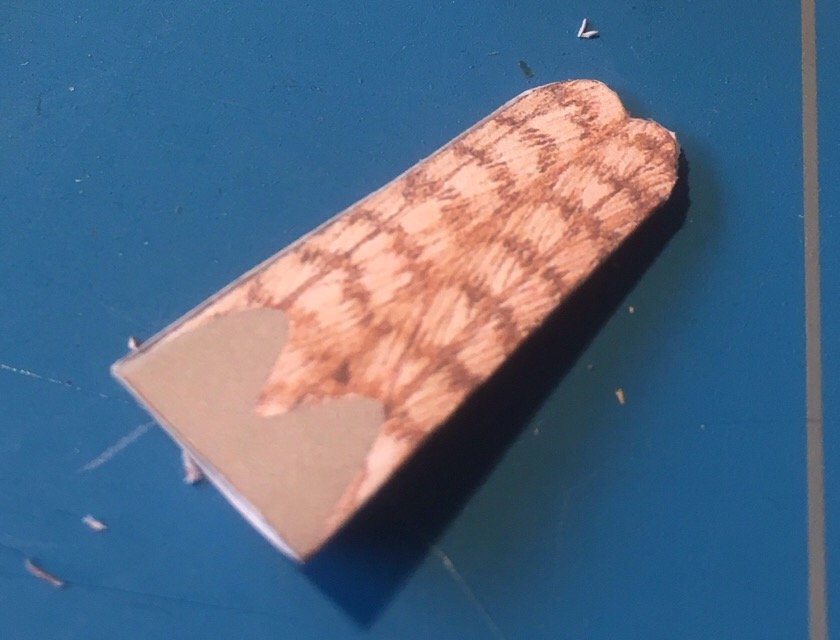
Hi, as a break (needed something to do while the glue of my other models is setting, I downloaded a cardmodel of a bird, a wren to be exact. (Www.johanscherft.nl). rather fun to build, and not difficult at all. The result is rather convincing: a life size bird, 16 parts, just from your own printer. I will just show the pics, no story needed (I think) to the 'kit'. I printed it on 120 grams paper, but 80 is better (as it is thinner, the edge problem is smaller, and it will curve more easily. The head: lines on my cutting mat are 1 cm apart the hull in variou stages of forming Start of the tail. The 5 additional feathers are still drying under some weight. Two wings. Flat and curved. There is a beak (somewhere on the grond now, but I willretreive it ) and two legs still to be cutted. Final assamblage will be tomorrow (I think) picture will follow for the gallery (untill the moderators remove it, as a wren is not a ship at all) Jan

-
As Pat says: nice and subtle. I don't like those heavily weathered ships (even though technically rather perfect). Looks too much like a ship on her way to the scrap-yard in my opinion. Jan
-
Not the type of story to hit the like-button. But thanks for telling. Jan
- 378 replies
-
- 7
-

-
- java
- pacific crossroads
- (and 2 more)
-
Hi Andy, you are a bit exaggerating. We all know your chainsaw isn't your primary tool with any of your builds But it is true: true POF and cross sections are not easily available for those without the more dedicated equipment. Jan
-
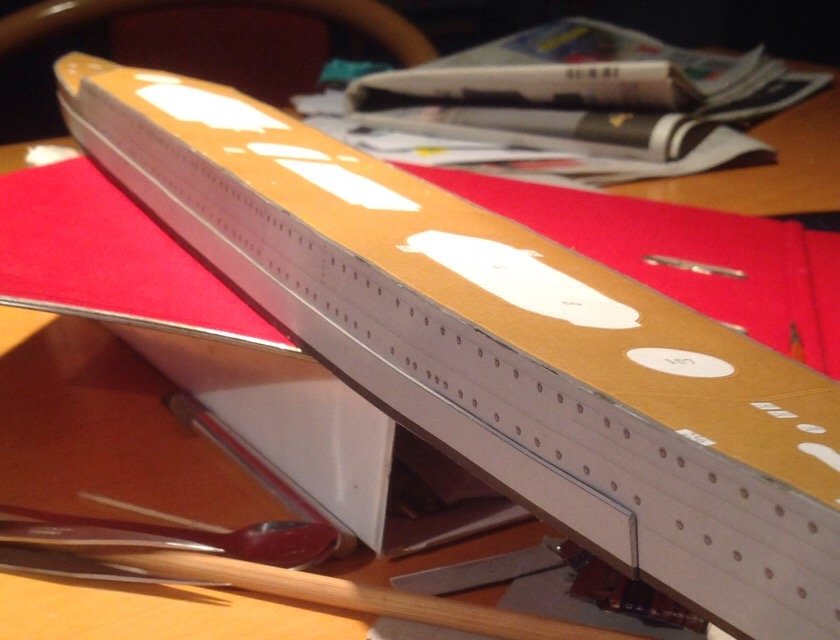
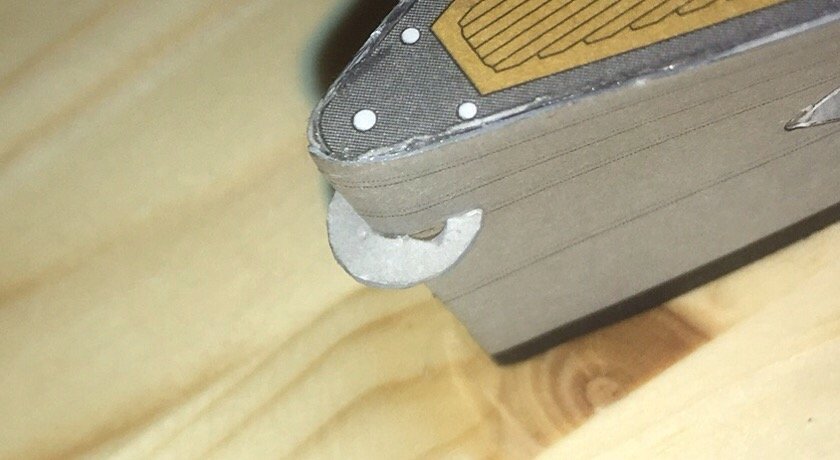
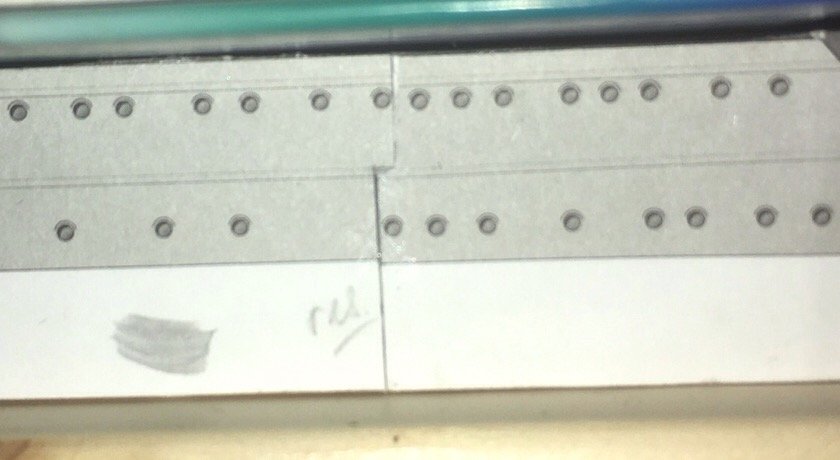
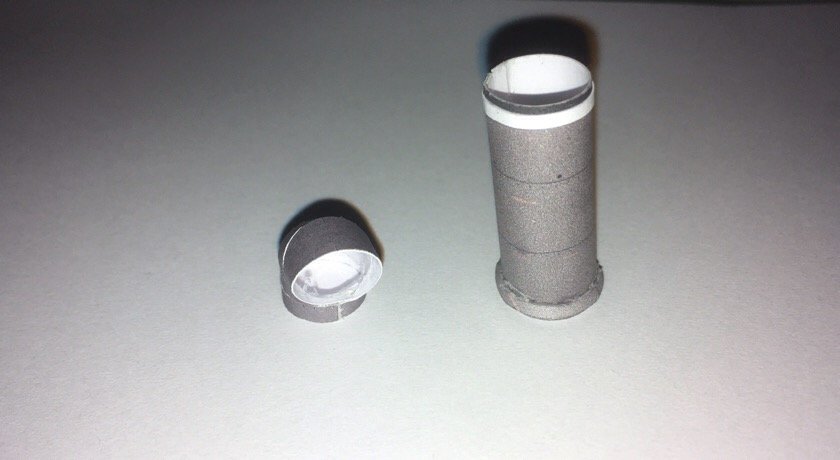
Today I finally had some hours to get the hull closed. Took me the better part of two hours. On this side, I needed some tweeking to get the middle part in the correct length: the cut had to go through a porthole, and that didn't seem a good idea. So, a non straight cut was used. finally someweight on to to get thehull a bit straightened (it tends to curve down at the ends) The little round part at the bow is also attached (still don't know what it is for) Jan
-
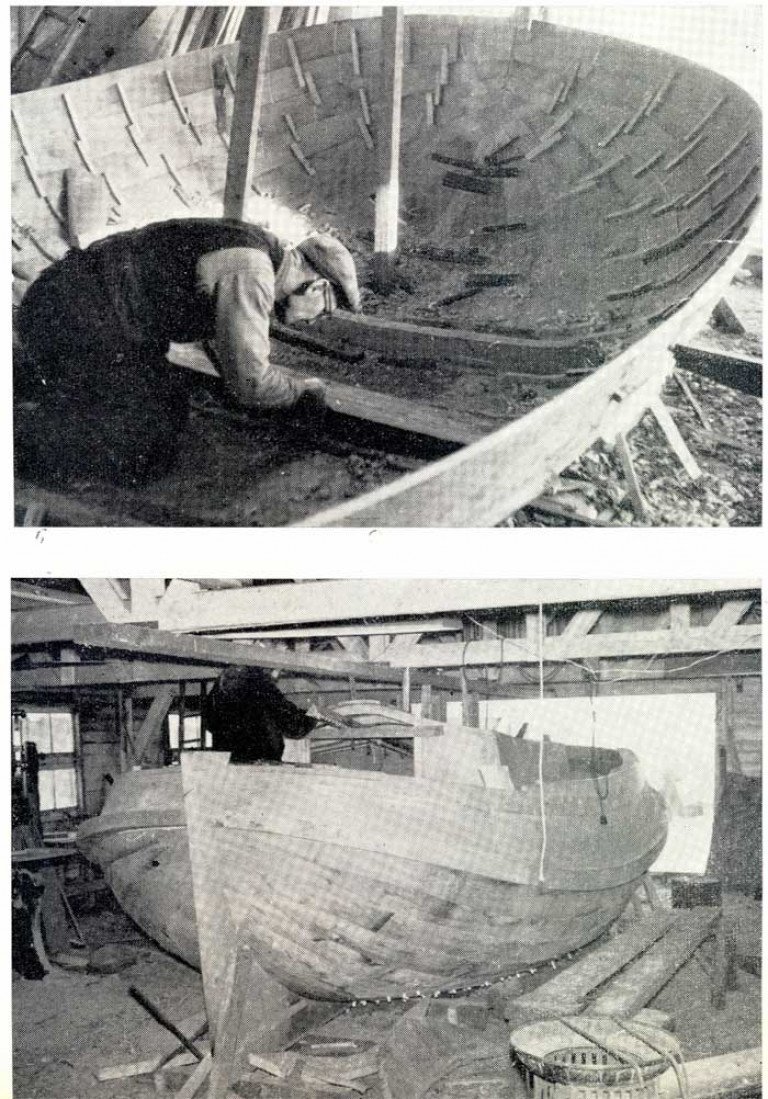
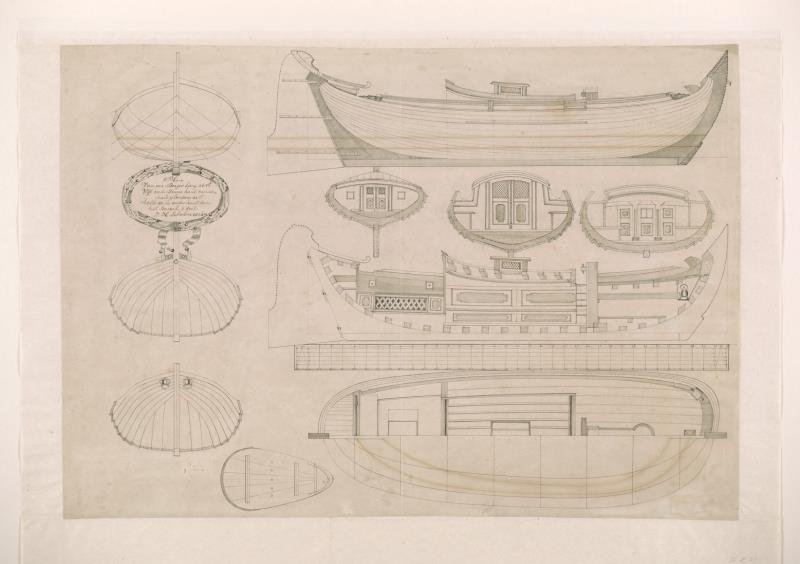
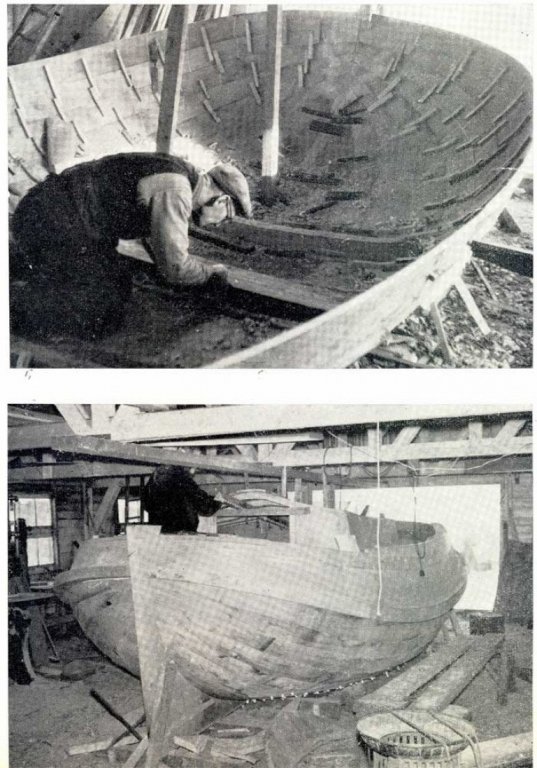
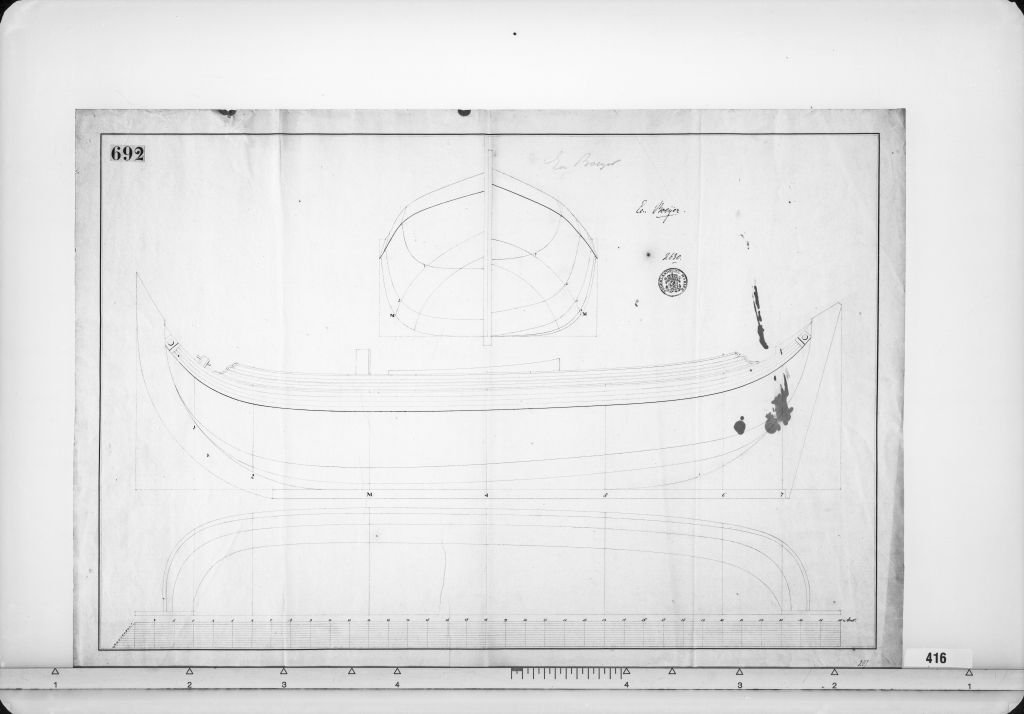
Bit of a hijack of thi sthread, but in a answer to a question to a POF-version of the BOeier. A boeier of that age had a builing style related to the Dutch 'bottom first' method. There is no complete set of frames that was erected before starting the hull. Framing was done along the route, fitting some planks to the frames, fitting the next frames to the planks. Therefore, not all the frames can be attached to the keel from the start. A POF-build sequence will be kind of fictitious. And: of all dutch bows, the boeier one is notorious for its difficult curves (the planks curves strongly upward, and slightly inward to the stern. Even more experiences builders cry for fillers in bow and stern. Easier to do with POB, especially while this boeier is clinked build, and not carvel. To illustrate: even at the turn of the twentieth century, some builders of the smaller boeiers used this 'frameless' building style. And to illustrate the interesting curves, I downloaded a drawing from Maritiemdigitaal (the digital inventory of the Dutch maritime musea) showing a drawing of a Amsterdam build Boeier (around 1850). Clinked build, looking very much (but not completely) like the boeier Chuck showed (this one has no wales, and a much stronger sheer (which I personaly like very much in this drawing) You can see the relatively flat build bottom on which the frames where erected. You can also see the Dutch style of framing the bow using heavy timer attached to the stern, and not the keel, and you can see the inward/upward curve of the planking at the bow. The drawing also shows part of the interior. I guess the model of the 'emperors Boeier' shows an even more lavishly decorated interior. (unfortunatedly: there is no easy way to buy copies via this maritiemdigitaal.nl-site....., and the pic below is the highest resolution you can download ) Jan And I don't know how this one relates to the model Chuck showed: an undated drawing of a Boeier from the Dutch Naval archive (indicating that the ship must have been build at the Rijkswerf, like the original of the model). Drawing is available (for non-commercial uses) at high resolution here: http://proxy.handle.net/10648/01dc8ced-b82f-885d-38eb-b86fff990f2e Jan
-
Thanks, I'll try to be patient Jan
-
I understand the decision. but believe me, I'm a bit disappointed by it. Smaller working boats, not coming from the US or the UK are rarely be found in kit-form (and certainly not in a decent quality kit). I do understand that kit-makers have to choose a subject for which a potentially large market exist, but one way or the other, that always seems to result in a kit of an "HMS something" with a certain number of guns. I'm simply not interested in any HMS-something..... Jan
-
unbelievable, how you turn simple grey plastic into a proper warship. on my screen I have some difficulty to get the exact shade of grey: it varies between steel-like, bluish towards a very flat light grey. Can you give a hint of the real life color? jan
-
Now I'm in to the boeier (but can't promise anything without permission of the treasurer ) Jan
-
Hi Chuck, I would very much be tempted for the boeier, especially while you choose a slightly older design, and not the rather yachtlike, modern Frisian version. You are right: no kits exist of this type of ship (Billing boats had one in the seveties, more or less decent, but that has gone by now) (for those who didn't know: the exact Boeier in the first pic is part of the museum collection of the Rijksmuseum in Amsterdam, dated 1817. The other one is in the scheepvaartmuseum, and labeled 'boeier voor de Keizer'. Both show a model of a boeier build as a gift of the Dutch king for the Russian Tsar in 1815. That makes it a bit more decorated than the normal one). The model shows a specific feature not present in the modern Frisian boeiers: they are clinked build, and not carvel. Planking using straight strips will be completely impossible . Very interesting as a build, and a welcome addition to kits in the Dutch market..... However, the scale would be a problem, as both my bench and my house do not allow for something big. With respect top size 20" (around 50 cm) would be my maximum. I'm afraid that 1/2" results in something larger. Price is of (slightly) less importance. I would also like an indication on the type of wood you consider: so far most of your ships tend to be boxwood. However, boeiers take part of their appearance from the specific tan of the oak used for their build. I guess a boeier in boxwood would look a bit bleak. (and coloring boxwood into oak is a bit of a shame to the boxwood....) So far, I didn't vote. Jan
-
I like the look of your metalwork. (and of course, but that goes without saying, the quality of your woodwork ) Jan
-
I had some time today. I did the forward funnel, and that large air-vent, ot what is called.... I also did two other small parts, but my cellphone would not focus properly on something under 5 milimeters..... all in all a couple of hours work.... have to think over the ladder on the funnel, have to do some inide painting. my printer did, unfortunatedly, not print the locator marks very clear. Is a bit of a problem when centering the parts.... jan
- 64 replies
-
- 5
-
-
- v108
- digital navy
- (and 2 more)
-
I suspect that there are still loads of tiny detail thingies all around the ship.... But serously, if this is the quality you reach from a kit you are not happy with, wewill be utterly blown away when you start a kit you do like Jan
-
That's a very nice statenjacht! one small point: given the position of your sails, the port-side leeboard should be up, the other one down (the leeside should be down, the windside up) Jan
-
I guess that in real life the builders didn't try to edge-bend, but just looked for a curved tree ...... (or a very thick one, from which they modeled a plank of the correct curvature) Jan
- 599 replies
-
- 4
-
-
- sidewheeler
- arabia
- (and 4 more)
-
I hoped to get her hull done today,but household chores got in the way. And next week my christmas holidays are over...... sigh... why does normal life always interfere with building activities? No work done, no update.... Jan
-
I guess you already know the pics in the German Bundesarchiv. There was a wide range of pics taken during her fitting out. (search isn't perfect, so some noise in the resultslist ) Jan
-
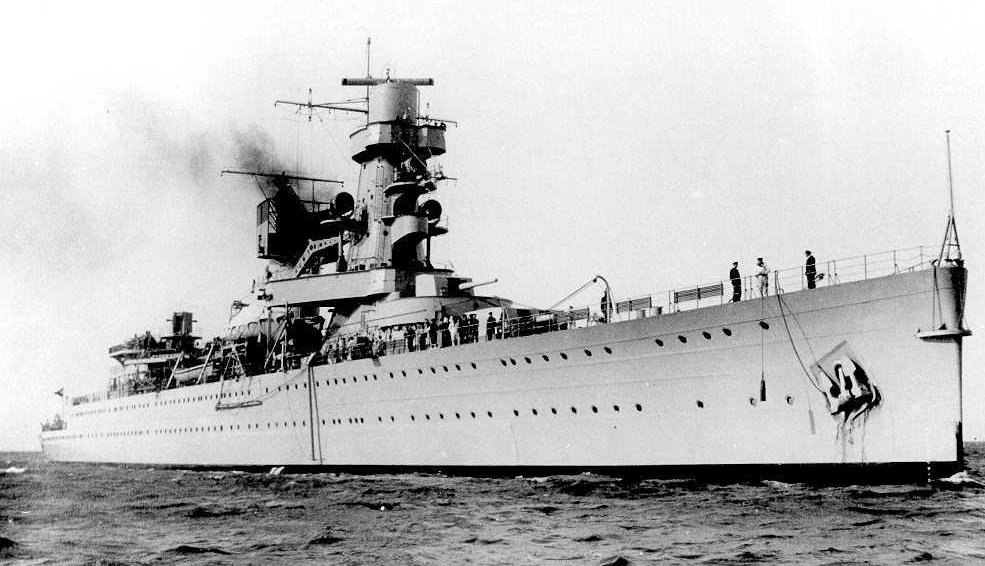
Yes, I know, it is on the design drawings. Hoever, I can't think of any function for it. in the crossection it can be seen that it is kind of and H-profile (and not a small deck) it is not connected to anything inside, and there are two rather large eyelets fastened on top. (On some pics you can see a line going down to these eyes. Jan

-
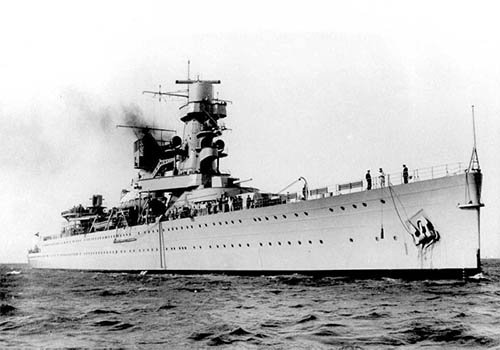
I really don't know. It is not on the Java, a cruiser build in the same period. and yes, it is a non-removable item. perhaps I should go through the wholebunch of drawings available i. The online naval archive.... Jan
-
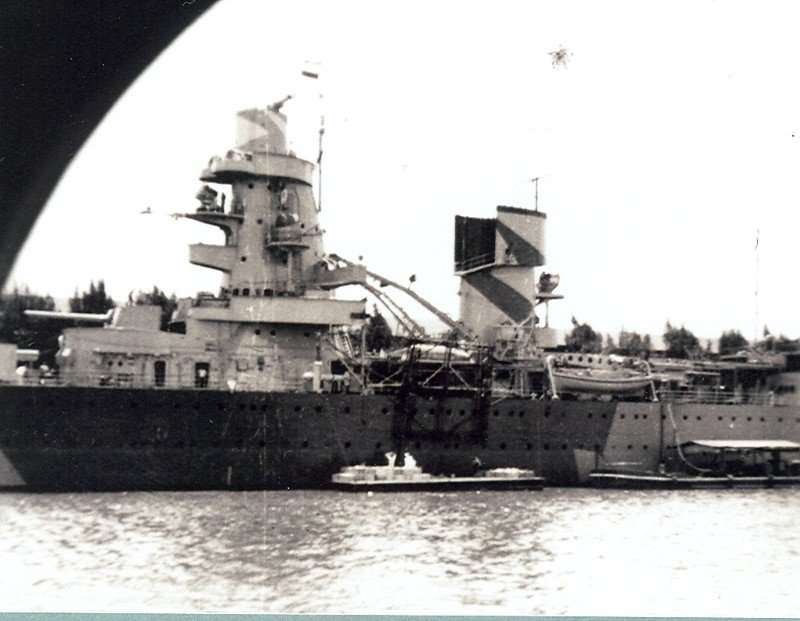
The second pic shows her on the other side in camouflage Maritiemdigitaal has a stunning amoh t of pic of De Ruyter (including many of the build), some during see trials (before the change in the funnel) but none in camouflage.... somediscussions suggest that the camouflage was only added when she entered the combined fleet in the Javazee, but I haven't yet found proof for that. btw: I also haven't any clue of the function of that little platform at the bow.... Jan
-
Hi Piet, thanks for the pic. Scaldis has two versions of the kit: one in plain grey, one in camouflage livery. I will not go and try to repaint my grey one into the camouflage version. there are some (but very little) pics of De Ruyter in camouflage. I couldn't find anything definitive on the question whether ornot she steamed into the Javazee with orwithout her camouflage. Jan