


amateur
-
Posts
3,533 -
Joined
-
Last visited
Content Type
Profiles
Forums
Gallery
Events
Everything posted by amateur
-
Hmmm.... not completely convinced by the argument. Nice colours, by the way. Jan
- 46 replies
-
- 6
-

-
- o16
- pacific crossroads
- (and 2 more)
-
Interesting build. Will definitely follow thisone! jan
- 599 replies
-
- 4
-
-
- sidewheeler
- arabia
- (and 4 more)
-
General guide to how rigging works.
amateur replied to gthursby's topic in Masting, rigging and sails
The answer depends on the type of rig, not so much on the era. The basics didn't change too much over time, the exact rigging (eg number, or type of blocks) however did change. But it is difficult to explain 'in general' without going into technical terms..... Also: a general description most probably does not answer your 'obscure lines' You could try to place a picture of the 'offending lines', and we'll try to answer. Jan -
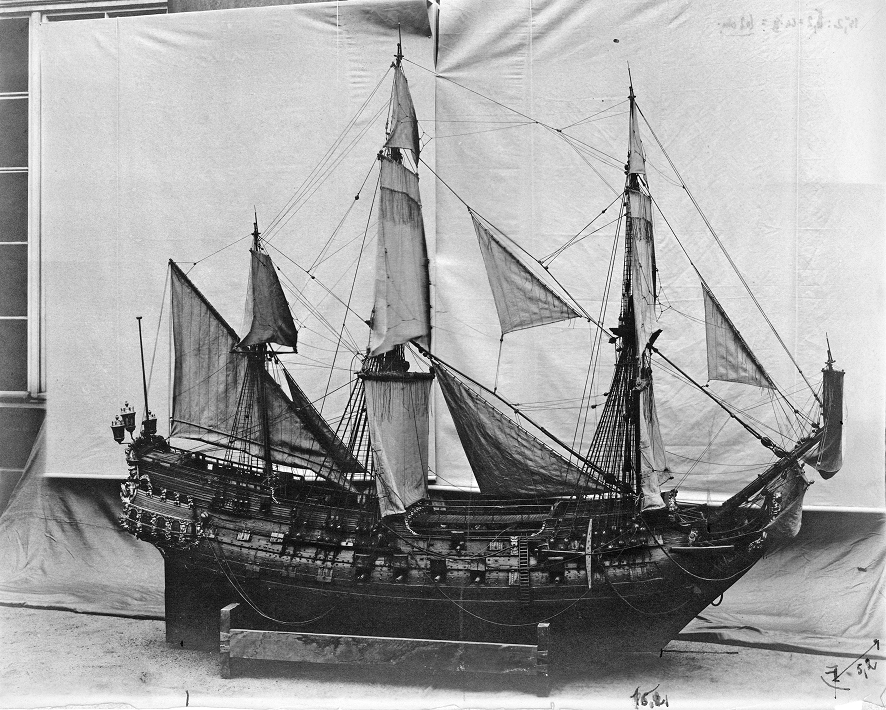
There is quite a lotoffotographic evidence onthis model. try to get hold of a book by Heinrich Winter, titled: hollaendische Zweidecker 1660/70' (make sure you dont pay too much, and that the drawings are included) and have a look at a tread here in msw where Peter is working on a model in1:1 of the original model of the model (not the ship itself:) ), look for hohenzollernmodel, and you'll find it somewhere in the scratchbuild section of the forum jan
-
Is Model shipsways Mayflower still available? Smaller than Syren, less complex (whiloe less gunnery), same designer, and an instructionbooklet that is equally instructive. Jan
-
Nice work (don't forget to paint your last piece ) silly question: what are the grooves in the masthead (or actually above the masthead) for? Jan
-
I have seen references to a brand called dc-fix. Jan
-
Hi, That is not only in Australia. Same here. Jan
-
they are colourpictures, and some of the deck-planking is missing. Oterhwise we could think that it is a picture of the original. I very much like the detail and atmosphere of the model. Could watch for hours to those pictures. Jan
- 3,618 replies
-
- 3
-
-
- young america
- clipper
- (and 1 more)
-
L is also out of allignment. perhaps you shouldn't try to cut, but use a rasp or afile to get the deck in allignment, a file goes over a few frames at the same time, so you can see which one is too high (and has to be files down), and which one is too low(and has to be filled. mind: when the problem is caused bu a centerslot that is not exactly square, you will have the same job to dowhen fairing the outside ot the frames. Jan
-
In Dutchshipbuilding of this period, the sheer of the decks was lessthan the sheel of the wales, gunports following the sheer of the wales result in problems (check the aft round gunport: no way you could get a gun into that one when you place it accordingly to the Coreldrawings) the drawing by Ketting shows how it was doen in the model in theRijksmuseum: the sides perpendicular to the waterline, the sills followig the sheer of the decks. You could do perpendicular ports, but you couldn't do porst that follow the sheer of the wales (on the other hand: repositioning the ports while you already fitted those black u-profile might get you in some trouble... another remark: Corel does put a gun into every port that can be seen inthe ship. When you check Kettings drawing, you''ll seethat there is no deck on which a gun could be placed (especially the small ports in the staterooms werenot intended to have a gun, they were intended just for what they are: windows and ventilation. Jan
-
Hi Steve, My guess is that these sheaves are not attached to the mast, so they won't change position when the mastis lowered. Also, there is no need to get the reep attached to the mast: it is taken directly to the main capstan on the aft deck, (as indicated in th efigure Kees posted. btw. on that picture, also the positions of the various fisherman are indicated (starting from the youngest one, on the bow of the lugger) Lowerin gthe mast is for not getting hit by the wind (which should get the ship in potentially large problems, as the Vleet is quite a long (and heavy) netting which you certianly wouldn't loose..... Retractable bowsprits ar equite common in Dutch fishing ships: I guess to get the center of gravity as low as possible, and as close to the mast as possible. The thing you see above the fishermen is the sail that is usually attached to the main stay. That was hauled up (as far as I was told) to prevnt being fauled by the vleet, (which was handled on the deck just below) Jan
- 193 replies
-
- 5
-
-
- wilhelmina vii
- fishing
- (and 1 more)
-
I'm no expert, but isn't that first strake above the main wale a bit awkward: it disappears in one long, very narrow taper, while at the same time it is heavilycurved inward. How would that strake have been fastened? Jan
- 2,699 replies
-
- 3
-
-
- heller
- soleil royal
- (and 9 more)
-
I still like the 100%-manual approach best: less risk of breaking, less risk of taking too much (and start over again) Jan
-
Is it? Getting them square is one, but you will have to check whether the keel isn't warped. Also (speaking from experience) the slots in the frames have to be dead-center, otherwise eveything can be square,but your deck will be warped. Jan
-
Building a hull from whipped cream....quite innovative I guess sanding will be an outside job. Hope your weather will be fine this week jan
- 193 replies
-
- 5
-
-
- wilhelmina vii
- fishing
- (and 1 more)
-
Another interesting result. I had a bottom plate, flattened. I had a deck (laminated on proper cardboard, flat as a glass plate) I attached the bottom plate to a glass plate, glued the frames and the deck onto it, let it dry under a considerable weight. Yesterday, I took the upper hull from the glass plate, to attach the lower hull. But....the aft end of the hull curved up by almost 3 millimeters (which is considerable, given the fact that the height of the hull is slightly over 1 cm.... (btw: the curving up of the hull is something I have experienced in more paper-build in my younger years, so lousy cardboard can not be the only explanation ) Option I see a: glue a serious wooden stringer along the lower side (but that will take some modification of the frames in the lower hull b: ignore and continue c: use some force to counterbend, and hope it will get better after attaching the lower hull plates d: restart, but without knowing the source of the problem, I am afraid that the outcome will be the same..... At the moment I tend to option c. Jan
- 64 replies
-
- 2
-
-
- v108
- digital navy
- (and 2 more)
-
I think I'll come back in three weeks when you're finished Thats a serious amount of cardboard on your workbench! If your frames are as thin as mine, you will definitely need some time to get some additional strips to thicken them up. Jan
-
Hadnt thought of that option, I'll try to think it out. problem sits in the aftermoth skinpart, that has quite an angle to the upper hull part. Im not quite sure, but i think the designer did n't go for butting, but for overlapping skinparts. Jan
- 64 replies
-
- 2
-
-
- v108
- digital navy
- (and 2 more)
-
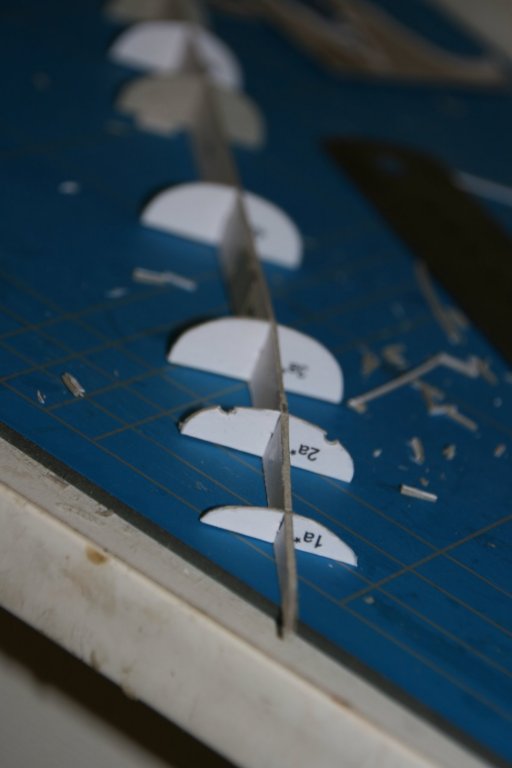
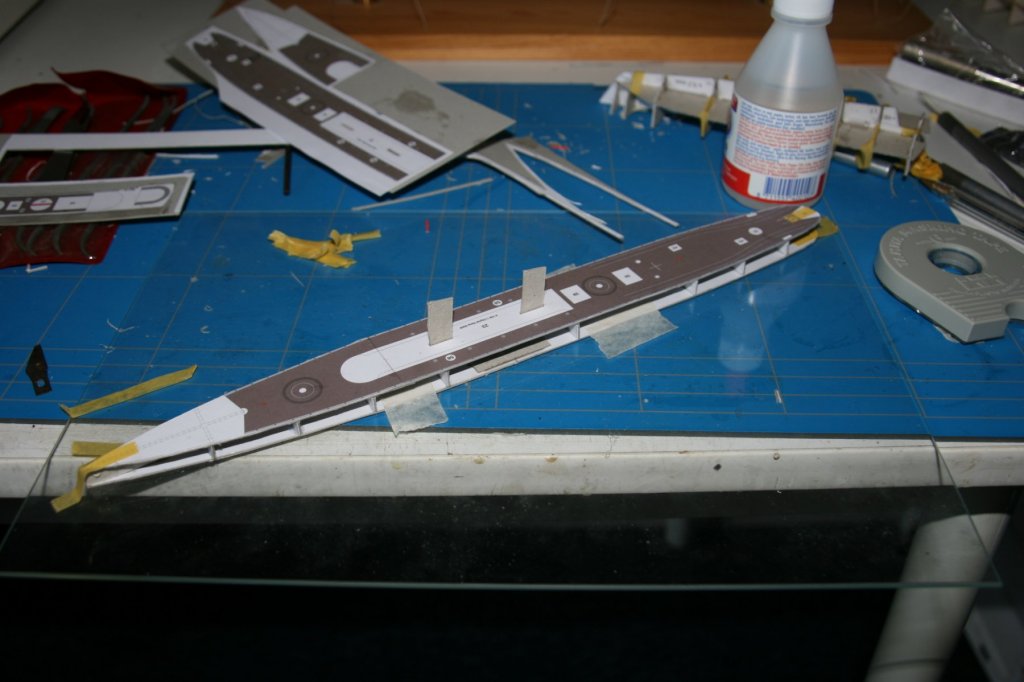
And a dry-fit for the other half of the hull. Frame 1 was a bit fiddly: the slot almost divides the thing in two separate halves... Just now I started wondering: the model can be build full-hull and waterline-only. Therefore,. the hull plating of the upper part covers the sides of the base-plate. On the other hand: the plating of the lower hull also covers the sides of that base plate. Therefore: after attaching the lower hull, the base plate is wider than it shoudl be for the upper hull. Am I seeing problem were no problems are, or should I trim down the baseplate by .3 mm on all sides Jan
- 64 replies
-
- 2
-
-
- v108
- digital navy
- (and 2 more)
-
Piet, Good to hear from you. We are confronted here in the Netherlands with pictures from Sint Maarten, that took the full force of the hurricane. Never realized that an hurricane could be so bad. Glad to hear that you have not too much damage. Jan
-
Hi Kees, I will be followi g this one with interest! I like the lines of the loggers, Are you going to d full rigging (including all sails), or will the mast be a bare pole? Jan
- 193 replies
-
- 4
-
-
- wilhelmina vii
- fishing
- (and 1 more)
-
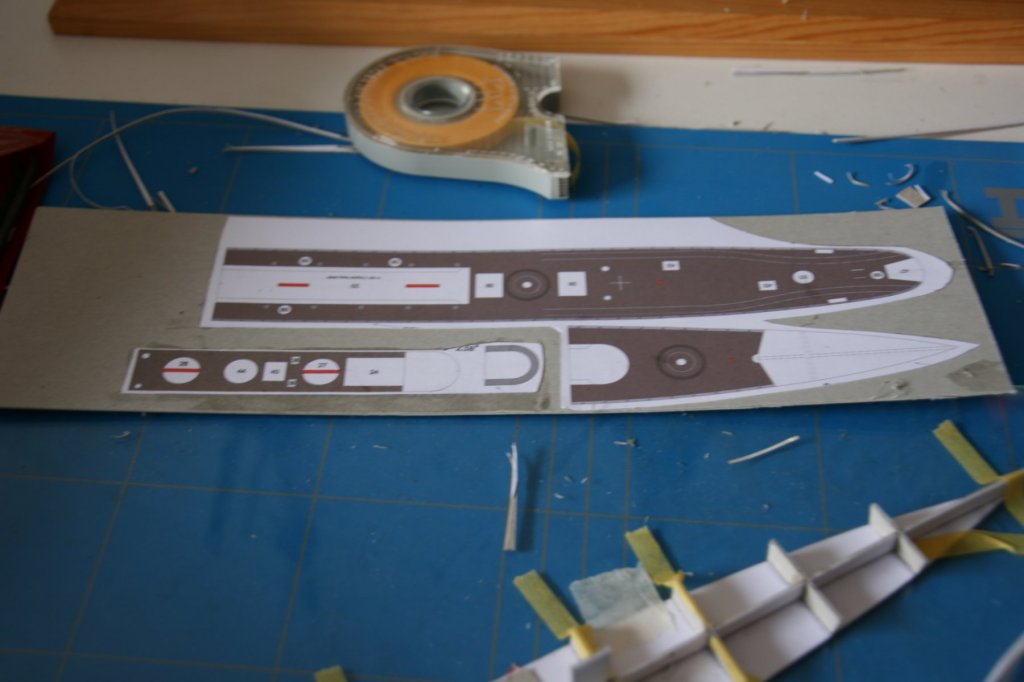
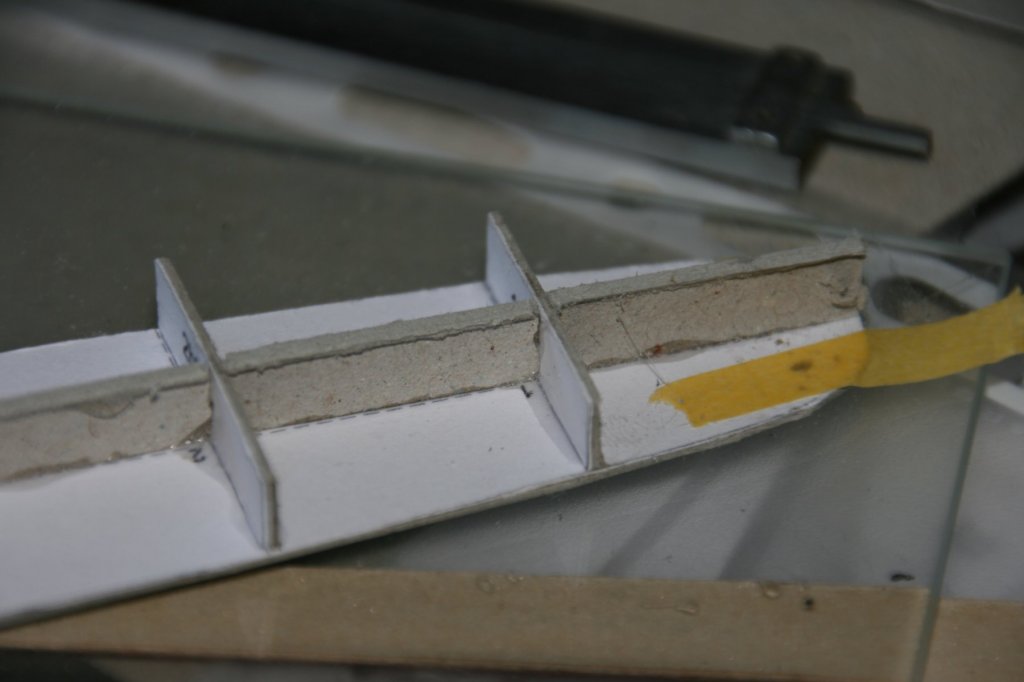
Some progress. I see I have some difficulty to get my pictures sharp and clear. Presumably because I take them from short distance with a flash, somewhere late at night I laminated the decking (on newly bought cardboard: it curves up only a bit, and it is much, much nicer to my scalpel) (but boy, how hazy the pic is ) There seemed to be some problem in the height of the central stringer and the frames. After some measuring I decided that the mid-frame was too low, so some filler was needed: And then the deck went on (actually, it is the second deck, as the first had far too much glue on the top-side ) Which learned me two new lessons: beware of too much glue, and second: make sure you have enough colour cartridges in your stack ) So much for now, Jan
- 64 replies
-
- 8
-
-
- v108
- digital navy
- (and 2 more)


