
HOLIDAY DONATION DRIVE - SUPPORT MSW - DO YOUR PART TO KEEP THIS GREAT FORUM GOING! (Only 20 donations so far - C'mon guys!)
×


Jeff-E
-
Posts
699 -
Joined
-
Last visited
Content Type
Profiles
Forums
Gallery
Events
Everything posted by Jeff-E
-
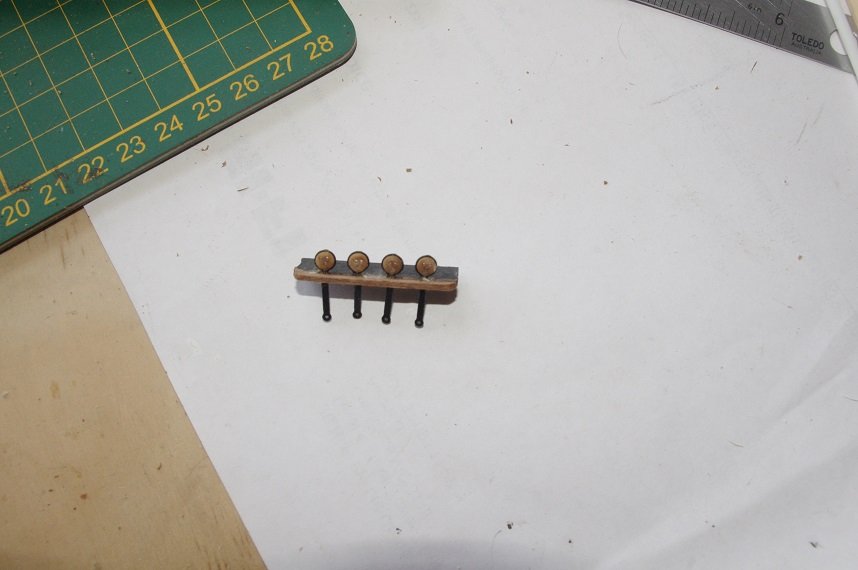
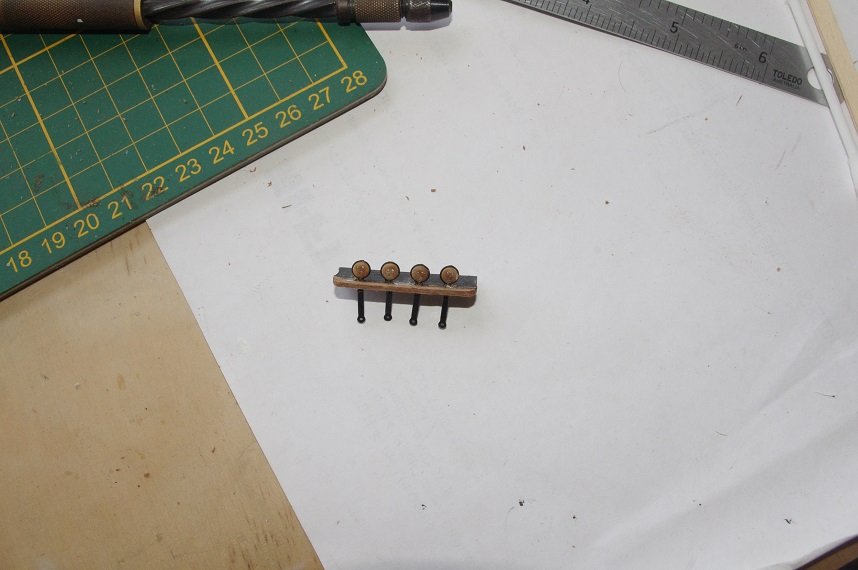
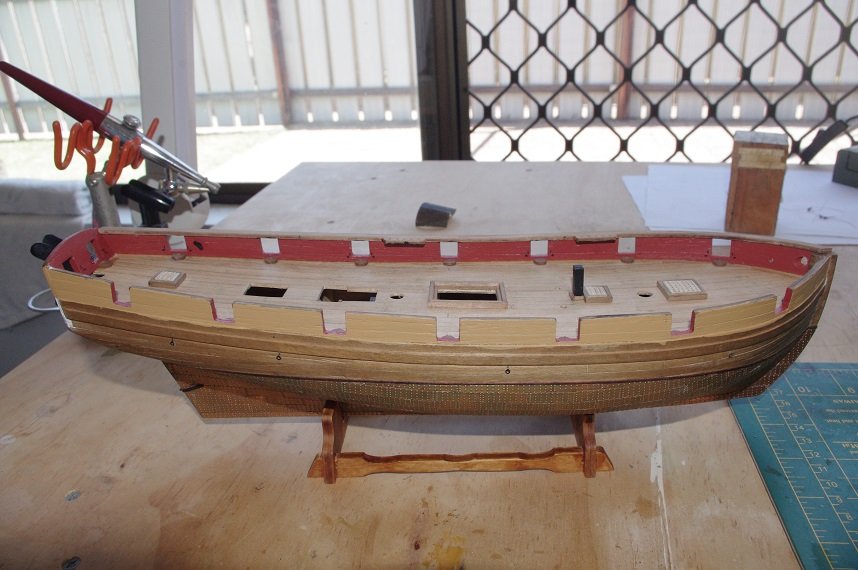
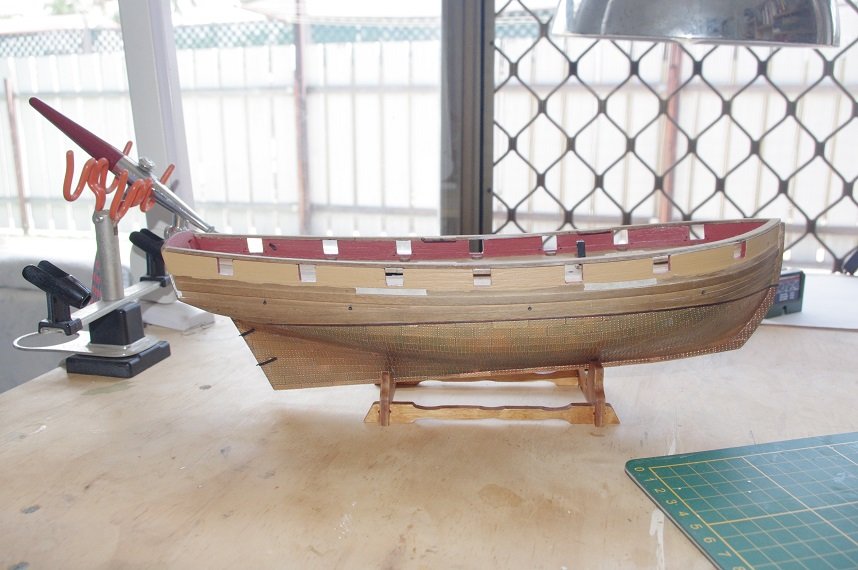
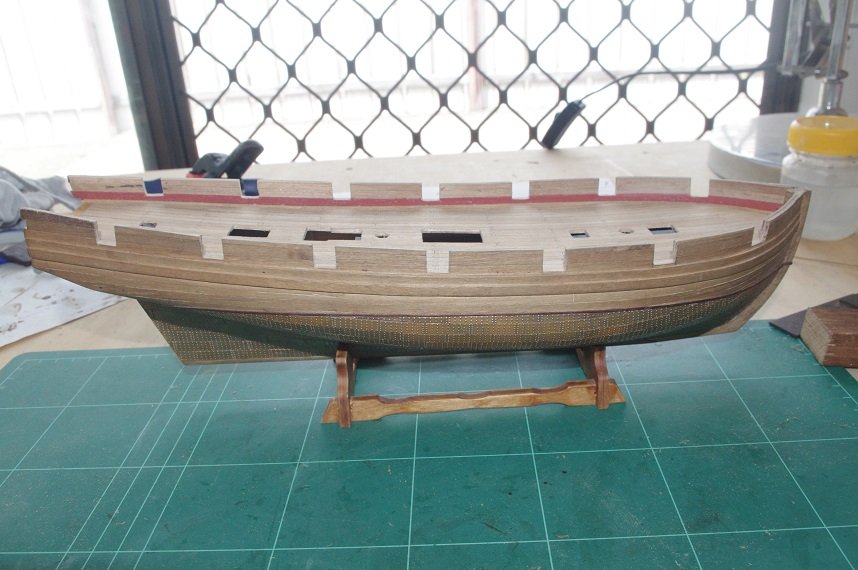
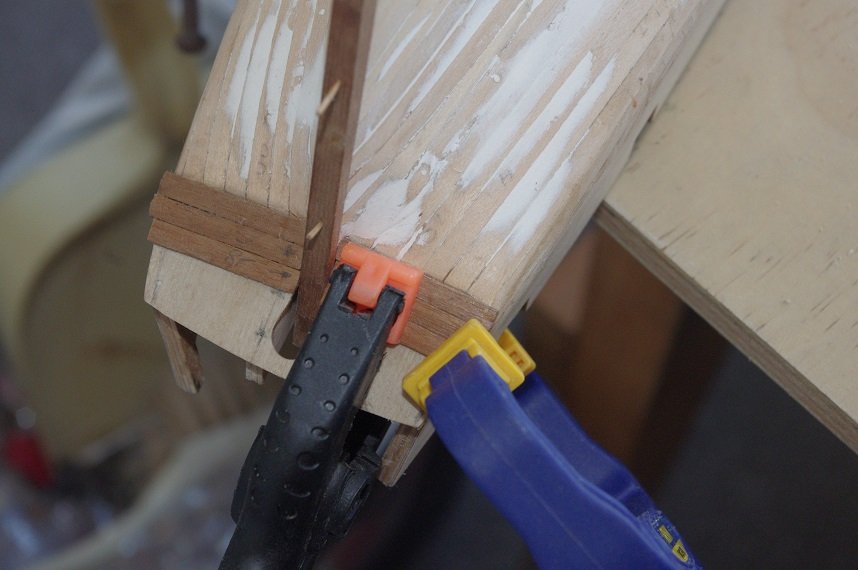
Hello All, The capping rails were painted and the deck was given it's first coat of matt varnish. The channels were also made up. These proved to be a little tricky as the instructions say after fitting the deadeye into the strop it can be fitted into the slot in the channel however the tabs on the strops are too wide for the slot by about 1mm, so I trimmed the tabs by about 3/4s of a mm and they fitted into the slot reasonably well, I then glued them in using a 2 part epoxy and then glued the 1.5 x 1.5mm strip across the front of the channel. After gluing they were set aside to dry for 24 hrs. All comments welcome. Thanks for looking and the likes.

- 86 replies
-
- 4
-

-
- pickle
- caldercraft
- (and 1 more)
-
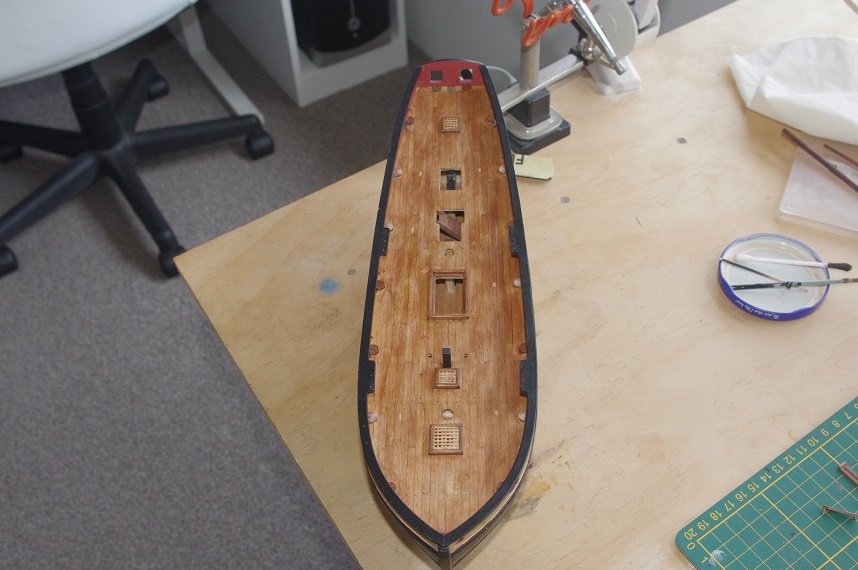
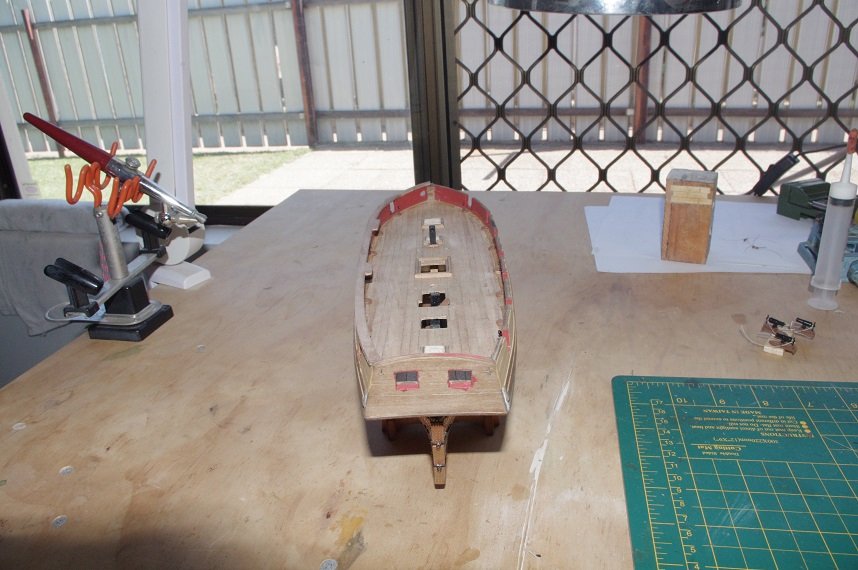
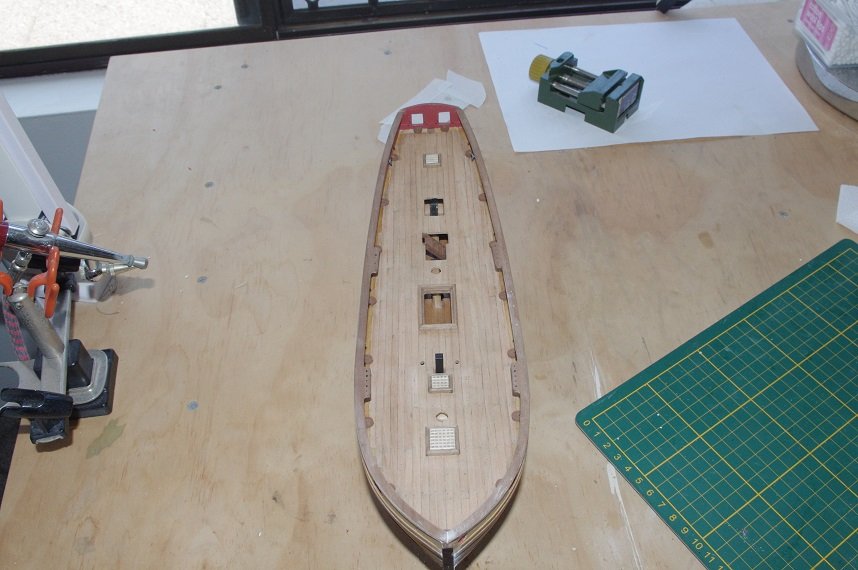
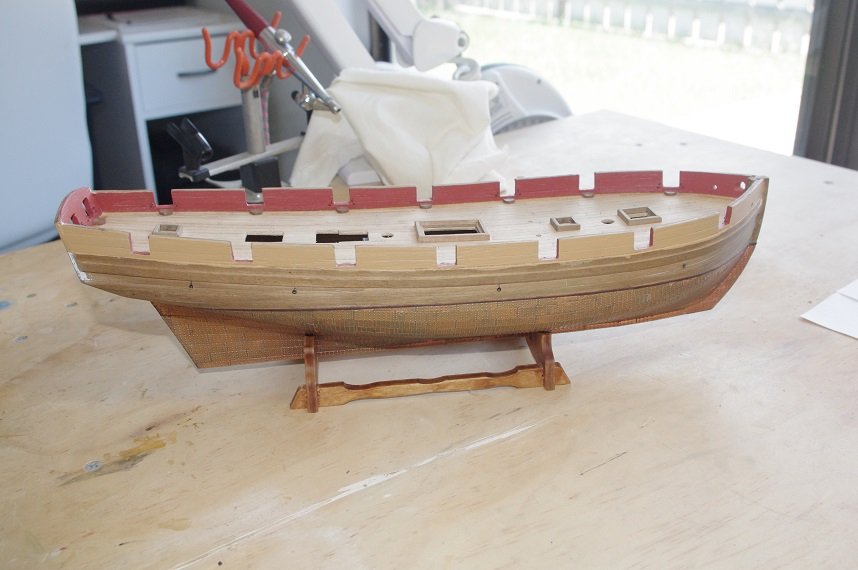
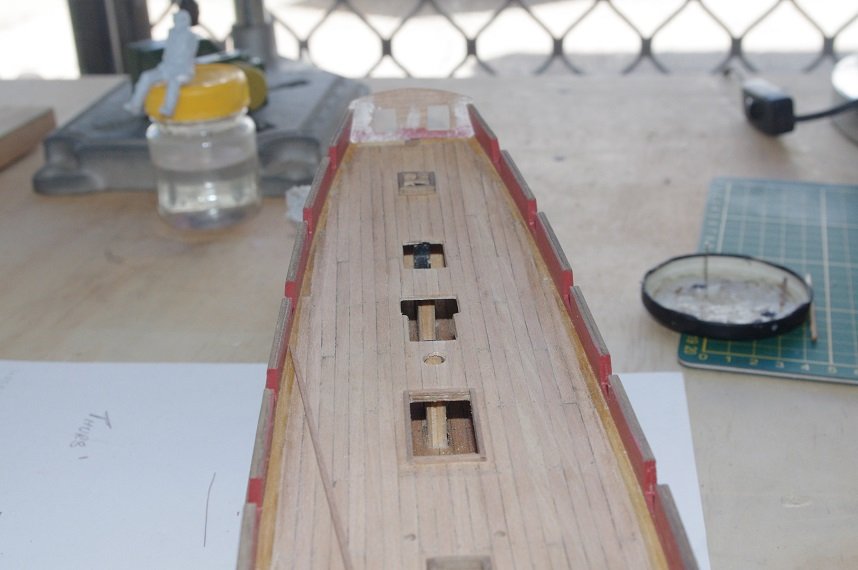
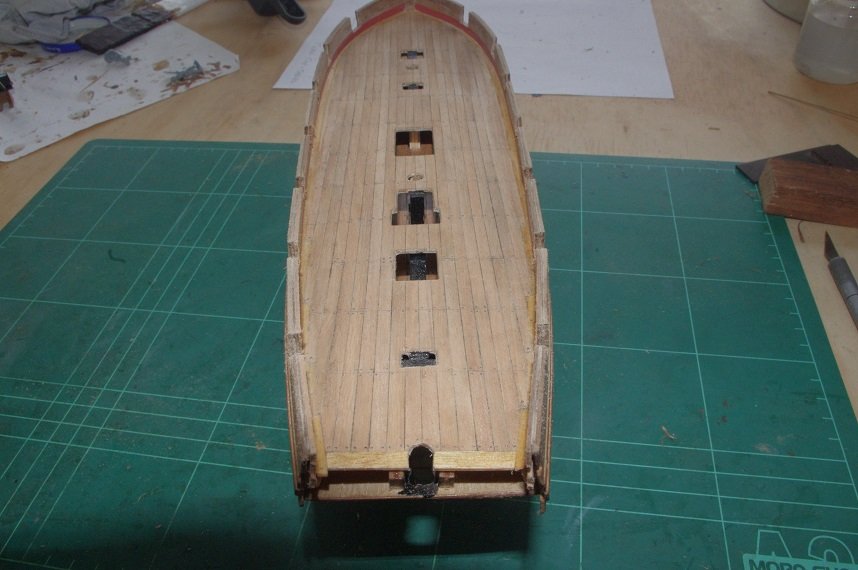
Hello All, The next job was to fit the capping rails. These went on quite easily with no issues, they were painted black on the underside before they were fitted. As can be seen in the above photos the deck gratings and the chimney for the stove have also been added, so have the rudder hinges. All comments welcome. Thanks for looking and the likes.

- 86 replies
-
- 5
-
-
- pickle
- caldercraft
- (and 1 more)
-
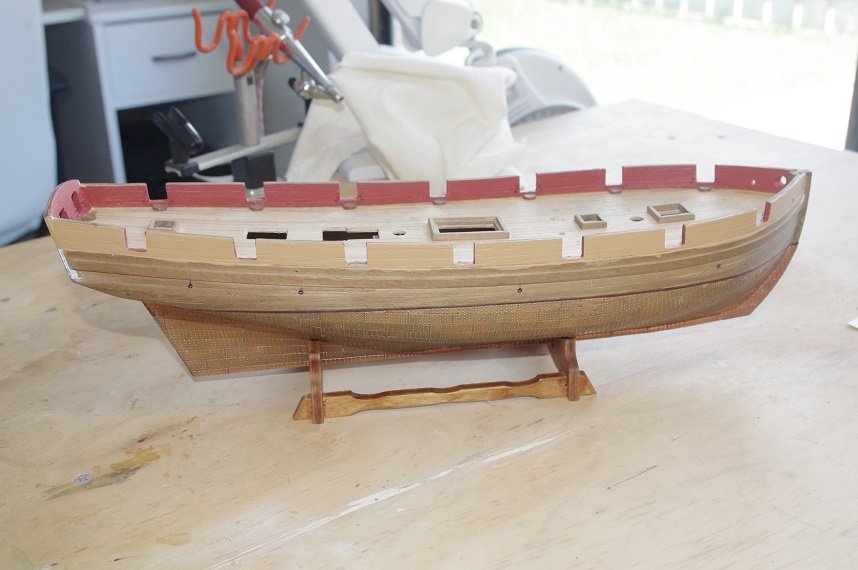
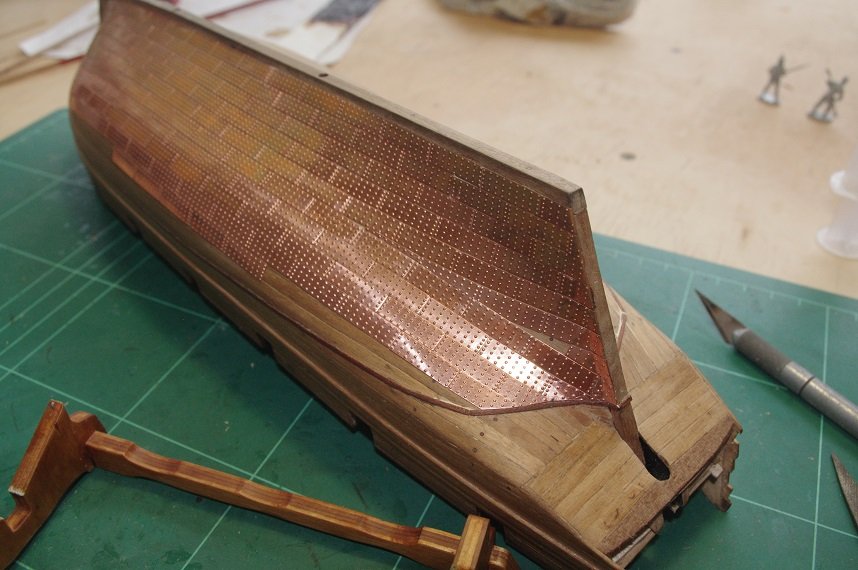
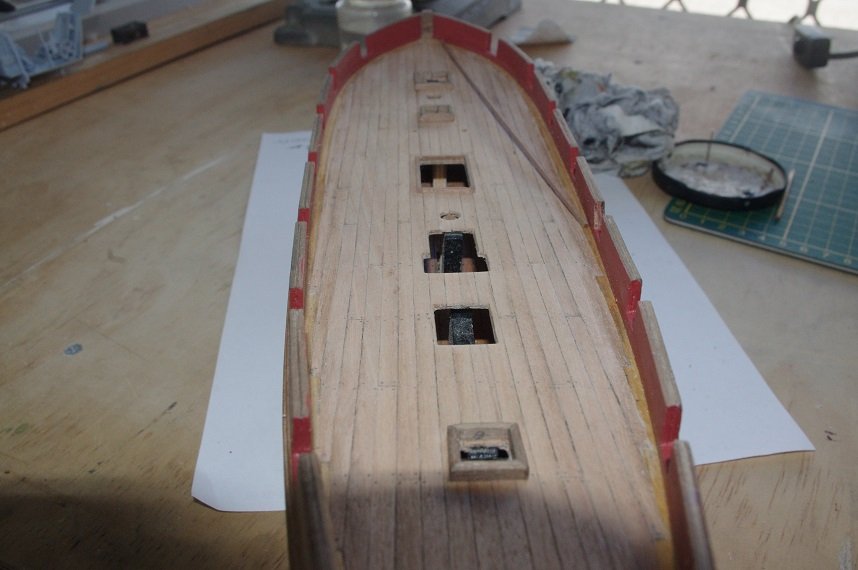
Hello All, The stern fascia was fitted next and planked. The carronade deck blocks were also fitted along with the eyebolts for the gun tackle but only in the ports where the guns are not being fitted because the guns will be rigged off the ship and then fitted. The sides were painted yellow ochre and the holes drilled for the bowsprit and anchor cables. The scuppers were also fitted according to the plans. All comments welcome. Thanks for looking and the likes.
- 86 replies
-
- 4
-
-
- pickle
- caldercraft
- (and 1 more)
-
Beautifully done Ian👍
-
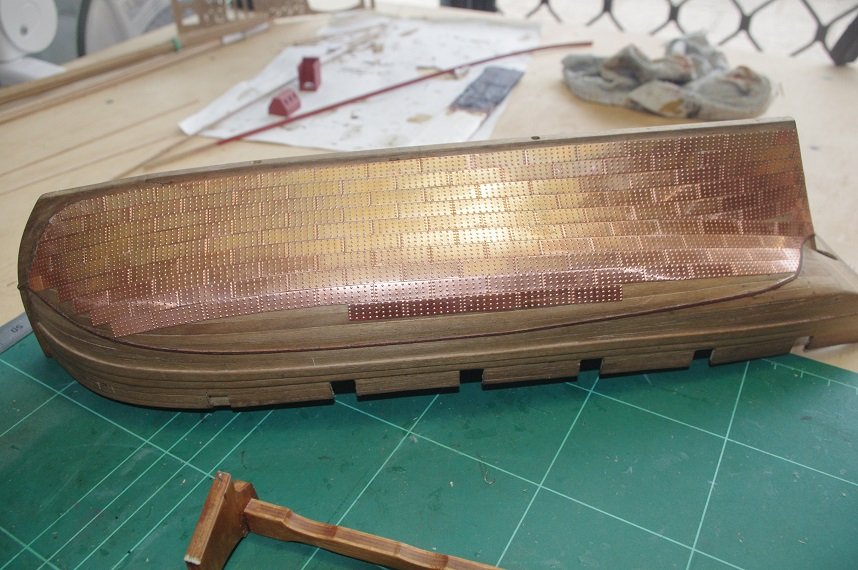
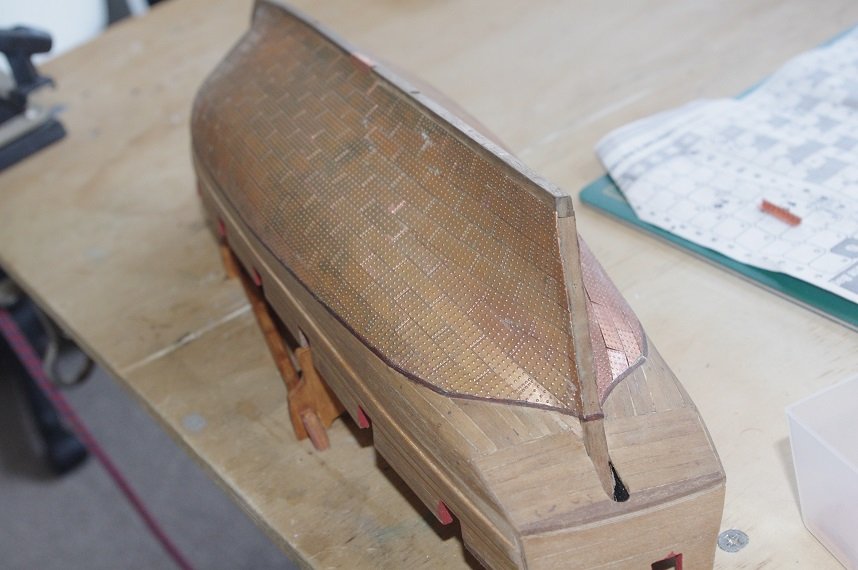
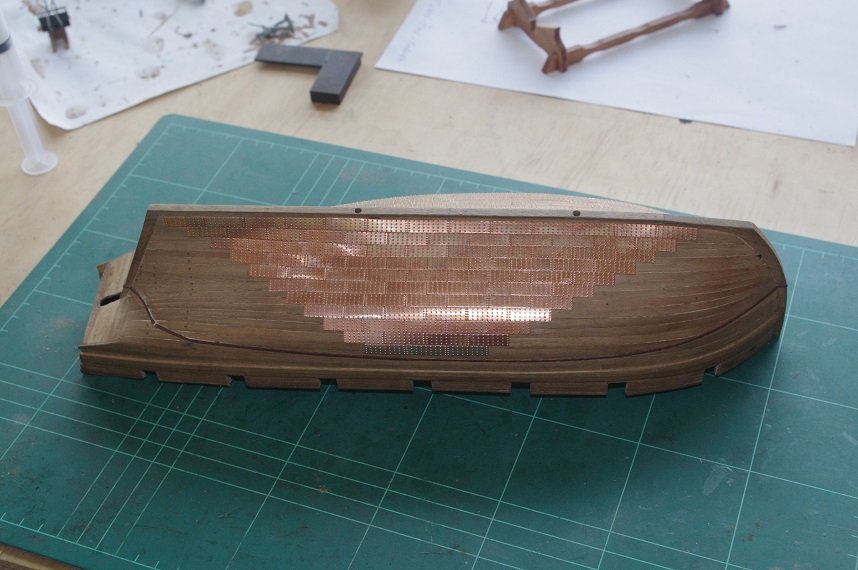
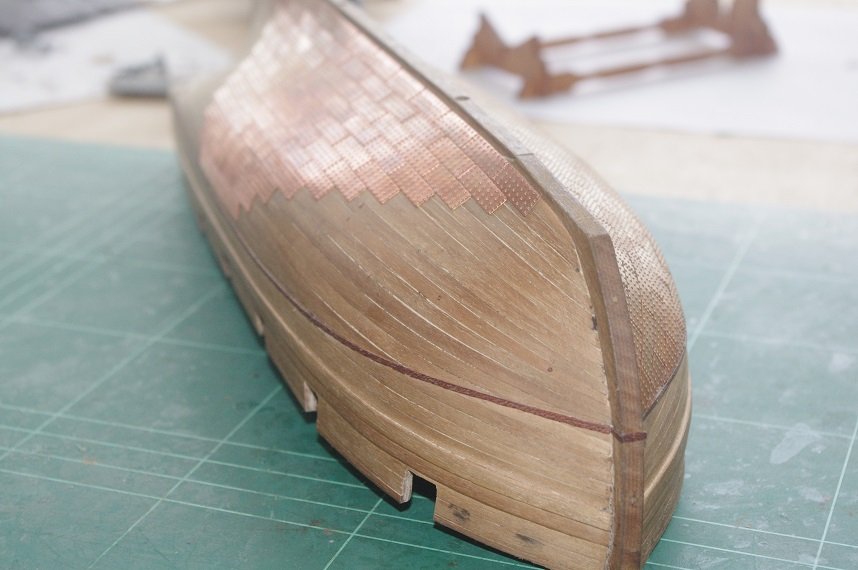
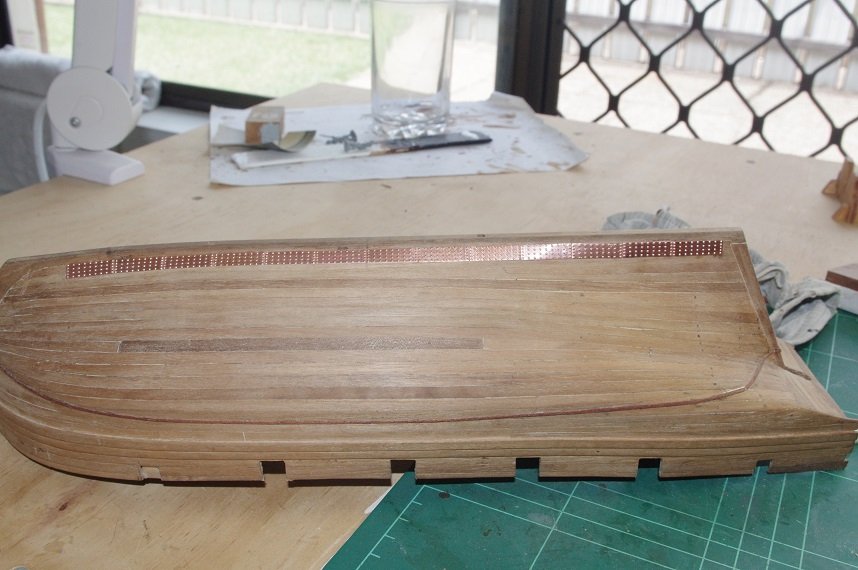
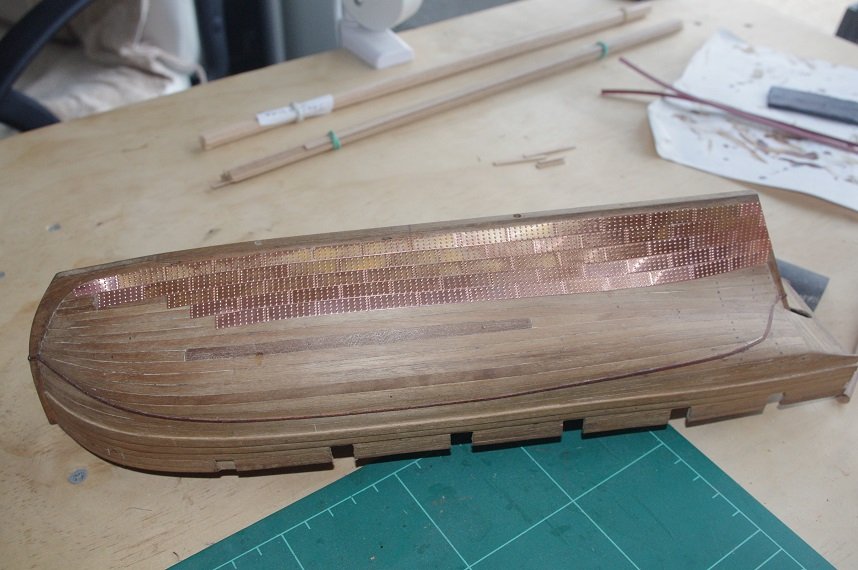
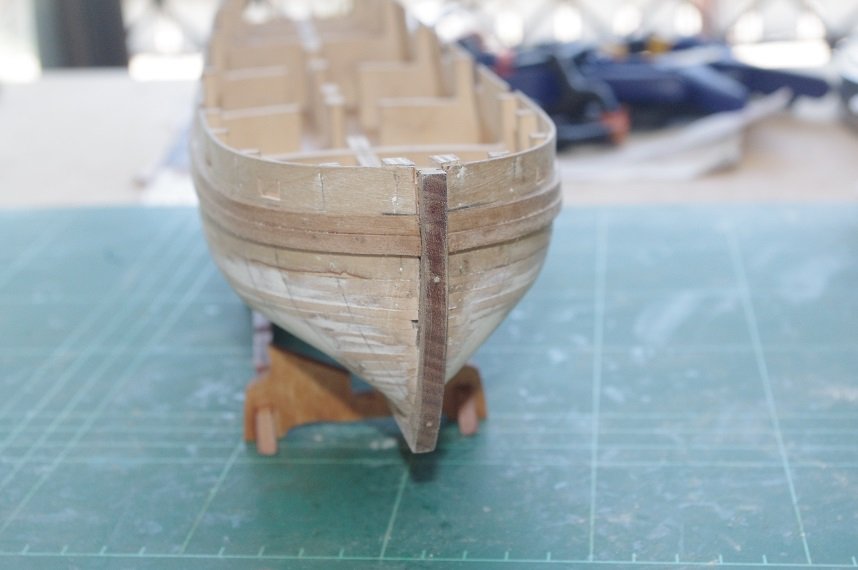
Hello All, The coppering of the hull continues. The plates that go along the keel were bent in half along their length and placed one either side so that the join line will be underneath the model and won't be seen. The inner bulwarks were also painted and the coamings fitted for the gratings and the main hatch. All comments welcome. Thanks for looking and the likes.

- 86 replies
-
- 5
-
-
- pickle
- caldercraft
- (and 1 more)
-
Very nice. Turned out really well, a shame most of it won't be seen.
-
Hi Wahka, Your fittings are looking good. As for your mistakes, is the hole in the deck at the bow you are referring to the elongated hole in front of the hole for the foremast? If so I think that is the mounting hole for the bowsprit and is meant to be there. With the paint you could try scraping it off carefully with a sharp scalpel or as you say just leave it as normal wear.
-
Thank you Mugje, this kit is pretty good built straight out of the box but a few simple enhancements make it that little bit better.
- 86 replies
-
- 3
-
-
- pickle
- caldercraft
- (and 1 more)
-
Fantastic effort in a month, it turned out really well.
-
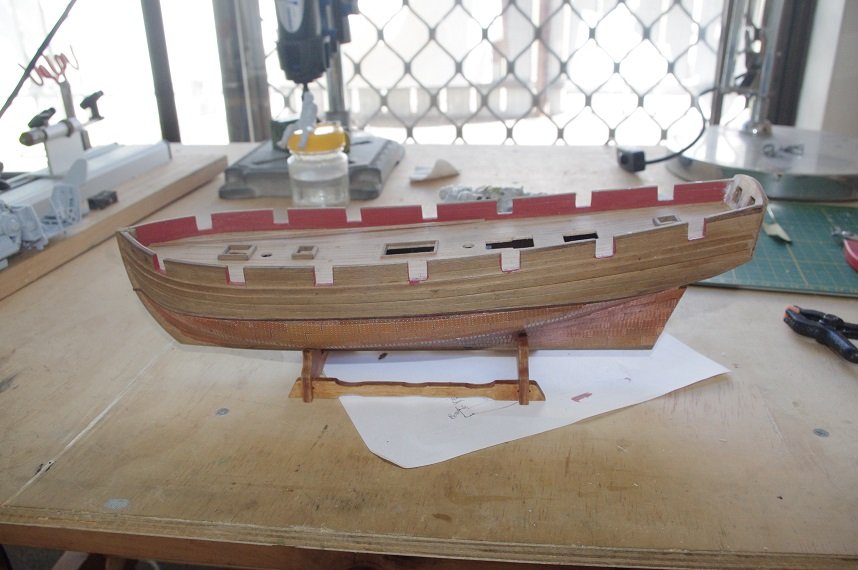
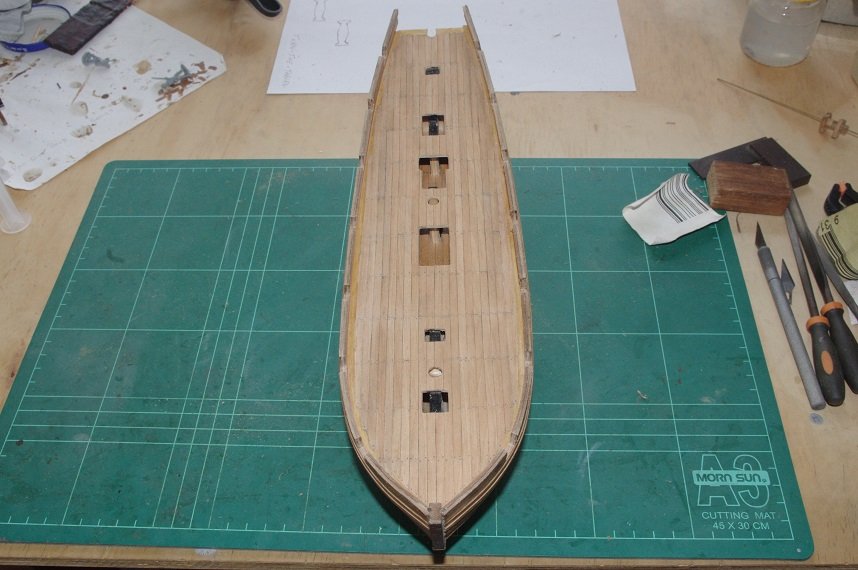
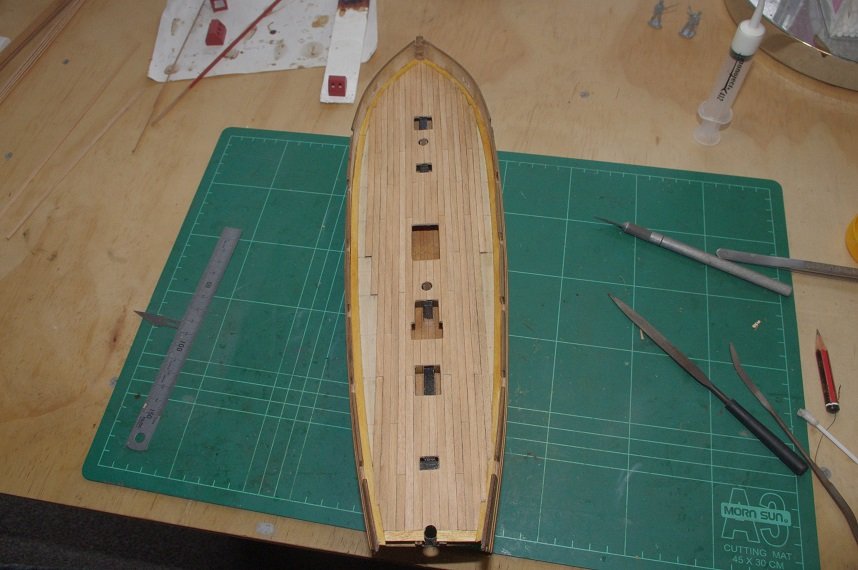
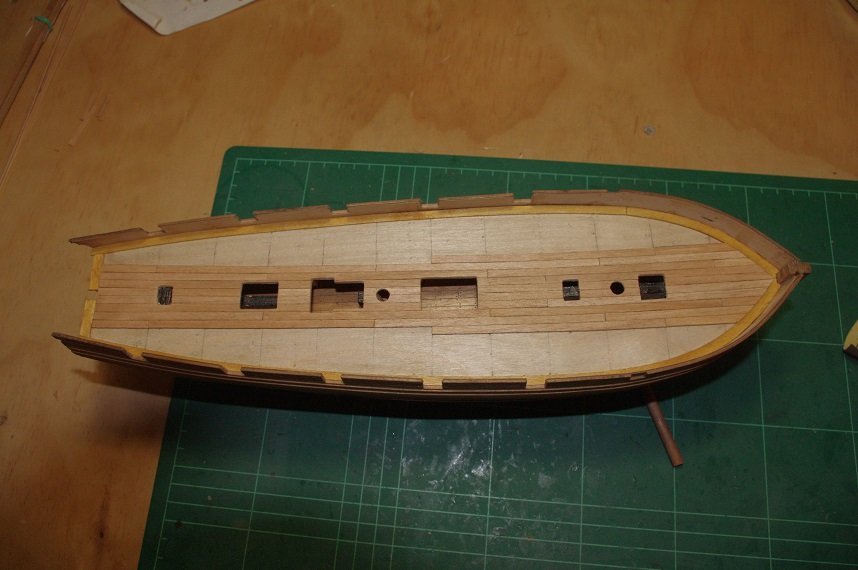
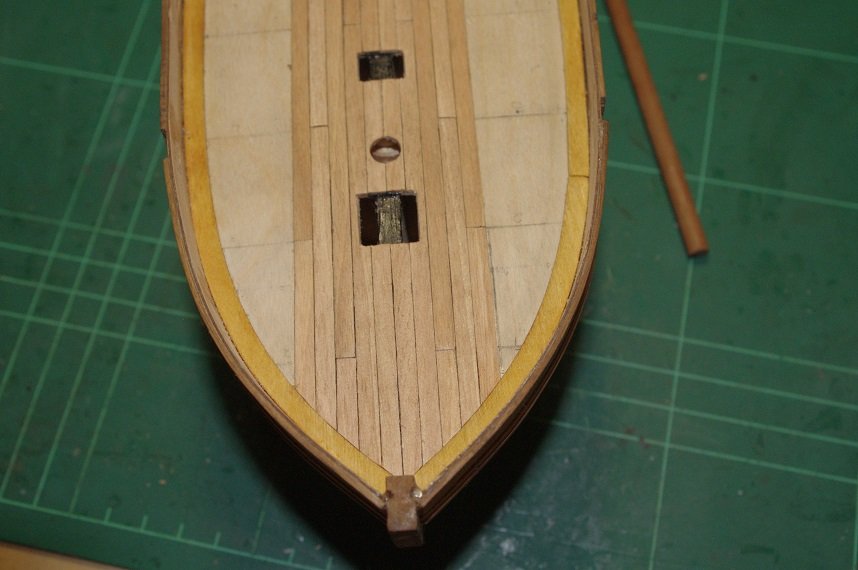
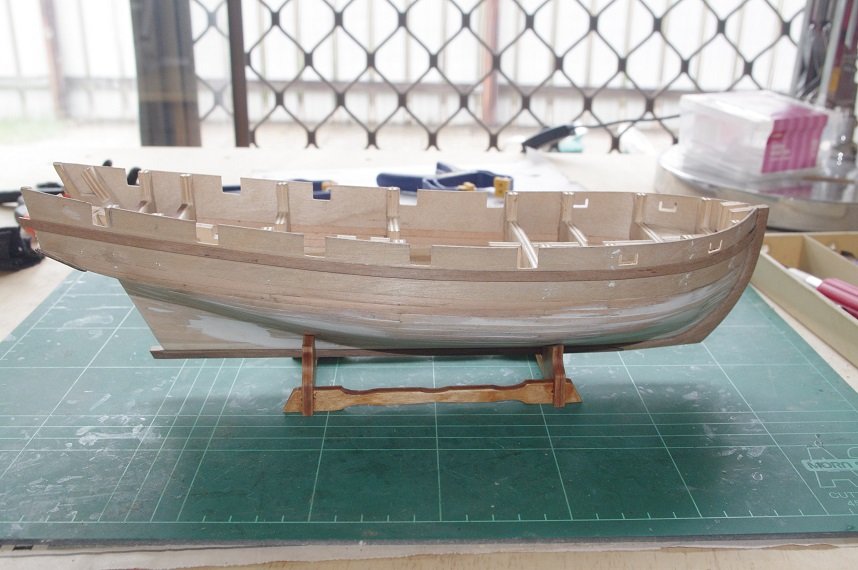
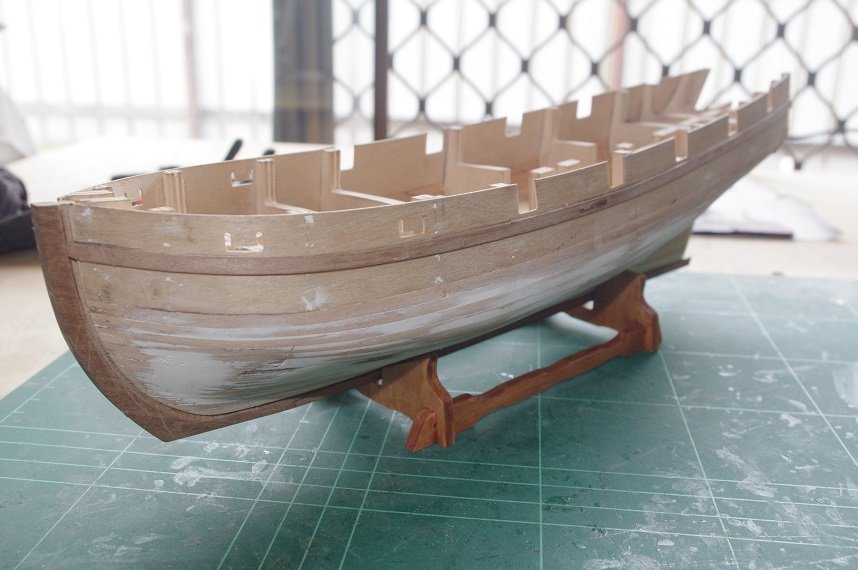
Hello All, The deck planking was completed and an imitation of trunnels was added, they were made by drilling a 0.3mm hole and colouring it with a lead pencil. Trunnels were only added across the lines where there were butt joints, as I thought adding them in between as well would look to cluttered. I am quite happy with the result. As you can see in the last photo the inner bulwark planks have also been fitted and the first two gun ports opened up. The first plank was painted red before it was fitted to avoid paint getting on the deck when painting them. And some more coppering was also done. All comments welcome Thanks for looking and the likes.

- 86 replies
-
- 4
-
-
- pickle
- caldercraft
- (and 1 more)
-
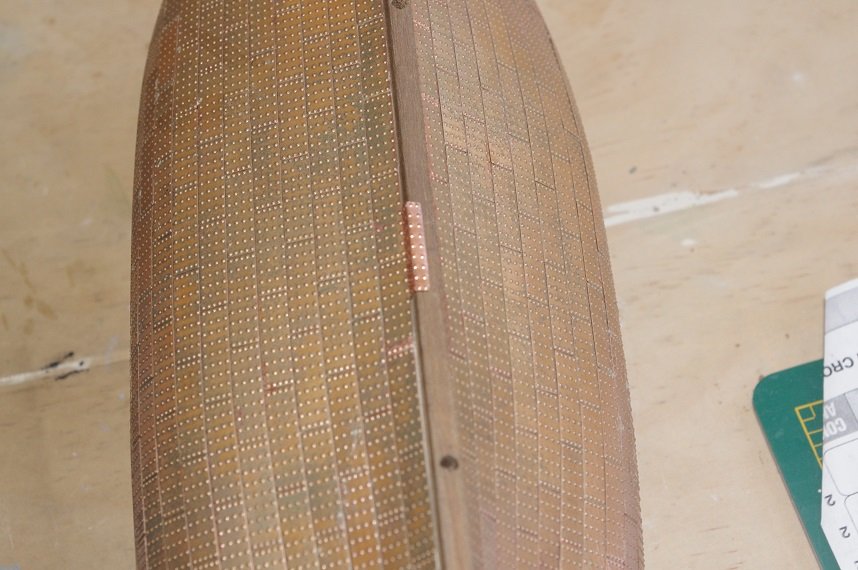
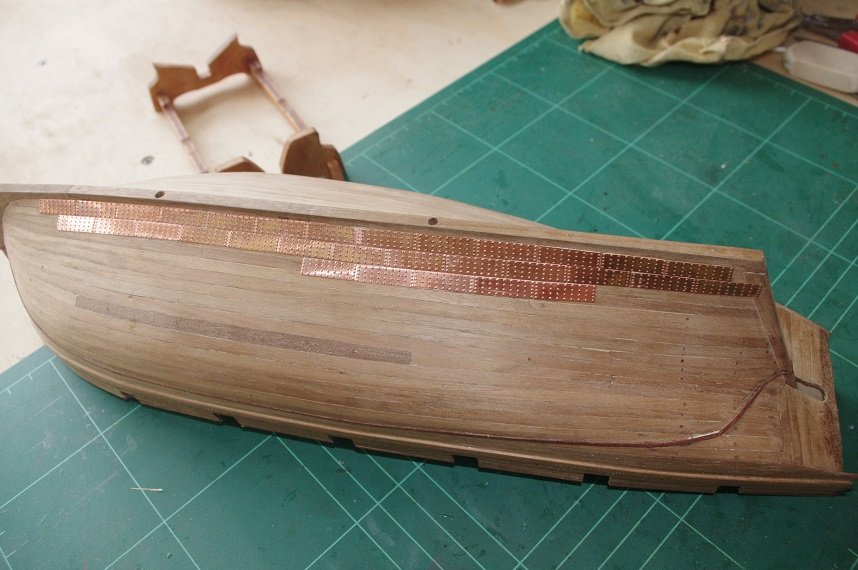
Hello All, The coppering of the hull was also started. This is only my second attempt at coppering and the first attempt on a full hull. And some more of the deck planking was done. You may also notice how the deck planks are joggled into the margin plank at the bow and the stern. Comments always welcome. Thanks for looking and the likes.
- 86 replies
-
- 5
-
-
- pickle
- caldercraft
- (and 1 more)
-
Good progress my friend. Are the wales going to be painted? If so you can just paint over where the paint bled under the masking tape. And in answer to your question about the deadeyes, yes the blue line you have drawn is approximately where the first deadeye should be placed.
-
Those rails turned out great, thanks for sharing your method.
-
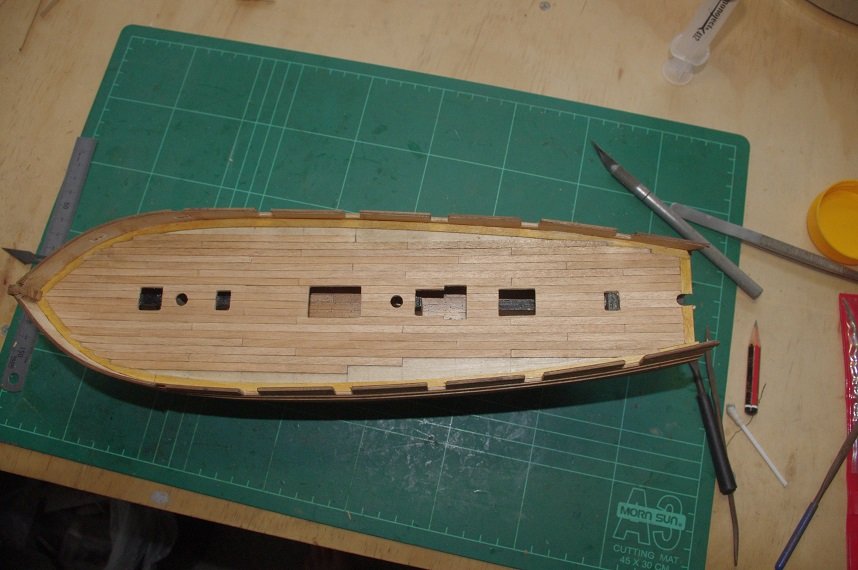
Hello All, Very good advice Spyglass, I have a box for offcuts and left over parts, timber strips ect from previous builds. The margin planks were fitted and covered the gaps between the deck and the bulwarks nicely. The deck planking was then started. I decided to go with the three butt shift plan as suggested in the instructions as I believe it is the best fit for this deck. The two centre planks were laid full length, one either side of the centre line, and the deck openings were cut out and the planking patten was started on the outside of each of these planks. The remaining planks will be joggled into the margin planks as required at the bow and the stern. All comments welcome. Thanks for looking and the likes.

- 86 replies
-
- 5
-
-
- pickle
- caldercraft
- (and 1 more)
-
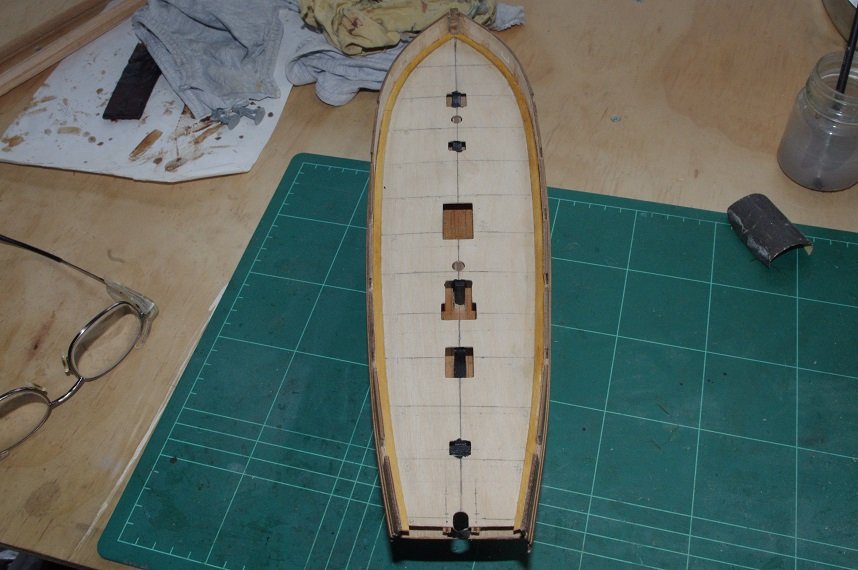
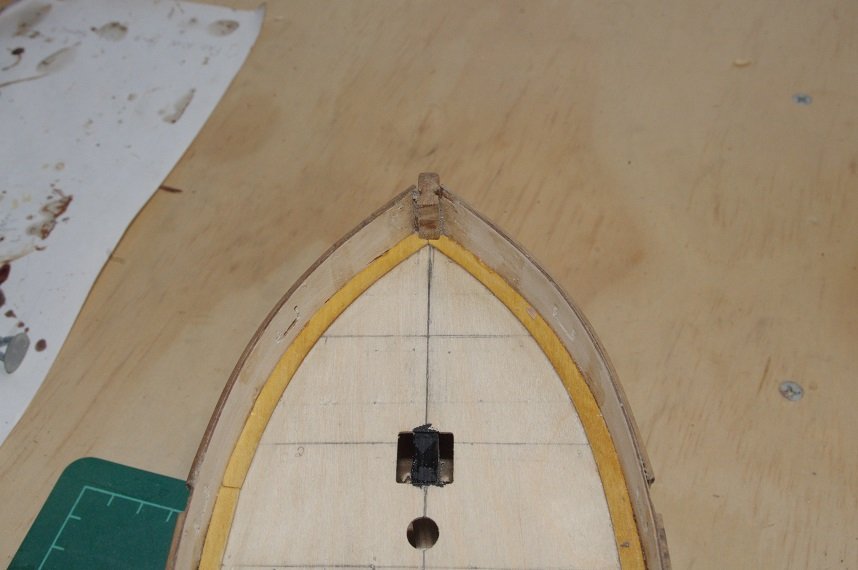
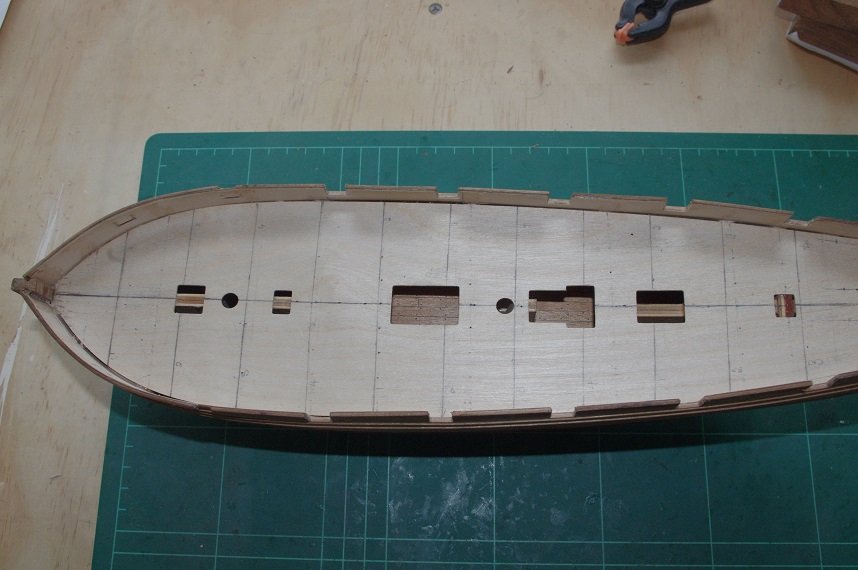
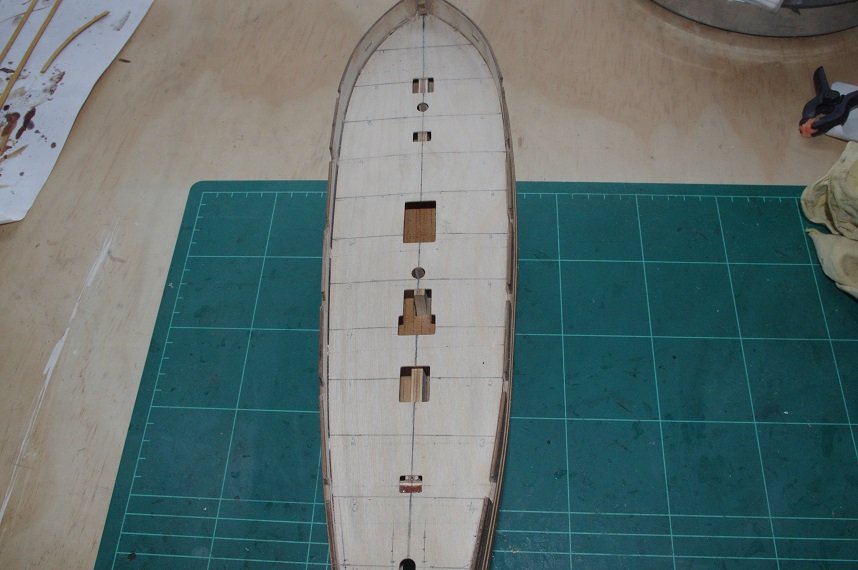
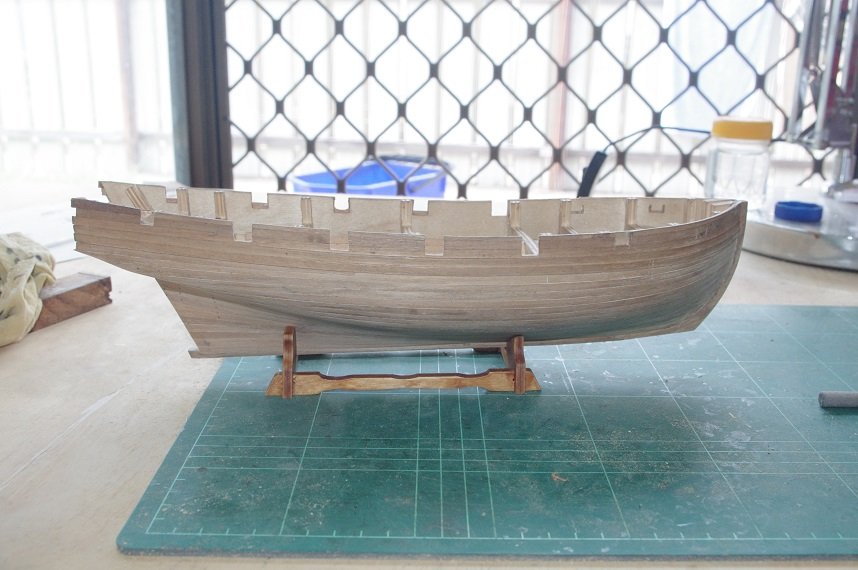
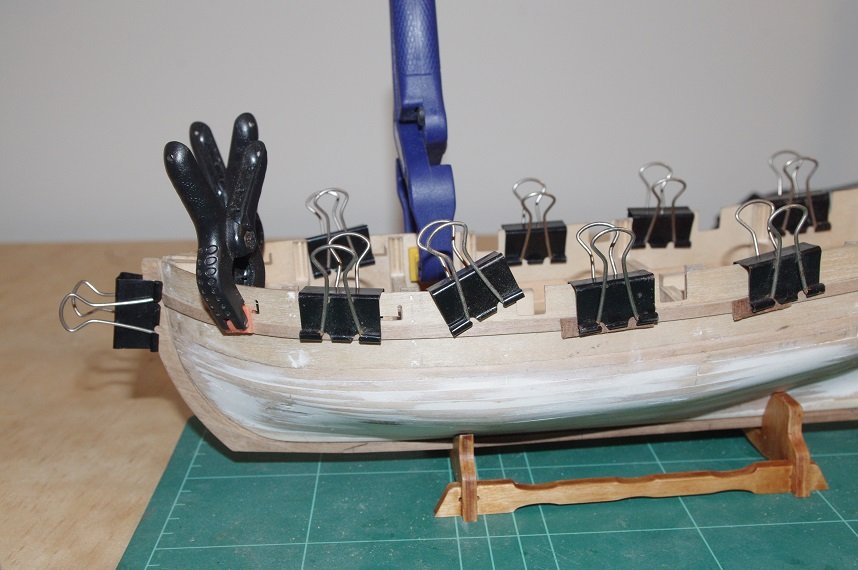
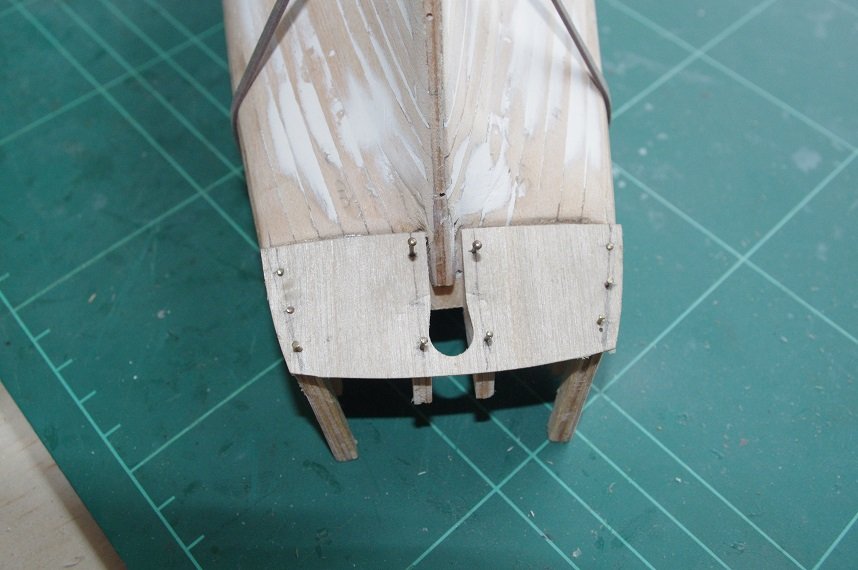
Hello All, I fitted the false deck next so I could alternate between coppering the hull and planking the deck. I was a bit nervous about cutting and breaking the horns off the top of the bulkheads, especially the ones in the bow area, as I did not want to cause any damage to the gunport patterns they were glued to. In the end I need not have worried by cutting 3/4s of the way through the horn with a flexible razor saw and then gently twisting them with a pair of pliers, as suggested in the manual, they came away quite cleanly leaving only a few small bumps to clean up with a needle file. A centre line was then marked on the deck as were the positions of the bulkheads and it was then glued and pinned into place. The deck fitted in well with no issues bar a few small gaps in some places which will be covered easily. I wanted to fit margin planks to the deck and while I was mulling over what timber to use and how best to shape it I was browsing some of the completed builds of this model on this site and came across Blue-Ensign's excellent build and he had the brilliant idea of using the outside of the sheet used to hold the false deck as it already had the shape of the deck and no bending would be required. Thank you Blue Ensign. So I cut the 'margin' planks out of he deck surround and stained them with baltic pine. Unfortunately the end of one side broke off as I was cutting it but it will be OK as I squared the edges up and hopefully it won't be noticed when it is fitted. All comments welcome. Thanks for looking and the likes.
- 86 replies
-
- 3
-
-
- pickle
- caldercraft
- (and 1 more)
-
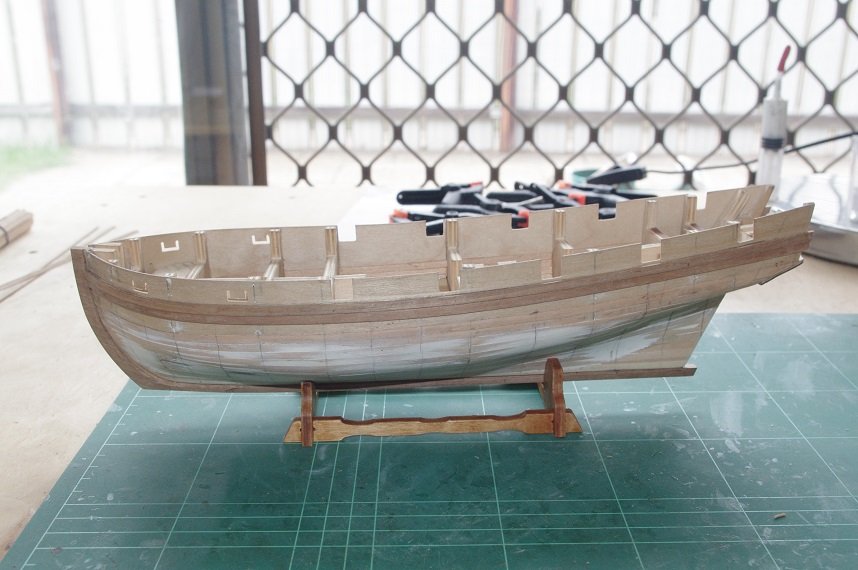
Hello All, Thank you Jeff and Mugje for your kind comments. As mentioned before the next job was to mark the water line. I did this following the instructions and using the little jig provided in the kit. Once the hull was level and set up on the jig it was fairly easy to mark the line. I decided to fit a batten along the water line for the copper plates to butt up against, as I did on the Victory bow section, I made the battens from 0.5 x 5mm Sapellia which was trimmed down to 1.5mm strips and glued onto the hull following the water line. It was a bit fiddly to get the bend right at the rear of the but it finally glued down OK. All comments welcome. Thanks for looking and the likes.
- 86 replies
-
- 5
-
-
- pickle
- caldercraft
- (and 1 more)
-
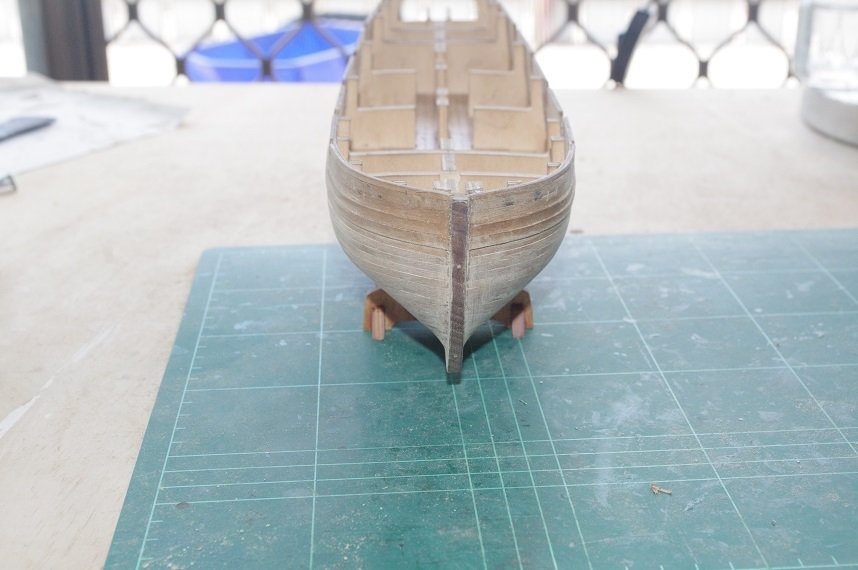
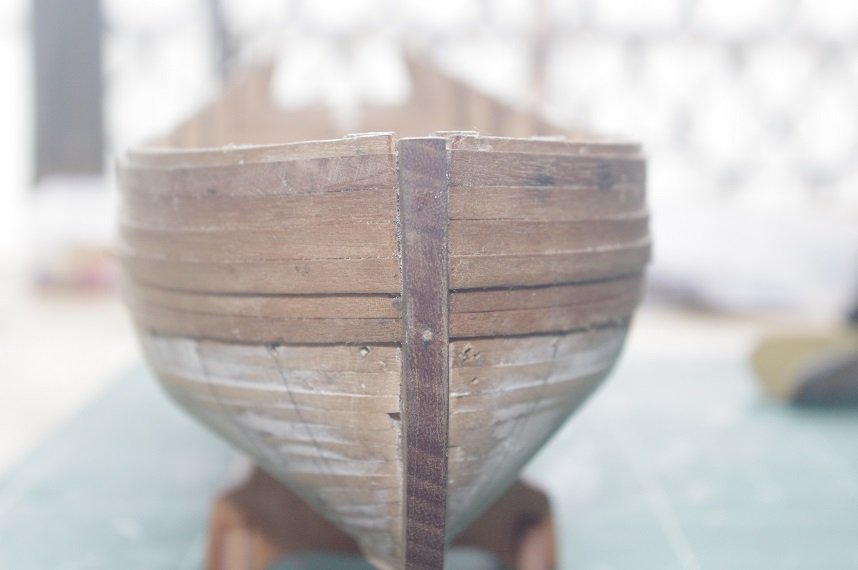
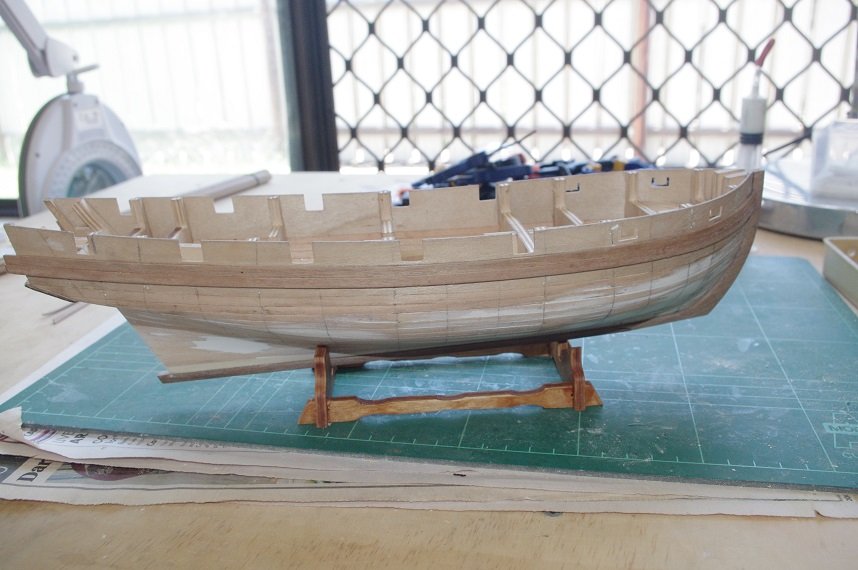
Hello All, The second layer of planking was completed and sanded. The next job is to mark the water line and to remove the extensions on the bulkheads so that the deck can be fitted. All comments welcome. Thanks for looking and the likes.

- 86 replies
-
- 6
-
-
- pickle
- caldercraft
- (and 1 more)
-
Hello All, The second planking continued with no major problems. These planks were shaped the same way as the first layer of planks by soaking them in water and pinning them to the hull, allowing them to dry and then gluing them into position. All comments welcome. Thanks for looking and the likes.
- 86 replies
-
- 4
-
-
- pickle
- caldercraft
- (and 1 more)
-
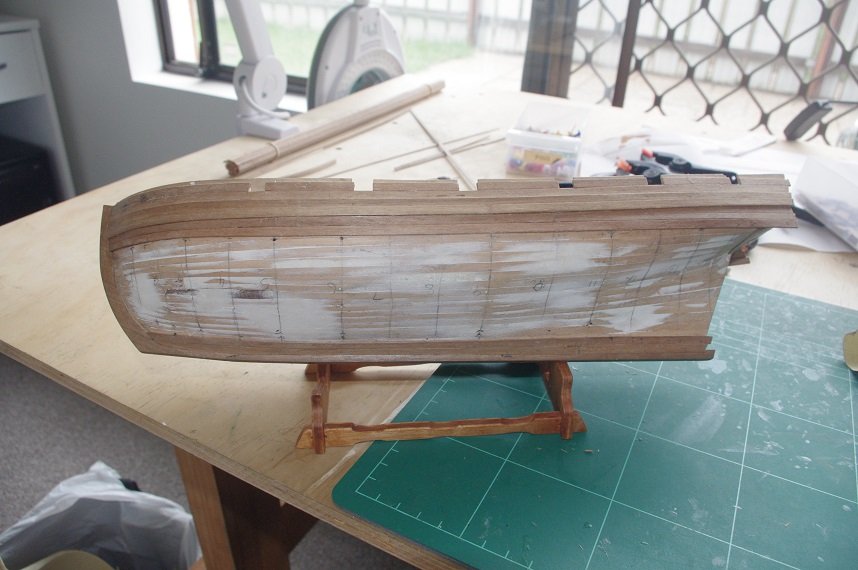
Hello All, The second planking was done with the supplied 1 x 4 mm walnut strips which were fairly good quality after a light sand. The first plank to be fitted was the garboard strake. Then planks were laid alternately above and below the wale and from the garboard strake up. All comments welcome. Thanks for looking and the likes.

- 86 replies
-
- 6
-
-
- pickle
- caldercraft
- (and 1 more)
-
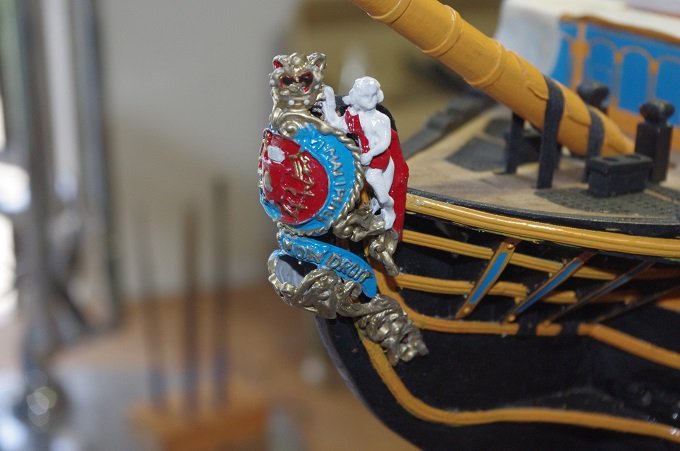
Hi Daliab, The figure head castings supplied by Mantua are very thick and need a lot of thinning on the inside of them to get them to sit properly, at least the ones supplied for my bow section of the kit did. I thinned the top one down until the crown sat fully on the stem post and glued it on with epoxy the second piece was widened until it sat underneath it. See the picture below. However I now believe this is wrong. The instructions in my kit did not mention notching the stem but it would allow the figurehead to sit back more on the stem and the bottom piece to hang straighter and fit tighter against the stem. Hope this helps.
-
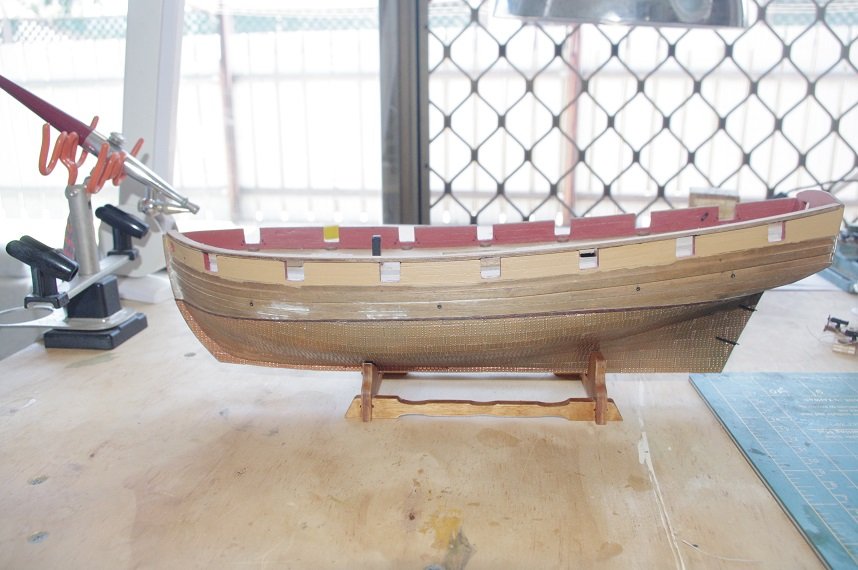
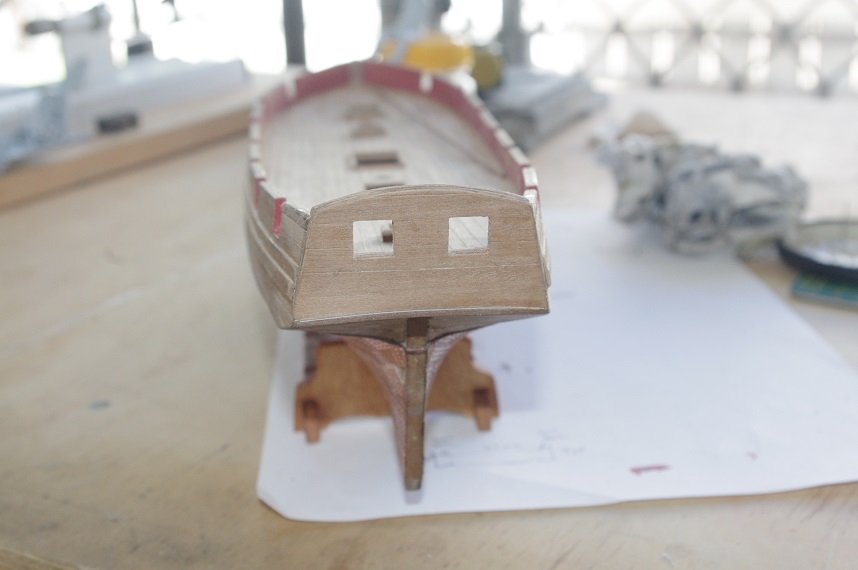
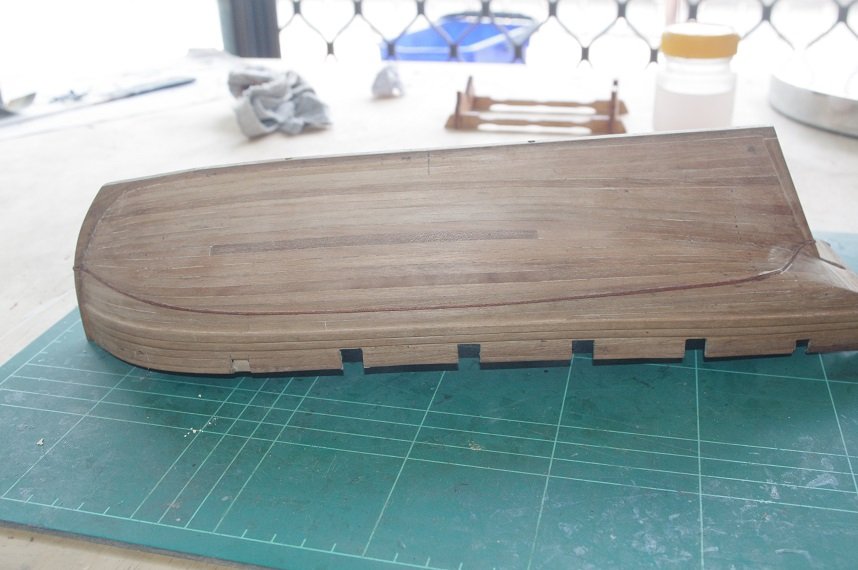
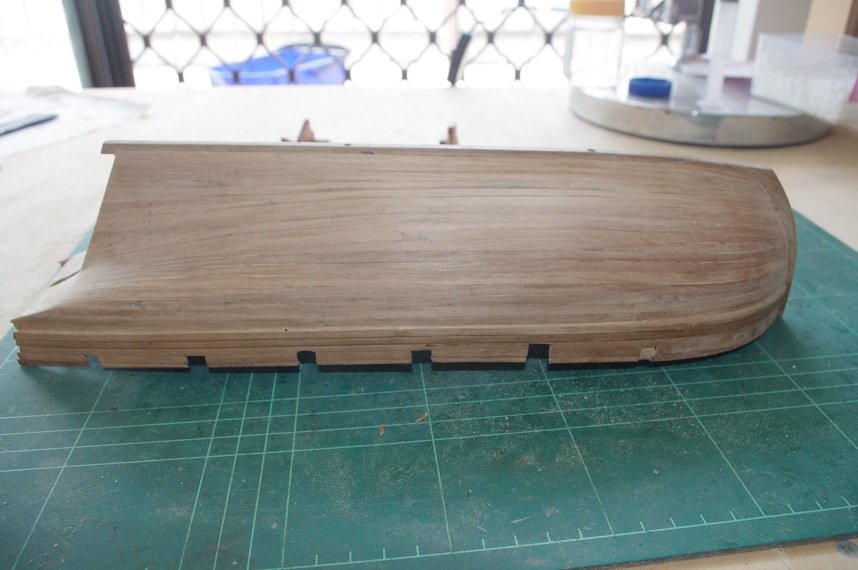
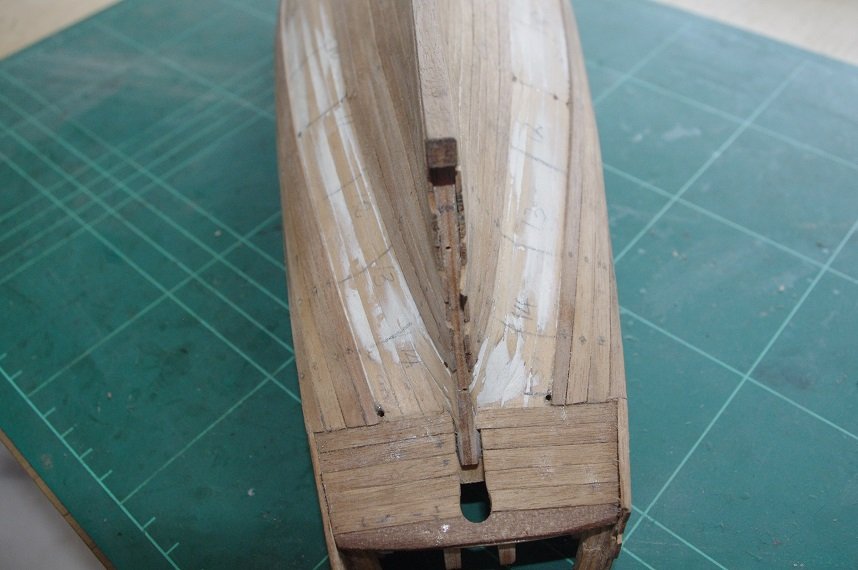
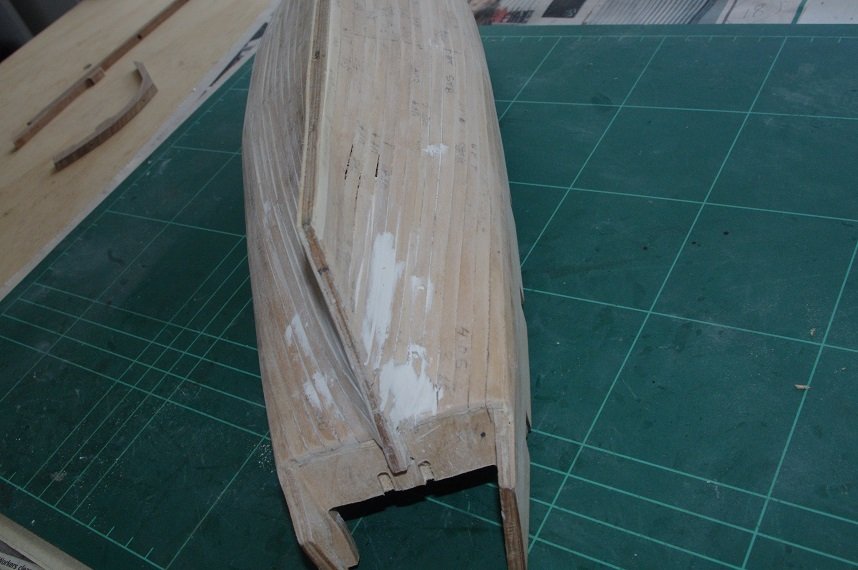
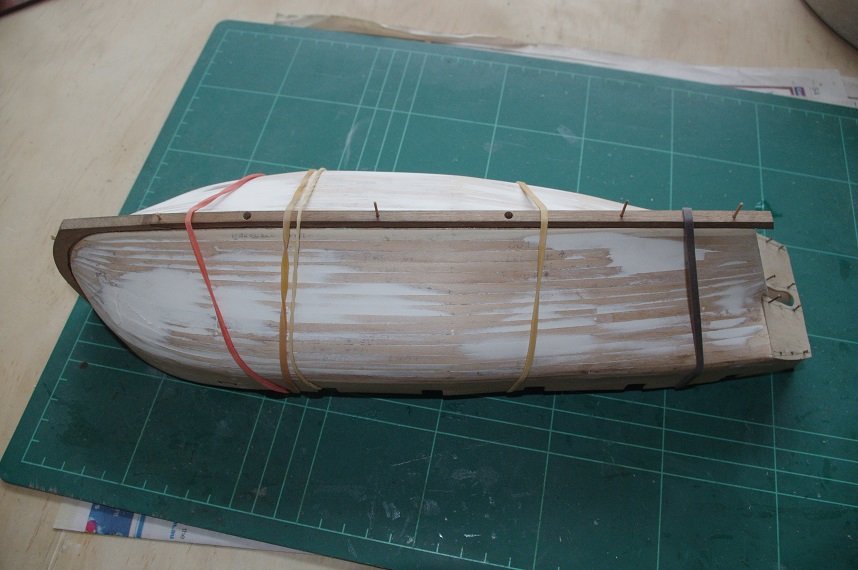
Hello All, After the keel and stern counter were dry the stern counter was planked. The sternpost was fitted temporarily so that the planks were laid hard up against it to eliminate any gap when it permanently fixed. The next step was to add the black strake and the wales. The positioning of these planks is important to determine the rest of the run of second planks above and below the wale. The first plank is position so that it sits 1.5mm below gunports 2 thru 5 and is the allowed to follow it's natural lie fore and aft of these points. The wale plank is laid directly underneath the first plank and is the same material as the first, 4 x 1 mm walnut and both planks are untapered. A 4 x 0.5 mm plank is then laid on top of the first plank and a 4 x 1 mm plank is laid on top of the second plank forming the black strake and wale. I like this method of approaching the second planking, laying the wales first, as it gives you a clear line above and below it for the run of planks. The other kits I have done have you complete the second planking first and then add the wales over the top of it. If it is practical I will use this method in future builds. All comments welcome Thanks for looking and the likes.
- 86 replies
-
- 7
-
-
- pickle
- caldercraft
- (and 1 more)
-
Hi Stuglo, The colours I chose to paint the model where from photo references of the ship on various websites which show the gun carriages and the upper gun deck painted yellow ochre, the paint I used was Mantua's own brand but I believe Admiralty paints yellow ochre is closer to the actual colour in which the ship has recently been painted. I painted the lower decks white to lighten the area as it would be very dark if they were left in natural wood and also because I did see a couple of photos on the web showing the lower decks painted white. Also in C Nepean Longridge's book he refers to inboard works to be generally painted yellow and the gun carriages to be painted yellow. I do not know how historically accurate that information is however. I do remember reading somewhere how the ship was prepared for the Battle of Trafalgar and it did mention painting and how the paint scheme differed from other vessels in the fleet but I can't find it. Hope this helps.
-
That's great. I hope you enjoy building it as much as I did.
-
Excellent work! For a first time build you have done a very nice job of planking your hull
-
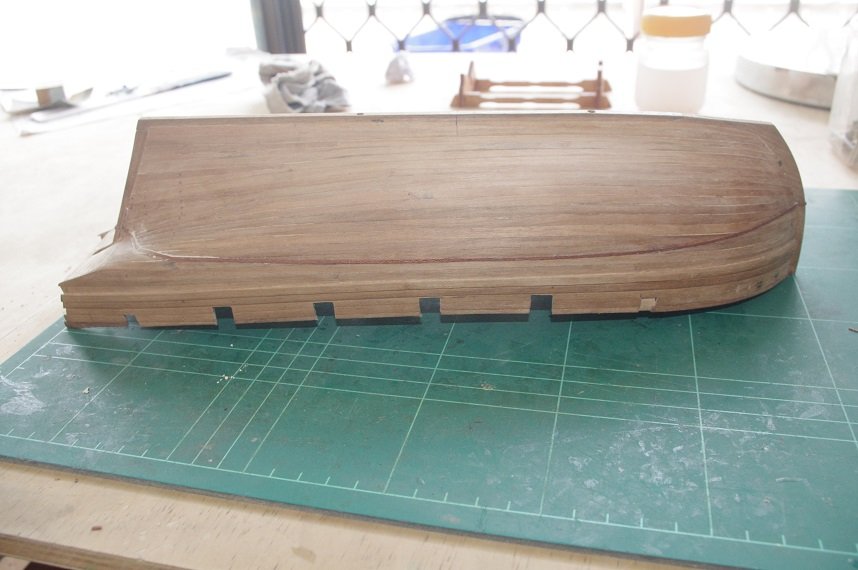
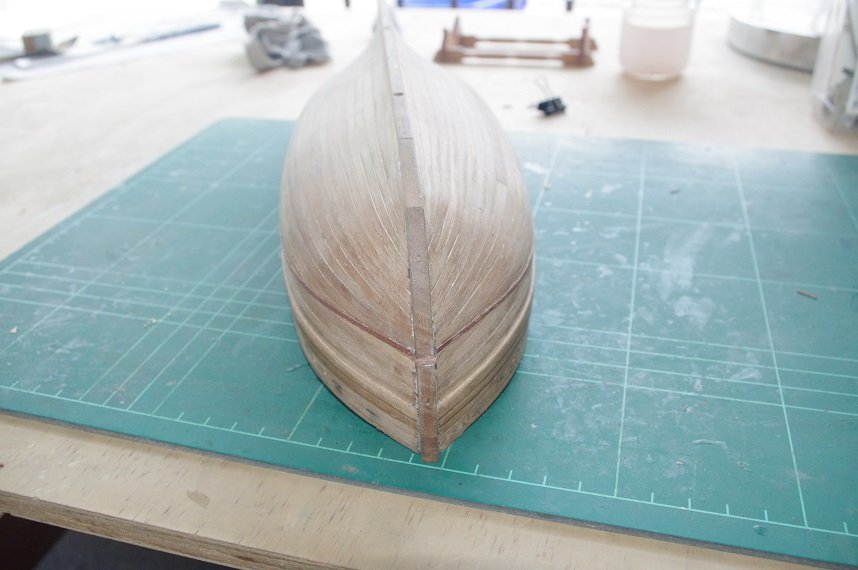
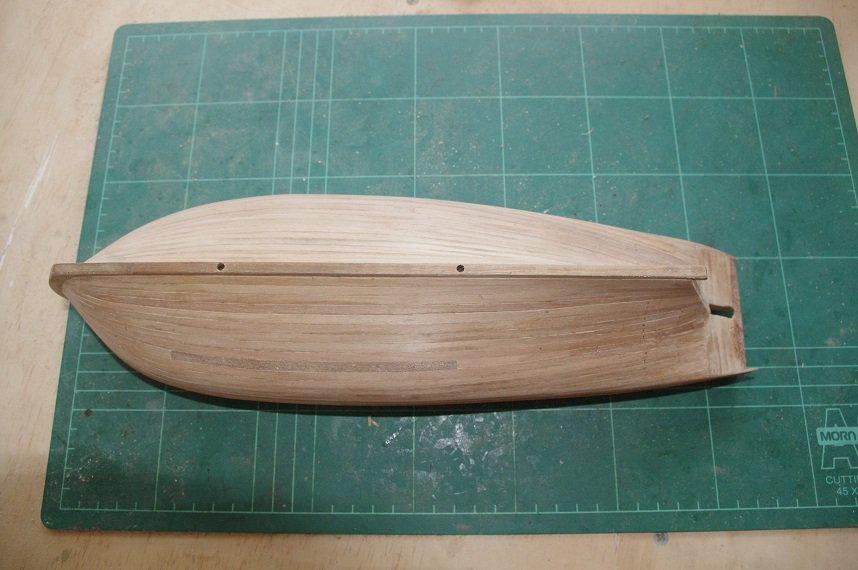
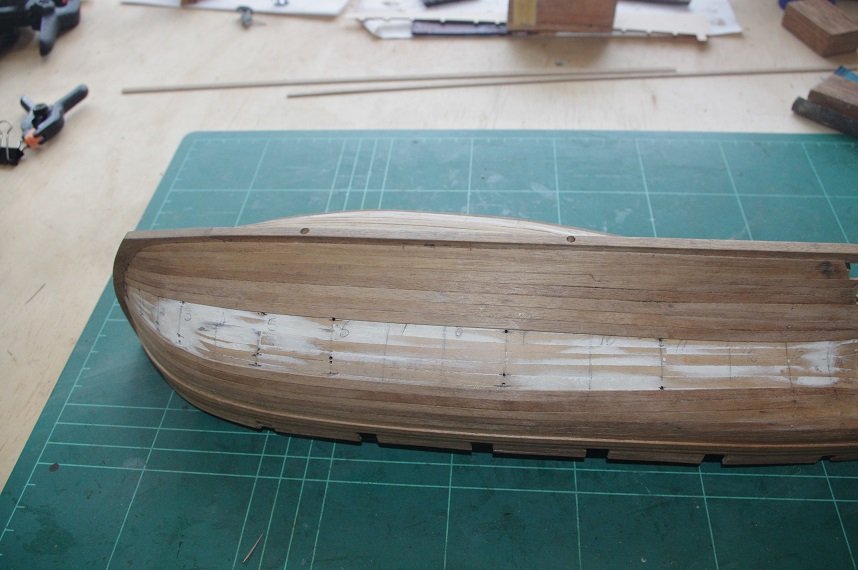
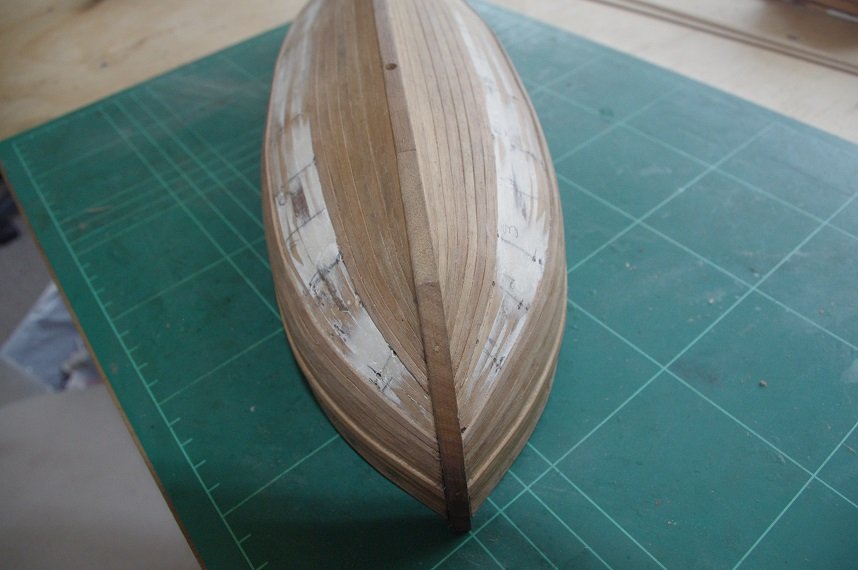
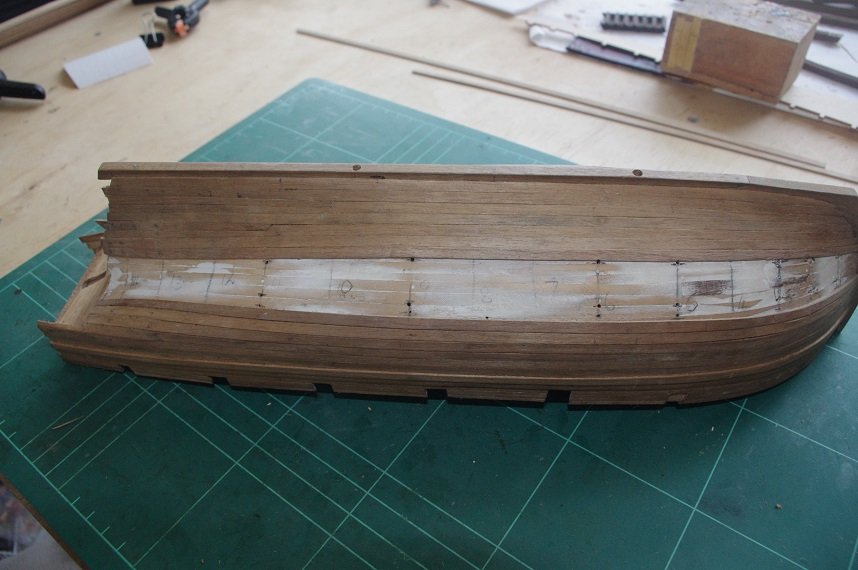
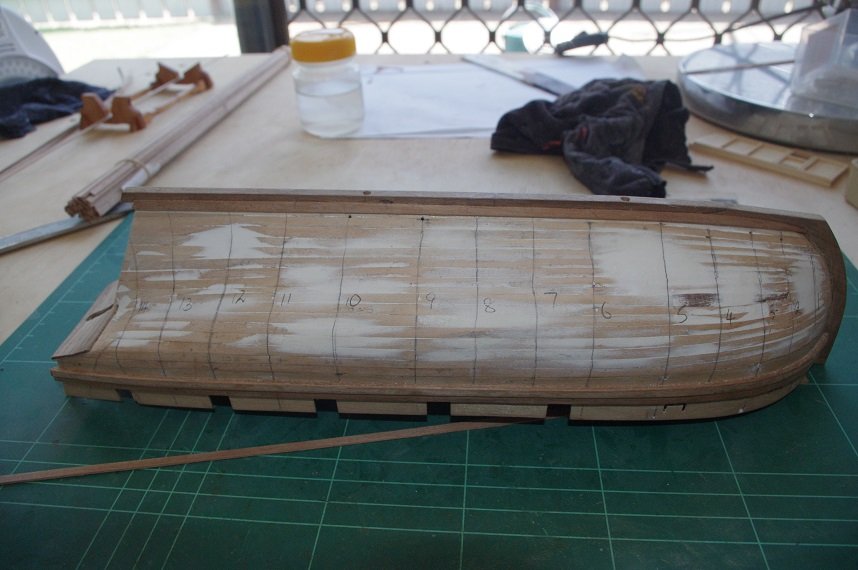
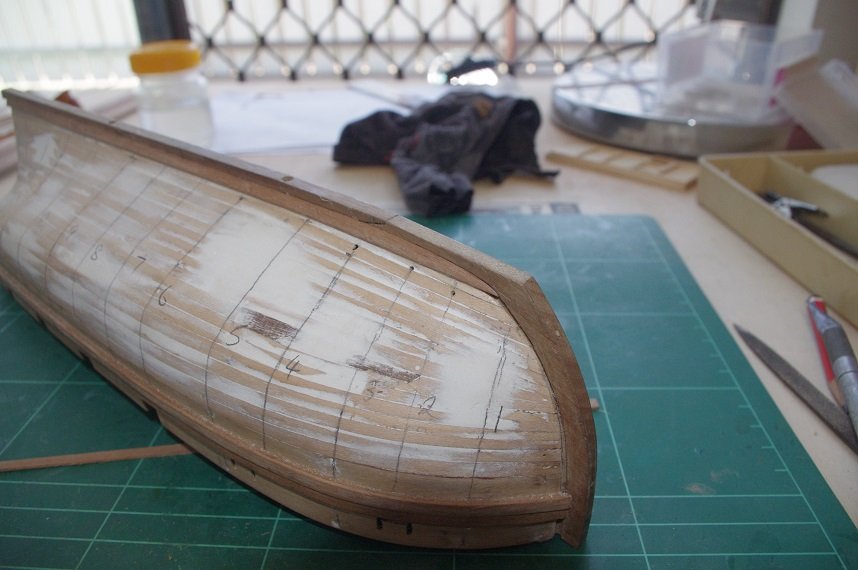
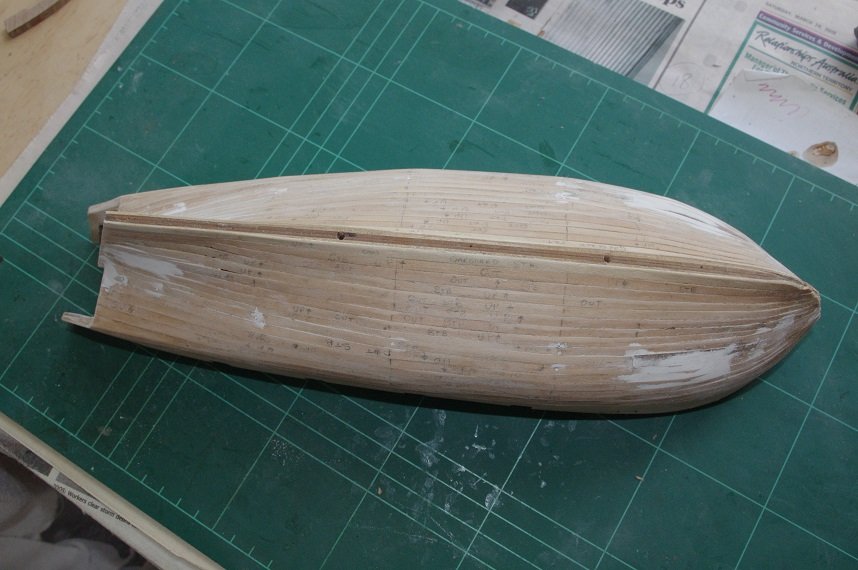
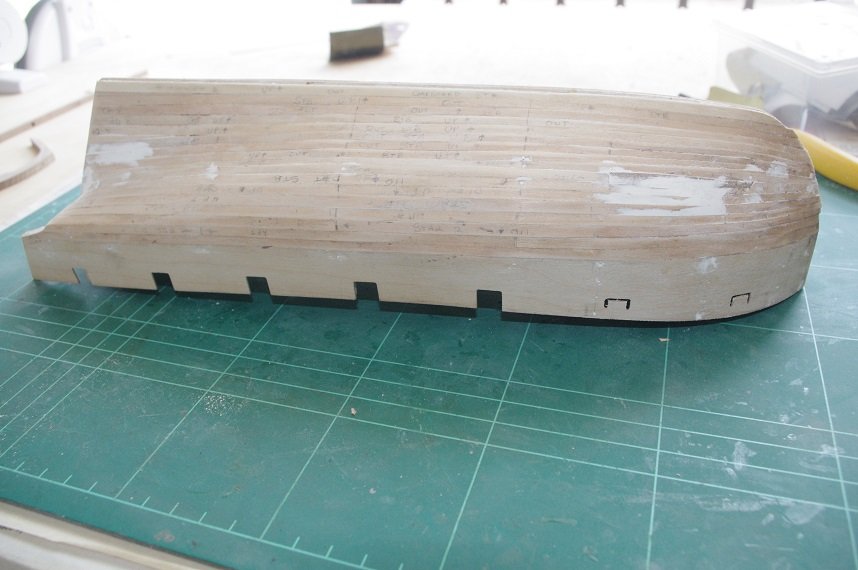
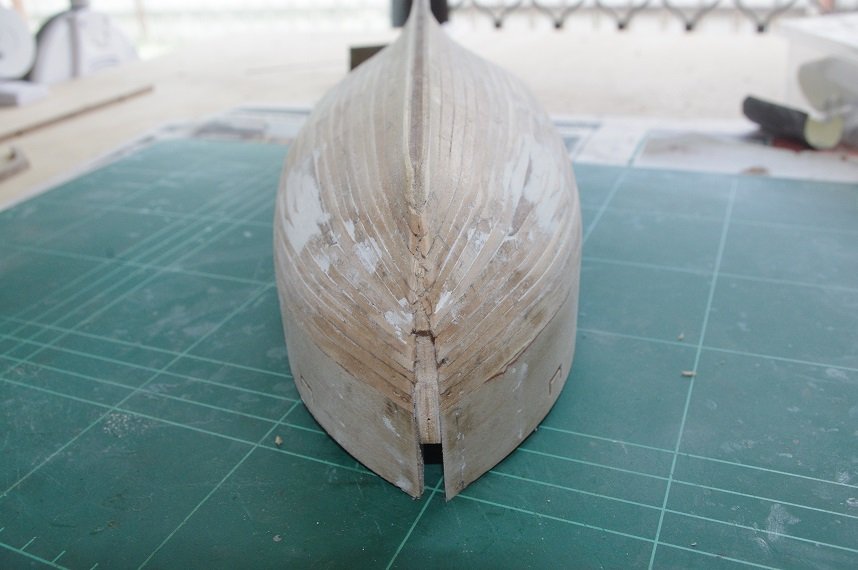
Hello All, The first planking was completed without an further issues and a few hollows were filled. The hull was sanded and the planks were trimmed at the bow to allow the stem post to fit snugly between them. I cut a 1 x1 mm rabbet into the stem post and keel using a 1mm milling bit in my dremel mounted on it's drill stand. I mounted the part to be machined in a vice and then set the depth of the cut on the drill stand and manoeuvred the vice underneath it by hand as I don't have an 'X' 'Y' machining table. The cuts are not as accurate as you would get them with a table but I think they turned out OK. After the rabbets were cut the stem and keel were doweled and glued to the hull. The rabbet can seen in the above photo. The stern extensions and the stern counter were then fitted. All comments welcome. Thanks for looking and the likes.

- 86 replies
-
- 6
-
-
- pickle
- caldercraft
- (and 1 more)