rafine
-
Posts
2,932 -
Joined
-
Last visited
Content Type
Profiles
Forums
Gallery
Events
Everything posted by rafine
-
 As indicated earlier today, attached are the final photos of the cross section build. This was a really fun build, made even more so by being part of a great group of talented builders and warm, encouraging and helpful friends. As with all builds the end is bittersweet -- nice to be done and looking forward to the next, but sad to part with a "member of the family". This was also a learning experience for me. I learned that it was possible for me to do a framed scratch build with only hand tools, including tools like chisels, which I had never used before. On the other hand, I learned that it is highly unlikely that I will ever attempt a full framed ship -- simply too much time and effort at my age (I might consider another cross section at some point). I'm happy to be looking forward to a return to kitbashing (or kit enhancement as B.E. calls it). Essex is sitting here waiting and I'm starting to figure out how I'll "enhance" it. Thanks again to all who have followed and supported this build. Bob

- 274 replies
-
- 14
-

-
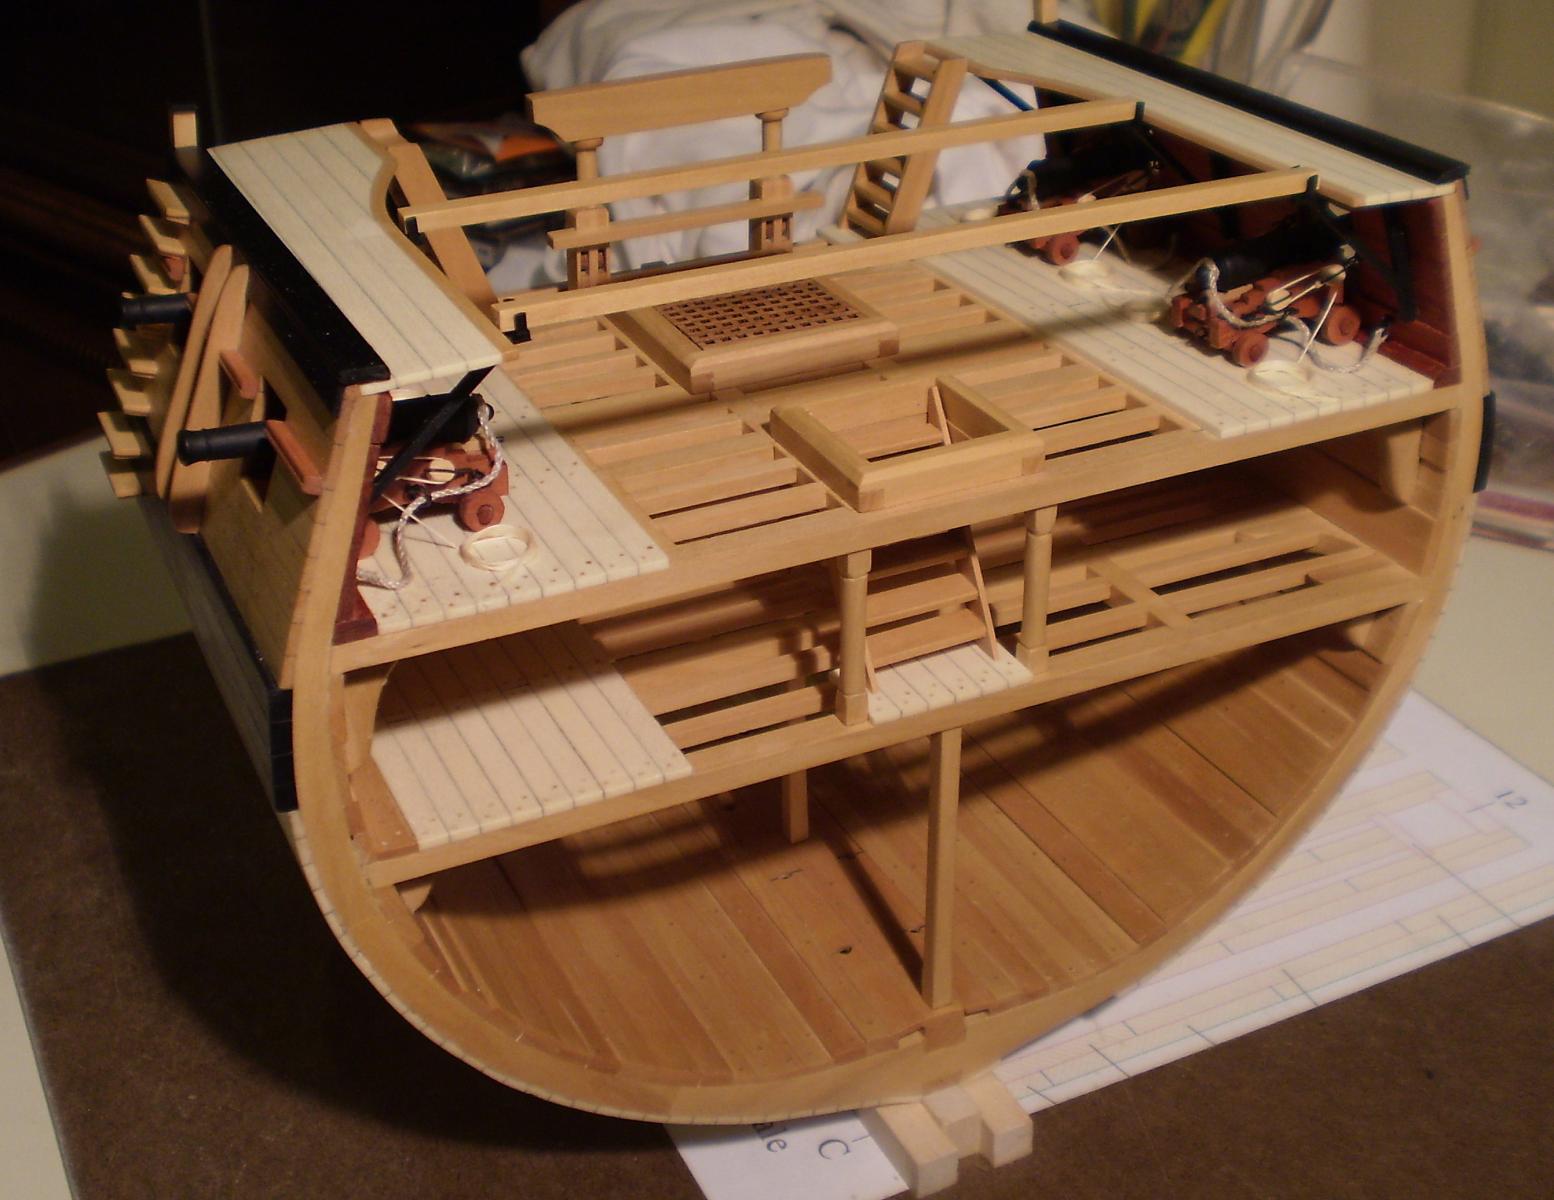
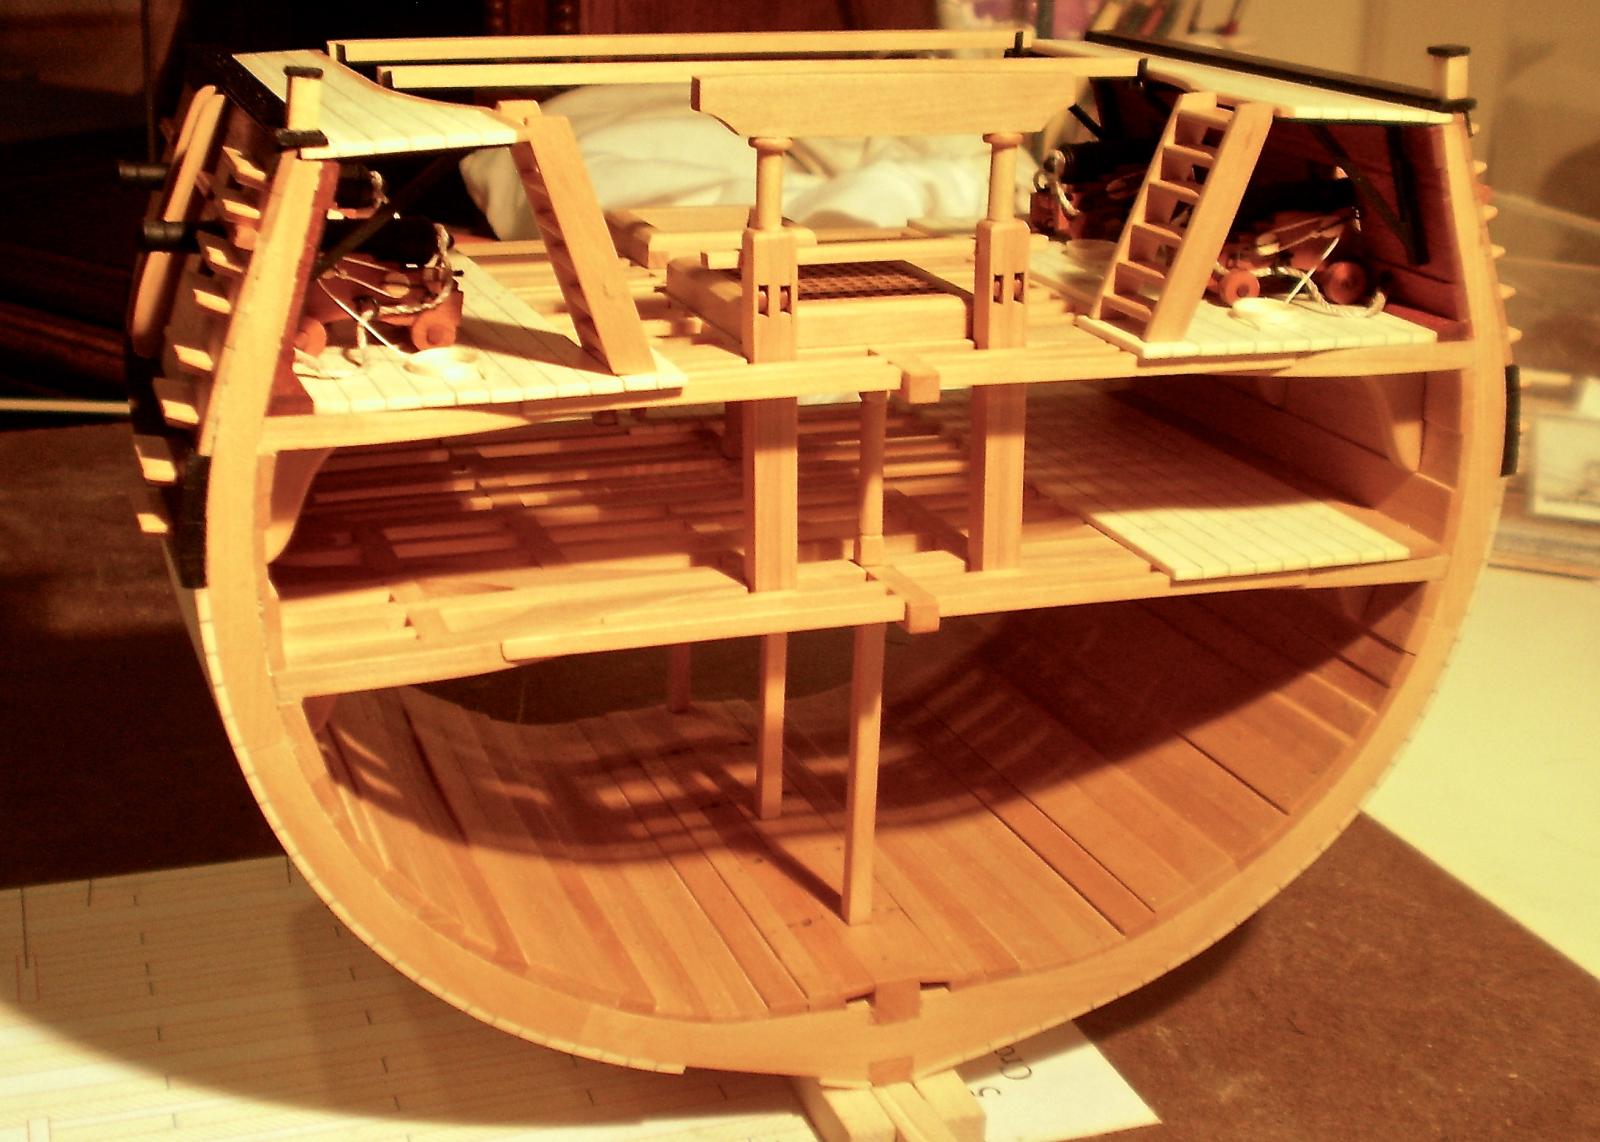
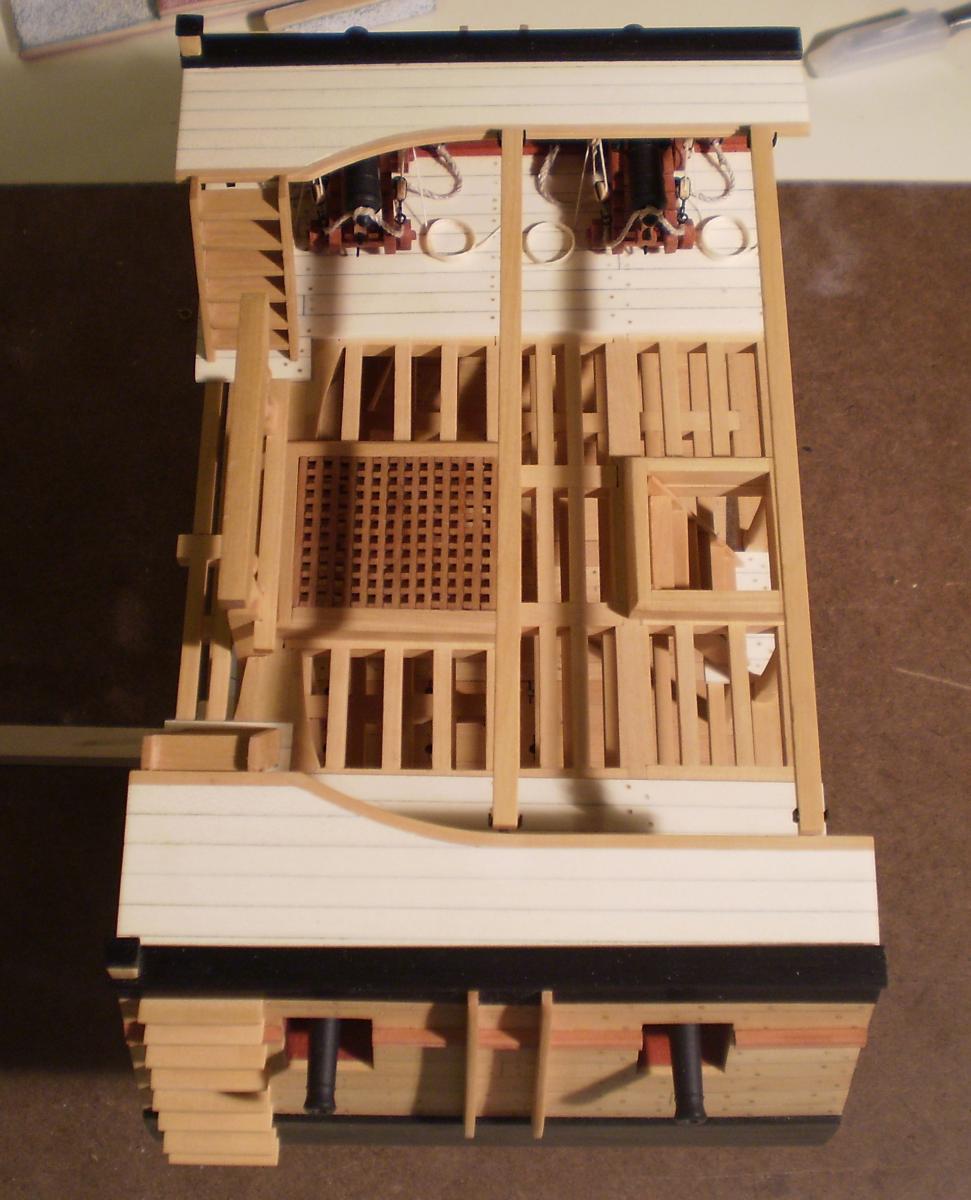
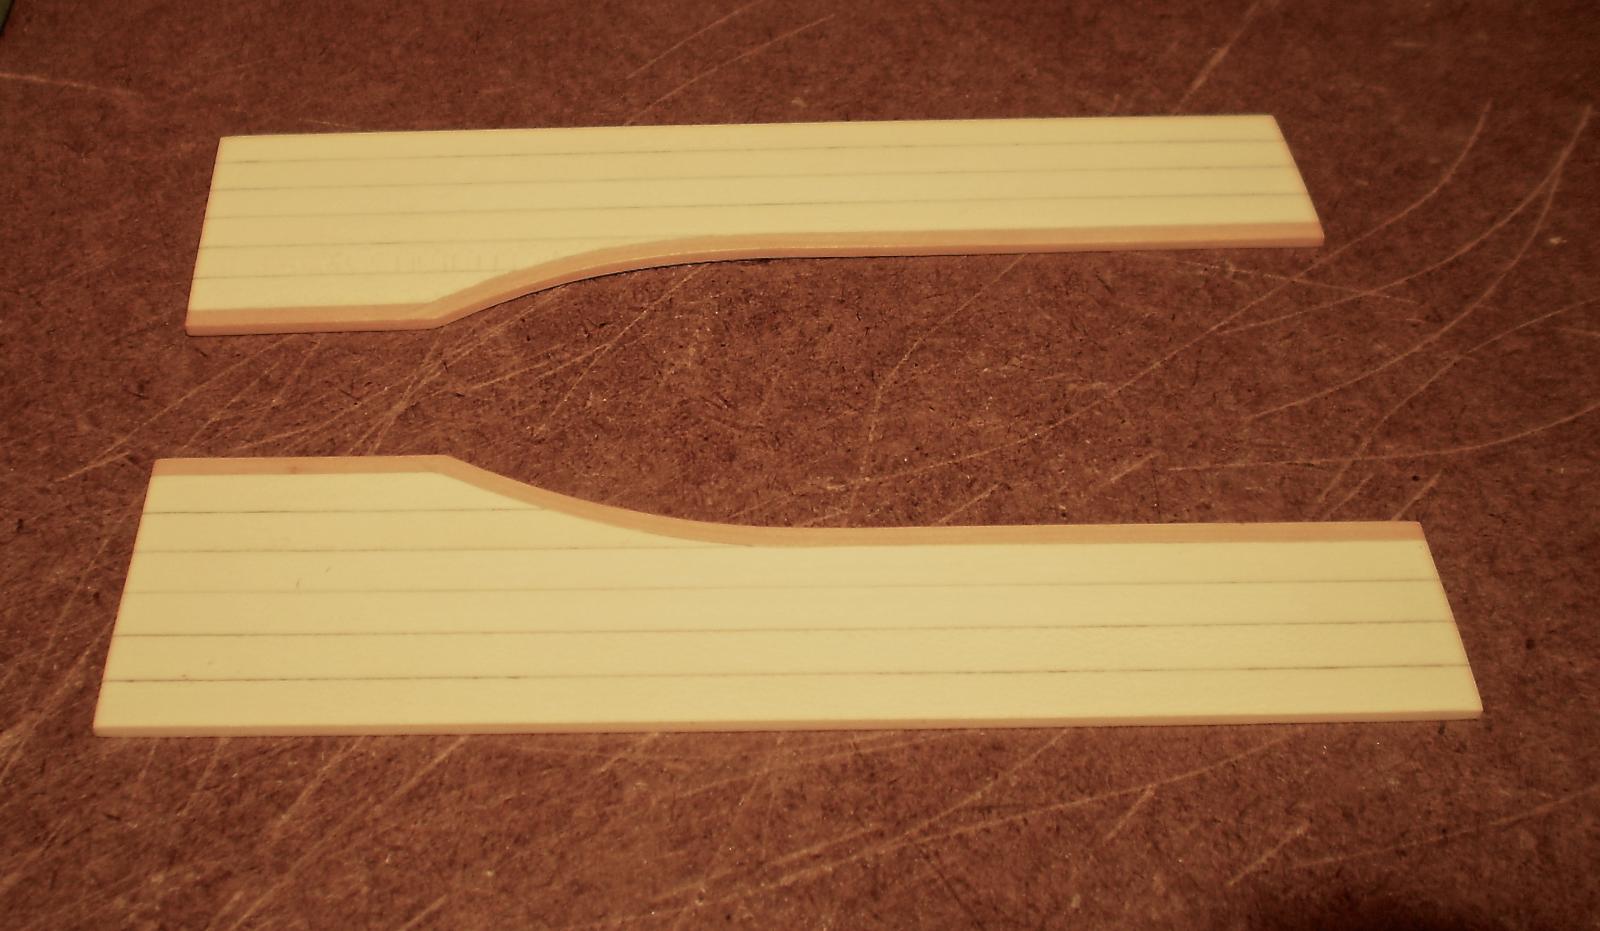
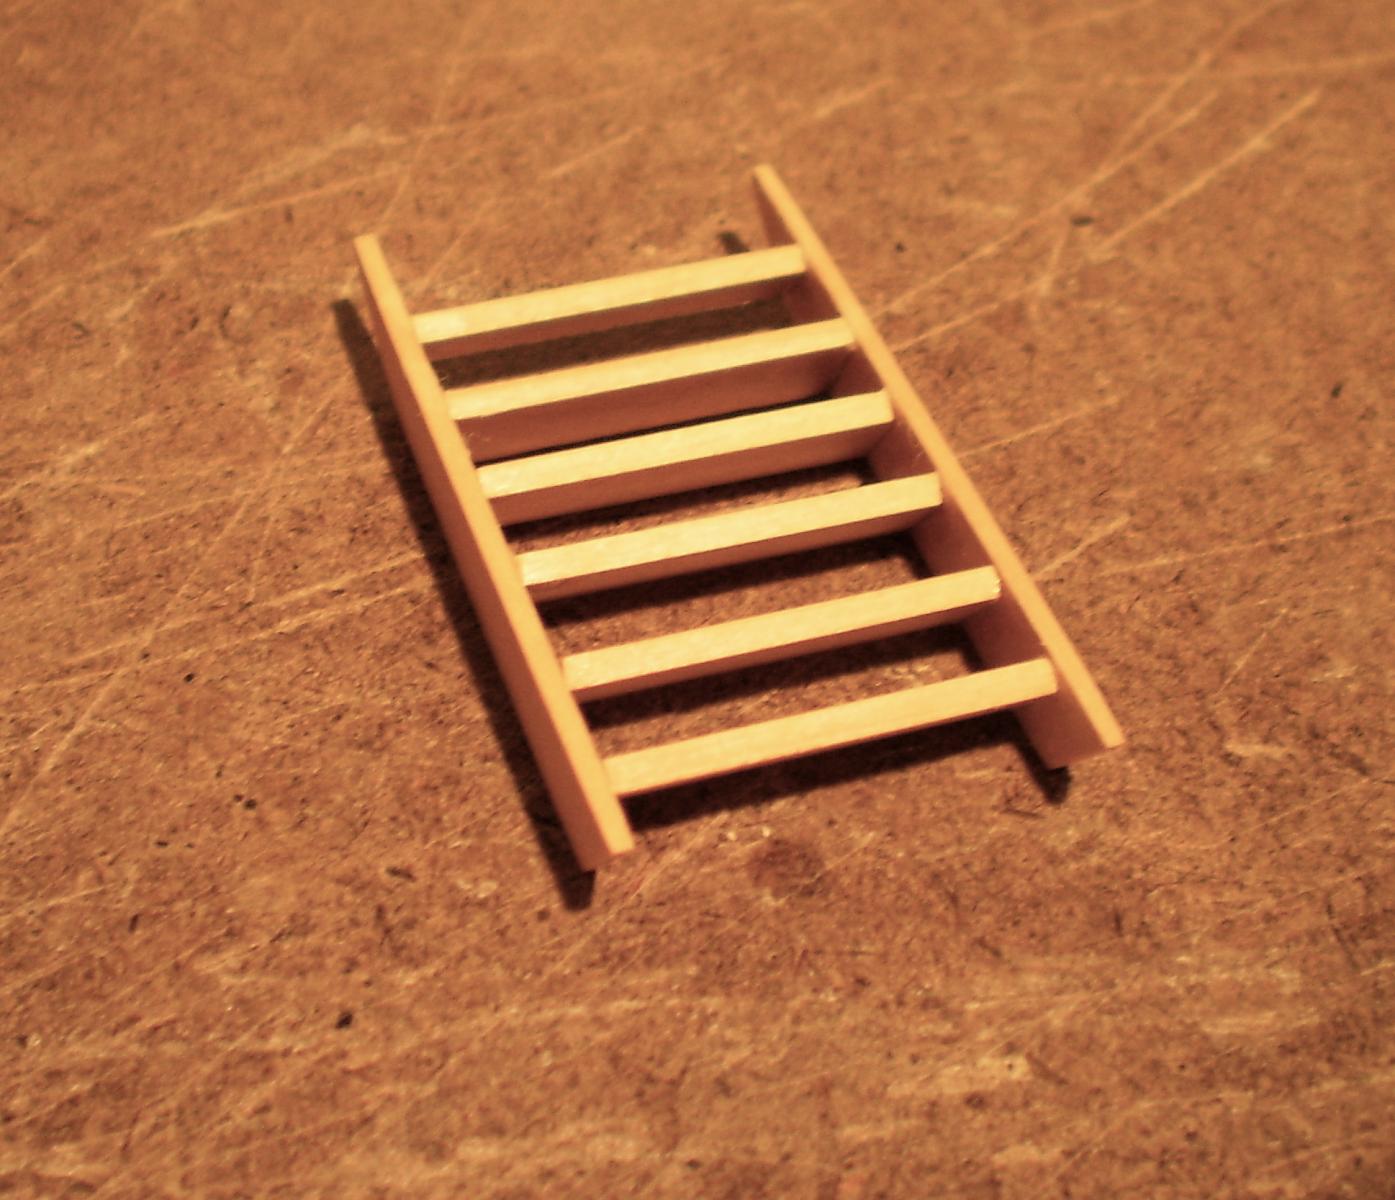
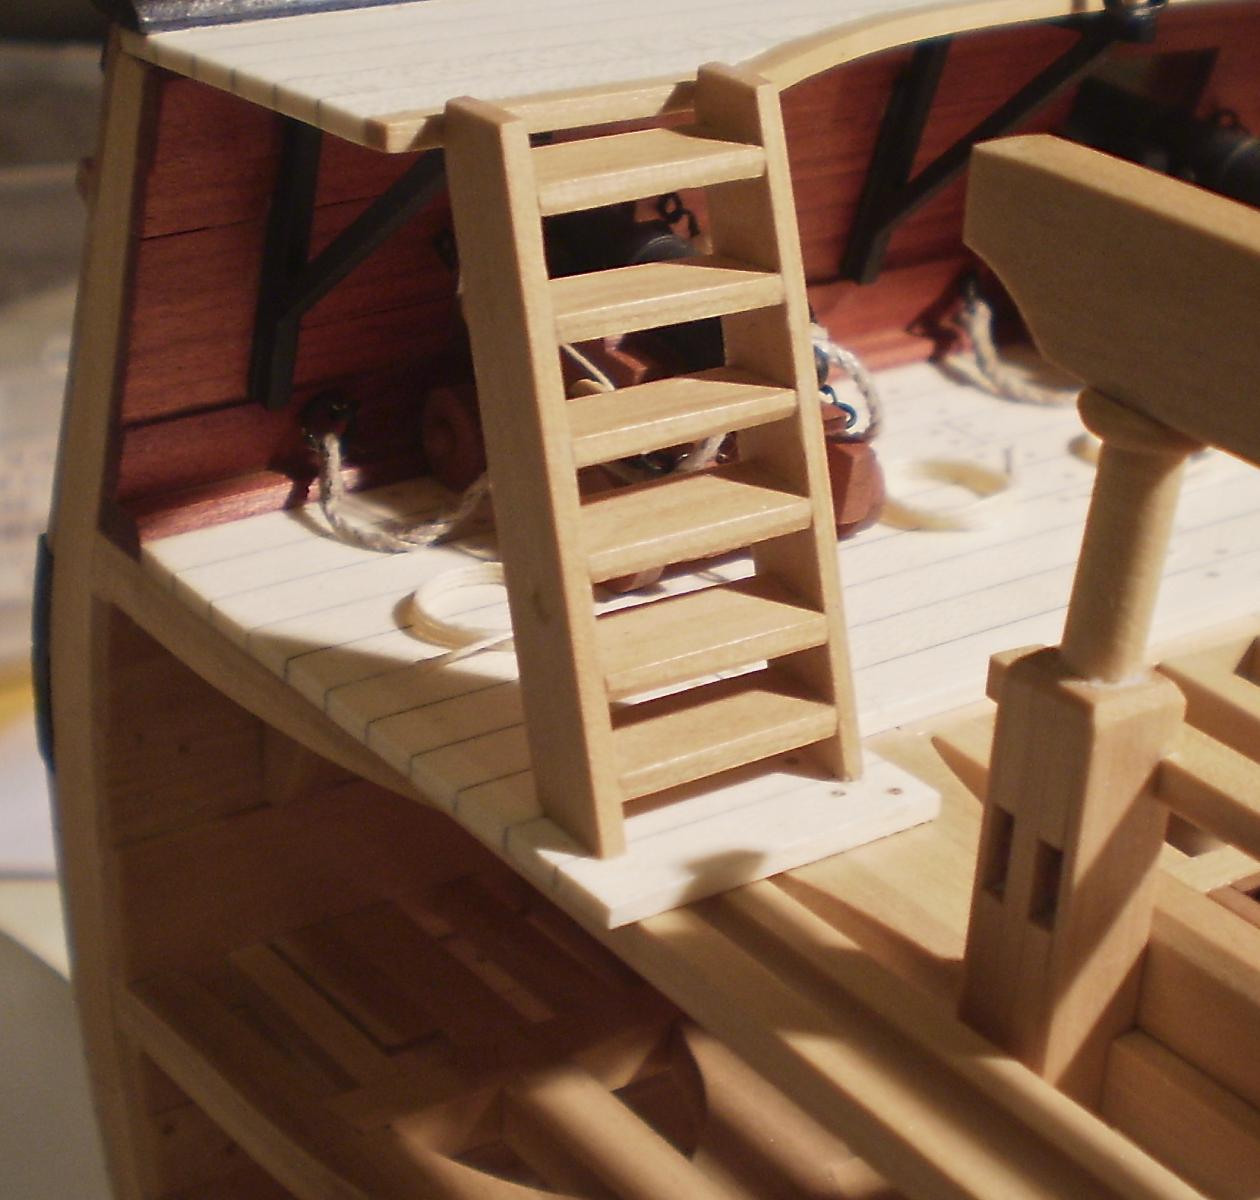
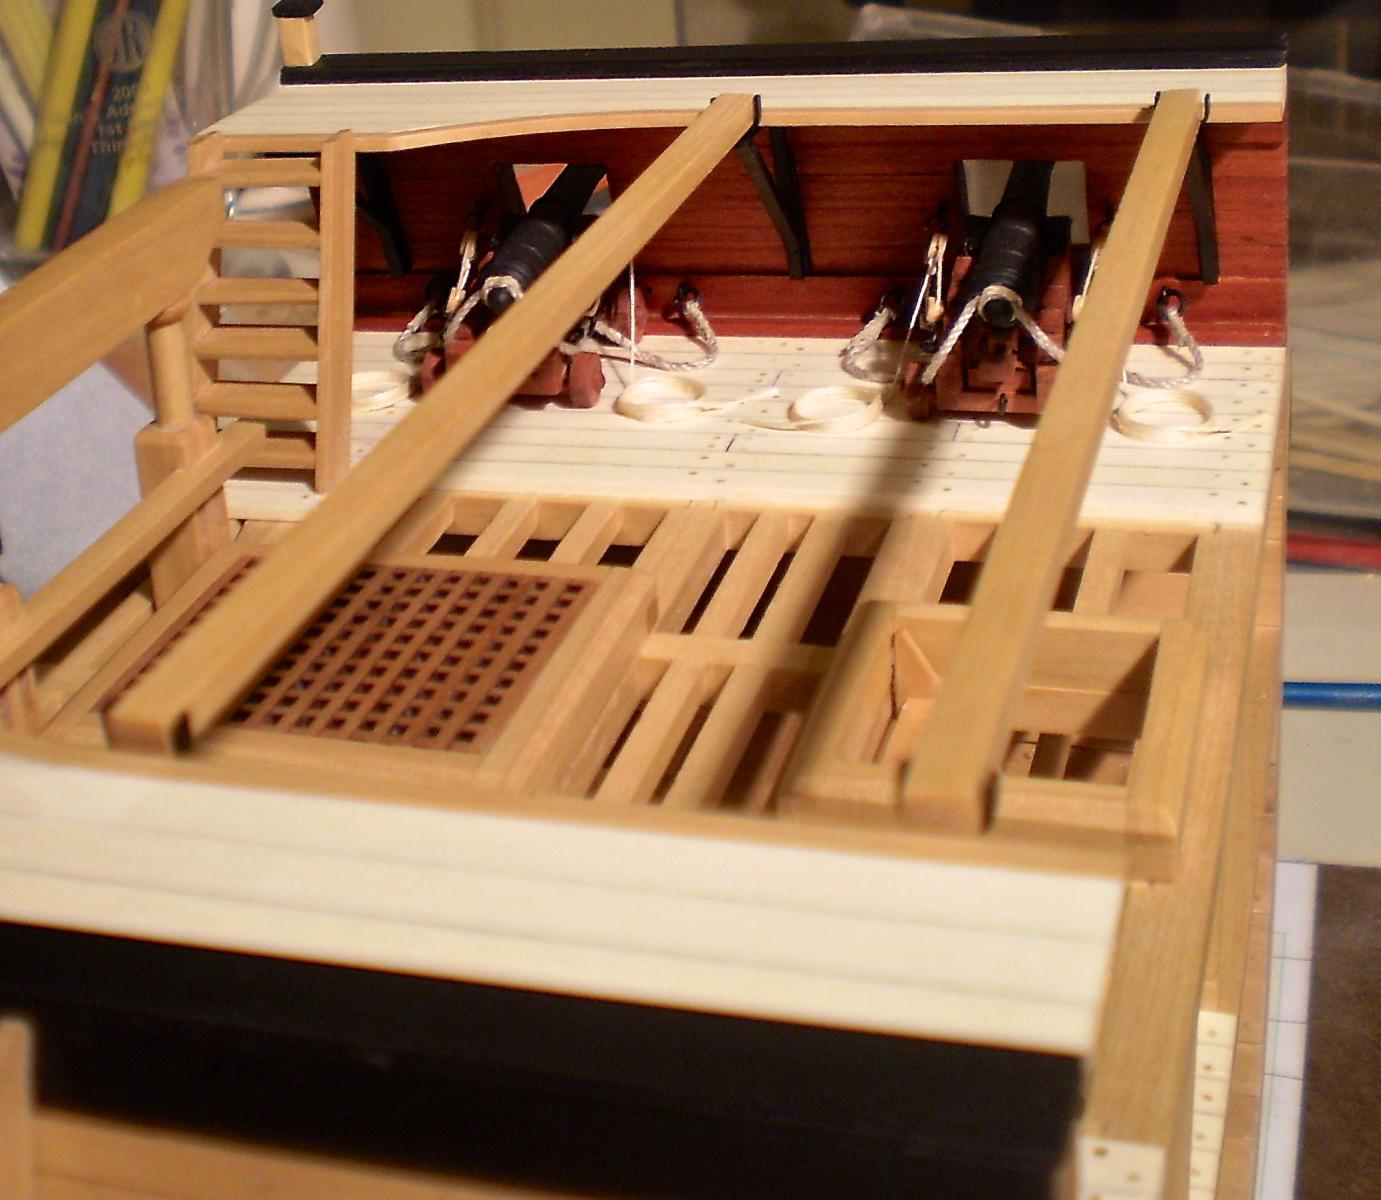
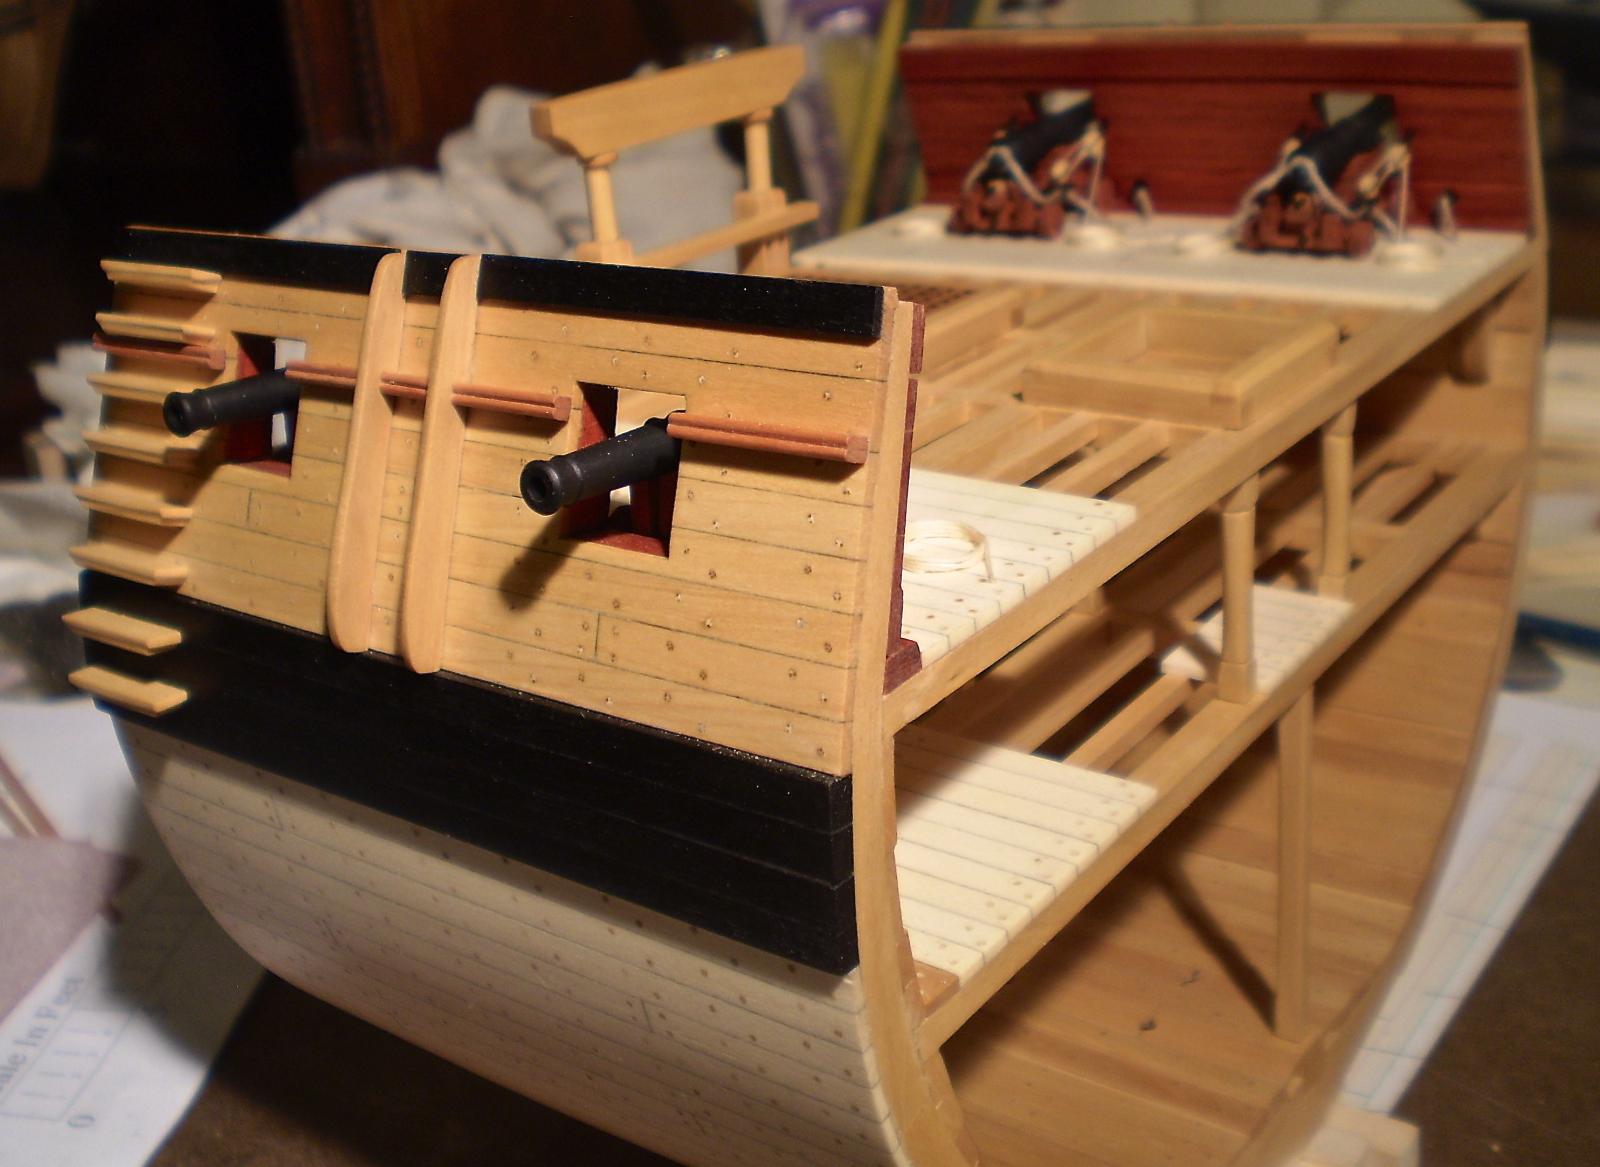
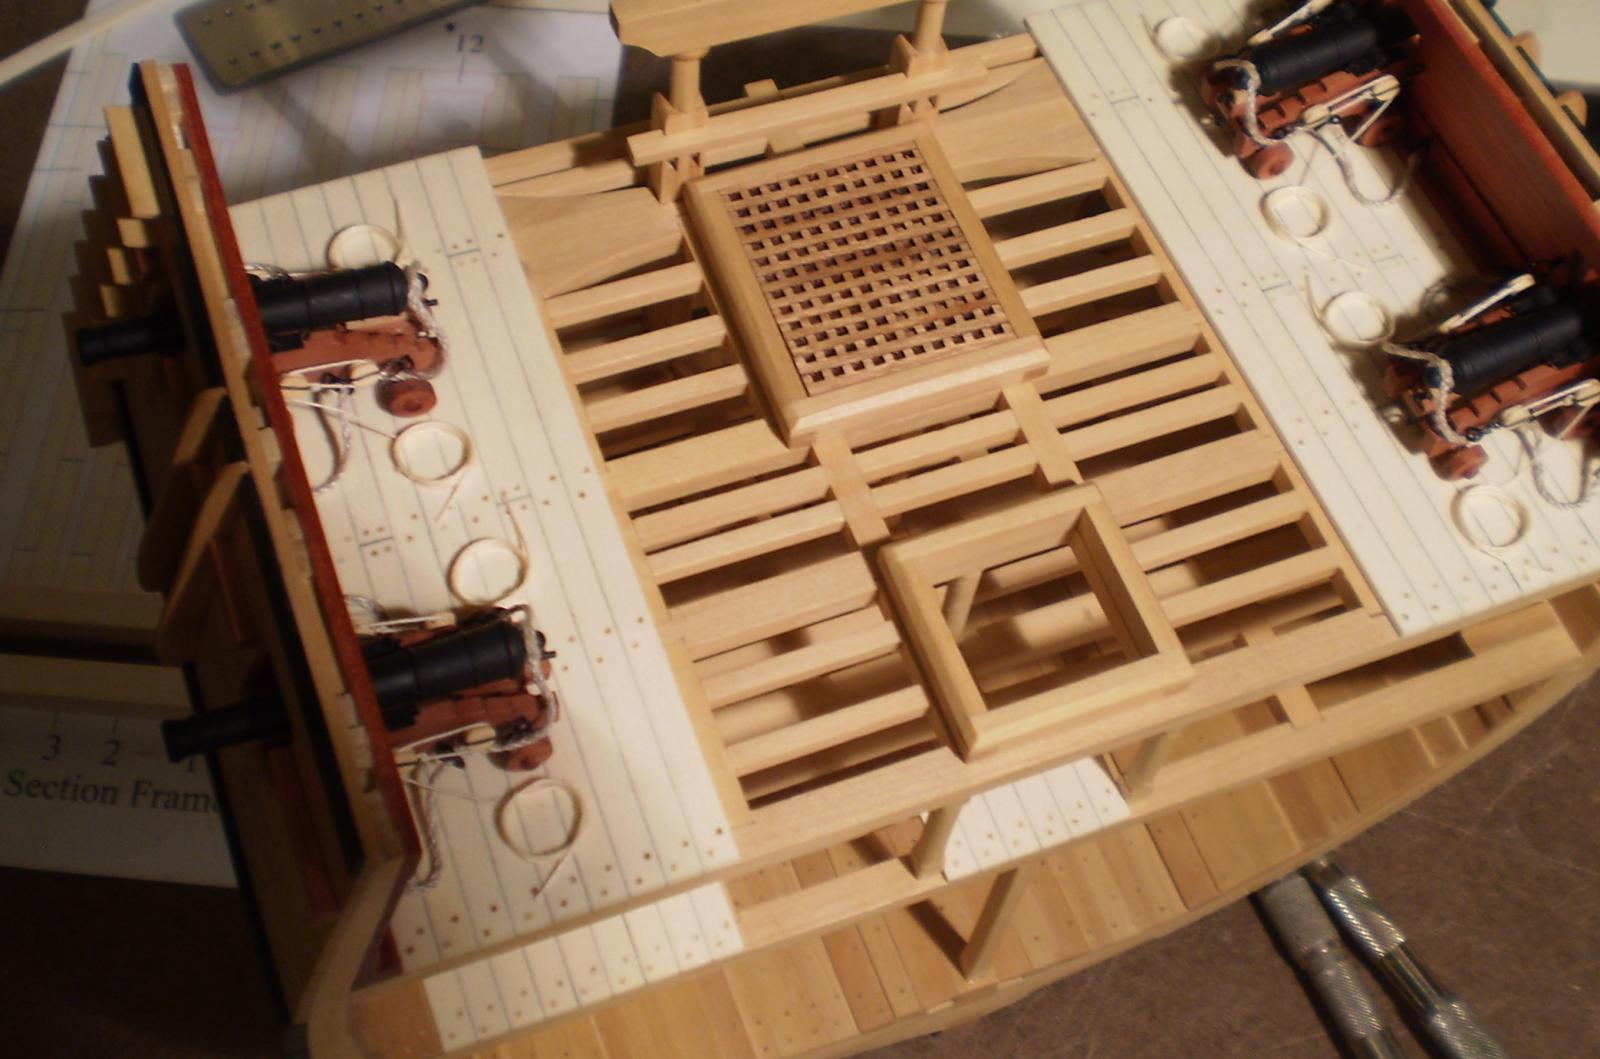
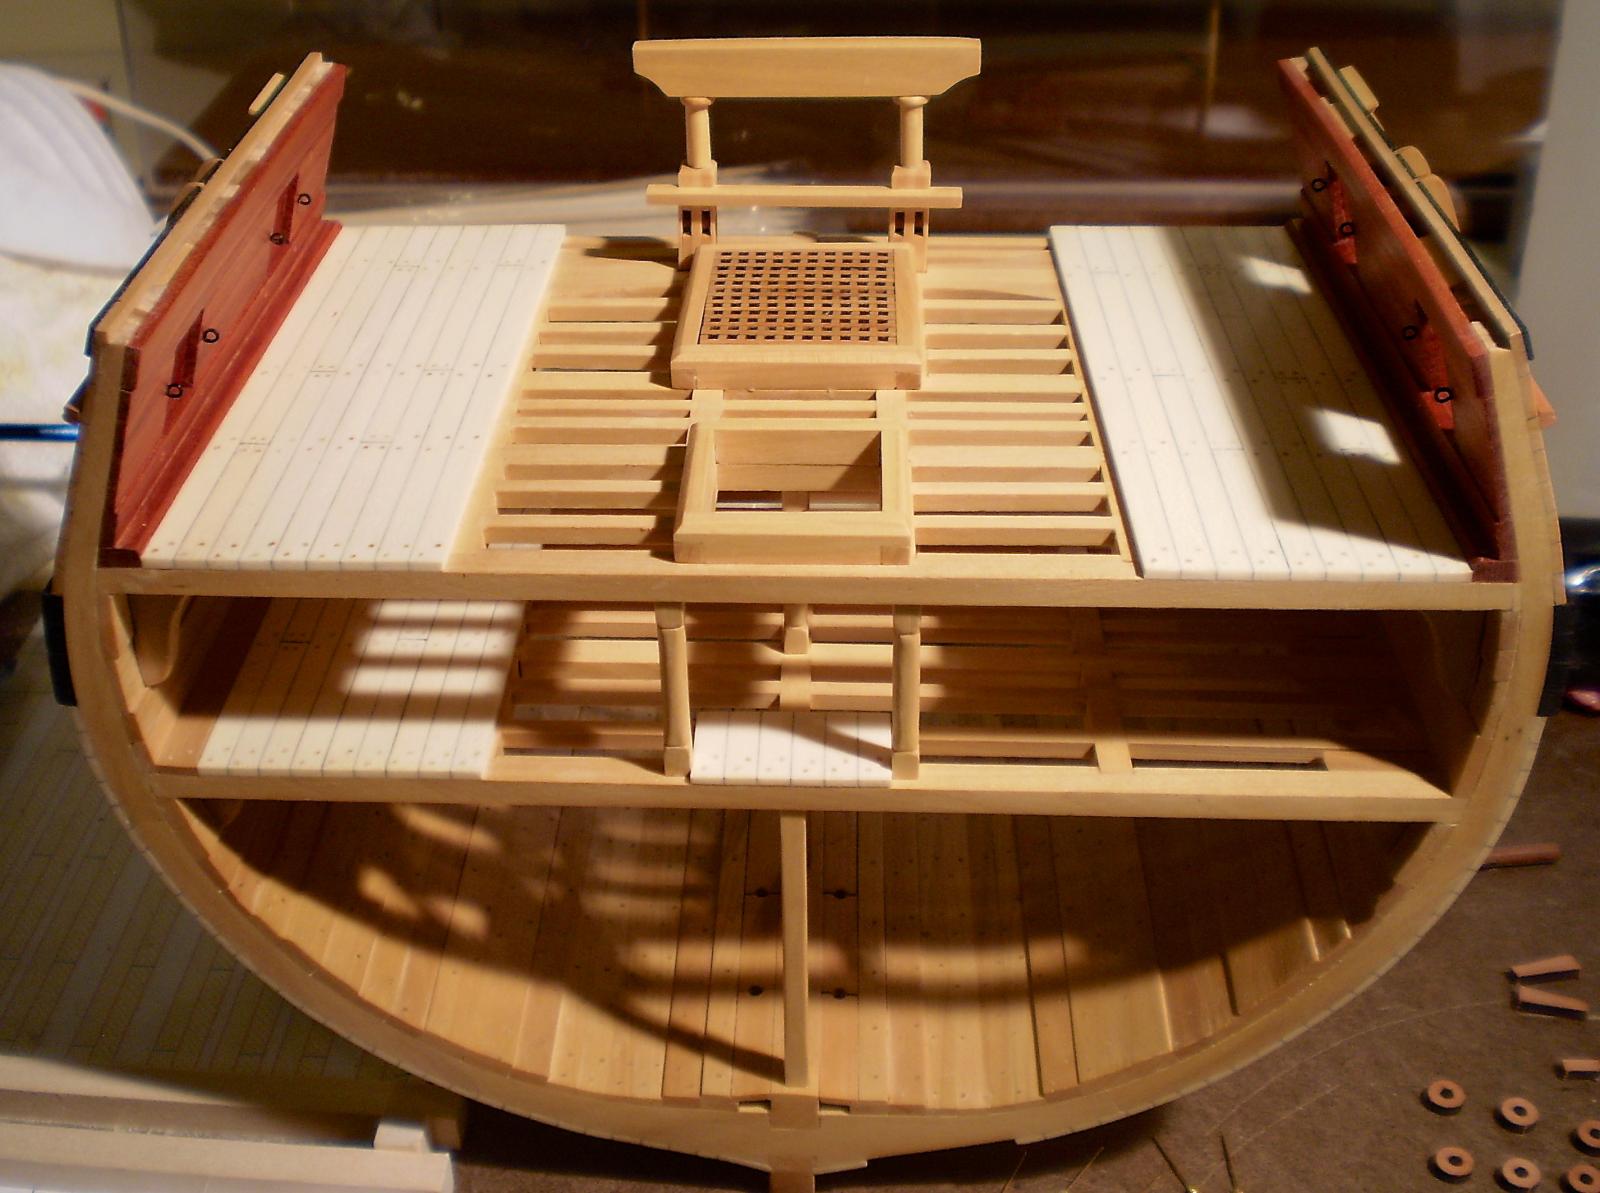
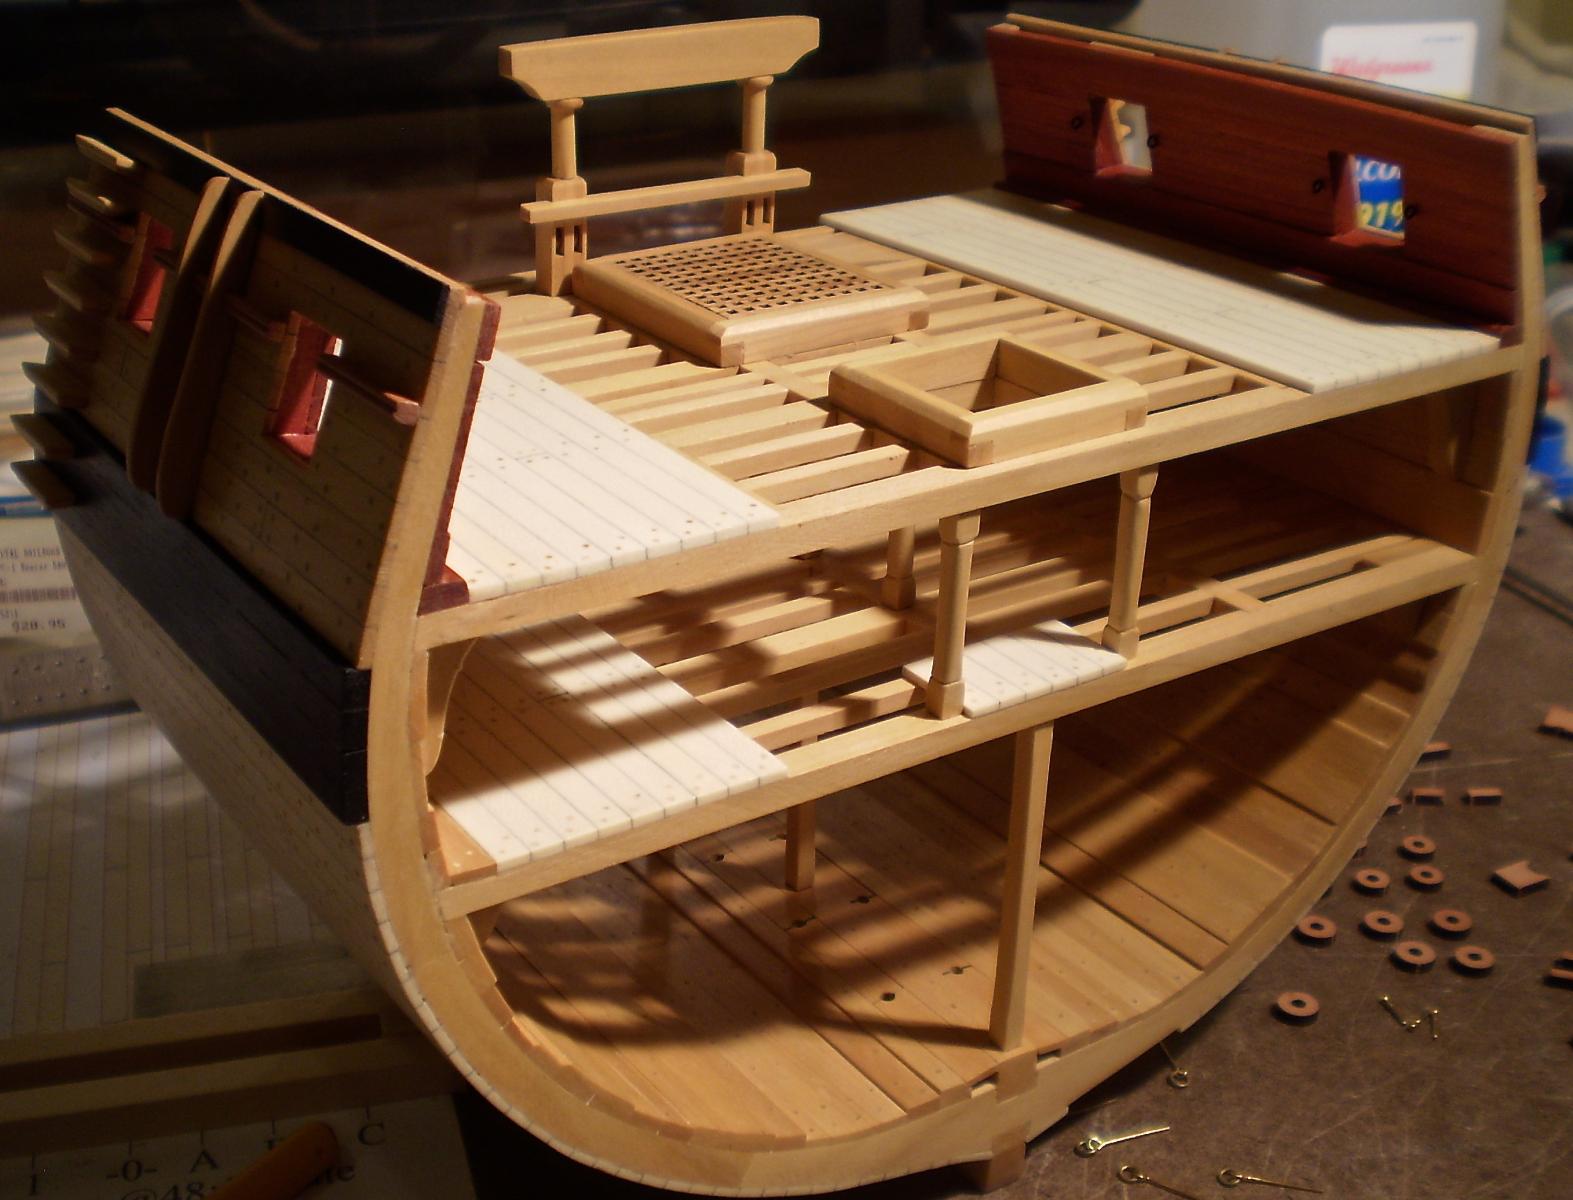
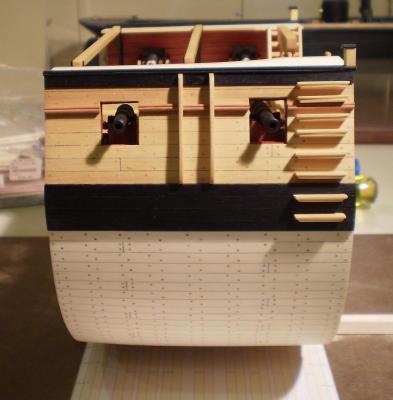
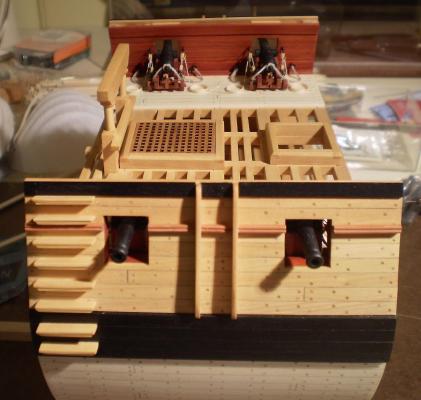
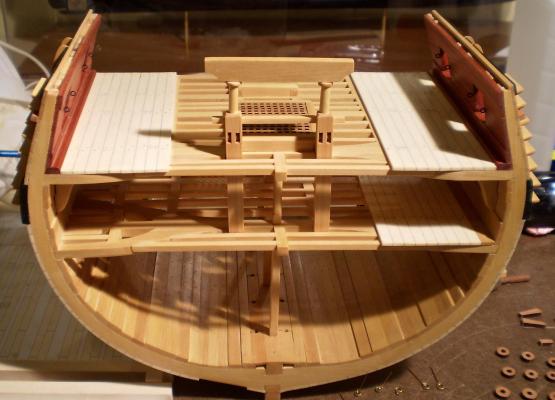
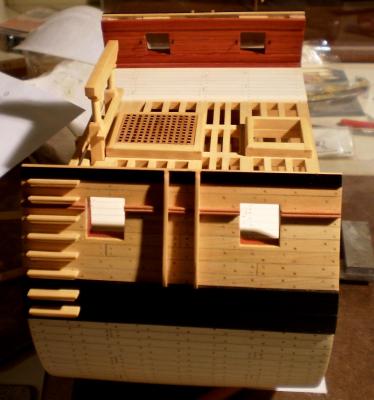
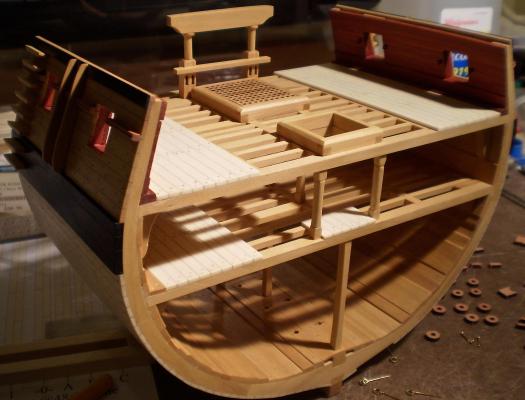
In a burst of activity over the last few days, I completed all of the remaining work on the cross section. This included making and installing the gangway brackets, the gangways, the cap rails, the ladders, bits of deck planking for the gangway ladder landings, the skid beams and the tiny slivers of the quarter deck rail. Because of my fear and loathing of working with metal, I made the brackets from wood, with the exception of the skid beam crutches, which are brass. The gangways were done with holly, with boxwood trim. The skid beams are boxwood, as are the ladders. The cap rails were made from laminations of ebony, sanded to create a molded outer edge. The fussiest part of this work was mounting the brackets so that they aligned properly and were level for the installation of the gangway. It required a lot of time and even more bad language. Later today, I will post photos of the fully completed model and my thoughts about the project. Bob


- 274 replies
-
- 12
-
-
It's looking very good Ken. You're off to a very nice start. Bob
-
Good to see you back at it, John. Looking very nice. Bob
-
It's looking very nice Ed. The filler should be put in the holes before any finish is applied to the deck and then the deck can be sanded and/or scraped. You could still possibly fill the holes and then sand and refinish the deck. Bob
-
Thanks for the vote of confidence, David. Bob
-
Thanks Ron. No full Triton for me, Im afraid. Next up will be a kit bashed MS Essex. Bob
-
Thanks so much Antony, Augie and Grant. I may have to sneak another peek at Essex soon. Bob
-
Thanks Paddy and Pete for the kind words. I've really enjoyed being part of this group project with so many talented builders. Bob
-
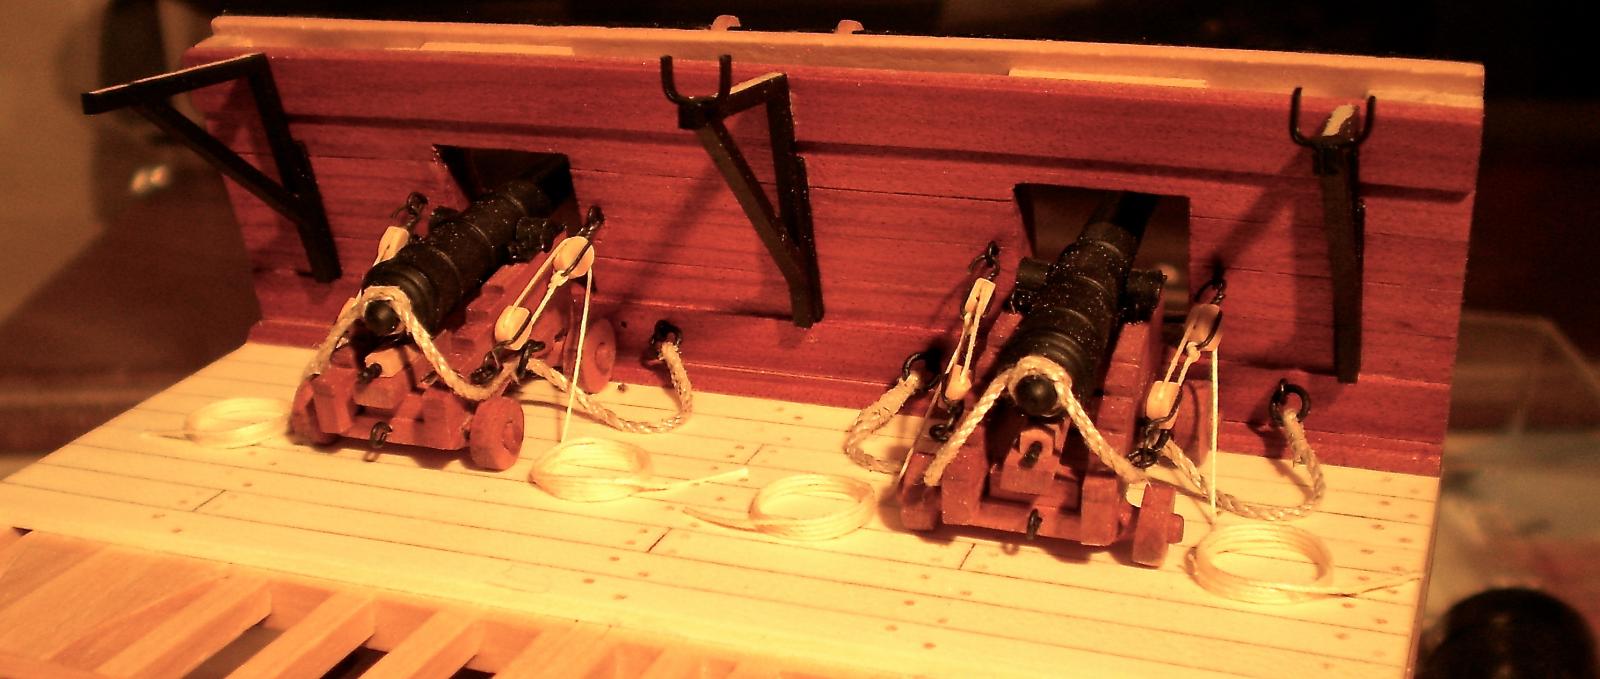
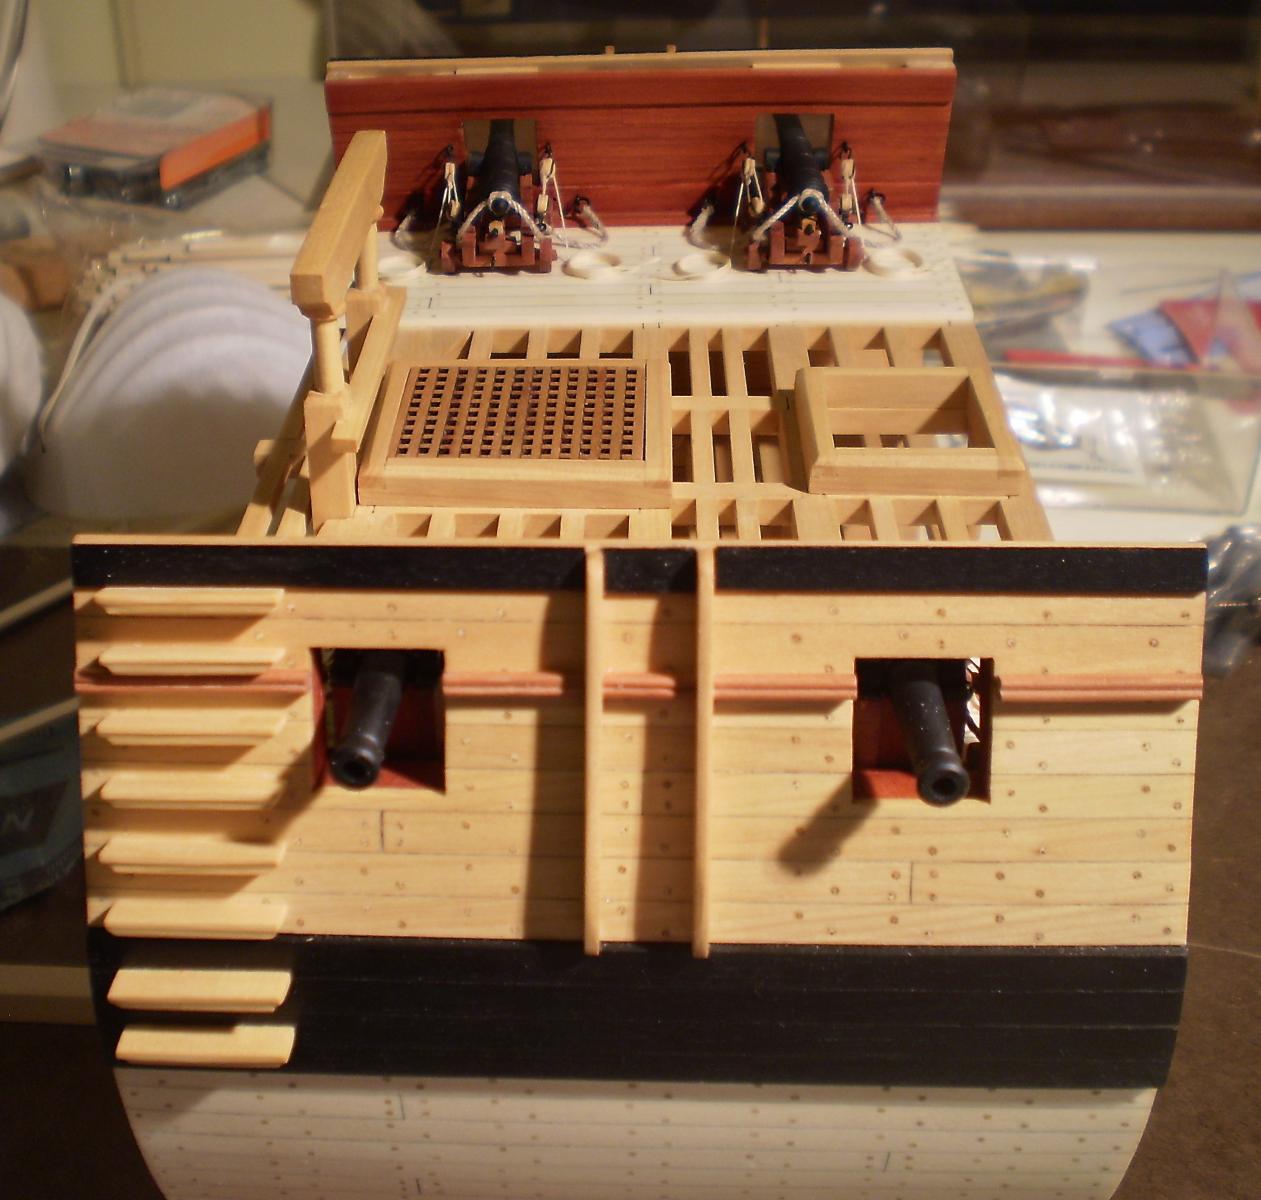
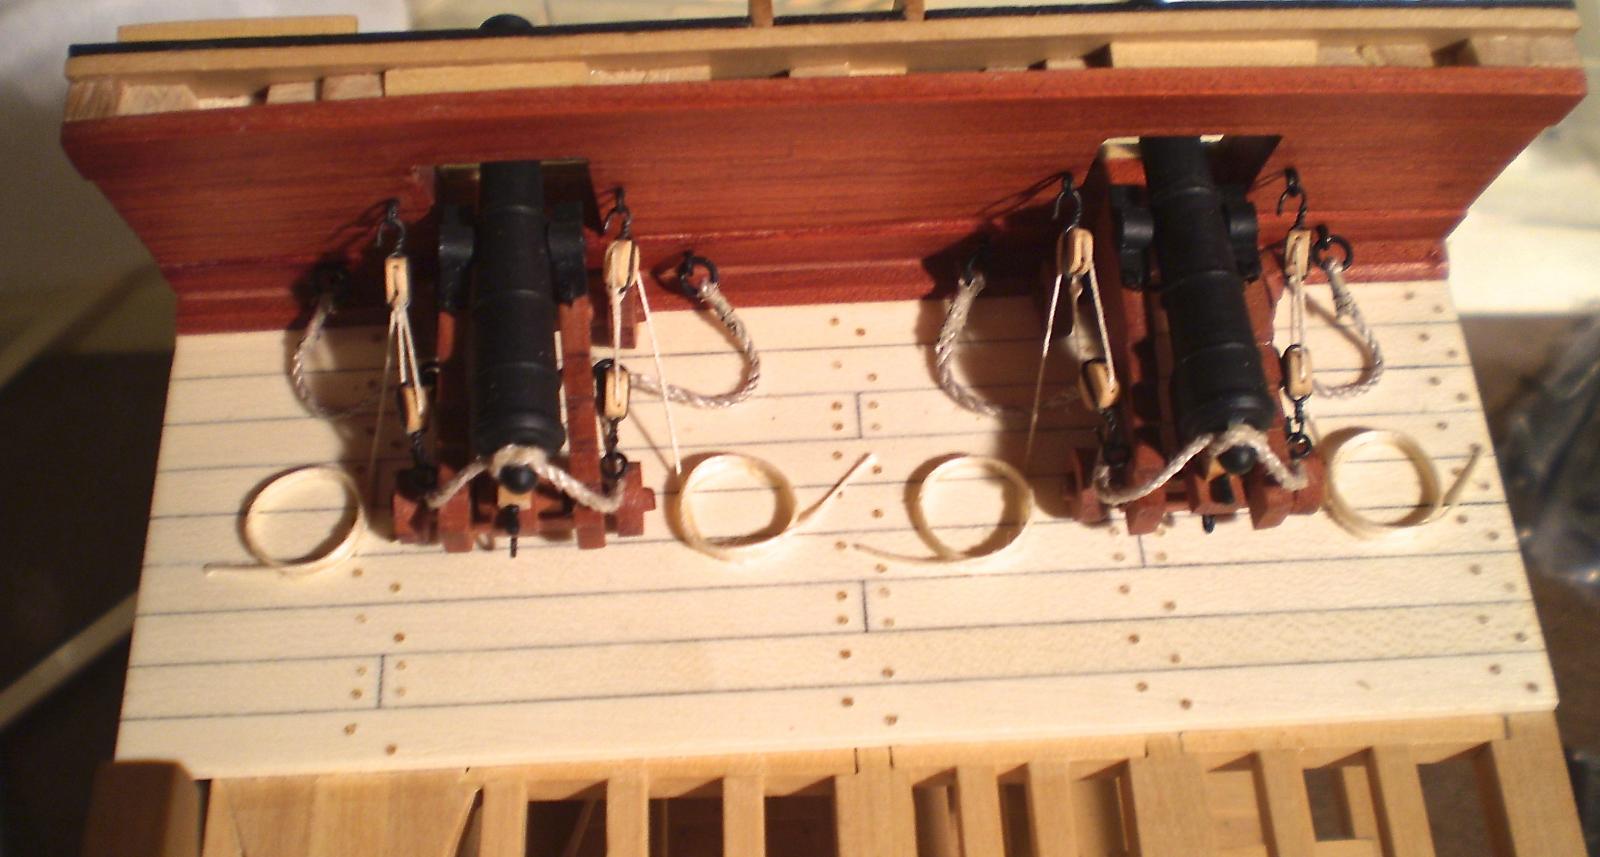
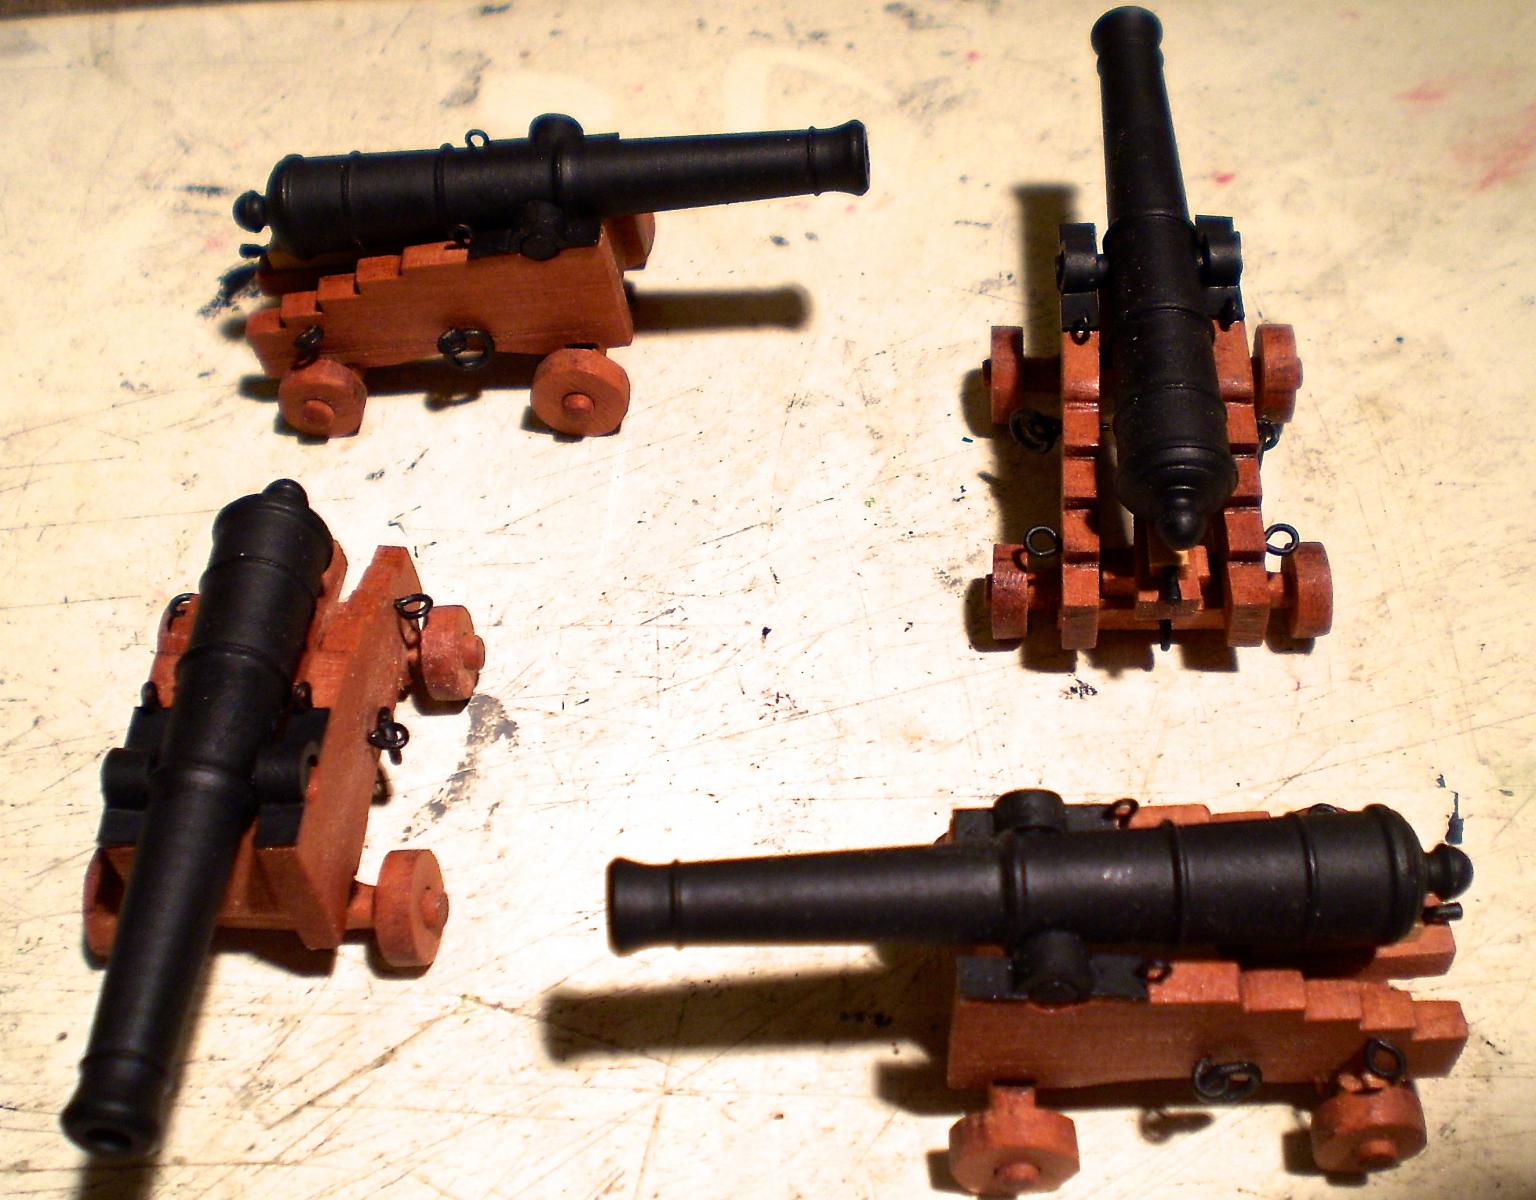
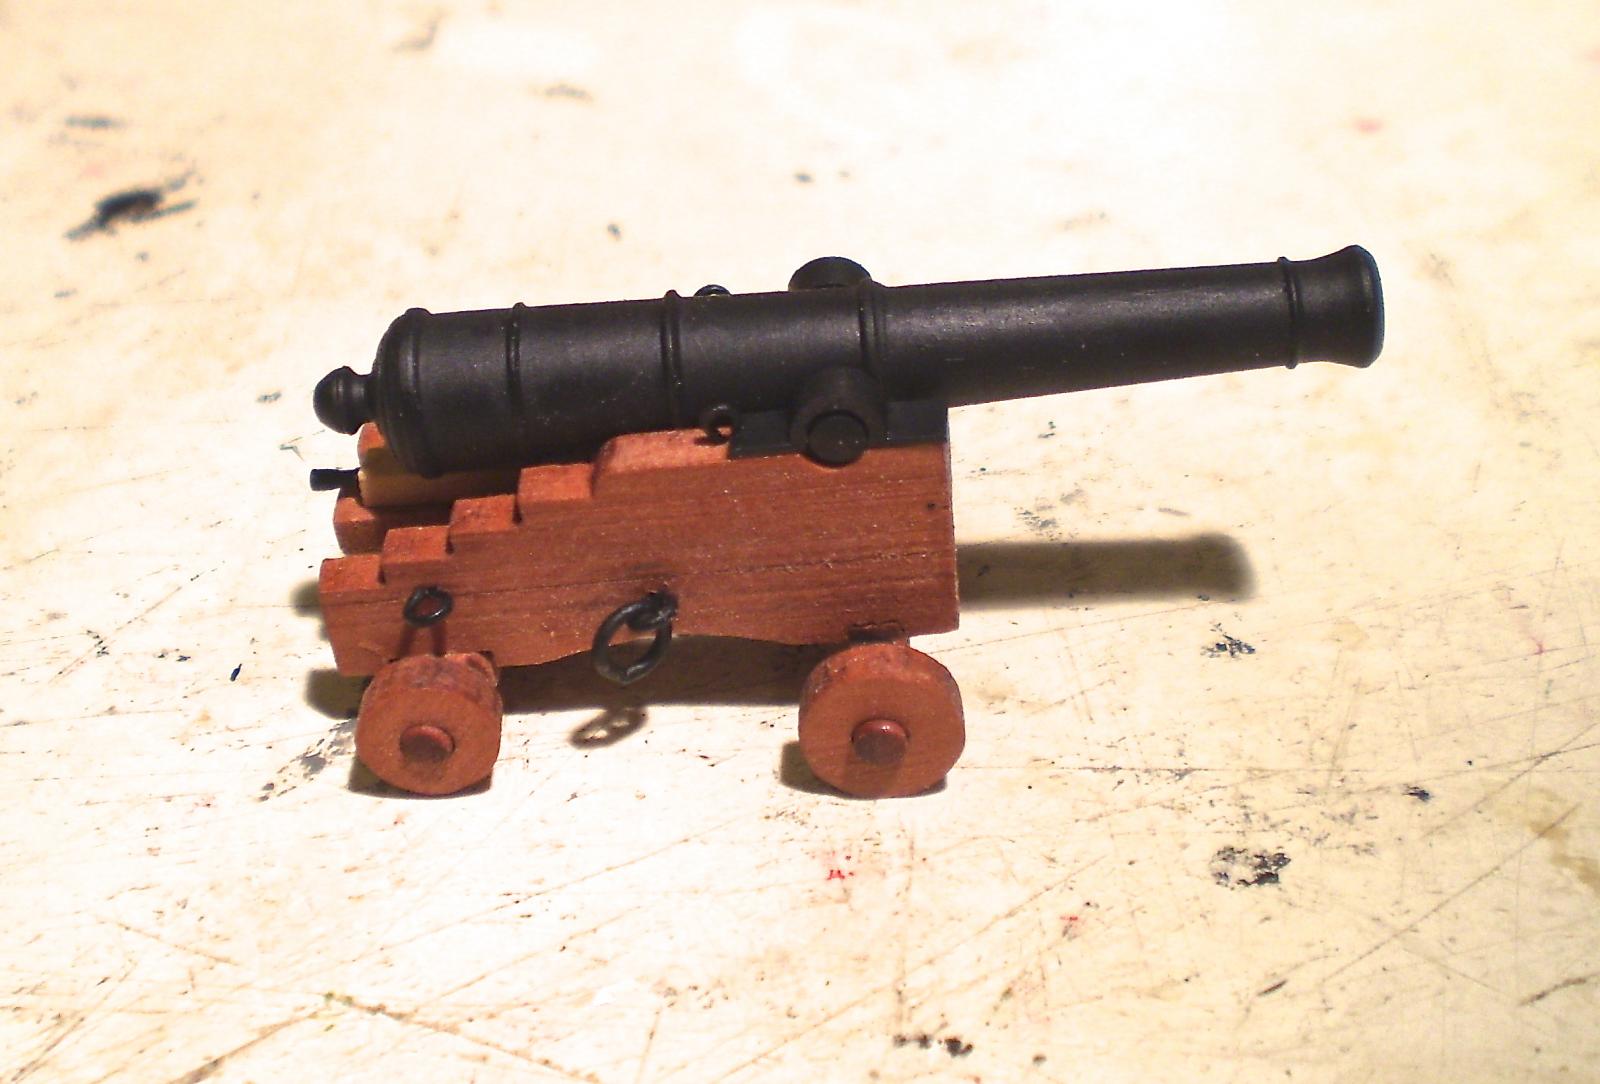
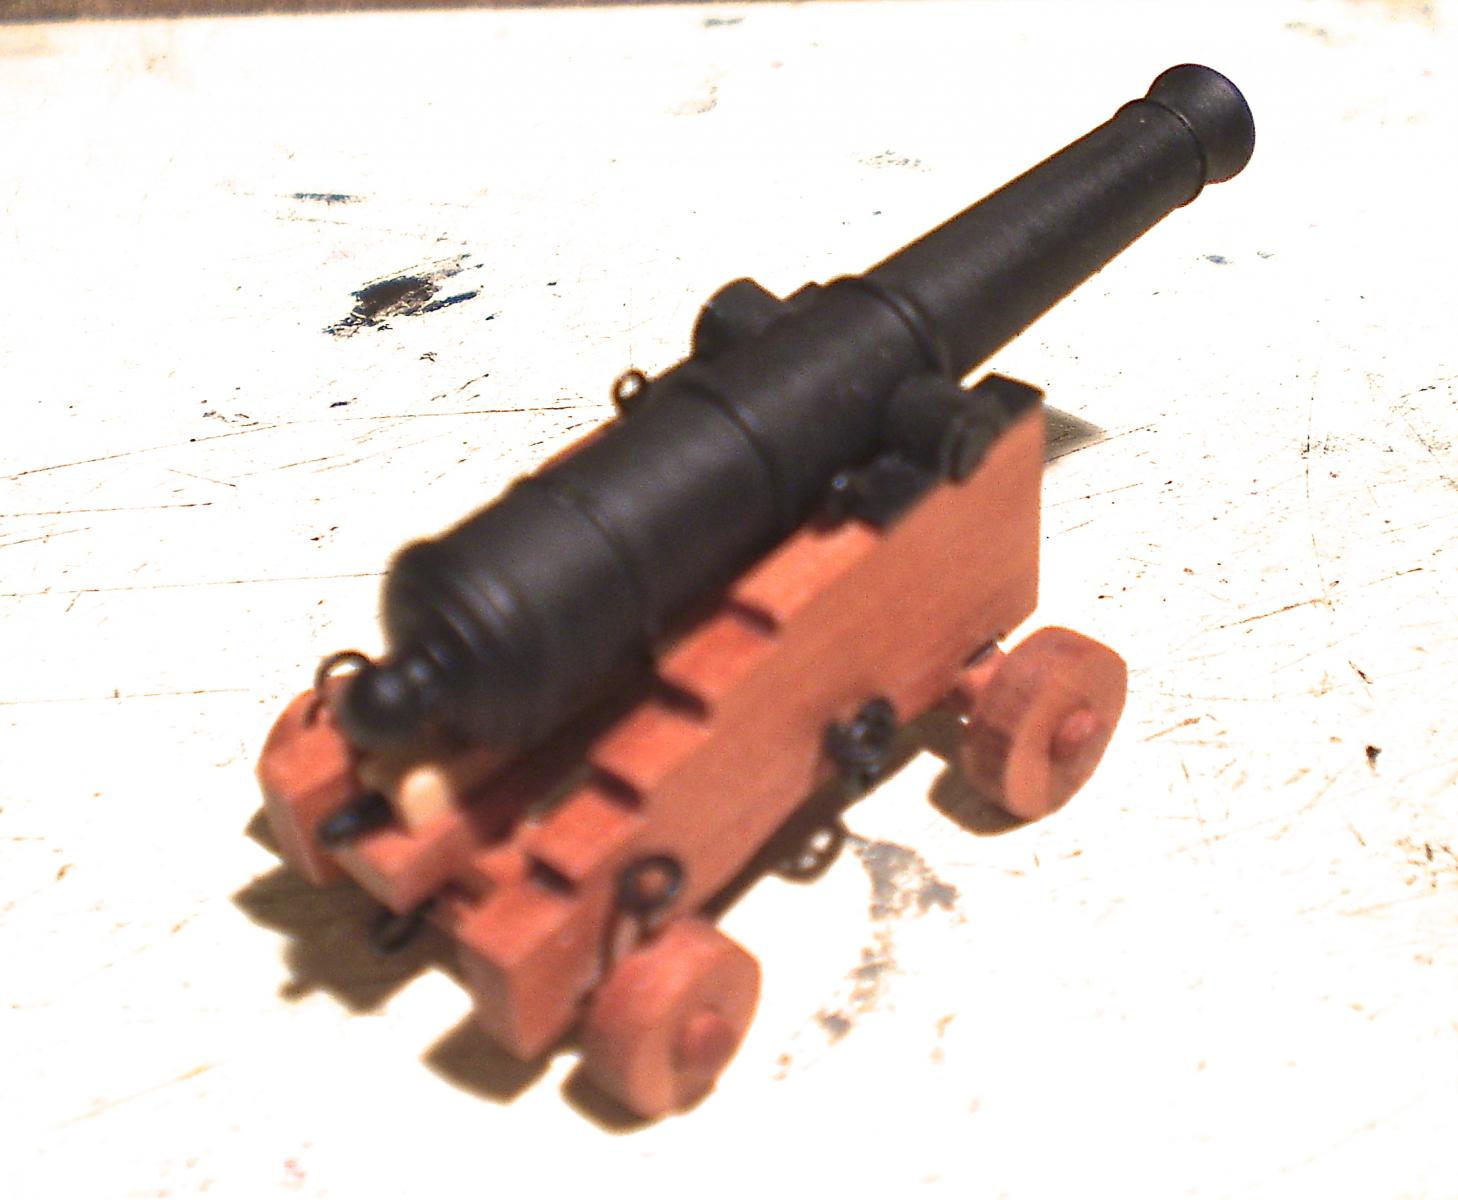
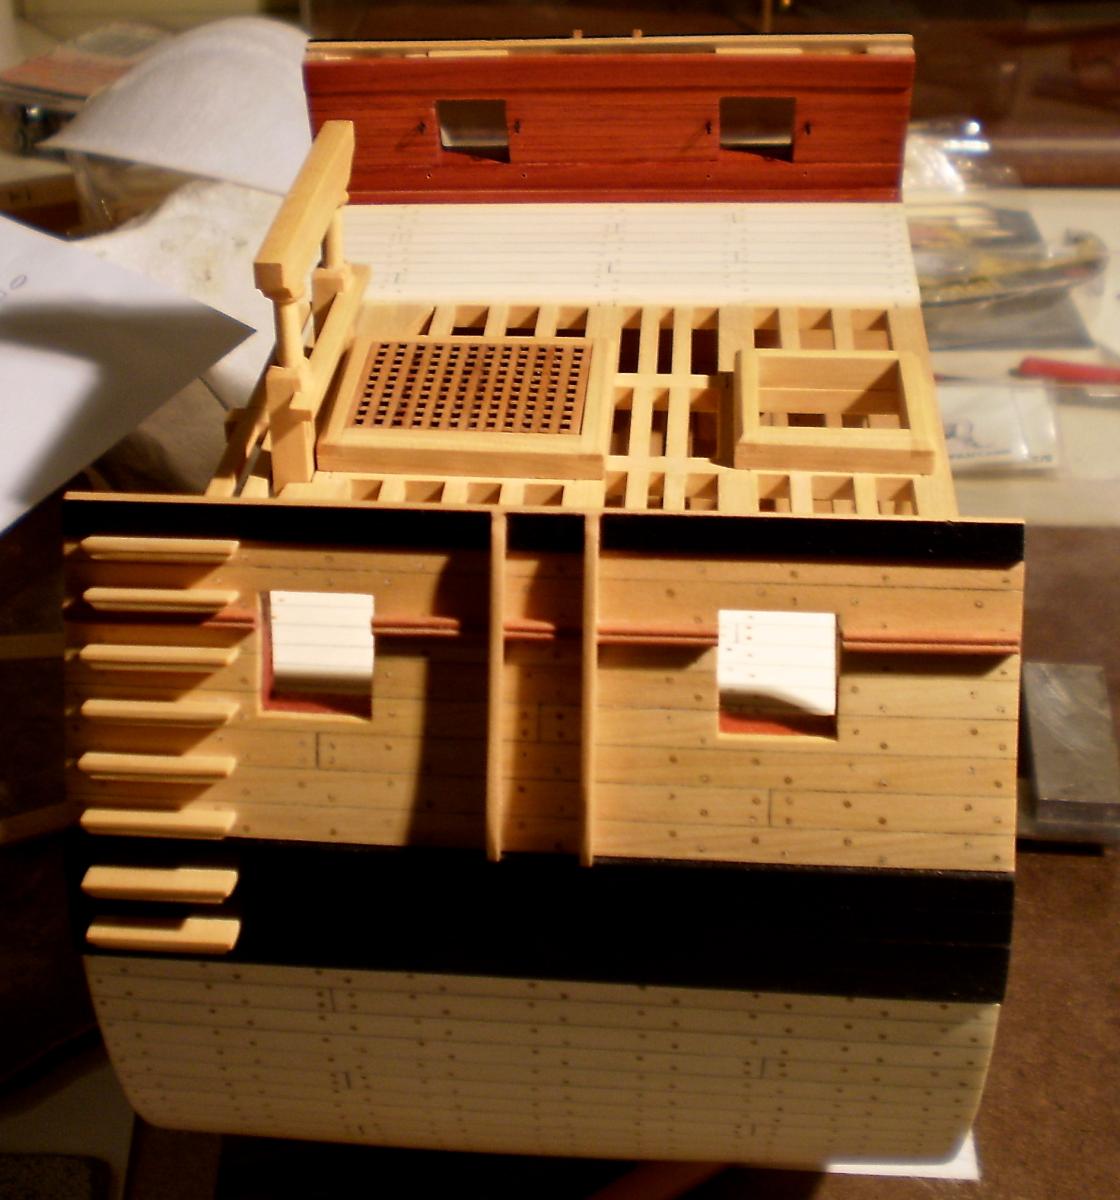
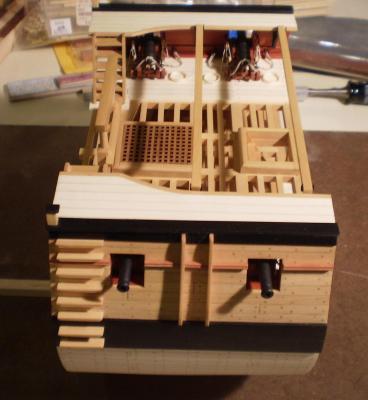
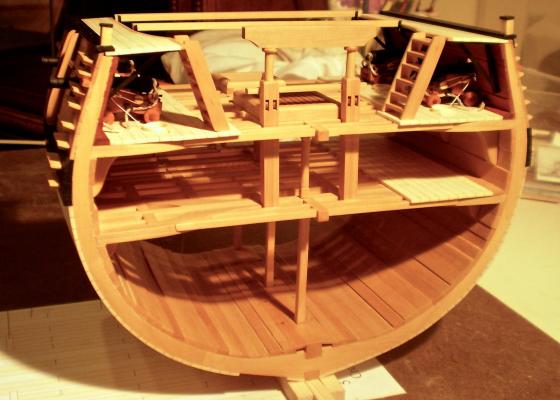
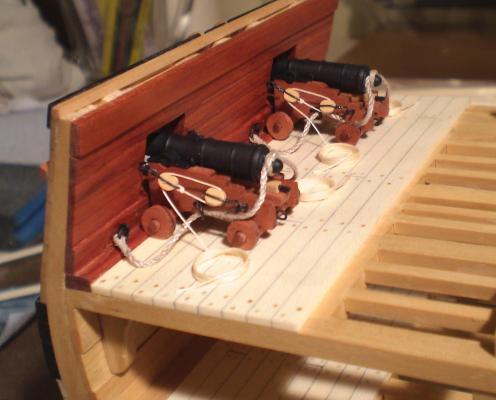
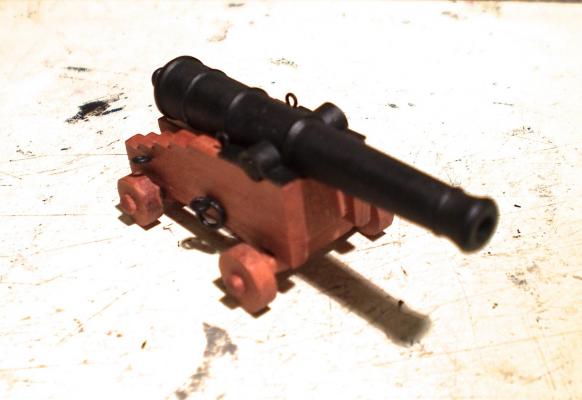
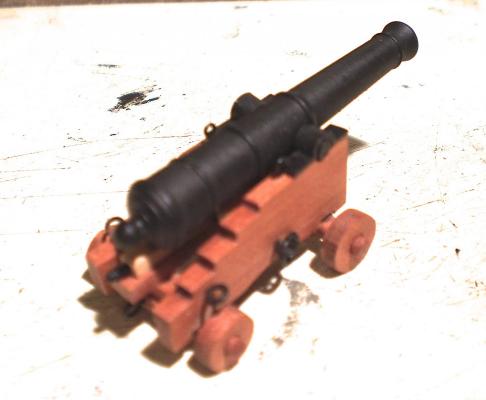
The guns have now been mounted and rigged. The blocks are from Chuck (my last scratch build "cheat"). They are very nice. The rigging was straightforward and presented no problems. Into the home stretch. It's on to the gangways and their supports and then the ladders. Bob


- 274 replies
-
- 11
-
-
Nice job with the ebony Mark. Nothing really beats the look of it if you can make it work. Bob
-
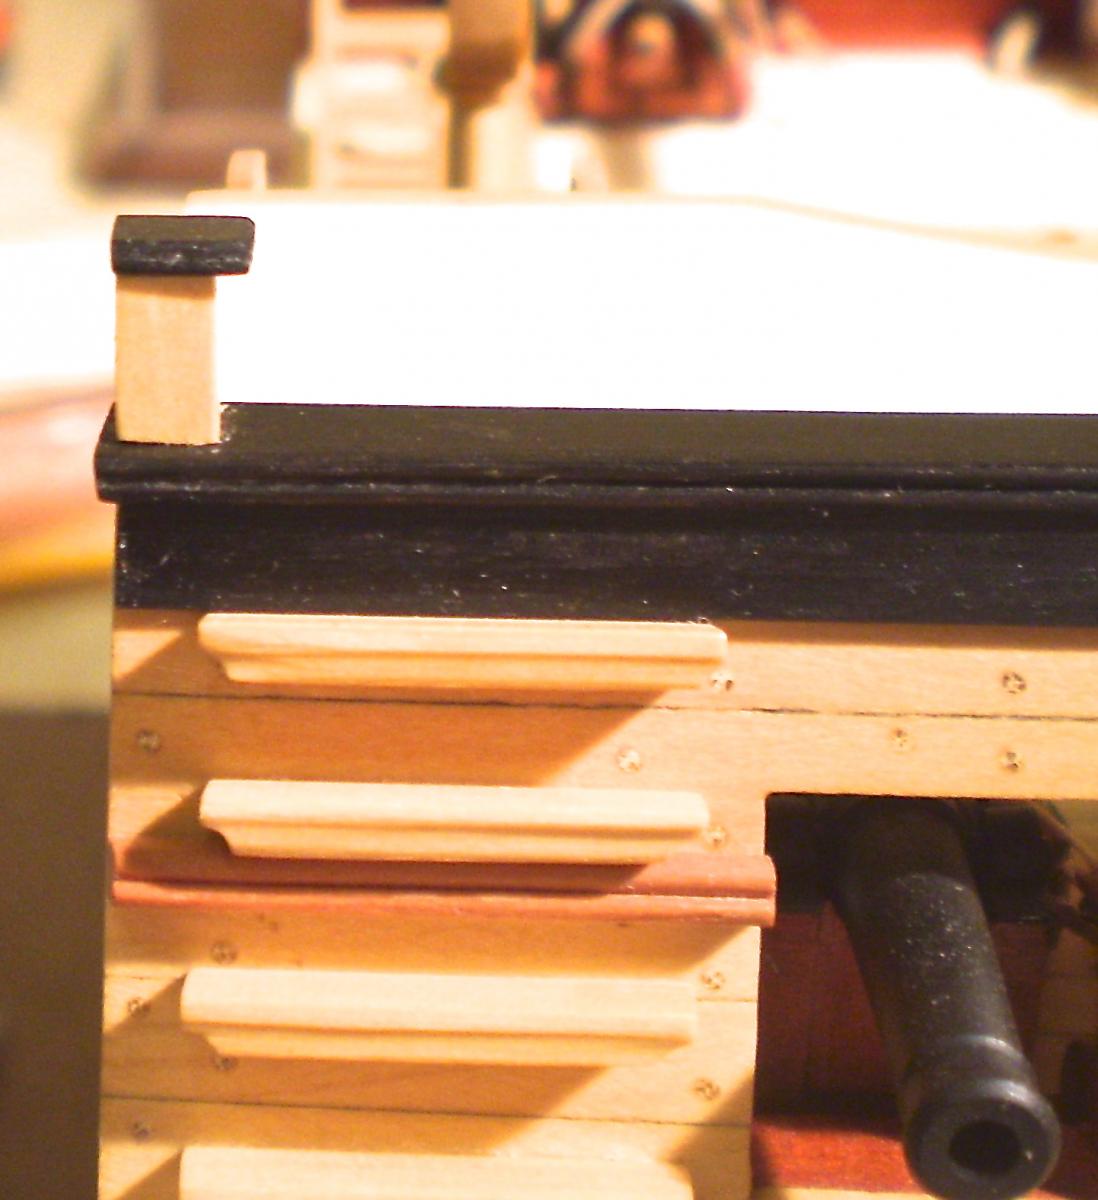
As they say Ken, "no good deed goes unpunished". Just kidding. All of the work at the head was done with laminations -- I find it very difficult to do accurate scoring. I know that others use homemade scrapers to do this work. The stern moldings and those on the outside of the sheer rail were done with double bead molding from Northeastern Scale Lumber. I have no memory of doing the "ball". Bob i
-
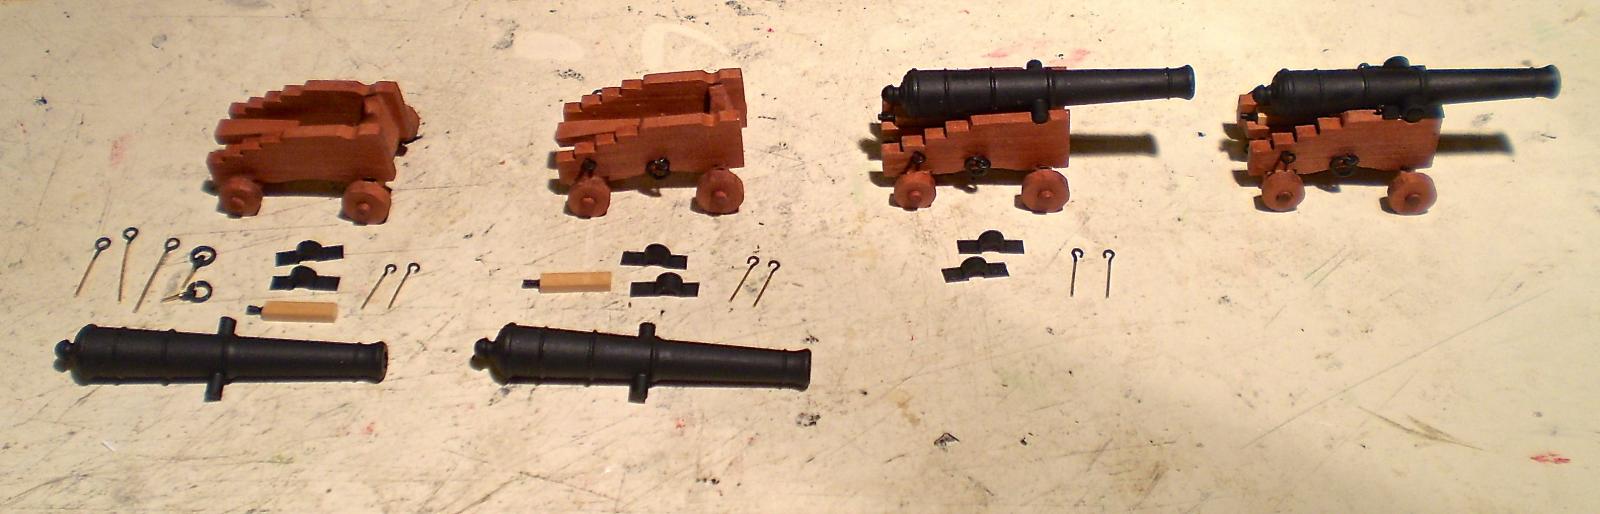
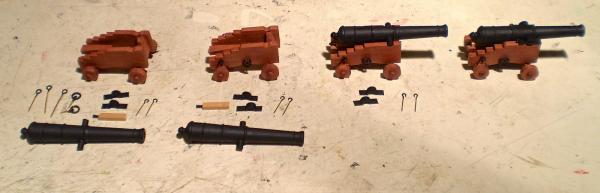
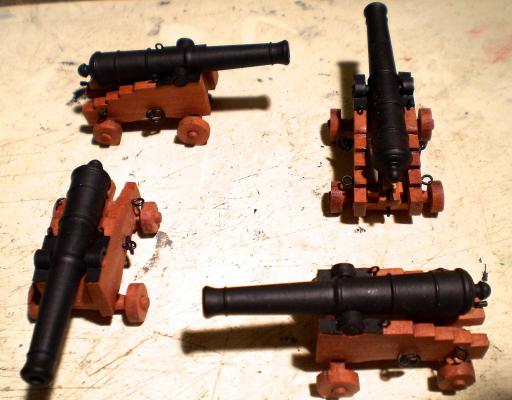
Thanks Mark and Russ. The Lumberyard acrylic barrels are very nice. They also have cast metal barrels, which are not nearly as good (but considerably cheaper). The carriage parts really require little more than removal of the laser char, rounding of the axles and a little filing. I've used their guns before and like them. Bob
-
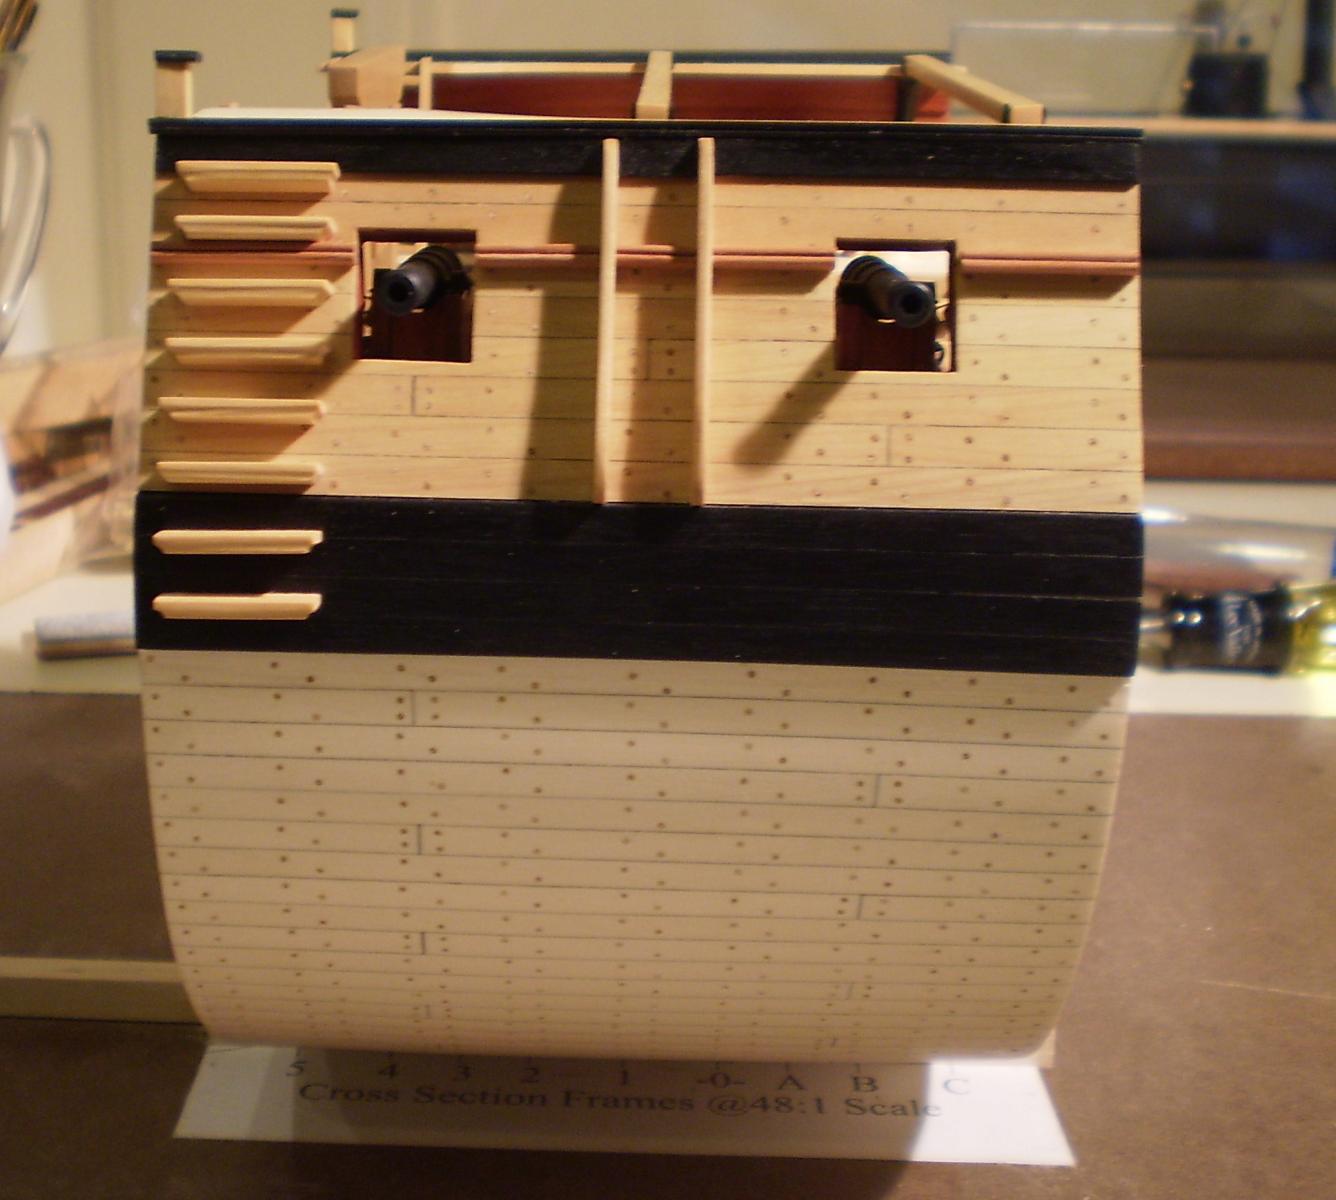
Thanks Thomas. The guns have now been made up. As I previously indicated when I did deck planking on both sides of the gun deck, my choice was to do all four guns. The guns are my next departure from true scratch building. Without a lathe, I simply did not want to try turning the cannon barrels, although I suspect that given enough time and effort they could have been done from wood. I bought acrylic gun barrels from The Lumberyard that fit the plan dimensions almost exactly. I also chose to buy a sheet of their laser cut pear carriage parts. After assembling the parts, I made and added various eye and ring bolts, the quoins and the cap squares and their hinges. Next, the guns will be mounted and rigged. Bob

-
US Brig Syren by Gahm - Model Shipways
rafine replied to Gahm's topic in - Kit build logs for subjects built from 1801 - 1850
It's coming along beautifully, Thomas. Bob -
Paddy, you may think that your framing is far from perfect, but from here it looks really good. You'll still be able to make small adjustments while you're doing the planking, if you should find them necessary. Bob
-
Ken: I didn't change the angle of either mast. I used the slots in the center keel. There seemed to be no reason to make a change. Ed: I changed what is shown on the plans, following the ideas of Pete Jaquith, whose log appeared on the old site. I don't recall the exact reasoning, but he had substituted a waterway and margin planks for the coverboard arrangement shown on the plans. As you can see from my photos, the waterway butts against the frames and the margin planks butt against the waterway, laying on the tops of the bulkheads and level with the deck planking. I believe that I cut the margin planks to a width of 3/16". which matches the width of my deck planks. I'm happy to be of any help to both of you. Bob
-
Thanks for the nice comments Grant and Ron. Always appreciated. Bob
-
Thanks so much Pete, Antony, Rusty and Paddy. You're right about the gun carriage parts, Rusty. That's the clutter of a small work space. Bob
-
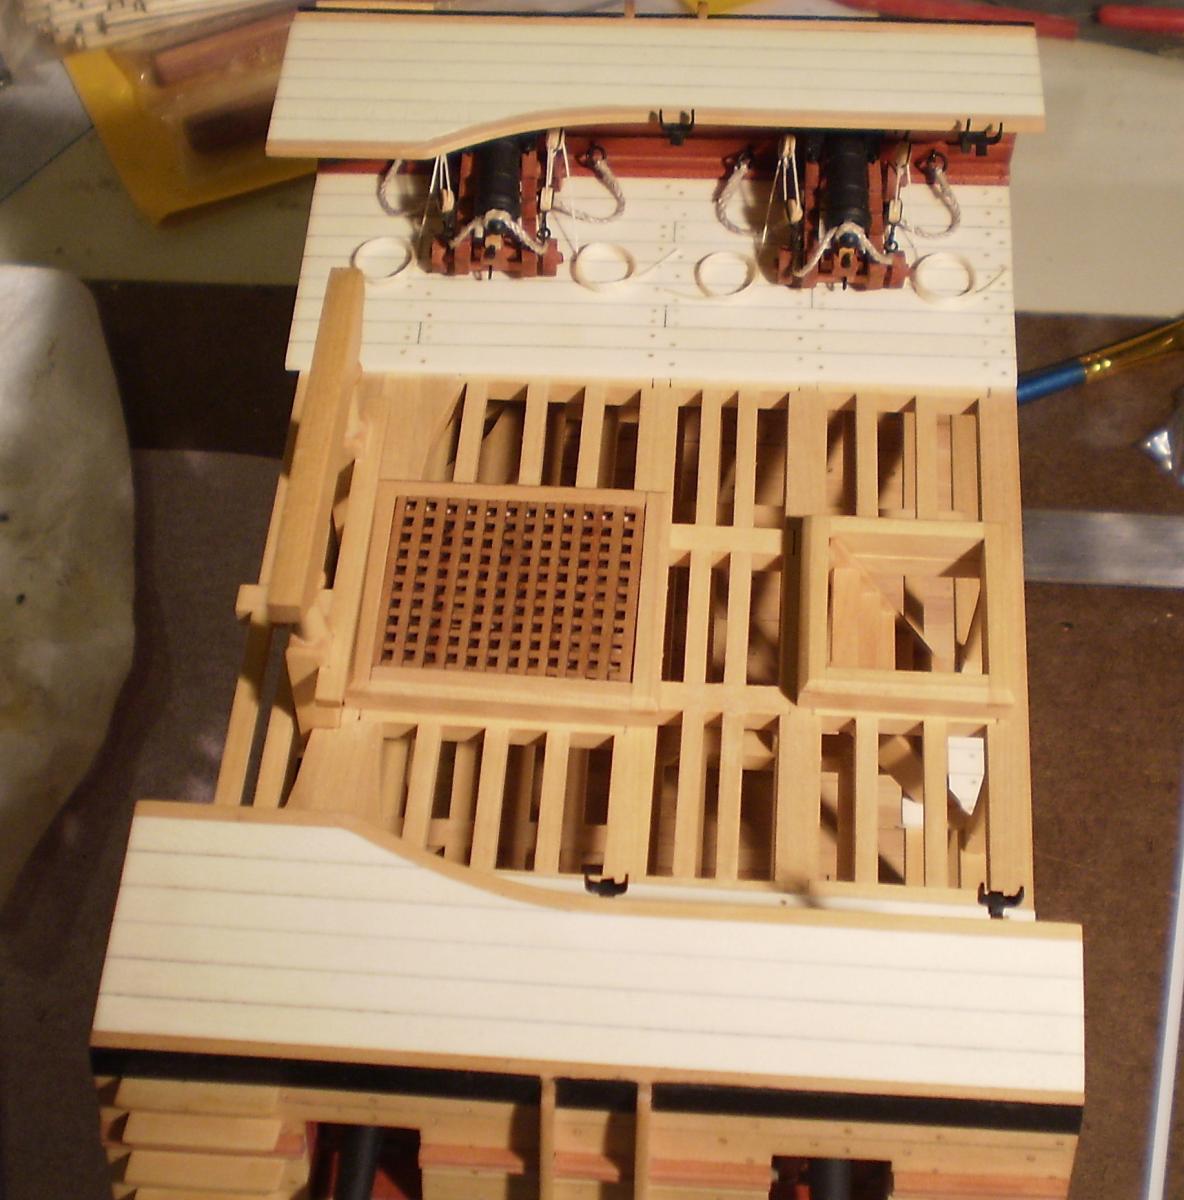
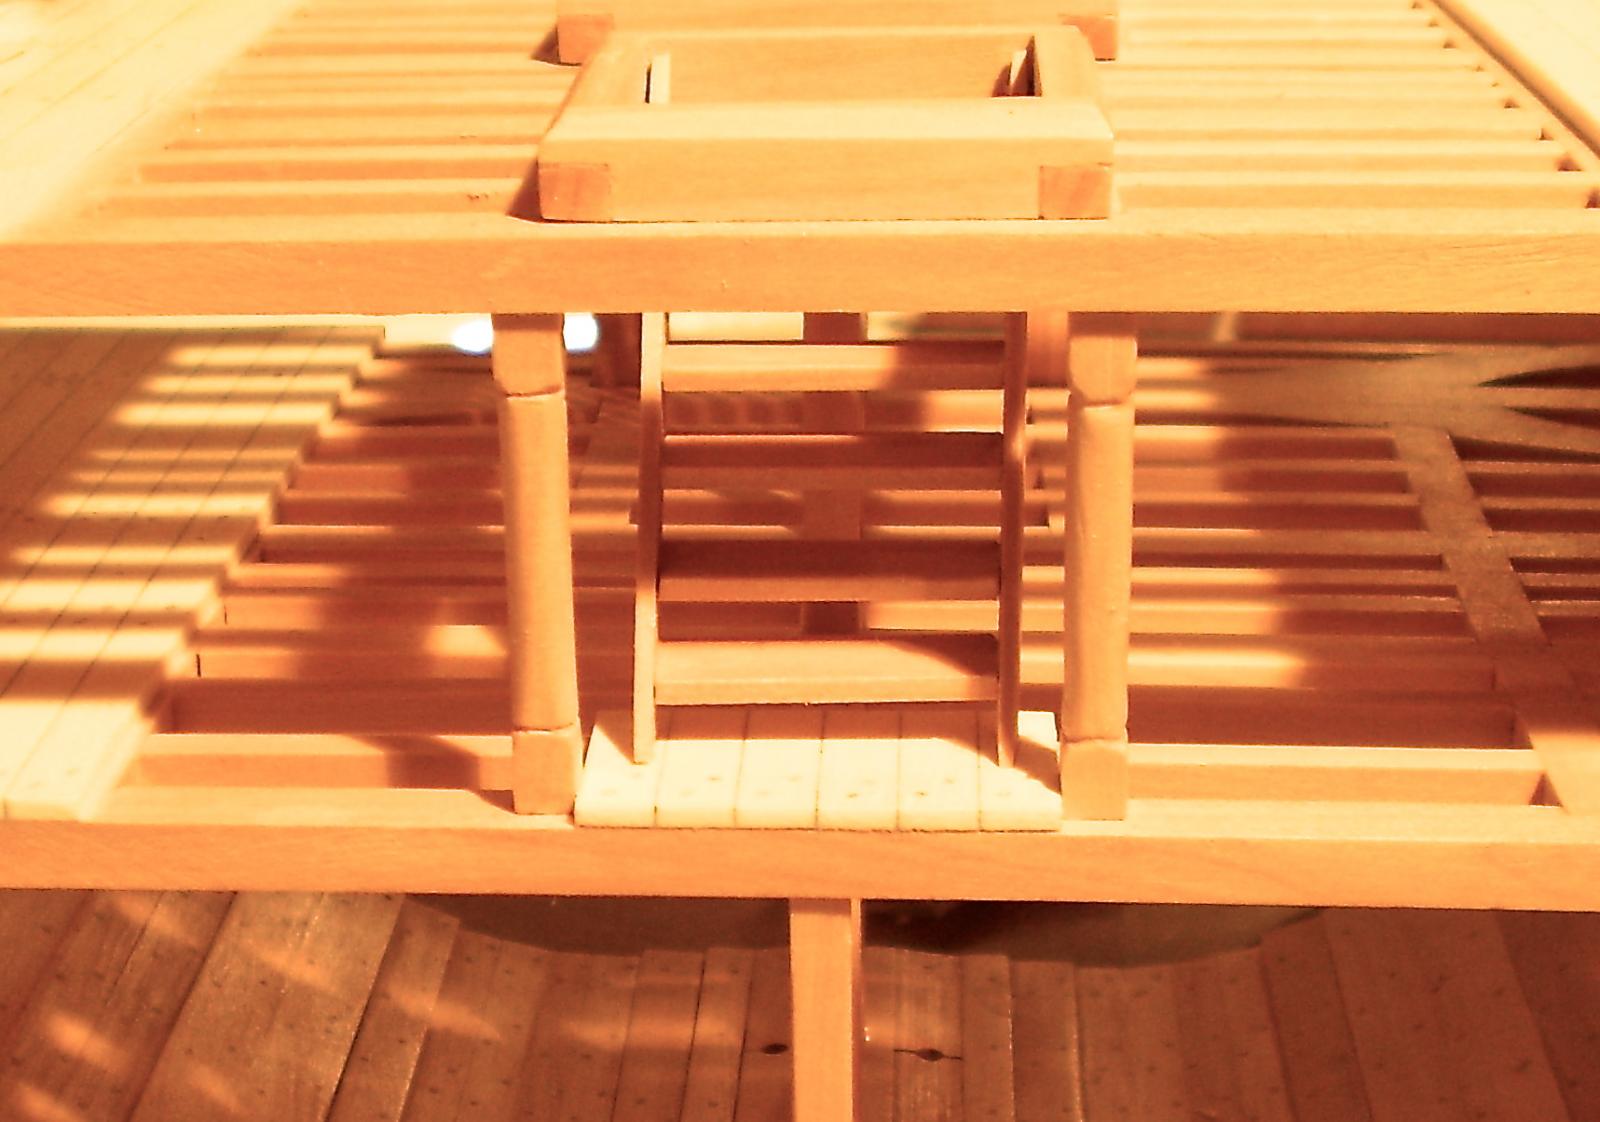
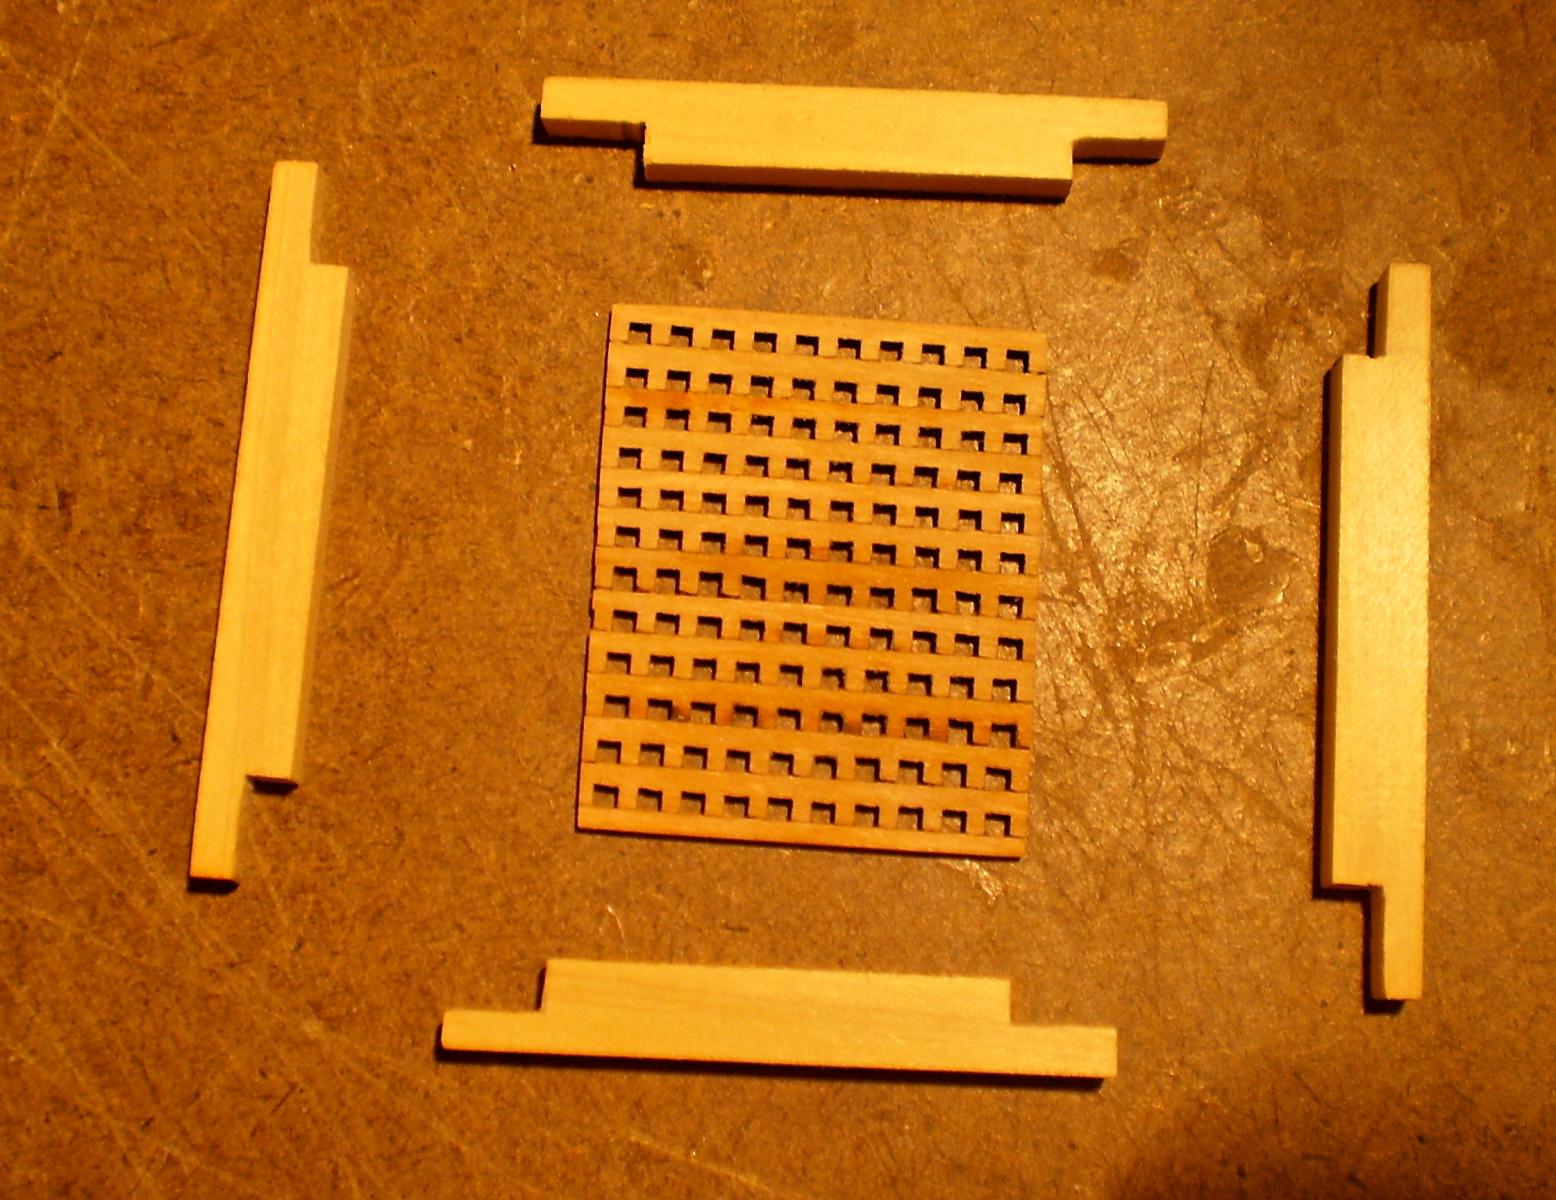
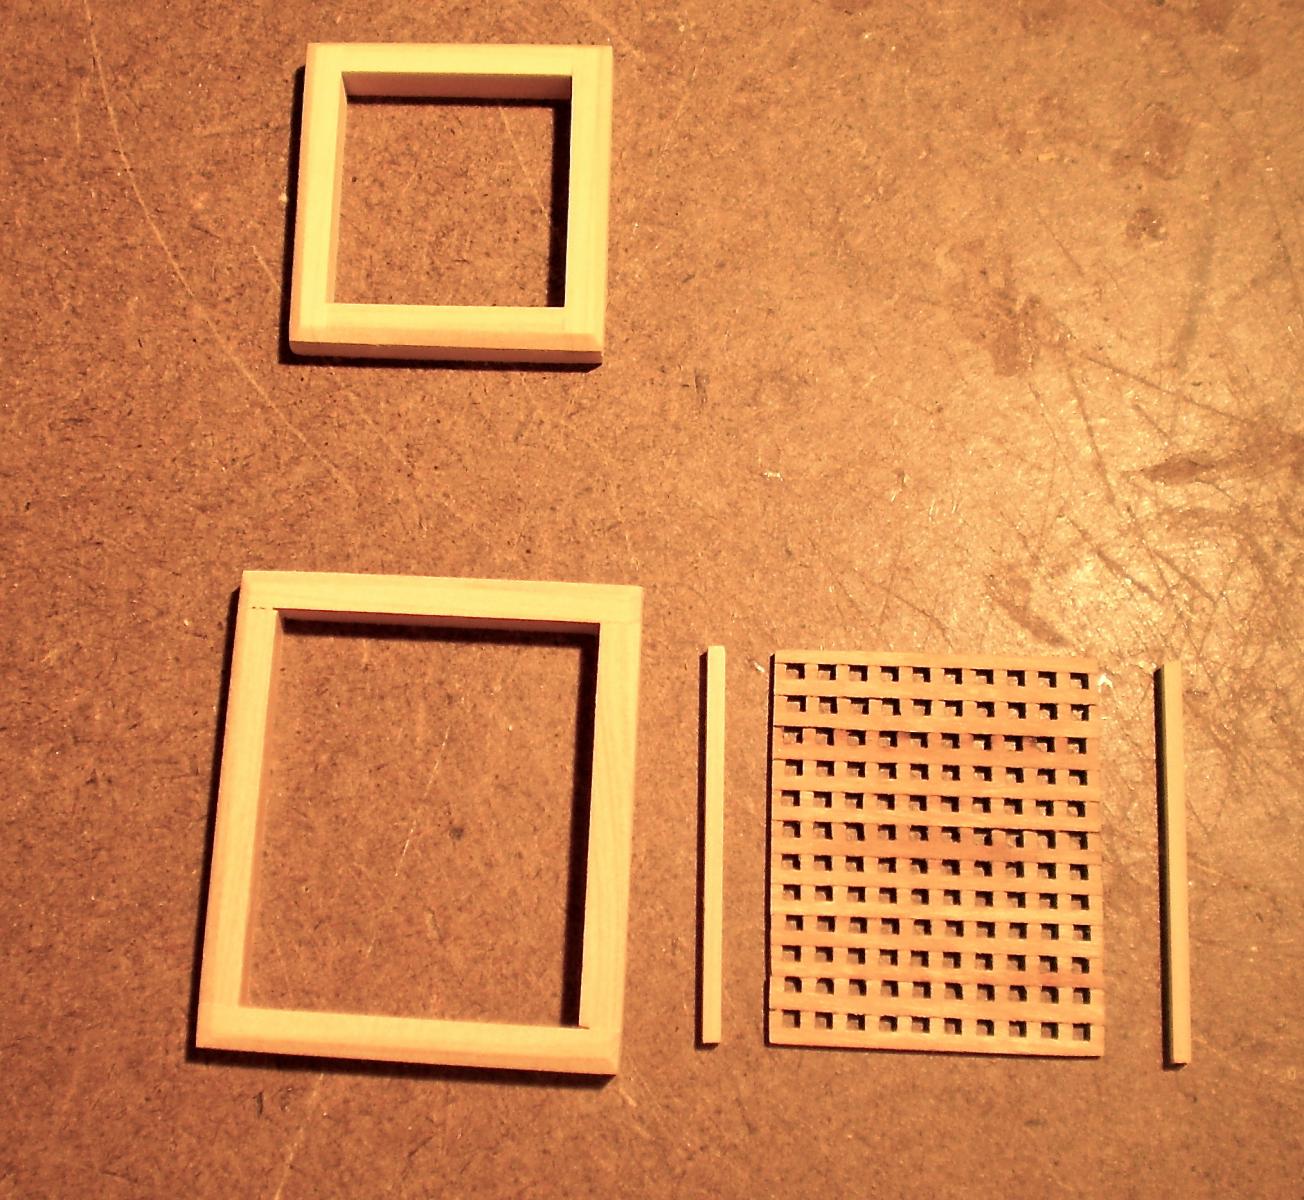
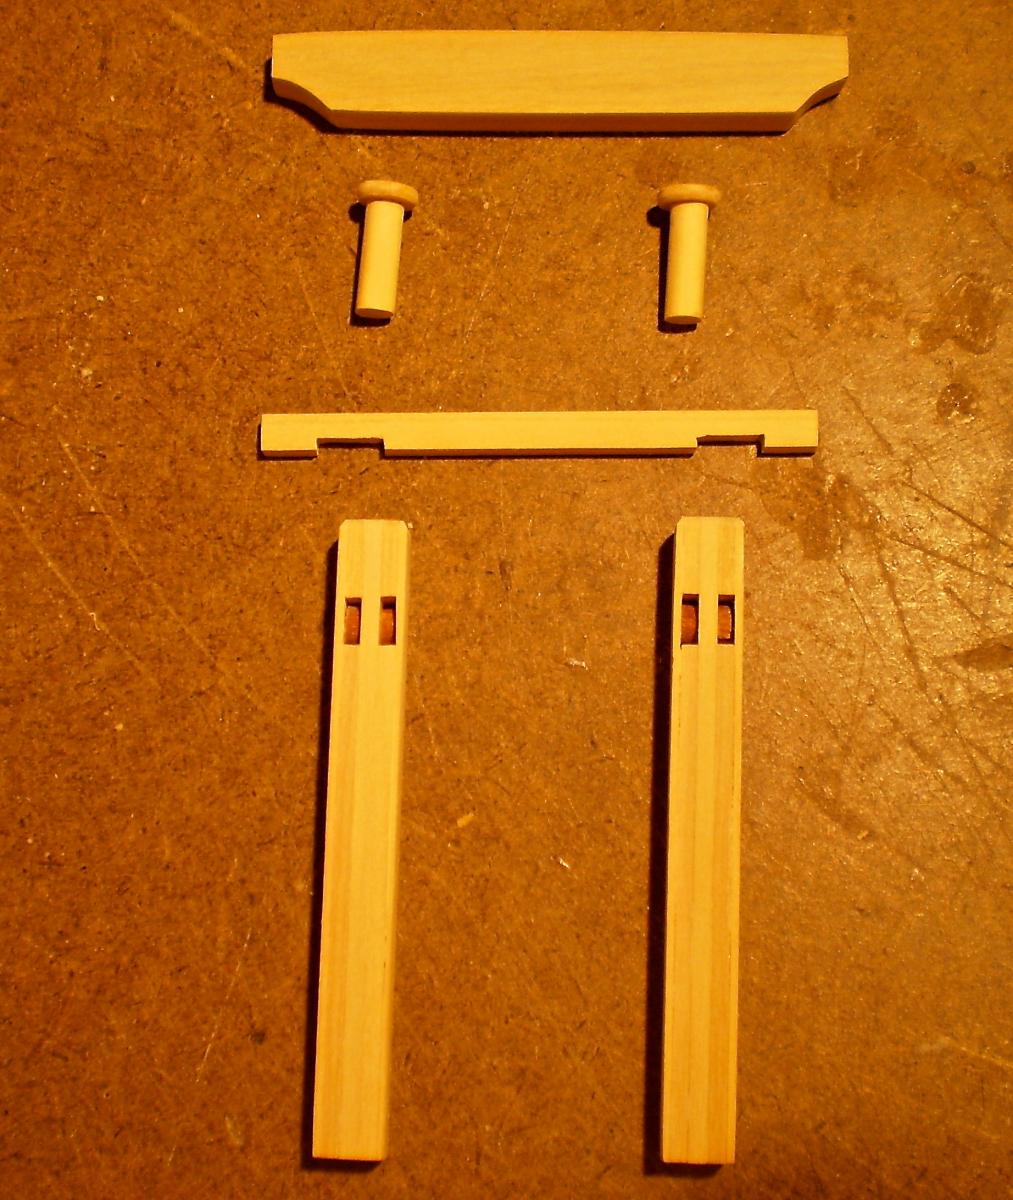
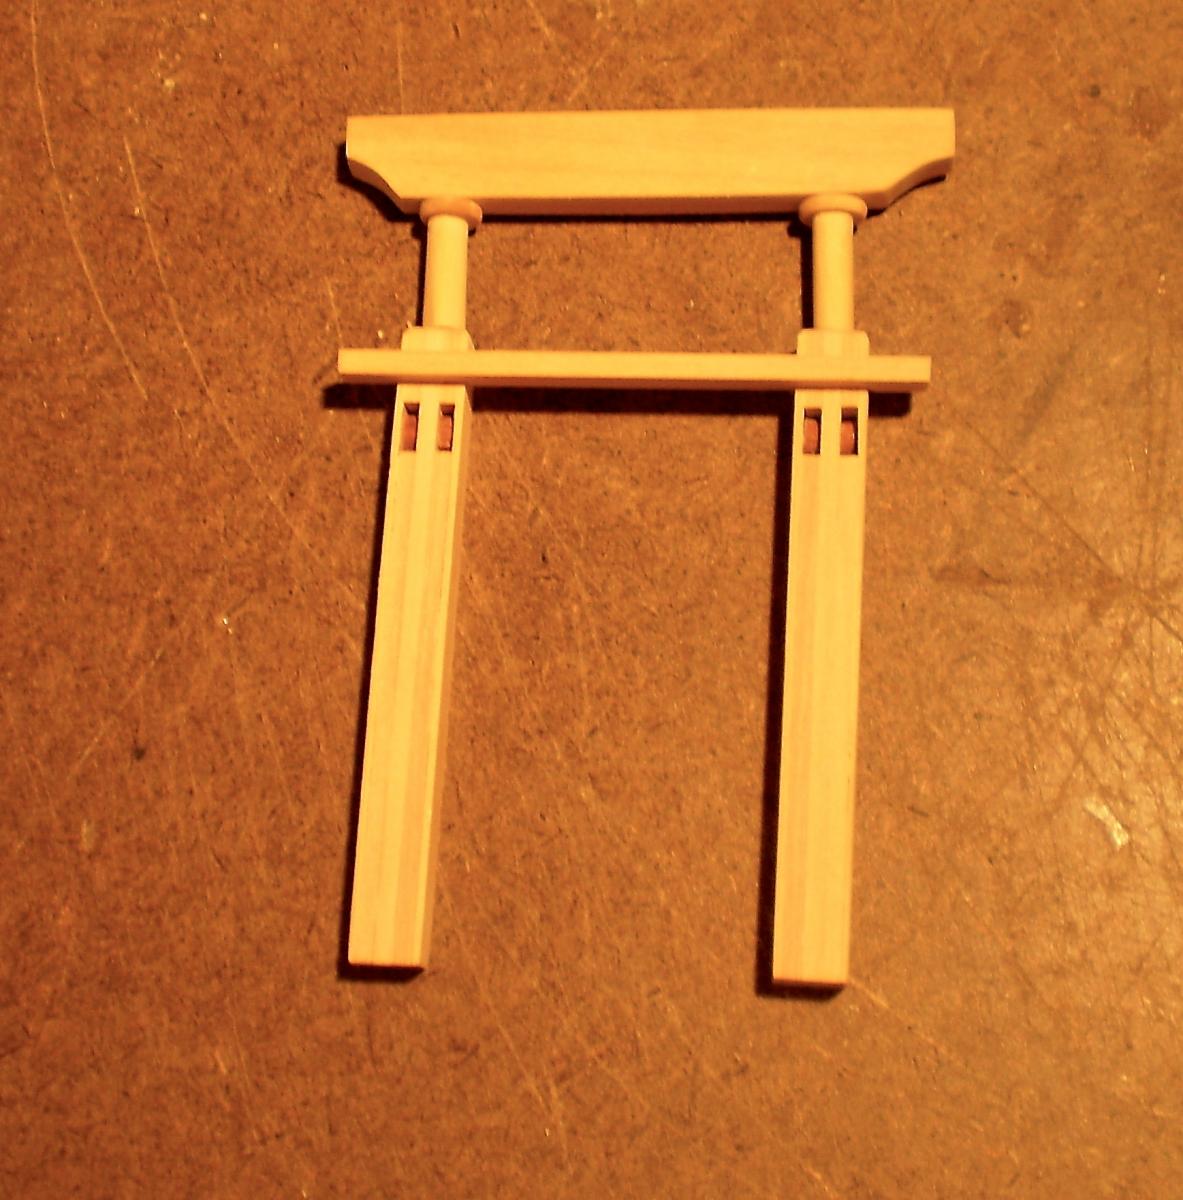
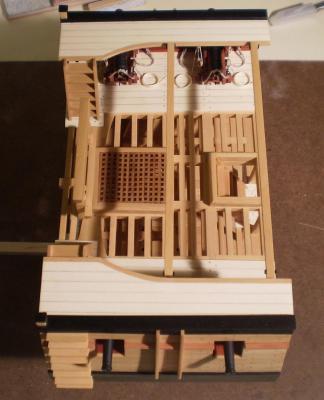
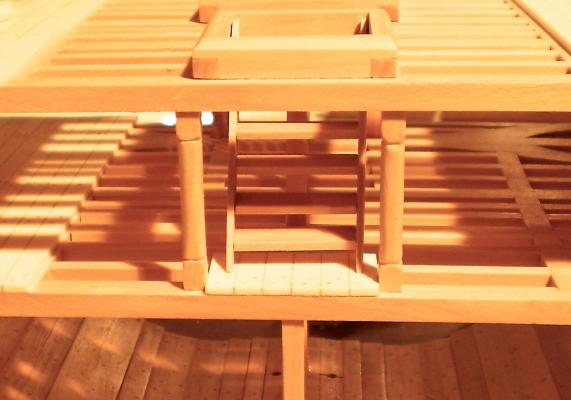
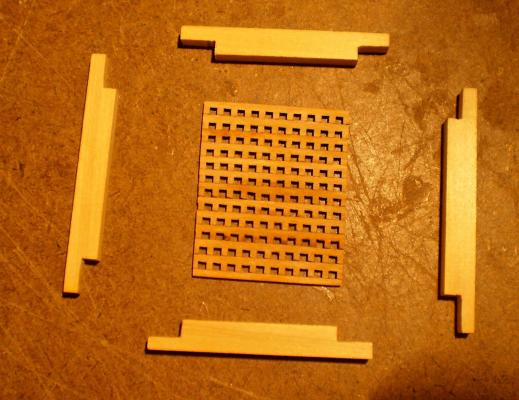
I've done the hatches and bitts. The hatch coamings are made from boxwood strip with lapped ends cut in. The gratings were my first ( but not last) concession to lack of power tools. Although I'm sure that there's a way to cut them by hand, I opted to use Model Expo cherry grating strips. The bitts are also made from boxwood.The bitt pins are laminated strips to create the sheave openings. I've never had much luck cutting slots in solid pieces. The sheaves are slices of walnut dowel. The round portion at the top of the pins was done by hand sanding square boxwood strip. The gallows was cut from boxwood sheet. I also drilled the holes for the eyebolts and ringbolts in the bulwarks and installed the eyebolts at this point. Next up are the guns. Bob


-
Your usual beautiful work, Rusty. It's going to look great in the case. Is it going to be Echo or the bomb vessel section that gets your attention next? Bob
-
Really nice looking brackets, Grant. Bob
-
Over size is a whole lot better than under size. Using sanding sticks that extend to multiple frames should allow you to reduce any areas that are sticking out. Bob
-
As everyone has said, "welcome to the club". I'd love a dollar for every similar thing I've done. Bob
-
Thanks Mark. Don't worry, I only know how to work on one at a time and I finish what I start. Bob