


rafine
-
Posts
2,932 -
Joined
-
Last visited
Content Type
Profiles
Forums
Gallery
Events
Posts posted by rafine
-
-
Really nice Don. That is a whole lot of planking. You know that you're going to do it the "right way". Why even think about it.
")
Bob
- EJ_L and Old Collingwood
-
 2
2
-
Rusty, you're a better man than me. I had a shipping disaster with a completed MS
Flying Fish that I had sent to one of my daughters a few years ago (i posted pictures somewhere here at the time). It still sits in her attic awaiting my restoration. I gave it a few tries, but I just can't stand to look at it. I wish you the best with the project.
Bob
-
Wonderful work Jason. Well worth the wait to see it.
Bob
-
-
Thanks Dave. I actually have the Mamoli plans. I built the Mamoli Halifax many, many years ago (the model was donated to a charity auction almost 20 years ago and I have no photos). There are some discrepancies from the Hahn plan and also from practices as set out in Lees, but I do intend to use them as another possible source of information.
Bob
- popeye the sailor, zappto, mtaylor and 4 others
-
7
-
It's looking great Denis. I'm very jealous of your ability to work at such a small scale. Those days are long behind me.

Bob
- Piet, Old Collingwood, mtaylor and 3 others
-
6
-
Thanks so much Denis, Rich, Patrick, Zappto, Thomas and Dave for the very generous comments. Thanks also to the "likes".
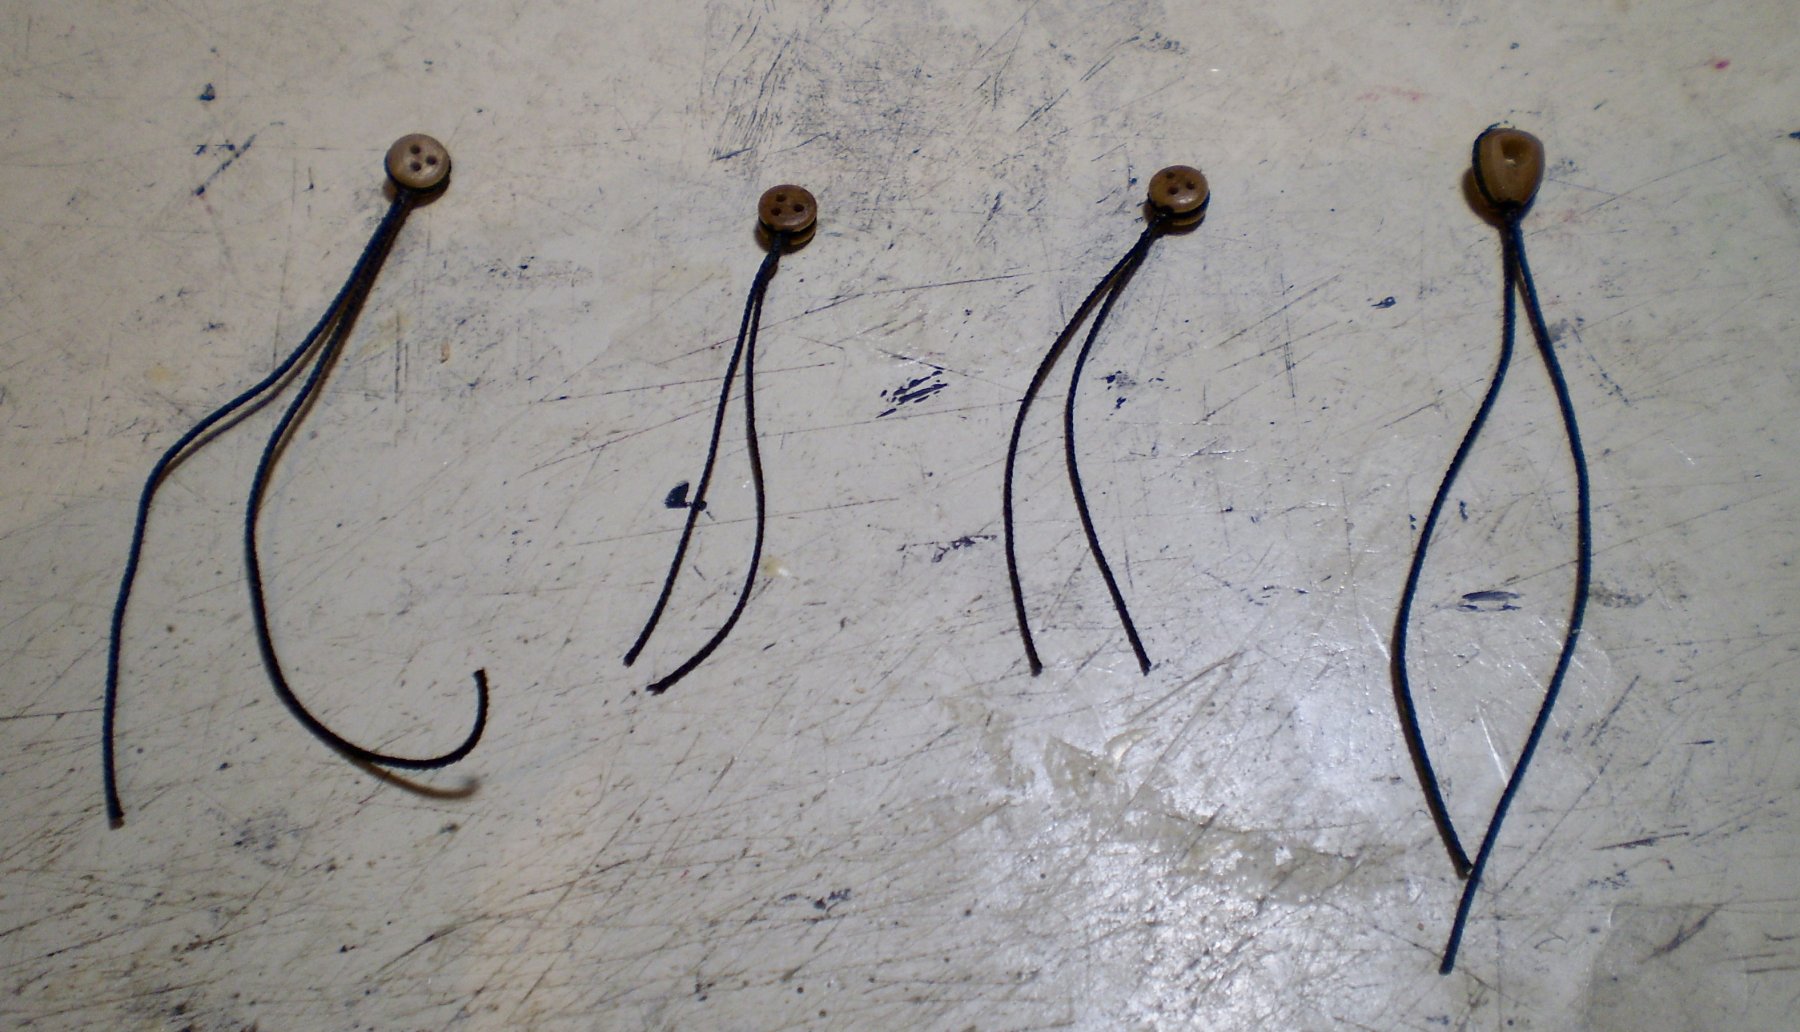
Dave, the deadeyes are 3/16" and the heart is 5/16". The shroud deadeyes are probably a little too large, but I was in between sizes and opted to go for a little larger, rather than too small.
Bob
-
Thanks so much Don and the "likes".
Don, I sanded the lower portion of the jackstaff flat and glued it to the cap. I then drilled holes on either side and glued in a tiny U-shaped piece of wire as a bracket. The wire didn't show up on the previous photos, so I'm attaching a photo that shows it.
Bob
-
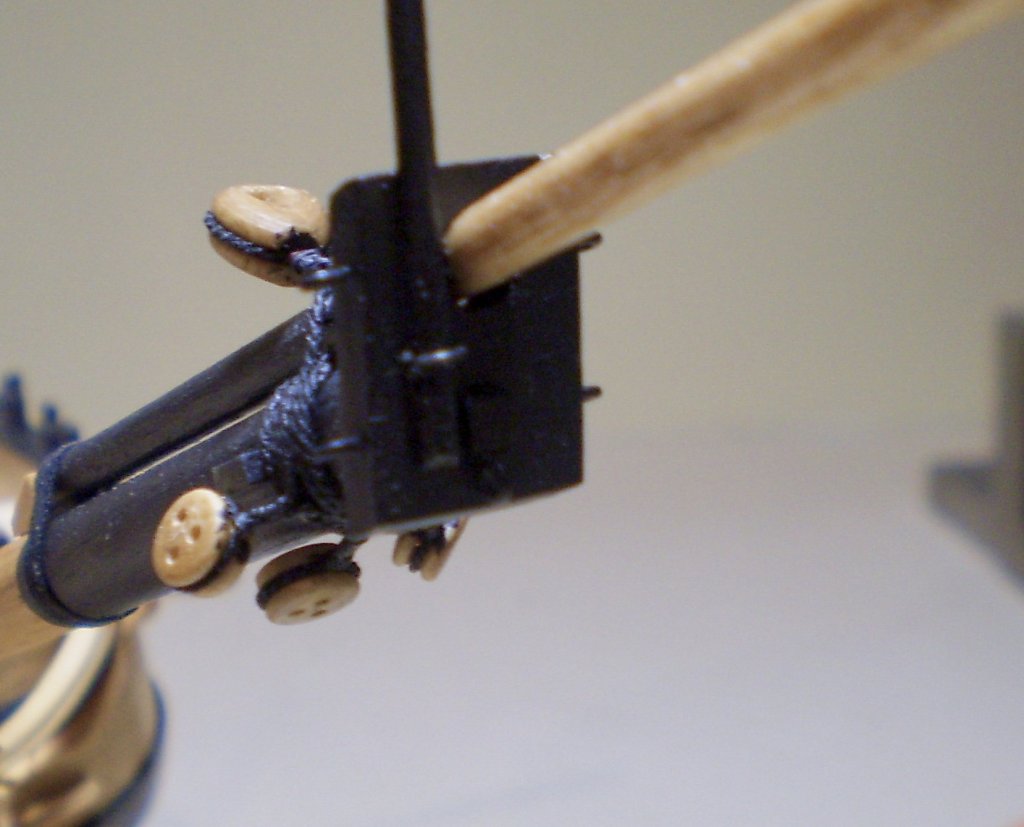
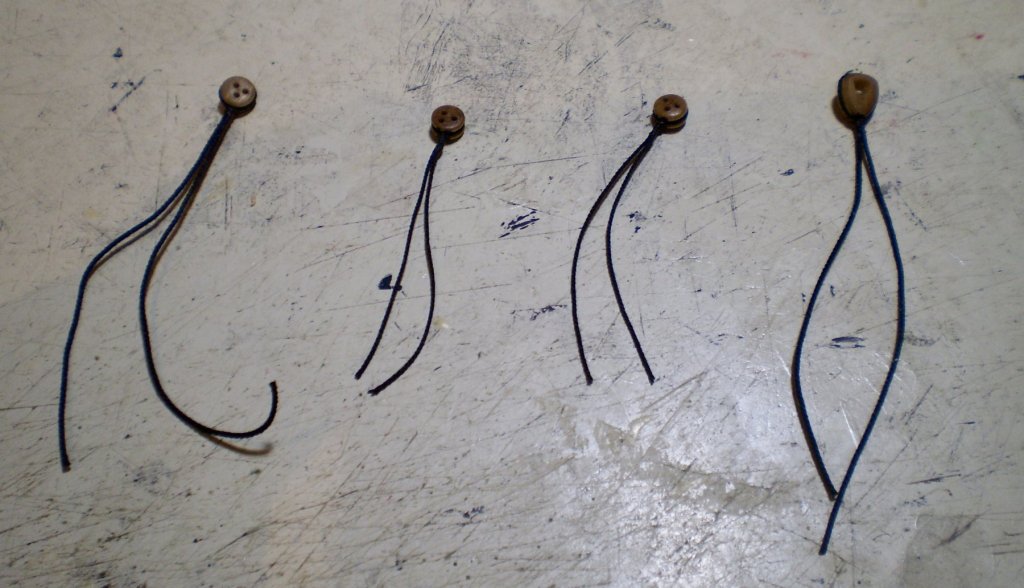
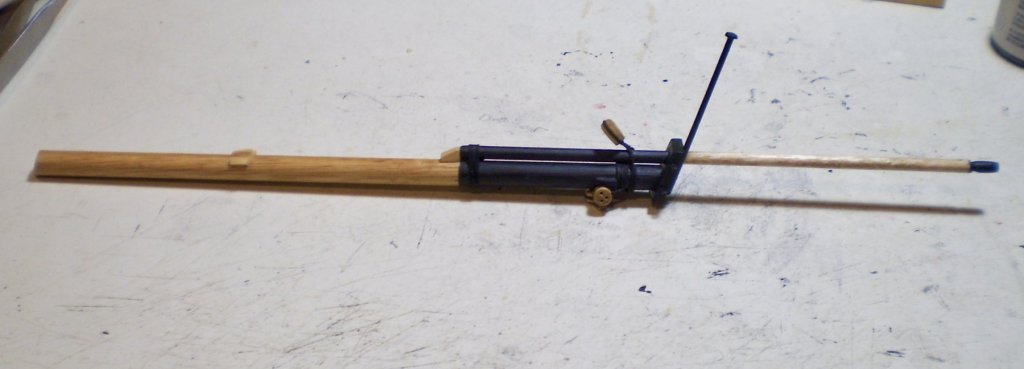
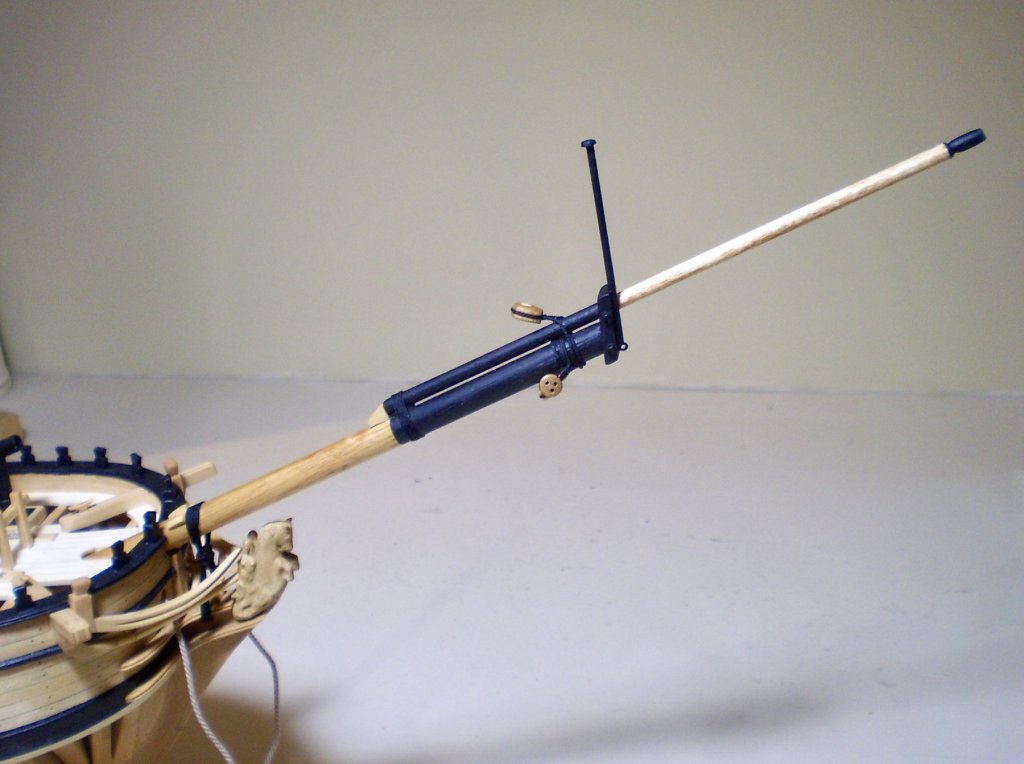
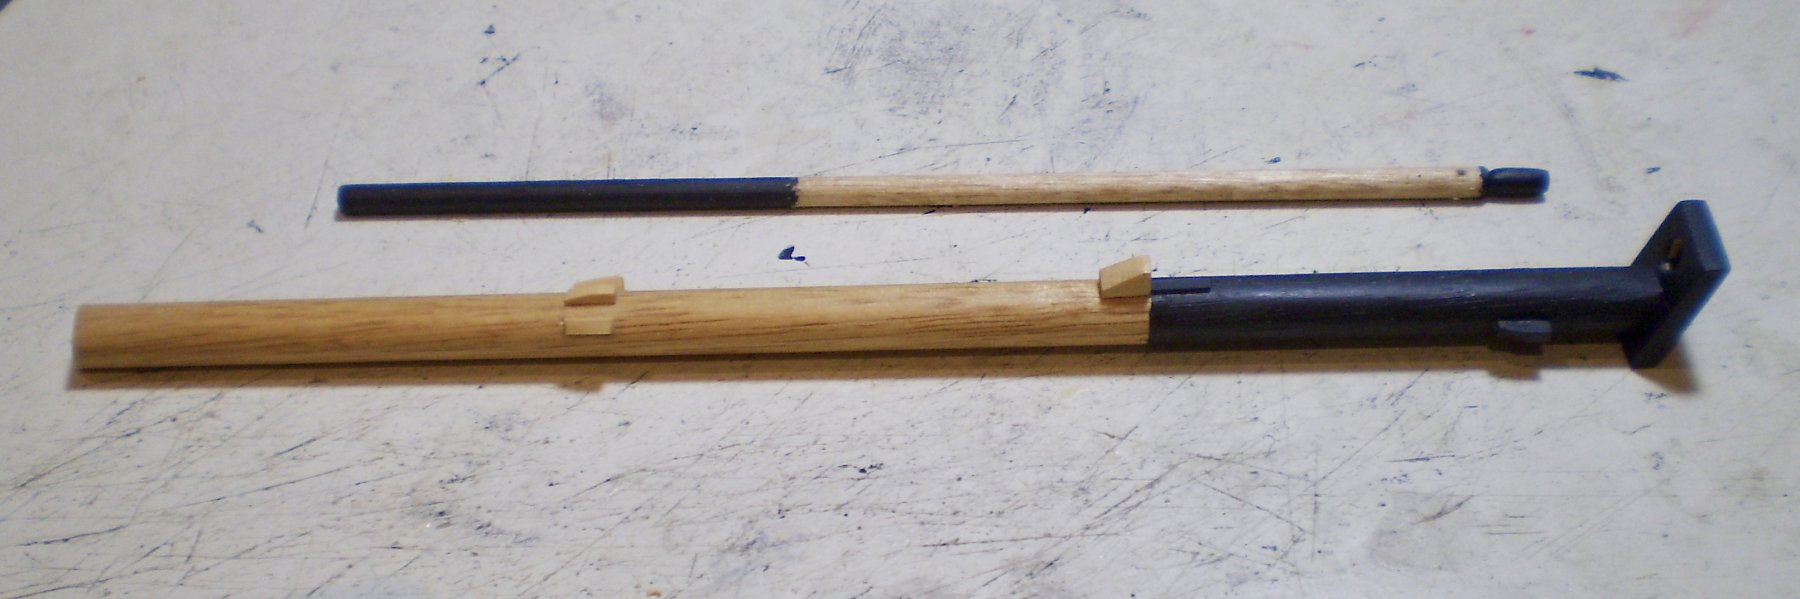
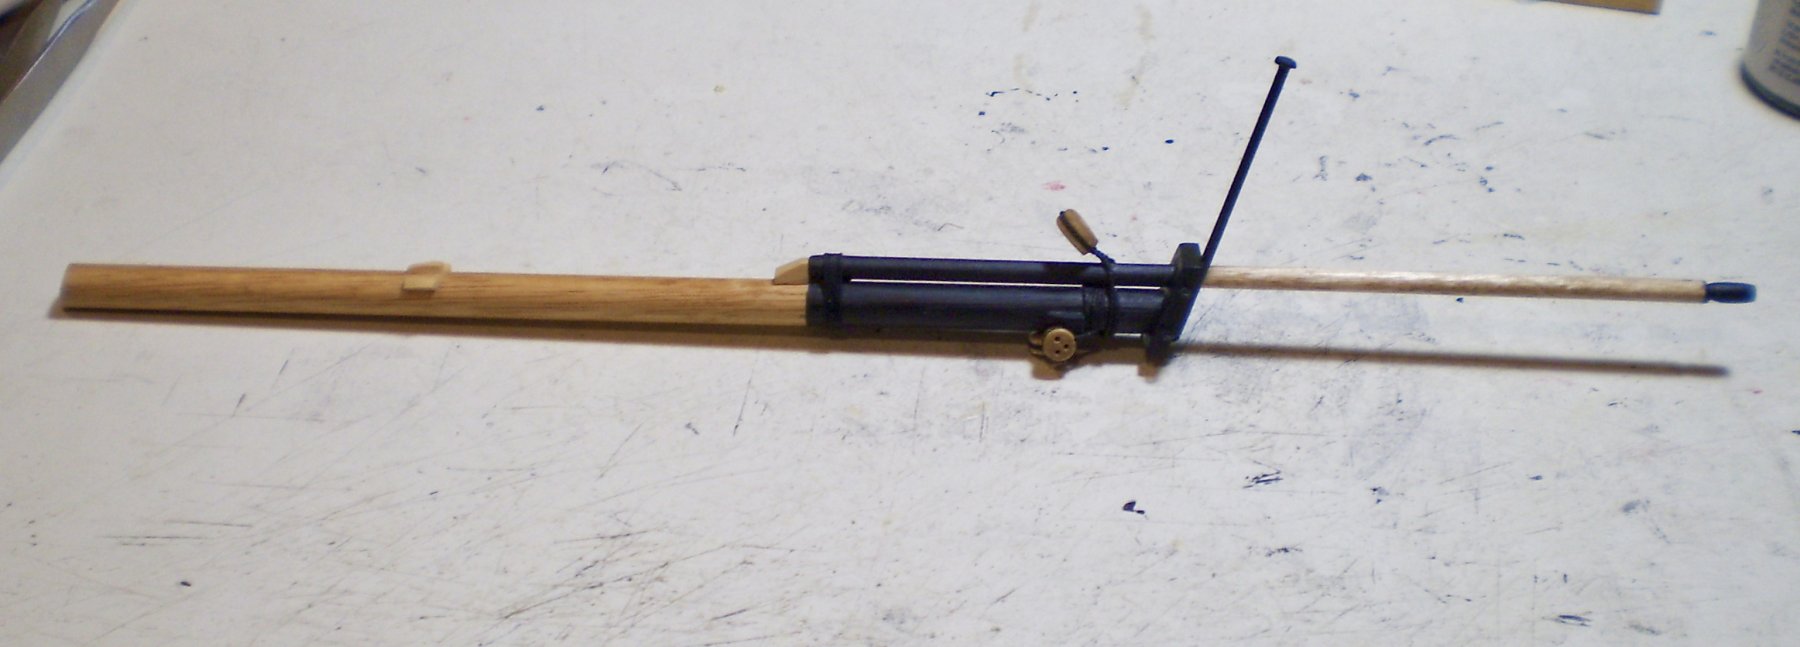
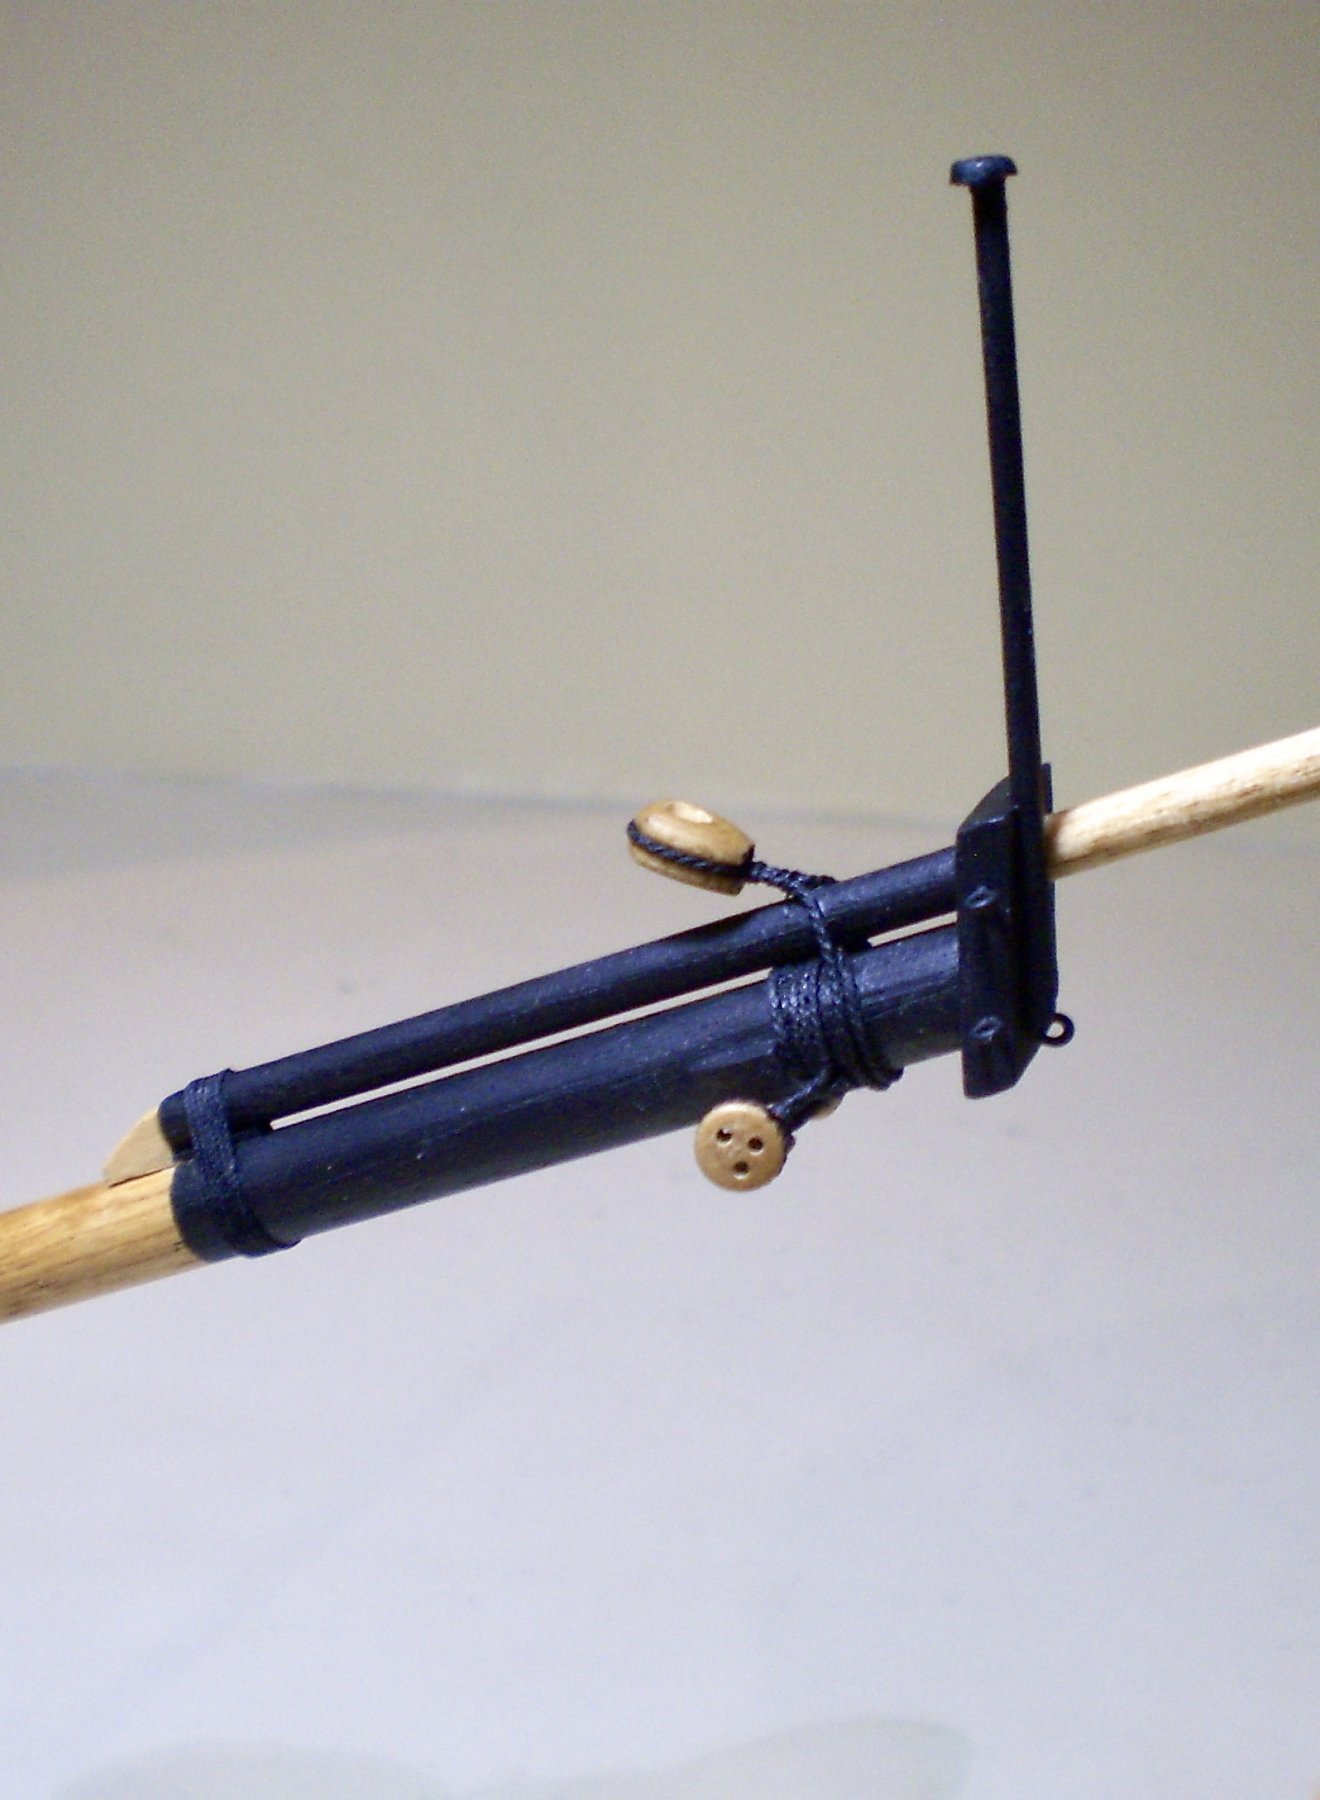
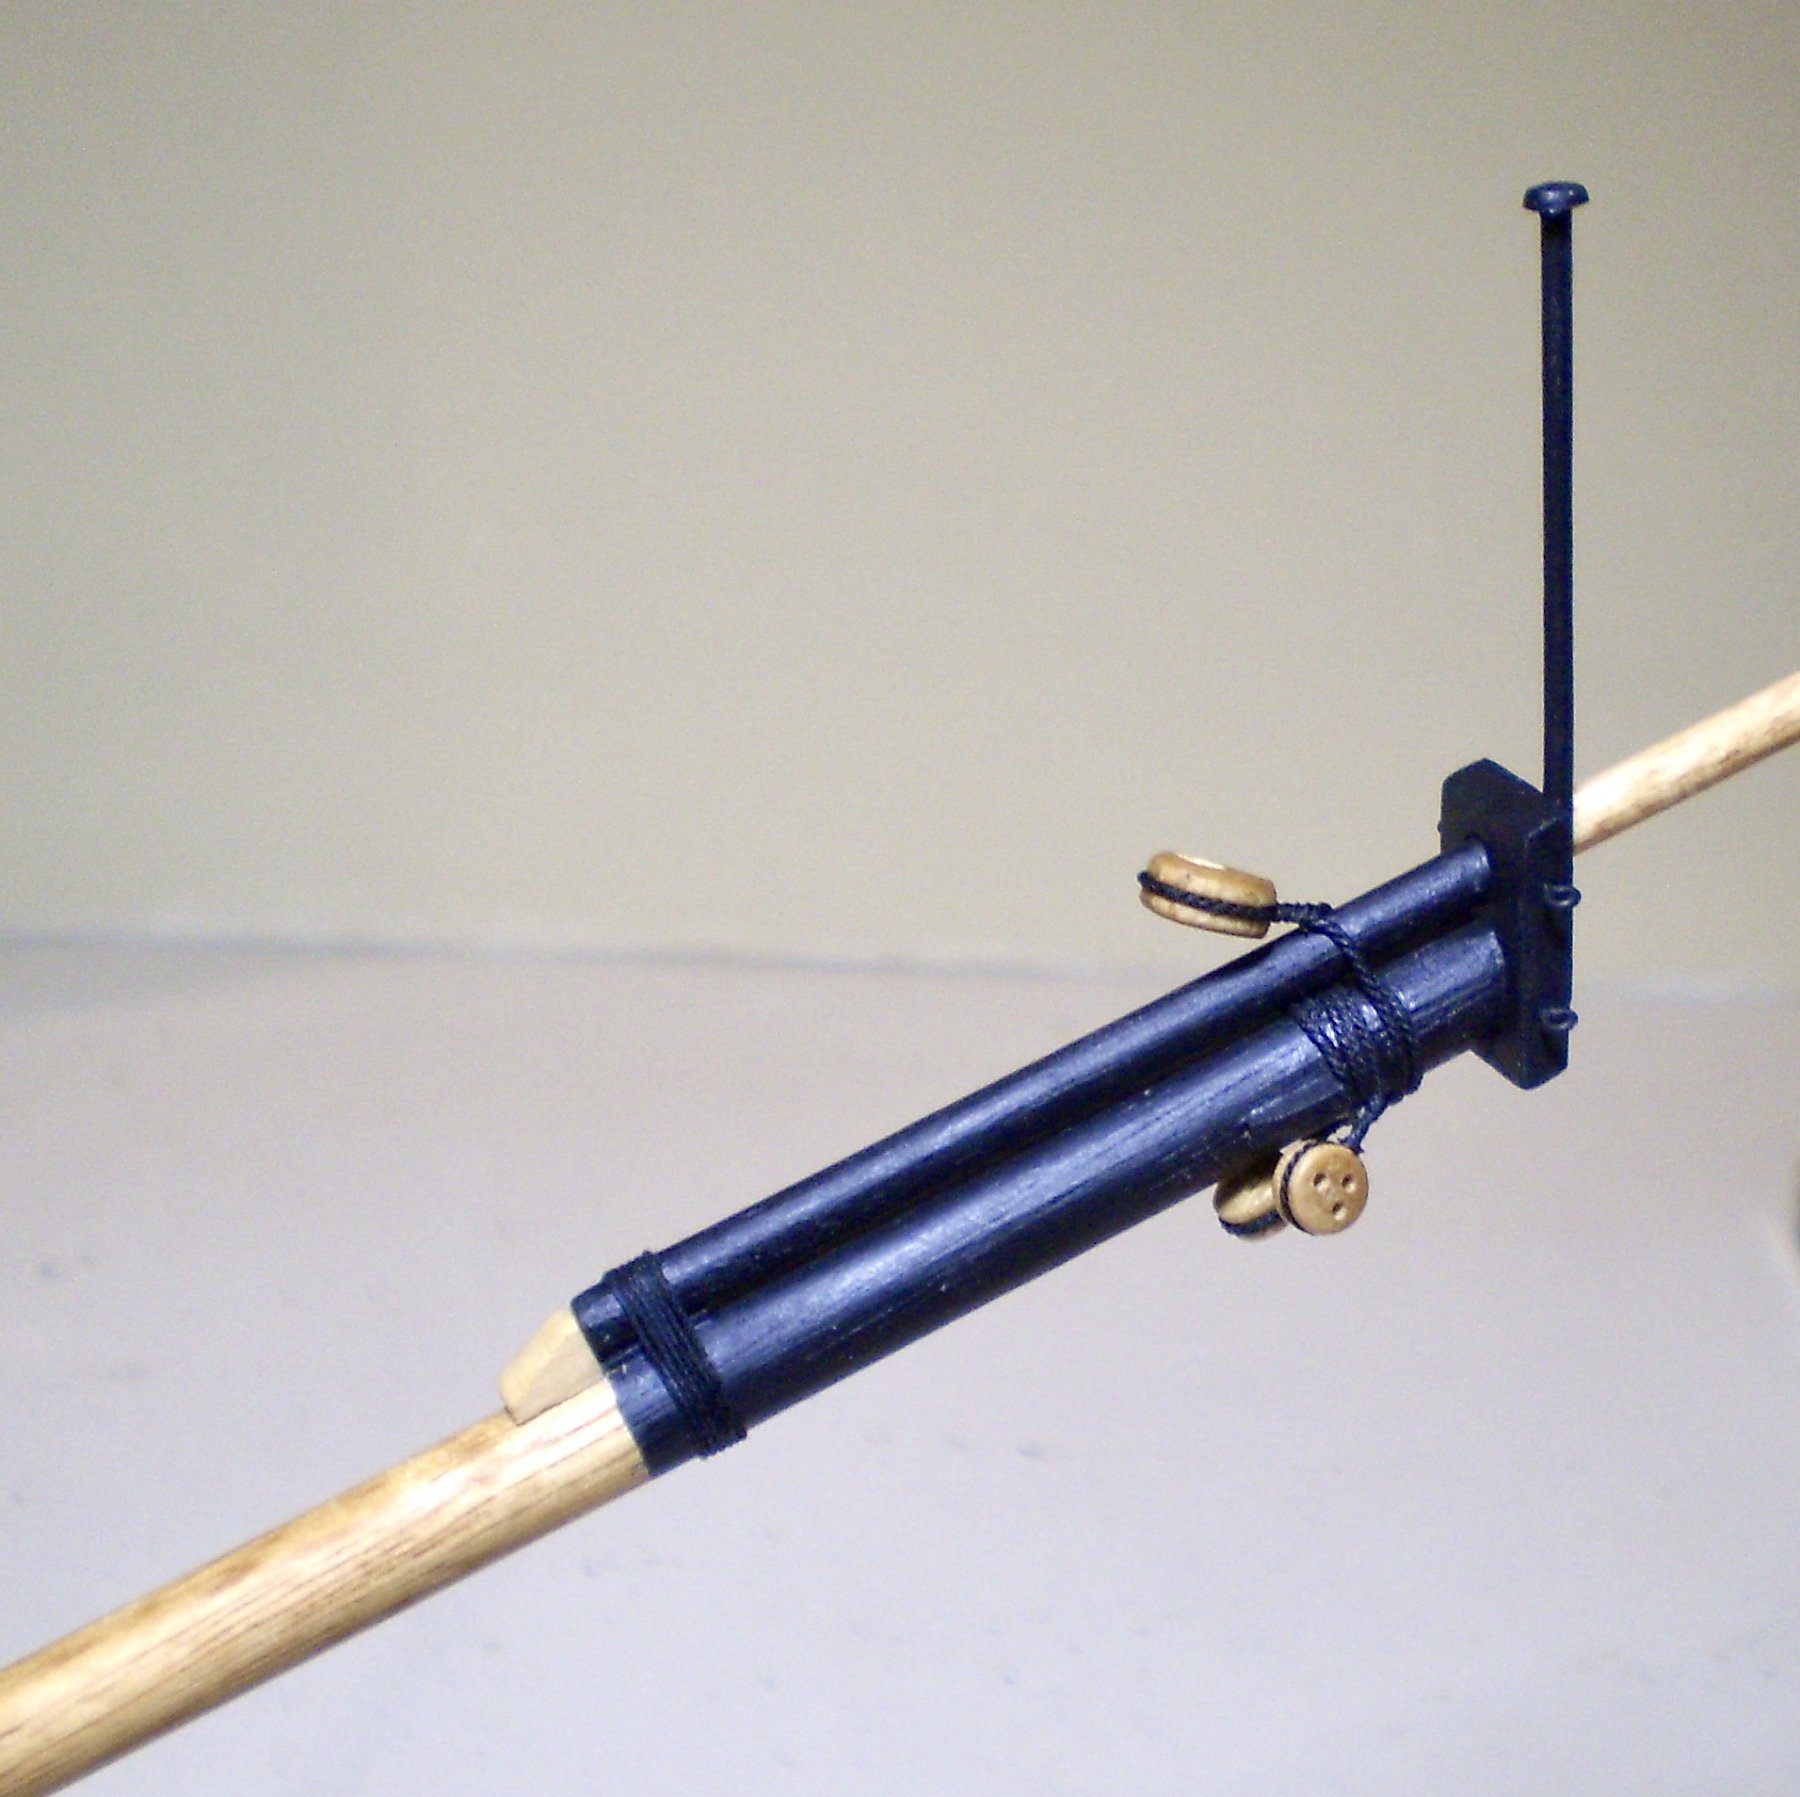
First work on the masting has now been done with the making and mounting of the bowsprit and jibboom. Both the bowsprit and jibboom were made from dowels, shaped appropriately, stained golden oak, and then painted black where called for. The cap was cut from boxwood sheet, beveled, holes drilled and filed, and painted black. Various boxwood cleats were added for the gammoning, rigging collars and a jibboom stop.
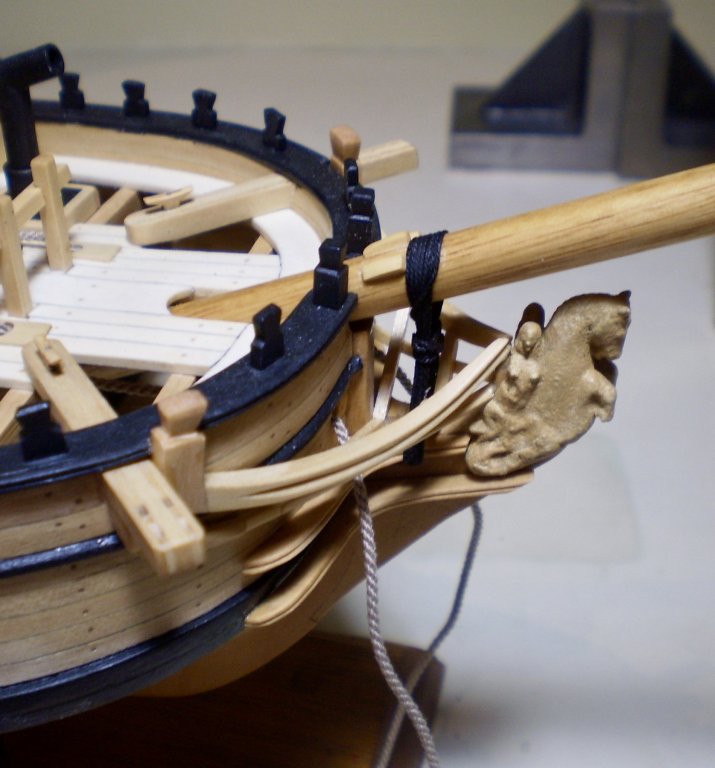
After assembling the bowsprit, jibboom and cap, I added the lashing for the jibboom and then the collars for the bobstay, shrouds and forestay. A jackstaff was made and mounted to the cap. I then mounted the assembled unit and added the gammoning.
The Hahn drawing provides limited detail as to the masting and rigging, so I am using Lees to provide information on sizing of masting and rigging components.
Bob


- John Allen, mtaylor, albert and 25 others
-
28
-
Coming along very nicely OC.
Bob
-
Thanks so much Martin. You've been quiet on your Fly for a while.
Bob
-
Thanks so much OC, Joe and the "likes".
OC, the planking is castello boxwood and that is the natural color (after a finish of Wipe-on Poly).
Joe, as might be expected, the windlass required more than one try, and it's still not a perfect octagon. "Tricky" is a charitable description.
Bob
-
-
Glad to see you back at it Joe. Really nicely done.
Bob
- jwvolz, Old Collingwood and Martin W
-
3
-
Thanks so much Rusty, Albert, Thomas and John for the very generous comments. Thanks also to the "likes".
Bob
- Martin W, Elijah, popeye the sailor and 1 other
-
4
-
Thanks so much Don for the kind comment and also the "likes".
Bob
- popeye the sailor, Canute, Martin W and 3 others
-
6
-
Thanks so much Denis and the "likes".
Bob
- Canute, Elijah, popeye the sailor and 2 others
-
5
-
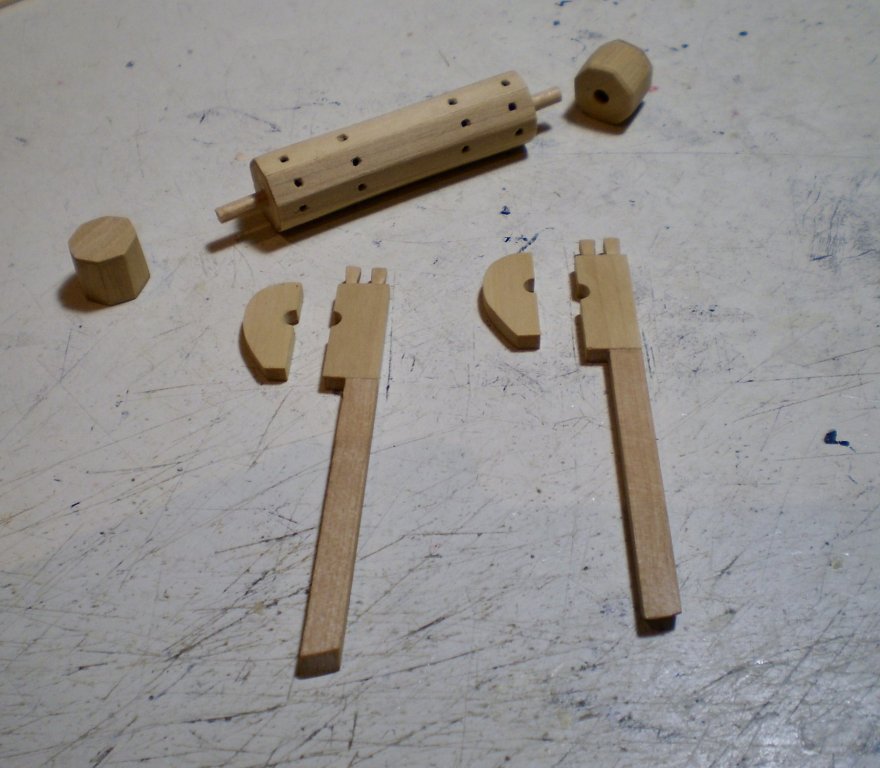
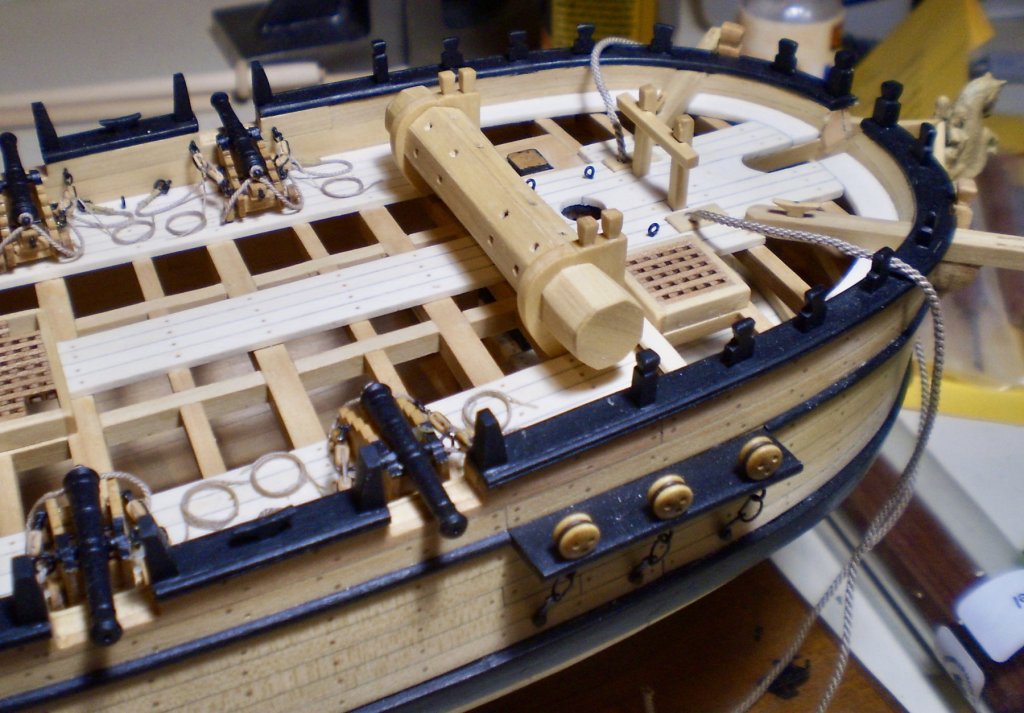
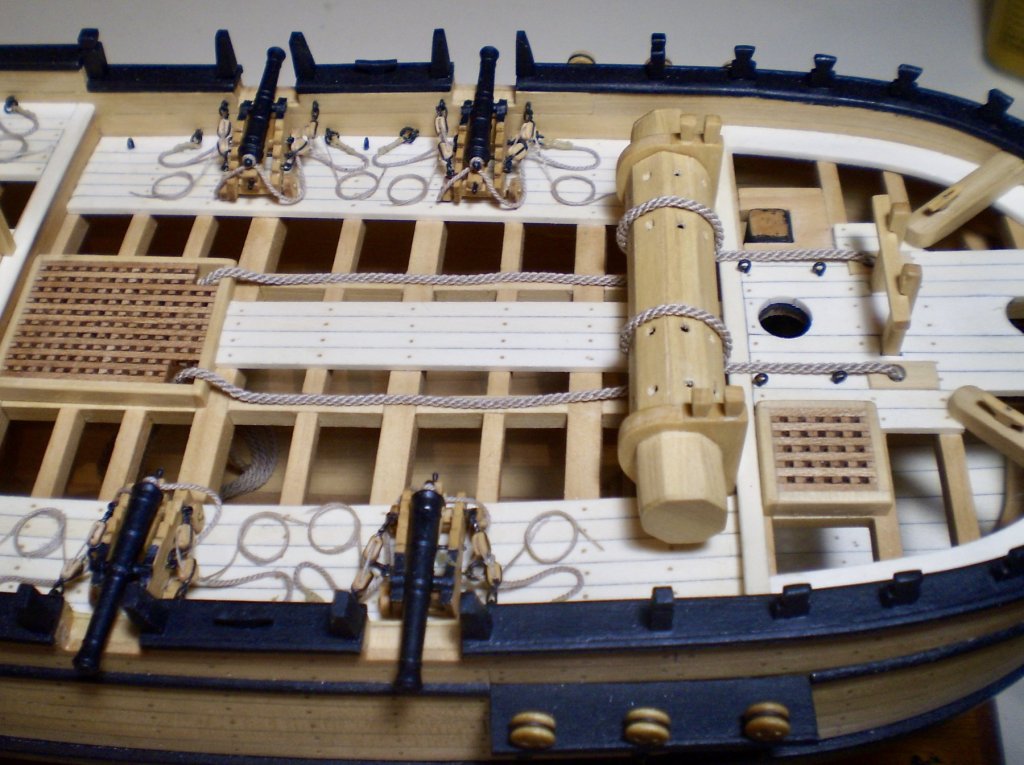
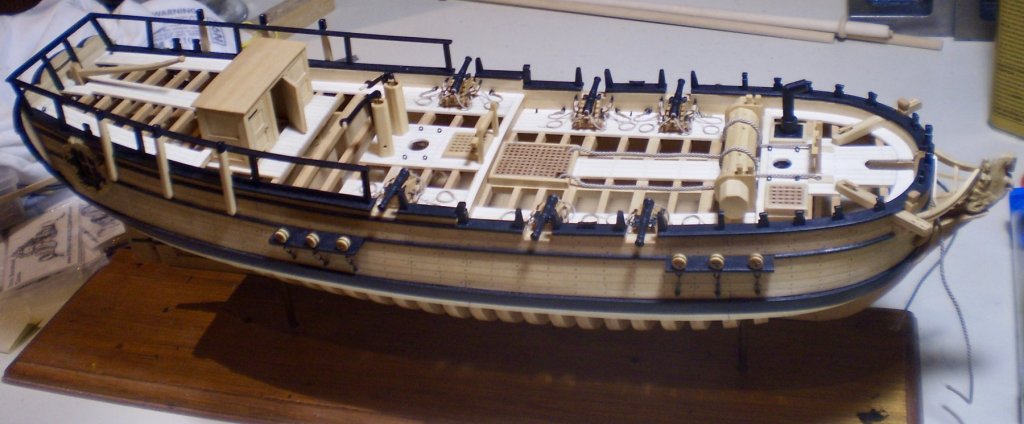
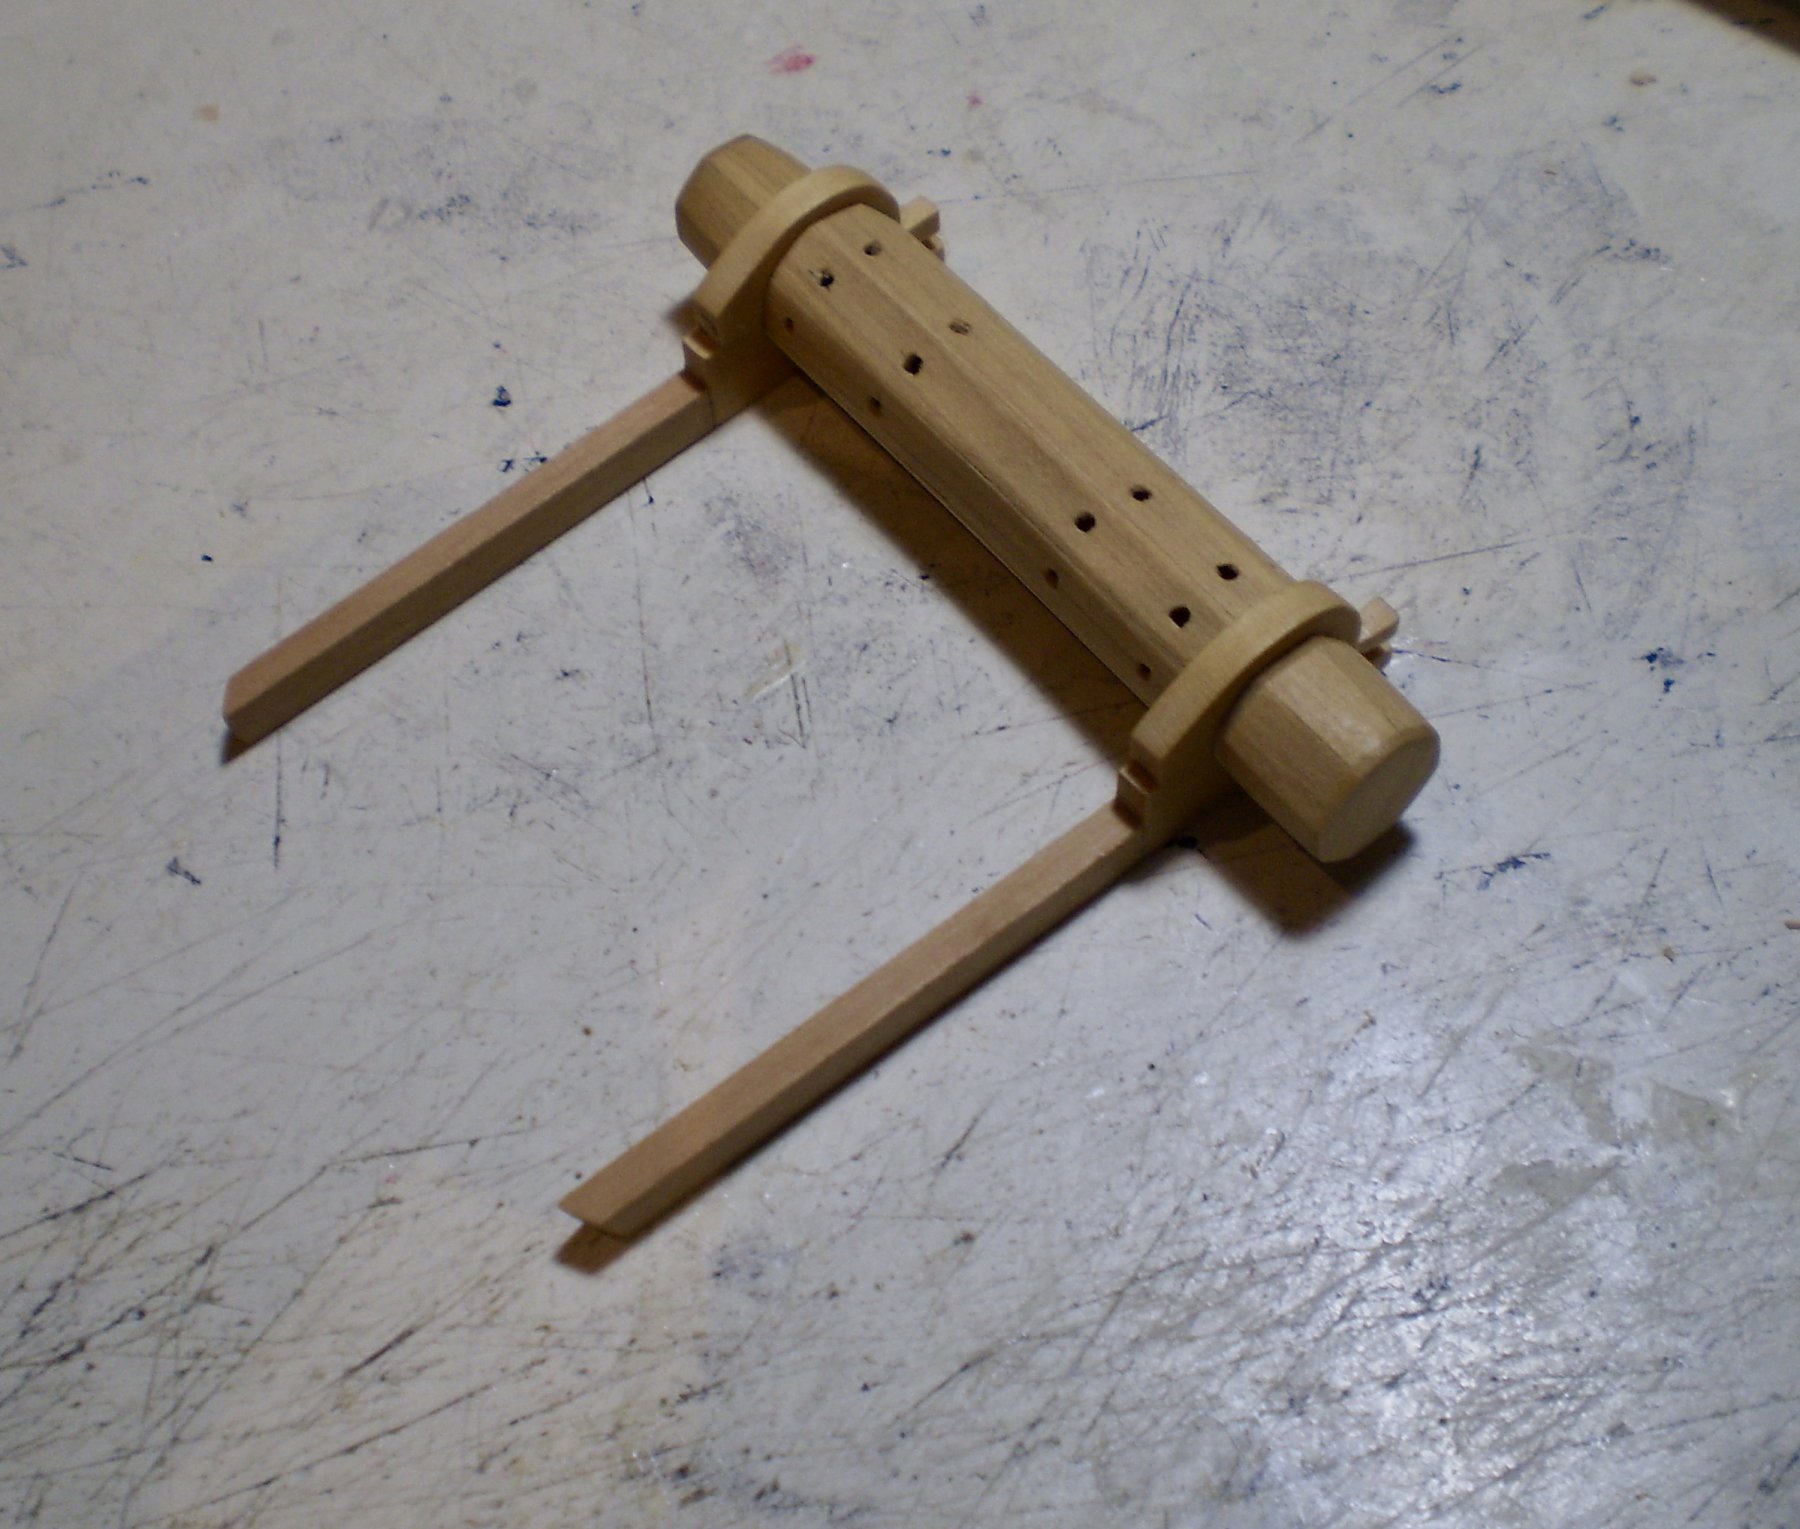
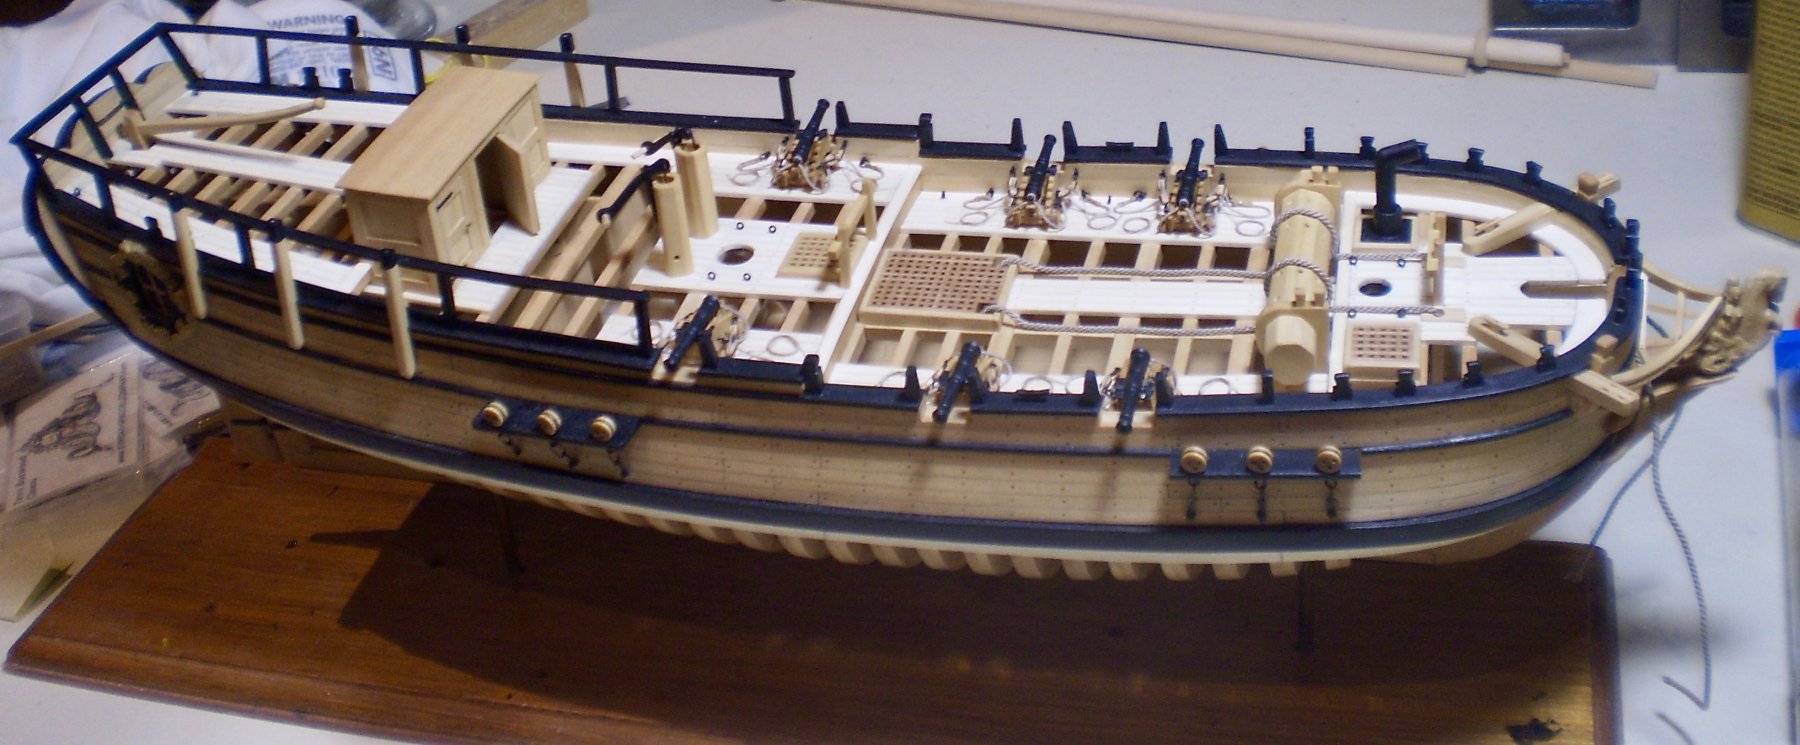
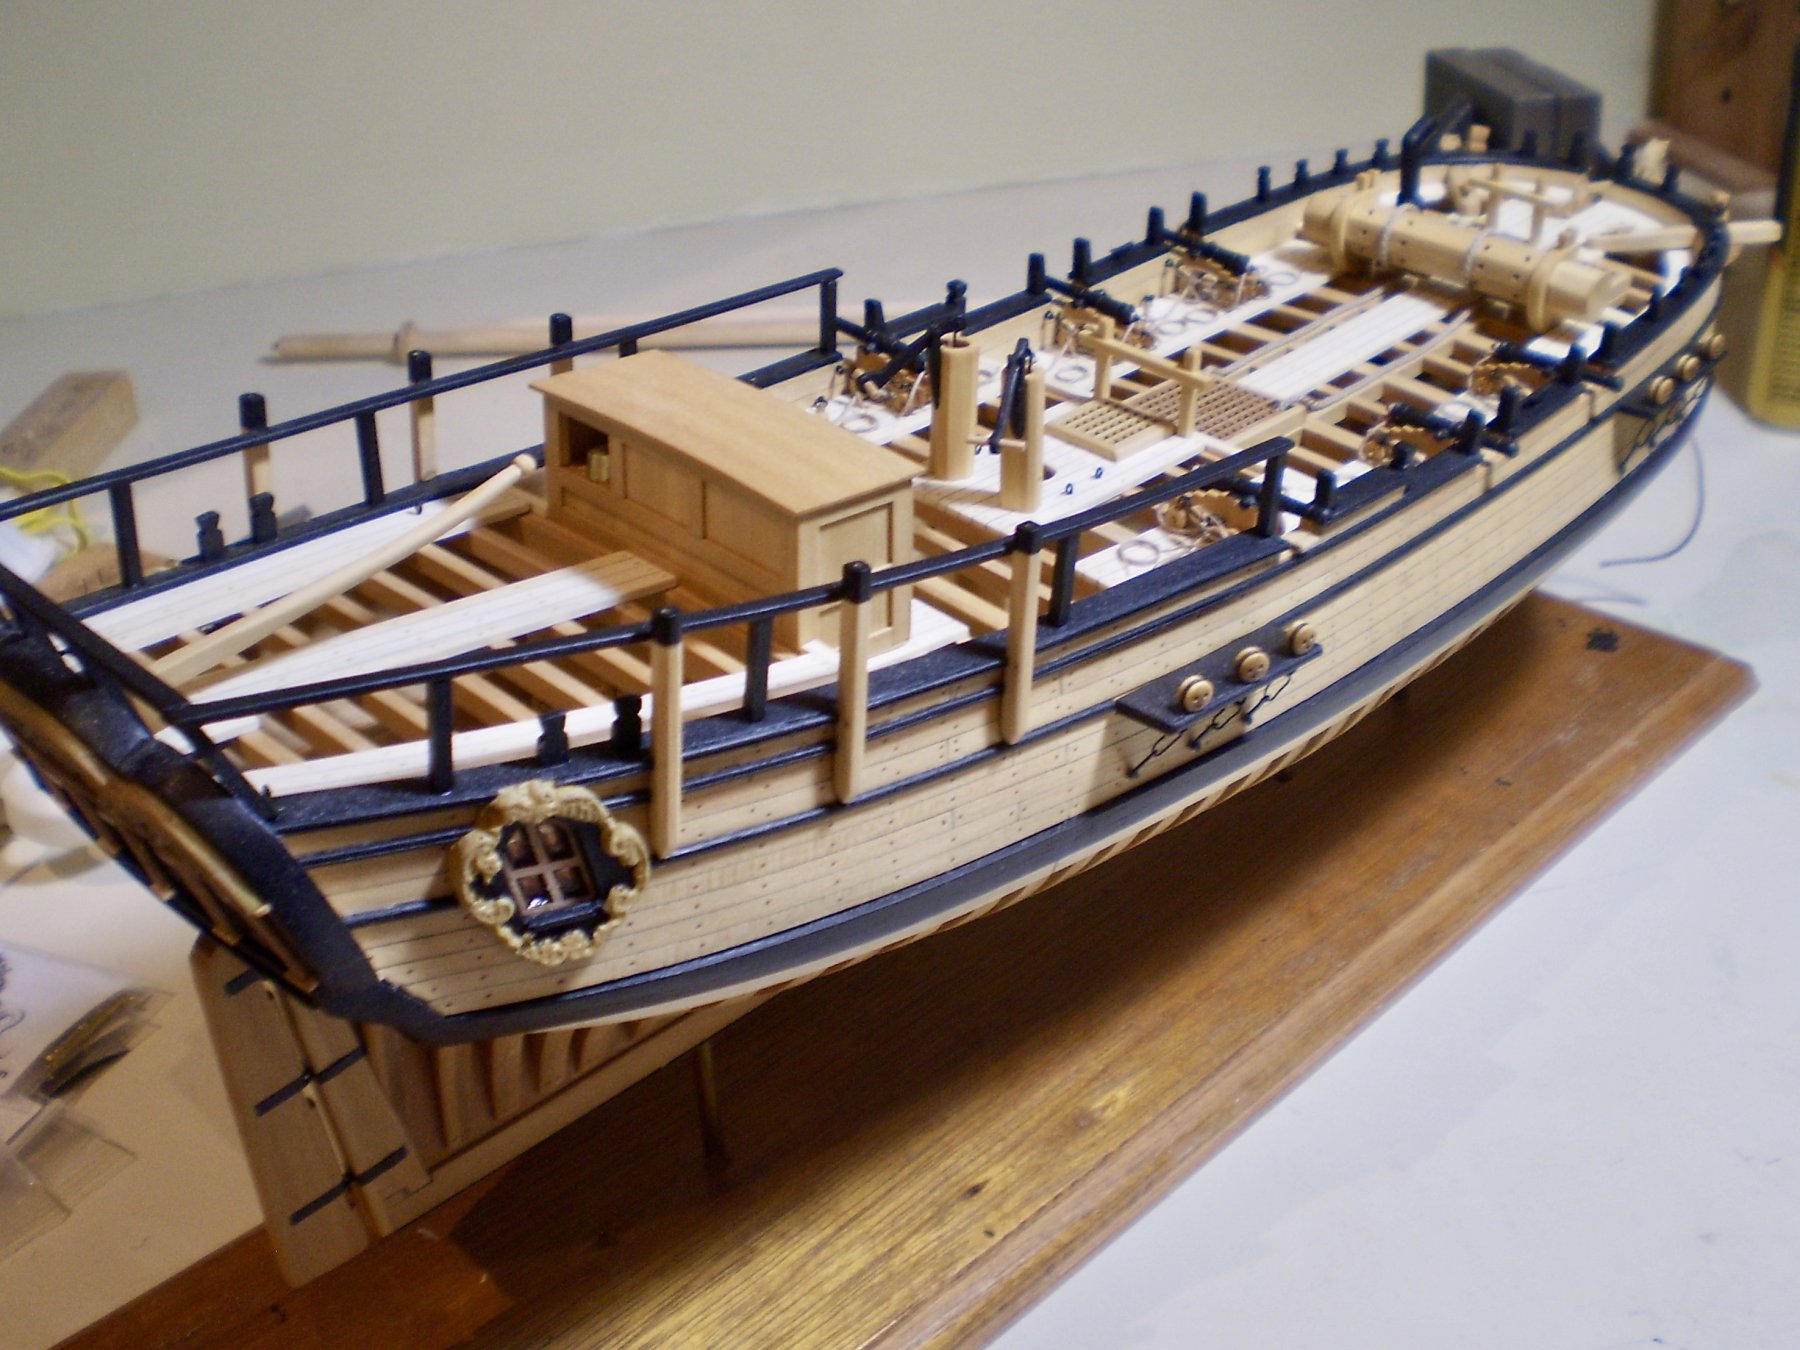
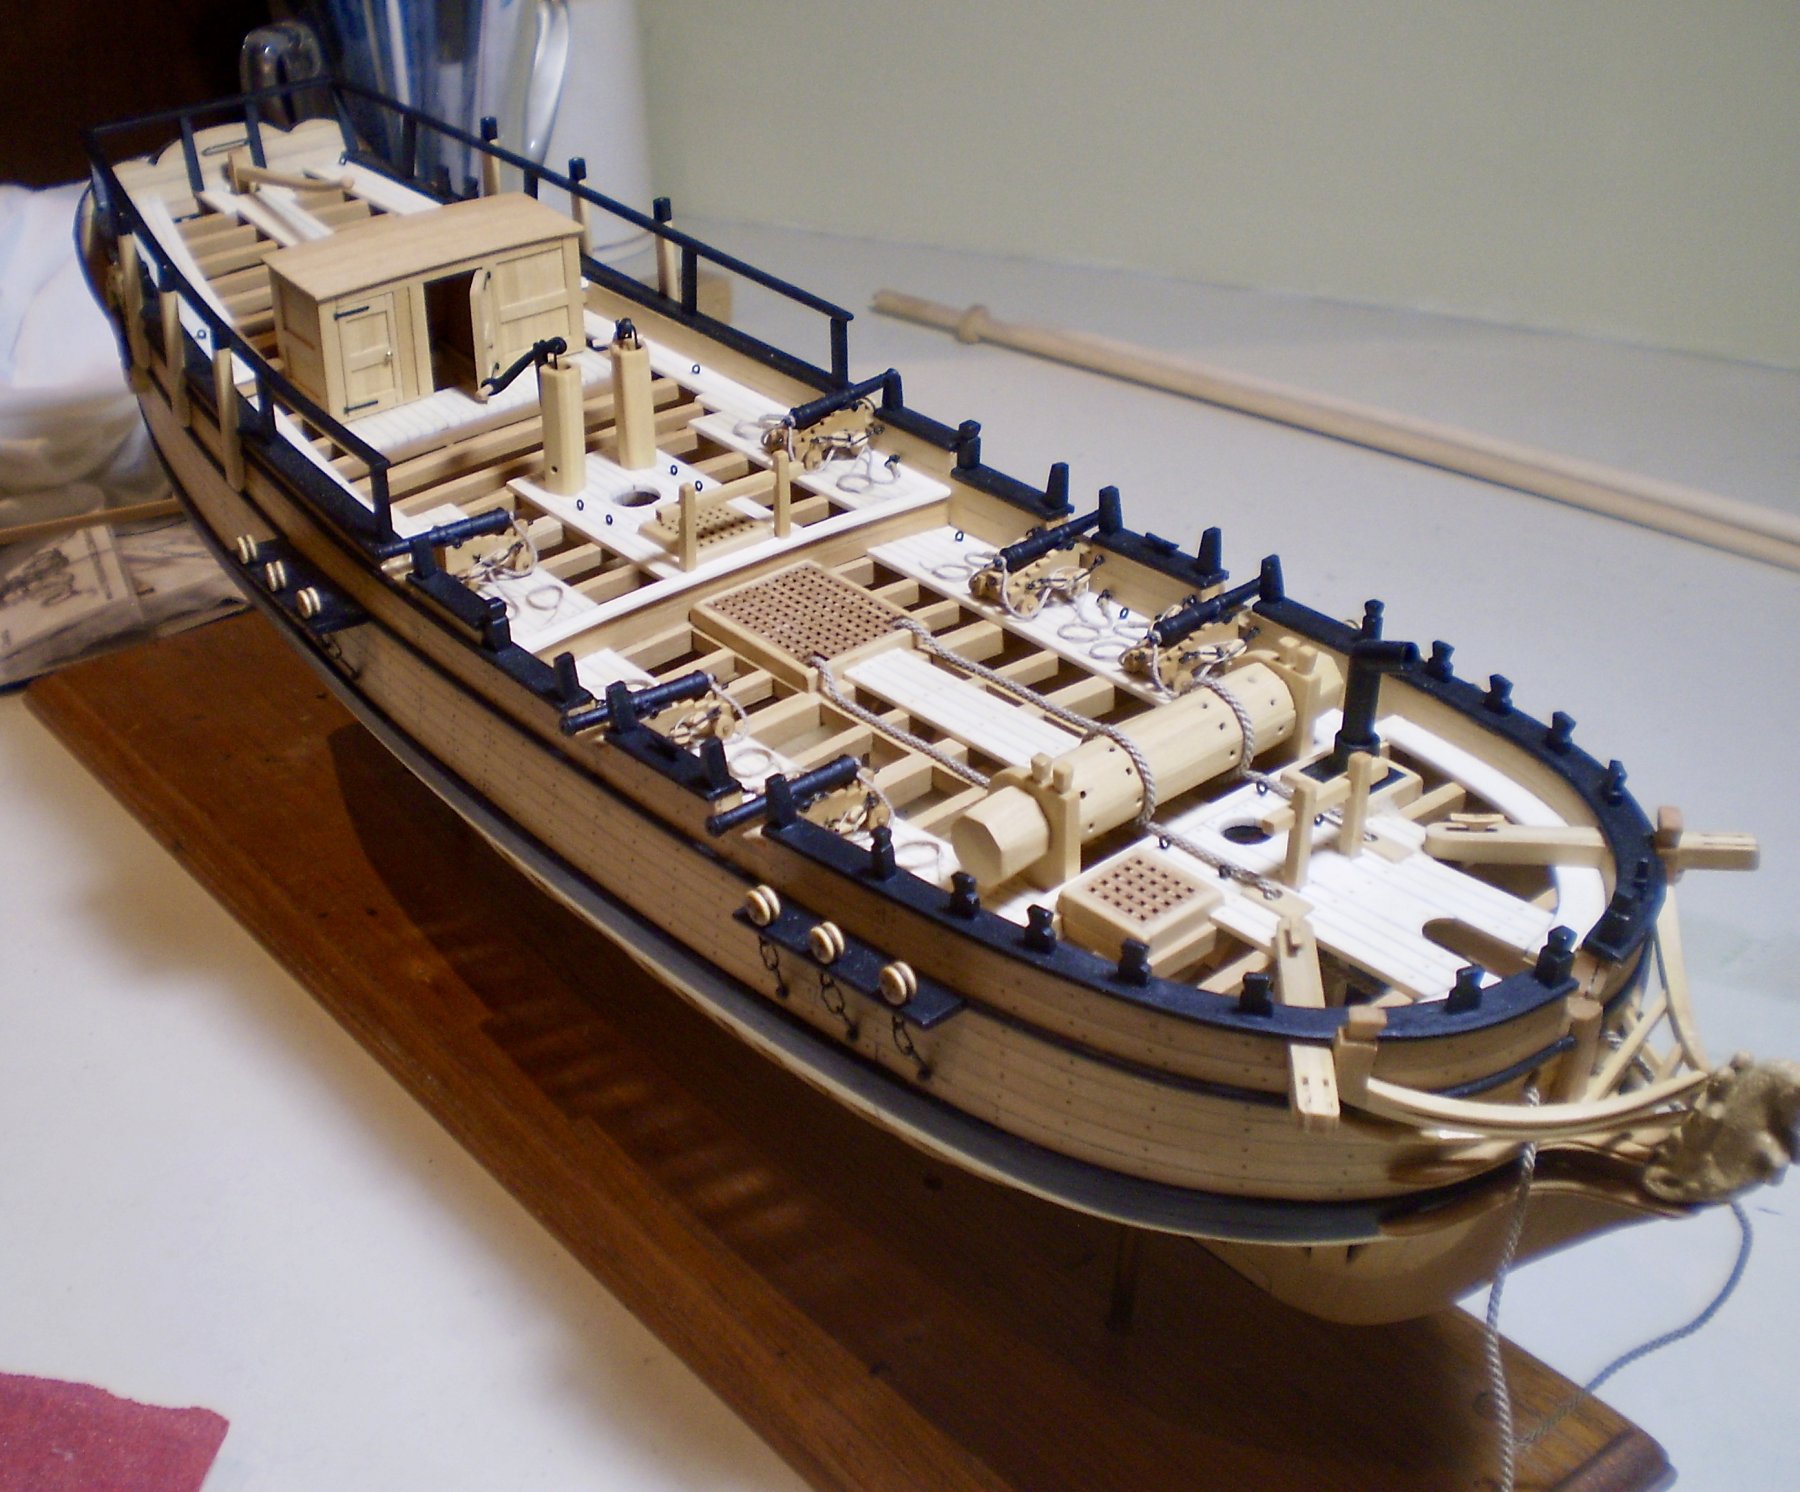
After spending a few days up north with family for the Thanksgiving holiday, I'm back and have finished work on the hull and deck. The final work involved making and mounting the windlass, running the anchor cables around the windlass and down into the hold, and adding some cleats. I also remounted the galley stack.
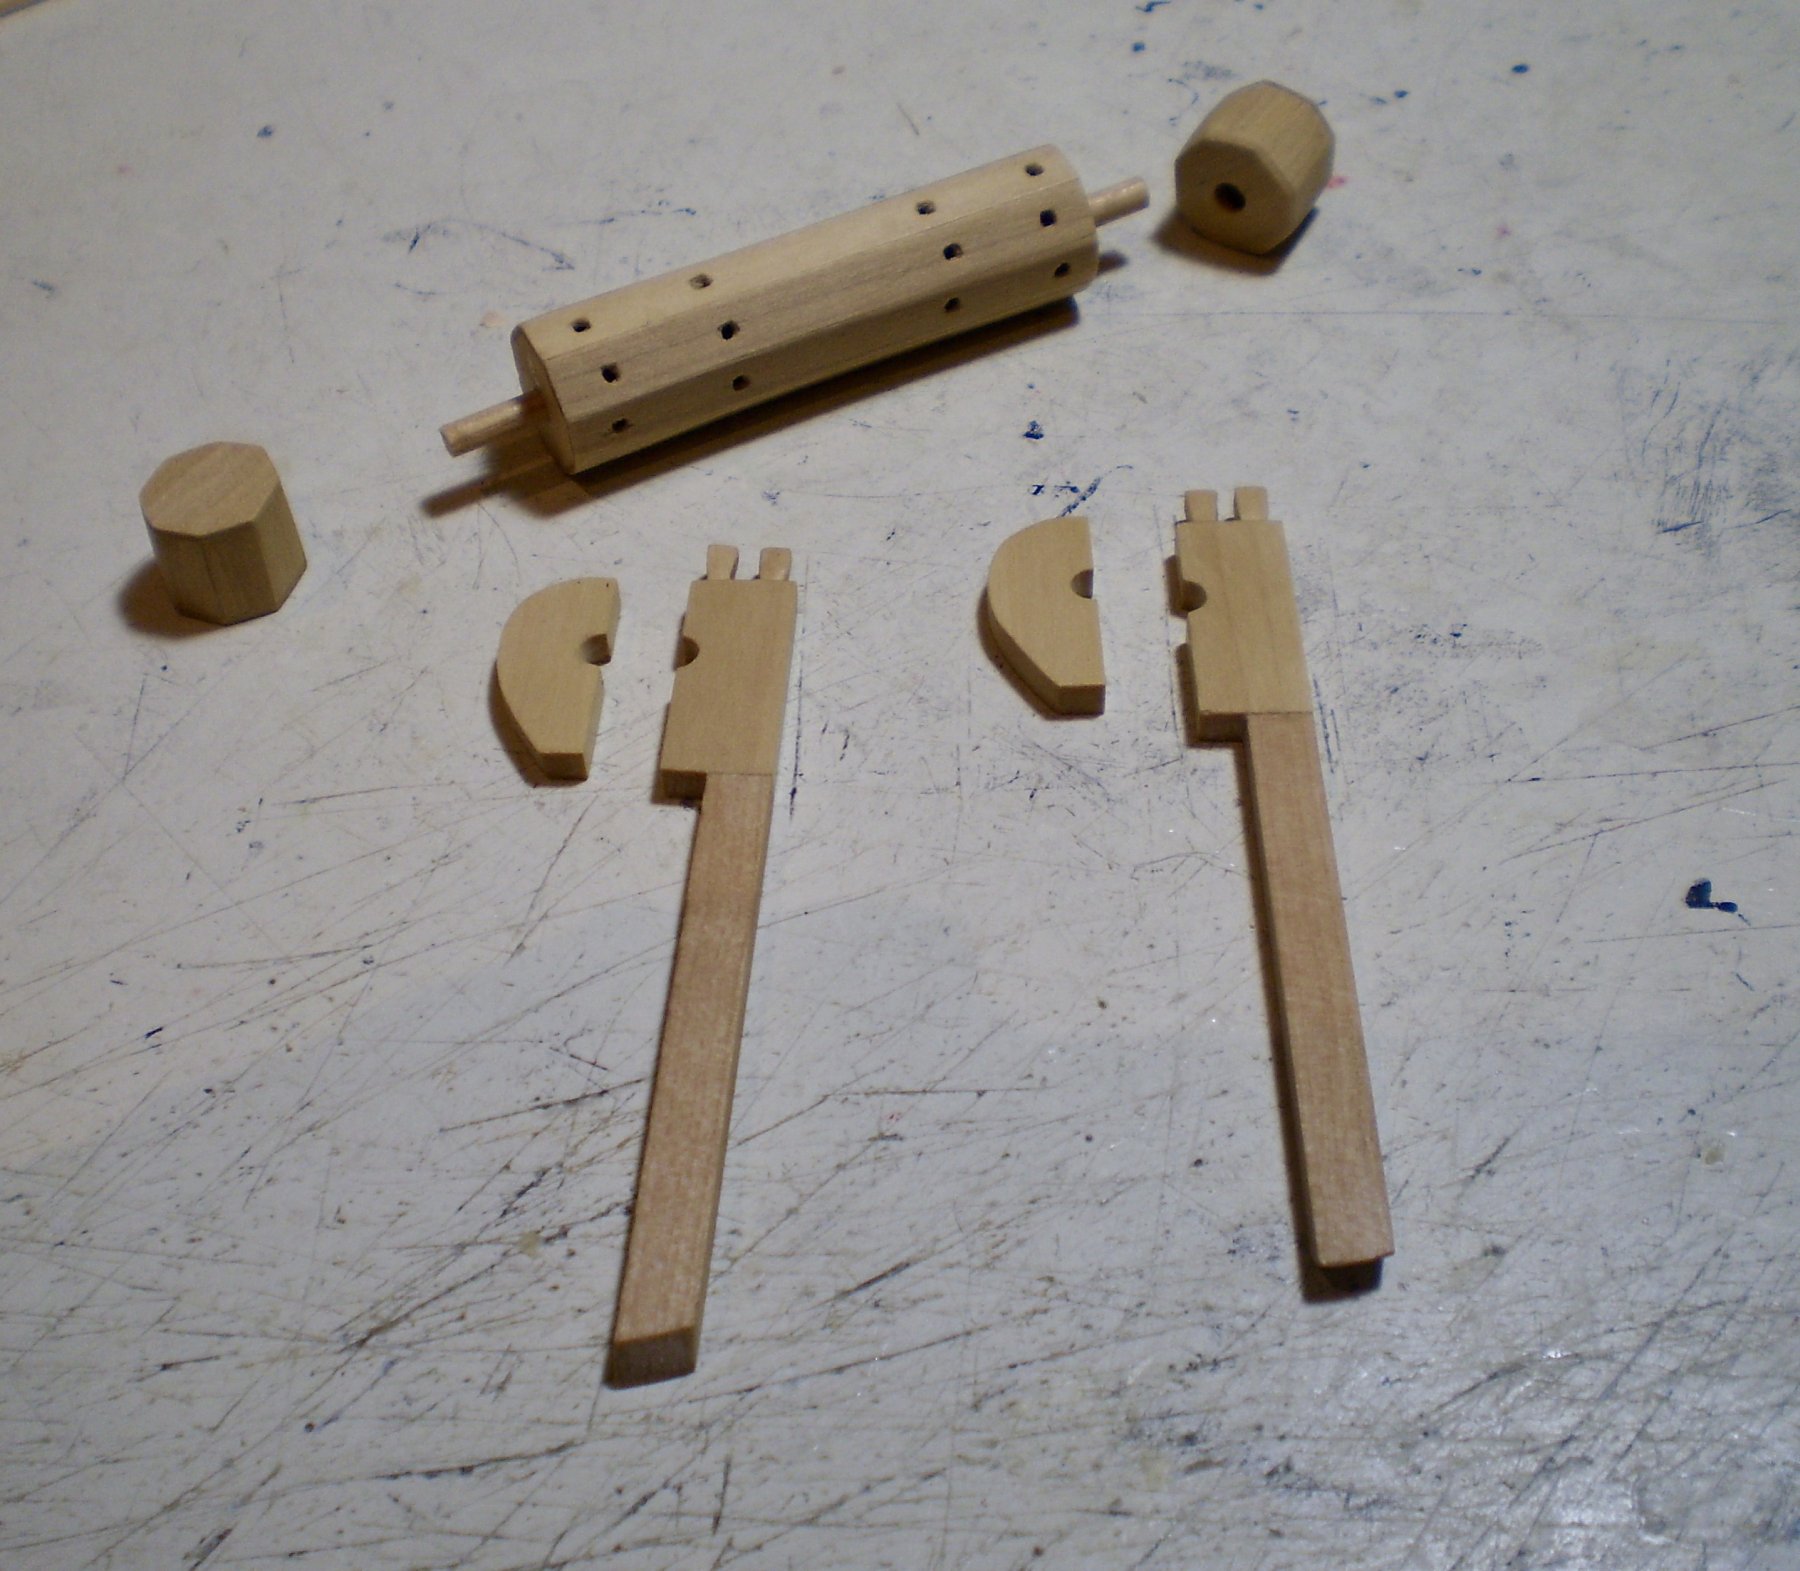
The windlass was made up from boxwood strip, which was drilled and filed for the bars, beveled on the edges and then assembled around end pieces cut and filed to fit the octagonal shape of the windlass barrel. I had to make some small adjustments to the uprights to fit the barrel as made. After mounting the windlass, I wound the anchor cables around it and then ran them down into the hold, where they were glued to rope coils that had been placed down there long ago.
The cleats are 7mm laser cut pieces from Syren, shaped with files and mounted with pins.
This completes work on the hull and deck, except for the swivel guns and anchors, which will be done after the rigging. I will now be moving on to the masting and rigging.
Bob


-
Thanks so much Sjors, Thomas, Denis and the "likes". Greatly appreciated.
Bob
- popeye the sailor, mtaylor, Canute and 3 others
-
6
-
-
Wonderful stove Nils.
Bob
- Omega1234, popeye the sailor, Piet and 2 others
-
5
-
She's a beauty Rusty.
Bob
- Ryland Craze, Canute, Stuntflyer and 1 other
-
4
-
Thanks so much Michael, Albert, OC and the "likes". Your comments and interest are always appreciated.
Bob
- Martin W, Old Collingwood, Elijah and 2 others
-
5
-


Halifax by rafine - FINISHED - The Lumberyard - 1:48 - semi-scratch schooner
in - Kit build logs for subjects built from 1751 - 1800
Posted
Continuing with mast construction. I've made and mounted the two lower masts. Each began with dowel, cut and sanded to a square shape for the head and a flat area for the cheeks. The cheeks were cut from boxwood sheet. The trestletrees and crosstrees were made from boxwood strip, with notches filed in to fit them together. The boom step on the mainmast was cut from boxwood sheet with boxwood strip supports. The cleats were made from boxwood strip, sanded to shape and pinned and glued in place. I had Syren laser cut cleats and they are nice, but it was more trouble removing the laser char, than just making them from scratch.The caps and mast coats were cut from boxwood sheet, after the holes were drilled and filed. The unpainted portions were finished with golden oak stain and Wipe-on Poly . The doublings, caps and mastcoats were painted black. Lastly, eyebolts were added for attachment of various blocks.
The masts were mounted in the holes previously drilled in the keelson, with the mastcoats in place. The caps will not be mounted until later.
Bob