rafine
-
Posts
2,932 -
Joined
-
Last visited
Content Type
Profiles
Forums
Gallery
Events
Everything posted by rafine
-

Cutter Cheerful 1806 by rafine - FINISHED
rafine replied to rafine's topic in - Build logs for subjects built 1801 - 1850
Thanks again Sjors. Thanks so much Thomas and the "likes". Thanks for the good wishes George and the same to you and yours. I will take this opportunity to offer the happiest of holiday wishes to all of my friends on MSW. Bob- 525 replies
-
- 6
-

-
- cheerful
- Syren Ship Model Company
- (and 1 more)
-
Nice job on the framing, especially considering the unscaled drawings. If you are not masting and rigging, the port framing should present no future problems. If you are, then you may want to now consider the position of the channels and deadeyes, to avoid positioning of the ports that will interfere with the rigging. The problems with the drawings and my lack of foresight caused me to have issues down the road. In answer to your questions: 1) The profile and deck drawings didn't match up and the AOTS drawings didn't match either of them. My memory is that I used the masts as the fixed points and then kind of fudged the spacing of the hatches to fit, taking into account the position of the bulkheads and the fact that I was using the kit gratings. I also had to take into account the position of the lower deck hatches that had been done previously. Neither very scientific, nor accurate, but it seemed to work out well. 2) I do my plank bending by soaking in boiling water. I have a very old electric plank bender that I use most of the time. I tend to over bend a bit to allow for spring back during drying. 3) I am generally low tech in my modeling, and this applies to clamping. I use a variety of cheap spring clamps, but often resort to using my fingers to hold planks in place until the glue takes hold. Hope this is helpful. Bob
-
Cutter Cheerful 1806 by rafine - FINISHED
rafine replied to rafine's topic in - Build logs for subjects built 1801 - 1850
Thanks so much Sjors. Glad to be able to keep you smiling. Bob- 525 replies
-
- 4
-
-
- cheerful
- Syren Ship Model Company
- (and 1 more)
-
Cutter Cheerful 1806 by rafine - FINISHED
rafine replied to rafine's topic in - Build logs for subjects built 1801 - 1850
Thanks so much Ken. I assume that's what they are. Bob- 525 replies
-
- 3
-
-
- cheerful
- Syren Ship Model Company
- (and 1 more)
-
Welcome to the Essex club on MSW. It's a very small and exclusive group right now. You look like you're off to a very good start. I hope that my log will provide you with some help, and please feel free to ask me any questions you may have, either through your log or by PM. Good luck. Bob
-
Cutter Cheerful 1806 by rafine - FINISHED
rafine replied to rafine's topic in - Build logs for subjects built 1801 - 1850
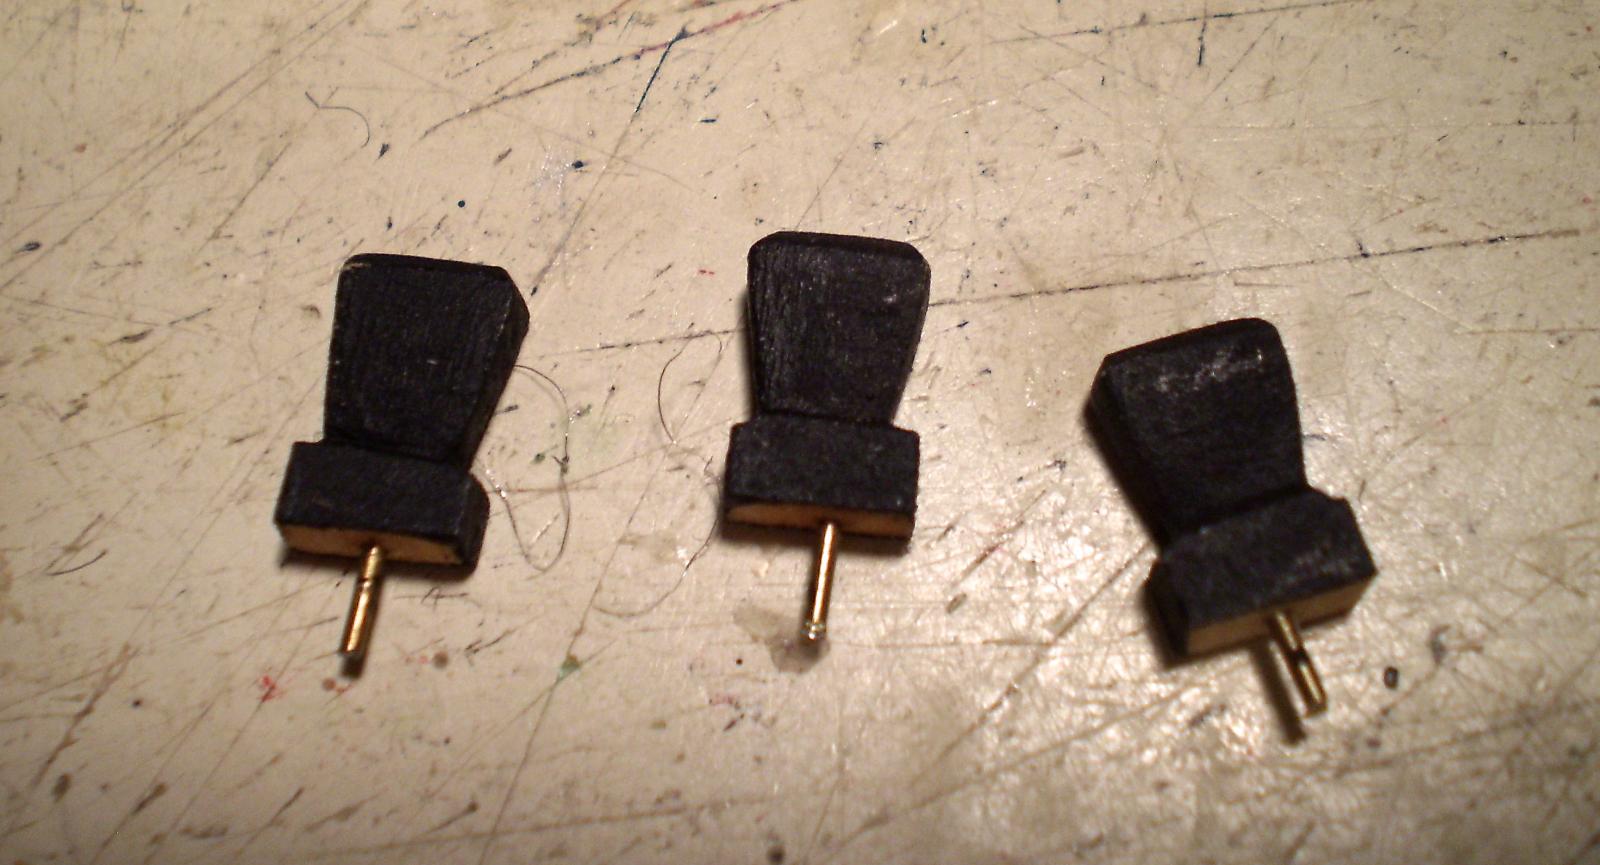
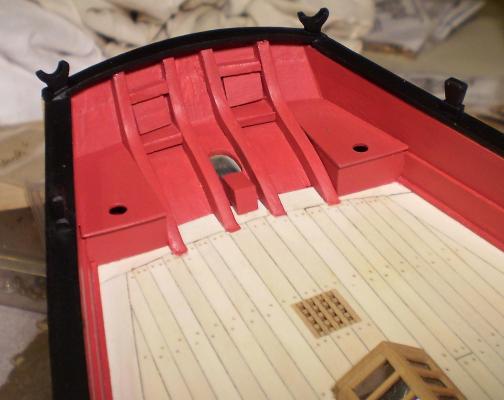
Thanks so much Dirk, Chuck, Mike and the "likes". You're so right Chuck, this is the fun part and i will enjoy it -- but I'd still like you to get back ahead. Mike, the seats are only three pieces -- front, one side and top -- but needed a fair amount of fitting, even using the templates. Bob- 525 replies
-
- 5
-
-
- cheerful
- Syren Ship Model Company
- (and 1 more)
-
Cutter Cheerful 1806 by rafine - FINISHED
rafine replied to rafine's topic in - Build logs for subjects built 1801 - 1850
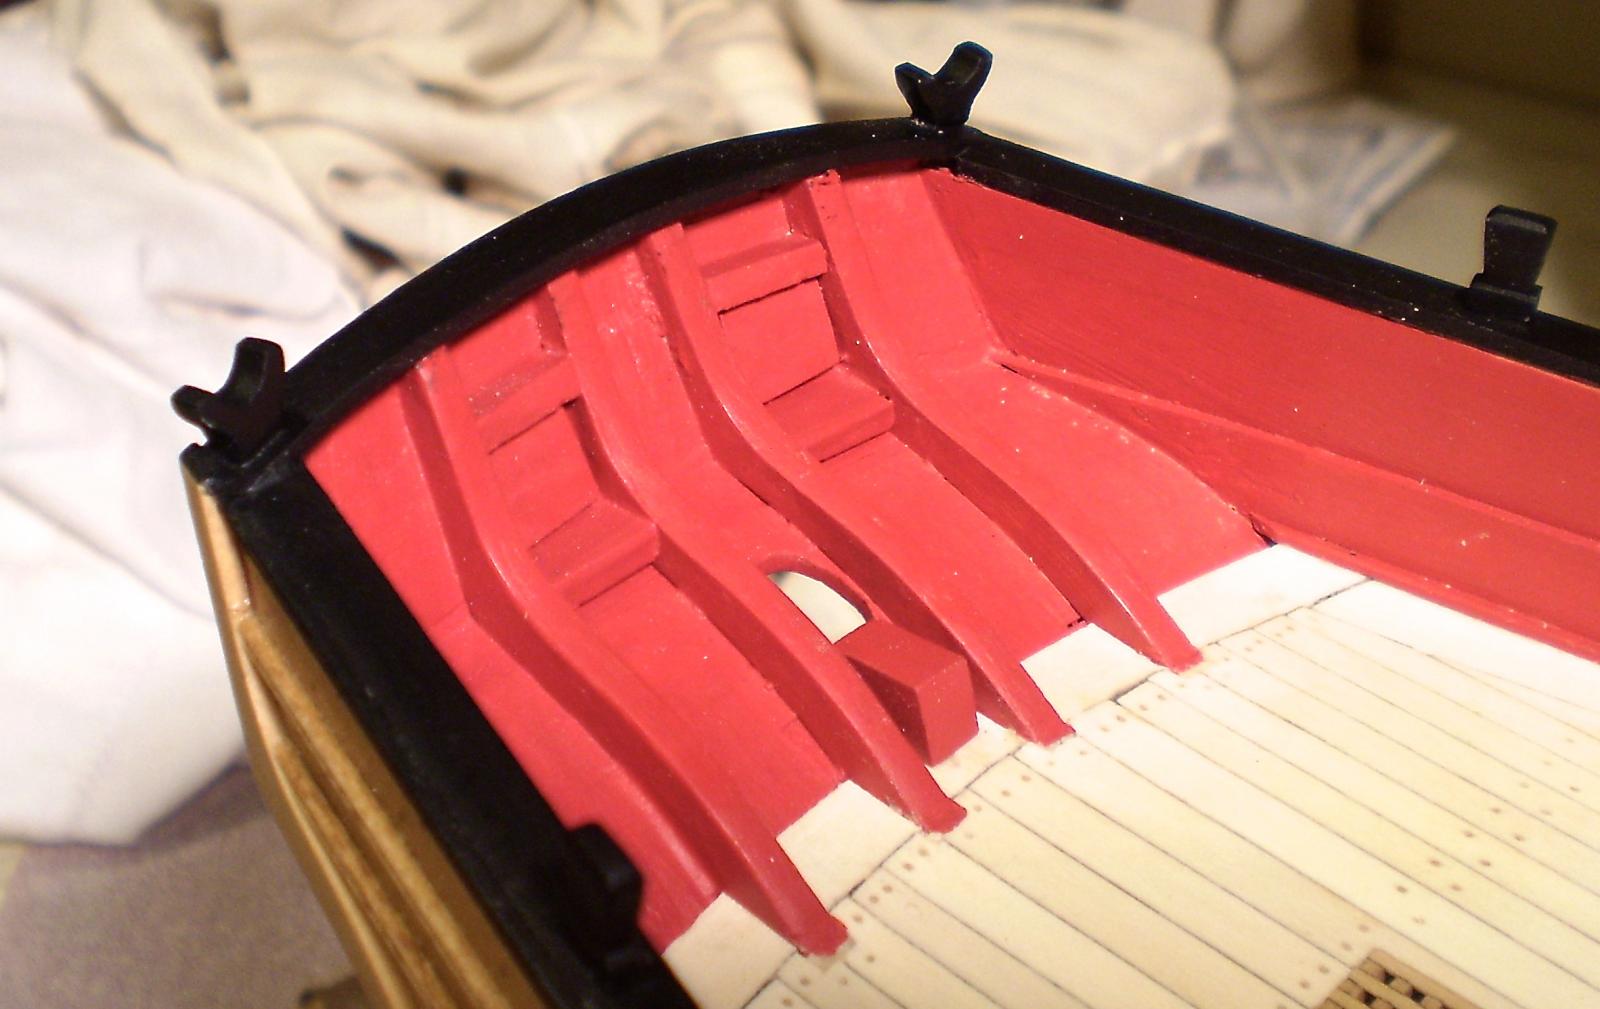
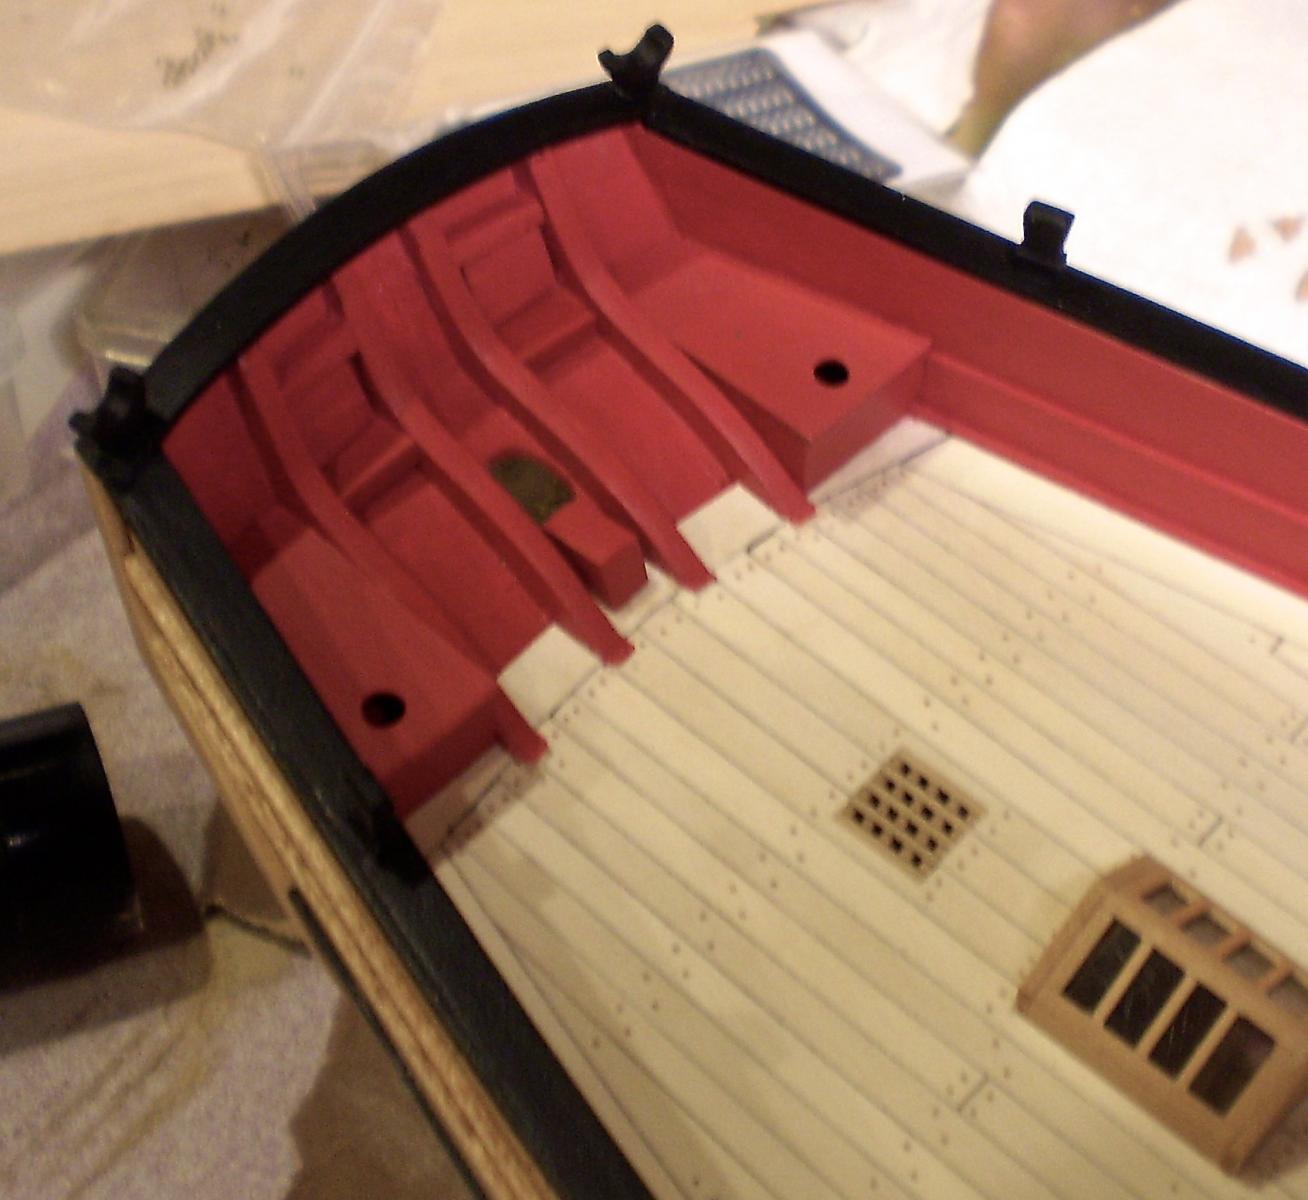
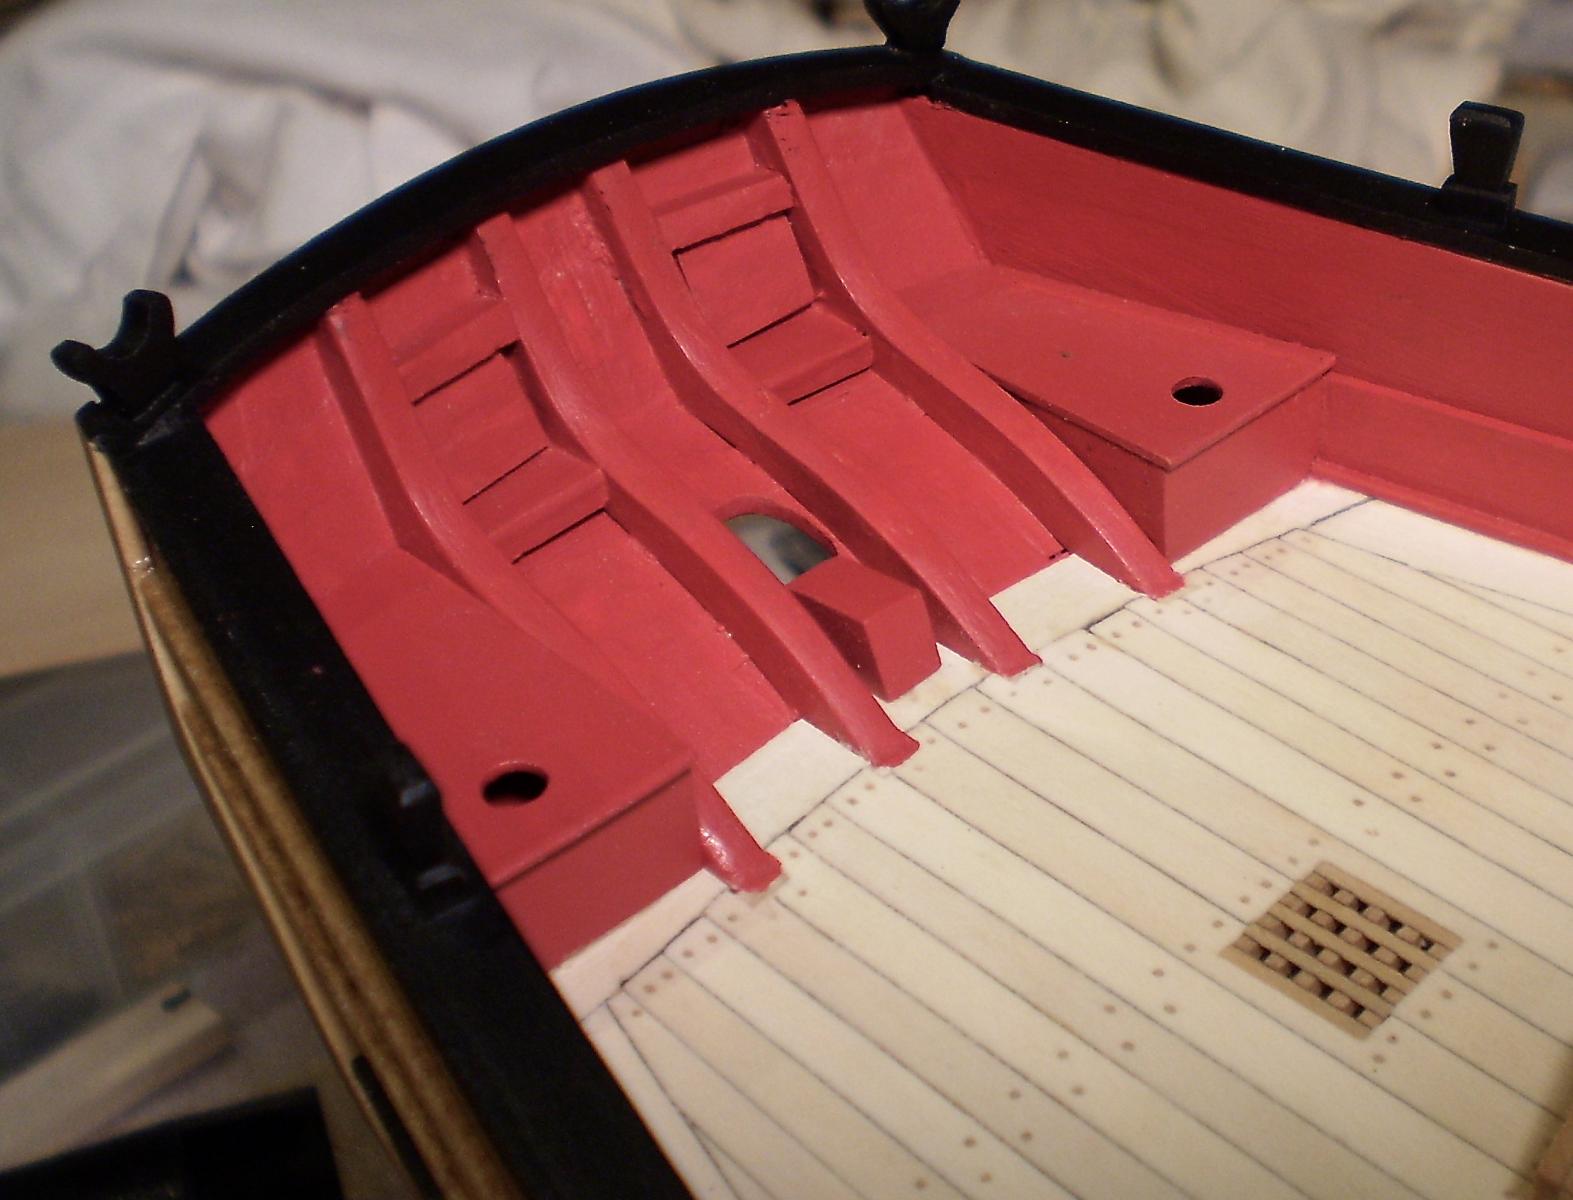
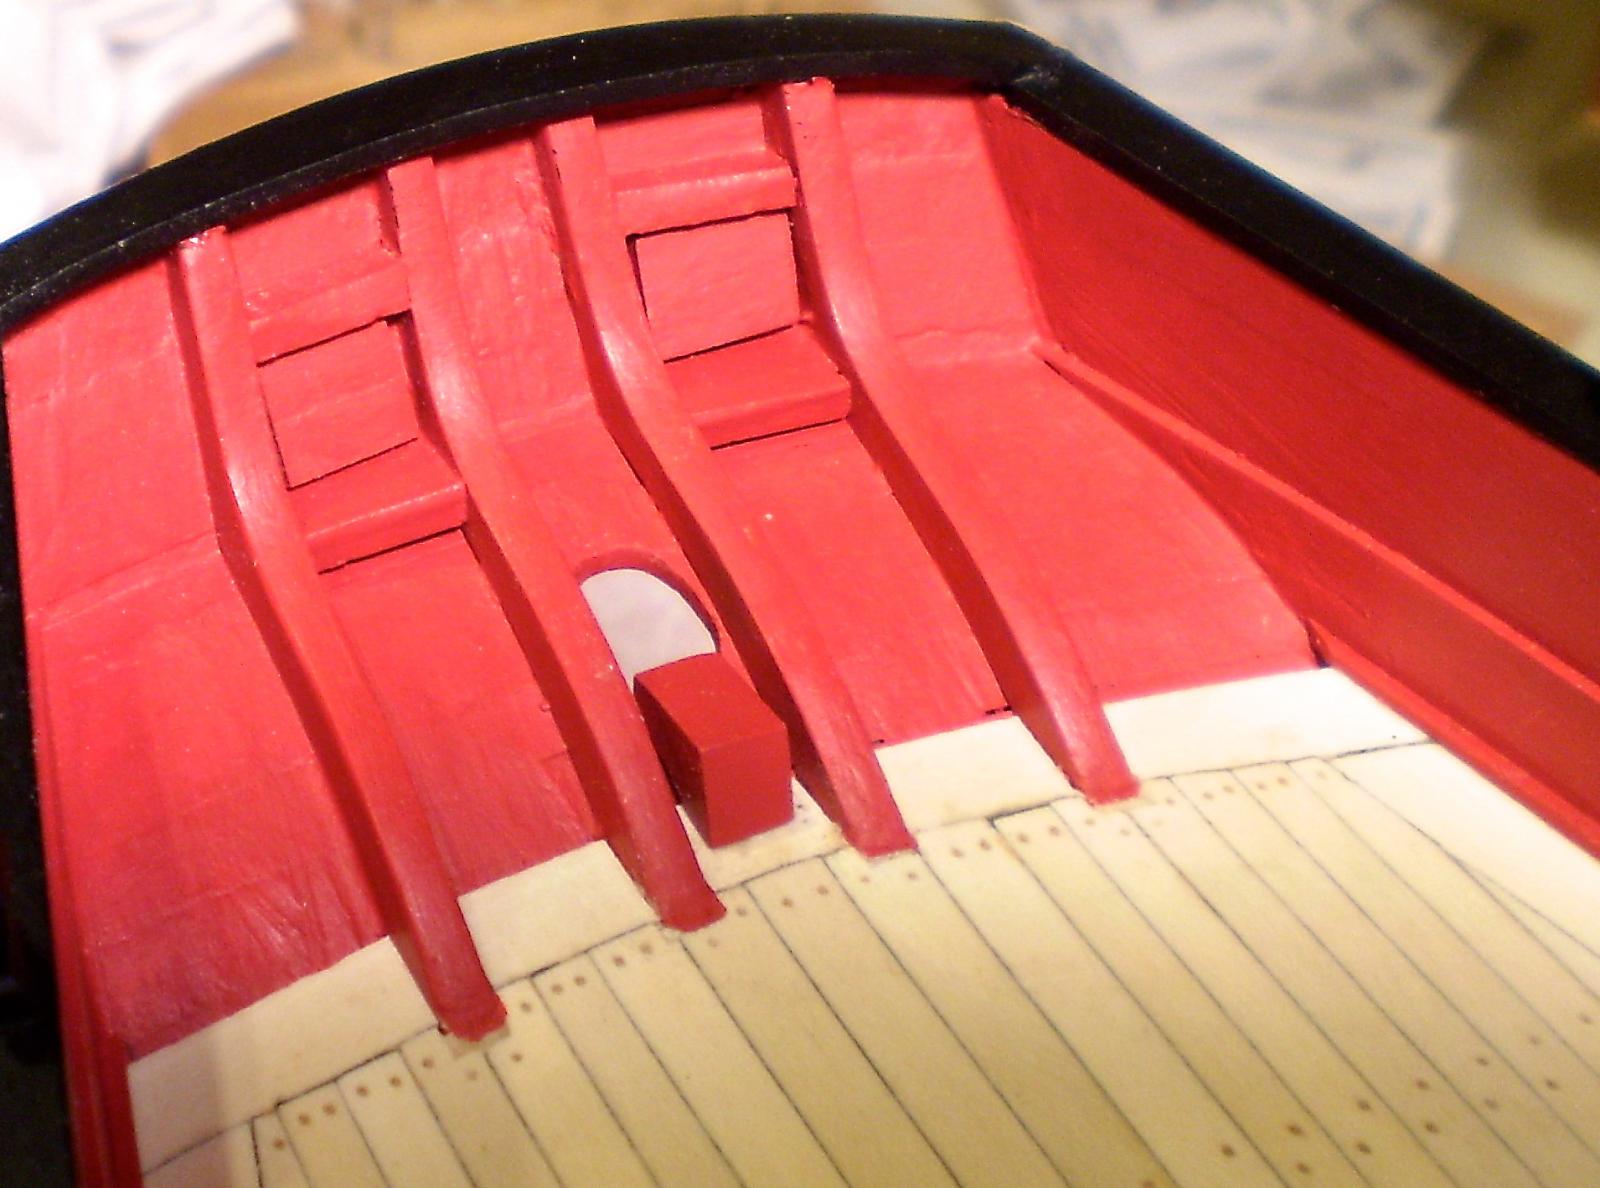
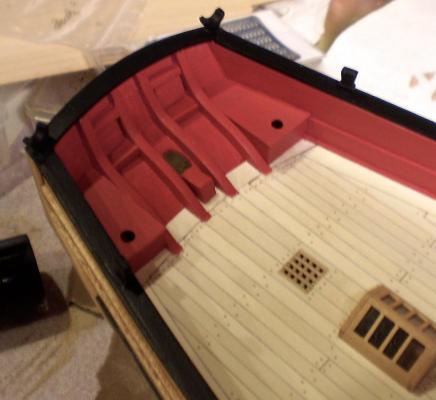
I neither wanted, nor intended, to get ahead of Chuck on this build, but I'm afraid that it's happening. After finishing the outer hull detailing by doing the boom supports and adding the keel plates (there are still some eyebolts to be added during rigging), I moved on to the interior by doing the stern seats, which Chuck hasn't done yet. The seats were made from boxwood sheet using card templates to make the parts. Some discards before they fit, but fairly straightforward work. The seats were painted red to match the inner planking. I think that I will start making some gun carriages now, while waiting to see where Chuck goes next. Bob


- 525 replies
-
- 40
-
-
- cheerful
- Syren Ship Model Company
- (and 1 more)
-
Looking great Sal. Don't ever forget just how long that bowsprit assembly is. It's like a magnet for hands and elbows. You don't have to ask how I know. Bob
- 659 replies
-
- 6
-
-
- syren
- model shipways
- (and 1 more)
-
Cutter Cheerful 1806 by rafine - FINISHED
rafine replied to rafine's topic in - Build logs for subjects built 1801 - 1850
Thanks so much Janet and Dave and the "likes". Janet, I use Elmers Carpenters glue for all of my wood to wood joins. Dave, you're very generous. Constraints or not, you did a great job on your Cheerful. Bob- 525 replies
-
- 3
-
-
- cheerful
- Syren Ship Model Company
- (and 1 more)
-
Mark, the planking looks great. As far as using the steel wool, I would throw caution to the wind and do it. At worst, you can always put another coat of poly on and return it to this look. If you use the steel wool, use a soft cloth and buff after the steel wool. I've found that to leave a pleasant sheen to the finish. Bob
-
Cutter Cheerful 1806 by rafine - FINISHED
rafine replied to rafine's topic in - Build logs for subjects built 1801 - 1850
Thanks so much John, George and Sjors for the nice comments and thanks also to the "likes". Sjors, I think you're quite right that it's easier than making up the individual links for chains, but these had their moments as well. Bob- 525 replies
-
- 4
-
-
- cheerful
- Syren Ship Model Company
- (and 1 more)
-
Cutter Cheerful 1806 by rafine - FINISHED
rafine replied to rafine's topic in - Build logs for subjects built 1801 - 1850
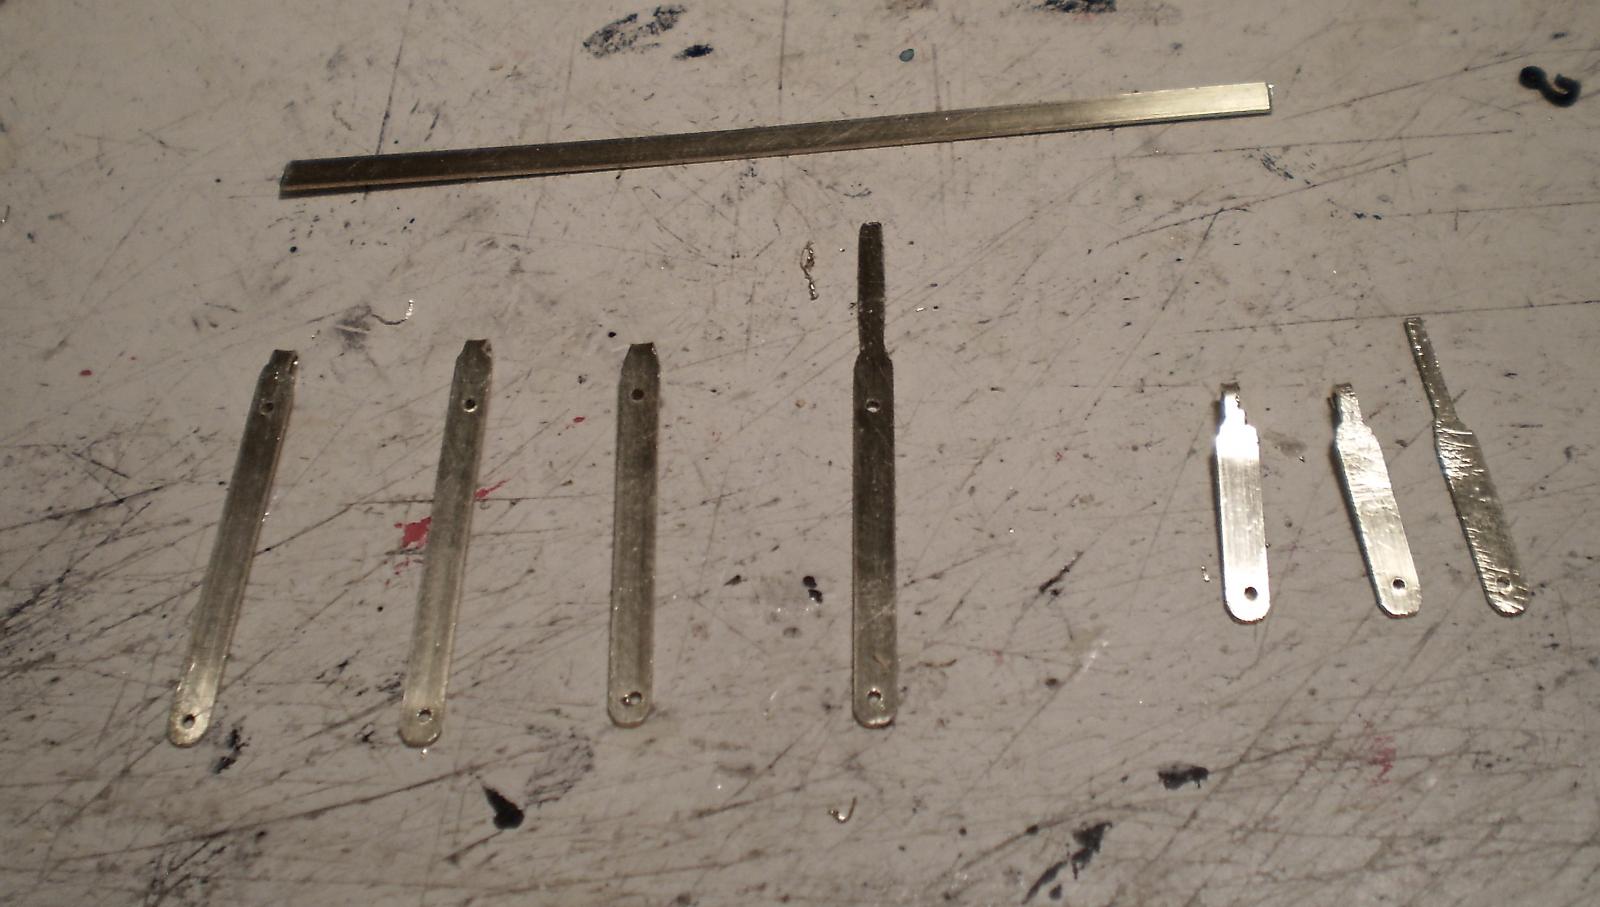
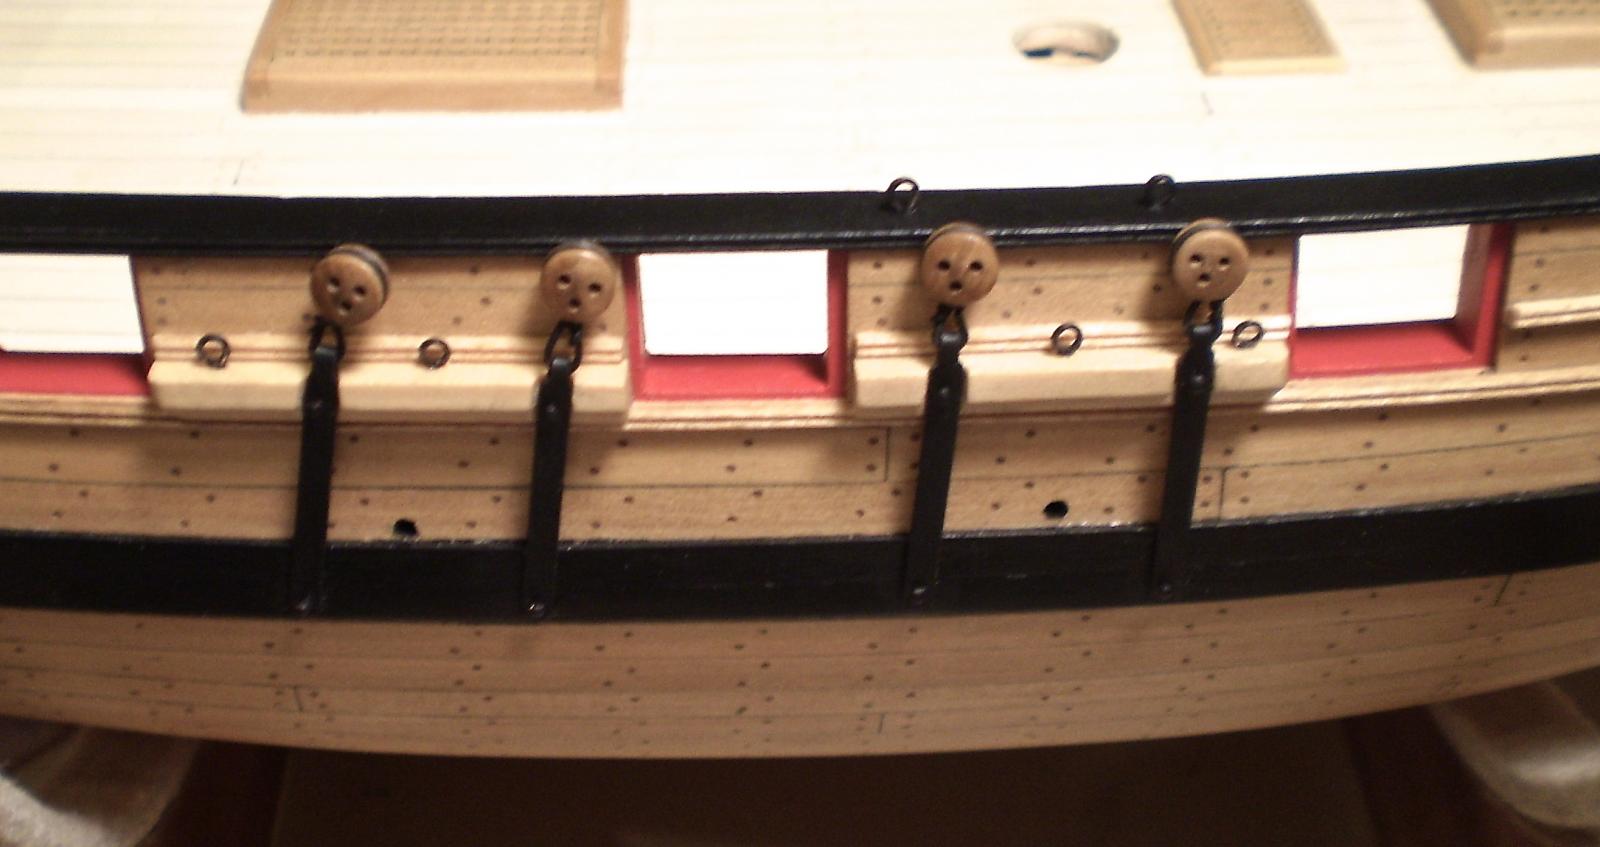
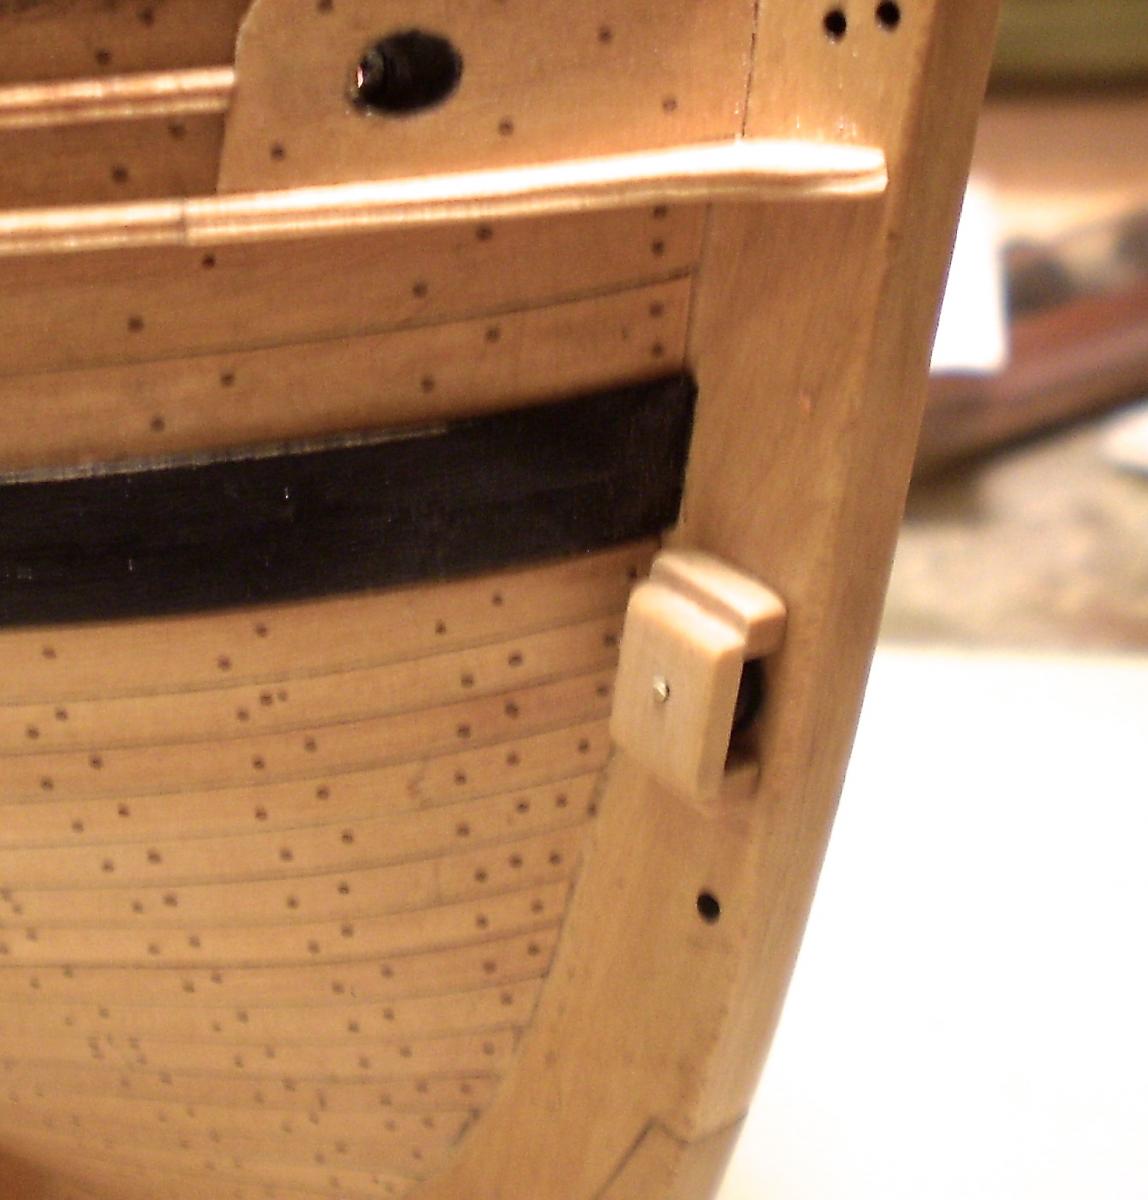
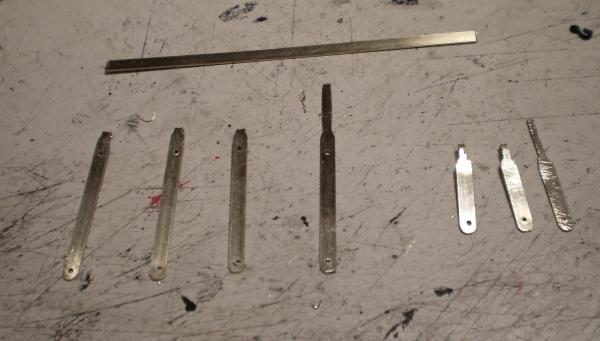
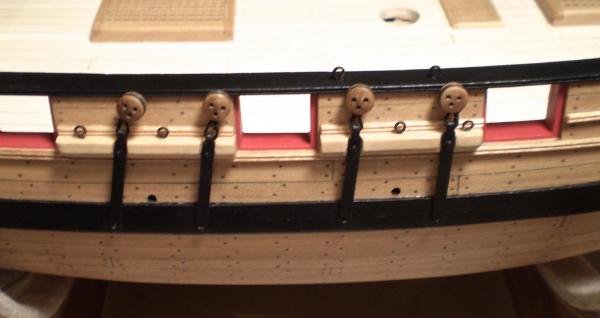
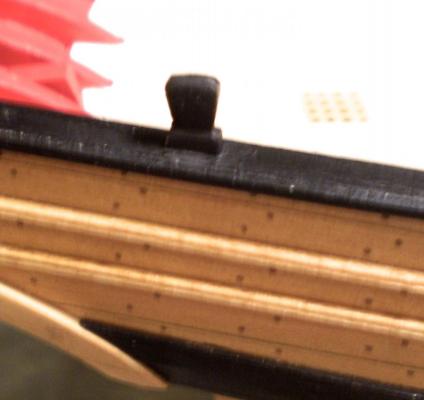
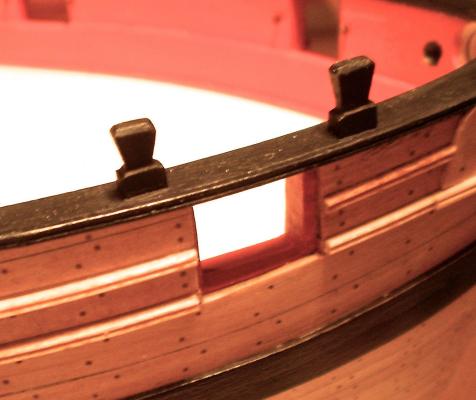
I've now done the channels and chainplates. The channels were made to fit between the two hull moldings, shaped on the bottom and one side of each, and slots filed for the chainplates. After adding some eyebolts, they were pinned and glued to the hull. The chainplates were made from brass strip, shaped with files, and holes drilled for pins. They were then blackened. The deadeyes were strapped with black wire and the chainplates were bent around them before mounting them with pins into holes drilled in the hull. The smaller chainplates were made the same way, making sure that hooks (Chuck's acrylic hooks) would fit into their loops. I am now finishing up the remaining outer hull details. Bob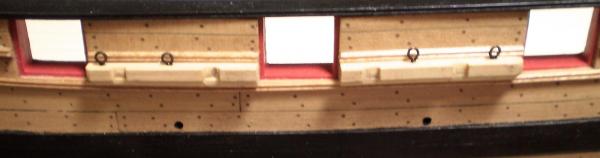

- 525 replies
-
- 30
-
-
- cheerful
- Syren Ship Model Company
- (and 1 more)
-
Great to have you back at it Sjors. Looking really good. Bob
- 1,616 replies
-
- 4
-
-
- caldercraft
- agamemnon
- (and 1 more)
-
Cutter Cheerful 1806 by rafine - FINISHED
rafine replied to rafine's topic in - Build logs for subjects built 1801 - 1850
Thanks so much Sjors for the kind words. I continue to look forward to progress on your Aggy. Bob- 525 replies
-
- 2
-
-
- cheerful
- Syren Ship Model Company
- (and 1 more)
-
Lost my internet for a few days, so I'm late to the party. It's looking really good Mark. Bob
-
Cutter Cheerful 1806 by rafine - FINISHED
rafine replied to rafine's topic in - Build logs for subjects built 1801 - 1850
Thanks so much Sal, Nigel, Hamilton, Crackers and Grant for the very nice comments and also to the "likes". Guys, I'm rooting hard for some sunshine, so I can out of the work room and back on the golf course. Bob- 525 replies
-
- 7
-
-
- cheerful
- Syren Ship Model Company
- (and 1 more)
-
Cutter Cheerful 1806 by rafine - FINISHED
rafine replied to rafine's topic in - Build logs for subjects built 1801 - 1850
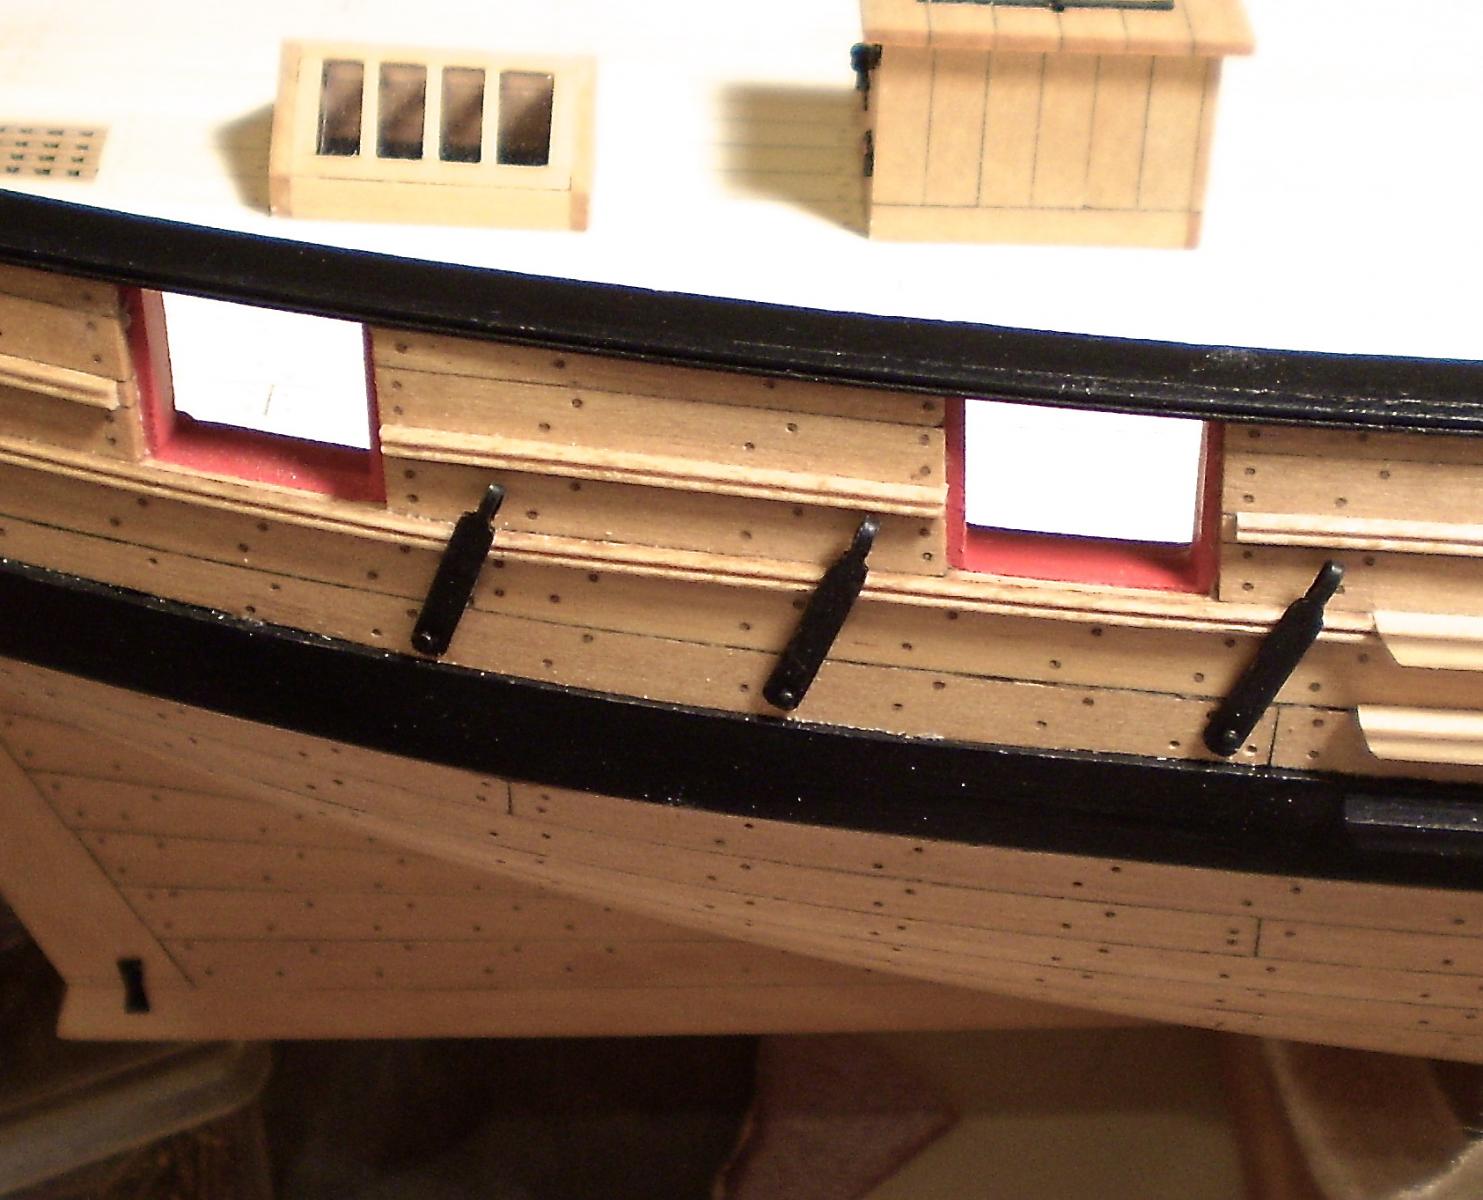
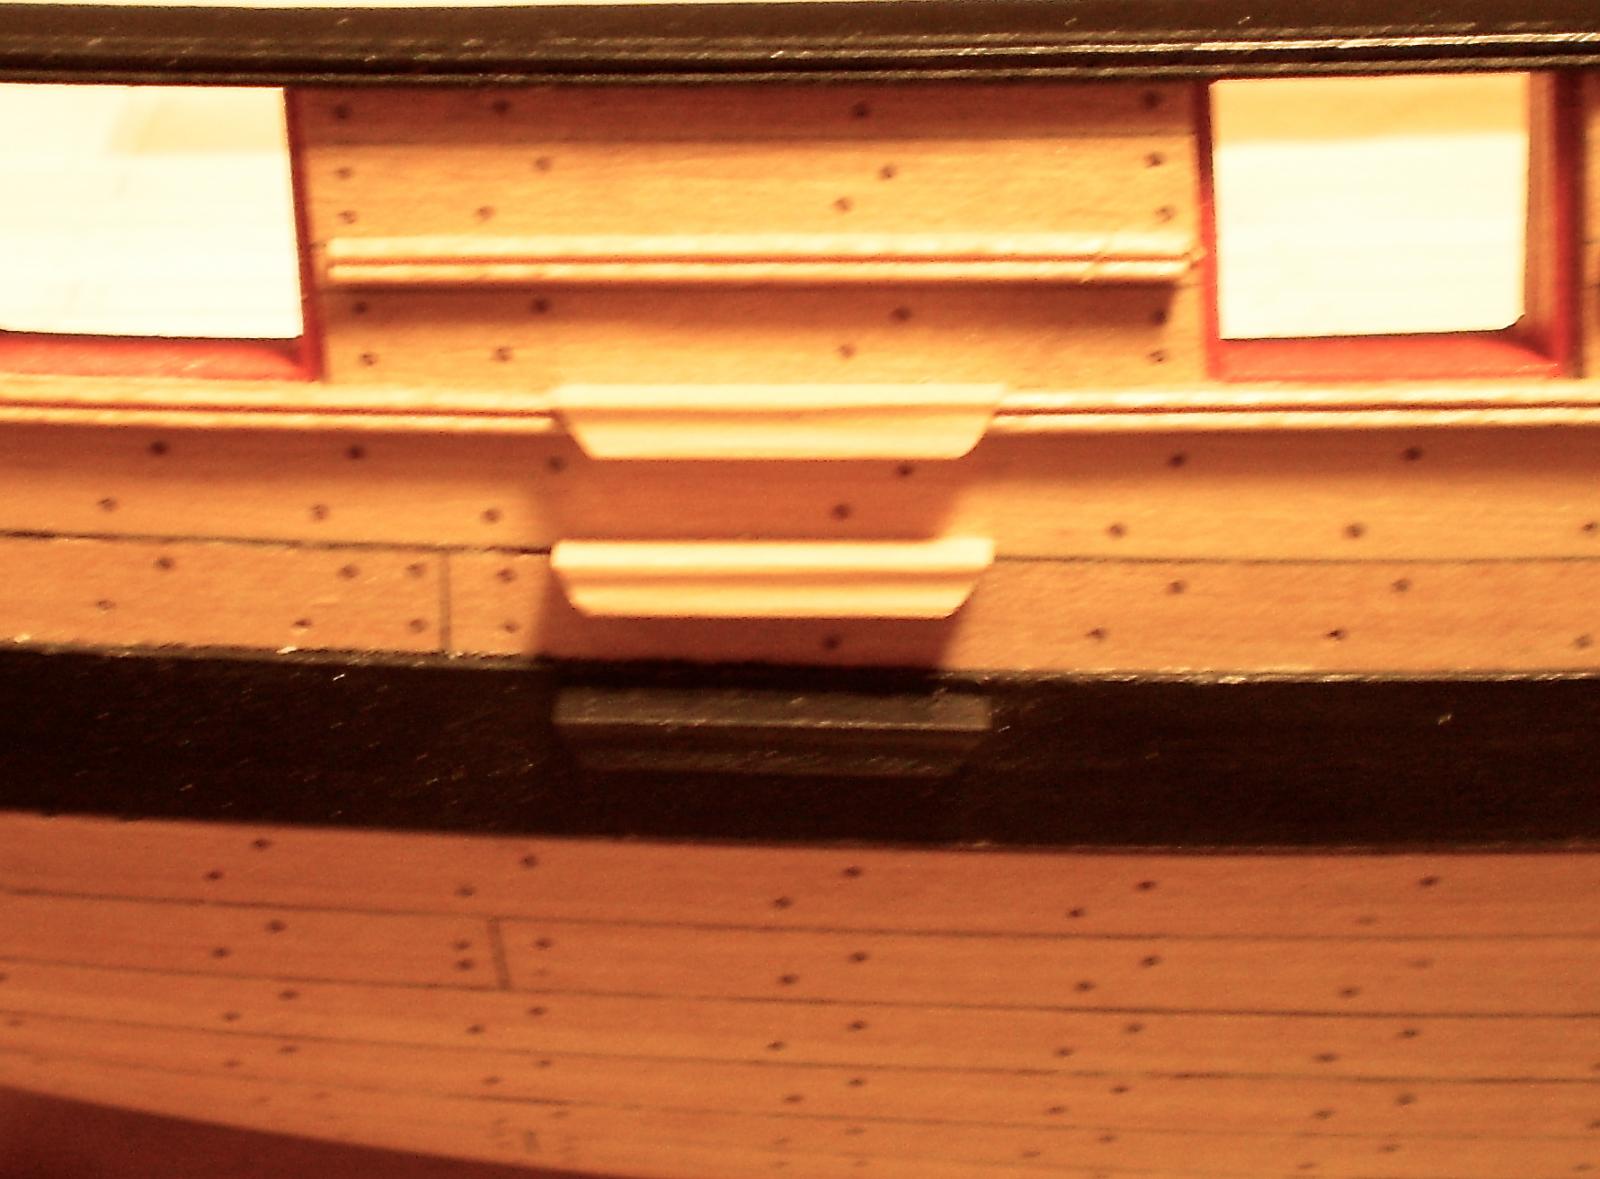
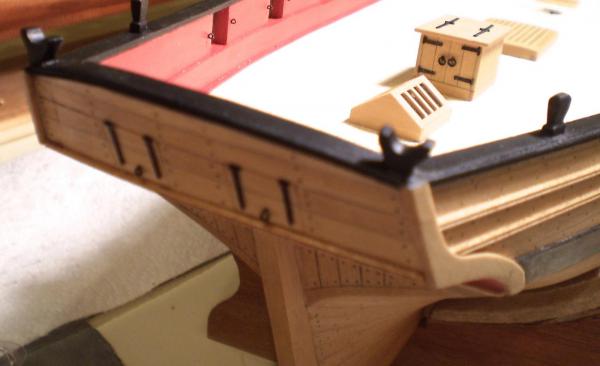
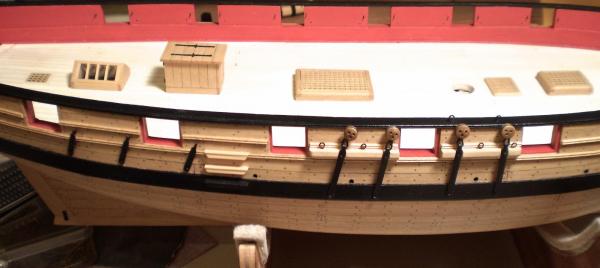
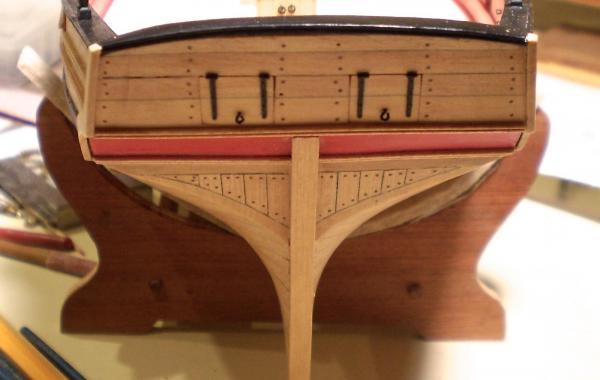
It has rained for several days in usually sunny south Florida. Rain means no golf. No golf means more modeling. All of this is a long way to say that I've done a number of items of work on the hull. Included in this list are the opening for the rudder in the transom and the extension of the stern post; the stern gun port lids; the timber heads; the hull steps; the jib outhaul fixed block on the stem; and the scuppers. All of this work was straightforward and doesn't seem to require explanation. The last photo shows the hull as it looks to this point. I am now working on the channels and waiting for the arrival of brass strip for the chainplates. Bob


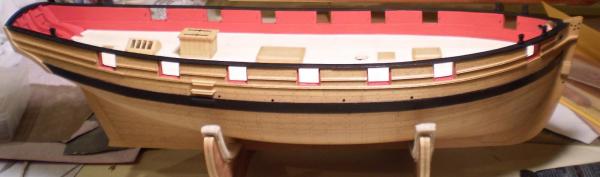
- 525 replies
-
- 44
-
-
- cheerful
- Syren Ship Model Company
- (and 1 more)
-
Cutter Cheerful 1806 by rafine - FINISHED
rafine replied to rafine's topic in - Build logs for subjects built 1801 - 1850
Thanks so much Thomas. Bob- 525 replies
-
- 3
-
-
- cheerful
- Syren Ship Model Company
- (and 1 more)
-
Glad to see that you didn't let any dust gather on your tools between builds. Looking forward to watching. Bob
- 129 replies
-
- 5
-
-
- armed launch
- panart
- (and 1 more)
-
Cutter Cheerful 1806 by rafine - FINISHED
rafine replied to rafine's topic in - Build logs for subjects built 1801 - 1850
Thanks so much Mobbsie for the kind words. I have a way to go to match up with your Granado cross-section. Bob- 525 replies
-
- 4
-
-
- cheerful
- Syren Ship Model Company
- (and 1 more)
-
Cutter Cheerful 1806 by rafine - FINISHED
rafine replied to rafine's topic in - Build logs for subjects built 1801 - 1850
Thanks so much Grant. Bob- 525 replies
-
- 3
-
-
- cheerful
- Syren Ship Model Company
- (and 1 more)
-
Cutter Cheerful 1806 by rafine - FINISHED
rafine replied to rafine's topic in - Build logs for subjects built 1801 - 1850
Thanks so much Mark, Remco and the "likes". Bob- 525 replies
-
- 3
-
-
- cheerful
- Syren Ship Model Company
- (and 1 more)